Limbus Company

Limbus Company

199 betyg
Mirror Dungeon 6 Achievements Guide and EGO gift graphics
Av ChaosComposer
A look at the new Mirror Dungeon 6 achievements, in both Normal and Hard mode. Explanations, tips, and walkthroughs. This guide also includes general graphics to better help plan runs around status EGO gifts.
16
8
3
3
3
   
Utmärkelse
Favorit
Favoritmarkerad
Avfavoritmarkerad
Intro and Important Notes
Welcome to the Mirror of Immortality. With new Achievements being phased back into runs, let's go over some best practices to help you get those clears!

I will be continuing to update this guide as new achievements are added. Some of this will be a bit copy/paste from my old guide, but updates have been made where necessary.

A few disclaimers - not a full guide to how to play Mirror Dungeon itself; the EGO gift images here are meant to be quick references (ie, no names are shown). For a full breakdown of what Mirror Dungeon is, how it works, and what EGO gifts do, check out Borderlined's suite of guides:
https://gtm.steamproxy.vip/sharedfiles/filedetails/?id=3526253064

Like my last guide, I will be attempting to explain how to do these achievements in Normal Mode, wherever possible. However, there do seem to be more achievements that may require Hard Mode this time than there were last time. Even still, by the end of achievement rollouts, you should be able to claim the decaextraction ticket prizes without playing Hard mode if you so choose.

Important Notes:
For most of these achievements, you have to Claim Rewards on a run for the achievements to count as complete!

Spending Starlight is one way to make many of these achievements much easier!

I have been dreading how to deal with this. In general, you won't need starlight to accomplish most of these achievements. That being said, if attempting to double dip or make up for potential bad RNG, having a good amount of starlight will be VERY helpful - I doubt there will be a reason to hoard starlight, so don't be afraid to use it to make things easier for you!
Clears Overview
Most of these are the same as we had in the previous mirror dungeon, and are self explanatory. There are a few categories here -

- Clear the Dungeon at Floor 5 or above X Times (Up to 50)
- Clear the Dungeon at Floor 5 or above X Times in Hard Mode (Up to 15)
- Clear the Dungeon at Floor 10 X Times (Up to 10)


All of these speak for themselves. Asking 10 floor 10 clears instead of 1 is a big difference though, so it certainly encourages playing deeper into the run more than once.

If you are a new player and do not have many IDs leveled, make sure you are using the Rental Teams! They are a bit limited in what they can do, but they will be a great way to double-dip with status achievements. They also are always max level, max uptie, and max EGO uptied as well - so be sure you are running them on Hard mode so they count towards the 15 clears you need!

There are also a few Theme Pack achievements that are new as well.

- Clear 6 Refraction Railway Theme Packs in a single Run

This one is sneaky hard. The first time a Railway pack is available is floor 4. This means you MUST take a Railway pack on EVERY floor besides one, from 4 and above. Additionally, you only have 6 packs to choose from, so you MUST do all of these. These packs can be pretty brutal, so I would definitely recommend spending some starlight to help boost your power level and ego gifts as much as possible. If you start at floor 4 and never skip one, you will end after Floor 9 (but at that point you should just finish the run for other achievement progress.)

On Floor 4, choose or search for Line 2: Mobius. It is currently the only railway pack that, for some reason, is not available on Floor 5+.

On Floors 5-10, choose or search for one of the following packs. You can do them as they come up, or if you don't mind the possibility of rerolling things, doing them in descending order of release may be beneficial, as lines 4 and 5 can already be quite tough, fighting the envy peccatulum within with as few mounting trials as possible might make the difference.
  • - Line 5: Merry Go Round
  • - Line 4: Masquerade Section 4
  • - Line 4: Masquerade Section 3
  • - Line 3: MirrorClock OrangeRoad (If you have a Sinking team/gifts, you might consider moving this one earlier in the run as well.)
  • - Line 1: MADNESS

Final new one to talk about:

- Clear 8 Canto Theme Packs in a single Run

This one also requires a good bit of planning. Canto-themed floor packs are not enough, they must be named after the canto. Stick to the following layout and you will be fine:

Floor 1: The Outcast
Floor 2: The Unloving
Floor 3: The Unconfronting
Floor 4: The Unchanging

Floor 5+: Choose From
The Evil Defining
The Heartbreaking
The Dream Ending
The Surrendered Witnessing

It may be beneficial to attempt doing the more recent canto packs earlier, before enemies get too strong.

Optimizing Runs

A quick aside - we will need to do 10 Floor 10 runs to obtain all the achievements anyways, so it is totally reasonable to take each of these challenges one at a time.

However.

Because burning starlight makes a lot of things much easier, it is also a good idea to consider attempting to finish as much as possible in each run that we spend a ton of starlight on. For that purpose, we can double dip these achievements with some of the Tier 4 EGO gift achievements in the next section. If interested, check out the Advanced Combo runs section of the guide.
Collection Overview
This tab of achievements is split into 2 categories once again: unlocking a certain number of gifts/theme packs in your collection, and actually finishing a run with up to X number of certain ego gifts, both status and tier 4.

(You also have to finish with 30+ ego gifts of any level, but this one is going to be completed on accident in most cases especially with a deep floor 10 run)

We'll deal with the first category first as it as the most straightforward.

First off, to find new theme packs, the theme pack search function lets you spend a small amount of starlight to choose any valid theme pack you want. You can use this, along with starting graces that give you rerolls, to easily complete the Theme Pack collection achievements.

Secondly: when starting a run if Activate EGO search is on, you can start with any 3 EGO gifts at Tier 3 or below, even if you have not unlocked them yet.

Because EGO gifts are added to your collection as soon as you pick them up, you can start a run, select 3 ego gifts you have not unlocked yet, and then abandon the run. This will add them to your collection but WILL NOT use up your starlight. You can repeat this method, if you wish, to fill in any missing gifts you do not have yet below tier 4.

You can use this same method for fusion gifts that require 3 or fewer tier 3 or lower gifts, by selecting the 3 ingredients, playing to the first shop, fusing the item, and then forfeiting.
15+ Status Gifts Overview
One of the few cases where these achievements actually became easier to do in normal mode than they were before. This is because EGO gift search lets you bring Hard mode-only gifts into Normal mode.

When going for a certain number of status EGO gifts and playing in normal mode, use the selection to bring Hard mode gifts whenever possible. That way, the total pool of obtainable gifts has gone up and it will be much easier to complete the challenge. This is NOT MANDATORY to complete these achievements, even in normal mode, but it DOES help a lot and in some cases prevents certain theme packs from being mandatory to clear. That being said, searching for theme packs is cheaper than selecting EGO gifts to start with, so if you are low on Starlight, I recommend saving it. These achievements are very doable without it.

Not completely free, though - In normal mode, you WILL have to either have to take specific Theme packs for unique gifts, or use the EGO gift search function in order to complete many of these status achievements.

Other important general notes:

If you fuse EGO gifts together, the product only counts as 1 EGO gift for the achievement. If you are going for these achievements, fusing EGO gifts for the target status will not only lower your total count, but may make it impossible to complete the achievement on a given run, since ingredients for status gifts will NOT reappear if you own a fusion that uses them.

  • Take the difficult/abnormality encounters whenever you can. It may increase the length of the run, but getting Cost AND a free EGO gift is better than only getting one or the other.

  • If you do happen to find yourself in an event, prioritize options that get you EGO gift quantity. If you gotta fight an abnormality to get 2 gifts instead of 1, it's worth it.

  • EGO Gifts do not repeat. Use this to your advantage! If there are only four possible Tier 1 EGO gifts for your status, and you have 3 of them - you are better off trying to obtain that final gift by fusing instead of shop rerolling. Don't be afraid to buy trash EGO gifts in the shop for the sole purpose of fusion, especially when you are close to completing a certain tier of gift. If you select a keyword and the result of a fusion does not show your keyword, that means you have obtained all possible gifts of that Tier that can be currently fused.

  • A related point - the results of a recipe fusion will behave as if you still own the ingredients to whatever fusion you made. (All this means is that the results of a fusion cannot be one of the ingredients to that fusion.) This can be useful to help force certain gifts.

  • Some EGO gifts can only be obtained in Hard Mode! The wiki is not super clear about this and is also not good about showing which gifts those actually are. This guide's images will always separate out Normal and Hard mode gifts and fusion options.

  • Don't spend Cost on rerolling too early. The deeper your run gets, the more trash EGO gifts you will have picked up, and the more likely it is you will be able to obtain what you need by either shop luck, pack rewards, or fusion. The Floor 3 shop is where I will really start to consider my options for rerolling.

  • If you are playing on Hard Mode, and you do not have enough EGO gifts on Floor 5, continue playing into Parallel Superposition. Floors 6 - 10 will pull from the same pool of packs as Floor 5, so if you missed an important Theme Pack you will have additional chances to pick it back up. Past Floor 5, you don't have to 'win' - you can forfeit and collect rewards and still complete 'Beat Floor 5+' achievement conditions.

Consider partnering these achievements with the status team loadout achievements, as those naturally fit together and help your run.

Following this guide should make completing these achievements very consistent, even on Normal Mode. If running hard mode all the way to floor 10, getting 3 or even 4 of these achievements in one run is not unreasonable. Either way, I will be writing the following sections as if the player is in Normal Mode and not using gift search, but know that these are options available to you to make things easier, or if you just don't mind spending some extra starlight.

Each image will include several sections: EGO gifts obtainable in Normal Mode (white text), EGO gifts only obtainable in Hard Mode (red text), and EGO gifts that are only obtainable in certain theme packs. There are also fusion sections for each of these categories, while applicable. Theme packs are labeled with two numbers or sets of numbers. Numbers in white are the floors that the pack can appear on in Normal Mode, and red numbers are the floors the pack can appear on in Hard Mode. If a Theme Pack is Hard Mode only, or if the relevant gift for a pack can only appear in Hard Mode, it will appear in red.
15+ Burn

Burn has one of the smallest presences in theme packs, so it's one of the harder ones of these to do in Normal mode.

Prioritize Hell's Chicken for Floor 2 for the unique gift pickup. Even if it's not displayed as a pack reward, this pack's events often will give you the burn gift if you pick a route that hits at a couple of them.

Similarly target LCB Regular Checkup for Floor 5. The gifts here are not super common, especially since they are all Tier 3, so going into this with a decent amount of Cost for shop rerolling, or extra EGO gifts for fusion, will be extremely useful here. Events are once again useful here to potentially land a guaranteed Burn gift. If you've completed this achievement, congrats! It gets smoother from here.
15+ Bleed

From one of the hardest achievements of this type, to one of the easiest! There are so many Bleed EGO gifts that this one is hard to miss.

While focusing on standard EGO gifts is fine, also be aware that each Floor has the possibility for a Theme Pack that may contain a unique guaranteed Bleed gift as a reward, if you are lucky. Be sure to focus of choosing these Theme Packs with unique EGO gift rewards - you can get the standard gifts anytime, so take full advantage of these limited packs!
15+ Tremor

Tremor is interesting. Ideally you can pick up the S.E.A. pack on Floor 2, but even if you don't - Timekilling Time is a lategame secret weapon that is incredibly useful. Not only can it show up on two floors, making it very likely you will be able to find it with enough rerolls, the Theme Pack itself is often full of events that also grant Tremor gifts. This is a scenario where I would shift my priority on stage selection to focus on getting as many events as possible.
15+ Rupture

It's important to have a strong start with Rupture. Rerolling early for Outcast is nice. I would also recommend Hell's Chicken over S.E.A. for the Floor 2 option when possible. Hell's Chicken is more consistent and often includes an event that will give you the Rupture gift for free.

Picking up Nocturnal Sweeping or Regular Checkup on Floor 5 is a nice backup, but of course you can only choose 1 in normal mode. Either way, be sure to go in with enough cost to get some Rupture rerolls in the shops - if you have lots of rupture gifts already, which you should, this makes it pretty likely for the unique gifts to appear.
15+ Sinking

Sinking is on the easier side of things. The Unloving is a great early option, with Noon of Violet coming late enough that you are fairly likely to be able to fuse into those gifts, as well as the potential pack reward. The layout of Noon is also beneficial with two forced events, which could lead to filling out those extra unique gifts for free. Hatred and Despair is a good backup if Noon doesn't appear, but has less sinking gifts available.

While Dregs of the Manor can appear in Normal Mode, its sinking gift is exclusive to Hard Mode.
15+ Poise

Poise has lots of options here as well, though a few are locked to Hard Mode. Miracle in District 20 is probably more efficient vs Full-stopped By a Bullet, because its Poise gifts are a lower Tier and will be more common to run across and easier to fuse. If neither option shows up, To Claim Their Bones is also available on Floor 4 and will very often include one or both of its Poise gifts as a guaranteed reward. However, prioritize Miracle or Full-stopped for Floor 4, because we can always pick up To Claim Their Bones on Floor 5 as a last resort.

While Crawling Abyss can appear in Normal Mode, its gift is exclusive to Hard Mode.
15+ Charge

Charge shares a similarity with Tremor, in that Murder on the WARP express is a very consistent pack to find and provides a HUGE number of Charge gift options. Noon of Violet is basically a worst case scenario option if you happen to not find WARP on Floor 4, which you should be aiming for every time. (Though in Hard Mode these packs do not conflict.)
10+ Blunt / Pierce / Slash

The damage type achievements are much less intimidating. Blunt is the simplest of these. Even better, Normal Mode has access to the dedicated 'To Be Crushed' and 'Crushers and Breakers' Theme Packs, which are very likely to contain relevant EGO gifts. They are not included on the graphic, but on normal mode look for the first of these packs on Floors 2/3 and the second on Floor 5. On Hard mode, Floors 1/2 followed by Floor 4.

With Nocturnal Sweeping, we got our first pack-specific Blunt Ego gifts. A great way to help get that little extra boost if you are having trouble reaching the 10.


Piercing damage is similarly simple, with even more options. Follow the same Floor layout as mentioned in the previous section to find the 'To Be Pierced' and 'Piercers and Penetrators' Theme Packs. Additionally, Full-stopped by a Bullet can pick up the slack as a mid-run option.


Slashing is the funniest of all of these. It still asks for 10 gifts but has a huge array of additional options thanks to our friends at the Blade Lineage. You can follow the same Floor layout as mentioned in the Blunt section to find the 'To Be Cleaved' and 'Slicers and Dicers' Theme Packs. (You can aim to choose "To Claim Their Bones" on whichever Floor will not conflict with the Slicers and Dicers pack - Floor 4 for Normal, Floor 3 on Hard.)
Tier IV Gift Overview
These achievements got harder, to the point where the highest tiers of these are no longer doable in normal mode. Because of this, I will instead focus on assuming you are playing on Hard mode for these sections.

The achievements are as follows:

Clear with 20+ Tier 4 gifts
Clear with 10+ Fusion-only Tier 4 gifts
Clear with 8+ theme pack Fusion gifts


Important - Lunar Memory and the EX gifts DO NOT count for this; they have their own category of achievement. (But really, you shouldn't be fusing lunar memory on this run anyway, as that's a net loss of tier 4 gifts!)

On the other hand, duplicate tier 4s DO count (for example, if you have a lot of Brilliant Vestiges, you don't need to worry about fusing them into a 'real' ego gift, they will count as they are).


For obtaining tier 4s, using Graces that help with EGO gifts will be very useful, ESPECIALLY upgrading them using starlight.

Specifically:

Chance Comet++ will get you 3 guaranteed tier 4 gifts at various points through a run, and also gets you bonus gifts when you fuse.

Moon Star-shop++ will get you a base 25% chance for a super shop. Ideally, we will be doing all our fusing in super shops because they have a bonus to fusions, making tier 4s cost less materials to fuse. This is a very good pick.

Binary Star-shop++ is very good as well, since it means we can buy more gifts per shop, get more cost per fight, AND make it more likely to randomly find a Tier 4 in a shop.

Perfected Possibility++ will start you with 3 tier 3s which is a nice bonus.

Star Shower is always good just to start with a decent amount of cost.


Getting as Many Tier 4s As Possible

To start out, if you are using the EGO gift search to start with extra gifts, I recommend grabbing Nagel und Hammer Scripters and Squalidity to make Wholeness, and then running The Unloving and Automated Factory packs on floors 1 and 2 to get Haunted Shoes and Frozen Cries to make the Hoarfrost Footprint. Normally you could only do 1 or the other of these, and both are nice easy tier 4s to knock out. From Floor 3 onwards, any pack that offers a Tier 4 gift as a reward should be taken no questions asked.

You can follow some of the suggestions in the next section for fusable specific gifts, but really, since we don't care about what type of Tier 4 gift we obtain, a lot of this achievement boils down to just "collecting two Tier 3s and a Tier 2, fusing them, and being happy with whatever happens." The fusion only gifts are a nice bonus but not the priority. Remember that it is not essential to fuse into a Tier 4 as soon as you get the ingredients for it - waiting until later floors will allow the ingredients to sit in your inventory and block those gifts from appearing in shops or other fusions. Holding onto a large number of gifts is a good way to make your rerolls even more effective in the shop.

Outside of the fusion-specific gift ingredients, you should only buy Tier 3s or Tier 4s from the Shop. You will get enough of the lower tier gifts by random event fights and rewards to help fuel your fusions. Tier 1 gifts can mostly just be sold for extra Cost income since they will not contribute to fusing a Tier 4 directly. (Super shops are the exception here!) A reminder from earlier - take the difficult/abnormality encounters whenever you can. It may increase the length of the run, but getting Cost AND a free EGO gift is better than only getting one or the other.

There are couple good ideas of packs to focus on. Taking a guaranteed Tier 4 is better than heading into these packs without a guarantee.
  • To Claim Their Bones - Very good pack with lots of tier 4 fusion opportunities.
  • Timekilling Time / WARP Express - Both offer flexible options for obtaining Tier 4 gifts from fusions, and fusion ingredients are often pack rewards. If you have no other options, head into one of these and keep an eye out for ingredients. (A full ingredient list is in the following section.)
  • Railway Theme Packs - These packs often have tier 4s as rewards or available in the shop. Line 5 is probably the best of these, because it has multiple events that have a chance to give tier 4 gifts.

There are also two events that give Tier 4 gifts as rewards. Keep an eye out for these and be sure to select the correct option if you happen to run into them.


Next we'll focus on the achievements that require fusions - both the general 10+ tier 4 fusion achievement, and the 8+ theme-pack specific achievement.

This achievement pairs well with the one covered in the next section, so following the above principles while also selecting packs mentioned below is a good way to try and knock out both of these intimidating achievements at once.
Fusion-Only Gift Overview

For some players this reference image may be enough for you to wing it and get the clear. I will attempt to provide some additional help, but unlike my previous guide, where I had a detailed walkthrough in order to help Normal mode players hit 5 gifts with consistency, the fact that we need 10 now makes it irrelevant as it is not really worth pursuing in normal mode, and I doubt even possible in normal without heavy starlight spending and RNG, if at all. On the plus side, in some ways this does mean we have more leniency now that we have 5 additional floors to work with and powerful Starlight abilities to help.

A couple general principles to remember:
  • Focus on the early packs first - you will have 6 chances to see the floor 5+ packs in a Floor 10 run, so it's more important to pick up good early packs that contribute to your total.
  • BokGak packs get extra appealing here, as if you happen to miss an ingredient in the normal version of a pack, you will be able to pick it up in the BokGak later. Especially relevant for TCTB and TKT.
  • If you hold onto extra EGO gifts, you will not see them in the shop, making Theme-pack specific gifts more likely to appear. Remember - gifts are counted when you FINISH the run. You don't have to fuse something the instant you are able to, especially in cases where holding onto gifts might help force fusions.
  • The same principle applies when fusing. If you own all tier 2 charge ego gifts except 1, and you fuse a tier 2 charge EGO gift, you are guaranteed to get that missing one. Use this to your advantage when fusing in theme packs, as you can use this to get lots of the pack-exclusive gifts, especially in packs like Timekilling Time or WARP Express, with lots of gifts of one type.

One way we can approach this is to try to combine it with the 20+ Tier 4 gifts run and the 10+ Fusion-Only Tier 4 gifts run. I'll discuss this first before going into alternate routes in the advanced section.

(Note - I recommend trying to overlap these, because they are not too difficult to do - but it was rightly pointed out to me that the Theme-Pack only fusion gifts do NOT need to be Tier 4 for the achievement. There are only two of these, Handheld Mirror, and Shadow Monster. I still recommend following the below guides so that you can try to multitask as much as possible )


The Run

With the EGO gift search function, I recommend grabbing Nagel und Hammer Scriptures for Wholeness later. Additionally, we can pick up Broken Glasses and Harpoon Prosthetic Leg - this is because those packs only have 1 specific fusion gift, so picking it up now means we can skip taking the packs later while still getting 100% value, since they combine with general gifts that don't need a specific pack.

From there, run The Unloving and Automated Factory packs on floors 1 and 2 to get Haunted Shoes and Frozen Cries to make the Hoarfrost Footprint, which knocks out another easy fusion. On Floor 3, go for The Unconfronting so we can pick up Squalidity to finish the Wholeness fusion.
Floor 4 onwards, try to use pack rerolls to find the story packs mentioned in the image above, especially ones that have multiple options of gifts to fuse into.

As you continue, be sure to buy up any status fusion ingredients you can, particularly the ones that only require 3 items to fully complete. When clearing packs, try to prioritize events and abnormality/hard fights in order to pick up bonus EGO gifts - again, the more gifts we are holding, the less gifts can appear in shops, and the more likely it is that we will find what we are looking for. Because we're going through in hard mode, we have a lot more of the tier 4 status fusions open to us, so look carefully to see if you find something useful! In general, I would not use more than 1 or 2 rerolls on my shops on the early floors just to keep my cost at a manageable level.

When selecting a floor, if you are out of theme pack rerolls, don't be afraid to use starlight to search for one of the remaining useful packs.

As a final point of reference, I've included some useful event choice outcomes for TKT and WARP relevant to fusion gifts

Good luck! If you struggle at all with this, I recommend picking up Chance Comet++. It is supremely powerful. In my test run, I was able to combine this achievement with the last one and ended with 48 tier 4 gifts.
Loadout Overview
Like last time, there are achievements for clearing floor 5+ with teams consisting of at least 5 IDs with a certain status archetype. These are naturally fit to be combined with the "15+ Status EGO Gifts" achievements from week 1's set, so consider doing those together if you haven't done them yet. (With good starting EGO gift/shop Graces, doing two of these at once is not that bad either, even with just a floor 5 run.)

Firstly, choosing random IDs to hit 2, or even 3, of these status ID achievements in one run is doable. However, since we also need to beat floor 5+ with IDs consisting of specific factions anyways, those are the ones I will be focusing on, as we will naturally be completing the status teams at the same time.

For Mirror Dungeon 6, we need to beat floor 5+ with the following faction loadouts. Unlike last time, however, we have almost 0 leeway to complete these. The numbers are kind of irrelevant, in most cases we need ALL the IDs belonging to each of these factions in order to complete the achievements:

  • 3+ T Corp & 2+ Yurodiviye (No leeway)
  • 4+ R Corp (No leeway)
  • 4+ Zwei (1 ID of leeway and can use either Zwei Sinclair)
  • 3+ Cinq (1 ID of leeway and can use either Cinq Don)
  • 3+ Rosespanner (No leeway)
  • 5+ Heishou (No leeway as of now)

Additionally, there are achievements for beating the named story theme packs with teams consisting of the canto's main sinner alternate ID, along with a themed team from that canto.

Do note that the Canto 3 / N Corp. achievement is the only one of these possible in normal mode. These can be in your backup units - but MUST be selected. If you have them equipped but not selected for combat, the achievement will not trigger.

  • Beat "The Unconfronting" with N Corp Sinclair plus 3 other N Corp Fanatic IDs (Must be Fanatics, Fell Bullet Yi Sang does not count)
  • Beat "The Unchanging" with all 4 of the Technology Liberation Alliance IDs (Spicebush Yi Sang, Sloshing Ishmael, Sunshower Heathcliff, Talisman Sinclair)
  • Beat "The Evil Defining" with all 3 of the Pequod IDs (Yi Sang, Ishmael, Heathcliff)
  • Beat "The Surrendered Witnessing" with Lord of Hongyuan Hong Lu, Hierarch Candidate Ishmael, and 4 Heishou IDs

(It is possible to hit all of these in one run with clever use of the shop to swap IDs throughout a Floor 10 run. I DO NOT RECOMMEND THIS because you would need all of these IDs leveled and ready for use in infinite mode. While you can get by in the lower floors with some unleveled IDs, it gets much tougher later on, especially when taking the Mounting Trials on later floors into account. I heavily recommend not wasting xp tickets leveling these and to instead take these one at a time, but if you truly wish for this challenge, the Advanced Combo Run section has been updated to include a route for this.)

You also technically don't need to finish the run if you are JUST going for these, but we will be able to overlap enough (and we need the clears) where finishing the run will be worth it.


Note for Normal Mode Players / New Players:
I'm sorry, they really upped the requirements this time around. More IDs required in general plus more hard-mode achievements means finishing these may be tough if you are stuck in normal mode or if you have a newer account without a ton of IDs. I won't go too far into details, but if you are playing on normal mode, taking these 5+ status ID achievements one at a time will let you have more control over which IDs you pick, as many IDs will count towards multiple statuses, you may have an easier time just throwing together anything you have that counts. If you need to take 7 runs to get just the basic statuses down, that's okay - the more runs you do, the more crates you will get to hopefully help you flesh out your collection of IDs. Be sure to be strategic with your dispensed IDs, and try to pick up ones that will help you reach the threshold for beating certain achievements. Feel free to leave any questions or comments if you would like more specific/detailed help.


For other players - we have our goals, let's see if we can take care of these as efficiently as possible. Technically we do not need to finish the run after beating these bosses, but we might as well. Having less leeway is more annoying in terms of requiring you to have specific IDs to complete these achievements, but it does make routing them a bit easier. There is still a lot of annoying overlap, but following these guidelines will let you complete as many as possible in the fewest number of runs. I will be structuring each of these as a standard 5-floor run - we will be able to complete every achievement mentioned above in just 5 total runs. Only the first two require hard mode.
5-Run Loadout Plan
Run 1: Pequod, TLA, T Corp, Tremor
On floor 4, take The Evil Defining, and be sure to run the Pequod IDs for the boss. On floor 5, take The Unchanging, and be sure to swap out the Pequod Trio for their TLA counterparts once you get to the shop. (You can technically fit in the N Corp team here as well, if you start with Sinclair, Faust, Don, and Heathcliff, and then swap Sinclair and Heathcliff to TLA and Don to T Corp on the Floor 4 shop, however this doesn't save us a run overall, so there is not much need to do this. Likewise, if you fill Faust, Meursault, and Gregor with their only Sinking IDs, you can finish Sinking here. Again, does not save a run and is less lenient on IDs so I kept it separate.)

Run 2: Heishou, Cinq, Rupture, Poise
Thank goodness Cinq has 1 ID of leniency. We skip Outis so that we can combine them with the Heishou + Lord Hong Lu and Candidate Ishmael team. This team fulfills both Rupture and Poise on its own, so any Yi Sang and Heathcliff ID can be taken to fill the gaps. Keep in mind that you must bring Hong Lu, Ishmael, and at least 4 of the 5 Heishou to the Surrendered Witnessing pack boss.

(NORMAL MODE VIABLE RUNS ARE BELOW)

Run 3: N Corp, Rosespanner, Bleed
Take the Rosespanner IDs, and fill in N Corp with Sinclair, Faust, Don Quixote, and Heathcliff. Two other bleed IDs must be taken between Yi Sang, Ryoshu, Hong Lu, Ishmael, and Outis. Ring Outis is a great buy if you are considering buying an ID to help with this, as she counts as every status ID and will be useful to fill in blanks for the following two runs as well. Keep in mind that the boss of floor 3, the Unconfronting, must be done with Sinclair, Don Quixote, Heathcliff, and Faust.

Run 4: R Corp, Charge, Sinking
Onto cleanup runs now. Not very interesting. The R Corp IDs themselves fulfill 4/5 of the required Charge IDs, so we need to add any other Charge ID and 3 more Sinking IDs. (The most recent Walpurgis IDs for Don and Rodion are perfect here, but I'll assume the player did not get lucky to obtain these, so I've filled out some other options.)

Run 5: Zwei, Burn
The "leftovers" run. Not that complicated, as all of the remaining sinner gaps except Heathcliff have at least 1 burn ID to choose from. You only need 4 of the 5 Zwei IDs listed.
Shop Overview
There are three main categories of Shop achievements, most of which we encountered last time, but with a few changes to the numbers required.

All of these require clearing the dungeon at floor 5 or above.

  • - Refresh the shop X+ times (Up to 50 times)
  • - Purchase X+ gifts from the shop (Up to 50 gifts)
  • - Win while holding X+ enhanced EGO gifts (Up to 20 gifts)

Some other challenges include
  • - Clear with at least 3000 Cost (Self explanatory, will not have a guide for this one, just save your cost)
  • - Replace a sinner's entire kit with Skill 3s via shop replacement and clear
  • - Fuse 20 times and clear
  • - Finish the run after leaving the final shop with 0 Cost

These shop achievements fit in really nicely with our initial Advanced Combo Run, where we try to hit 20+ Tier 4 gifts plus all Railway packs. With some care, we should be able to hit nearly all of these, especially if we dump starlight on a mega run. Otherwise, if you wish to take these in a more relaxed manner, continue on below.


Refresh the Shop 50+ Times / Replace A Sinner's Kit with Skill 3s

If you are willing to spend some starlight, this is doable in normal mode! 10 Refreshes per shop sounds like a ton, but Star of the Beginning++ and Moon Star-shop++ means we get 4 of those for free. If we spend our 2 normal free refreshes, then buy 6 more refreshes, then use our 2 free keyword refreshes, we will be asked to spend 495 Cost per shop, which isn't that unreasonable, especially if we have other Cost graces to help out. Don't forget you can sell EGO gifts if you need some extra cost.

You could try to combine this with the "replace a sinner's entire kit with skill 3s" achievement, but only having 5 floors and no super shop makes this a bit risky, as you would need to get the same sinner at some point on every single shop. I would recommend doing this on hard mode, but if you are willing to roll the dice a bit, normal mode players can and should try to combine it with this achievement.

( An important note - if a sinner is dead, they cannot appear in the skill replacement slot.
This means you can get a bunch of sinners killed early (or just kill the half of the team you aren't using) and this will make the achievement a lot more consistent. Especially nice in normal mode where you have less shops to work with! )

In hard mode with the above graces going to floor 10, you only need to spend 45 cost per shop on rerolls, which is even nicer (5 on average per shop, 4 of which are free). You have more chances to see a sinner appear in more shops, so just keep an eye out as you are doing your refreshes.


Purchase 50+ Gifts from the Shop / Enhance 20+ Gifts / Fuse 20+ Times

This one is simply just not possible in Normal mode. 5 floors leaves us with 10 gifts per shop, and shops cannot have that many gifts in normal mode.

For hard mode, we can make this easiest with a Floor 10 run - which leaves us with buying 5 gifts per shop on average. We can buy more at super shops, which will definitely be appearing as we purchase all the gifts.

Be sure to include the Binary Star Shop and/or Star of the Beginning Graces; we need their bonus shop EGO gift selection boons for this run to be consistent.

Because we have all these excess gifts laying around, this fits in very naturally with the challenge of fusing 20 times, and to enhance 20 gifts. Just remember you only need to enhance a gift once for it to count. Be sure not to fuse away your enhanced gifts!
Clearing the Dungeon With 0 Cost
This seems like a very tricky achievement at first glance, but luckily we can make this very consistent by following a few guiding principles.

  • 1: NO Bonus Cost EGO Gifts or ANY starting Graces - we want to keep our cost as predictable as possible.
  • - Avoid the following EGO gifts: Milepost of Survival, Golden Urn, Rebate Token, New Release Pamphlet, Voracious Hammer, Preorder Discount, Renewed Merch, Trial Plan Guide, Prestige Card. If you accidentally obtain one of these, get rid of it by fusing it rather than selling it. If it has already ruined your cost total, it may be better to just reset the run if you don't want to bother thinking about how to recover.
  • 2. Play on NORMAL MODE. Normal Mode allows us to see the entire floor at the start of each pack, making it easier to plan our route. This also just makes the run easier since we will not be purchasing EGO gifts.
  • 3. Events are still good but avoid options that gain Cost, but gaining EGO gifts is still good. We want a decent collection of gifts by the end of the run. You are reasonably likely to run into an event that gives one of our NO-GO ego gifts above. Be sure to NOT choose options to obtain gifts in these cases (reference image below)
  • 4. After beating a floor, do not choose a card that gives you cost. This also comes in random amounts, which is no good. If your only options both give you Cost, just click Cancel and move on without selecting a reward.
  • 5. When choosing a path through the floor - avoid the risky chain encounters. (These give 120 cost, which will slightly throw off the balance of our plan, so these should not be fought if at all possible.) Abnormalities and Focused encounters are okay.
  • 6. If you want, you can start with a Tier 1 EGO gift that can be enhanced. You are very likely to pick one up over the course of the dungeon, so I don't necessarily recommend spending starlight on this, but if you want to be VERY sure you can win, feel free to.


Following these principles we will be able to predict how much cost we have. We know we will need to beat floor 5 for this achievement, IE, leave the floor 5 shop with 0 cost. This means we only have 5 sources of DEFINITE cost gain during the run: beating the Floor 1-4 bosses, and our starting 200 Cost. This adds up to 1340 cost that we will definitely be getting as a constant. (200 base + 200 F1 + 240 F2 + 300 F3 + 400 F4).

From there, assuming we only take Normal, Focused, or Abnormality packs, we will always be increasing this total by a multiple of 25. (75 for Normal, 100 for Focused, or 150 for Abnormality fights). The exact fights don't really matter, just keep taking these specific nodes through the dungeon. Keep avoiding the 120-reward hard fights if at all possible.

FLOOR 1-4 SHOP:
We can't let our total cost build up too high, so each shop we will control our spending by Healing INDIVIDUAL sinners, one at a time, until we are no longer able to. Prioritize sinners you are actually using, so they can take damage and get healed again in the future. If no sinners can be healed and you need to get cost down, use the Team function spend an additional 100 cost. To make the most of this, I recommend having your sinners at full HP just defend until they get hit, or take unopposed attacks, in the final fight before the shop. We ideally should be buying heals until we cannot afford any more at each of these shops.

Similarly, we will not be buying any EGO gifts. The only time you SHOULD buy an EGO gift, is if you happened to pick up Urn or Hammer on accident, and you realize your cost is not a multiple of 5. In this case, buy EGO gifts with units digits that get you back to a multiple of 5. (For example, if my Cost ends in 8, I might buy 2 ego gifts, one that ends in 1, and one that ends in 2. This will put my units digits back at 5.) It may be easier on the brain to restart, but it is certainly recoverable if this happens.

FLOOR 5 SHOP
Assuming things have gone to plan, you should be entering the shop on floor 5 with 400 cost from the Floor 4 boss, plus whatever you had leftover from Floor 3, plus whatever you picked up on Floor 5. If you followed the guide perfectly, this cost should end in one of the following: 15, 40, 65, or 90. Don't forget to let your sinners take damage on the previous fight so you can spend cost to heal them up.

If cost ends in 15: Refresh normally once.
If cost ends in 40: Keyword refresh once, then enhance a Tier 1 EGO gift.
If cost ends in 65: Refresh normally once, then enhance a Tier 1 EGO gift.
If cost ends in 90: Keyword refresh once.

You should now be at a multiple of 100 - to get rid of the rest of your cost, just spend it all on INDIVIDUAL sinner heals. (If you spend it on general heals for the whole team, you may get blocked from healing once everyone hits full HP. This might have happened to me. Learn from my errors.)

Congrats!

Recovery Options
If things got messy you may still be able to recover, especially if you are still on a multiple of 5. The goal is to get to an even hundred of Cost so you can buy heals, using the following properties:
Enhance a Tier 1 Gift once to lose 50 cost. Again will lose 100.
Enhance a Tier 2 Gift once to lose 60. Again will lose 120.
Enhance a Tier 3 Gift once to lose 75 cost. Again will lose 150.
Skill replacements will lose 45, 75, or 120 cost.

If none of these work, you may be able to find a combination of these, along with normal and keyword refreshes, that work your cost down low enough to win. Get out a calculator if you have to! Remember that both refresh costs go up by 15 every time one is used. In WORST case scenarios where nothing works, you can try selling some gifts to try and find a new starting number, but the messier things get, the harder it is to recover. Don't feel too bad if this one takes a couple tries.
Combat Overview
With 1 exception, this category is tracked per combat - once you achieve the conditions, you will get the achievement immediately - you do NOT need to claim rewards or even finish the run for any of these. Remember that if you don't want to finish a run, you can always spend a ton of starlight to get helpful graces and starting gifts and then abandon the run to get that starlight refunded.

There are some interesting/tough challenges in here, as well as the 99 status potency achievements from the last dungeon as well. Hitting "80 clash power" and dealing 15k damage in one skill also require some cheese or intense planning. I'll cover the less complex stuff first.

I will update these following sections with a few reference images later, but I've spent like 10 hours over the past few days staring at stuff for this and doing test runs so I need a hot second

Clear the Run with All IDs at Level 80

This is our one exception where we actually do need to complete the run for the achievement to count, so be careful. Also be aware that your backup IDs ALSO need to be level 80, so make sure you start every sinner with a level 55 ID regardless of if you will be using them or not.

Favor of the Nebulae: +3 at start, +1 per clear up to 5 (8 total)
Favor of the Nebulae+: +3 at start, +1 per clear up to 9 (12 total)
Favor of the Nebulae++: +3 at start, +3 at floor 6, +1 per clear up to 9 (15 total)

Piece of Relationship: +5
Piece of Relationship+: +7
Piece of Relationship++: +10

The Railway packs and Miracle in D20 BokGak can give you up to +3 levels, but they can only give you that level buff once in the run. This means that both of the above are mandatory to some extent for this achievement, or at the very least the most consistent way without relying on RNG abnormality events. If you haven't done your floor 10 all-railway achievement run yet, this is a great place for some overlap.


Reach 20+ Speed

There are a few different ways to go about this, but in order to try and keep things as focused as possible we'll just roll with using one of the Heishou IDs, as they have great base speed and are generally built to gain haste over time as well, and are also used in multiple places in achievements already.

Some Haste EGO gifts to consider picking up or starting with:

- Smoking Gunpowder++: 1-2 Haste when a Rupture skill is used
- Resolution+: 2 Haste when the ID has 2 slash skills
- Harpoon Prosthetic Leg: 2 Haste to ally with most Poise
- Devil's Share: 1 Haste to ally with most Poise
- Shadow Bamboo Hat: 2 Haste to Heishou Mao IDs
- Ancient Effigy: 5 Haste to random ally

Starlight Guidance Grace upgraded once will also increase the max speed by 3.


Kill 7+ Enemies with One Skill

There are not many floors with 7 enemies at once. The Sign of Roses fight in Line 2 is a good option, but Church of Gears in the Full-stopped By A Bullet pack is probably the best bet we have. Any high-attack weight EGO that hits 7 or more enemies should be able to get the clear here. Last season's Don Quixote limbus pass Yearning Mircalla EGO is especially good if you have it.

If you want to either spend some starlight to help guarantee you have the DPS (or just want to speedrun to this floor and not care about finishing the run), start with at least Sharp Needle & Thread, and Grey Coat. Try to fuse into either of the Tier 4 EGO gifts for the damage type you choose, and ideally the Tier 4 status EGO fragment as well, before you reach the Fullstop Pack just to give yourself as much firepower as possible, but it's not mandatory.


Use 7 Different Skill Affinities

This one is kinda fun but obviously not very hard at all. Just make sure you bring a team with a decent spread of skill sins and you should be able to get this in a couple turns on floor 1.


Activate Imposed Weight by Turn 2 and win on a Floor 5+ boss
This one is a little weirdly worded as well. You can have Weight active prior to Turn 2, and can use extra sinners before then as long as they die, but honestly I would recommend just attempting a solo on the boss for this achievement to make sure you get it fulfilled. (It's not as scary as it sounds, promise!) Solo has been confirmed to work, but if your HP is below 25%, then the Imposed Weight effect won't activate and you may not get the achievement.

At the start of the run we grab the Imposed Weight ego gift (of course) as well as Manor-shaped Music Box which is a free stagger cancel, and lastly Ashen Constellation's Blessing. Both of these gifts will greatly help your survivability. They are not NEEDED but if you are new to soloing it will make things much more comfy.

Regardless, you can play the first 5 floors normally, being sure to build up resources for any EGOs you plan on using. Picking up healing EGO gifts on the way will be nice as well, since Imposed Weight will slowly eat small bits of your health.

On the boss, just enter alone with your desired sinner. You will start with just 1 skill slot and slowly gain slots over the following turns, so surviving the first few turns is the toughest part. IDs with Evades are very good here since you can reasonably dodge entire sets of attacks. Either way, defending through the early turns should let you survive long enough to start attacking with the skill slots you gain. (IE, on turn 2, attack with the first slot and defend with the 2nd slot if you have an evade). As your slots fill up, you will likely find the boss to be a bit of a pushover with all the extra power to your skills from Imposed Weight, especially in normal mode.
99 Status Potency Achievements
These are mostly about reaching certain counts of status effects. You may get several of these naturally if you have not yet completed the status team or EGO gift achievements. Overall, try to get as many EGO gifts for the status as you can. I will highlight any EGO gifts that are especially powerful for achieving that status.

One general tip for these - several of these statuses will be dealing lots of damage to enemies. Try going for them on Floor 5 or higher in order to give the enemies more survivability. Don't be afraid to use defense skills on some sinners to help enemies live long enough to reach these potencies. I'd recommend attempting these on bosses that have high protection or invuln mechanics to help keep them alive for the full damage amount, such as -

So You Want to Get Beat, Hurtily
My Form Empties
Skin Prophet
Shock Centipede
Gasharpoon Ahab


99 Burn Potency:
Fiery Down - Inflicts extra burn potency and doubles burn potency if over 20.
Dust to Dust - Extra burn count to help kick things off at combat start.
- Avoid Glimpse of Flames when going for this as it will kill most enemies before you can reach 99 potency.


99 Bleed Potency:
Wound Cleric - Inflict extra bleed potency.
Smoke and Wires - Doubles inflicted bleed.
Red-stained Gossypium - Start combat with 15 count.

Note - If you have access to her, the Sanguine Desire Rodion EGO is also perfect for maintaining count.


99 Tremor Potency:
Oscillating Bracelet - Inflicts tremor on hit.
Nixie Divergence - Helpful starting potency and count.
Downpour - Ramping potency application.

Tremor doesn't have super great EGO gifts so far as application is concerned, so having IDs that can consistently apply Tremor will be extra important.


99 Rupture Potency:
Talisman Bundle - When enhanced, can make every hit apply rupture.
Standard-duty Battery - Rupture on hit.
Thunderbranch - Helps inflict more count.

Note - Thrill helps with maintaining count, but also does a wild amount of damage, so if you are killing things too fast you may want to avoid or sell it.


99 Sinking Potency:
Thorny Path - Extra potency and count.
Midwinter Nightmare - Inflict sinking on all hits.
If you're having trouble with this one, try going for this on a boss with sanity, so the Sinking isn't also dealing massive damage on every hit.


99 Poise Potency:
Stone Tomb - 1.5x potency gain from skills.
Nebulizer - Starts off with potency and count.
Four-leaf Clover - Helps maintain count and potency.
Endorphin Kit - Extra poise generation from skills.
Avoid Angel's Cut, as it will consume potency to give count.


10 Charge Potency:
!!!Warning - this is Potency, not Count! The only EGO gift that can help directly is T-1B Octagonal Bolt, which gives 1 potency for every 20 count consumed. Even this though has a limit of twice per encounter for a given ID, so you CANNOT get this achievement with this gift alone. Unique Charge also does not count for this. Most Charge IDs have no way of gaining potency either, so this means you MUST use one of the following IDs at at least Uptie 2 to unlock the passive, which all gain potency for every 10 count spent:

-W Corp. Outis
-Multicrack Faust
-Multicrack Heathcliff
-Reindeer Hong Lu
-W Corp Don (but only if you happened to get the Love and Hate EGO)

Outis and Heathcliff have great Charge-spending EGOs if you happen to have them as well, to help speed things up.
Deal 15,000 Damage With One Skill
First off - massive damage attacks that happen as the effect of EGO gifts do NOT count. This means Glimpse of Flames and Thrill, the Tier 4 gifts for Burn and Rupture, will not trigger this achievement on their own. The damage must be directly associated with a skill.

There are a couple of cheesy ways to do this (hint, it's exactly the things that the achievement tells you). The non-cheesy way to do this is very hard. High attack weight EGOs have problems finding normal enemies that can get high enough HP even with lots of HP up mounting trials. Additionally, if the skill is multicoin, the later coins won't trigger if enemies die too soon. We could focus all the damage into boss enemies that that have invincibility mechanics like Skin Prophet, Shock Centipede or Gasharpoon Ahab due to their invincibility mechanics as another option. I personally am a big fan of attacking the Skin Prophet candles.

To move onto the cool debuff strats, we have 2 options, Time Moratorium and Sinking Deluge. All the relevant IDs for these are required for other achievements so I feel more okay with recommending these options. If you have a good sinking team, I like Deluge more, but Moratorium has more versatility.

Time Moratorium:

This debuff absorbs all damage done to the enemy, and then dishes it out with a multiplier all at once. If it expires on its own, its damage is not linked to a skill, but if you apply a second instance of the debuff with a skill, that first instance will trigger and the damage multiplier will be counted as damage done by that skill. What this means is instead of dealing 15k damage with one skill, you can have a full round (or more) with all your sinners pouring damage into the debuff and trigger its payout all at once. The damage inflicted is Sloth Damage, so make sure you are running a pack with a boss that is Fatal to Sloth Damage, OR have Lunar Memory fused.

This debuff is inflicted by T Corp Identities; Rodion, Don Quixote, and now Outis.

If you can time it such that the enemy gets the debuff while staggered, all attacks will be fatal which is an excellent time to build up massive amounts of damage, especially using EGO gifts that boost raw damage.


Sinking Deluge

This debuff/skill effect is specifically caused by the Spicebush Yi Sang ID, and even more specifically, his Skill 3 on hit effect. Similarly to Glimpse of Flames, this does multiplicative damage based on Sinking Potency and Count, but will remove the Sinking status afterwards. This is slightly easier to control when you want to activate it than Time Moratorium, but as a tradeoff does rely on very high Sinking count and potency rather than just overall damage, so you'll probably want a full Sinking team. The Tier 4 sinking gift is extremely important as it vastly increases your potential damage output by ensuring the deluge damage is fatal. Just make sure you avoid using Yi Sang's skill 3 too soon or else you will lose the Sinking you have been building up.

You will probably need to do this on a boss with either very high HP and sanity, or some invulnerability mechanic. You'll hit 99 potency before you hit 99 count, which will obliterate abnormalities without sanity.
The Crit Achievement
The wording on this achievement is very bad.

Disclaimer, I am not fully sure of every requirement for this. Some things that appear to be true:
- Every coin you deal damage with in the entire fight must crit, starting from turn 1
- Losing a clash counts as 'not doing damage with a coin' so will fail the achievement despite not being mentioned or really implied anywhere in the wording

(I really hope they update the wording of this achievement soon)

It sounds pretty scary, but on the other hand, this achievement is a Blade Lineage run achievement in disguise. The 'Ragged Bamboo Hat' EGO gift makes all BL ids always crit with poise, so ideally we can do a single normal mode run, pick up as many Poise EGO gifts as possible, and make sure we get this gift. There are only 6 BL ids, so we do need one additional Sinner to always crit - so we want to pick an extra poise ID that ideally has skills that gain poise on use, so that they have an easier time rolling that RNG with the below gifts.

Side note - it is completely possible to do this without all 6 Blade Lineage IDs, if you don't have them all or don't want to shard them (which is fair) but just be aware that every non-BL ID is an extra reset point at the start of a fight if RNG is bad. Run as many as you can to reduce the inherent RNG of this run.

With Nebulizer++ we can get our final sinner to 8 potency and count when Pride Resonance is active, which is itself a 40% chance to crit.

Pendant of Nostalgia++ will apply another 4 potency to a random ally with poise, so if our final sinner has gloom and poise they are in the running to rng into this at the start of a fight. Stone Tomb is excellent to boost on-use poise gain which is great, since it applies before the roll happens.

After this, other poise gifts like Four-leaf Clover and Endorphin Kit will do a good job maintaining potency and count. If you play a full normal mode run out after picking up the bamboo hat, you have decent odds of just stumbling into a clear along the way, but if not, you can spend some time restarting a fight to make sure the odds go in your favor.

This does rely on RNG for getting the Bamboo Hat ego gift but honestly it's better than the RNG required without having 6 of your 7 sinners guaranteed to fulfill their requirements.
Clash Power 80 (the Cool Way) Part 1
Despite the name, and the confusing difference and bloat between Base Power, Clash Power, Final Power, Attack Power, Power, Skill Power - forget everything. This achievement is simply asking you to roll an 80 on a skill in a clash. (Not while dealing damage.)

This is quite hard. To do this, we're going to have to do 4 things:

1. Get a lot of offense level up and power up. Luckily we have EGO gifts for that.
2. Give enemies a lot of offense level down. Luckily we have EGO gifts for that
3. Have enough base power on a skill or EGO where we can actually hit 80.
4. Have Fourth Match Flame Ryoshu. That's it. If you have this EGO at Uptie 4 you can skip reading this whole section. Click the Ryoshu chapter on the sidebar and see you there

VERY IMPORANT: I WROTE THIS ALL OUT FOR FUN!
If you JUST want the achievement and don't care about theorycrafting and stuff, JUST WAIT UNTIL 4TH MATCH FLAME APPEARS ON A RENTAL TEAM AND SKIP TO THE NEXT SECTION.

If you're still here that means you want to do this the legit, cool way. There are several viable sinners and EGOs that have potential to hit this number. Which ID you want to use will depend on your team and what sounds fun to you. Want to build up an ID that grows in power and excels in long fights? Go for it. Want to stack plus coin power up on Edgar Heir Gregor or Liu Ishmael by upgrading all their skills to skill 3? Sounds awesome. Just want to use an EGO and see a giant number right off the bat? Cool (and probably the easiest option.)

Main Strategy
In general I recommend keeping your target sinner in slot 1 and double-slotting them so that they get more skill usage which can be good for building resources in general. I recommend trying these on long fights in most cases, to build up as many buffs as possible. High recommendation to try this on a Line 1 pack on a mid/late parallel superposition floor, which opens with good slow fights to build resources and ends against My Form Empties with invuln mechanics and adds you can wail on to stall if necessary. Technically might be possible with a Rental team's EGO, but being limited to 5 floors is very hard when there are so many gifts to collect.

Normally, our sinner's level will also give us more offense level (abbreviated to OL). However, the enemies will outscale us in mirror dungeon, so we will lose the arms race in terms of OL. However, if we use the Chesed ability, we can completely negate the base OL of skills and only leave the effects of EGO gifts and status effects.

Our main goal as we move through the floors will be to pick up as many of the general gifts and gifts relevant to our status as we can. When we are ready, we will use Chesed to nuke the enemy's offense level and hopefully hit our target of 80.

Increasing our Power
This will be any direct power up effects as well as OL up. (Every 3 levels of difference in OL is another clash power. Will abbreviate all power-related effects to P as it all goes into the final number displayed.)

Starting off with some useful gifts that EVERY ID can use. (We'll assume they are in sinner slot 1.)
- Tango Marinade: +3P if speed is 9 above the enemy's
- Chief Butler's Secret Arts: +3 OL if 6+ speed difference
- Crown of Thorns: +1P each turn if at max sp
- Hardship: +3 OL each turn if at max SP after 3 clashes
- Imposed Weight: If solo, +2P (+3 at sub-50% hp)
- Darkflame Smoking Pipe: +2P
- Kaleidoscope: +4 OL if in a team of 5 from the same faction
- Sunshower: +2P for everyone if sloth res exists or a 2+ attack weight skill (can use EGO to proc this)
- Spicebush Branch: +3P once all skills have been used 3 times (careful of skill replacement)
- The Unchosen: +2P after a sinner dies (not that consistent)
- Emergency Investigator Badge: +2P after taking lethal damage (must upgrade twice to work on sinner 1)
- Tier 4 Damage Type EGO Gift: +2P and +3 OL if 3 sinners total share that damage type
- Tier 4 Damage Type Memory Stone: +2P and +1 Coin Power
- EGO Fragment: If using an EGO, this gives power based on resources which can be quite strong depending on the EGO. (+5P or higher is common)

Bleed Integration for Any Team:
- Arrested Hymn: +2 OL when all enemies have bleed

Sinking Integration for Any Team:
- Faded Overcoat: +2 OL when 3 enemies at -45 SP. Any ID can inflict sinking with some decent gift setup. (but seeing 3 panicked enemies might be tough)

Poise Integration for Any Team:
- Clear Mirror, Calm Water++: +15 OL on Crit. Any ID can crit with some decent gift setup.
- Finifugality: +2P at 40 Poise Potency/Count
- Devil's Share: +2 OL to an ID with most Poise potency/count, 4 if they have Lust
- Cigarette Holder: +2P at 5+ Poise count
- Guiding Gas Lamp: +3 OL to an ID with most Poise potency/count

Charge Integration for Any Team:
- Biogenerative Battery: +1-6 OL as you build clashes, not consistent. +3 OL at 18 Charge
- Nightvision Goggles: +5 OL, -15 Charge (risky, we want to just sit and not use charge)

Status-Enabling Gifts: Some of my preferred options for bringing any status to any team.
- Dust to Dust: Burn
- Rusted Muzzle, Red-stained Gossypium: Bleed
- Nixie Divergence, Downpour: Tremor
- Talisman Bundle, Standard-duty Battery: Rupture
- Midwinder Nightmare: Sinking
- Nebulizer: Poise
- Lightning Rod, Charge-type Gloves: Charge

Starlight Guidance Grace upgraded once will also give +2P.

Combining all of these gets you around 36 effective Power plus 1 Coin Power. It's worth noting you may need to use starting gifts to get some of the theme-pack exclusive gifts listed, otherwise there is a chance of missing out on a few. Obviously getting every single one of these is an unreasonable ask, so these are more meant to be things to keep an eye out for as you go through the run.

Enemy Debuffs
For enemies, we only care about gifts that decrease the enemy's offense level, their clash power doesn't matter in terms of hitting our goal of rolling an 80.

- Charred Disk: -4 OL with burn
- Melted Eyeball: up to -10 OL with 2x tremor burst via Downpour++. (Tremor IDs get more)
- Melted Spring: -3 OL with sinking
- Broken Revolver: -2 OL with rupture
- White Gossypium++: Unstaggers and applies up to 18 OL down on a previously staggered enemy, 24 if double staggered

Sums to -37 even with just 2 tremor bursts which get the player an additional +12 or so to their rolls.

All of these together mean we can get around +50-55 if all of these are active.
(Breakdown: 27 Clash/Attack/Skill/Final Power, 45 OL Up = 15 effective Power, 37 OL Down = 12 effective Power)
That should cover generic gifts, but don't worry, we still have more to go.
Clash Power 80 (the Cool Way) Part 2
Status-dependent Power Boosts

Here are some overviews for what is available for each status on top of what everyone has access to above. LOTs of info so sorry about that.

TLDR: My personal opinion for some possible teams to run. Full numbers are below.

S Tier: Charge (+25P, 3+ Coin Power) (What the hell)
A Tier: Bloodfiends/KK (+14P, 3 Coin Power), Blade Lineage (+20P)
B Tier: Poise (+15P on skill 3s with no other conditions)
C Tier: Rupture (+16P), Tremor (+16P), Bleed (+4P, 3 Coin Power) - All good but rely heavily on many conditionals
D Tier: Burn (+4P, 1 Coin Power), Sinking (+6P)

Blunt IDs (+5P) are sligtly better than Slash or Pierce (+4P) but not enough for it to matter that much. If running Blade Lineage Slash is very good. (+5P extra)


Burn: +1 Clash Power, +9 OL, +1 Coin Power = +4 Total +1 Coin Power
Pain of Stifled Rage: +4 OL to Burn skills along with haste
Combustion Gloves: +5 OL for 3 copies of a Skill
Soothe the Dead: +1P and +1 Coin Power


Bleed: +3 Coin Power, +4 OL, -15 Enemy OL = +4 Total +3 Coin Power
Token of Victory: +2 OL on kill with 10 bleed (not that consistent)
Respite: + OL based on remaining coins after clash (4 coins = 2, probably not getting much higher)
Red-stained Gossypium: -15 OL to enemies at 30 bleed stack
Bloody Mist: +3 Coin Power (kills the OL from Arrested Hymn but it's worth it)

Bleed Subset - Bloodfiends:
A Drop: Up to +4 Power if reducing bleed from ~55 to 15. (Very consistent with other gifts)

Bleed Subset - Kurokumo:
Resplendence: +2 Lust Power up, + 1 Slash Power
Cloudpattern Gourd Bottle: +1P to skill 1, +1 extra to all KK IDs, -2 OL to enemy on hit
Swarmcloud: +1 OL for KK IDs per 10% missing hp

If you have a team of 3 Bloodfiends and 3 Kurokumo IDs, your bleed team can rocket up to +6-14 Power and +3 Coin Power depending on various conditionals, making this a very strong option as the coin power can easily translate into another +12 power on 4-coin skills


Tremor: +8-13 Clash Power, +3-8 OL, -5 OL = +11-16 Total
Sour Liquor Aroma: +3 OL
Melted Eyeball: Improves an additional -5 OL to enemies with access to another tremor burst
Microprecision Time Accelerator: +5P on turn 1, decreases by 1 per turn
Clockwork Spring: +1P
Epicenter: +3P
Coupled Oscillation: Guarantees a stagger with Downpour++ and 1 extra tremor burst which is very consistent for triggering Gossypium
- Do not fuse into Omnivibro Bell, you only keep 3 clash power whereas its ingredients give you 4 while separate
Pocket Watch Type P: +2P, +2P if clashing with faster enemy +5/3/2OL to slowest sinners OR Type Y: +2P, +2P to Yurodivy IDs


Rupture: +7-9 Clash power, +10 OL, -13 OL = +14-16 Total
Twigs: -6 OL to enemies after being hit 9 times
Spiked Combat Boots: +5 OL if 3 copies of skill
Deathseeker: +1P, +2 OL. Extra +1P if single-coin
Strange Glyph Inscriptions: +2 P or +3 if against Deathrite Haste
Glyph of Glass Shards: +2P with 40 rupture
Ruin: Improves Revolver with additional -4 OL, +1P
Unmailed Letter: +1P vs slower enemy. If enemy has OL up, get +3 and inflict -3


Sinking: +3 Clash Power, 9 OL = +6 Total
Eldtree Snare: +1P if Skill has 2 or fewer coins
Red Order: +6 OL
Haunted Shoes: +1P to 2nd sinner slot, worth mentioning but be careful
Impending Wave: +1P, improves Surging Globe with additional +3 OL.


Poise: +15P on Skill 3. Poise's other bonuses can be applied to any team.
Lucky Pouch: +3 Final power, coin power worth +12 to Skill 3


Charge: +7 Clash Power (+4 to Skill 1), +56 OL, +3 Coin Power plus more on kill = +25P plus Coin power
Has many gifts that affect specific skills. Probably stick with trying on skill 3, but there are lots of skill 1 buffs too included for reference.
Patrolling Flashlight: +1P to Skill 1
Spent Use, Forming Hate: +10 OL after consuming 20 charge, +1P if ally lost SP
Imitative Generator: +1 Coin Power to Skill 3, if 5+ base power, +2 instead
E-Type Dimensional Dagger: +1P to Skill 1
Portable Barrier Battery: +2P to Skill 1
T-1 Perpetual Motion Machine: +10 OL after 40 charge consumed. +3P after 50 charge consumed
T-5 Perpetual Motion Machine: +1P, +1 Coin Boost on kill, up to +30 OL at 3000 consumed charge
Perpetual Generator Servos: +2P, up to +6 OL for 3 clash wins
Overcharged Battery: +1 power upgrade to Biogenerative Battery, +1 Coin Power


Slash: +3-4 Clash Power, +2 OL. Blade Lineage is a huge improvement
Resolution: +1P
Dreaming Electric Sheep: +2P after slash kill. +2 OL on envy resonance
Cloudpattern Gourd Bottle: +1P to skill 1.

Slash Subset - Blade Lineage: +4-5 total
Cultivation: +4 slash power
Old Dopo Robe: +1 Coin Power to skill 1. (+3 if single coin)


Pierce: +3-5 Clash Power, +2 OL
Torn Bandolier: +1P
Gathering Skulls: +2P after pierce kill
Torn Hems: +2 OL, +2P if 2 or less coins (also TLA buffs but please do not try this on TLA)


Blunt: +4P, +4 OL = +5P. Middle is nice for +1 Coin Power
Today's Expression: +2P after blunt kill
Temporal Bridle: +2 OL
Dimensional Perception Modifier: +2 OL on skill 1-2.
Enhanced Tattoos - The Middle: +1P

Blunt Subset - The Middle:
Everlasting Chains of Bond: +1 OL, +1 Coin Power addition to Tattoos
Clash Power 80 (Ryoshu style)
"What Was that You Said About Fourth Match Flame Ryoshu?"

This EGO skips all of the above nonsense and lets you get the clear as early as floor 2. An evasion ID for her is nice but not mandatory. The EGO should also be Threadspin 4 for this to work. We also want to make sure our team has plenty of Wrath and Pride to fuel this EGO. Ryoshu should unequip her other EGO so that we can force a corrosion easily, or at least make sure you can force the specific corrosion we need.

Don't be afraid to go wild with starlight usage on graces, we will be abandoning this run so you will not lose anything. Do try to pick up some EGO gifts that help with power, including Imposed Weight. Rusty Commemorative Coin is good too for reasons that will become clear soon.

We'll spend the first floor building up EGO resources and gifts.

On floor 2, all we have to do is get the Automated Factory pack, and fight the "You Want To Get Beat? Hurtily?" boss. If you don't get this, you can just reset and go again. (Or try to find the boss on the "To Be Crushed" pack on floor 3, or failing that, Vain Pride on floor 4 if you really want to keep it rolling)

Enter the fight with solo Ryoshu, and evade/defend/survive until she gets her full skill slots. Then, we need to corrode, which we can do by using 4th match flame itself. This will start dealing damage to the boss and its adds. On the turn we corrode, we will be damaging the enemies over and over again - they won't die due to the fight mechanics, so every time we fail a kill we will get 3 attack power up... Which will happen 3 times every time a corrosion goes off.

The turn after, she should be well-prepared to use one more corrosion/EGO (choose based on your sanity) which should be enough to hit the 80 roll required for the achievement depending on rolls. This might take a few tries depending on corrosion luck and RNG, but it is a very brain-off option compared to the alternative.
(Advanced) Combo Runs
In this section we'll get into some meaty details on how to combine several of these previously mentioned achievements. The core idea is that even if we need 10 floor 10 runs, it will save us starlight in the long run if we can spend a lot of starlight on fewer runs that accomplish many goals, rather than

Big thanks to Borderlined who helped me outline routes for this section.

I will be assuming you have read the basic outlines in previous sections to get an idea of general best practices and things to consider when going for each of these individually, I'll try not to repeat myself too much.

I would also potentially recommend waiting until we know all of the achievements if you want to truly run as few of these as possible. Future achievements are likely to contain some elements that may be able to mix into these runs, so if you follow these before all the achievements are out, know that you're potentially missing out on some easy overlap down the line.

As further achievements come out, I will be adjusting these runs and adding onto this section as necessary.

I Highly Recommend choosing both Chance Comet++ and Moon Star-shop++ for these runs. Their boons are immensely helpful to make things more consistent.

Run 1: 20+ Tier 4s + 6 Railway Packs + 50 Bought EGO Gifts + 50 Refreshes + Fuse 20 Times + Replace A Sinner's Full Kit

Starting off, this one should be not all that bad. 20+ Tier 4s is actually very doable on any Floor 10 run with Comet++, but for now we will be pairing it with the 6 Railway Pack achievement. We'll start again with our classic Scriptures, Glasses, and Harpoon starting gifts for three easy fusions in the future. Be sure not to forget to fuse these later.

To factor in the shop achievements, keep a running checklist of what you need to do at each shop on average, in order to stay on track. Take free refresh and cost-gaining Graces to stay afloat with how much spending is required.
* Fuse 2 Gifts Per Shop
* Refresh 5 times
* Buy 5 Gifts
* Enhance 2 Gifts
Pick a Sinner you want to replace the full kit of on the Floor 1 shop, and as you go, keep an eye out for when this sinner appears in future shops. Aim for 1 replacement every 2 floors, and don't fall too behind or it will become risky/expensive to catch up later.

Floor 1 and 2, pick up the ingredients for Hoarfrost with the Unloving+Automated Factory combo. Ideally, these packs should also give at least one other tier 2/3 gift. Might be worth just restarting if Floor 1 doesn't cooperate on that front.

Floor 3 will be Unconfronting, to finish that fusion.

Floor 4: Mandatory to take Line 2.

Railway packs often have Tier 4 rewards, and all contain pack-exclusive tier 4 gifts that may appear in the shop, so holding lots of extra gifts and boosting shop rarity with graces will be effective here. For the rest of the run though, we will mostly be trading out our previous strategy of "always take a tier 4 gift" to instead focusing on Railway packs. Be sure to pick up the Nebulizer and Umbrella from shops to finish our starting gifts. Additionally, with Chance Comet, make sure you fuse one tier 4 gift in a shop whenever possible, as you will get a random tier 3 back.

Floors 5-10: Continue to stock gifts and fuse into as much as you can. Make good use any super shop appearances to dump some trash EGO gifts into random tier 4 fusions with the extra fuse slots. Again, consider doing the railway packs in descending order to keep fights manageable, but if one of them has a guaranteed tier 4 reward, its a nice little bonus.

As you move through, you will have 1 floor of leeway that you can use whenever you want. Ideally, try to choose either a pack that can give you nice consistent fusions (like TKT, TCTB, WARP), OR just any pack that has guaranteed tier 4 gifts. The railway packs themselves will help with this a lot.


Run 2: 8+ Theme Pack Fusion-Only Gifts + 10+ Tier 4 Fusion-Only Gifts + 8+ Canto Named Theme Packs

This run is a bit stricter in its requirements, but with some clever planning, we should be able to make it fairly comfy. Four of the Canto theme packs involve pack-specific fusions, so we need 4 more themed fusions in the 2 remaining non-story floors in a 10 floor run. Luckily, our old friends Timekilling Time, WARP Express, and To Claim Their Bones are here to fill those gaps. We will need to take two of these, and get 2 unique gifts from each.

That brings our total fusion-only gifts to 8. We need 2 more, so as you move through these packs, you will need to keep an eye out for gifts that fuse into the unique status archetypes. (Charge and Tremor are probably good to choose just to help overlap with TKT and WARP, but this is up to you.)

To start off, we need to pick up Haunted Shoes and Nagel Scriptures. We have one extra pick of leeway here, but we still need to be smart about this. Our final choice needs to be one of the ingredients for a fusion from TKT, TCTB, or WARP. It's up to you which one you want to focus on, but just remember to keep track of it for later.

We need to be as specific as possible, so if a pack does not show up, you will need to reroll for it. Here's our rough floorplan. There is some leniency in which order you do things once you get to floor 5, so it's not super precise after this. Try not to end the run on the TKT/WARP/TCTB choice, as that will prevent you from getting access to the rewards of the pack, which you might need to complete your fusions.

Floor 1: The Outcast
Floor 2: The Unloving. Make sure you pick up Frozen Cries so you can fuse the gift.
Floor 3: The Unconfronting. Make sure you pick up Squalidity so you can fuse the gift.
Floor 4: The Unchanging. Be sure to pick up Broken Glasses. You will need to find or fuse Ragged Umbrella at some point to fuse this gift.
Floor 5+: The Evil Defining. Pick up Harpoon Prosthetic Leg. You will need to find or fuse Nebulizer at some point to fuse this gift.
Floor 5+: Break time! Pick one of either TKT, WARP, or TCTB. If you want to REALLY minmax this, you can use the pack search functionality on each normal reroll so you can compare the rewards from each of these packs and try to select one that provides you with the most ingredients. Either way, we will need to fuse 2 unique gifts here.
Floor 5+: The Heartbreaking.
Floor 5+: The Dream Ending.
Floor 5+: Break time! Pick another of TKT/WARP/TCTB and fuse 2 more gifts.
Floor 5+: The Surrendered Witnessing.

By the time you reach floor 10, you will have needed to pick up/fuse at least 2 tier 4 status gifts, which shouldn't be that difficult if you've been focusing on this during the shops.

With all that done, congrats!

Additionally: I DO NOT recommend this but if you have enough of these IDs leveled, you can combine the story-specific loadout challenge achievements here as well. It's possible but I would probably advise against doing it this way.

Starting loadout:
Floor 4: Swap to Sunshower Heathcliff and Talisman Sinclair
Floor 5: Swap to Pequod Ishmael, Yi Sang, and Heathcliff
Before the Surrendered Witnessing: Swap to Candidate Ishmael, Heishout Faust, and Heishou Rodion
Outro + Updates
Thanks for reading! Another huge shoutout to Borderlined for their guides and for helping route some of the advanced runs presented here.

As the weeks continue and more achievements are added, I will continue to update this guide. I have a rough idea of what we might expect based on the last set of achievements, but there have been surprises, so who knows what the future may hold.


Any updates will be outlined below:
____________________________
8/11 - Updated Tier 4+ title to Tier 4 to match upcoming translation error fix
8/11 - Updated Canto 7 bleed gifts to reflect availability in any c7 theme pack
8/14 - Week 2 Achievements Added
8/22 - Week 3 Achievements added, fixed a few mistakes and clarifications
8/25 - Updated Imposed Weight info
70 kommentarer
ealt1999b 1 timme sedan 
This has been a massive help, thanks.
One thing I noticed when doing the 0 cost achiement, if you have trouble getting your sinners damaged to be able to spend cost on heals, getting sinners intentionally killed solves it, just put a lone sinner in any encounter and only defend and they'l die, you can then spend 200 cost (revive and sp heal) per dead sinner.
Terse 19 timmar sedan 
FYI, Tango Marinade works on objective speed, not difference, so you get the full 3 power if you are 9+ speed and the enemy is any number slower than you. This only needs a small correction in the 80 clash power section
ChaosComposer  [skapare] 25 aug @ 2:03 
Yeah the wording on Imposed Weight isn't great, either. You definitely don't need to bring more than 1 sinner, but it seems to be the case that being below 25% HP means the gift does not 'activate' for the purposes of the achievement, will get that updated in the guide itself
Unimportant 25 aug @ 1:00 
I eventually got it with solo Rodya only, did not bring any other units.
Draednaught 24 aug @ 18:54 
For everyone saying they did a boss solo and didn't get the imposed weight achievement, it's not for doing the boss solo. You need to have more than one unit fielded for the encounter for imposed weight to activate on turn two.

In other words, bring the unit you want to solo with and ALSO a low level unit to get killed in the first turn. The other unit needs to die turn one, then, on turn two, since your solo unit is now alone, imposed weight activates.

Ignore the condition for low HP on imposed weight, it's not important for the achievement. I got it with Lei Heng Mersault at almost full hp. Also make sure you're on floor 5 or higher boss when you try doing it.
Hebisonic 23 aug @ 13:22 
Personally I didn't have an issue doing Imposed Weight totally solo. I just fought Bamboo Hat Kim with solo Mao Faust (and had to be careful because I was killing him too dang fast)
Joshua Kurayami 23 aug @ 4:58 
I did manage to complete the imposed weight one a while ago while using a full charge team on normal. On floor 5 all I did was solo Multicrack Faust against fae lantern with roughly max HP with a crap ton of charge items (including some from warp train pack) imposed weight and healing items.
Unimportant 23 aug @ 3:47 
Imposed weight's HP draining does not activate at 25%- HP. Do I need to keep my HP above 25% for it to count? I just finished a solo fight with 1 HP left and didn't get the achievement.
Ga(\w/)rus 23 aug @ 3:29 
@Evil Azzie you need to bring in another fodder to die on turn 2+ and finish the fight for that achievement. Cant do solo from start

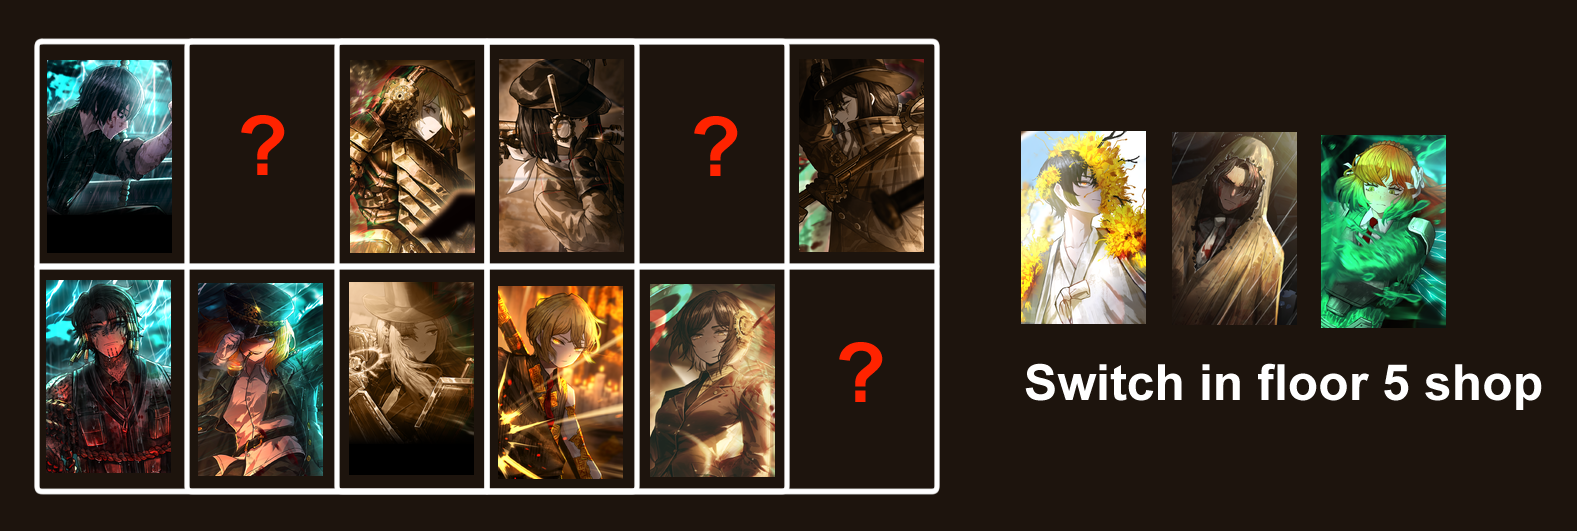
Btw, anyone know if level bonus from events and starlight apply to replaced ID in shop?
Evil Azzie 23 aug @ 1:59 
*Imposed Weight by Turn 2* How to raise the attack weight, what gifts do the ego need?
I've already gone through the boss solo twice and didn't get an achievement.