Tokyo Xtreme Racer

Tokyo Xtreme Racer

247 ratings
List of Car Settings and Recommendations
By grey
List of car settings and recommendations.
14
10
9
2
2
2
2
   
Award
Favorite
Favorited
Unfavorite
Introduction
This is my personal list of car settings and recommendations. These setups aim to improve the speed, handling, and ease of use for many of the different vehicles I've used in my playthrough.

I've covered almost all of the cars I would consider 'meta' in a playthrough of TXR2025. If a car you're interested in isn't listed here, it's probably because it isn't very good and/or I don't think much of it.

Some settings are based on real aftermarket car parts, especially with regards to transmission. You'll likely be happy with a number of close ratio gear sets you can find online, but do make sure to compare! In general you'll want a 1st gear that tops out at around 80 to 90 km/h depending on where your max power peaks in the RPM range between 0 and redline.

If you want to better understand your tuning settings, I recommend you check out my other in-depth guide:
https://gtm.steamproxy.vip/sharedfiles/filedetails/?id=3446391157
All thoughts and criticisms accepted by the way! Please let me know of any typos, or if you came to different conclusions than my own. I'm always open to amending any observations I possibly got wrong.
Methodology
The S4 is one of the best cars you can pick up in Stage 4, even if it's relatively mid in stock form.
My method for rating cars' performance is based largely on how they scale with tuning upgrades as one approaches the end of the current stage, as that's when the most difficult bosses of the stage appear. Every stage features a different set of bosses that unlock different sections of the tuning perk tree, and typically the ones that unlock the power upgrades first are the most important. There won't be a huge difference between say, power unit Lv 5 to 6, but there will be a huge difference between genuine/OEM and power unit Lv 5.

To put it into example, this is why I rate the Subaru WRX S4 STI higher than the Honda NSX-R (NA2). In stock form, the NSX is clearly better. Following lower level power upgrades would suggest the two are mostly equal, but the S4 STI scales much better with power than the NSX does.

Another thing important to mention, I play primarily on manual transmission and have much less experience with automatic in TXR. I will mention if a given car is less suitable for driving on manual as it has too many gears (8 to 10-speed), but to the extent that AT and MT affect handling, especially with regards to sudden weight transfer on automatic shifting, I make no comment. Just be warned.

I recommend learning MT though, seriously. The AT implementation is more or less... okay? It's kind of miserable, because it will only shift at redline or when acceleration is stagnant; a number of cars, specifically the Skylines and GT-R, will benefit from short-shifting at 200-300 RPMs below redline because their power band occurs earlier in the RPM range (around 6400). Other times it won't downshift when you want that extra power at a higher RPM as on corner exits.
Important Note on Transmission Gearing
Make sure to start transmission changes from the default values! Sometimes after tuning upgrades, your transmission's gearing values are all thrown out of sync and you need to reset them to their default values. You'll be able to tell if this is happening because the top speed will glow in orange, indicating that there are changed values.

The way I've written my transmission settings, only the gears indicated are the gears changed from their default values. If you don't see some gear ratios shown, that means you can leave them as default. You may not see the final speed on the last gear present, that's because it changes depending on your power upgrades and I've chosen to omit it.

Another thing I should mention, most of these transmission gear settings are all-rounder. That's usually accomplished by setting tall 1st and 2nd gears and leaving the others untouched or with minor adjustment. Generally that means you can use this gearing wherever you are on the expressway.

That said, on some cars I will list an alternate gearing that's either more suitable for technical courses like C1 and New Circular Route (New Belt Line as WMMT players may know it as), or for high-speed courses like Haneda, Yokohane, Daikoku, and Bayshore.

What that means is:
  • Technical: Gearing is much closer to each other, to maximize time spent in the power band. 1st and 2nd gears are tall, with 3rd through 6th+ being relatively close (around 80% step). Typically what most aftermarket close gear ratios may look like as they tackle road courses with a mix of tight corners and high speed corners. This does also mean drivers will be busier on the shifter, and running AT (Automatic Transmission) will not often yield the benefits of a shorter gearing.
  • High Speed: Gearing is spread further to each other to maximize top speed. 1st and 2nd gears are tall, but 3rd through 6th+ may be only about 72-78% steps between each other. Drivers will be less busier on the shifter and this may be more suitable for AT, but there will be lower possible acceleration in technical courses.
On occasion you will see cars with 8 gears (e.g. WRX S4, RC F, GR Supra), 9 gears (NC1), or even 10 gears (LC500). More gears generally is a good thing, but in real life comes at the cost of added weight as the transmission has to be made longer and more complex to accommodate the extra gears.
Important Note on Engine Swaps
This guide only covers car setups with their genuine, OEM engine.

For any NG+ enjoyers, the engine swap perk unlocks at the cost of a whopping 3000 BP. If you choose to engine swap your vehicle, it will change how your car handles. The engine block is the heaviest part of the car, after all. Not only that, but the transmission numbers may all be thrown out of whack because the engine characteristics will change significantly.

That said, you may refer to the cars these engines came from:
  • T-type L6 Turbo (Toyota 2JZ-GTE[en.wikipedia.org]). Comes from the Supra A80. If you're sticking to realism, this is a somewhat popular swap in the car world.
  • M-type RE Turbo (Mazda 20B-REW[en.wikipedia.org]). The only car ever to use this engine is the Eunos Cosmo[en.wikipedia.org], which isn't present in this game. Closest thing maybe is the RX-7 FD3S, which uses a 1.3L rotary engine (13B-REW).
  • N-type L6 Turbo (Nissan RB26DETT[en.wikipedia.org]). This particular engine comes from the Skyline BNR34. Also a popular swap in the car world, though more difficult and expensive than the ol' reliable two Jay-Z.
  • H-type V6 Turbo (Honda JNC1[en.wikipedia.org]). Comes from the NSX NC1. Genki made a typo here, as the engine has a displacement of 3.5L, not 1.5L.
  • N-type V6 Turbo (Nissan VR38DETT[en.wikipedia.org]). Comes from the GT-R (R35). *slaps engine cover* This bad boy makes any car fast af
  • L-type V10 NA (Lexus 1LR-GUE[en.wikipedia.org]). Lifted from the LFA. (How does your tuner even get a hold of this? Hmm...)
Stage 1 Cars
Best cars to consider in order of performance:
  • Subaru BR-Z GT (ZC6) '16
  • Honda Civic Type R (EK9) '99
  • Nissan 180SX Type X w/ SUPER HICAS (KRPS13) '96 (needed for wanderer)
  • Nissan Silvia K's (PS13) '91
The BR-Z GT scales the best with tuning upgrades among all of these, with 271 PS near the end of Stage 1. You would think the Toyota 86 GT (ZN6) would be similar because they're basically the same car, but it's not; the 86 GT has a disappointingly low power rating of 228 PS with the same upgrades.

The Civic Type R doesn't scale as well to power upgrades as the BR-Z, but it has the best handling out of these cars. This makes it an excellent choice for C1, which you'll spend a good amount of time in. It's the car I would personally recommend, as it's very easy to drive.

As you may have guessed, the 180SX and Silvia S13 are very similar as they both were built on the same S platform and share many of the same parts (so much so that it birthed the Sileighty[en.wikipedia.org]). Both of them scale similarly with power upgrades getting up to 260 PS at the end of Stage 1, albeit the top speed still lags way behind the BR-Z GT at only around 240 km/h. Their handling is sort of atrocious though, as it's rather stiff and unresponsive. You'll want a car with good handling as you'll be able to carry speed through the turns more easily.

Cars were tested with 3/2/2/2/2/1/2/2/2/2/0 tuning upgrades (End of Stage 1).
Subaru BR-Z GT (ZC6) '16

The fastest car in Stage 1 after upgrades. Do not confuse this with the 86 GT (ZN6), they are not the same car. For whatever reason, the 86 GT is just much weaker after upgrades compared to this one.

This car boasts a top speed of 273 km/h come the end of Stage 1. It also handles fairly well, albeit the Civic Type R (EK9) is a bit more nimble.

Car data[ddm999.github.io]

Wheel Alignment
Front
Rear
Notes
Camber
-3
-2
Slightly aggressive camber helps with cornering in more technical routes
Toe
0
0
Ride Height
-3
-3
Offset
+5
+5
May provide more stability.
Tire Width
0
0
Brake
Front
Rear/Other
Notes
ABS
ON
Brake Balance
0
0
LSD
Front
Rear
Notes
LSD Type
1.5 way
Initial Torque
+5
LSD Ratio
+5
Suspension
Front
Rear
Notes
Spring Rate
+2
+2
Damper
+5
+5
Damper Balance
+50
+50
Stabilizer
Front
Rear
Notes
Stabilizer
0
0
Transmission
Ratio
Speed (km/h)
Notes
1st
2.946
71
Cusco Close Gear Set
2nd
2.011
104
Honda Civic Type R (EK9) '99

In my opinion, this is the car to get as soon as possible once you graduate from your starter car. The BR-Z is faster after upgrades, given, but there's just something about the Type R that makes it so likeable. Its top speed after 3/2/2 power upgrades is not bad either, at 253 km/h.

The handling is remarkably good for a car that appears this early in the game. That's a good thing because you'll be spending a lot of time around C1 where cornering speeds matter.

This setup will largely work for the Integra Type R (DC2) '99 as well, with the technical gearing. For 6th gear you can use 0.834, and then lower FD if you need more top speed.

Car data[ddm999.github.io]

Wheel Alignment
Front
Rear
Notes
Camber
-3
-2
Slightly aggressive camber helps with cornering in more technical routes
Toe
0
0
Ride Height
-3
-3
Offset
+5
+5
May provide more stability.
Tire Width
0
0
Brake
Front
Rear/Other
Notes
ABS
ON
Brake Balance
0
0
LSD
Front
Rear
Notes
LSD Type
1.5 way
Initial Torque
+5
LSD Ratio
+5
Suspension
Front
Rear
Notes
Spring Rate
+2
+2
Damper
+5
+5
Damper Balance
+50
+50
Stabilizer
Front
Rear
Notes
Stabilizer
0
0
Transmission
(Technical)
Ratio
Speed (km/h)
Notes
1st
2.533
80
Spoon Close Ratio Gear Set
2nd
1.944
104
3rd
1.591
128
4th
1.280
159
5th
1.033
197
Transmission
(High Speed)
Ratio
Speed (km/h)
Notes
1st
2.533
80
Use this gearing for Bayshore, Yokohane, etc.
2nd
1.764
115
3rd
1.282
159
4th
1.000
204
5th
0.806
253
Stage 2 Cars
Once you enter Stage 2, you're a bit more spoiled for choice; a number of the cars you get to select are strong.

The best cars to consider in order of performance:
  • Honda S2000 Type-V (AP1) '03
  • Mazda RX-8 Type S (SE3P) '03
  • Toyota Supra 2.5GT Twin Turbo R (JZA70) '93
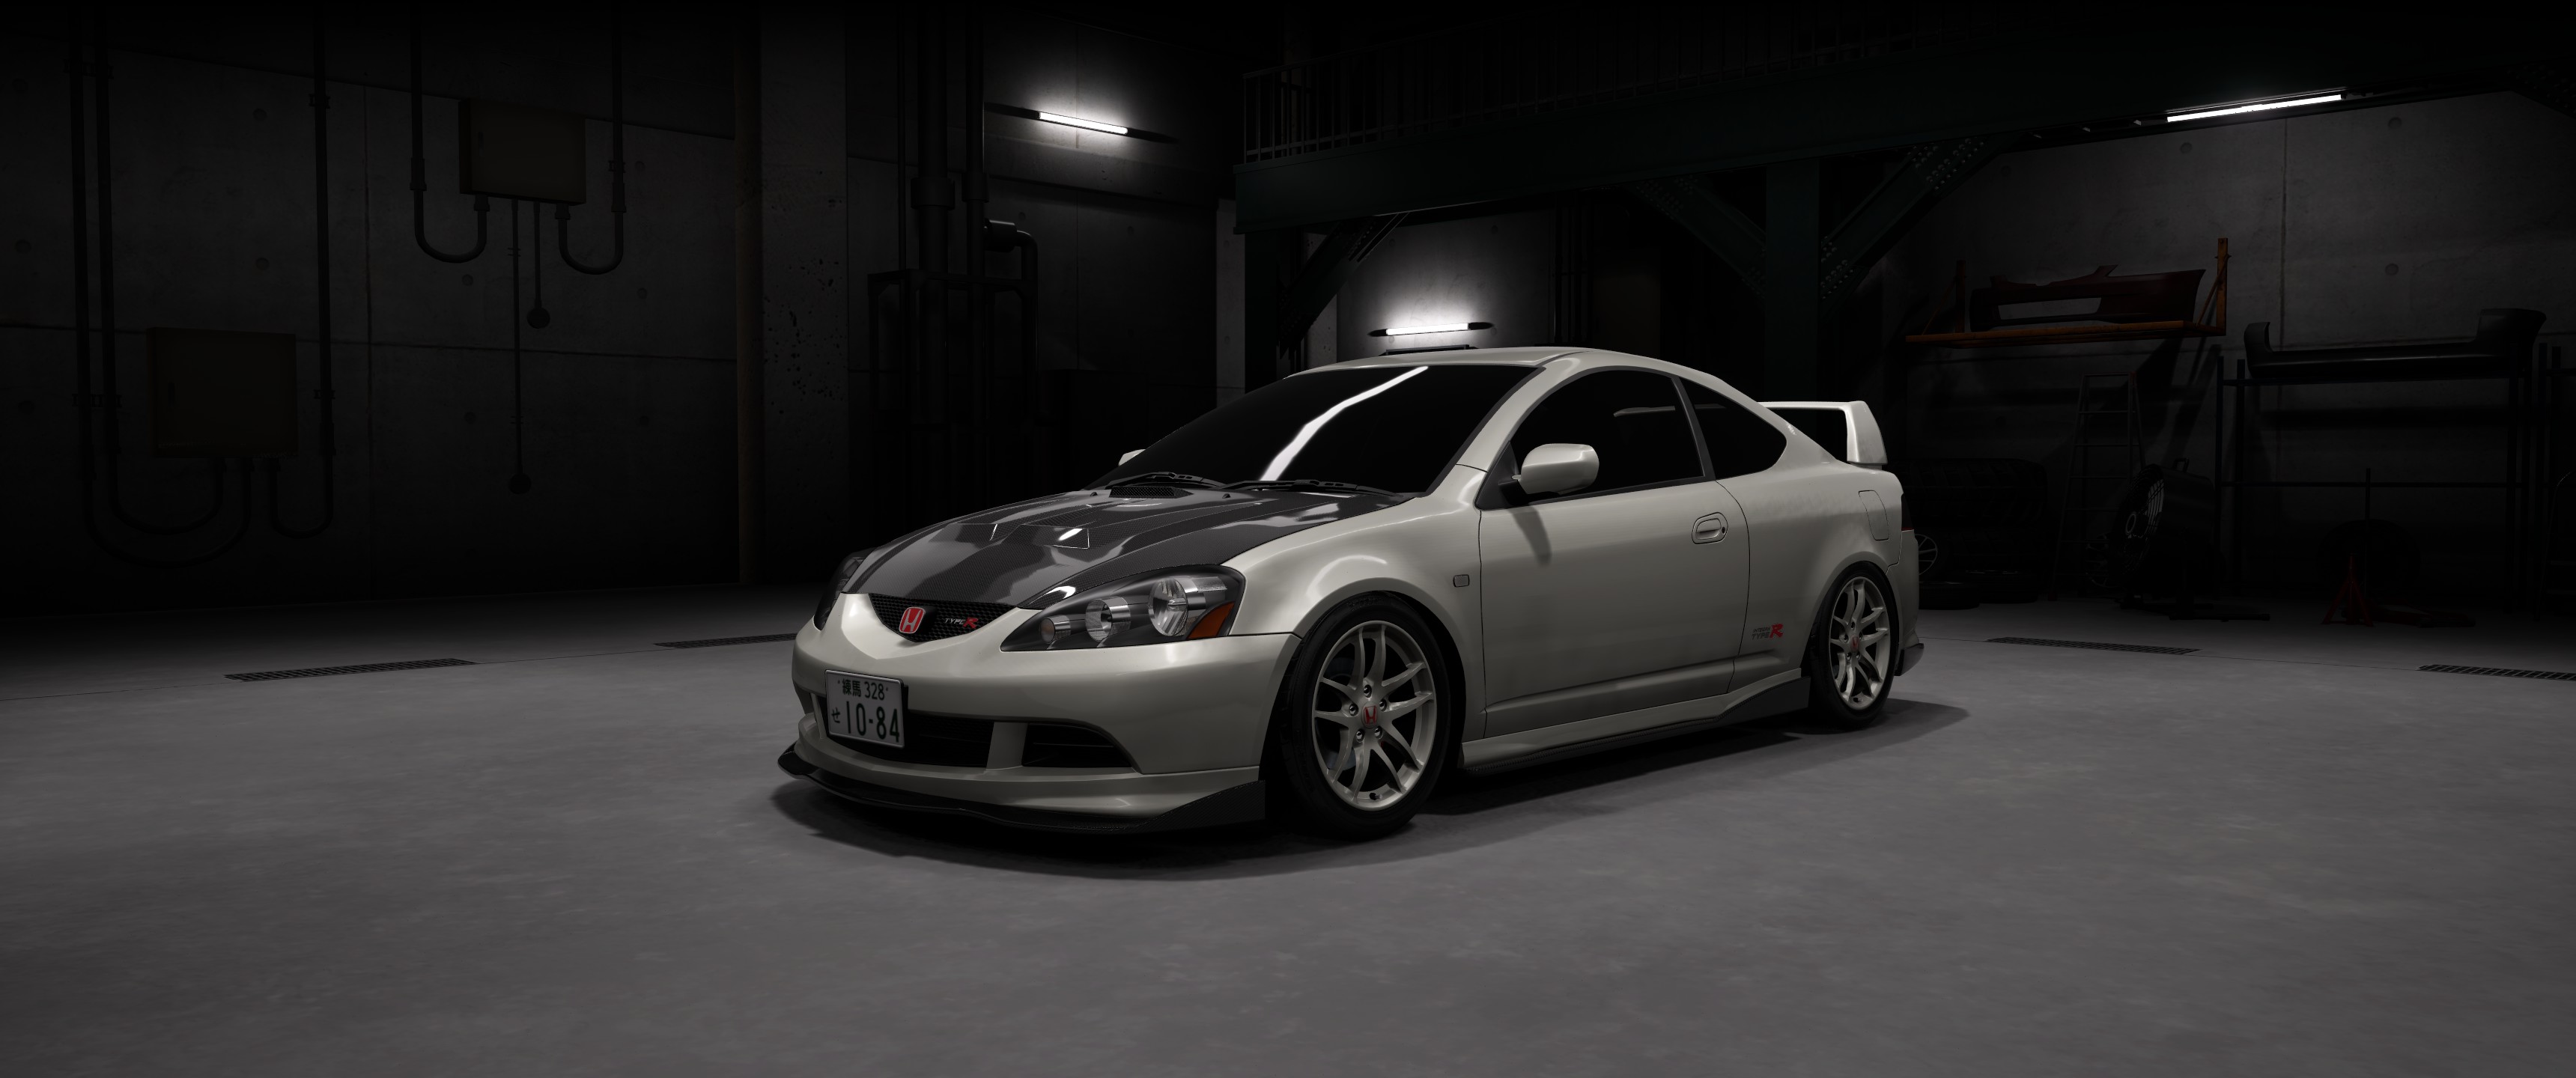
  • Honda Integra Type R (DC5) '04
  • Subaru Levorg STI Sport R EX (VNH) '21
The S2000 has the best handling out of the three in my opinion, but you can't go wrong with any of them. The RX-8 Type S used to be the car to get in Early Access if you wanted to clear Stage 2; it's still a great choice, about on par if not slightly slower than the S2000. The Mk3 Supra has the most power and top speed, but it's less capable in handling.

The Stage 2 rivals are pretty easy, so if you're looking for more of a challenge the Honda Integra Type R (DC5) '04 might be in your purview. It's a little bit slower than the very best cars in this Stage, but not miserably so. The Subaru Levorg STI Sport R EX (VNH) '21 is also decent as it has a decent power-to-weight ratio, although it rides a bit high and is more prone to body roll. It drives kind of like a crossover.

Other unlocks:
  • Honda Integra Type R (DC2) '99
  • Mazda Axela Sport 23S (BK3P) 03 (known overseas as the Mazda3)
  • Mazda Atenza Sport 23Z (GG3S) '03 (known overseas as the Mazda6)
  • Mazda Roadster RS (NB8C) '03 (known overseas as the MX-5 Miata)
  • Mazda Savanna RX-7 Infini (FC3S) '90
  • Nissan Silvia K's Aero SE (S14) '97
  • Subaru BRZ S (ZD8) '21
  • Toyota GR86 RZ (ZN8) '21
  • Toyota Vellfire 3.5VL (GGH35W) '15
Most of these are fairly unremarkable and lack acceleration as compared to the cars above this list. Acceleration in particular is more important for Stage 2 as battles don't often continue corner-to-corner as they do in other stages.

The FC3S RX-7 is disappointingly slow in particular. Even if the perk tree suggests it's a better car than the Mazda RX-8, it's not. (Seriously, how does it only have only 255 PS with a Lv4 power unit? Thanks to Maruzen·Williams for helping point this out.)

Cars were tested with levels 4/3/3/3/3/2/3/3/3/3/0 tuning upgrades (End of Stage 2).
Honda S2000 2.0 Type-V (AP1) '03

One of the fastest cars you can unlock in Stage 2, if not the fastest. I personally went with the S2K since it's just such a lovely looking car. It's easy to drive and handles cornering incredibly well at medium-high speeds.

This is just the usual setup, but you will want to change the final drive as while the default is correct for the JDM model, the 4.1 FD just makes more sense considering the power band on race starts.

Car data[ddm999.github.io]

Wheel Alignment
Front
Rear
Notes
Camber
-3
-2
Slightly aggressive camber helps with cornering in more technical routes
Toe
0
0
Ride Height
-3
-3
Offset
+5
+5
May provide more stability.
Tire Width
0
0
Brake
Front
Rear/Other
Notes
ABS
ON
Brake Balance
0
0
LSD
Front
Rear
Notes
LSD Type
1.5 way
Initial Torque
+5
LSD Ratio
+5
Suspension
Front
Rear
Notes
Spring Rate
+3
+3
Damper
+6
+6
Damper Balance
+50
+50
Stabilizer
Front
Rear
Notes
Stabilizer
0
0
Transmission
Ratio
Speed (km/h)
Notes
Final
4.100
J's Racing Final Drive
Mazda RX-8 Type S (SE3P) '03

A fairly fast car you get to unlock upon entering Stage 2, it has similar acceleration but a slightly lower top speed as compared the S2000 with the same upgrade levels. This used to be the car you had to get if you wanted to clear Stage 3 in the early access by beating Melancholic Angel and Cinderella Past Midnight. It's still good though, and better than the FC3S that appears later in the perk tree.

Car data[ddm999.github.io]

Wheel Alignment
Front
Rear
Notes
Camber
-3
-2
Slightly aggressive camber helps with cornering in more technical routes
Toe
0
0
Ride Height
-3
-3
Offset
+5
+5
May provide more stability.
Tire Width
0
0
Brake
Front
Rear/Other
Notes
ABS
ON
Brake Balance
0
0
LSD
Front
Rear
Notes
LSD Type
1.5 way
Initial Torque
+5
LSD Ratio
+5
Suspension
Front
Rear
Notes
Spring Rate
+3
+3
Damper
+6
+6
Damper Balance
+50
+50
Stabilizer
Front
Rear
Notes
Stabilizer
0
0
Transmission
Ratio
Speed (km/h)
Notes
1st
3.014
82
REVOLUTION Close Gear Set
2nd
2.062
122
Toyota Supra 2.5GT Twin Turbo R (JZA70) '93

The car with the most power upon entering Stage 2. It has the stiffest handling out of the trio, but if you can get used to it it'll win your battles.

Car data[ddm999.github.io]

Wheel Alignment
Front
Rear
Notes
Camber
-3
-2
Slightly aggressive camber helps with cornering in more technical routes
Toe
0
0
Ride Height
-3
-3
Offset
+5
+5
May provide more stability.
Tire Width
0
0
Brake
Front
Rear/Other
Notes
ABS
ON
Brake Balance
0
0
LSD
Front
Rear
Notes
LSD Type
1.5 way
Initial Torque
+5
LSD Ratio
+5
Suspension
Front
Rear
Notes
Spring Rate
+3
+3
Damper
+6
+6
Damper Balance
+50
+50
Stabilizer
Front
Rear
Notes
Stabilizer
0
0
Transmission
Ratio
Speed (km/h)
Notes
1st
2.450
82
PAR Close Ratio gearset
2nd
1.680
120
Honda Integra Type R (DC5) '04

Better known as the Acura RSX Type S in North America. Although this VTEC-loaded puppy lacks power as compared to the best cars in its class, it's a zippy little guy in technical routes. It handles similarly to the other FF-layout cars in the Honda family.

Car data[ddm999.github.io]

Wheel Alignment
Front
Rear
Notes
Camber
-3
-2
Slightly aggressive camber helps with cornering in more technical routes
Toe
0
0
Ride Height
-3
-3
Offset
+5
+5
May provide more stability.
Tire Width
0
0
Brake
Front
Rear/Other
Notes
ABS
ON
Brake Balance
0
0
LSD
Front
Rear
Notes
LSD Type
1.5 way
More or less inspired by J's Racing DC5 1.5 way LSD
Initial Torque
+3
Lower to +2 if you still feel the front is a bit understeery
LSD Ratio
+6
More analog engagement helps with powerslides and handbrake turns
Suspension
Front
Rear
Notes
Spring Rate
+3
+3
Damper
+6
+6
Damper Balance
+50
+50
Stabilizer
Front
Rear
Notes
Stabilizer
-1
+1
Helps reduce understeer.
Transmission
Ratio
Speed (km/h)
Notes
1st
2.615
89
PPG Elite Pro Sequential Kit Honda K-Series (6 Speed)
2nd
1.930
120
3rd
1.500
155
4th
1.200
194
5th
1.000
232
6th
0.848
Final
4.250
Stage 3 Cars
The best cars to consider in no particular order:
  • Mazda RX-7 Type RZ (FD3S) '00 (needed for wanderer)
  • Nissan Skyline GT-R V-spec (BCNR33) '97
  • Nissan Skyline GT-R V-spec II (BNR34) '00
  • Toyota Supra RZ (JZA80) '97
  • Toyota GR Yaris RZ (GXPA16) '20 (needed for wanderer)
  • Subaru Impreza WRX TypeR STI Version VI (GC8) '99
If you have to pick just one car, the RX-7 FD3S is the strongest and most useful out of the bunch. The Skyline R33 and R34 are both great choices that closely follow, while the A80 Supra is good but can lack a bit in acceleration.

The GR Yaris is the better of the two rally-inspired cars and definitely the one you might like if you're looking for something fun albeit more difficult to drive. It also scales surprisingly well with upgrades past Stage 3, you can continue driving this car well into Stage 4 if you prefer. The Subaru GC8 is slower, though it doesn't fall too far behind.

Other unlocks (there's a lot):
  • Mitsubishi Lancer GSR Evolution V (CP9A) '98
  • Mitsubishi Lancer Evolution Final Edition (CZ4A) '15
  • Mitsubishi GTO Twin Turbo (Z16A) '95 (known in NA as the 3000GT or Dodge Stealth)
  • Mitsubishi Eclipse GT (DK4A) '05
  • Nissan Silvia spec-R Aero (S15) '99
  • Nissan Fairlady Z Version R TwinTurbo 2by2 (GCZ32) '98 (known overseas as the 300ZX)
  • Nissan Fairlady Z Version ST (Z33) '05 (known overseas as the 350Z) (needed for wanderer)
  • Nissan Fairlady Z Version ST (Z34) '14 (known overseas as the 370Z)
  • Nissan Skyline GT-R V-spec II (BNR32) '94
  • Subaru Levorg 2.0GT-S EyeSight (VMG) '15
  • Subaru Impreza WRX STI (GDB) '00 ("Bugeye")
  • Subaru Impreza WRX STI 2003 V-lLimited (GDB) '03 ("Blobeye")
  • Subaru Impreza WRX STI spec C (GDB) '05 ("Hawkeye")
  • Subaru WRX STI Type S (VAB) '15
  • Toyota Chaser Tourer V (JZX100) '98
  • Toyota Mark X 350RDS (GRX133) '16 (needed for wanderer)
  • Toyota Crown Athlete G Package (GRS184) '05
Some notes:
  • The Skyline R32 is worse as compared to its younger siblings. Its acceleration is roughly about the same if not a bit slower but its top speed is quite lacking compared to the R33 and R34. This is mainly because of its high drag coefficient (link[ddm999.github.io]).
  • The Fairlady Z's that unlock here handle well but don't have good acceleration despite their somewhat similar power-to-weight ratio to the Skylines, with the Z33 being the worst of the three. Upgrades are also quite expensive compared to the other cars. Looking at the data, it's likely because the V6 doesn't rev anywhere near high enough to make use of that power (link[ddm999.github.io]).
  • The Subaru Levorg, WRX's (aside from the VAB), and Mitsubishi Lancer Evos that are unlocked at this point are decent but significantly slower compared to the best cars in this stage. A wanderer does require you drive a Mitsubishi though, making the CP9A not a bad choice.
  • The Subaru VAB and Silvia S15 are exceptionally bad; they lack power and don't scale well with upgrades. The S15 in particular continues the trend of bad handling with the Silvia line, with poor lateral grip (link[ddm999.github.io]).
  • The Mitsubishi GTO and Eclipse pale in comparison to the best cars with their low power-to-weight ratio and heavy steering feel. They lack in acceleration and have poor handling.
  • The Chaser JZX100 has decent power, but struggles with cornering and has poor handling. It's likely the fastest out of the Toyota sedans that unlock at this stage, though that isn't saying much. The Mark X handles better than the Chaser, but is very expensive to upgrade and otherwise unremarkable. The Crown Athlete doesn't fare much better.
Cars were tested with levels 5/4/4/4/4/2/4/4/4/4/0 tuning upgrades (End of Stage 3).
Mazda RX-7 Type RZ (FD3S) '00

Not only is the RX-7 FD3S a fairly fast and great handling FR car, it satisfies niche requirements for two wanderers: Shonan Affair, who only races rotary engine cars, and FD Tomo-san, who only races against this car.

Car data[ddm999.github.io]

Wheel Alignment
Front
Rear
Notes
Camber
-4
-2
Aggressive camber helps with cornering in more technical routes
Toe
0
0
Ride Height
-3
-3
Offset
+5
+5
May provide more stability.
Tire Width
0
0
Brake
Front
Rear/Other
Notes
ABS
ON
Brake Balance
0
0
LSD
Front
Rear
Notes
LSD Type
1.5 way
Initial Torque
+7
LSD Ratio
+7
Suspension
Front
Rear
Notes
Spring Rate
+3
+3
Damper
+7
+7
Damper Balance
+50
+50
Stabilizer
Front
Rear
Notes
Stabilizer
0
0
Transmission
Ratio
Speed (km/h)
Notes
1st
2.714
82
OS Giken Close Ratio Gear Kit (3 Speed)
2nd
1.742
127
3rd
1.267
175
Nissan Skyline GT-R V-spec (BCNR33) '97

This setup should work for the Skyline GT-R V-spec II (BNR32) '94 as well. Note that top speed for the R32 will be lower as the R32 is generally worse; I don't make any suggestions on what your 6th gear should be for the R32 as it'll depend on your power upgrades.

Car data[ddm999.github.io]

Wheel Alignment
Front
Rear
Notes
Camber
-4
-2
Aggressive camber helps with cornering in more technical routes
Toe
0
0
Ride Height
-3
-3
Offset
+5
+5
May provide more stability.
Tire Width
0
0
Brake
Front
Rear/Other
Notes
ABS
ON
Brake Balance
0
0
LSD
Front
Rear
Notes
LSD Type
1.5 way
1.5 way
Initial Torque
+4
+6
The front LSD will only kick in if you have any torque going to the front; see torque balance.
LSD Ratio
+5
+7
Suspension
Front
Rear
Notes
Spring Rate
+3
+3
Damper
+7
+7
Damper Balance
+50
+50
Stabilizer
Front
Rear
Notes
Stabilizer
0
0
Transmission
Ratio
Speed (km/h)
Notes
1st
2.695
88
OS Giken Close Ratio Gear Kit (5 Speed)
2nd
1.703
140
3rd
1.236
193
5th
0.826
289
6th
0.725
Max speed 6th gear
Torque Balance
-
Front:Rear
0:100
Adjust for preference; I prefer the default FR-style handling.
Nissan Skyline GT-R V-spec II (BNR34) '00
Godzilla is a strong all-rounder. Solid power, solid handling.

Car data[ddm999.github.io]

Wheel Alignment
Front
Rear
Notes
Camber
-4
-2
Aggressive camber helps with cornering in more technical routes
Toe
0
0
Ride Height
-3
-3
Offset
+5
+5
May provide more stability.
Tire Width
0
0
Brake
Front
Rear/Other
Notes
ABS
ON
Brake Balance
0
0
LSD
Front
Rear
Notes
LSD Type
1.5 way
1.5 way
Initial Torque
+4
+6
The front LSD will only kick in if you have any torque going to the front; see torque balance.
LSD Ratio
+5
+7
Suspension
Front
Rear
Notes
Spring Rate
+3
+3
Damper
+7
+7
Damper Balance
+50
+50
Stabilizer
Front
Rear
Notes
Stabilizer
0
0
Transmission
Ratio
Speed (km/h)
Notes
1st
3.241
85
5600 RPM at race starts
2nd
2.269
122
Torque Balance
-
Front:Rear
0:100
Adjust for preference; I prefer the default FR-style handling.
Toyota Supra RZ (JZA80) '97
This JDM legend has strong power delivery, though it doesn't have the best acceleration among the Stage 3 cars. It has a low drag coefficient of 300 coef×1000.

Car data[ddm999.github.io]

Wheel Alignment
Front
Rear
Notes
Camber
-3
-2
Slightly aggressive camber helps with cornering in more technical routes
Toe
0
0
Ride Height
-3
-3
Offset
+5
+5
May provide more stability.
Tire Width
0
0
Brake
Front
Rear/Other
Notes
ABS
ON
Brake Balance
0
0
LSD
Front
Rear
Notes
LSD Type
1.5 way
Initial Torque
+4
The Supra is already stable as-is, so not as much engagement is needed
LSD Ratio
+4
Suspension
Front
Rear
Notes
Spring Rate
+3
+3
Damper
+6
+6
Damper Balance
+50
+50
Stabilizer
Front
Rear
Notes
Stabilizer
0
0
Transmission
Ratio
Speed (km/h)
Notes
1st
2.827
84
Not based on a real gear set but somewhat emulates the close-ratio T56
2nd
1.814
131
3rd
1.312
181
4th
1.000
238
5th
0.793
300
6th
0.634
Toyota GR Yaris RZ (GXPA16) '20

The brainchild of Akio Toyoda, chairman of Toyota, and the reigning champion of WRC. This bad boy is actually quite fast and comparable with the FD RX-7 and R34 Skyline in terms of performance. You also need it for a wanderer, which makes it another good choice if you're willing to learn how to drive it.

If you're wondering why the gearing from 4th to 5th is so borked, it's because it is. Technically those are the real gear ratios on the GR Yaris but 5th, 6th, and R gears use a different, shorter ring gear of 3.350 which Tokyo Xtreme Racer fails to account for (source[media.toyota.co.uk]). Technical limitations I guess. But you can get the more or less 'proper' gear ratios by multiplying 5th and 6th by the ratio of the proper final gears (3.350/3.941).

I've been playing around with this car a lot as well as it is very sensitive to tuning changes. It's to the extent that if you really want to learn your tuning settings, drive this car. It's a great example of subtle changes making bigger differences, without having to drag your sliders all the way to one side or the other.

Some things you should know about this car:
  • Like other sport compacts, the Yaris is slightly front-heavy, with a 59/41 weight distribution. It also has a rather high center-of-gravity measuring at 435 mm.
  • The GR Yaris has a shorter wheelbase than other sport compacts like the WRX. This allows it to rotate into corners very easily but also makes it hard to control if you're not careful.
  • It's meant to be driven as sort of a rally car, less as a track car. You can drive it as a track car somewhat -- the traditional brake and turn-in, but it's better to get used to throwing it around corners.
  • How, you might ask? The main thing you need to know about is opposite lock[en.wikipedia.org] during a powerslide. When you approach a medium speed corner, you want to essentially 'throw' the weight of the car around the corner. You do this by turning the steering wheel in a little early before the corner, then pulse the brakes quick and hard for a moment or two to throw out the rear and induce an oversteer, all the while countersteering with the front wheels to correct the front and flooring the throttle as you approach the corner exit. You may find TXR's strong traction control model often doesn't require you to countersteer very much, however.
  • On very tight corners like Edobashi left/right turn from Ginza upbound, if you don't want to end up veering sideways into the barriers, you'll have to modulate the brakes and get a feel for the car slowing down. Typically that means pulsing the brakes once or twice just before they lock up, let ABS help you out with some of the work, and then threshold brake some 50-80% of the way up until you can clear the corner safely or drift through it.
All that said, it is a very fun car to drive. It's a powerslide monster that you can kansei dorifto around C1 all night.

Car data[ddm999.github.io]

Wheel Alignment
Front
Rear
Notes
Camber
-3
-2
If you're having trouble keeping the car stable when braking hard, try reducing rear camber to 0. This sacrifices some corner exit grip for straight-line stability.
Toe
0
0
Ride Height
-3
-3
Offset
+5
+5
May provide more stability.
Tire Width
0
0
Brake
Front
Rear/Other
Notes
ABS
ON
Brake Balance
0
0
LSD
Front
Rear
Notes
LSD Type
1 way
2 way
The aggressive locking on deceleration helps keep the Yaris planted. You may choose to run a 1.5 way in the front as it's more stable, but 'sticky'/understeery; the front will rotate significantly less as the axle locks.
Initial Torque
+3
+6
Increase rear to +7 for more stability if desired
LSD Ratio
+5
+7
Increase rear to +8 for more stability if desired
Suspension
Front
Rear
Notes
Spring Rate
+3
+3
Damper
+6
+6
Damper Balance
+60
+60
Increase both to around +70 if you're struggling to keep the car straight on braking
Stabilizer
Front
Rear
Notes
Stabilizer
0
+2
Helps reduce understeering. Try -1 F, +1 R if you want more response.
Transmission
Ratio
Speed (km/h)
Notes
5th
0.919
265
approx. 1.081 × 3.350 ÷ 3.941
6th
0.767
approx. 0.902 × 3.350 ÷ 3.941
Final
3.141
Default is fine if you're farming in C1.
Torque Balance
-
Front:Rear
50:50
Set to 30:70 for more rear rotation or 60:40 for more FF-style handling.
Subaru Impreza WRX TypeR STI Version VI (GC8) '99
The GC8 Subie used to be one of the best cars in early access, but that's no longer the case in the full release. The acceleration is on the faster side, but is a bit lacking compared to the best of the Stage 3 cars, especially the GR Yaris. It also has a somewhat high center of gravity, measuring at 426 mm tall.

This setup makes it more comfortable and easy to handle; it's very similar to the setup I used in early access, but with a few minor tweaks.

Car data[ddm999.github.io]

Wheel Alignment
Front
Rear
Notes
Camber
-3
0
Camber only on the front tires as you may want to maximize rear grip on straight-line braking
Toe
0
0
Ride Height
-3
-3
Offset
+5
+5
May provide more stability.
Tire Width
0
0
Brake
Front
Rear/Other
Notes
ABS
ON
Turning ABS off lets you powerslide longer through corners at the cost of having to threshold brake
Brake Balance
0
0
LSD
Front
Rear
Notes
LSD Type
1 way
2 way
Aggressive locking on the rear wheels; front is relatively stable on deceleration.
Initial Torque
+4
+7
Lower engagement on front LSD makes it less jerky on corner exit
LSD Ratio
+3
+7
Suspension
Front
Rear
Notes
Spring Rate
+3
+3
Damper
+6
+6
Damper Balance
+65
+65
Stabilizer
Front
Rear
Notes
Stabilizer
-2
+1
Helps reduce understeering. The softer front bar helps induce better rotation.
Transmission
Ratio
Speed (km/h)
Notes
Final
3.545
Based on OEM rear final drive swap. The gearing is decent as-is.
Torque Balance
-
Front:Rear
35:65
Adjust towards front for more FF-style handling, though I don't recommend it for this car.
Toyota Chaser Tourer V (JZX100) '98
I don't particularly recommend this car over its flagship cousin, the JZA80 Supra, because unlike the A80 Supra, the Chaser struggles with cornering and doesn't generate enough inertia to properly commit to drifts with the power upgrades you're limited to in Stage 3. 6/4/4 power upgrades give this a decent 423 PS but past that, you're better off upgrading to a new car in Stage 4.

If you're committed to making this thing work, these settings may help give you an idea of how to adjust for its characteristics.

Car data[ddm999.github.io]

Wheel Alignment
Front
Rear
Notes
Camber
-3
-2
Slightly aggressive camber helps with cornering in more technical routes
Toe
0
0
Ride Height
-3
-3
Offset
+5
+5
May provide more stability.
Tire Width
0
0
Brake
Front
Rear/Other
Notes
ABS
ON
Brake Balance
0
0
LSD
Front
Rear
Notes
LSD Type
1.5 way
Initial Torque
+4
The Chaser is already stable as-is, so not as much engagement is needed
LSD Ratio
+4
Suspension
Front
Rear
Notes
Spring Rate
+3
+3
Damper
+6
+6
Damper Balance
+35
+35
Softened dampers for more responsiveness.
Stabilizer
Front
Rear
Notes
Stabilizer
0
0
Transmission
Ratio
Speed (km/h)
Notes
1st
2.599
86
Nagao Techno Close Gear Set
2nd
1.722
129
3rd
1.348
165
5th
0.758
294
6th
0.575
Default ratio is too tall; multiply 5th by ratio between 4th and 5th (.758 × .758 ÷ 1)
Stage 4 Cars
Best cars to consider in order of performance:
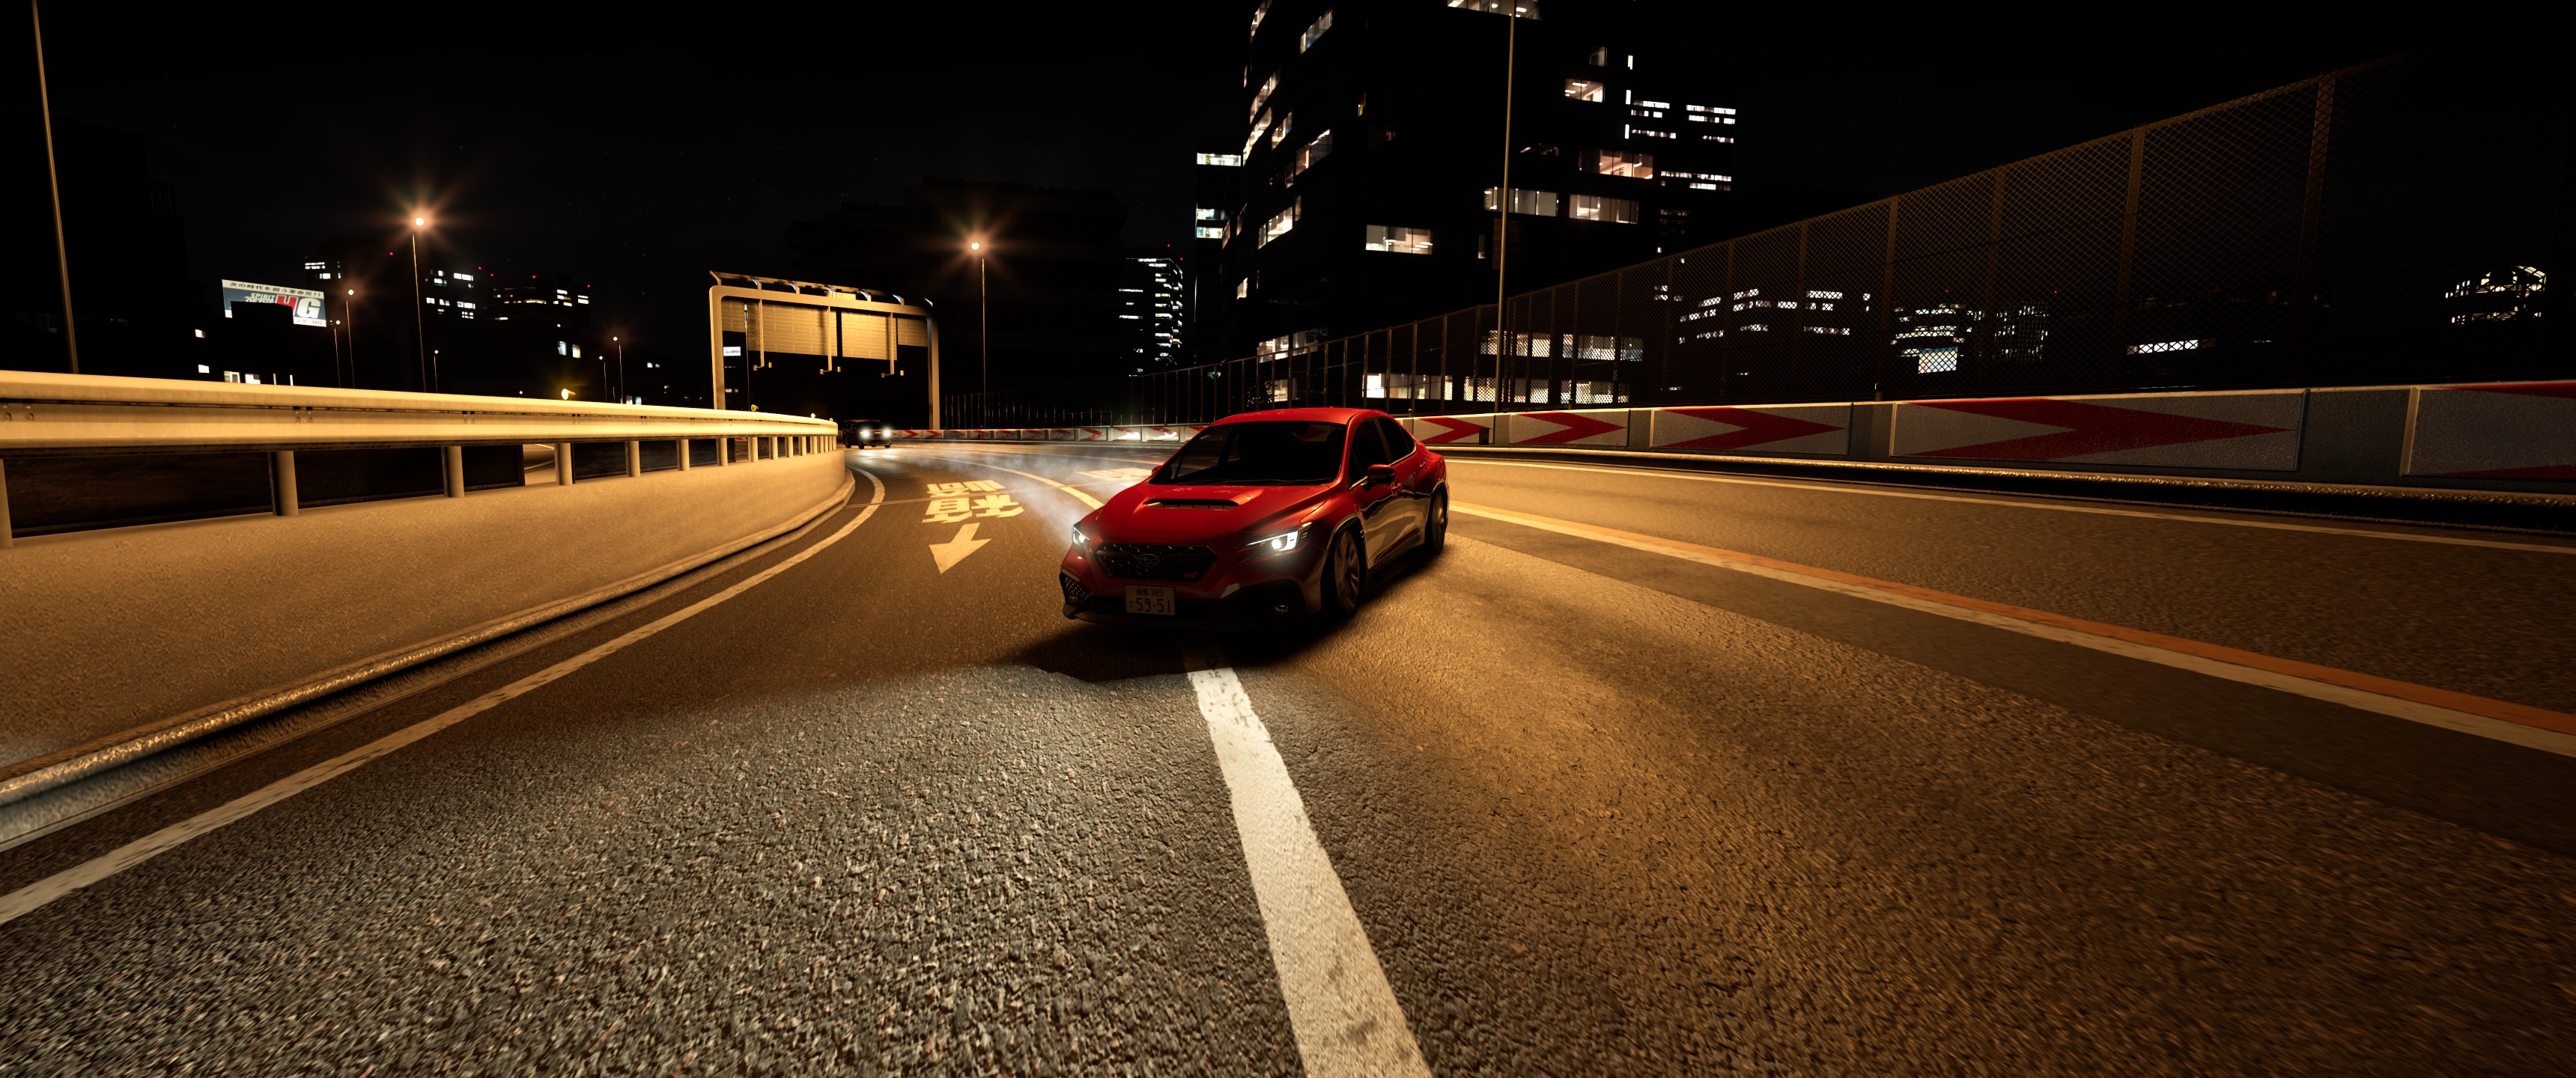
  • Subaru WRX S4 STI Sport R EX (VBH) '21
  • Honda Civic Type R (FL5) '22 (needed for wanderer)
  • Nissan Fairlady Z Version ST (RZ34) '24 (needed for wanderer)
The S4 STI scales extremely well with power upgrades and is easy to handle, so it gets a very strong recommendation. The FL5 Type R also gets a strong recommendation as it scales well with power upgrades as well; you also need to eventually max it out for an endgame wanderer. The RZ34 is the weakest of the three but it doesn't lag far behind; you also need it for a wanderer albeit they're not very difficult.

Other unlocks:
  • Honda NSX-R (NA2) '02
  • Honda NSX Type Zero (NA2) '97
  • Lexus RC F Performance package (USC10) '23 (extremely expensive to upgrade)
  • Lexus LC500 S package (URZ100) '18 (extremely expensive to upgrade)
I used to recommend the NSX NA2's because they felt fast, but unfortunately they don't scale very well with power upgrades and might struggle to keep up with some of the endgame bosses. They do have very comfortable handling and excellent steering response, but are lacking somewhat in acceleration. They're still awesome cars though, so don't let this list deter you from getting one if you like them. It'll just hurt when the Stage 4 bosses can outright plow through turns like nobody's business. The '02 NSX also has a somewhat dismal top speed of 382 km/h with the Stage 4 upgrades, though you won't ever notice it if you just keep firing up that nitro.

The Lexus cars are a little frustrating to drive and their tuning upgrades are very expensive. Saving CP is kind of important at this stage since doing so lets you jump straight into Stage 5 without having to farm rivals to afford the endgame cars.

After upgrades they're powerful, given, but they're still very heavy cars that struggle a bit more with acceleration than the other cars you may unlock here. They're also really not meant to be driven on manual; the LC500 has a 10-speed transmission while the RC F has a slightly more bearable 8-speed.

Credit where it's due though, the upside of having a ten-gallon pure beef car like the RC F (1609 kg) means you can basically bully rivals and traffic, so if you're the type of driver that absolutely hates being pushed around, the RC F might be your jam. It also has a quite good steering response, albeit not better than the similarly fast NSX NA2.

The LC500 is even heavier at nearly 1800 kg after upgrades! In stock form it's heavier than the FJ Cruiser (the SUV), and the only car to beat its weight is the Toyota Vellfire. Yeah, the minivan. The LC500's steering response is on the slower side but it is very stable at high speeds; par for the course for a luxury GT coupe. Again though, it's the 10-speed automatic that makes it kinda-sorta miserable on manual. In practice you'll only ever be using the first 9 gears, with the 10th as a very tall overdrive. Still something to keep in mind though.

Cars were tested with levels 7/5/5/5/5/3/5/5/5/5/0 tuning upgrades (End of Stage 4).
Subaru WRX S4 STI Sport R EX (VBH) '21
After upgrades, this is the fastest car you can unlock in Stage 4. It can clock ~34-35 seconds in in C1 Inner Loop Ginza easily. For comparison the NA2 regularly clocked 36-37s with max upgrades... so yeah.

I'll admit this really surprised me. You'd be fooled by the initial numbers and speed metric but it's surprisingly fast and handles remarkably easily as compared to something like ye olde GC8. The Lv7 and Lv8 power unit upgrades scale up much better compared to the NSX NA2's power upgrades. It's also one of the most cost-friendly cars to upgrade, which is great considering you'll need a lot of CP saved up for Stage 5.

One caveat to mention, it has an 8-speed transmission and could be annoying for manual drivers. Realistically it's not that bad since you're only ever between 1st and 6th on technical courses, touching 7th and 8th while you're on Bayshore or Yokohane.

The real S4 STI uses what Subaru calls the Subaru Performance Transmission (With Manual Mode) (specifications[scdam.subaru.jp]). While it is indeed a step-less CVT, the manual mode is designed to emulate the feel of a manual transmission by fixing the ratios in place for each virtual gear shift. However, because TXR doesn't implement CVTs, this transmission is essentially a bona fide manual. The same thing applies to the Subaru Levorg cars.

Car data[ddm999.github.io]

Wheel Alignment
Front
Rear
Notes
Camber
-3
-2
Slightly aggressive camber helps with cornering in more technical routes
Toe
0
0
Ride Height
-3
-3
Offset
+5
+5
May provide more stability.
Tire Width
0
0
Brake
Front
Rear/Other
Notes
ABS
ON
Brake Balance
0
0
LSD
Front
Rear
Notes
LSD Type
1 way
1.5 way
It's relatively stable compared to the Yaris and doesn't need a lot of engagement on deceleration.
Initial Torque
+4
+6
LSD Ratio
+5
+6
Suspension
Front
Rear
Notes
Spring Rate
+3
+3
Damper
+6
+6
Damper Balance
+50
+50
Stabilizer
Front
Rear
Notes
Stabilizer
0
0
Transmission
(Technical / Not Full Tuned)
Ratio
Speed (km/h)
Notes
Final
3.800
Move to 3.444 after power unit lv 8
Transmission
(Top Speed / Full Tuned)
Ratio
Speed (km/h)
Notes
1st
3.056
81
I don't recommend this gearing for more technical courses as you may spend less time near peak power. 6th becomes too tall to use in C1.
2nd
1.778
140
3rd
1.279
195
4th
0.976
256
5th
0.791
316
6th
0.661
363
7th
0.565
393
8th
0.500
Final
3.444
Torque Balance
-
Front:Rear
50:50
Set to 35:65 for more rear rotation or 60:40 for more FF-style handling.
Honda Civic Type R (FL5) '22

A very good choice in Stage 4; from my testing it's the 2nd fastest car there. It clocks around 35-36s in C1 Inner loop Ginza with max upgrades. Being an FF, it's also quite easy to handle albeit the weight distribution (62/38) does mean you have to learn its quirks.

What makes this car important to pick up is that it satisfies requirements for two wanderers: Lady Lightning in the very late game Stage 5 epilogue who only races against this car, and Gentle Examiner who only races FF cars. If you intend to beat both of them you'll end up maxing this car anyway.

Car data[ddm999.github.io]

Wheel Alignment
Front
Rear
Notes
Camber
-3
-2
Slightly aggressive camber helps with cornering in more technical routes
Toe
0
0
Ride Height
-3
-3
Offset
+5
+5
May provide more stability.
Tire Width
0
0
Brake
Front
Rear/Other
Notes
ABS
ON
Brake Balance
0
0
LSD
Front
Rear
Notes
LSD Type
1.5 way
Loosely inspired by Spoon's 1.5 way LSD for FK8/FL5 Civic.
Initial Torque
+4
You don't want the LSD to engage too much as it may cause more understeer. Try lowering to +3 if you're still struggling with understeer.
LSD Ratio
+6
Increase to +7 for a more analog engagement. This makes it engage better with powerslides if that's your driving style.
Suspension
Front
Rear
Notes
Spring Rate
+3
+3
Damper
+6
+6
Damper Balance
+55
+55
Slightly stiff damper response makes it less frenetic when driving this car hard.
Stabilizer
Front
Rear
Notes
Stabilizer
-1
+1
Helps reduce understeer.
Transmission
Ratio
Speed (km/h)
Notes
Final
3.235
The default gearing is already close as-is, so just adjust FD to taste.
Nissan Fairlady Z Version ST (RZ34) '24

The modern Z. It's pretty good, though compared to the WRX S4 STI and the Type R FL5 it doesn't scale as well with power upgrades. It also has stiffer handling than the other two. To be fair I did give it a bit of flak at first, but it's grown on me. The Z32-esque rear end just looks so good.

Flying Fish of Shuto Expressway, the wanderer that requires this car to battle with, isn't that fast, so if you're only buying it for the requirement feel free to cheap out on the upgrades as they're quite expensive.

Car data[ddm999.github.io]

Wheel Alignment
Front
Rear
Notes
Camber
-3
-2
Slightly aggressive camber helps with cornering in more technical routes
Toe
0
0
Ride Height
-3
-3
Offset
+5
+5
May provide more stability.
Tire Width
0
0
Brake
Front
Rear/Other
Notes
ABS
ON
Brake Balance
0
0
LSD
Front
Rear
Notes
LSD Type
1.5 way
Initial Torque
+5
The RZ34 is fairly stable even on hard braking, so not much LSD engagement is needed.
LSD Ratio
+6
Suspension
Front
Rear
Notes
Spring Rate
+3
+3
Damper
+6
+6
Damper Balance
+50
+50
Stabilizer
Front
Rear
Notes
Stabilizer
0
0
Transmission
Ratio
Speed (km/h)
Notes
Final
3.100
Default gearing is fine as-is. Lowering the final drive to 3.1 allows you to start races at around 5600 RPM in 1st. Lowering it further to 2.757 will increase your top speed and start races at around 5000 RPM, though I don't recommend it for technical courses (spacing is too wide).
Lexus RC F Performance package (USC10) '23

Do you hate it when your car gets pushed around by other rivals? Want to ram the ever-living crap out of the guys from Phantom9 that keep playing dirty? Do you just abhor having CP in your wallet and get a huge high off blowing a fat wad of cash on your ride? How about zero custom livery or aftermarket aero, as you are no boor that dares tarnish the beauty of the original design? Perhaps you desire to be unique and own a car no other rival in the game does? Or you simply love the sound of a naturally aspirated V8?

If you answered yes to any of these questions, then the Lexus RC F might just be for you! It is a behemoth of a car weighing over 1600 kg after full Stage 4 upgrades. Those upgrades? Ungodly expensive. It costs more to tune this car than an LFA. Why? Dunno. Maybe our Lexus tech needs to enjoy their dinner of A5 Wagyu and fine wine before they order custom fab parts for the beloved RC F.

But it's on this list because it's technically a decent car if not also substantially... unique. Compared to the best of the Stage 4 cars, it's a bit behind the RZ34. There's really no reason to specifically get this car over the RZ34 as I believe the RZ34 outshines it in all but steering response and grip. For the flak it might get, the RC F as it exists in TXR has grip for days and drives super stable; turn the wheel and it goes where you want it to.

Car data[ddm999.github.io]

Wheel Alignment
Front
Rear
Notes
Camber
-3
-2
Slightly aggressive camber helps with cornering in more technical routes
Toe
0
0
Ride Height
-3
-3
Offset
+5
+5
May provide more stability.
Tire Width
0
0
Brake
Front
Rear/Other
Notes
ABS
ON
Brake Balance
0
0
LSD
Front
Rear
Notes
LSD Type
1.5 way
Initial Torque
+3
RC F handles rock solid without need for eager LSD engagement.
LSD Ratio
+4
Suspension
Front
Rear
Notes
Spring Rate
+3
+3
Damper
+6
+6
Damper Balance
+50
+50
Stabilizer
Front
Rear
Notes
Stabilizer
0
0
Transmission
Ratio
Speed (km/h)
Notes
Final
3.430
You get 8 gears, so plenty of spacing to go around. 3.430 will yield top speed of 389 km/h with power unit Lv7.
Honda NSX-R (NA2) '02

The OG NSX. Unfortunately not the fastest car you get to unlock in Stage 4 as it scales quite badly with power upgrades as compared to the S4 STI and its younger cousin the Civic Type R FL5. It's also sort of expensive to buy the tuning upgrades for. It is pretty comfortable to drive and handles well though, so if you like it you're welcome to get it.

Aside from the Beat and S660, both of the NSX NA2 models are TXR's only cars with an MR layout (rear mid-engine, rear-wheel-drive) and they handle as such -- nimble, light front-end that's significantly less prone to understeer. Granted, this does make it a bit more difficult to drive as you're also no longer able to slap the handbrake to correct your car's angle because the weight is pinned in the back. It also means it's a bit more prone to oversteer, though I haven't found this to be a problem at all.

One thing to definitely be careful about is, well, crashing into other vehicles. It's a challenge with any of the cars in TXR, but sometimes you can get away with powering through traffic with many of the FR-layout cars with a beefy front-end. But the NSX's front profile is basically a skate ramp for other cars; that means if you're not careful navigating traffic, you'll occasionally send some poor guy in a Honda Beat to the skies above while also killing your race.

As usual, depending on where you're racing you'll want to adjust the final drive for top speed or acceleration. This setup should work similarly for the '97 NSX.

Car data[ddm999.github.io]

Wheel Alignment
Front
Rear
Notes
Camber
-4
-2
Aggressive camber helps with cornering in more technical routes
Toe
0
0
Ride Height
-3
-3
Offset
+5
+5
May provide more stability.
Tire Width
0
0
Brake
Front
Rear/Other
Notes
ABS
ON
Brake Balance
0
0
LSD
Front
Rear
Notes
LSD Type
1.5 way
Initial Torque
+7
LSD Ratio
+7
Suspension
Front
Rear
Notes
Spring Rate
+3
+3
Damper
+6
+6
Damper Balance
+50
+50
Stabilizer
Front
Rear
Notes
Stabilizer
0
0
Transmission
Ratio
Speed (km/h)
Notes
Final
4.235
The default gearing is already close as-is, so just adjust FD to your use case. 3.858 is good for higher speed courses.
Stage 5 Cars
Best cars to consider in order of performance:
  • Nissan GT-R Premium edition (R35) '17
  • Nissan GT-R Premium edition (R35) '14
  • Lexus LFA (LFA10) '10
The '17 model is the stronger of the two R35's. The T-spec Takumi Edition GT-R shouldn't be considered as it's not possible to change the settings of that car. Even with a save editor I couldn't modify the settings; they seem to be locked to the game's settings. Likely needs some sort of mod.

The LFA has better handling than the GT-R in my opinion, but it is objectively slower; the GT-R scales the best with full power upgrades, whereas the LFA's power upgrades, while good, lag a little behind.

Other unlocks:
  • Honda NSX (NC1) '17
  • Honda NSX Type S (NC1) '22
  • Toyota GR Supra RZ (DB06) '22
  • Toyota Celsior C specifications F package interior selection (UCF31) '04
Neither of the 2nd Gen NSX (NC1) models hold a candle to either the GT-R or LFA in terms of performance, which is a huge letdown since they're such cool cars. To put it into perspective, the top speed for the '22 NC1 is only 416 km/h after all upgrades. Much, much slower than the GT-R (516 km/h) or LFA (485 km/h), and it'd actually only be a tiny bit faster than the S4 STI. Heck, the S4 STI might have better acceleration, and you won't have to contend with the 9-speed DCT the NC1 carries if you drive on manual.

Top speed is really important in the endgame as you end up having to drag race on Bayshore route for a few of your final battles. Any car that can't at least exceed 420 km/h comfortably will undoubtedly struggle.

And then there's the GR Supra. It's not nearly enough to catch up as it can only get up to 409 km/h with max upgrades. Honestly, it should have been a Stage 4 car, but Genki decided to put it in Stage 5 for some reason. I'm inclined to believe that it's because the GR Supra has exceptionally good handling, probably the best handling car in the game actually. It would be a good choice for an engine swap.

Right, and finally the Toyota Celsior C-spec, known overseas as the Lexus LS430. Not a sleeper car that scales like crazy with upgrades or anything like that; it's a novelty, on par with Stage 1 or 2 cars' performance. One wanderer drives this car, Mystic Barber, and he's one of the easiest wanderers to defeat.

The one thing strangely remarkable about the Celsior C-spec is that it has the lowest drag coefficient in the entire game (250 coef×1000), beating out even the R35's drag coefficient of 260 coef×1000. You heard that right. The Celsior is more aerodynamic than the R35 by TXR metrics, although that would only ever matter if they could produce the same amount of power. Hey, that's an idea!

Cars were tested with max upgrades except nitro (End of Stage 5).
Toyota GR Supra RZ (DB06) '22

First things first, as mentioned before I do not recommend this car in Stage 5. If you're still adamant on beating the game with it, you'll have to swap out the engine for a VR38 anyway. That means you'll have to farm Impatient Princess/Craftsman Manabe/your favorite wanderer for hours on end if that's your thing.

I will admit it is a cool and fun car. It has exceptionally good handling, and it's definitely a looker. But I'm still not over the fact that it's a Stage 5 car, because as much as I like the actual GR Supra Genki would have to first sell me the Brooklyn bridge before I admit it's got apples to apples competition with the 2nd gen NSX, GT-R, and LFA. And they totally gimped the 2nd gen NSX's upgrades!

Max upgrades yield a final power rating of 585 PS and 1333 kg so it's just about as fast as the WRX S4 STI, which is a Stage 4 car. The setup is sort of the usual fare, as there's really not much to change for the GR Supra.

That said, if you have the engine swap perk, this is one of the best cars to do a VR38 swap in. The 8-speed helps a lot as you don't have to spread your gears too wide; it reaches a top speed of 506 km/h. The handling changes, but not terribly so.

Car data[ddm999.github.io]

Wheel Alignment
Front
Rear
Notes
Camber
-4
-2
Aggressive camber helps with cornering in more technical routes
Toe
0
0
Ride Height
-3
-3
The GR Supra is quite low to begin with at 112 mm; any lower risks scraping the road.
Offset
+5
+5
May provide more stability.
Tire Width
0
0
Brake
Front
Rear/Other
Notes
ABS
ON
Brake Balance
0
0
LSD
Front
Rear
Notes
LSD Type
1.5 way
Initial Torque
+4
The Supra is already stable as-is, so not as much engagement is needed
LSD Ratio
+4
Suspension
Front
Rear
Notes
Spring Rate
+3
+3
Damper
+6
+6
Damper Balance
+50
+50
Stabilizer
Front
Rear
Notes
Stabilizer
0
0
Transmission
Ratio
Speed (km/h)
Notes
Final
3.153
2.907 FD with max upgrades will yield a top speed of 409 km/h, but it's not really worth it considering you won't be beating Stage 5 bosses on Bayshore anytime soon.
Nissan GT-R Premium Edition (R35) '17

Currently the fastest car in the game after full upgrades. Has a top speed of 516 km/h.

This setup should work similarly for the '14 GT-R, though the '14 has a lower top speed of 511 km/h.

Car data[ddm999.github.io]

Wheel Alignment
Front
Rear
Notes
Camber
-4
-2
Aggressive camber helps with cornering in more technical routes
Toe
0
0
Ride Height
-3
-3
The GT-R is quite low to begin with at 110 mm; any lower risks scraping the road.
Offset
+5
+5
May provide more stability.
Tire Width
0
0
Brake
Front
Rear/Other
Notes
ABS
ON
Brake Balance
0
0
LSD
Front
Rear
Notes
LSD Type
1.5 way
1.5 way
The front LSD will only kick in if you have any torque going to the front; see torque balance.
Initial Torque
+3
+7
LSD Ratio
+4
+7
Suspension
Front
Rear
Notes
Spring Rate
+3
+3
Damper
+7
+7
Damper Balance
+50
+50
Stabilizer
Front
Rear
Notes
Stabilizer
0
0
Transmission
Ratio
Speed (km/h)
Notes
1st
3.124
92
2nd
1.772
162
3rd
1.228
234
4th
0.961
299
5th
0.771
373
6th
0.613
457
Final
3.700
The closer your race start RPM is to max power, the higher your acceleration. 2.700 final has top speed of 516 km/h.
Torque Balance
-
Front:Rear
0:100
Adjust for preference; I prefer the default FR-style handling.
Lexus LFA (LFA10) '10
The second best car in the game, but personally my favorite car. Has a top speed of 485 km/h and slightly better handling than the GT-R.

The LFA really doesn't need much, but as usual you will want to adjust the final drive ratio depending on where you're racing.

Car data[ddm999.github.io]

Wheel Alignment
Front
Rear
Notes
Camber
-4
-2
Aggressive camber helps with cornering in more technical routes
Toe
0
0
Ride Height
-3
-3
Offset
+5
+5
May provide more stability.
Tire Width
0
0
Brake
Front
Rear/Other
Notes
ABS
ON
Brake Balance
0
0
LSD
Front
Rear
Notes
LSD Type
1.5 way
Initial Torque
+4
Has quite stable handling already.
LSD Ratio
+7
Suspension
Front
Rear
Notes
Spring Rate
+3
+3
Damper
+7
+7
Damper Balance
+50
+50
Stabilizer
Front
Rear
Notes
Stabilizer
0
0
Transmission
(Technical)
Ratio
Speed (km/h)
Notes
1st
2.910
93
2nd
1.971
138
3rd
1.449
188
4th
1.110
245
5th
0.874
311
6th
0.716
380
Final
4.777
Adjust depending on situation, 3.302 final has top speed of 485 km/h.
Stage 5 Epilogue Cars
These two cars unlock at the very end of the game after beating Machine Light King:
  • Nissan Fairlady 240Z (HS30S) '71
  • Nissan Skyline HT 2000GT-R (KPGC10) '70
Both of these cars are clear homages to their respective car lineups. The Fairlady 240Z is the first Z made by Nissan, while the Skyline HT 2000GT-R is the first Skyline GT-R produced.

Neither of these vintage cars are particularly fast in the endgame; they're closer to Stage 1/Stage 2 cars. The Nissan S30 is required for a wanderer, so you'll have to purchase it if you want to work towards the true ending.
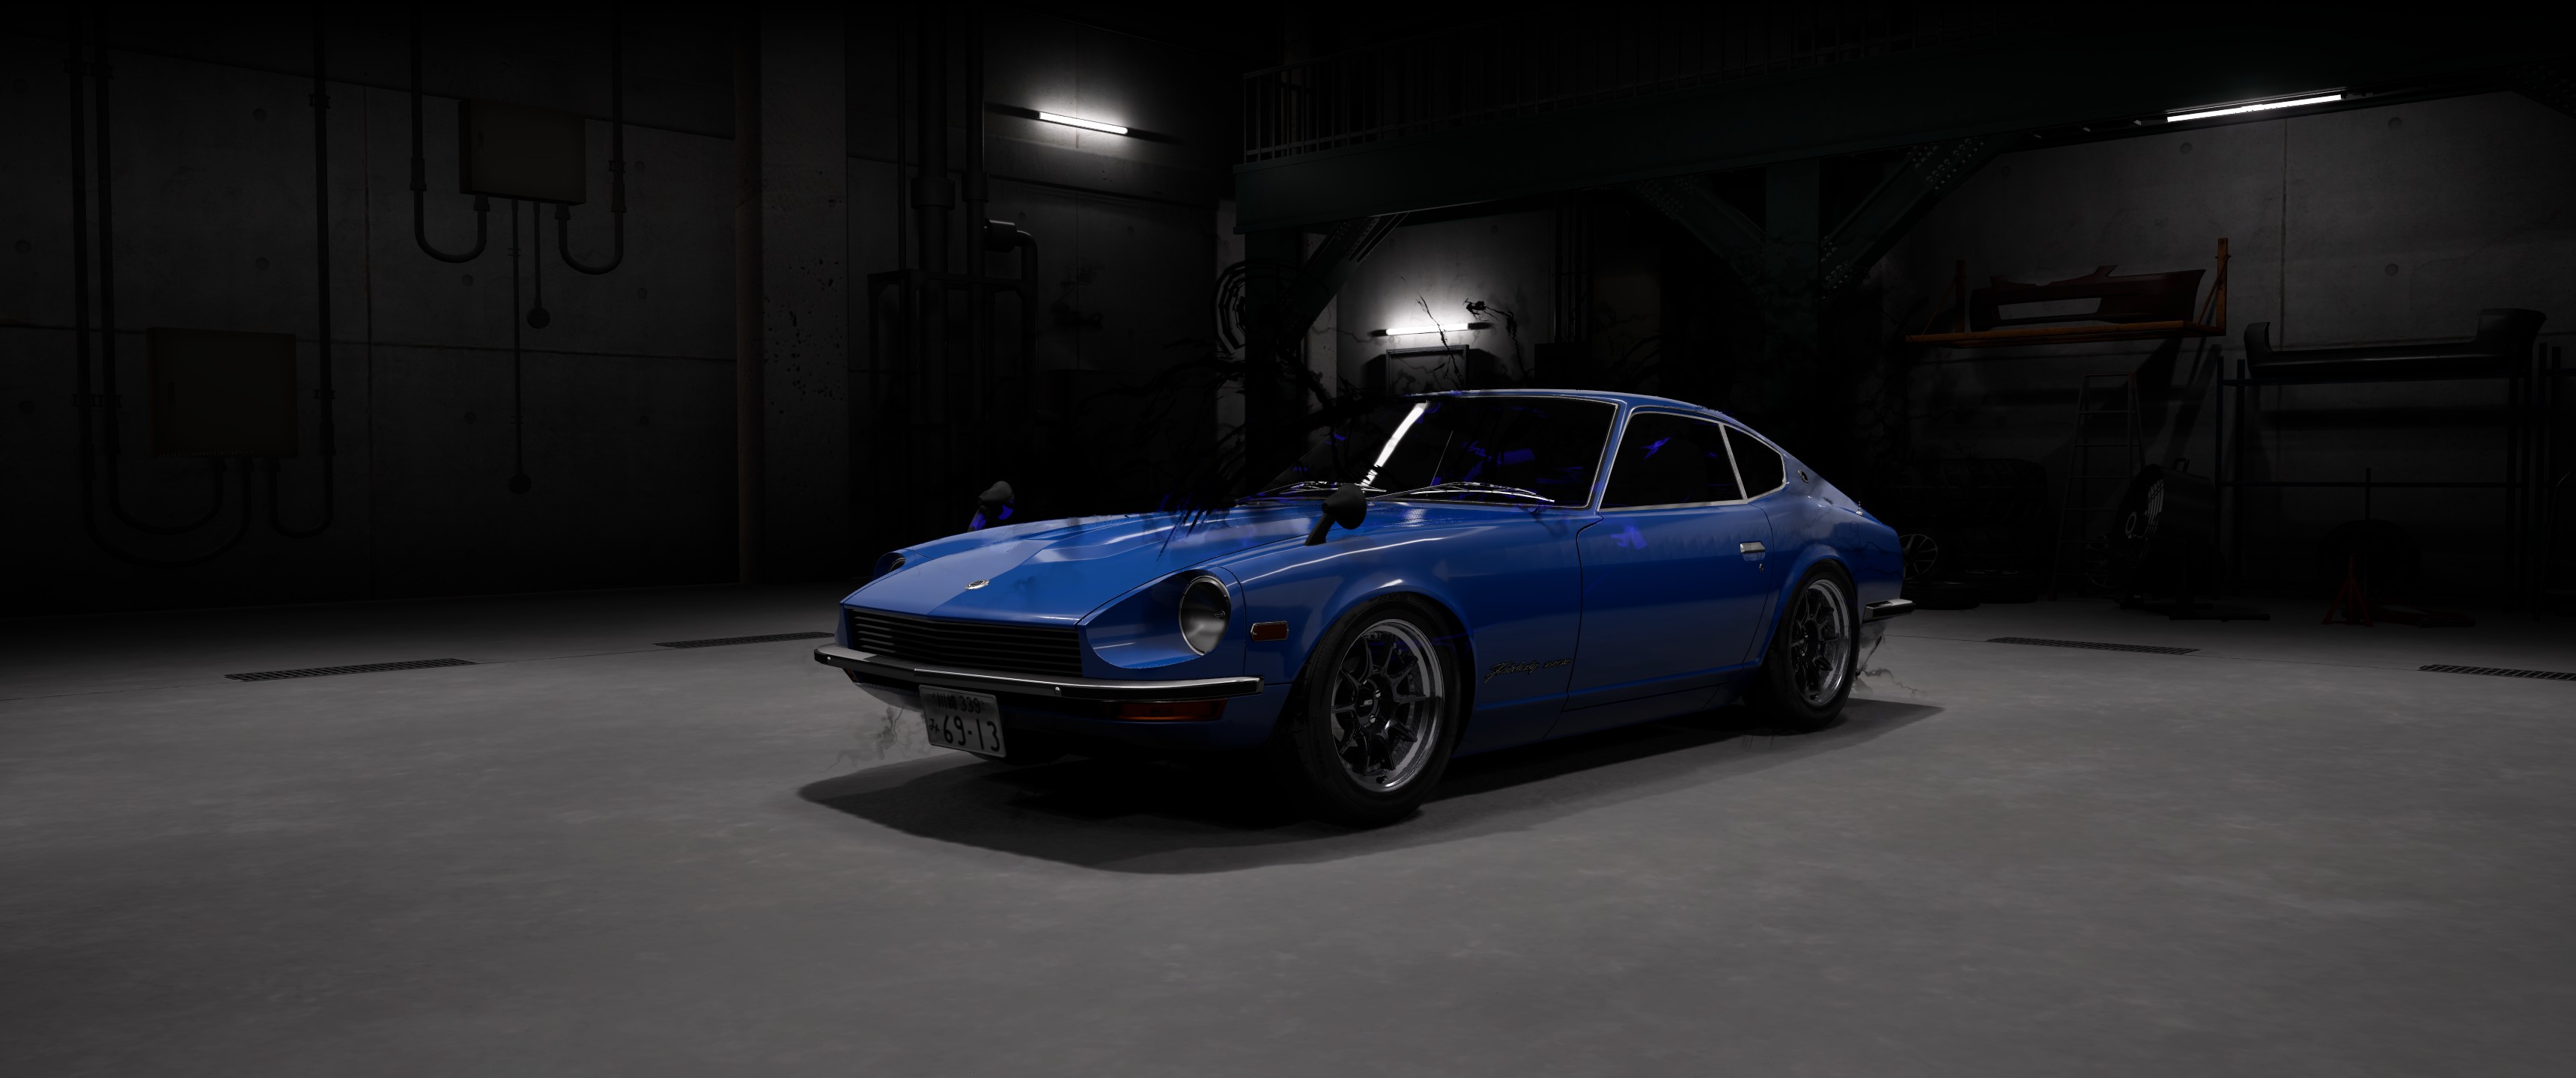
Nissan Fairlady 240Z (HS30S) '71

The classic Z, the car that brought two-seater sports cars to the masses. Back in the '70s you could only get cars of this style from the expensive European marques like the Jaguar E-Type and BMW E9.

As this is a vintage car, there actually is no traction control system onboard this car (or at least isn't supposed to be); modern TCS, which is part of electronic stability control (ESC), wasn't commonplace until around the mid '90s when major manufacturers such as Toyota and GM started putting these systems onboard their cars.

These settings are for the genuine S30 without an engine swap. You could engine swap it if you wanted, but I see engine swapping more as a fun novelty than something that significantly affects your progress of the game. Tune it how you like it, but engine swaps are endgame/post-game content and the 3000 BP barrier is really only reachable after either farming bosses/wanderers for hours or starting New Game+ as your BP is refunded.

I've tried the VR38 swap. It's fast, yeah, but handles pretty badly as it's very front-heavy and understeer-prone. No, it's not the "Devil Z"; Jun Kitami didn't just slam a VR38 into the engine bay and call it a day. He got every last bit out of that L28. Twin turbo, increased bore, reinforced the engine to hold an insane compression ratio, etc.

Unknown drives the actual "Devil Z" (with an absurdly high 988 PS matched to 911 kg of curb weight) and it comes with the proper body mods as well (notably the custom aero parts and bolt-on wide-body fenders). Dashutsu remarks that it's the fastest car in the game, reaching a maximum top speed of 666 km/h after unlocking the tuning settings via mods (link here).

The RB26 swap on the other hand isn't bad. Wangan Midnight canon aside, it's the closest compromise available spec-wise to the Devil Z's engine sans the insane horsepower, and it only tacks on an extra 20 kg of weight to the front-end (as compared to the VR38's massive 146 kg), thereby preserving most of the Z's handling.

Car data[ddm999.github.io]

Wheel Alignment
Front
Rear
Notes
Camber
-3
-2
Slightly aggressive camber helps with cornering in more technical routes
Toe
0
0
Ride Height
-3
-3
Offset
+5
+5
May provide more stability.
Tire Width
0
0
Brake
Front
Rear/Other
Notes
ABS
ON
Can turn off for authenticity, I suppose.
Brake Balance
0
0
LSD
Front
Rear
Notes
LSD Type
1.5 way
Initial Torque
+5
LSD Ratio
+5
Suspension
Front
Rear
Notes
Spring Rate
+3
+3
Damper
+6
+6
Damper Balance
+65
+65
Stiffening the damper response helps the car stay more stable during sudden changes in inertia and weight transfer.
Stabilizer
Front
Rear
Notes
Stabilizer
0
0
Transmission
Ratio
Speed (km/h)
Notes
Left as default. The default gearing for the Nissan Z is actually quite good already; you probably don't want to move the final drive as it'll make race starts really rough.
Additional Resources
TOKYO XTREME RACER (2025) INFO & DATA RESOURCE[ddm999.github.io]

Thanks to TeaKanji for the link.
148 Comments
Torosaurus 2 hours ago 
I get that. Either way this is a game and not IRL so I think making the demokit cars late game unlokcs and having them as a separate category was unecessary given that they would be pretty much useless since by the time they become avaliable for you to buy, you would have a better car that outclasses all of them and with the kits being separate aero parts, it would look similar but at least they will be avaliable for the car at the stage you unlock it which give the kits at least a hint of usefulness at worst.
grey  [author] 2 hours ago 
Yup, would've been cool if they just included the demokit as a full aero accessory that overrides all the other aero settings but ehh... Tuning shop demo cars are usually quite kitted out so I assume they had some ideas about making them fully custom, but at least you get to modify them in the base game (without mods).
Torosaurus 2 hours ago 
Like the insight! It's pretty interesting with how the demokit cars are since many of them are only unlocked at the late game and if their performance is the same as the regular cars, they would be useless by then. I think that the body kits they have should have been made as separate aero parts for the respective cars if that is the case. What do you think?
grey  [author] 6 hours ago 
Same performance as the cars they're based off of. I've read a remark by someone else though that they're actually worse than the regular cars as the body kit tends to scrape the ground.

The aero may have a slight ground effect, but looking at the data sheets it doesn't seem to be the case.
Torosaurus 11 hours ago 
Sorry if this upsets you as you are getting bored of testing the cars, but do you have an idea as to how good the demokit cars are? I just thought to bring them up as I noticed there are rivals who use them and you unlock them after you beat the rivals that use them.
grey  [author] 11 Oct @ 3:06pm 
Hmm, wow. I'm learning a lot. So that's the reason why the R32's top speed lags in comparison to the R33 and R34. It has a pretty high drag coefficient of 400 coef×1000 as compared to the R33's 350 coef×1000 and the R34's 330 coef×1000. And as you said with the Silvias, below-average lateral front grip.

I will be linking some of these in my guide. Thanks again.
grey  [author] 11 Oct @ 3:00pm 
Yeah, they shouldn't be very difficult iirc. You should be able to easily get ahead of them with nitro on race start. When they start blocking you, you have to find gaps and force your way through. Think that's about it.
STAR_15 11 Oct @ 2:49pm 
@grey the part with have his boys' and him all the same time
I think its stage 3
grey  [author] 11 Oct @ 2:34pm 
@STAR_15 I don't remember Iron Old Man being particularly difficult, is he gapping you on race starts or is it something else?
grey  [author] 11 Oct @ 2:32pm 
@Derek Foreal It would be spoilers for the epilogue, but basically they're ghosts that haunt the expressway .

@TeaKanji I have not seen that resource! Fascinating, thanks for linking it. I'll look at it thoroughly. I'm actually so excited we finally get real data for each of the cars.