Hammerwatch Anniversary Edition

Hammerwatch Anniversary Edition

37 ratings
Hammerwatch: Anniversary Edition Secrets
By PsychoDriveBy
WARNING: THIS GUIDE CONTAINS SPOILER INFORMATION AND SHOULD BE USED FOR SECRET COLLECTION
5
   
Award
Favorite
Favorited
Unfavorite
Castle Hammerwatch: Floor 1
Secret # per floor
Unlock Description
Guide Screenshots
Secret 1 (Breakwall)
You'll reach a point in the level where you need to open a bronze gate. There is a button nearby that opens the wall to the north. Head north until you run into a corner with four mana shards. Look closely and you'll notice a crack in the wall that will break if you attack it. Inside is some gold and a Rejuvenation Potion.
Secret 2 (Breakwall)
From secret 1, head to the room to the far east and you will find another breakable wall. Inside is a portal skip to advance to floor three, only use this if you plan on clearing later levels and are not following the secret guide.
Secret 3 (Breakwall)
Once you have collected the bronze key and passed through the bronze gate, you will approach a wooden bridge. Before you cross the bridge head to the west and you will find a breakable wall. Inside you will find gold and a chest.
Secret 4 (Breakwall)
Before you leave the loot room of secret 3, you will notice a breakable wall inside. Inside you will find gold and a Vendor Coin.
Secret 5 (Passwall) PLANK
On the right side of the map, you'll run into an NPC that mentions wooden planks. If you look to the east of him, you'll notice a wooden plank. Head south, where you find a bronze key, and you'll notice a wall that every few seconds has red eyes peek out of it. This is a new type of secret, what I call a passable wall, you can literally wall through the wall and follow the path to the Wooden Plank, collect all twelve for the true ending.
Castle Hammerwatch: Floor 2
Secret # per floor
Unlock Description
Guide Screenshots
Secret 1 (Button)
From the start of floor two head southwest, you will see another entrance that takes you back to Floor 1. To the west of that door you'll notice a button, pressing the button opens a secret room directly to your south. Open it to find gold inside.
Secret 2 (Passwall)
Progress through the map until you reach a spiked room with levers, you'll need to shut off spikes to reach the north room. Once to the north room there is another room where you can pass through the wall to enter. Inside that room is some gold and a chest.
Secret 3 (Breakwall)
Near Secret 2, you'll find a button that shuts off red spike traps. Once you have done this you can proceed to the next secret. Cross the spikes and enter the room to the northeast and once inside you'll find a breakable wall. Inside you'll find a loot dispenser that requires you to pull a lever in the center, loot is entirely random.
Secret 4 (Rune)
Once you have passed through the golden gate, you'll come across a new style of secret where you have to walk across rune markers on the floor until you have collected them all. You'll need three bronze keys to finish this secret, if you don't have them then collect them and return to this location. One rune is located southwest of the gold gate and does not require a key. Southeast of the gold gate is a bronze gate to unlock with a rune marker inside. Another one to the east of the gold gate with a bronze gate to unlock. Last one is directly to the west and also requires a bronze key to enter. Once you have completed the rune series, you will find your loot south of the gold gate, you will receive a chest and a Vendor Coin.
Secret 5 (Breakwall) CHANCE ONLY
Southeast corner of the room with the rune markers in it has a chance to spawn a breakable wall with an inventory item inside.
Secret 6 (Breakwall) PLANK
Once you complete this secret, you will have to cross a spike trap to progress through the level. After heading to the north, you'll eventually reach a sealed gate where you can see a Wooden Plank. To the west of this Wooden Plank, you will find a breakable wall with a button that opens that room with the Wooden Plank.
Secret 7 (Breakwall)
To the east of the Wooden Plank, you will find another breakable wall with a button that spawns a chest in that room with the Wooden Plank.
Secret 8 (Breakwall)
North of the room with the Wooden Plank, you'll find a room infested with beetles. The northeast room connected to that room has a breakable wall inside it with a puzzle to solve. The solution is random, so you'll have to figure it out on your own, but your reward will be a 1-up placed in the room to the southeast.
Castle Hammerwatch: Floor 3
Secret # per floor
Unlock Description
Guide Screenshots
Secret 1 (Button)
From the entrance of Floor 3, head to the north and you'll find a button that unlocks the Powerup Vendor to the northeast.
Secret 2 (Breakwall+Button)
From secret 1, head straight west along the top of the map. In the corner, you will notice that there is a breakable wall. Once broken, you can enter and press a button to unlock a room to the southwest. Inside the room is some gold and a Vendor Coin.
Secret 3 (5 Buttons)
Progress through the level until you see the Defense Vendor in between two blue spike traps. Once you are there, you should begin to look around for five button switches. From the Defense Vendor, head southeast to find a button located on a pillar. From there, head straight east to a small room. After that button, head to the north and it is on the northeast corner. Next button is located in the northwest corner. After that, head southwest to a floor button to turn off the spikes and the last button is to the southwest with a plant enemy. Activating all five switches opens a room to the east where you have to solve a DDO Puzzle. Once you have solved the puzzle you may proceed into the portal to the Gauntlet Bonus Level.
Secret 4 (Breakwall) CHANCE ONLY
Located on the east side of the room where you unlock the Gauntlet Bonus Level, there is a chance for a breakable wall to spawn. Inside will be an inventory item.
Secret 5 (Breakwall)
Progress through the level until you run into the far southeast corner of the map. There should be a small room there with a breakable wall. Inside you will find some coins and the Combo Vendor.
Secret 6 (Breakwall)
From secret 4, head to the west and weave back and forth through the arrow traps until you deactivate the spike traps. Once you have done this, you can find a breakable wall with a Vitality Vendor behind it.
Secret 7 (2 Buttons) PLANK
Head to the southwest corner of the map where you'll find an area infested by bats. There you will find a floor button switch, press it to reveal a room back in the arrow trap hallway. Once you have reached the arrow trap hallway, press the button on the wall to open a path to the Wooden Plank. Progress until you find the Boss Gate, head to the southwest of this gate and you'll find a tunnel that leads to the Wooden Plank.
Secret 8 (Breakwall)
Along the path to the Wooden Plank, you'll notice a breakable wall. Inside is some gold and the four easter eggs from the original game.
Castle Hammerwatch: Maggot Queen
Secret # per floor
Unlock Description
Guide Screenshots
Secret 1
Once you are on the boss floor, head to the portal that takes you to the boss room, but before you enter walk behind it and collect the Vendor Coin.
Castle Hammerwatch: Floor 4
Secret # per floor
Unlock Description
Guide Screenshots
Secret 1 (Button)
Head to the east of the start of Floor 4 and you'll come across a bronze gate full of skeletons. Head a little bit more to the east and you'll find a small room with a button that activates a puzzle room north of you. Once you solve that puzzle head back to the bronze gate and clear the room if you haven't already. Inside the room is gold, 1-up, 2 chests and a Vendor Coin.
Secret 2 (Passwall)
Progress through the level until you find a place where you walk under a grated ceiling. Once there you will see a 1-up in the wall to the north, walk straight against the wall and you will pass through and pick it up.
Secret 3 (Button)
To the left of secret 2, go to the corner and press the button hiding there. It will open a room to the north where you will find some gold and a Vendor Coin.
Secret 4 (Breakwall)
Progress through the level until you find the boss switch. Once there head to the east and break the wall just south of the bronze gate. Inside you'll pull the lever and wait for the random reward.
Secret 5 (Button) PLANK
For this secret, you must first clear through floor 6 and unlock the glasswalk. Once you enter floor 5 via the glasswalk, head to the south and you'll find a door to floor 4. Inside is some gold, 2 chests and a Wooden Plank.
Castle Hammerwatch: Floor 5
Secret # per floor
Unlock Description
Guide Screenshots
Secret 1 (Passwall)
Progress through the map until you reach a silver gate. Once you have gone through the silver gate, head to the northeast corner of the map. There are two bronze gates located in this corner, we'll be walking through the wall on the right side. Inside the room is a puzzle and if you solve it you will get a 1-up located behind the other bronze gate.
Secret 2 (Breakwall+Button) PLANK
Directly south of secret 1 is a really long fire trap hallway. On the southwest side of the fire trap hallway, you should be able to see a Wooden Plank. The wall directly below it is breakable with a button located inside that moves the Wooden Plank to the center of the fire trap hallway.
Secret 3 (Button)
For this secret, you must first clear through floor 6 and unlock the glasswalk. Once you enter floor 5 via the glasswalk, head southeast and you'll find a floor button on the north side of a pyramid. This button unlocks the Gauntlet Bonus Level for this area. The portal is located near the entrance you used to get here.
Secret 4 (Button)
Once you are inside the Gauntlet Bonus Level clear through until you find a floor button surrounded by blue. Pressing this button will turn off the spikes to the east of the portal you used to enter the Gauntlet Bonus Level.
*BEFORE YOU LEAVE GLASSWALK AREA*
Make sure you go around pressing all of the switches in this area because one of them places the Wooden Plank on Floor 6. This switch is located on the west side of that pyramid you opened the Gauntlet Bonus Level with.
Castle Hammerwatch: Floor 6
Secret # per floor
Unlock Description
Guide Screenshots
Secret 1 (7 Buttons)
Progress through the level to the furthest point north that you can and you'll find a room with dart traps with five buttons located in the paths. Activate all five of these and you'll unlock two rooms nearby, each room has a button to press. Once you have pressed all seven buttons, a room near the left of the two buttons will open with 2 chests. This will also unlock the glasswalk path on the northwest corner of the map.
Secret 2 (Breakwall)
Southeast of where the dart trap room is, you'll come across another grated ceiling. Just before you enter there is a breakable wall to your east. Inside is some gold, and chest, and a Powerup Vendor.
Secret 3 (Button)
Southeast corner of the map you'll find a floor button. Inside you'll need to kill the duplicate and stand on the open spot to complete the puzzle and you'll be rewarded a large diamond.
Secret 4 (Passwall)
Progress through the level towards the southeast and you'll find a room with spike traps. Once you are there, head west and you'll notice a 1-up in the wall, you can pass through a nearby wall and walk a "L" shape to get to it.
Secret 5 (Breakwall) CHANCE ONLY
From secret 3, head north and there is a chance that you'll find a breakable wall. Inside this breakable wall is an inventory item.
Secret 6 (Button) PLANK
Once you have completed secret 1, head to floor 5 and find the pyramid with a Wooden Plank nearby. Press the button on the west side of the pyramid to move the Wooden Plank up to floor 6. Return to floor 6 and head southeast and you should come across the Wooden Plank.
Castle Hammerwatch: Floor 7
Secret # per floor
Unlock Description
Guide Screenshots
Secret 1 (Button)
Progress through the level until you reach a silver gate. Once you have passed through the silver gate, you will find a button inside that unlocks a secret room to the south. Inside this room is a chest.
Secret 2 (Button)
To the west of the button you pressed for secret 1, you will find a floor button that opens a room to the south. Inside this room you'll find some gold.
Secret 3 (Passwall)
The next secret is located to the north of secret 2. You will find a save point and head north to the bookshelves and find a wall you can pass through. Inside the room is a lever you can pull for a reward.
Secret 4 (Button) PLANK
Progress through the level until you find a Vitality Vendor behind a silver gate. Once you have unlocked the silver gate, press the floor button to unlock the area to the east. Inside that secret area is some gold and the Wooden Plank.
Castle Hammerwatch: Floor 8
Secret # per floor
Unlock Description
Guide Screenshots
Secret 1 (Passwall+Button) PLANK
Progress through the level until you open the south side of the map. On the west side of this new area, you will see a deadend hallway with bookshelves on the north side. In the corner you will be able to pass through the wall and in a small closet there is a button that reveals an area to your southeast. Inside the secret area is some gold, 2 chests, Wooden Plank and the button for secret 2.
Secret 2 (Button+Breakwall)
In between the two chests in secret 1 room, you press a button that activates glasswalk to your west. Head there and you'll find a breakable wall with a puzzle room. Completing the puzzle opens a secret room to your north where you pull a lever for a reward.
Secret 3 (5 Buttons+Bonus) PLANK
After completing the Gauntlet Bonus Level on Floor 9, you will come out near a staircase back to floor 8. Once you are back to floor 8, head directly south and you'll find the Wooden Plank
Secret 4 (Button)
After completing the Gauntlet Bonus Level on Floor 9, you will come out near a staircase back to floor 8. Once you are back to floor 8, you will find button on the wall to the east of the stairs. This unlocks a hallway above the dart traps. At the very end of the hall is some gold, 2 chest and a 1-up.
Secret 5 (Breakwall)
Halfway down the hallway that opened when you pressed the button for secret 4 you will find a breakable wall. Inside is some gold and an easter egg.
Castle Hammerwatch: Floor 9
Secret # per floor
Unlock Description
Guide Screenshots
Secret 1 (Button)
Progress through the level to the west and you'll find a giant bronze gate. After opening the gate, you'll see a wall button on the right side that opens a room directly to the north. Inside this room are 2 chests.
Secret 2 (Breakwalls+Buttons)
After opening the giant bronze gate mentioned in secret 1, you'll notice a breakable wall on the left side. Break in and press the button inside. This will reveal a room to the north with some gold and another breakable wall. Inside this secret room you'll find some gold, a chest, and yet another breakable wall. Through this wall you will find some gold, a chest, and a series of buttons, go back and forth pressing them until you are able to press the floor button far north and it will reward you with a Vendor Coin to the east.
Secret 3 (Passwall)
Southwest of the Vitality and Defense Vendors you will find a wall that you can pass through and find a Vendor Coin.
Secret 4 (Button+Passwall)
Progress through the map until you find a golden key located on a pedestal that you cannot reach. To the northwest of this you'll find two buttons, go ahead and press both of them. One moves the gold key to a new location and the other moves a 1-up to a spot near the golden key. Once you have reached the new location, you can pass through the bookshelves right beside the golden key and grab the 1-up.
Secret 5 (5 Buttons+Breakwall)
This secret will unlock the Gauntlet Bonus Level for this zone. All five buttons are located in the southeast corner of the map. First button we will go for is straight east of the Vitality and Defense Vendors. Second button is to the northeast of that button to the left of some pillars. Third button can be accessed by floor button and heading south. Third button is in the room that opens up directly south of the portal nearby. Fourth button is in the northwest corner of the fire traps located nearby the portal. Fifth button is behind a breakable wall right next to the fourth button. Inside the room with the fifth button is some gold and a vendor coin. Once you have pressed all five buttons, you will unlock a puzzle to the east of the third button. Once completed head back towards the third button to find a passage opened leading to the Gauntlet Bonus Level portal.
Secret 6 (Puzzle)
After completing the Gauntlet Bonus Level on Floor 9, you will come out near a staircase back to floor 8. Instead of taking this staircase, head directly south and complete a puzzle. This will unlock a glasswalk to the north that rewards you with a 5-up.
Secret 7 (Breakwall)
After completing the Gauntlet Bonus Level on Floor 9, you will come out near a staircase back to floor 8. Instead of taking this staircase, head to the northwest to find a room with a breakable wall. Inside is a puzzle and that you will be rewarded for completing.
Castle Hammerwatch: Floor 10
Secret # per floor
Unlock Description
Guide Screenshots
Secret 1 (Portal) PLANK
Progress through the level and find yourself a silver key. Once you have found a silver key find the portal that is locked behind a silver gate. Taking the portal will take you to the first boss switch where and another portal. If you take that portal, you'll be teleported to a platform with a Vendor Coin and Wooden Plank.
Secret 2 (Button)
Back to the silver gate, if you walk behind the portal there is a floor button that opens the room directly north. Taking the staircase in that room leads you all the way back to the very start of the game for puzzle that unlocks a lever pull reward.
Castle Hammerwatch: Floor 11
Secret # per floor
Unlock Description
Guide Screenshots
Secret 1 (Button)
Near the boss portal in the map to the southeast, you'll find a Powerup Vendor behind a bronze gate. Inside this room is a button that unlocks a lever pull reward room to the southwest.
Secret 2 (Passwall)
Progress through the map to the northwest corner and you'll find a spike trap. At the top of the spike trap is a wall you can pass through to reach a puzzle. Completing the puzzle will move the Vendor Coin, 2 chests and a 1-up to the spike traps.
Secret 3 (Breakwall)
Progress through the map to the northeast corner and just before you take the staircase to floor 12 you should look around to find a breakable wall. Inside this room is a simple math puzzle that the better you do the better the reward. A number will appear at the top and when you stand on a number below they will light up. The numbers need to add up to the requested number, i.e. if you look in the last image you'll see that I am standing on 8+4+1=13.
Secret 4 (Button)
After you solve the rune puzzle on floor 12, you'll take a series of portals. There is a floor switch in between one that opens a room with a group of vendors on floor 11.
Secret 5 (5 Buttons+Puzzle) PLANK
This secret will unlock the final Gauntlet Bonus Level. First we need to find five switches and complete a puzzle. The first switch is located directly to the west of the staircase that returns you to floor 11. The second switch is directly to the west in the corner beside 5 chests. The third switch is directly south of switch 2. The fourth switch is to the southeast near a plant enemy. The final switch is northeast of here in between two fire traps. Once you have pressed all five switches, you should head directly west of here to find a puzzle room near switch 3. After you complete the puzzle a portal will open in this room leading you to the final Gauntlet Bonus Level and the final Wooden Plank. Be sure to collect the final Wooden Plank before you leave the Gauntlet Bonus Level.
Castle Hammerwatch: Floor 12
Secret # per floor
Unlock Description
Guide Screenshots
Secret 1 PLANK
In order to find the Wooden Plank for floor 12, you just need to explore to the northwest corner and it is on the floor in between four ice towers. To save yourself time, grab this while pressing Rune 4 on secret 2.
Secret 2 (6 Runes+2 Buttons)
Once you have entered floor 12, you'll head south until you reach a bridge to the west. In this room you'll find the first of six runes on the floor. From Rune 1, head south and you'll find Rune 2 near a chest. From Rune 2, head north and you'll find Rune 3 in a room behind a gold gate, to the west of the path you took at the start of the room. From Rune 3, head to the northwest corner of the map and you'll run into a room with four ice towers and a Wooden Plank. Directly west of the Wooden Plank is Rune 4. From Rune 4, head southwest and you'll find Rune 5 beside a bronze gate and a plant enemy. From Rune 5, head directly south to the southwest corner of the map. You'll find the final Rune located there. Once you press this Rune a room will open directly north of you. Head through the spike trap and on the last trap you can pass through the wall and press a button that unlocks a switch for the next secret. Grab the chest to your west, take the portal and progress through the fire traps. There is a Vendor Coin on the fire traps if you're interested. Find the portal on the east side of the fire traps. Once you're through this portal, press the button to unlock the secret Vendors on floor 11. Take this last portal and you'll come out near a 1-up.
Secret 3 (Button+Breakwall)
Once you come out of this portal, head south to find another switch. This switch is directly east of the portal you took for the Runes, and to the west of the fire traps. Press this button to unlock a glasswalk in the room where you find Rune 5. Across the glasswalk you'll find 2 chests and a 5-up. Before you leave you'll notice the wall to the north of the chests is a breakable wall. Inside you'll find some gold and an easter egg.
Sun Temple: City of Stone
Return to this section once you have given Lyron back his pickaxe.
Secret # per floor
Unlock Description
Guide Screenshots
Secret 1 PYRAMID
Once Lyron has broken the rocks, right beside him you'll find a pyramid puzzle to unlock the Pyramid of Fear.
Secret 2
Head in between the Library and Temple entrance down an alleyway. At the end you'll find a drop spot that takes you to a secret in Desert Cave Arid Passage.
Secret 2 (Button)
To the northeast of the Pyramid of Fear, you'll find a floor button that moves a powerup to the east.
Head southeast and you'll find a path opened by Lyron that leads you to that powerup. In the same area, you can find a vendor coin and a Serious Sam easter egg.
Sun Temple: Desert Cave Arid Passage
Secret # per floor
Unlock Description
Guide Screenshots
Secret 1 (Breakwall) CHANCE ONLY
Once you have dropped into the caves, head to the west and near a small pool of water you'll find a breakable wall. Inside you'll find a some gold and a chest.
Secret 2 (Breakwall)
Head north of secret one and to the west of a save point you'll find a breakable wall. Inside is a lever pull reward.
Sun Temple: Desert Cave Nesting Grounds
Secret # per floor
Unlock Description
Guide Screenshots
Secret 1 (Breakwall) CHANCE ONLY
Progress through the level until you find a red bridge. To the west of that bridge is a breakable wall.
Secret 2 (Breakwall)
On the west side of the map, you'll find a breakable wall. Inside is a puzzle where the faster you complete it the better reward you get. From my experience you always get an inventory item.
Secret 3 (Breakwall) CHANCE ONLY
North of secret 2, you'll find another breakable wall.
Secret 4 (Breakwall)
On the southwest corner of the map, you'll find a breakable wall with a lever pull reward inside.
Secret 5 PYRAMID
After using the lever to turn on the pumps, you'll find a bunch of rewards hidden in the drained areas. You'll also find one of the six small pyramids for activating the Pyramid of Fear.
Sun Temple: Desert Cave Spider Hollows
Secret # per floor
Unlock Description
Guide Screenshots
Secret 1 (Breakwall) CHANCE ONLY
Progress through the level until you find a blue floor button. Directly north of this button is a breakable wall.
Secret 2 (Breakwall) CHANCE ONLY
Progress through the level until you find a blue bridge. Directly north of this bridge is a breakable wall with a chest inside.
Secret 3 (Breakwall)
Progress to the northwest corner of the map and you'll find a breakable wall with a lever pull reward inside.
Secret 4 (Breakwall) CHANCE ONLY
Progress to the northeast corner of the map and you'll find a breakable wall near the teleport for this floor. Inside the room is a 1-up.
Sun Temple: Desert Cave The Arena
Secret # per floor
Unlock Description
Guide Screenshots
Secret 1 (Breakwall)
Right after you beat the Dune Sharks in The Arena, head to the west out the gold gate. In the corner, you'll find a breakable wall with a chest inside.
Sun Temple: Sun Temple Lower Floor
Secret # per floor
Unlock Description
Guide Screenshots
Secret 1 (Breakwall)
On the far west side of the map, you'll find some fire traps. In the corner on the top path you'll find a breakable wall. Inside is a puzzle where you have to flip switches to find the correct path and the quicker you do it the better the reward.
Secret 2 (Breakwall)
On the east side of the map, you'll find a small pyramid puzzle.
Secret 3 PYRAMID
In the northeast corner of the map, you'll find a breakable wall with a lever pull reward inside.
Sun Temple: Sun Temple Middle Floor
Secret # per floor
Unlock Description
Guide Screenshots
Secret 1 (Breakwall) CHANCE ONLY
On the west side of the map, north of the portal that you don't need to put a rune key into, you'll find a breakable wall with a lever pull reward inside.
Secret 2 (Breakwall)
On the north side of the map, right next to a solar node, you'll find a breakable wall with a lever pull reward inside.
Secret 3 (Breakwall)
On the southwest corner, right next to a light path, you'll find a breakable wall with a lever pull reward inside.
Secret 4 (5 Runes)
Across the Sun Temple Middle Floor you'll find five runes to activate. The first rune you'll need to break the rock nearby to access. The second rune is directly to the east, you'll have to cross the fire traps to reach it. The third rune is northeast of the second rune in a big room. The fourth rune is on the southwest corner of the map. Once you have the fourth rune, go west through an area with the small pyramid puzzle and down with the gold beetles is a button to turn off the green spikes. Proceed to the west until you run into the room with the fifth rune. Completing the rune puzzle activates three separate glasswalks on this floor. First glasswalk is to the west of the fifth rune. Second glasswalk is to the south of the green spikes you passed over between the fourth and fifth rune. Last glasswalk is all the way at the start, near the first rune.
Secret 5 PYRAMID
Near the button to deactivate the green spikes, mentioned in the previous secret, you'll find a small pyramid for activating the Pyramid of Fear.
Secret 6 (Button)
On the final glasswalk you'll find a teleport, right behind the teleport is a floor button that opens the reward to your west.
Secret 7 PYRAMID
Now take the teleporter and you'll be taken to Desert Caves where you'll find another small pyramid for activating the Pyramid of Fear.
Sun Temple: Sun Temple Upper Floor
Secret # per floor
Unlock Description
Guide Screenshots
Secret 1 (Breakwall)
On the west side of the map, you'll find a breakable wall with a puzzle inside. You'll have to traverse through a maze of teleporters to receive a reward.
Sun Temple: Sun Temple Sun Altar
Secret # per floor
Unlock Description
Guide Screenshots
Secret 1
In the bossroom of Sha'rand, you'll push him to 75% health and he'll teleport to the east. You'll find a hole you can drop down to the Sun Temple Upper Floor.
Secret 2
Return to the bossroom of Sha'rand, push his health to 50% and he'll teleport to the north. Again you'll find a hole you can drop down to the Sun Temple Upper Floor.
Secret 3
Return to the bossroom of Sha'rand once more, push his health to 25% and he'll teleport to the west. Once more you'll drop down a hole to the Sun Temple Upper Floor.
Shaftlocke Tower: Keltonite Mines Tower Floor 1
Secret # per floor
Unlock Description
Guide Screenshots
Secret 1 (Breakwall) CHANCE ONLY
Progress to the northeast corner of the map and in a hallway you'll find a breakable wall with some gold and a chest inside.
Secret 2 (Breakwall or Passwall)
Near the southern part of the map there is a big open room. In the northeast corner of that room there can be a breakable wall or a wall you can pass through.
Secret 2 (Glasswalk)
For this secret you'll have to acquire the Magical Mirror to use glasswalks. On the pedestal is some gold and a chest. Chest can be on a random pedestal on floor 1.
Shaftlocke Tower: Keltonite Mines Tower Floor 2
Secret # per floor
Unlock Description
Guide Screenshots
Secret 1 (Breakwall or Passwall)
Near the northwest staircase that takes you back to floor 1, you'll find a breakable wall or a wall you can pass through in the hallway southeast of the stairs.
Secret 2 (Breakwall or Passwall)
Progress through the level until you find the gold gate. Behind the gold gate is a 1-up, if you have spare dynamite, and a breakable wall or a wall you can pass through.
Secret 3 (Breakwall)
From floor 3 you'll find a staircase that returns you to floor to in the southeast corner. Fight through these enemies to find a silver key and a series of breakable walls. Inside is a Vendor Coin and a 1-up.
Secret 4 TOOLBOX and LIFT
Once you have found the ace key in the Keltonite Mines, located on floor 3, return to the south part of floor 2 to find an ace gate. Fight through the enemies here and head south to find the toolbox for fixing the Keltonite Mines lift. Once you have the toolbox, head to the west side of floor 2 and it is located behind a gold gate.
Shaftlocke Tower: Keltonite Mines Tower Floor 3
Secret # per floor
Unlock Description
Guide Screenshots
Secret 1 (Breakwall) CHANCE ONLY
Near the northeast corner of the map right beside a bronze gate, there is a chance for a breakable wall to spawn here.
Secret 2 (Breakwall or Passwall)
On the south side of the map, near the chest you cannot reach you'll find either a wall you can pass through OR a breakable wall.
Secret 3 (Breakwall)
Progress to the south of the map where you'll find an area infested with plants. In this area, you'll find two breakable walls and an ace key. One leads to a gate that, to my knowledge, cannot be opened. The other one is north of the ace key and has ore inside and another breakable wall inside that to make a shortcut back.
Secret 4 (Glasswalk)
For this secret you'll have to acquire the Magical Mirror to use glasswalks. On the pedestal is some gold and a chest. Chest can be on a random pedestal on floor 3.
Shaftlocke Tower: Keltonite Mines The Motherlode
Secret # per floor
Unlock Description
Guide Screenshots
Secret (Glasswalk)
For this secret you'll have to acquire the Magical Mirror to use glasswalks. To the west of where you fought the Stone Golem is a place you can glasswalk to acquire an inventory item.
Shaftlocke Tower: Infested Prison Tower Floor 4
Secret # per floor
Unlock Description
Guide Screenshots
Secret 1 (Button)
Somewhere on floor 4 you'll find a button that unlocks all of the basic prison cells. Most of them have loot inside. NOTE: The location present in the screenshot is not guaranteed.
Secret 2 (Passwall)
On the east side of the map, you'll find a silver key in between two bridges. Right beside that silver key is a wall you can pass through to get a Vendor Coin.
Secret 3 (Puzzle)
Less of a puzzle, more of a game, you can up the rewards by pulling the lever multiple times. You just have to not be killed by the traps to get your reward.
Secret 4 LIFT
For this secret you'll have to acquire the ace key, located on floor 6, and the toolbox, located on floor 5. Once you have both of those items, head to the northeast part of floor 4 to fix the lift.
Shaftlocke Tower: Infested Prison Tower Floor 5
Secret # per floor
Unlock Description
Guide Screenshots
Secret 1 (Button)
Somewhere on floor 5 you'll find a button that unlocks all of the basic prison cells. Most of them have loot inside. NOTE: The location present in the screenshot is not guaranteed.
Secret 2 (Breakwall) CHANCE ONLY
In the northwest corner of the map, near a rune you can find a breakable wall.
Secret 3 (Breakwall) CHANCE ONLY
To the east of the prisoner, you can find a breakable wall.
Secret 4 (5 Runes)
There are five runes to complete this secret. The first rune is located in the northeast corner of the map near some spike traps. The second rune is located in the northwest corner of the map near some open prison cells. The third rune is located in the center of a vertical hallway to the west of the big bridge. The fourth rune is in a room to the east of the prisoner. The final rune is directly to the east of the fourth rune beside a poison trap.
Secret 5 (Puzzle)
On the north side of the map you'll find a room where you must stand in the middle and dodge arrow traps. After completing this it will activate a glasswalk to the south, connected to the big bridge, that has a 1-up on a pedestal.
Secret 6 (Breakwall) CHAOS ORB
To the southeast of the prisoner, you should find a breakable wall on the south wall. Inside is the first of four red portals for collecting Chaos Orbs.
Secret 7 TOOLBOX
On the southeast corner of the map behind a silver gate, you'll find an area with spike traps and elite plants. The toolbox is located in this area.
Shaftlocke Tower: Infested Prison Tower Floor 6
Secret # per floor
Unlock Description
Guide Screenshots
Secret 1 (Breakwall or Passwall)
On the north side of the map, you'll be passing through a horizontal hallway and run into a spike trap with an elite plant enemy in the center. Right nearby this location is a breakable wall OR a wall you can pass through.
Secret 2 (Puzzle)
This is pretty simple, once you start the puzzle you'll have to stand on a zone that is not lit up red on the board to the left. Complete this puzzle and you'll open up two glasswalks. Head north to a slot machine reward.
Secret 3 (Breakwall) CHANCE ONLY
To the northeast of secret 2, you should look around for a breakable wall.
Secret 4 (Breakwall) CHANCE ONLY
Directly west of the staircase to return to floor 4, you should find a breakable wall with a puzzle inside.
Secret 5 (Passwall)
This secret is part of the All in the Family questline. The cell is to the east of the slot machine mentioned in secret 2.
Shaftlocke Tower: Haunted Barracks Tower Floor 7
Secret # per floor
Unlock Description
Guide Screenshots
Secret 1 (Passwall)
Directly east of the entrance, you should be able to find a wall you can pass through attached to a large room. Inside of the passage will be a 1-up.
Secret 2 (Breakwall or Passwall)
Directly south of the gold gate, you should be able to find a breakable wall OR a wall you can pass through.
Secret 3 (Portal)
For this secret you'll have to acquire the four portal keys located in the Haunted Barracks Hidden Duke Rooms. Once inside the room you'll find the Magical Mirror which grants you the ability to glasswalk in various spots throughout the tower.
Shaftlocke Tower: Haunted Barracks Tower Floor 8
Secret # per floor
Unlock Description
Guide Screenshots
Secret 1 (5 Runes)
For this secret we will activate five floor runes to get a gold key. The first rune is to the west of the entrance, near the ace gate. The second rune is east of the teleporter. The third rune is southwest of the second rune, beside fire traps. The fourth rune is directly west of the third rune on the open walkways. Once you get the fourth rune, head north, then to the east and you'll find both the fifth rune and the gold key the rune puzzle unlocks.
Secret 2 (Passwall)
Once you have completed the rune puzzle, head straight to the west across the open walkways again. Eventually you'll make it back to walled areas and you can find a wall you can pass through.
Secret 3 (Breakwall) CHANCE ONLY
Directly beside secret 2 is a breakable wall.
Secret 4 (Breakwall)
Directly to the north of secret 2 and 3 is a hallway with a breakable wall.
Secret 5 (Breakwall)
After passing through the silver gate, you'll see four pillars with torches. Directly behind the third from the right is a breakable wall.
Secret 6 (Passwall)
Directly to the east of secret 5 is a wall that you can pass through.
Secret 7 (Breakwall)
Directly north of secret 6 is a breakable wall.
Secret 8 (Breakwall) DUKE
For secret 8 we will backtrack to the hallway between secret 5 and 6. Head north into the room with a bunch of spikes, then head into the hallway to the west. Go along the northern part of the hallway to find a breakable wall with one of four Duke rooms inside. Search the bookshelves and bed to find a rune key.
Secret 9 (Breakwall)
Directly east of secret 6 is a room with two floor buttons that open hallways to progress through the level. Once you have the ace key for this area return here and head north for the last three secrets on floor 8.
Secret 10 (Breakwall) DUKE
On the northeast corner of the map, you'll find a room where the floor is littered with skulls. Go along the northern part of the room to find a breakable wall with one of four Duke rooms inside. Search the bookshelves and bed to find a rune key.
Secret 11 (Breakwall)
On the northeast corner of the map, you'll find a room where the floor is littered with skulls. Go to the southern part of this room to find a breakable wall with a guy performing a ritual. Wait for his dialogue to finish and he'll drop a bunch of gems for you to pickup.
Secret 12 TOOLBOX
On the northeast corner of the map, you'll find a room where the floor is littered with skulls. Go to the southern part of this room to find the toolbox for the Haunted Barracks lift.
Shaftlocke Tower: Haunted Barracks Tower Floor 9
Secret # per floor
Unlock Description
Guide Screenshots
Secret 1 (Breakwall) CHANCE ONLY
After you enter floor 9, you'll come into a very large room swarmed with enemies and ice towers. Head to the north of this room to find three gates lined up one after another. On the east side is a breakable wall.
Secret 2 (Breakwall or Passwall)
On the west side of that same series of gates is a breakable wall or a wall you can pass through.
Secret 3 (Passwall)
Head to the southwest of this room and pass through a bronze gate. Look near the top of the hallway to find a wall you can pass through.
Secret 4 (Breakwall) CHANCE ONLY
Directly to the west of secret 3 is a breakable wall.
Secret 5 (Breakwall or Passwall) CHANCE ONLY
Return back to the large room and head south. Near a save point, you will find a breakable wall OR a wall you can pass through.
Secret 6 (Passwall) CHANCE ONLY
In the room to the east of that save point mentioned in secret 5, there is a wall you can pass through.
Secret 7 (Breakwall) CHAOS ORB
To the southeast of secret 6, you'll find a silver gate to pass through. Head down the hallway to find a breakable wall just before the lift. Inside is the second of four red portals for collecting Chaos Orbs.
Secret 8 LIFT
Through the same silver gate as mentioned in secret 7 is the lift for Haunted Barracks. Return here after you pick up the toolbox on floor 8.
Secret 9 (Breakwall or Passwall)
Progress to the northeast, you will find a room with a large cross in the center. In the northeast corner of that room you will find a breakable wall OR a wall you can pass through.
Secret 10 (Breakwall)
Directly north of secret 7 in a hallway you can find a breakable wall on the south wall.
Secret 11 (Breakwall) DUKE
From secret 8, head to the west room and then to the north room. On the north wall you'll find a breakable wall that holds one of the four duke rooms. Search the bookshelves and bed to find a rune key.
Secret 12 (Breakwall) DUKE
In the northwest corner of the map, you can find a breakable wall right next to the staircase to floor 8. Inside you'll find one of the four duke rooms. Search the bookshelves and bed to find a rune key.
Shaftlocke Tower: Demonic Library Tower Floor 10
Secret # per floor
Unlock Description
Guide Screenshots
Secret 1 (Button)
Directly south of the entrance you'll find a button near a broken bridge, press the button to free the 1-up to a location you will reach later.
Secret 2 (Breakwall)
Along the west side of the map you'll find a breakable wall.
Secret 3 (Button)
Near the center of the map you'll find two buttons that after you press will open a hallway in between them with a 1-up.
Secret 4 (Puzzle)
Once you return to floor 10 from floor 12, in the center of the east side of floor 10 is a puzzle where you must use the wisp enemies to light up the markers on the floor. You only have 60 seconds to light all of them and if you do you will get an ace key.
Secret 5 (Breakwall) CHANCE ONLY
Once you return to floor 10 from floor 12, head northeast of secret 3 to find a breakable wall.
Secret 6 (Puzzle)
Once you return to floor 10 from floor 12, head to the northeast corner and complete the puzzle to activate the glasswalk.
Shaftlocke Tower: Demonic Library Tower Floor 11
Secret # per floor
Unlock Description
Guide Screenshots
Secret 1 (Breakwall) CHAOS ORB
Once you have returned to floor 11, you can head to the northwest corner of the map. Inside is the third of four red portals for collecting Chaos Orbs.
Secret 2 (Breakwall)
Along the wall to the west you'll find a breakable wall that leads you to a book you need to translate. It says that you can now walk on glasswalk. This activates the glasswalk in the center of the map.
Secret 3 (Breakwall) CHANCE ONLY
Near the center of the west side of floor 11 you'll find a breakable wall.
Secret 4 (Passwall, Button and Breakwall)
Progress to the center of the west side of floor 11. This secret requires you to do three things. You'll find a bookshelf that you can pass through that leads to a button that opens a wall to the west. Progress to the west and find a breakable wall leading you to loot.
Secret 5 (Glasswalk) LIFT
Directly in the center of the map you can reach the lift for Demonic Library, but first you'll need to activate the glasswalk for this floor.
Shaftlocke Tower: Demonic Library Tower Floor 12
Secret # per floor
Unlock Description
Guide Screenshots
Secret 1 (Passwall)
On the west side of the map, head south of the ace gate and you'll find a wall you can pass through.
Secret 2 (Passwall)
On the southeast corner of the map, you'll find a large map painted on the ground. This map is mentioned in one of the notes you have translate. We're looking for a wall you can pass through to the southeast of this map. Passing through this wall will get you some gold and the Bookrot achievement.
Secret 3 (Passwall and Button)
This one was decently difficult for me to do. I knew the map painted on the floor was going to be used for something, but I did not know what. Once I realized that it would be used for this secret it definitely made it easier. Progress to the northeast of the map to find a passwall where you must blindly move through a maze until you find a button that opens up the wall and rewards you with a gold key outside.
Secret 4 TOOLBOX
Behind an ace gate on the northwest side of floor 12 is the toolbox to fix the lift on Demonic Library Floor 11.
Shaftlocke Tower: Chambers of Illusion Tower Floor 13
Secret # per floor
Unlock Description
Guide Screenshots
Secret 1 (6 Runes)
For this secret we will collect six runes to unlock a secret area filled with more secrets. The first rune is directly north of the entrance in a corner. The second rune is in the northwest corner of the map. The third rune is to the southeast behind a bronze gate. Head to the east of the third rune and when you reach a save point in a hallway go into the nearby room and head to the northwest corner to find the fourth rune. Progress until you find another save point across a bridge and head west of that save point to the nearby corner to find the fifth rune. The final rune is directly southeast across a wooden bridge in the corner right after. Completing this rune puzzle unlocks a secret area south of the second rune.
Secret 2 (Breakwall) CHANCE ONLY
Located in the room where you find the fourth rune is a breakable wall on the opposite corner on the north wall.
Secret 3 (Breakwall) CHANCE ONLY
To the east of the room with the fourth rune is a vertical hallway. Go to the north corner for a chance to find a breakable wall.
Secret 4 (Breakwall) CHANCE ONLY
Directly on the west wall beside the fifth rune is a chance to find a breakable wall.
Secret 5 (Breakwall)
To the west of the final rune you'll find a breakable wall on the south wall.
Secret 6 TOOLBOX
Head back to the room where you found the second rune and go to the very south. You should find a new area opened by completing the rune puzzle. It is filled with every trap you have encountered in every campaign so far. There are three separate secrets here, but first traverse to the west and you'll find a staircase back to floor 1. Fight through the enemies and you'll be able to get the toolbox for the lift on Chambers of Illusion. BEFORE YOU LEAVE head to the north and use the Magical Mirror glasswalk to acquire the ace key for secret 8.
Secret 7 (Portal) CHAOS ORB
Head back to the trap maze and traverse to the south to find a red portal, which if you've followed the guide thus far should be your final Chaos Orb.
Secret 8 LIFT
Return to the trap maze once more and traverse to the east. Use the ace key to get through the gate and toolbox to repair the lift for Chambers of Illusion.
Shaftlocke Tower: Chambers of Sacrament Tower Floor 14
Secret # per floor
Unlock Description
Guide Screenshots
Secret 1 (Passwall) CHANCE ONLY
On the northwest section of the map, there is a chance to find a wall you can pass through.
Secret 2 (Breakwall) CHANCE ONLY
On the east side of the map, there is a chance to find a breakable wall.
Shaftlocke Tower: Tower Battlements Tower Floor 15
IF YOU HAVE COLLECTED THE MAGIC MIRROR THERE ARE NO BREAKABLE WALLS, BUTTONS OR PASSWALL. JUST WALK AROUND TO FIND SECRETS HERE.
Shaftlocke Tower: Tower Battlements Tower Floor 16
IF YOU HAVE COLLECTED THE MAGIC MIRROR THERE ARE NO BREAKABLE WALLS, BUTTONS OR PASSWALL. JUST WALK AROUND TO FIND SECRETS HERE.
Secret # per floor
Unlock Description
Guide Screenshots
Secret 1 (Glasswalk)
Progress to the east side of the map and look for a single path glasswalk that leads you to a tower with arrows traps and the Despair and Deception questline.
Secret 2 CHAOS ORB
Right near the teleport for this map, just before you cross the final bridge to the final boss, to the west is a place to put the four chaos orbs you collected via the red portals. Turn them all in to get an inventory item and achievement.
32 Comments
... 28 Sep @ 10:34am 
The guide was extremely helpful and so were some of the comments below!
I managed to platinum the game thanks to this guide and the achievement guide
There are some map changes or small secrets missing that aren't in the guide, but if you look carefully, you'll be able to complete everything. At least the most difficult parts are very well explained in the guide; congratulations on the work, 10/10.

For those who want to complete all the achievements with speed runs and serious mode, I recommend playing as a thief and enabling infinite health, 2x damage, HP/MANA regen, because serious mode is annoyingly boring and doesn't reward you for the difficulty.

THERE'S NO POINT IN INVESTING IN DEFENSE/HP; the mobs will kill you in one hit.
Upgrade everything in damage, combo and mana regen to spam abilities—that's what I did, and it worked!
good lucky, everyone!
Ъ 27 Aug @ 11:47am 
How do i open cage door in CH floor 7?
DuranArgith 3 Jul @ 6:32am 
Shaftlocke level 11 library. Inside the second book area with the orcs and the glyphs, a wall you can break on the north side of the map for a funny conversation between a paladin and an orc and some 2500-3000 gold in gems.
Flytrap 14 Jun @ 10:00am 
Secret 2 on the temple middle floor is actually on the lower floor
Mr. Alan Wake... 22 Apr @ 12:24pm 
There are a lot of missing informations & secrets on that "guide"

Lots of useless parts like "Proceed by solving the riddle" make it useless and quite hilarious.
DuranArgith 11 Mar @ 3:22pm 
In the Hammerwatch campaign, note that if you take the secret teleporter in floor 1 to level 3 you will reveal a few new rooms in floor 3 with some gold. But do not rush to use it because it locks you out of the first two floors. Play normally and as soon as you reach level 3, backtrack to floor 1 and take the teleporter. The few extra gold may help you get another upgrade before the first boss.
aquatorrent 24 Feb @ 8:05am 
it seems the layout for the sun temple dungeon changes a bit in every playthrough. anyway, here is another secret on sun temple upper floor.
https://imgur.com/a/cxUj0eH
aquatorrent 16 Feb @ 8:27am 
i'm not sure what happened, but the switch for the last secret in floor 12 of castle hammerwatch doesn't seem to be there for me: https://imgur.com/a/MHkYmFD
DacianDraco 9 Aug, 2024 @ 1:20am 
I've took some screenshots but i didn't take ones with map overlay so i'll try to explain them, most new ones are on the Shaflocke Tower campaign but i found a few in Hammerwatch Castle and Sun Temple campaigns too

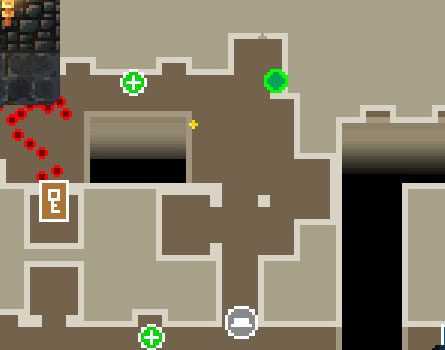
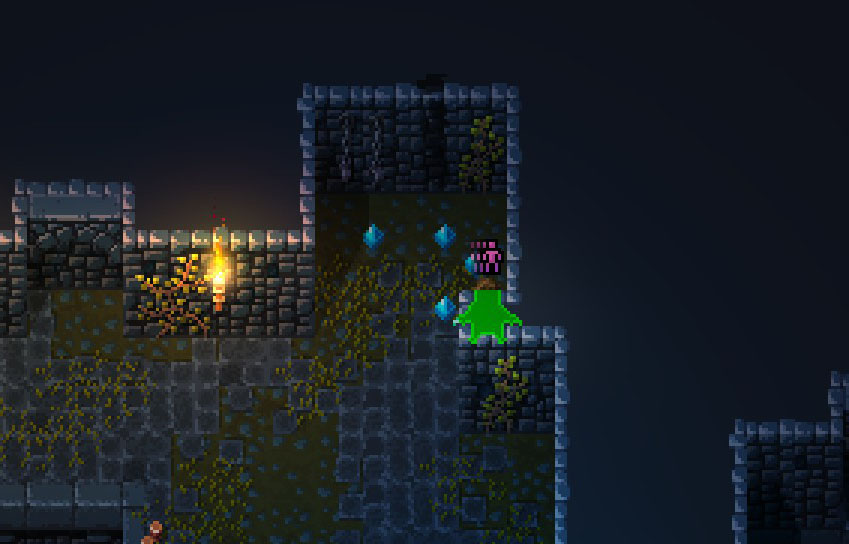
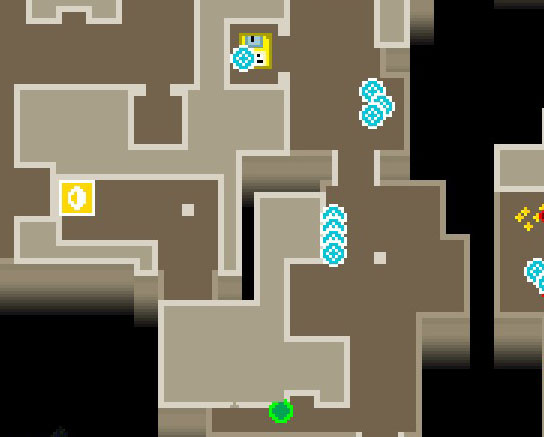
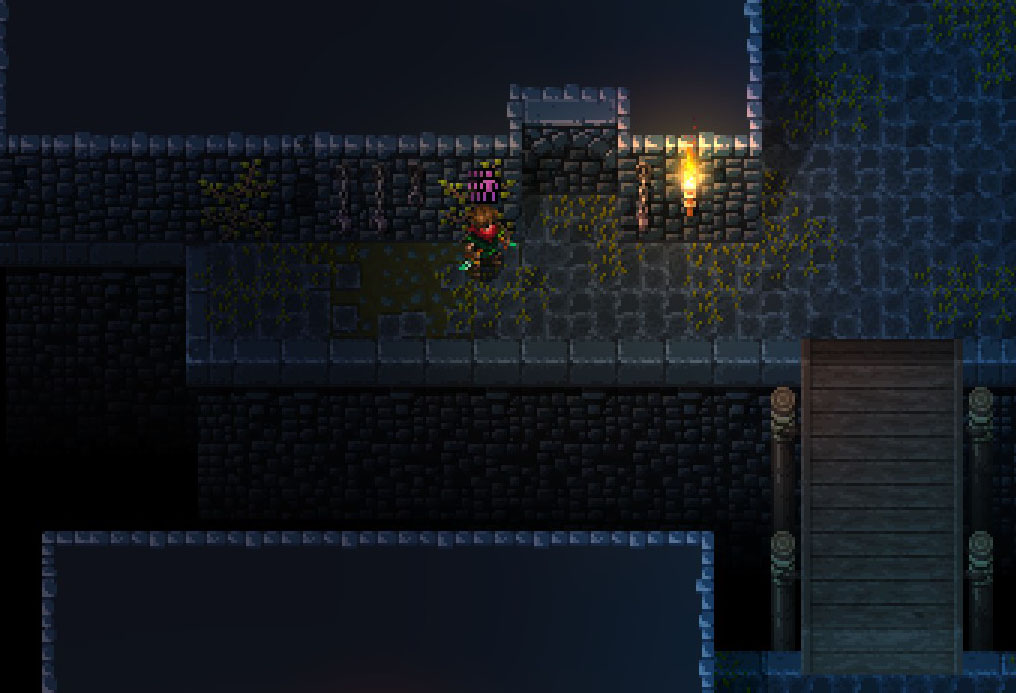
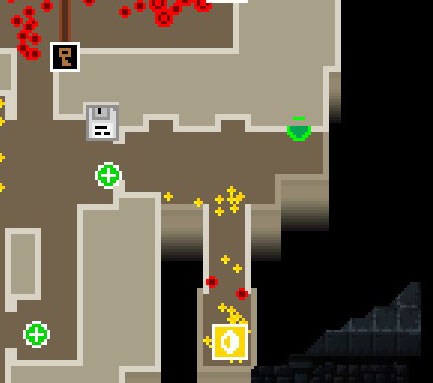
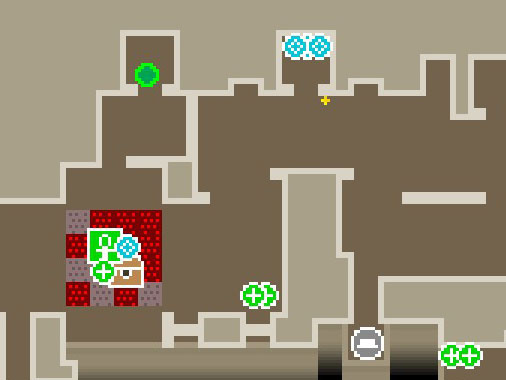
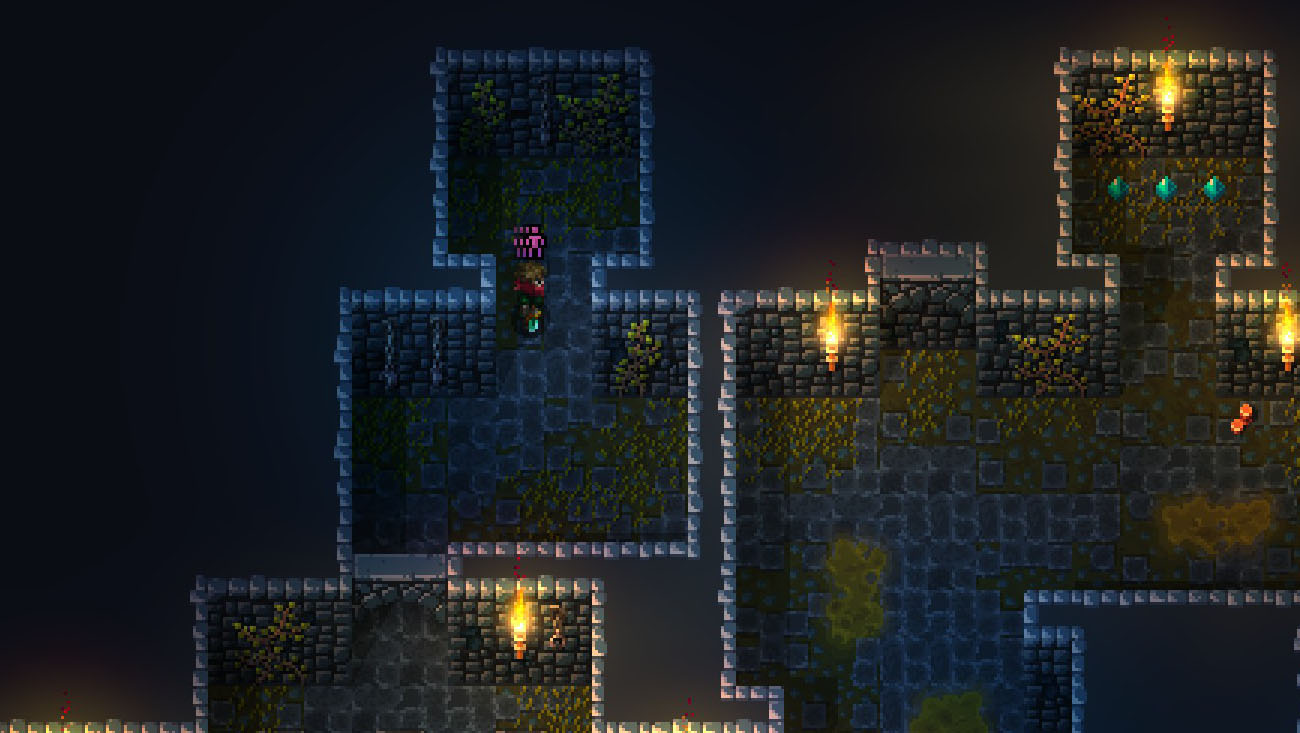
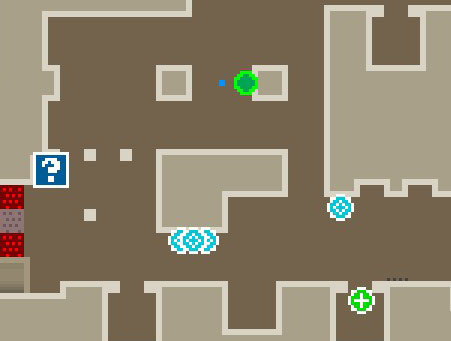
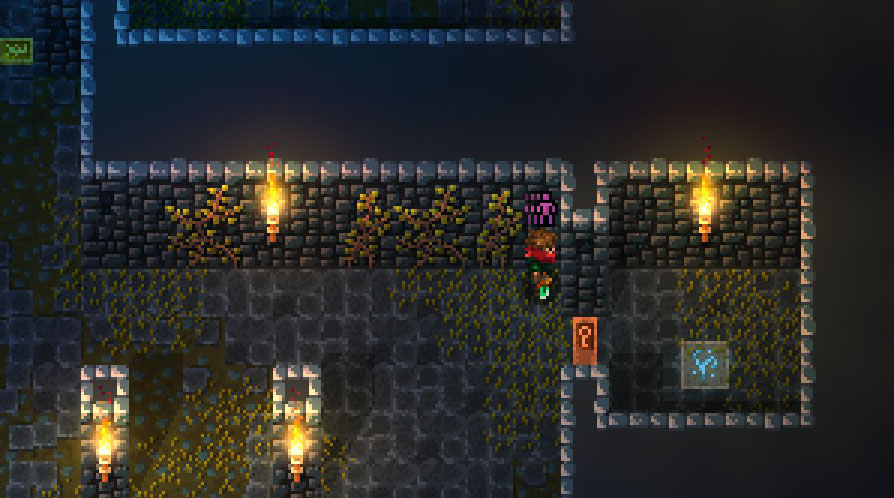
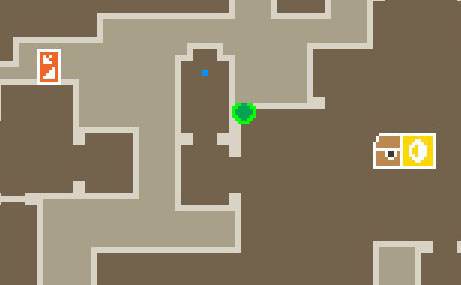
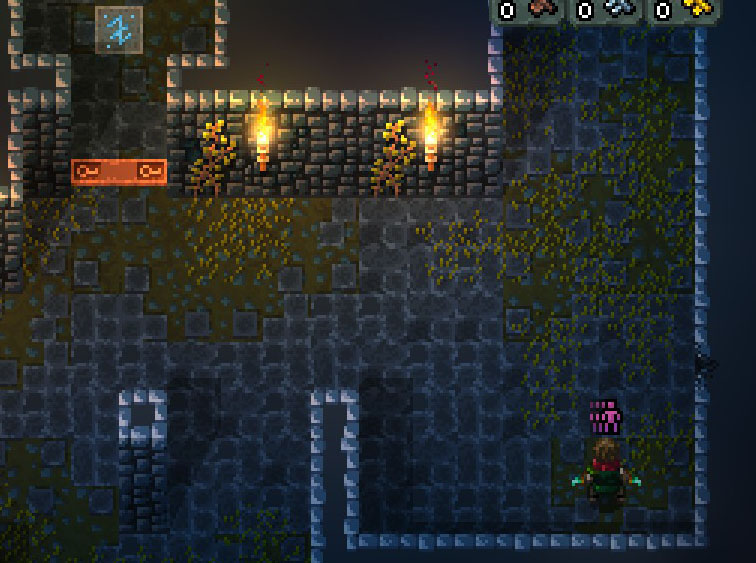
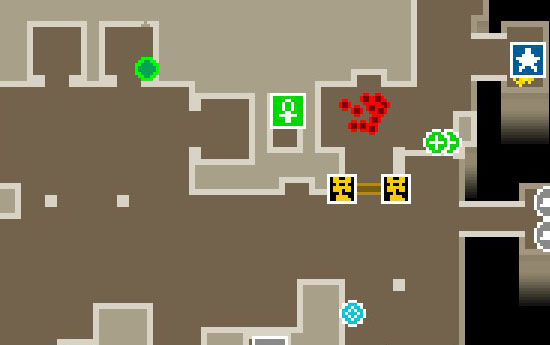
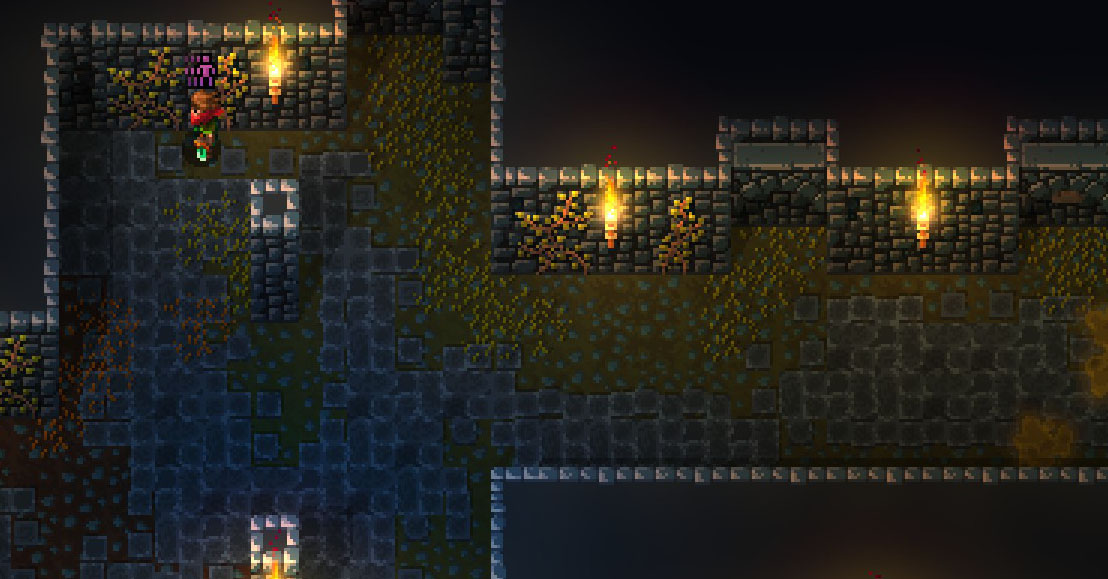
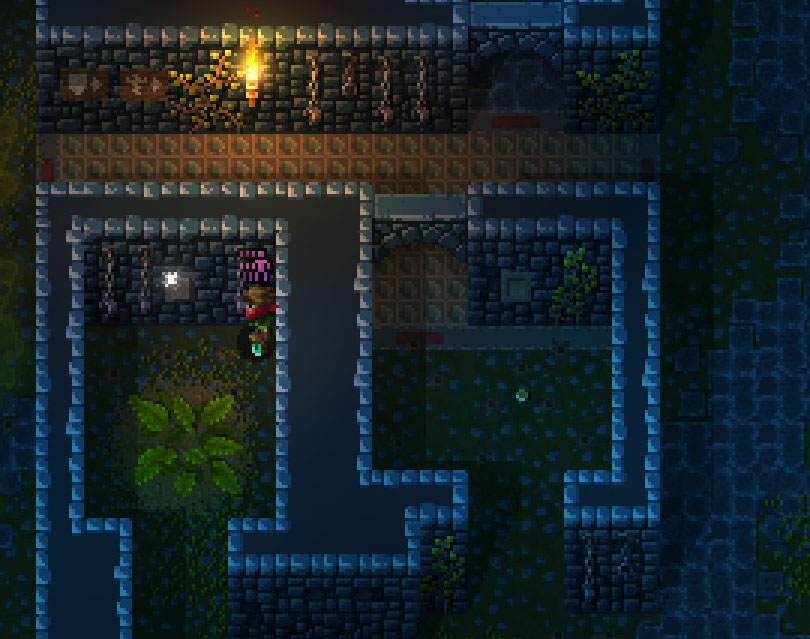
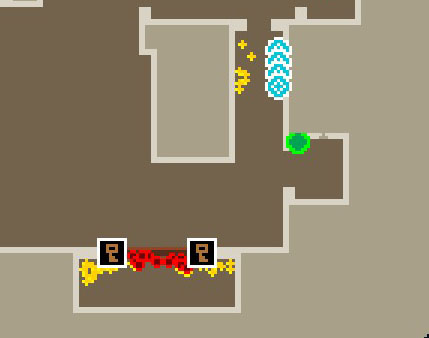
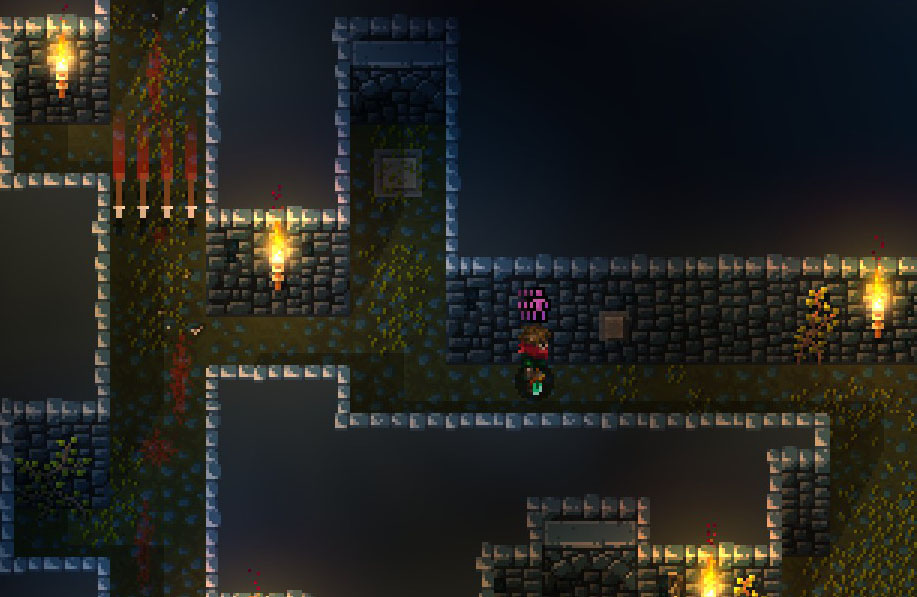
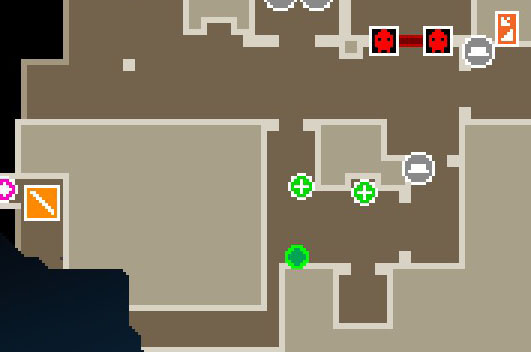
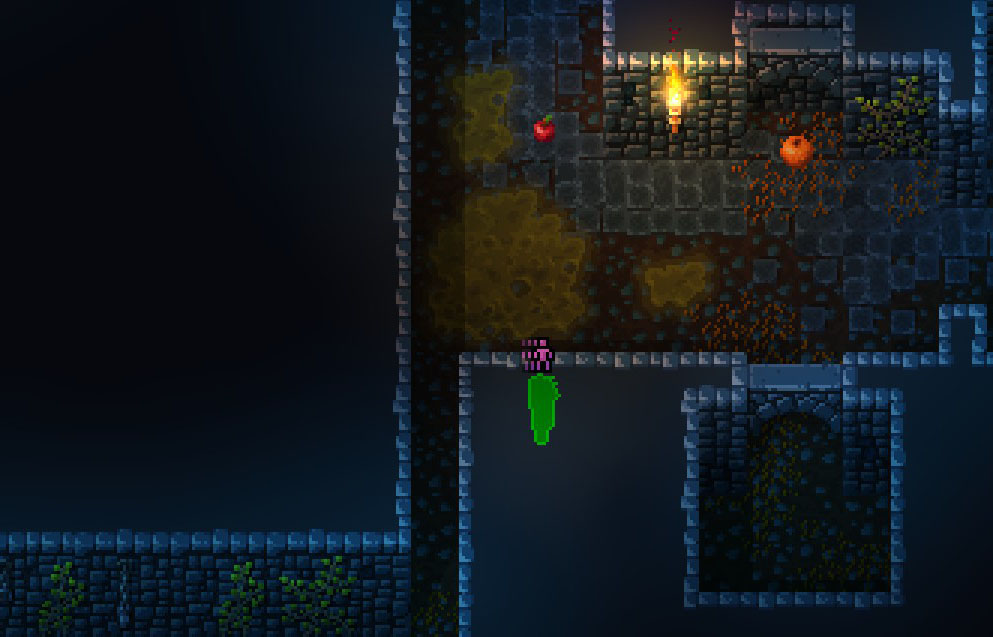
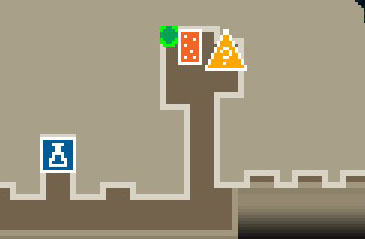
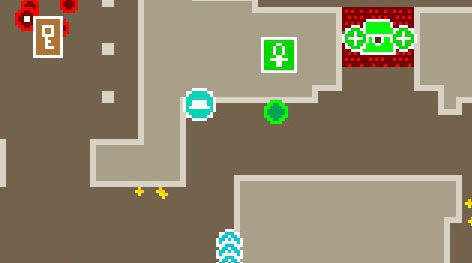
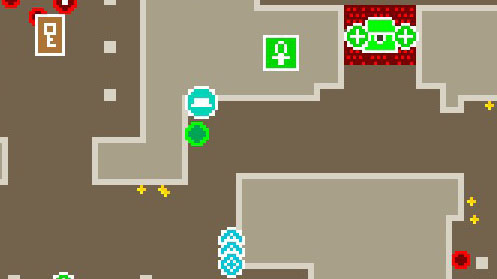
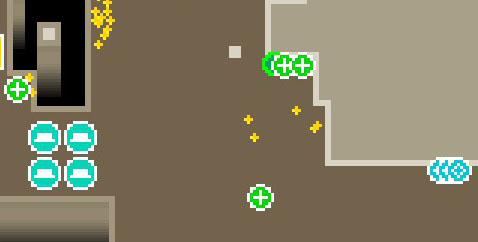
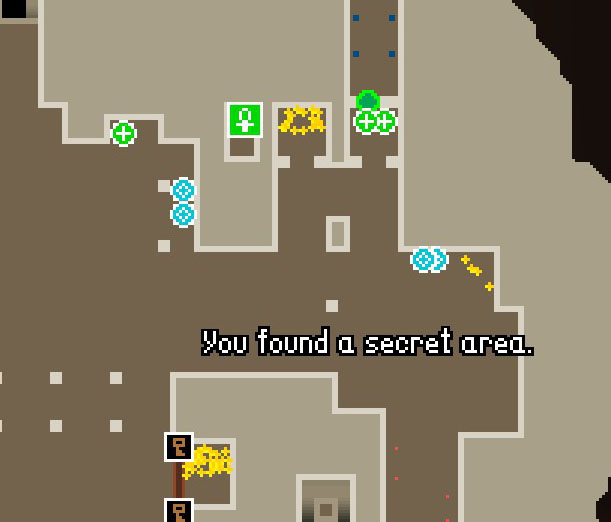
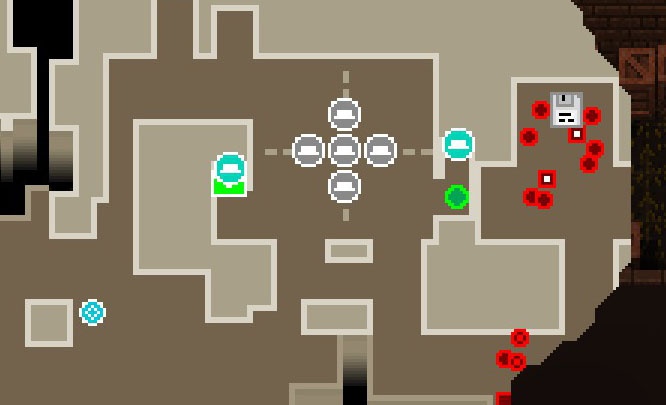
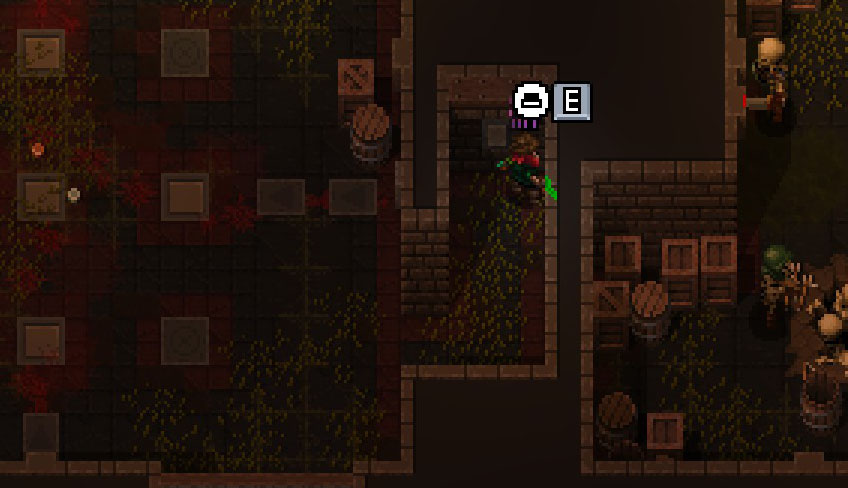
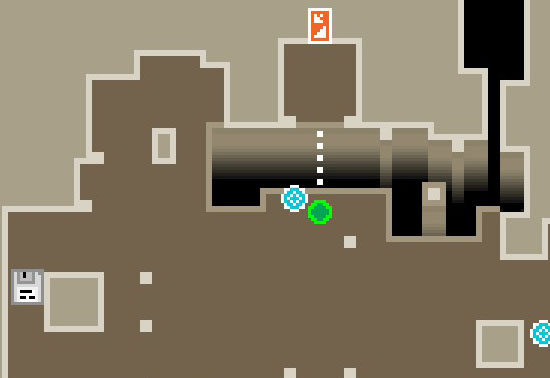
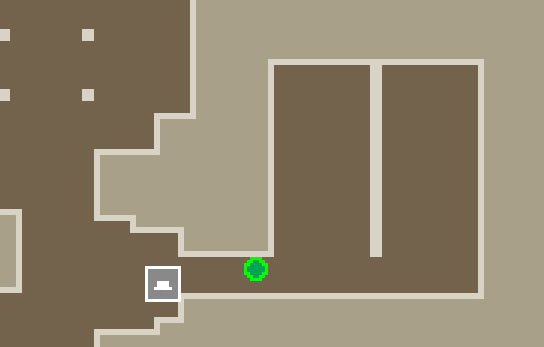
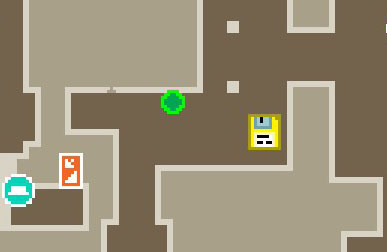
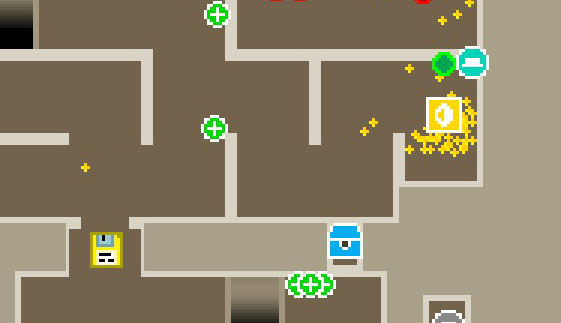
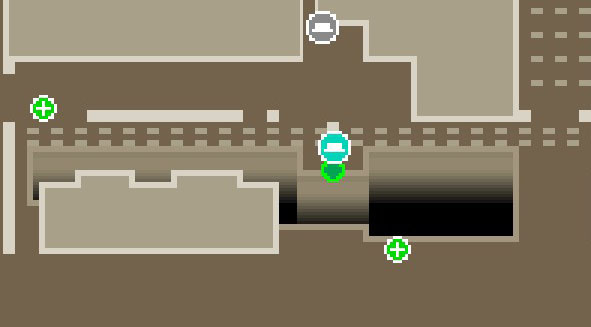
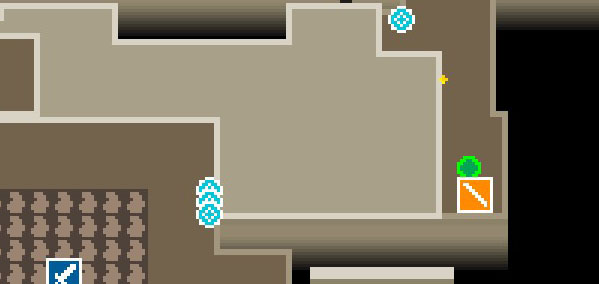
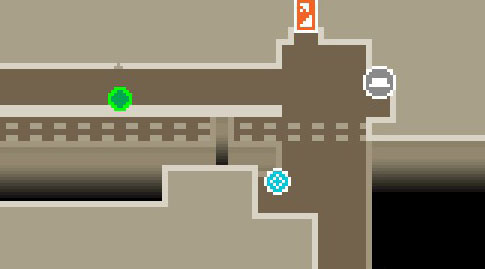
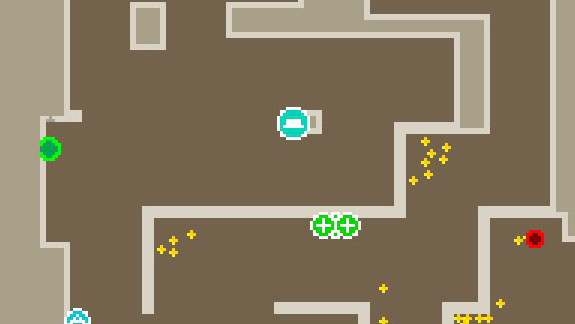
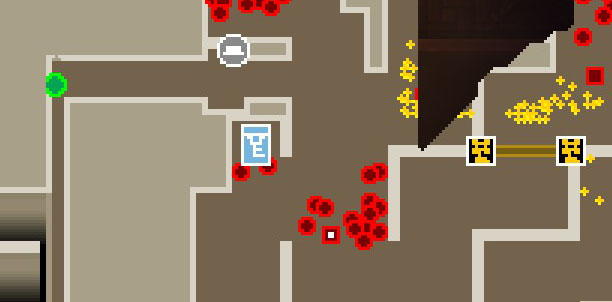
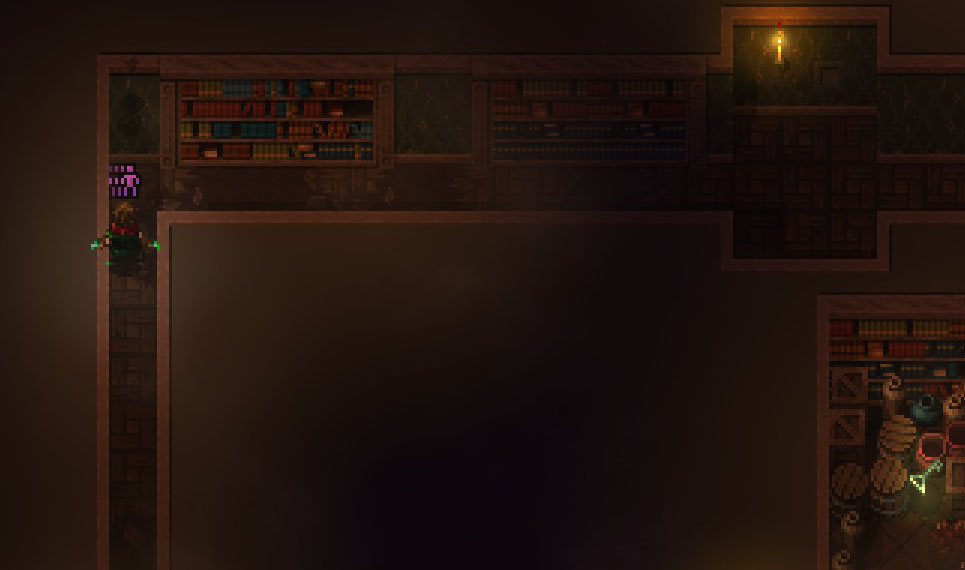
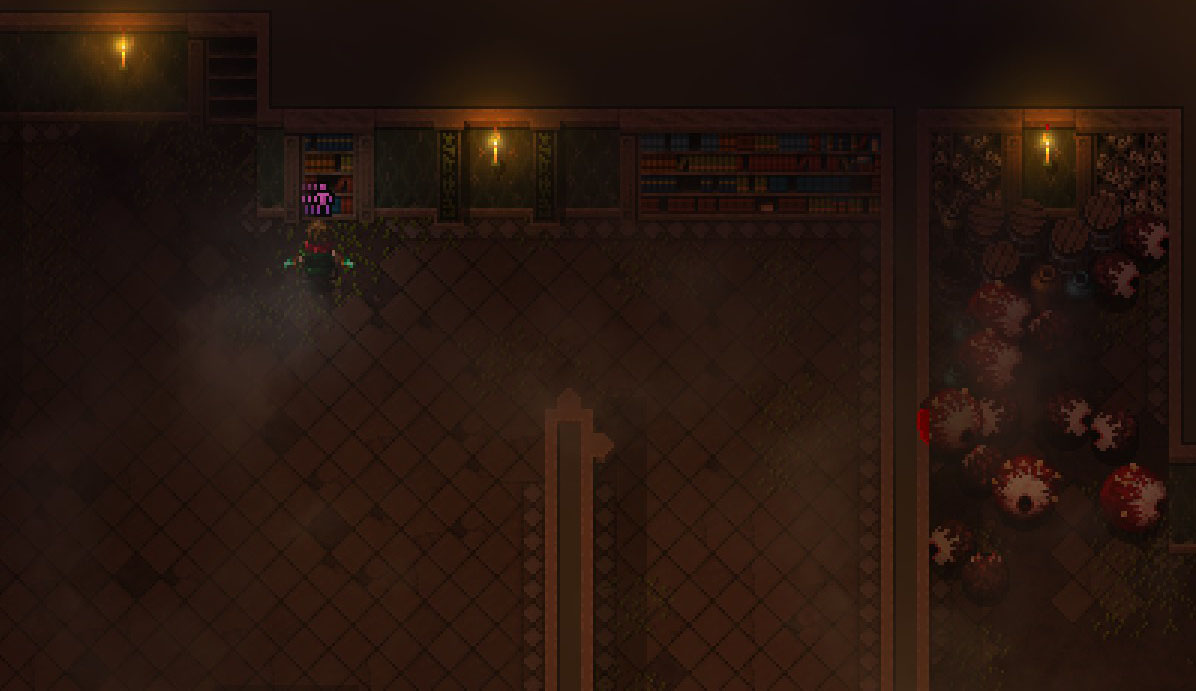
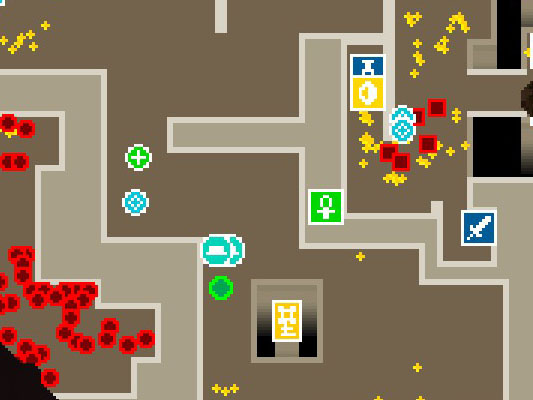
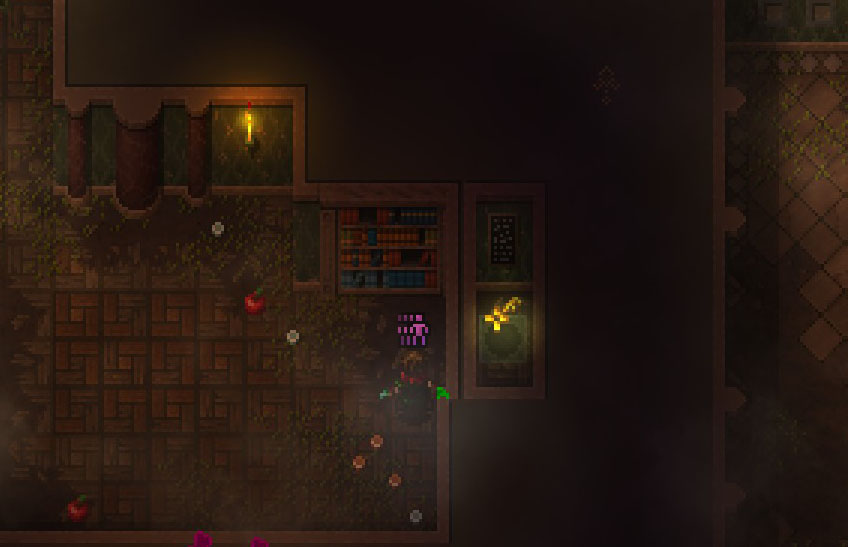
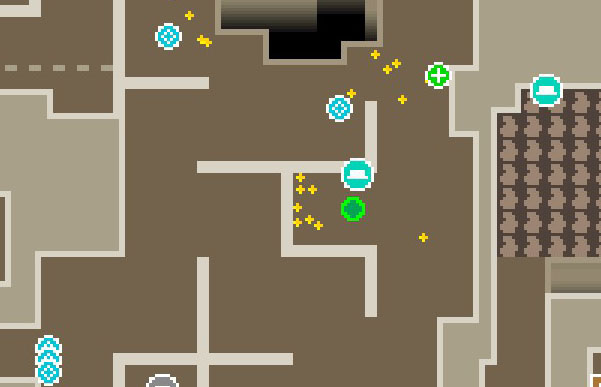
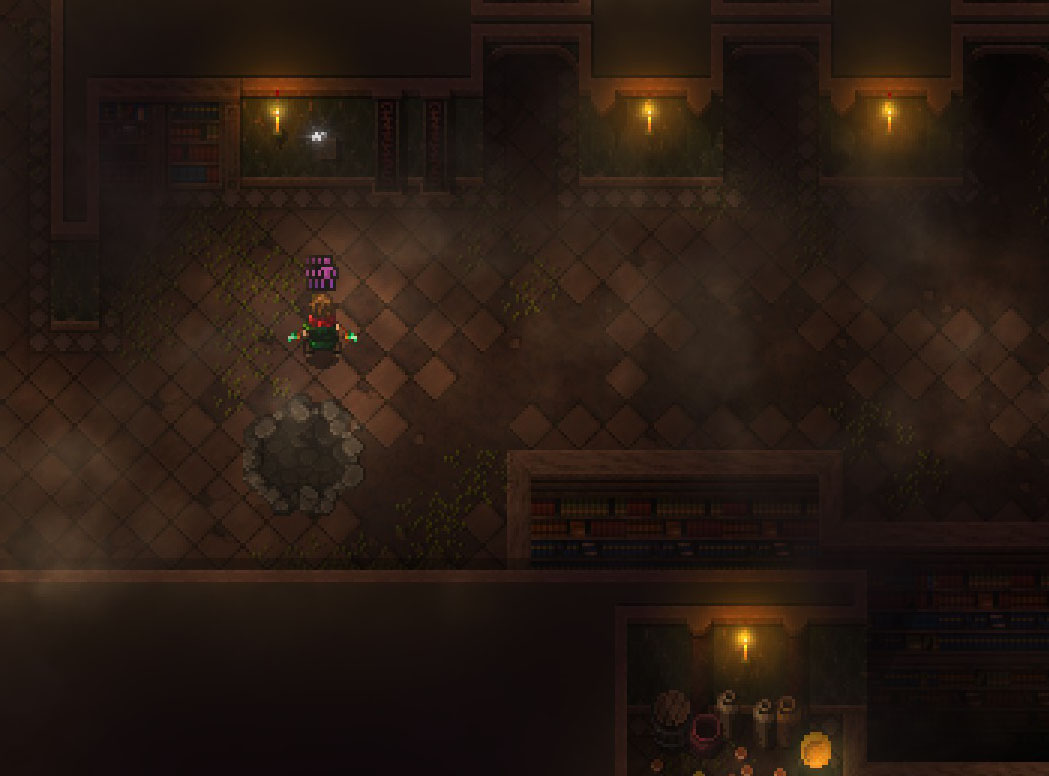
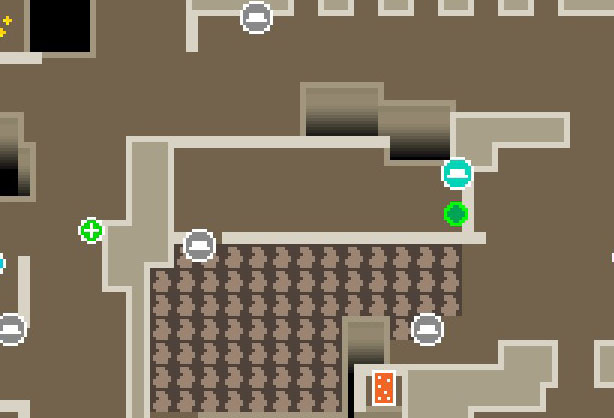
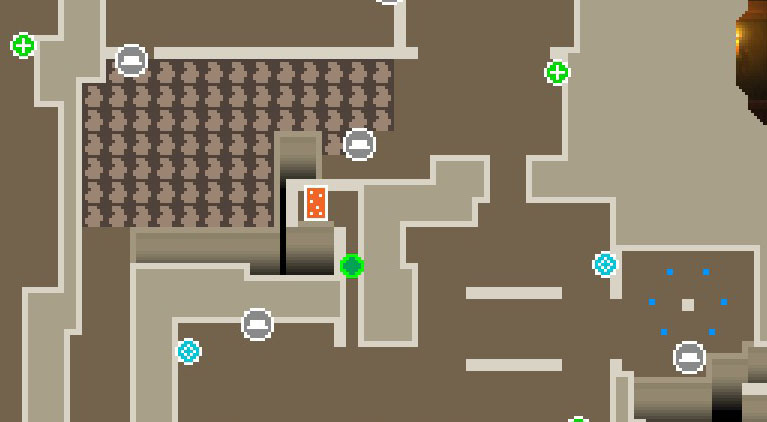
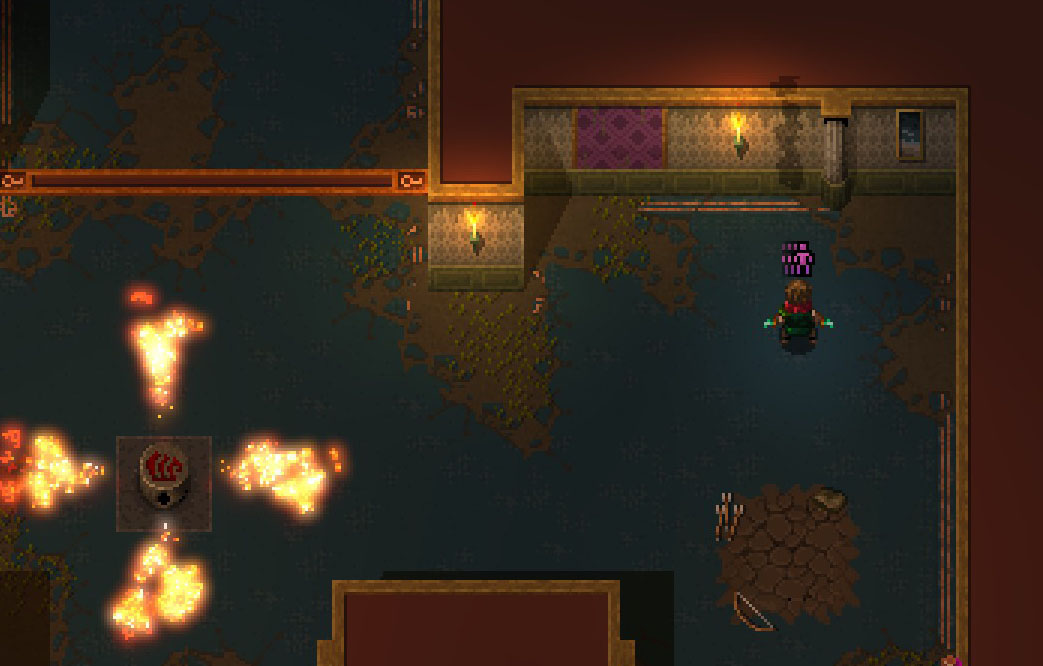
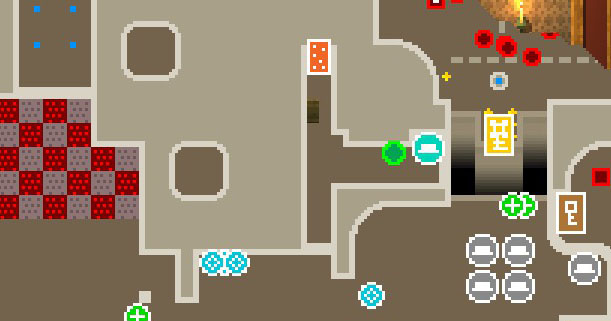
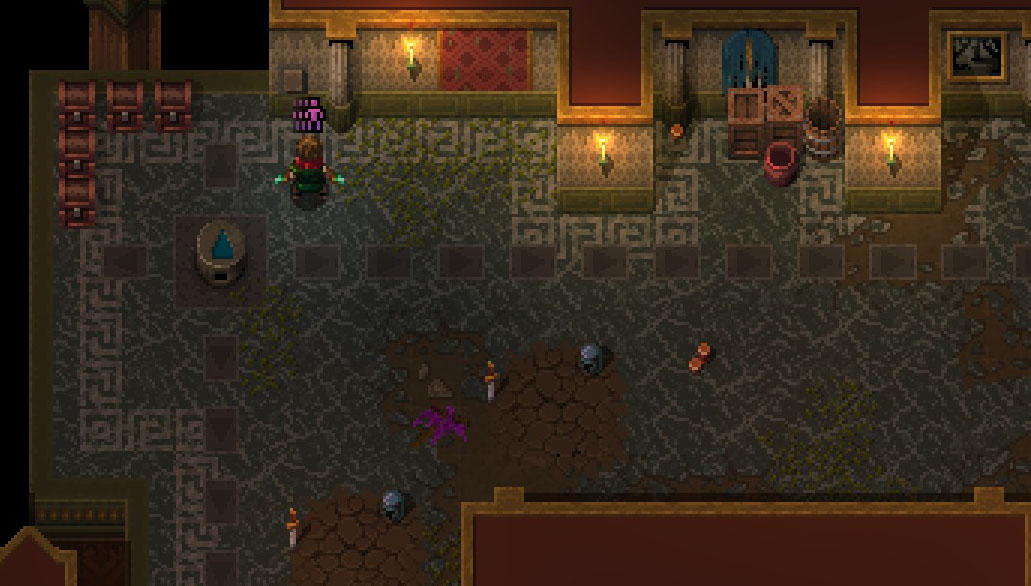
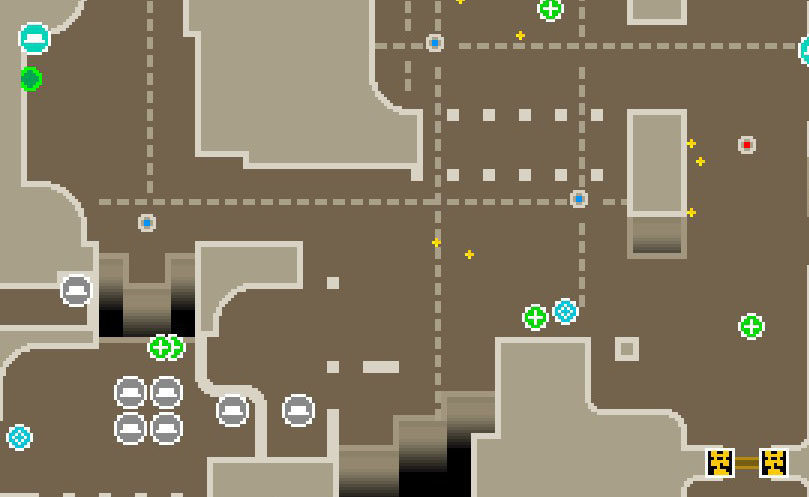
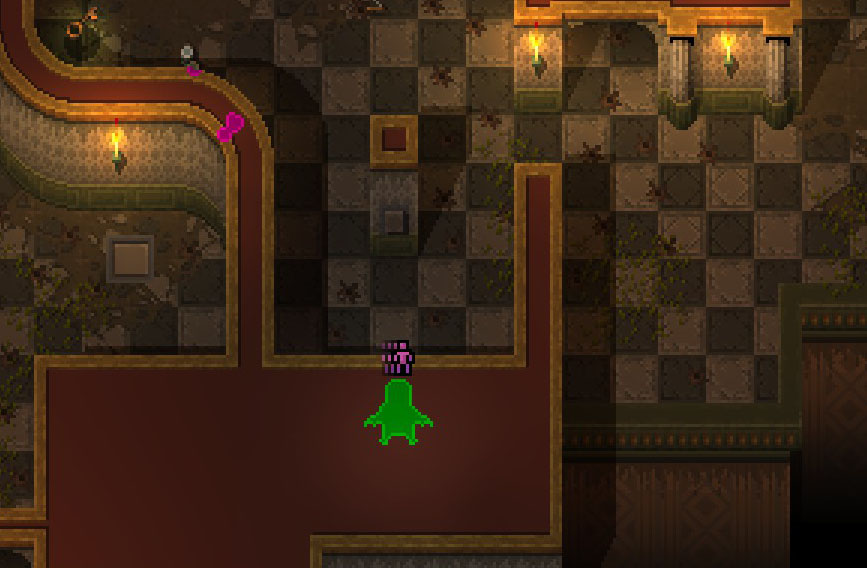
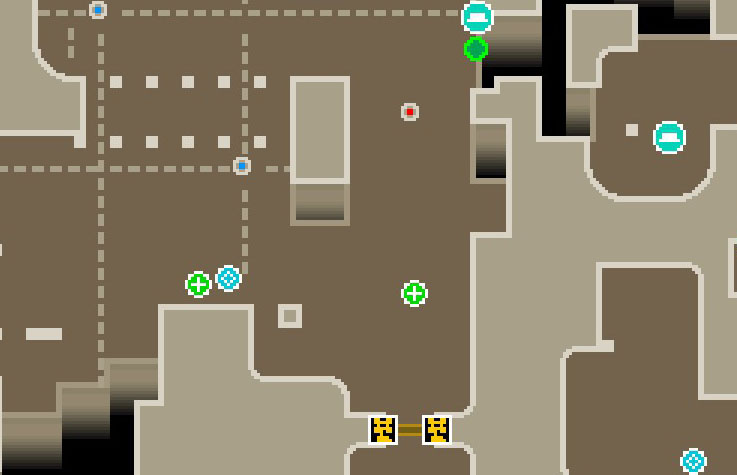
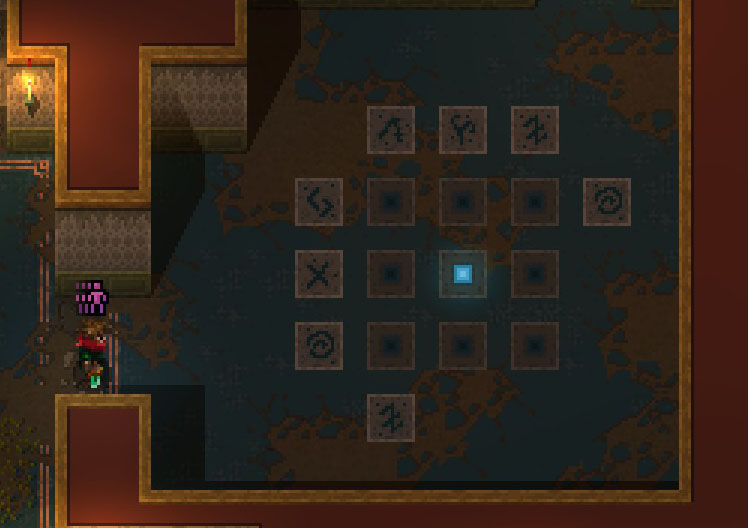
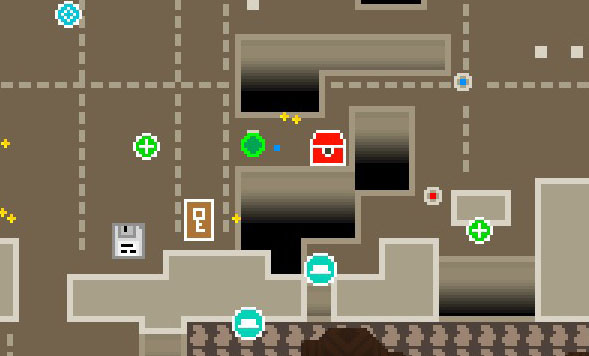
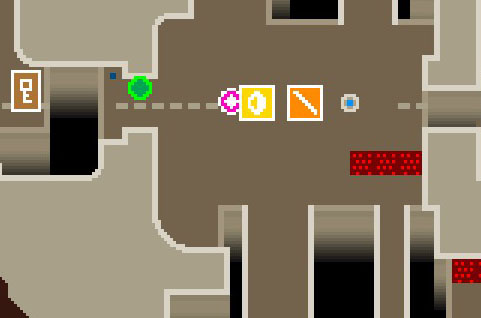
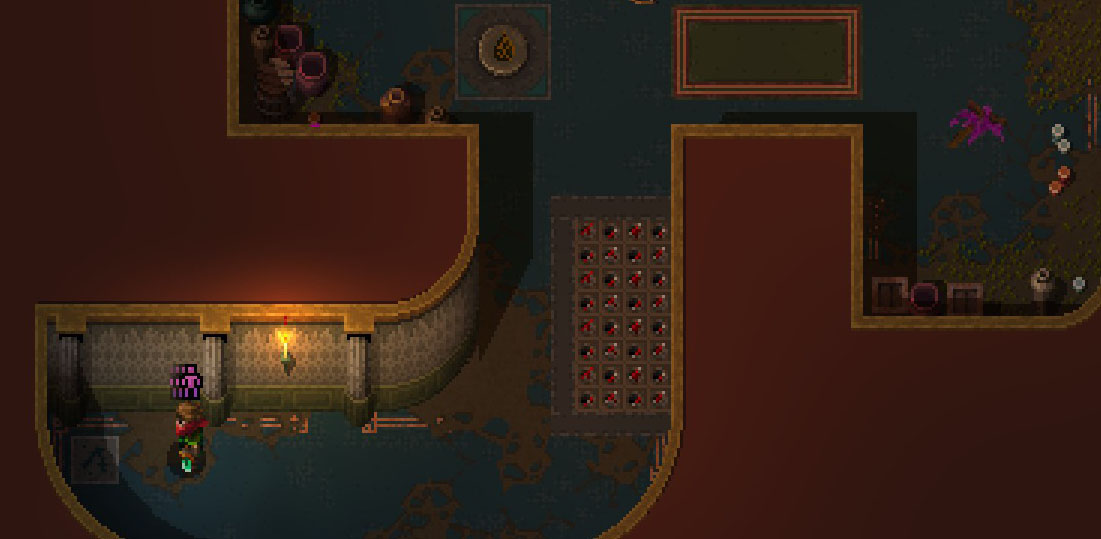
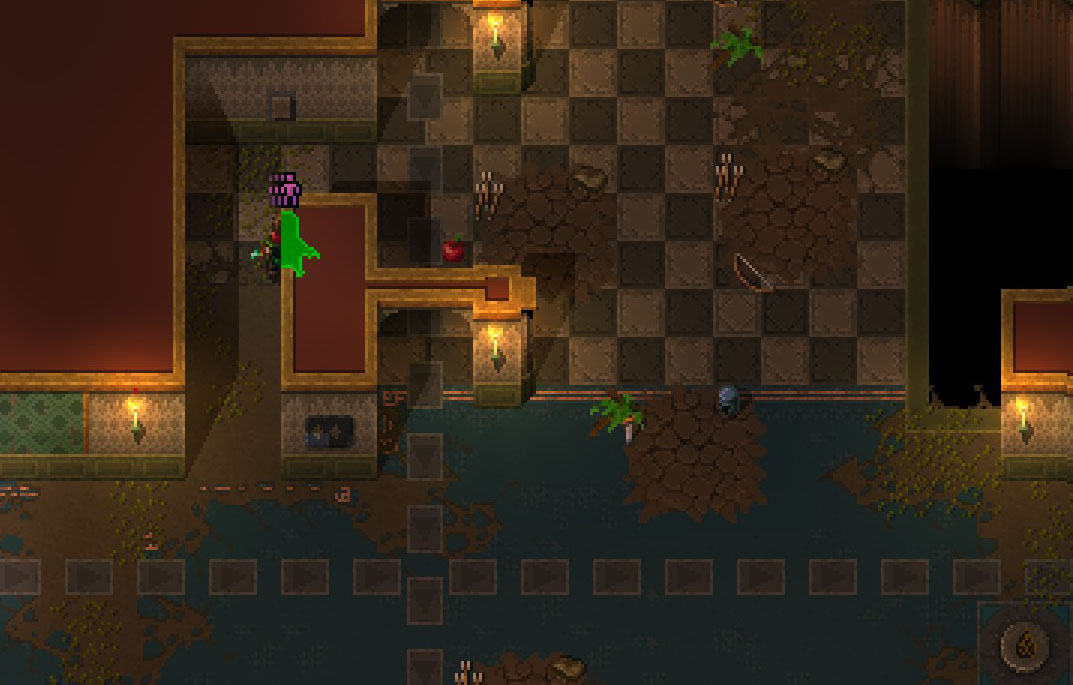
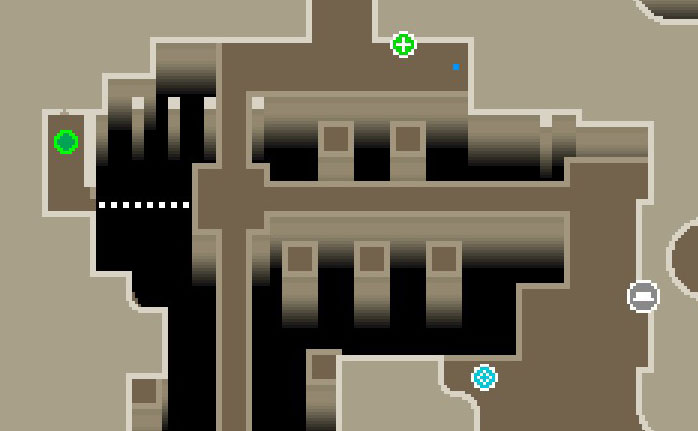
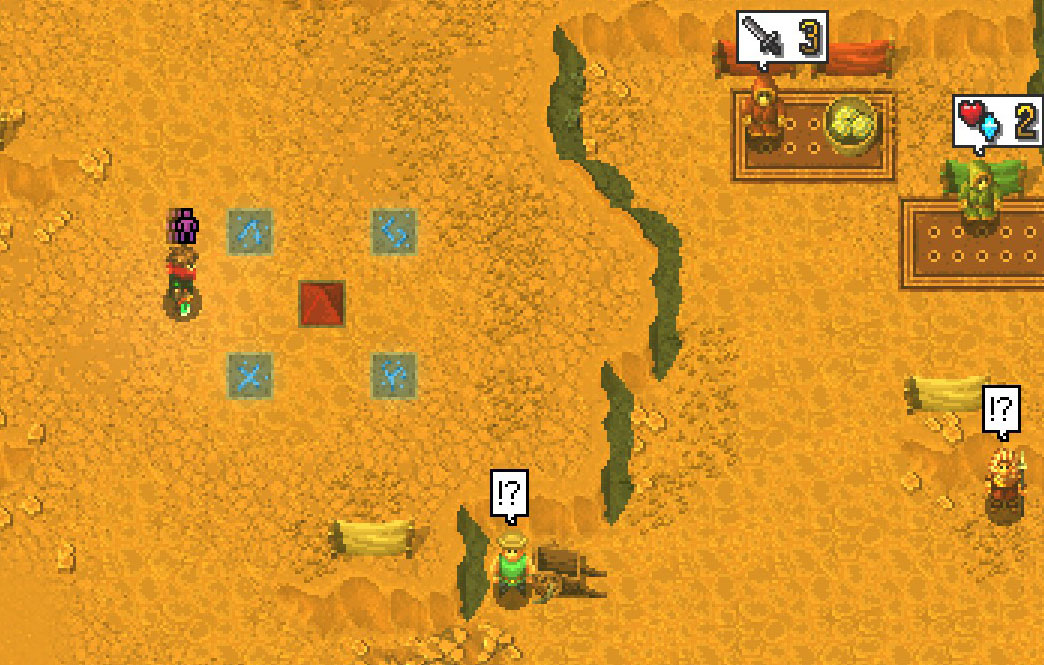
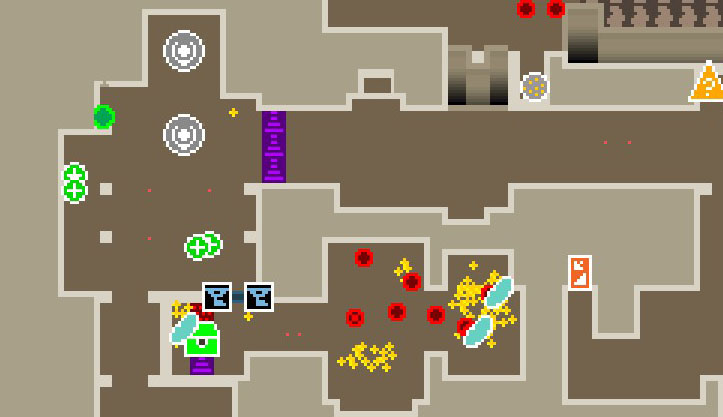
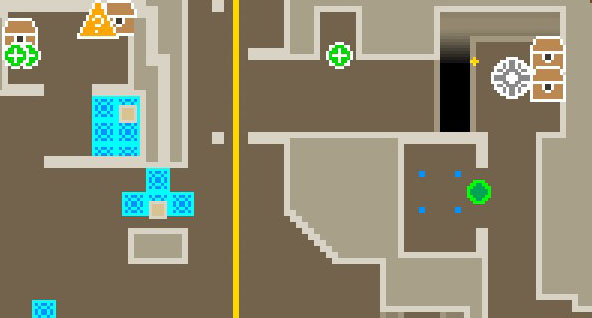
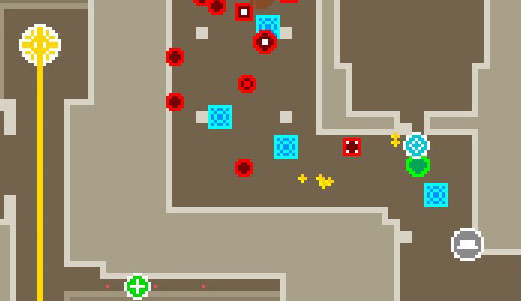
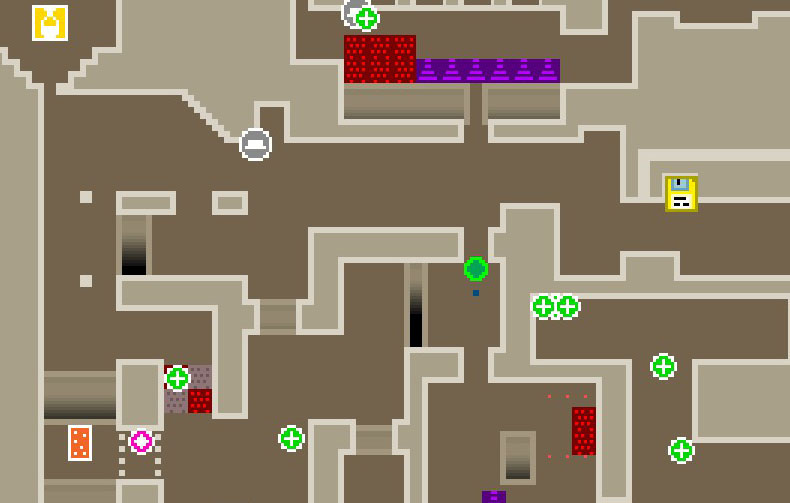
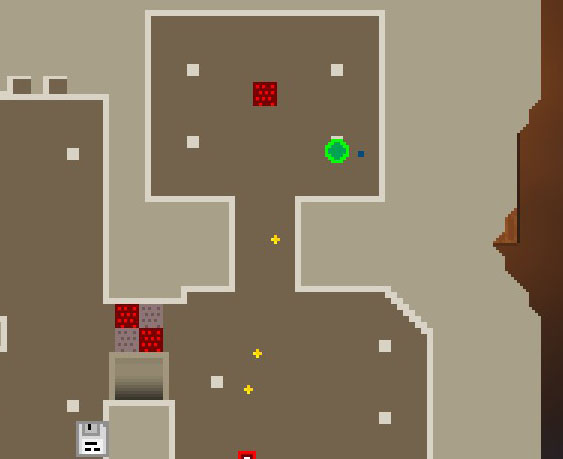
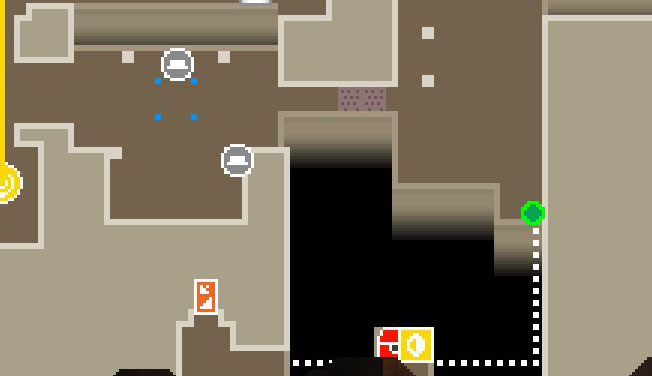
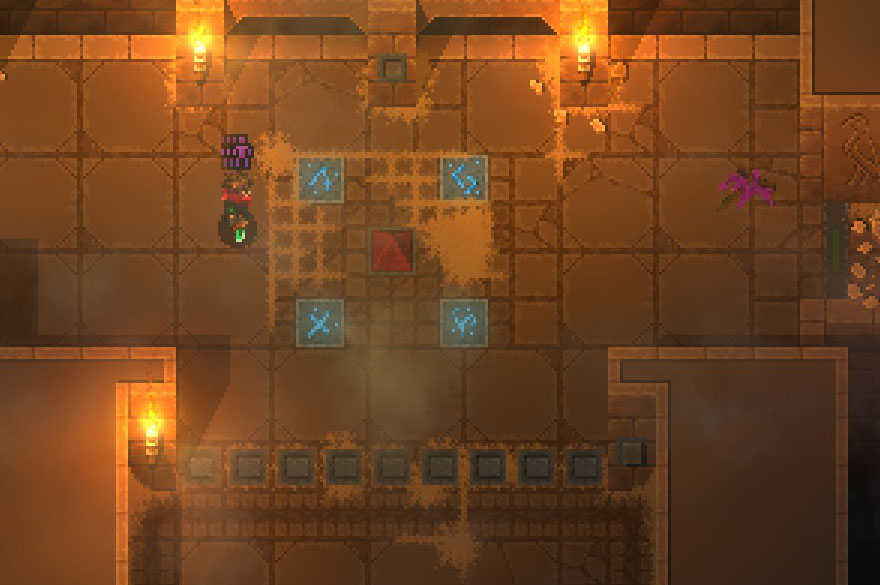
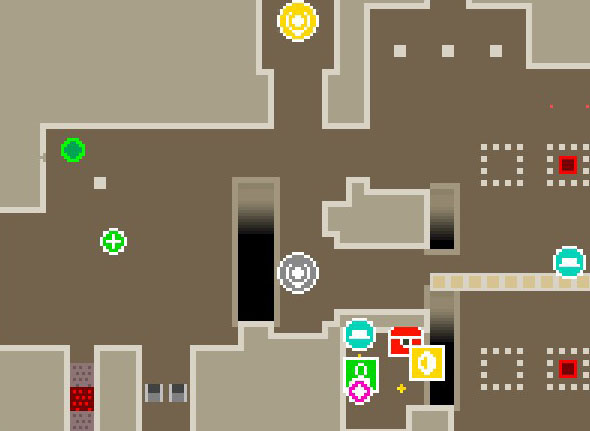
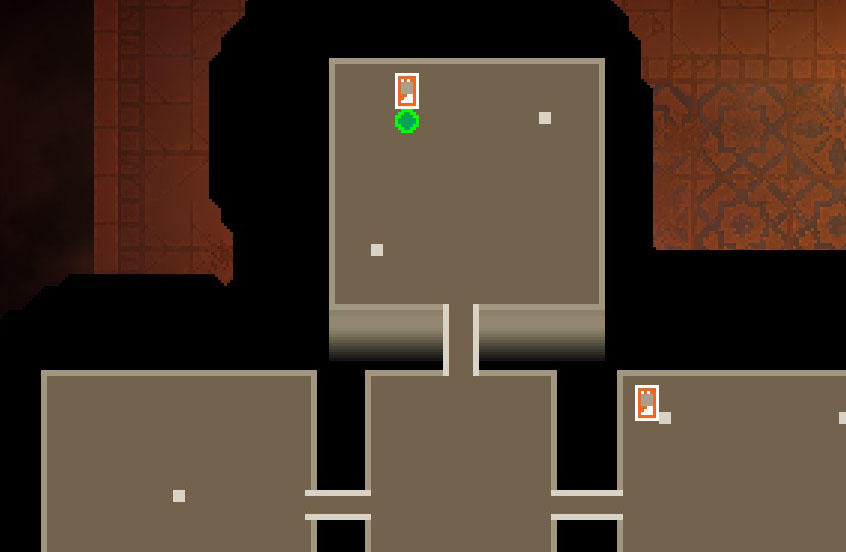
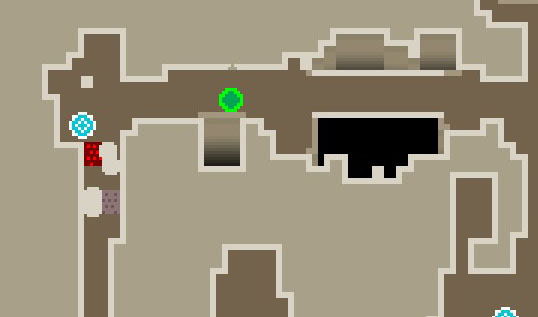
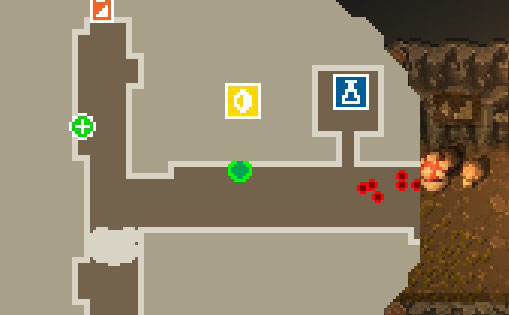
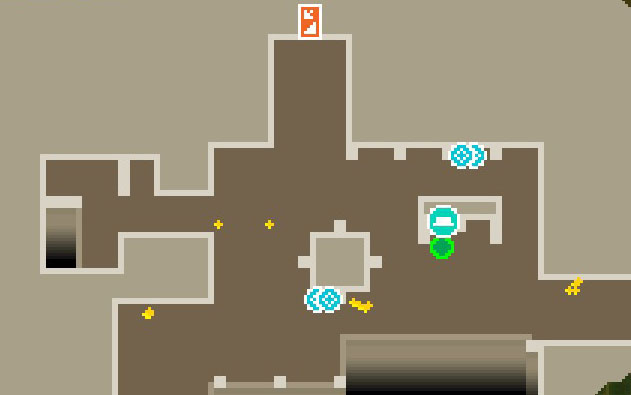
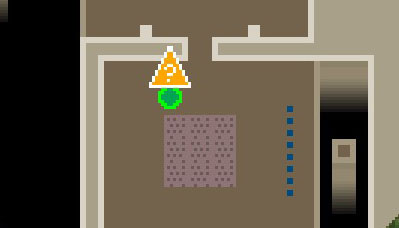
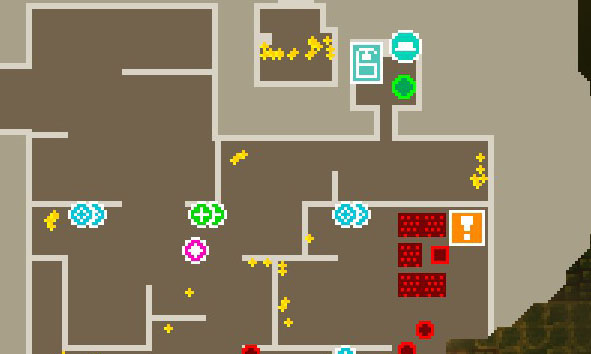
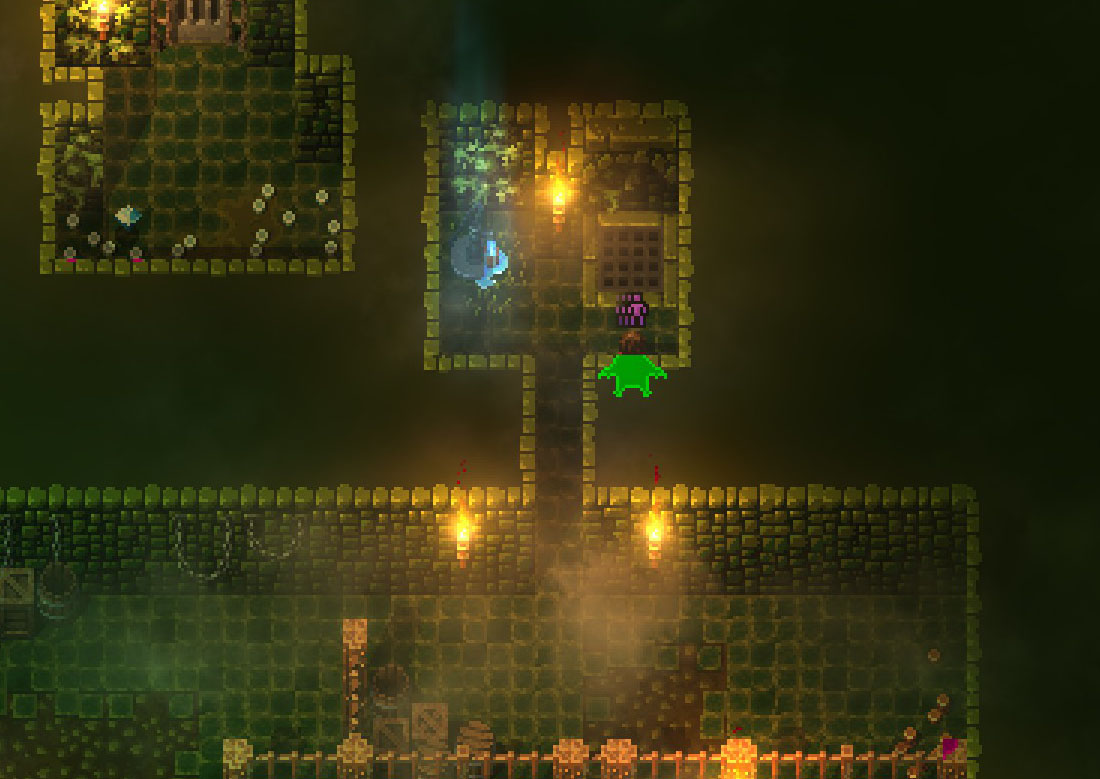
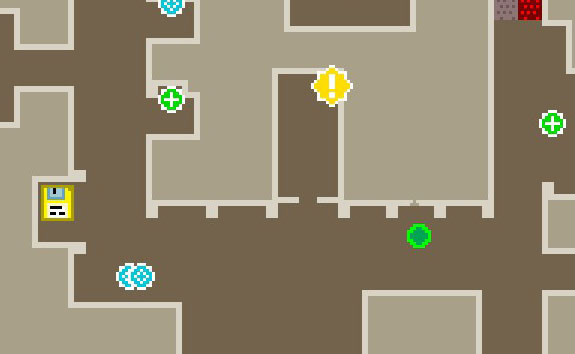
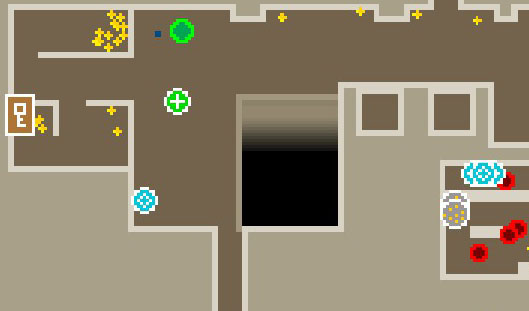
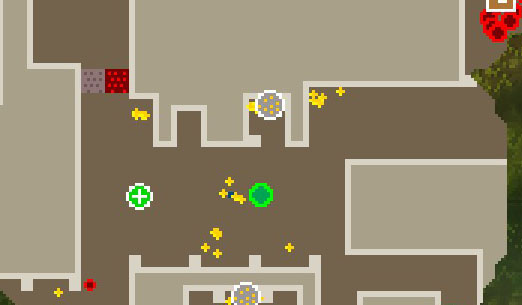
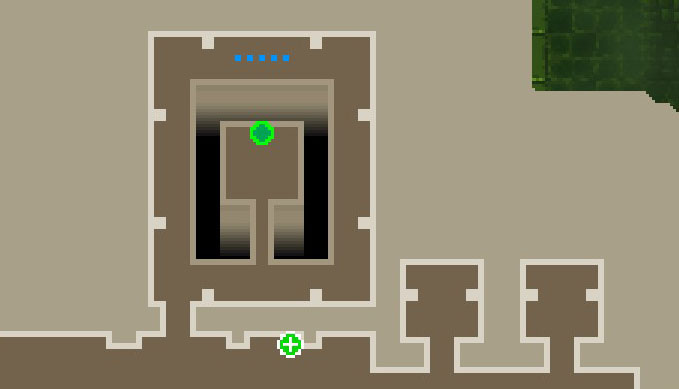
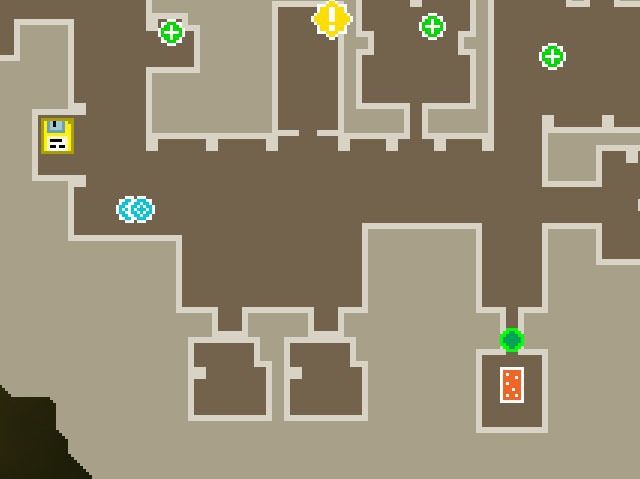
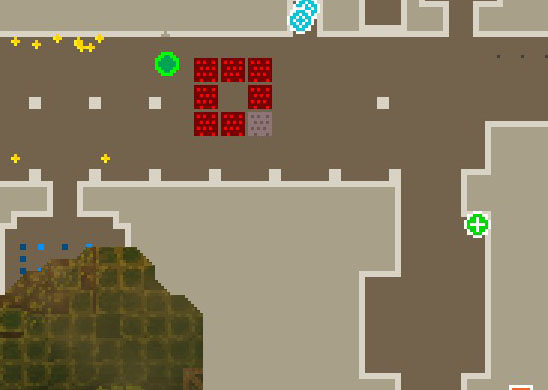
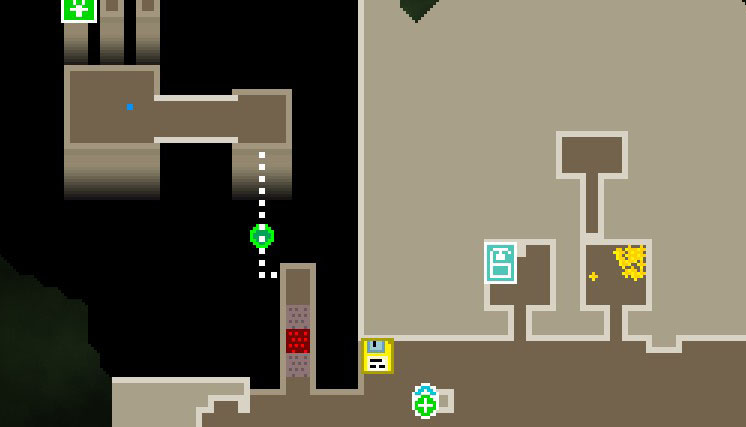
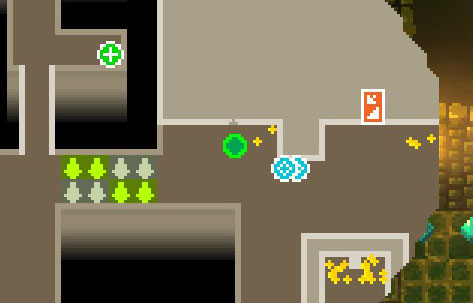
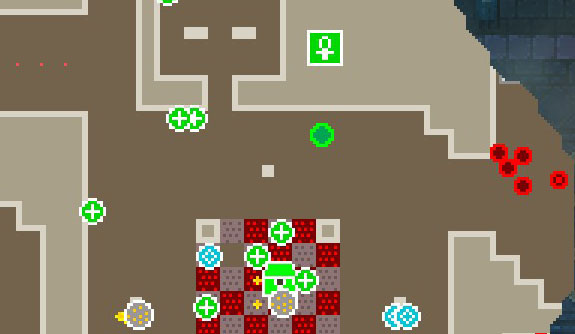
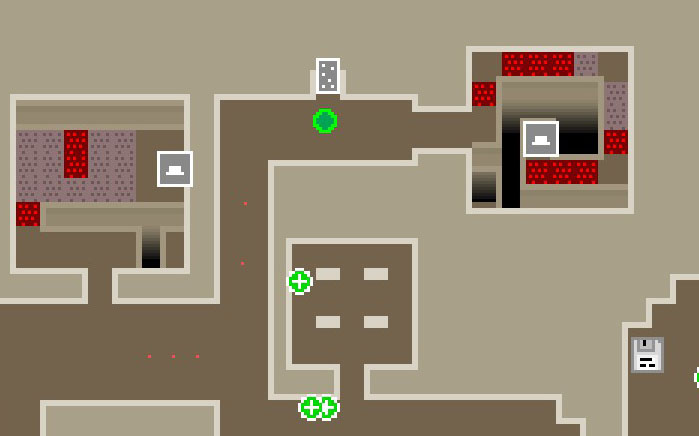
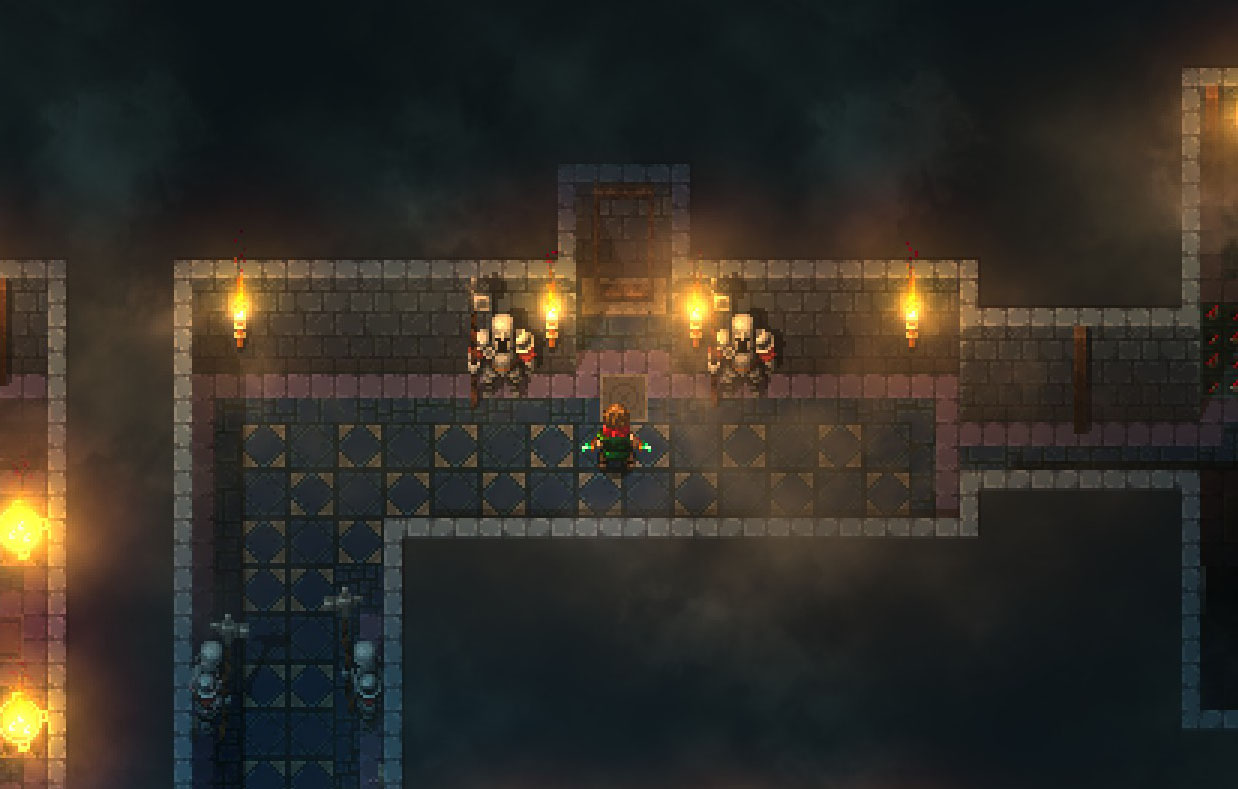
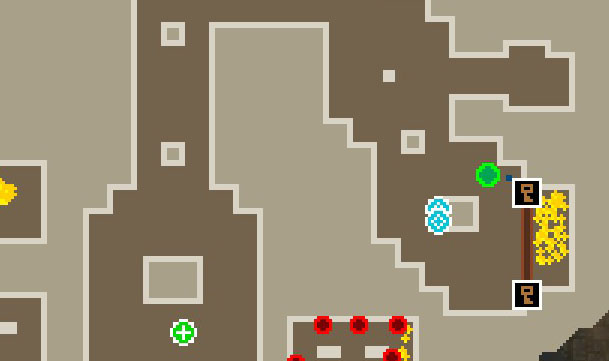
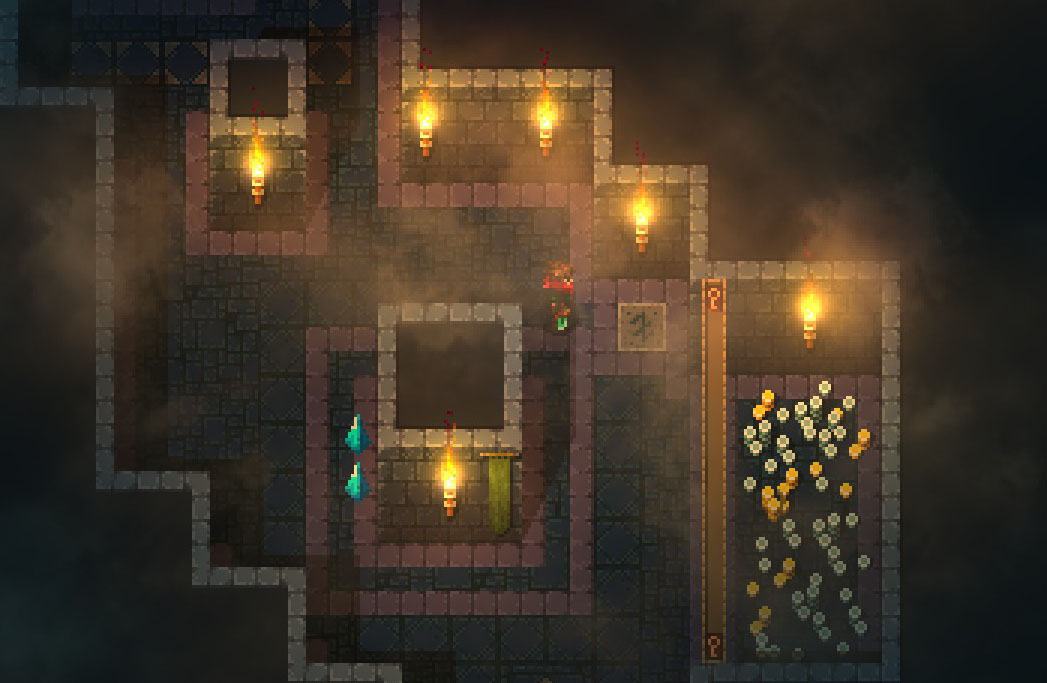
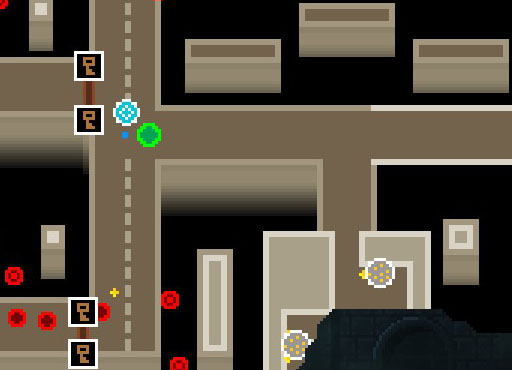
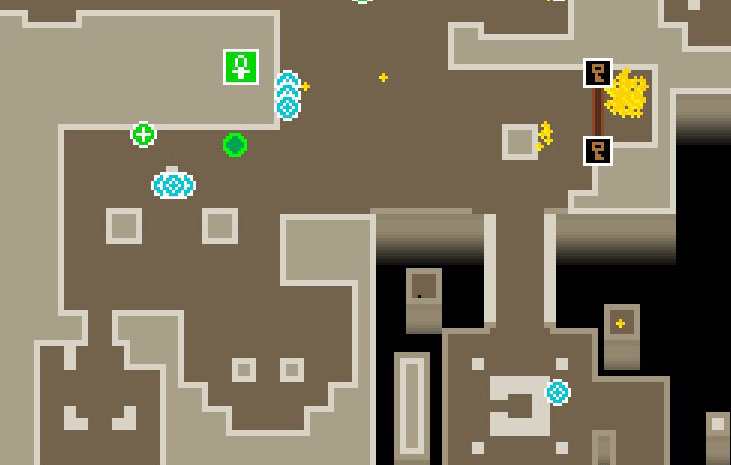
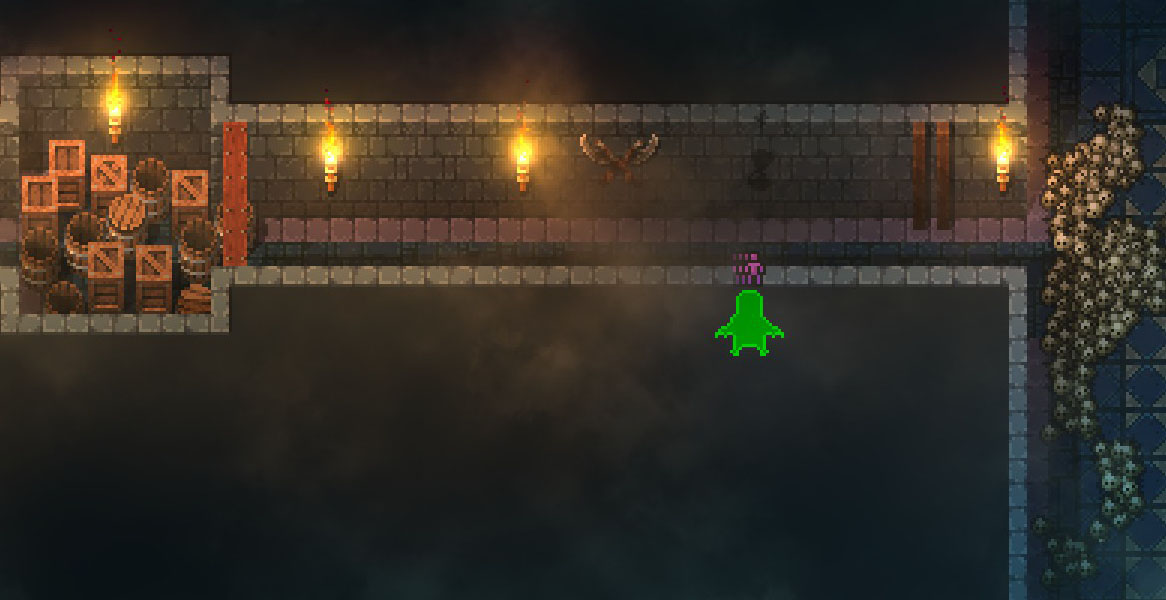
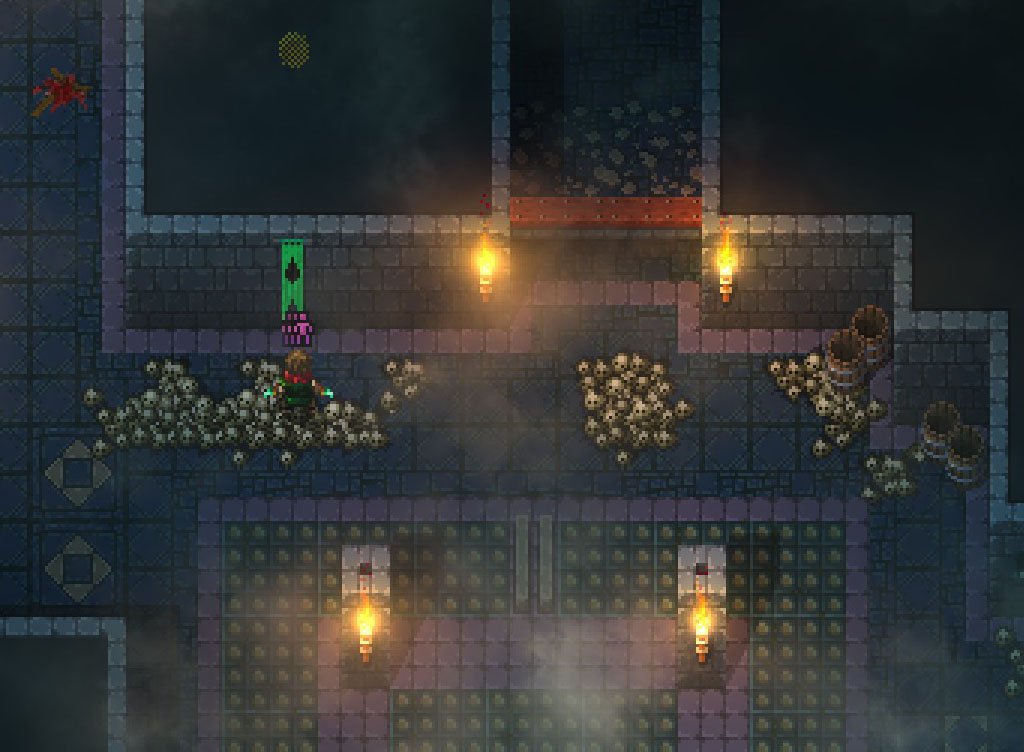
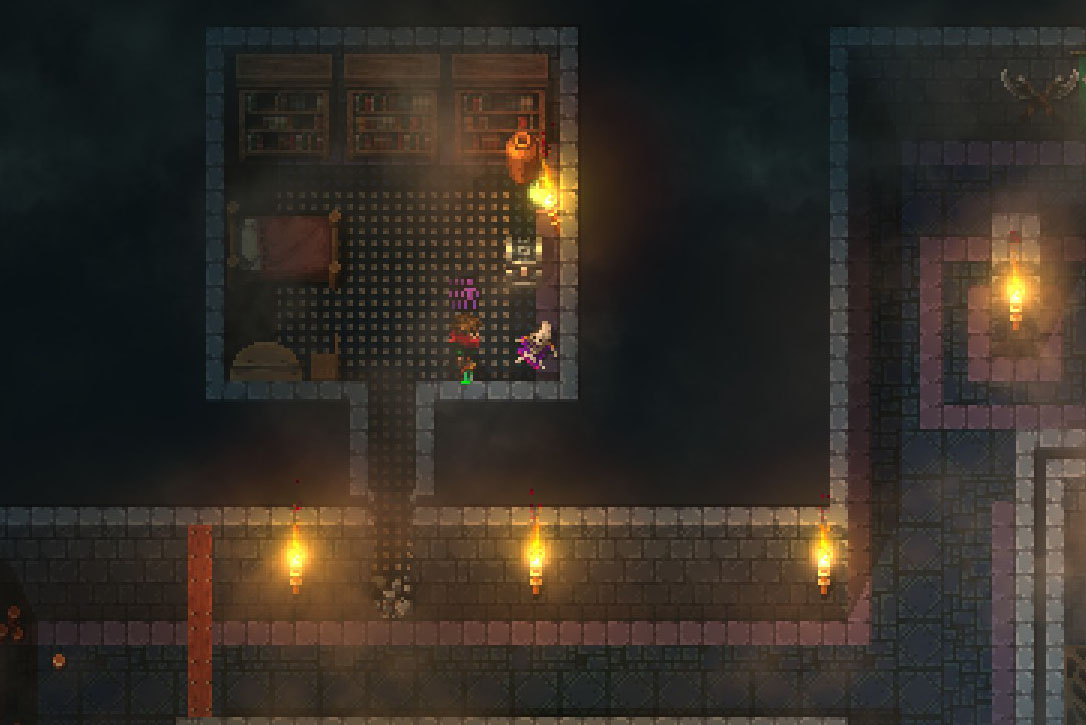
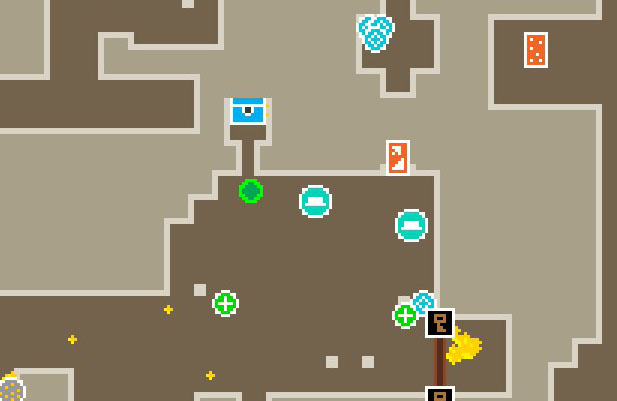
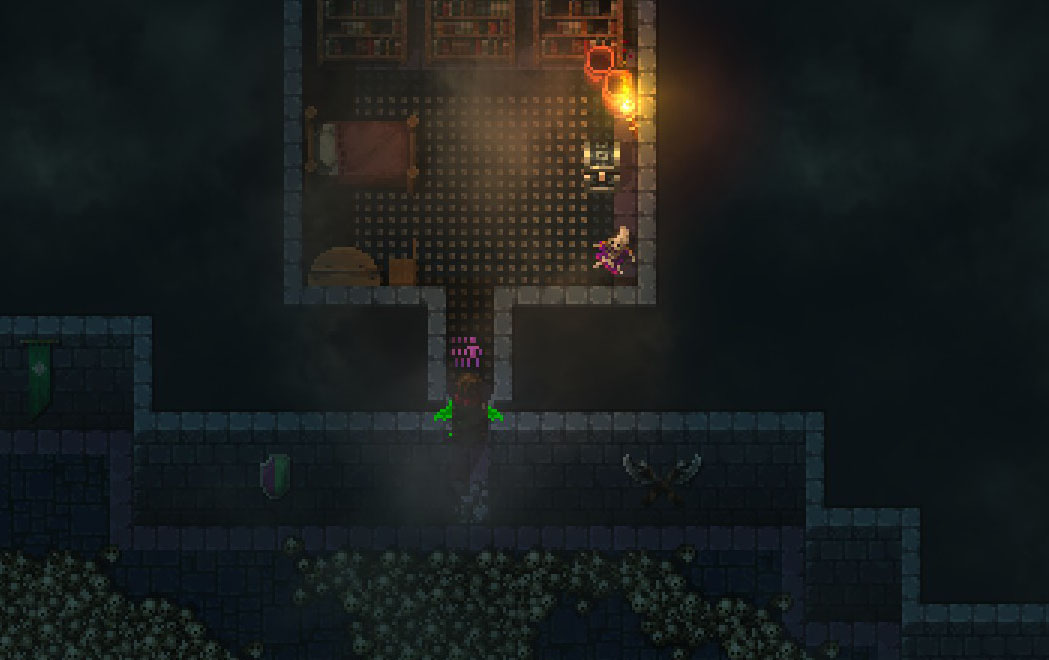
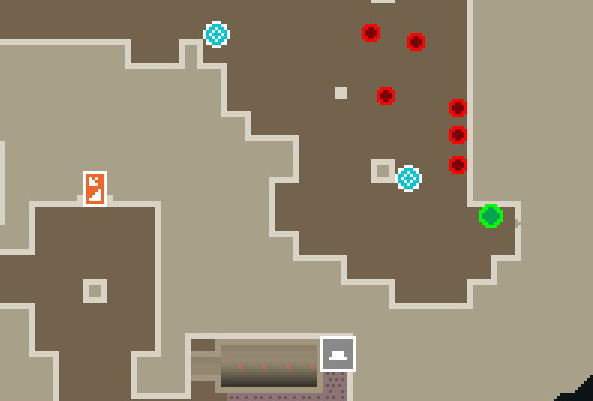
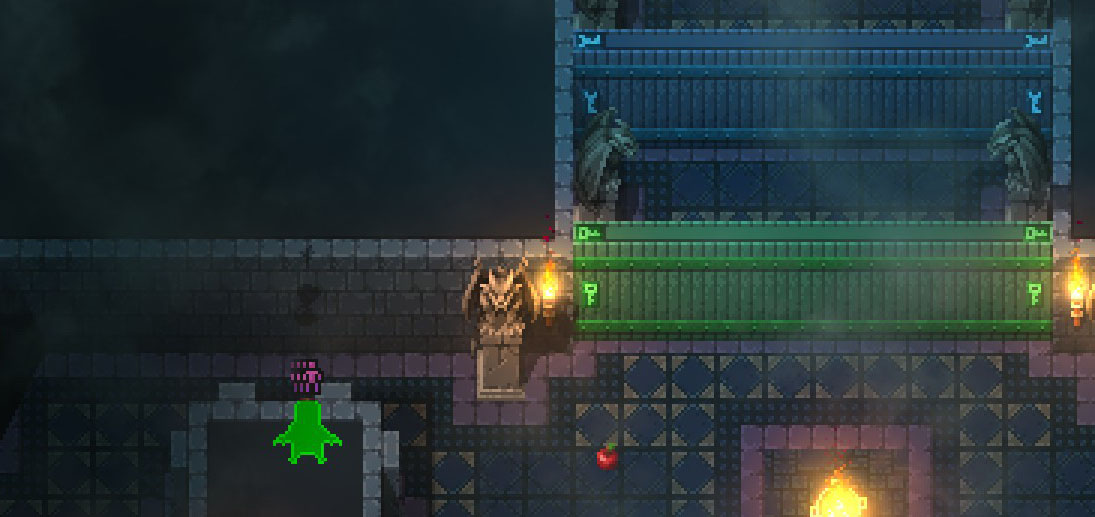
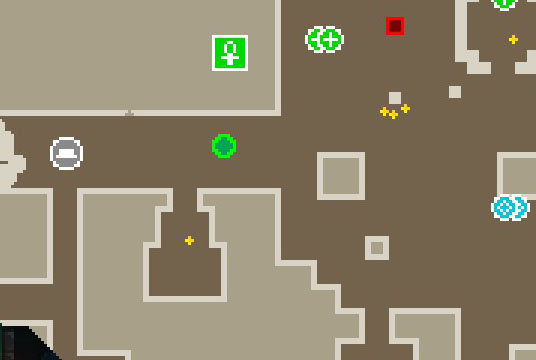
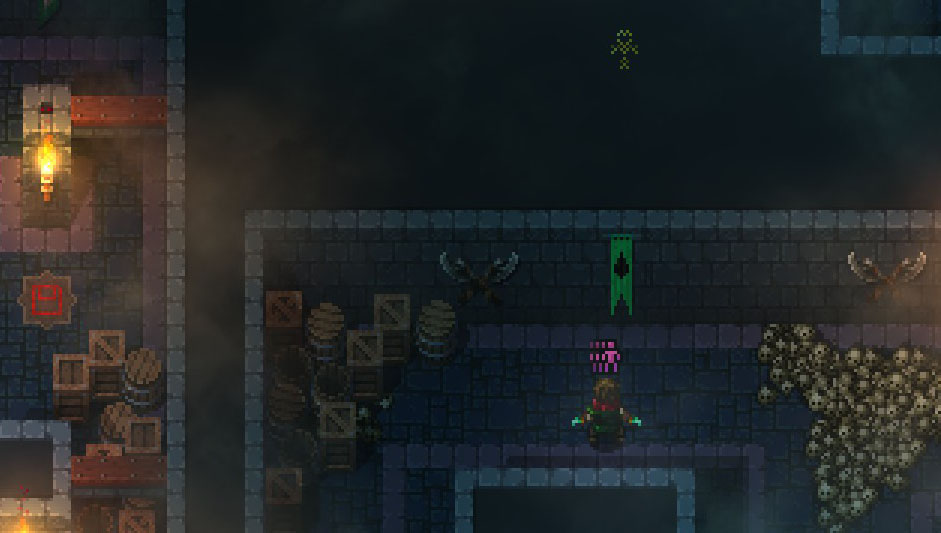
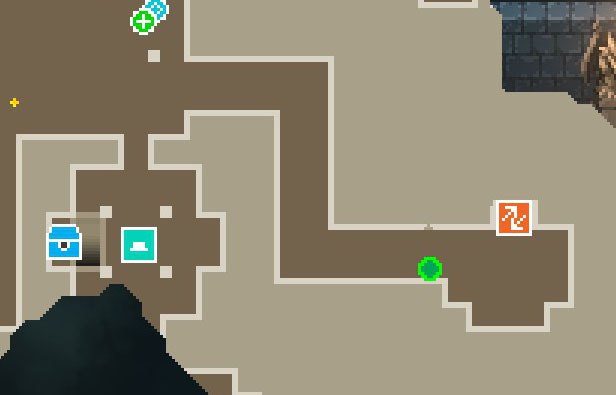
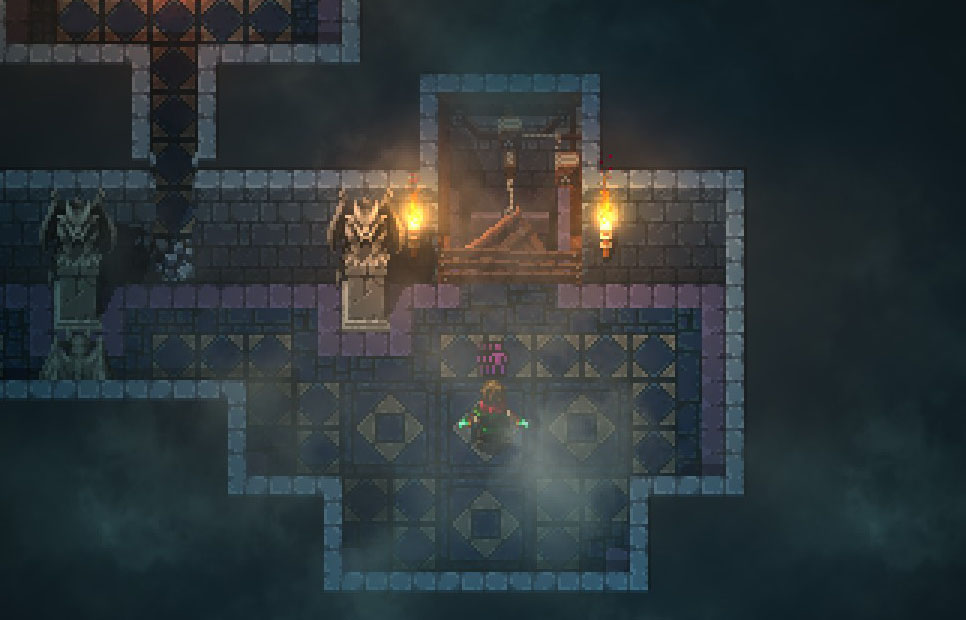
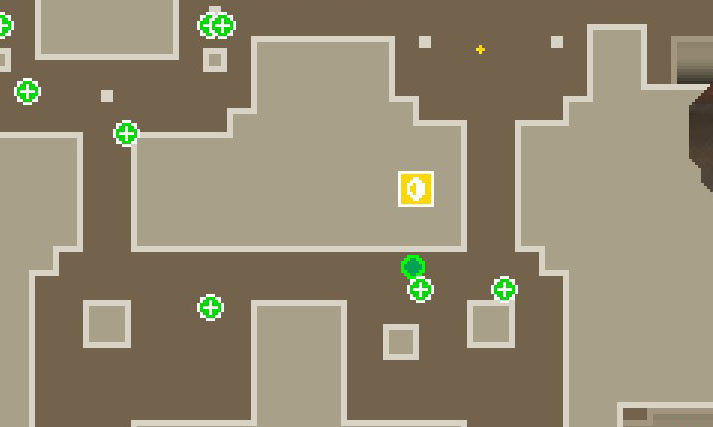
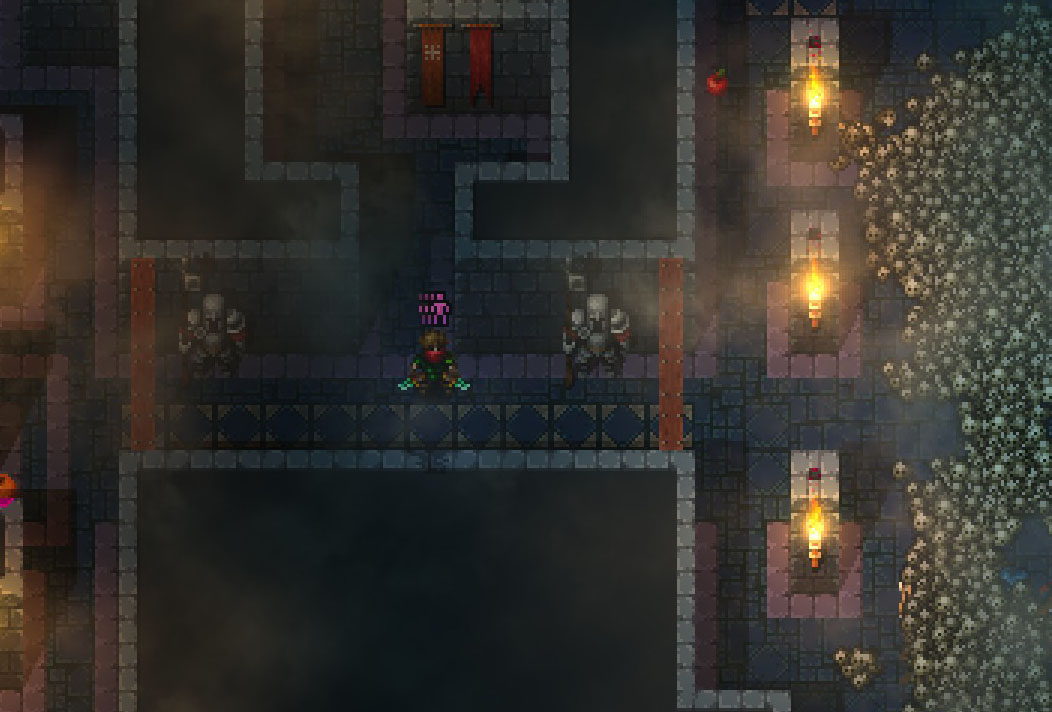
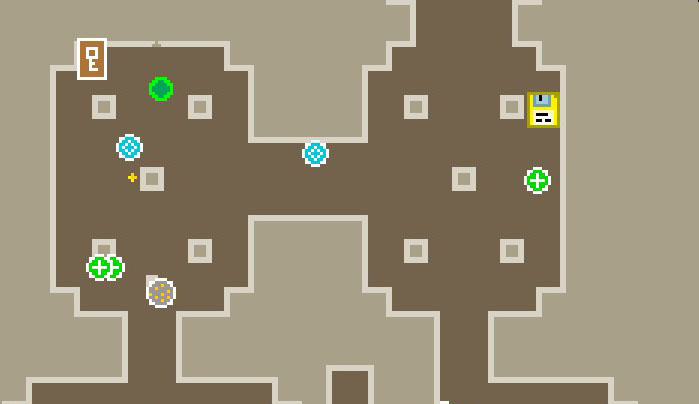
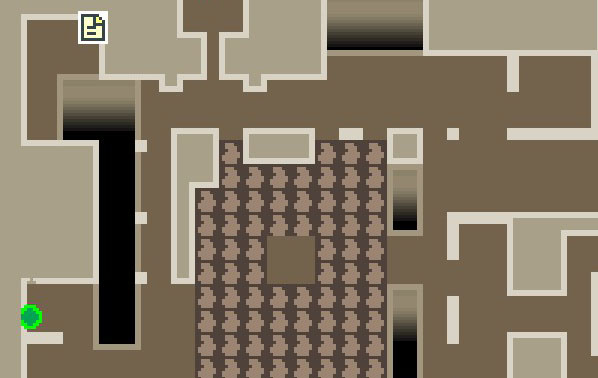
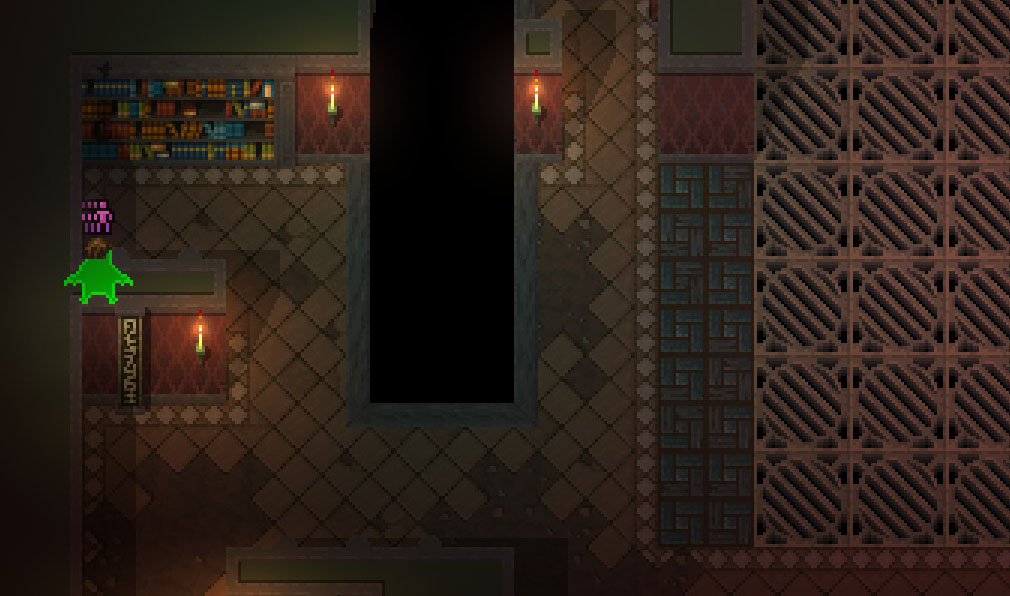
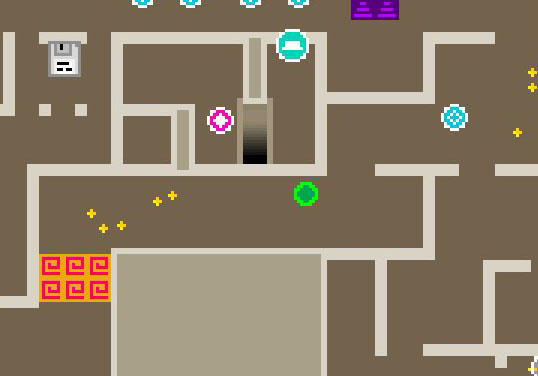
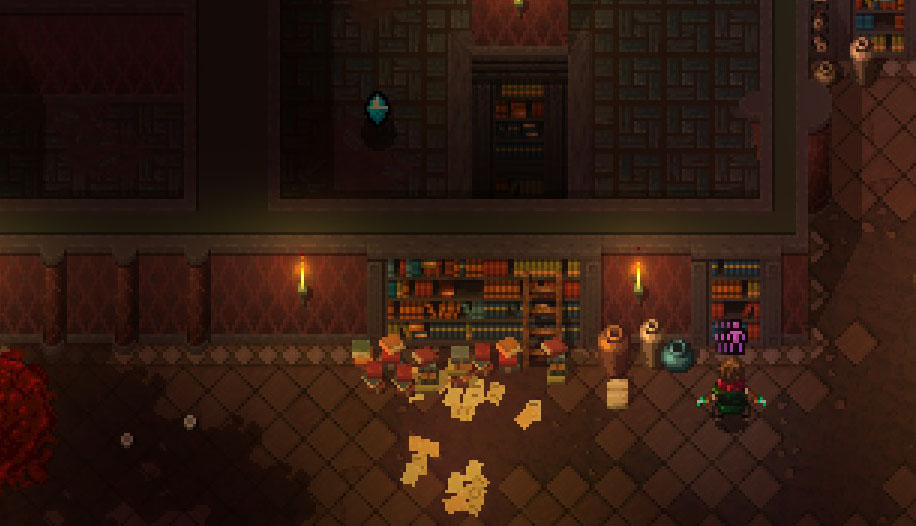
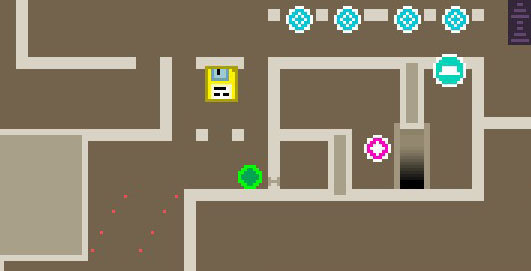
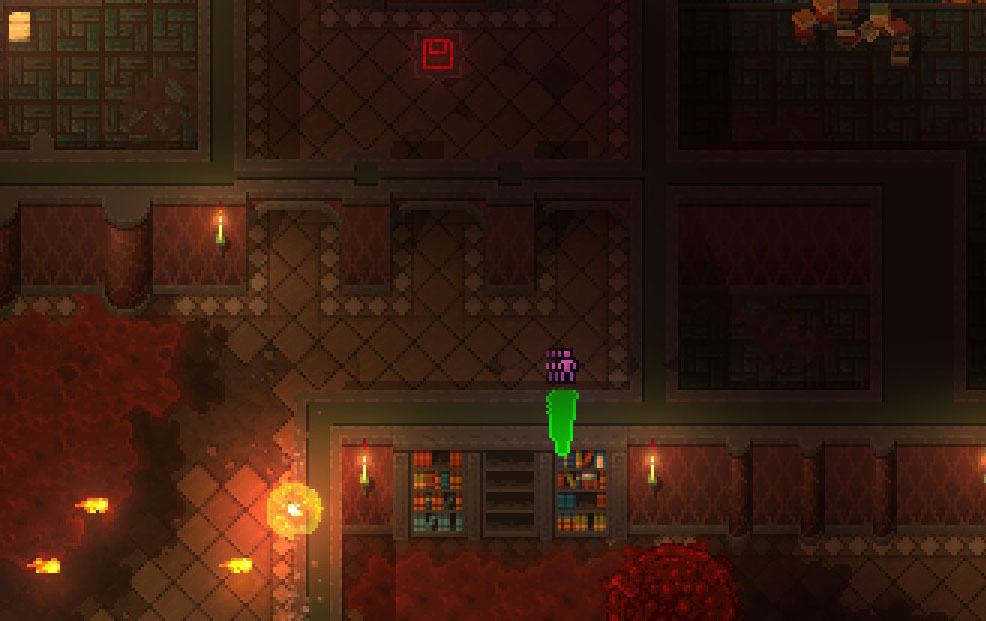
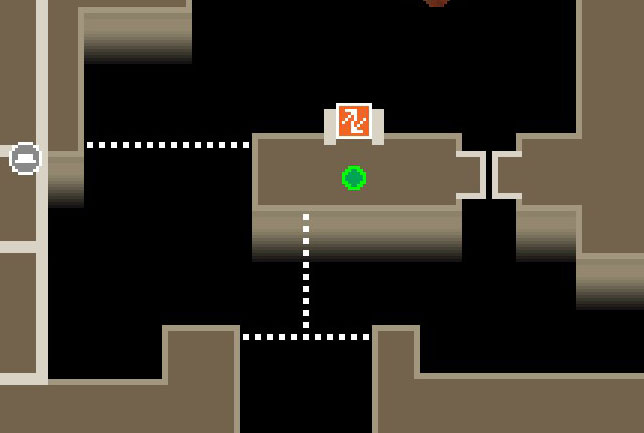
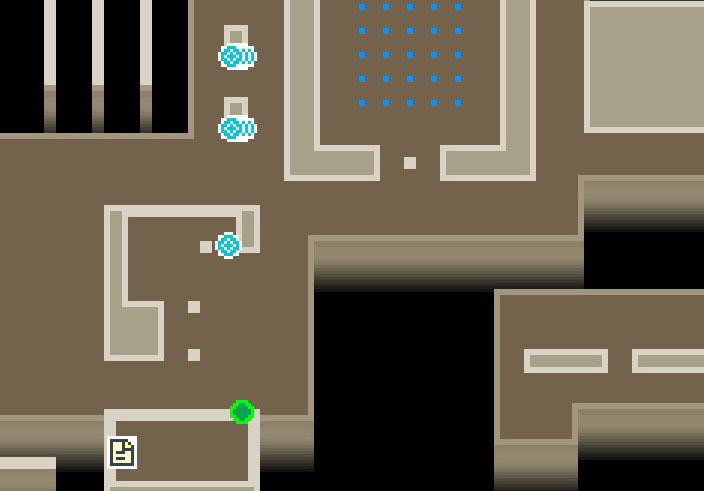
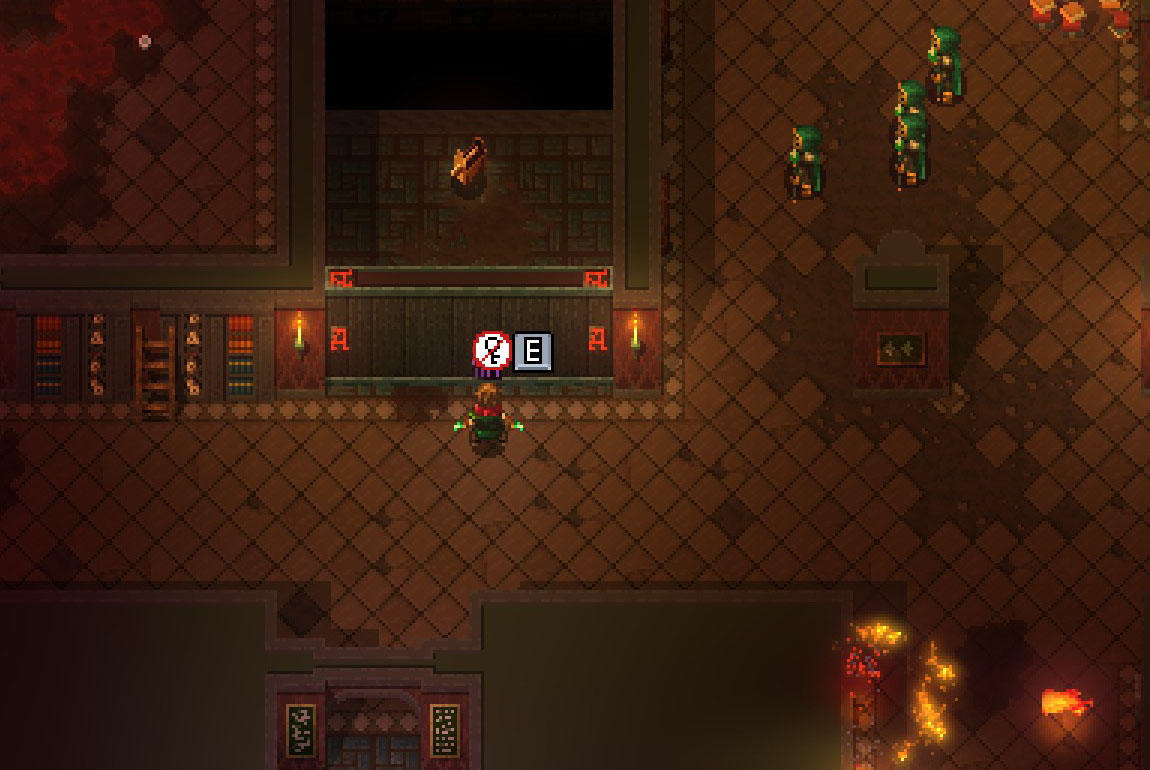
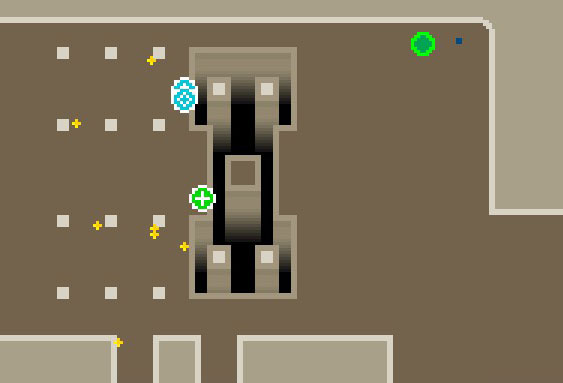
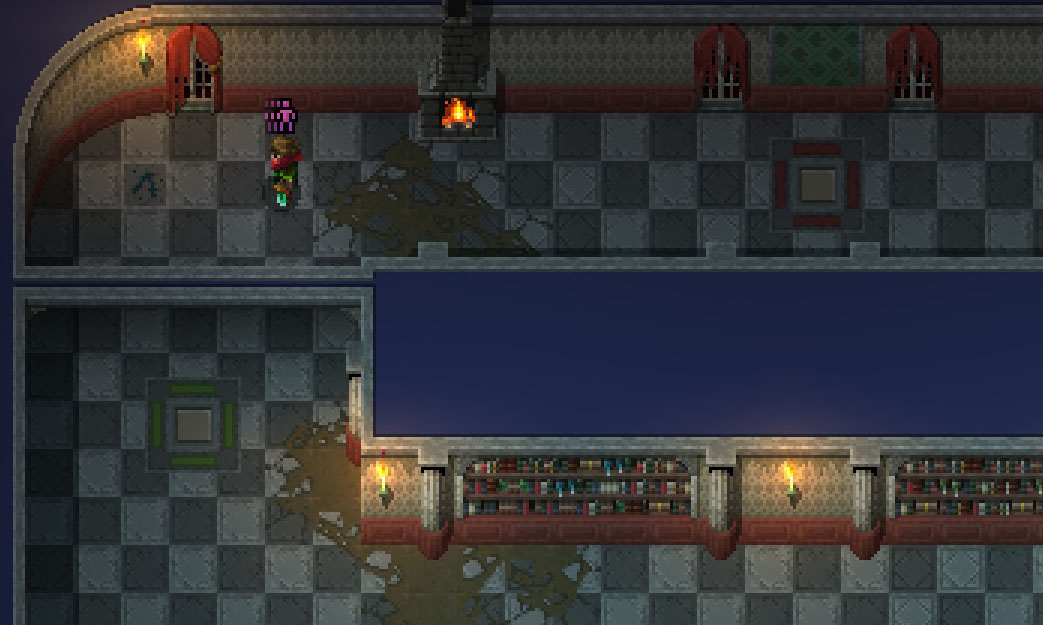
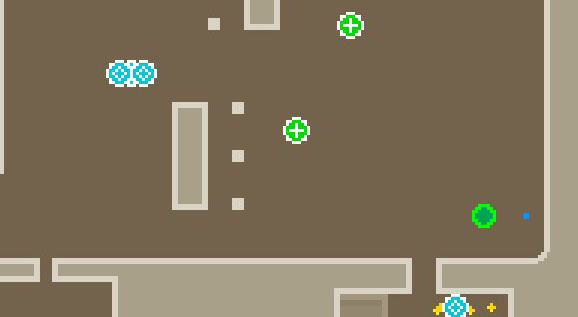
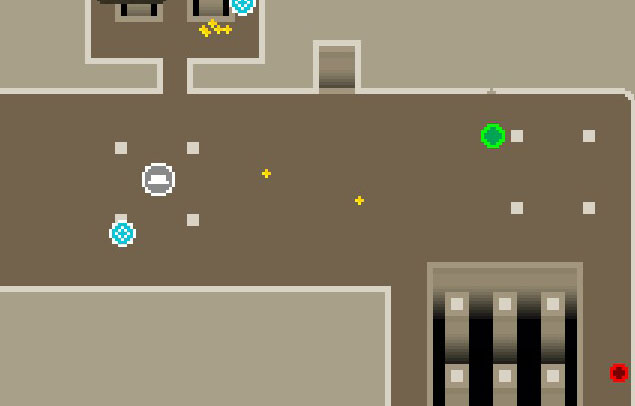
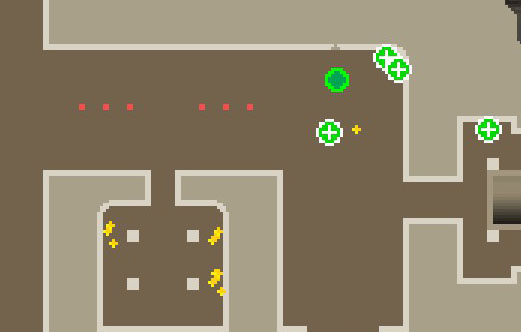
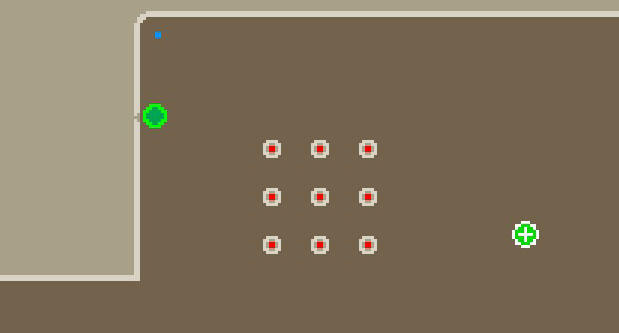
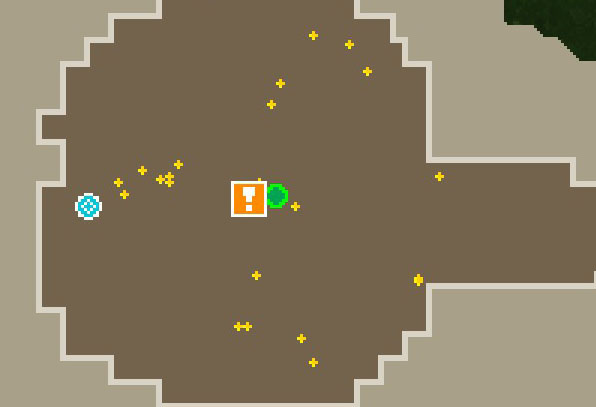
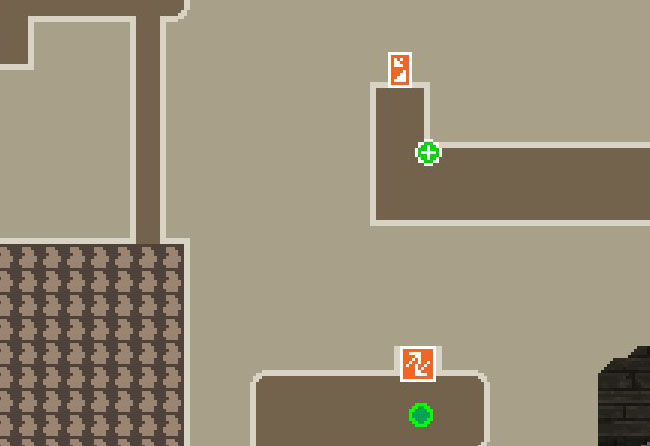
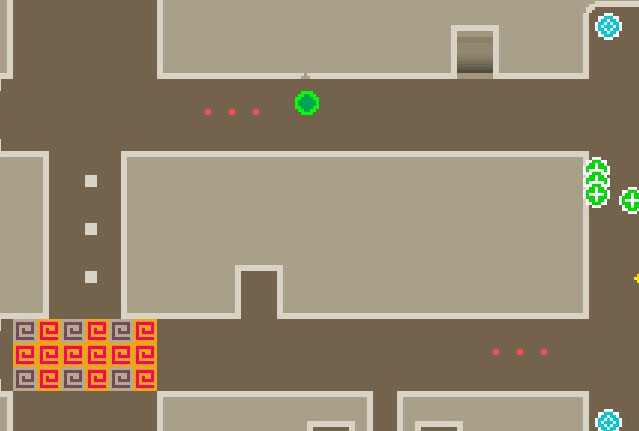
I found 2 more secret rooms on Floor 1 near the arrow shooters https://gtm.steamproxy.vip/sharedfiles/filedetails/?id=3297067230

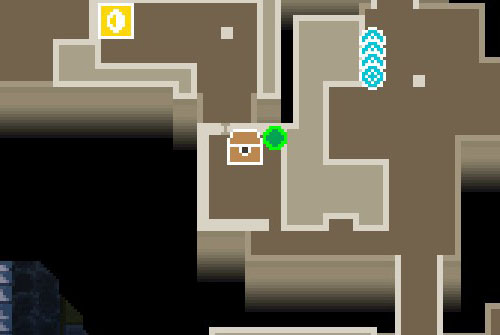
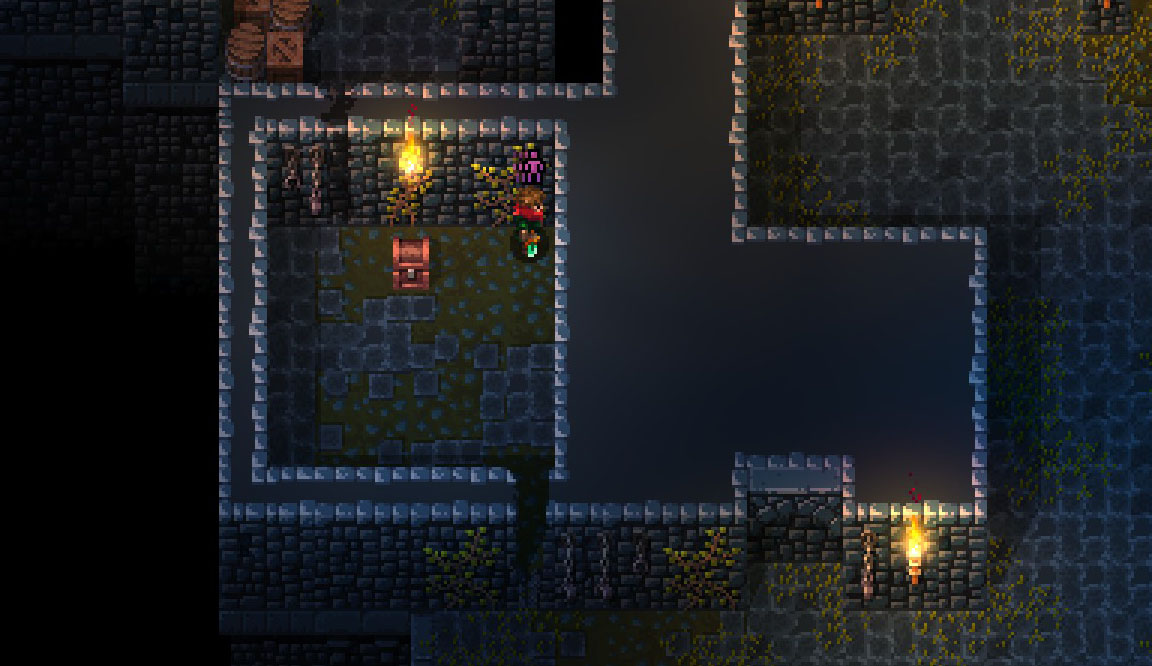
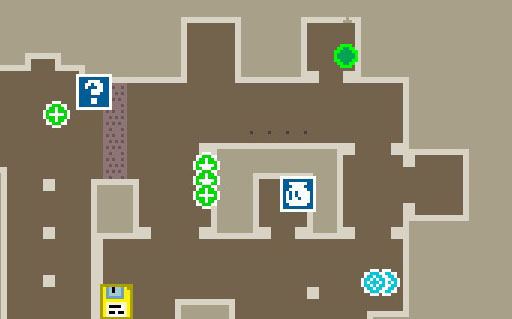
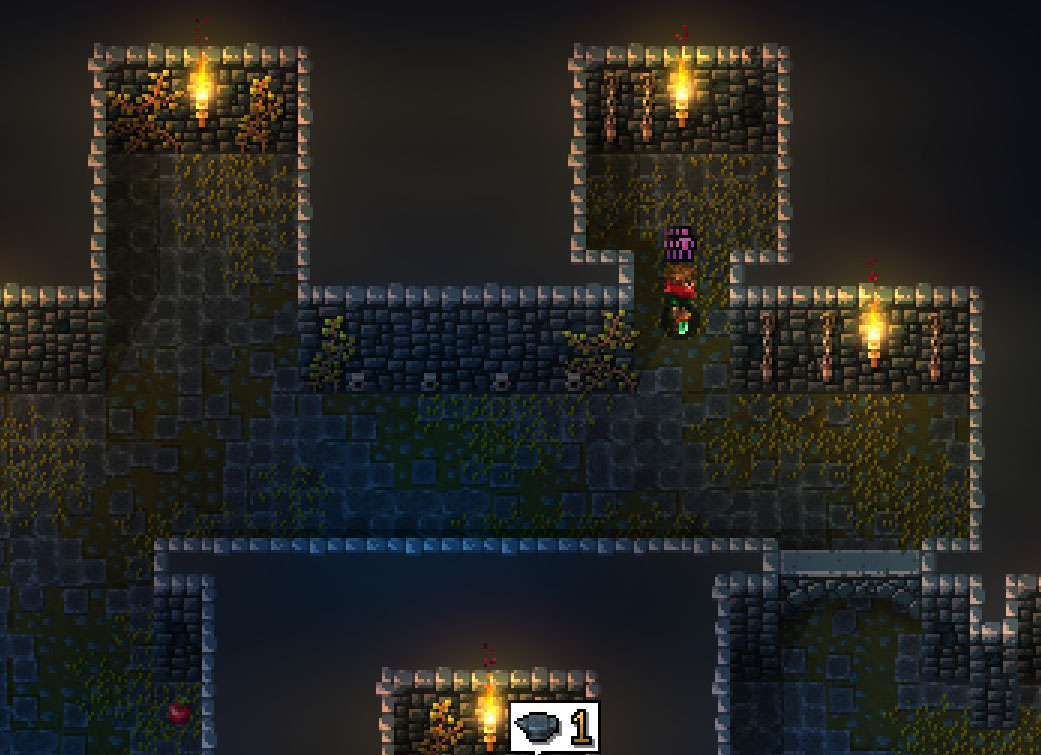
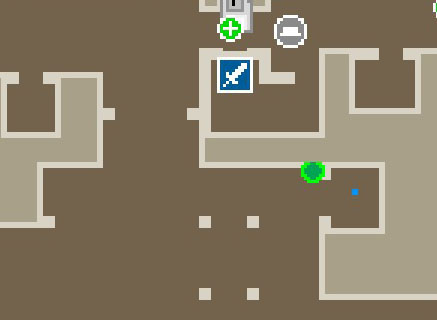
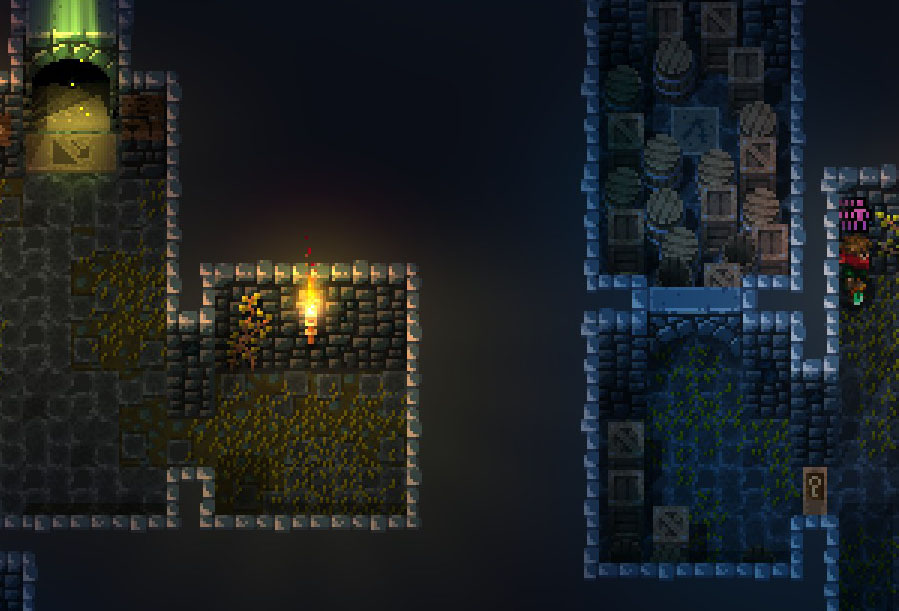
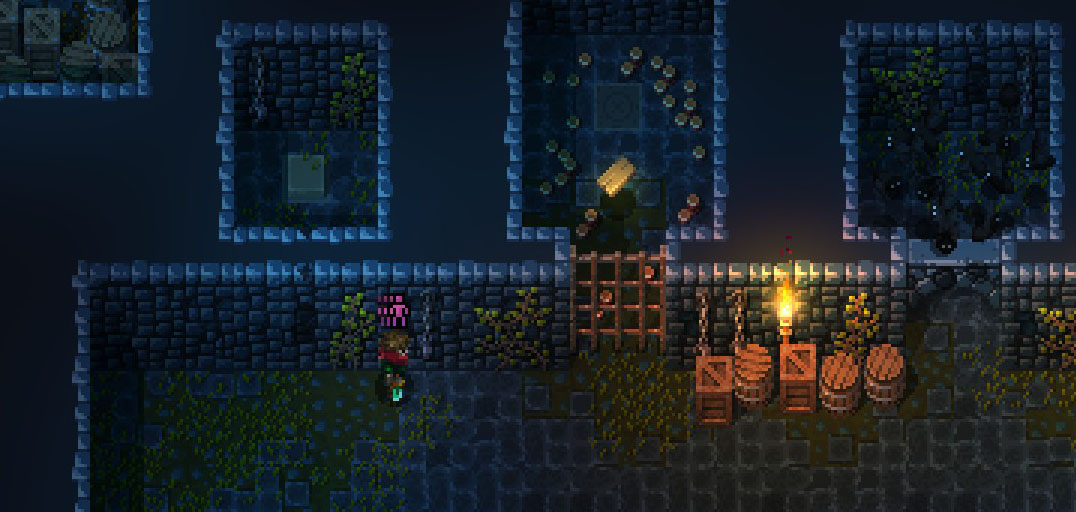
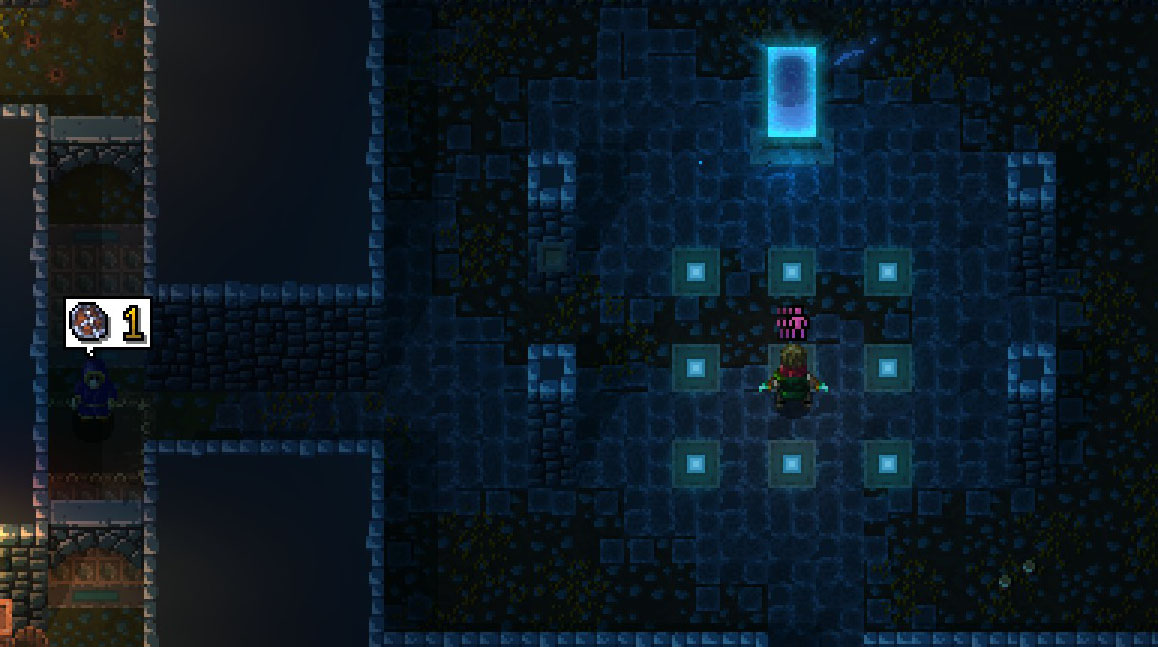
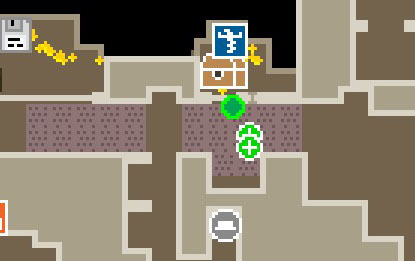
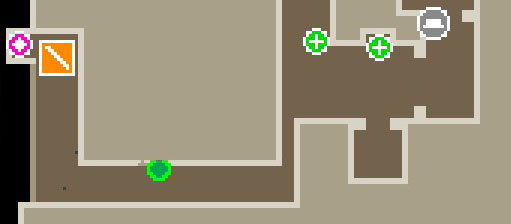
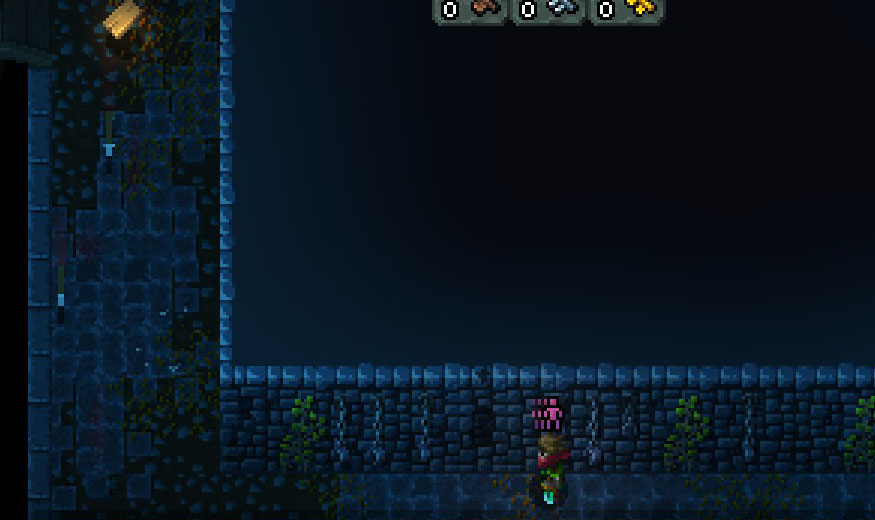
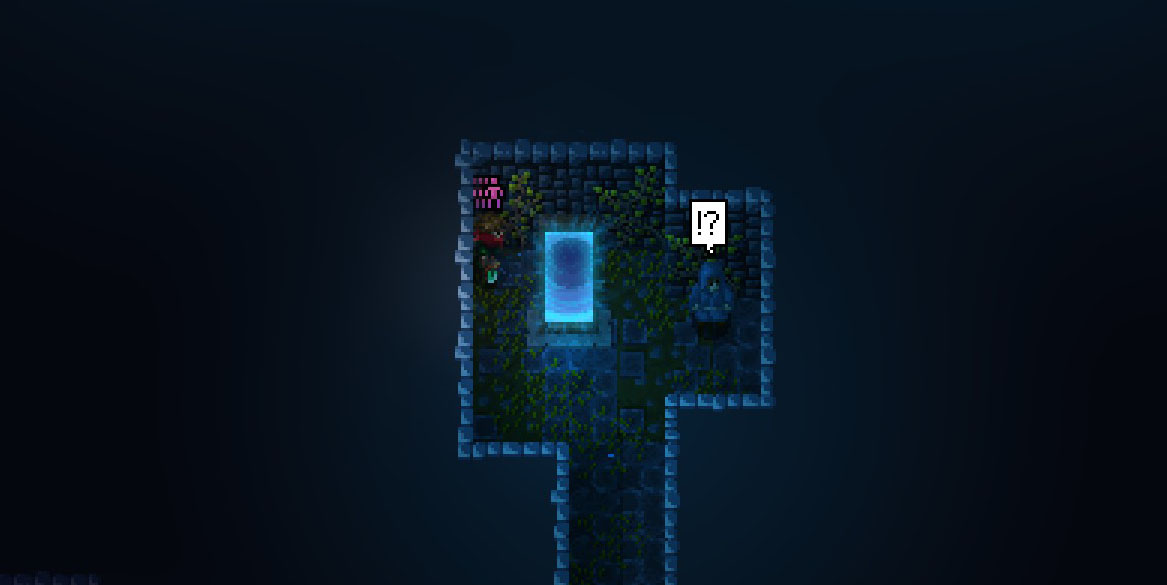
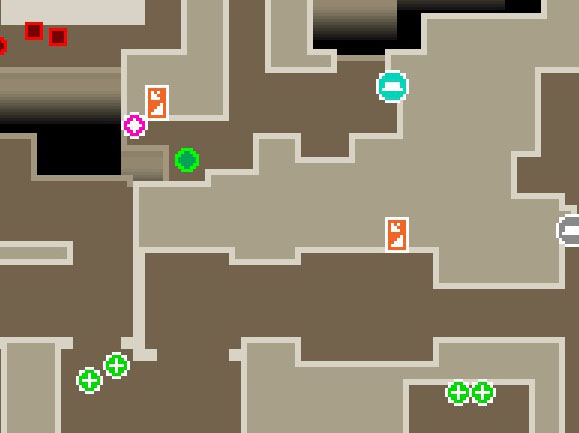
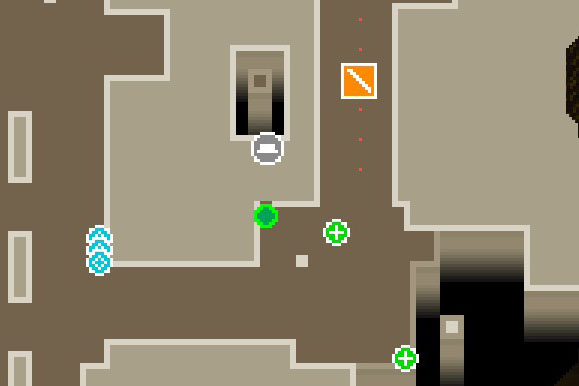
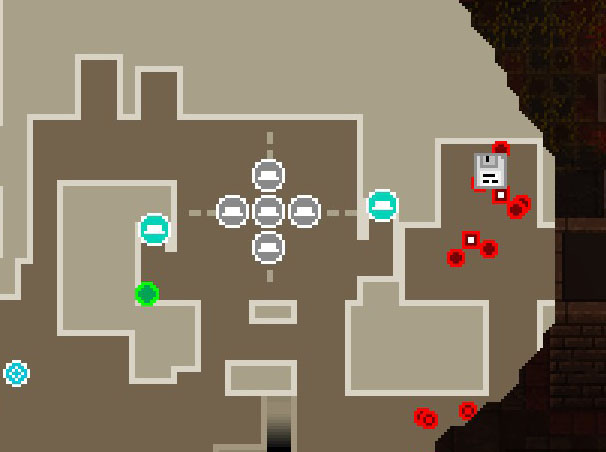
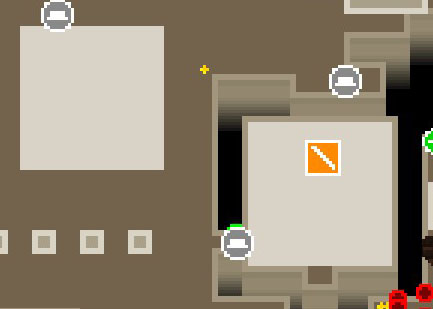
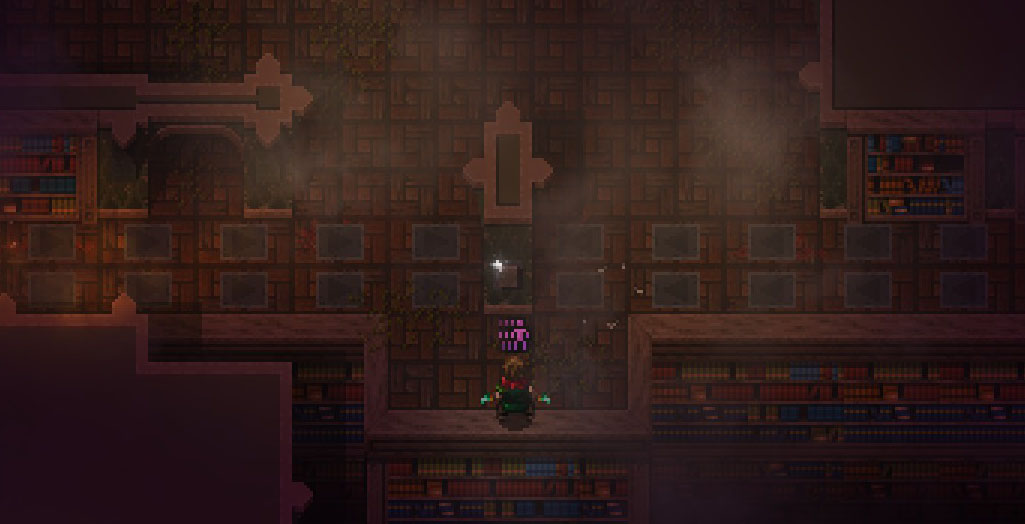
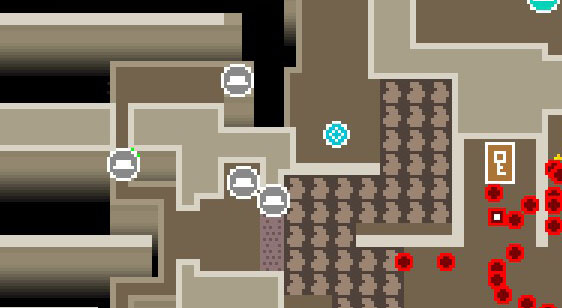
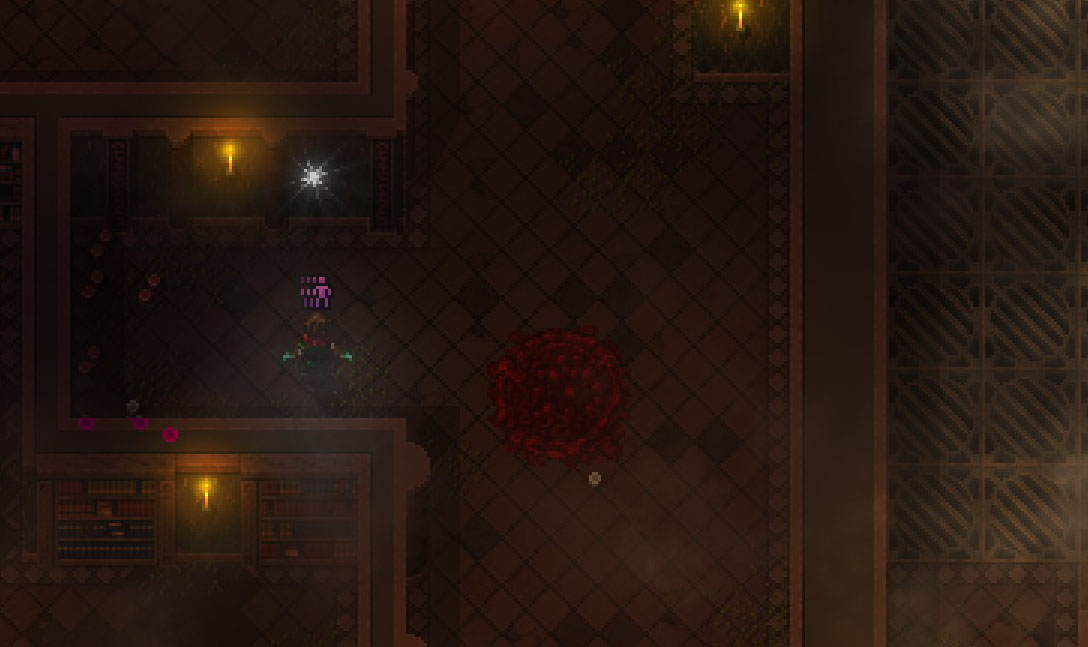
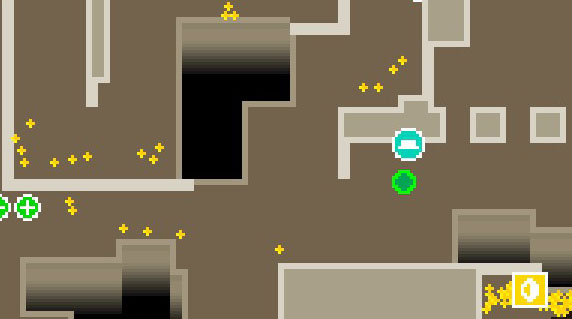
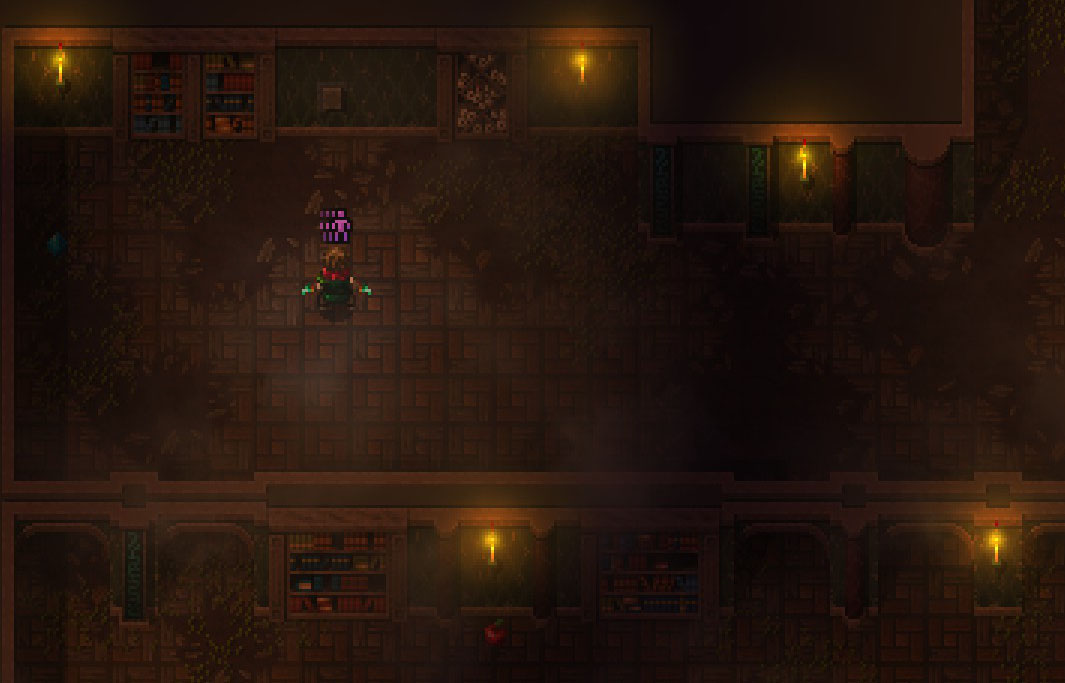
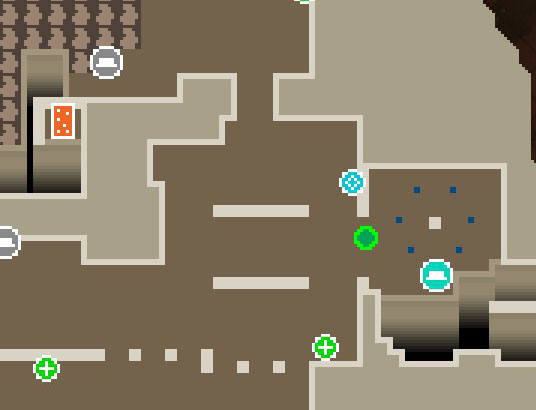
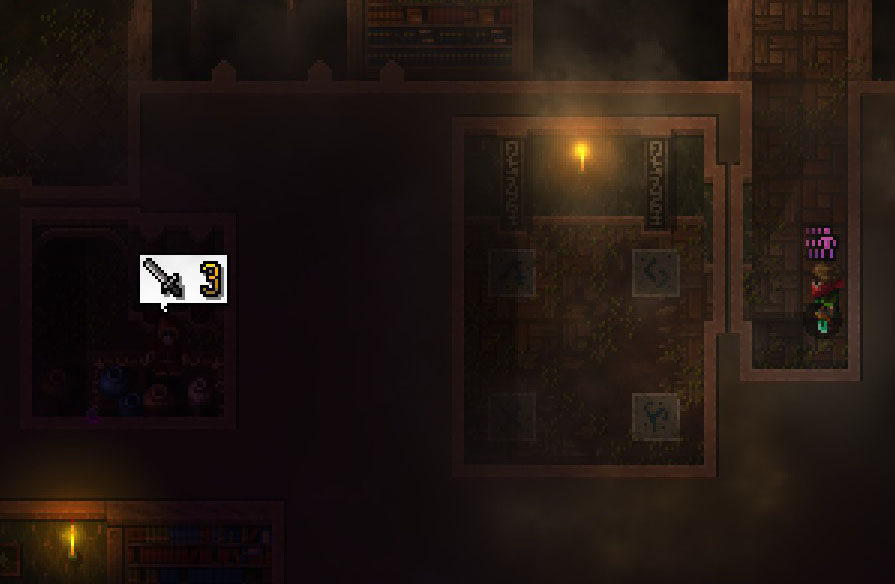
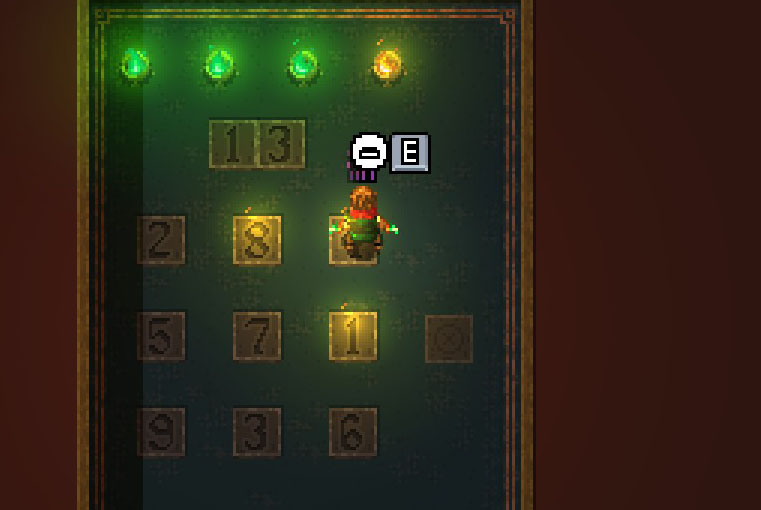
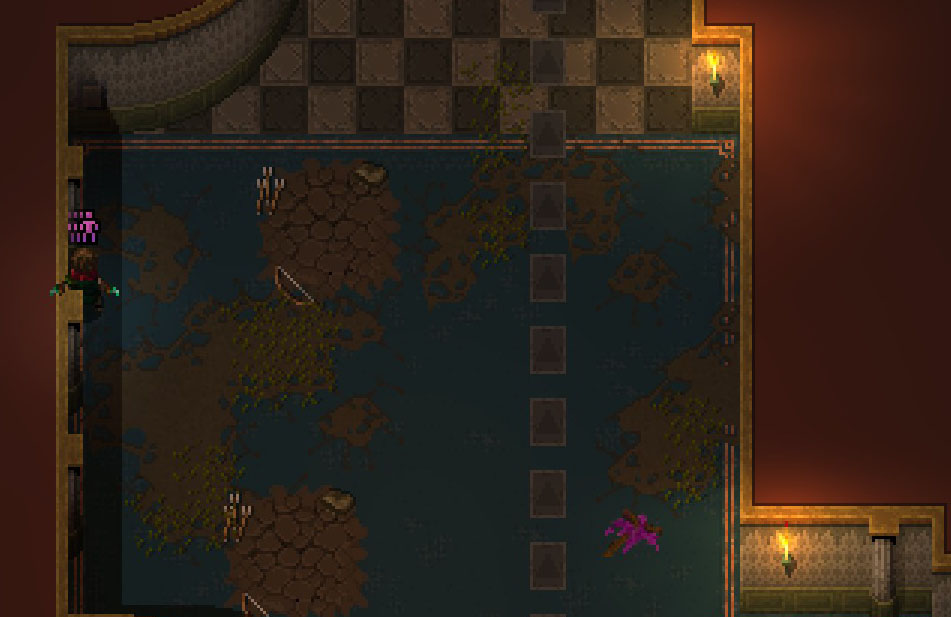
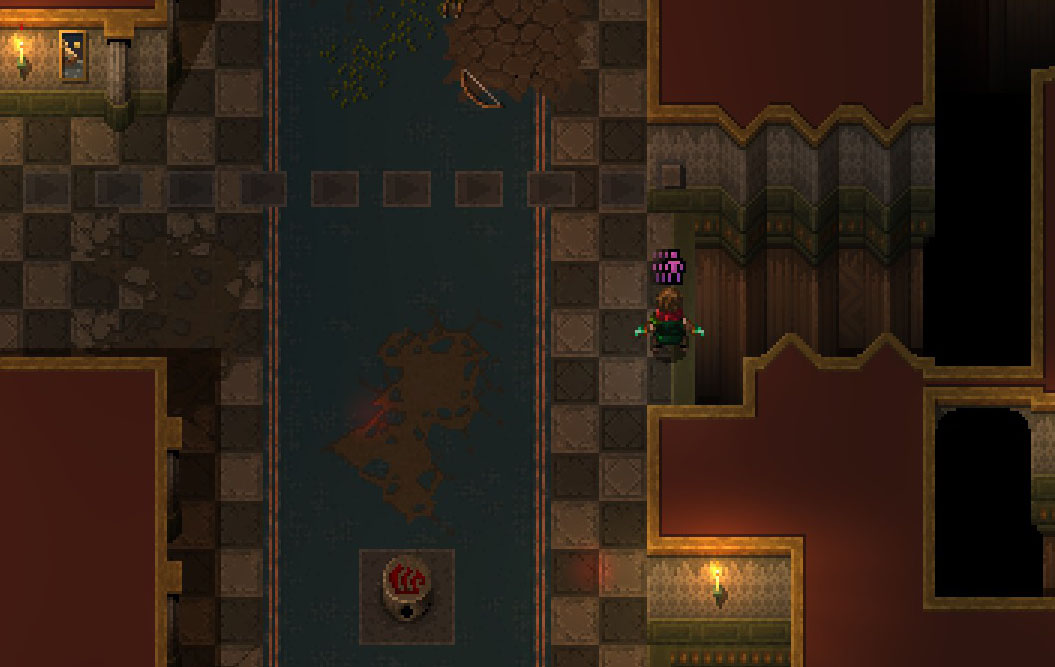
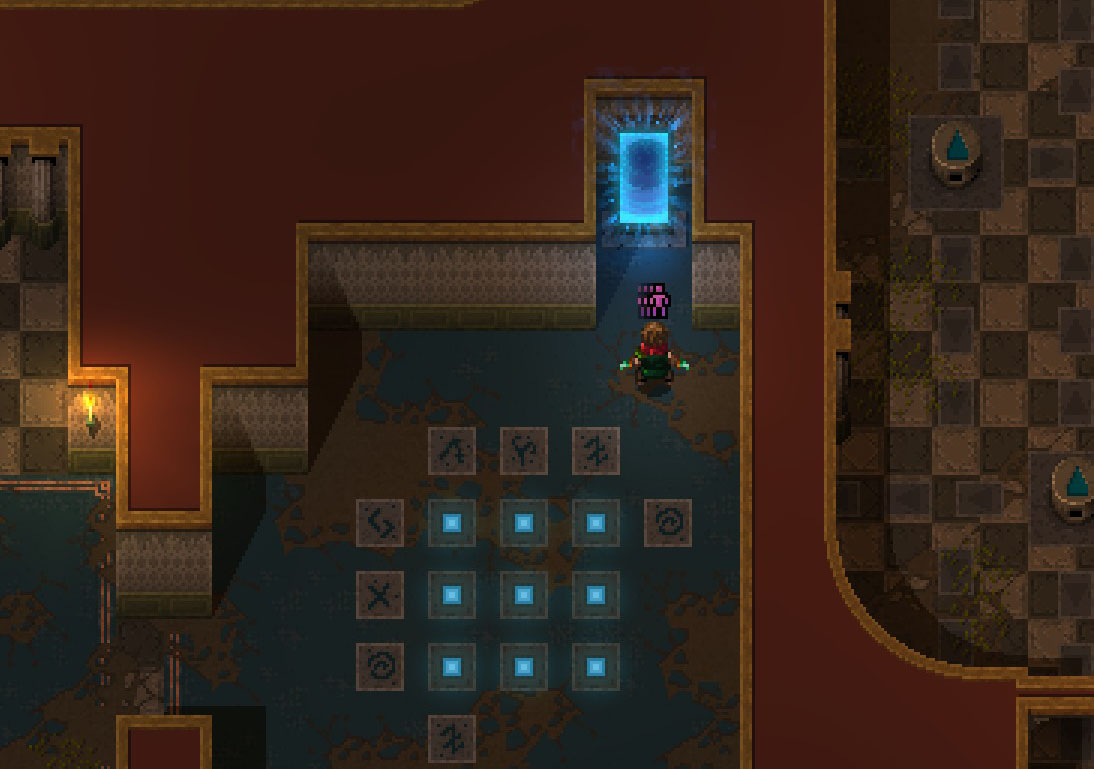
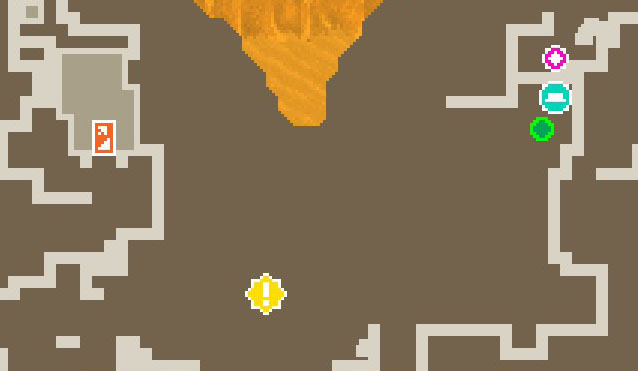
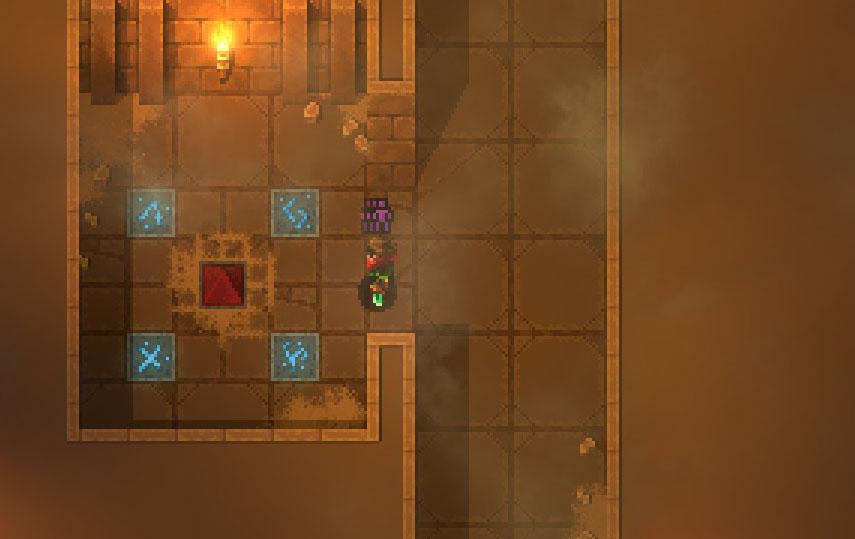
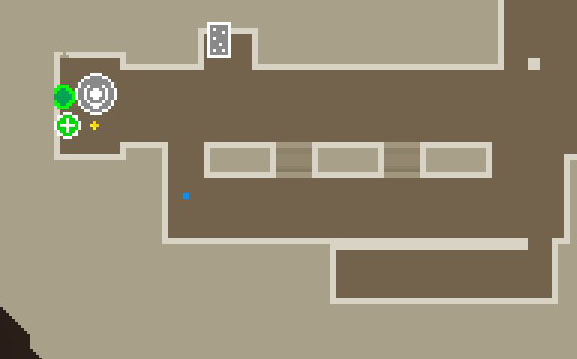
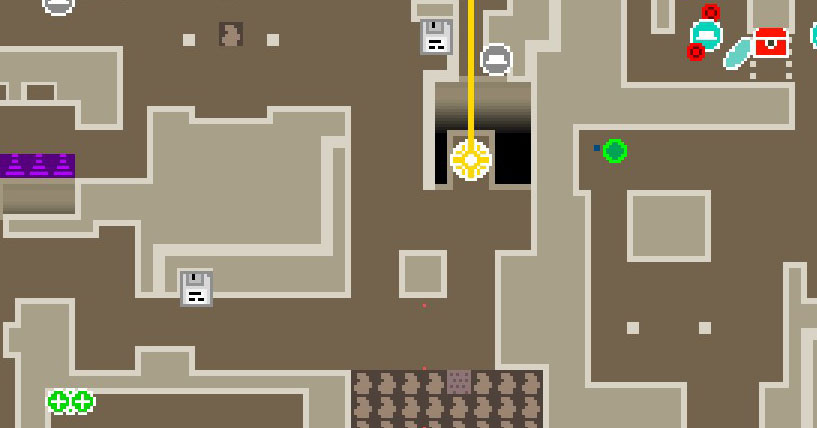
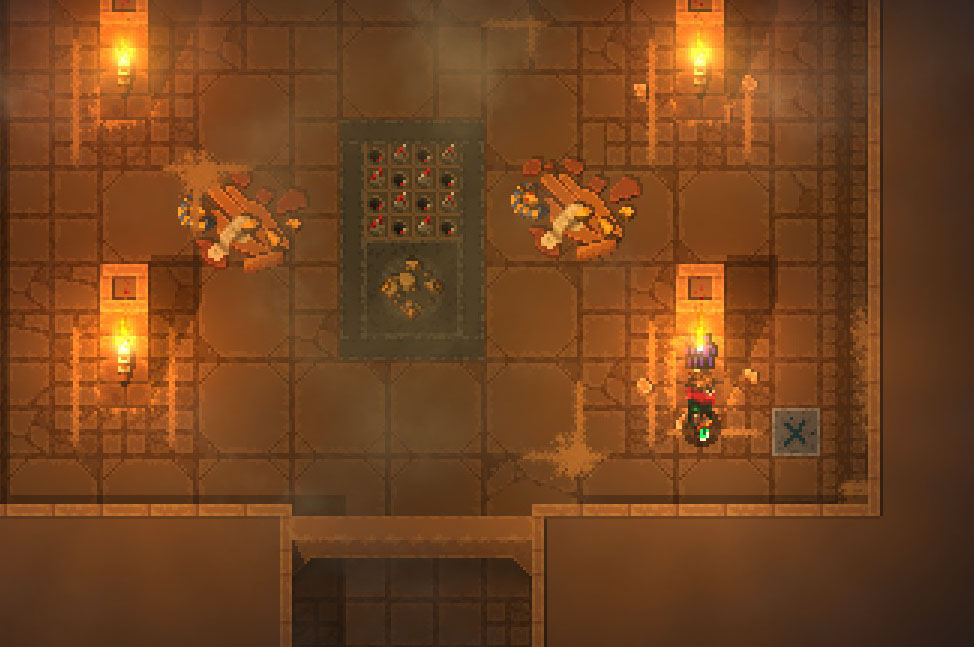
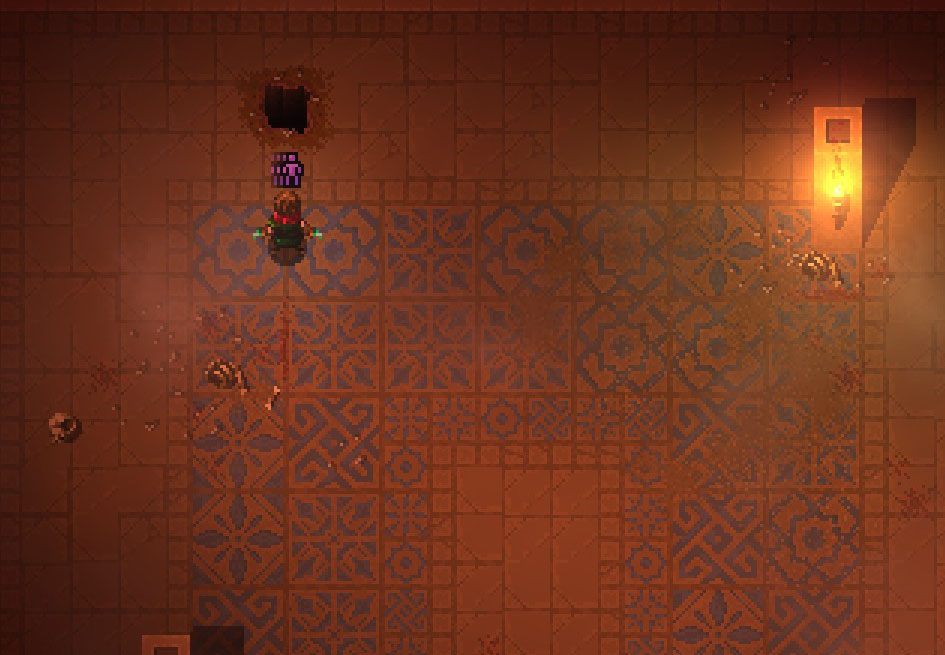
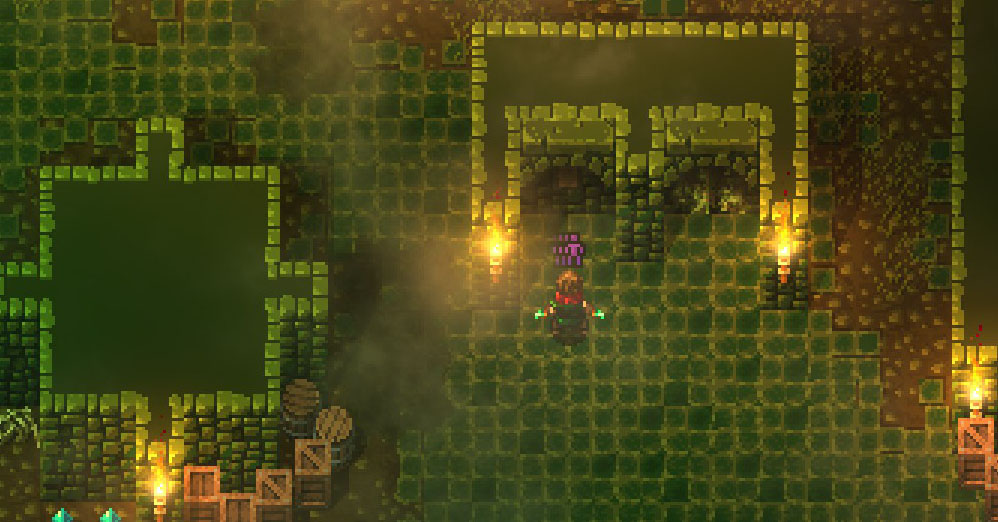
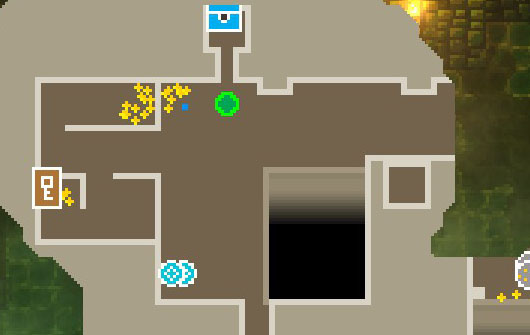
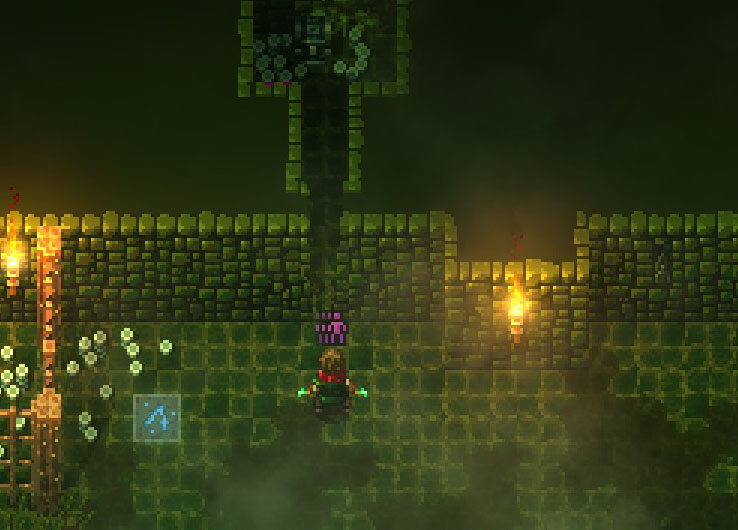
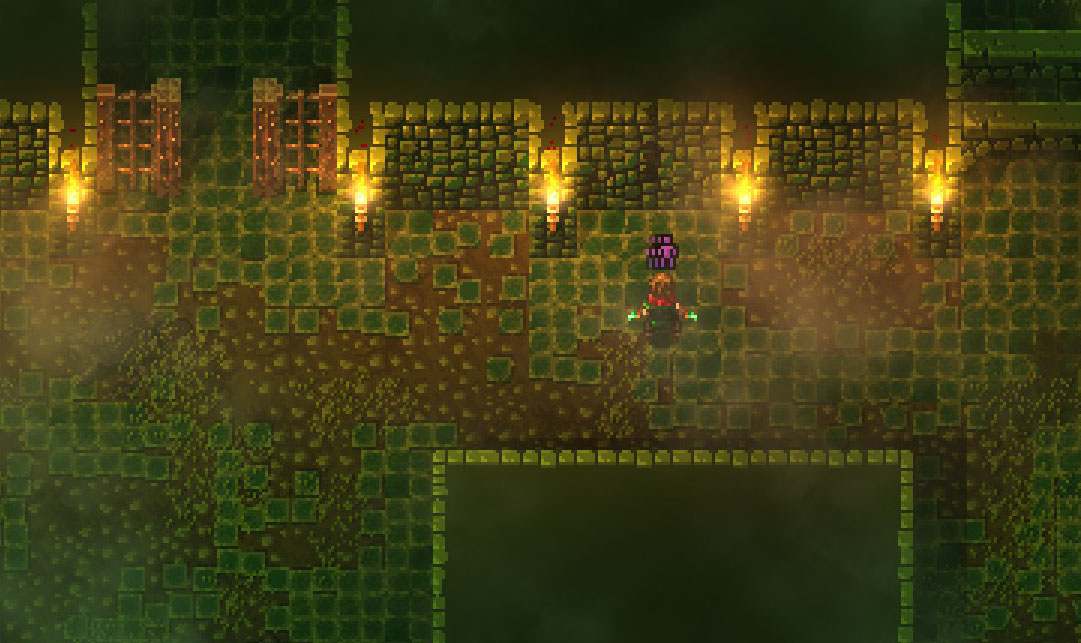
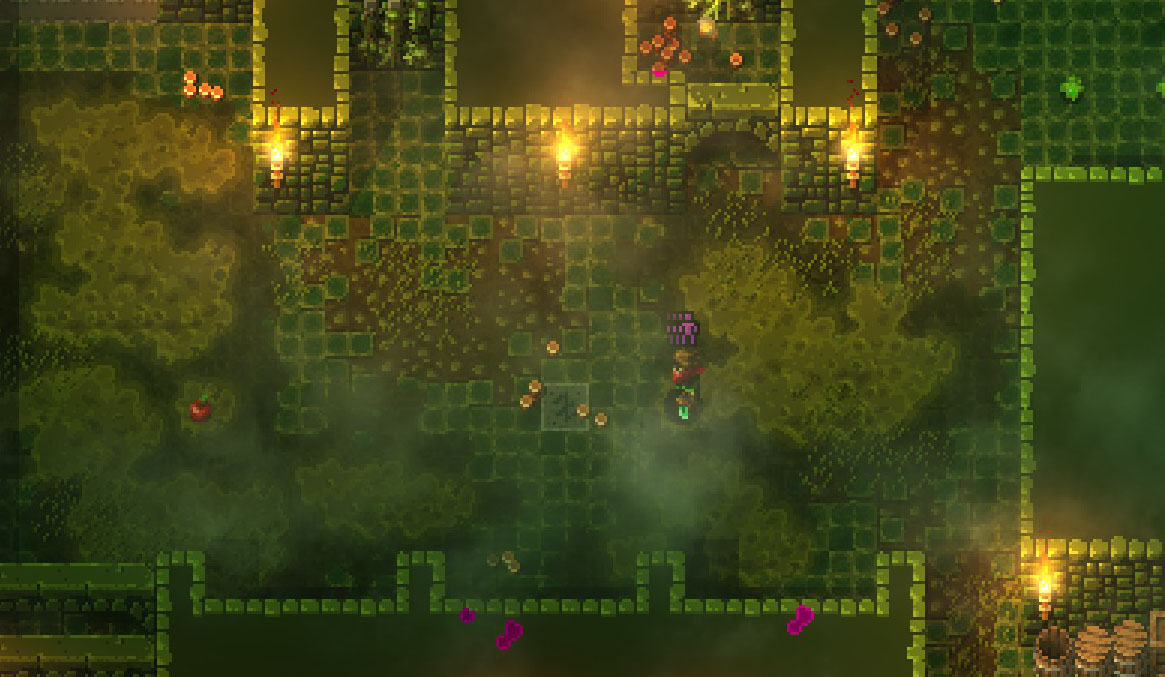
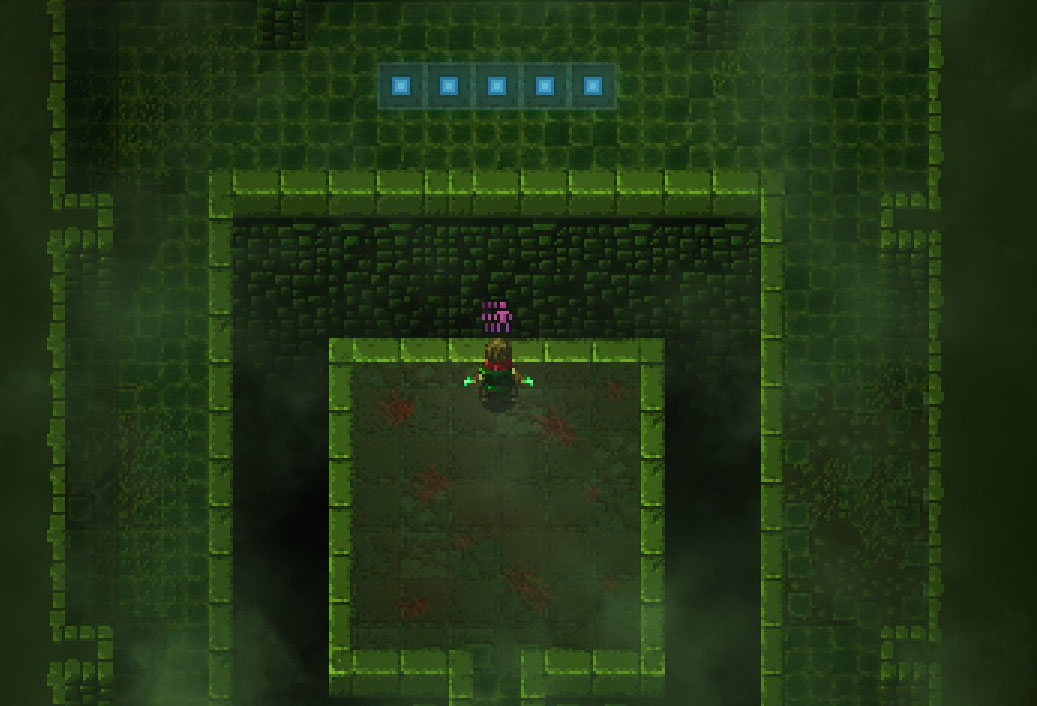
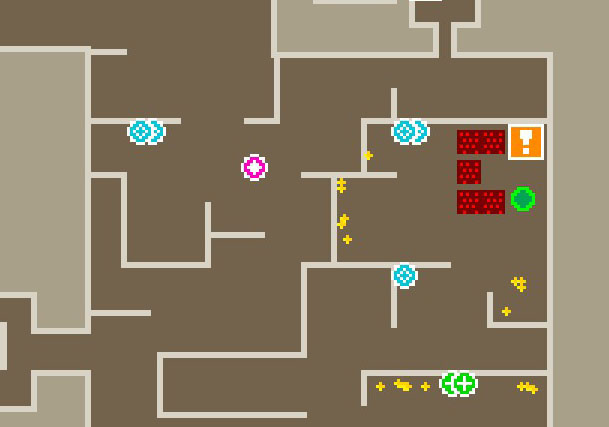
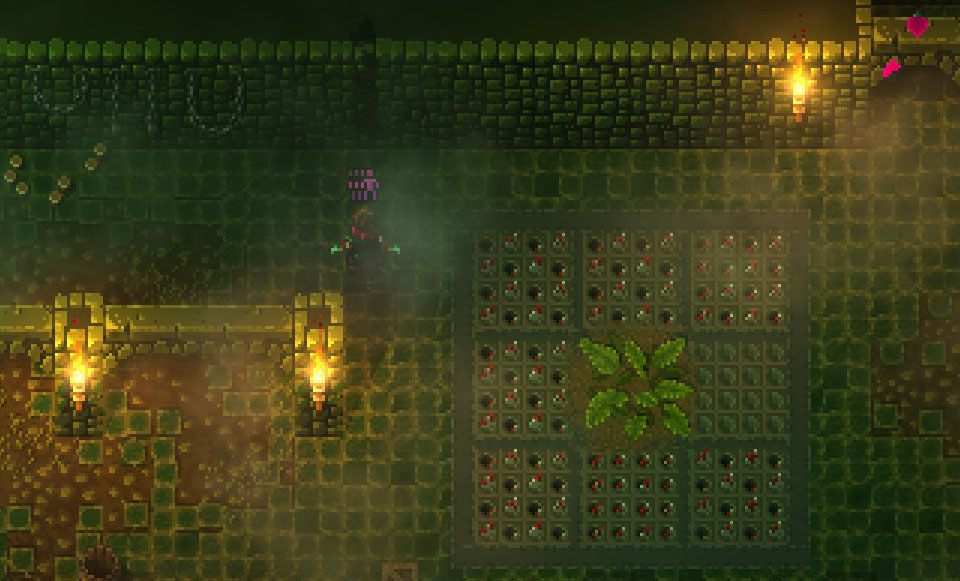
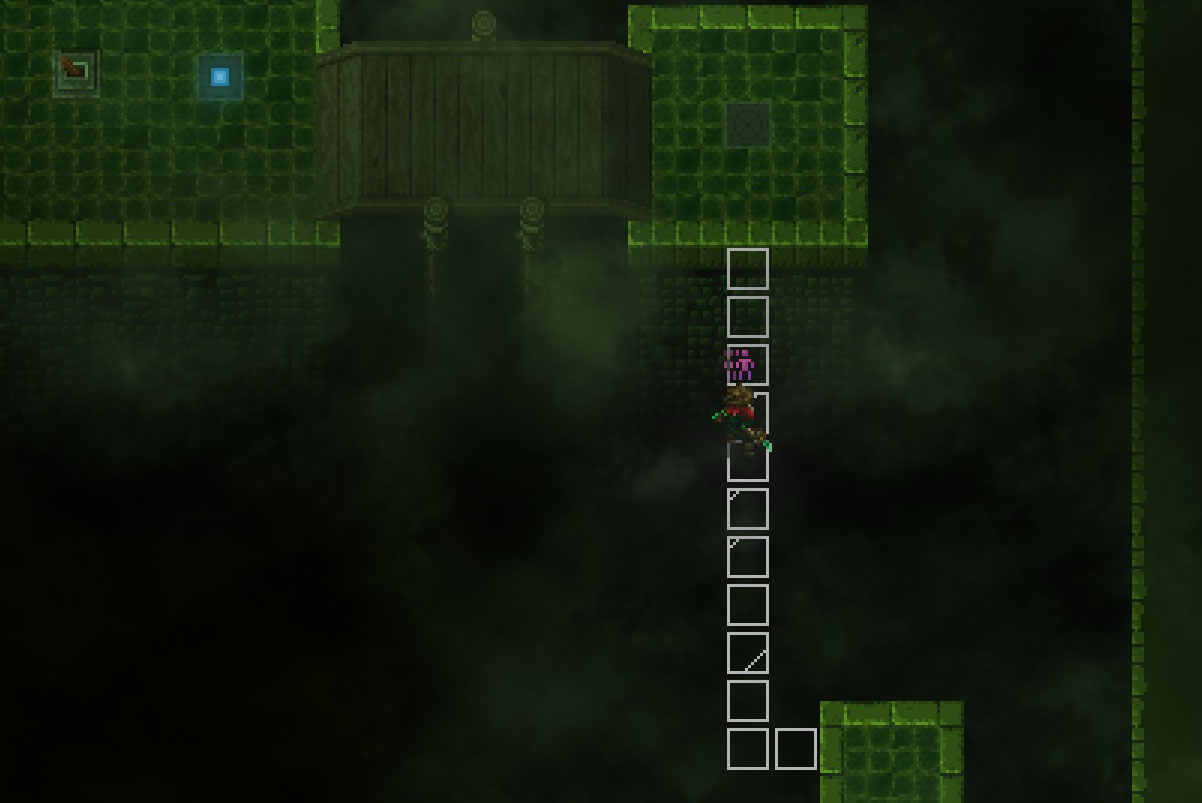
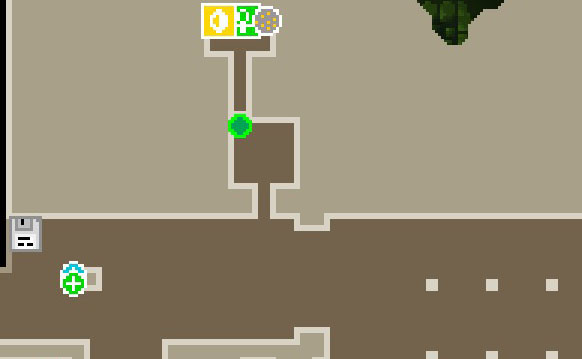
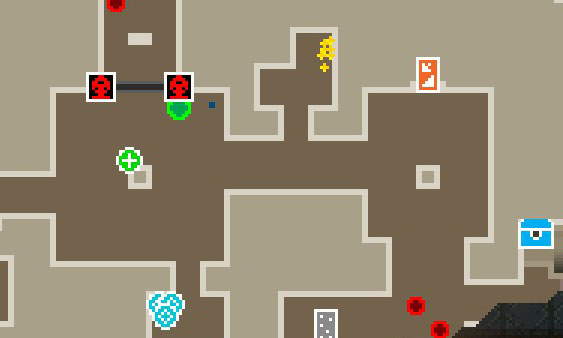
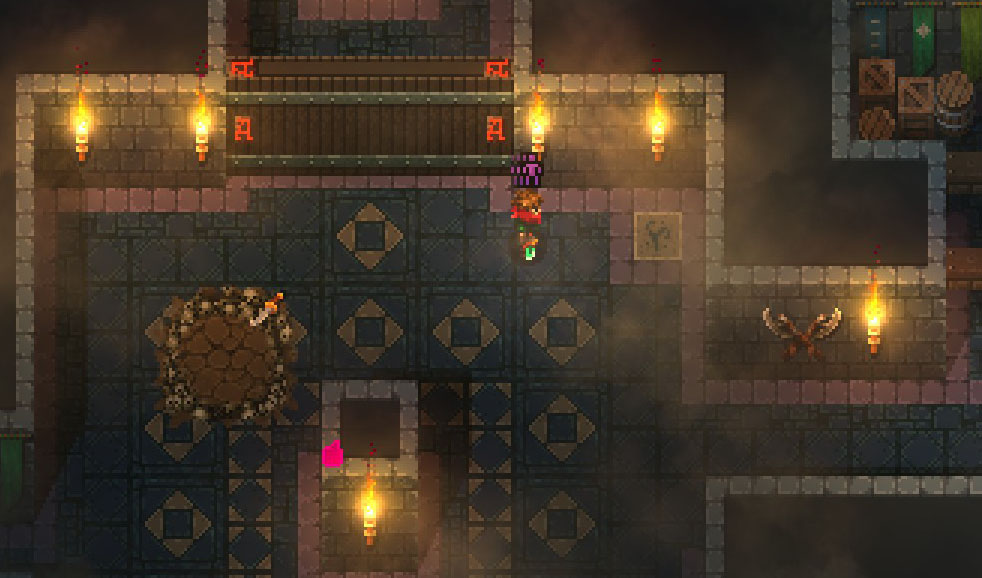
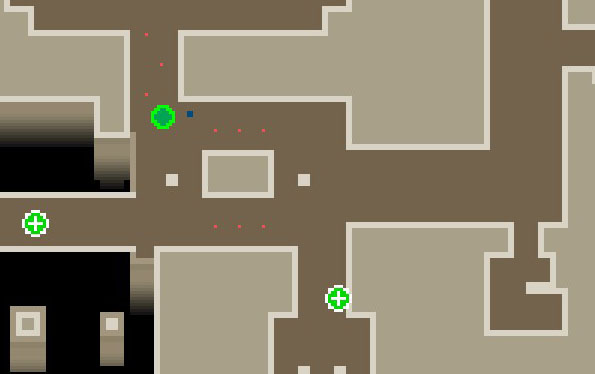
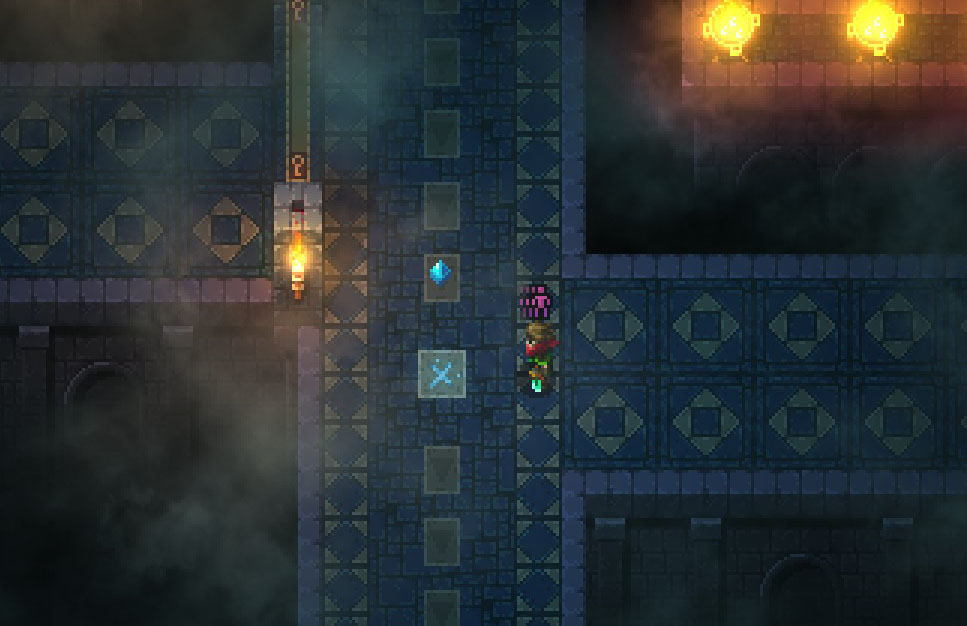
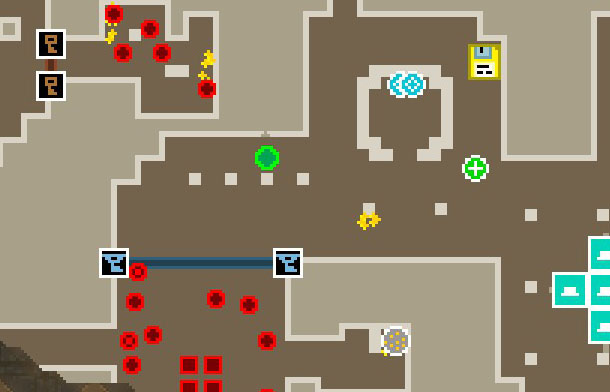
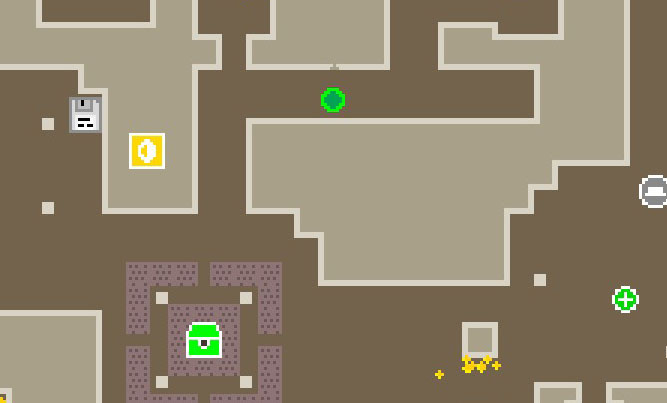
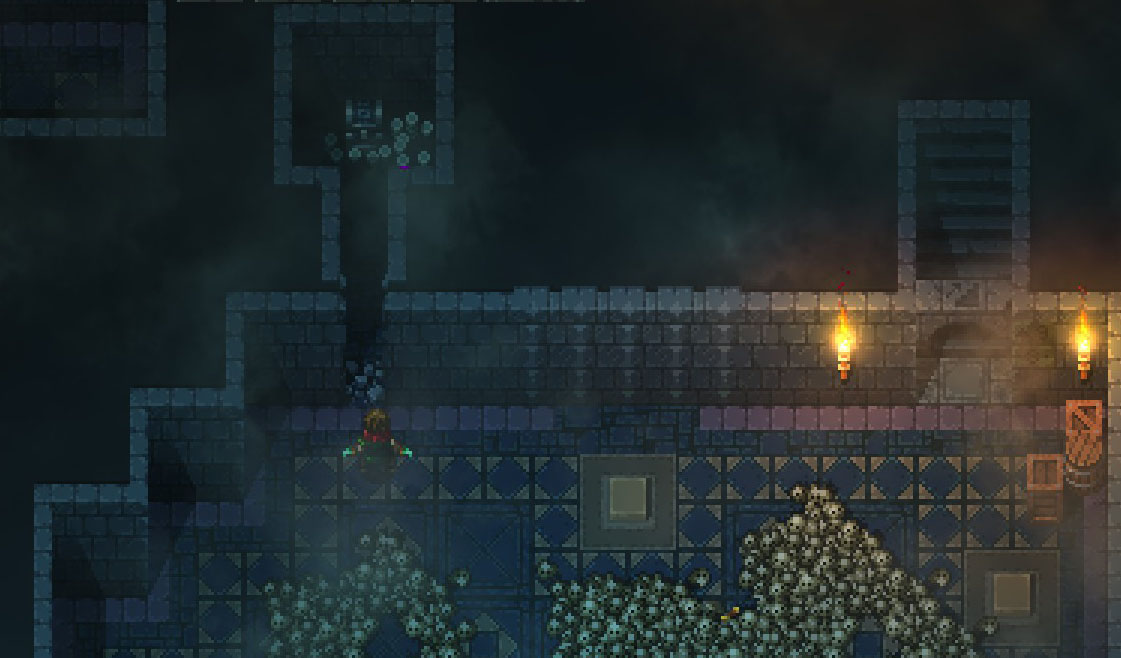
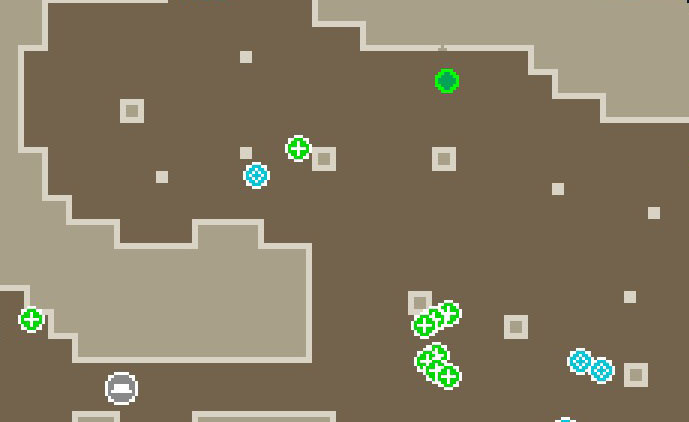
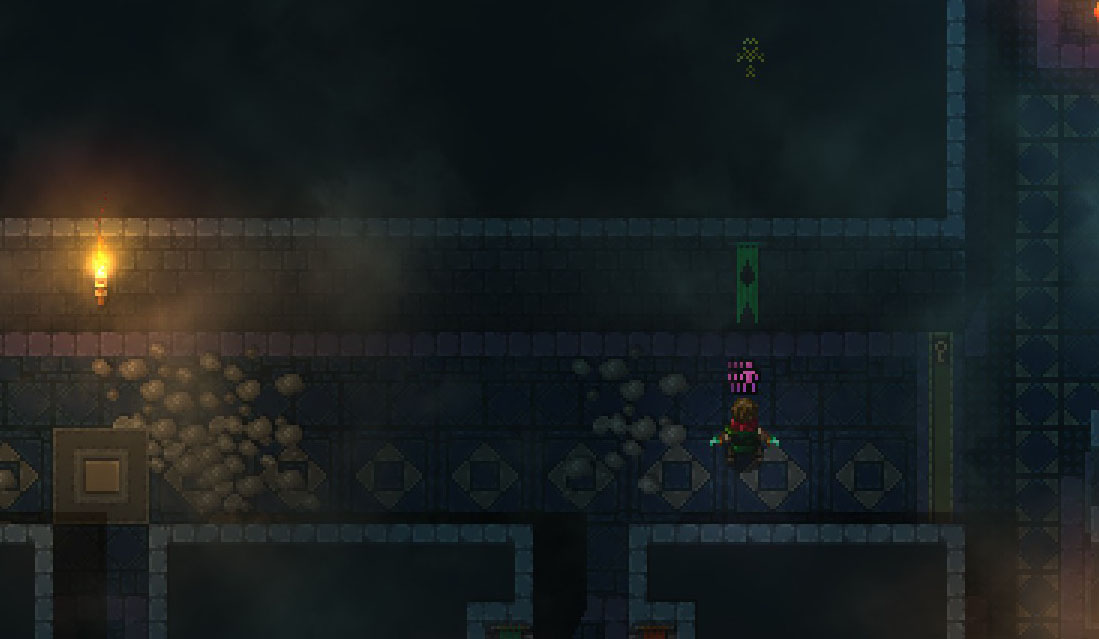
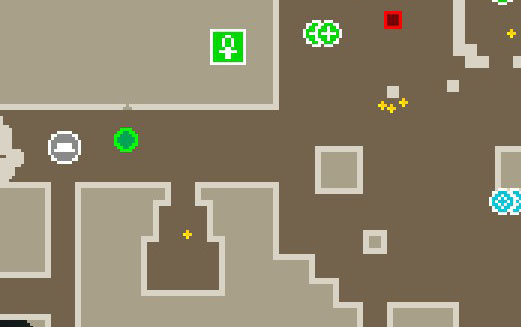
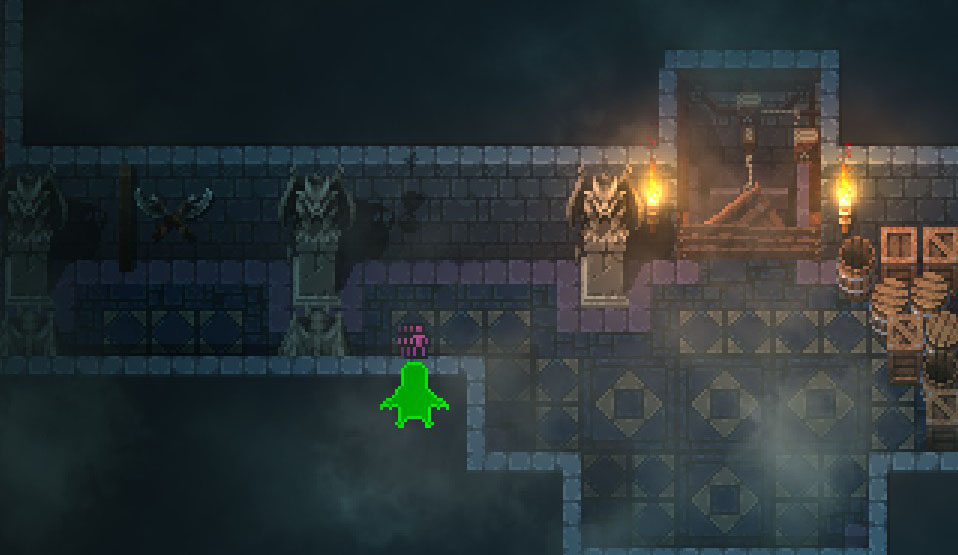
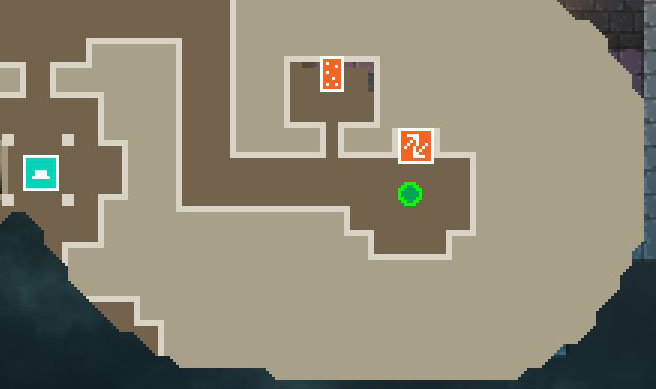
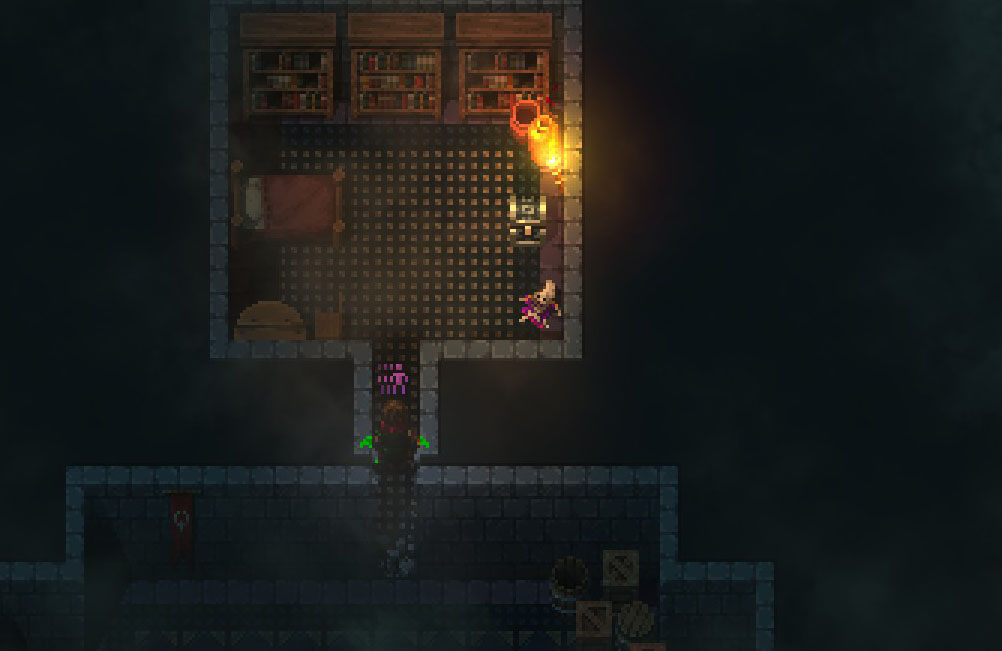
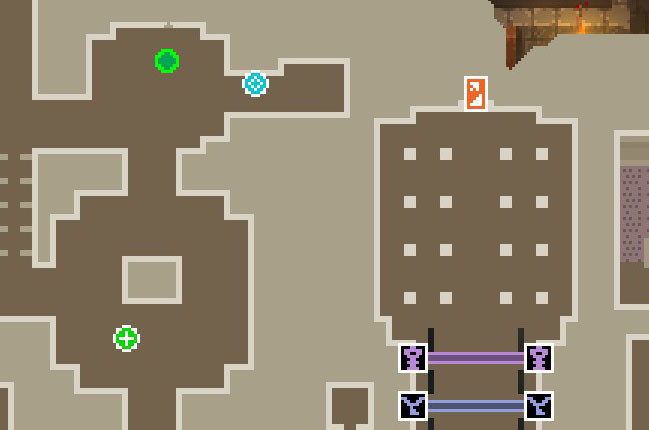
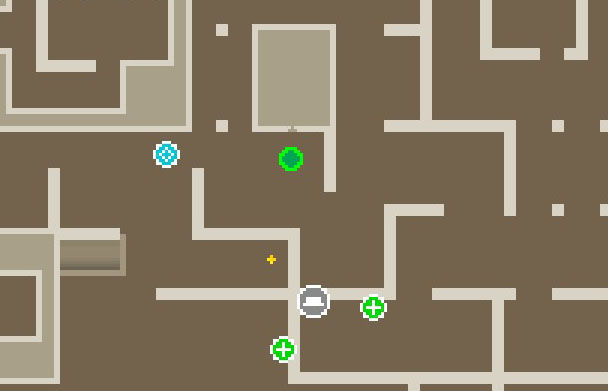
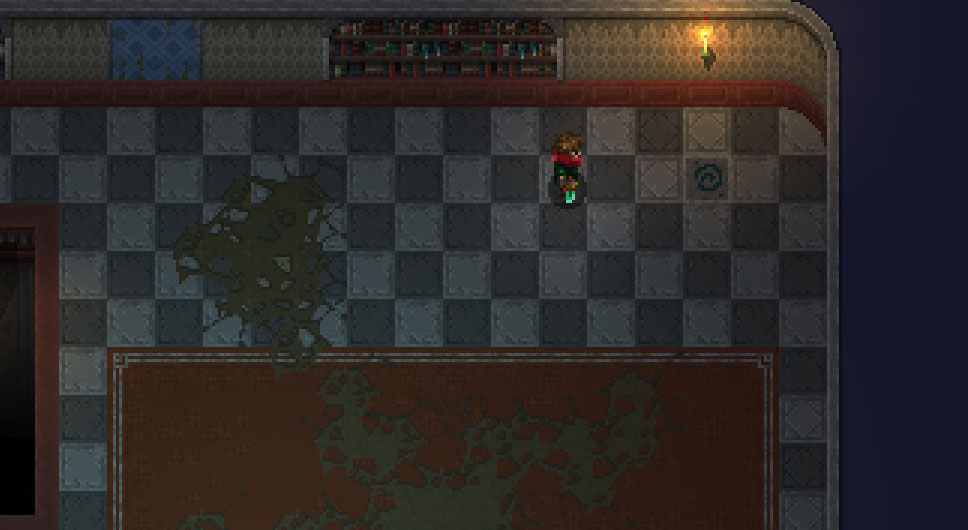
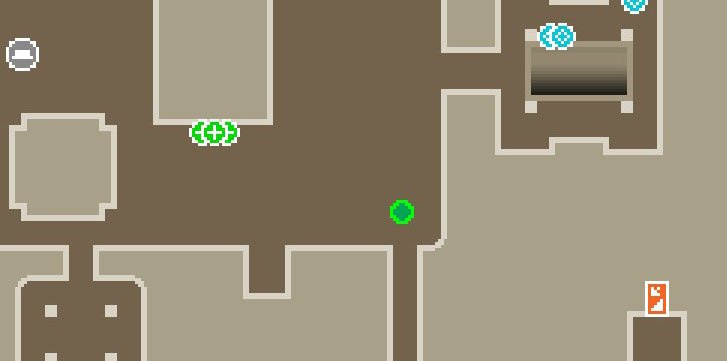
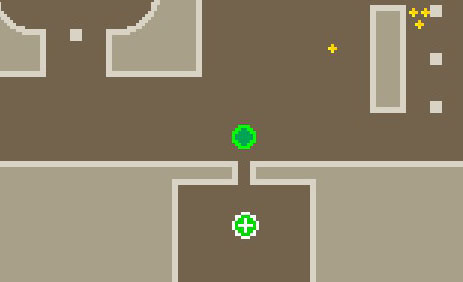
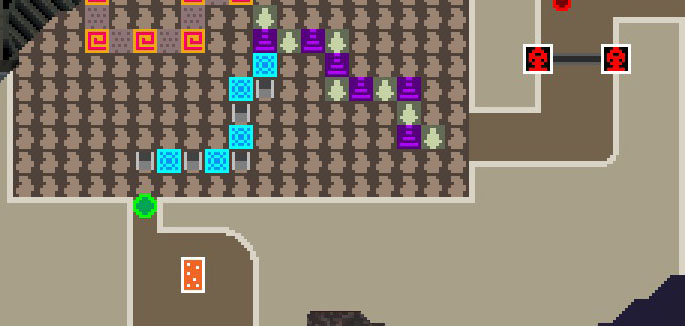
And 1 more on Floor 2 near the lever puzzle
https://gtm.steamproxy.vip/sharedfiles/filedetails/?id=3297307157

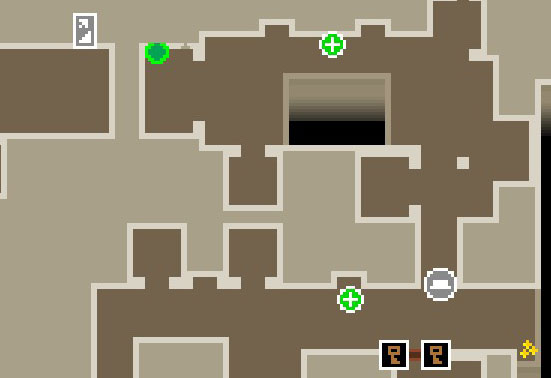
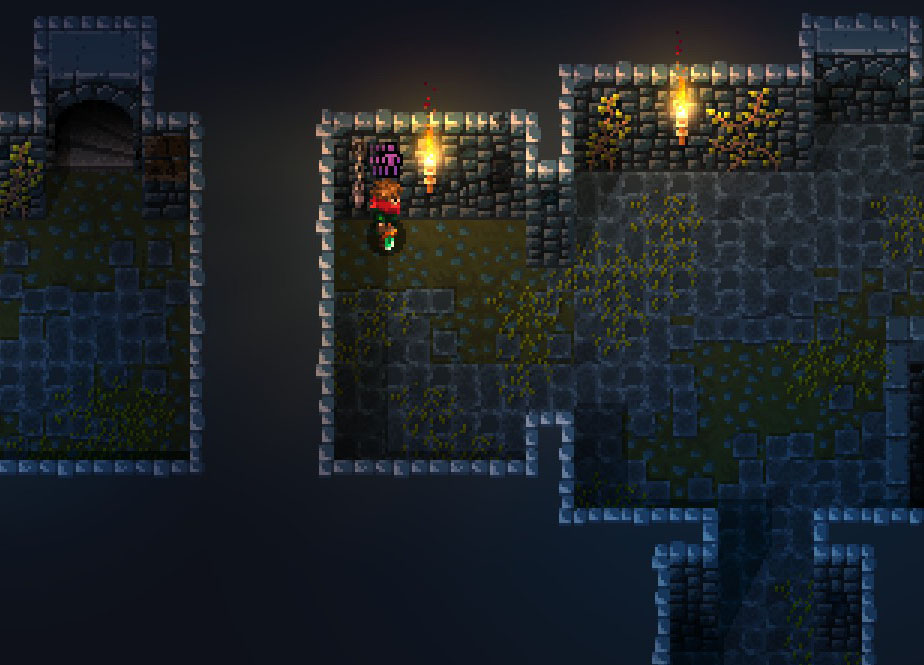
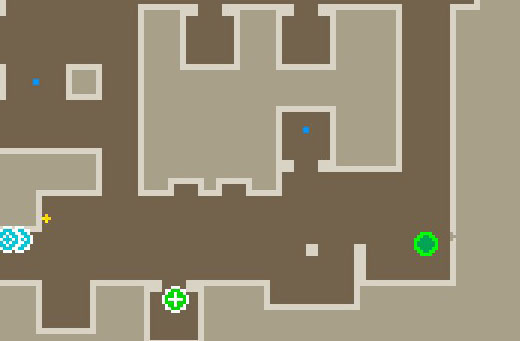
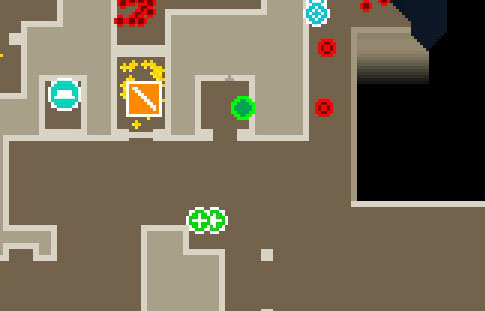
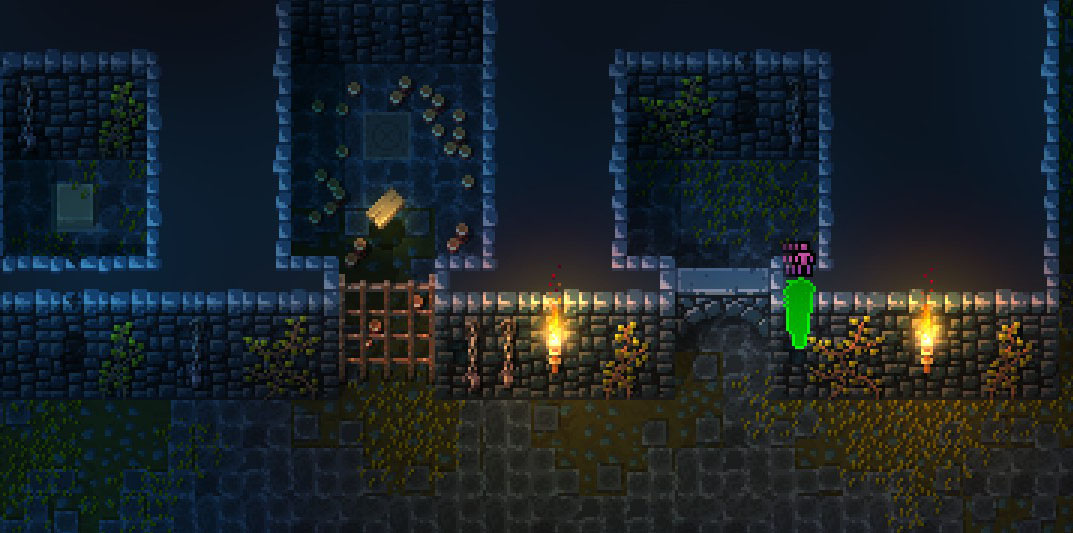
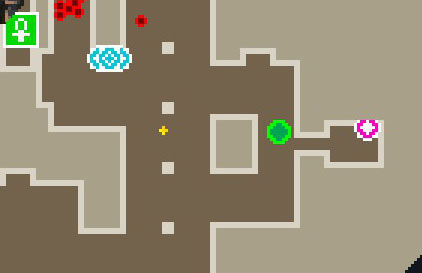
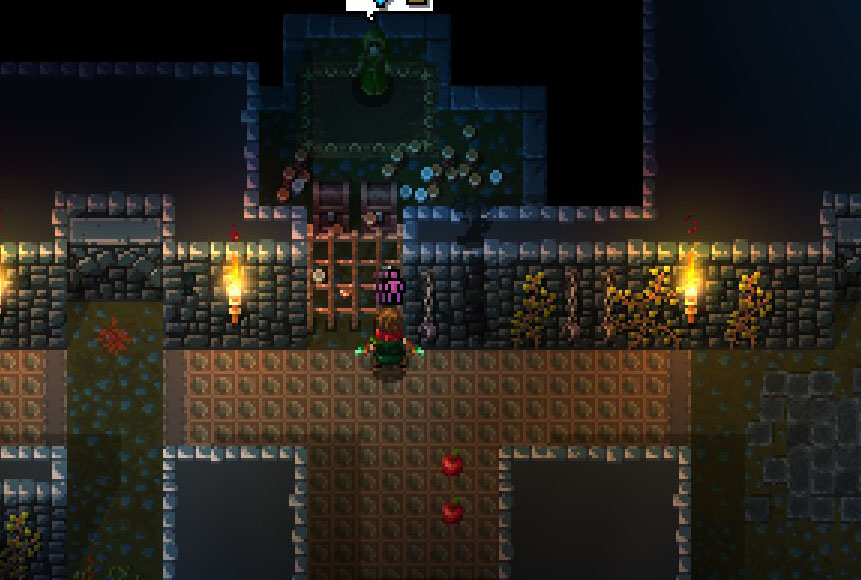
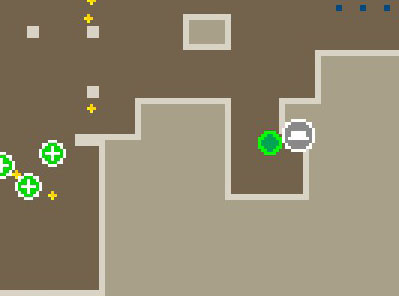
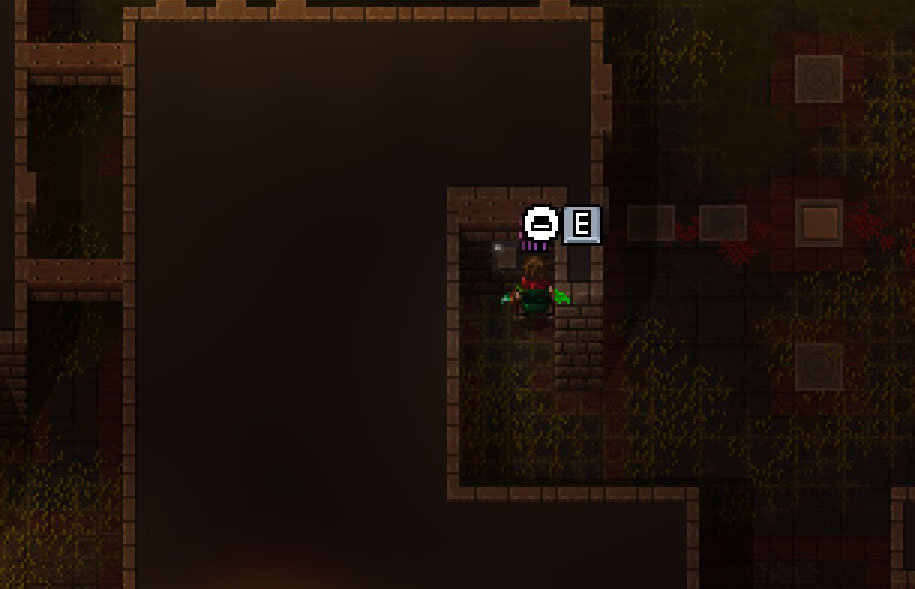
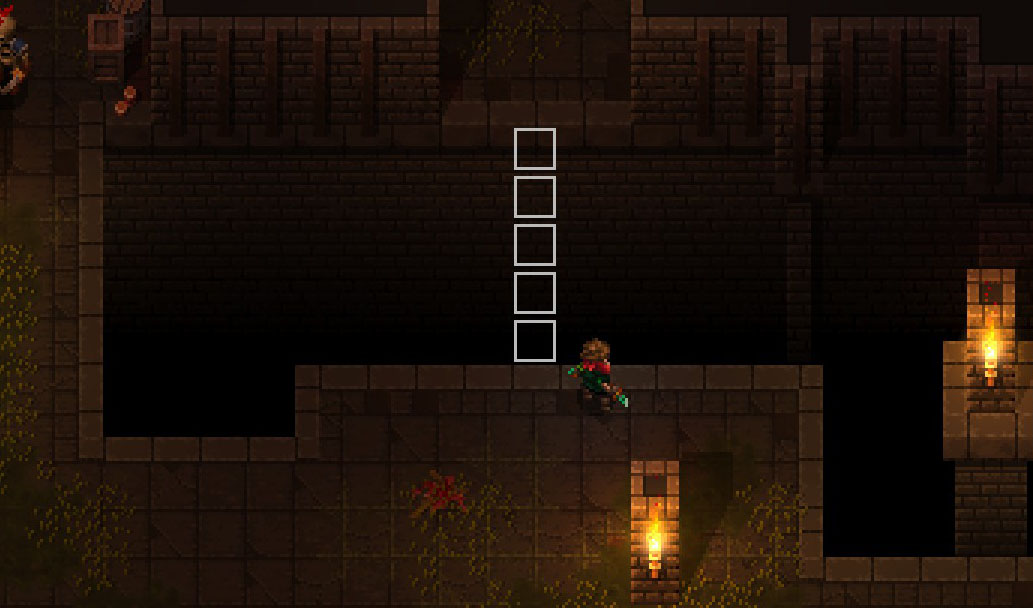
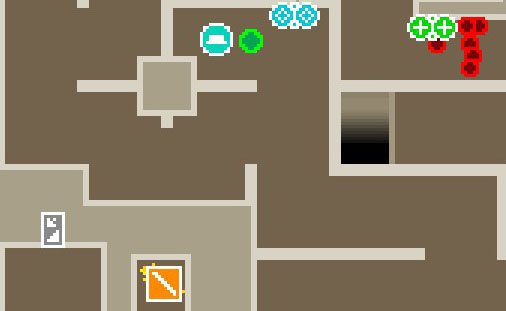
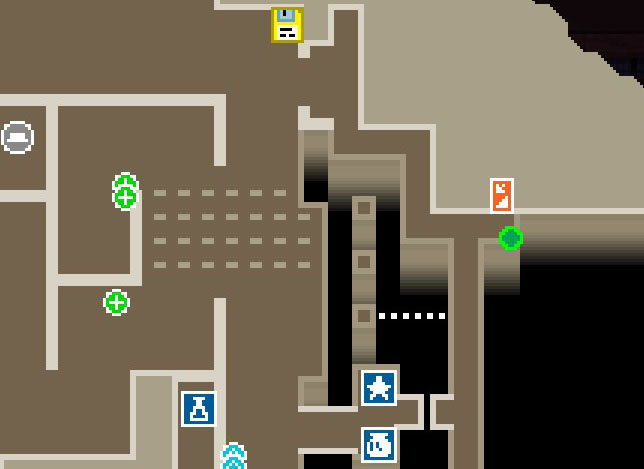
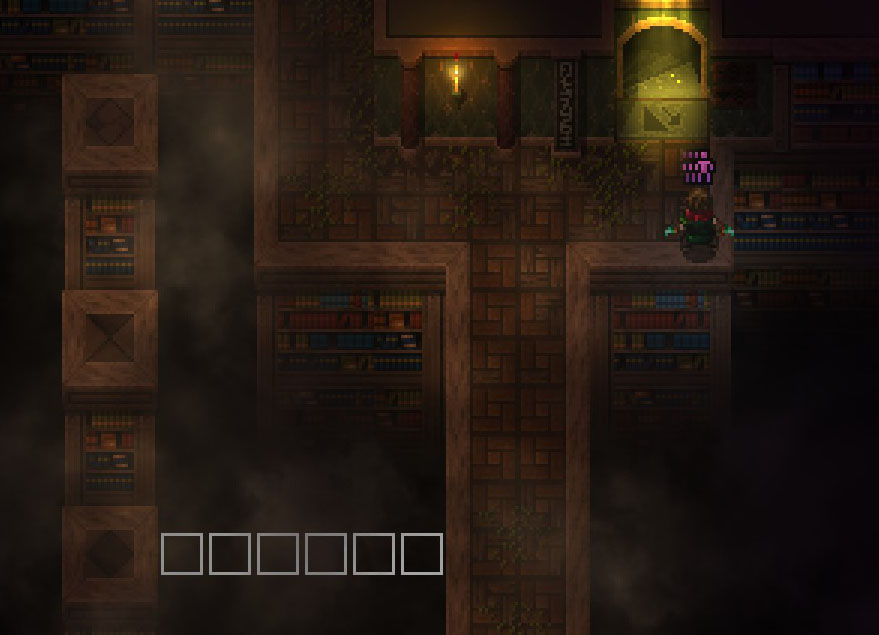
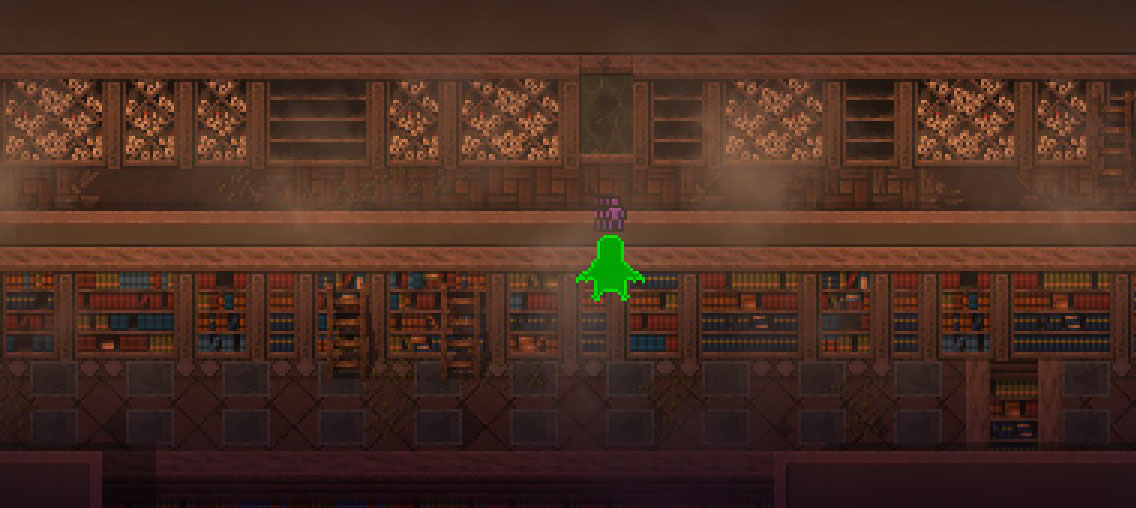
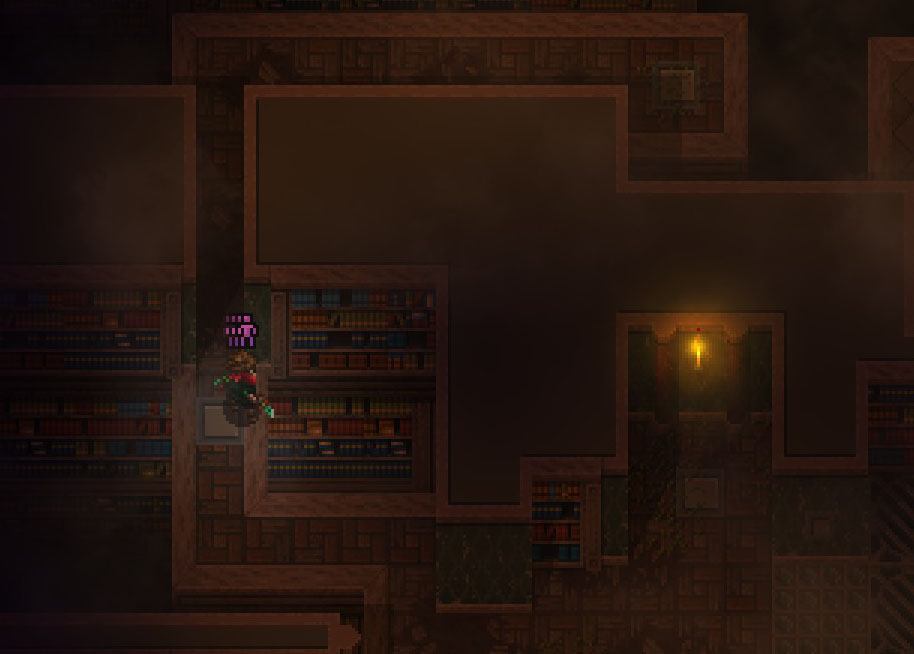
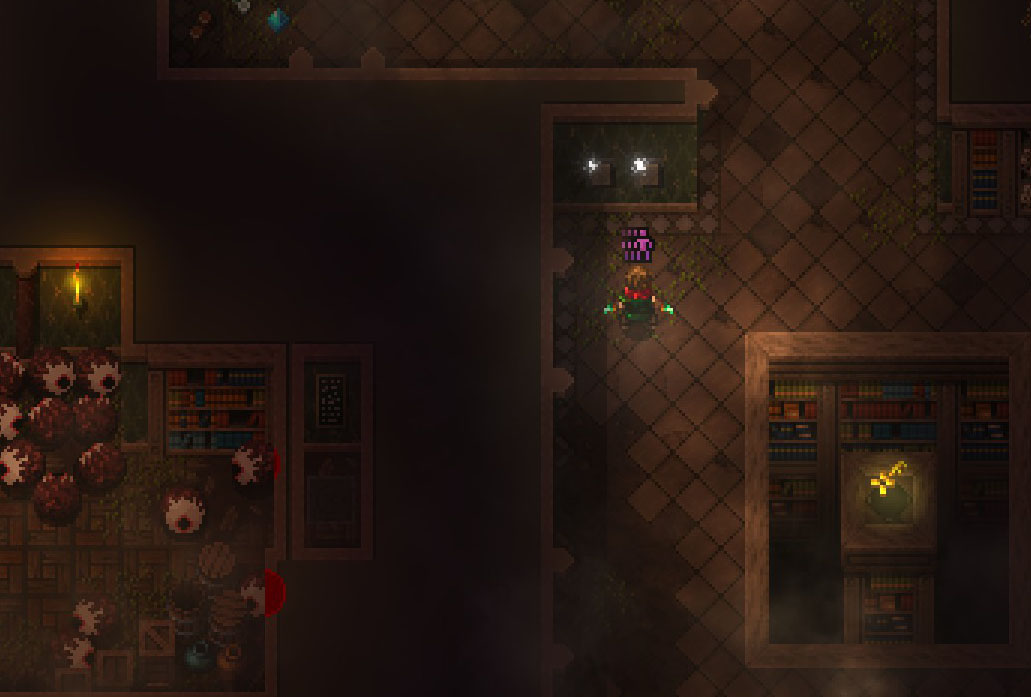
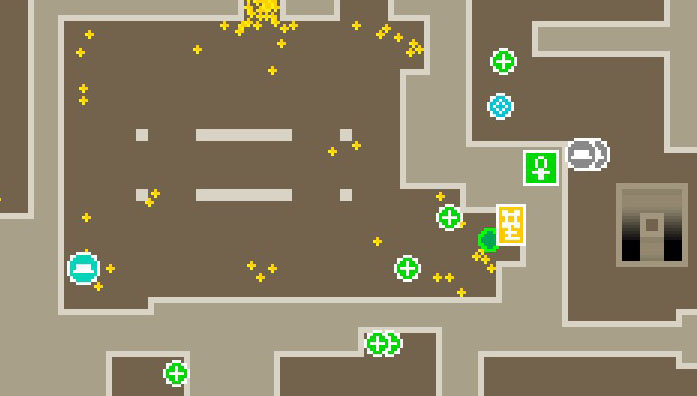
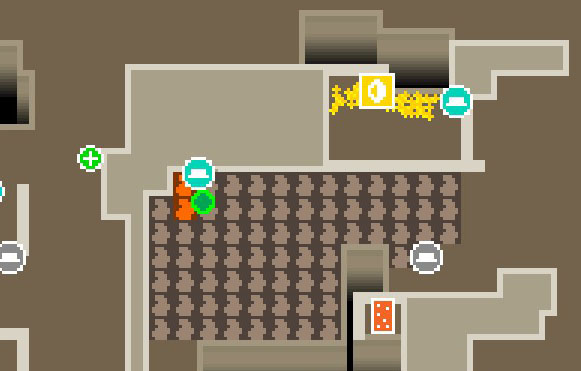
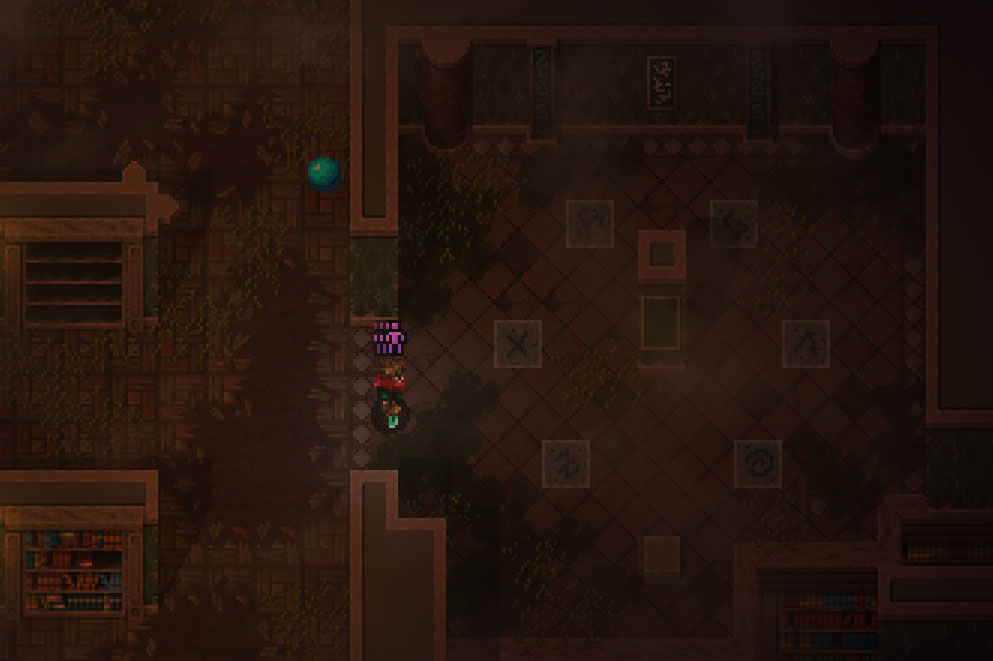
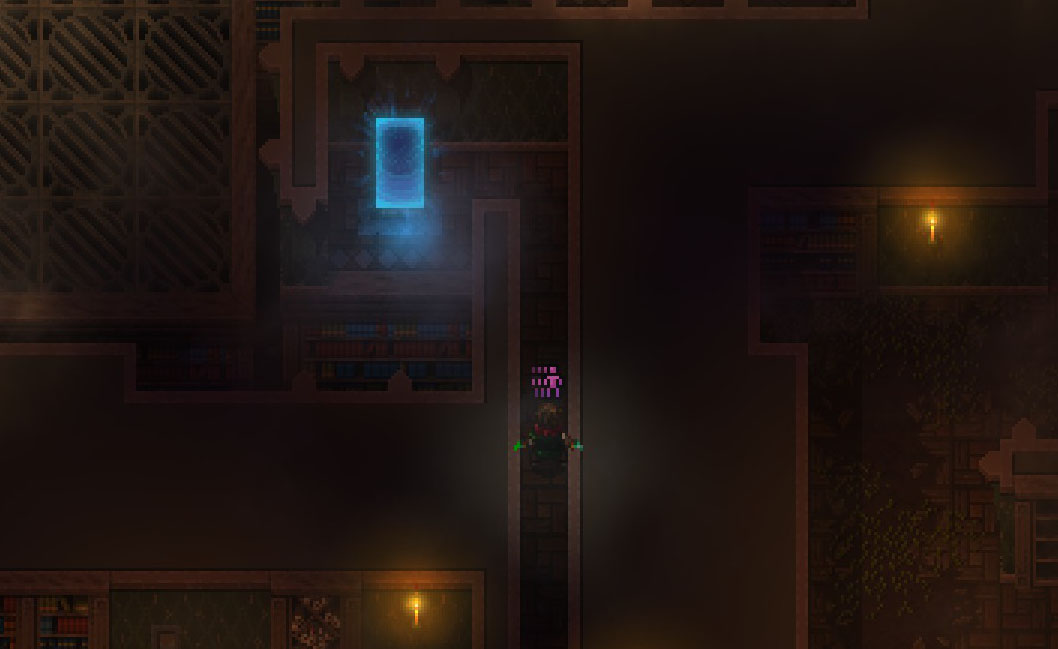
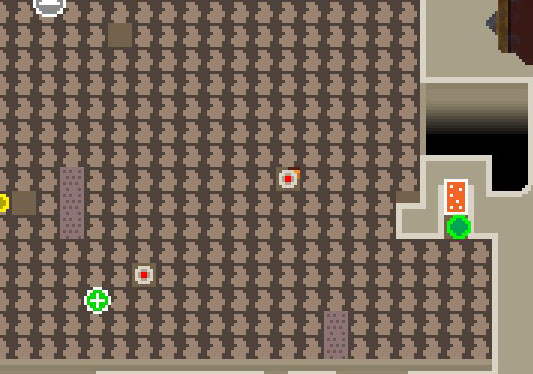
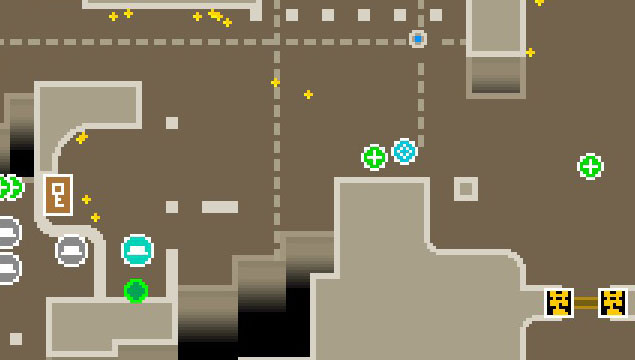
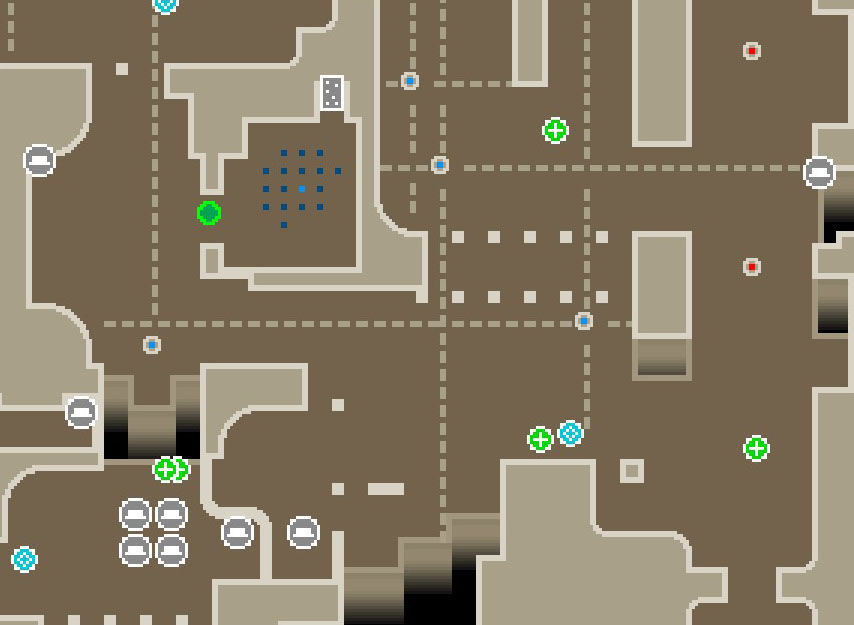
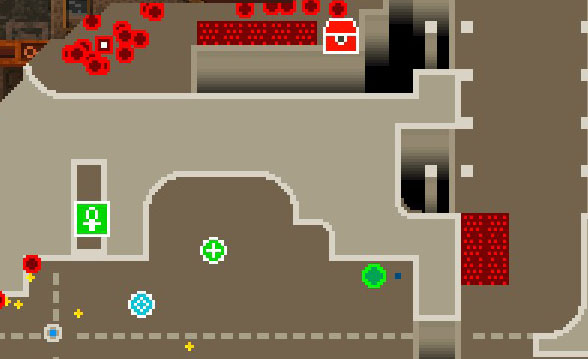
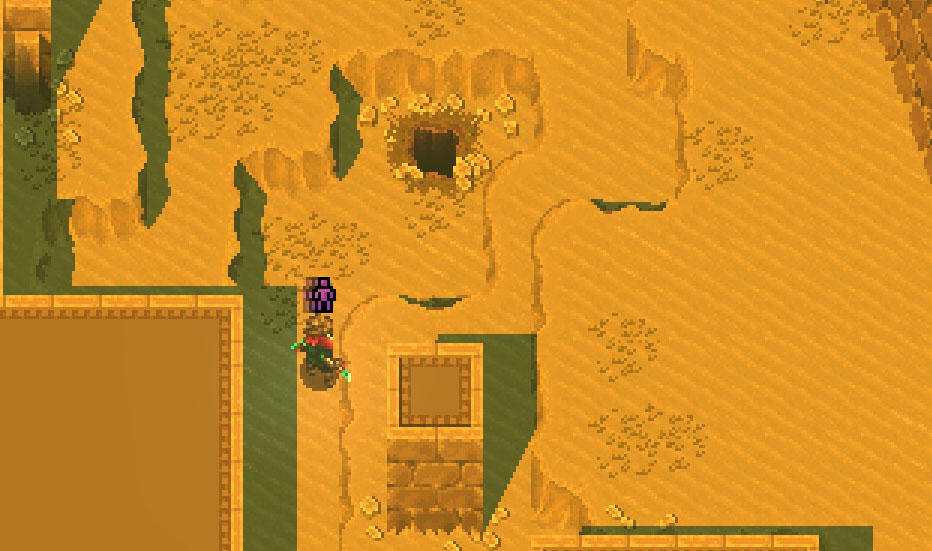
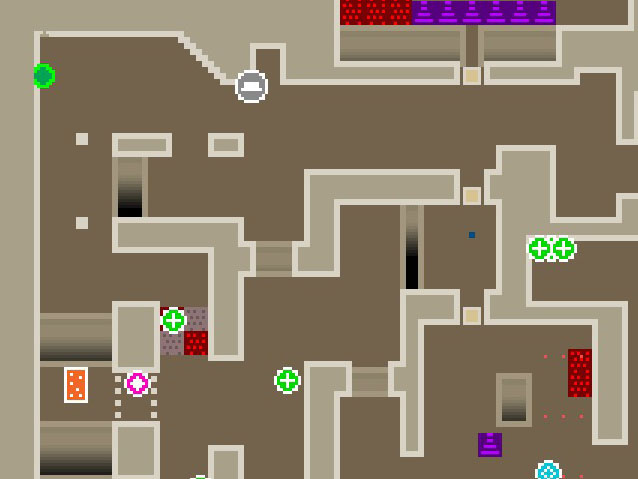
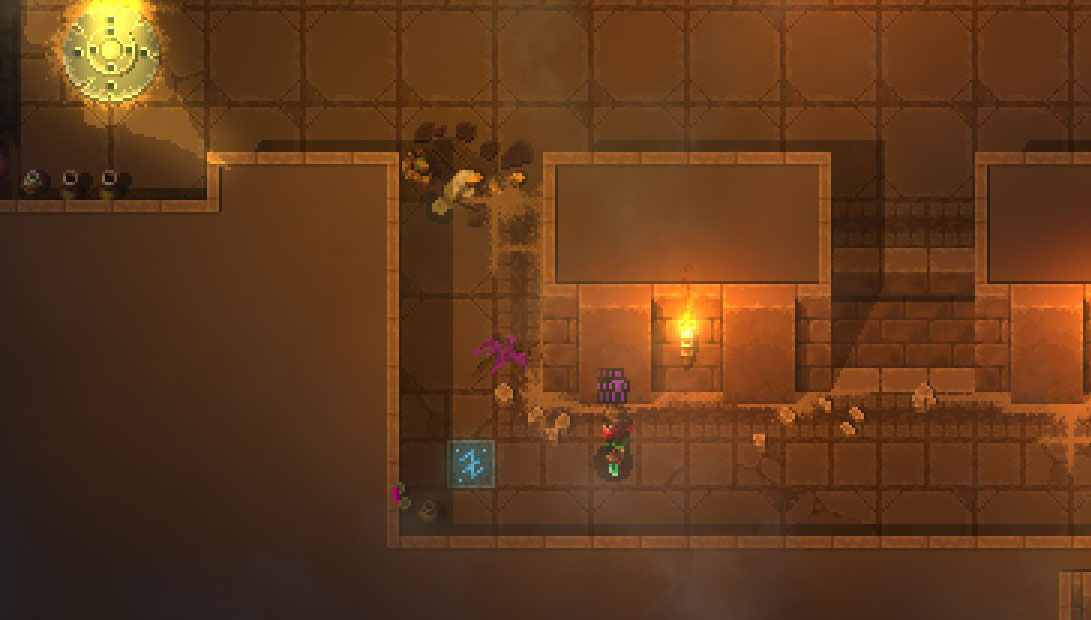
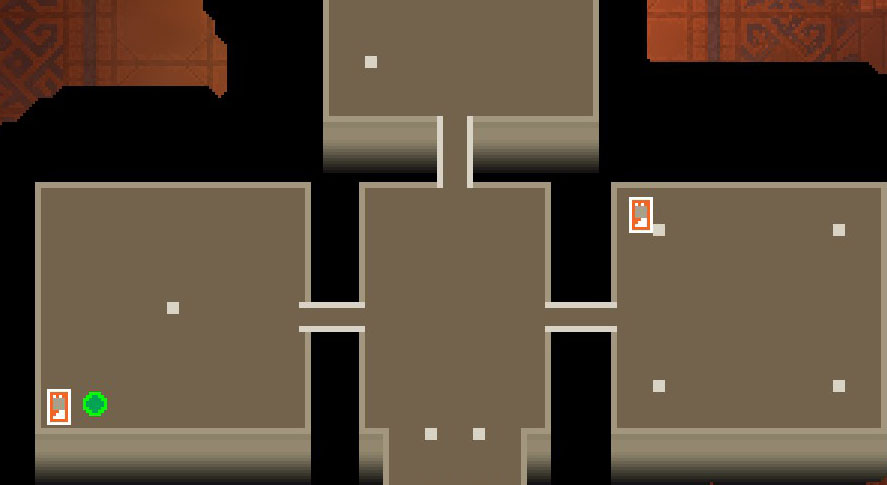
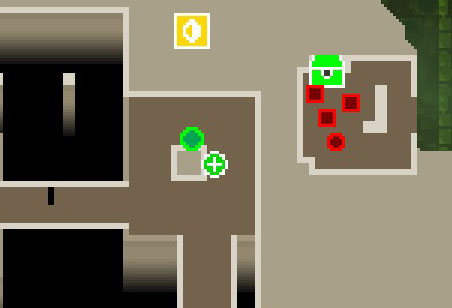
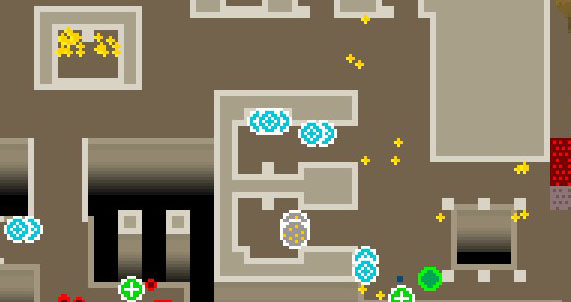
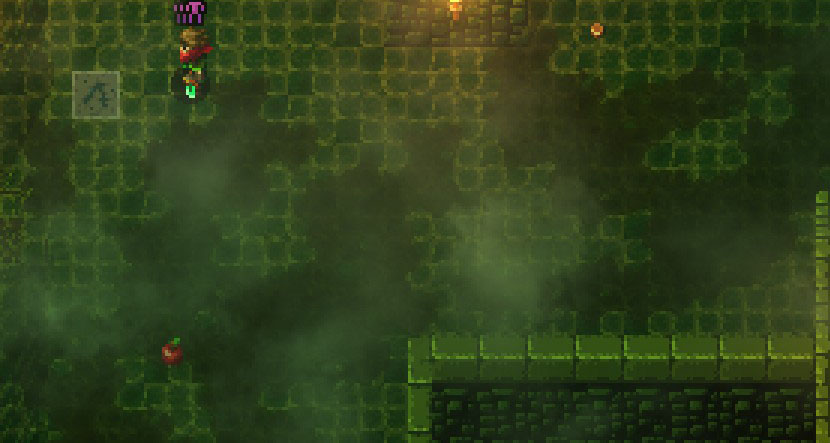
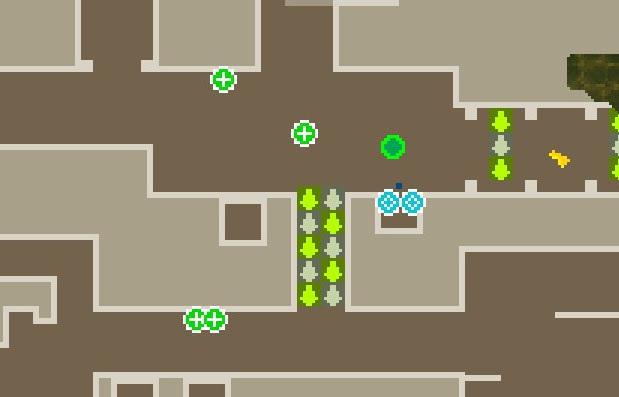
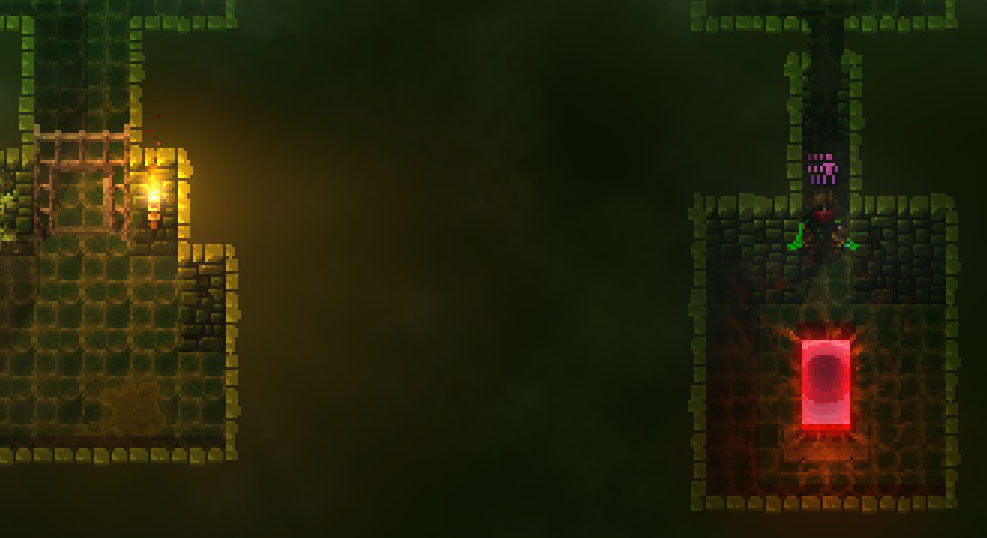
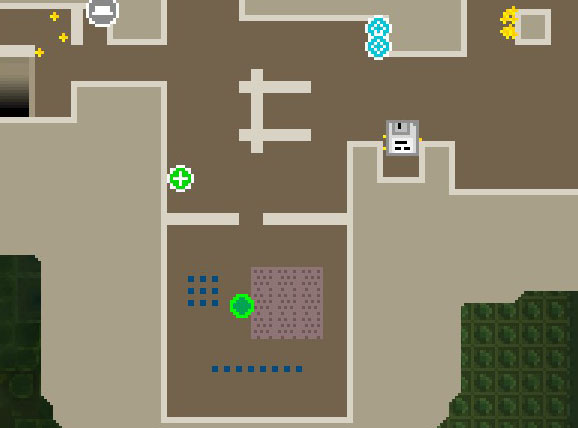
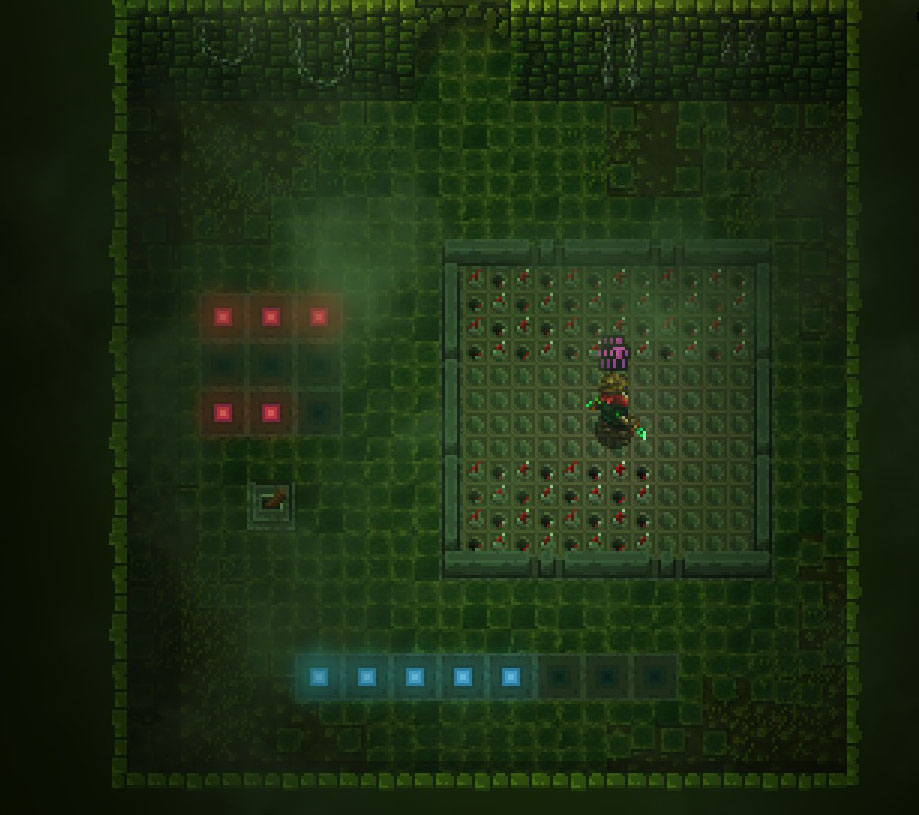
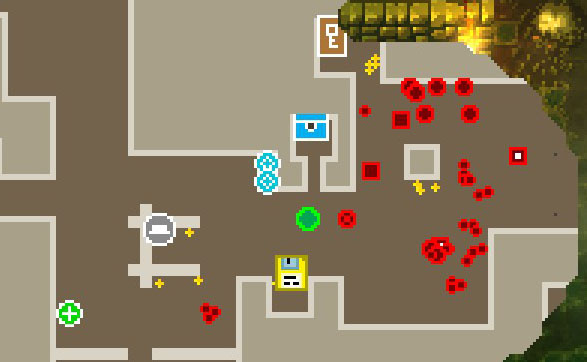
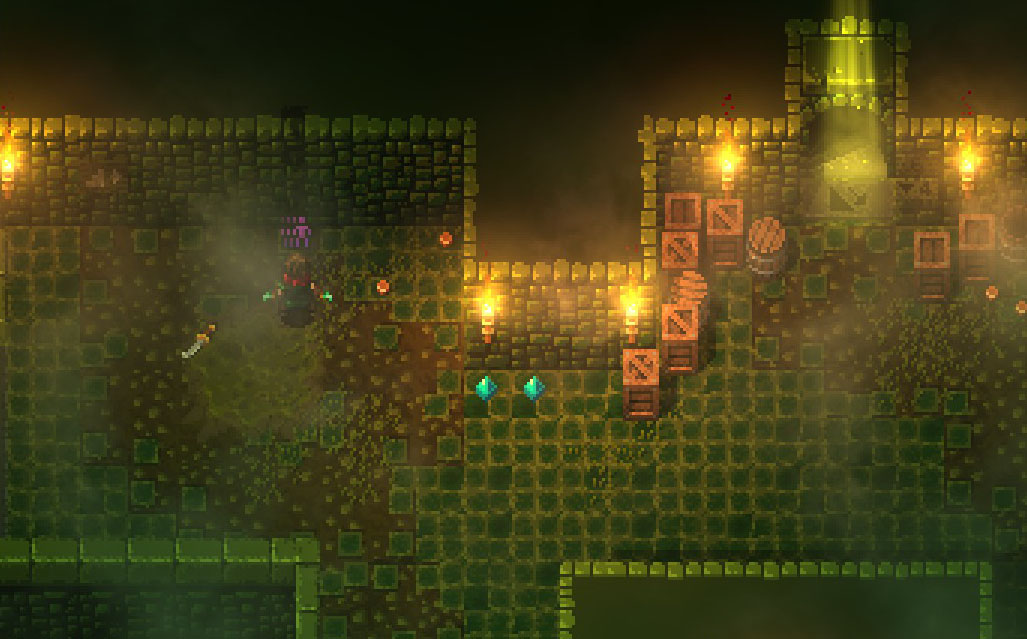
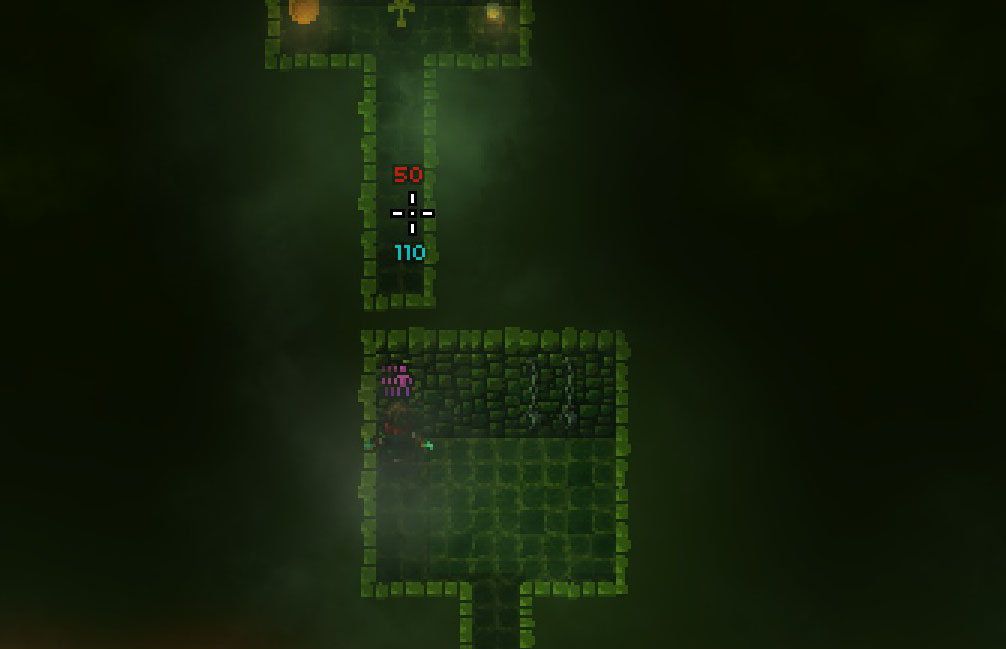
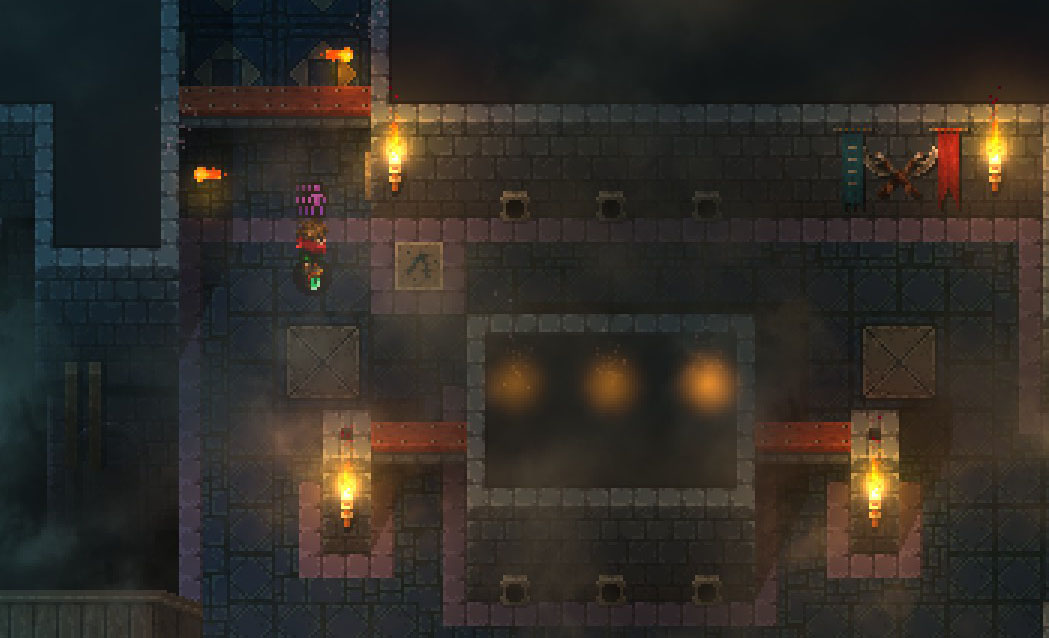
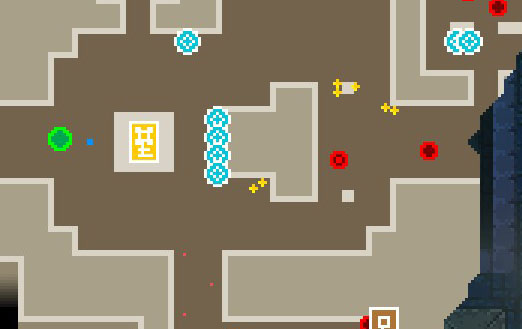
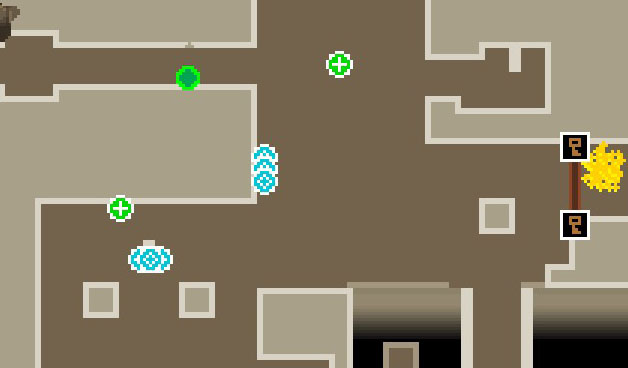
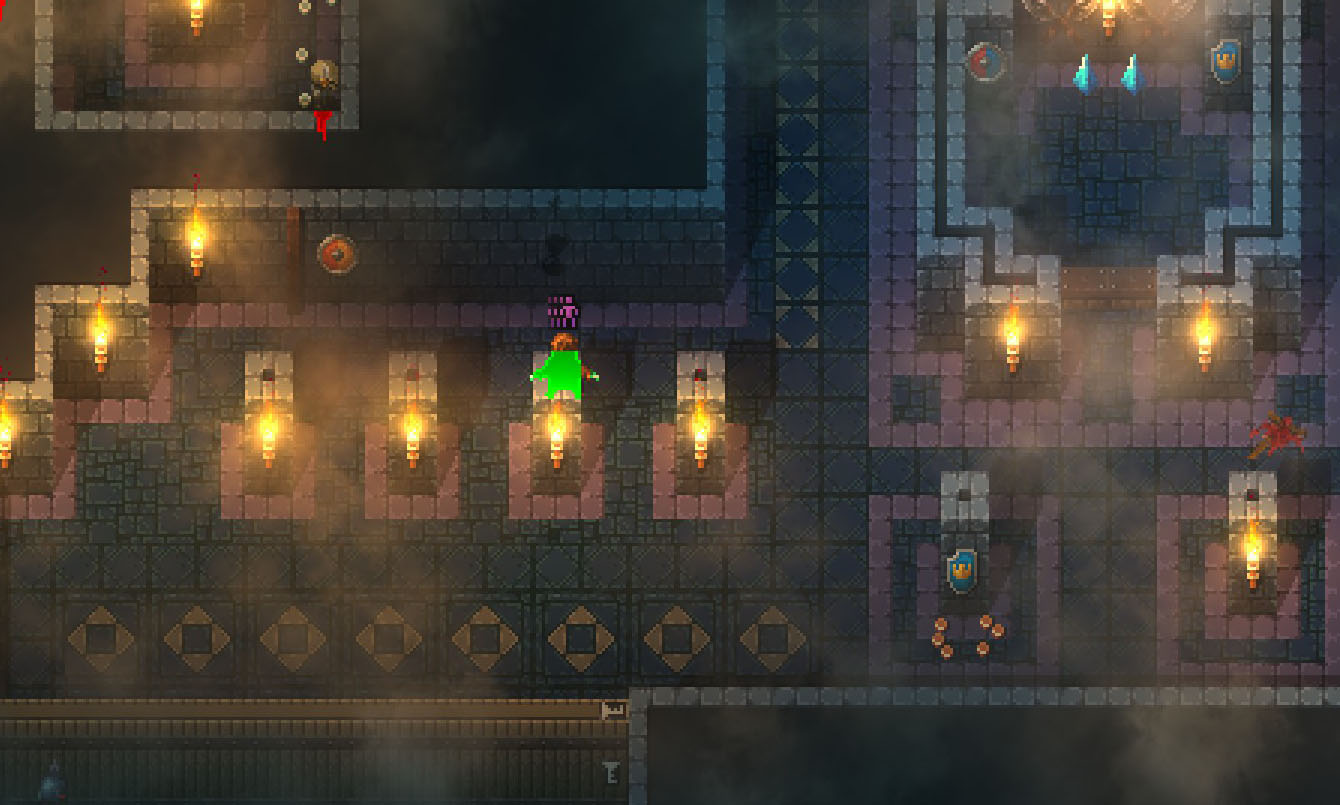
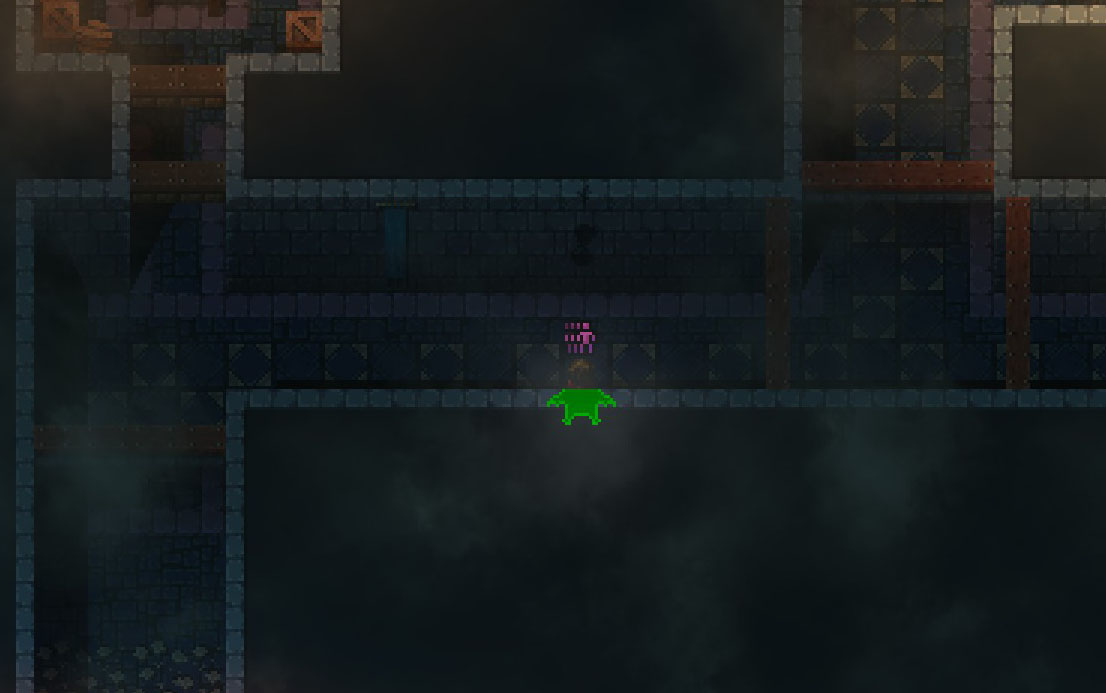
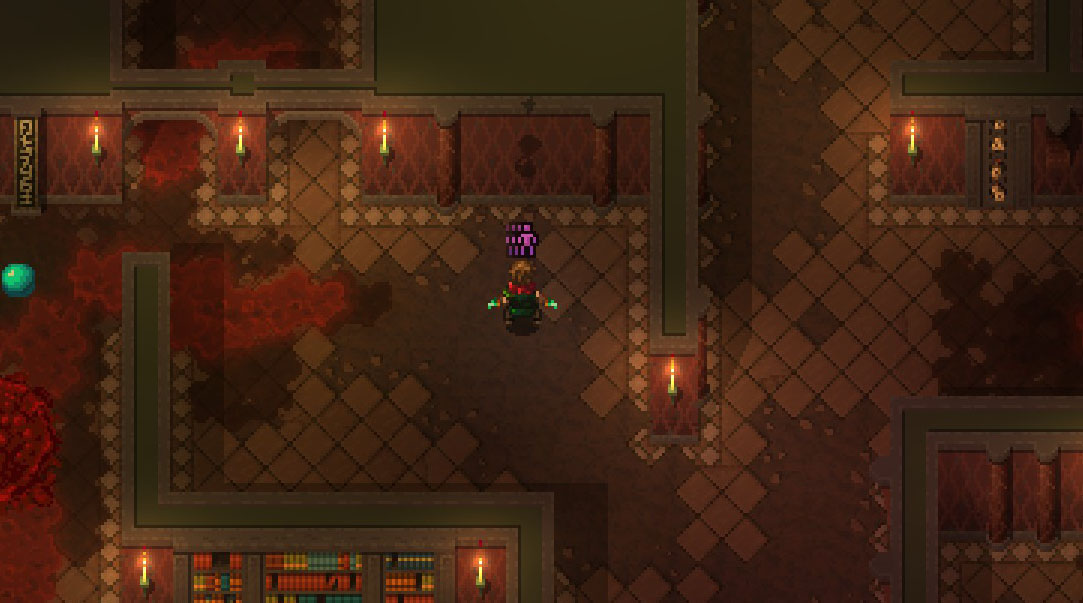
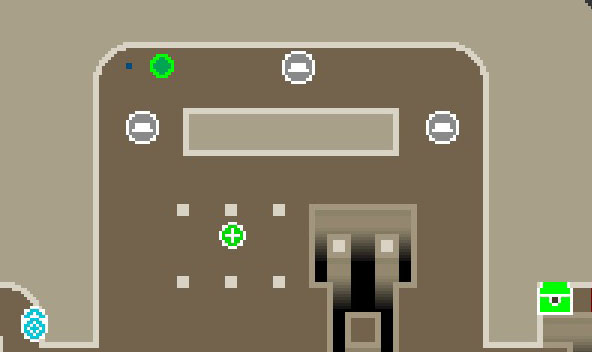
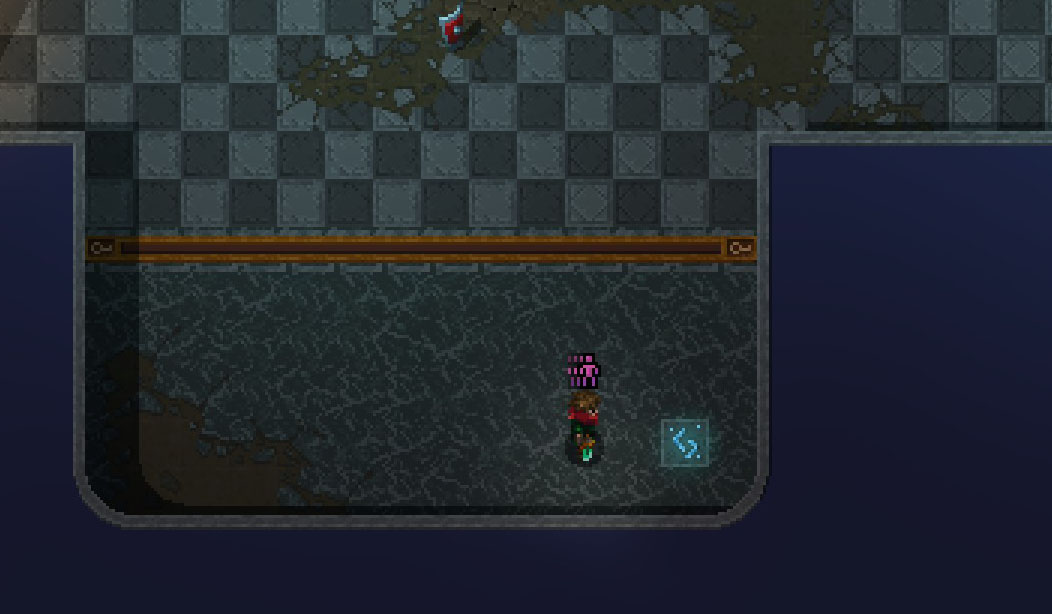
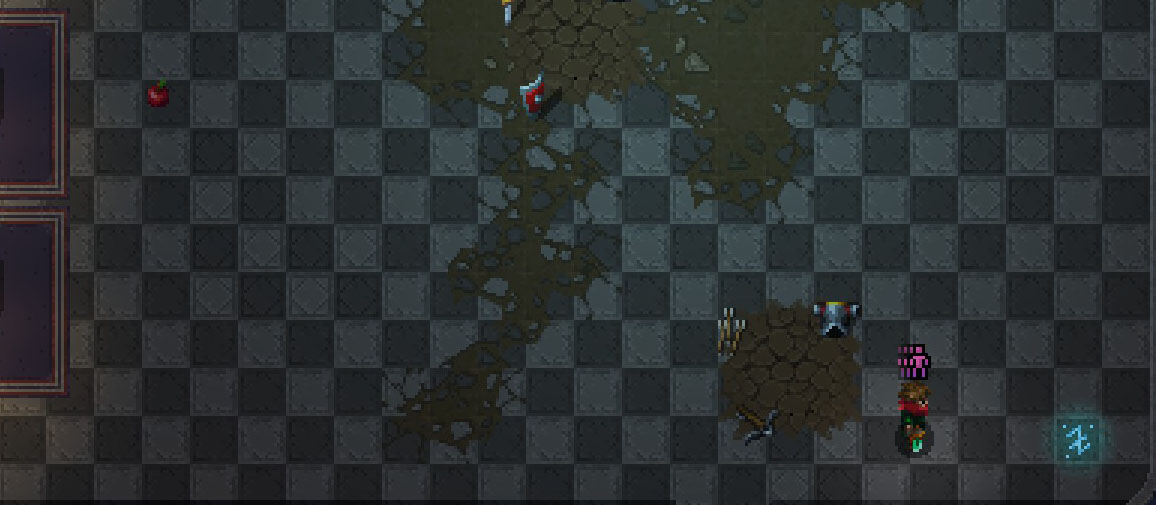
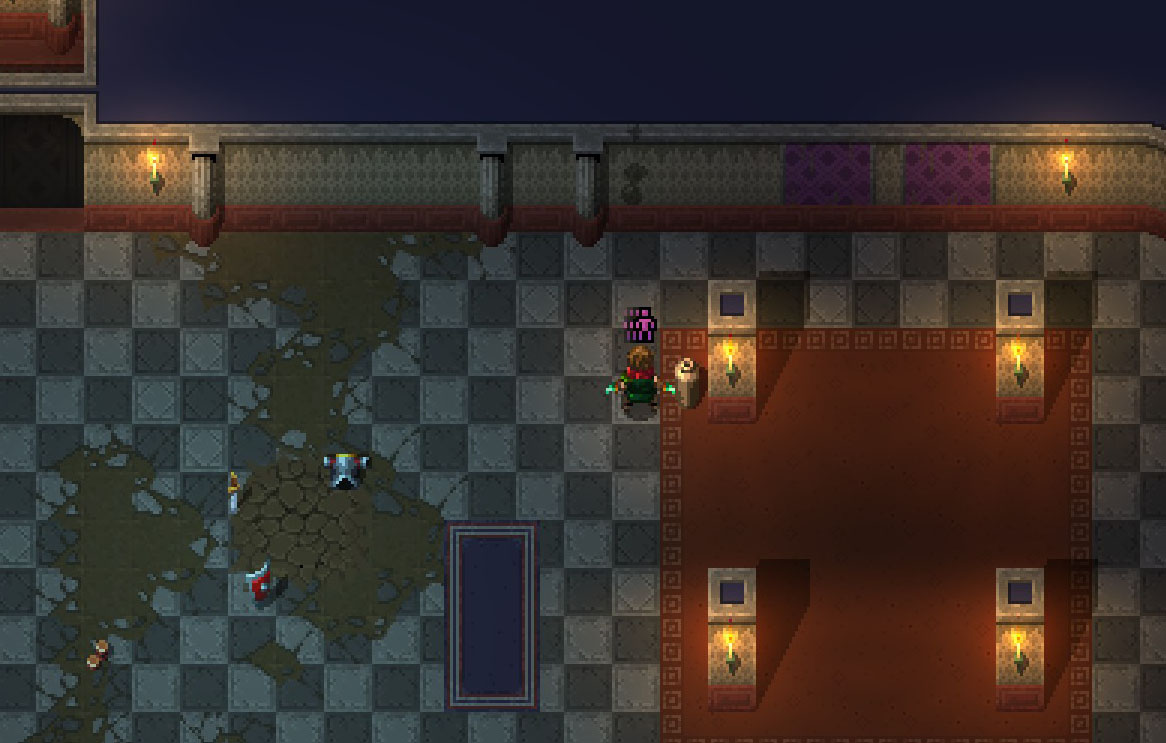
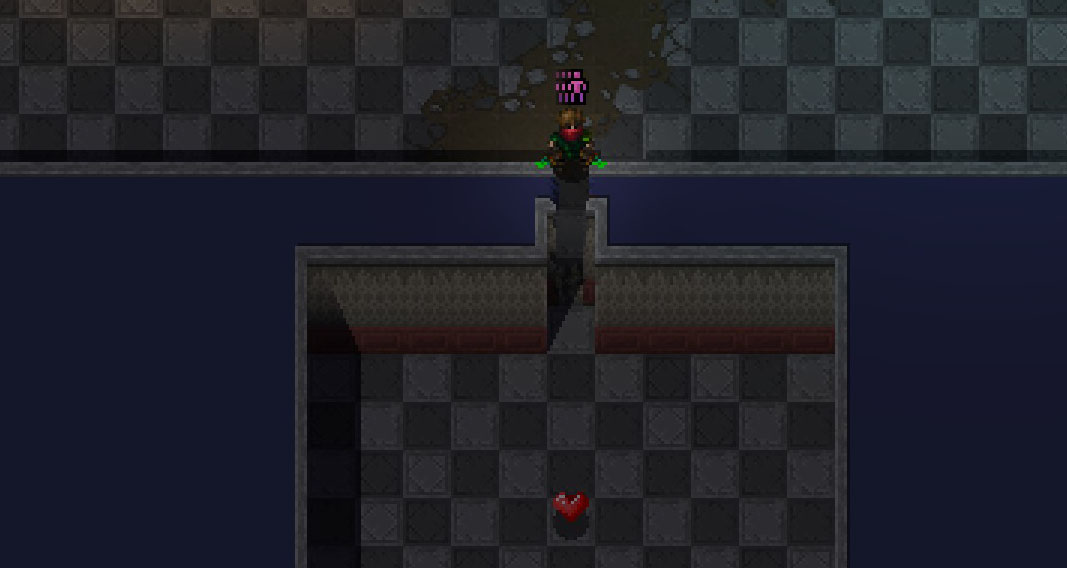
And this is also on Floor 1 when you go down from Floor 3 for the last boss rune
https://gtm.steamproxy.vip/sharedfiles/filedetails/?id=3297307228

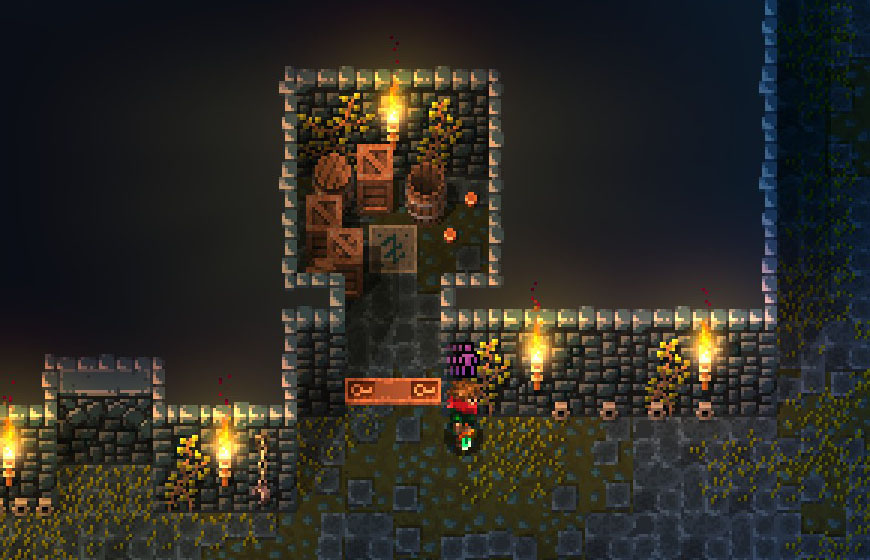
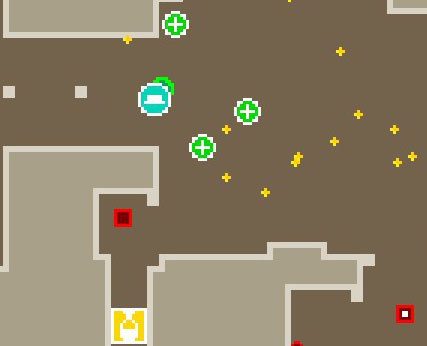
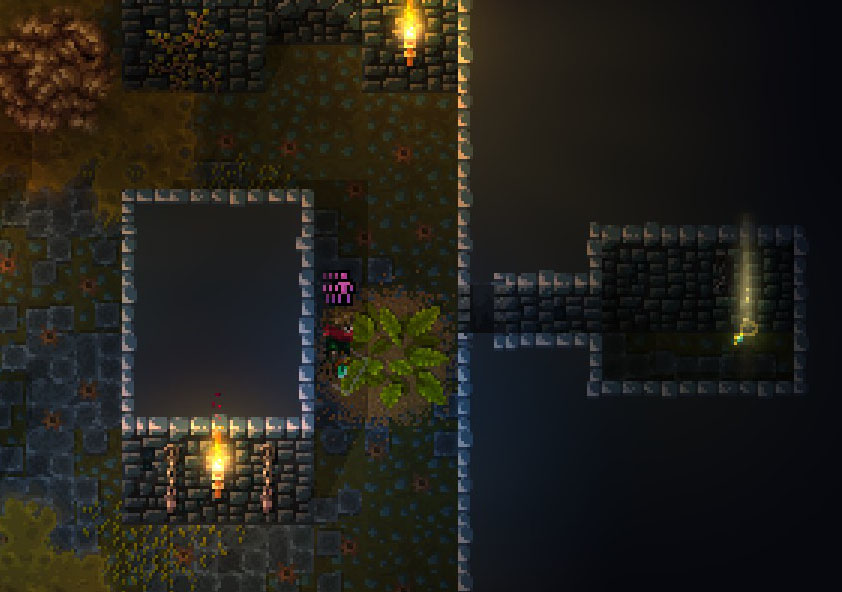
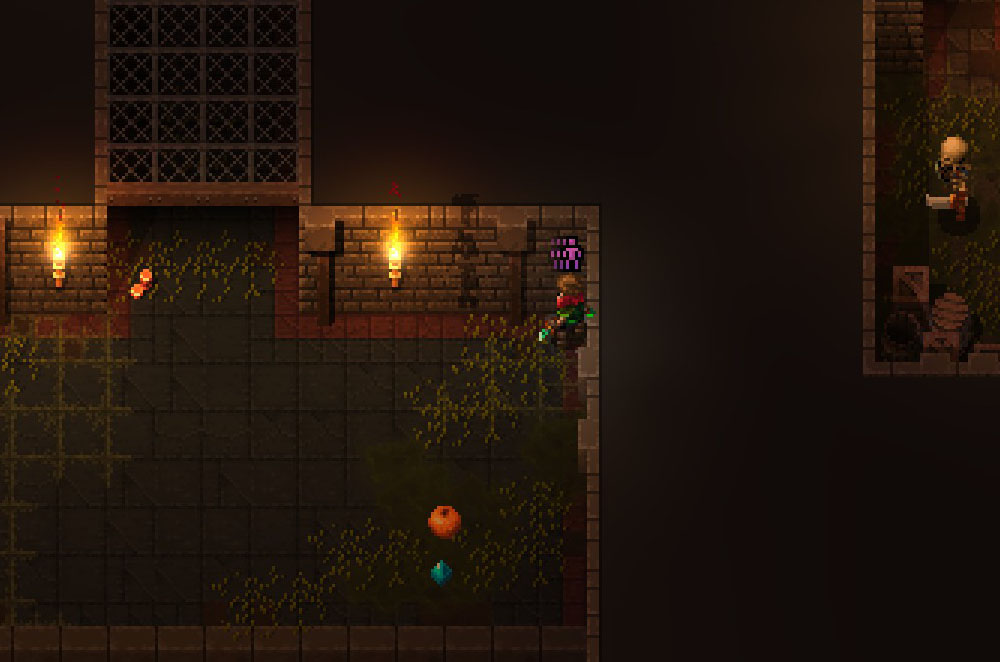
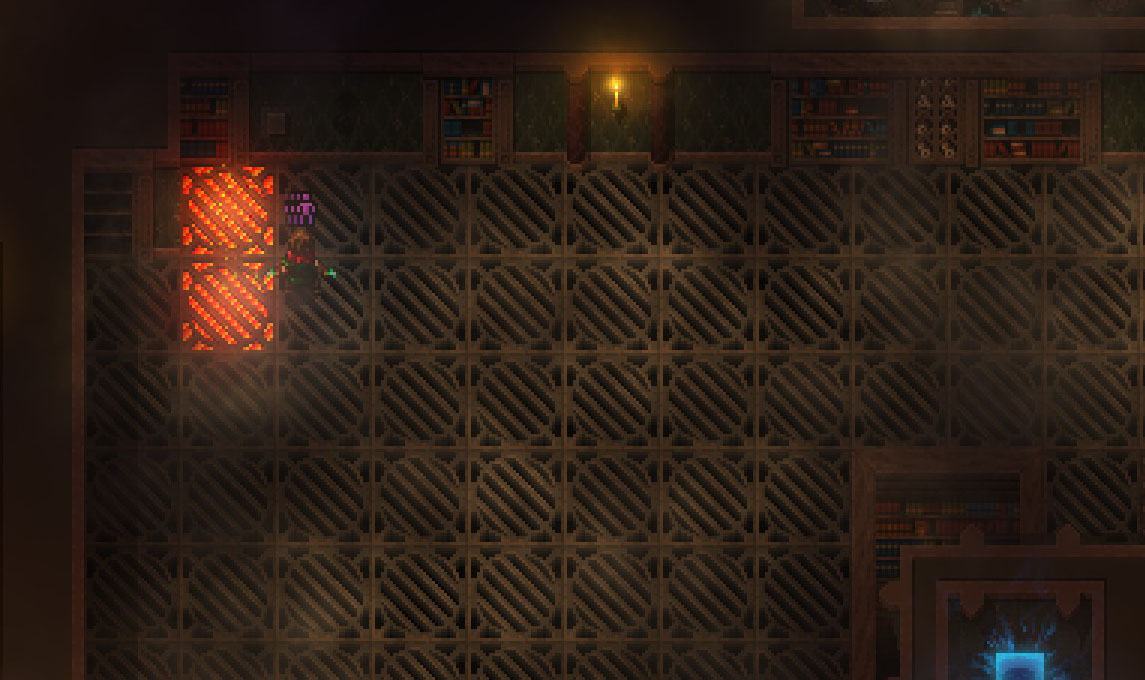
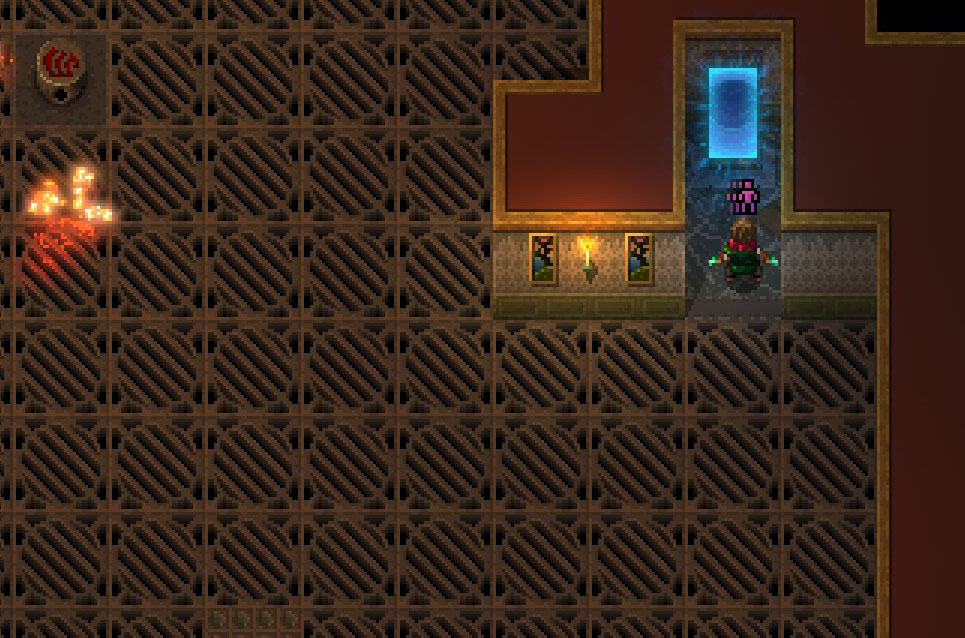
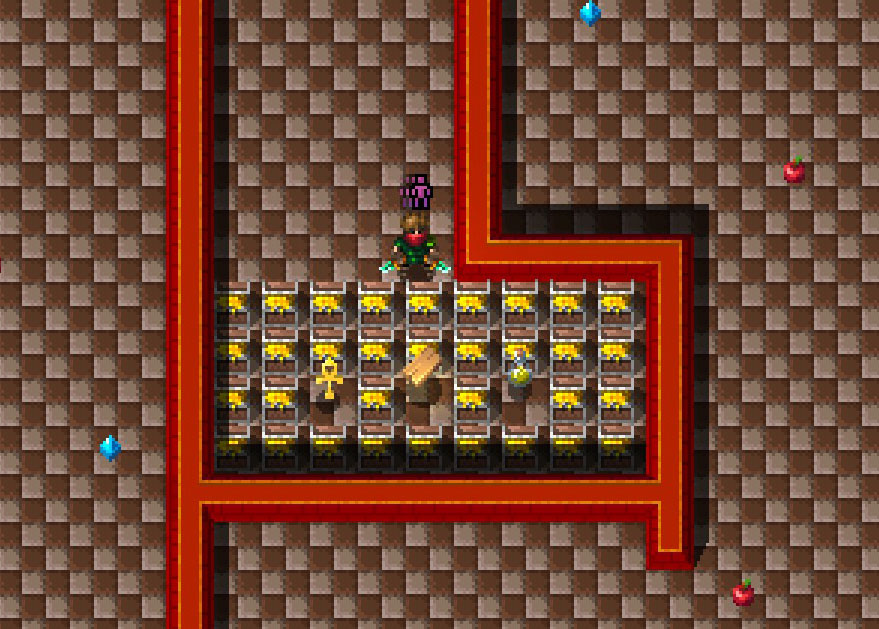
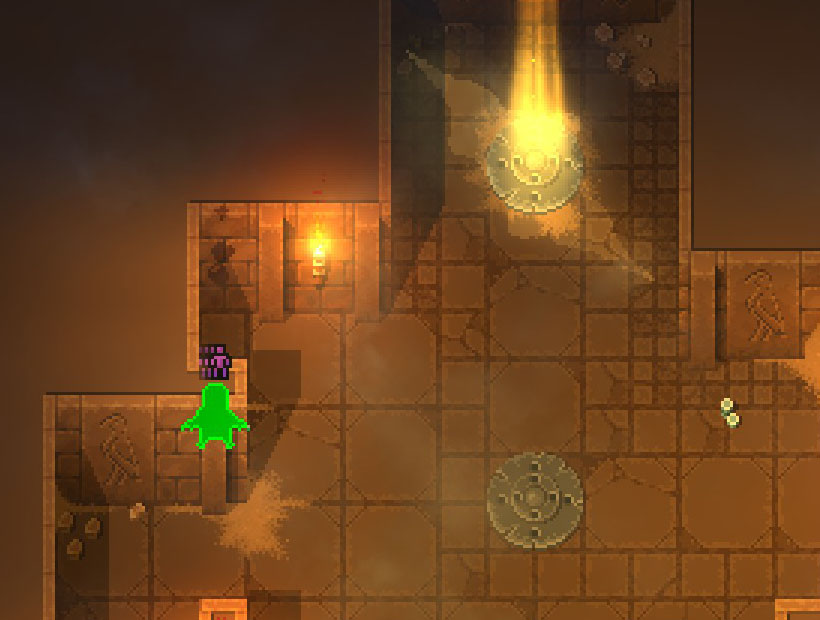
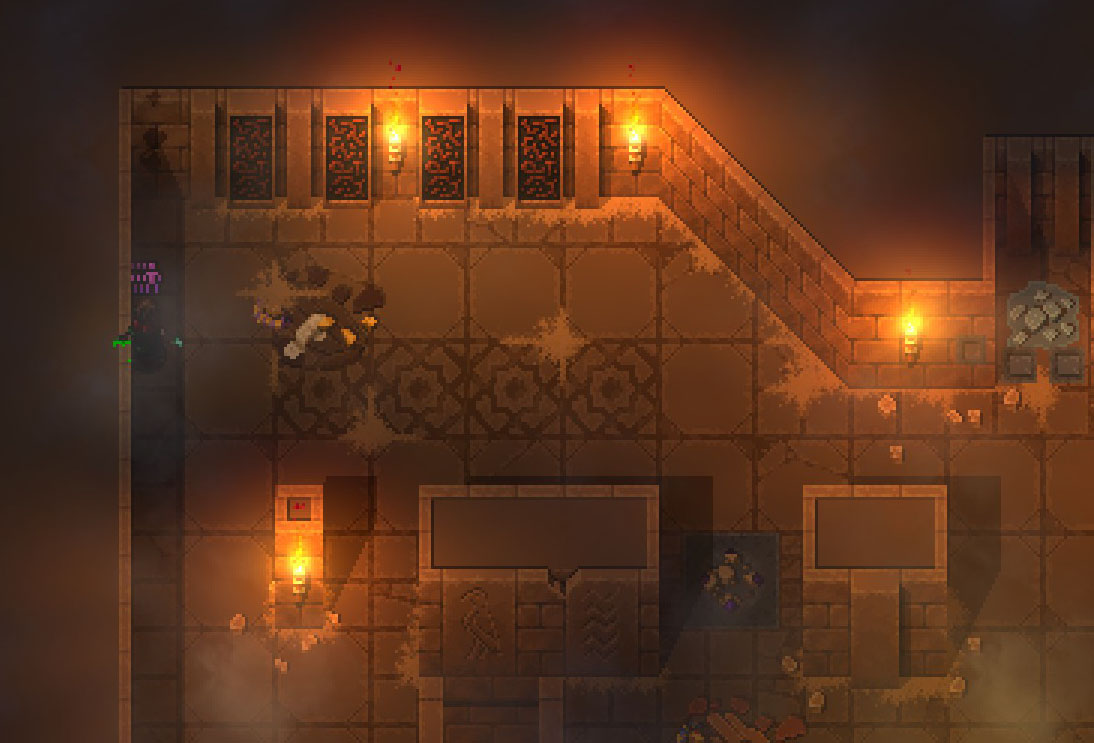
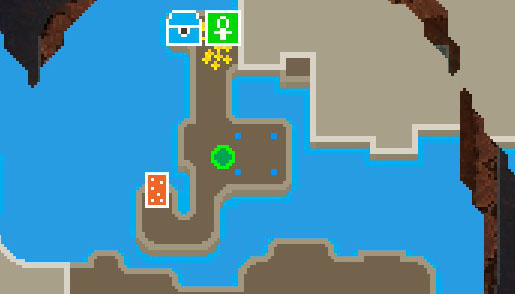
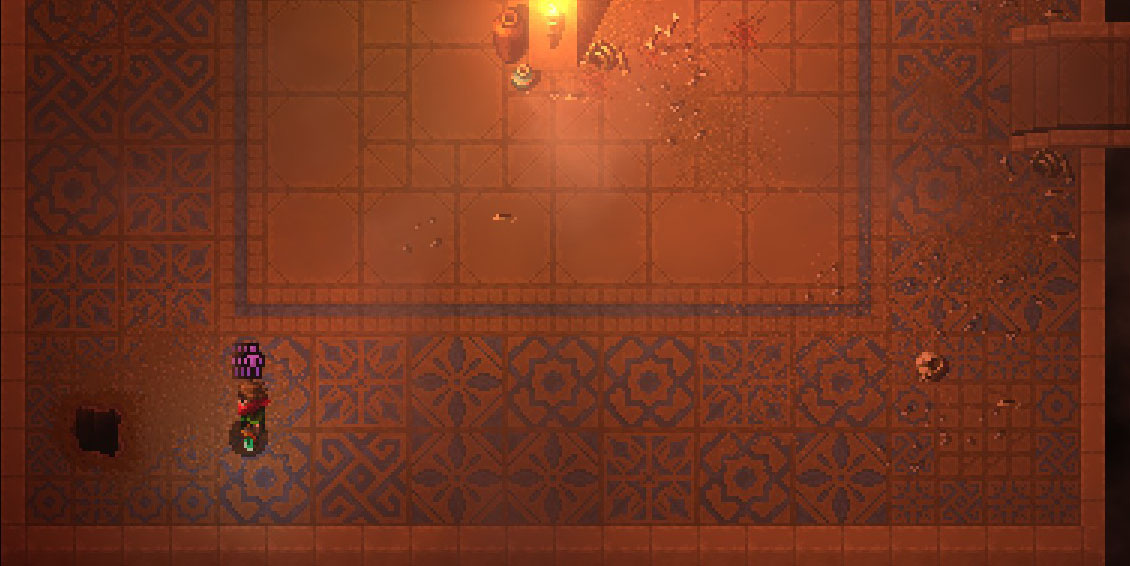
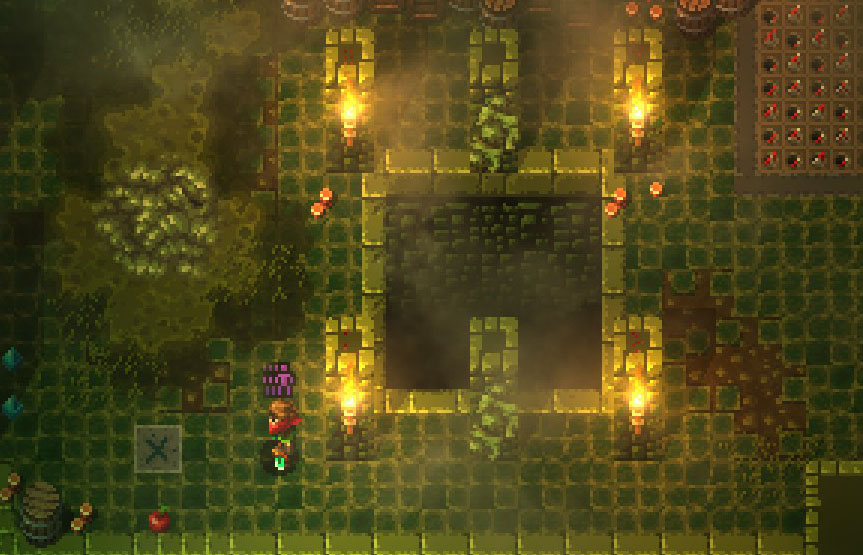
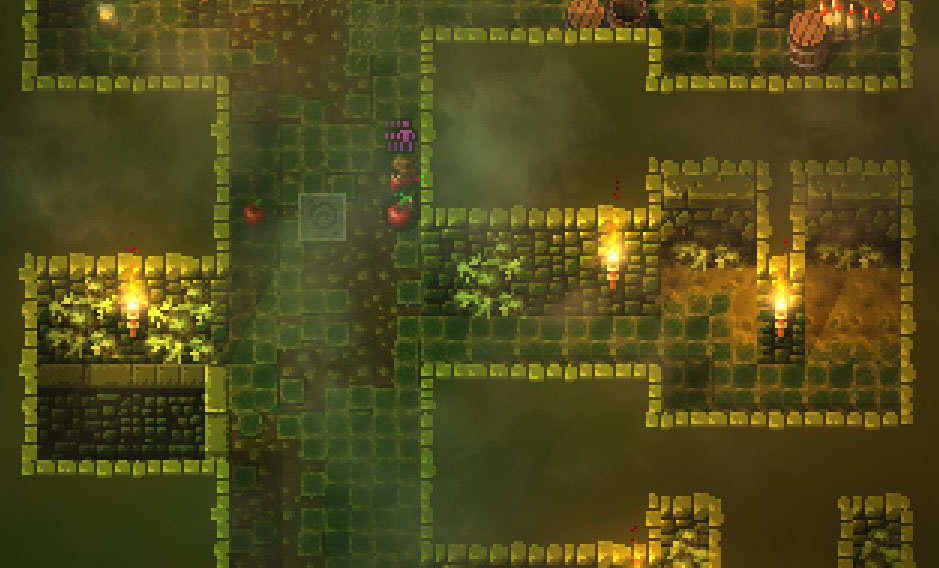
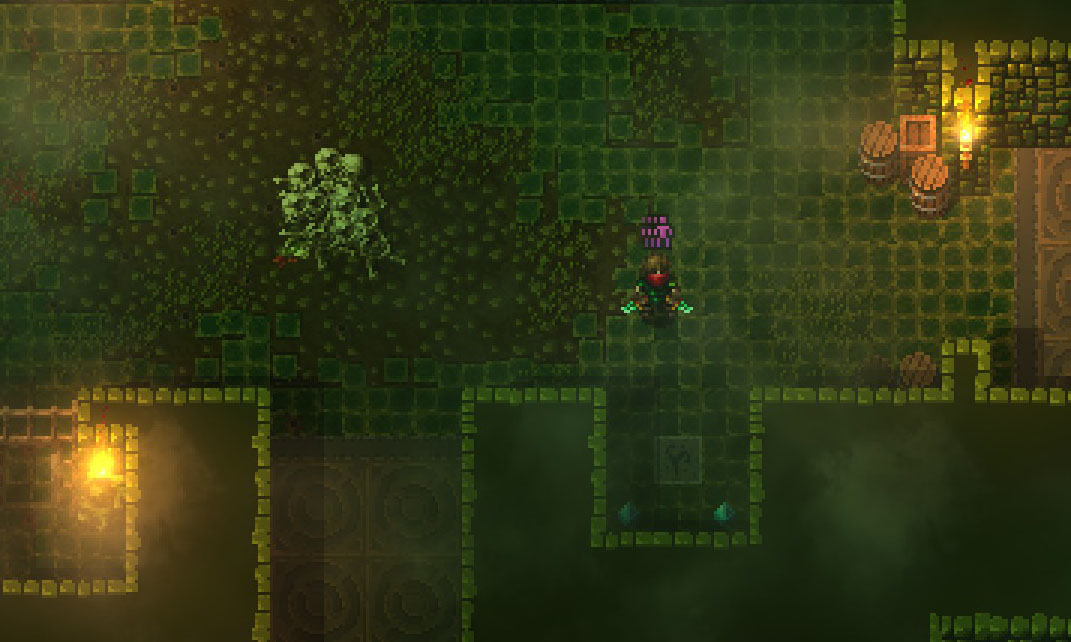
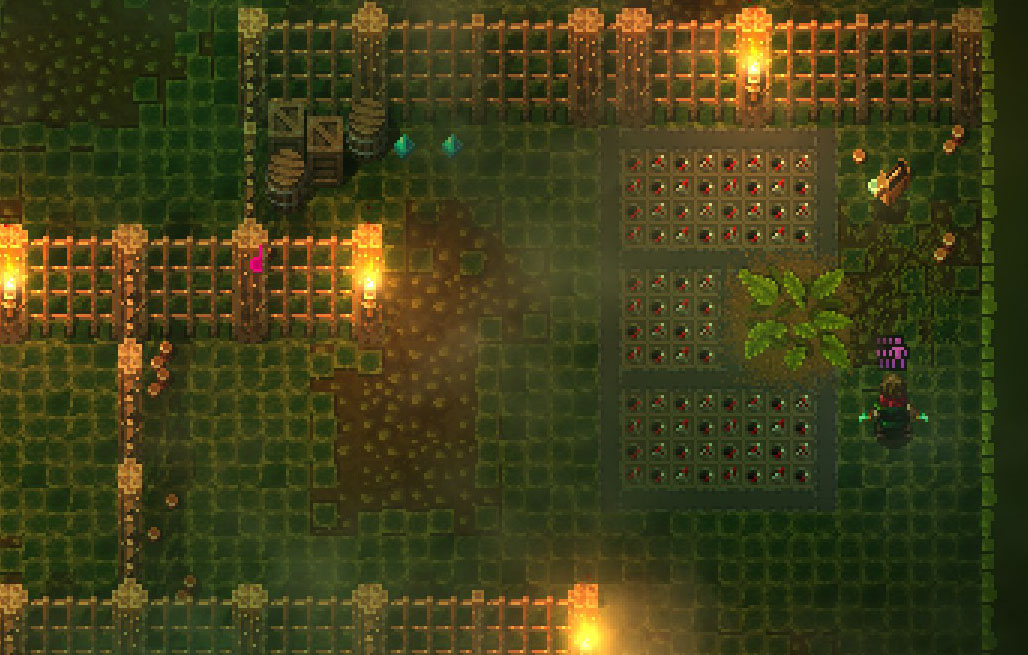
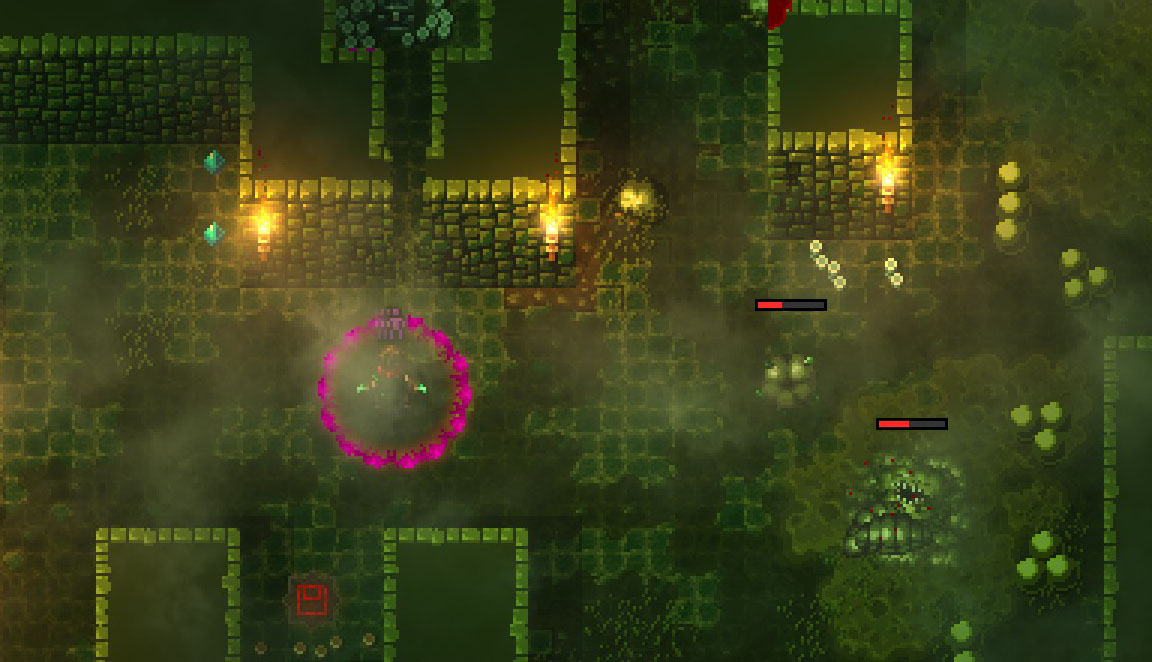
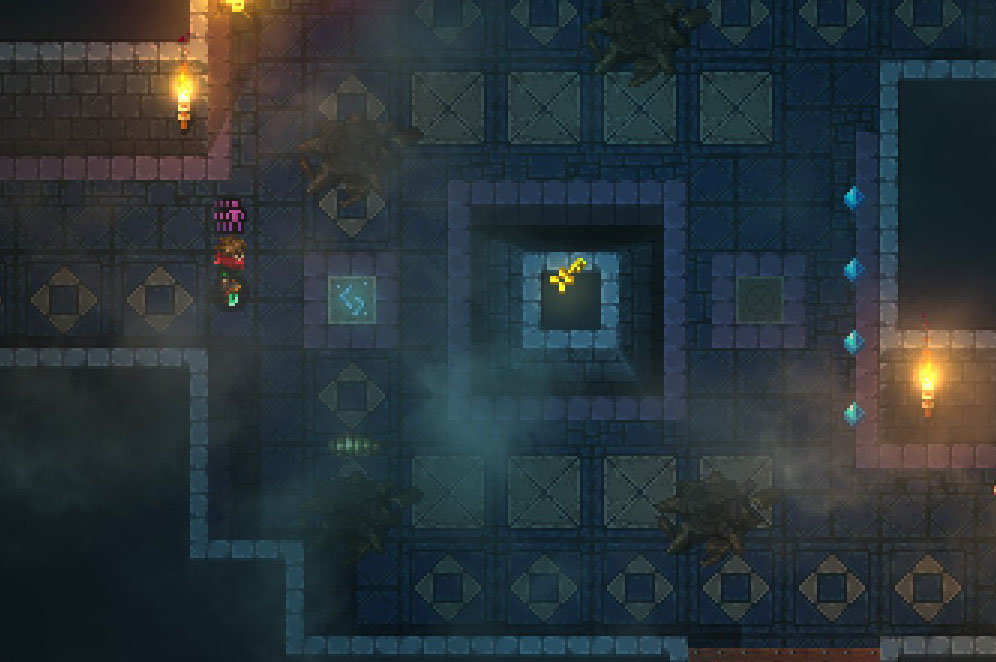
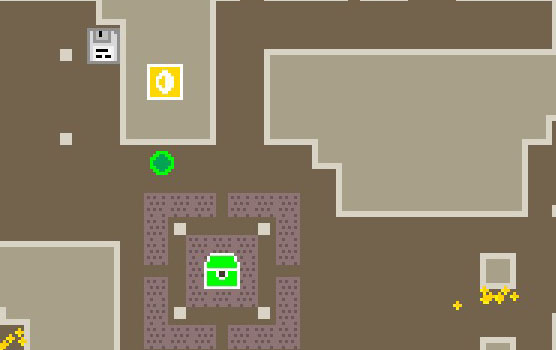
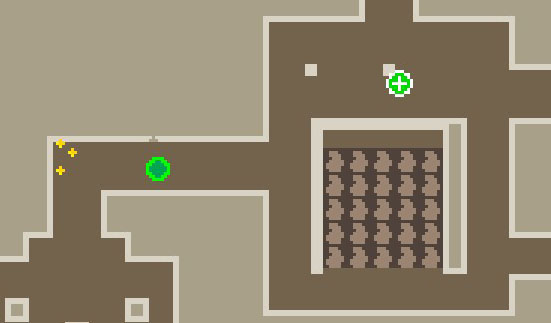
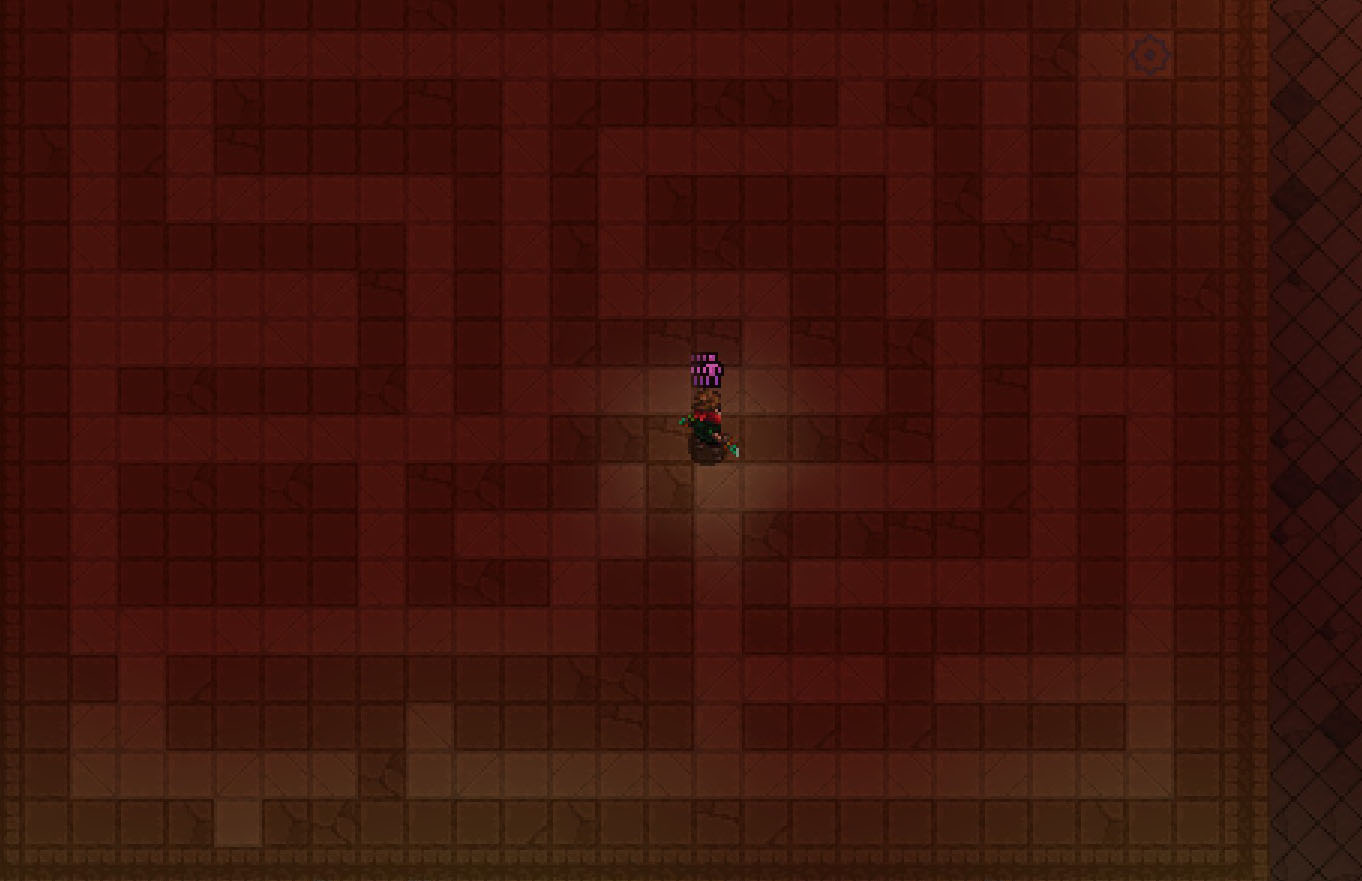
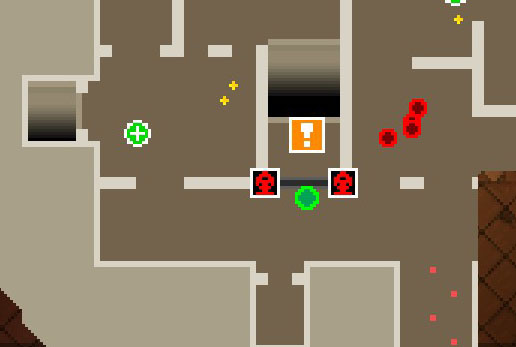
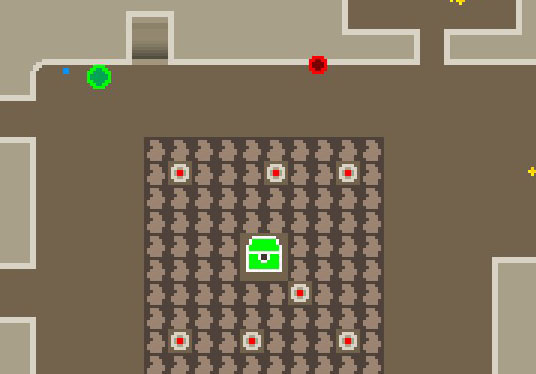
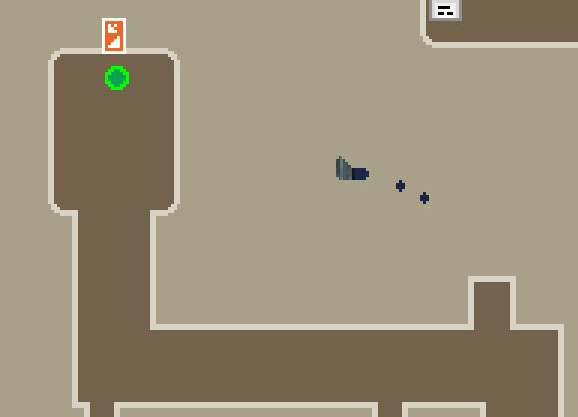
Here is an Item room on Floor 4, i think at the middle of bottom area but unsure
https://gtm.steamproxy.vip/id/DacianDraco/screenshot/2501272149840180072/

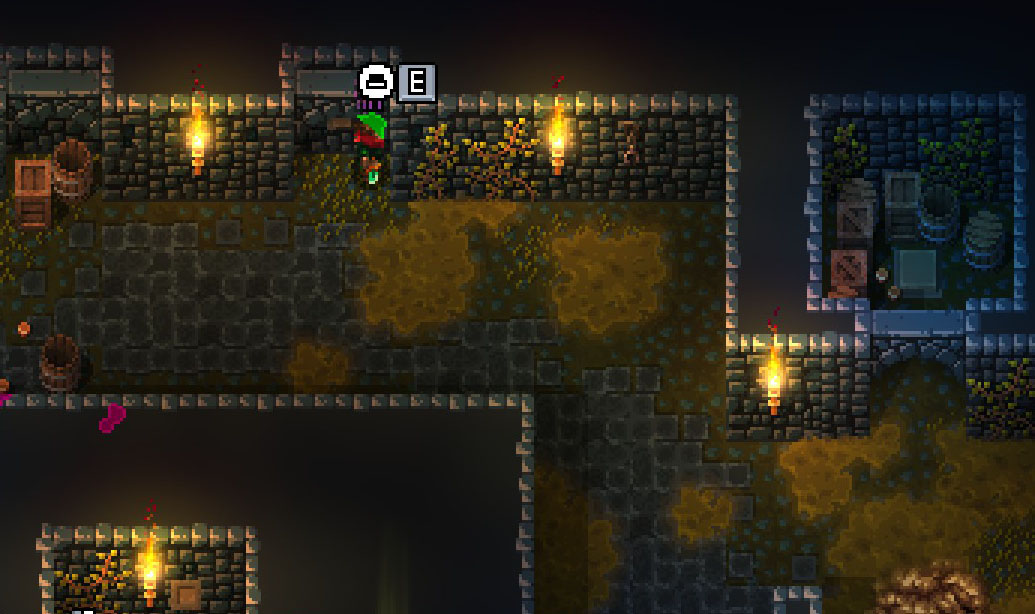
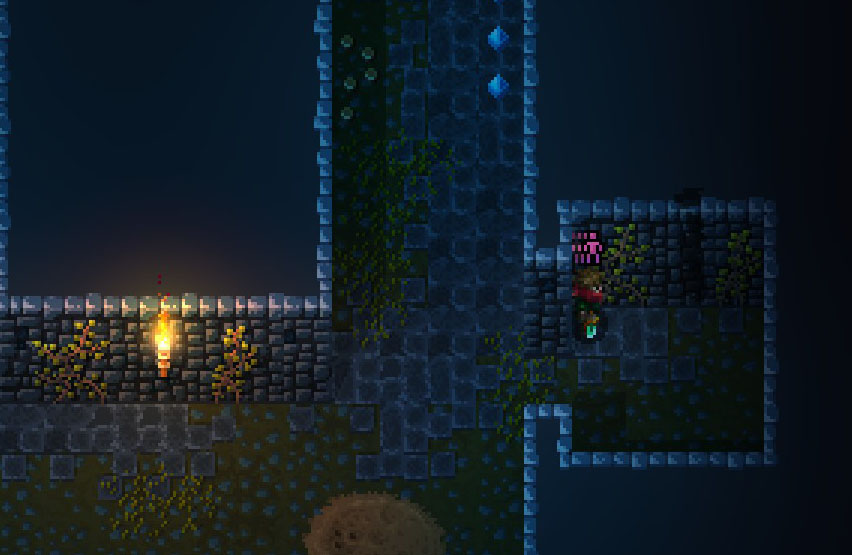
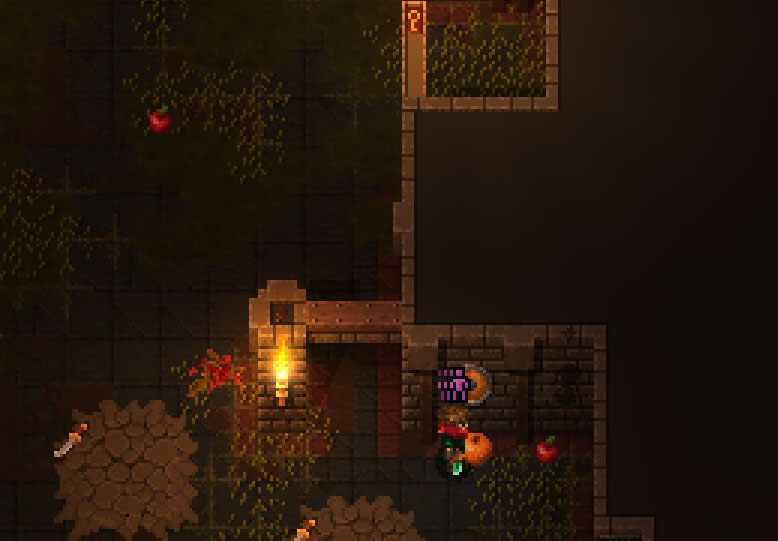
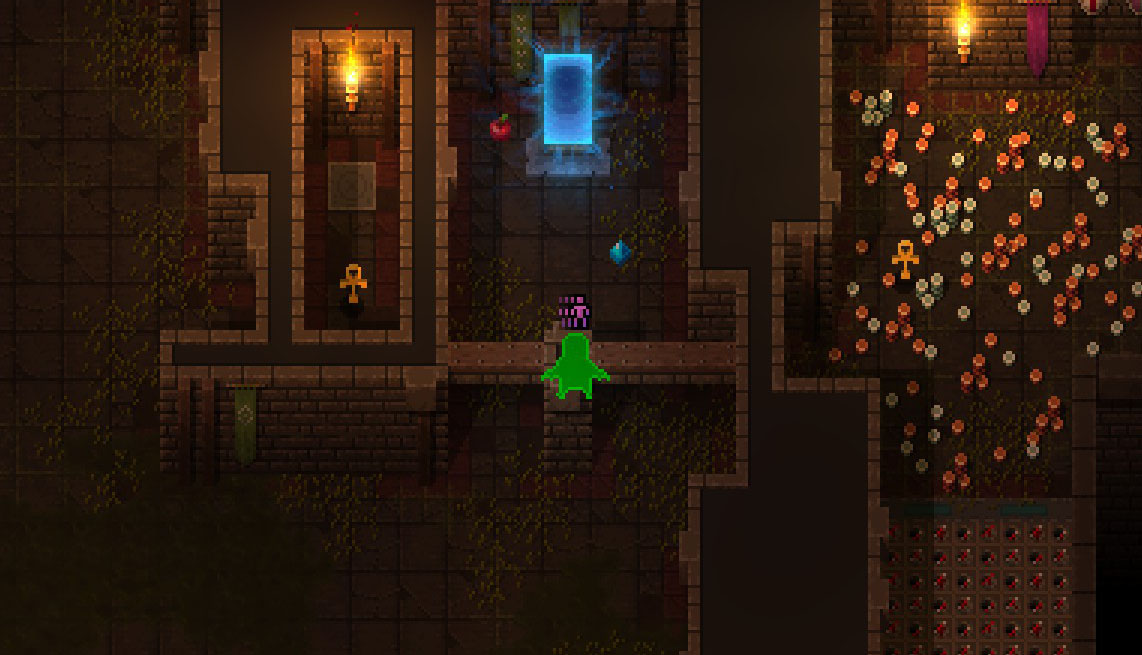
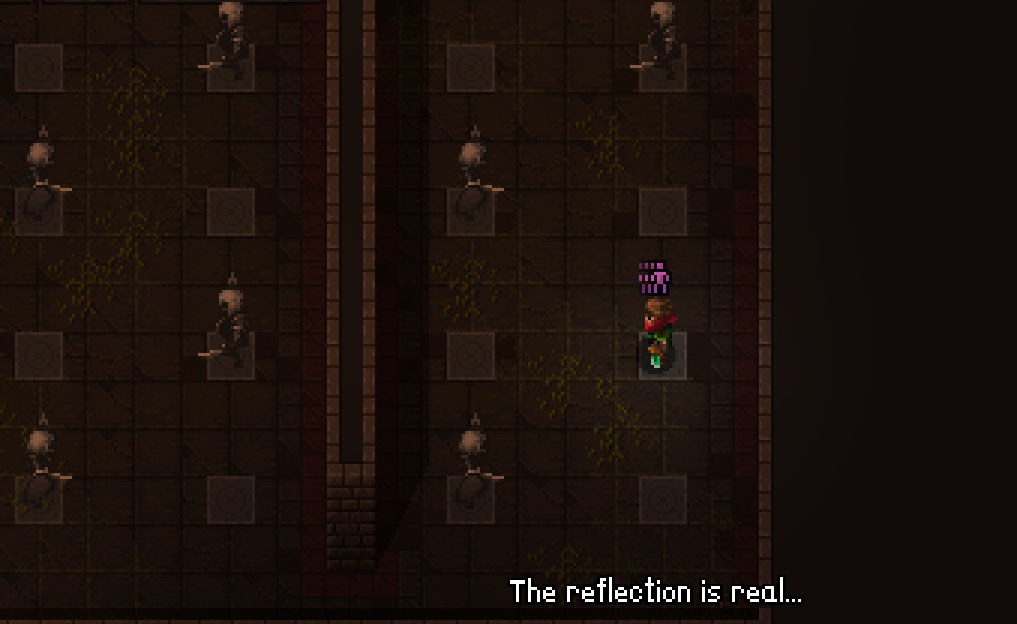
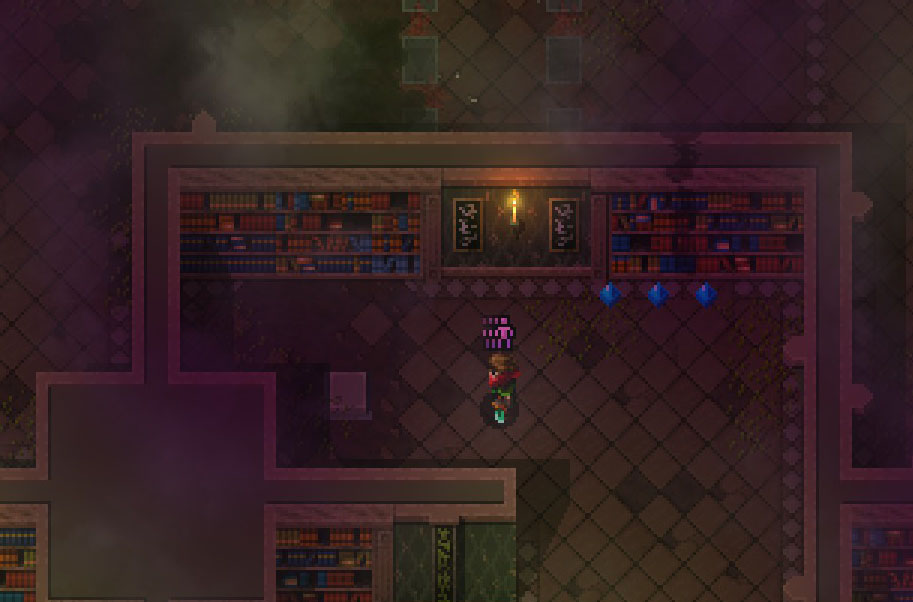
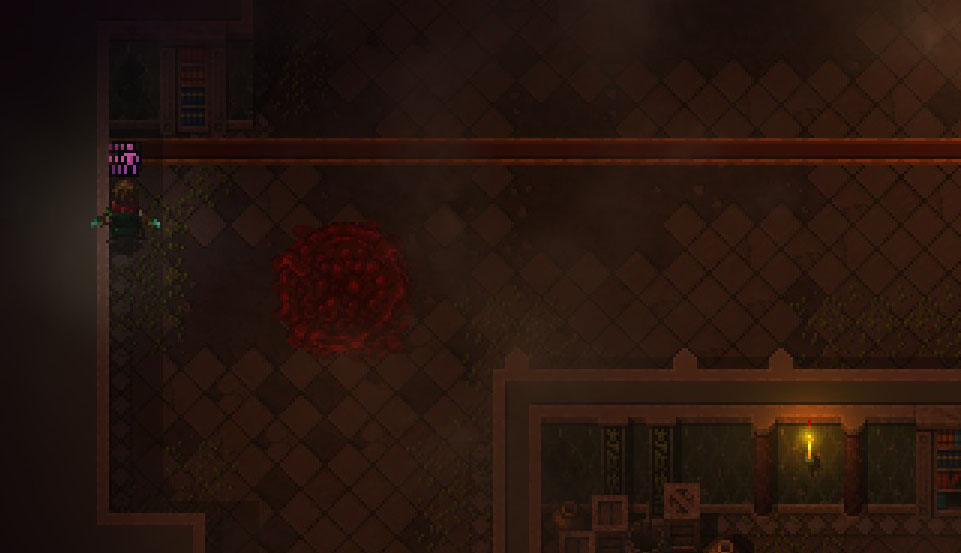
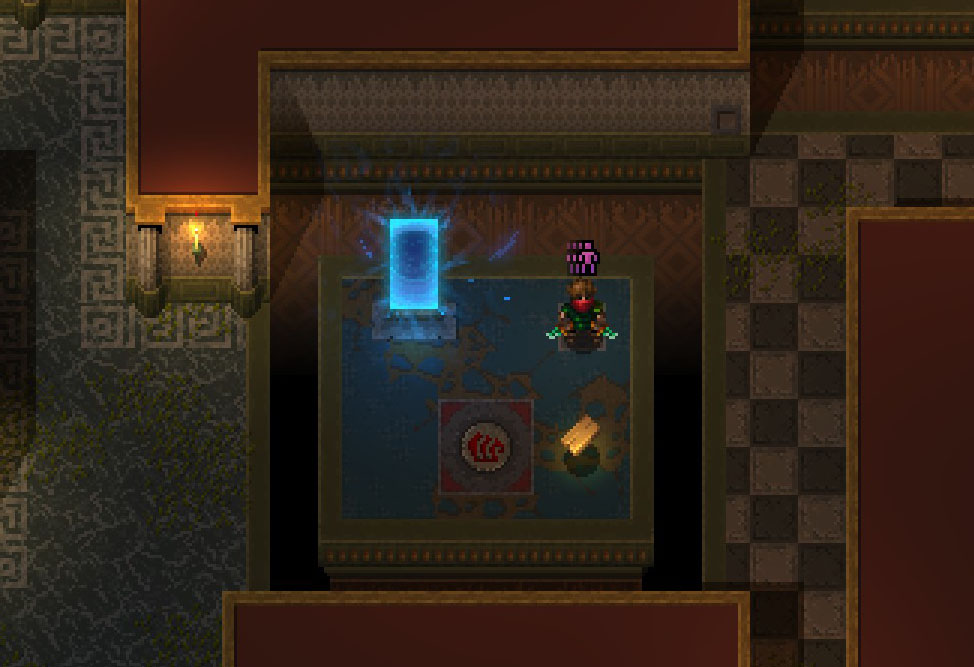
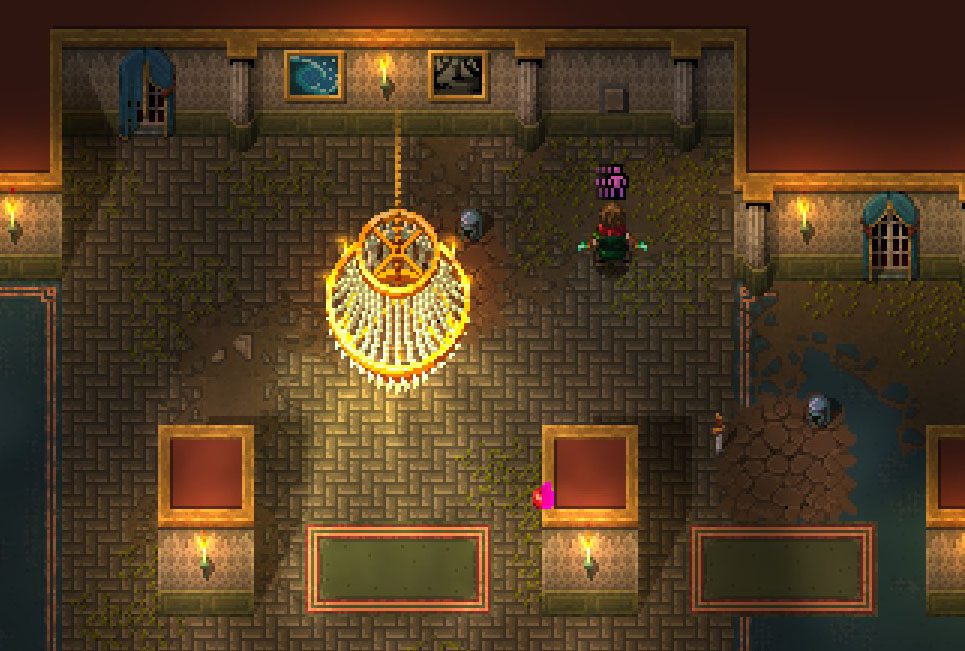
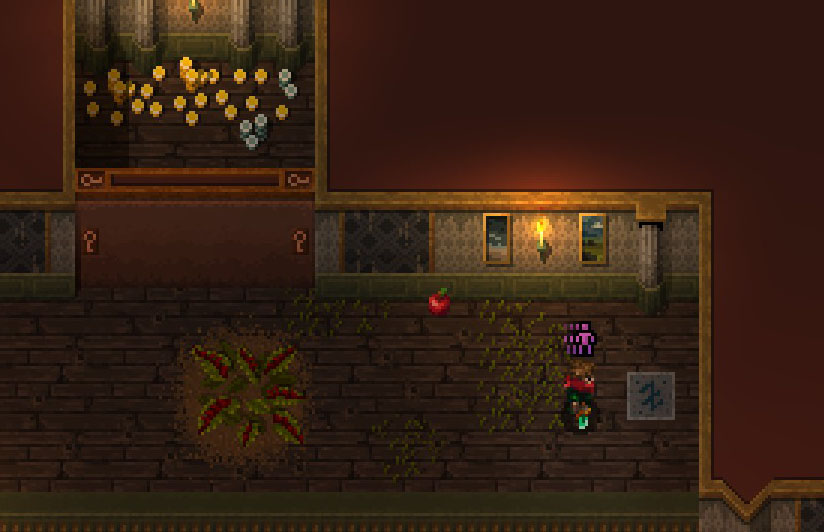
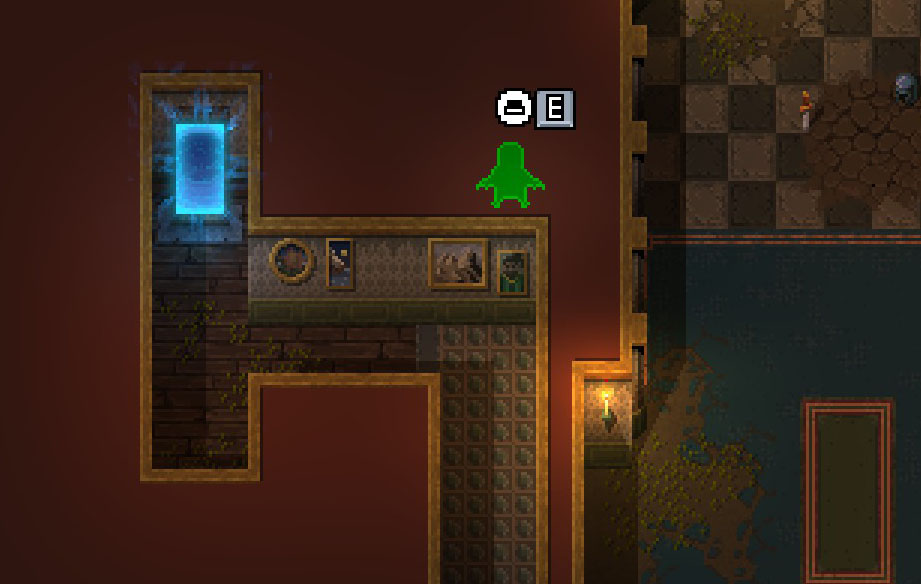
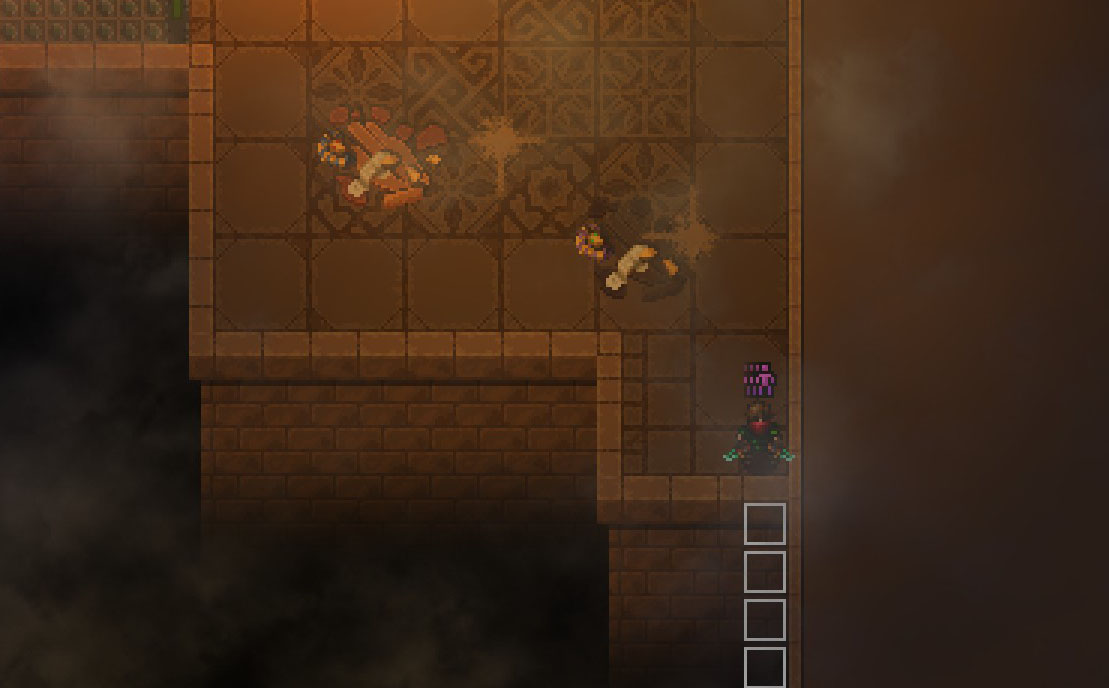
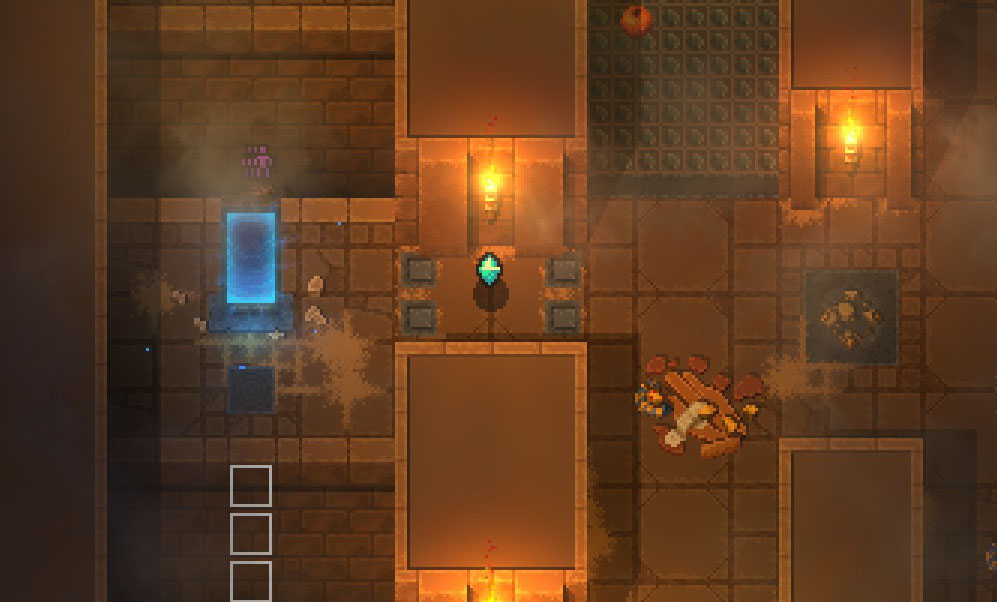
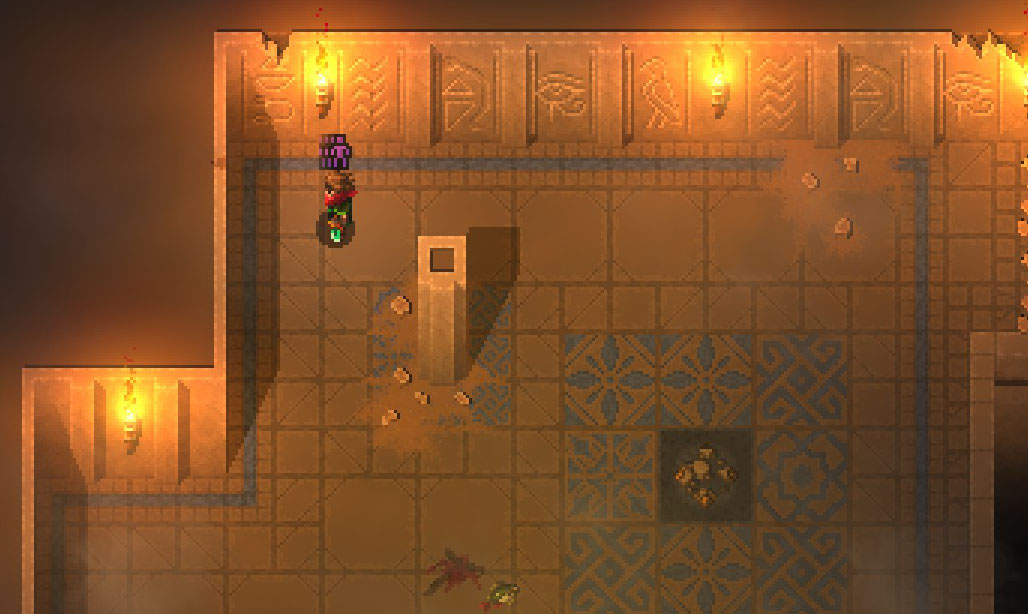
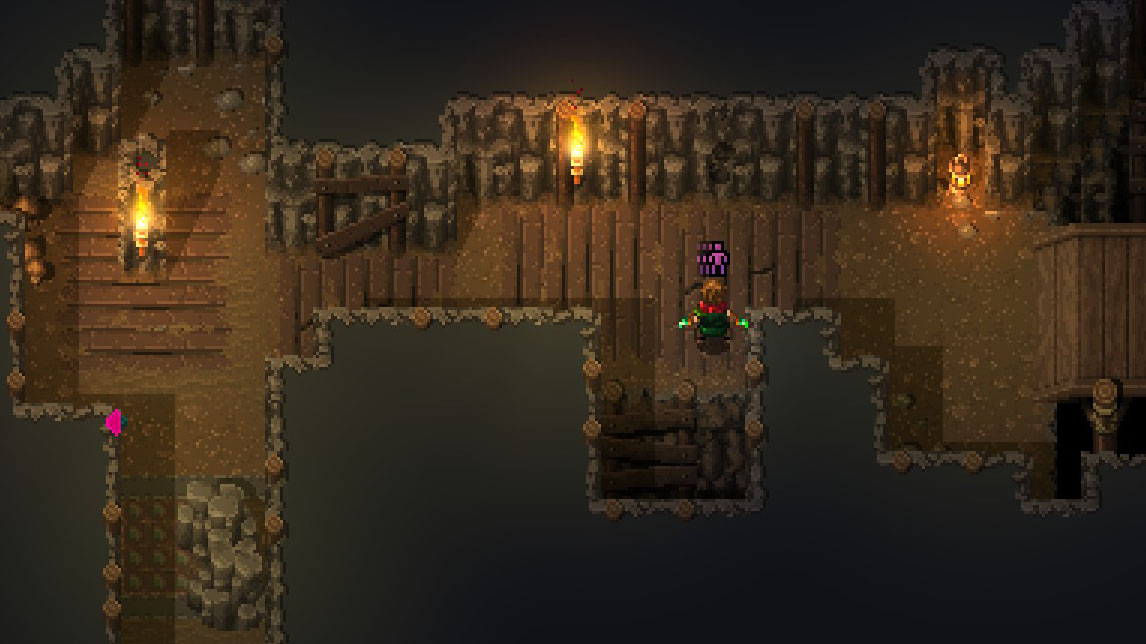
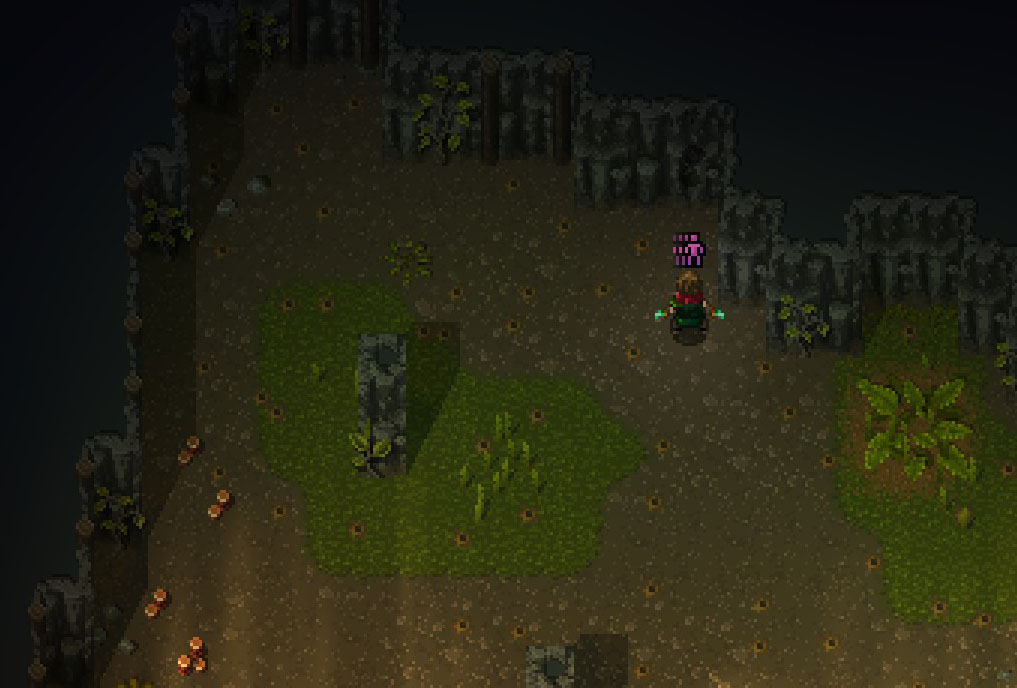
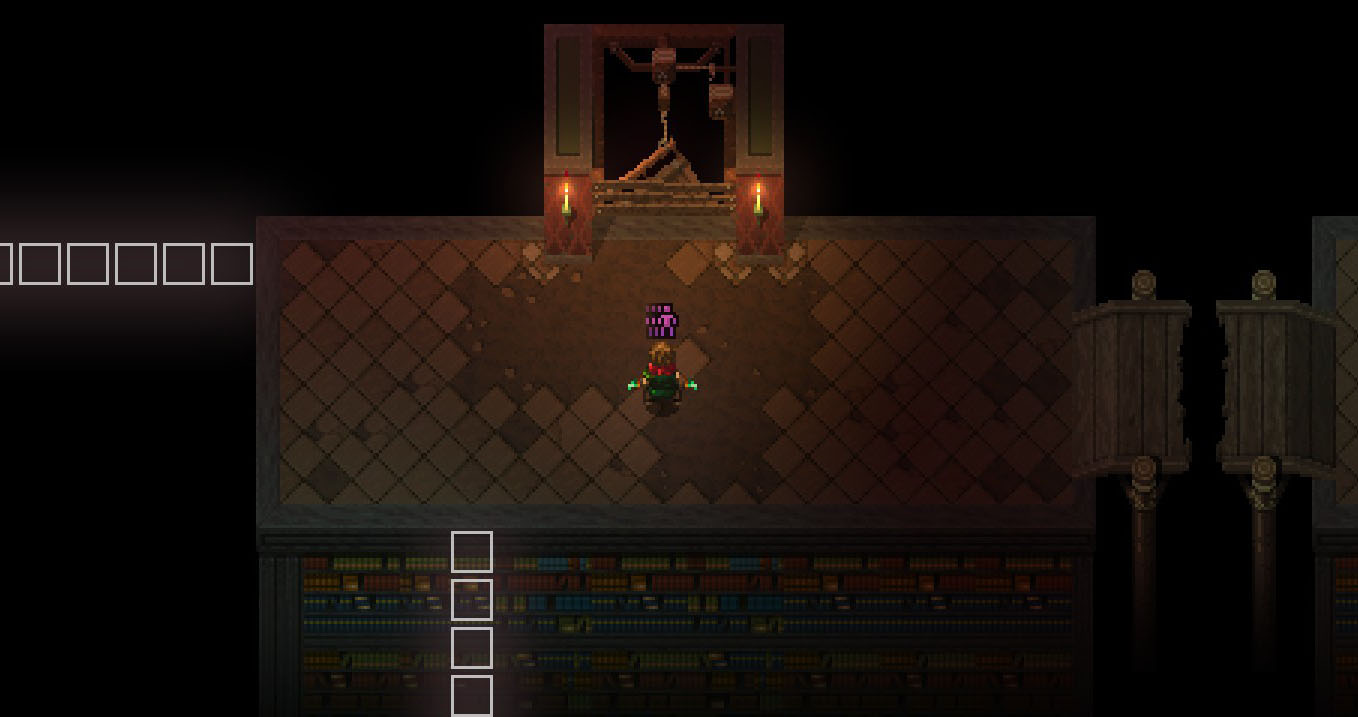
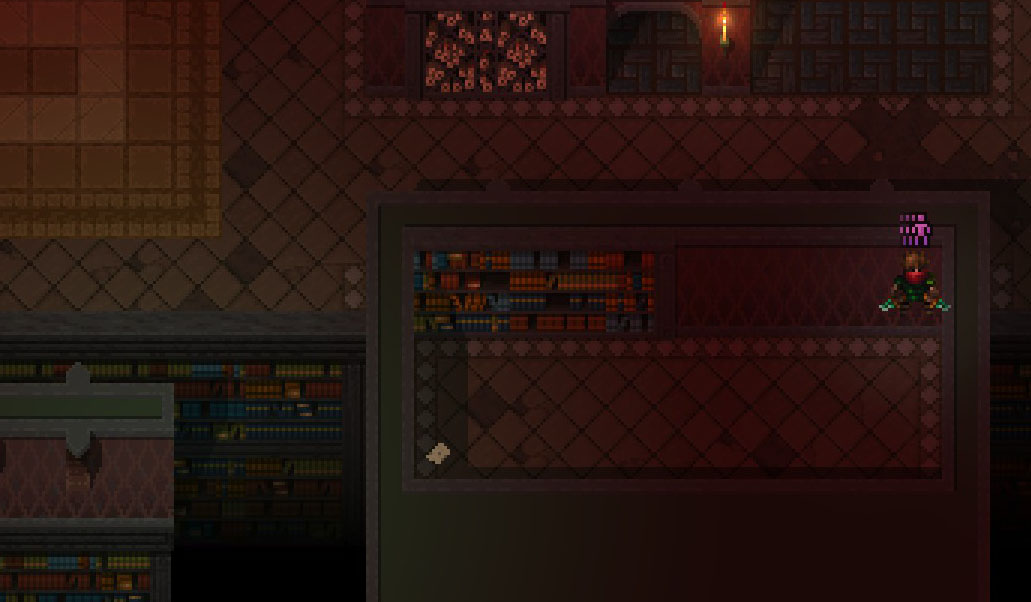
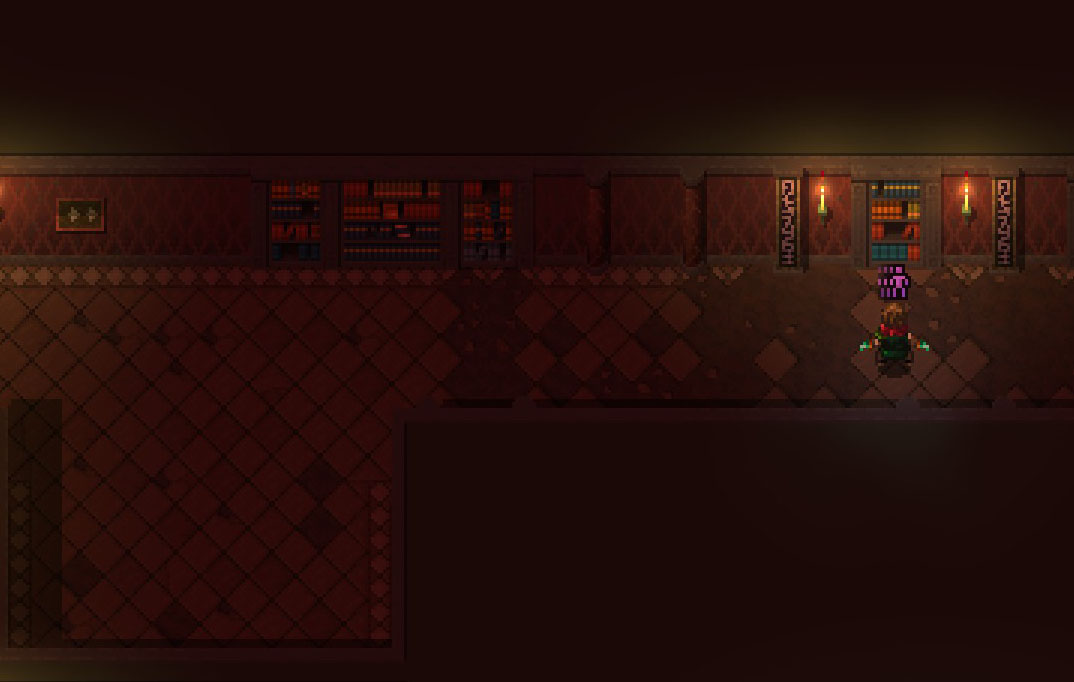
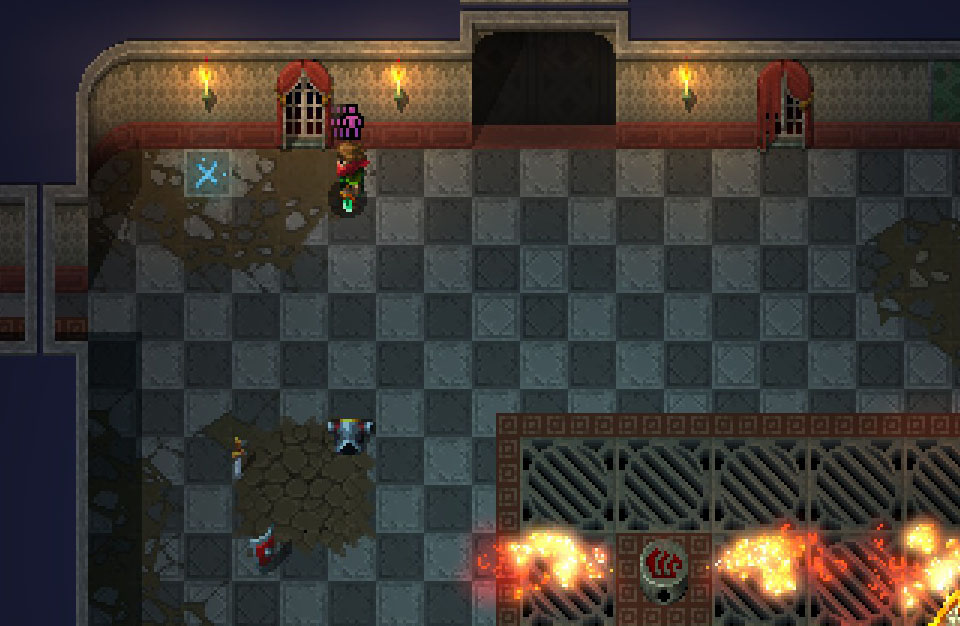
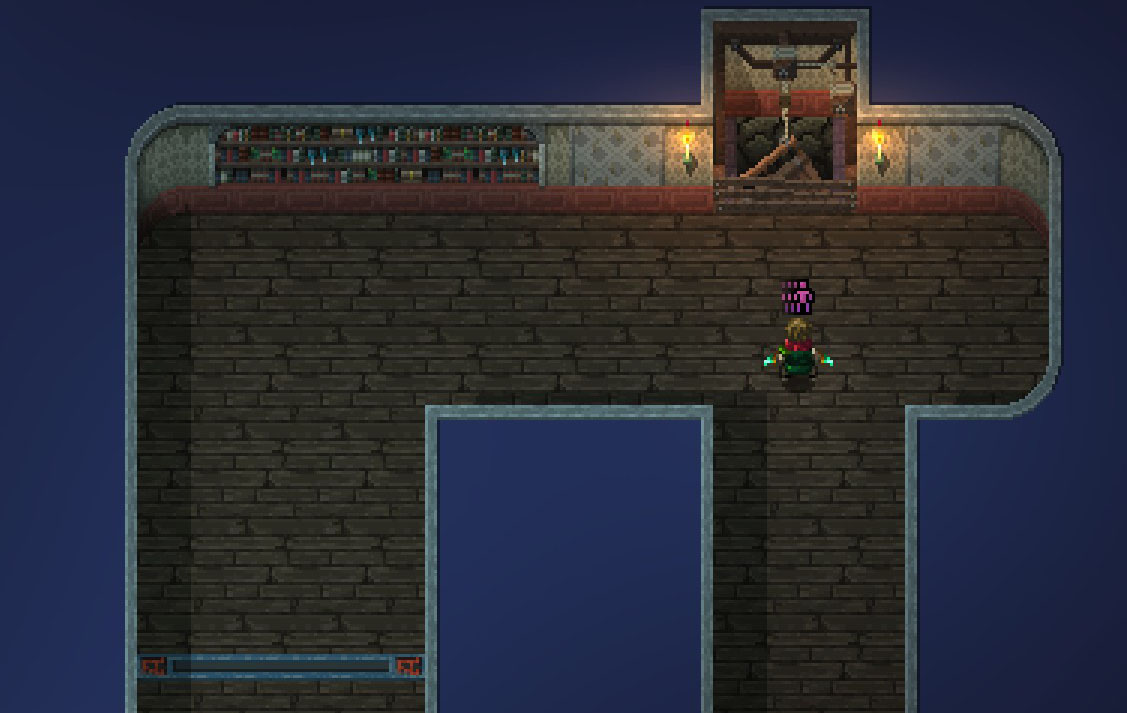
A chest i revealed by breaking a wall from above the last Mirror pillar in Sun Temple Upper Floor
https://gtm.steamproxy.vip/id/DacianDraco/screenshot/2501272149840193979/
DacianDraco 9 Aug, 2024 @ 1:08am 
Now for Shaflocke i think Keltonite Mines Floor 1 Secret 2 has wrong screenshot and repeats Keltonite Mines Floor 3 Secret 1, but unsure since i see Shaflocke has some random generation

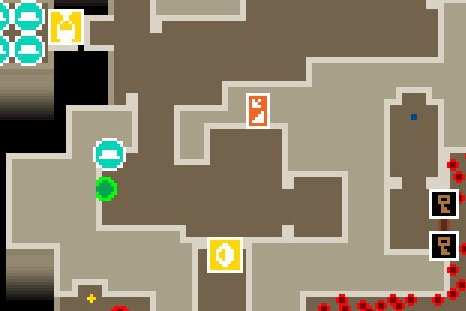
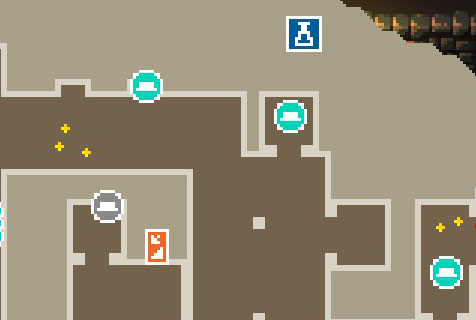
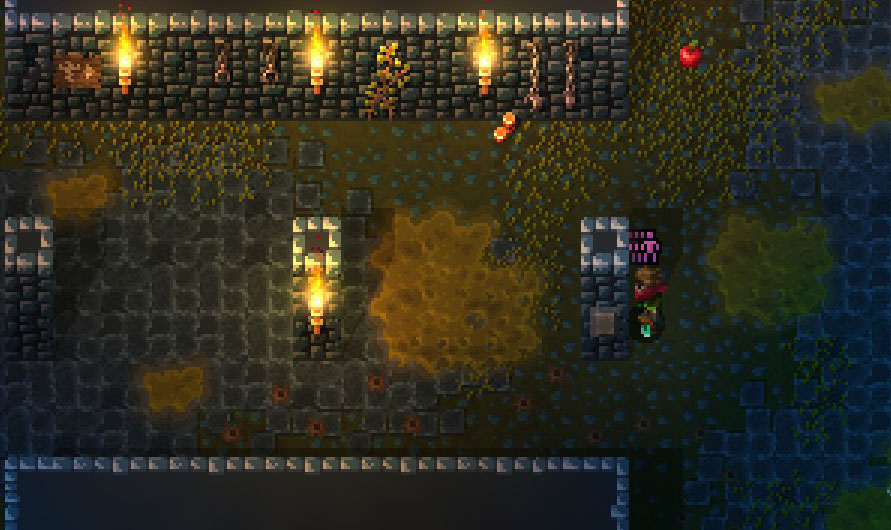
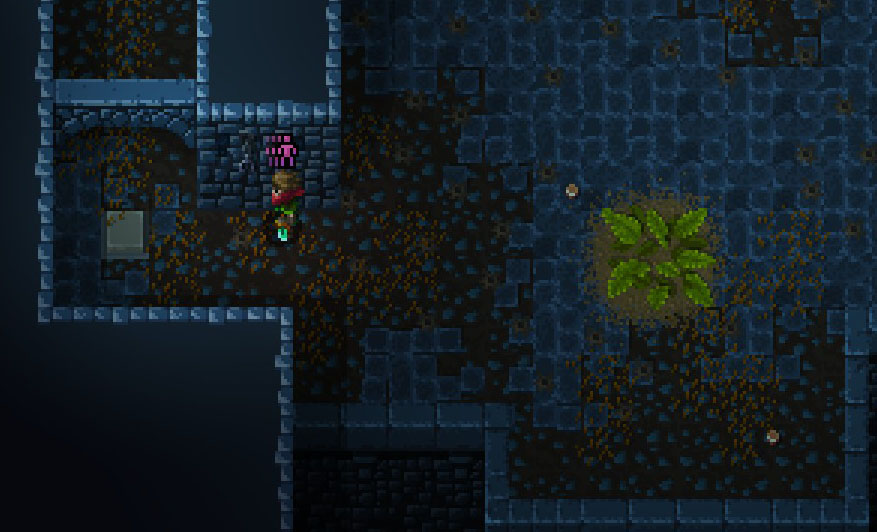
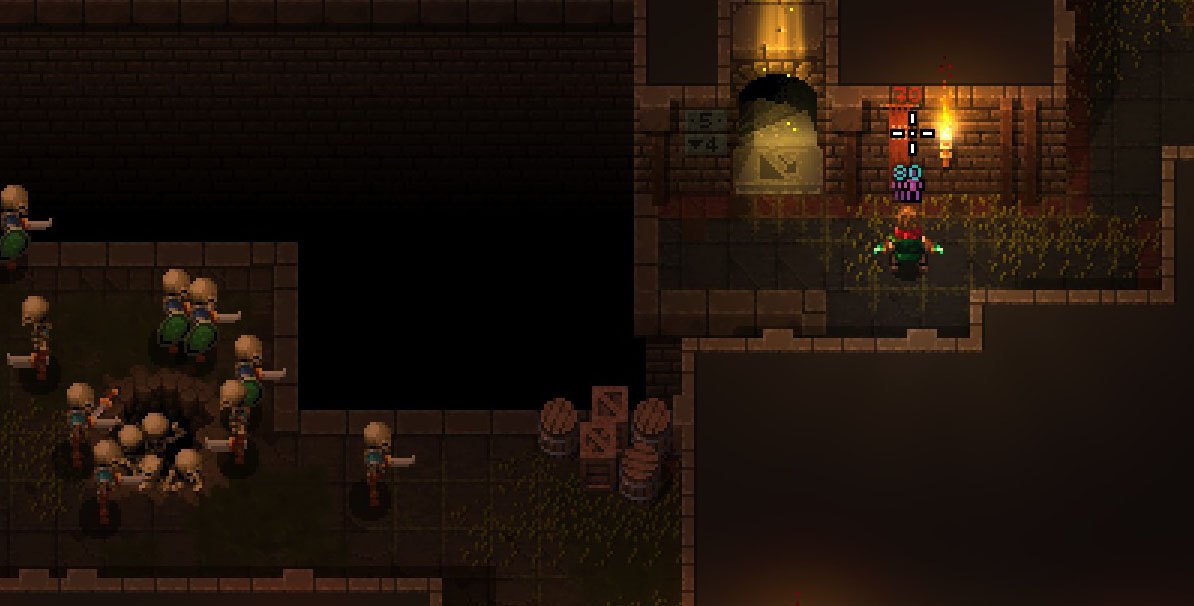
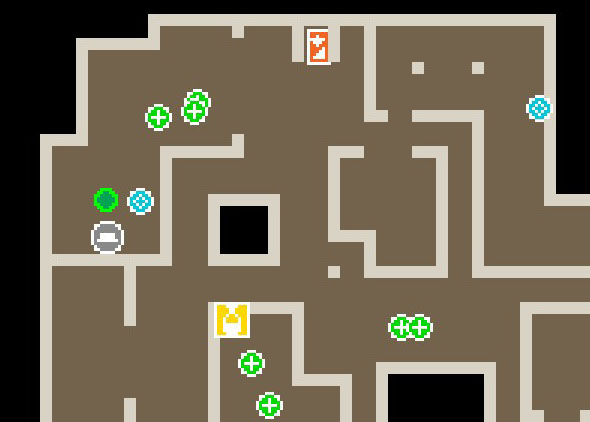
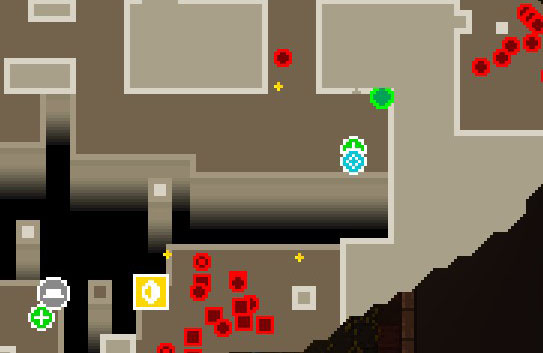
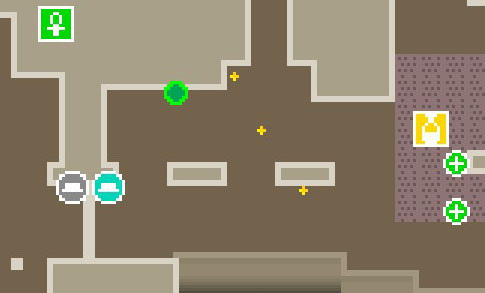
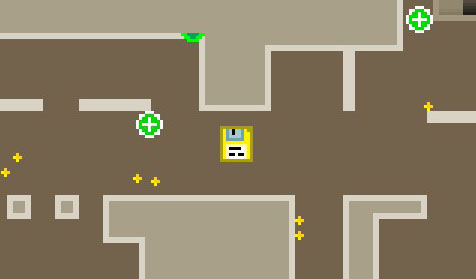
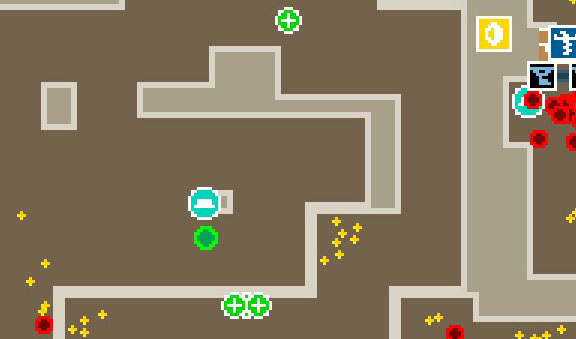
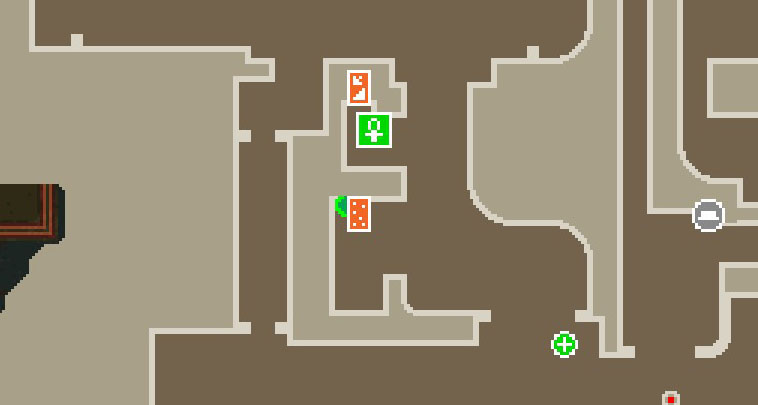
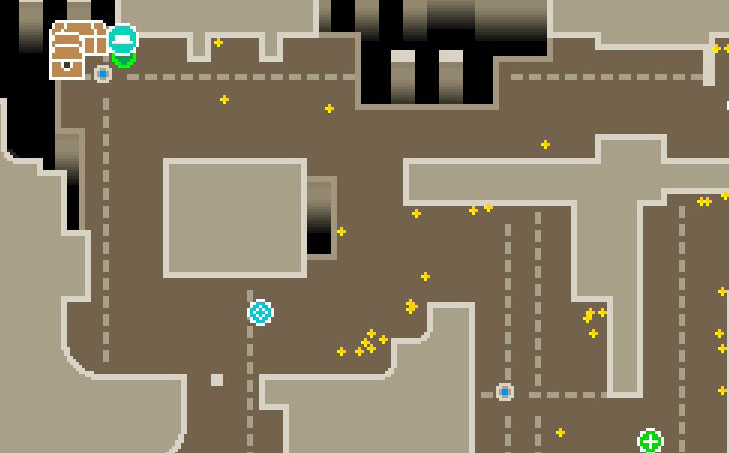
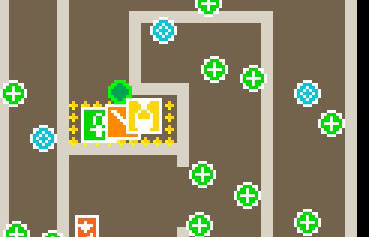
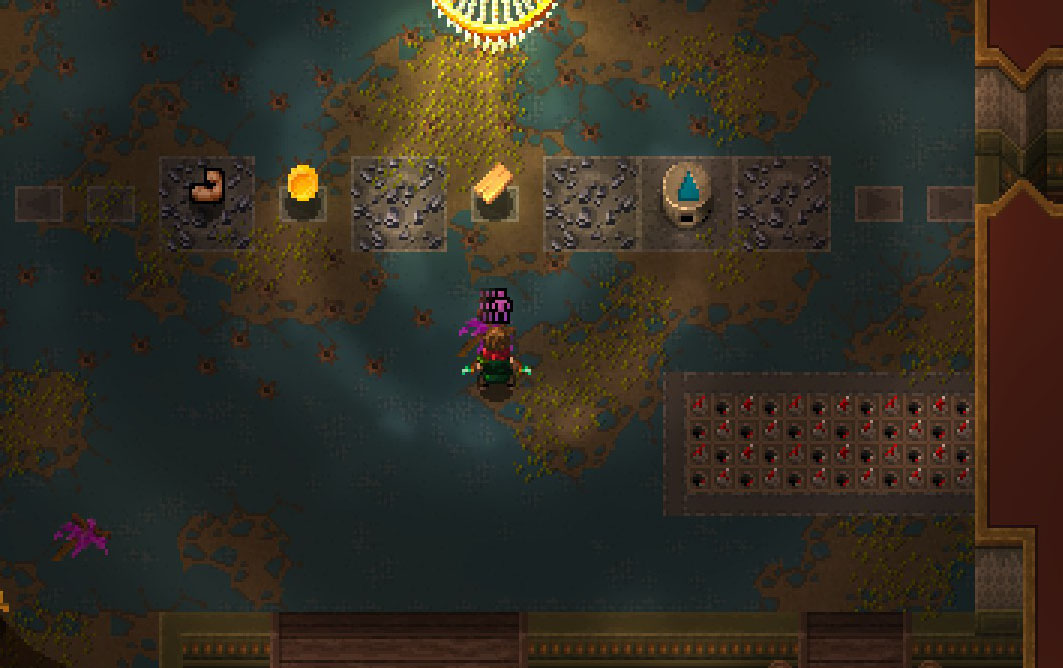
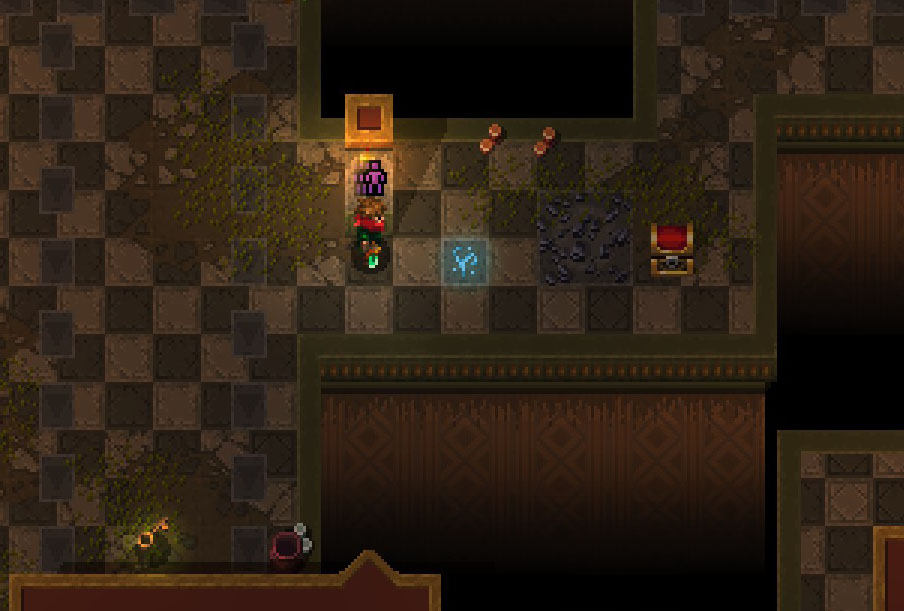
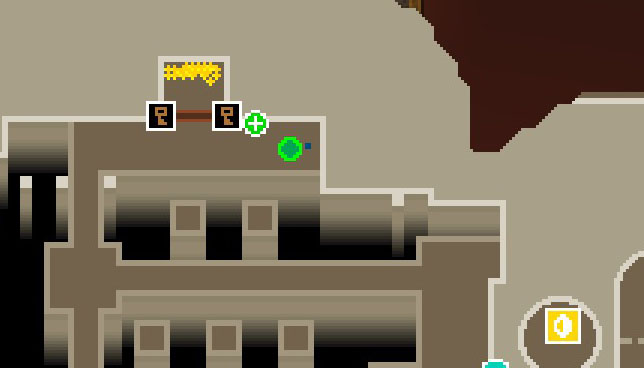
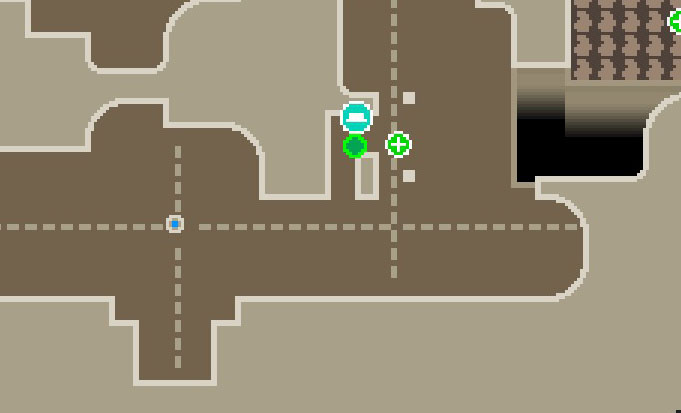
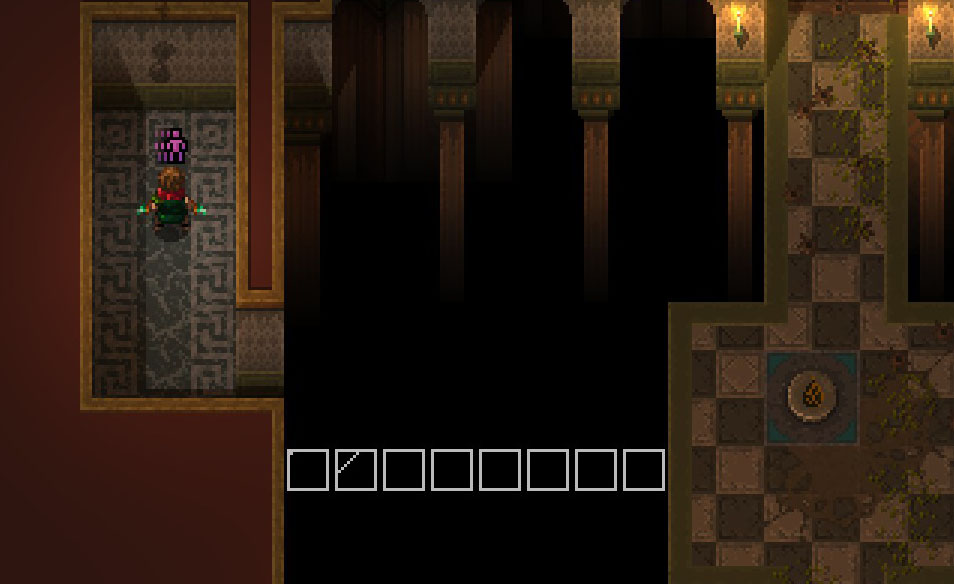
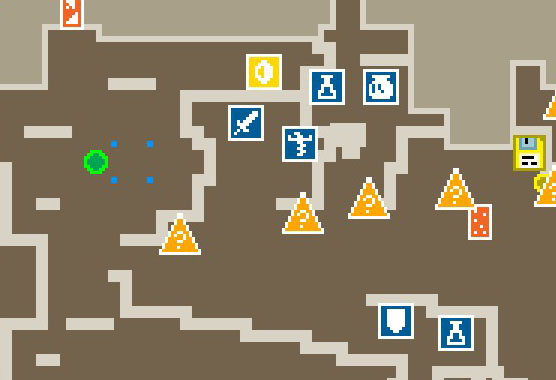
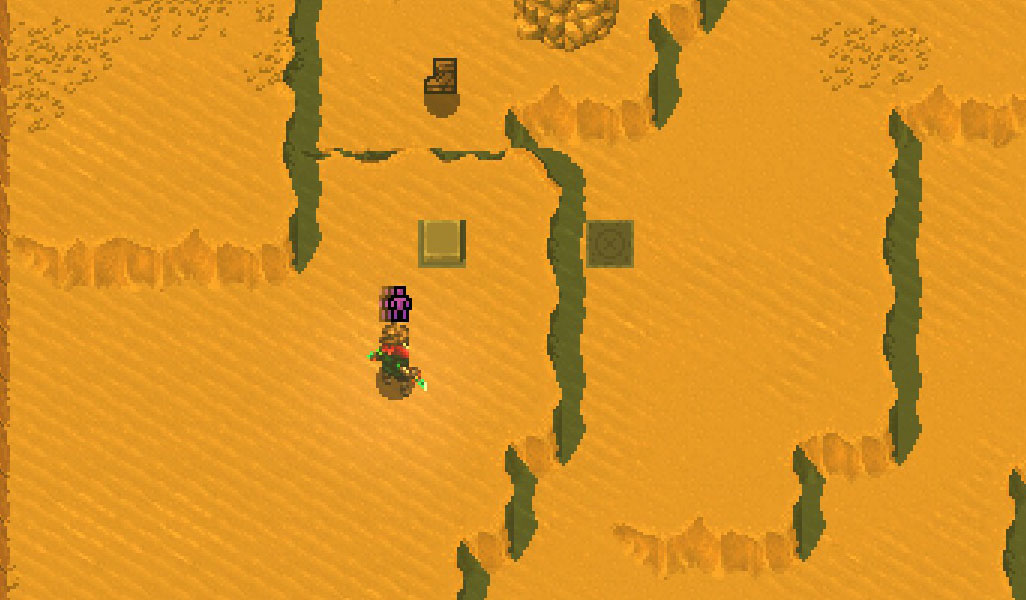
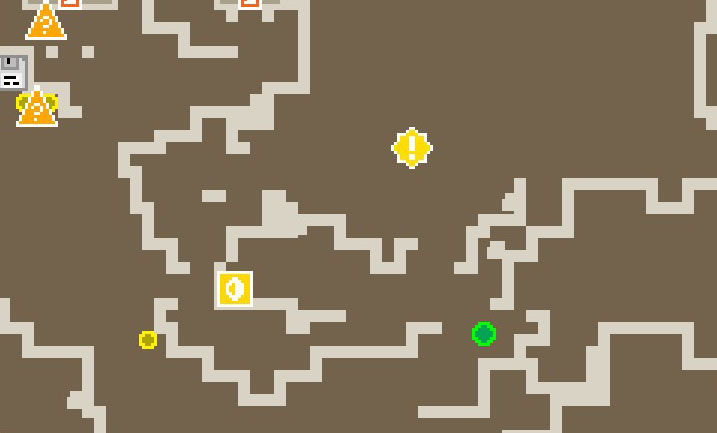
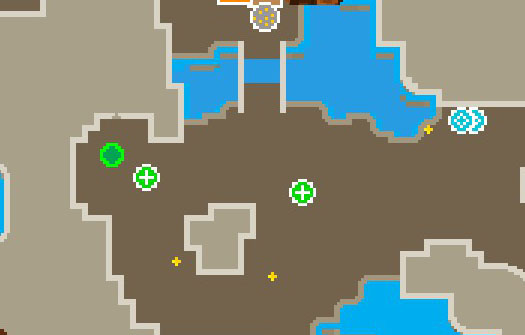
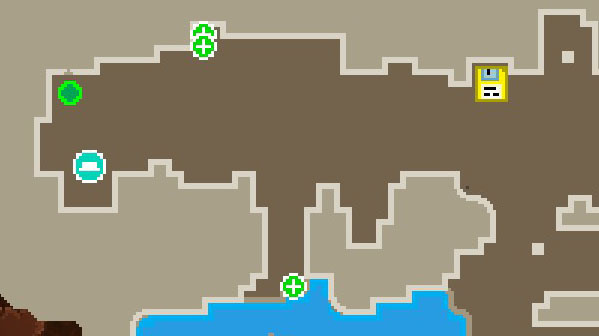
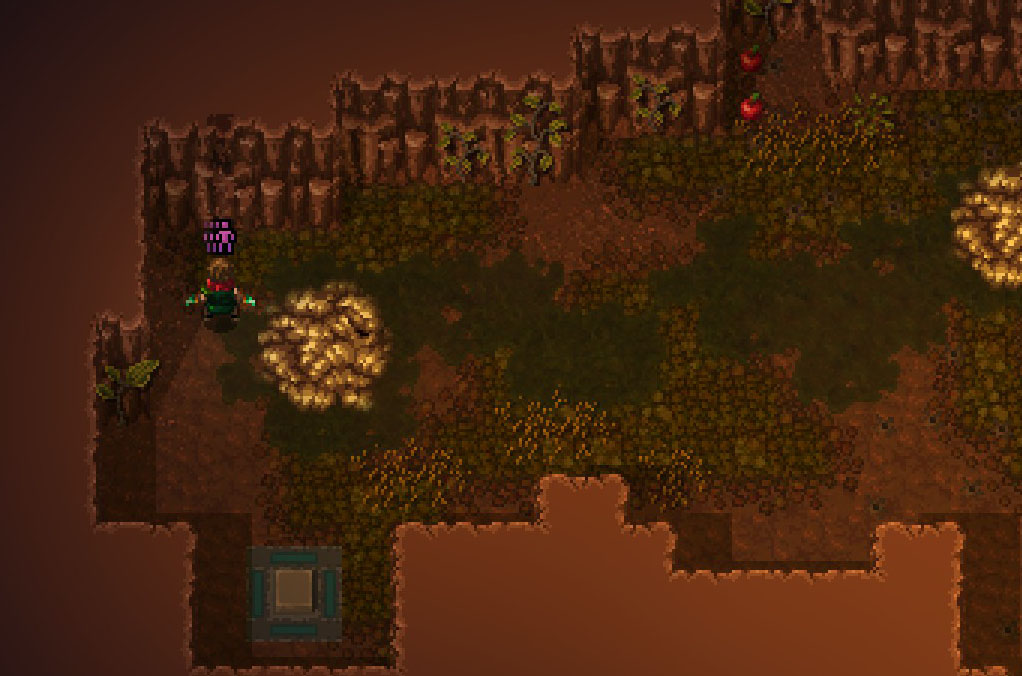
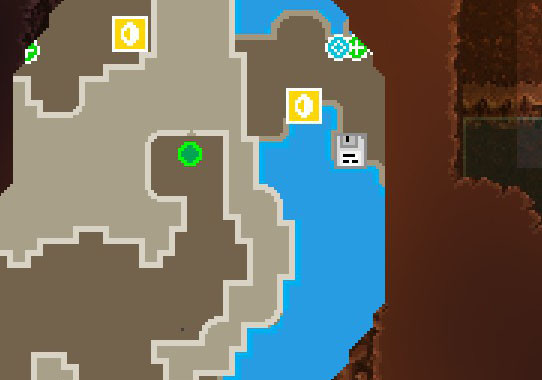
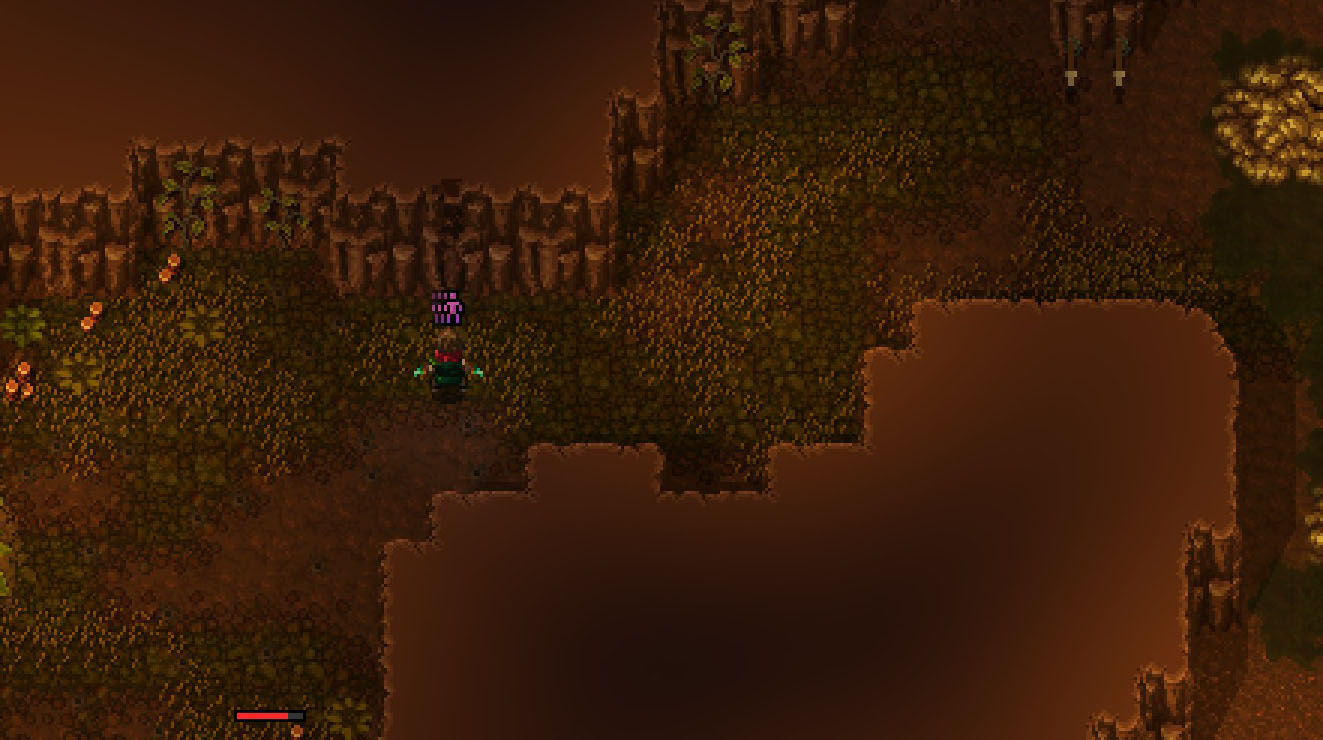
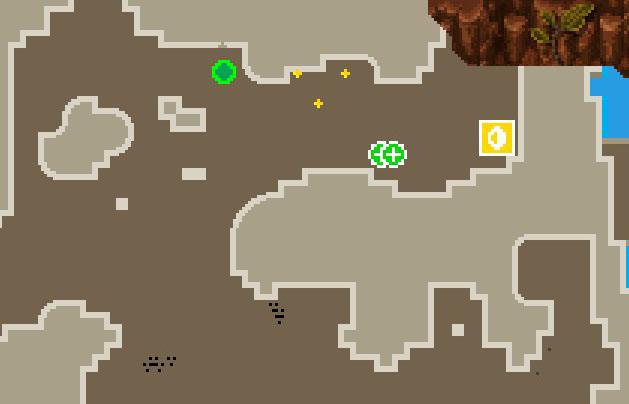
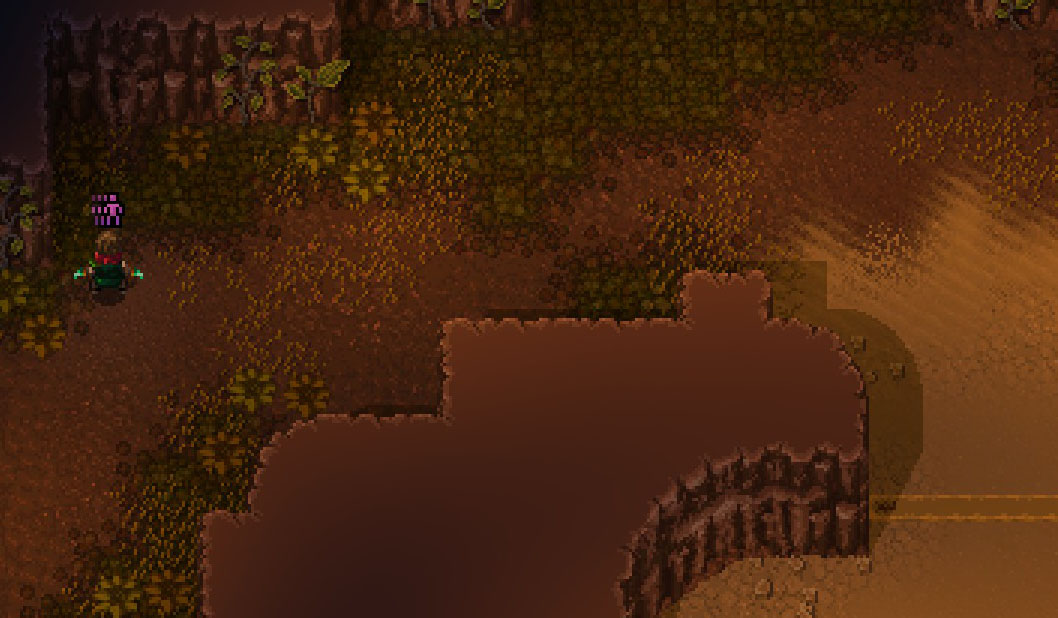
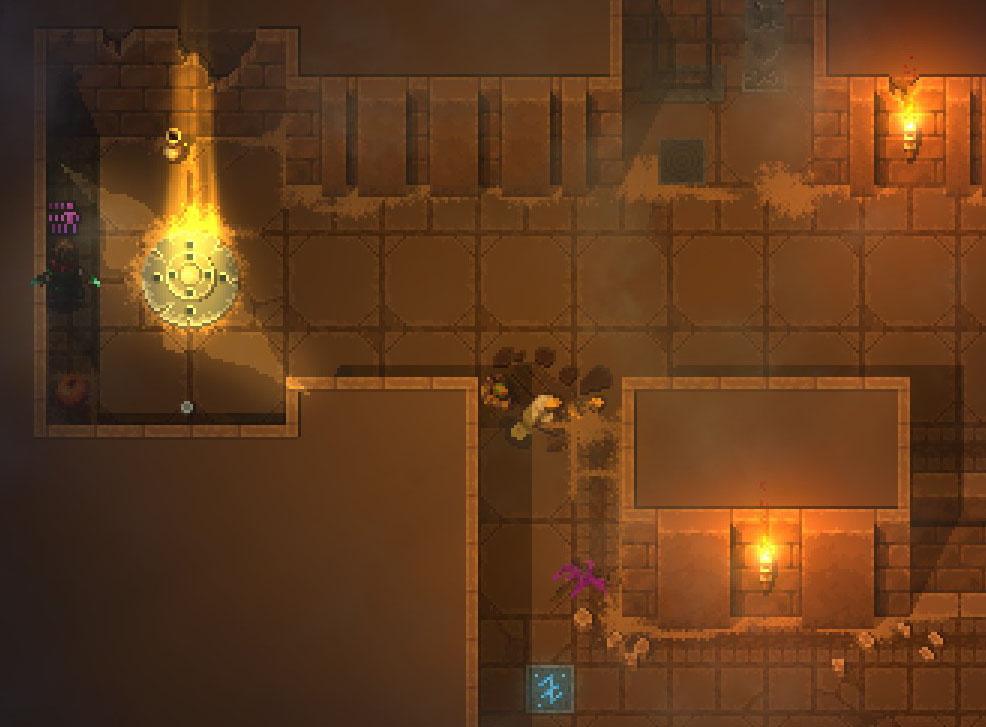
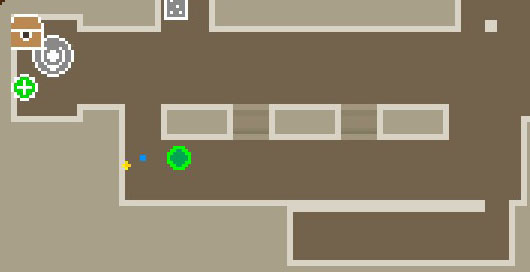
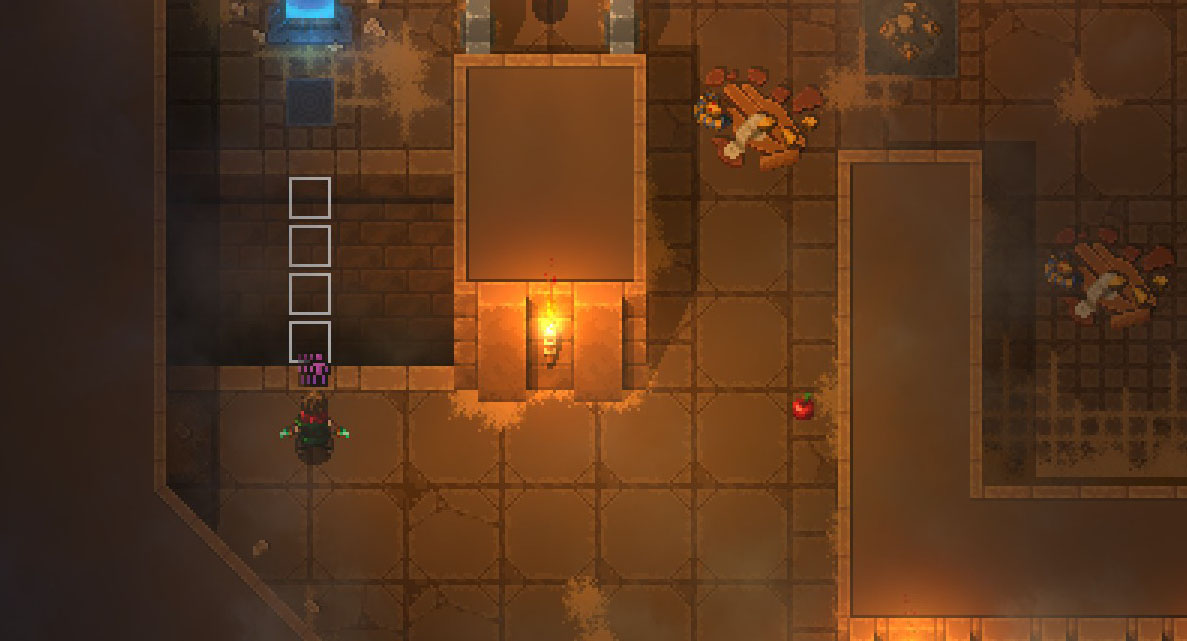
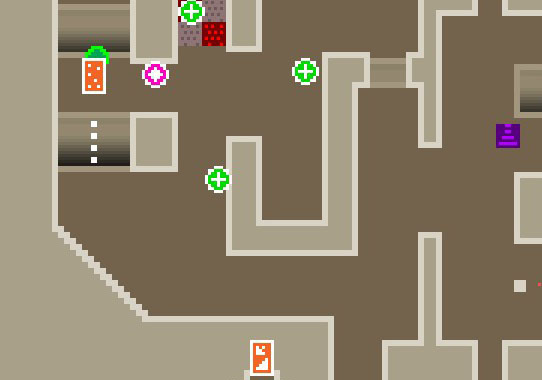
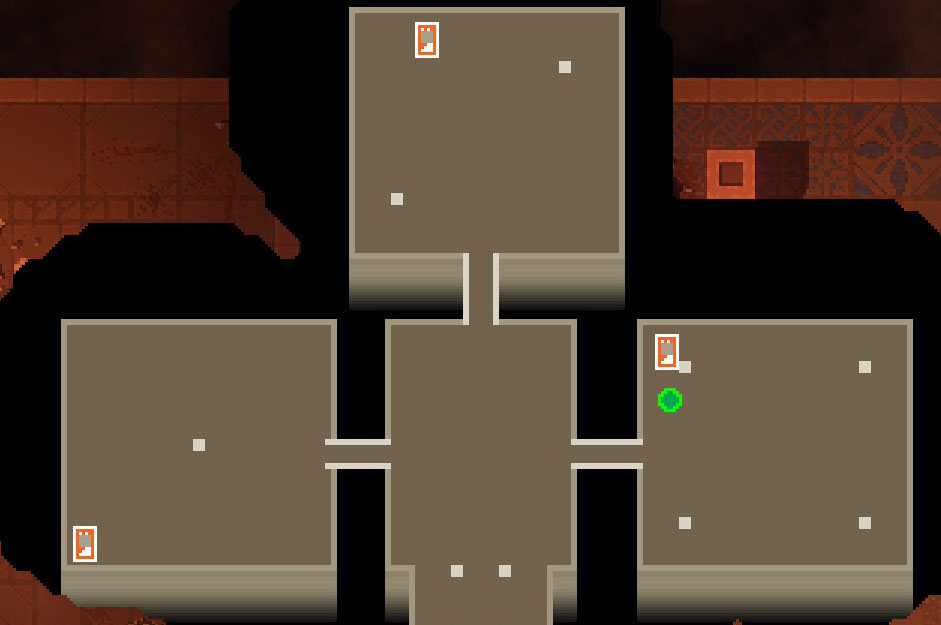
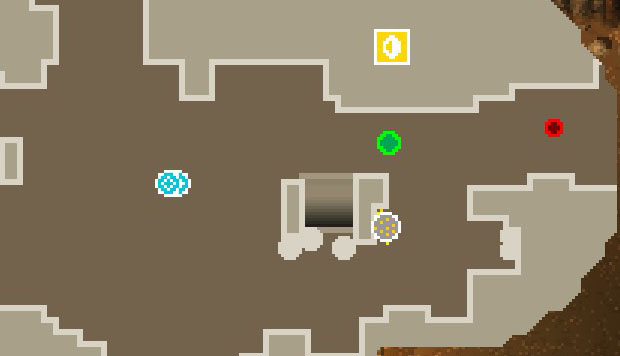
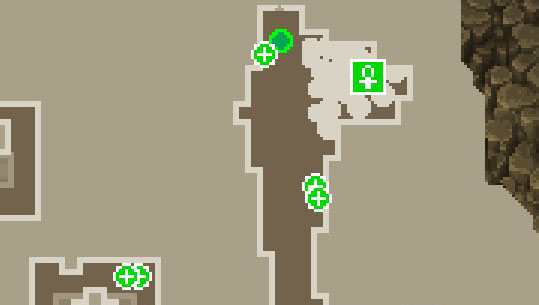
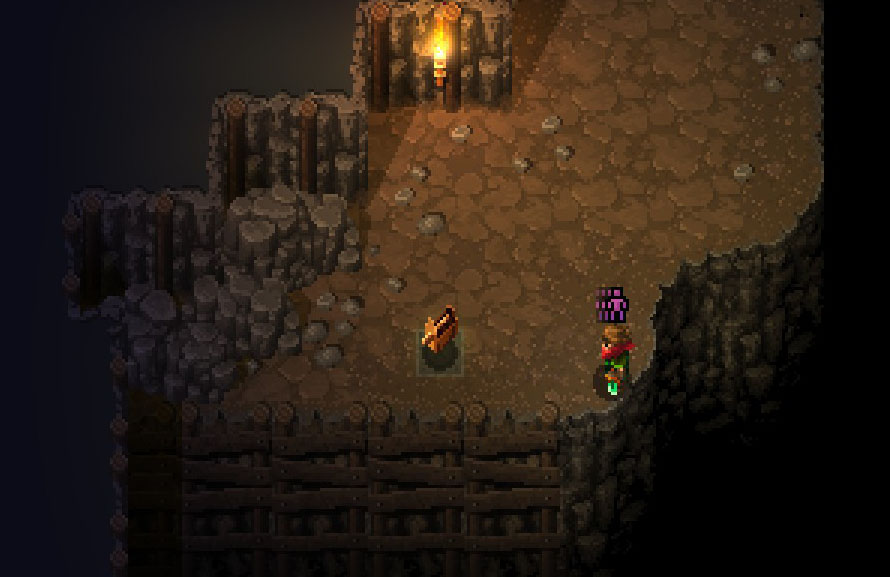
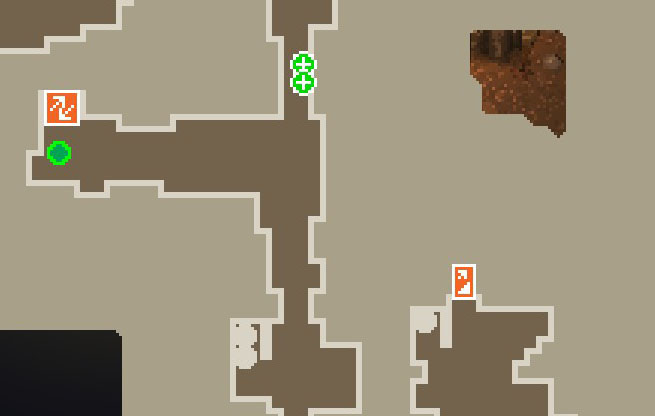
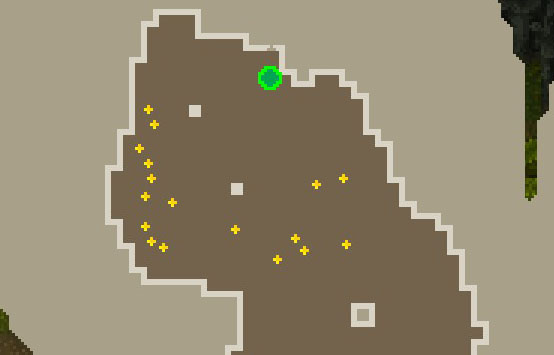
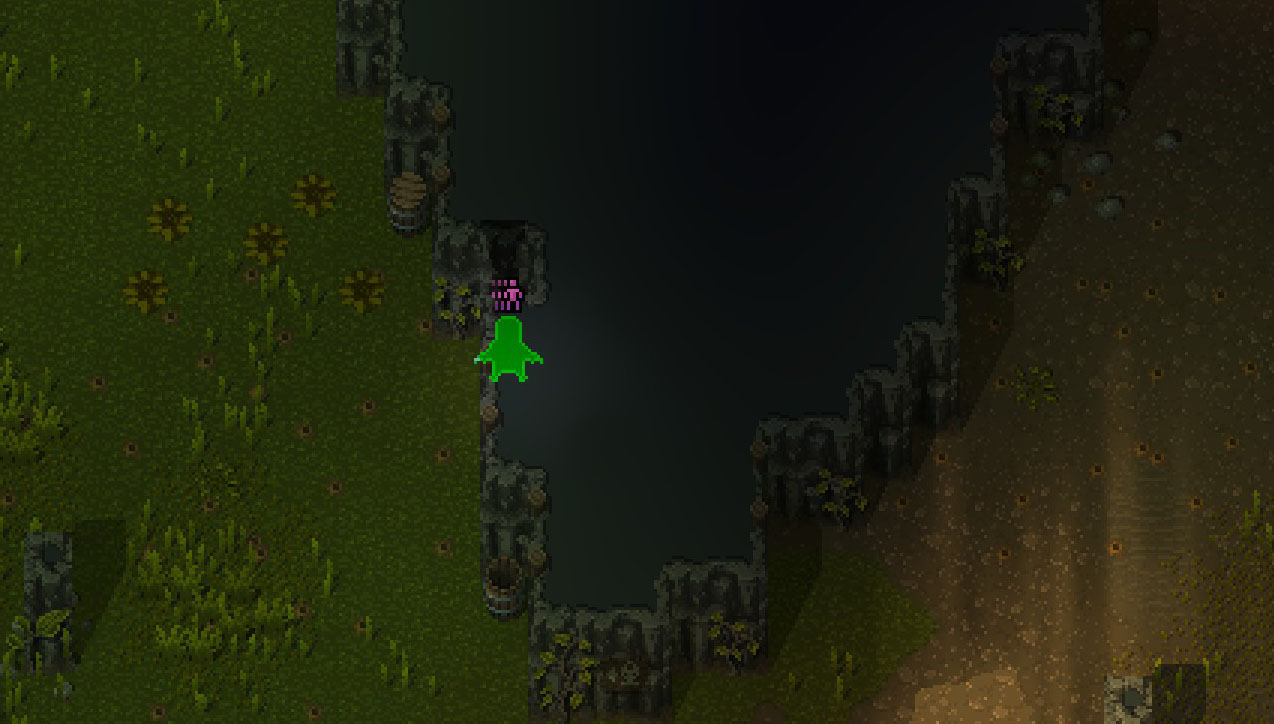
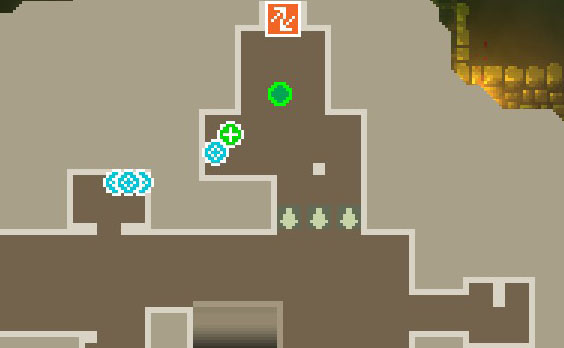
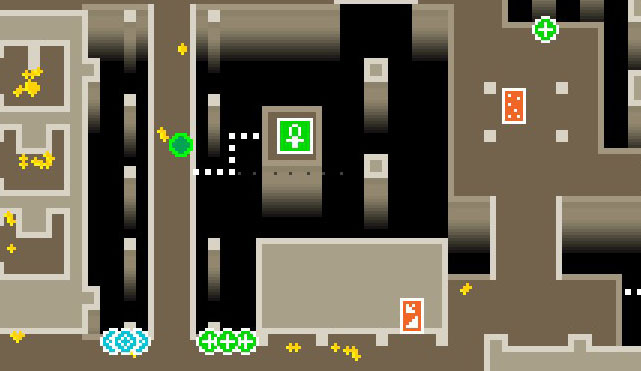
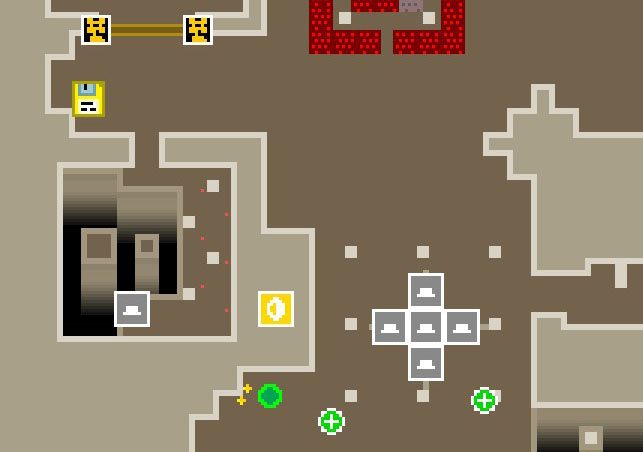
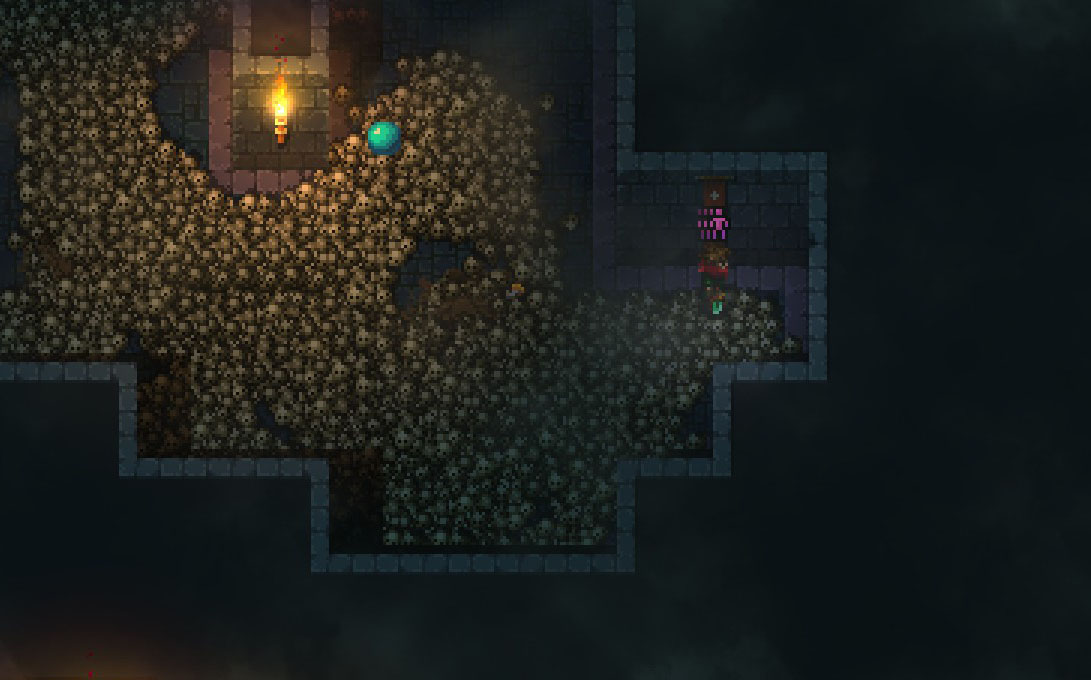
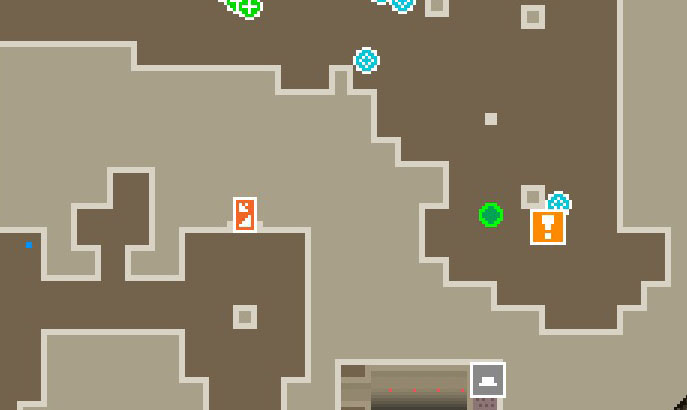
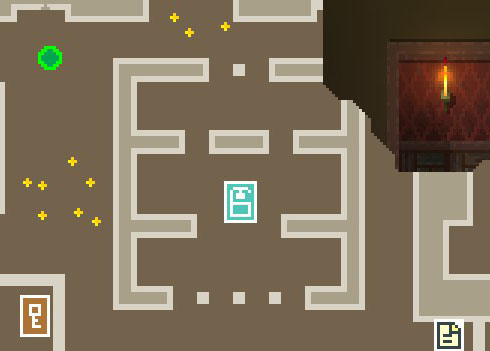
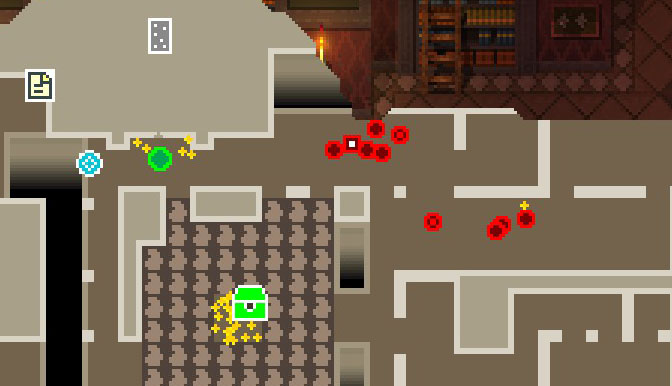
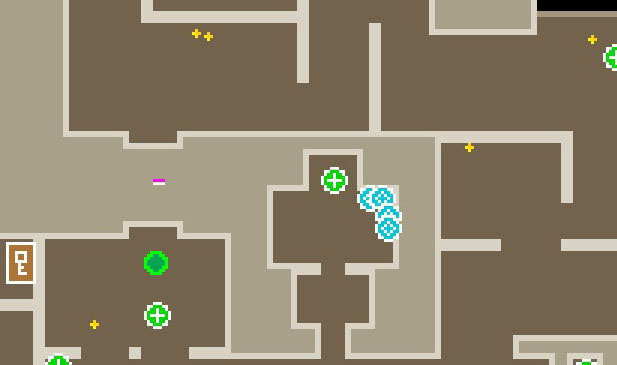
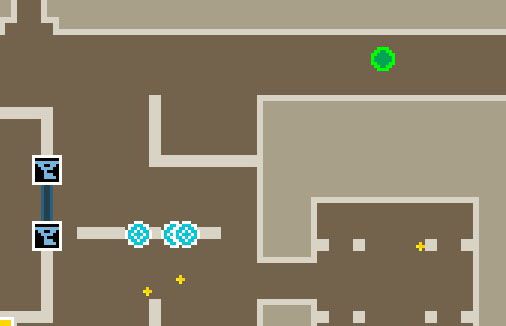
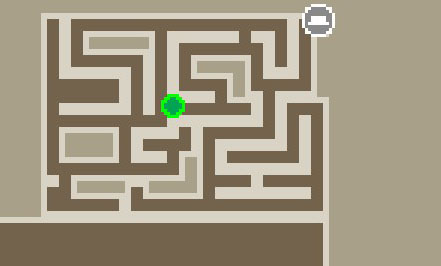
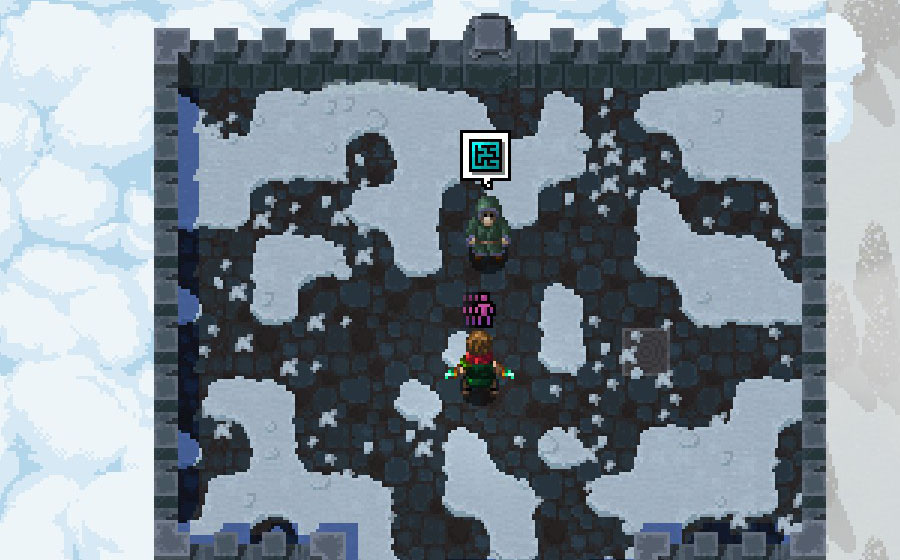
Here is an Item room on Keltonite Mines Floor 1 if you circle and go above the main entrance
https://gtm.steamproxy.vip/id/DacianDraco/screenshot/2501272149848763969/

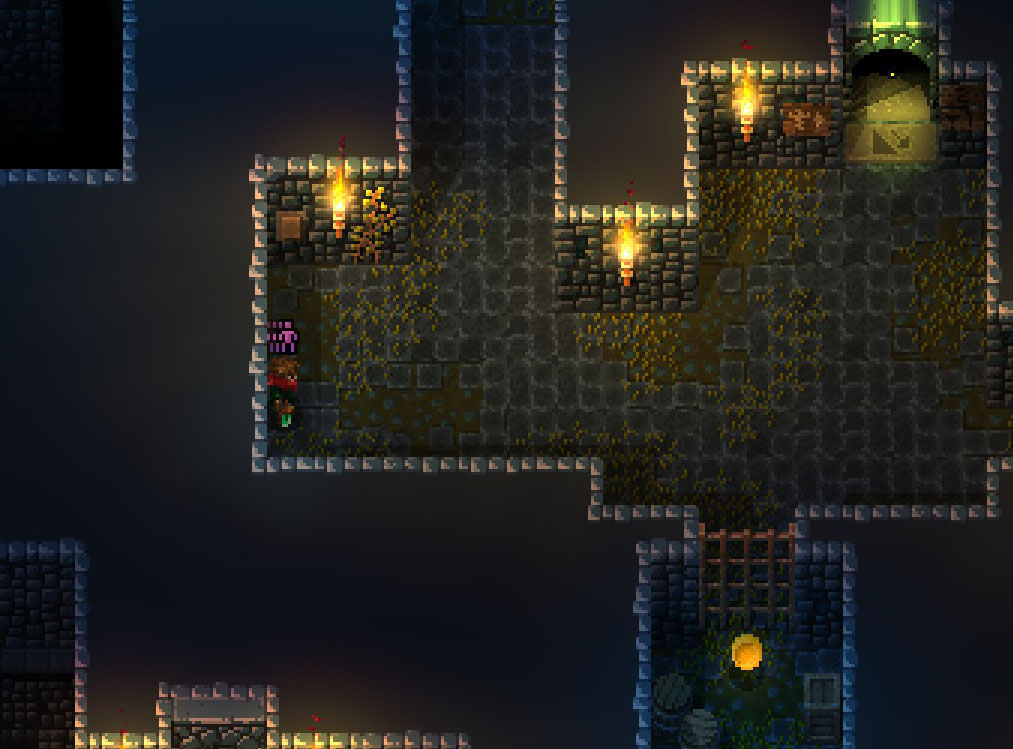
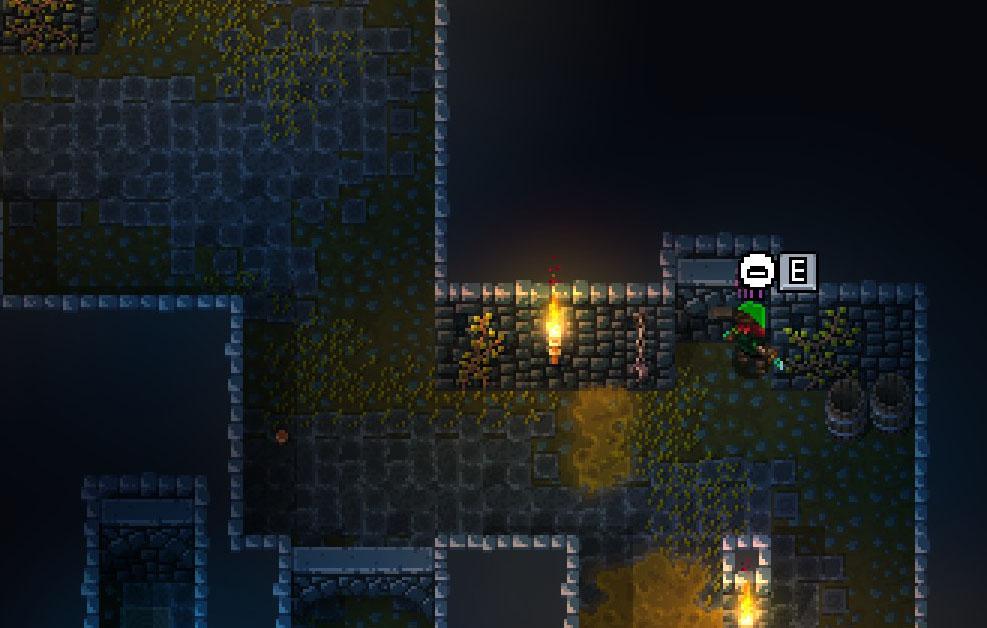
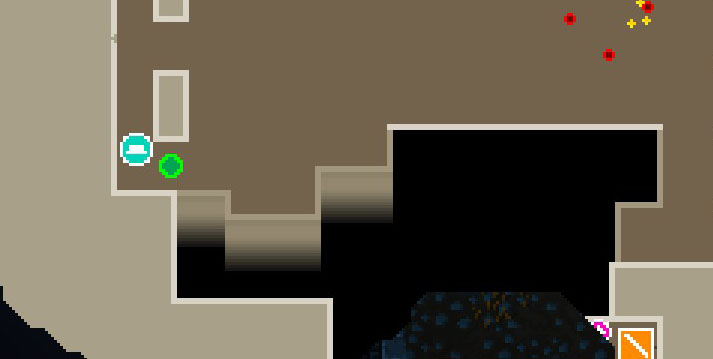
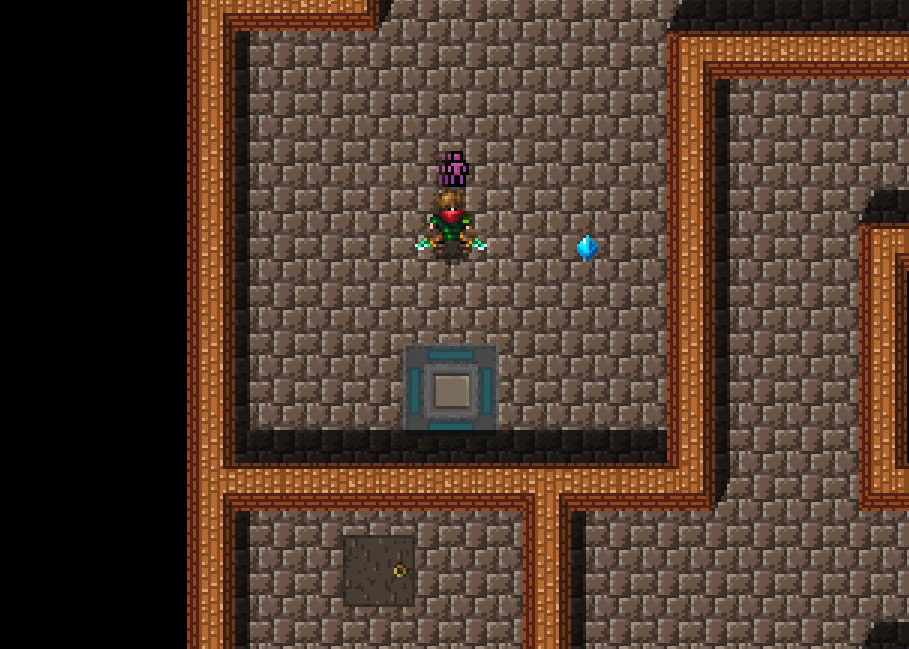
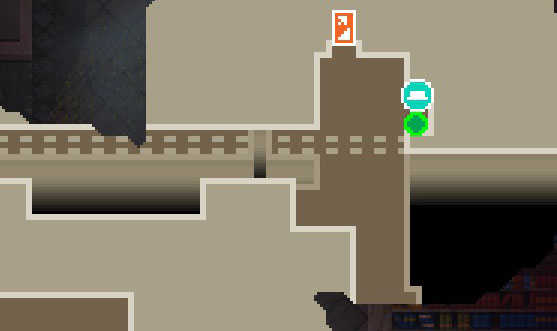
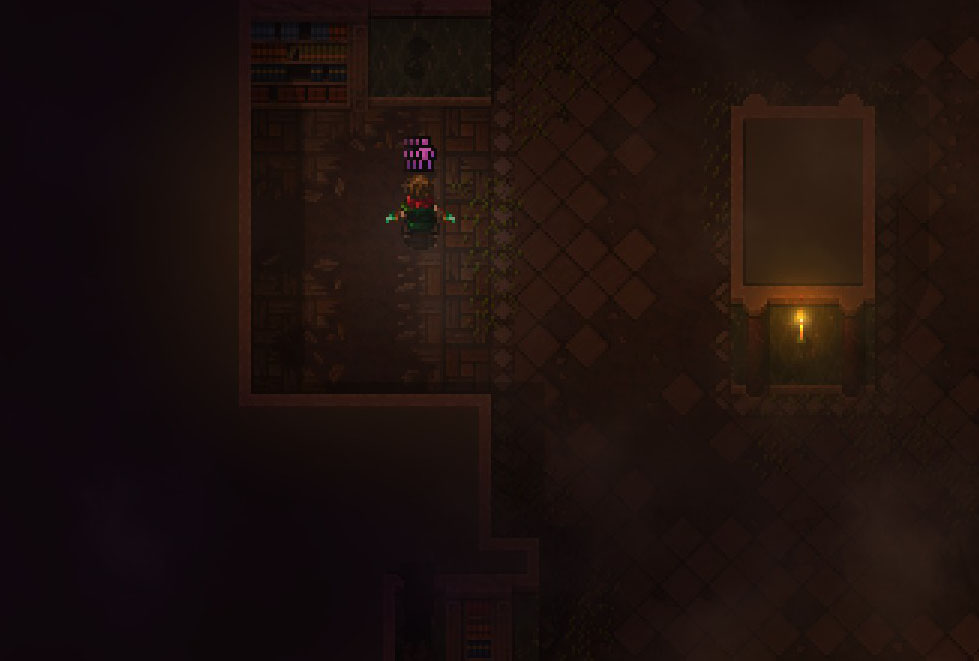
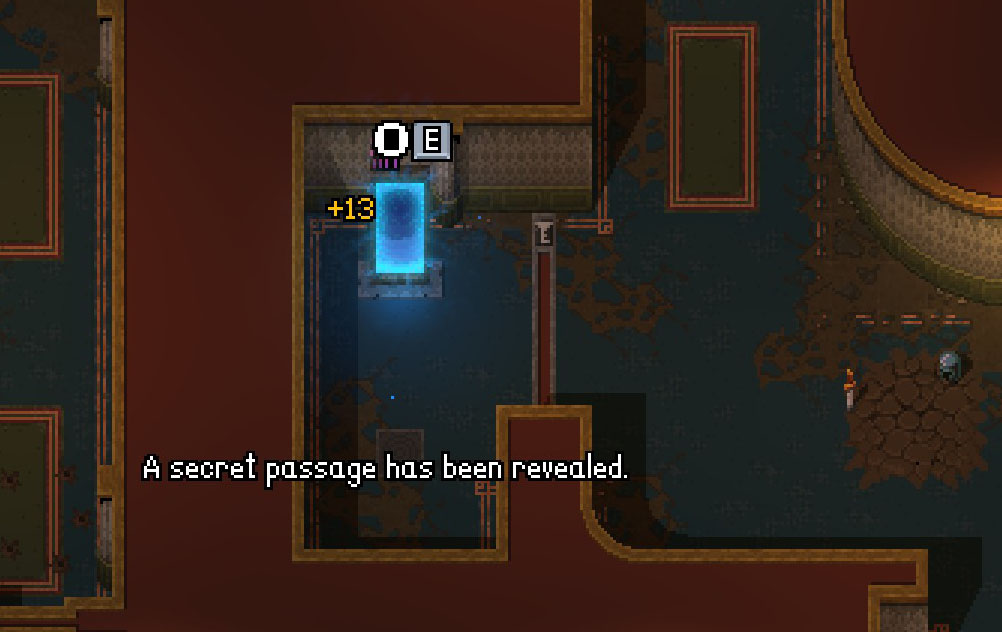
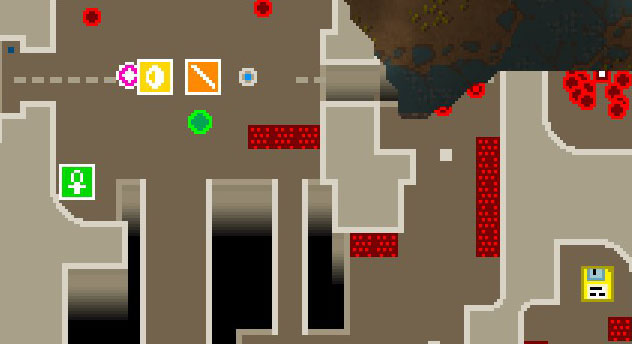
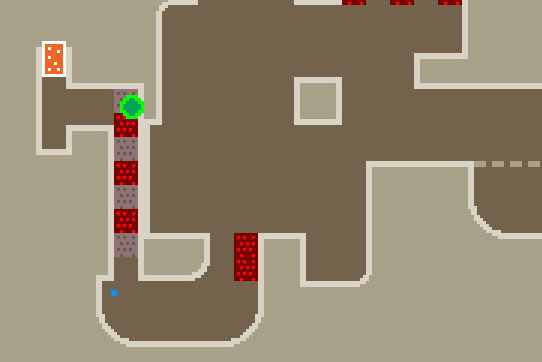
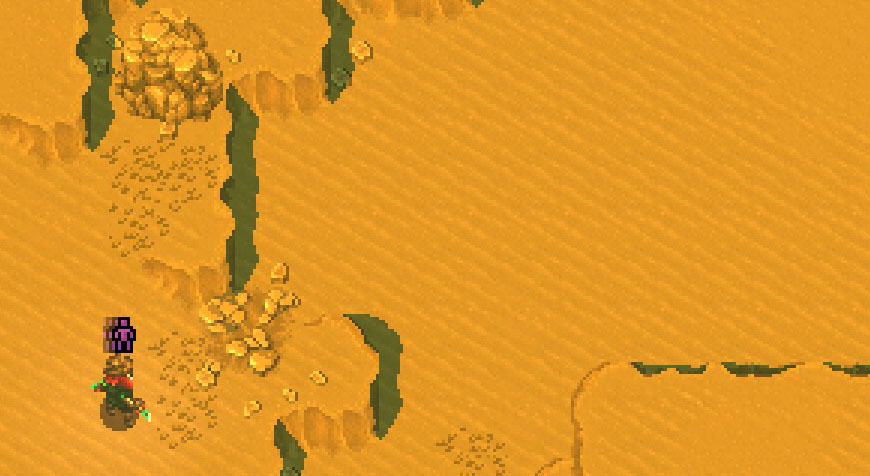
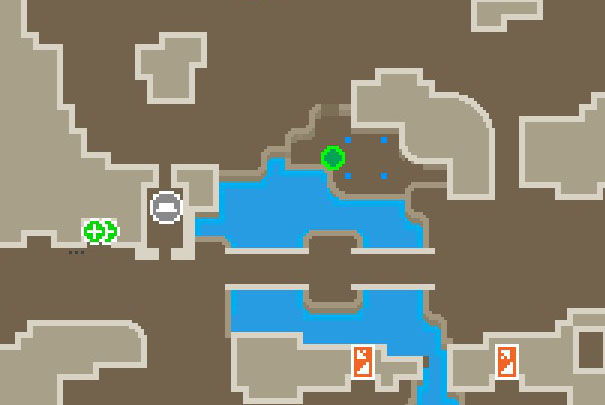
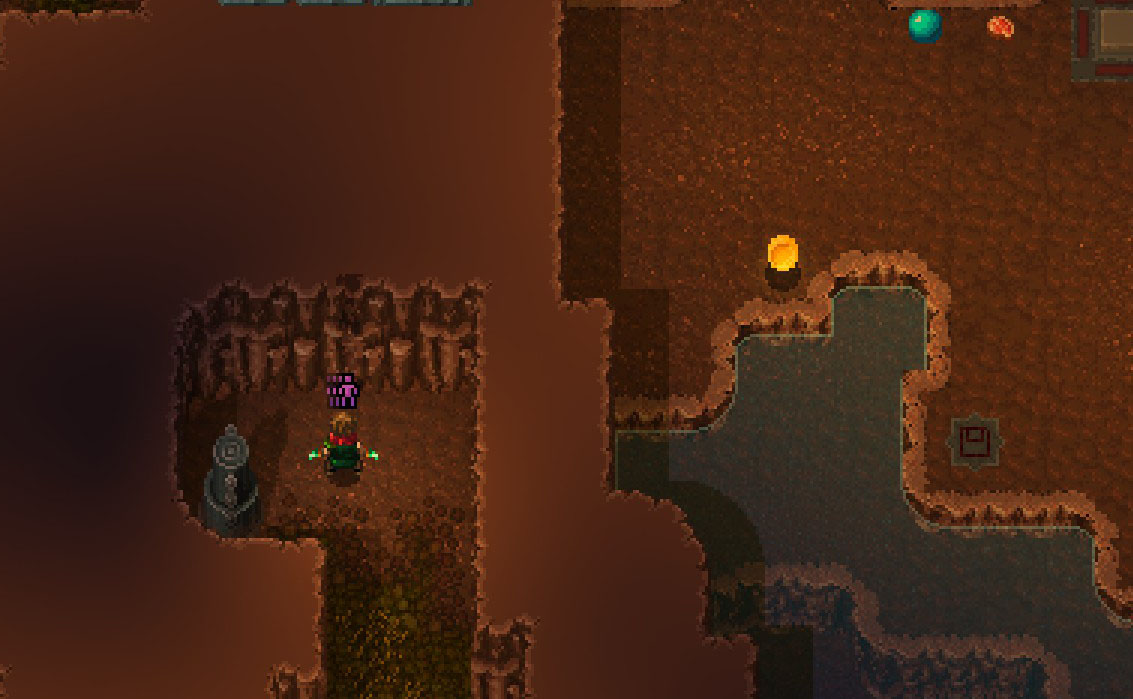
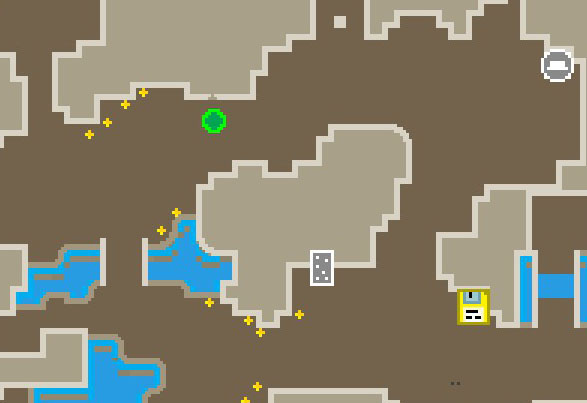
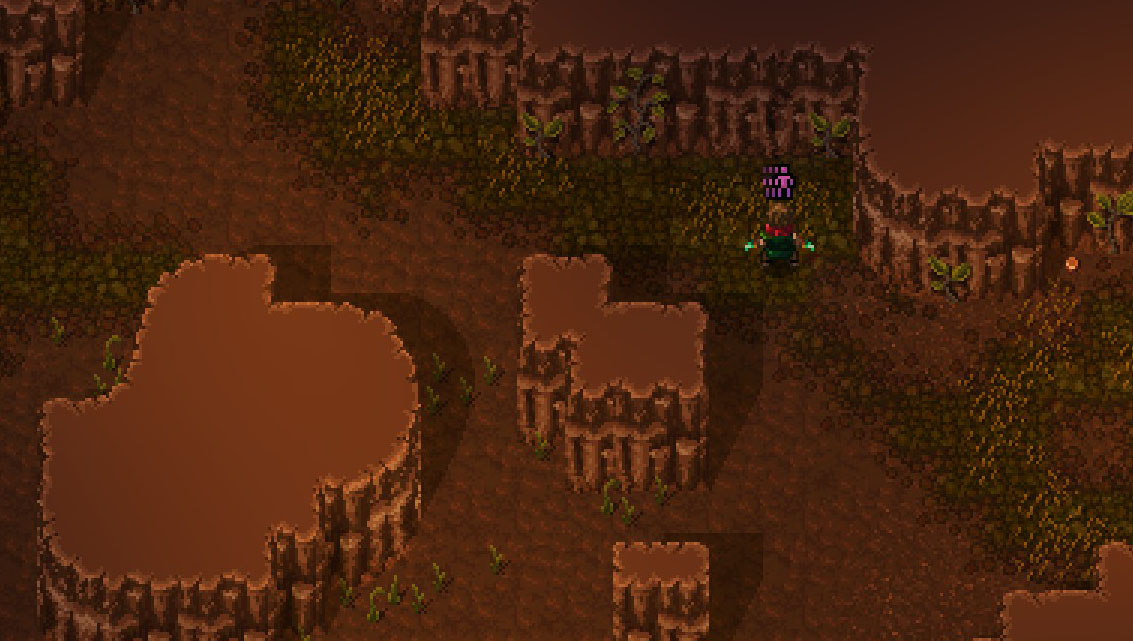
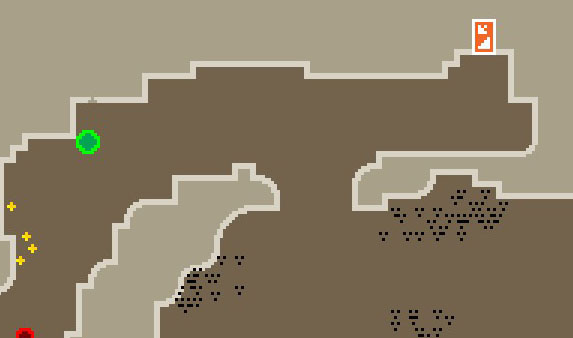
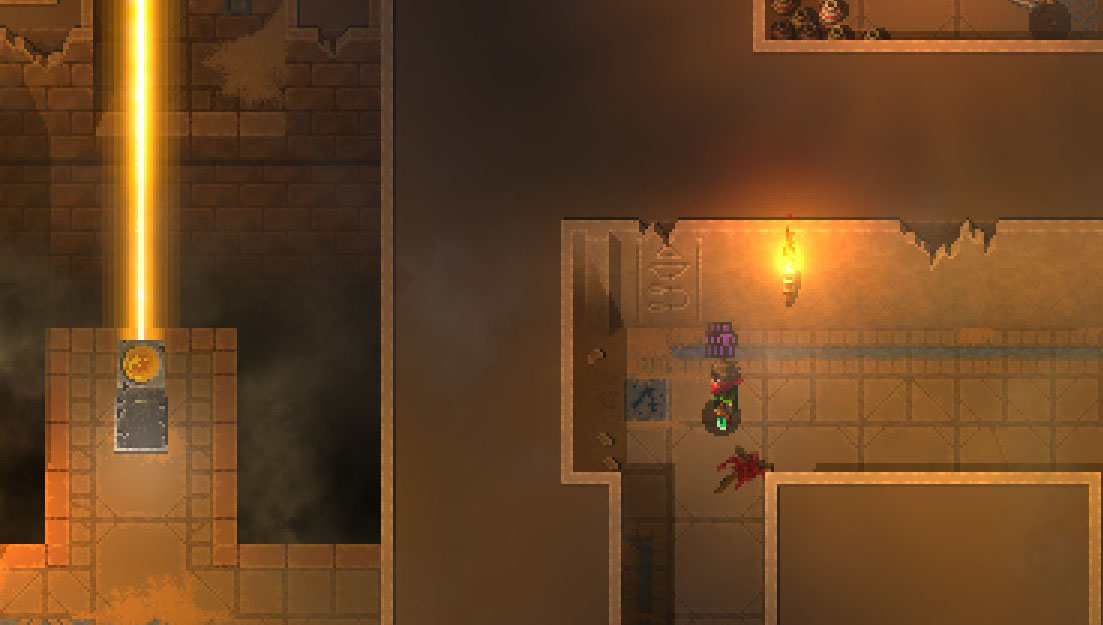
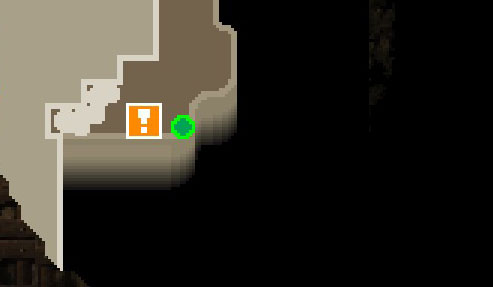
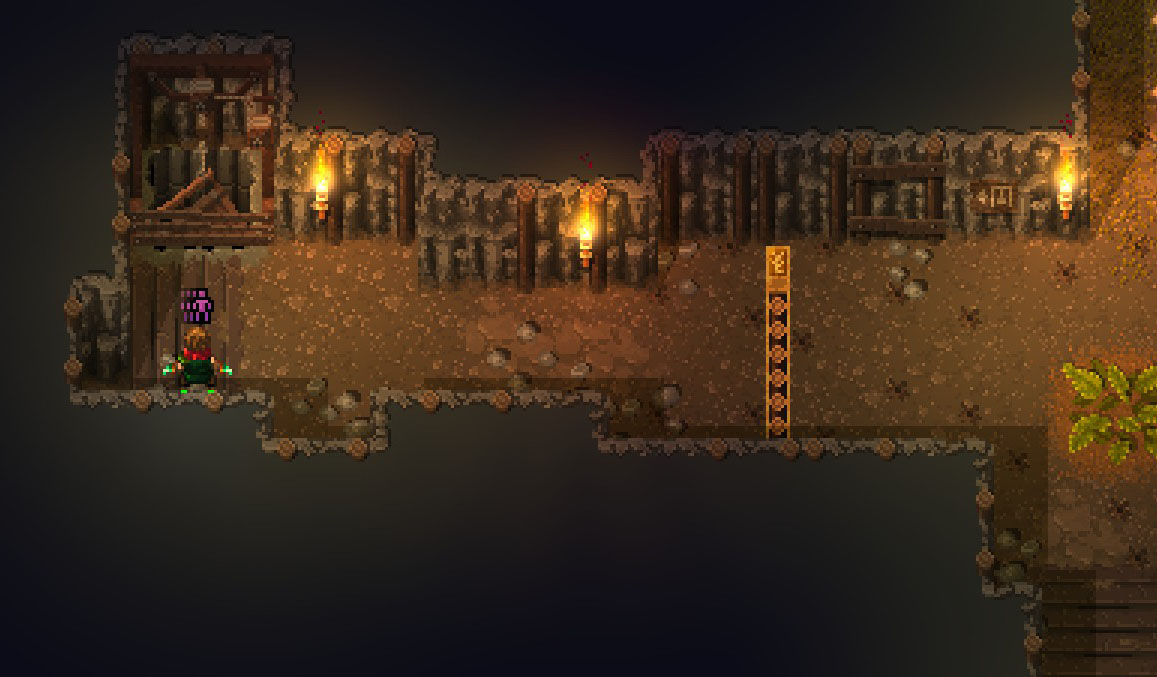
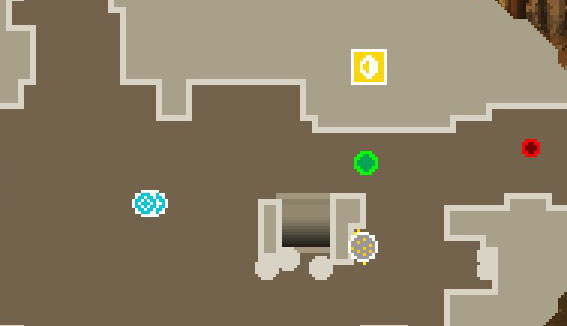
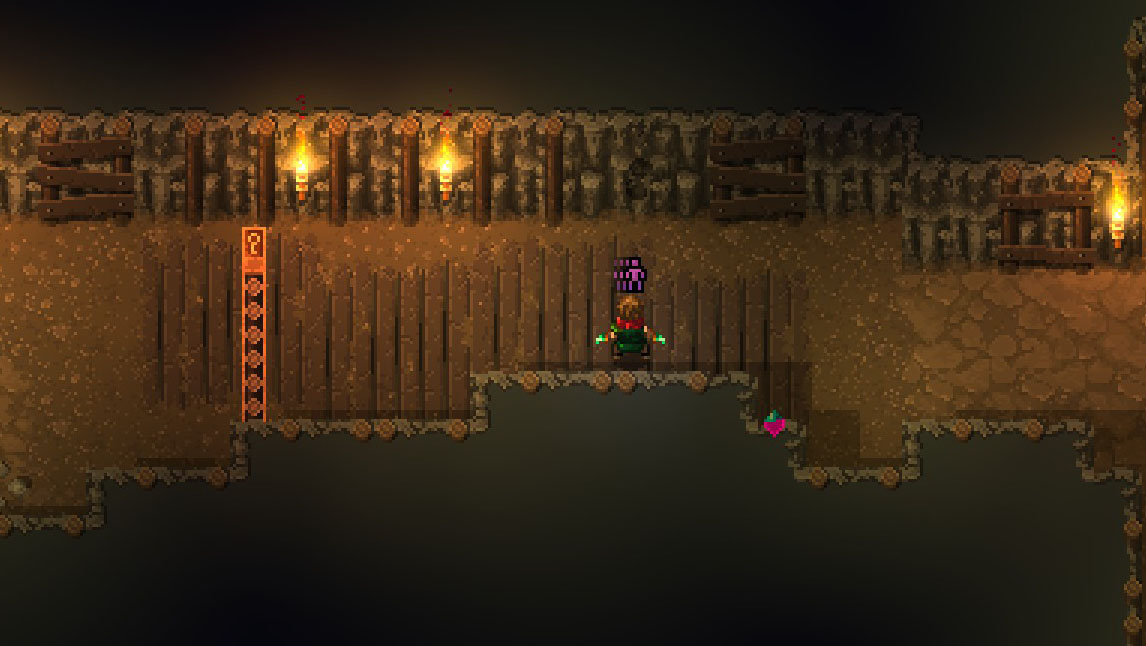
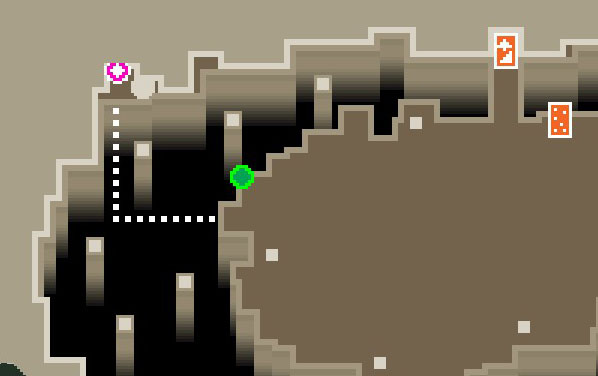
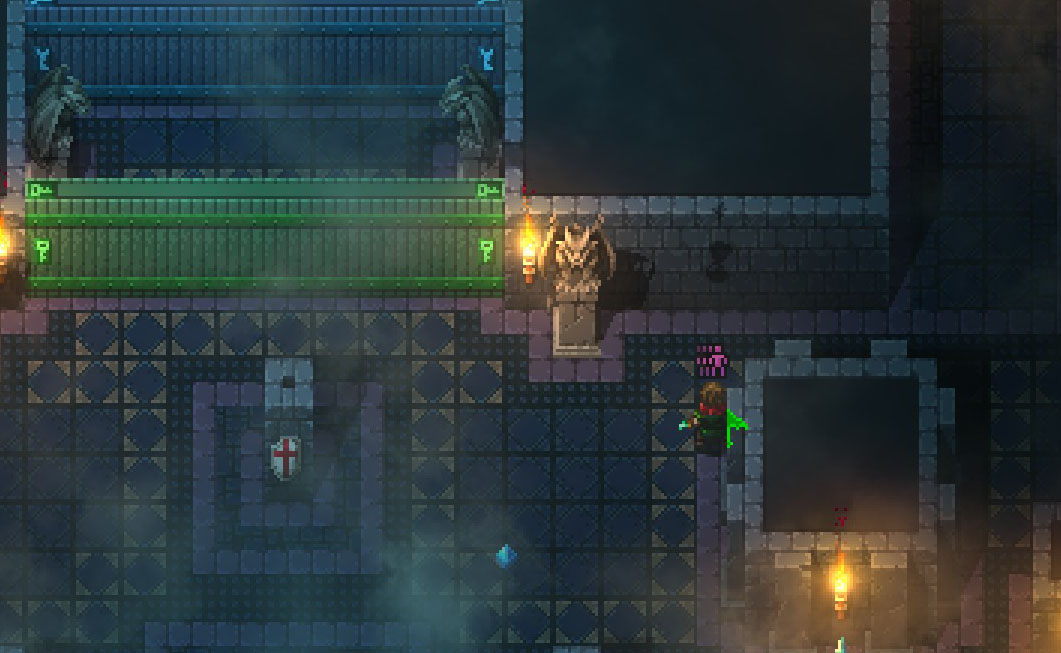
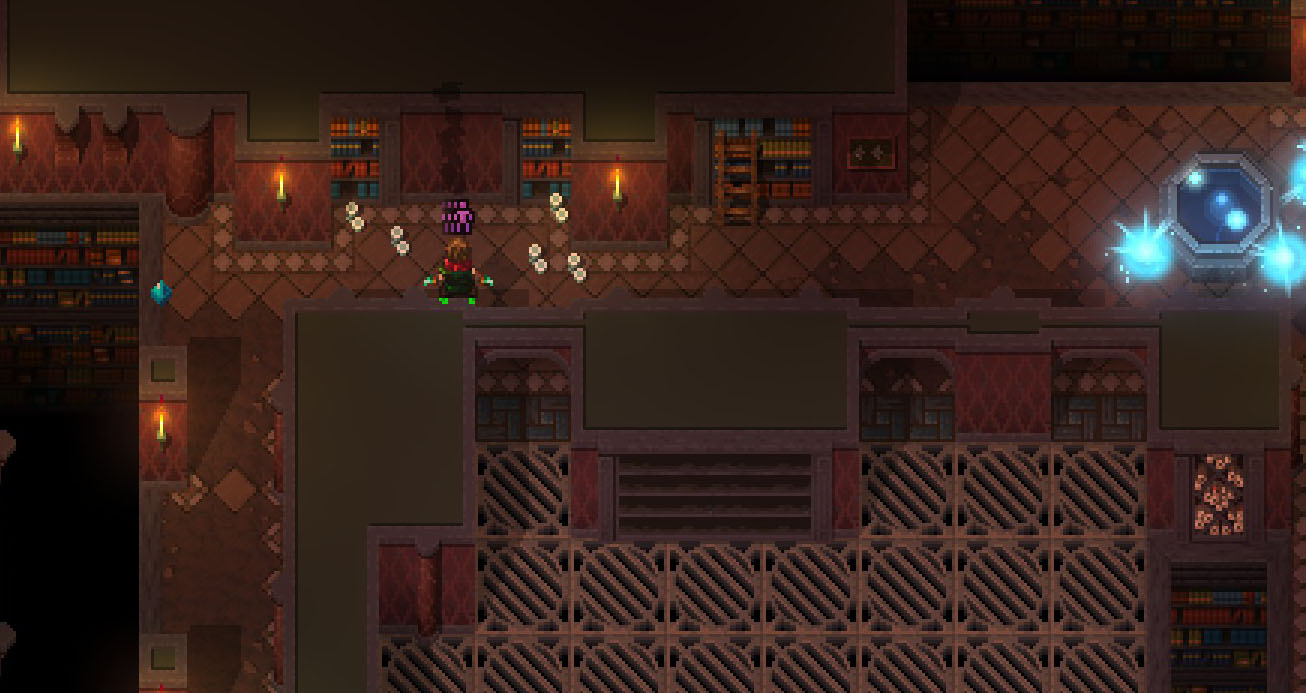
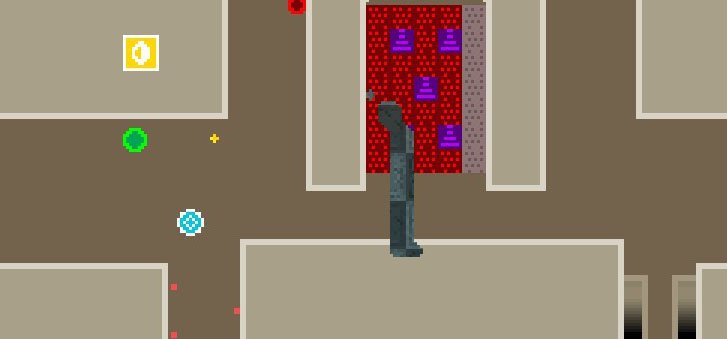
Passwall on Keltonite Mines 3 top right close to the entrance to the Ore farming area
https://gtm.steamproxy.vip/id/DacianDraco/screenshot/2501272149848773030/

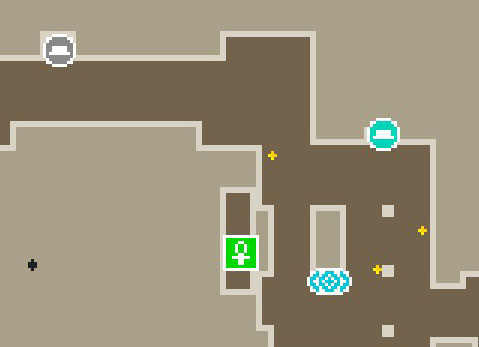
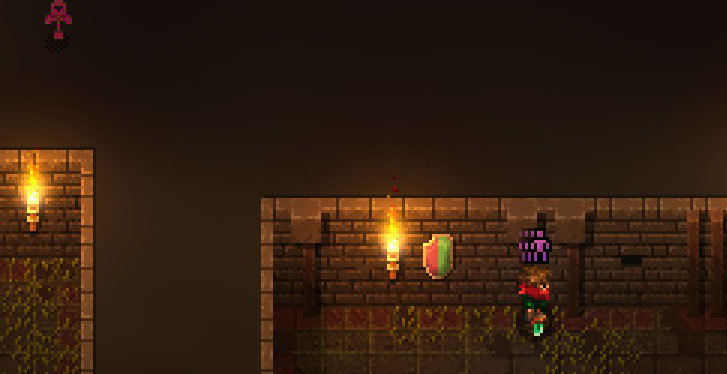
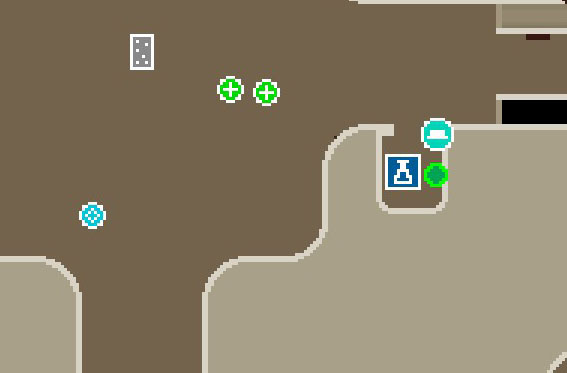
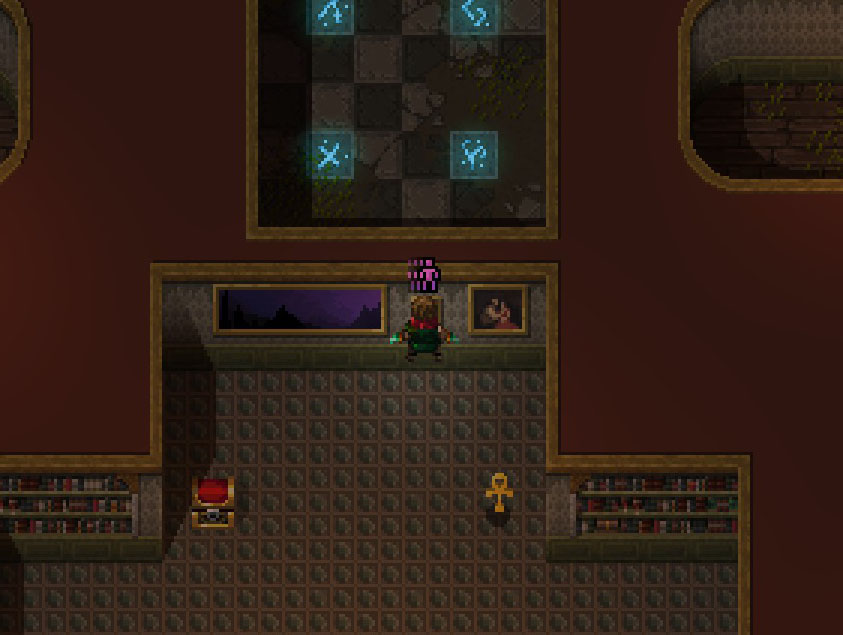
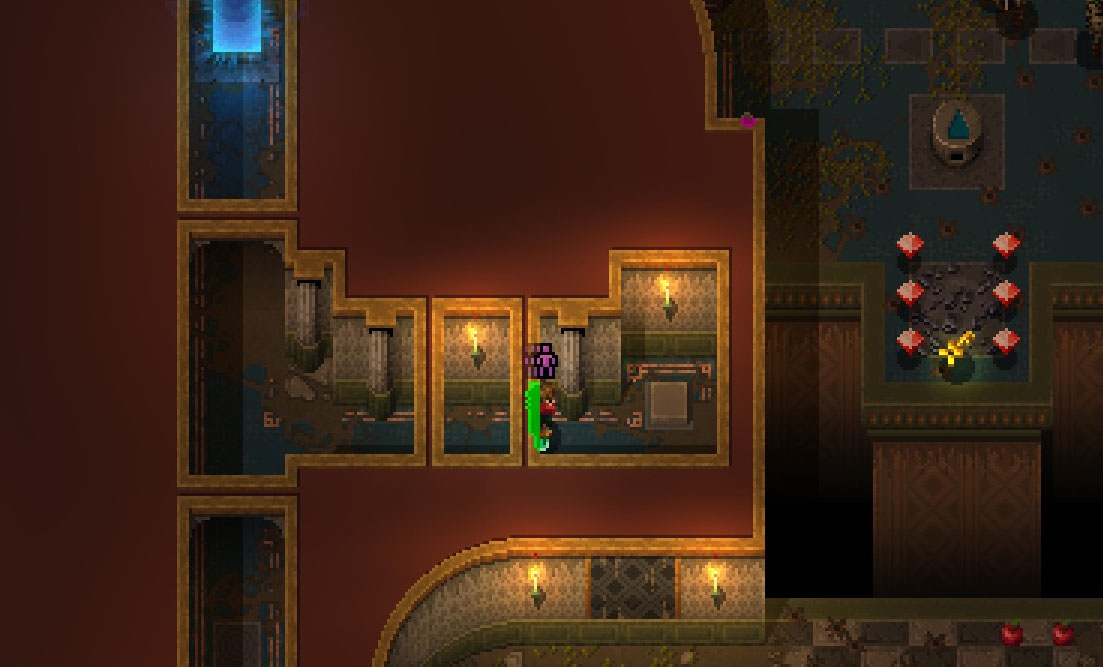
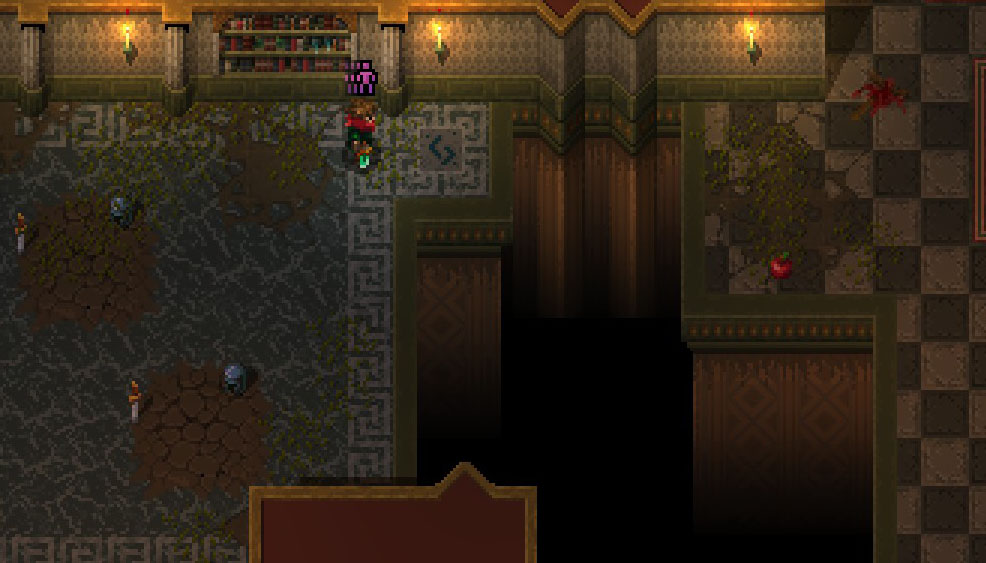
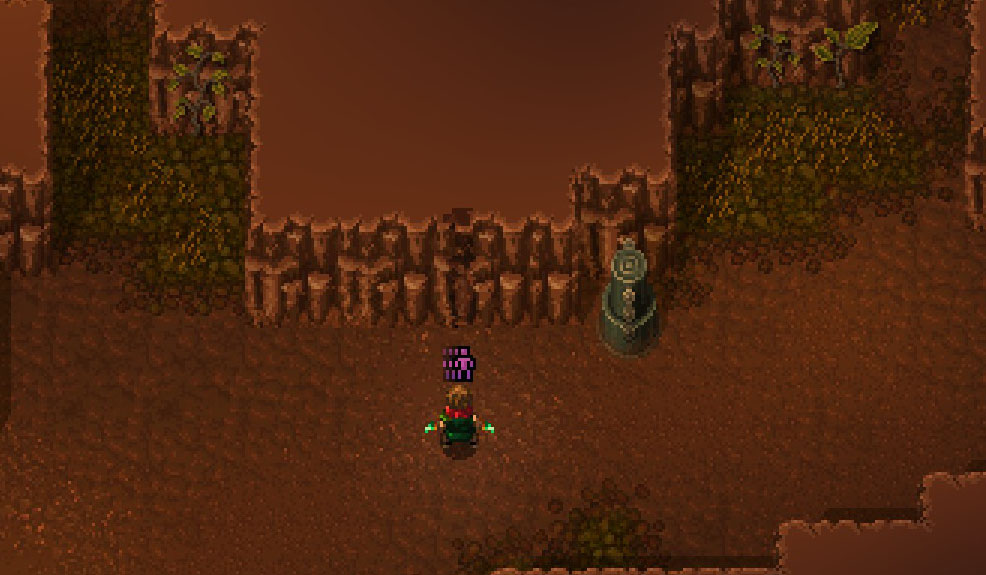
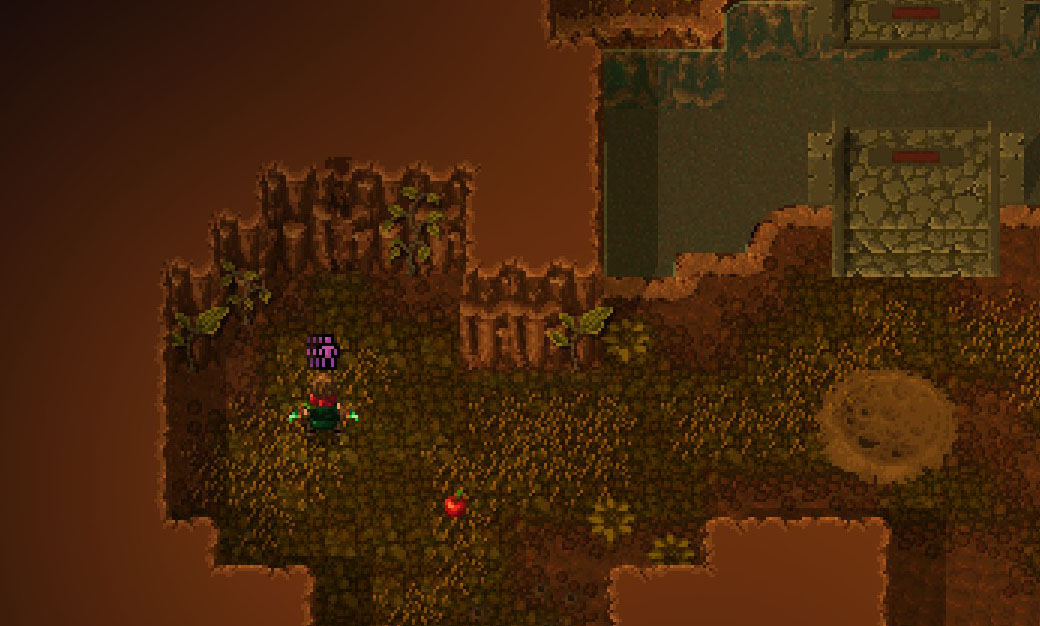
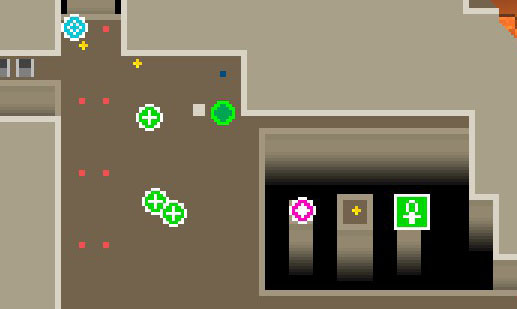
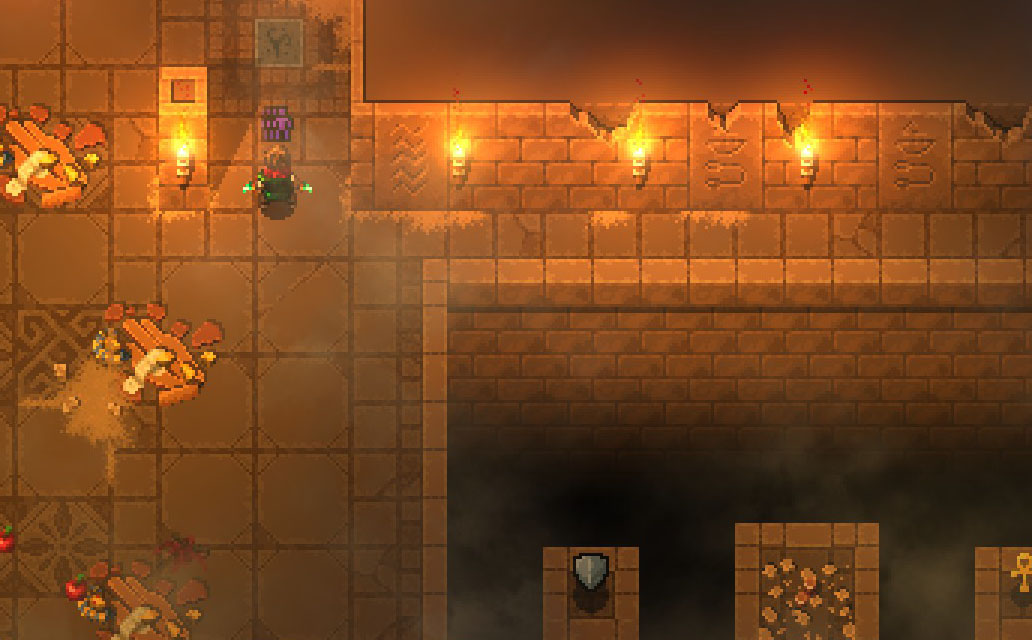
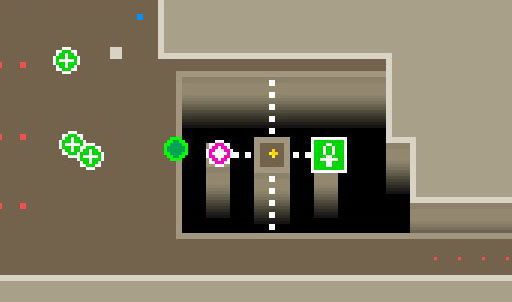
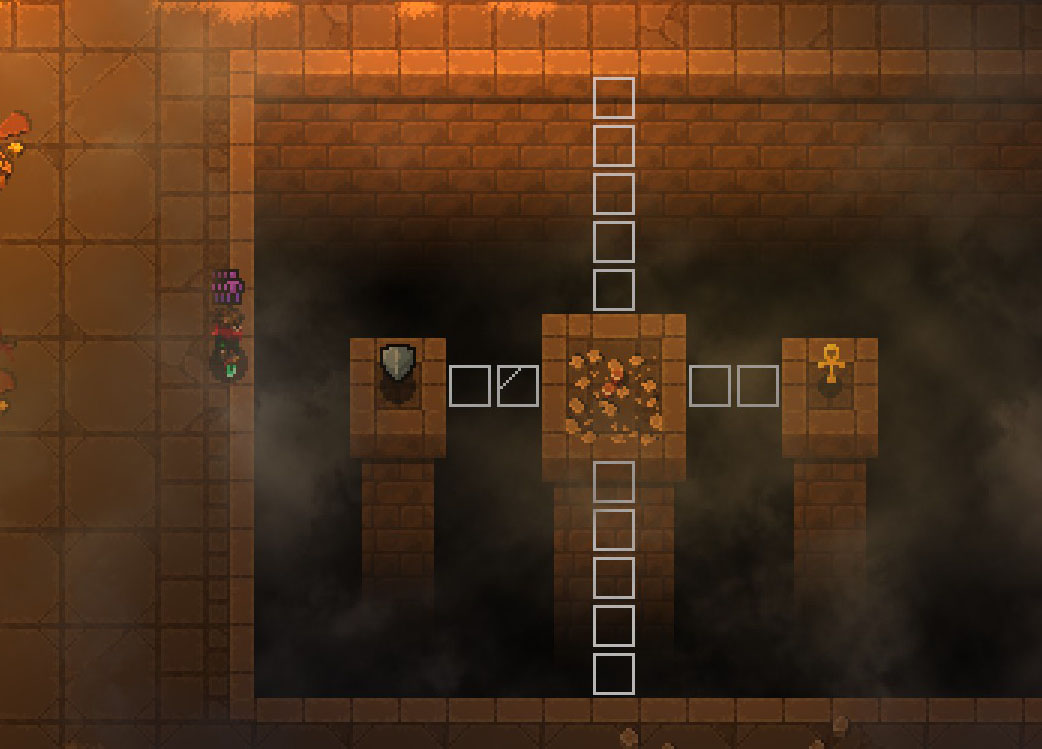
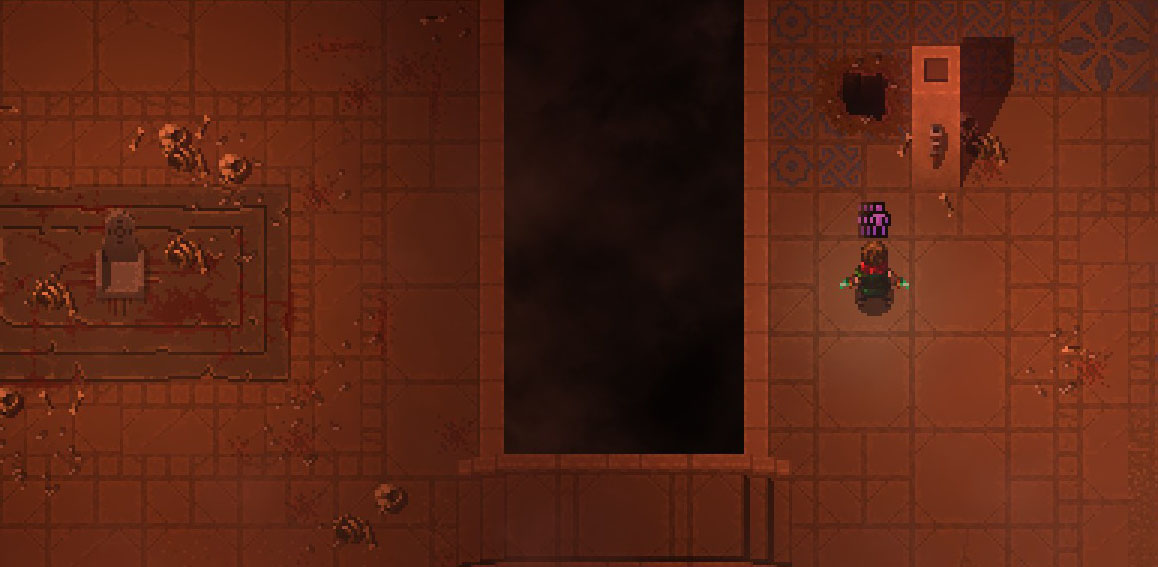
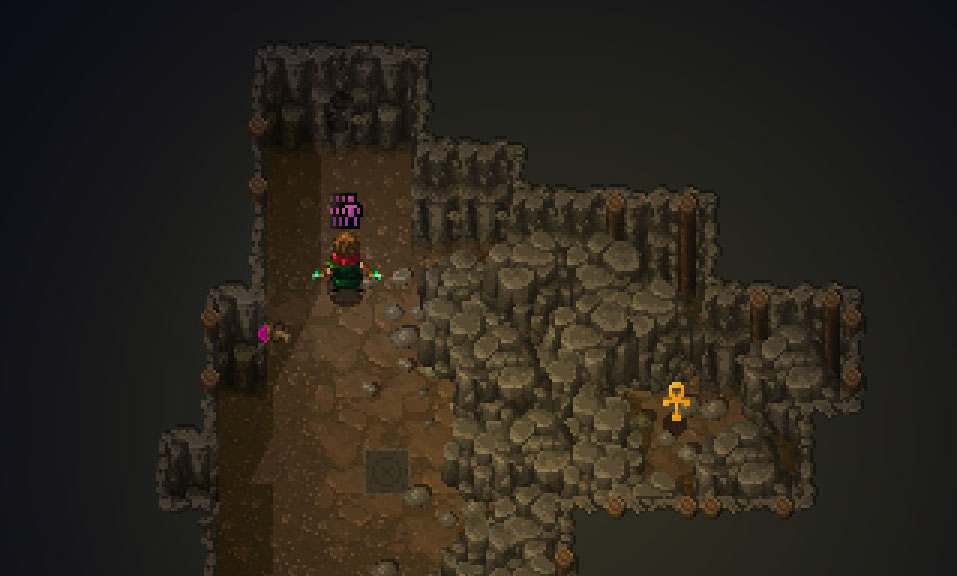
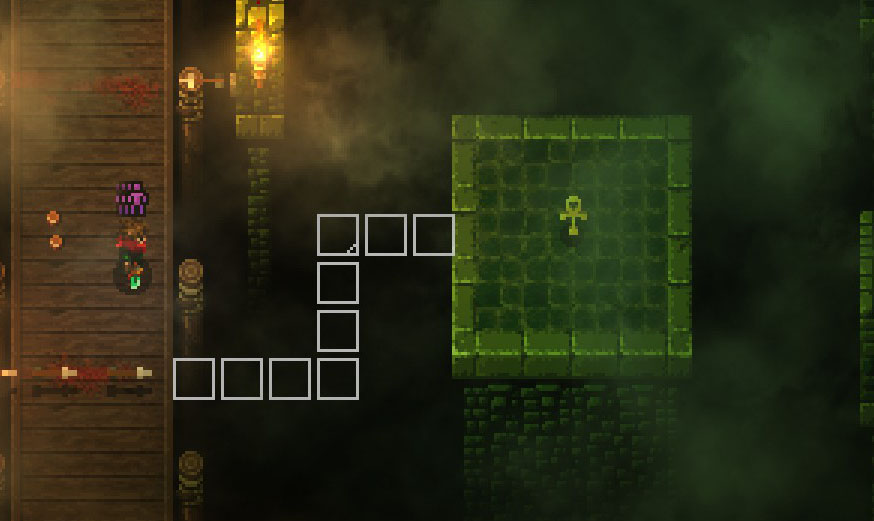
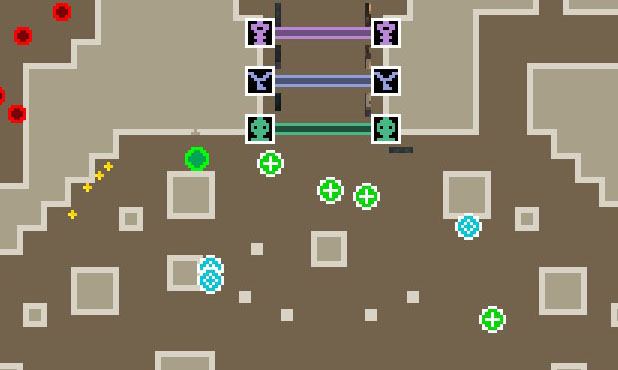
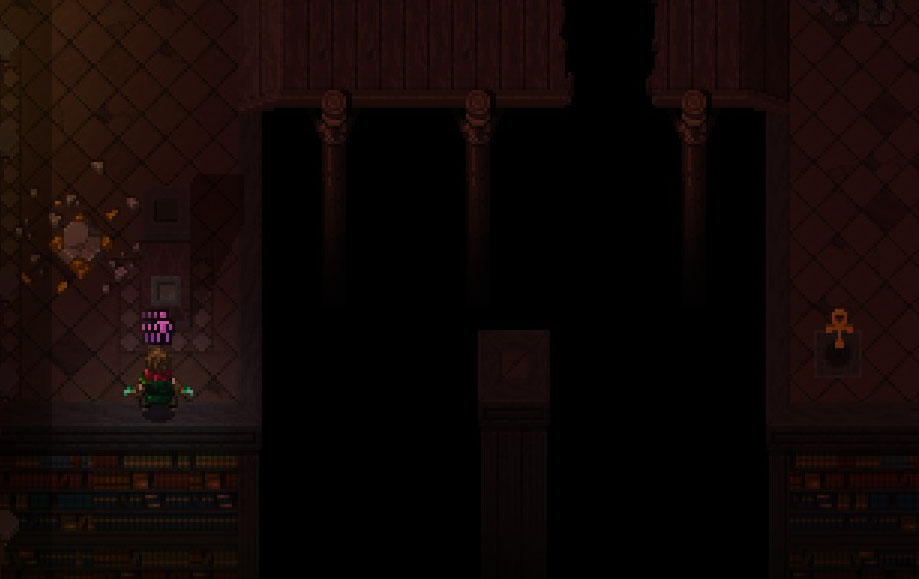
This is found from Keltonite Mines 3 bottom right going down to 2, the wall near Ank breaks too
https://gtm.steamproxy.vip/id/DacianDraco/screenshot/2501272149840208027/

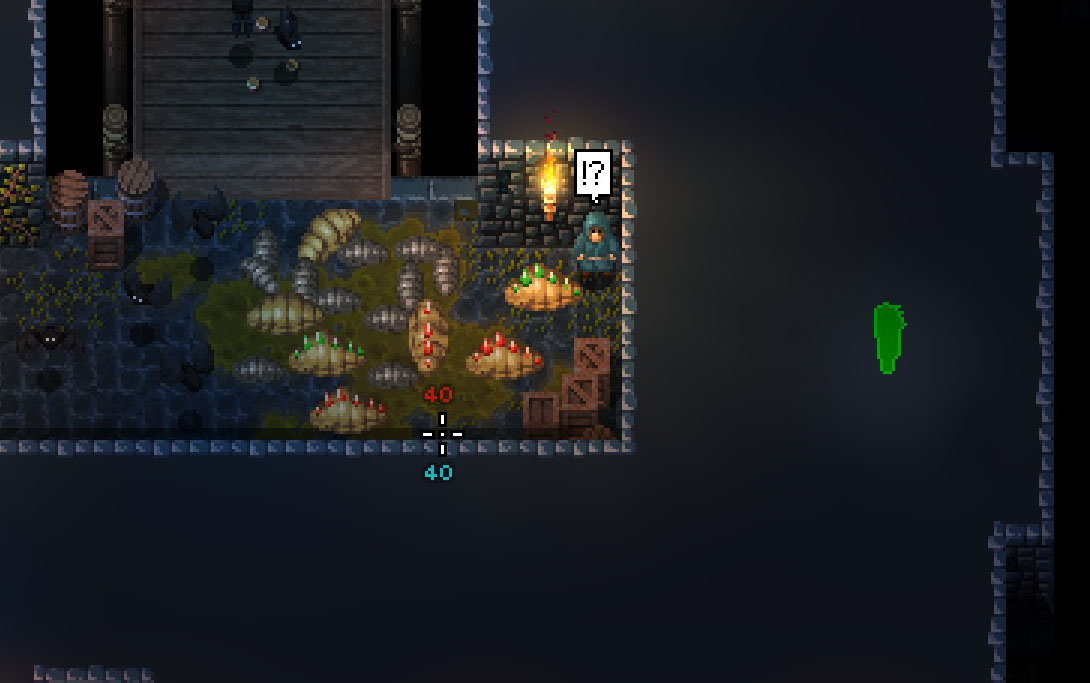
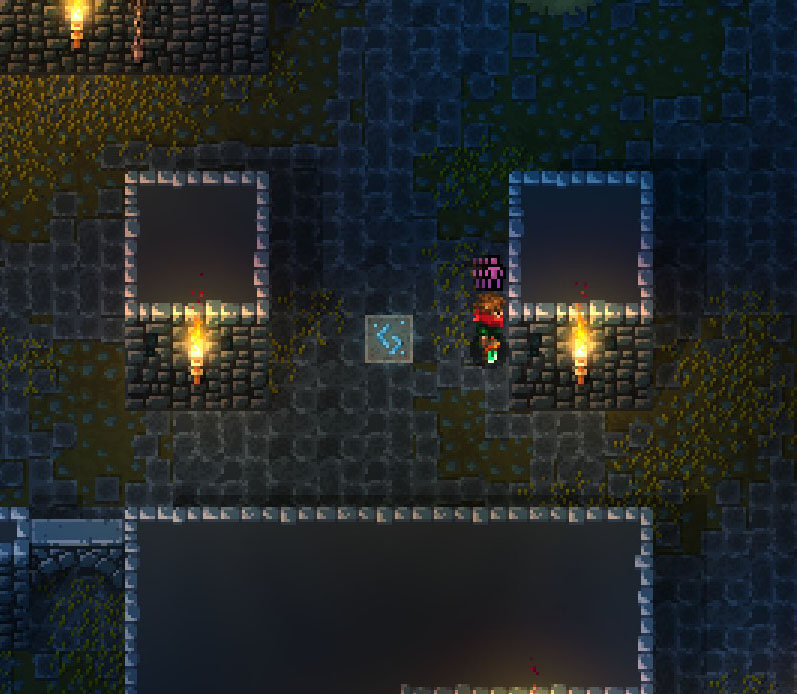
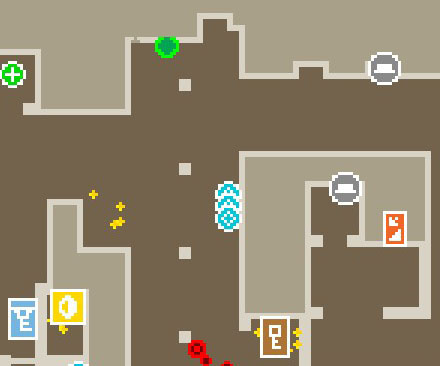
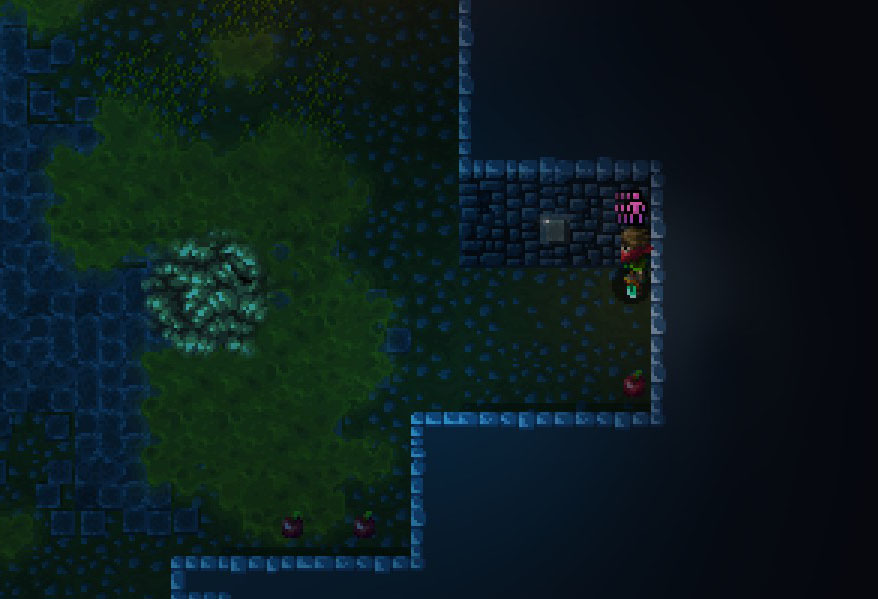
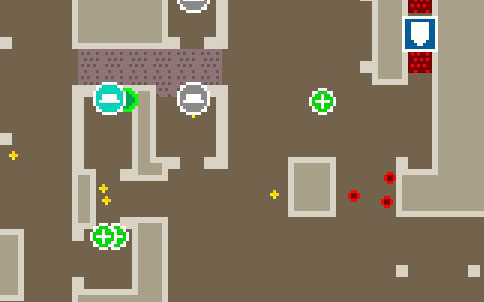
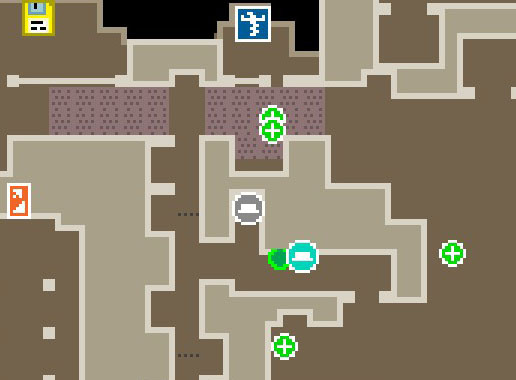
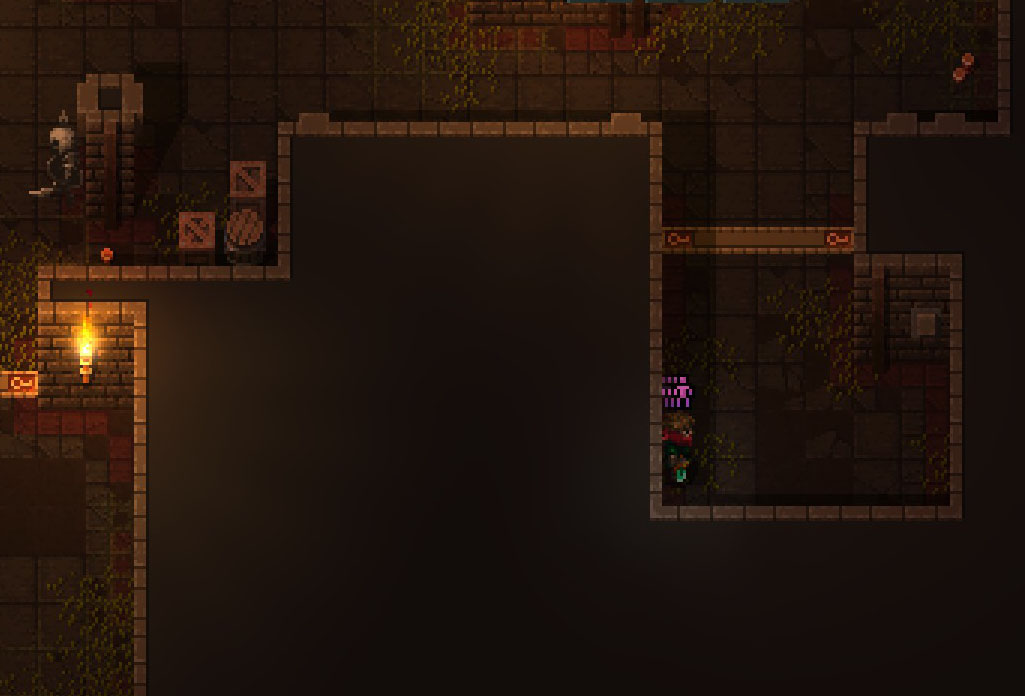
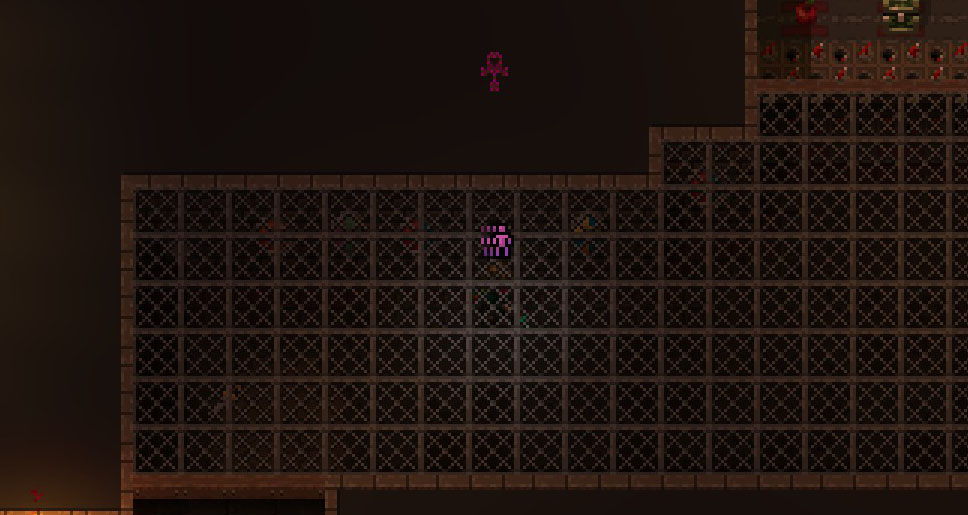
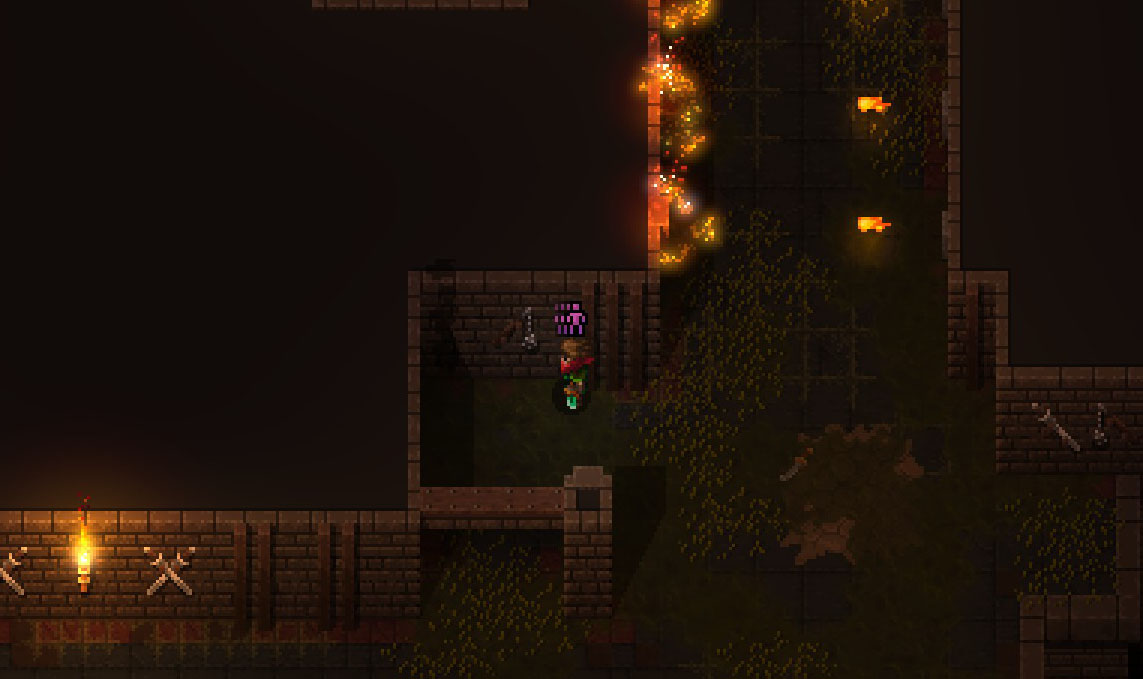
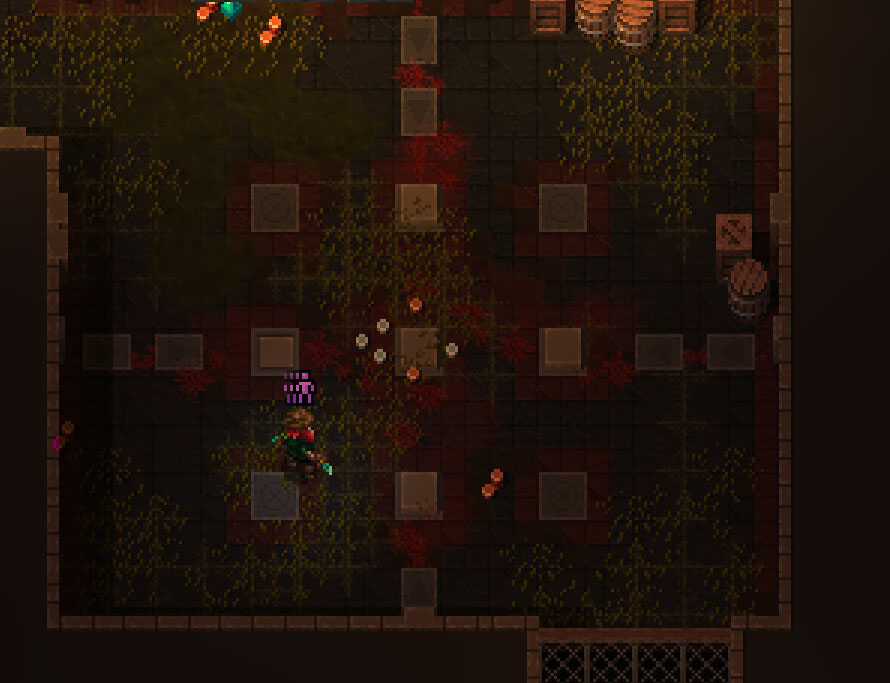
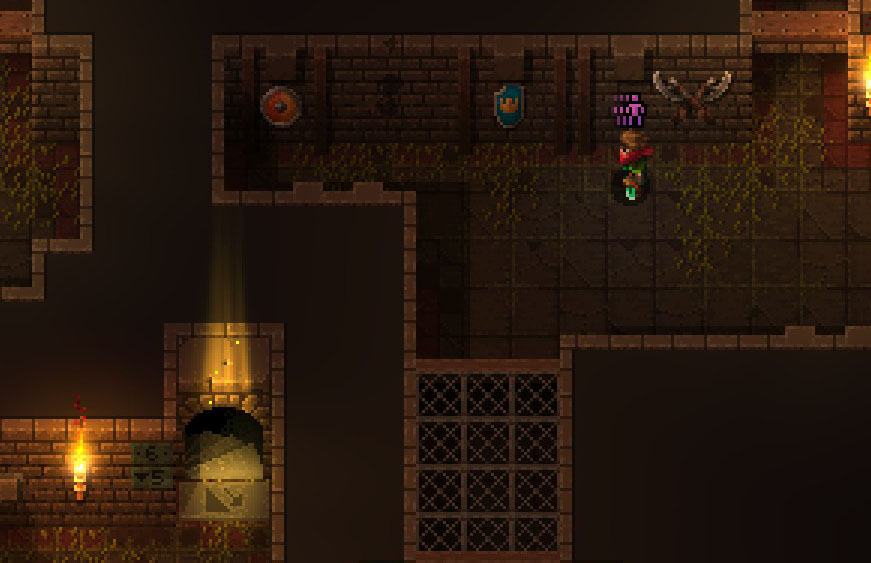
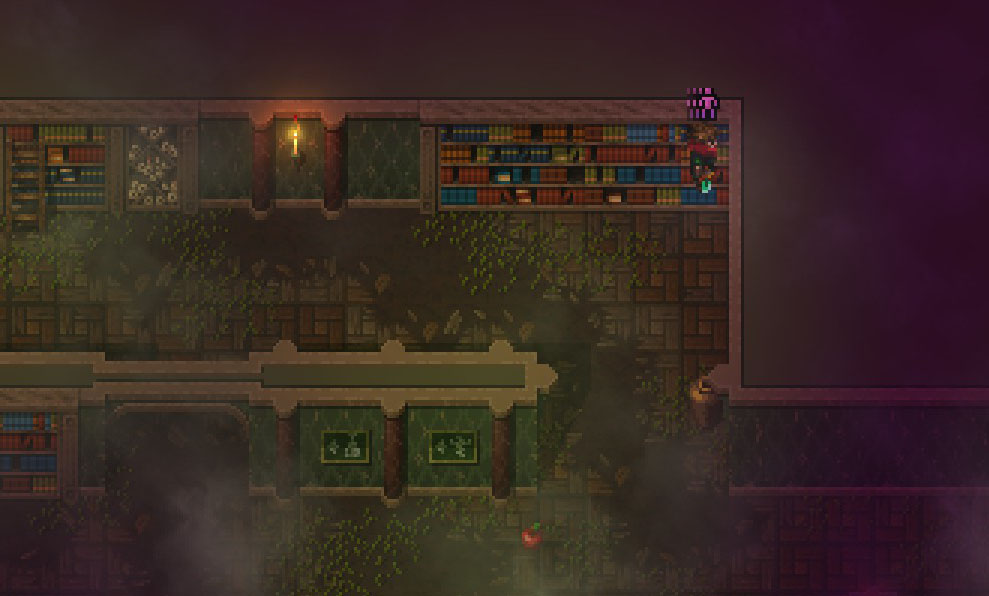
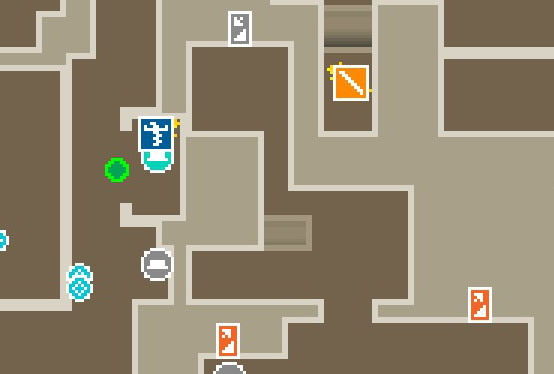
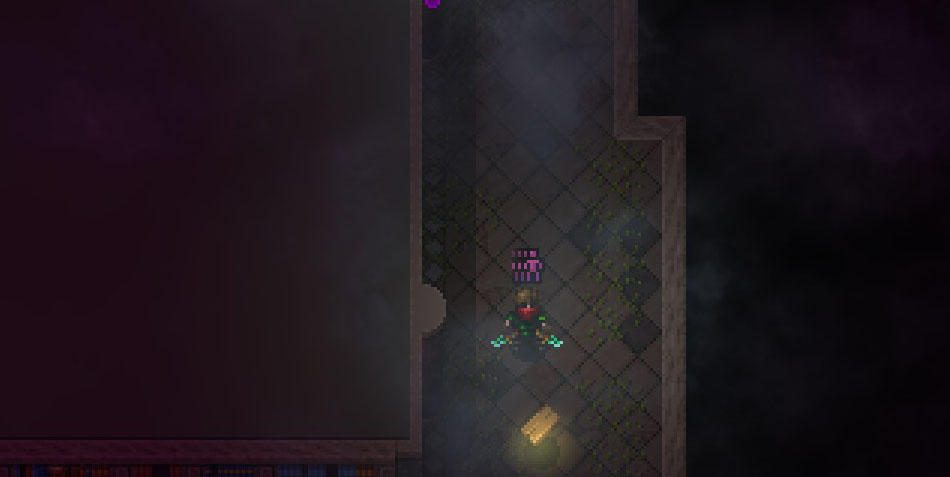
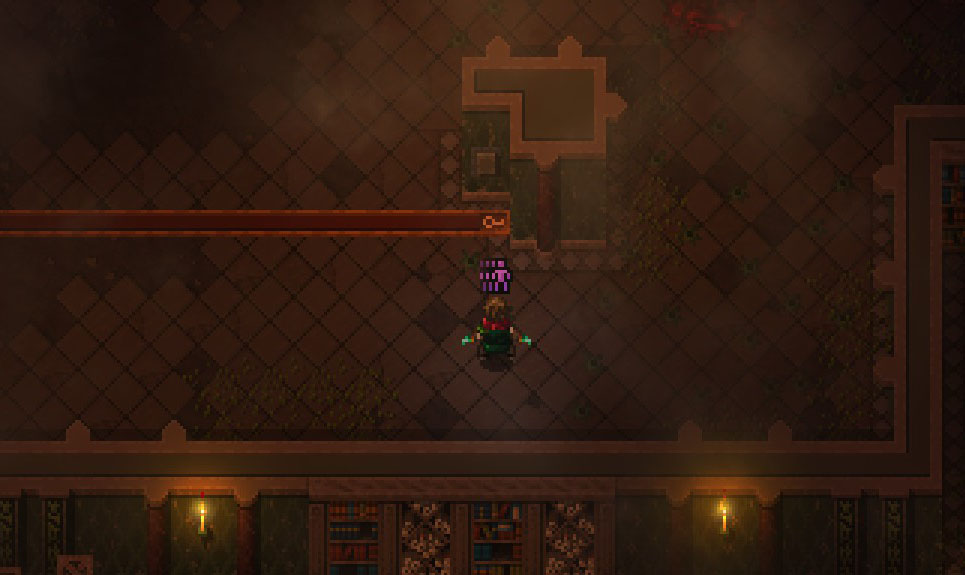
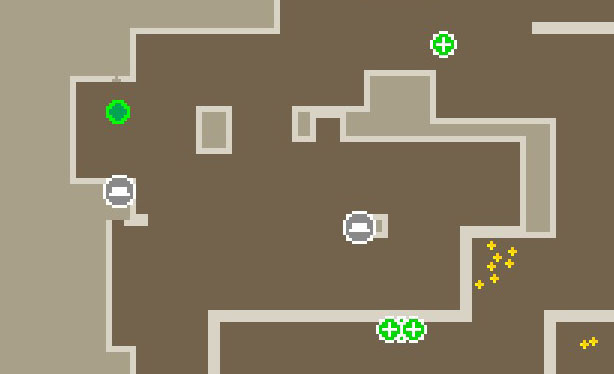
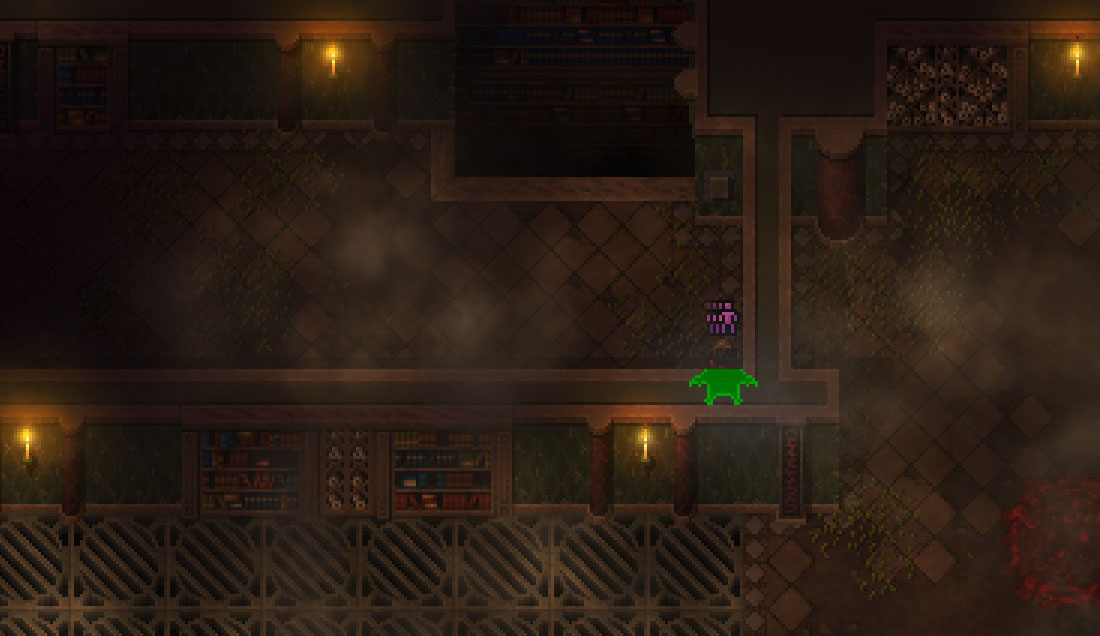
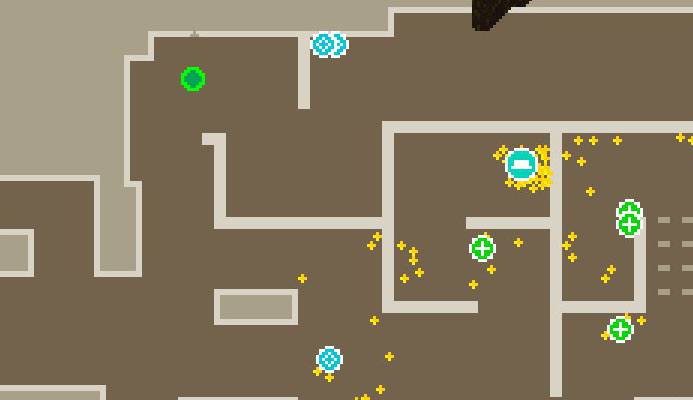
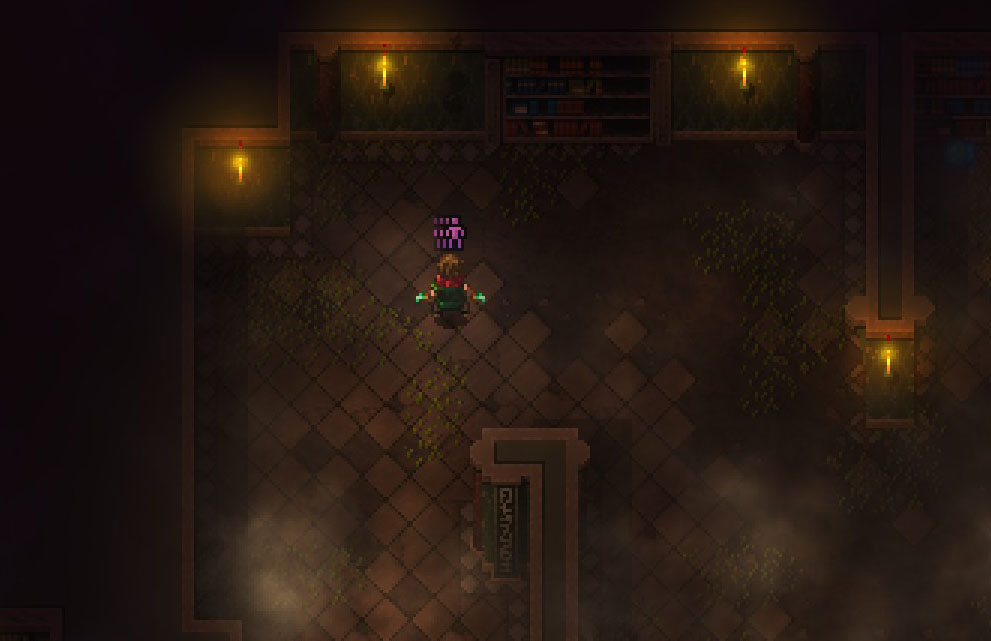
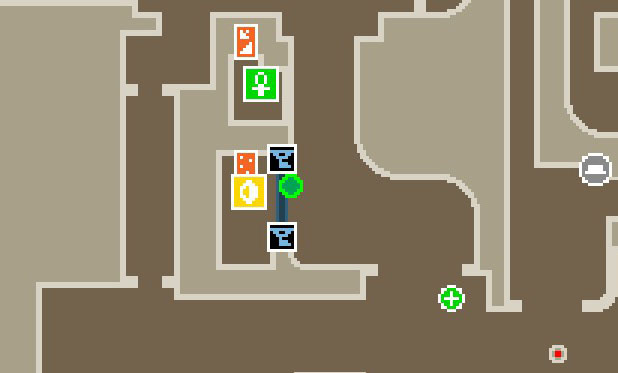
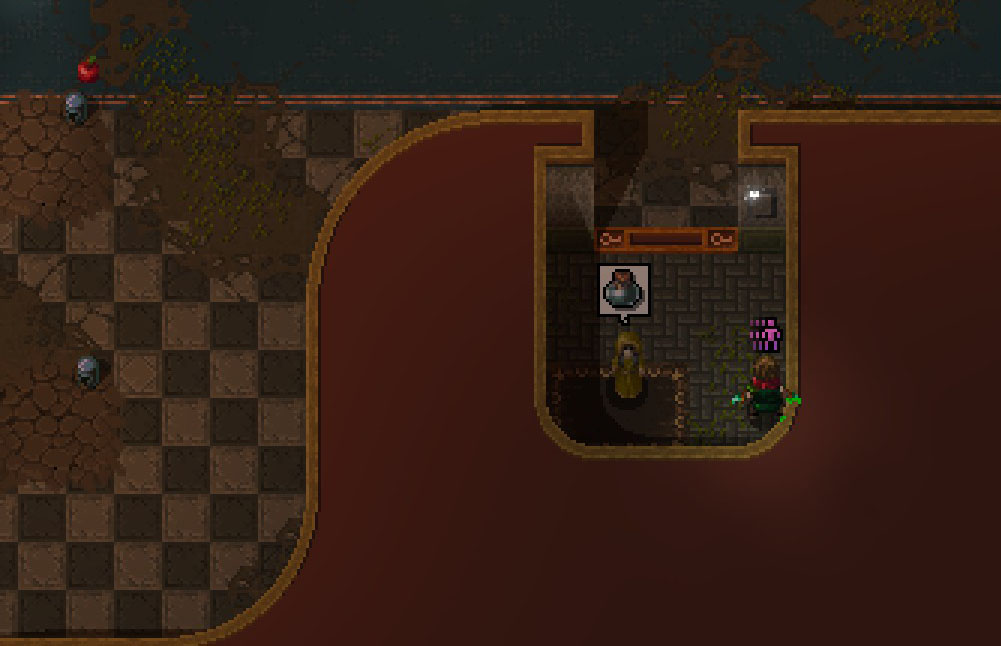
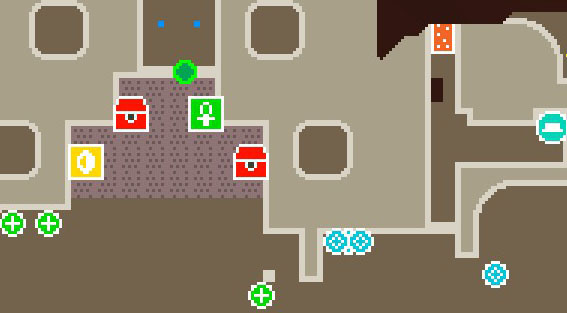
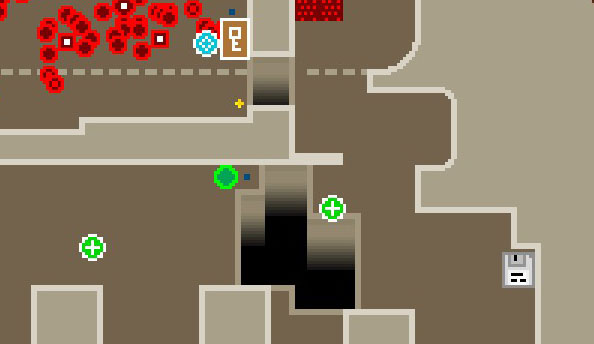
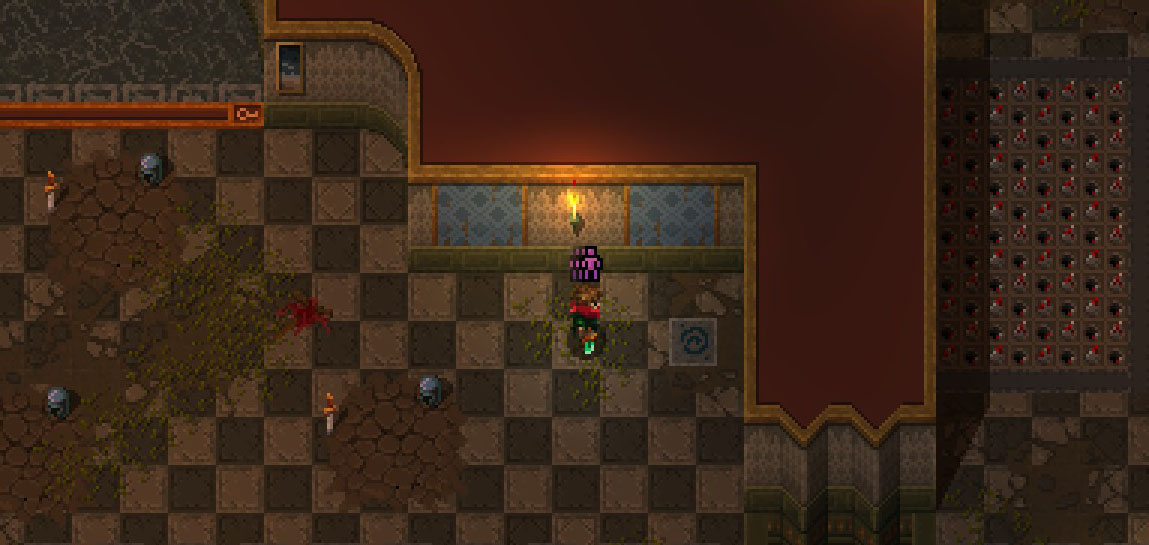
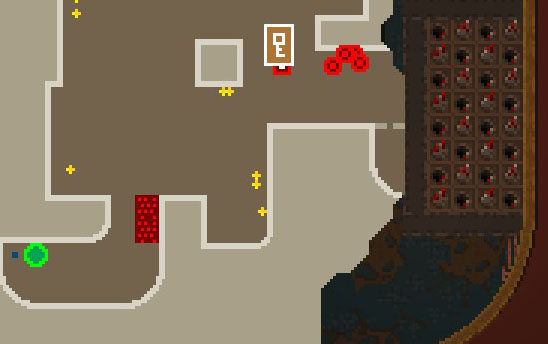
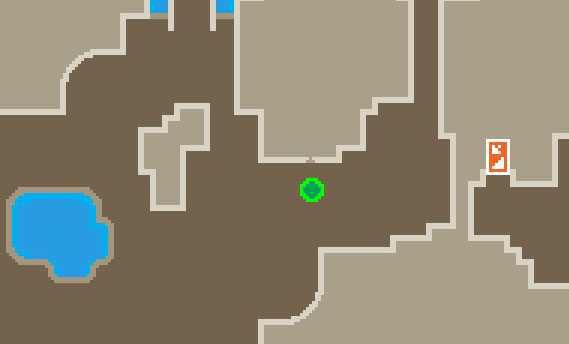
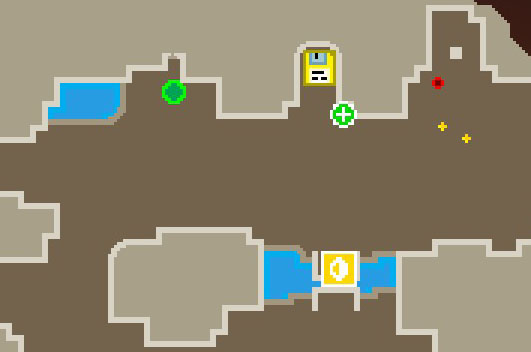
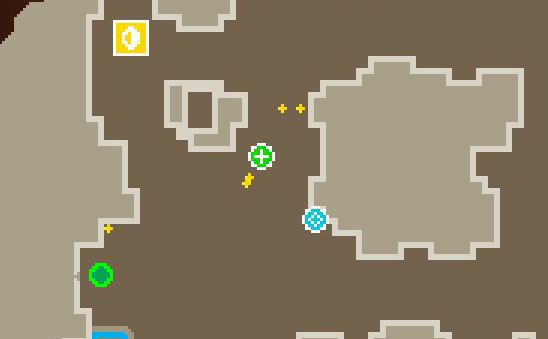
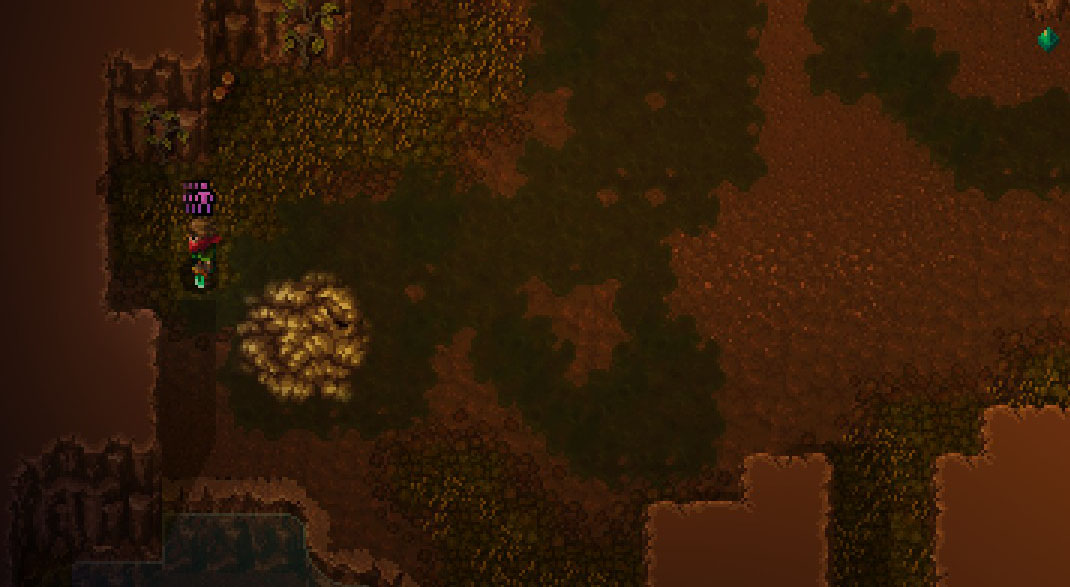
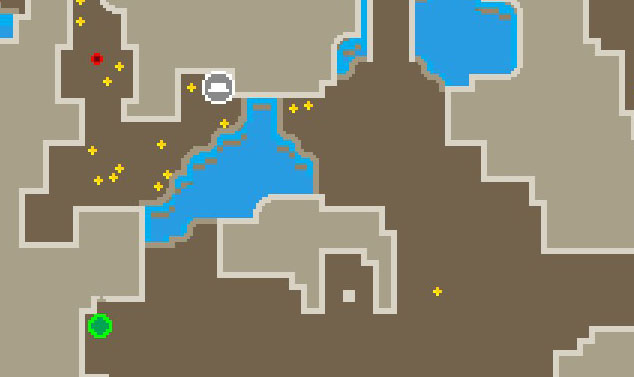
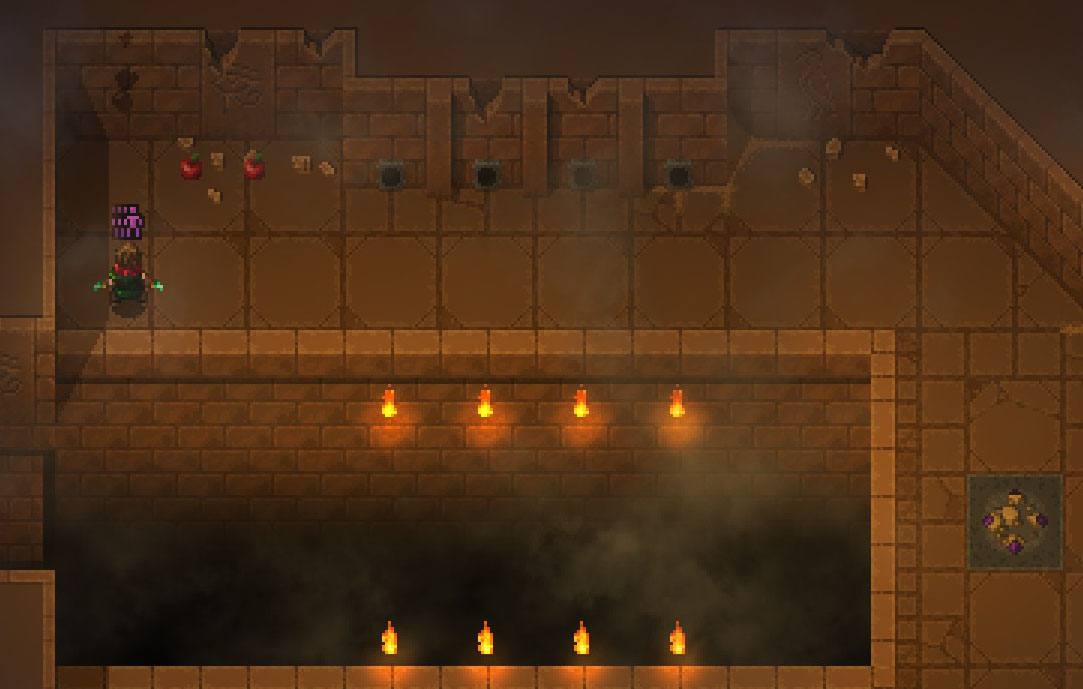
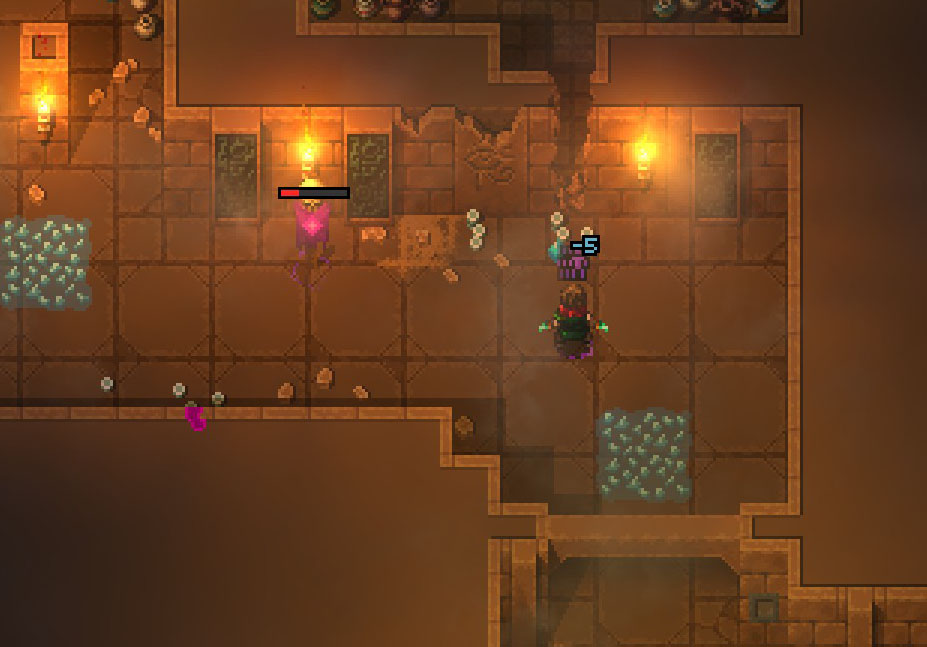
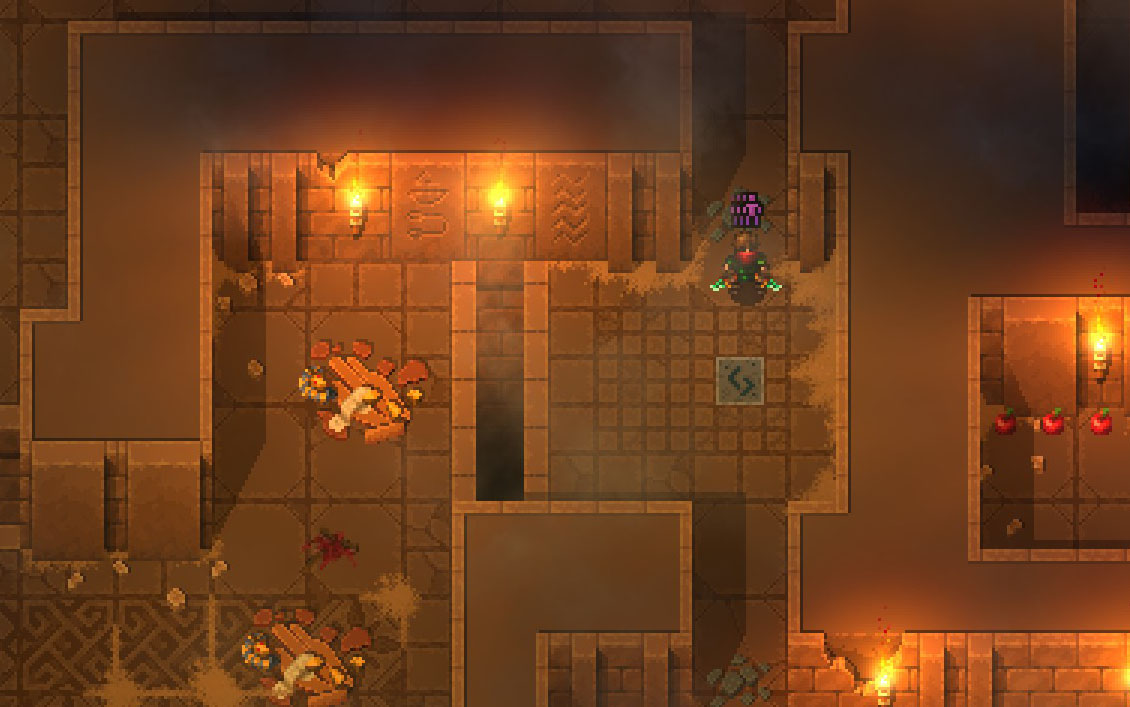
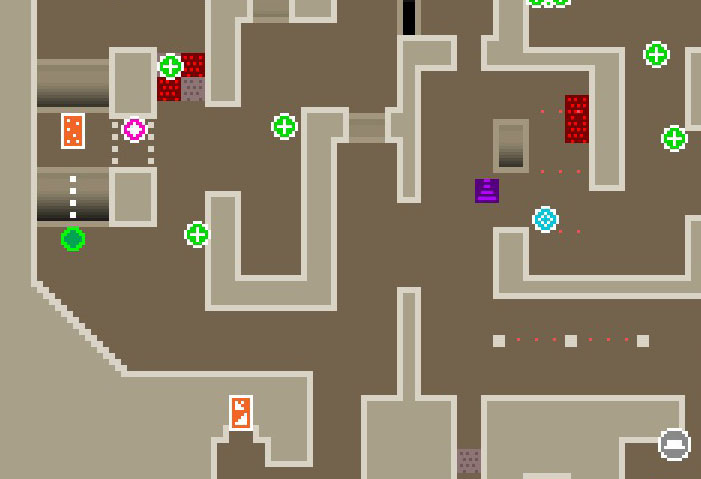
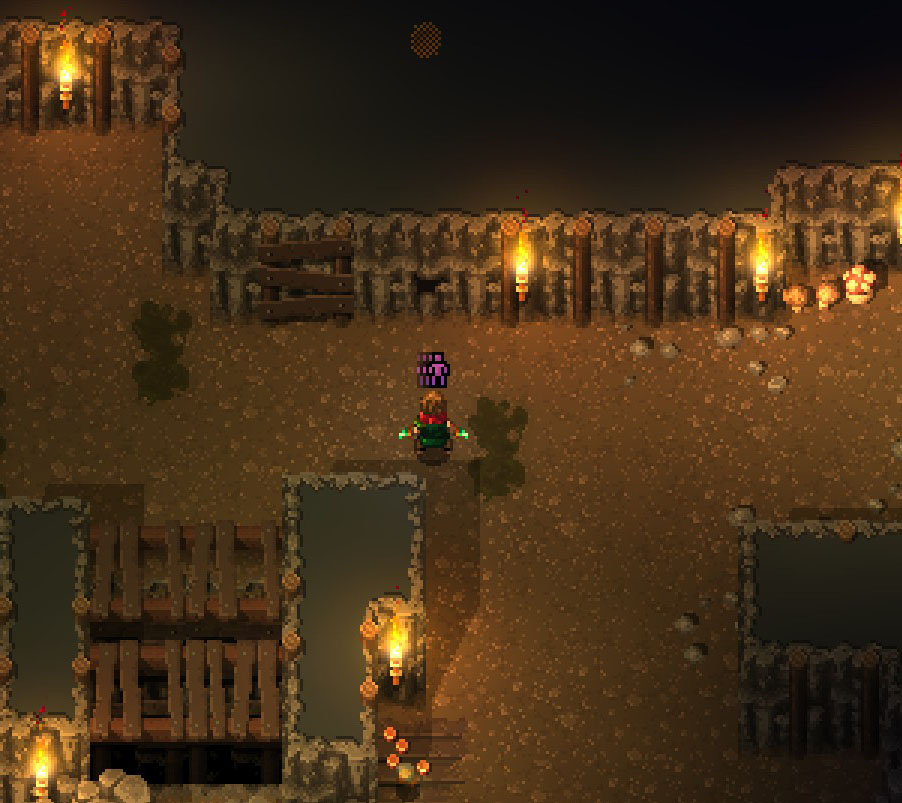
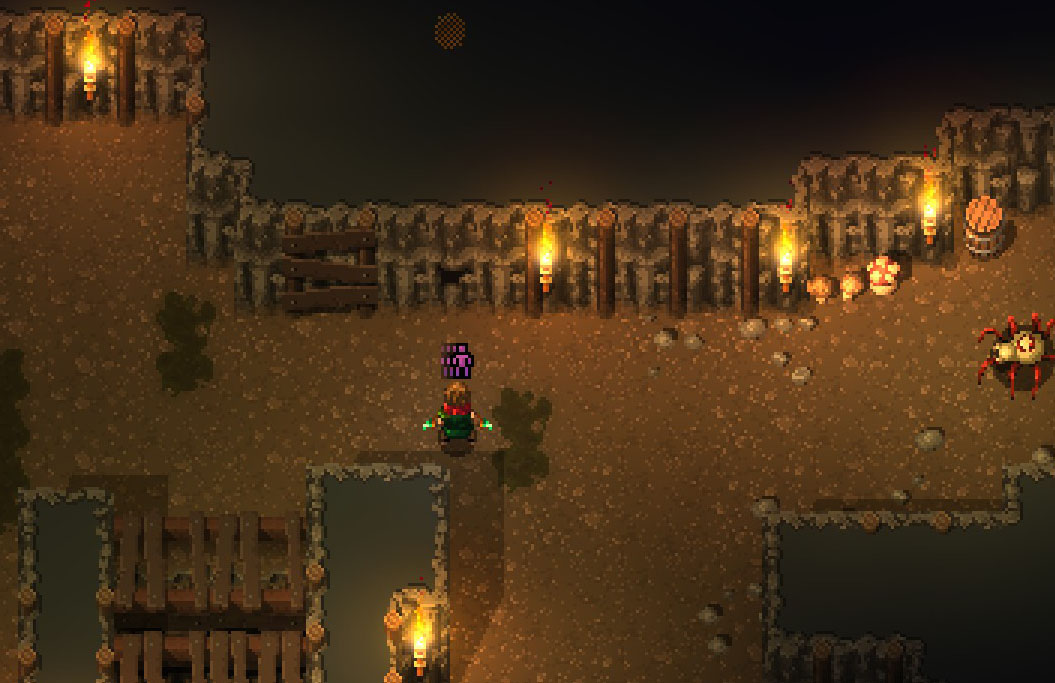
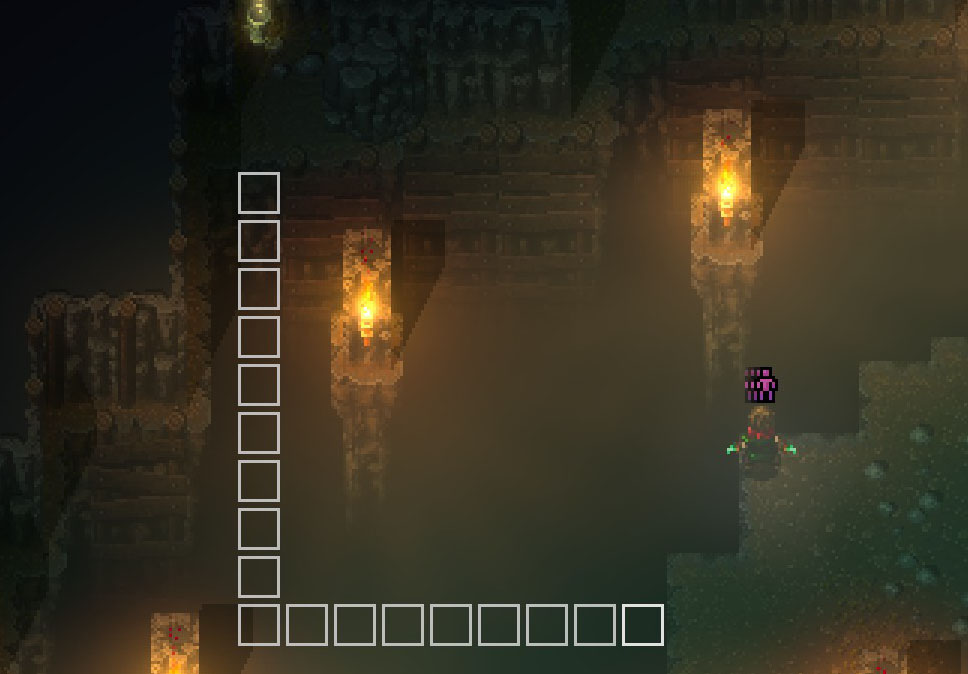
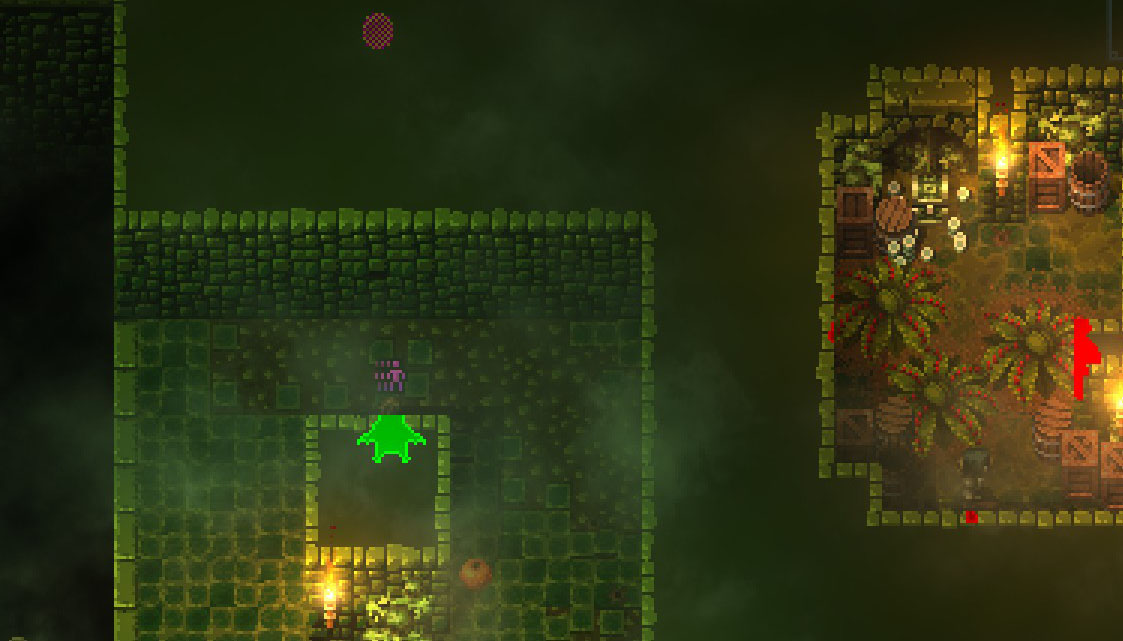
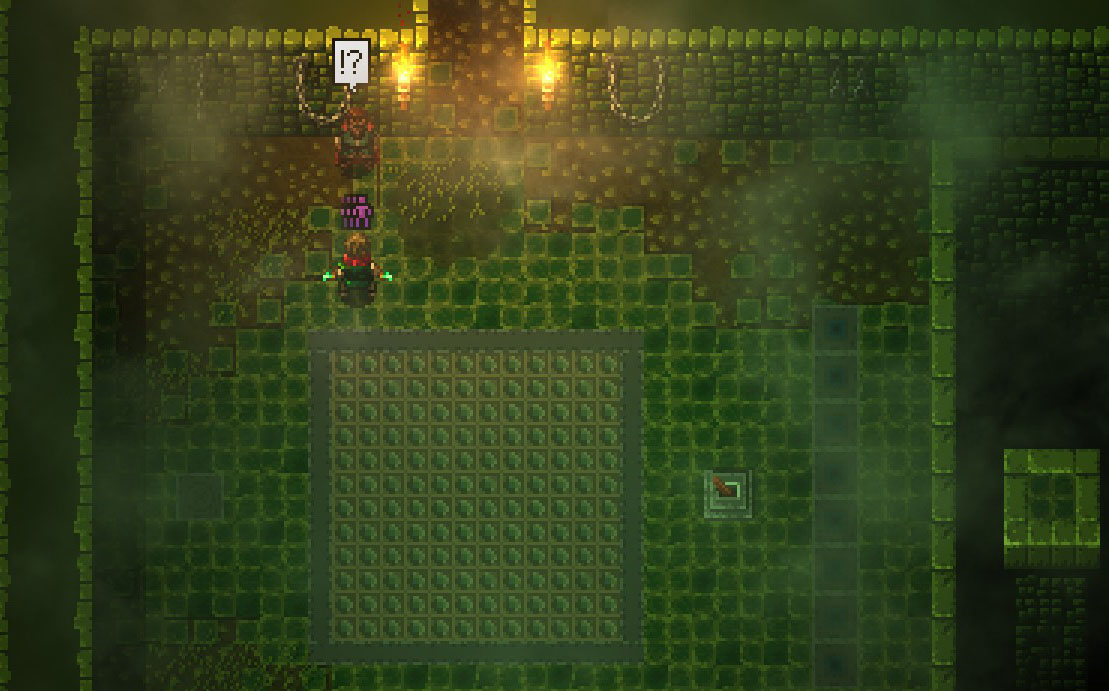
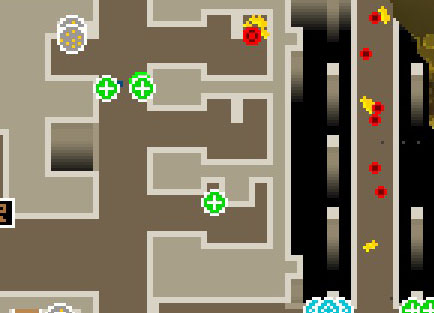
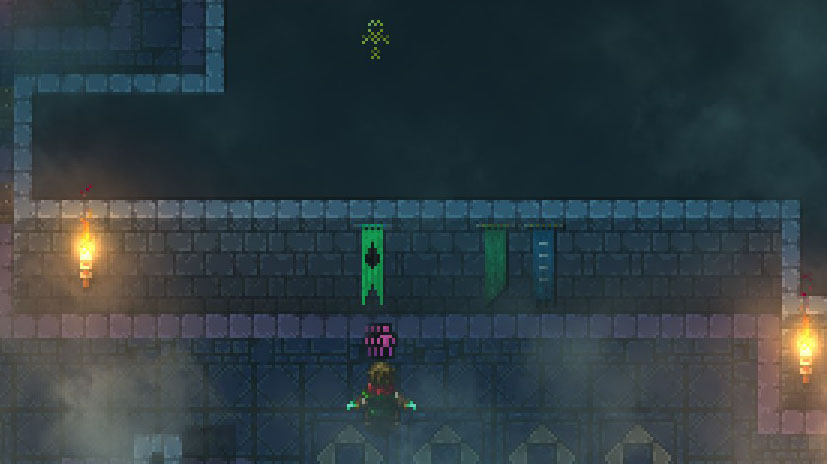
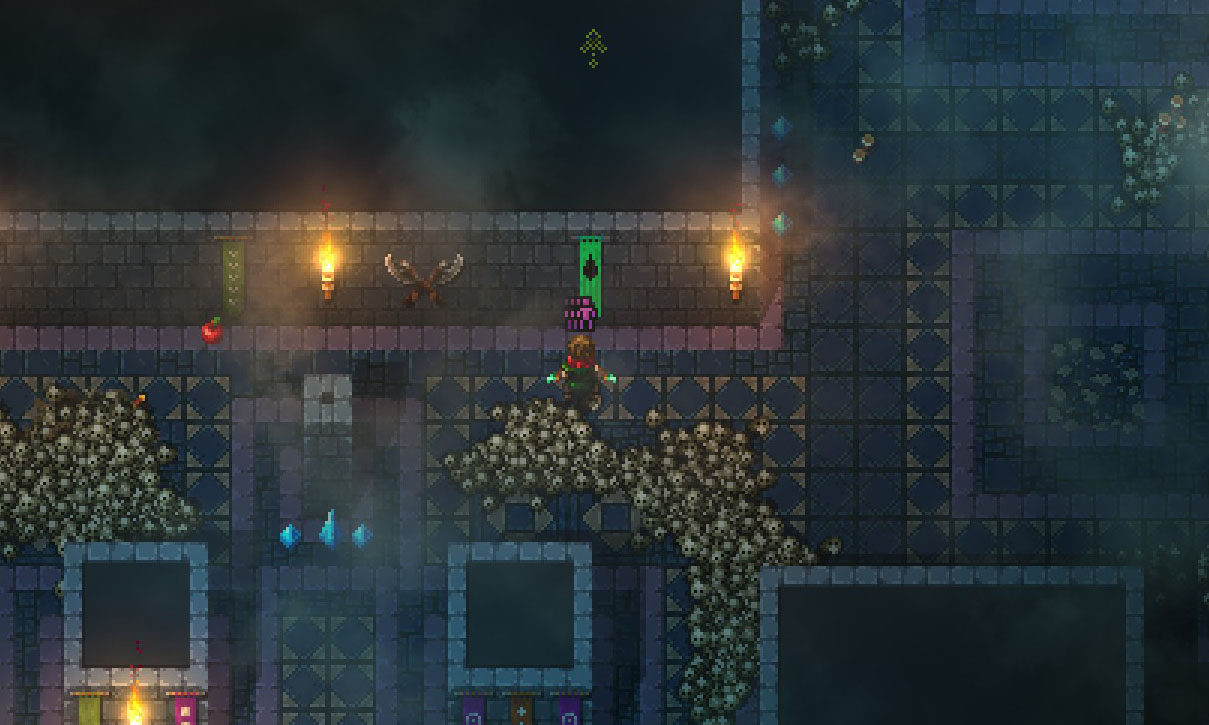
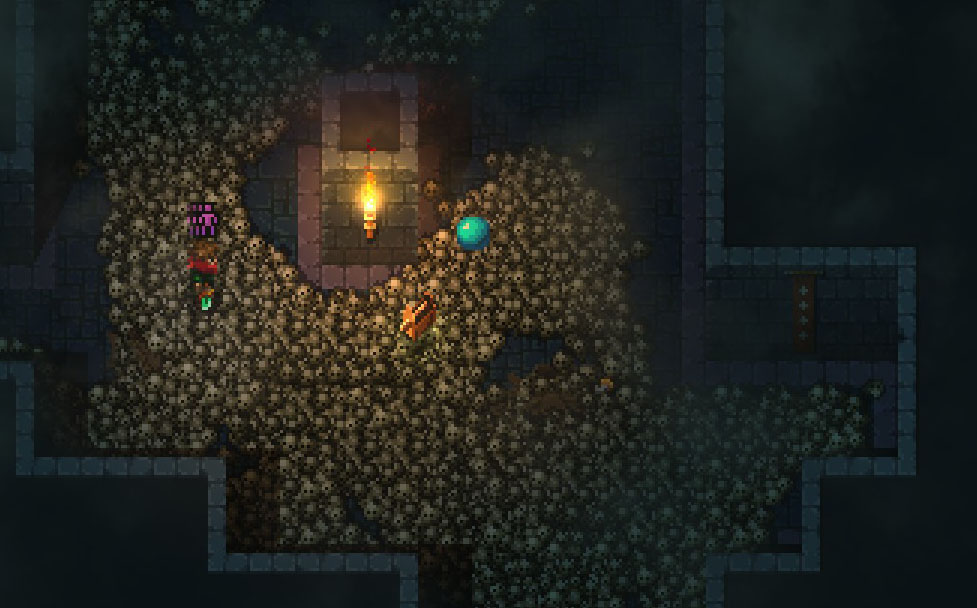
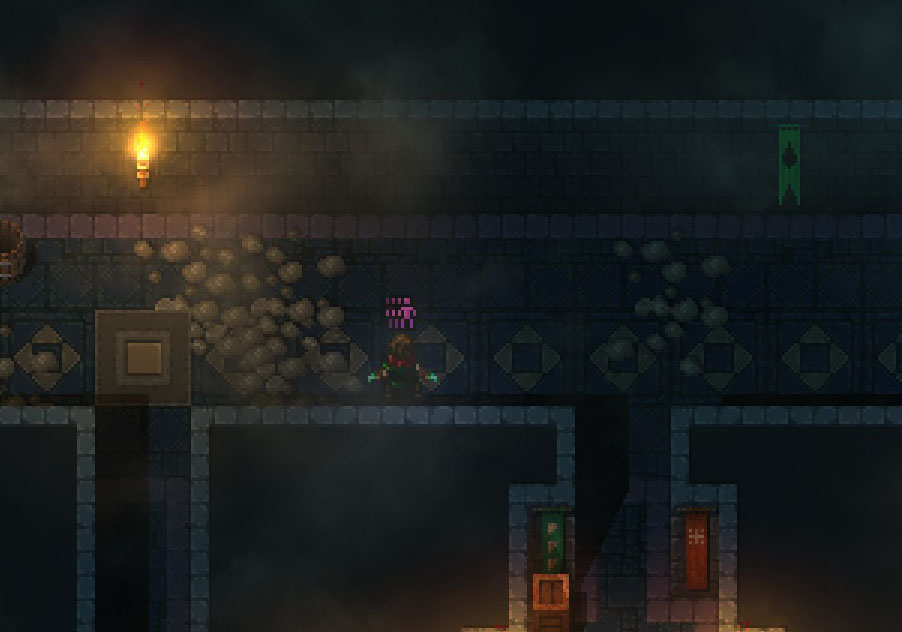
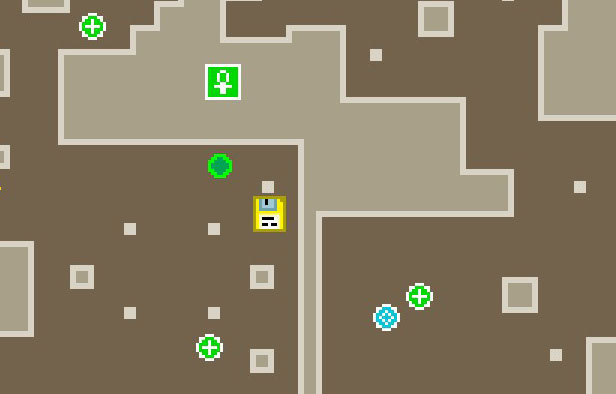
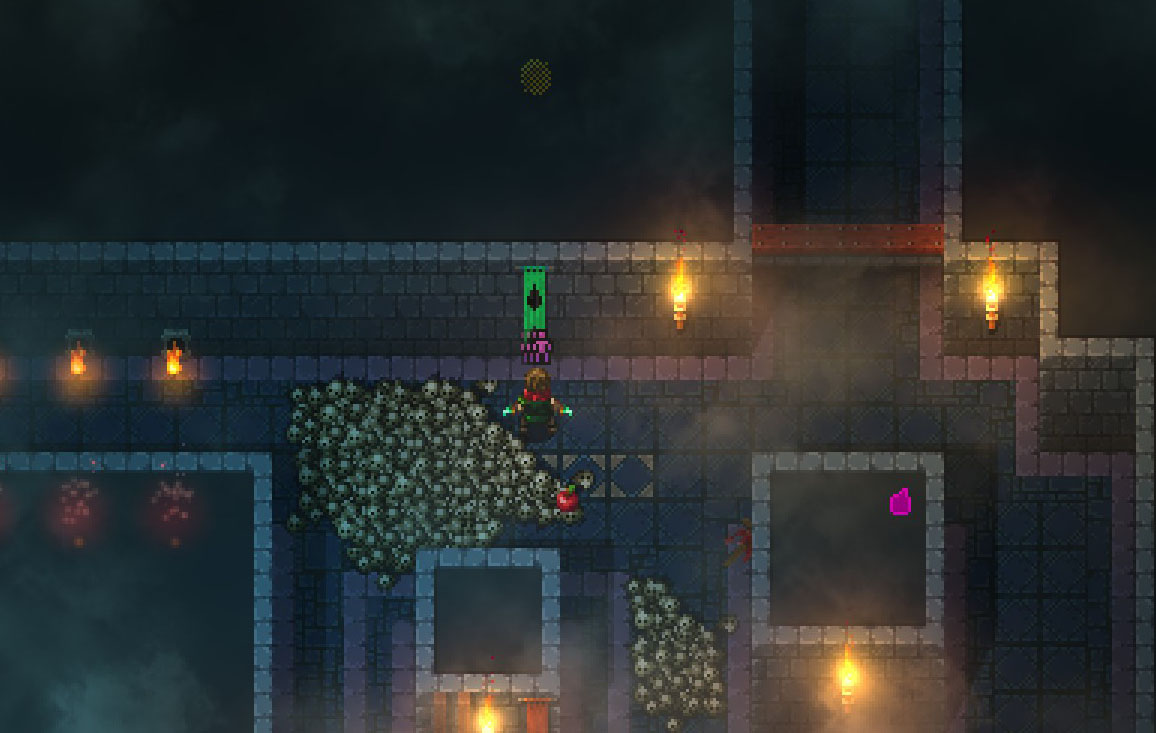
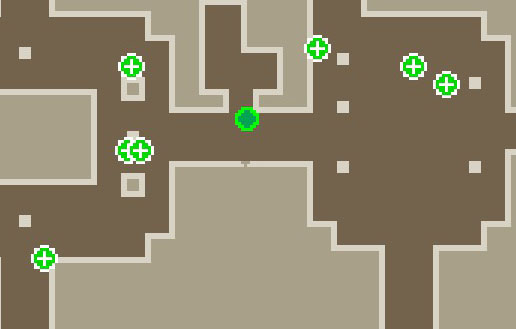
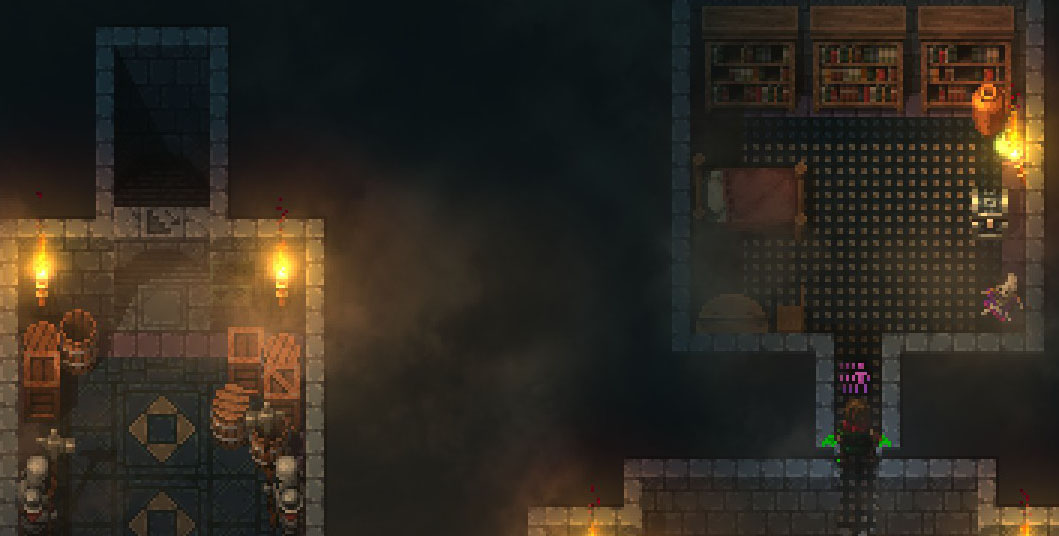
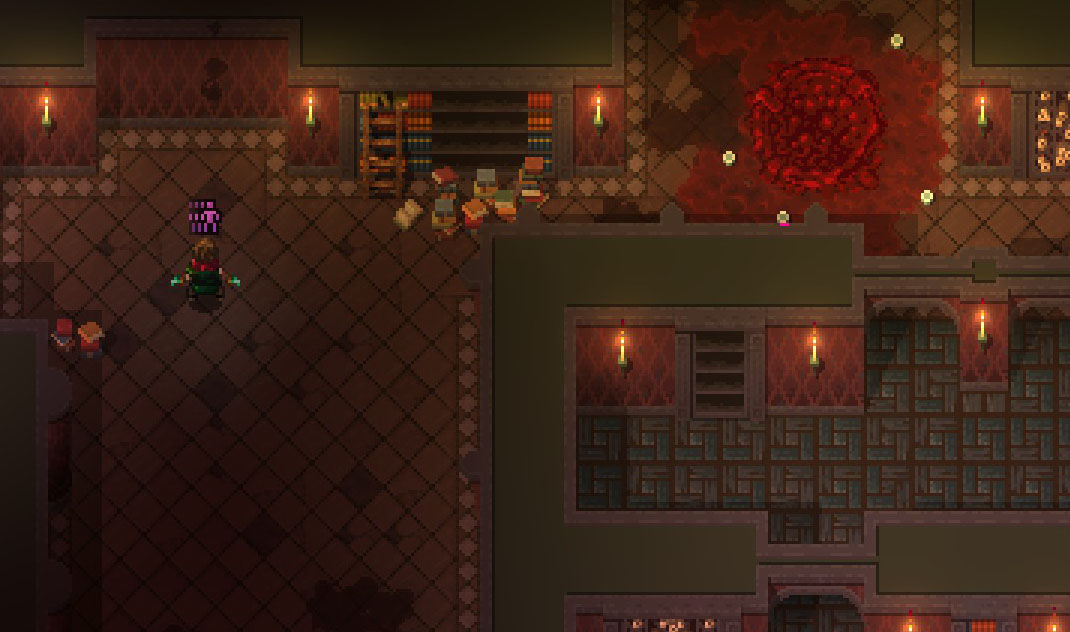
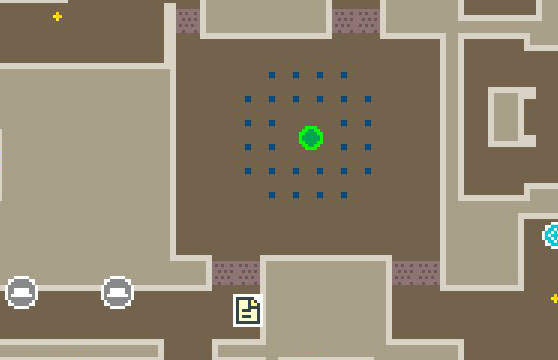
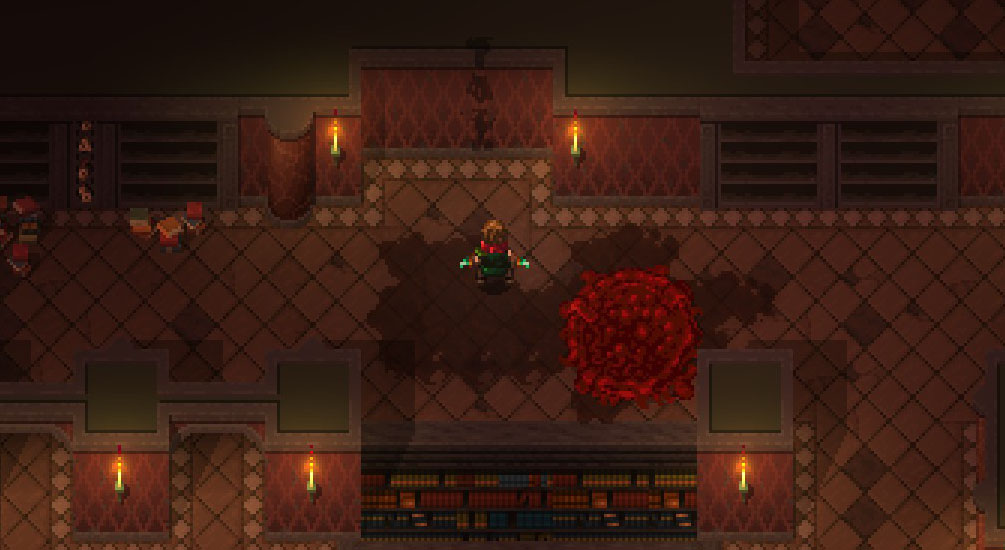
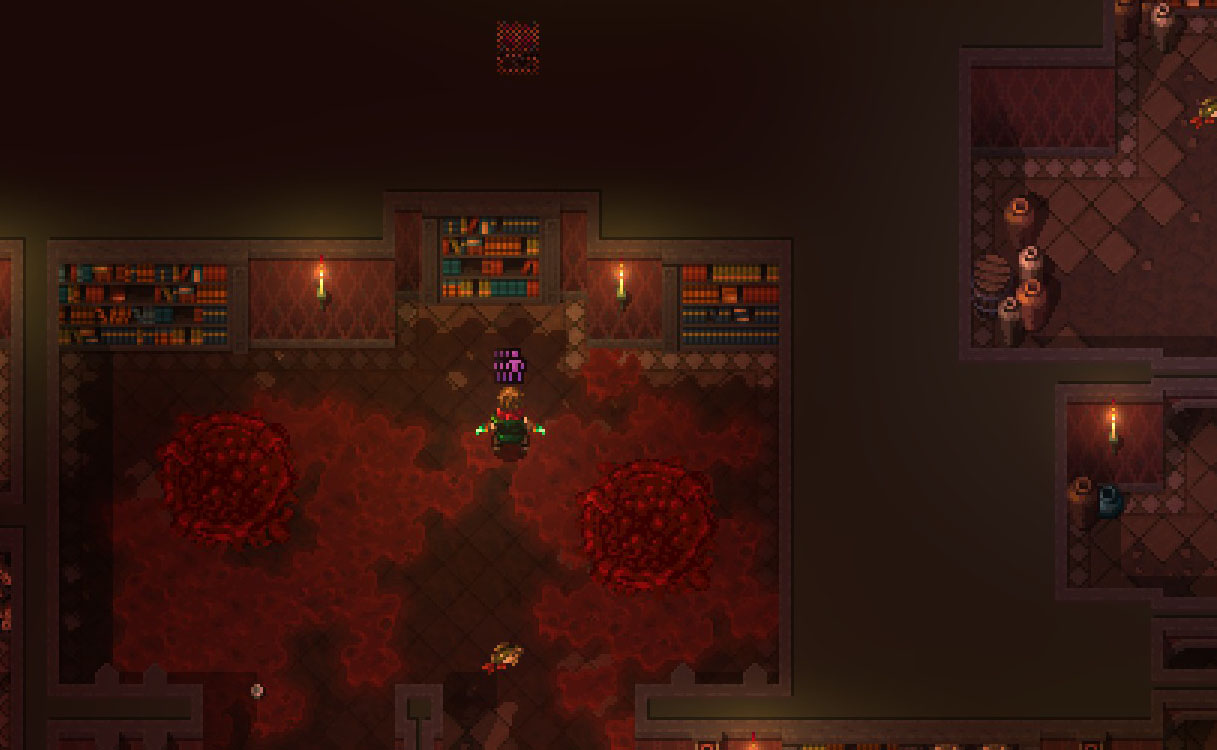
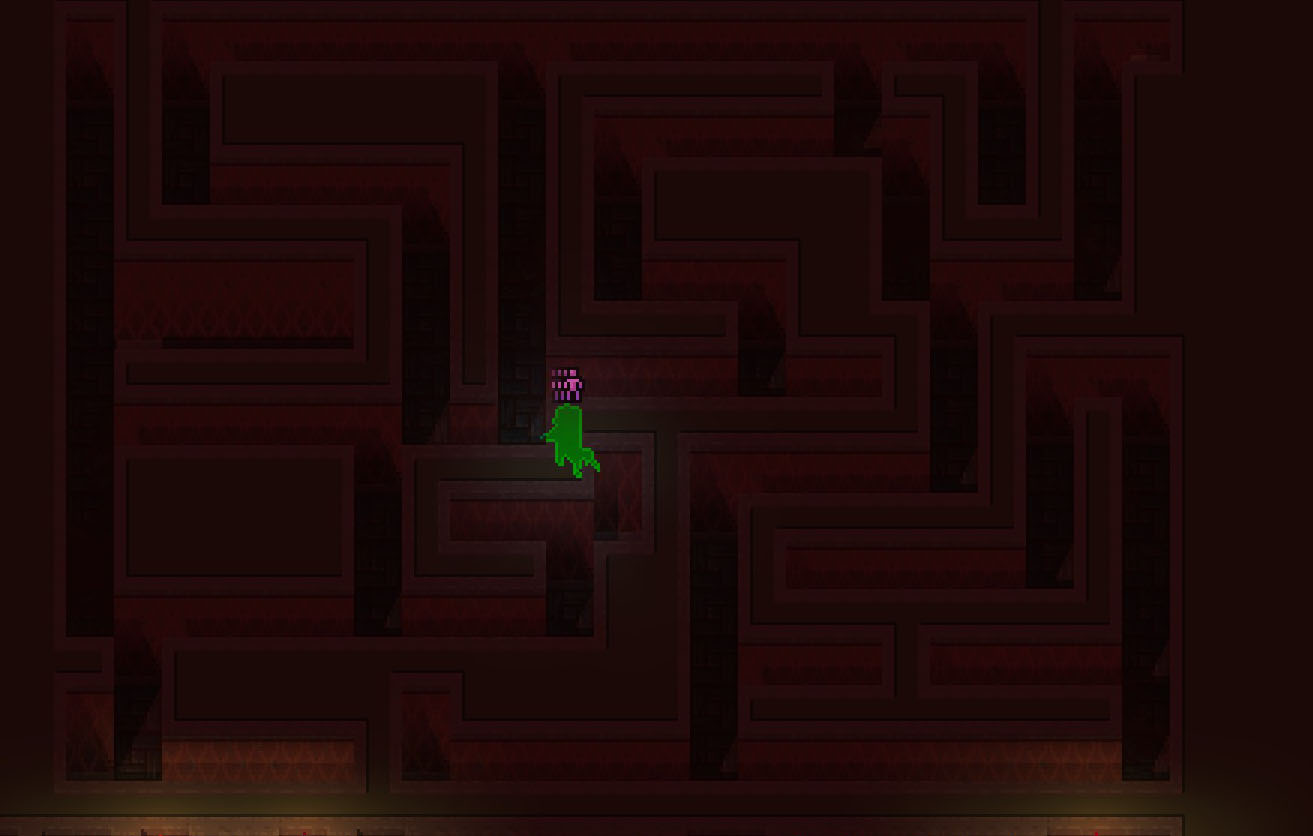
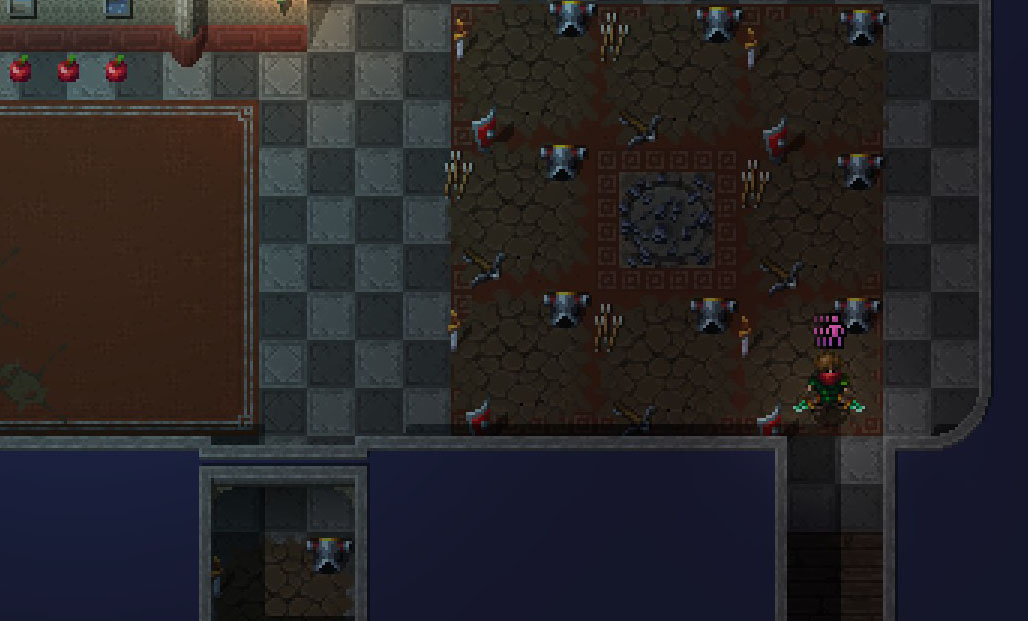
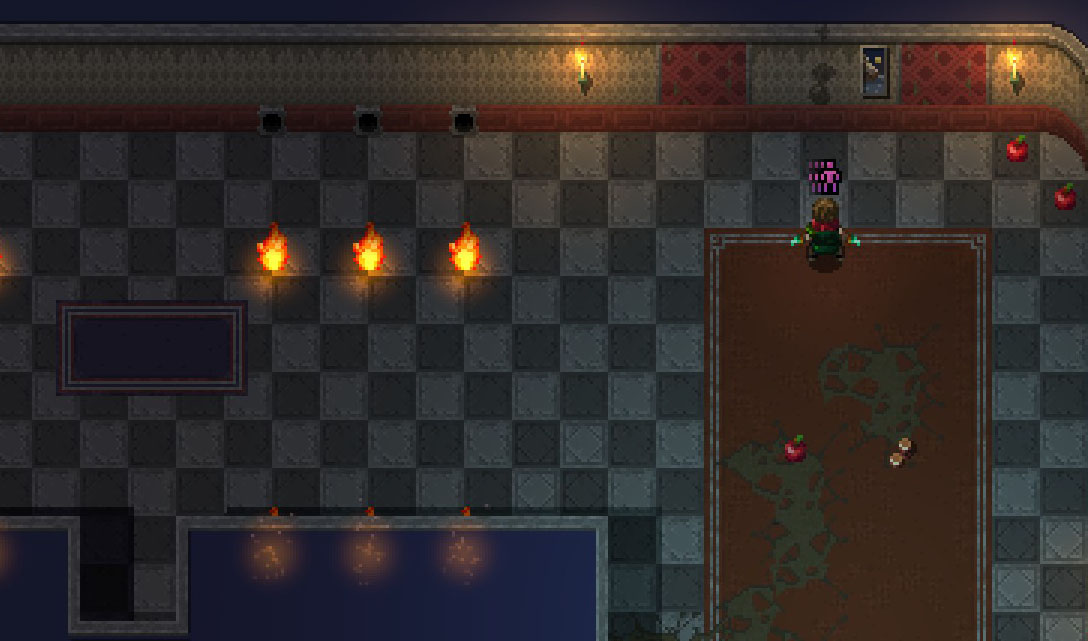
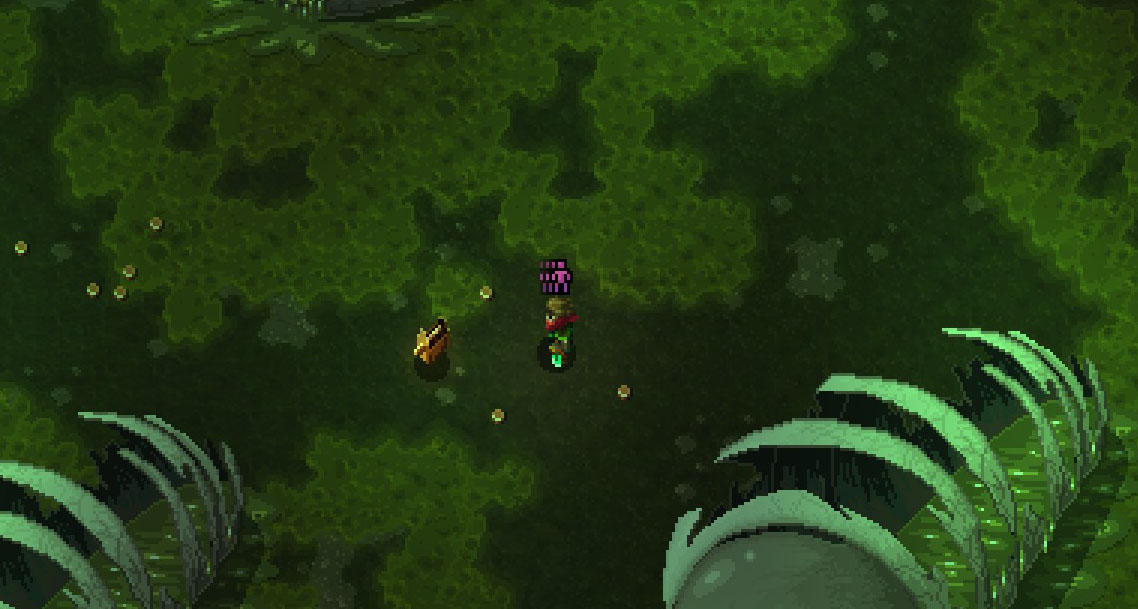
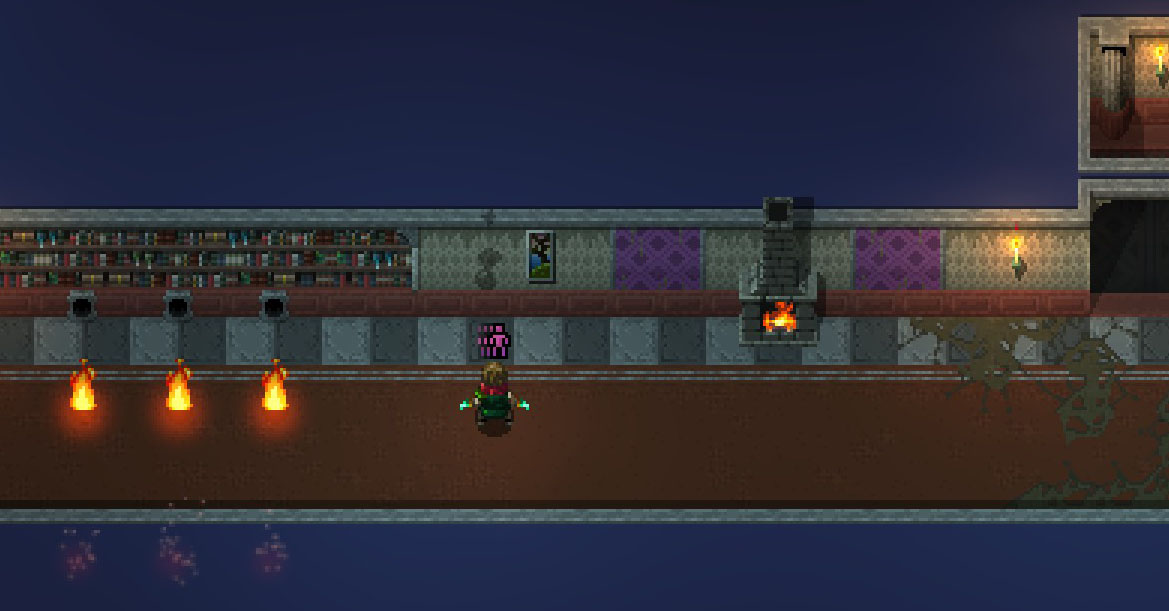
Here is one on Infested Prison Tower Floor 4 near the arrow shooters in middleish bottom area
https://gtm.steamproxy.vip/id/DacianDraco/screenshot/2501272149848789137/

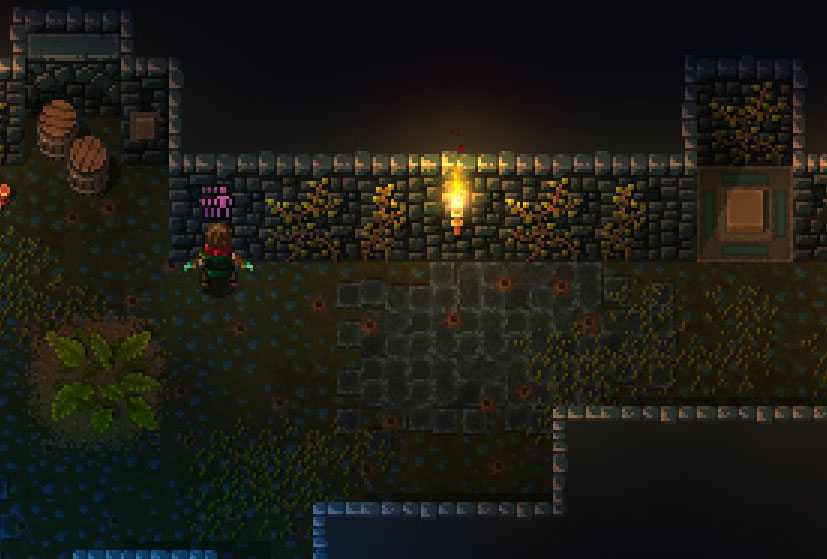
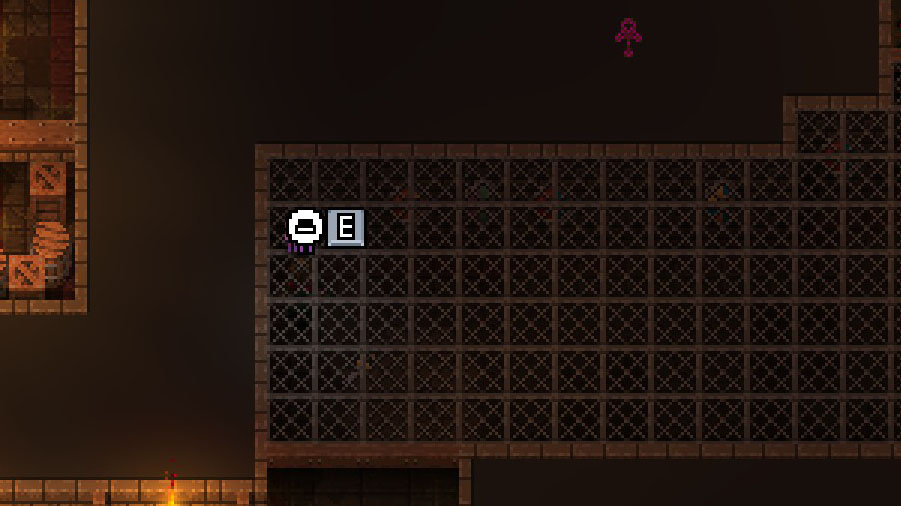
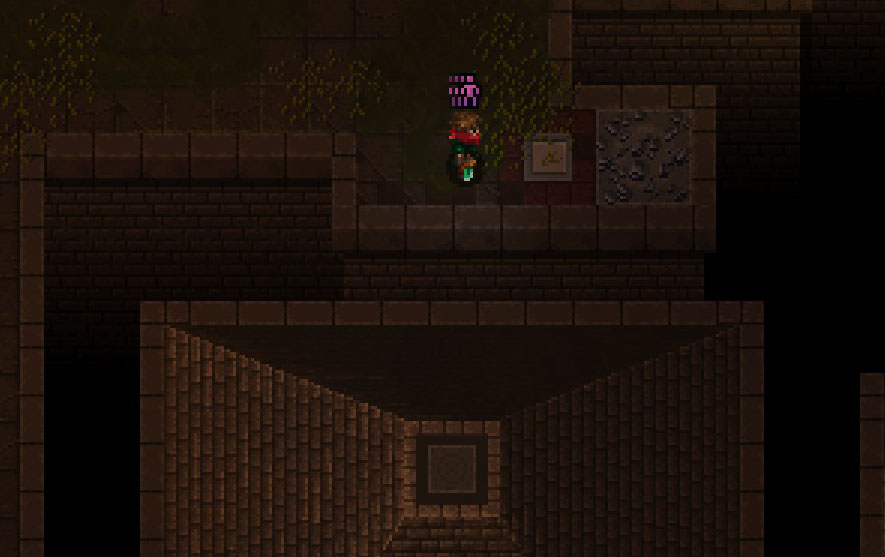
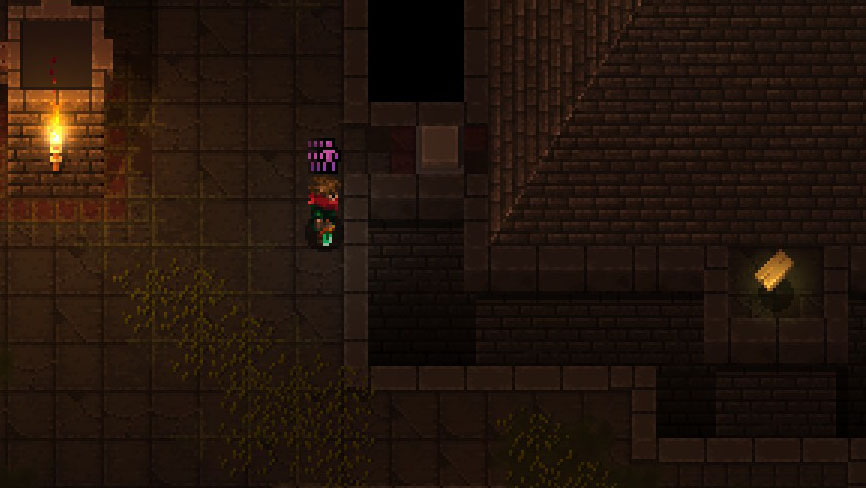
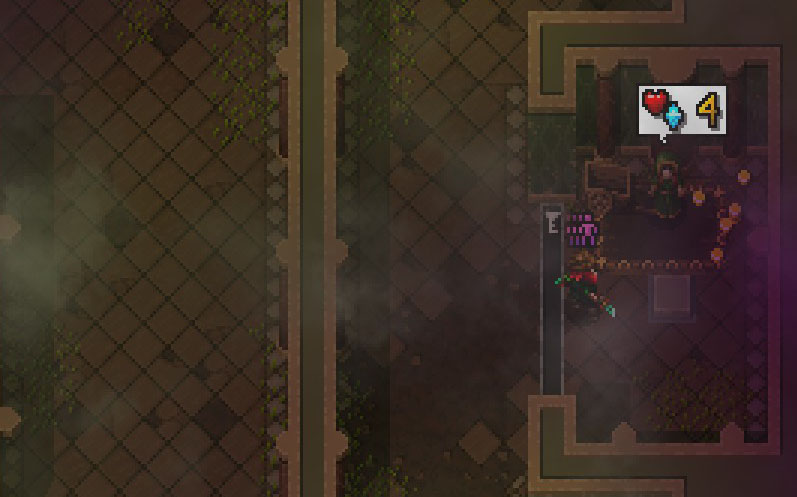
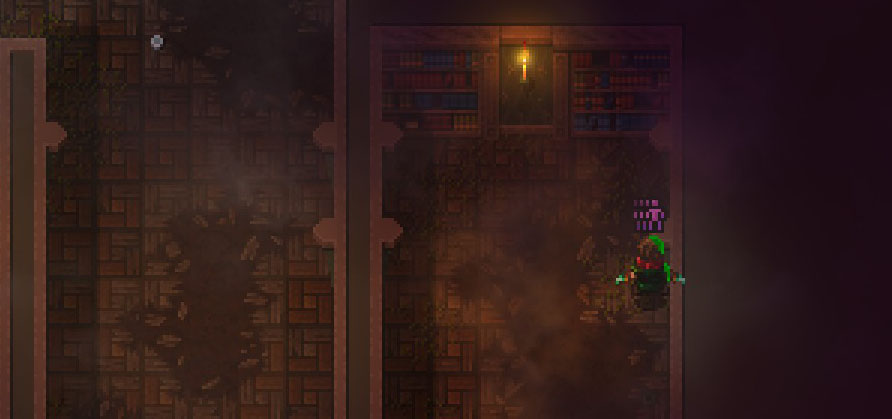
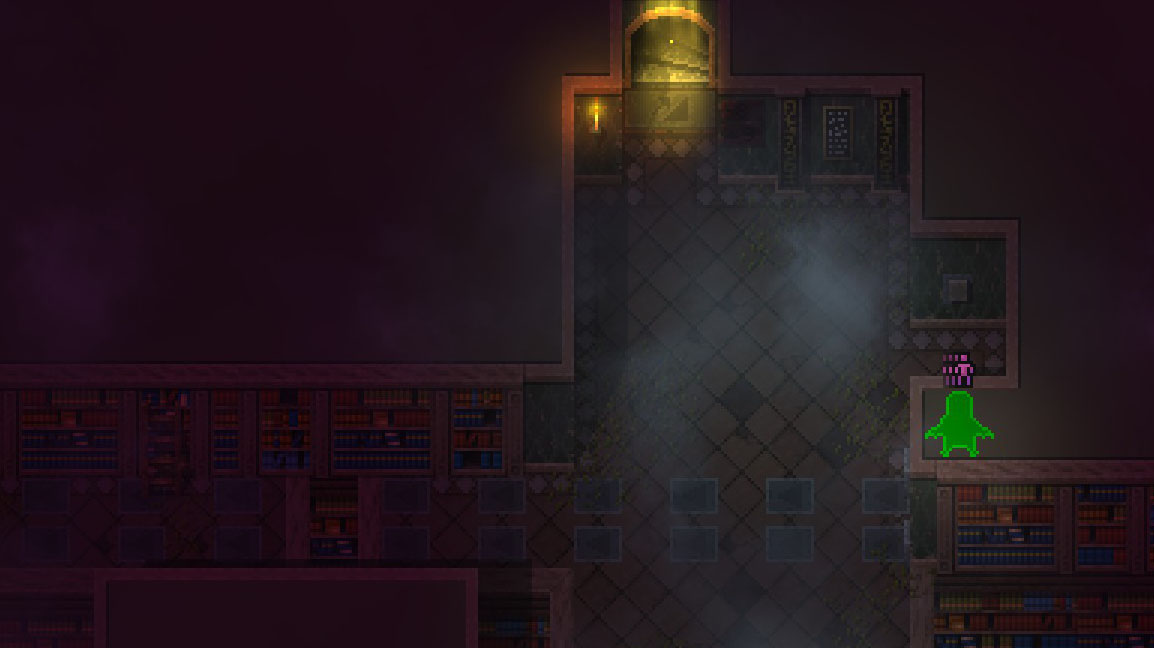
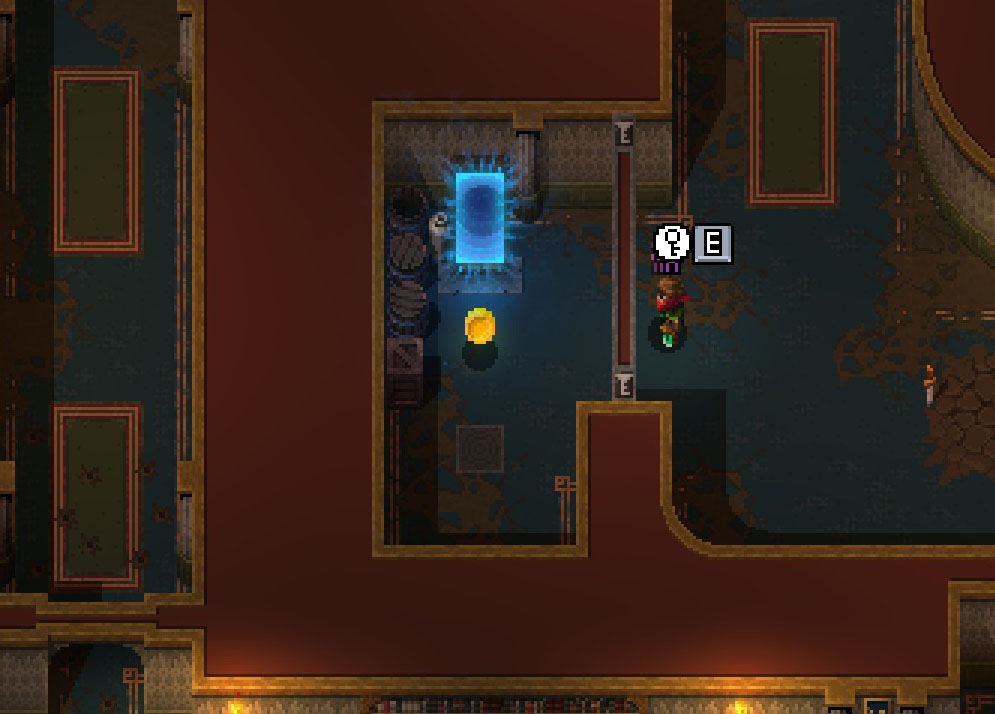
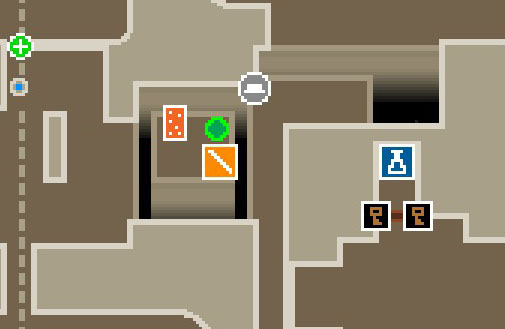
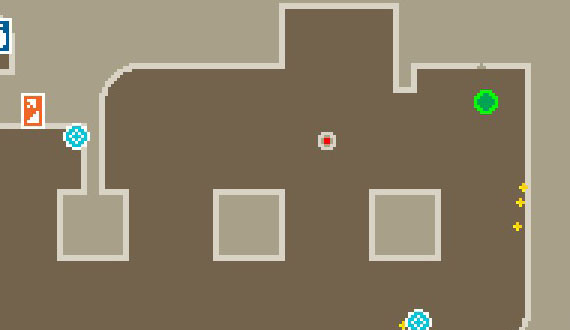
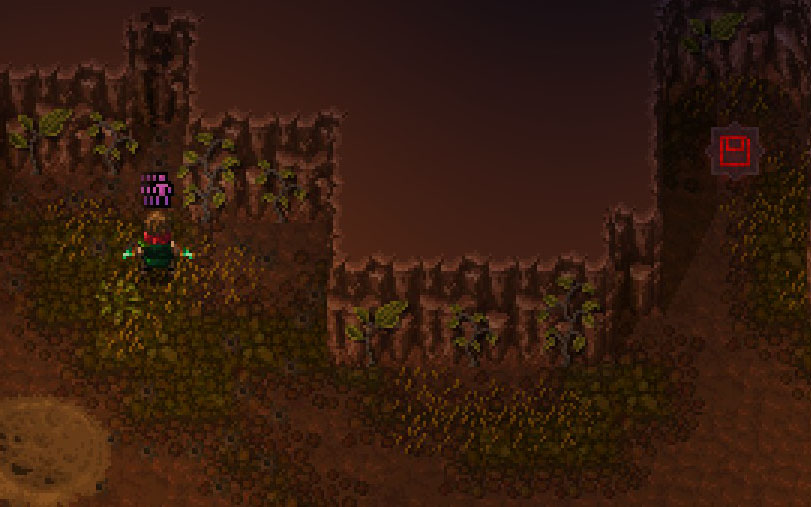
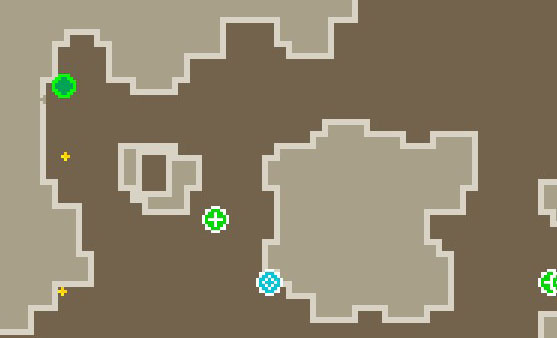
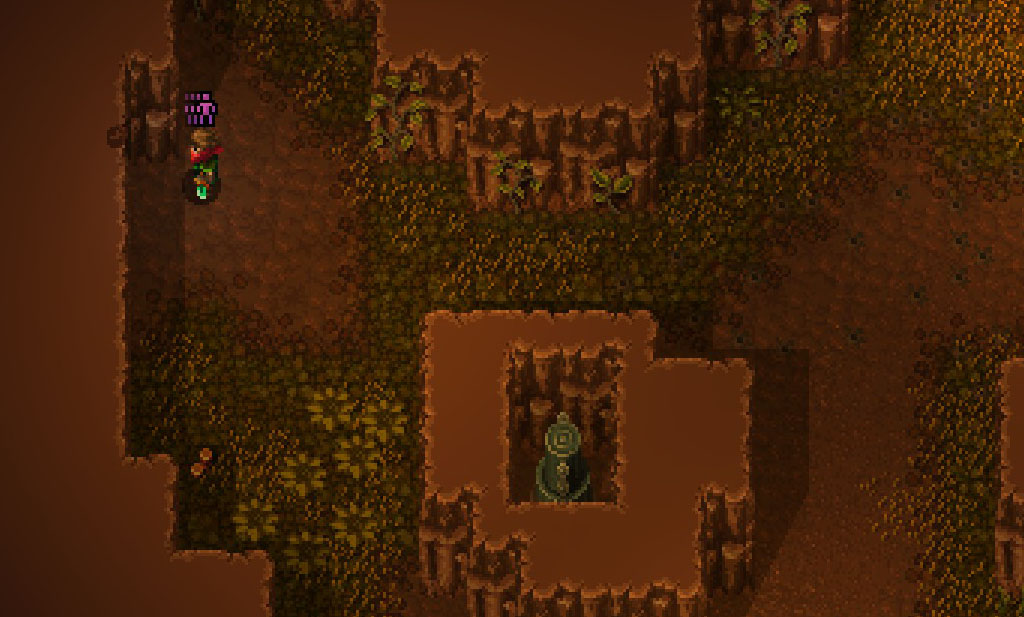
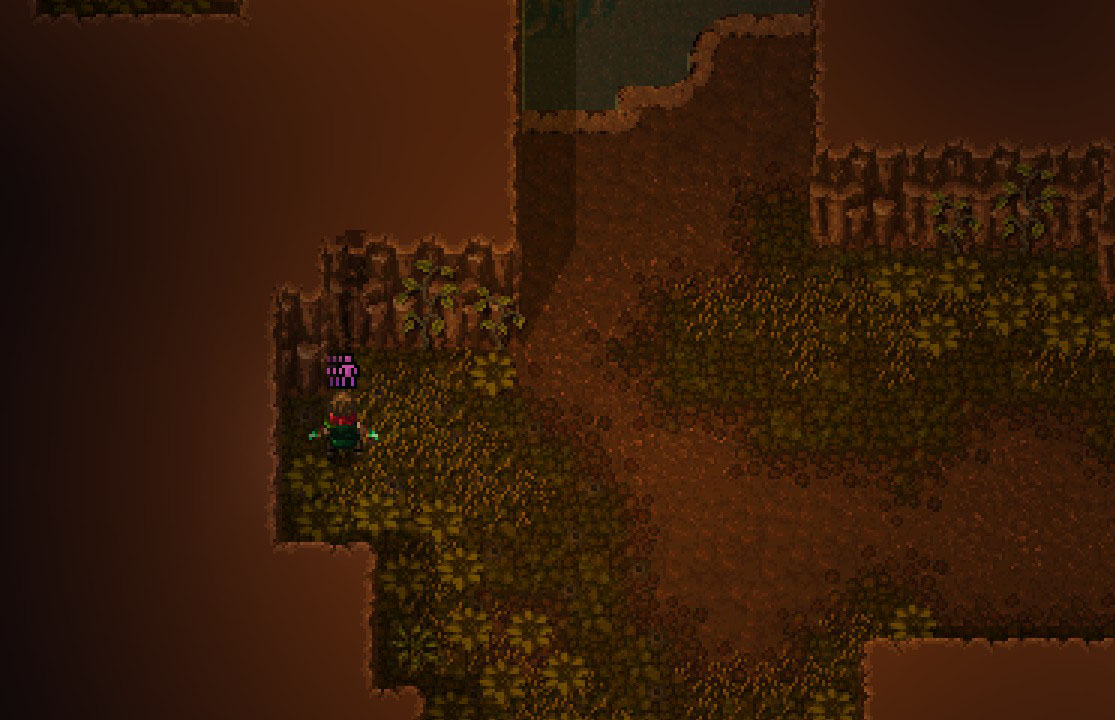
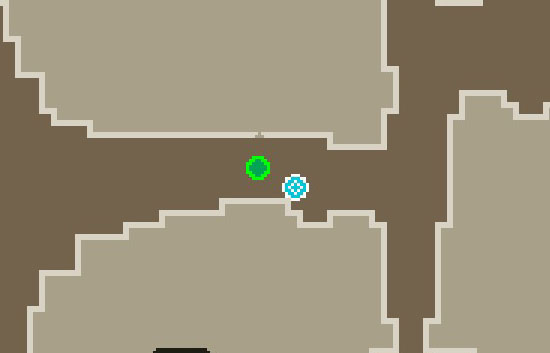
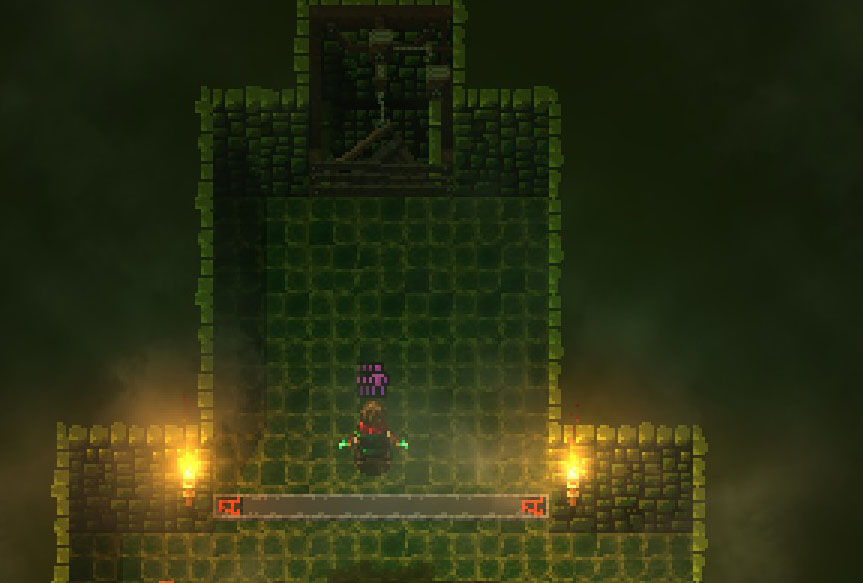
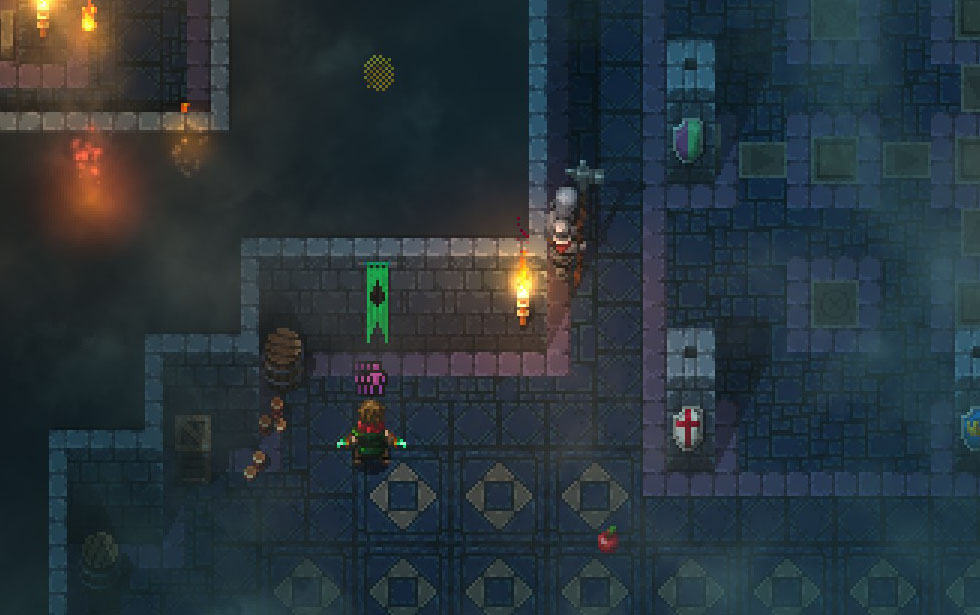
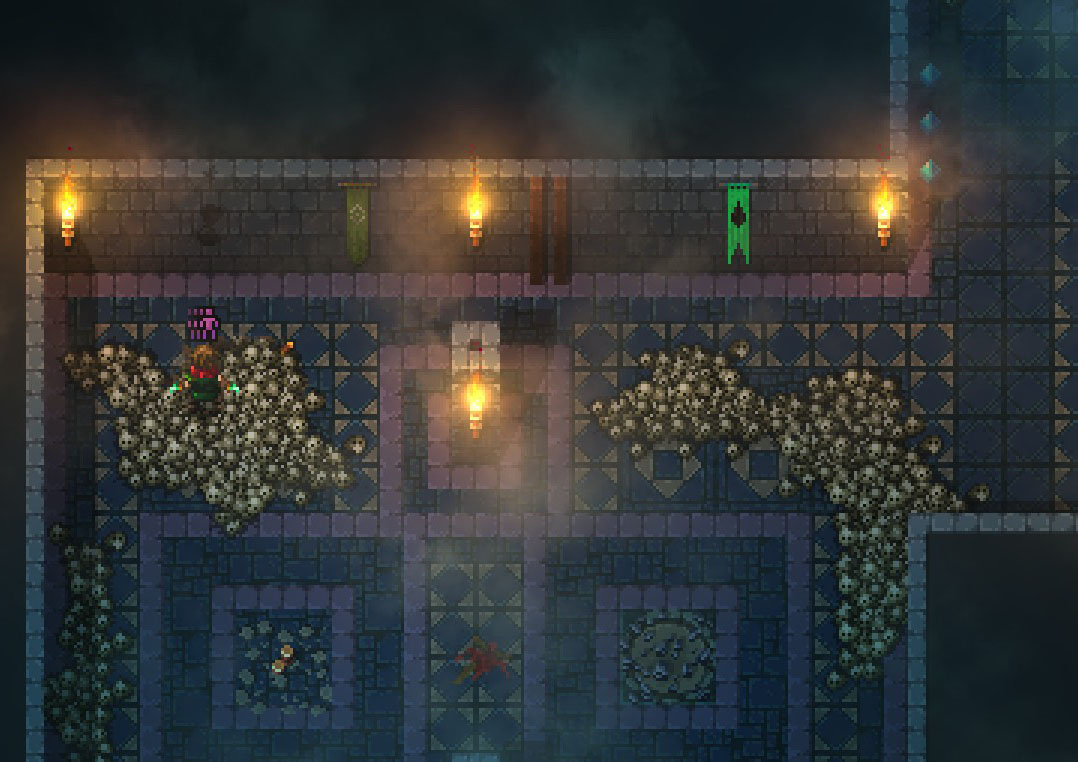
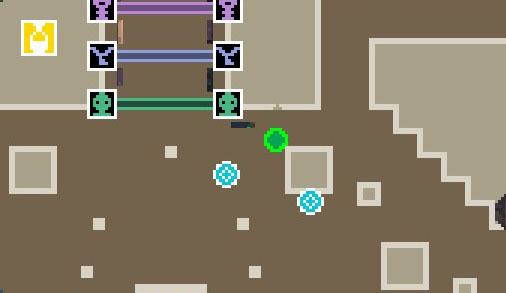
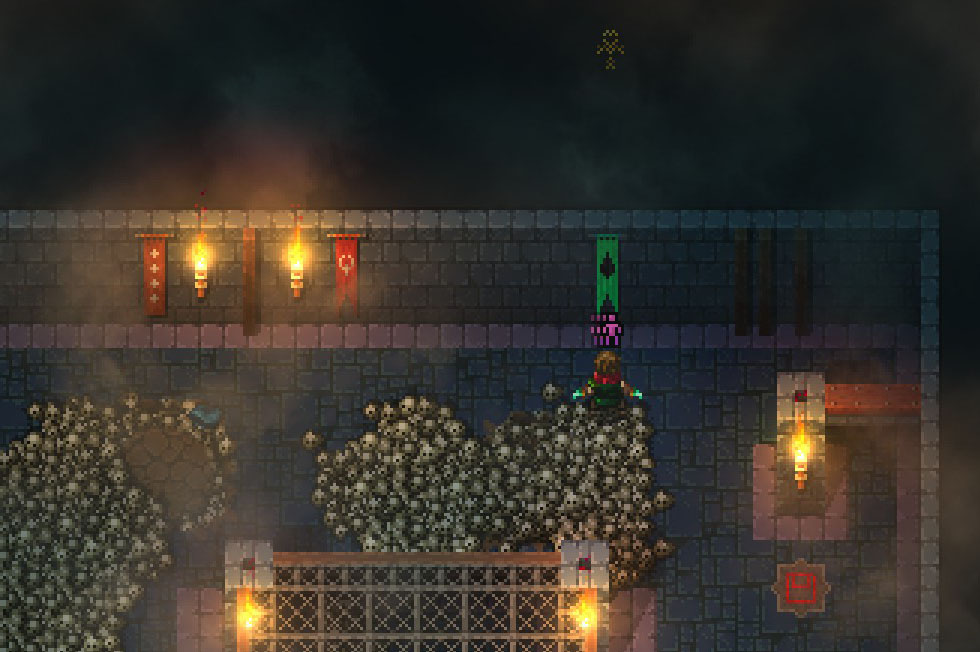
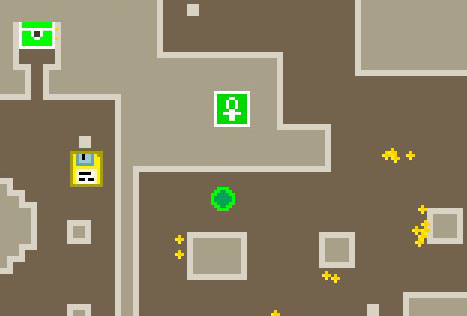
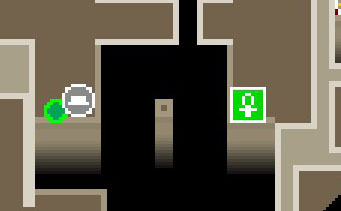
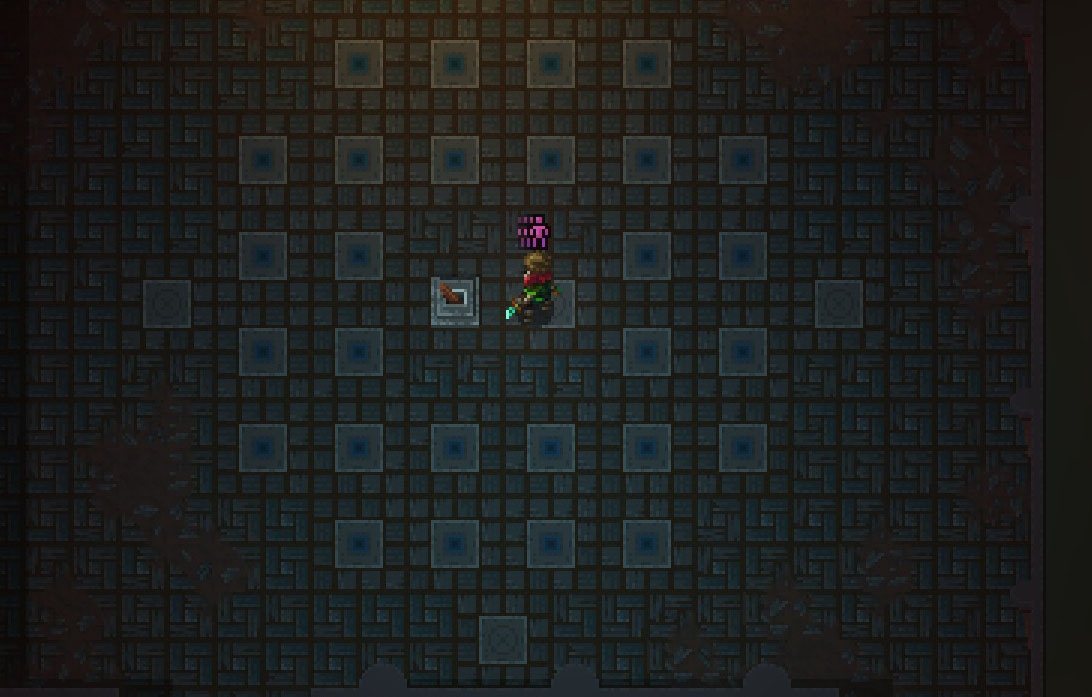
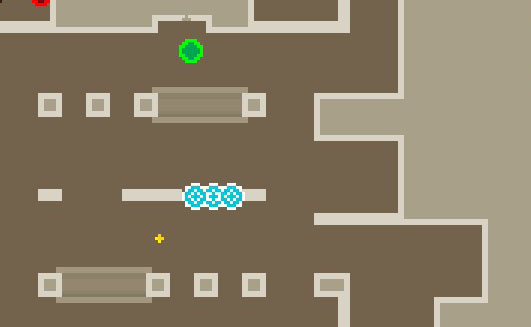
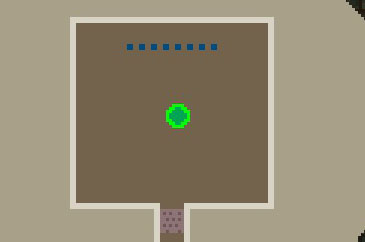
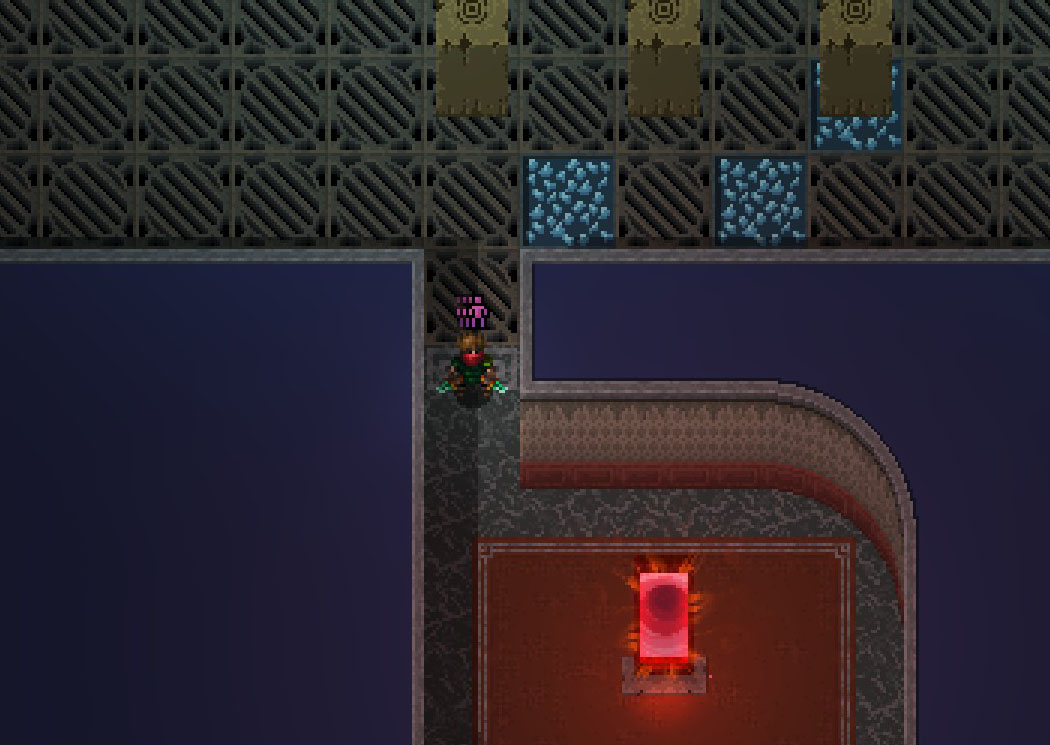
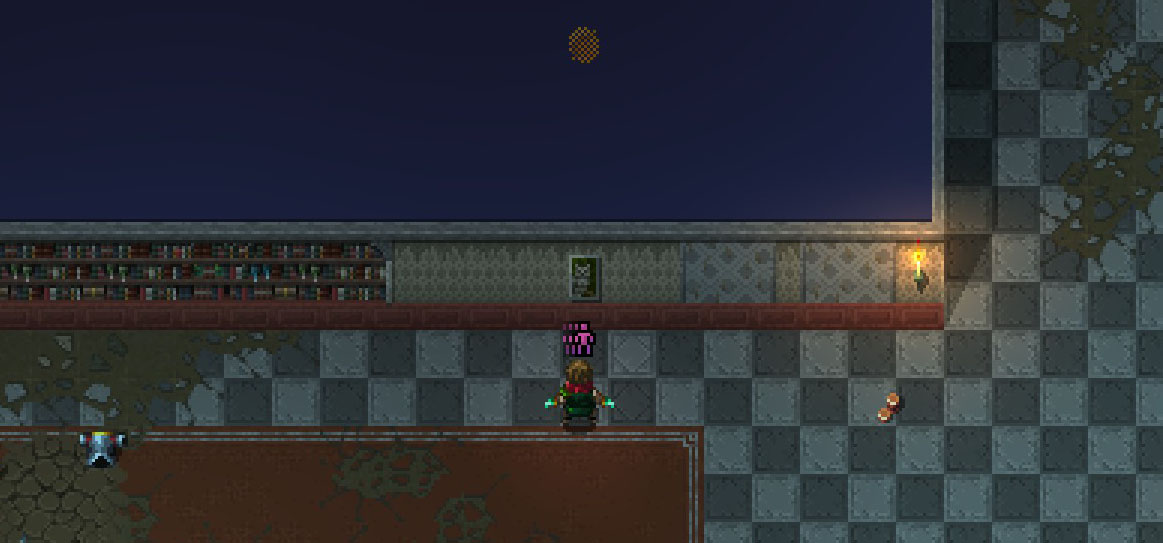
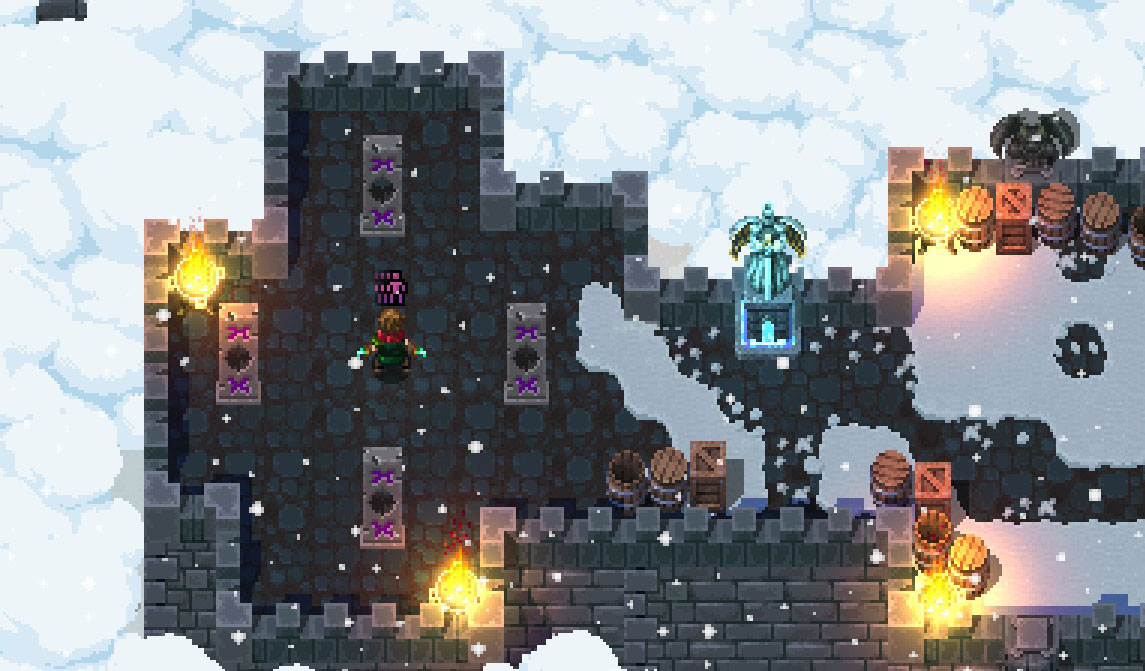
Passwall on Infested Prison Tower Floor 5 around the top right area
https://gtm.steamproxy.vip/id/DacianDraco/screenshot/2501272149848799294/