GTFO
508 ratings
The ULTIMATE GTFO guide
By Czlopek and 1 collaborators
The ultimate guide to GTFO. Here you will find everything one needs to know as a new player as well as some advanced info. This guide is a subject for update and covers essential information while trying to avoid constantly changing aspects of the game whenever possible. We might as well touch some glitches every now and then if we believe covering them makes sense. Any numbers that can be found in the guide are based on our own in-game observations. If we feel that some aspects of the game were already covered and well-described by someone in a thorough way and we have nothing to add - we'll do our best to reference these sources.

Disclaimer. This is not:
  • a guide to a specific level;
  • datamined paradise with lots of numbers most players will never use;
    We do recognize that there are data enjoyers out there. Even though we are not focusing on it, we'll do our best to reference people who do a really nice job presenting numbers and showing data.

What you will find in here:
  • fundamental information which is likely to stay unless the opposite is specified;
  • highlights on what's actually needed to become a good prisoner;
  • cool things you may do as a player, which are not obvious nor explained by the game itself;

The guide was verified for the Rundown 2.0 build 32390. We'll do our best to update the guide as long as we stay interested in doing it. However, every major update will take time as we need to play though the rundown ourselves and ensure that we provide a coverage that meets our quality expectations. Long story short - updates for the guide aren't likely to come within a week or 2 after the new rundown appears. Please, use your best judgement in such cases and keep patch notes in mind when going though the guide.

After 9 months in development, hopefully it was worth the wait.

For the latest changelist of the guide's content, check the What's new right after the intro.
39
10
4
5
14
6
6
7
3
2
2
2
   
Award
Favorite
Favorited
Unfavorite
What's new
Rundown 2 re-release introduced a partial fix for mines breaking doors: (update for the Mines section of the guide)
  • Mines should deal damage to reinforced doors.
  • Mines should deal damage to non-reinforced doors, both with 100% hp and damaged ones.

Remaining issue:
  • Front mines still don't deal damage to doors. It seems only those deployed on the door frame work as intended.
Chapters
▣ Terminals Basics
⊳ You will learn about the basics of using the terminal as well some handy tips.

▣ Unique Terminals
⊳ Here we talk about common terminal-related mission objectives and how to approach them.

▣ Equipment
⊳ Is all about the proper way of using tools, some weapons misconceptions, and a short description of every consumable and the best way to utilize them.

▣ Stealth and combat
⊳ We talk about the core mechanics of this game when to sneak when to shoot how to dodge all the good stuff.

▣ Events and preparation
⊳ Some basic knowledge about enemy behavior during an alarm as well as alarm types and how to prepare for them.

▣ Special enemies
⊳ The proper way of dealing with certain enemies tips and tricks on how to get rid of them quicker as well as some behavior patterns.

▣ Summary
⊳ Golden words of advice that will hopefully help you out deep down in the rundown.

▣ Interesting finds
⊳ In the end, we talk about interesting stuff we discovered during testing that didn't fit anywhere or we didn't have space for.
Terminals Basics
Terminal is a vital tool at prisoners' disposal which either significantly helps to progress through the level, or is even required to complete an objective. Any prisoner will eventually learn how to handle any task via terminals. However, these are some of the basic commands which can easily be used from A1 of any Rundown.
◆ LIST
LIST is not a command that delivers the desired output on its own, yet serves as a mean for other commands to achieve a certain result.

LIST cannot be used on its own - a filter is required to even run this command.
Hitting just "LIST" into a terminal will generate a respective warning message.

There are 4 main ways to apply filters to LIST command:
  1. Filters specifying location, namely zones. In our example, we are looking for any items in zone 290. In order to get this list, we enter "LIST ZONE_290". This can be used to check our current zone, or any other zone of interest.

  2. Filters identifying type of items we are looking for. In our case, we are looking for a tool refill. Thus, typing "LIST TOOL_REFILL" will do the trick - all tool refills from from the entire level are listed. Alternatively "RESOURCE" can be used as a filter to list all resources: ammo, tool, meds and disinfection packs altogether.

  3. It's possible to apply multiple filters at a time. For instance, we're interested in tool refill from zone 290. "LIST ZONE_290 TOOL_REFILL". As a result, tool refill only from zone 290 is going to be listed.

  4. "LIST -A" will summon list of all items present in the level, which gives very little value on its own.

    Note[1]: Order of filters doesn't matter for the end result. However, in case you'll run LIST command multiple times, it's advised to use a filter you are more likely to change last. It's not a rule, but a simple quality of life habit, as you will be able to change filters quicker.


Notice that in our example we use "E_290" instead of "ZONE_290", "TOOL" for "TOOL_REFILL". The reason behind this is that filters don't require full names in order to list something. As long as you enter part of the body, LIST will find matches for it.
We advice against using just "290" for "ZONE_290". While it will list all items from zone 290, chances are there is an item on the map containing the same number in its name, while being in another zone.

LIST doesn't accept abbreviations of any sort.

Note[2]: LIST could be used as an alternative to QUERY. e.g. lets imagine that you are looking for a single key, and you have a choice between several zones where it could potentially be located. Instead of QUERYing an item by its unique name, you can type "LIST KEY ZONE_X", where ZONE_X is a zone of interest. Should this zone X have a key, the LIST will show it, the opposite is true as well. It is especially useful when name of an item you are looking for is complex and you don't want to type it fully.
◆ PING
Unlike LIST, PING is a little bit more straightforward command. It works with only 1 interactable item at a time, only full names including IDs are accepted. Once you ping an item, e.g. "PING AMMOPACK_589" in our scenario, a visual and audio clue will show the exact location of whatever we are looking for, as well as a distance between us and a target.

None[1]: PING works only for items located in your current zone. Otherwise terminal will show an error message.

Note[2]: It takes a couple of seconds for a terminal to process a request and send a response. The exact time depends on a distance between you and the item. While waiting for a response, you are completely functional, may look around and perform literally any possible action in the game as long as you don't step aside from the terminal - the response will arrive. If you step aside - the process will pause, and will resume once a prisoner comes back to the terminal.

Note[3]: If a constant PINGing with minimum effort is required, it's possible to add -T in the end of our command for constant PINGing of an item. However, this will pause once you leave the terminal interface, so you lose part of flexibility. "PING AMMOPACK_589 - T" will do the trick.

Visual Example:


PING logic
PING is by miles the most frequently used command in the game. As PING works only for items located in the same zone with the given terminal, you will have to LIST specific items present in this zone before PINGing them unless you already know their exact names. Refer to the LIST section of the guide for more info on this command. The terminal itself provides info on where it's located - the zone number can be found at the top of the initial message. Should someone clear the terminal screen by hitting "CLS", or use several other commands and push this message out of the screen, you can enter "PING" on its own. An error message will appear, where your current zone number will be displayed. This error message appears when PINGing an item with incorrect name, but it as well shows up when hitting "PING" on its own, as an item with no name can't be found for obvious reasons.

Zone ID via terminal initial message and PING error message:

◆ QUERY
QUERY similarly to PING works only with 1 item at a time, and accepts only fully written names. However, unlike PING, QUERY works for every single item in the level.
QUERY does multiple things simultaneously.
First and foremost, it tells the zone where QUERied item is located (no visual or audio clues). Second, it gives detailed information about an item where applicable. e.g. capacity of an ammopack.

Thus, QUERY helps in 2 different scenarios:
  • QUERY is frequently used to locate an objective, or anything else necessary to progress through the level.
    It helps navigating through the map by identifying your main path, and avoid redundant routes.

  • QUERY helps in decision-making whether you need to explore an additional area, and take a risk to get some sort of resource.
    Since query shows the capacity of an AMMOPACK_784, we can make a rational decision whether it's worth going for it, or maybe it's better to ditch it for good.


◆ Navigating a terminal
Depending on your personal experience with various command lines and not only, this will not come as surprise. However, one can easily navigate through the terminal and fasten whatever you try to achieve.
  • TAB completes the word you are typing, which might not seem like a big deal at first, yet appears to be a true savior. Most commands require just their 1st letter, or the 1st couple of letters for TAB to complete them. In practice, "P" + TAB will result into "PING", "A" + TAB into "AMMOPACK".

  • Arrows come extremely handy when there is a need to run the same command multiple times, or navigate through a different commands you've used earlier. Where upper arrow moves you up the list to commands used earlier, and lower arrow moves you down the list to commands used later.


  • HOME moves focus to the beginning of the line you are typing.

  • END on the contrary shifts focus to the end of the given line.

  • CTRL has several functionalities:
    1. Holding CTRL on its own is used to jump word by word.
    2. CTRL + BACKSPACE removes the whole previous word.
    3. CTRL + DELETE deletes the whole next word.

None[1]: When dealing with Uplink Terminals, and uplink verification is being processed you still have some control over the terminal, meaning you can still write, edit, and prepare commands while the animation is running.


Unique Terminals
While it's true that most terminals share the same attributes and have no difference at all aside from their IDs and placement. However, some terminals have unique commands available for them.

These commands serve different purposes and are usually required to complete a mission. Such commands can be found in the terminal itself in the list of commands (enter "COMMANDS" to generate this list). These are the unique terminals currently present in the game:
◆ Objective Terminals
These terminal resemble the most basic caliber from roster of unique terminals in terms of inputs required from prisoners. Long story short, find a terminal - hit a certain command. However, these commands tend to have a specific affect on the mission aka "something happens" when you enter one of these commands outside of the terminal itself. These commands tend to sound in a specific way (usually with a hint of what's going to happen), and usually are clearly presented in the objective itself, or at least when the required terminal is located.


Note[1]: Despite being unique, these commands work just fine with TAB (properly explained at TAB and Arrows section of the guide).
◆ Reactor Terminals
Just like mission objective terminals, dealing with reactor through its respective terminal is required to complete certain missions. In the current state of the game, prisoners may encounter reactor startups and reactor shutdowns.

Reactor startups
These reactors are more frequent and possess 2 special commands:
  • REACTOR_STARTUP - used to heat up the reactor and begin the entire reactor event.

  • REACTOR_VERIFY - used to complete a given stage of the reactor startup and move to the next phase. Always used with a 4-character code. "REACTOR_VERIFY [wrong code]" will be rejected by the terminal with no penalty.

The way we recommend to approach these terminals looks as follows:
  1. Enter "REACTOR_VERIFY". The command will fail, since it's used before "REACTOR_STARTUP". However, now it's possible to summon "REACTOR_VERIFY" with an upper arrow. This step is a habit of many players, yet it's easily possible to skip this one if you don't find it useful enough.
  2. Enter "REACTOR_STARTUP" - this will begin reactor sequence with a number of stages to verify.
  3. Summon "REACTOR_VERIFY" which you've failed at step 1 and leave it like that. Alternatively, type "REACTOR_VERIFY" right now. The effect if going to be the same. The reason behind it is that you have a limited time to complete the following steps. And having this command pretyped will save a couple of seconds later, which can easily be the difference between a fail and a pass.
  4. Once the required code is obtained, come back to the reactor terminal and enter "REACTOR_VERIFY [required code]". In our example "REACTOR_VERIFY CURE".
  5. Repeat steps 3 and 4 for every reactor sequence until the reactor is up and running.


Obtaining codes is done in 2 separate ways. The game will either provide you the code via HUD. UI clearly communicates it to the player. Or, you will have to get this code yourself via one of the terminals on the map. The game will notify prisoners which terminal they are meant to find to get a code. The code itself is located in the logs of the specified terminal, and is usually called in the following way "REACTOR_VERX06.LOG". Read the log and get the password. Please refer to the Logs section of the guide for more information on logs.

Note[1]: We recommend typing the code in the chat for the 2nd scenario. First and foremost, you don't have to keep it in mind. Second, unless you are a native speaker, you will avoid potential pronunciation/spelling issues, which might happen occasionally.

Reactor shutdowns
Shutdowns are more straightforward in terms of terminal commands compared to reactor startups. The main difference is that it doesn't have multiple stages, and no specific time pressure regarding the terminal whatsoever. Thus, there is no need to pretype anything, and "REACTOR_SHUTDOWN" is required to initiate the process with just one "REACTOR_VERIFY" present, where the password is directly communicated to prisoners via HUD.
◆ Uplink Terminals
Uplink terminals represent another kind of special terminals which require multiple commands to complete the event. While there are 2 types of uplink terminals, both of them consist of establishing an uplink connection through a given terminal and completing several verification steps similar to the reactor startup. However, the way required codes are being obtained differs significantly. Our team doesn't use specific names for either of these terminals atm, so bare with us :)
This part will have a lot of similarities with reactors, which is something to look out for.

Generic uplinks
These uplinks were around since R2 and are generally known around the community. Similar to reactor, they contain 2 unique commands:
  • UPLINK_CONNECT - used to initiate the connection, while several verification steps are required to establish the connection.

  • UPLINK_VERIFY - used to complete current verification step and move to the next one. Always used with a 4-character code. "UPLINK_VERIFY [wrong code]" will be rejected by the terminal with no penalty aside from wasted time.

The way we recommend to deal with uplinks goes like this:
  1. Enter "UPLINK_VERIFY". The command will fail, since it's used before "UPLINK_CONNECT". However, now it's possible to summon "UPLINK_VERIFY" with an upper arrow. This step is a habit of many players, yet it's easily possible to skip this one if you don't find it useful enough.
  2. Enter "UPLINK_CONNECT [address provided in the objective]" - this will begin the event with a number of stages to verify.
  3. Summon "UPLINK_VERIFY" which you've failed at step 1. Alternatively, type "UPLINK_VERIFY" right now. This can be done quickly with U + TAB, V + TAB.
  4. Once the required code is identified, enter "UPLINK_VERIFY [required code]". Please, refer to the attached media below to see an example of an uplink sequence.
  5. Repeat steps 3 and 4 for every verification sequence until the uplink is established.

Complete uplink sequence (number of stages will vary):


The terminal prompt will give a 3-character key (highlighted with yellow colour) for the required 4-character code for each verification step. A number of key-code combinations will appear on the screen of prisoners in close proximity to the terminal, while HUD is turned off for those interacting with a terminal. Prisoners need to identify a required code based on a key provided by the terminal.


Note[1]: Prisoners working on the terminal can leave the terminal interface at any time and in such a way check the HUD themselves. It is extremely convenient since there is no need to rely on communication with teammates. Thus, it easily helps to avoid potential pronunciation issues, not being able to hear your teammates well due to being in a fight, and eventually letting your teammates focus on fighting sleepers.

Note[2]: Similar to any non-instant commands (e.g. PING), prisoner working on the terminal can easily leave the terminal interface without hindering command processing, and, as long as staying in front of it without stepping away, defend himself, help other teammates by shooting sleepers, using resources, etc.


Note[3]: It is possible to see what's written on the terminal screen without actually interacting with it. Usually crouching by the terminal and looking at the screen at a certain angle (as shown above) will do just fine. By doing this you can get required code a bit quicker since there is no need to enter terminal to look for a key, leave a terminal to enable HUD, look for the respective code, and only then interact with a terminal to hit the code. You can easily skip half of this sequence and save a second or two.

R5C3 aka "new" Uplinks
This uplink has appeared only twice so far, 1st time at R5C3 (thus the name). While being basically the same uplink procedure, these terminals have a separate way of acquiring verification codes. These codes are no longer provided via HUD, but can be found in another terminal. Thus, more cooperation is required to beat this event.

These uplinks involve 2 parties: 2 players, each operating a separate terminal. 1 terminal is identical to the generic uplinks, they use the same commands, response in the identical way, and they should be treated in the same way as described in Generic uplinks part of the guide minus the need to look for the verification codes via HUD. Instead, keys for each verification step should be communicated to player working on the 2nd terminal. The event can be initiated once confirmed from both terminals.

How to deal with a terminal providing codes:
  1. When the uplink terminal initiates uplink connection, you need to confirm it.
  2. When the uplink terminal gets the 1st verification request, your terminal will have a new log available. You can either find it in logs, or read it directly by hitting "READ UPLINKCODES_01.LOG".
  3. Based on the key provided by another player, locate the respective code and communicate it to the player working on the uplink terminal.
  4. As soon as the other player enters uplink verification code and awaits for the next verification step, you can already read the next set of codes. Simply hit "READ UPLINKCODES_02.LOG", which is identical to the previous log, but 02 instead of 01, a number respective for the verification step. Always add +1 each step.
  5. Repeat steps 3-4 for the remaining verification steps.

Here is an example of A for an uplink terminal, B for a code terminal. As you can see, it's very similar to the regular uplink, but it does require more inputs from the team and communication between 2 prisoners working with terminals.


In our case (starting from stage 3 since the entire sequence didn't fit in one terminal screen), we were requested to provide a code for key X05 - RUSH. Similarly for stage 4: X09 - SLAM; and stage 5: X06 - ONLY. After doing it just once it won't feel that much different from generic uplink. What matters is that 2 prisoners lose their mobility. However, this is a topic for Events and preparation.

Note[4]: Similar to the regular regular uplink terminal, you can defend yourself and do pretty much anything while operating with a code terminal.

Note[5]: We strongly recommend typing the correct codes in the chat. The reason behind it is similar to the reactor codes - simply to avoid potential pronunciation issues and similar problems.

Note[6]: It is extremely helpful to load the 2nd and following set of codes as soon as possible. Do not neglect your option to load these codes when another player working on the uplink terminal hits the previous verification code and awaits for the next verification step. These seconds can matter when your team loses flexibility due to 2 players being occupied by terminals.
◆ Logs
Logs are roughly speaking present for every single terminal in GTFO. However, they've evolved greatly since R1 - more and more applications are being made for logs.
What are the logs anyway? These are essentially short text documents containing some information, which might me crucial to complete a given level, while some of them are optional and contain information about the complex, lore.

Note[1]: Terminal containing logs required to complete the objective are always clearly stated in the objective itself, while terminals with optional logs don't give away the fact that they contain something interesting. Thus, it's necessary to check terminal logs manually if you are into lore and don't want to spoil anything through wiki. The one exception for the time being are terminals with corrupted audio logs - these are incredibly hard to miss as they emit distinct sounds.

Hitting "LOGS" into a terminal will generate a list of logs available on this terminal. In our case there are 2 logs available:
  • AUTO_GEN_STATUS.LOG - a standard log present on all terminals in the game.
  • EBDT_00BE11.LOG - a unique log for this specific terminal, probably worth checking.


In order to read log, you need to hit "READ [full name of the log]". In our case: "READ EBDT_00BE11.LOG". The terminal will display whatever information log has to offer. The content will vary from one log to another. Here we have a lore log.

Note[2]: Log names can't be completed by TAB. Unfortunately, these have to be typed manually.
Equipment
Choosing and knowing your equipment is vital to complete many complex missions as proper use of these things will make your run a breathe, while a bad and incompetent one will surely lead to frustration and potentially "YOU DIED" message.
◆ C-foam Launcher


C-foam launcher is a tool spraying c-foam blobs either as a load, or one at a time. The c-foam itself could be used in 2 ways:
  1. C-foaming the ground / separate sleepers.
    C-foam is capable of freezing enemies for a short duration when applying enough c-foam to them. Amount of c-foam required to freeze an enemy varies between different sleepers. This could be applied either by spraying c-foam at them directly, or c-foaming a ground for active sleepers. You might consider this option when killing some dangerous enemies, or dealing with waves when there is no solid choke point. However, turrets usually deal much better with the latter scenario. Sure, sometimes you can combine them. Everything depends on your specific needs and current situation. Keep in mind that c-foam fades after 4 to 5 minutes when sprayed on the ground, so you definitely want to spray it right before the action.

  2. Reinforcing doors:
    Each blob strengthens the door, requiring sleepers to spend more time breaking it. Having enough blobs on a single door will "reinforce" the door, sadly it's just a visual effect. Right now 9 blobs will perform similarly to full reinforcement since the tenth blob required to trigger the animation disappears.

    Here is the comparison:


    Efficient c-foaming with the animation:


    Strategies for c-foaming:

    • Blob by blob.
      A reliable and the most forgiving way of doing it, you have full control over how many blobs you will use. But as a consequence, it takes much longer to c-foam an ordinary door and it's quite hard to c-foam the door under attack.

    • Controlled charges.
      A quicker alternative that is much better at foaming doors under attack. Roughly speaking, you can either perfectly time a 9-blob spray (but there is always a small risk of launching 1 blob more or less. Alternatively, you can always try to play it safe charge the launcher halfway though (or any other value you feel comfortable with. If it goes above 50% it will spew out 5 blobs if below 50% it will drop 4 blobs. Then simply add the reaming blobs.

Note[1]: While we don't cover boosters in details in this guide, it's worth saying that higher c-foam portion makes blob by blob strat redundant, and charged loads use less % of tool compared to using the same amount of blobs shot separately when using c-foam portion increase boosters. That's something you need to keep in mind when using these boosters.

Note[2]: In certain scenarios you will have a c-foamed door sleepers never broke and you need to open it after the fight. When playing solo (without clients, bots are fine) - you can hit the door with your melee, remove all the blobs and open it as you normally would. When there are some clients in the session, in most cases the door will have small blobs remaining on the door - it's a c-foam replication bug. You'll have to completely break this door if you need to pass.

On many occasions you will need to hold the same door for a relatively long time and keep it reinforced (aka perma-foam). While door has a cap of c-foam it can take, dealing damage to the door will be decreasing amount of c-foam it has, which is clearly visible. Once c-foam present on a door is below cap, you are able to apply new portions of c-foam. This can be done in any suitable way: blob by blob as sleepers hit the door, or charged sprays when most of the foam on the door is nearly gone. What's important is adding c-foam before current foam is completely removed and the door itself starts receiving damage, as c-foam doesn't repair a door, but reinforces it. Thus, if you allow sleepers to regularly hit the door itself it will break in a couple of loops, which is a widespread mistake when door should be held for a while. The later advice can be neglected if you are about to finish the alarm, or don't mind letting sleepers in a bit earlier. However, if it's something you should keep in mind when perma-foaming a door for a longer period of time.


Reinforcing doors combines really well with other tools as it gives other tools more time to put in their work and increase their overall value. Ideally you want to combine reinforced doors with mines, since enemies have more time to group behind the door and die simultaneously. Or a turret will have more time to shoot, so that fewer enemies break in (inferior to mines in most cases). Pay close attention to using turrets behind doors you are going to reinforce multiple times - the turret will use X amount of tool while the door is c-foamed, probably will kill a wave if you refoam a door long enough. As a result, the next wave will spawn and come to the very same point. Identical result could be achieved with just perma-foaming, without wasting resource on turrets. Keep in mind, only 1 sleeper hits any door at a time. Killing part of the wave won't make them to break a door any slower. The point is that you are able to hold the entire wave behind a single door with a help of c-foam alone. There is no need to kill sleepers during that time as they will respawn again with the only difference is your tool being wasted. Consider deploying turrets behind reinforced doors only in cases when your team has no plans to refoam them whatsoever. Thus, be mindful about how you work around reinforced doors.

Door size matters.
Wider doors can sustain much more punishment compared to their smaller counterparts, that's why when perma foaming smaller doors take extra care as to not let them in by accident.

Note[3]: In certain scenarios you don't want to kill sleepers as soon as they break in, but simply delay your encounter with them. We'll cover reasons for it in Max cap section of the guide. For the time being keep in mind that reinforced doors can be useful on their own, not simply act as a support for other tools to kill more enemies.

Note[4]: Plans do change sometimes. There going to be cases when you change your mind about c-foaming something, yet the launcher is already charged up. Simply switch to any other item, this will cancel the charge.

Note[5]: You can move freely with a charged c-foam: sprint and jump. This is especially handy when perma-foaming doors, as you can juggle between doing objective and sprinting to the door with already charged load.
◆ Bio Tracker


Bio tracker is a unique tool since it doesn't require a single use of tool to be operational and can be used in a number of ways from the beginning till the end of level.

Here is an actual shape and range of bio:

Bio tracker communicates information in 2 separate ways:
  1. First, prisoner holding bio tracker sees positions of sleepers within 24 meters ahead from him. Bio clearly shows whether these are stationary (white dots) or moving (red dots; in most cases already alerted) targets. This is incredibly helpful when giving a heads up for your team on what are you dealing with. The more experienced you are the less you need to give the exact position of every single sleeper, but rather a general idea: "This room is screwed" vs "Just a couple" vs "This room is empty".

    Note[1]: Having just very few targets doesn't always mean these are small regulars! Aka scream of the overload blood door in R4C3 Overload.

  2. Second, player with a bio can tag moving targets present on bio screen. That might seem like a simple quality of life, but it's a real saving grace when fighting in low visibility environment, when seeing sleepers is not that easy. It helps both in shooting, estimating the threat when fighting with melee weapons, as well as seeing sleepers' pathing in general.

    Note[2]: Bio is required for turrets to lock on shadows, otherwise turrets will ignore them altogether.

    Note[3]: Bio has a synergy with certain tools affecting their performance when enemies are tagged. We will cover this in specific tools that have this synergy. For the time being, it's only true for some turrets.

Since using bio in stealth is extremely intuitive, we'll focus on tips on using bio in combat:
  • Have patience and try to tag as many sleepers as possible at once.
    While fighting waves you'll often find yourself in a situation when you can already tag the frontline of enemies, but way more are coming behind. Try to find a balance between tagging as many as you can, yet when they are not too close. Tagging just a couple won't have a great impact otherwise.

  • Constantly update the ping if needed.
    Sometimes pinging once when the wave approaches isn't enough and new pings might be required. E.g. when fighting without lights or in the thick fog. Keep in mind bio's cool down and reping the enemies if needed. You'll need to learn how to catch windows for new pings when you are shooting or fighting with melee weapons, it takes a bit of muscle memory or a developed habit if you will.

  • Update the info using VOIP if needed.
    You'll occasionally see situations when your team feels confident in clearing the strugglers and starts pushing them, or simply a large group of enemies is approaching for whatever reason but you can't tag them due to the cool down - simply give you team mates a shout "Hey, more sleepers are coming" and it should suffice before the next tag.

  • Bringing more than 1 bio.
    Certain levels combined with fighting lots of shadows in the past were known for many teams bringing several bios. Usually it happens when you play extremely dark and foggy levels and are forced to fight many shadows. Second bio might be a good idea since shadows lose their tags quicker than other enemies while a single bio still has a cooldown, plus sometimes bio can't keep every enemy tagged. Keep this option in mind, but it's generally speaking a redundant idea for vast majority of the levels.

    Note[4]: It's possible to negate the need in 2nd bio by using tracker CPU speed boosters should they be available.

    Note[5]: Similar to other tools bio can be used while sprinting, which is especially convenient for this tool.
◆ Mines


Generally speaking, there are 2 major types of mines:
  1. Door mines.
    These mines are deployed to ensure that a group of sleepers gets blown up on single mine. On some occasions it makes sense to set several mines, yet in most cases a single mine will do the trick. Sleepers choke on a single door, while mine sets off upon the door being broken/open. Such mine(s) will deal a significant damage to a group of multiple sleepers at the same time (potentially a large group of sleepers) regardless of their size and other attributes. These mines in their turn appear to be the most effective. Door mines can be deployed in 2 ways:

    • Cross-mines.
      Deployed by the side of the door so that a beam coves the entire door, these mines are definitely a go-to option for most cases, especially since mines were buffed in R5. The idea is incredibly simple: sleepers break through as a tight group, cross the laser to set off the mine - BOOM. When it comes to deploying a cross-mine on Blood doors, you can always deploy it on the door frame clipping with the door itself. Once the door opens, the mine will work as expected.


    • Front-mines.
      Prior to R5, our group used to use these more frequently than cross-mines. These mines are placed in front of the door should there be a solid surface relatively close to it. The reason behind it is the fact that explosion goes alongside the beam. Thus, the explosion will go through the door and will reach those enemies that might stay a couple of meters behind the door. This is especially useful for tight passages. For bigger doors a front-mine can be a good addition to a cross-mine if you can spare some.


    Note[1]: Sometimes you realize that just a single enemy, or a couple if them, are breaking the door. In such instances you can save a mine and pick it up. The is no need to commit to every mine placement. Moreover, you can open a door and shoot these sleepers quick. Sleepers keep breaking the door while it's opening, but can't get through until the opening animation is completed. Keep it in mind, but beware of potentially exploding together with sleepers. Stay away from opening doors when a front mine is deployed as it will trigger instantly prior the door being completely open.

  2. High mines.
    Unlike door mines, these mines do not rely on sleepers choking at a single door and are deployed elsewhere. Only 1 condition: these mines should be deployed high enough, so that smaller sleepers never trigger them. They are reserved for some of the bigger enemies in the game. We strongly recommend deploying such mines if you have titan heavy event, and you know for a fact that you can spare these mines as they are by miles less effective than door mines. However, they are still useful if you are threatened my titans, but can't rely on doors as choke points.

    Note[2]: Mind the flyers, as they can easily trigger high mines, but are generally not worth spending mines on them unless they are grouped up.


Note[3]: We strongly recommend to stay aside from deploying mines that don't fall under one of the categories above, unless you're positive that these mines won't be needed later. e.g. during the extraction alarm - there is no need to extract with all your resources

Note[4]: You do not need to use mine in all the cases when fighting waves of sleepers. While mines are a powerful tool to deal with enemies on the go without significant preparations, sometimes you just want to keep enemies at bay and just closing/c-foaming doors, or even running itself to make distance is a better choice. e.g. this could happen if you are running from a full cap of enemies to the extraction point and there is still a long distance to cover with multiple zones on the way. Killing enemies behind will potentially enable sleepers to spawn ahead from your group. While in most cases you simply need to kill sleepers, there are certain scenarios when you need to think twice.

Note[5]: While it's true that only enemies trigger mines when crossing their laser beams, prisoners can always blow up mines by shooting them. In certain situations it proves useful. e.g. in case you've deployed a mine a bit too high and you see a crowd of enemies running under it.

Note[6]: Mines do additional damage for the headshots. As a result, you can kill a giant(s) with 2 mines. However, these explosions are highly inconsistent and even when visually hitting the head they might technically hit a leg, or another part of their body.

Last but definitely not least, doors can be instantly broken by a mine explosion if there is a need to go though them quick. Should you be chased by a horde of sleepers and there is a door you need to go through - just shoot a mine to remove a door. This is especially useful against reinforced doors - mine explosion will remove the obstacle much quicker than melee weapons. It's also a fine option if you don't care about being resource efficient. Simply shoot a mine and enjoy a free way.


Note[7]: Currently there is a bug when front mines will not break the door upon exploding, but when it is deployed on the door frame - everything works as intended and door breaks when a mine is shot. Hopefully if will get patched out sooner rather than later, but it is something you might have to keep in mind for the time being.

Note[8]: Noise from a mine explosion doesn't transfer to other rooms. Explosion alerts sleepers within 20 meters that are in the same room with a mine. Sleepers in other rooms aren't affected even of they are just a couple of meters away from the mine - they don't care about the noise. In practice, this is used almost exclusively for Blood doors. Please, refer to that part of the guide for more idea about sound from a mine explosion and how it can be used to your advantage.
◈ Turrets

Turrets might easily be the 1st tool to catch an eye of newer players. As such, the way people use them evolves greatly as hours on record keep growing. What's the deal? In the end of the day, turrets possess the greatest variety compared to other tools, since for the moment we've seen:
  • Burst turret.
  • Shotgun turret.
  • Auto turret.
  • Sniper turret.

These turrets have their own advantages and disadvantages compared to the rest of the tools. We've never seen all turrets in the same rundown together. As such, direct comparison might not always be 100% fair. Yet, it's still possible to rate some these turrets from Godlike to inferior options, and point out their niches. We'll do our best to describe every turret, when and how you want to use it, as well as propose the general mindset when it comes to using turrets.

Let's consider logic regarding turret placement of most players as they gain experience:
  1. First and foremost, most players instinctively deploy turrets facing the enemies.
  2. Later many start deploying turrets behind doors. It seems to make sense, as doors buy more time for turrets to deal damage, especially if the door was reinforced.
  3. This is a point where one should ask himself: does it actually make sense to deploy a turret behind a door where a single mine could achieve the same result with less tool usage? Does it mean that deploying turrets behind closed doors is irrelevant? In most cases - yes, it is irrelevant. Roughly speaking, you don't want to deploy turret behind a door when:

    • Your team can deploy a mine.
      There is no need to kill some sleepers with a turret whereas a single mine will wipe the entire wave. The added turret won't add any extra benefit, just a waste of tool.
    • The door will be reinforced multiple times.
      Meaning that a turret will definitely erase most if not all sleepers. In this scenario, tool will literally be wasted, as a new cap of sleepers will spawn and come by the reinforced door.

  4. If we step aside from using turrets behind doors (in most cases, it doesn't mean that you should never do this), where they should be used? Unironically, step 1 with a bit of thought works out incredibly well, as turrets are capable of creating new choke points that are not dependent on doors. These work equally fine in tight corridors and open areas.

    Note[1]: Thus, we recommend considering deploying turrets behind doors when there are no mines available, door is not going to be reinforced multiple times, or even better if the turret placement is extremely important when the sleepers break in, which is especially relevant for sniper turrets.

Deployment principles. What to consider:
  • Distance.
    As a rule of thumb, the more range of a specific turret you can utilize - the better.
  • Line of sight.
    Same goes true for the line of sight, as more obstacles on the way make it hard to land shots.
  • Number of turrets.
    You need to consider the number of turrets you deploy when placing them. The point is that as a rule you need to avoid turrets shooting the same target at the same moment as more often than not it leads to a waste of bullets. Thus, consider deploying a crossfire of turrets (where front turrets shoots the front of the wave, potentially staggers them, while another shoots at the back). Or deploying turrets in a line facing the same direction with enough distance between them where the last turret shoots those sleepers that managed to run by the other turret(s). Or even consider placing turrets in different places. Everything depends on what turrets your team is running and current situation. See specific turrets for some examples.
  • When to deploy turrets.
    You can deploy turrets on the go instead of deploying them before the event. This is especially useful when your team needs to move a lot, and there is no reliably good deployment spot for every possible scenario. This works as follows: Get to the point of interest (e.g. a team scan) -> deploy a turret facing enemies -> finish off the wave -> pick up the turret -> move to the next point. In such a way turret works as a source of additional fire power. This option should be considered when there are multiple directions for enemies to approach and you don't want to gamble, or there is a need to move a lot as said earlier.

    Note[2]: Turrets used to deal more damage when shooting sleepers at the back. It was true for R1-R5. However, in R6 it got patched and turrets deal the same amount of damage regardless of them shooting at the back, or at the face. Some people might still argue that back damage multiplier exists for turrets, which is not true. Keep it in mind and prioritize good line of sigh for the turrets.

Turret CPU speed:
There are 2 ways to increase turret CPU speed right now (how quick does is shoot, both during the initial lock on target, and every follow-up shot).
  • Add boosters increasing turret CPU speed.
    While in general it's seems like a good idea to have your turret shoot quicker, we would suggest to not go crazy with these boosters for auto turret and shotgun turret. Specific reasons for these turrets will be discussed in each of section for each turret later on.
  • Symbiosis with bio tracker.
    Some turrets (namely shotgun turret and sniper turret) have increased turret CPU speed while shooting at the tagged sleepers. We'll cover turret CPU speed for turrets affected by bio in their respective sections. Turrets having bio symbiosis have it presented when selection these tools before dropping into the level.


Note[3]: Apparently it's a bug, but only turrets that have a bio symbiosis are affected by turret CPU boosters! Keep it in mind before burning these on a burst turret.

Note[4]: We strongly don't recommend mixing bio symbiosis with CPU boosters. The reason behind it is that it will backfire if you have turrets shooting quicker than you want them too do it. What could happen? Turrets might and most probably will shoot already dead enemies, resulting in a significant loss of ammo for no reason. Also, while it's cool when turrets kill the entire wave during lets say a reactor sequence, because every wave is unique. However, you don't want turrets to kill the entire wave that quick during a regular alarm, because a new one will just spawn quicker. This is something similar to what we've discussed when arguing against deploying turrets behind closed doors, as it won't benefit you at the slightest more often than not. Last but not least, turrets with incredibly high CPU speed are way more likely to deal friendly fire.
◇ Turrets - Burst


Probably the hardest turret to describe due to the rollercoaster it had at the release of R6. As a result, after all buffs and nerfs it feels like burst turret has it's own spot: it's not the best turret, but a fine option to pick for earlier levels and some niche scenarios in the lower levels of the complex. We'll explain why in a minute.

Lets begin with positives:
  • Starts dealing damage relatively quick at a reasonable distance.
  • Combines nicely with other turrets, but sniper.
    Burst turret will miss targets more often when shooting sleepers staggered by an auto turret. You almost never need to combo burst with auto. However, if you do - make sure they are shooting the same target as little as possible. A cross-fire of turrets will do when facing a large wave.
  • Easy to deploy.
    It's quite forgiving to mediocre deployment spots, which is especially good for newer players. Ease of deployment on the go when there is no time to be picky about better spots.

What are the major issues with burst turret:
  • Low damage.
    Low dmg per X% of tool => the least effective damaging turret.
    At 100% of tool it kills ~36 sleepers (when dealing with waves of basic enemies: small strikers and shooters). Which is already less than lets say sniper turret, which is guaranteed to land each of its 40 shots, each is an instant kill for these enemies. The comparison with other damaging turrets gets only worse for burst when shooting more dangerous enemies (titans, chargers, etc).
  • Runs out of resources very quick.
    While it's true that burst turret kills enemies relatively quick (or to be more precise, it starts shooting them quick), it will also run out of resources much quicker than lets say a sniper turret, which wouldn't be a waste on its own if not for the 1st point.
  • Literally sabotages your team by shooting off titans' heads.
    While wasting lots of bullets to kill a single titan, burst turret literally shoots your team in the foot by not allowing snipers to land headshots by removing titan's heads, but not killing them.

Note[1]: While it is true that burst is not tool efficient, and thus should be ignored when comparing it directly with other damaging turrets, R6 has a huge amount of resources, so you will literally never run out of bullets. The problem comes when you need turret to deal more damage. So we suggest toying with burst turrets on earlier levels (mb you'll find it useful on later levels, by all means choose tools you are comfortable running and feel free to experiment), but for the later levels with tougher enemies you might have to switch to other turrets (mainly sniper turret), as burst turret simply becomes even more inferior option the lower you go. In the current rundown, burst turret will serve you well. However, we strongly encourage getting used to other damaging turrets just to be able to use it when you there is a need for it.

Where do you want to place a burst turret?
When placing a burst turret, you need to consider generic turret deployment principles, as well as burst's own pros and cons. Since it is not able to one-shot most sleepers, usually you want it to have at least some distance to shoot enemies. It will stagger smaller sleepers, while tougher enemies will power though it. The more distance it has on them the higher chances of killing them. Combining it with an auto turret should help as sleepers will partially lose their mobility, and will get staggered, but this extra stagger from auto turret will cause burst turret to miss more frequent that it normally does (and it's very accurate on its own right now). At this point you might just want to take 2 damaging turrets instead. Please, refer to Tools setup - Auto Turret for media on this point. Ease of deployment on the go is what might make burst attractive for niche situations in the lower levels.
◇ Turrets - Shotgun


This is 1st major reason why burst turret is a questionable choice. Everything is relative, and as we have multiple damaging turrets available in GTFO, all of them do a better job compared to burst in the majority of cases, yet exceed at certain scenarios, and shotgun turret is an example of a tool killing tons of sleepers in close quarters.

What makes shotgun turret a powerhouse?
  • Ease of deployment.
    Shotgun turret is incredibly easy to deploy and it starts shooting just as quick as any other turret but sniper, and does not always need to shoot at its maximum range to be effective. Just make sure enemies will stay in front of it for a while. Sure, if you can afford using its full range at a reasonable spot - go for it.
  • Damage.
    This turret has an incredible one-shot potential against many sleepers. What's even better, its shells will more often than not damage and stagger, if not kill, multiple sleepers per shot. Unlike burst, shotgun turret works well against wider range of sleepers, yet it's still not as good as a sniper turret against certain enemies.
  • Benefits from shooting crowds of enemies.
    Due to reasons described earlier.
  • Massively benefits from stacking with other turrets.
    Perfectly stacks with other shotgun turrets, or an auto turret due to staggering enemies as tight groups.

Note[1]: A choice between shotgun turret and a sniper turrets (should both of them be present in the same rundown) narrows to answering a question whether you have lots of tight spots to defend, or you can utilize long range of a sniper. If the 1st scenario is true - go for the shotgun. In fact, 2nd scenario is the only downside of a shotgun turret, and it's even an indirect downside, just a relative one.

Note[2]: Many people remember shotgun turrets from the early rundowns where they were glitched and prisoners were able to get much more damage out of them than it was intended. Shotgun turret is an awesome tool, but is often credited for this side effect. Be realistic about your expectations.

Where do you want to deploy a shotgun turret?
The general rules of deployment are the same (as described in general turret section), with an addition of trying to find as tight bottleneck spots as possible - as enemies spreading out hurt the performance of this turret.

Refer to the media below for an example of shotgun turrets working very close to their full potential, where we can see a cross fire of shotgun turrets as suggested earlier, and a tight choke point against a large group of sleepers. Mind the friendly fire.


Shotgun turret CPU speed:
For the time being, we strongly discourage you from adding extra CPU speed to this tool. The problem is the targeting system of the shotgun turret - it aims at the head just like any other turret, not center of the mass. Usually it isn't a big deal. Let's consider 2 scenarios:
  • A wave spawned, but they aren't clustered yet. Only 1-2 sleepers get in front of the turret. What happens with a default turret CPU speed: a turret will shoot its target, potentially killing it, maybe not. By the time it shoots again, there's already another target ahead, or sleepers are even clustered (which is perfect for a shotgun turret). This extra window before a follow up shot kinda covers a flow of a targeting system which doesn't fit shotgun turret's purpose at all.
  • Similar situation as before, but right not turret shoots its 1st target way quicker before any other sleepers appear. Since the 1st sleeper got staggered and potentially lost a head already, shotgun turret might just shoot in the air dealing little to no damage.

Long story short, shogun turret is still great at tight quarters, but usually needs to be supported by another player, or another turret. However, adding extra CPU speed literally makes it a bad tool that spends ammo really quick without any value to the team (unless you got lucky and shotgun turret unleashed its automatic potential on a cluster of enemies getting around the corner.
◇ Turrets - Auto [OUTDATED]


Auto turret arguably stands out from the rest of cast due to its nature - it deals little to no damage per bullet, but staggers enemies. Thus, it's incredibly powerful at creating bottlenecks allowing almost everything else across the board work more effectively: guns, other turrets, or simply buying time for whatever you need to do. It's worth mentioning that auto has a potential to deal a lot of damage due to its large bullet count. However, it takes incredibly long time to come into play and you'll never notice it during the real game.

Where do you want to place an auto turret?
Definitely in front of the wave shooting enemies in the face. The reason behind it is the fact that sleepers don't move as an organised wall, but rather as a column. Thus, turret will actually create a bottleneck by staggering the front sleeper, then the 2nd one when it runs ahead, then the 3d one and so on. Whereas when deploying auto turret at the back of the wave, chances are that just one or two sleepers will body block the turret and most of the wave will run past it without any issues. Keep in mind, it deals very little damage per shot. Shooting sleepers at the back will certainly hinder its ability to create bottlenecks. Please, refer to the media below for one of the better scenarios for an auto turret - a narrow bridge where it's incredibly easy to create a bottleneck, with a prisoner and another turret killing a wave at this newly created bottleneck while auto turrets keeps them at bay. Similar to other turrets, it can be deployed on the go and stay close to the team as a support tool when needed.

Note[1]: The obvious drawback of the auto turret is a simple concept "do we want to take a stagger tool, or something capable of killing more sleepers?". Auto turret used to shine at the release of R4 when we had only burst and auto - no sniper or shotgun turrets. It doesn't mean that auto turret is irrelevant, but it is arguably not a go-to option for most runs.

Note[2]: Right now auto turret stagger might actually hurt performance of other turrets and make them miss way more than they would normally do on their own. You need to take it into the account, sometimes it's better to use auto and damaging turrets separately, unless you are expecting to face a big wave of sleepers, and your team is deploying a cross-fire - the turrets will shoot different targets at most of the time as per deployment principles described above.

Note[3]: While not being the best choice for most scenarios, auto turret can be used on its own without other turrets.

Here is a showcase of creating bottleneck and staggering enemies with an auto turret. As you can observe, it even makes weak burst turret look extremely viable.


◇ Turrets - Sniper

This is the 2nd reason to never equip burst turrets for challenging levels (especially ones with tough enemies) unless you are confident in what you are doing. Sniper turrets might be seen as a very niche choice for most players at the first glance: takes 4 seconds of aim to land the 1st shot, thus, needs long and open space to be effective, and many do sincerely believe it to be effective against bigger enemies, while other turrets do a much better job at killing smaller enemies. However, these people tend to miss a number of facts.

Main pros of a sniper turret:
  • After the 1st shot, it takes only 2.8 seconds to shoot every other time.
    In reality it means 1 dead sleeper every 2.8 seconds by default.
  • Every shot is an instakill for most sleepers in the game.
    Alongside with being the best tool against tougher enemies (e.g. just 2 shots to kill a titan).
  • Incredible accuracy.
    It almost never misses unless a player kills, or staggers as sleeper as a sniper turret is shooting it.
  • Kills more sleepers per X% of tool than any other turret.
    But potentially shotgun at very tight spots. Some enemies are the rare exception in this rule, e.g. auto turret can arguably kill more babies that a sniper turret for the same amount of tool. However, this is a niche scenario.

Cons of a sniper turret:
  • 4 seconds to land the 1st shot.
    The one and only drawback of the sniper turret present for every single level. The very same point makes it hard to deploy a sniper on the go similarly to other turrets.
  • Hard to use well against shadows.
    Since turrets require shadows to be tagged in order to shoot them, and shadows loose their tag quick, sniper turret will have to go through initial 4 seconds of initial shot more often.
  • Hard to deploy on the go.
    Since you can't be picky about placement spots, it might be tough if even possible to reasonably use sniper turret on the go while scanning or pushing though the level.

What's the profile of a sniper turret and why it's awesome?
As a result, we receive a turret that is slow for the 1st shot, yet then turret will kill a sleeper every 2.8 seconds, while being a better choice against bigger enemies, while being arguably the most tool effective damaging turret in the game (literally guaranteed 40 dead regular sleepers against ~36 from burst turret). This everything puts sniper turret so much higher compared to other damaging turrets that it becomes our go-to for vast majority of the expeditions. See kill rates based on the attached video for the sake of demonstration. Taking other turrets mostly makes sense if it's impossible to utilize a sniper turret due to its initial 4 sec shot - extremely tight maps, or even specific alarms. Personally we can recall just a few alarms where it's close to impossible to get any use out of a sniper turret.

Refer to the attached recording showing 2 sniper turrets literally wiping waves of sleepers more effectively than any other turret combo can afford. Hopefully, it is enough to demonstrate advantages of a sniper turret against other turrets in the game, but shotgun turret for tight maps, or specific alarms. However, by all means experiment if you feel like it and make your own conclusions!


Where do you want to deploy a sniper turret?
There is no universal answer for this question. You need to know / get familiar with map layout and understand sleepers' pathing. Keep in mind that:
  • The more distance you have - the better. It is true for most turrets, but especially true for the sniper. Usually it's not a problem to find a spot from where sniper turret will cover a significant part of the sleepers' route.
  • Deploying sniper turrets on certain objects so that it shoots above many small obstacles will help.
  • It is also great if sniper turret starts aiming at sleepers when they turn around the corner. Due to their wonky pathing, they frequently waste a bit of time when turning (and even scream) into the room.

Note[1]: While in the ideal scenarios sniper turrets are second to none, many would argue that you can't always deploy it in good spots. In fact, you can deploy snipers turrets in nice spots for most of the alarms. We do encourage other prisoners to experiment with their sniper turrets and, if you struggle to find decent spots for them, treat it like a mini-game of its own. Some of these spots are not just working effectively, but also look cool!

Note[2]: While sniper turrets do not stack well with other turrets (why would you want other turret to damage a sleeper and as a result waste bullets, when sniper turret is about to instakill it), but multiple sniper turrets work incredibly well with each other. Just make sure they are working on different targets.

Sniper turret CPU speed:
Sniper turret is a great weapon, especially if you can nullify its long initial shot, and make it shoot a bit quicker. However, we are not recommending mixing this turret's CPU boosters and bio symbiosis. The reason is, even with bio symbiosis on its own, this turret already sometimes shoots dead enemies, and may follow their dead bodies flying over it, and potentially shoot a player standing behind it. Also, having multiple sniper turret with high CPU speed makes even harder to make efficient cross-fine. Adding more CPU speed on top of bio symbiosis will just lead to more waste at this point, which isn't something you want from a tool.
◈ Weapon choice
"What's the best weapon?" is arguably one of the most frequently asked questions, especially from newer players, and the most realistic answer is "none, all of them are viable to a degree". Obviously some weapons from one rundown to another have questionable attributes, like unreasonably low ammount of bullets per clip, relatively low damage output per clip, or something else. However, every weapon is viable as long as it fits your play style, or the needs of the current level. Right now weapon roster can arguably be called balanced with no weapons being borderline OP (Looking at you HEL revolver and burst cannon from R4). Anyway, what about the weapon choice?

Main weapons - literally all main weapons are good at shooting regular/smaller sleepers, and can be used reliably when pulling a room of sleepers, or dealing with an alarm. Shooting bigger targets is an option as well, but they are inferior to a number of special weapons available in this regard. We strongly recommend toying with every available main weapon and eventually choose your favorite. Choosing your main weapon almost never depends on a level you are going to play, or your teammates choices. Thus, by all means base this choice on your preferences and what you love using. The criteria that might indirectly influence your choice is desire to combine your main and special weapons in certain ways, but it once again narrows down to your personal preferences.

Special weapons - as the name suggests, these are more specialized in doing something specific. e.g. weapons like sniper rifle, or scattergun are insanely good at killing big targets, while being awesome boss killer weapons as well. However, it is arguably a waste to use sniper against smaller targets (only reasonable if you need to burn some ammo to balance % against your main weapon).
On the other hand, there are such weapons as machine gun, or combat shotgun. Both of them can be used against bigger enemies, but they definitely shine when used against crowds of smaller sleepers. And so on, every special weapon tends to have its own purpose and these weapons should be considered from a team perspective. e.g. for most levels you don't need to bring 2 sniper rifles, as it wouldn't be ammo efficient, and 2 snipers could potentially stand in the way of each other and literally steal kills from their teammate; or bringing just special weapons that have the same purpose could be a mistake as well. For most levels it doesn't really matter, but for harder levels you definitely need to consider it.

Melee weapons - while any melee does kill enemies, unlike firearms, we'd like to suggest you to avoid using spear and knife for the time being. By all means give them a shot and play with them a bit to form your own opinion. However, knife and spear both have strong downsides. Just to name some:
  • Knife is an incredibly weak choice against bigger enemies and requires more precision during the active combat. Its only redeeming quality is 0 stamina cost, which is not even a big deal. Many people would argue that speed is the advantage of a knife, but other melees effectively clears rooms just as quick while being better weapons.
  • Spear prevents you from running while charging it, and nullifies the main advantage of using melee in combat - being mobile. The only objective advantage of spear over any other melee weapon - ability to comfortably and reliably kill already alerted giant chargers as they have incredibly wonky fist attack which has animation and actual damage dealt out of sync. These enemies can be killed with other melee weapons when awake, but we strongly recommend shooting them instead. Almost the same could be said about tanks in close quarters when there is not need do sprint towards them - they have the same fist animation as chargers. Overall, aside from dealing with giant chargers (and occasionally tanks in close quarters - there is a showcase of doing in in Tanks aka papas part of the guide), spear is a trap for newbies who would often take comfort and ease of use over net power of a weapon. This is true especially since net damage of spear and hammer is literally the same.
Having even 1 of these drawbacks per melee weapon is more than enough to justify staying away from them, especially since the rest of melee weapons is arguably stronger. Hammer is strong in the same scenarios where spear would shine, but it's much more mobile and versatile melee weapon. Bat is almost as quick as knife to charge, you'll barely notice any difference compared to knife when killing smaller sleepers. However, it's staggering multiplier (literally guaranteed to stagger almost every sleeper in the game) combined with its ability to one-tap padlocks make it much stronger than knife. Overall, try them all and don't be discouraged by what we say, but keep our advice in mind.
As a final thought about melee in GTFO: the better you are at playing GTFO, the worse knife and spear become. In the current state of the game we strongly recommend considering a hammer, or a bat as your melee weapon choice.

Melee weapons have a charge up mechanic, with more charge leading to more damage dealt. We are not going into specifics for each weapon-target application at different charge % since it would take effort we are not willing to invest in these details especially considering possible weapon updates in the future. However, we can not stress enough that the full charge isn't always necessary. It mostly comes in clutch when you are under time pressure, or need to deal with many targets within a limited period of time, and extra time investment in a full charge is a waste since you don't gain anything from it. Instead of focusing of enemies, we are going to focus on something universal - padlock. You may need to break it asap in certain situations.
  • Hammer can break a padlock with a 50% charge.
  • Bat can simply one-tap it without charging.
  • Spear does the job in almost 1 full charge - approximately 85-90% will do. Going for a full charge is much simpler.
  • Knife needs almost 2 full charges to break a padlock. Poor thing. There is little to no need to use anything less than a full charge for a knife.
The same concept is applied when killing enemies. We do recommend you to invest some time in your favorite melee weapon and learn how much damage you need to deal against certain targets. However, don't negate full charges at all. Just keep in mind that it is not always necessary.

Weapon stats
You probably remember that at the guide intro we stated that we are not willing to focus on numbers. However, we do recognize that there are people who are interested in reliable data and want to make an informed decision when choosing their guns. For this very reason we'd like to recommend a Weapon Stats Spreadsheet by Ereggia. This spreadsheet contains a lot of interesting numbers for you data enjoyers - definitely check it out!

Pay a visit to this reddit thread and remember to say hi :)
◇ Our personal preferences
As suggested previously, choosing your weapons usually comes down to what you enjoy using. Here are our personal preferences just to give an idea about what you may be looking for.

Cyberbullying's loadout:
  • Main weapon:
    For main weapons my number 1 pick would be pistol. There are many advantages of using pistol, but to describe them shortly - pistol is an incredibly versatile weapon and it fits almost every situation you may face. 1st, you may comfortably use pistol against individual sleepers: every bullet is guaranteed to stagger smaller sleepers, which makes landing other bullets much easier. e.g. you just need 3 bullets at close proximity to kill a regular striker provided that you land 1 head shot and 2 body shots. Since you can stagger a striker by shooting at any part of the body, you are not even obliged to land a head shot on a moving target - you can stagger a striker, then land a head shot, and than finish it off with an easy body shot. On the other side, you can easily spam pistol shots when facing a crowd of enemies, or tougher sleepers, and it won't be a waste. If you have an organized defense, you can simply use pistol to stagger sleepers for your team mates to kill them. Pistol is also insanely good for kiting again due to its staggering potential - you can simply keep sleepers at bay while recovering your stamina. Another important argument is how accurate this weapon is when hip firing - aiming with a pistol is not nearly as mandatory as with some other weapons. Aside from that, pistol if one of a few weapons that was constantly being buffed in a timeline from R1, its current fire rate, reload speed, damage output and flexibility make pistol a very pleasant weapon to use. Its effective range has cut down the road, but it's still an insanely convenient weapon. Moreover, pistol's potential at close range combines nicely with my special weapon preferences.

  • Special weapon:
    For the majority of missions I'd decisively choose sniper as my special weapon. 1st and foremost, I have a tool to quickly deal with giants and hybrids on my own, as well as lift this pressure for my team as they can always rely on me taking down giants and hybrids from a big distance before they make any damage - as a result, my fellow team mates can focus on other sleepers, or even ignore combat whatsoever if there are just giants remaining. With a decent level of trust, it makes combat much more entertaining and I'd even say professional. 2nd, I have a tool to actively fight against bosses and mini-bosses. Last but not least, it just feels satisfying to insta-kill some dangerous sleepers. What if the level has little to no giants, or someone else in a team is willing to run sniper? No biggie, I'm most likely going to choose regular shotgun. Shotgun is another solid choice against bigger enemies. So if I face them on my own, I won't be helpless. In other situations shotgun can be used against smaller sleepers without being a waste. Shotgun is also a decent weapon against tanks and mothers. Alternatively, if I feel that level requires some specific weapons for a smooth run, I might take other special weapons based on a niche I need to fill.

  • Melee:
    My melee choices rotate around hammer and bat. Usually it comes down to a question: do I have any weapon to deal with bid enemies comfortably? If the answer is yes - I'll go with a bat. If the answer is no - hammer is my choice. If I had to choose between these 2 and pick just one to use universally - hammer is an answer without any doubts. Here are the main reasons for it, both subjective and objective:
    • I simply got used to it since R1. Playing GTFO without a hammer feels weird to me, plus I'm confident to say that I feel this weapon and can rely on it during the combat.
    • Hammer is arguably the most universal melee weapon in the game. There won't be a single time when you regret bringing hammer over anything else - it's good at killing almost everything in the game.
    • Simply better than bat when fighting bigger targets, and bat is the only melee weapon you can objectively compare against hammer.

    Czlopek's loadout:
  • Main weapon:
    My Weapon of choice would be DMR.
    One of the best weapons damage-wise, it has almost no dm falloff, one hit kills shooters to the head and leaves strikers with almost no health when hit to the head. Good at stumbling everything and is better at killing giants compared to other primaries.

    The Biggest downside is the ammo capacity this gun hurts the entire team if you are unable to land your shots or just go for body shots, every miss stings like a bee and is comparable to using a sniper rifle as a primary, meaning it's not always the best idea to use it on every enemy or bring multiple dmr's.

    Another downside might be the close-quarters combat since the scope has high zoom you pretty much need to hip fire or switch to more suitable secondary, thankfully even when hip-fired dmr is 100% accurate on the first shoot and still reliable at striker range.

    If my internet connection was a bit off today I would pick pistol because it is technically the same idea just much more forgiving.

  • Special weapon:
    Usually, I would pick one of the shotguns to combo it with dmr for some crowd control but in Rundown 6 the added heavy assault rifle as secondary which is a regular assault rifle but compressed meaning you get less ammo for more damage, it's perfect for finishing off headless strikers while being capable of shredding through regular enemies on its own. The only downside is once again over all low ammo capacity.

  • Melee:
    Batton all the way baby.
    The ability to stun lock almost everything in this game is amazing, you get the stunning power of fully charged hammer on every hit, charge only affects the damage you gonna deal per swing.
    It's just pure fun to turn dangerous enemies into stumbling drunks and as a bonus, you can break padlock on regular swings.

    (Here I would put batton montage of me stunning every enemy, if I had it of course)
Consumables
Consumables are the most common items in the game, they can spawn pretty much everywhere from shelves, lockers, benches up to floors, they share spawn points with artifacts (those shiny rocks) and zones have a predetermined list of items they can spawn. You can not ping them.
  • Glowsticks - They let you highlight enemies in dark corridors without alerting them or mark points of interest for the team.

  • Fog repellers - Repel fog in 20 meter radius in spherical shape, they also emit small amount of light.

  • Long range flashlight - Strongest flashlight in the game, lets you synchronize entire rooms and help a lot in consumable/rock hunting.

  • Lock melters - Silently destroys hack locks and padlocks.

  • Red syringes - Heal you for a random amount of health from 5% to 15% and apply a random amount of infection from 3% to 10%.

  • Yellow syringes - Infect you when used from 3% to 10% similar to read syringe and triple all melee damage dealt by you for consistent 8 seconds, your health bar turns yellow for the duration.

  • Explosive tripmines - Literally the same mines as discussed in the Mines section of a guide. The only difference is a fact that you can't pick them up after placement.

  • C-foam grenades and mines have a little bit to tell about them. These consumables are covered in the sub-categories of this section.
◇ C-foam Grenades
An honorable mention should go to c-foam nades. They literally do the same thing as c-foam launcher: reinforce doors and can freeze enemies. However, there are certain aspects worth speaking about.
  1. Speaking about reinforcing doors with c-foam grenades, there is 1 little trick about them: they actually give more c-foam that it's needed to fully reinforce a door. Thus, you can easily spare some blobs on the ground in front of the door. Some enemies will freeze when breaking inside. Please, refer to the video below for an example.


  2. C-foam grenade releases a great load of c-foam at once, which is enough to freeze almost any enemy in the entire game, including some of the most dangerous ones. They can be used in the combat much quicker and effectively than trying to achieve the same result with c-foam launcher, especially against rapidly moving targets.

    Here is a showcase of freezing a birther aka mama:


Note[4]: Similar to c-foam launcher, if you feel like canceling grenade charge, simply switch to another item.
◇ C-foam Mines
C-foam tripmines trigger in a similar way to their explosive counterparts. However, they release a load of c-foam, which is enough to foam almost anything in GTFO. So far there are 2 major applications for c-foam mines.
  1. Reinforce a door.
    This one requires a mix between a front and a high mine placement if there is such possibility. Just make sure that you can deploy a mine in front of the door high enough (depends on a distance between a door and a mine, since c-foam is falling over distance), then shoot it.


    Note[1]: Similar to c-foam grenades, c-foam tripmines provide more blobs that needed to reinforce a door. These blobs can be spared to stay on the ground in front of the door similar to their grenade counterpart.

  2. Freeze dangerous enemies.
    Works simply as a high mine, yet instead of dealing a direct damage, it freezes a sleeper that triggers it (apparently the explosion itself freezes the target, amount of c-foam blobs applied to the target seems to be irrelevant, yet these blobs might freeze other sleepers). Should be kept relatively close to your defense position. You'll be happy when it freezes a giant charger, or a tank when one of these is charging your team. Alternatively, could be deployed in combat if you anticipate a worthy target to trigger it. A worthy mention, it even freezes a queen.


Note[2]: Similar to explosive mines, you generally don't want regular sleepers to trigger it. If there is no better usage for it - trigger it manually and make sure it sprays c-foam on the ground where you need it most. Or deploy it as a high mine for dangerous enemies.

Note[3]: Once c-foam mine is deployed it can't be picked up. Mind the placement!
Stealth and combat
Dealing with enemies under different conditions is a core part of the game. In this section of the guide we'll cover some of the most fundamental things about combat. Similar to any other part of the guide, please remember that it is just a part of the puzzle and everything we say can vary or be modified by using something else we've discussed in other parts of the guide. Dealing with enemies will mostly be discussed from melee perspective, but we'll also provide some information on using tools and firearms where applicable.

Note that combat regardless of its form is arguably the most complicated topic in the game to explain, as it involves game knowledge, situational awareness, using your best judgement here and now, as well as spicing it up with a need of at least occasional communication. A lot of variables are involved, so please be as critical here as possible and don't treat it as a strict step by step instruction on combat, while we'll do our best to present information which will help you along the way.
◆ Sleepers' anatomy
Lets begin with the basics aka picture you've probably seen lots of times, but skipping it makes little to no sense.


The idea is incredibly simple: sleepers take different damage when hit at different parts of their body, with their head and back separately receiving more damage. Hitting sleepers in the back of their head leads to damage multipliers stacking up. Thus, hitting sleepers in the back of their head grants the most damage. How much exactly is "more" depends on the weapon used, as every weapon has different precision multiplier, as well as enemies you are fighting against - different sleepers have different headshot and back damage multipliers.

The back damage multiplier works based on player's and sleeper's orientation.
For example, this sleeper is facing east, at an angle of 75°.
If I was about to hit him with anything it would give me the highest back damage bonus, you don't have to be perfectly positioned you have about 22.5° of a wiggle room in both directions, meaning it would still work at approximately 52,5° or 97,5°, but its a bit inconsistent since enemies don't always visibly show which direction they are facing.

Since this sleeper was facing 75° his back damage starts at around 187,5° from his left and right, it starts increasing smoothly up to 2x damage at 75°.


It doesn't matter if you are behind him as long as you can hit a sleeper while facing the same direction as him.


But in the grand scheme of things this mechanic doesn't affect you as much, since most things would consistently die in one or two melee hits to the back as long as you are behind them.


Note[1]: This anatomy is applicable to most, but not all sleepers in the game. Namely: all variants of chargers (black spiky boys) don't have a headshot multiplier, they receive additional damage only when hit at the back; Bosses are almost invincible to damage at any part of their body, and you want to hit meat balls located on their body; Flyers receive additional damage when shot in their mouth instead of a headshot;

Note[2]: Going for the biggest multiplier is not always the best choice. It mostly depends on weapon selection of your team. Lets say you have a sniper in your team, which has an incredible precision damage multiplier and is able to one-shot a giant, and you personally don't have weapons with good precision multiplier. If you have to shoot a giant to stagger it - shooting (or melee hitting) in other parts of the body will make more sense, as you are leaving an opportunity for a sniper to take down this target much quicker. Obviously, if you are left alone with a giant - do what you must.

Stagger
There are various ways to stagger an enemy:
  • Soft-stagger is applied after hitting an enemy enough times (some weapons do it in 1 hit against most enemies) with something capable to stagger it - every weapon has its own stagger multiplier, which is applicable to both firearms and melees. This stagger is relatively quick when compared to the other category, but is extremely useful nonetheless.

  • Hard-stagger lasts longer, and is more beneficial if you can afford applying it. There is literally never ever a need to go out of your way to apply it to smaller sleepers, just headshots will do, and you'll get extra damage as well - best from both worlds. So consider bigger sleepers as we are talking about hard-stagger. This stagger is achieved by fracturing a part of sleepers body by dealing enough damage to it (a full charge hammer is enough for most enemies). Each part of the body can be fractured only once, just like a head can't be removed for the second time. Thus, if you want to apply hard-stagger for the same sleeper multiple times - you need to fracture different parts of its body. These parts of the body are:

    • Head
      Not really applicable to shooters as they simply die when their head is removed.
    • Upper body
    • Lower body
    • Legs
    • Arms

    Note[3]: Hard stagger doesn't apply the same way to fliers and bosses. Mostly because they don't have the same body parts to fracture. When enough damage is applied they will get a relatively quick stagger, which already leads us to a soft-stagger.

    Note[4]: Oddly enough, you can fracture up to 4 parts of a sleeper's body. It barely ever comes into play since almost any sleeper will be dead by that point. However, if you are a dmr enjoyer (or use something else of a comparable caliber), you'll notice it occasionally. A footage showcasing that you can't really count on the 5th hard-stagger should you ever need it is presented below.


Enemy stats
If you need solid information on various damage multipliers and how much does it take to kill specific sleepers - please refer to the Weapon Stats Spreadsheet by Ereggia we've already recommended earlier. Such information is clearly presented there alongside weapons stats.
◆ Stealth
Stealth in GTFO implies doing something silently: either sneaking by and doing your objective (or simply crossing the room), or killing separate targets without alerting the entire room. In this section of the guide we'll cover what triggers sleepers, how you can work around it and use it to your advantage.

Sleepers' alert patterns
The bread and butter of everything related to stealth is understanding what alerts sleepers. Almost every sleeper in the game has 4 stages:
  1. Complete hibernation.
    Basic state of all idle sleepers in the game. At this stage sleepers literally don't show signs of life and you need to keep your eyes open to locate them.

  2. Glowing/clicking.
    The second stage of sleepers' alertness. All idle sleepers will occasionally go into this stage on their own. Sleepers also move to this stage from complete hibernation when players do certain actions. If players keep doing the same actions - sleepers will move to the 3d stage of alertness. At the stage 2 enemies start glowing and make clicking noises. 1st and foremost, it's much easier for you to locate them as they become much more visible, and you can hear them. 2nd, sleepers become much more sensitive to players' actions. If left alone - they'll return to complete hibernation. What does it mean in practice will be covered separately.

  3. Throbbing/pulsating.
    A stage which can be triggered only by players' actions as described in the previous stage. At this stage sleepers are making loud pulsating noise and are throbbing. This is the last stage before they wake up should players keep disturbing a sleeper. If left alone - they'll calm down similar to the previous stage.

  4. Alerted/woken up.
    A stage when players disturbed sleepers enough to wake them up. At this stage sleepers can't go to sleep and will attack players. Already alerted sleepers can scream and wake up the entire room of sleepers - that's something you need to look out for.

Disturbing sleepers
There is a number of things disturbing sleepers. We are going to group these disturbing factors based on their source. However, some sources are going to include disturbances gradually affecting sleepers - think about sleepers having a bar for each stage, and doing certain things fills these bars. When the bar is filled in completely sleepers move to the next stage of alertness. This is so called soft-alert. There are also certain action waking up sleepers immediately bypassing a need to go through all alertness stages, aka hard-alert.
  1. Flashlights.
    Sleepers react when players are pointing their flashlights at them. Flashlight work as a soft-alert disturbance. Flashlights are different in terms of range/power. Flashlights with longer range affect sleepers from further distance. More powerful flashlight don't alert sleepers any faster - it's all about the distance. Flashlight is a powerful tool when clearing rooms silently. Way to use it will be covered later.

  2. Sound.
    Most sounds will wake up sleepers instantly. Every noise creates a sphere within which sleepers react to it. Range at which sleepers wake up depends on the source of the noise:

    • Gun shots.
      Probably the most obvious one on paper, but not so simple in practice. As a rule of thumb - shooting will instantly wake up all sleepers in your current room plus all the neighboring rooms (rooms 1) provided that there are no sound barriers - sound doesn't transfer from room 0 to room 1 if all the doors between these rooms are closed.

      Note[1]: Guns have their own range of shot noise of approximately 40 meters, usually this distance covers your room 0 + room 1. The sound doesn't transfer to room 2 even if there are no doors present. Thus, we say that guns wake up the entire room 0 and 1 for the sake of simplicity. Whereas rooms 2 don't get affected even if they are within 40 meter range from the shooter and there are no sound barriers.


      A video showcasing sound transfer from room 0 to room 2. Note that sleepers may still wake up if you kill another sleeper very close to them.

      Note[2]: Speaking of sound barriers - they are present until door is fully open/closed, or broken. What does it mean for you? You can shoot though the door during its opening/closing animation, or even though the gaps in damaged regular doors. Since it's a bug, you can't expect it to be reliable. As a result, sometimes separate sleepers wake up when you shoot though an opening door (mostly due to being close to the sleeper you kill, but sometimes a sleeper across the Solar system will wake up - no explanation here, it's a bug in the end of the day). However, you can frequently use it regardless. For example, you can take down a dangerous enemy, or a scout (or even multiple enemies) while the door is opening/closing without alerting the room. Same goes true for shooting enemies though the holes in the damaged door. Please find the recording showcasing it after the note.
      FYI, we don't support glitches, nor want someone to get used to them. Please, treat it as a last resort, or simply keep it in mind in order to avoid confusion if you see someone else doing it.


    • Screams.
      When alerted, sleepers can either attack a player, attempt to catch up, or scream. When they manage to scream successfully (can be interrupted) - they wake up all sleepers in their current room. Neighboring rooms are not affected. Sleepers have an insane cooldown on scream, so you can easily say that they can alert a room only once per life while screaming for the 1st time. When waking up sleepers in room 0, they will attempt to scream in the same room. If you have a wave coming, for example from Error alarms, sleepers will scream in room 1, and might potentially alert one of your neighboring rooms.

      Note[3]: Some rooms will have scripted scream applied to them when you approach them. These are rare, but something that you might encounter.

    • Other noises.
      These noises include:

      • Hitting the ground/other objects/breaking padlocks/breaking doors.
        Enemies within 4 metes will wake up, sleepers withing 4-8 meters will bump.

        Note[4]: The noise of hitting objects/breaking something comes from the player, not from whatever was hit. So the sound from hitting objects works similar to gunshots.

      • Killing idle sleepers.
        Sleepers wake up when an idle sleeper dies within 4 meters when in complete hibernation, and within 12 meters in later stages of alertness.

      • Failing a hacklock.
        Has a relatively big range and wakes up sleepers within 10 meter range.

        Note[5]: Sleepers in other zones will ignore noises such as hitting the ground, or breaking padlocks even though the open doors.

  3. Movement.
    Sleepers detect prisoners' movement within 5 meter range. Running is a hard-alert which will instantly wake up sleepers from any alertness stage. Walking and crouching both act as soft-alerts and will progress sleepers though their alertness stages. However, sleepers ignore crouching when they are in the 1st stage (unless you literally hug them), while walking will force them to start glowing. Crouching and uncrouching, jumping and falling down have the same effect as other soft-alert types of movement.

  4. Touching/damaging a sleeper.
    Pretty self-explanatory.

Note[6]: Line of sight blockers. These can be walls, or any assets in the game (can't be a prisoner, or another sleeper). These blockers prevent sleepers from detecting you walking, or pointing your flashlight at them (e.g. you can do it through the glass and they won't care). However, they don't block sounds whatsoever. You can use conveniently placed assets for better stealth mobility.
◈ Stealth combat
When discussing stealth combat, meaning killing sleepers without waking up the entire room, we are going to separate the discussion into 2 parts: passive stealth and active stealth. Both of them have the same goal, whereas passive version is much more simple and generally used by newer player, while active one uses the same principles as a passive stealth, but in a more aggressive fashion, and requires better reaction and adjusting to the situation on the fly. Consider them as basic and advanced ways to silently clear rooms. We'll begin with a passive stealth as a base.
◇ Passive stealth
This version of a stealth could be defined as "take it slow and play as safe as possible". It's a must have skill to master in GTFO which will be useful even on the lower levels, but at the same time it's one of the most boring components of the game - it's just incredibly repetitive and time consuming. Moreover, despite being a safe option, you can't always afford doing it when the game forces a more dynamic gameplay on your team. However, as said earlier, it's a fundamental skill in GTFO and something you need to learn before playing more aggressively.

What's the deal? Passive stealth implies your team clearing the room slowly, identifying which parts of the rooms are easier to clear 1st, and leaving the harder parts of the room for last in order to minimize potential damage from alerting the room. Usually you kill lonely sleepers 1st, and leave clusters of enemies you can't reliably kill silently for last.

Note[1]: You aren't obliged to get out of your way and crouch across the entire room just to kill a lonely sleeper against killing a small cluster right in front of you if you can handle them. Just avoid large clusters in case you have doubts whether you can clear them silently. Priorities differ from one situation to another - use your best judgement which sleepers you want to kill 1st.

How does it look like in practice? The main rule of a passive stealth is a green/red light game as per patterns described in Stealth part of the guide. You need to keep in mind what disturbs sleepers, and you need to approach them without your targets waking up. When the target is identified, you get close to it and prepare to melee kill it. Then you verify whether it's safe to kill this specific sleeper and go for the kill. This are the general steps, and there are more detail when doing it in practice. Here are more detailed steps when killing a sleeper with a passive stealth:

  1. Get close to the sleeper.
    Take into account sleepers' alert patterns described in Stealth part of the guide. Usually it means that you crouch towards sleepers when they are in complete hibernation stage and you are within their range of detection without pointing your flashlight at them or doing anything that would disturb them.

  2. Verify that you are close enough for a melee kill.
    Your rectangle will get smaller while looking at the sleeper when it's within melee range.

  3. Verify that it is safe to silently kill your target.
    Take into account sleepers' alert patterns described earlier. You remember that it's a game of a green/red light, right? You need to look out for:

    • Sleepers being within a 4 meter range from your target - they will wake up regardless of their alertness stage. In such a case you need to prepare for a multi-kill. The idea is very simple: charge your melee - kill a sleeper - see the other sleeper waking up and start charging your melee again - kill the next target - repeat if needed. Sometimes you will even be able to make a double/triple kill by a single swing. The only condition - your melee attack needs to hit several sleepers with a deadly blow at the same time.

      Clearing small clusters on your own:


      Multi-kill. Killing more than 2 is possible, but double-kills are the most frequent:


    • Sleepers being withing of a 4-12 meter range from your target - they will wake up if glowing. It shouldn't be a problem if you have just one or two sleepers around and you can wait for each of them being in complete hibernation stage, and then kill your target. However, what if you have a lot of enemies around you and each of them starts glowing at different times? Playing in green/red light would be close to impossible under such conditions. However, you can sync them by doing one of soft-alert actions described in Stealth section. Namely:

      • Flashlighting sleepers around you (turning on a flashlight and doing a 360 turn will do).
      • Making a couple of walking steps.
      • Crouching/standing up/jumping/simply landing after falling from somewhere (they all have the same effect as a walking step).

      Flashlights (especially powerful ones, such as a long range flashlight, or those attached to certain guns like a sniper rifle) work best. By disturbing sleepers like this around you, you will force them to glow simultaneously and as a result go to complete hibernation at the same time. They won't be in sync forever, but you'll have more than enough time to kill your target while all sleepers around you are in complete hibernation. As a result, risk of alerting something tends to zero.


  4. Kill your target considering scenarios described in the sub-points above.
    Same rules apply when coordinating kills with your team mates regardless of whether you are clearing a cluster of smaller sleepers, of killing bigger enemies together.

Notes[2]: Your stealth might occasionally be complicated by a number of environmental threats, such as fog, or spitters. e.g. spitters can be temporarily disarmed if you point your flashlight at them. Such rooms will require combination of flashlighting spitters, but not waking up sleepers at the same time. Alternatively spitters can be shot to disarm them (doesn't go well with a stealth) or c-foamed by a single blob.

Note[3]: Usually we consider a game when it works smooth. However, due to the nature of p2p game when 1 player is hosting your session, and other players are joining as clients, a number of latency issues might arise. Stealth is heavily affected by extra lag, as you might not get a visual/audio feedback from a game that you are about to alert a sleeper. When playing with high latency, you need to sync sleepers on your own much more frequently just to nullify the risk of pulling them without you seeing it coming.

Note[4]: Many sleepers have different postures when in different alertness stages. Sometimes it would make sense to flashlight a sleeper or walk a bit toward it for a sleeper to raise its head for example. You will definitely use it occasionally with with knowledge of enemies and their postures.

Note[5]: You can keep your flashlight on at most times - just point it to the ground. Sleepers don't react when you point your flashlight at their feet. It's an easy and reliable way to see the exact positions of sleepers when playing in low visibility or dealing with shadows.
◇ Active stealth
This is a more advanced way to clear rooms silently. We do encourage people to experiment with it and get used to playing more aggressively relatively soon after you learn sleepers' alert patterns, how much melee damage you need to kill certain sleepers as well as knowing what to avoid doing and when to bail, or pull out your guns.

Why even bother going quicker if it is arguably riskier and there are higher chances of receiving damage? Some levels are pretty long and take hilarious amount of time to complete them crouching. Moreover, crouching is simply boring. Even if you enjoy it right now - we'd happily look at you in 1 or 2 hundred hours on record. Green/red light game is simply repetitive and we encourage to use it only for rooms you are really scared of pulling. And in the entire history of GTFO there weren't a lot of such rooms. It doesn't mean that you shouldn't crouch at, but in 9/10 cases it is not needed.

What does the active stealth look like? Active stealth could be described as chain kills while walking instead of crouching. The idea of chain kills is quite similar to what we've discussed in Passive stealth when covering killing small clusters on your own. With the only difference that now you don't rely on crouching, but walk for the most part, sometimes combine it with sprinting. The idea is incredibly simple:
  • You walk towards a sleeper, or a group of sleepers charging your melee.
  • If a sleeper was in complete hibernation - you will have more than enough time to smack this sleeper before it wakes up.
  • If a sleepers wakes up - it is not a big deal, you will have plenty of time to kill it while it's in the wake up animation.
  • Repeat.
You only need to be vary of big clusters, and bigger enemies. You can still kill big enemies solo, this will be covered separately. Sprinting can be used if you are going to kill a lonely sleeper, especially if it is about to wake up due to any reason.

Here is a small showcase of what it might look like:


Does it work reliably only against regulars? Absolutely not! E.g. here is a small showcase featuring chargers straight from Detroit:


Note[1]: Active stealth is riskier than crouching, and nobody is playing perfect at all times. Thus, expect some occasional damage, usually because of overestimating yourself just like I did in clearing Detroit. However, keep your head cool and do your best to adapt to various situations - you can still avoid room waking up in most cases.

Note[2]: Charging melee is a good habit - you never know what's around the corner.

Note[3]: Using the environment to your advantage is extremely helpful, especially line of sight blockers to approach sleepers without them noticing you. Remember, sleepers don't see you moving if there are assets preventing sleepers from seeing you. Glass does count as well.

Note[4]: Shove is a powerful tool even when stealth clearing a room. 1st and foremost, you can interrupt an attack, or a scream animation. The sleeper might scream, but if you prevent it timely - other sleepers won't care. If needed - you may push a sleeper out of the room, or a bit further from other sleepers.

Note[5]: Going like this together as a team nullifies fear of pulling even arguably populated rooms.

Note[6]: If someone from the team is clearing the room in this way - DO NOT SHOOT even if you see some sleepers waking up. First, shooting will wake up all sleepers instantly, and they will instantly attack prisoners standing close to them, which will lead to losing health, or even getting down. Moreover, it can pull nearby rooms just as well. Sure, there are some examples, like killing a scout across the room if sleepers are going to alert it in a moment. In other words, when just a single room is involved, and there are no special enemies to take down - shoot only when the entire room is already up.

Note[7]: Some rooms are easier to pull and shoot, or even better shut the door and mine it. When you want to do it 100% depends on your situational awareness. However, remember that it's an option and you don't have to commit to stealth. e.g. this might be useful when having a large cluster of enemies, and the room is full of spitters. This abstract condition is a good scenario to pull the room and clear it with a single mine.

An interesting fact supporting active stealth:
Sleeping enemies go through 2 checks when killing a sleeper:
  1. First one checks if you killed or damaged a sleeper in 4m range and wakes all sleepers in that area.
  2. Second one checks if there was a glowing sleeper in lets say 12m range then wakes it up. If there were multiple glowing sleepers in said range only one can wake up at the time.

Now where it gets interesting. Checks come out one after the other so if you passed 1st check the 2nd one doesn't go through meaning you can safely kill enemies in pairs without worrying about some random sleeper alerting the entire room.


◈ Loud combat
As a loud combat we understand a fight against alerted enemies when there is no element of stealth remaining at all. It may or may not include using guns (in many cases it will). In most cases, we'll consider you fighting a wave of regular enemies without considering bosses and mini-bosses, as you may need to work around them in a different way.

This is an aspect of the game newer people tend to struggle with, and that doesn't come as a surprise, as it requires some mechanical skills, game knowledge in general (environmental awareness, knowing your weapons and enemies, etc.), ability to make decisions on the fly, a certain degree of confidence and so on. Most of these things will never be explicitly explained as a whole picture by any guide (nobody will ever give a unified guide on decision-making - only case analysis is applicable here) - they come with game experience as you keep beating harder levels, and ideally constantly communicating with your team. We are not speaking about in-game communication, but rather exchange of ideas, strategies, thoughts on specific aspects of the game with your friends - it's hard to overestimate the importance of this knowledge and experience transfer. Here we'll do out best to explain some general practices which could be applied to the active combat.

First, let us kick-off with some universal tips:
  1. Use melee whenever applicable. Mix melee and guns during the fight.
    It is true that you can use guns in the majority of cases. However, melee has no ammo limitations and using it extensively will save your team lots of resources during hard levels. Treat guns as a mean to kill enemies fast, whereas melee could do the same, but it takes more time in most cases. As a result, in your average combat you might want to rely on melee for the most part, but occasionally switch to guns if needed. For example, you've just found a tight choke point and you may utilize one of your guns there, or you need to eliminate certain enemies asap. Our point is, you need to practice your melee, but mixing it with guns is definitely a way to go during the advanced gameplay.

  2. Mobility is your strength.
    As a player, you are much more mobile than sleepers.

    • First, you are not attached to weird pathing, and you are limited only by the edges of the map and some invisible walls pretty much.
    • Second, you can use assets to your advantage - take shortcuts, cover behind something do avoid damage, etc.
    • Last but not least, you can deal a significant damage to enemies with your melee on the run - no need to stay still to deal some damage. Even walking for a second or two to shoot a bit is still much better than what most of the sleepers have.

  3. Know when to bail.
    No jokes, this is probably the most important thing newer people tend to forget, and decide to hold their ground spamming with their guns until they die. Don't take us wrong, sometimes you must hold your ground and taking some damage while you do it is acceptable. In most cases, however, if you see that you are about to get overwhelmed - time to relocate.

  4. Do your job.
    You have a bio tracker? Use during the combat! Mb you have a turret you haven't deployed previously? Deploy it in a suitable spot when there is a window of opportunity. Is that a sniper you have? Why than there is a hybrid harassing the team? The idea if incredibly simple: don't play chaotic, especially if you are holding your ground. You certainly have tools and weapons which need to be used and shine the most at doing something. This attitude makes gameplay much more engaging when you trust a sniper user to take care of giants, or a dmr enjoyer is taking care or small shooters, and so on and so forth. With more experience, there is no need to actively communicate to you team every step or decision you make, but try to make rational steps even during the active combat.

  5. Take your time.
    While there are certainly levels where the time is gold, in most cases you aren't really that tight on time and may approach a combat with patience. Do you need to kite enemies a bit, or take a bit more time to kill tough enemies? In most cases you can afford it.
◇ Melee combat
For the sake of simplicity, we are going to discuss active combat mostly from the melee perspective. However, many of the described things can be applied when using guns, or a combination of melee and guns. Switching to guns at any moment is 100% legal. Before proceeding, it would be wise to revise Sleepers' anatomy, as here we'll frequently refer to staggers, and other game aspects discussed in that part of the guide.

Why melee combat anyway when you have guns?
Guns are arguably more powerful in terms of speed of killing sleepers. However, ammo is not infinite and players have to count with it. Even if in the current state of the game ammo is not an issue - you cannot expect it always remain like this. Thus, melee is your only way of killing sleepers without wasting ammo. Last but not least, melee combat is extremely satisfying in this game. Playing GTFO without bonking seems wrong.

What are the core principles of melee combat?
There are 2 general principles applied to the melee combat in GTFO:
  • First, you have to avoid taking damage. There are certain patters of sleepers' behavior and targeting which allow you to feel like a fish in the water while fighting a group of sleepers. Applying these principles badly will lead to extra damage and potential downs.

  • Second, you have to kill sleepers as quick as possible. It might seem self explanatory, but the quicker you kill them, the less risk of receiving extra damage you face. It is especially true with the stamina system present in the game - you aren't interested in prolonged fights.
Thus, you want to kill sleepers as quick as possible while being as careful and coldblooded as possible.

Stamina system
During the melee combat you will be limited by several constrains. One of the most noticeable ones is a stamina system. It literally forces you to switch between melees and guns during the fight, or at least use terrain to gain some safety from sleepers and recover your stamina. We strongly recommend checking a GTFO Academy: Stamina & BPM | Intermediate by The Real Khepri for reliable info on stamina system and how does it affect your runs. As always when we recommend specific content creator - don't hesitate to check the entire channel, not just a separate video, you'll definitely find some great content! Also huge props to The Real Khepri for verifying some numbers present in the guide, as well as bringing attention to several blind spots!
◇ Melee combat - dodging
This is a core element of the fight when it comes to saving health. Here we'll cover your behavior against projectiles and melee attacks of the enemy. For simplicity reasons, we'll kick-off with facing individual sleepers, and slowly move to crowds of enemies for each point.

Ranged attacks
There are different projectiles in the game, we'll stick with breaking them into just 2 groups:
  • Relatively slow curving (auto-aiming at their target).

  • Relatively quick going in a straight line.

Both types of projectiles can be dodged by strafing, alternatively, if you are on the move, you can use elevation to dodge shots - just sliding right before the missile is about to hit you will do. However, there is a small trick which is useful mostly to the curving projectile. Every missile in the game is aiming at your camera position. It's irrelevant for the fast projectiles, but you can manipulate curving shots by moving your camera to the side when they are about to reach you. Please, refer to the media below for demonstration of what dodging missiles looks like in reality when facing a single shooter and a crowd of shooters.

Shooter 1-1. Moving to the side, camera manipulation, crouching/sliding to dodge a missile:


Multiple shooters:


Hybrids (kinda equivalent to a horde of shooters):


Note[1]: When facing that many shots with little to no window between them, it's much more reliable to move to one side, while shifting your camera to the opposite direction. Going with Neo style is an option, you'll dodge most missiles, but you are way more likely to get hit.

Flyers' shots:


Note[2]: Obviously you can cancel the missile attack by killing/staggering a shooter before the projectile flies off. Certain enemies (namely hybrids) can be manipulated to perform another action, but shooting. e.g. Hybrids have a priority to perform melee attack over anything else. Thus, if you stay close enough - they'll never shoot or scream, you'll just have to deal with their melee attacks.

Melee attacks
These attacks can be divided into 2 groups:
  • Fist hits.
    Some sleepers will attempt to hit you with their fists. It will happen even if you shoot off their hands!

  • Tongue attacks.
    Arguably more frequent - all sleepers but shooters and some special enemies have this attack with different attributes, such as lock on range, damage, etc.

Fist attacks - generally speaking, there are several options available:
  • The most obvious one, you don't want to get into the attack range when a sleeper can perform it.

  • When fighting, you want to be able to stun, or kill your target before it smacks you. It's especially important when fighting against bigger targets, as they can literally rip off your face.

  • Alternatively, you can use dash to quickly get out of the hit range. Dash can be triggered by holding shift + left/right/backwards (better to the side as some enemies perform a combo of hits while charging ahead). It can be used against other attacks as well, but it's especially useful when dodging fist attacks.


Note[3]: Shove (M2 by default, many people assign it to Q as well) it not the best option against fists. Namely because mostly bigger enemies use their fists, and shove does nothing against them. The only small enemies hitting you with their fists are regular chargers, and charger scouts.

Tongue attacks - every enemy has a different lock range with a clear line of sight required to lock on and perform this attack. Different enemies have different reach range and deal different damage, as a rule of thumb - bigger enemies do this attack overall better. However, all the enemies (with a Tank being the only exception) have a cone in front of them when performing a tongue attack on a locked on target. If a locked on player manages to get out of this cone, or an obstacle appears between a sleeper and a player - attack won't reach him. Thus, these are the methods to dodge tongue attack:
  • Get out of the attack cone.
    The direction you choose doesn't really matter. However, it's much easier to go to the sides than going backwards. The reason behind it is that a lock on range is shorter than the actual attack range. Even walking will do to get out of the range of most sleepers when moving to the sides! Running towards the attacking enemy and bypassing it to behind a sleeper is an option as well. Use your best judgement what's the best way to get out of the attack cone.


    Dodging attacks by going sideways against small striker, frank, and a regular charger as examples:


    Running by the enemy to avoid damage: (same idea as moving sideways - just get out of the cone)
    [PLACEHOLDER]


  • Getting behind cover.
    Remember, getting behind an obstacle will also grant you safety against an attack of a sleeper if it no longer has line of sight on you.


  • Shove smaller sleepers.
    Here shove actually becomes useful against smaller targets as it will interrupt their attack animation and apply stagger:
    [Shove PLACEHOLDER]


    Note[4]: Batton is the only melee weapon right now which doesn't really need to use shove, as it can stunlock almost any enemy in the game by just tapping it with light attacks.

Against a group of sleepers, you have to combine all of these dodging aspects of melee combat - it works wonders. Elevation and terrain are impossible to overestimate since you will need to take a rest during a prolonged combat. When fighting a crowd of sleepers, don't attempt running through the crowd - soft collision will slow you down, and you will quickly get your portion of damage. Instead, run by the crowd of sleepers to have a window of opportunity to hit them. However, you can jump over the crowlers to avoid soft-collision, and dodge their attack.

Note[5]: While it's arguably harder to dodge a group of sleepers - they are out of sync, possibly even attack from different directions. You can partially negate it by grouping them up, so that sleepers attack you just from one side - then you can almost reliably use all mentioned techniques.


What's the take away?
In order to avoid taking damage you either need to get out of the attack cone, get behind cover to block line of sight, or cancel the attack by killing or staggering a sleeper.
◇ Melee combat - bonking
All the dodging would be useless in the majority of scenarios if you aren't killing sleepers. In the end of the day, dead sleeper won't deal any damage, so killing them is an ultimate way to avoid taking damage yourself. While there is very little specifics in killing individual small sleepers, we'll spread this section into dealing with a group of sleepers, and killing bigger targets.

Bonking a group of enemies
To say honestly, this is a combination of all your knowledge of dodging their attacks (both in the open field and using terrain as much as possible), taking into account your stamina, and knowing sleepers anatomy. There is no step by step instruction on how to bonk a group of enemies, how to set priorities. e.g. some people would attempt to get rid of shooters 1st, other will leave them for last. Your behavior will change if there is a boss involved in the fight, if there are specific enemies, or environmental hazards. However, in the most generic fight you want keep the following points in mind:
  • Be mobile.
    If you are staying in a single place there has to be a reason: doing a scan, recovering your stamina, etc. And even in these cases you aren't helpless and you can dodge many attacks by walking, use your guns, and so on.

  • Always charge your melee (unless it's a spear).
    You never know what's around the corner, it's always good to have a chance to release your attack and kill, or stagger a sleeper.

  • Consider Sleepers' anatomy.
    You won't always have a chance to land a deadly blow, mb you're facing a big enemy where 1 hit isn't enough, but you can stagger it, or your melee is not fully charged, but you need to hit a sleeper anyway - you are still fully in control of where and how you land your hits during the active combat.

  • Switching to guns.
    While in many scenarios you need to utilize melee to its best - it's still perfectly legal to switch to your guns if you see that they might be useful here and now. Especially when you recover your stamina.

  • Shove after a melee hit.
    When running by a crowd of enemies and bonking some of them, you will often find yourself in a position when you see that another sleeper is about to hit you, but there is no time to charge your melee - shove it literally created for such instances.

Bonking big sleepers
As a big sleeper we understand one of these enemies that require multiple hits to be take down, most of them are bigger versions of their small counterparts. As a base, let's consider fighting one of them while they're already alerted.
  • Titan variants of sleepers aka franks.
    The general rule is, you should aim to stun titans every attack you hit them. Thus, fracturing different parts of their body is a way to go. Obviously, you might want to aim for the biggest damage per hit. Thus, if you can get behind your target for a hit while this titan is stunned, or destructed by another player - that's good. If you can begin your combat with a titan by dealing the most damage aka hit at the back of the head - that's a perfect start. Remember about fist attacks as you get close. Franks will break their tongue attack animation and will switch to their fists if you are in range. As a result, you'd better be ready to dash after baiting a fist attack, and then attack yourself. Alternatively, you need to land your own hit really quick and than step back, but it's a riskier move. If you have multiple prisoners fighting a single frank, it could be wise to hit one by one in order to keep your target stunlocked. The same logic is applied to shadow titans. Remember, higher Shadow Resolution setting helps seeing them better.

    Note[1]: We strongly DO NOT recommend using melees during the active combat against giant chargers, unless you have a spear. The reason is that every charger in this game has a horrible fist attack animation, which is not in sync with actual damage dealt. You can only reliably hit them during their screaming animation based on our experience.


  • Giant shooters aka chickens.
    Chickens are much tougher in terms of health compared to franks, but receive a lot of extra damage when hit at the back of the head. For example, just 2 charged attacks are required to kill a single chicken. While it's easy to pull when the chicken is sleeping, what about the actual combat when the chicken is facing you? We'll take hammer as a base. All you need to do is run towards a chicken, jump when being point-blank close to it, do a 180 turn in the air and smack it at the back of the head. However, what if there is no way to hit a chicken like this, e.g. it stands by the wall? Then you fight it in a similar way to titans - just keep it stunlocked by fracturing different parts of the body - it'll take longer, but on the other hand it's quite easy. Remember to dodge the projectiles, chicken shoots 3 of them per attack. Strafing combined with camera manipulation work both at close proximity and when you charge it. When having multiple prisoners fighting a chicken - all the same rules apply.


  • Hybrids.
    These are called hybrids for a reason, as they share many qualities of franks and chickens. 1st, and foremost, these are the shooters and they die after two hits at the back of the head. However, unlike chickens they have a fist attack, so jumping though them might not pay-off. 2nd, they shoot and shoot a lot, but you can dodge all their projectiles in a similar way to other shooters' missiles, there are lots of them - pretend being Neo from Matrix. 3rd, they prioritize fist attack above anything else, and won't shoot or scream if they have someone to smack. What do we have as a result? A target you can ambush, but can also charge in the open field, but prepare for lots of strafing; A target that prioritizes fist attack over everything else, so it's perfectly predictable in close combat; An enemy that can be stunlocked similar to other enemies. As a result, you need to get close to a hybrid and juggle between baiting its fist attacks, and damaging/stunning it with your melee.

    [MEDIA FOR HYBRIDS]


Please remember, that this list is not exhaustive and you aren't always facing lonely targets, and you are not forbidden from using your guns. Sure, you can take multiple big targets on your own using just melee - it's time consuming, but doable. Use your best judgement during the real combat!
◇ Kiting
Similar to what you might encounter in other games, kiting is a part of the combat when you actively avoid the direct encounter and try to keep distance between you and enemies, or what's even more important - gain this distance. Kiting became harder with the introduction of stamina in R6 as you cannot run indefinitely long - you'll occasionally need to walk a bit to regenerate your stamina. Let's answer two questions: When do you want to kite, and what you need to do for it to be successful.

When to kite?
As said earlier, you want to kite when there is a need to avoid direct contact with an enemy. There are generally speaking 2 major conditions when it happens:
  1. First, which is way more widespread - you can't handle the wave.
    Typically it happens when all your teammates are down, and you have the entire wave coming after you. Why you can't handle them is a different question. It could happen if you be a wave of chargers and you are out of ammo while having just a knife. Or maybe you are dealing with Surge alarms and killing sleepers won't give you any extra room to breath. And these conditions keep going on. Realistically, you can't revive your teammates, or finish the objective by holding your ground, thus you need to flee.

  2. Second, as suggested in the Max cap of enemies section of the guide. These situations are rare, but under certain conditions you don't want to kill sleepers, or there's very little sense to kill them. E.g. enemies are spawning too fast and you have no luck in killing them quick enough. Under this assumption, you need to maintain distance between you and sleepers, even if your entire team is up.

What do you do while kiting?
Yet again, there is no unified answer as it's heavily dependent on the level, type of enemies you are facing, guns used, etc. However, there are still certain common principles applied to any kiting.
  • First, you need to bail in time.
    For example, imagine that you are doing a team scan, and you clearly see that your team is about to get overwhelmed and staying here will do you no good - having a head start will save your HP, or even life. This is one of the examples when you need to clearly communicate with your teammates. For the sake of example, lets have a condition that your team mates never listened to you and died - you'll have several seconds to break from sleepers.

  • Holding shift + W isn't enough.
    It's true that you are quicker than most of the sleepers in the game. However, some sleepers are quicker than their brothers and sisters, which is something you need to consider. Regardless of sleepers' base speed, you will eventually get tired because of the stamina system. Thus, you need to take the most from your sprint time. Can you get on the upper floor jumping on this box close to you instead of running to the staircase on the other side of the room? Maybe you can jump down in the opposite situations? You need to utilize these shortcuts.

  • Utilizing funneling is a must.
    We've discussed it extensively in the Funnel enemies part of the guide - this is extremely level and layout specific. As a result, you'd better plan kiting as a plan B in advance before ♥♥♥♥ hits the fan. Doors are your best friend as you can use them to force sleepers take longer routes than you do.

  • Taking a breath.
    Due to the stamina being a thing, you will occasionally need to slow down and walk for a bit. This is a point where you need to shoot if there is a line of sight on enemies. However, you don't need to kill them! As discussed in Max cap - if you kill enough enemies, a new portion of sleepers will spawn if you have an ongoing alarm. There is a chance they'll spawn in a place you don't want them to spawn, for example in front of you when you are coming back to revive your teammates. Use your guns to stagger enemies and damage them a bit - it will ease your life when you actually need to kill them, and you'll have time to regenerate your stamina.

Remember, kiting for the sake of kiting makes no sense, you need to apply this principles to gain distance on sleepers in order to do something, e.g. revive your teammates, or finish a nasty scan.

Note[1]: Not every level is equal. Some levels will contain more environmental hazards than the others, while some levels have quicker enemies that aren't so easy to kite. Kiting is very context dependent.
Events and preparation
GTFO has a number of events to challenge prisoners: from relatively simple "open the door - shoot what you see" to those where a team has to move and adapt on the go, and anything in-between these 2.
However, regardless of what you face, there are certain similarities in terms of preparation, or rules that are being shared between these events when it comes to preparations.
In this section we'll cover these similarities, and will discuss unique aspects of specific events in details, as well as tools at prisoners' disposal. Everything said here is applicable to both: thorough preparations, as well as setting your defense on the fly.
◆ Enemy spawns
While maps do possess idle sleepers, there is a lot of scenarios when new enemies will spawn on the map. Some cases are unique and are more scripted than other events, e.g. with a fixed direction from which sleepers will come, or fixed areas where they will spawn, but in this section we'll cover basic enemy spawn rules for the majority of events.

As events we do consider various alarms, scout triggers, uplink alarms, and reactor waves. When one of these events occur, a new pack of alerted sleepers will spawn somewhere on the map, and will move towards prisoners. In most cases, a roar will clearly tell which direction they are coming from. This "somewhere" has its own limitations, namely:
  • These waves can't spawn in areas behind locked security doors (as long as they remain closed) since these doors can't be broken and there is no way around them.

  • Sleepers will spawn 2 rooms away from the prisoners, where players are located in room 0, room 1 serves as a buffer (Where "buffer" is a room with no players), and spawn occurs in room 2. Pay attention that rooms may or may not be separated by doors, an arch might serve as a room divider. With experience you'll easily see it. Until then, better double-check the actual name of the room if you can spare a moment.

Note[1]: In case there are multiple rooms falling under these 2 categories, spawn location is chosen randomly between them.

Note[2]: Should there be no room falling under these categories - sleepers will choose the next best option. e.g. there is no option for them to spawn 2 rooms away - they will spawn 1 room away. If there is no way for them to spawn even 1 room away, they'll literally spawn on top of you. These situations are rare, yet they do happen occasionally.

Extremely important: previously we've considered prisoners as a single entity, since most of the events requite prisoners present in the same room due to beginning with a team scan. Moreover, when doing scans you want the entire team to focus on scans in 9/10 cases (speaking about alarms because they are arguably the most widespread sort of events atm). Thus, we do count enemy spawns from the position of the TEAM. However, as a matter of fact, sleepers take position of each prisoner individually when spawning. One random prisoner is chosen at a time to identify the next wave spawn location, and will spawn sleepers based on the conditions explained above. This comes into play only when players are not in the same room, and then a wave spawns.

What would happen if a prisoner moves from room 0 to room 1 during the alarm? Sleepers won't be able to spawn in room 2 any longer, but their spawn will shift to room 3 instead. Let's imagine that there are multiple directions for sleepers to spawn where room 2 is a dead end, and no room 3 is available. By having 1 prisoner moving to room 1, you'll prevent sleepers from spawning from this direction since there are better alternatives as said at the beginning of this section - it's generally known as spawn blocking. Usually it's not worth sending a prisoner since you'll sacrifice 1 player and will do scans much slower. Needless to say, team scans might occur during the alarm. Obviously there are exceptions, sometimes you dedicate 1 man to perma-foam a door, or you can absolutely do the same and send 1 player to defend against the wave (and simultaneously push their spawn deeper into the level), while the rest focuses on scans. Just make sure you do it for a reason.

What could go wrong?
As said previously, sleepers consider position of each individual player when spawning. As a matter of fact, they do require a single buffer room from a single prisoner to spawn, where a buffer room is a room with no players. If the team is spread between neighboring rooms - sleepers will respect all the described rules. However, should there be a gap between players and they are located 2 rooms away from one another, sleepers will consider this gap as a buffer room when spawning. Now there is a high chance of a wave spawning in the same room with players on either side. As at least right now sleepers care only about buffer room being free from players when spawning, but they do not take into account if someone is present in room 2. For example, this can happen when a separated player triggers a scout. The solution to such a problem is incredibly simple: when pulling something spawning a wave: be it and alarm, or a triggered scout (even though nobody usually plans to trigger them on purpose, but it does happen occasionally) - stay as a team.

Note[3]: Prisoners can and absolutely should take it into the account especially during Error alarms and Uplink alarms. We'll come back to the topic of spawn in these sections.

There are visualized generic enemy spawns as per information above:

Case 1:
Sleepers spawning 2 rooms away, 1 direction only.


Case 2:
Sleepers spawning 2 rooms away, multiple possible directions.


Note[4]: See the difference between these 2 screenshots. It would make sense to deal with an alarm while having only 1 direction for enemies to come from. If you can afford it, do not open additional direction for sleepers until you finish the alarm - the less directions for enemies to come from the easier it is to fight them. Once the alarm is done - feel free to open any doors you want.

Case 3:
Sleepers spawning just 1 room away.


Pay attention, this particular example comes from the Uplink alarms. Reasons why enemies spawned like this are explained in that part of the guide. Note, if sleepers don't even have an option to spawn 1 room away, they'll spawn like this in room 0.

Note[5]: Certain new tiles break this rule! usually these are multi-layer rooms, e.g. one in R6D1, where enemies never followed 2-room rule.
◆ Funnel enemies
This is an extremely important aspect of preparation for various events in GTFO, as well as something you can use on the fly. What's the deal? Alerted sleepers will try to catch up on prisoners, and will take certain pathing trying to take the easiest route. It is fair to ask a question "what is the easiest route?".

Before proceeding, please, make sure that you are familiar with our definitions of "room 0, "room 1", and "room 2". We've extensively discussed it in Enemy spawns section of the guide. Speaking the same language is crucial here.

These are the main conditions sleepers obey when taking a certain path:
  • Sleepers act like pawns and always move ahead, where "ahead" is +1 room closer to the team.
    When located in other room but 0 (aka not in the same room with prisoners), they will always move one step closer: from room 2 to room 1, from room 1 to room 0. This rule applies to further rooms as well, but these are more rare cases. Imagine that sleepers are pawns, and rooms are squares. Sleepers will move 1 step ahead even if there are "easier" paths available. Size of rooms doesn't matter for them at this point, even if let's say moving from room 1 to room 0 through another room 1 is actually quicker, or has less obstacles, and would make more sense all together (should this be available similar to the example below). Such interconnected areas are not always available. And as irrational as it seems, sleepers will take what it seems a "harder" route with closed doors by moving directly from their current room 1 to room 0, despite the fact that there is a "free" route though another room 1 with no closed doors, even if they don't lose distance whatsoever.


  • Open/closed doors matter.
    When moving 1 room ahead as per the rule described above sleepers take into account which doors are closed, or open. In case several doors lead from 1 room to another, but only 1 of them is open, sleepers will prefer open one against closed ones, even it takes them more time and actual distance in meters to move from 1 room to another.

  • Distance to identical doors matters, with open doors being preferred over closed ones.
    In case sleepers have several identical doors, and by identical we mean either open or closed, they will take the closest one to them. "The closest one" this time means actual distance in meters. They don't care whether it's the most optimal pathing in general when reviewing their route as a whole, they just want to get from 1 room to another as soon as possible, regardless of where they need to go next. It means that if sleepers go from room 2 to room 1, they will take they quickest way to get into room 1, even if it means they'll spend more time getting from room 1 to room 0 later on. Same goes true for prisoners' position in room 0. Sleepers ignore it while being in room 1, and will simply attempt to get into room 0 asap, even if the entrance is on the opposite side of the room from prisoners.

  • When in the same room with prisoners, sleepers will take the shortest path to reach players.
    You can perfectly expect which route will be taken by sleepers when they are in the same room with you. Make sure this is the longest available path by applying previous rules and funneling them through a certain door. This can also be used to ensure that sleepers will move through tight spots where shooting them becomes much easier. Sometimes even staying on the opposite side of the team scan will force sleepers to change their route - experiment, and with experience and layout knowledge you'll be able to do crazy things while funneling enemies even within 1 room.


Please, do not treat these rules as something separate, but treat them as a whole, as all of them are essential for funneling.

What could go wrong:
If enemy spawning rules are interpreted and applied correctly, sleepers can still break your funneling plans by breaking the doors you didn't want them to break. The reason is sleepers get triggered by the door and will break it under the following conditions:
  1. Spawning by the door.
    When sleepers spawn in a room, they spawn in random locations. Chances are some of them (even 1 sleeper is enough) will spawn by the door you didn't want them to break. If such unlucky spawn occurs, they will break a door. It can potentially hurt your funneling from room 2 to room 1.

  2. Simply going really close to the door.
    This can happen regardless of the room. If sleepers just go very close to the door, some of them will get triggered by the door.

Why funneling is a powerful tool and when prisoners usually want to consider it?

When funneling enemies, you basically gain extra time before sleepers come close and you have to deal with them. Thus, you have more time to do whatever you need, use less ammo, tool and health per unit of time. As a rule of thumb, the more time sleepers need to approach you the better. It's a tool you may want to utilize as much as possible. There is little to no downsides, and no events when one can say "we don't need to funnel sleepers here even though we can". However, some situations literally require funneling to deal with them successfully, namely but not exclusively Surge alarms. More info will be provided in the respective section.

Funneling vs. perma-foam:
Both options serve the same purpose: delay the direct encounter with sleepers. Which is a go-to option? There is no definite answer for this question. However, when making a decision, consider the following:
  • Can we spare 1 man to keep a door perma-foamed? "No" makes perma-foaming close to impossible. e.g. when we have a number of team scans, and the entire team needs to stick together.

  • Which resource is more valuable atm? Should we be able to spare more c-foam over turrets, or actual ammo - perma-foam is a way to go. However, if c-foam is a scarce resource compared to ammo and turrets - funneling could be more attractive.

    Note[2]: It's fair to ask what's the difference between c-foam and turret usage, as both of them consume tool. That's a fair question. However, we are not always able to allocate tool in the most efficient way. Sometimes tool was already used on certain items and we can't take it back, or we know for a fact we need tool later, or many other things might happen during the run.

  • Are we willing to fight, or actually keep enemies at bay? Some enemies in this game are nasty and facing them could be a challenge. While funneling delays the encounter, perma-foam has a much better delay potential at the cost of tool.

Note[3]: Doors are essential for funneling, thus should be treated as a resource, and should be saved whenever possible. You never know whether this or another door will prove useful later. Even damaged door can be used for funneling.

Note[4]: The fact that you can't close security doors once they were open makes them extremely important for funneling. Imagine that you have a situation where you can do an alarm in room 0, with only one way in being open, which creates a decent bottleneck since you can adjust all your defenses. However, there is also a non-alarm security door located in room 0, which you can open for free and get some resources there before dealing with the alarm. While the exact algorithm of actions depends on the specific mission and your current situation, usually it's a much better idea to deal with the alarm 1st, and only then open additional direction.
◆ Max cap
Due to limitations present for literally every game out there, nothing keeps spawning indefinitely unless its predecessors are removed. Sometimes its explained by balancing, while in most cases, however, it's a part of game optimization. e.g. having too many active sleepers chasing players would hurt optimization badly, and will put an incredibly high load on users' systems. In order to avoid it, there is cap of sleepers - a number above which new enemies will not spawn. Here we will discuss how this fact affects the game, how it can be used, and what we should expect from it.

Key facts about max cap:
  • Every single event in the game contributes to max cap.
    By "every single event" we mean it - everything awake and willing to kill you in GTFO contributes to the max cap. What does it mean in practice? If you have several different alarms going at the same time, they both will respect max cap even if these alarms spawn different type of sleepers. You won't have a double size max cap or something crazy like this. Sometimes (extremely rare) it's beneficial to deal multiple alarms at the same time as you'll literally face the same number of sleepers at once instead of having a need to clear these 1-2 extra times. It's especially powerful if you can combine it with perma-foaming a door. Even though you won't see suitable rooms that often, not even every rundown. However, if you already have a max cap of sleepers chasing you, you can pull the next alarm, and new sleepers won't spawn. What's the takeaway? New sleepers do not spawn if there is already a cap of enemies.
    Scout waves also respect the max cap, but we'll cover them in more details in the next points.


  • Spawn queue.
    Despite having a spawn cap, you can't keep certain waves from not spawning at all. These are unique waves. The most notable example - scout waves. Reactor waves are known for the same pattern as well as these waves tend to evolve from 1 startup sequence stage to another 1. Imagine that you are at full cap already, but then another wave is meant to spawn (be it reactor, or many scouts triggered). A queue of waves will be created, and when you partially kill the current max cap, the new wave will spawn. So eventually you'll be forced to deal with every single wave from every scout triggered, or from every reactor startup sequence stage. This doesn't happen that often as well, but it's something you might have to keep in mind, especially when dealing with lots of scouts at once.

What can go above max cap and potentially break your game?
  • Waking up idle sleepers.
    The most obvious one is scenario when you already have cap of active enemies, but you keep going deeper and deeper into the level and keep pulling lots of new previously idle sleepers. This is incredibly hard to do (if even possible for the vast majority of levels) and something you have to actively try to do. You'll literally never do it by chance.

  • Mothers.
    As they can spawn 20 babies at ones (queens spawn 30 instead), they can add lots of new sleepers above the max cap. 1 mother shouldn't be a big problem. However, what if you alert multiple mamas, and each of them spawns dozens of babies - you know where it's going. It's relatively easy to reach an unacceptable number of sleepers above cap, which may be enough to make your game unstable.


  • Blood doors.
    While different on paper, it's literally the same as pulling new idle sleepers.

In what other scenarios do you need to play around cap of enemies?
  • Extraction, or pushing though the map for any other reason, or intense error alarms.
    Sometimes you will deal with very intense alarms, while having to push though the level with a long distance to cover, potentially even carrying a cargo or any other object to slow you down. Should you already have a cap of enemies chasing you, there might be no sense in killing them, as they'll respawn fast with a chance of spawning ahead. In this cases it's much much better to simply flee and gain distance however you can by applying c-foam, simply closing doors, use funneling or shortcuts available. It is incredibly level specific. However, if at one point you face such a situation and feel like killing enemies doesn't really benefit you and your team - keeping enemies at max cap and making distance on them as much as you can could be the answer.

  • Pulling new alarms while already having a max cap.
    Looks and sounds counter-intuitive, and redundant in many cases. However, if you enjoy playing somewhat edgy and enjoy moving quick through the level (provided that you already understand the level, or at least part of it). The name of the point speaks for itself. We don't recommend use it as a reliable option in all cases, but it's a real existing option at your disposal.
◈ Security scans
All zones are separated by security doors. These doors can't be broken, but you will constantly need to move from one zone to another. In rare cases, these doors will open automatically once you complete certain actions, or you will be able to unlock them similar to regular doors with no scans whatsoever. However, in the vast majority of cases, these doors require prisoners to go through scans. Once open, these doors can't be closed.

These scans can be divided into various groups, and it's easily possible to divide them even further compared to what we offer. Most of them share the same key attributes:
  • At least 1 prisoner is required to stay in the circle to complete the scan.
  • It's possible to leave the scan (if you are being pushed away and need to flee) and the completion % will stay the same as you leave it and any prisoner can complete it later.
  • Having more prisoners in the same scan fastens its progress.

We'll try to keep these groups as clear as possible.

Big scans / small scans.
Scans do vary in size, and you will see several scan sizes while playing GTFO: from small ones designed for 1 player (but still fitting several players if needed), to incredibly big scans creating a sort of defensive arenas. As a rule of thumb, the bigger the scan the longer it takes to complete it. This time is always modified by the type of alarm, e.g. individual cluster scans are much quicker than their regular red counterparts. However, size is definitely something to consider.

For the sake of simplicity, we we'll consider this size as a small scan:


And this size (and anything close to it) for a big scan:


Should anything described later require specific attention due to its size - this will be mentioned separately.

Team scans / non-team scans.
While the majority of scans can be completed by an individual player, a number of scans require the entire team to be present in the circle to complete the scan. While it doesn't cause any issues when opening non-alarm security doors, during the alarm they add a bit of a twist: if at least one prisoner gets downed during the scan, or is not in the scan at all for any reason - its progression will stop until everyone is standing in the scan. Team scans during the alarm also force prisoners to regroup and do the scan, otherwise it won't be possible to finish the alarm. Team scans are always big, or larger circles. These scans as for right now include:
  • Regular team scan.
    These scans appear as big orange circles and act as regular scans, just requiring the entire team to be in the scan to finish it. Regular team scans are by miles the most widespread type of team scans in the complex, as most of non-alarm security doors require to complete such team scan, which is also true for many other events, e.g. when establishing an uplink connection, or beginning the reactor startup. Most alarms also begin with this scan, so you'll see it fairly often.

  • Checkpoints.
    Act similar to regular team scans, but they aren't directly connected to any alarms (unless you have 1 in the background). For the time being checkpoints are quite wonky and many glitches are tied to them. The main advice we can give is make sure you drop any items you are carrying while scanning for a checkpoint (fog turbines, cells, cargoes, etc.), and pick them up after finishing the scan. If you die later on and take the checkpoint, you might not be able to drop the item you were carrying.

  • S1 scans.
    A big purple scan with a unique attribute - the scan progress doesn't stay in one place, it only goes up or down. If the scan progresses - it works similar to any other scan. However, if someone leaves the scan, and thus, it can't progress, instead of staying at the same %, it will regress until it reaches 0, or the team manages to regroup and carry on with doing S1 scan. There are 2 main types of S1 scan. Simply S1 scan tends to be relatively long, and forces prisoners to hold their ground at 1 spot, while S1 cluster scans (or as a part of a mixed alarm) require much less time to complete them, while other S1 scan traits remain the same.

  • Arenas.
    Incredibly big S1 scans. For the time being these scans were present only in R5. Prisoners are facing waves of sleepers during this scan while having to stay in 1 area. The space given is pretty generous and players are able to maneuver around the arena freely with only 1 condition: staying in the arena progresses the scan, while going outside of the arena, or someone being downed looses the progression.

  • T scans.
    Look similar to the regular team scans, but with 1 interesting addition - they are moving across the room and team should stay in the circle for it to progress. If someone leaves a scan, it stops moving and stays in place. The path is always predetermined.

Note[1]: You will occasionally see scans overlap. When this happens you can do several scans simultaneously provided that you stay in the overlapping parts of the scans. However, this works only for non-team scans regardless of their size. Team scans have to be done separately even if they overlap.

Alarm / no alarm.
Every security door clearly says whether there is an alarm, or just a security scan when you approach it.


Non-alarm scans are obviously simpler to grasp: simply initiate the scan and proceed though it. In the majority of cases you'll have to deal with a single team scan and that's it. However, some rooms were designed for sneaking (even though you are not obliged to sneak and can clear the room in most situations). These rooms will contain Silent scans as we call them. These are non-team scans, which can be small, or big. These scans appear to be green and you won't mistake them with anything else. The advice on whether to clear a room or not is extremely level specific. Use your best judgement when choosing between clearing the room, or doing the silent scan "as intended".


Alarms are more interesting in terms of approach as they actually apply some pressure on the team. The main rule regarding the alarms: do not pull any door mindlessly! If you are playing the level for the 1st time, make sure you understand what's coming and how you can deal with it. Every alarm has its class, where class 1 means that only a single wave of scans will appear. Class X will have X waves of scans. Several waves imply that after dealing with all current scans, a new group of scans will start popping. As a rule of thumb: the higher the class is, the longer it takes to complete it. However, sometimes even low-class scans will take eternity to complete should they slowly go from one to another side of a large room. In the next section we'll cover general things you need to keep in mind during alarms.
◇ Alarms - general
This section will offer a set of advises useful for the majority of alarms. If we believe that some alarms need specific attention and we have anything to say about them - these alarms will be covered separately. This part also takes as a given that you are utilizing funneling and other preparation aspects of the game we've discussed previously, or are able to adjust and set your defenses properly on the go. There are lots of unique situations, but these pieces of advice can be generally applied to most condition you'll face in the complex.

Hits for dealing with alarm scans:
  1. Know when to flee and when to stand your ground.
    Regardless of the scan, usually there is nothing good in dying while trying to complete the scan. If you feel that you are about to get overrun, you can always reposition, deal with the threat, and then finish the scan, or have someone else finish it for you. No need to die as a hero. The opposite can be true as well: if there is a need to finish the scan asap, and prolonging the fight will only worsen your situation, you might have to take some hits while doing the scan. In rare cases finishing a scan and going down as a trade could be justified. Use your best judgement, but remember - you are not obliged to hold your ground in all scenarios.

  2. Which scans to take 1st.
    A number of factors determine which scans to do 1st, and taking the nearest one is not always the smartest solution. Here are some factors which might determine which scans you want to prioritize:
    • If you have bio, or any other tool or weapon benefiting from being closer to enemies - you might wanna take scans which are closer to enemies, or the direction they are coming from.
    • When there is a window between waves and the next wave isn't right on top of you, you want to take scans which are closed to enemies 1st. As a rule, it's much easier to fall back and do scans on the go, pushing enemies and trying to do scans is much harder.
    • In case your team is spread out a bit, and you are closer to the scans, it's usually a good choice to take scans which are further from your teammates, as it will take some time for your fellow prisoners to get to the furthest scans and complete them, which will result in longer time you spend doing these scans as a team.

    Note[1]: When dealing with several team scans at once (namely S1 cluster scans) it's usually a good idea to assign a captain who decides which scans you take 1st. It can help you to avoid potential mess and organizational issues when choosing between several team scans. It's also good if someone makes decisions while dealing with hard team scans. e.g. when push, and when to defend during T scans.

  3. Doing scans vs focusing on something else.
    In certain situations you will have to abandon doing scans, and focus on something else. Quite frequently you'll have to decide between doing scans and another activity. Similar to other choices in GTFO, there is no "one size fits all" answer. Some of the reasons for leaving the scans are:
    • Reviving a teammate.
    • Refilling turrets / deploying turrets / setting mines / spraying c-foam (e.g. perma-foaming a door which is far from scans.
    • Defending against sleepers, while others focus on scans. In rare cases you will find it useful when someone separates from the group and focuses on killing sleepers in an advantageous position, while the rest of the team focuses on scans.

  4. Partially doing scans on the go.
    As suggested previously, you could have many reasons to ignore the closest scans and focus on something else: be it the furthest scan, or even kiting across the room. It's a good habit to run though the scan if it's on your way. Doing so will give very little progression, but it's definitely better than nothing and something adding up to your efficiency across the board.

  5. Be adaptable.
    Sometimes things don't go according to the plan: low class alarms take ages to complete, scans pop close to the enemies, and literally anything could happen - being open minded and adapt on the fly and making decision on what needs to be done is crucial for harder levels of GTFO. Thus, definitely prepare, follow the plan you believe works best, but don't hesitate to change something if you see that something goes wrong during the fight.

Note[2]: When dealing with Error alarms make sure you finalize your defenses (e.g. c-foam and mine doors) and begin the scan at the window between error alarm spawns. By doing so you make sure that your resources, such as doors, are not wasted on small error waves, but are used for a larger group of sleepers instead. Same concept applies if you have some strugglers after another fight.
◇ Surge alarms

Depending on how you treat different alarms, you may argue that every type of alarm is different and has nuances to it. While it's true, but these nuances are usually pretty small and just narrow down to how often you need to regroup, or move across the room - you are just doing different scans with a bit of flavour here and there. However, some type of alarms definitely stay out of the crowd and force you to play differently, adjust your mindset when setting up a defense, and reconsider your usual alternatives when things go south. Surge alarm is by miles one of the hardest possible alarms in the game, with only a few incredibly strong examples of Error alarms being on par with it. What's the deal?

There are 2 main attributes that make Surge alarms a real threat:
  • First, surge alarm composes of regular team scans. There's been only one notable exception - S1 Surge alarm from R4E1. However, S1 is still a team scan, but more punishing for mistakes.

  • Second surge alarm trait, which is probably even more important - surge alarm always stays at max cap. Meaning that when you kill a sleeper, a new one almost immediately spawns. Notably, the 1st wave spawns together similar to any other alarm and they move to you together. Any other sleeper you kill can spawn in a new spot in case there are some alternatives present.

Key takeaway:
This means that you don't really benefit from killing the sleepers early, but rather delay your encounter with them for as long as possible. The point is there is very little sense in killing a sleeper when it moves from room 2 to room 1, just for it to immediately respawn in room 2. Instead, funneling (see Funnel enemies part of the guide) should be utilized to its best. C-foam and any staggering tool or weapon become your best friends against these alarms if you can afford bringing these tools. Remember, surge alarm is usually not the only challenge of the specific level! Especially having additional killing power close to you in many cases is arguably better. The idea is when you kill sleepers close to you, they'll spawn further away, which is a great delay on its own. When it comes to killing sleepers. you usually want to kill them as close to your position in room 0 as possible. By doing so, you'll maximize the time every individual sleeper has to spend to reach you. These points make mistakes extremely punishing, and if someone goes down, you still have to fight the max cap of sleepers while trying to revive your friend. God forbid several people go down - coming back from this collapse could be hard.

When things go south:
However, let's imagine you are the last man standing and fighting sleepers trying to revive you mates is clearly a suicide. In previous rundowns, people would kite in such scenarios (and not only them). Which implies running away from the fight, make a significant distance on sleepers, and try to come back and utilize this bit of time gained to damage control and get back into the fight. Kiting is a separate topic to discuss, which became extremely hard to do since R6 release due to anti-kiting measures applied. However, it's still doable in many scenarios, and surge alarm is definitely a sort of event where you might want to keep this option in mind. Please, refer to the Kiting part of the guide for more information.

◆ Error alarms
Error alarm, also frequently referred to as an infinite alarm, which is not nearly as infinite nowadays compared to what it used to be in some of the previous rundowns. The idea of an error alarm is that it doesn't revolve around scans (aside from potential 1st team scan when initiating the alarm, even though frequently it begins when picking up an objective item, or even from the very beginning of the level. Unlike regular alarms, error alarms spawn a wave of enemies once per a set period of time - usually around 30-40 seconds, but some error alarms were spawning enemies much less frequently. The point of error alarms is not to deal with a single set of scans in order to open a specific door, but it applies additional pressure on prisoners for the part of the level, or even the entire level. Error alarms vary a lot, and range from mild alarms you don't have to worry about (most of them are 3-4 small regulars), to those you want to shut down (potentially by finishing the level) asap. Below we'll consider main things you need to know about error alarms by answering some of the most fundamental questions. Most of these points are interconnected, which is something you need to keep in mind.

How many players do you feel comfortable with when it comes dealing with a single error alarm wave?
The majority of error alarms are extremely, or relatively mild. Thus, usually there is little to need to dedicate the entire team to fight a single wave. In most cases, having just 1 man is enough. Remember, error alarm is just something going in the background and it won't finish until you do the objective, or a part of the objective. As such, it is crucial to keep moving through the map. In extremely rare cases, you want at least several people to focus on the error alarm, or even the entire team while pushing for the objective.

As said above, in most cases 1 man can hold a generic error alarm. Remember, we all make occasional mistakes - getting hit once in a while is fine.


Are you comfortable, or is it reasonable to rely on melee to kill a wave, or you'd better use guns?
An extremely important question as an infinite flow of enemies can and will eventually drain your resources if you keep spending them. There are several factors affecting the answer on this question:
  • Avoid enemies stacking up.
    First, and foremost, you need to identify whether you can reliably kill an error alarm wave before the other one arrives. Remember, most of the error alarms spawn waves that are by miles below the Max cap of enemies. If you let enemies to stack up, their numbers may become threatening, and you definitely don't want that. However, you can always use guns as a damage control.
  • How dangerous are the enemies?
    A point extremely close to the previous one. If you are able to kill enemies quick, usually they are relatively weak. However, it's not always the case, and in a number of cases you have more than enough ammo to shoot literally everything that moves. Just think about killing solo let's say 4 chargers with melee. Is it doable? Sure, but you are more than likely to trade some of our health, which is not what you always want. Can you kill a papa with melee? Sure, but it will take unreasonably long time and for a various reasons usually you don't want to invest your time into and and choose guns over melee.
  • Are there any additional threats with an extra time pressure.
    Even though you can arguably kill almost everything with melee in GTFO before the next wave arrives, in some levels you want to shove additional seconds and remove the wave asap. e.g. some levels had an error alarm going, while the fog was rising in the background, making everything you do harder. The quicker you move through the level, the less threatening the fog it.

How fast you need to move while the error alarm is active?
A generally correct answer is "as quick as possible". Does it mean that you need to prioritize speed over everything else? Depends.
  • Think about all previous questions. If the error alarm is threatening, or you waste a lot of resources to deal with it - sure, you definitely want to move quick.
  • Or the other scenario, the wave strength doesn't really matter, it can even be incredibly weak, but each spawn has a chance to break some valuable doors, trigger nasty rooms, scouts, etc. In such cases you want to move at least relatively quick, not because of the wave dealing a lot of damage by itself, but rather due to them having an affect on the rest of the levels. Please, refer to the Enemy spawns part of the guide for more information.
  • If the wave if not threatening, e.g. and you are staying by the security, and confident that any new spawn won't have unpleasant affects on your team - you can take all the time in the world and proceed though this specific part of the level like nothing is happening.

Consider the wave spawns.
This one requires either the level knowledge, could be presented by the objective, spawn in a specific room/area, or could be absolutely random and follow the basic Enemy spawns rules. What are the possible options?
  • Forward spawns.
    Potentially the worst one, since the enemies will always spawn ahead of you, they can easily wake up additional sleepers. Please, refer to the Stealth and combat part of the guide for more information on this point. Sometimes even more crucial, they can break valuable doors.
  • Backward spawns.
    Enemies spawning behind you. Could be a threat just in 2 scenarios: The wave is dangerous on its own, or you leave unpleasant uncleared rooms behind, and they could be triggered.
  • Specific room/zone.
    Eventually becomes backward or forward spawn, threat is extremely level-dependent.

Note[1]: Spreading out is much more frequent during the error alarms as opposed to dealing with alarm scans. As a result, it's much easier to break these Enemy spawns rules.

Main takeaways you need to understand to deal with error alarms effectively:
  1. Don't panic!
    An advice applicable literally to the entire life, not just GTFO or video games in general. However, usually error alarms are not nearly as terrifying as them might seen to a newer player. Do your best to keep your head cool and deal with an alarm in a calm fashion.
  2. Potentially the wonkiest spawns in the entire game.
    Consider the Enemy spawns rules, but recognize that it's incredibly easy to break these rules, especially due to the nature of teams spreading out quite frequently.
  3. Changes tempo of the game.
    • Only pull the next area when you are ready to push hard! (save the doors that are important!)
    • More aggressive stealth. (and sometimes just shoot)
      The idea is that when dealing with an error alarms and crossing really dangerous rooms you generally need to move as fast and as quite as possible. Refer to our Stealth and combat part of the guide for more info on this matter. Remember, sometimes killing enemies in a brutal fashion by simply pulling the room, bringing enemies to a regular door and killing most of them by using a single mine is an option. You can always shoot down the most dangerous enemies really quick and fall back. Everything is extremely level and team specific, but the error alarm definitely affects the tempo of the game.

Last but not least, pay attention to any conditions for shutting down an error alarm. If no conditions were communicated to you by the game itself, chances are you will have this alarm active till the end of the level.

◆ Uplink alarms
Uplink alarm is another sort of alarm not tied to security scans (aside from doing the team scan when initiating it for generic uplinks), but rather an alarm going during the entire process of establishing an uplink connection with pretty generic waves similar to what you might expect from most of the other alarms. The sleepers will keep coming until the connection is established. Once terminal work is done, the alarm will stop similar to completing all scans for other alarms. Refer to the Uplink terminals section of the guide for more information on how to deal with terminals themselves, while in this section we'll focus on dealing with the alarm. Similar to Uplink terminals it does make sense to talk separately about 2 different types of uplinks.

Generic Uplinks
What's the approach to dealing with generic uplink alarms and how do they look like? The idea looks simple at 1st: 1 man stays on the terminal and deals with codes, while the rest of the team focuses on the wave. However, these are some facts about these alarms to keep in mind:
  1. Unique wave spawn "rules".
    Most likely a glitch, but that's something we've been having since R2 where uplinks appeared for the 1st time. Uplink alarms follow all general rules described in Enemy spawns part of the guide + 1 additional rule: enemies spawn exclusively in the same zone with an uplink terminal. What does it mean for you? Sleepers will never come from other zones, and you may ignore them when setting up your defenses. It can occasionally make your life easier or harder:
    • If you have a small zone (let's say a zone composed of 2 very small rooms), the enemies spawn very close to you, which is an obvious downside. If your team spreads across all rooms of the uplink zone, the enemies will spawn right on top of you.
    • On the other side, this addition can absolutely work in your favor as you can spawn block relatively easy and know what to expect since you have a smaller environment to work with. Can't stress enough, but refer to the Enemy spawns part of the guide, but apply one additional rule of sleepers spawning only in the same zone where an uplink terminal is located.

  2. Prisoner dealing with a terminal is not a dead weight when speaking from the defense perspective.
    While being on the terminal, it's possible to exit the interface at any time and do literally anything: shoot, use tools, resources. If damage control is required, it's even possible to step aside from the terminal and do what you must, but that's literally your last resort. When it's relatively calm, terminal duty looks like this:
    • Enter the correct verification code.
    • Exit the interface while the next set of keys is loading.
    • Do whatever you can to help your team without stepping aside from the terminal (because in case you leave, any processing will stop until someone comes back to the terminal.
    • Repeat until the alarm is over.


  3. Perma-foam is an attractive option.
    There is a couple of reasons for this statement:
    • First, there is no penalty for dedicating 1 man to perma-foam a door since there are no scans to do.
    • Second, effective funneling is rather hard to do (not in all cases obviously) due to additional enemy spawn rule, leaving a perma-foam as an attractive option.

R5C3 aka "new" Uplinks
Similar to generic uplinks, this alarm is going while establishing an uplink connection. However, now we don't get codes via HUD. Instead, another terminal from the same room should be used to retrieve codes. We've explicitly described how to approach such terminals in the Uplink terminals section of the guide. From the defense point, these uplinks differ from generic uplinks.
  1. First major difference, Enemy spawns are back to normal and general spawn rules apply.
  2. Second, now we have 2 players busy with terminals, which makes defense even more demanding for players not involved into terminal duty, as they have to be mobile and adapt to enemy spawns accordingly.

Note[1]: Similar to dealing with an uplink terminal, it's perfectly possible to do various things when working with a code terminal. When the next log is processing - simply exit the interface and do whatever to can to help with the defense without stepping back from the terminal unless you absolutely have to.

Note[2]: We've just seen these uplinks 2 times total, but every time one of the required terminals is locked by a password, which can be obtained from another terminal located in side-area from the uplink room. Thus, you will have at least two directions to take care of, which makes perma-foaming harder to pull off, but forces you to rely more on guns and other tools.
◆ Setting up for alarms summary
Simply a set of questions one might ask himself to ensure the team is dealing with an alarm in a reasonably optimal fashion.

  • Do we know what to expect?
    Narrows down to reading what an alarmed security door says, what's the class of this specific alarm, etc.

  • Did we utilize funneling to its best?
    Taking a minute to manipulate sleepers' pathing will definitely pay off.

  • Are we good on resources/health?
    If the answer is no, do we have spare resources to burn right now? If using medkits, or checking on ammo is needed - doing it before the alarm is the right time.

  • Are we using our tools effectively?
    E.g. did we deploy everything we wanted to use, or alternatively prepared to use it on the go? This also includes tools that need multiple uses per event, such as constantly using bio tracker. Are we happy with our turret(s) placement, etc.

  • Are we progressing though the event reasonably quick, or are we going slow?
    Most notable example is some players forgetting about scans and playing way below optimal level.

  • Do we have a plan B if our defense collapses?
    In the early rundowns the only answer would be kiting. While it's still doable, but in certain scenarios it's hard to pull off. Alternatively, you might keep some some side area in mind where we can get, mine the door to kill the wave as an attempt to damage control, etc. This mostly comes from your game knowledge and personal experience, or even improvisation skills. With experience there is no need to plan it, since you'll do it instinctively - just use your best judgement when to bail.

  • Is it a good moment to begin the alarm?
    The most popular scenario (but not the only possible one) to ask this question is having an error alarm going in the background. As stated earlier, you do usually want to finish off error wave, then finalize your defenses, e.g. c-foam and mine doors, and then pull the alarm.
◆ Blood doors

An event that looks significantly different from the alarms, yet can easily be treated as an alarm but the other way around. When a blood door is being open, a wave of alerted sleepers spawns behind it. Wave composition varies from one door to another (as a rule of thumb, easier levels have easier blood doors), and may consist of just regular sleeper, or might event have a boss behind it, and anything in-between. So you literally never know what's behind a blood door when you open it for the very 1st time. On top of that, there could be a number of idle sleepers behind a blood door, which will wake up once a fight with a spawned wave begins.

So, how do we usually approach a blood door:
  1. Make sure that your current room is clear of enemies, and that you won't pull extra sleepers from the nearby rooms. There is very little to no reasons why you'd like to pull some extra enemies, even though a couple of regular sleepers won't make a difference.

  2. Prepare your defense. A mine will do the trick and should wipe out most if not the entire blood door wave. Feel free to use other tools if you feel like it, even though in most cases it's a bit redundant.

  3. Should you have a biotracker, check what's behind the door. By doing so, you will know in advance if you are about to pull extra sleepers aside from the spawned wave. We strongly recommend tagging enemies when idle sleepers wake up. By doing so, you team won't be fooled and caught off-guard by some extra sleepers.

    Note[1]: Starting from R7 some blood doors have a somewhat unique wave spawn. Part of the wave spawns alerted by the door as always, while part of the wave spawns deeper inside the room, and probably won't be killed by a mine. That's something you need to be on the lookout, especially as a bio tracker user.

  4. Open the blood door and do some piu piu or bonks to finish off the strugglers.


Mine glitch
While we don't support cheese, glitches and other BS, we'd like to highlight this option which might prove useful to some prisoners. Since it's arguably a glitch, it could be removed in the future, so stay away from using it extensively, or even getting used to it.

Back in Rundown 1 mines explosions were not alerting sleepers at all. Apparently there was a fix ensuring that mines do wake up sleepers when set off. Interestingly, there was only a partial fix. When the mine sets off, it alerts only sleepers in the room where it was deployed. The sound doesn't go to neighboring rooms 1, and sleepers in these rooms don't care even if mine blew up just a meter away from them.

Coming back to the topic of blood doors. Let's imagine you have a lot of idle sleepers behind the blood door and you really don't want to fight them. While in most cases it's not a question whether you want to fight them - it's just a given. In some cases you can open the blood door and while it's opening you are able to get one room away. Meaning, that sleepers behind are the blood doors are 2 rooms away from prisoners. The following will happen: mine explosion (if deployed on the blood door) won't trigger any sleeper due to a described mine glitch, while those who survive the explosion won't scream and will simply move towards the prisoners. As stated in Stealth part of the guide, alerted sleepers don't scream in room 2, they only scream in rooms 1 and 0. Thus, by running 2 rooms away you are having a "silent mine" by default, but as well prevent blood door sleepers from screaming and alerting their idle friends. It might sound a bit complex, but truth be told, it is incredibly easy to pull off. Check the video below for some demonstration.


Scout behind the blood door.
Another situation that sounds really nasty. As scout triggering when the blood door opens might have several negative outcomes. 1st, you might get sandwiched if a scout wave spawns from behind. 2nd, scout wave can spawn ahead and break some valuable doors. However, scout behind a blood door isn't guaranteed to trigger. No idle enemy behind the door (including scout) will wake up until the door is fully open, even if mines trigger, or you start shooting inside. Thus, you have a window of opportunity to take down the scout before it screams. In this case, bio is a real deal breaker as you can pinpoint the exact scout location, open the blood door when the scout is in front of it, and kill it while the door is opening. Room layout will not always allow you to do this. However, it feels incredibly satisfying when done right. Keep in mind, blood door wave will stay behind the door and can block line of sight to the scout just like other solid obstacles. Having some HEL weapons will allow you to penetrate enemies and still hit the scout. If there is a slightly elevated spot in front of the blood door, it will allow you to shoot above the enemies and hit a scout with direct shots. Once again, it is not something you will always be able to make happen, but definitely give it a shot. Or there is always a mine glitch as said earlier.


▣ Special enemies
What is understood as a special enemy in GTFO is purely subjective, as most of these special enemies share some attributes with the rest of the cast: be it alert patterns, their moveset, or simply visual appearance. Consider this section a part of guide dedicated to enemies which you can't simply shoot in their face at all times.
◈ Scouts
If anything could be considered unique is a sleeper wandering around the room instead of being stationary. Despite the fact that scout is constantly moving and shown properly on the bio tracker screen and can be tagged as a moving enemy - it isn't alerted yet.

What does a scout do?
The scout is an enemy wandering around the room (just a single room, unless alerted it won't move to another room), and occasionally stops to spread tentacles. When alerted, scout becomes invincible for a short period of time and screams. This scream triggers a room where the scout is present, as well as spawns a wave. Wave spawn falls under rules discussed in Enemy spawns. Shortly after spawning a wave, scout becomes vulnerable to the damage again, and behaves in a way similar to a regular shooter.

Note[1]: Scouts do not have a predetermined path. However, it is not random either. Scouts are defensive by nature and move from one sleeper in the room to the other. As a result, if you clear half of the room - scouts won't go there and will stay in relatively close proximity to the remaining sleepers. If there are no sleepers present in the room but a scout - than its pathing seems to be random within the borders of the room.

Note[2]: What happens if multiple scouts get alerted? As previously discussed in the Max cap section of the guide, these waves will obey the max cap rules, but if they don't have "space" in this cap - remaining waves will queue and will spawn when you free this space by killing sleepers that spawned earlier.

What does trigger a scout?

Made a handy dandy guide/explanation on everything scout behavior related, give it a watch.

First, we need to identify what a "trigger" means in this case. Scout reacts to the same disturbers as other sleepers, but with 2 different outcomes when its "alertness bar" fills up.
  1. Spreading tentacles.
    Scout does it on its own, yet will stop and spread tentacles prematurely if triggered by:
    • Flashlight.
    • Players' movement: walking, sprinting.
    Note[3]: This can be utilized to lock a scout in a single place. It also means that it's generally safe to walk, or even run by/towards a scout, just be aware of other sleepers around.

  2. Screaming right away.
    This applies when scout is walking, or spreading tentacles:
    • Physically touching a scout.
    • Sound: shooting, hitting an asset, breaking a padlock, failing a hacklock, killing another idle sleeper within 4 meter range, another sleeper screaming in the same room when there is no scream cooldown.
    • 1.5 sec after touching a tentacle.
    • Dealing damage that's not enough to kill or stagger.

Please refer to the Stealth part of the guide to revisit what triggers enemies, but relate it to the scouts' trigger behavior.

Killing a scout with guns.
Much simpler on paper than using melee to kill them. However, many people tend to forget that not only a sniper rifle and weapons of a similar caliber can kill scouts. Here we are going to list some weapons (not all of them!) that are able to kill a scout and what you need to look out for when experimenting with different weapons, especially rundown specific ones since we are not covering each of them in details, just presenting a general idea. It is important to understand that some weapons can stun a scout when dealing enough damage (usually at the back of the head), than follow-up with a shot at any part of the body. This opens up a window for the 2nd and even 3rd shot, which is enough for many weapons to finish-off a scout.

As a rule, there are weapons that kill a scout when their range conditions are met:
  • Insta-kill a scout at any part of the body (Scattergun - R6 specific).
  • Insta-kill a scout at the head from the front (Sniper rifle, shotgun).
  • Insta-kill a scout at the back of the head (Revolver, sniper rifle, shotgun).
  • Insta-kill a scout at the back (Sniper rifle, shotgun).
  • Double-tap a scout: shoot at the back of the head with a quick follow-up at any part of the body (Dmr).
  • Double-tap a scout: shoot at the front of the head with a quick follow-up shot in the head (Revolver).
  • Triple-tap a scout: shoot at the back with quick follow-up shots (Revolver).
  • Triple-tap a scout: shoot at the back of the head with quick follow-up shots (Pistol) - no idea why someone would want to do it other than for fun.

Note[4]: Remember we've already discussed shooting enemies though doors in the Stealth part of the guide? It can be applied to scouts. You can land as many shots as you want during the door opening/closing animation and the scout won't react until door is fully open/closed. As a result, you can literally spam a scout with any weapon in the game, even though we don't encourage you to do so on a regular basis.

This list is not exhaustive, but something you may want to experiment with weapons as they keep changing, or new weapons are being added to the game. We are simply telling that there are different weapon options to kill a scout. No need to say that you can time shots with other players if needed (there is literally never a need to do it in practice). Some rundown specific weapons are a good fit for other combinations. However, these are rather exotics of the game and killing a scout with melee weapons is a way to go. Moreover, there is usually someone in a team carrying a weapon able to insta-kill a scout - let them handle it.

Killing a scout with melee weapons
First and foremost, every melee weapon is capable to kill a regular scout without additional help. However, there are some nuances which we will cover below.

Lets get rid of basic info about every melee weapon:
  1. Hammer / Spear.
    • Kill a scout at the front and back of the head at full charge.


    • 2 Players can time a full charge at the back of the scout to kill it without touching scout's head, where the 1st hit staggers the scout, and the 2nd one finishes it - these hits do not need to have a frame perfect timing. This might seem redundant, but will prove helpful later.

  2. Bat / knife.
    • Kill a scout with a full charge at the back of the head. Note, these weapons have a low range compared to the hammer or spear. Jumping before the hit is recommended, mind the ceiling.

◇ How to approach scouts
In the tales of old they say that scouts are perfectly self-aware and feel when prisoners fear them. Killing scouts is not that hard and usually comes down to confidence in what you are doing. When spreading out tentacles, scout is going to stand still. Thus, you can perfectly predict its posture. Moreover, even after touching tentacles, you still have a 1.5 sec window to take down a scout before it becomes immune to damage and screams. As a result, unless you are killing scouts with a long/medium range guns, and are most likely using melee (or short range weapons like shotgun) - you have to come close to the scout. In most cases you can literally rush it (as you don't care whether it will start spreading tentacles). Just pay attention to the environment around you, namely: other sleepers, and whether you can use some assets to your advantage, e.g. get above the scout and kill it without a risk of even touching its tentacles. Sometimes the scout will come to you on its own will - waiting for it and landing a hit as a scout approaches you will do the job. And literally anything in between works fine.

Note[1]: Scout will bend down when pulling back its tentacles - look out for this, as it might prevent you from landing a clean hit at the head. You can always adapt on the fly, just keep in mind that scout may change its posture if you are approaching it a bit too late with tentacles spread out. This is especially true for bat and knifes, as you have to land a hit at the back of the head.

Note[2]: Tools can be used to kill a scout. You can c-foam a scout if you need to nullify some risks, e.g. if there are multiple scouts close to each other. It's much easier to deal with scouts in such a way, but we do encourage you to use c-foam as a last resort and invest some time in learning how to kill scouts without c-foam. Other tools might prove useful as well:
  • A mine instantly kills a scout.
  • Sniper turret instantly kills a scout when landing a headshot (read: doesn't instantly kill charger scouts).
Yet again, we can't stress enough the importance of not relying on tools to kill a scout - treat them as a backup plan.


Scout variants
Shadow scouts - these are literally the same scout in terms of behavior and they should be treated in a similar way. However, you can't see them as clear as regular scouts. You would benefit from maxing shadow quality in settings - these will make their shadows more visible. We do perfectly understand that it sounds weird, but you literally approach them in the same way as regular scouts - it's just a question a practice and confidence spiced up with shadows quality.

Note[3]: Higher Shadow Resolution setting will make seeing shadows much easier. Truth be told, anything above minimum will make a significant affect.


Charger scouts - unlike their shadow counterparts, these scouts are perfectly visible. The gimmick here is the fact that just like any other chargers, these scouts don't receive extra damage when hit at the head. As a simple rule, you kill them in a similar way to regular scouts, but remove every option connected to their head. Thus, weapons that kills scouts in the back with one or more shots will do, timed melee hits with your teammates is a great skill to master, as well as occasionally relying on tools (c-foam for the most part), even though we encourage you to practice killing this scouts with melee without using c-foam, just for the sake of being able to pull it off when there is no c-foam to use.


Note[4]: Yellow syringes are golden when killing charger scouts, as you can melee them alone, which is a huge asset. Just remember, a hit at the back is still required! Any melee weapon will do, but knife.


Note[5]: Unlike regular scouts, chargers scouts don't shoot projectiles when alerted, but charge their targets in melee similar to other chargers. It's quite easy to mistake them for a giant charger when alerted charger scout appears in front of you.
◈ Birthers aka mamas
Mothers are considered to be the most dangerous enemy in the game, and for a good reason. Mother is the 1st mini-boss that appeared in the game back in R3. Moreover, she's the only enemy in the game spawning potentially infinite number of other enemies (put a boss from R6D1 aside), which is a big threat on its own as these additional enemies will drain your team's resources. As a result, you usually want to get rid of mothers asap without prolonging the fight longer than you should. It doesn't imply that you need to rush her like a headless chicken, even though with the right attitude it may work. In the guide we are focusing on regular mothers. For queens apply the same logic, just remember that queens are mothers on steroids.

Mothers typically inhabit specific environment: rooms and zones with typical layout, but there are lots of meatballs present. Sure, certain levels had mother spawning without this environmental hit, but whenever these meatballs are present in the zone, you might want to be extra careful, as it signalizes that mother is somewhere close.


Mother's behavior patterns.
  1. When asleep:
    Literally behaves similar to any other hibernating sleeper in the game with the same rules and conditions discussed in Stealth part of the guide. However, we cannot stress enough the importance of taking extra care when dealing with her.

  2. When alerted:
    Mother is the only enemy in the game right now that is not applying direct damage. When alerted, mother is generally not that aggressive and might take her time to approach you. How quickly she decides to charge players and engage with them depends on a several factors, these will be covered separately. Generally speaking, a mother has 3 actions she might do aside from moving around. 2/3 depend on mother having a line of sight on a player, as well as a distance proximity, where a line of sight is a straight line without any assets, walls on the way. It's important to stress that glass does count as an obstacle despite players clearly seeing a mother behind it!

    Note[1]: Some walls, or assets have holes, cracks or whatever else though which mother can see you, and she will spawn babies then. The most notable example is a catwalk.

    • Spawning babies - requires line of sight and distance proximity.
      Mother is standing still while locked in spawning animation. Regular mother spawns 20 babies at a time, which in their turn attempt to kill players. Queen (p-mother) spawns 30 babies. In both cases you can "spawn camp" babies and eliminate them as soon as they spawn, but remember, you are not obliged to do it and usually can focus on killing mother herself. The queen could be an exception as she's much tougher, and 30 babies are more dangerous than 20 babies :) Dealing with them at any other spot is possible as well, tighter choke points are generally better options (just like against most other enemies). Works especially nice if they are locked by a climb up/down animation. You can find a sample video below.


      Once the horde of babies is cleared, or thinned out enough - you can rush mother as her baby spawning machine is having a cooldown.

      Note[2]: Mothers can spawn babies infinite number of times with a cooldown. However, every regular mother has her own spawn cap of 40 babies based on our observations (similar to what queen spawns in a single birth). There is realistically no scenario you keep ignoring these babies unless you are staying in the cheese spot - which is incredibly disgusting on its own.

    • Spraying fog - requires line of sight and distance proximity.
      Mother keeps moving around while spawning fog. Apparently it has lower priority than spawning babies, and she does it if babies are spawned and she has line of sight on players while being relatively close to them. Quite frequently she spawns fog right after spawning babies because of the reasons mentioned above. The effect is quite self explanatory and purely defensive as she makes it harder for you to catch and kill her.

    • Screaming - doesn't require line of sight.
      The most harmless action she can possibly do. If anything, it opens a window of opportunity to charge mother and deal with her. The reason behind it is the fact that during the scream animation she can't perform other 2 actions - so it's safe to approach her. Well, as save as it gets.

Which weapons work well against mothers?
A frequently asked question, yet the answer in short ans straight - all weapons will do, but guns that are effective against bigger targets will shine when killing mothers.
◇ How to approach mamas
Just like mamas behavior, we are splitting this section on dealing with hibernating mamas, and fighting active ones. Obviously, there is more to say about alerted mother. The bread and butter of fighting mini-bosses in this game is the fact that they receive damage when hit in tumors located on their body. Other parts of the body receive little to no damage. These tumors aren't always visible from every angle/side, so you need to work around it. Mother has her tumors located on her back. Considering her posture, they are on top of her, but they are partially protected by her body from the front.

Killing sleeping mothers.
Works out as easy as it sounds, you simply need to gather enough fire power to kill mother quick before she spawns babies. Killing mother with yellow syringes is a fun gimmick, but you'd better off using guns. What you need to do is simply come close and start shooting together. You don't always need all 4 prisoners to effectively kill her. With the right loadout a single player can handle her (even though we don't recommend doing it solo unless you are confident in your abilities), in most cases 2-3 players is more than enough. However, there is very little arguments to focus on something else but a mother, unless there are several mothers you need to get rid of. A good way to safely kill an idle mother is to c-foam her by any means (launcher, nade, or a mine) - by doing that you'll ensure that she spawns no babies. However, if you have enough firepower to kill her quick, c-foam might easily be redundant and you may keep it for something else, e.g. for active mini-bosses, or alarms. Killing idle mother is not a problem on its own, just mind the environment - mothers tend to chill in screwed rooms.

Killing active mothers.
This part is a bit more interesting and you will eventually have to deal with it. Be it due to accidentally pulling a mother prematurely, or there is simply a script waking up her room. Long story short - you need to get used to killing active mothers. First and foremost, mothers are usually quite defensive and will take their time to approach you, so you can stay behind line of sight blockers, clear other active sleepers, then give mother some love.

Note[1]: Sometimes mothers will charge you right away, and that's a point to improvise, but usually they don't do it. However, they will charge you if you move at least 1 room away from them, and close all the doors connecting your rooms. That's something you may use to your own advantage, just don't accidentally force her to charge you unless the team is prepared.

Unlike dealing with sleeping mother, you can reasonably utilize c-foam more frequently. The main reasons are:
  • Mothers are incredibly mobile enemies and chasing them around the room might be exhaustive to say mildly.
  • Mother is not always point-blank close to you when she starts having a line of sight on you. A c-foam nade, or a tactical spray of c-foam launcher will do the trick to prevent her from spawning babies.

Note[2]: Due to a mother being incredibly mobile and quick, you might want to c-foam her when she stands still to perform one of the actions described in the previous section. Remember, you can run with a charged throw of c-foam grenade, or a charged launcher. Landing a single c-foam nade, launcher charge, or having 1 c-foam mine if you are playing passive will to the job.

There is a somewhat hard to describe balance between ambushing and actively charging a mother. If there are some other active sleepers on top of you, probably using line of sight blockers so that mother doesn't spawn babies while you kill other enemies is usually a good call. However, when the mother is left alone, you are not obliged to be passive. Sure, you may wait for mother to come around the corner and then kill her just like she was sleeping, potentially c-foaming her for extra confidence. However, there are 2 main options how you can fasten this process if needed:
  • Charging mother during her scream animation.
    There will frequently be a situation when mother is relatively close to you and you can cut the distance to her relatively quick. If you hear a mother screaming reasonably close (or even see her tag if your team has bio tracker), it means that you can get in the open field and charge her, ideally c-foaming her as you approach. Remember, she cannot spawn babies during the screaming animation. As a result, you no longer fear having a direct line of sight on her.

  • Falling back behind a closed door.
    If prisoners get in a separate room from a mother, and shut doors between these rooms mother's behavior will change and she'll attempt to break in this room allowing players to catch her quicker.


    Note[3]: For whatever reason, explosive mines tend to work poorly against mothers even if the explosion visually hits her tumors. We don't recommend relaying on explosive mines against mothers. Mines in general tend to be unreliable against enemies which don't take body damage (or rather have take damage, but it tends to zero).
◈ Tanks aka papas
Tank is the 2nd GTFO mini-boss that appeared back in R4. While he's a force to reckon with, he is arguably less threatening than a mother. Despite still being quite threatening, tank is a much more conventional enemy than a mother - he is dealing damage on his own, and cannot drain your resources indefinitely when staying up for a long time. In the worst conditions, he it more likely to waste your time, rather than wipe a team on his own. Thus, being skillful enough to get rid of tank quick is a valuable asset - as you may occasionally face a tank when something else is going on: a rising fog, alarm, or any other threat. However, not every encounter with a tank has this additional variables. This leads us to the 1st conclusion about tank: while you want to get rid of him, he isn't always your top priority and you can take your time when dealing with a tank more often than having to rush it.

Unlike mothers, tanks don't have a specific environment hints. Thus, there is very little to say about visually spotting them in advance, but simply keeping your eyes and ears open.

Tank's behavior patterns.
  1. When asleep:
    Literally behaves similar to any other hibernating sleeper in the game with the same rules and conditions discussed in Stealth part of the guide. However, being cautious is still recommended.

  2. When alerted:
    Papa has a certain mix between being active and passive. As a rule of thumb, he'll try to get in position when he has line of sight on at least 1 prisoner. When having this line of sight, he'll perform a tongue attack dealing 14 hp damage,- it's incredibly similar to what you've previously seen titans doing lots of time, but there are certain differences. Let's consider everything tank does before proceeding to fighting him:

    • Catching up on prisoners.
      As discussed earlier, tank will try to be in position to attack prisoners. While it's true for almost every sleeper in the complex, tank does it with a little twist. He will get closer to his target to get in range of a tongue attack lock on. When in range and having a line of sight - he'll remain in this position. If not in the same room with players no matter how close to a player or whether there is line of sight present, he will sprint towards the nearest entrance to said room. These is true for doorless room dividers as well. Tank will stop sprinting when being in the same room with players, and having at least 1 prisoner within ~20 meter range. Consider a generic condition when a tank spawns as a part of a wave under normal conditions - 2 rooms away. That's why you'll always see him breaking into your room like a mad lad. If not having a line of sight for a short time (3 sec or so), he'll attempt to close on the position of the player that he saw last. When having line of sight and performing tongue attack, he will move passively instead of actively trying to catch up on you.

    • Tongue attack.
      Tank's tongue attack is quite similar to what titans do at the similar lock on range. However, there are some significant differences. 1st and foremost, tank is able to perform up to 3 tongue attacks simultaneously, where each prisoner can be hit by a single tongue at a time. Meaning that tank can potentially hit up to 3 prisoners standing in front of him at the same time - his aiming principles are similar to other sleepers. Namely, papa only targets players that are in front of him. Second, tank has infinite tongue range. True, he has a limited lock on range, but once he starts attacking you only getting behind cover will prevent you from getting hit, you can't simply get out of attack range. Even if you manage to get across the Solar system when he's already locked on you, the tongue will reach its target provided that there are no line of sight blockers. When in position for a tongue attack, tank will behave quite passive and won't actively try to cut distance to his target.

    • Swinging with his fists.
      Conditions and even animation is identical to what chargers do. When having a prisoner close right in front of him, tank will dash forward swinging his fists. While you can dodge is, usually you don't want to be in position for being slapped by a tank.

    • Scream.
      Tank will eventually scream like any other enemy, comparing it to giant sleepers in this game he can't attack you while doing this so you can freely run through him.

Who is the tank's focus?
An incredibly important question, we'll discuss how to utilize this knowledge in the following sub-part dedicated to fighting a tank. Tank's focus pattern are similar to other sleepers - a random prisoner when spawning, and the last player who damaged it in combat. As a rule of thumb, the tank will face you when you've deal damage to him.

Which weapons work well against tanks?
The answer is similar to what we've said about birthers - all weapons will do, but guns that are effective against bigger targets will shine when killing papas.
◇ How to approach papas
When discussing how to combat a tank, we will keep in mind killing already alerted papas from the get-go. Similar to other bosses and mini-bosses, tank receives little to no damage at his body, but tumors on his back receive full damage. The trick is that it's quite hard to deal damage to the tank when he's facing you due to a very simple reason - you don't have a clear sight on meatballs located on this back, and shooting him in the face is a waste of ammo. Does it mean that you are helpless against a tank when facing him a lone? Not exactly. However, it means that it's beneficial to spread your team in 2 groups when fighting a tank and play a pinball of a sort. These are the things you usually want to do against a tank in general:
  1. Split your team.
    First, you need to split your team (or part of the team dealing with a tank) at least in 2 groups, where splitting further doesn't really benefit you while fighting a tank. Ideally, you want to have at least 1 weapon which is good against giants from each side. During the fight you play a sort of a pinball with the tank. Team A shoots a tank at his back -> tank turns to team A -> team B shoots a tank at his back as soon as he turns away -> tank turns to team B -> repeat.

  2. Have some actual cover.
    As described in the previous section of the guide, tank's tongue has a limitless range once locked on you. As a result, you may want to actively use cover while fighting a tank instead of taking extra hits for no reason. Remember that a tank will stay in place when having a line of sight and lock on range on a player, but will keep approaching prisoners when not seeing anyone of them for a brief moment (aprx 3 sec)? You can utilize it by literally locking a tank in 1 place by constantly picking out of your cover (which you will to when shooting), or vice versa - hide and lure him to a different spot.

  3. Bring tank to a good spot.
    Usually you don't want a tank to stay close to the wall or a random environmental asset. Tank may not always face players in a perfect way and will randomly cover his back with whatever there is close to him. It's not a must, but having a tank in the open, or at least relatively open space is arguably a good thing.

Here is a brief showcase of what the described above looks like in reality:


And that's it in terms of fundamentals when fighting a tank. Is there anything more? A lot of variables might come into play when fighting a tank and we are going to list them as separate points which will hopefully help, or at least provide some ideas alternatives how to deal with a tank.

Fighting a tank solo.
Despite being an enemy designed for at least 2 players to fight against, there is still a way to damage a tank when he's facing you (and he will do it when you are facing him on your own). First, when having all tumors in place, some of them are visible from the front and you may shoot them off. It shouldn't be a big problem if you have a sniper rifle per se, or a similar weapon. Having a high ground and looking at the tank from the top allows you to see even more meatballs which you can shoot. Finally, when a tank screams, he will have a bend down animation, and you can shoot meatballs during this animation. However, these are arguably the last resort options and you will fight a tank infinitely better when fighting him at least in duos. Even though you can definitely utilize these tips in other scenarios.


Tools vs tank.
We strongly recommend you to learn how to fight a tank without tools, but you can definitely utilize them to your own advantage.
  1. Turrets.
    Turrets will shoot a tank when in range, but they don't care if they are shooting front or back. Thus, deploying them randomly is not recommended. However, lets imagine that you are fighting a tank alone and you have a damaging turret. You can deploy a turret, and lure a tank to stay with his back turned to the turret. Tank won't turn around when tool is damaging him - you just need to keep a tank in front of the turret. When having a few meatballs remaining, turrets are incredibly likely to miss the remaining tumors and shoot him at the body (turrets still aim of the head, not tumors!), and that's not something you want to do, but you can surely utilize turrets to deal the initial damage. Overall, we don't recommend this as a go-to option.

  2. Explosive mines.
    There are some clear evidences of killing tanks with mines. However, we do not recommend anyone to get into these strat. 1st, it's a significant tool waste. 2nd, it's extremely unreliable. We strongly recommend to avoid using mines against a tank.

  3. C-foam.
    It is possible to c-foam a tank, which will help to kill him incredibly quick. Note that tank doesn't stay frozen that long. To begin with, we don't recommend using c-foam launcher. You will never use it reasonably quick during the active combat, and even if you do - it's a waste of tool. Instead, we suggest using c-foam nades and mines.

    • C-foam mines.
      C-foam mines freeze almost every single enemy in GTFO that triggers it, and tank is not an exception. The idea is incredibly simple: you need to deploy a c-foam mine high enough for tank to trigger it, and avoid smaller enemies accidentally triggering it. It can be done both prematurely as a part of your defense or as a part of the active combat. We've described it in detail in C-foam Mines section of the guide, you can find a recording of c-foam mine working against a tank in practice.

    • C-foam nades.
      These are also capable of freezing a tank, but there certain conditions for it. When throwing nades in the tank's face, you need to land 2 nades for a tank to freeze - 1 nade is not enough. When throwing nades at the back, however, just 1 may be enough. We say "may be enough" because of the glitch currently present in the game. The idea is, as a client you can c-foam a tank with 1 nade provided that it lands on his tumors, not on the body itself. Removing some bobbles seems to negate this option, potentially it just makes it harder to land sufficient amount of c-foam on tumors.
      Please, find recordings of both cases below:

      2 c-foam nades:


      1 nade portion glitch:


Melee vs tank.
You can kill a tank with a melee, and unlike dealing with a mother it actually makes sense if you need to conserve some ammo. The only downside - you need time to accomplish it. However, if you are not in a rush and feel like doing it, or you literally have no other option - go for it. All common principles apply, you just need to be close enough to charge a tank, land a hit and get back to cover. Yellow syringes and melees that are good against giants help a lot.


Everything we've considered above was about fighting an active tank. When it comes to dealing with sleeping tanks, we recommend you to get in good positions for fighting as soon as you pull it. The point is that after receiving damage tank will start wiggling and rotating - splitting in advance is definitely a good thing unless you are c-foaming it and killing a tank asap while it stands still.

As a final word of advise, or rather a reminder: you don't have to rush a tank in most cases. Quite frequently you can even have an active tank for a while without having lots of consequences, just make sure you keep an eye on it.
◇ Immortal
Immortal is a variation of a tank with several minor differences:
  • The 1st one being relatively obvious - he is technically immortal. "Technically" because he still receives damage, but with a drastic damage reduction. So there is no was it can realistically be killed in a normal game without mods or cheats.
  • The 2nd one, he is a bit more aggressive than a regular tank, meaning that he is more tempted to spring towards you, so keeping an eye on him is advised.
  • Immortal has several animations missing, such as climb ladders, that's another reason to look after it.

How to approach Immortal
Since Immortal is not an enemy you are planning to kill in a regular game, there is always a need to avoid direct contact. In general, basic rules of dodging tanks described in How to approach papas section of the guide apply, with peeking out of the cover, and such. There are 2 basic conditions you might have while Immortal is chasing you:

  1. Normal level progression.
    Your team is normally progressing through the levels, looks for resources, etc. In ths case it usually makes sense do dedicate just one player to take Immortal's attention, while the rest of the crew does their things.

  2. Dealing with alarms.
    The other condition is slightly more tricky, and you need to do an even where the entire team is needed (at least because of team scans). It's 100% layout dependent, but there are some advises we can give:

    • If you are planning to set up defenses, such as turrets, deploying mines - make sure to bring your friend inside 1st, then deploy whatever you want, otherwise Immortal will waste some of your resources.
    • If Immortal is blocking your objective, e.g. guarding a scan - just fall back and let him chase you. Rotating around the area like this is usually what you need to do rather than tanking hits (unless you are confident in doing it).

Note[1]: Despite the fact that Immortal is unkillable, shooting him has its own applications when drawing his attention. Lets say you are a man responsible for keeping Immortal busy as described in condition 1 above, and Immortal besides to leave you and switches focus for another player. Damaging him (shooting 1 bullet will do) will switch Immortal's focus back to you.

Note[2]: Immortal is resistant to c-foam, so using it against him is not worth it.

And that's really it about the Immortal which most player will use while facing him, otherwise he's not that much different from a regular tank.
◈ Snatcher
Snatcher is an enemy that 1st appeared in R7, and as the name suggests, he snatches people. While on the surface snatcher might look like a complex enemy, it is actually not hard to deal with him.

Let's have a look at what snatcher actually does in details:
  1. Spawn and initial focus.
    Just like any other alerted enemy, snatcher focuses 1 random player. However, unlike other enemies, snatcher won't change its focus when receiving damage from another player - he will keep chasing focused player.

  2. Snatching a player.
    After approaching a focused player and having a line of sight on him, a snatcher will attempt to grab a player. From a player perspective, there are several ways to avoid being grabbed: stagger/kill a snatcher, getting out of grab range, or get behind a cover.

    Note[1]: Player has to block LOS (not just cover your torso), otherwise snatcher is still able to grab him.

    Note[2]: When initiating a grab animation, snatcher is not static, he still moves forward, so he might get around the corner and restore LOS on a targeted player.

    Note[3]: Snatcher initiates their grab when their focus is within 5 meter range they have a LOS. Its attack actually has a range of 8 meters, but it's really hard to get out of the range when running away horizontally, because snatcher keeps going forward while he's attacking. However, falling off somewhere to gain this distance should work.

  3. IF player is successfully snatched and snatcher manages to get away with it, repeat from step 1.
    A snatcher attempts to run away while carrying a player (note, player doesn't show at the map at this time!) while dealing damage. The grab itself instantly deals 5 damage, + 12 additional damage overtime (3 dmg per second for the initial 5 seconds of being snatched), meaning 17 dmg combined. Snatcher keeps player for ~7 seconds. If player has less than 17 hp when grabbed, snatcher will release him earlier in a downed state.

  4. ELSE snatcher will run away and repeat from step 1.
    This will happen if snatcher misses his attack, gets staggered, or loses focus on its target.

    Note[4]: Snatcher gets hard staggered based on the damage received, and can get staggered at any moment, but while carrying a snatched player. Thus, you can even stagger him on your own while he is trying to grab you. Weapons that work well against giants should do the trick.

Note[5]: When snatcher gets staggered by taking enough damage, the moment he recovers instead of facing the player while running away, he will ignore them giving you an opportunity for that sweet back damage.

Dodging a snatcher by blocking LOS:


Dodging a snatcher by getting out of range:


Staggering a snatcher during his attack:


Note[6]: Snatchers are c-foam resistant.

Note[7]: Snatcher's head has high damage resistance - shoot any other part of his body.

Note[8]: 1 mine is enough to stagger a snatcher, which could be useful. 5 should be sufficient for a kill, even though we advise against using that many mines to kill a single sleeper, especially since they might be inconsistent if snatcher takes damage to the head.

Snatcher vs mines:


Note[9]: Snatchers chase their focus for 25 seconds before loosing their interest.

Snatchers vs doors:
There are 2 major points to consider when closing doors on snatcher.
  • Snatchers have their own cooldown on hitting doors ignoring the global one.
    In Layman's terms, they will chew through doors much quicker than regular enemies. Global cooldown is also referenced in the Interesting finds section of the guide.


  • Snatchers clip through doors while breaking them.
    Meaning that you might not want to deploy your regular cross-mine against them.


Note[10]: Sometimes you'd better get snatched. Sounds counter-intuitive, but lets say you are stealthing a very sketchy room full of sleepers, and a snatcher is about to grab you. Resisting could draw unnecessary attention and alert the room. Such situations literally never happen, but it's something you might keep in mind for the future. The snatch itself doesn't alert sleepers, they also don't care about you while you are being transported.
▣ Summary - words of wisdom

As we've said at the guide introduction, and stressed it multiple times in various parts of the guide - it's not exhaustive, and every gameplay scenario combines knowledge from multiple points covered in the guide, and even things we decided to omit if we felt like they are generic or self-explanatory. Please, don't treat anything we've said like it's in the vacuum. As a summary, we'd like to list some of the pieces of advice we'd give to a new player. You know the drill - explaining core concepts of the game to a team of new players who need someone to show them the ropes. These points aren't listed in order of their importance or something similar.
  • Staying at 20% HP is fine.
    Most newer players instinctively heal whenever they can. However, you health recovers on its own up to 20%, so it's kinda infinite resource. As counter-intuitive as it sounds, players can actually afford more ballsy gameplay style while having just 20% HP in most cases as there is nothing to lose. It makes sense to heal before something threatening happens: an alarm, boss fight, etc.

  • Navigation is the key.
    It's about your general feel of navigating though a new level you aren't familiar with. As you keep gaining experience, keep paying attention to environmental clues, as well as using terminals to their best.

  • Don't freak out.
    As dumb as it sounds (yeah, giving advice on your own emotional condition, sounds like a plan), it's true! Most scenarios you are facing aren't that terrifying if you approach them with a cool head.

  • Analyse your mistakes.
    Did you just fail an expedition, or something else happened which you aren't happy about? Especially while not having lots of experience, try to analyse what was the root cause, what was the reason things went south? If you are playing with your friends - these discussions and speaking out loud help all of you grow as players and eventually beat the level instead of beating your head against the wall.

  • Be smart about burning your resources.
    We've already covered meds, but you'd better be rational about resources you use. On the one hand, every use of any kit gives you ~20% of something. Be it ammo, health, of removal of infection. In the ideal world, you want to avoid wasting resources and make use that you have space for the use of resource you are about to consume. On the other hand, you might want to minimize time of backtracking around the level. As a rule of thumb - burn smaller resources 1st, keep bigger kits for longer period of time until you need to use it.

  • 🧀 Cheesers suck.
    That's right - DO NOT ever get used to cheesing, that's an advice from the bottom of our hearts. If you struggle with something specific, yet there is a cheese option to nullify the difficulty - don't take this route. You'll become a great player if you break though the actual difficulties instead of avoiding them. You perfectly realize where it's going, if you use cheese whenever you can - you'll never learn how to play a video game. Why even cheese in a video game? :D

  • Assume the worst.
    Just like any other video game, GTFO has a system of triggers, where something happens if conditions are met. Are you about to pick up the objective item / complete a stage of your objective? Maybe you are entering the extraction scan, or do anything major? Assume that something bad is about to happen, be it an alarm, some sort of environmental threat, or anything else. Assuming the worst helps a lot during blind playthoughs.

  • Trust issues.
    Assuming that you are playing with a group of friends and you are confident in them being adequate (as you can always encounter a troll, or event a drunkard while playing in a public lobby - these are rare, but it happens sometimes), you may want to rely on your teammates. This covers information they provide, as well as what you do together in combat.

  • Setting high goals, or keep them reasonable.
    While we do have disagreements on this point even within our team, I (it's me, Cyber) would absolutely argue that going for the most difficult objective is more fun than learning the base level 1st, then moving with harder objectives. Czlopey on the other hand favors being reasonable when playing some of the harder levels (hey R4E1 Extreme) and frequently prefers learning main part of such brutal levels than going for the harder objective. Decide for yourself, but in the end of the day - aim to eventually close all objectives, you'll definitely learn quicker by doing so.

  • Don't believe everything you hear, but don't neglect it completely either.
    GTFO community has a lot of myths, and if you hear something sketchy - you'd better verify it. Some of the craziest tricks we know come from other people, while a lot of myths in the community are just misleading. Remain critical thinking.

  • Sometimes there is no right answer.
    Many in-game scenarios can be resolved in a number of ways. While some of them are more optimal than others, you aren't obliged sticking to the only solution. Experiment and have fun, it's a game in the end of the day!

Some advice on graphic settings.
We strongly recommend keeping Shadow Resolution at least above minimum. Higher shadow resolution allows you to see shadow enemies much better, which might be a deal breaker when fighting shadows. The other thing worth paying attention is your FOV. The default FOV value of 55 is a joke. Toy a bit and choose value you are comfortable with, something around 90 will usually do.

Key binds.
Crouching using control is an option, but C is used by many players as an alternative. Melee (which is a shove actually) doesn't make a lot of sense in its default spot. Many people reassign it to Q. At this spot it's much easier to use shove and switch to melee at the same time in a much more convenient fashion.

Gameplay.
Most people playing this game we believe set Crouch toggle on, as well as Stand on jump is a real life savior when something goes wrong during the stealth. It's also recommended to switch Auto reload off - it makes sense to be in control of when you reload.

Thanks for reading!
And that's it for the time being. We might add some more generic advice in the future, but later. As for right now, we do hope that the guide will prove useful and we managed to tell you something new and interesting. Good luck and have fun!
▣ Interesting finds

This part contains some interesting facts about GTFO which never found their place in other sections, but it still might be interesting to know about them. It may be updated anytime without further notice, while some points might shift to different parts of the guide in the future.

Sleepers vs doors.
Sleepers have a global cooldown on hitting doors. More sleepers stacked up behind a door doesn't help them break it faster. If sleepers break though multiple doors at the same time, it'll take them longer to break each separate door. Cooldown applies to all doors at any time.

Silent Turrets
If the turret is placed one room away from the sleeper and other sleepers have no line of sight on the turret they will completely ignore it.
Be warned that the only way to break the line of sight is a solid wall, objects and models don't hide the turret. In addition, it works on every turret but sniper turret is the most reliable at hiting the target but can always miss the head.


Bots with Bio
For the time being, bots seem to have little to no cooldown on bio, can track enemies omnidirectionally in a 48 or so meter radius, and compared to regular biotracker it has no limit on tags meaning they can tag ALL of them. If there are too many active enemies the game will tank in performance every time bot attempts to do it.
Even though it's incredibly close to cheese, you might consider giving bio tracker to a bot if you have one in a team. It's especially true for levels where you might need 2 bios - just a single bot will do.

Cfoamed Enemies can be biotracked
Sleeping cfoamed enemies become "active" on bio tracker for the rest of the level.


Big enemies don't wake up after a shove
Any enemy resistant to shoves during combat won't wake up if you shove them while they are sleeping:

30 Comments
Czlopek  [author] 2 Apr @ 1:39am 
Most of the stuff is up to date because they didn't change anything. We definitely should update it though and add the new things.
Volkayno 1 Apr @ 4:31pm 
Masterpiece of a guide, is this uptodate ?
21 24 Nov, 2023 @ 11:56am 
one of the best guide i ever read in my life
DaisyComment 20 May, 2023 @ 6:25am 
This is really detailed. Thank you:steamthumbsup:
Czlopek  [author] 7 Aug, 2022 @ 9:58am 
it's based on weapon precision multiplier some guns do more damage to weak spots while others not, we already have a sprite sheet on weapon stats but if you don't like it gtfo wiki maintains pretty accurate statistics on each gun.
epsilon_sigma 7 Aug, 2022 @ 8:38am 
If you want, I could run more tests to parse the damage discrepancy. From what I gathered, it's either headshots, or melee. Because anything less than crits is a waste of ammo.
epsilon_sigma 7 Aug, 2022 @ 8:37am 
By the way, I figured out why I was having a lot of problems with combat, and it didn't dawn on me until I did some rudimentary testing: Apparently, the Sleepers are nigh on bulletproof when it comes to body shots. Or really, anything that isn't a headshot, or a high caliber weapon.

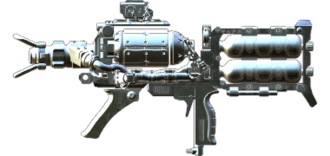
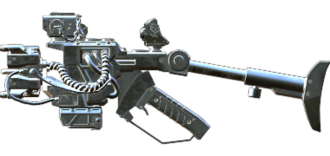
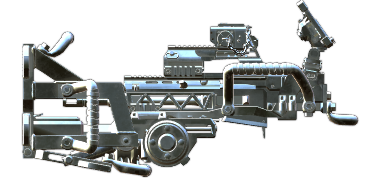
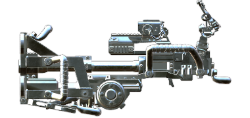
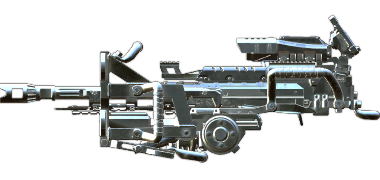
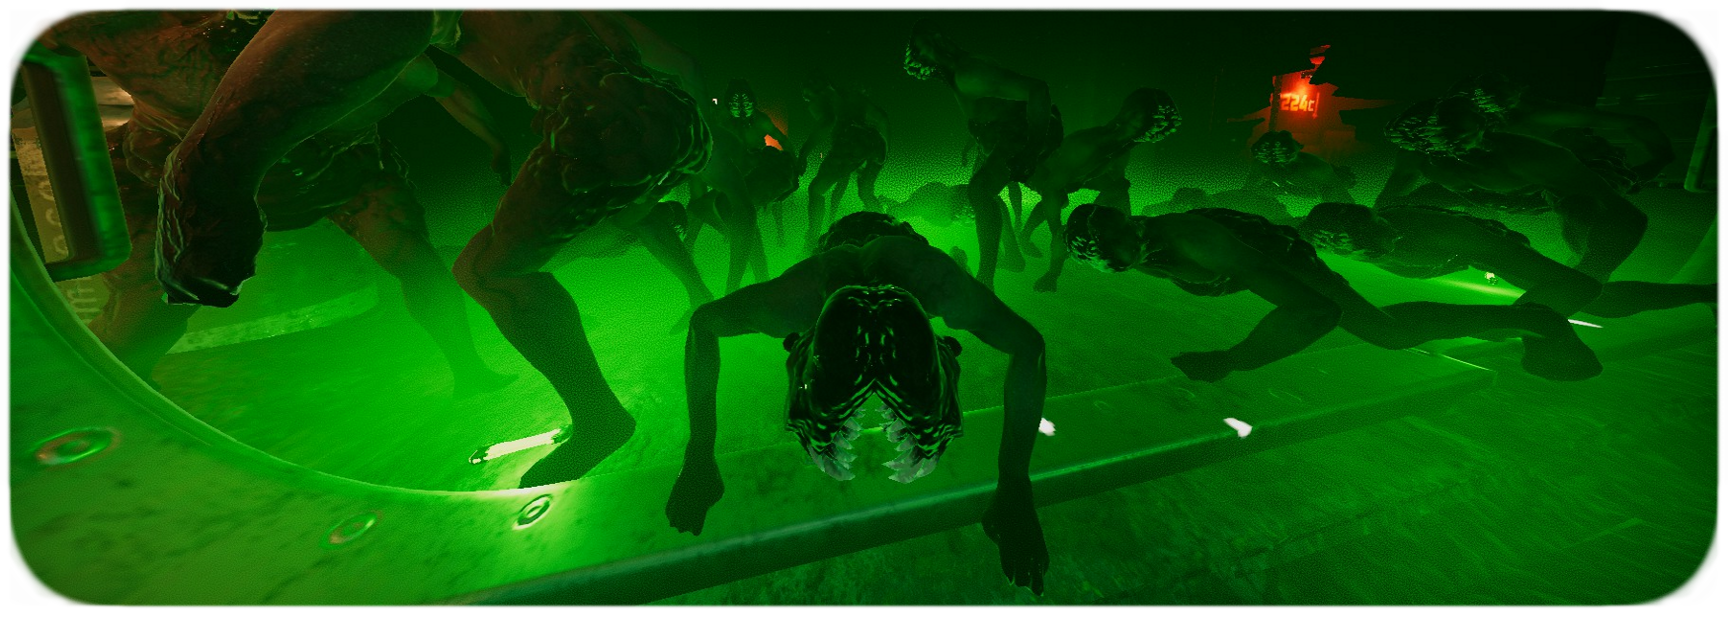
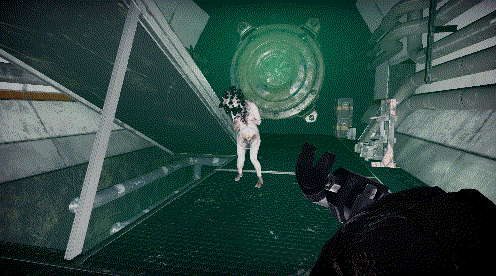
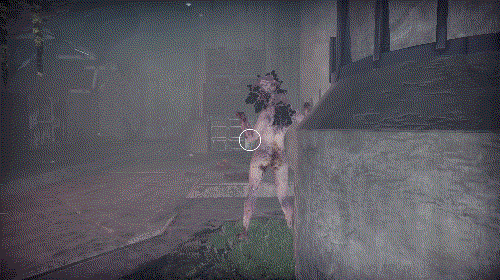
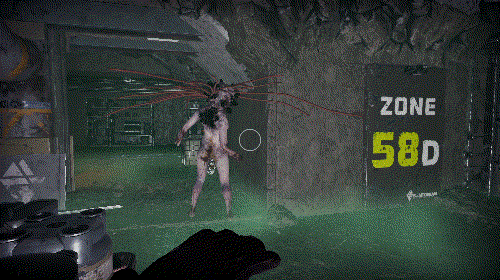
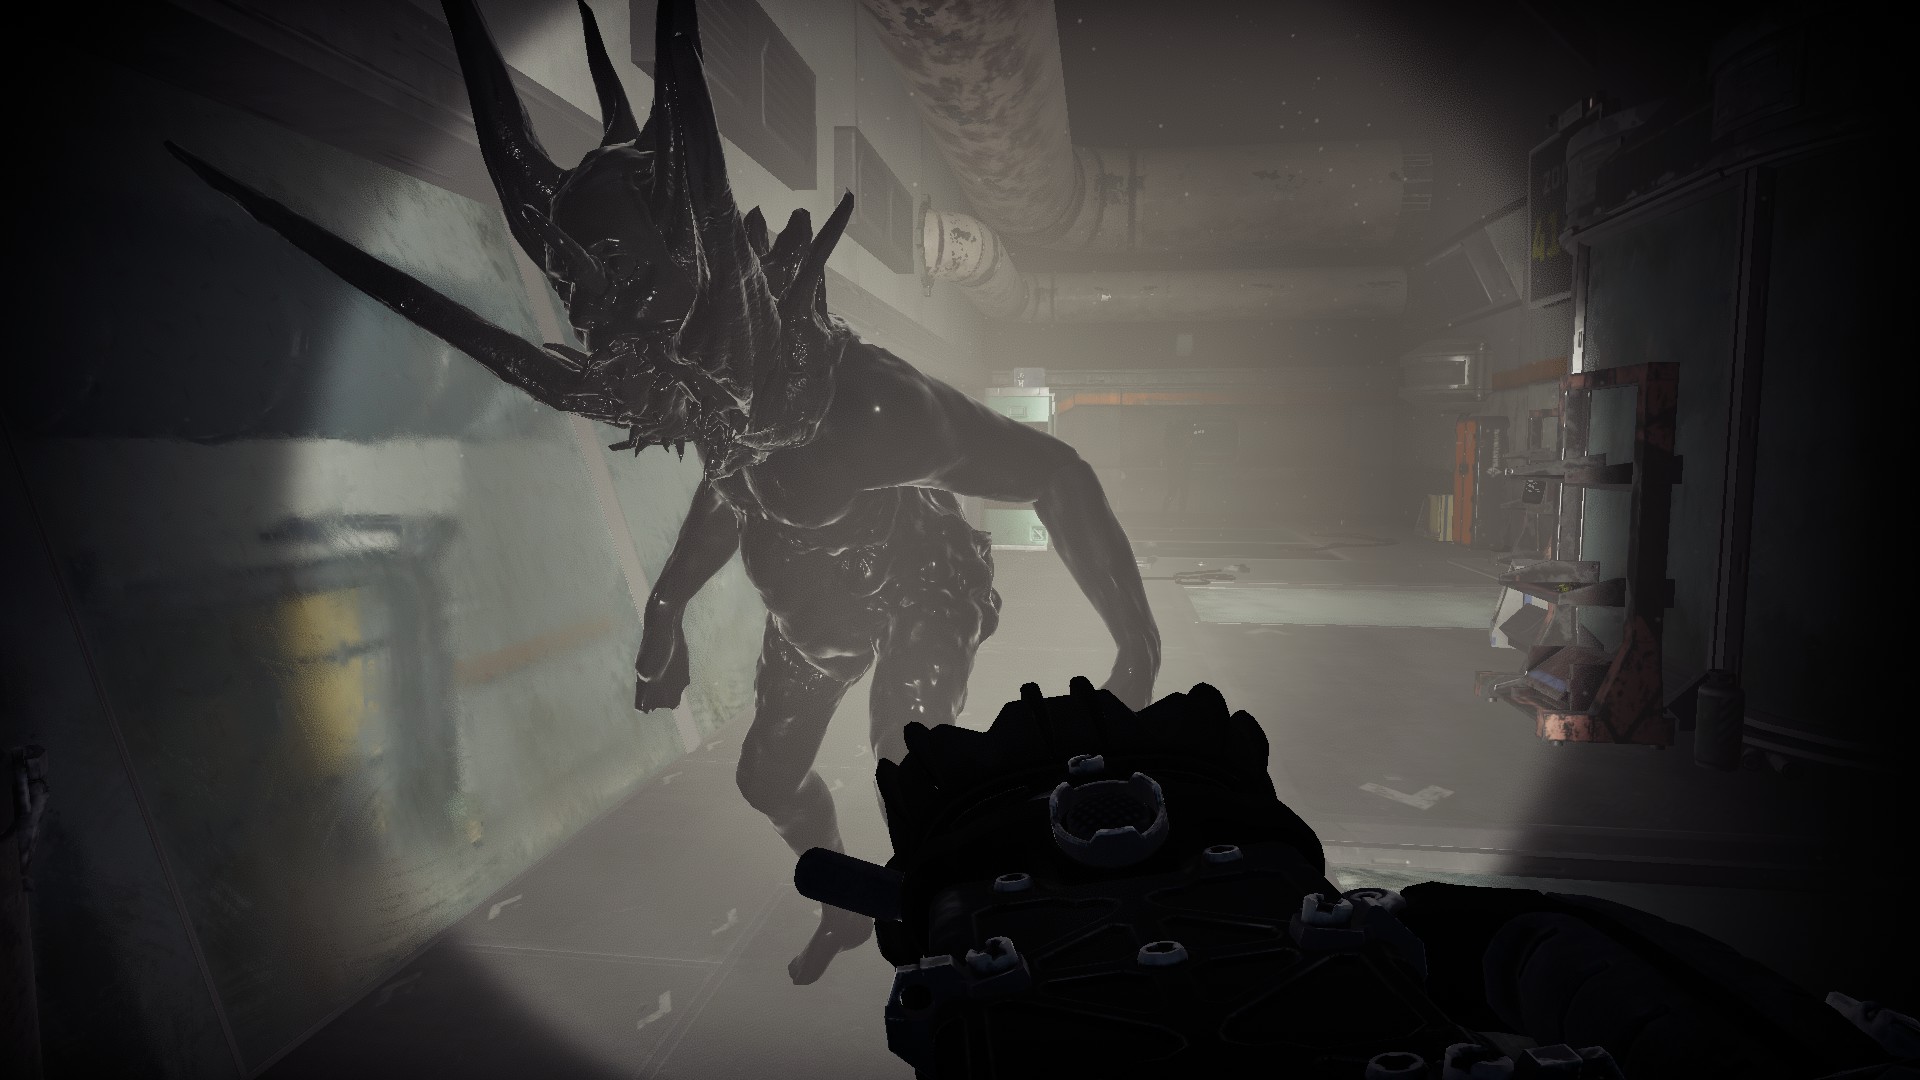
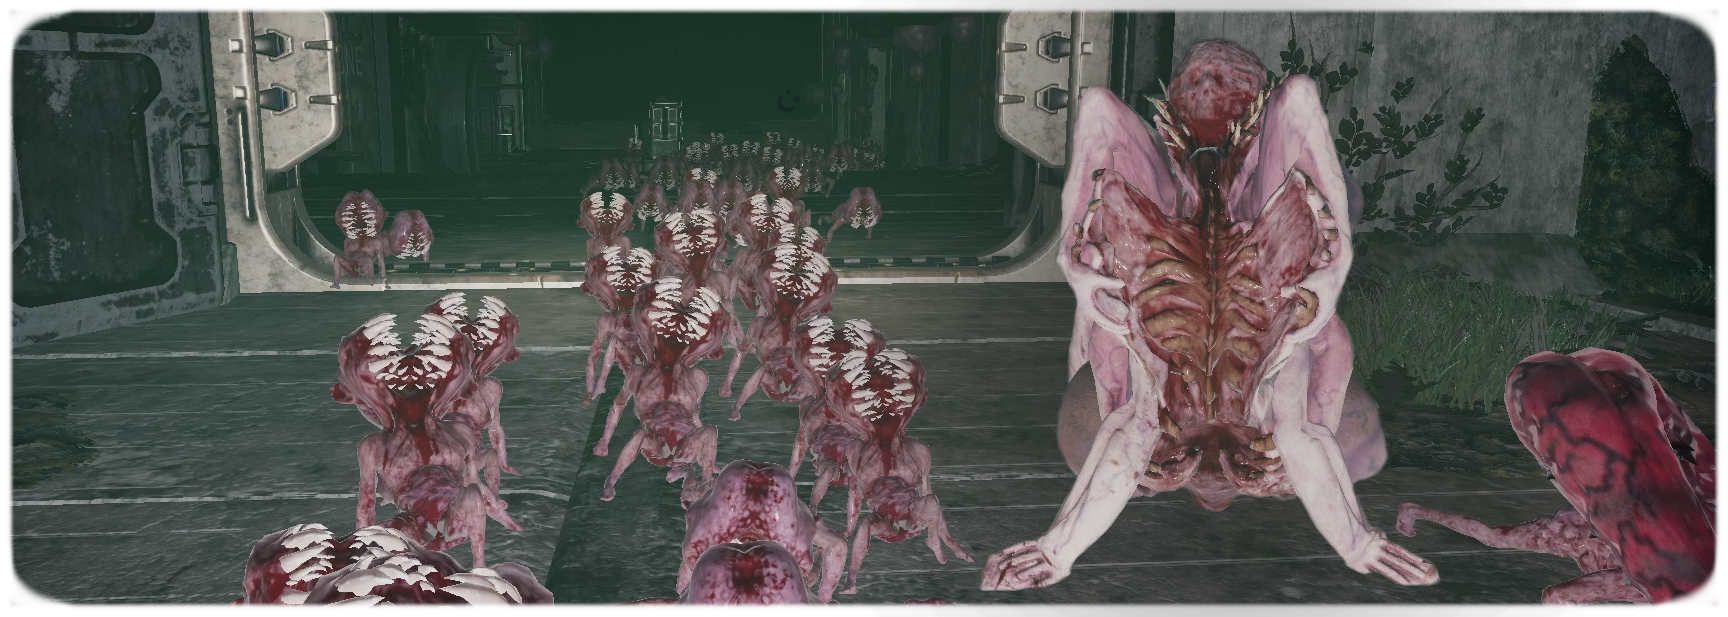
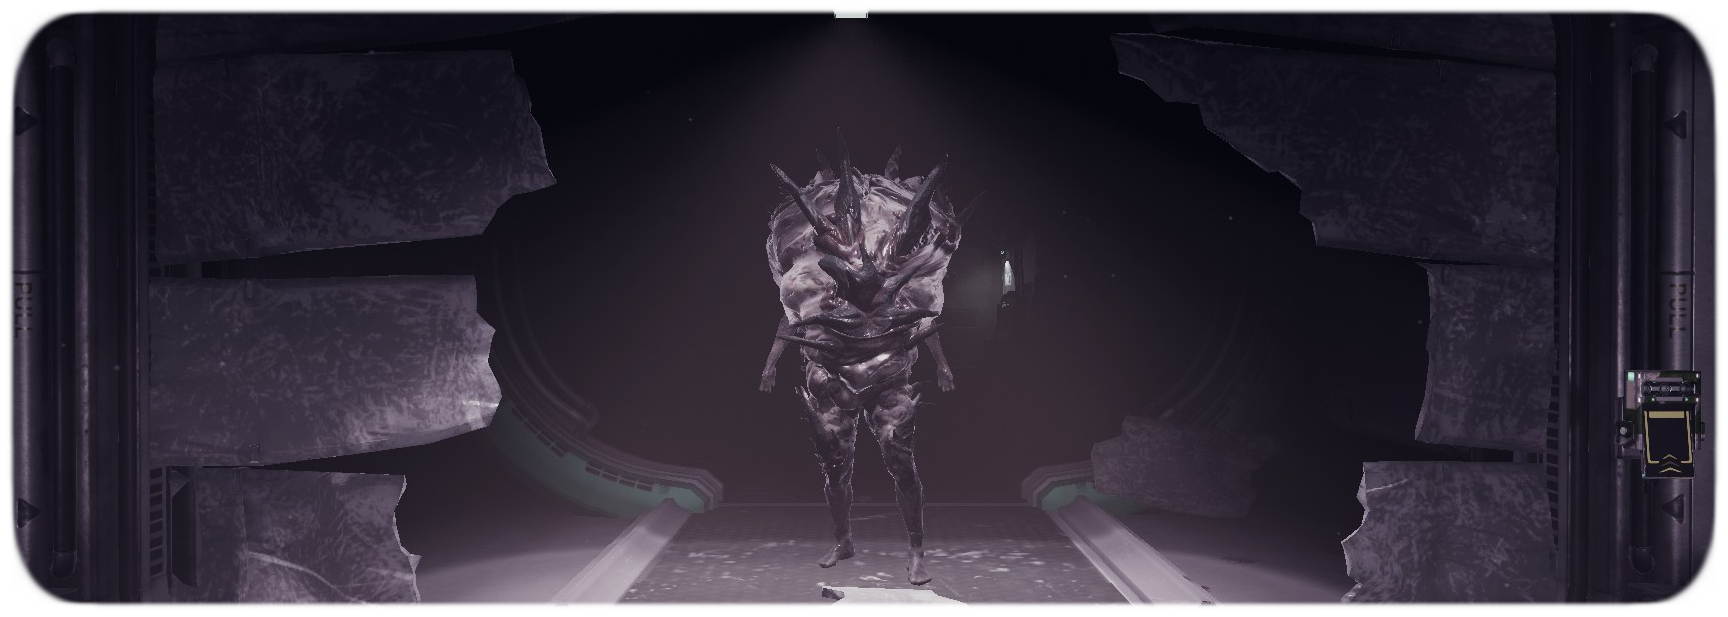
From a quick and dirty test, it takes around 4-6 rounds from the standard AR, versus 11-15 when explicitly missing the head. That's a HUGE difference, from a quick burst to literally half your magazine, for one small Sleeper. This is also why the Shelling low-caliber handgun feels pretty decent to use, since video game logic dictates that most handguns need headshots to be effective. On the converse, this is why the Techman LMG is downright terrible to use: You can't spray wide crowds on account of the DMG resistance, and high recoil and windup time usually mean you have to barrel stuff them to get the desired effect.
Papazhoom 10 Jun, 2022 @ 3:27am 
nice
Khaibit 26 May, 2022 @ 12:42am 
Thank you!
Czlopek  [author] 25 May, 2022 @ 5:35am 
It doesn't, they see it as a closed door.