Battlezone 98 Redux

Battlezone 98 Redux

58 ratings
The Multi-Player Map Editor for Beginners
By Beldeth
This document provides some basic instructions for Battlezone 98 Redux’s map editor and tools. The editing tools provided with Battlezone 98 Redux are covered by the license agreement at the end of this document. Please read the license agreement before using the map editing tools. These tools are completely unsupported and as such are not guaranteed to work under all conditions. Use at your own risk.
   
Award
Favorite
Favorited
Unfavorite
Introduction

This guide provides some basic instructions for Battlezone 98 Redux’s map editor and tools. The editing tools provided with Battlezone 98 Redux are covered by the license agreement at the end of this document. Please read the license agreement before using the map editing tools. These tools are completely unsupported and as such are not guaranteed to work under all conditions. Use at your own risk

Introduction
The following is a basic outline for creating your own singleplayer and multiplayer maps.

Note: These tools were created to build Battlezone, so you’ll be using the exact same tools the developers used to make the game in 1997.

This document will show you how to make 2 kinds of maps: Deathmatch and Strategy.

For the purposes of this guide we will be using the mapname multdm07. We suggest using a higher number for your own map (to avoid duplicating current maps).

Where to find the Battlezone 98 Redux editor
To find and get started with the editor you’ll want to go to the following directory within windows explorer.

Default - C:\Program Files (x86)\Steam\steamapps\common\Battlezone 98 Redux\Edit
Or - YourSteamInstallLocation\Steam\steamapps\common\Battlezone 98 Redux\Edit

In here you’ll see all the relevant files to get started, while in this folder you’ll want to Shift + Right click in the folder, select the “Open Command Window Here” option to load the Command window. The command window is how we’ll be generating the files needed to get started with map editing.
Creating a Blank Map
Using the Command Window
In the command window, type in maketrn as a command prompt. You should see a list of options scroll by. For now, we're just going to create a simple example map.

In the command window type maketrn multdm07 /c /w=2560 /h=2560. Press the enter key.

This will create 3 files

  • multdm07.trn
  • multdm07.hgt
  • multdm07.mat

These are all we need to start editing a Deathmatch level.

Breaking down the command line
  • /c Creates a new map.

  • multdm07 The name of the map. Maps must start one of two ways: multdm will create a deathmatch map, and multst will create a strategy map. This must be followed by a two digit number. Don’t use the number of an existing map!

  • /w and /h The width and height. They MUST be either 1280, 2560, 3840 or 5120. Battlezone 98 Redux maps are made of zones. A zone is 1280 meters by 1280 meters, so your map can be any multiple of 1280 in either direction. The command mentioned previously - /w=2560 /h=2560 - is 2x2 zones. The maximum size of a map is 5x5 zones.

Note - you must start all map names with either multst or multdm. Once you create it, it can’t be changed from one type to another. If you change the name of the map from multst to multdm after you’ve created the map, it won’t make the map a Deathmatch level.
Choose your Planet
You can now choose your terrain or planet type from 7 different templates within the Edit folder. For the purposes of this guide, we'll be using the Europa template. In a separate text editor – we recommend Notepad - open the file multdm07.trn you created and delete all the sections of text EXCEPT the [Size] section. The [Size] section should look something like this:

[Size]
MinX=0
MinZ=0
Width=2560w
Depth=2560
Height=0


Now, go to the trn subfolder in the Edit folder and open the file Europa.trn provided. Copy the entire document and paste it into your own multdm07.trn file below the [Size] section. Now save your multdm07.trn file(still in the Edit folder).

Your trn should now look something like this.
Loading Your Map
Copy all the files you have created so far into the game’s addon folder, those files being:

multdm07.trn
multdm07.hg2
multdm07.mat


Usually located here
C:\Program Files (x86)\Steam\steamapps\common\Battlezone 98 Redux\addon

The addon folder is where the game looks for new maps and other user-created content

Back in the command window, type cd.. and press enter to go back up to the Battlezone 98 Redux folder. From here we can launch the game and our new map in Battlezone 98 Redux Edit Mode.

Type the following:

battlezone98redux.exe multdm07.trn /edit /win

This will now launch the game launcher. If it does not load in windowed mode you can choose this option from the launcher options menu.

Start the game from here as you would normally. You will find yourself in your newly created map, and the game should be in windowed mode. Note: You have to edit maps while the game is in windowed mode or it you will not be able to save objects.
Editing Your Map
In Battlezone 98 Redux Edit Mode, you start out in a vehicle. Press Ctrl +E to switch into the top-down view You can switch back and forth between viewing the map top-down and viewing it from the tank by pressing Ctrl + E at any time.

Pressing W toggles between the texture, and wireframe modes.
Pressing Ctrl +A will place you in object mode. You must be in your tank to see these options pop up. (Ctrl +E to jump back into the tank)

You can use the mouse and cursor keys to change the camera orientation.
To zoom in or out while editing, use the + and keys .

Note: It is best to start in wireframe mode due to textures being made for specific terrain slopes.

Wireframe Mode
In this mode you can change the map's elevation (creating hills, pits and divots).

Texture Mode
Here you can style your map from a selection of pre-defined textures.

Object Mode
Use this mode to place spawn points, tanks, units and buildings. (Multiplayer maps will need at least 2 spawn points or they will not load). Warning – Placing many AI may crash your map.
Saving/Loading Your Map
While in the editor window, press Ctrl+ S to bring up the save menu.

We want to save the file in the addon folder along with the other files (multdm07.trn multdm07.hg2 and multdm07.mat) as multdm07.bzn. We recommend saving your maps as often as possible. As mentioned earlier, you must be editing in a window to save.

For reference later, Ctrl+O will also open maps from the editor.

Remember: Now that you have saved a .bzn file, the command line for loading up this map to edit is: battlezone98redux.exe multdm07.bzn /edit /win


Elevation Editing
To help create hills, valleys, canyons and river beds, there are many tools at your disposal.
To edit elevation, we will need to be in wireframe mode.


Zoom
Left click to zoom in. Right click to zoom out.


Width Brush Size


Depth Brush Size


Height Brush Size
These tools will change the depth, width and height of the brush.
By left clicking on these tools you increase the size of the brush’s width/depth/height, by right clicking you decrease the size of the brush’s width/depth/height.


Raise Brush
Left click to raise the elevation with the brush. The height of the elevation will be changed incrementally the longer you hold down the mouse button. Right click to flatten it. You cannot lower the elevation below 0.


Rounded Raise Brush
If you want a rounder effect when raising terrain.


Increment Amount
Click to increase or decrease the increment amount while using the Raise Brush tool. (This does not affect the Rounded Raise Brush)


Eyedropper
If you want to set the brush to a single elevation, use the eyedropper to pick a height that you want.


Leveler
After picking a height with the eyedropper use the leveler to create a single continuous elevation at the size of your brush.


Rounded Leveler
Works the same as the Leveler tool. For more precise elevation editing.


Vertex Lifter
Left click to raise a single point, right click to lower.


Smoother
Use this to smooth out sharp edges and large elevation differences. This is an incredibly handy tool when the major features of the map are done to round out the rough edges and fix all the dips and spikes that may get the player stuck.


Bell Width
Similar to raise brush. But with a lot more gradual inclines and smoother edges.
Automatic Texturing
Before you start to edit textures, unless you want to do it all tile by tile, you can use maketrn.exe to paint the entire terrain for you based on elevation.

First we need to go back into the edit folder. In here we will find the ini subfolder. As we are using Europa textures, we will be wanting to copy the Europa.ini file from this folder, and paste it into the addon folder directory. You will also need to move the MakeTRN.exe from the Edit folder into the Addon folder.

You should now have these 7 files in your addon directory
  • multdm07.trn
  • multdm07.hg2
  • multdm07.mat
  • multdm07.bzn
  • multdm07.lgt
  • Europa.ini
  • MakeTRN.exe

Now, with the game closed, simply launch the command window while in the addon folder and type:maketrn multdm07.trn /p=”europa.ini”

Now when you reload Multdm07.bzn, we will see that the level has been automatically painted based on its elevation.

Placing Objects
If you want to do it in real-time while in your tank, press Ctrl+A. A build menu will replace the unit command menu.

If you want to do this from an overhead view, press shift+F9. Then choose 1 and then 4 to edit objects. Finally, press 5 to get the build menu up.

You must place at least 2 spawn points on your map or it will not load.

To create spawn points, simply choose Buildings and then Spawn from the menu. The spawn point will be placed where the pointer is. For strategy maps you will also want to place Geysers and scrap, which are also found under the neutral map. You can place any unit, tank or building from the game in this fashion.

Uploading your map to the Steam Workshop
If you want to put the map into the game so that you and everyone else can play it, you have to upload it to steam workshop. Prepare all of the files for your map including a preview image and the ini into one folder.

To make a preview image, type:

battlezone98redux.exe /win /nointro /shellmap:216,178 multdm07.bzn from the default Battlezone 98 redux steam install location.

C:\Program Files (x86)\Steam\steamapps\common\Battlezone 98 Redux

This will run the game and output a top down image of the map at a size of 216x178 to the default install location.

A sample .ini and .des files can be located within the Edit folder for you to use.

Fill out a sample ini file based on the template below. Workshop has 3 kinds of content, Instant action, Multiplayer and Mod. For your map to appear in the right place, you need to add one of those lines to your .ini file. In the example below, Instant action and Mod are commented out with a “;” character leaving the maptype “multiplayer”.

Sample INI
[DESCRIPTION]
missionName = "Yourmissionname"

[WORKSHOP]
;mapType = "instant_action"
mapType = "multiplayer"
;mapType = "mod"

[MULTIPLAYER]
minPlayers = "2"
maxPlayers = "8"
gameType = "D"

You will also need to create a description. The .des is what description will be displayed in game in the Multiplayer or Instant action map screens. You may wish to write out a little narrative. For example “You must infiltrate the enemy base and blow up the cafeteria”

Finally you will need to choose a small square .jpg file as your preview image. I suggest roughly 300x300. Choose something that explain what your map is about.

List of files to upload to Steam
Here is a checklist of the files you must upload to steam for your map to work.

addon\multdm07.bznaddon\multdm07.trn
addon\multdm07.mat
addon\multdm07.hg2
addon\multdm07.lgt
addon\sample.des
addon\yourpreviewimage.jpg
addon\multdm07.bmp
addon\sample.ini


Before you upload, rename all the files to your mapname choice and move them to their own folder within the addon folder. I named my folder mybzmap for ease of use. (make sure to use a name that hasn't already been taken and that it is under the 8 character limit)

Like this
addon\mybzmap\addon\mybzmap\mybzmap.bzn
addon\mybzmap\mybzmap .trn
addon\mybzmap\mybzmap .mat
addon\mybzmap\mybzmap .hg2
addon\mybzmap\mybzmap .lgt
addon\mybzmap\mybzmap .des
addon\mybzmap\mybzmap .jpg
addon\mybzmap\mybzmap .bmp
addon\mybzmap\mybzmap .ini


Now launch the Battlezone 98 Redux – Uploader Tool from The Steam Tool Library. Hover over Library in Steam and click Tools from the dropdown options.
Enter the names for your Workshop map and its descriptions. Then press the Create New Item button to upload your first map.

The uploader will ask you for your map install location and preview .jpg.
Once you have directed the uploader to these files and all the rest of the files are in the same location it should begin its work uploading your map to the workshop.

It may take a few minutes uploading and checking but this is normal.

To update an existing item select it from the list and press the Update Item button.

After your map has been uploaded it normally takes a few minutes for it to appear on the Steam Workshop page.

Congratulations you have now finished and uploaded your first map!
Software Licence Agreement
SOFTWARE LICENSE AGREEMENT ("LEVEL EDITOR")
IMPORTANT - READ CAREFULLY: Battlezone 98 Redux (THE "PROGRAM ") CONTAINS LEVEL EDITING TOOLS ("LEVEL EDITOR") THAT ALLOWS YOU TO CREATE CUSTOMIZED NEW GAME MISSIONS AND OTHER RELATED GAME MATERIALS FOR PERSONAL USE IN CONNECTION WITH THE PROGRAM ("NEW GAME MATERIALS"). THE USE OF THE LEVEL EDITOR IS SUBJECT TO THE SOFTWARE LICENSE TERMS SET FORTH BELOW.  BY USING THE LEVEL EDITOR, YOU ARE CONSENTING TO BE BOUND BY AND ARE BECOMING A PARTY TO THIS AGREEMENT WITH REBELLION. IF YOU DO NOT AGREE TO THE TERMS OF THIS AGREEMENT, DO NOT USE THE LEVEL EDITOR.
LIMITED USE LICENSE.

Rebellion Interactive Limited.("Rebellion") grants you the non-exclusive, non-transferable, limited right to use the Level Editor for the purpose of creating New Game Materials solely and exclusively for personal use. For purposes of this Agreement, "New Game Materials" represent computer data that modifies, substitutes for or adds new materials to the materials currently contained in the Product, thus modifying or replacing one or more existing game missions and other constituent elements provided in the Product. You shall not create New Game Materials, or tools that have no substantial purpose other than to contribute to the creation of New Game Materials, except as expressly permitted pursuant to this Agreement. All rights not specifically granted under this Agreement are reserved by Rebellion and, as applicable, its licensors. The Level Editor is licensed, not sold. Your license and the use of the Level Editor confers no title or ownership in the Level Editor or the New Game Materials created using the Level Editor and should not be construed as a sale of any rights in the Level Editor or such New Game Materials.
* OWNERSHIP. All title, ownership and use rights and intellectual property rights in and to the Level Editor and the New Game Materials created by you using the Level Editor are owned by Rebellion or its licensors and are protected by the copyright laws of the United States, international copyright treaties and conventions and other laws. In the event that you should, by operation of law, be deemed to retain any rights in any New Game Materials created by you, you, by using the Level Editor, hereby irrevocably assign, without any further consideration and regardless of any use by Rebellion of such New Game Materials, all of your rights and interest, if any, in and to such New Game Materials to Rebellion. You also hereby grant Rebellion an irrevocable, perpetual, exclusive, fully paid and royalty-free license to exercise any rights, including moral rights, to any and all aspects of the New Game Materials.

LICENSE CONDITIONS. 
* You agree that as a condition to Rebellion's consent to allow you to use the Level Editor, you will not use or allow third parties to use the Level Editor and the New Game Materials created by you for commercial purposes, including but not limited to selling, renting, leasing, licensing, distributing, or otherwise transferring the ownership of such New Game Materials, whether on a stand alone basis or packaged in combination with the New Game Materials created by others, through any and all distribution channels, including, without limitation, retail sales and on-line electronic distribution. You agree not to solicit, initiate or encourage any proposal or offer from any person or entity to create any New Game Materials for commercial distribution. You agree to promptly inform Rebellion in writing of any instances of your receipt of any such proposal or offer.
* If you decide to make available the use of the New Game Materials created by you to your friends, family, co-workers and other fellow gamers, you agree to do so solely without charge.
* You shall create New Game Materials only if such New Game Materials can be used exclusively in combination with the retail version of the Product. The New Game Materials may not be designed to be used as a stand-alone product.
* New Game Materials shall not contain modifications to any COM, EXE or DLL files or to any other executable Product files.
* New Game Materials must not contain any illegal, obscene or defamatory materials, materials that infringe rights of privacy and publicity of third parties or (without appropriate irrevocable licenses granted specifically for that purpose) any trademarks, copyright-protected works or other properties of third parties.
* New Game Materials must contain prominent identification at least in any on-line description and with reasonable duration on the opening screen: (a) the name and E-mail address of the New Game Materials' creator(s) and (b) the words "THIS MATERIAL IS NOT MADE OR SUPPORTED BY REBELLION."
* You will not use the Level Editor to reverse engineer, extract source code, modify, decompile or disassemble the Program, in whole or in part.
TERMINATION. Without prejudice to any other rights of Rebellion, this Agreement will terminate automatically if you fail to comply with its terms and conditions. In such event, you must immediately discontinue the use of the Level Editor and any New Game Materials created using the Level Editor.
INJUNCTION. Because Rebellion would be irreparably damaged if the terms of this Agreement were not specifically enforced, you agree that Rebellion shall be entitled, without bond, other security or proof of damages, to appropriate equitable remedies with respect to breaches of this Agreement, in addition to such other remedies as Rebellion may otherwise have under applicable laws.
INDEMNITY. You agree to indemnify, defend and hold Rebellion, its partners, licensors, affiliates, contractors, officers, directors, employees and agents harmless from all damages, losses and expenses arising directly or indirectly from your acts and omissions to act in using the Level Editor pursuant to the terms of this Agreement
MISCELLANEOUS. This Agreement represents the complete agreement concerning this license between the parties and supersedes all prior agreements and representations between them. It may be amended only by a writing executed by both parties. If any provision of this Agreement is held to be unenforceable for any reason, such provision shall be reformed only to the extent necessary to make it enforceable and the remaining provisions of this Agreement shall not be affected. This Licence shall be construed according to English law and the English courts have exclusive jurisdiction over any dispute concerning the Level Editor or this Licence. No terms of this Licence are enforceable by a third party pursuant to the Contracts (Rights of Third Parties) Act 1999. 
If you have any questions concerning this license, you may contact Rebellion at support@rebellion.co.uk

For FAQs and other information please visit www.rebellion.co.uk.
23 Comments
Rongeur 31 Jan, 2021 @ 3:22pm 
@nostalgic_console_peasant ...you need to use .\battlezone98redux.exe (the .\ is needed for powershell in windows)
nostalgic_console_peasant 16 Jan, 2020 @ 9:15pm 
When I use the command prompt I always get an error message of some kind. It happens when I type in maketrn it simply doesn't recognize the program. Any help with this would be much appreciated.
battlezonepedro 23 Dec, 2018 @ 3:53pm 
i have a command prompt but it say users\battl. Can any one help me pls? i love to know
hOcus4pOcus 30 Dec, 2017 @ 5:54pm 
Hi there guys, is there any option or command line for changing AI multiplayer difficult ?
Because I'm trying to pay with a friend that is new on this game, and we can barely start to build a base and we're attacked in few minutes with an unbelievable amount of enemies !

Any help would be much appreciated.

Thanks
SMEG~CaptMo 29 Jul, 2016 @ 1:48am 
Hi This Guide is much better than the previous version thankyou

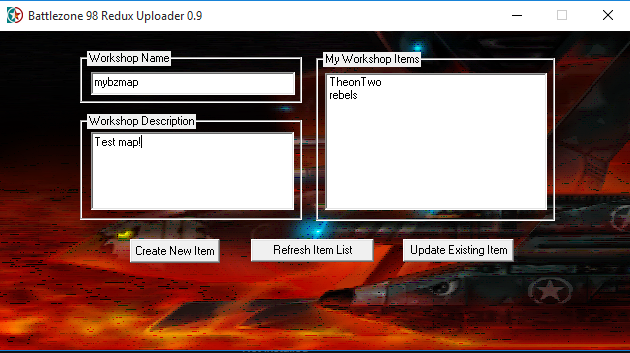
I would however recommend someone provides some working INI examples of the different map types.

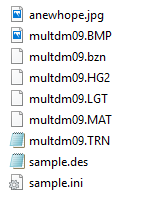
Since myself and other uses are finding BZ crashes on exit of the BZ program and when these maps are used, whereas the inbuilt maps seem OK also these maps work OK offline but clearly have an issue once uploaded. is there an easy method we can use to test the Map online once it's been uploaded to ensure it works on steam?

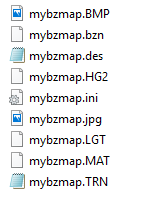
Another point is the small Bit map doesn't always show the Map layout and produces a blank square. it does seem to work on occasions but not reliably.
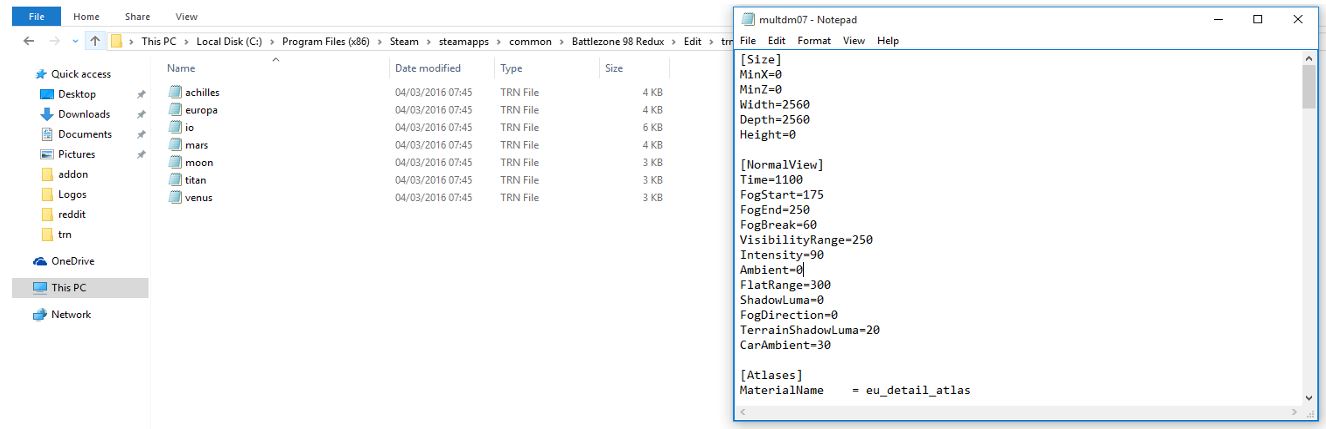
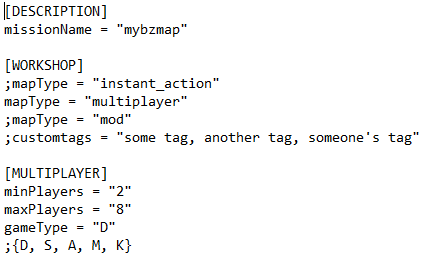
I Darkstar X 17 Jul, 2016 @ 10:07pm 
Why is this so ridiculously hard?
awgsknite 16 Jul, 2016 @ 2:03pm 
i think its your gameType = "S" ...shouldnt it be "M" 'cos your using multiplayer ? or are u making an instant action type ?
MintyCheddar 16 Jul, 2016 @ 8:15am 
so im at the final stage of the map making but it says "missing or invalid map type in the .ini file NONE" anyone know what to do? so confused cause i have this in my ini file

[DESCRIPTION]
missionName = "Bomos"

[WORKSHOP]
;mapType = "Multiplayer"
mapType = "multiplayer"
;mapType = "mod"
;customtags = "some tag, another tag, someone's tag"

[MULTIPLAYER]
minPlayers = "2"
maxPlayers = "2"
gameType = "S"
;{D, S, A, M, K}

first time trying this (obviously) so any help here would be nice :)
awgsknite 15 Jul, 2016 @ 10:46pm 
it worked using the command line in the steam startup prompt but not in the windows cmd prompt window
awgsknite 15 Jul, 2016 @ 10:25pm 
I can't go into object mode using CTRL A
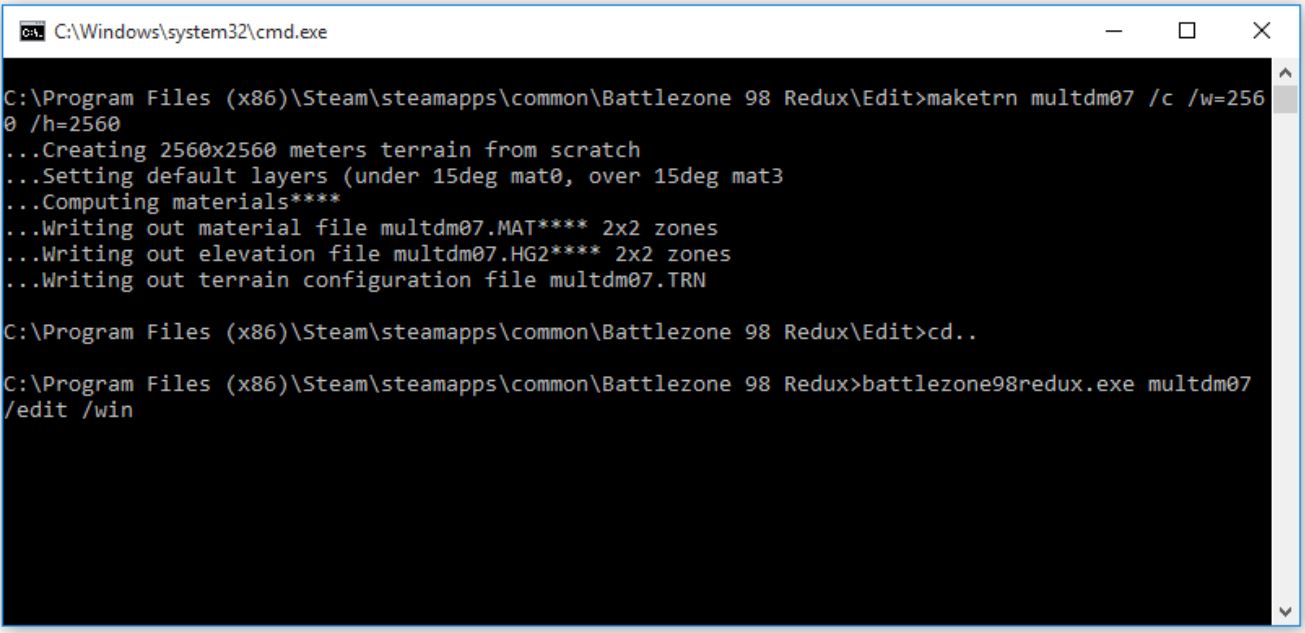
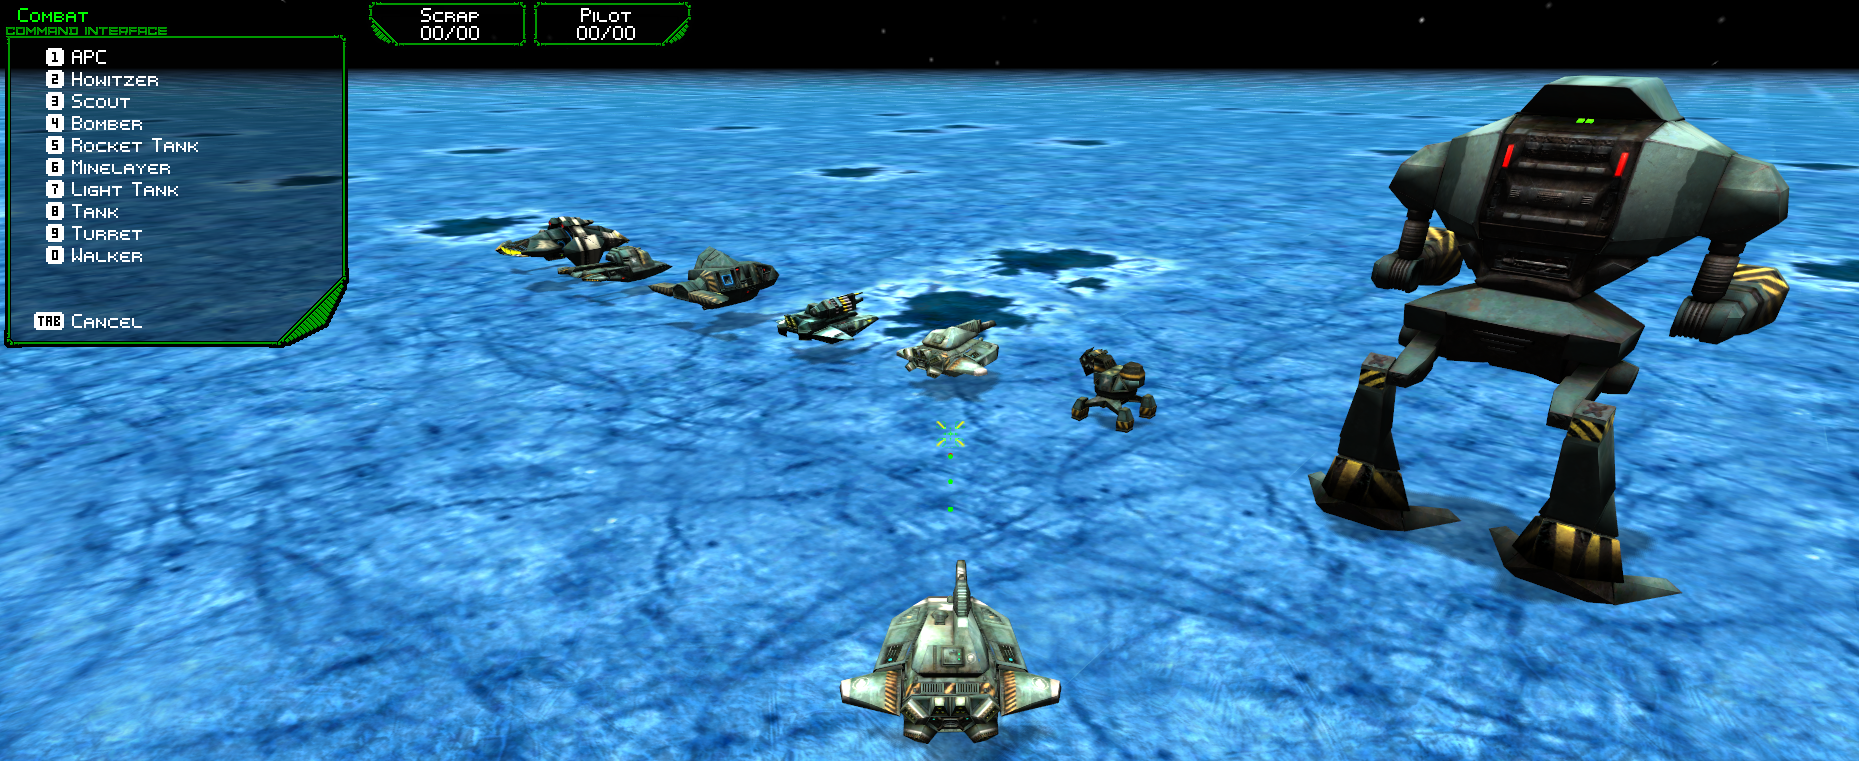
How do I go into object mode then ?