Nexus: The Jupiter Incident

Nexus: The Jupiter Incident

Not enough ratings
Creating skirmish battles: A guide to the NEXUS Skirmisher tool
By Arparso
Skirmish matches against AI opponents are fun, but sadly Nexus doesn't feature a flexible skirmish mode. With the help of the Skirmisher you can create your own skirmish battles against a capable and configurable AI fleet whereever and however you like. You can configure the fleets, the ships, the weapon layout, the battlefield and even the background music.

This guide attempts to explain at least the basics of the tool so that you can experience exciting skirmishes against the AI, too!
   
Award
Favorite
Favorited
Unfavorite
About Nexus Skirmisher
The Nexus Skirmisher allows you to create skirmish battles against the AI or even between two competing AI fleets with you in the observer seat. Fleets can be customized down to each individual weapons bank and the tool is also compatible with most mods released for the game, meaning you can try to recreate your favorite battles in the Stargate, Babylon 5 or Freespace universes.
Download and installation
The Skirmisher is hosted online at http://www.arparso.de/nexus/downloads.html. There is an automated installer available, which should pick the correct install location by default. Alternatively you can download the ZIP version and extract the archive right into your Nexus installation folder. It should not overwrite any existing files. Be sure to also download and extract the patch provided on the same website.
A note on Steam workshop
The Skirmisher was created long before the addition of Steam workshop – by default, the tool will not recognize the mods downloaded through this service (other mods will work fine!). If you want to create missions for a workshop mod, you need to copy the mod from the workshop folder to the game’s own “mods” folder.

Look for the workshop mod in your Steam folder, e.g.:
C:\Program Files (x86)\Steam\steamapps\workshop\content\6420\

One of the subfolders at that location will contain the mod you have downloaded from the workshop. Locate it and copy the folder to Nexus’ mods folder, e.g.:
C:\Program Files (x86)\Steam\steamapps\common\Nexus The Jupiter Incident\mods\

When launching the game, the mod will now appear twice: Once with a “Steam:” prefix and once without. The one with the prefix is the mod from the workshop folder and the one without the prefix will be the copy you just created. Try launching the mod and confirm that it’s working fine before attempting to use the Skirmisher with it.
Starting the tool
To start the Skirmisher, just launch the “Nexus Skirmisher.exe” in your Nexus folder or the shortcut created by the automated installer. Once launched, it should look like this:

General options

When creating a new mission, you should always start with the options at the top. First select the mod you want to use (1). By default, the “NEXUS Skirmisher” mod will be selected, which uses ships and weapons from Nexus’ single- and multiplayer modes. You can select any compatible mod here.

Next you can enter the mission name (2). Enter any name your like. The mission type (3) should best be left at “default”, unless the mod provides its own specialized mission type. A mission type usually defines the objectives of the battle as well as the AI behavior. The “default” mission type is a simple fleet-vs-fleet battle.

The location (4) is basically the map on which the battle will take place. The selected mod determines which locations can be used – just experiment a little with them until you find locations you like. The music (5) is probably the least important – just pick any of the available tracks or stick with the default choice. If the mod uses its own custom music, then these tracks will be available as well.
Singleplayer fleet setup

The fleets will be set up on the “Singleplayer Mission Settings” tab (6). This is the primary location to setup the fleets and ships. On the left side will be the player fleet (7) and on the right side the enemy’s ships (8).

For each of the two fleets, you need to choose a race (9). For the player fleet, “race_player” needs to be selected – otherwise the AI will take control. The AI fleet can use any other race. It does not really matter which race you pick, as there are no restrictions with regards to the available ship types or weapons.

Below the race selection, there will be 10 rows of of input elements – one row for each ship. This means you can have a maximum fleet size of 10 capital ships. First you select the ship name (10) – just pick any of the suggested names or enter your own. Next you can choose the ship type (11). The names might be a bit cryptic, but soon you will get to know each of the available types and recognize them easily. These ship types come equipped with weapons, generators, engines and everything they need. If you want to customize their loadout, click on the customize button (12). This option is better suited for advanced users, so you might skip this next section for now.
Customizing ships


This customization dialog offers full access to every piece of equipment on each ship. Sadly, the displayed names are all very cryptic. You will need to familiarize yourself with the names and abbreviations or just experiment with different loadouts to see what works well and what does not.

First you need to pick a ship class (13). This defines the number of hardpoints on your ship and what devices it can carry. Next you will have a dropdown box for each single hardpoint on the ship, where you will need to select weapons, engines, shields, generators and other types of equipment.

Once you are finished, you can save this current configuration in a separate file (15), which you can then load later on (16). This way you avoid of having to select all the same devices again next time. Alternatively, you can just reset the whole form (17) at once to start over.

After you are happy with your custom ship config, click on Ok (18). Clicking on Cancel (18) will close the dialog without saving any changes.
Saving the mission

After you are happy with your mission setup, click on “Create Mission” at the bottom (20). The mission file will be saved and is now available in the game. A small popup will confirm the successful mission creation.

Naming conflicts: All missions will be saved as separate files. Picking the same mission name twice will lead to overwriting the previous mission file, so be careful to avoid any naming conflicts.

You can also clear the form and start from scratch again (21). Once the mission has been saved, the Skirmisher can be closed (22) – the tool does not need to run for the game to find start the mission.
Playing the mission


After creating the mission, you just need to start the game and pick the correct mod from the “Modifications” list. If you created a mission for the default Skirmisher mod, then pick the “Arparso’s NEXUS Skirmisher” mod, for example.


Once you’re in the game, the new mission should be available in the mission list and can be started from there.
Have fun!
Feel free to add a comment or ask questions if you have any issues with the tool or need further assistance. In the future I might expand the guide a bit more to also cover some of the other features of this tool, but the current version should be enough to get you up and running.
8 Comments
Hayden the first watcher 6 Mar, 2024 @ 11:31pm 
I created the mission but it\s not showing at all in play menu
AllieG95 5 Mar, 2023 @ 8:41pm 
When launching Nexus Skirmisher (not SP Settings version) from the game's launcher.***
AllieG95 5 Mar, 2023 @ 8:40pm 
Hello, I keep encountering this error message. Can you please assist? Thank you very much! :) https://imgur.com/owO9lEH
Arparso  [author] 26 Feb, 2022 @ 7:13am 
@Tossblade:
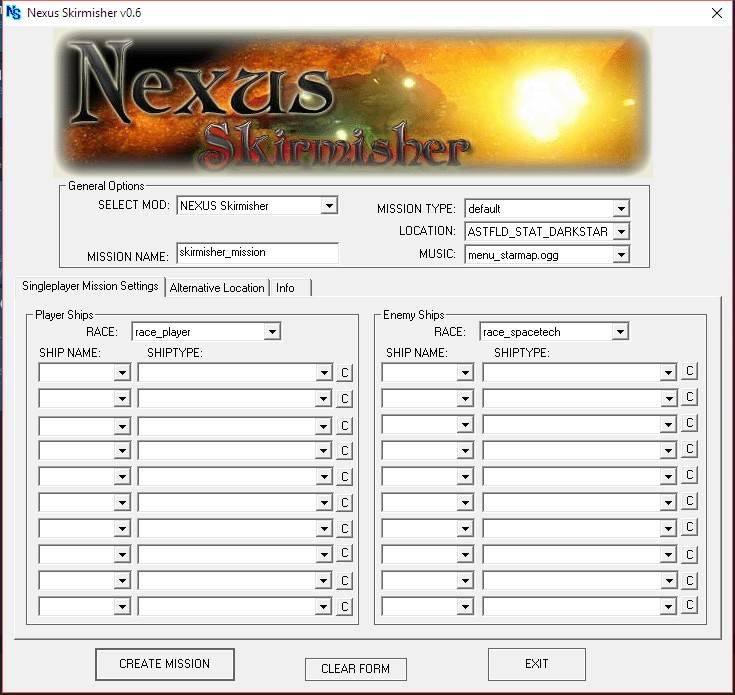
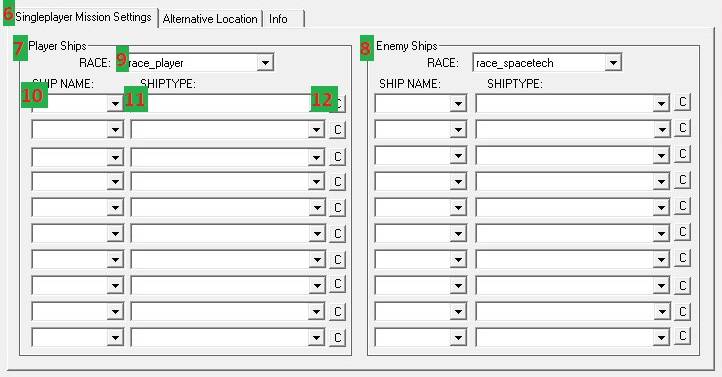
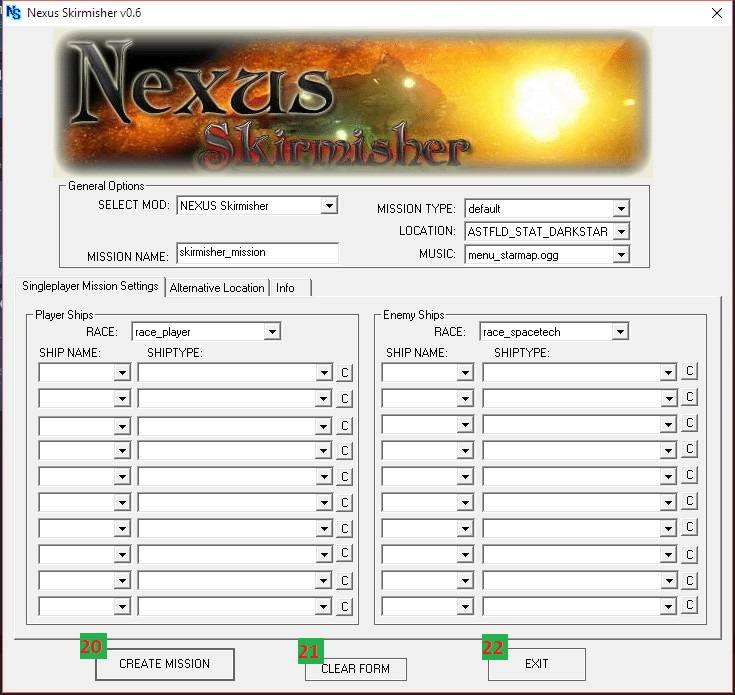
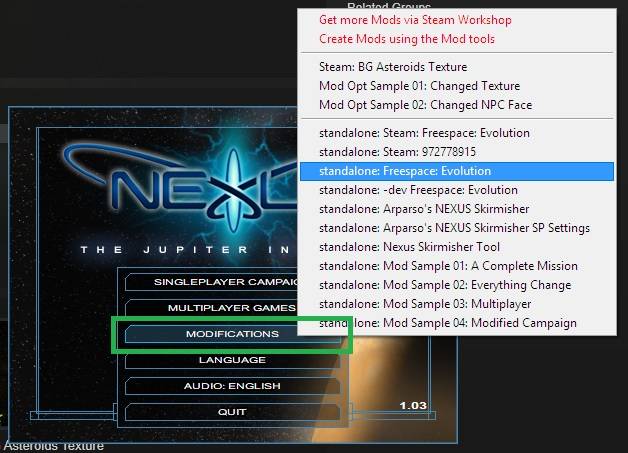
No options at all in the dropdown menus? Could be an installation issue or missing access rights to the files. It should look like this: https://imgur.com/M2ymKBV

If it looks empty like this: https://imgur.com/97xiCGX
- then it cannot find the mod files.

Try to reinstall and go here: http://www.arparso.de/nexus/downloads.html
Under "Download NEXUS Skirmisher" download both zip files and extract both of them into the game's installation folder (the patch last). If everything went right, there now should be a subfolder "mods\NEXUS Skirmisher SP Settings" in the game's install folder. Launching "Nexus Skirmisher.exe" should not show empty dropdown menus then.
Tossblade 24 Feb, 2022 @ 9:47pm 
I know this is old but Im not getting any options in the drop down menus(select mod, mission type, etc) any idea why?
Nico 4 Jun, 2021 @ 11:25am 
I spent so much time with this
<;)))< 31 Aug, 2018 @ 3:14am 
Good day,
im always getting a Direct X 9 Error when i wanna start my safed Skirmish. Any ideas how to fix that?
zeho 13 Jul, 2017 @ 12:15am 
Nice one. Look forwards to reading it. :steamhappy: