America's Army: Proving Grounds

America's Army: Proving Grounds

Not enough ratings
Official Guide to Creating Weapon Skins
By Rawrster and 2 collaborators
This guide provides a walkthrough to creating, testing, and submitting weapon skins for America's Army: Proving Grounds
   
Award
Favorite
Favorited
Unfavorite
Overview
This guide provides a full walkthrough for creating custom weapon skins and getting them into the game! The guide covers downloading required files, creating your new content, viewing your content on in game weapon meshes, and submitting your content for review and possible inclusion into the game.
Downloading Required Files
You can download the weapon skin files here:

Primary
Download from GDrive[drive.google.com]

Free Mirrors
Location 1[www49.zippyshare.com]
or
Location 2[fs12n2.sendspace.com]

MIRROR 1[www49.zippyshare.com]
MIRROR 2[www.sendspace.com]

The files are sorted by weapon with each weapon folder containing:
- obj files
- UV unwrap files
- Color coded unwraps for easier part reference

Each weapon has a file for the main body. Additionally, some weapons also contain files for iron sights and other weapon components. A successful weapon skin requires a main body file. While completing the other files is optional, we recommend it for a more comprehensive look to your custom weapon skin.


We also provide all of our base weapon textures for use. You can find them here: http://forum.americasarmy.com/discussion/6175/aa-pg-base-weapon-skins
Creating Your Skin
Creating a new skin is as simple as opening the UV file for your chosen weapon and painting over that file.

First, open the UV file in the painting tool of your choice. The UV file shows a broken up wireframe view of the weapon. This lets you know where on the image you should paint to affect a specific portion of the weapon.

Once you locate the areas of the weapon you want to paint, simply paint over top of the UV file. Save your final results as a .png file.

Previewing Your Skin
The Full Editor provides an easy means for viewing your weapon skin on the actual weapon mesh. Open the editor and pull up the Content Browser. Right click in the main panel and select 'Import'. Import your .png file in to a new Package.

After importing your weapon skin, search for the folder containing the weapon you are modifying. Find the Material Instances for the weapon skin with 'Skin1' in the name. Note each weapon has multiple Material Instances with 'Skin1' in the name. Each correspond to a specific portion of the weapon. For example, the M4 has a material instance used for the main body of the weapon and an additional material instance used for the weapon's iron sights. They are named 'M4_1P_Body_Skin1_INST' and 'M4_1P_IronSights_Skin1_INST' respectively. It also has a Material Instance for the third person version of the skin (it has '3P' in the name), but you do not need to worry about creating this portion of the weapon skin. Open the 1P Material Instance that corresponds to the portion of the weapon skin you are working on.

On the left pane, find 'DiffuseMap' property under the TextureMaps rollout. Replace the texture there with your newly imported weapon skin. You will now see your texture on the weapon mesh in the right pan. Use the mouse to rotate the weapon around and check out your work!

Alternative Workflow
If you own Photoshop you can work in a different manner. Instead of opening the weapon's UV file, open the weapon .obj file in Photoshop. This provides a 3D view of the weapon within Photoshop! By double clicking the layer under diffuse you can view the UV file for that weapon. This allows you to paint on the UV layer and then immediately hop over to see how it looks on the weapon! Or, alternatively, you can paint directly on the weapon and your work will show up on the UV layer as well.

Submitting Your Skin
Once you are happy with your skin you can submit it for review on the forums. A submission includes:
- Your new unwrap files for the weapon
- An image showing the weapon skin on the weapon in editor

This means you should have between two and four .png files to submit, depending on the weapon you created the skin for. Upload these in the Weapon Skin Challenge section of the official forums: HERE[forum.americasarmy.com]

Be sure to check out the 'Example Weapon Skin Submission' to ensure your submission is correct.

This allows the community to view your submission and comment on it. Skins that are well received by the community and the development team will be added to the game for all players to use! We are looking for high quality skins that fit with the general style and aesthetic of our current weapon skins.
Example Skin
Here is an example of one of our M4 skins and how it looks in game.

11 Comments
[D-D] Walmart Nazi © 9 Feb, 2018 @ 3:46pm 
thanks for this ! i might make something for fun. thank you !
mmchaos 13 Jul, 2017 @ 9:55am 
late reply but several have been made official and released in the game. https://forum.americasarmy.com/discussion/6310/first-round-of-weapon-skin-additions/
Rawrster  [author] 8 Feb, 2017 @ 10:14am 
The intent is to release a good number of them. It really just depends on the quality of the submissions. We plan on releasing them in batches every month or two.
Smurffy 7 Feb, 2017 @ 7:54pm 
Do you guys actually intend to release several skins or just 1 or 2 here and there gapped by several months? This might be an interesting project for me to mess around with but not if they won't actually be implemented.
Rawrster  [author] 7 Feb, 2017 @ 1:38pm 
Just added up all of our base weapon textures for use, here: http://forum.americasarmy.com/discussion/6175/aa-pg-base-weapon-skins
Ilrita 4 Feb, 2017 @ 6:41pm 
SOLUTION!

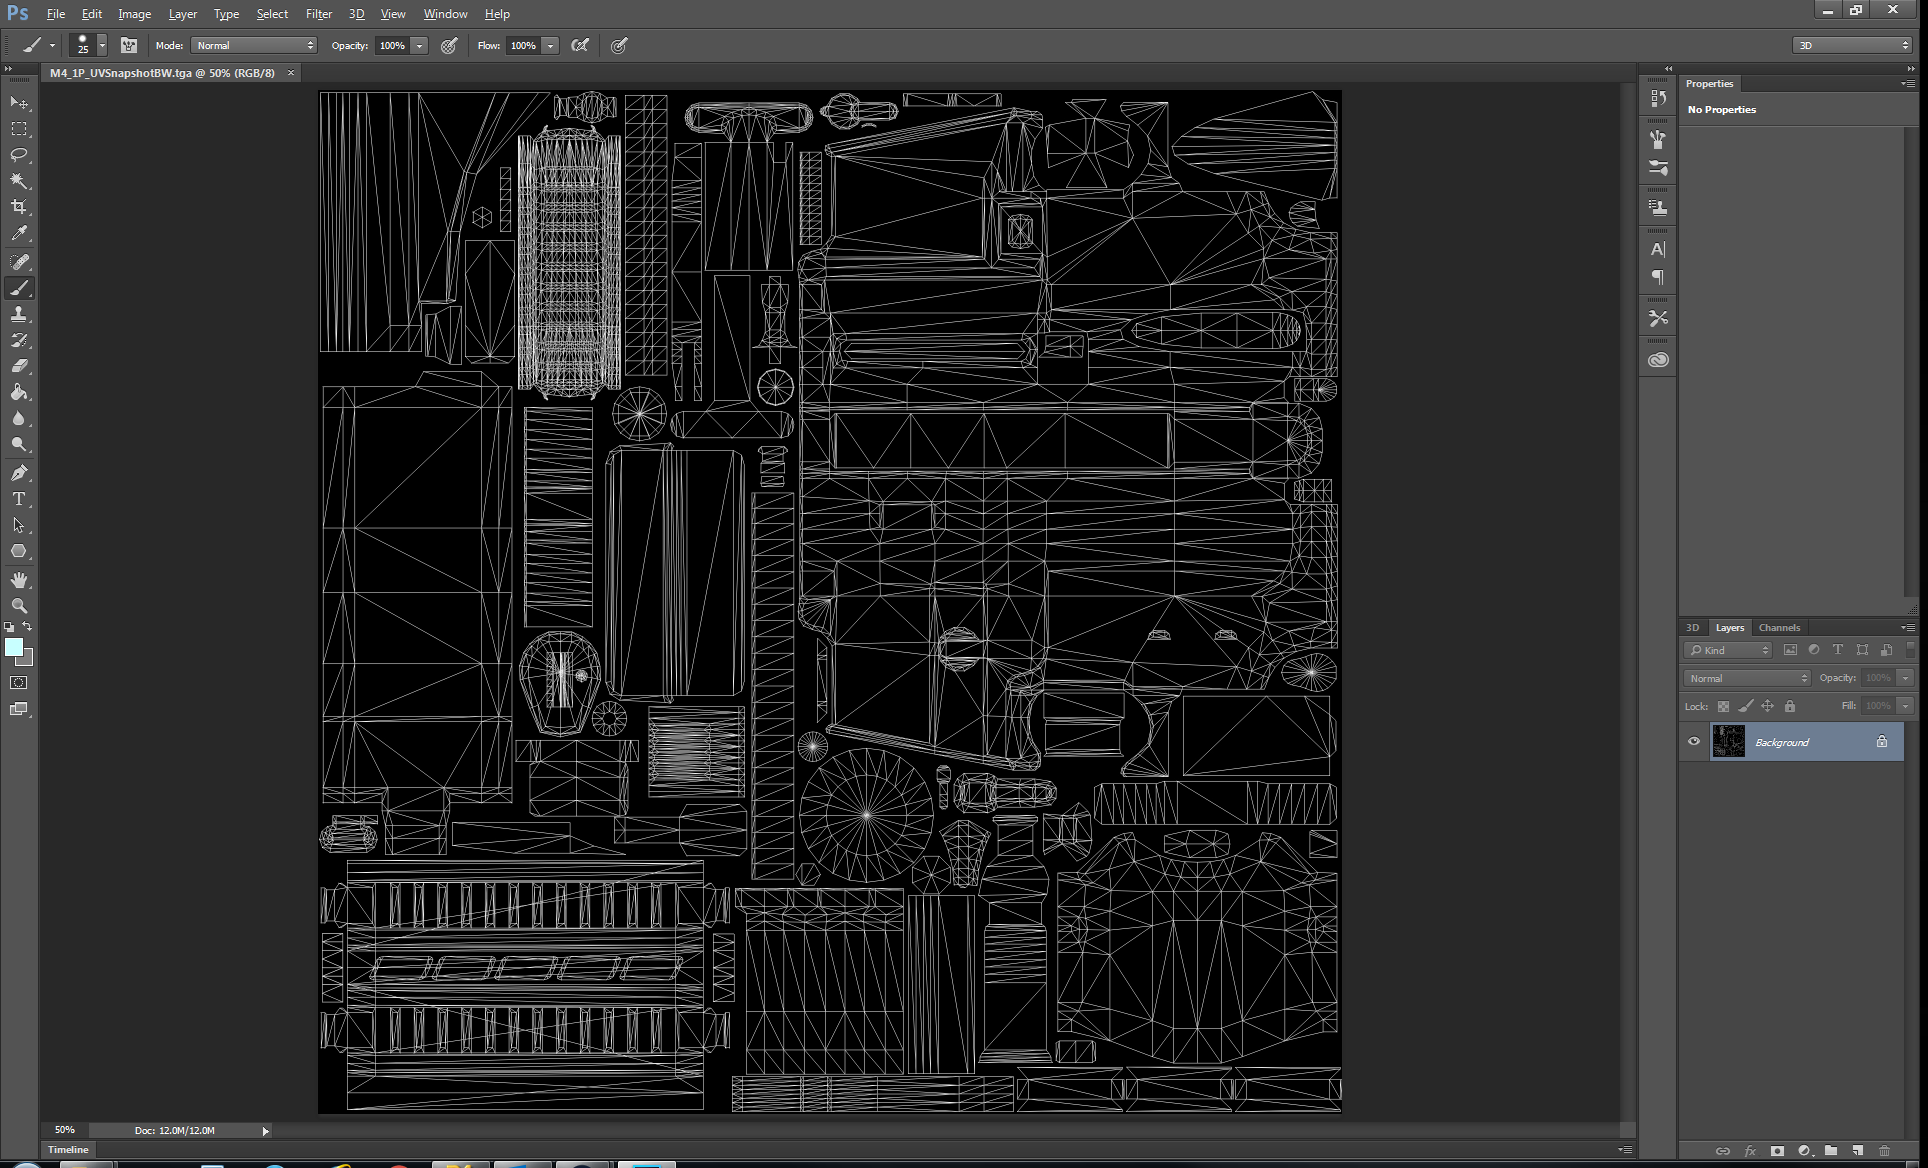
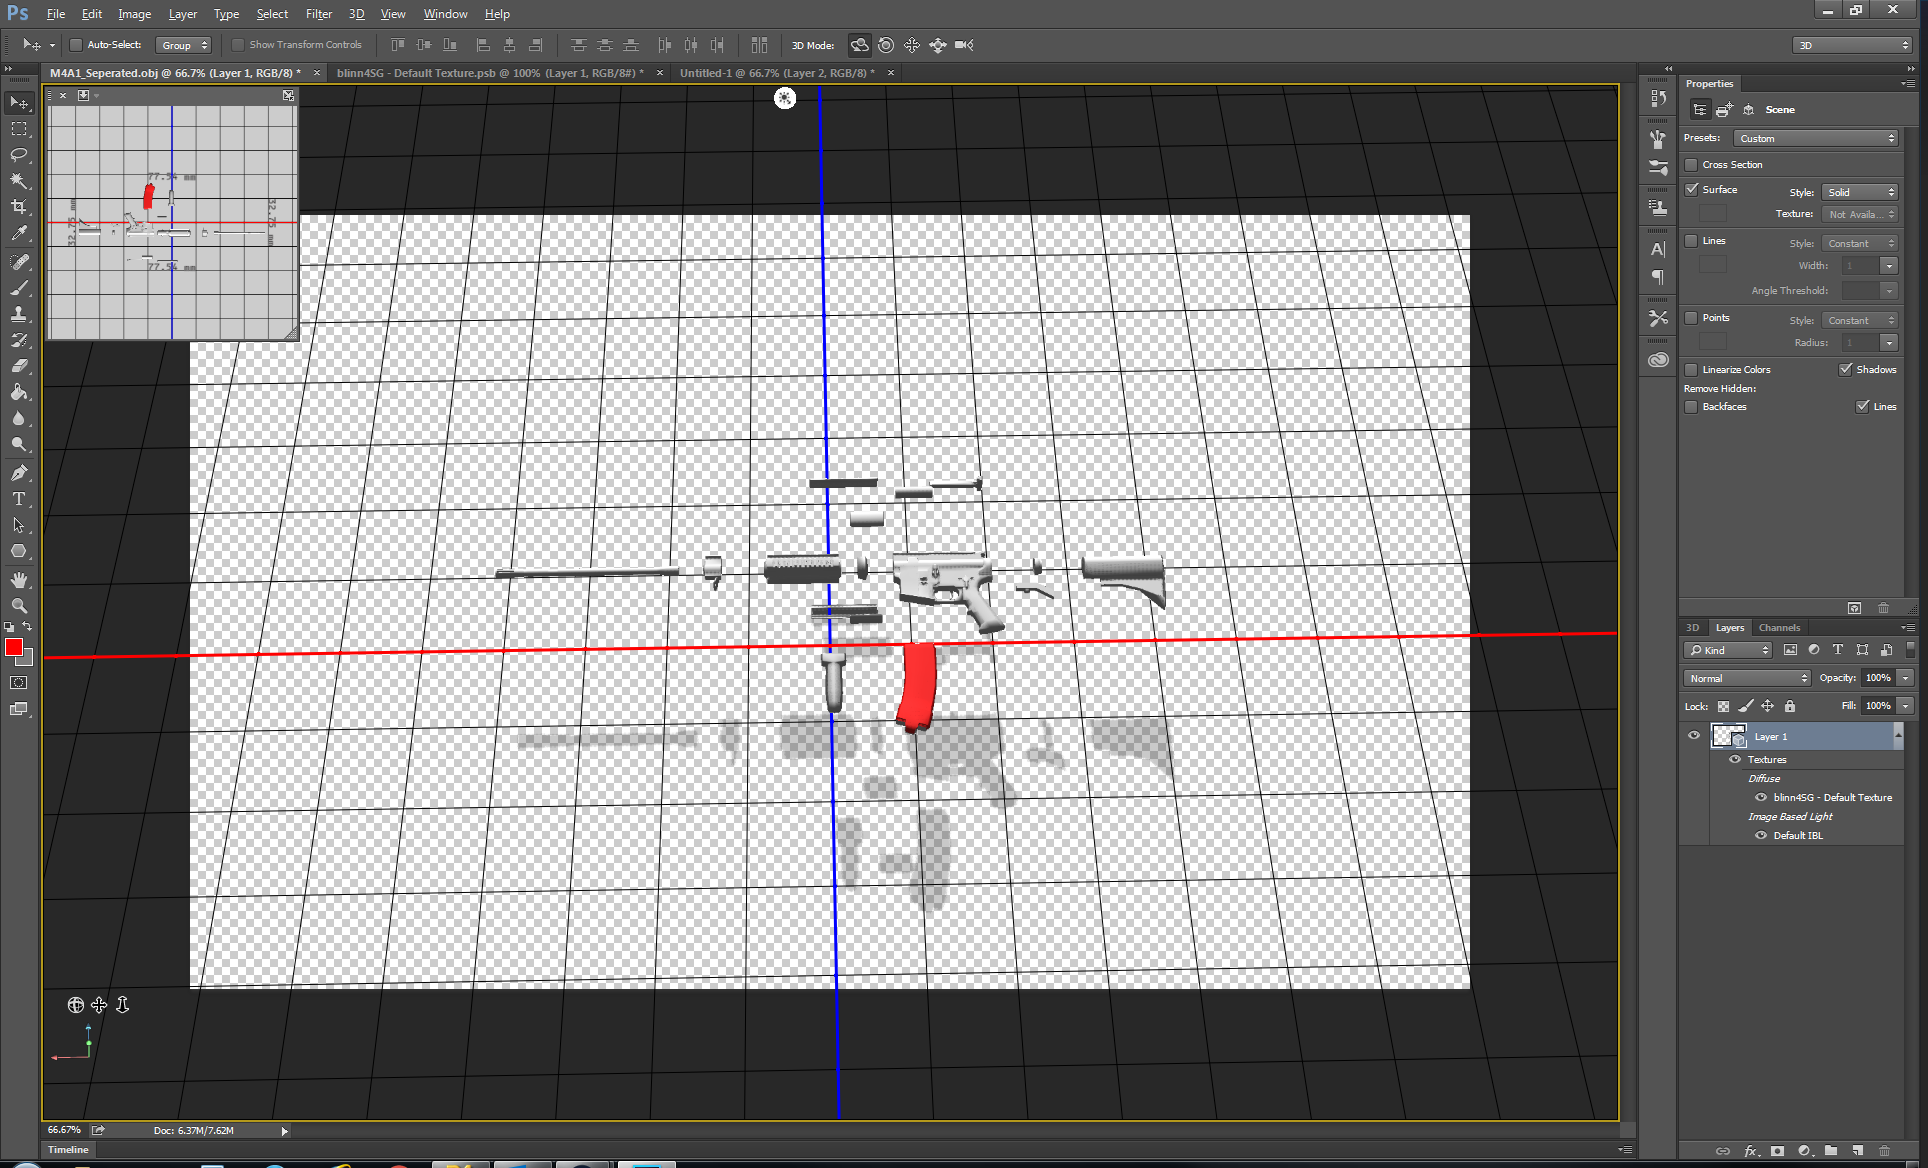
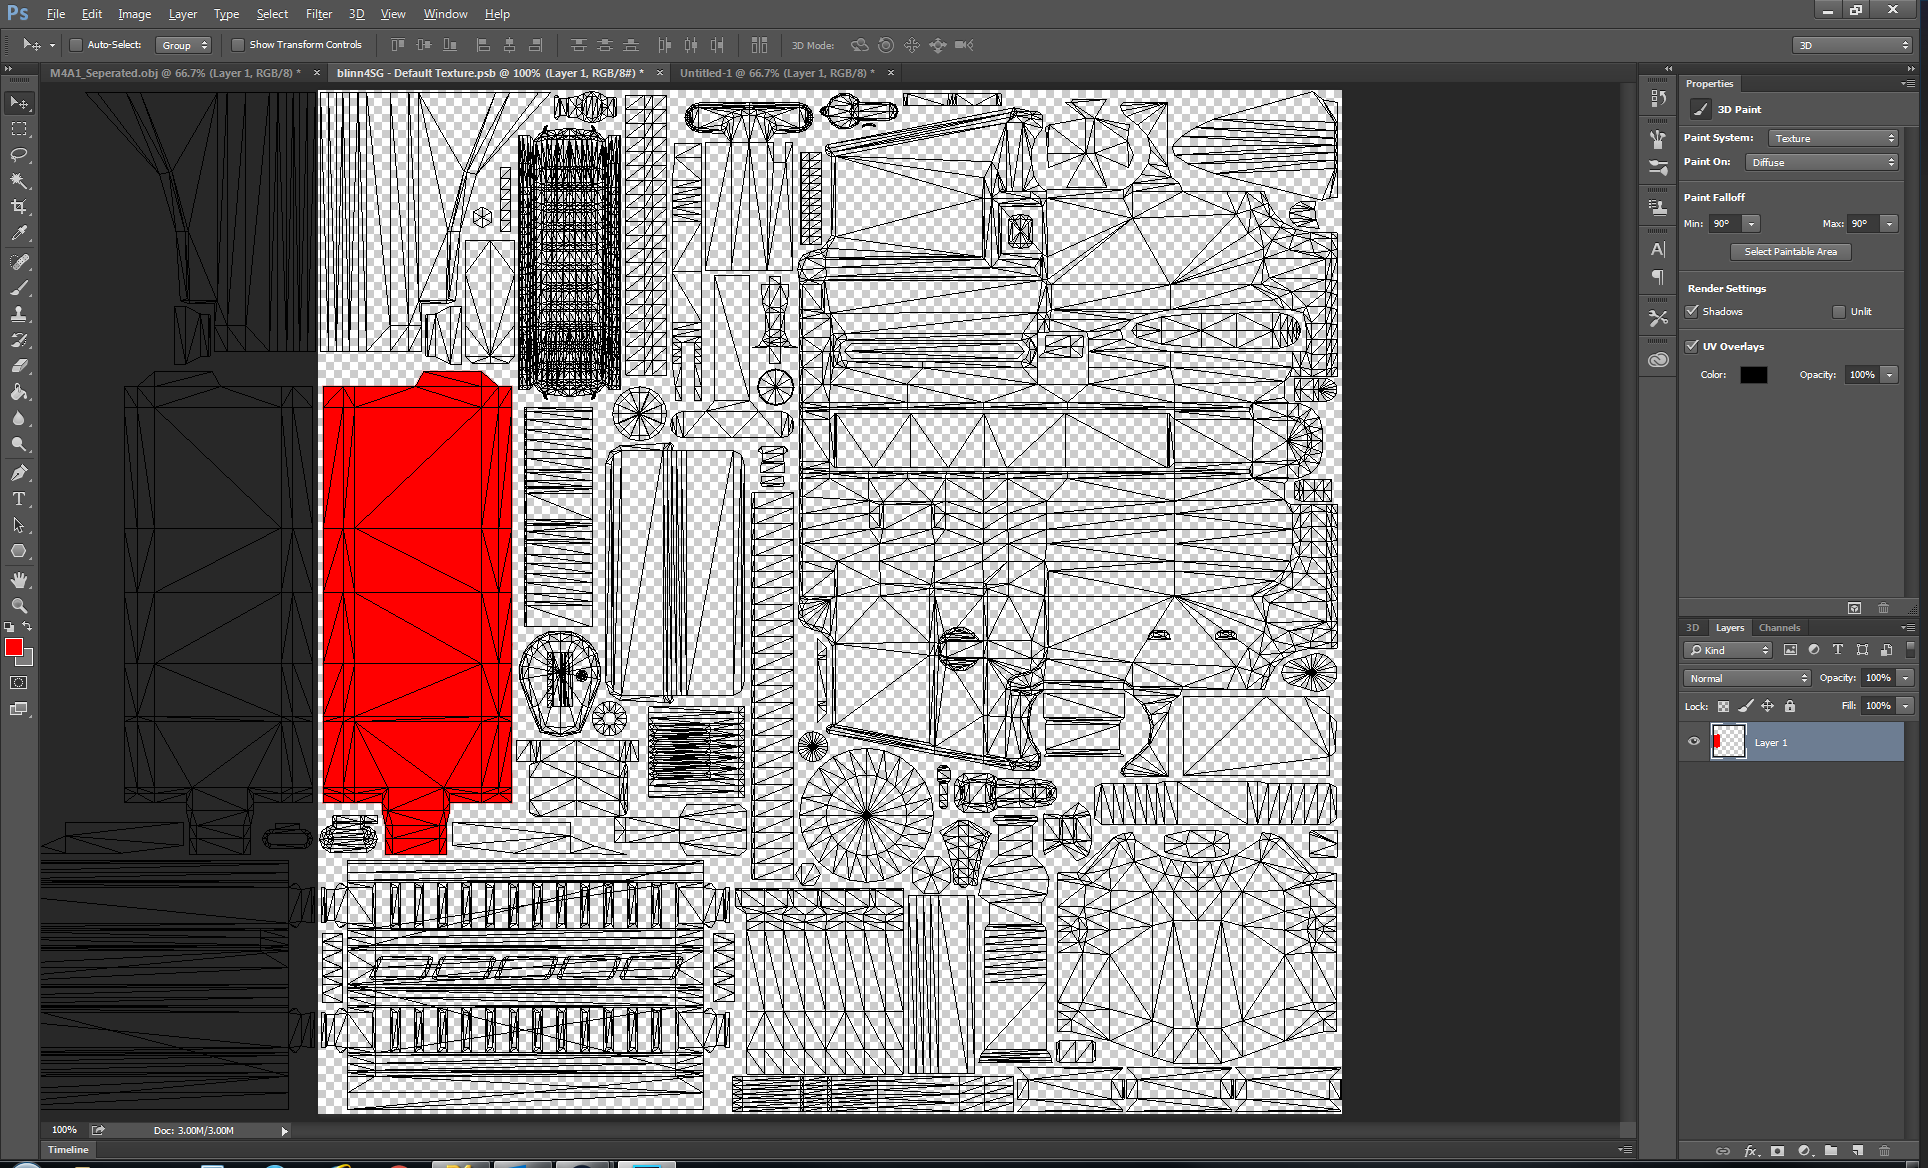
If clicking the layer gives you an "empty" screen, click 3D > CREATE UV OVERLAYS > WIREFRAME and BAM! It'll load right up. :2016popsicle:


I do not know if it is different beyond CS5 Extended, but that's what I had to do.
Ilrita 4 Feb, 2017 @ 10:34am 
Thanks for the answer Rawster!

I have a question about the PS step. When I open my .obj file and try to double click on the layers beneath "Diffuse" (rearSightUPSG or blinn5SG) it opens a new document that is empty. Is there a specific setting we should adjust so it opens correctly beyond just opening the .obj file?
Rawrster  [author] 2 Feb, 2017 @ 7:08am 
Most of the optics have a material from the gun, with the Mk4 being an exception on the M24. This keeps us from having dozens of extra textures and materials to handle skins on optics. You could, in theory, place your skin on the Red Dot or Acog if you wish. You would just need to grab the texture for the optic and paint over it, similar to with the weapon.

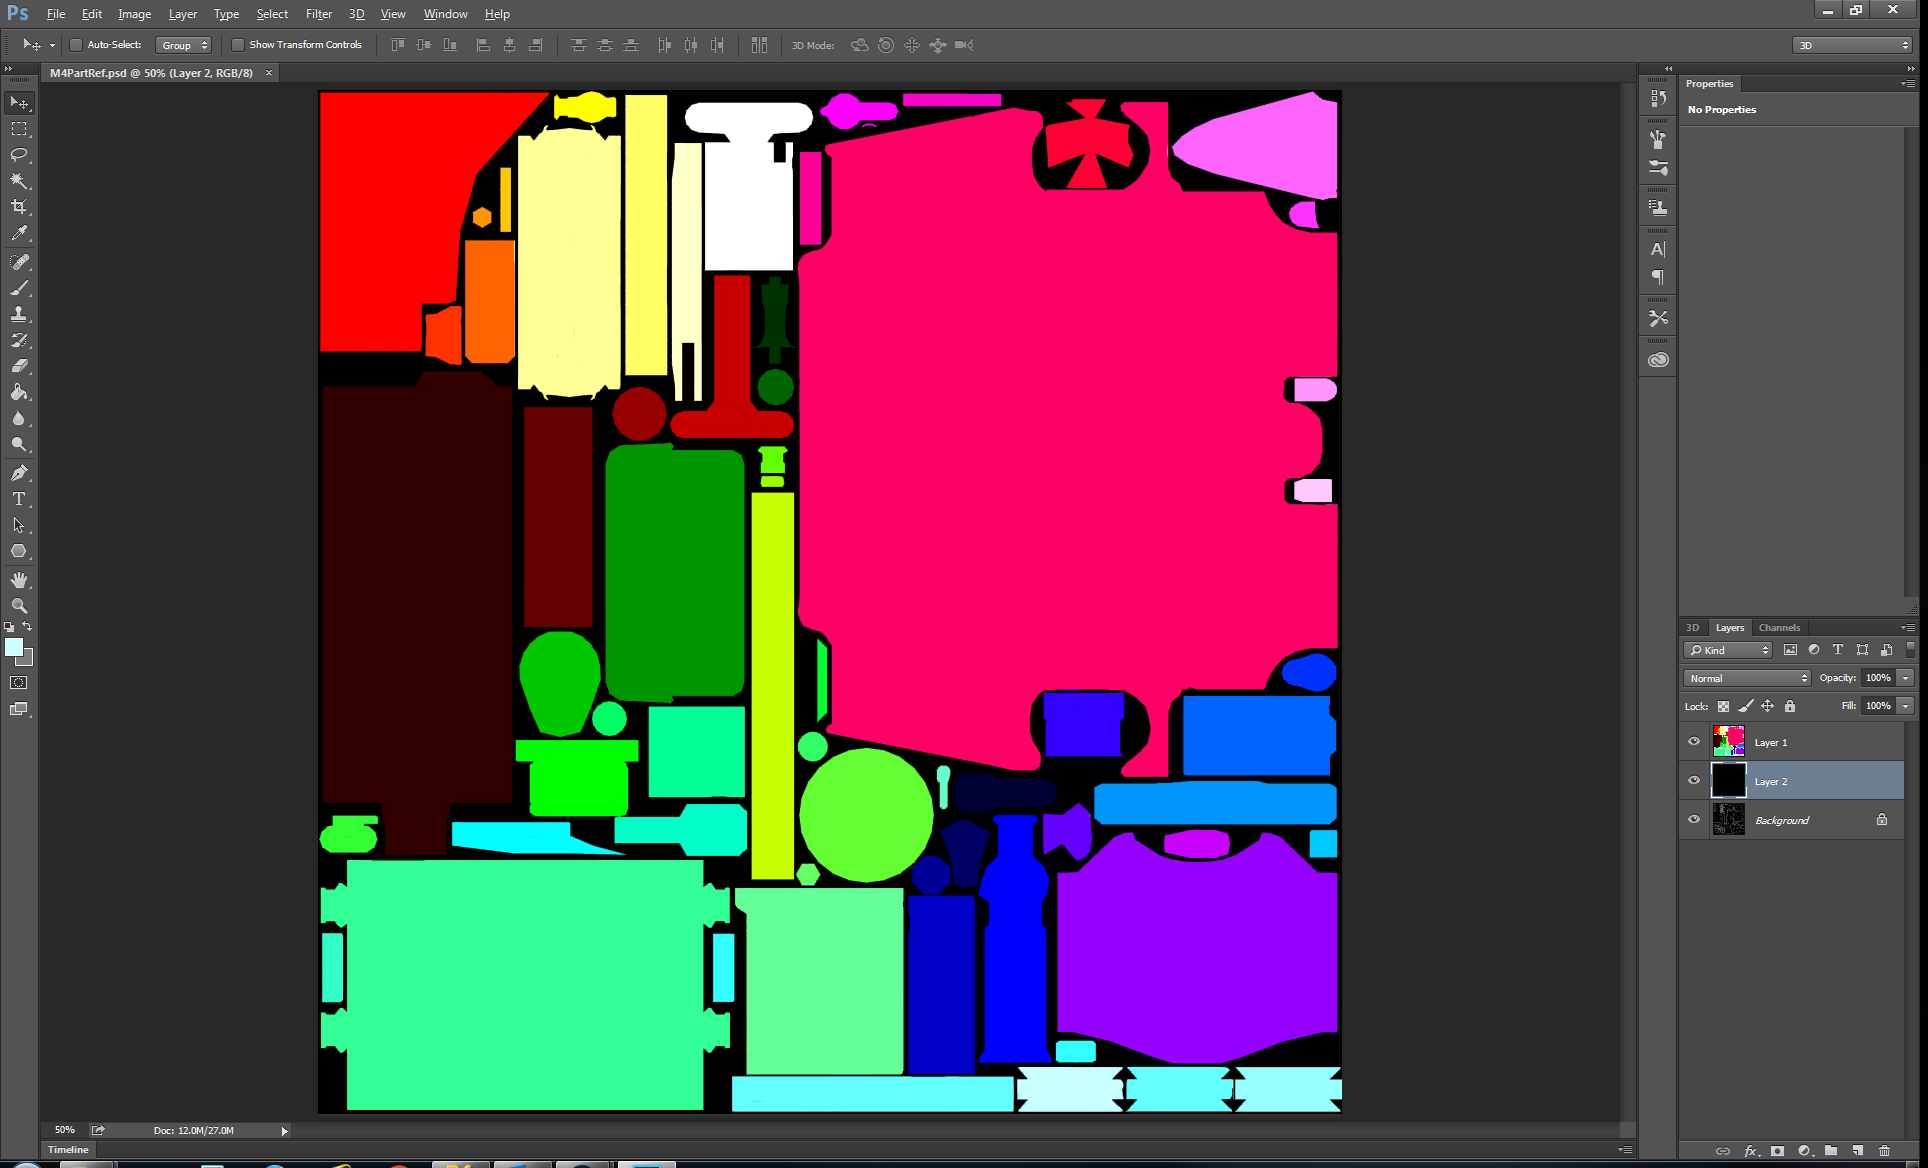
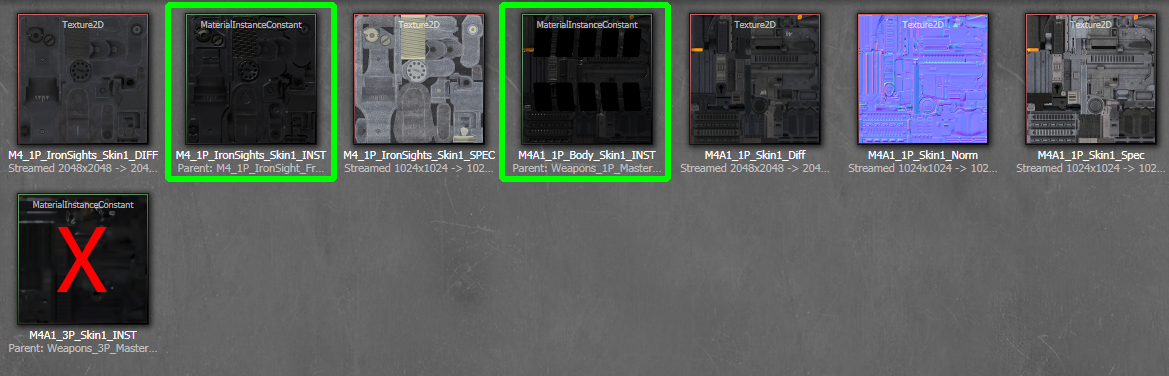
We did provide the unwrap for the iron sights on the M4, M16, and SAW since we already handle that aspect in game.
Ilrita 1 Feb, 2017 @ 11:20pm 
Does this mean it is possible to "recreate" some of the existing skins so that they go over the scopes as well? That always sort of irritated me a little. lol
Rawrster  [author] 29 Jan, 2017 @ 8:02pm 
Fixed! Sorry about that :)