Kingdom Rush Frontiers

Kingdom Rush Frontiers

294 ratings
Know your Frontiers: A Walkthroughless Walkthrough
By Happiness Officer
For those who want guidance on the levels whilst still keeping that 'ah ha!' moment when you solve it
7
4
8
2
2
2
   
Award
Favorite
Favorited
Unfavorite
Walkthroughless what-now?
Do you want something to help you solve the level but still give you the satisfaction of that “Ah ha!” moment when you crack it?

This is what I intend to provide.

You might have often found yourself stuck on a particularly nasty level of Kingdom Rush without being able to make any kind of headway. You know you’re close, but are missing something.
Unfortunately, most guides pretty much give you the solution. In effect, it’s all or nothing. You either go with headbutting the wall for a while or just give up and get the answer. But that kills the joy out of completing the level... as it then became a case of playing-the-game-by-numbers.

So less of a step-by-step guide, my aim is to cover the stumbling blocks or cool moves and hand them to you under the table all sneaky like. You get to enjoy cracking Kingdom Rush without having to headbutt the wall repeatedly.

I’m serious. Stop it.
Tips before you go
Because who doesn’t like freebies? Some general tips to help give you some starters to get cracking:

If you fail… change something

I’ve been guilty of this many times. You fail a level… then on the replay do the exact same thing again, only this time willing the game even more, as if that will make a difference.

“Grr! Grr! Grr I say! I’m really want this enemy to die!”

Of course, what happens is that the same lines break and you still lose.

And it’s easy to do. You’ve created what you feel is logically a very sound defence, so changing it can feel like taking a several steps backward.

But the most important thing with this game is to try things out. There’s no penalty for losing a level. So if it goes wrong: Try something different.

Sometimes it’s changing the towers you use, others it’s how you upgrade them. In fact, some of the later levels purely come down to the upgraded abilities of a particular 4th level tower… so try them out! Experiment with different quantities or at different times. Sometimes the trick is to build a completely unconventional setup.

Kingdom Rush is as much about adaptability as it is strategy. It is not a case of learning a single tactic that will solve everything… but getting to know the quirks of the towers at your disposal and being able to apply it.

Update: As astutely pointed out by Evanflame1667, sometimes the key difference can come down purely to when (or on what) you use Rain of Fire or your Reinforcements. This is especially true on Heroic and Iron levels. So if you feel you're very close but something just keeps sneaking by... look to see if your spell casting could be adjusted.

Max out towers before Heroic / Iron challenges

Small detail, but you might notice that the Heroic / Iron challenges limit the level of upgrades your towers get.

So before you try the level – make sure all 6 upgradable elements are at that level or greater. These levels are tricky, so you’ll want every advantage going for you.

For example: If the max upgrade level is 2: You’ll want at least the entire bottom 2 rows of the upgrades purchased.


Identify the Kill-Zone(s)

Not all paths are equal.

The inclusion of infantry means that a lot of combats will cluster into particular areas of the map. Most maps are awkward with weirdly placed tower spots: So the trick is about identifying the areas where you stand the best chance of defending. These are your Kill-Zones.

Generally, these are chokepoints and/or patches with the greatest amount of available tower spots overlooking them.

(I’m using Kingdom Rush maps so as not to spoil the fun of the Frontiers maps)


Now bear in mind this doesn’t mean you focus solely on the Kill-Zones – just your primary upgrades. You’ll still often want to expand to cover most of the map – creating additional Kill-Zones or just adding vital auxiliary towers to help keep enemy numbers in check (whether it’s reducing the amount that hit your lines or catching any that sneak by). Identifying Kill-Zones is primarily about getting your foot in the door: Finding the best places to set up and place your initial focus. Gold is scarce, so you’ll rarely get to sprawl the whole map with the best towers: So it’s all about being economical.

In general, you’ll want at least 1 Kill-Zone covering each road. Sometimes that involves letting both roads merge (so you defend as one), or covering them separately. It depends on the level. Just make sure each is covered in some way.

Be aware, of course, the best Kill-zones also depend on the enemies you face, so you’re not always able to identify them at a glance. As you play, you might find that some areas work better than others – so it’s not a hard-and-fast rule. As the level unfolds: Pay attention to what areas take brunt of the force (or even break) and adapt accordingly.

Now how to make the most of them…
Know your Towers
To understand how best to capitalise upon a Kill-Zone: it helps to know some quirks of the 4 tower types at your disposal:

Barracks

When you plan for a barracks tower… don’t pick them for damage.

Their primary job is to stall enemies and hold them in range of your brightest and best towers. Damage is just a bonus. They don’t deal a lot and most enemies beat them in a straight 1-vs-1, so it’s more about pinning enemies down long enough for your better towers to pummel them. The main reason to upgrade them is primarily to improve their survivability.

You want at least one barracks in every Kill-Zone and vital areas where you need to stall enemies. Always build them in range of other towers.

The thing to remember: The barracks tower cannot shoot. So anywhere you place it is somewhere a ranged tower won’t be. Now I appreciate this sounds inconsequential, if obvious… but this means that anywhere you place a barracks will not get ranged tower coverage.

Let’s take a slightly extreme example to demonstrate. Consider the below setup:


Assuming the enemies travel from the north: This layout is very weak. How come? The problem is that all of the ranged towers are at the very bottom. The enemies will get to stroll down the entire top path completely unhindered, meaning that the only time the ranged towers start shooting is when the enemy are straight on top of your infantry.

Let’s switch it about like so:


Though the same towers are used and the infantry are in the exact same place: This placement is much more effective. The reason is that the ranged towers can now shoot at the enemies on both the top and bottom road. So by the time the enemies reach the infantry, they will have had more shots directed at them. And the bonus just stacks: If the towers whittle down the enemy numbers, it ultimately allows your infantry to survive much longer, making the defensive line considerably more resilient as a whole.

As a result: The best locations for barracks are awkward tucked-away spots that a ranged tower would have too much of a limited range with. In effect, give them the worst spots in every Kill-Zone. Try to place them towards the back so that your ranged towers can get some free shots before they hit your troops.

Additionally, in some cases: You might have a super-cool Kill-Zone with many towers covering each other, but an awkward lone tower spot a bit further ahead. If you need some more infantry, this is also a good spot; adding a top ‘layer’ to your Kill-Zone, if you will.

Artillery

For something with such a delightful explosion and heart-warming ‘splut’ sound as it frags enemies… this tower requires a lot of finesse to use properly. It is, curiously, perhaps the trickiest to use for that simple reason that, wielded incorrectly, it’s just an oversized money-sink.

Its subtlety is the numbers. The basic blast deals about 8-15 damage, but only shoots every 3 seconds or so though (3.8 damage-per-second). To give you some comparison: The archer tower deals around 6 damage-per-second. So against a single target: The archer tower deals 50% more damage… at nearly 50% of the cost.

It goes without saying then: The only time the Artillery is worth its money is when it’s crashing down on top of as many enemies as possible. Clustering enemies together with infantry is vital for getting your money’s worth. Cram several in one place, and the collateral damage is just deliciously obscene. So you need the chokepoints.

As such, always pair artillery towers with infantry. Most enemy waves appear in single-file, so you’ll need something to help bunch them up. When it comes to the Kill-zones, it helps to tuck them nearer the back (similar to the barracks) as they won’t be of much use until the enemies are bunched up... so better to let the other ranged towers get the first shots at the incoming foes. This does change, however, when the DWAARP is concerned, so check that section for more details.

Archer / Mage

These are essentially your ‘ranged towers’. The archer towers are cheaper and fast-firing, the mages are slower but deal heavier damage.

The mages counter enemies with armour, the archers counter enemies with magic resistance.

As a general rule, you’ll want both. The only exception is, obviously, if a particular road has greater levels of a particular resistance.

In a balanced set though: Mages tend to deal more damage overall and can punch through armour (which also negates barracks / artillery, so is more threatening than magic resistance), so they tend to get the better locations and first upgrades, but really it’s not a hard-and-fast rule. Keep both rolling and upgrade them equally, as they’ll both have their key parts to play.

They pretty much operate well anywhere. Against a balanced force (i.e. mix of resistances), the main thing you’ll want is to ensure you have reasonable coverage throughout the level (i.e. your entire back line isn’t just archers). You can generally achieve this by alternating on tower spots: The first is a mage, the one next to it is an archer, then mage… and so on…

How to put them together

So you’ve identified a pretty sweet strategic spot. Now what?

As before – this isn’t a clean-cut strategy that you can just apply to every level. In many cases, the weird positioning of tower spots mean that you’ll often be forced to shoe-horn something in… But as a general pattern:

Start off with a barracks at the most awkward or furthest-back point and move the troops so that they’re in the centre of the area the towers cover.

If you have space for artillery, place this one near the back as well, as it’s only really useful once the enemies cluster up.

The front then gets your ranged towers.


Again, this is more a pattern than an exact science, and there will likely be many exceptions and scenarios that break this. But it’s a decent starting point to try things out from.
1. Hammerhold


Get it? Because it’s where a hammer is stored (the people of Liniria are a simple folk).

Campaign

Basic level that shows you the ropes. Play around and get a feel for the game!


Heroic

What worked for the campaign will work here. The main challenge is that you’re without your hero: So will need to use reinforcements and barracks placements carefully.


Iron

This one teaches you the key synergy of the Barracks and Bombard Tower: Congregating enemies and blasting the lot of them in one, satisfying, boom! Don’t even bother trying to guard the chokepoints: You sadly have to guard both roads separately here. Make sure the bombard towers can reach where your barracks units are stationed. Use your reinforcements to help bolster any roads and save your Rain of Fire for Dune Raiders: They’re resistant to everything else.
2. Sandhawk Hamlet


Campaign

Can you see that delicious chokepoint where both roads meet? That is the key to this level. Beef it up, stick your hero there and dig in.

Once you’re rolling, you’ll also want to put some attention to the small road to the right. It already has a useful dune archer, but you’ll want a bit more to help stall nasties that come from there – otherwise your chokepoint might crack when both roads charge forward.

Heroic

Back to the chokepoint with you! Get a nice mix of towers again. However, out of all the upgrades: The critical one is a level 2 bombard tower by wave 4. You’ll get completely overrun without it.

Resist the temptation to use rain of fire in the first waves. You’ll want to save it for Wave 3 to take out as many Dune Raiders as possible. Waves 4 and 5 can get quite hectic, but so long as you have your bombard and enough brutes to stall enemies around it… you should be fine. Keep spawning reinforcements in that little cluster to beef up the numbers.

Iron

This level’s actually pretty easy. You have sufficient gold to make a solid chokepoint. Where you lack artillery, you’ll want a lot of strong firepower coming in (remember – barracks units don’t deal a lot of damage). As before, it’s just about keeping the enemies pinned down in your kill zone. Stash rain of fire for when you get a good cluster – not forgetting the handy burning ground it leaves behind as well (you do have that upgrade, don’t you?)
3. Sape Oasis


This is where the game starts to up the ante. You get to play with stronger towers, and just as well… you get 2 new nasties.

Firstly are the War Hounds. They’re magic resistant, so mages will be a lot less effective. You’ll need good archer towers for these brutes.

The nasty ones, however, are the Immortals. Well armoured, good HP and decent damage. You need high-level mage towers to take them down.

Campaign

This one always catches me out. But you can crack it with relative ease if you avoid 2 temptations:

Firstly, avoid trying to treat both paths the same. Keep an eye on each road and the sorts of creatures come down it (specifically their resistances). Each lane actually needs a different setup.

Also avoid the temptation to mass your ranged towers in the middle. At first glance, it seems economical: One tower can cover both lanes! However, it also means you’ll be quickly overrun when both roads churn out bad guys; as those towers can only defend 1 road at a time.

Once you crack that, you’ll be fine. The Immortals are pretty tough, but nothing a good levelled-up mage tower cannot handle.

Heroic

Brace yourself: You’re in for a pretty scrappy fight. You have a lot of beefy enemies and not enough gold to face them with. You’ll be scraping by with a lot of low-level towers to begin with, so try to condense the map into 2 kill zones, as you won’t have the luxury of being able to sprawl about. Limit yourself to one bombard as well – they’re far too expensive for this level. But well-placed, it can actually keep the north road in check quite nicely.

Like before, try to avoid clumping your ranged towers in the middle (tempting as it might be for the first wave or so). The roads churn a mixed assortment of baddies, so combined arms is key. That said, you get a lot of armoured enemies to begin with, so prioritise mage towers first and then get arrows as the hounds start making appearances. Whilst you’ll get Immortals from the southern road… that’s where Rain of Fire comes in. Resist the temptation to nuke the first one you see… he’ll have a few of his buddies in the next wave who deserve it slightly more (they wear socks and sandals).

Iron

After the melee of the previous level, this one’s just fun! Take a look at the incoming waves… Each road is to be treated very differently. In fact, the middle shouldn’t even see any ranged towers at all.

Your primary focus should be the north road. Right from the start, you’ll quickly be reminded that you need a solid group of troops there. Archer towers are cheaper to upgrade, so you’ll want to cash those in first to keep ahead of the tide. Truth be told, the southern road is pretty easy to defend, even with the Immortals stomping along it. A few towers, some Rain of Fire and you could probably host a picnic there (a somewhat molten picnic, granted).
4. Dune of Despair


You get your first taste of level 4 towers here! You also get the taste of some horrible nasties:

To be honest, Dune Terrors aren’t too bad… just annoying. They hide underground (where they cannot be hit) so are only vulnerable when they pop up to engage infantry. As such, you must have enough infantry on hand to be able to tie them all up. So long as they’re in range of decent towers, they will go down quickly.

The desert archers, however, are just awful… we’re talking stepping-on-a-Lego-brick awful. Unlike other enemies, they prefer to stand back and shoot your infantry from range. They’re also resistant to magic. Left unchecked, they just decimate your lines and let everything else swarm through. You want strong archer towers, but a well-placed artillery can also be useful. Tying them up in melee is also an excellent idea – either with reinforcements or your hero.

Campaign

This is where it starts to get nasty! By and large, you have two key problems in the form of new enemies: Desert Archers and Dune Terrors. And just to rub it in, you have a giant sandworm trying to eat you. (But you’ll quickly find that is, weirdly, the least of your problems).

The chokepoint and the stretch behind it is the ideal place to set up. You have a ton of available tower spots… and you’ll need them to really stand a chance. Get set up and work from there.

Your first expansion site should be the road on the right. You won’t need much, but something to whittle down the dune terrors is ideal. You can only target them when they’re above ground in melee, so you’ll have to have sufficient barracks units to keep them occupied whilst your towers pick them off. Mage towers are particularly useful where you’ll also have scorpions rolling down it later. To be honest, you’ll seldom be able to hold off the right road indefinitely, so don’t panic if enemies break through – it’s more to thin things down so your main site doesn’t get overwhelmed.

The road on the left is the nasty one to pay attention to, as that’s where the desert archers come from. Needless to say, direct all rain of fire their way! Also drop reinforcements on their head to keep them engaged in melee. As you expand to the left road: place your focus on ranges towers first. Upgrade them before you even think about more barracks. There’s no point having good soldiers if the ranged towers cannot support them… the archers will just tear through them.

Avoid the temptation to hire mercenaries from the hut. It’s too isolated to be able to support properly, so you’d only waste gold trying to keep it topped up.

Heroic

This fight gets pretty intense very quickly! The layout you used before should, by and large, work well here. The catch is that you need to drastically scale back the expansion to the south. The east is still important early on, but you primarily want to just soften up the foes and stall them so they’re gathered in one, neat rain-of-fire-shaped group. Most of what ventures that way is well armoured, so match accordingly.

Now… The inordinate numbers of thugs and beatnicks that charge your way mean only one thing… a damn big artillery! You want one in place and levelled up sharpish. A level 3 is a must by wave 5.

In the early phases, stash your rain for fire for the heavily armoured brutes from the east. If you can wait until they meet the other road and catch more baddies in the carnage… even better. Once the desert archers make an appearance though – turn your attention to them. They are, by far, the biggest challenge in the final waves. The problem is that they stand just back from the mob – so your towers tend not to target them.

Firstly, a second artillery tower isn’t a bad idea, tucked on the south road so is out of reach of the main chokepoint (but can hit those pesky archers when they cluster!) – The rest of your coinage should go into your barracks units. Get them fully upgraded so that you at least have something holding the line for the artillery to do its thing. Don’t forget that upgrading automatically respawns new soldiers – a handy way to quickly replenish numbers when things get tight.

Iron

Remember before how I told you before not to hire Mercenaries?

Yeah… ignore me.

The first challenge in this level is putting your archer towers somewhere where they’ll only target the wasps from the east. If they get distracted shooting the armoured foes from the west – the wasps will sneak by. So you have to un-learn protocol a bit and not place them in key chokepoints. Make sure they’re highly upgraded as well.

Once you get the start down, the level progression is actually pretty straightforward. Keep the archer towers going up and throw in the odd barracks as a buffer for your more expensive guests. The biggest threat is, surprise surprise, the desert archers again. Distract them with reinforcements, barracks and Rain of Fire the suckers when you get them nice and clustered together.

There is an achievement specifically for this level. Go get it.
5. Buccaneer’s Den


Long roads and plenty of towers to use them on! The enemy also bring cannons to this fight (which periodically shoots your infantry)… but so do you!

This level brings with it 2 new nasties:

Firstly are Executioners. They’re big, tough and insta-kill infantry – so can quickly render your infantry lines useless. Try to pick the fights within range of powerful ranged towers and tie them up with your hero, whom they cannot one-shot. You can also use reinforcements as a temporary shield to buy you some time. Rain of Fire is very handy, so long as you can keep them in one place to get the full effect of the scorched ground.

The Sand Wraiths are next. They’re pretty annoying as they summon plenty of undead (who draw all of the towers fire) creating an almost unlimited wave of enemies. The good news is that tying them up in melee stops them summoning, so do so, also within range of strong towers (they’re pretty strong so your infantry won’t last long in combat).

Campaign

By now you’ve probably seen the naughty surprise this level has waiting for you! For reference: It’s wave 8 and no, you cannot do anything to stop it – so make sure you’re ready.

The trick to this level is all about your big, new, shiny DWAARP. There are a huge number of trash mobs ready to party and this bad boy absolutely ruins them. Get a single artillery set up to cover the 2 main lanes and build everything else around it. The start will be a bit hectic trying to level it up, but once DWAARP’d the main roads shouldn’t be a problem. Obviously you’ll want to be upgrading others towers as you go along, but this one’s the key one to aim for. Don’t be afraid to hire cannon fire to help out with the squishy mobs (only use the 25 gold shots – the triple just isn’t worth it where the shots scatter). You’ll want 2 barracks blocking each side as well.

The left road might seem a bit flimsy, so try not to defend the whole stretch, but focus on a single point in range of your bombard. You have a bit more grace with the right road, so should be fine there despite how messy it will get. Unless needed elsewhere, keep your hero here.

The sneaky slip-road that appears looks daunting, but it’s actually quite easy to defend. Space is tight (and you even get Dune Terrors) so don’t be afraid to bash on the front door of the SCUMM bar to hire some fire support. Make sure the towers around there are also fully upgraded. Plan for scorpions… a lot of them.

Heroic

Brace yourself for another scrappy fight. The good news is that you can bring your hero to the party this time (they finally found their invite). The bad news is that they’ll be resigned to guarding the small side path for most of the start – likely with many of your reinforcements. (It’s what they get for not bringing a drink).

It’s hard to establish a strong position early on, particularly as your lines will quickly get decimated by cannon fire. So expect to sprawl. Spread out and focus on covering the map before going for the big upgrades. It’ll be messy, but with enough towers; you should be able to wear down the attackers through pure attrition. Ultimately, the layout that worked for the normal level will work just as well here. Likewise, the DWAARP is the kingly lifesaver that pounds everything into dirt.

It will need a lot more fire support this time around though, particularly high level mage towers. A lot of armoured enemies are in the mood for gate-crashing, so you’ll need to be ready. It’ll grudgingly mean that your barracks units and archer towers don’t get as much love this time – so expect your lines to get flimsy at times. If you can bring your hero in the bolster: Do it. You’ll particularly want them to go toe-to-toe with the executioners to try and hold them off a bit.

Iron

Another level where you should expect to sprawl.

The lack of barracks here tends to mean you need to bring a melee specialist to this fight. Alric tends to be the best out of the early bunch, as his sand warriors are able to engage multiple foes (and this is certainly something you’ll need!)

Conceptually, this level is actually pretty straightforward. You can only use archers and mages, and need a mix of both to win this level… so alternate them on the spaces available to get an even spread. That’s the easy bit.

The challenge is not burning through your gold. You have no barracks so must rely purely on the SCUMM bar mercenaries to assist you (your hero will generally spend the fight tied up by the small eastern road). Whilst strong, replacing them can quickly get expensive if you’re not careful. The key is to only have one or two at each bar a time (except in the bottom-right, where you’ll want plenty by end game). If you cluster them, they’ll just get wiped out by cannon fire.

Only go for Corsairs as well. They’re cheaper and will be locked in melee most of time, so the ranged buccaneers won’t be as useful this time around. Ultimately, they’re expensive to replace: so only really bring them out when you have the towers to mean they won’t need replacing too often! But, by all means, bring out an extra corsair or two when heavies turn up and you need them stalled.
6. Nazeru’s Gates


By now you’re probably well-acquainted with the more annoying enemies up to this point. Prepare for all of them!

Campaign

This deceptively small map doesn’t give you a lot of room to work with. As such, there are 2 important elements to this level.

Firstly, the winding bends are perfect for a well-placed DWAARP. You’ll want one each side to stand a chance. Remember that it affects its entire radius: So try to cover as much ground as possible. In fact, if you haven’t tried it already: Aiming for the Furnace Blast upgrade is also a very sound tactic for the latter parts of the level.

Secondly are the newly acquired Arcane Mage towers. The short roads make armoured foes very deadly, particularly in the west. So you’ll want to have a counter in place.

The south-west road is going to cop it the most where you only have a few towers to be able to hold the southern bend with, so your hero will likely be helping out here for the most part. It’s hard to really stop the northern road’s forces from joining in, so you’ll want get some well-upgraded towers set up quickly.

The eastern road tends to get swamped with large mobs. If you bolster artillery early over there, it can generally make do for the first few waves – freeing up resources to beef up your inevitably beleaguered western side. The real problems begin though when the Sand Wraith’s turn up in wave 6. They are horrible. The tight bends mean that your towers will be too busy targeting their undead minions to focus on the wraith’s themselves (as they stand back, shooting your troops). Rain of Fire is your only real ace-in-the-hole here, as your hero will likely still be occupied on the west. Where possible, try to tie up the wraiths in melee to stop their damned summoning. Your reinforcements won’t last long in combat though, so only really call them in when you’re in range of your towers. It also helps if you play with your barracks rally points to move them out of the way (so they don’t get shot) so that the wraiths are at least in range of your primary towers.

To be honest, if you can make it through that wave in one piece – then you’ve probably got the level cracked. By the time you hit the later waves, your DWAARP should make the wraith’s undead minions less of a concern and just more a pain in the backside.

Heroic

Less is more when it comes to this level.

This unrelenting challenge hits you hard and fast, so you need something to hit back with. Keep your sprawling to a minimum and use your generous starting gold to get some solid towers up.

The eastern road is the easier to defend (in theory anyway). Though it gets hit heavily with a ton of well-armoured nasties, they all share the same trait: armour. So long as you capitalise on this and keep the upgrades flowing through the level – you’ll crack it.

The west is where it gets nasty. To be honest, you’re unlikely to be able to defend both roads without stretching yourself too thinly… so don’t. Pull back and let them merge. Sure, you’ll have a huge glob of lightly-armoured enemies congregated in one place just asking for ordnance… and?

Make sure you get another tower or 2 set up though. You’ll have armoured enemies and some executioners later on in the level, so make sure you’re ready for them.

The nasty twist is near the end when the desert archers turn up (miss them?) – The most important bit is to keep them at arm’s length away from your main defence site as much as possible. You’ll need that infantry for the dune terrors. Your best bet is to build up the tower spots that just overlook the western entrance. Use some arrows and assorted infantry to take the brunt and whittle them down and then let your DWAARP catch the stragglers.

Fun fact: If the very final surge on the east path gives you trouble at the very final wave – Don’t be afraid to sell off your towers on the west side once it stops spewing enemies.

Iron

Freebies!

Only sell the barracks where you have a better tower to go into its place (as you can’t get them back when sold). Truth be told, most will play as free cannon fodder, so don’t worry about trying to upgrade them. The key is more to rally them around your brightest and best towers.

I’ll keep this simple: you don’t need much. You have a lot of enemies coming at you right from the off. We’re talking one heck of an a lot. So don’t waste your time with flashy wizardry… Pound them into dust with souped-up artillery. Place ‘em right and that’s the bulk of the level sorted right from the get go.

The rest is then simply getting mage towers set up and damage control. Scorpions will scuttle from the west, so you might need some mage loving there. But the real fight will be over on the east. You’ll have Immortals and desert archers coming at you pretty quickly. Get your hero there and target the archers first. So long as they fall into the radius of the DWAARP, they shouldn’t be a problem. Clump the immortals together and then rain of fire the heck out of them. But just when you get the hang of it… the sand wraiths return! As before: Furnace Blast on the DWAARP is a very sound idea to keep the undead under control whilst you try to target and take down the wraiths.

Weirdly, the east road finishes long before the west does. So once it goes quiet – sell up everything in the east to really spruce up your western defences. The final surge of scorpions and executioners can cut it fine (hur hur hur) so sneak in every advantage you can.
7. Crimson Valley


Welcome to the jungle! We’ve got fun and games.

Lol no. We don’t. There’s only death. Death and sadness. Enjoy.

This new terrain pits you against tribal warriors. The basic Savage Warrior is decent in combat, but easy to take down with a strong ranged tower or 2. Careful not to leave low-level infantry in their path though… they’re good in combat and any killed infantry get eaten (regenerating their health). So make sure you have enough towers around to do the heavy lifting. This level also brings forth Witchdoctors, which are stronger heal enemies around them. If possible you want to try and keep them away from the rest of their squad. Isolate them, knock out the savages and then the witchdoctor shouldn’t put up much of a fight.

The jungle also gives you spiders (magic-resistant wolves). The Matriarch is, in particular, nasty where it has a strong attack and spawns tiny spiderlings. You generally want artillery here, because from level 3: All the spiderlings get insta-crushed with a satisfying ‘splut’. It’s the best way to keep their numbers in check.

Campaign

This level is all about staying on top of things. It starts off gently but you end up with 4 roads to protect, so scaling correctly is the key here.

As a general rule, you don’t want any tower sitting at level 1. Always aim to upgrade first before moving onto the next tower spot. Don’t panic too much about the debris-covered spots – you can work around most of them for much of the level. It’s only later on when the road to the east opens up that you might want to clear a few spots by the exit to give you a plan B if your lines crack.

The north road predominantly chucks forth spiders. Unusually, the mercenary camp is very well placed to synergise with your defences – especially where the spear twirl is a great area-of-effect move… So keeping in mind the spider’s magic resistances and penchant to spawn spiderlings – find the right combo and you won’t actually need to worry about the north road at all. Establish it early.

The western road(s) gives you the savages, so never set any infantry in their path unless you have decent ranged towers set up nearby. Mage towers tend to be the best counter, as they deal stronger bolts of damage. So get a few more set up than you normally might.

Once you establish the north line, build a decent defence for the west near your entrance. Don’t worry about spreading out just yet – focus more on a solid base first.

Once the lower of the western roads appear, you’ll have Witch Doctors to deal with. They’re manageable so long as you can keep them apart from the warriors. You don’t have many towers to play with to guard that line, so focus more on just stalling to begin with. Thankfully, you should start having more gold rolling in, so now’s a good time to expand and move your western defence line up towards to the chokepoint. Keep the strong towers rolling and don’t leave any infantry exposed.

The east road cracking open is the final nasty surprise. You’ll get plenty more spiderlings from here, but sadly don’t have the spear maidens in range. So make sure you have enough infantry covering here, as it’s very easy for spiderlings to sneak by. Your hero will likely need to hover here during heavier waves too. This also tends to be a good time to clear out some debris so you can guard the exit.

Whilst you’re juggling this (I know I know… multi-tasking): Just also be aware of the periodic wasp swarms. Careful not to get too caught up with artillery that you forget the mages or archers. But so long as all 4 roads have some coverage from them, you should be ok.

Heroic

If you can comfortably crack the campaign level, then this one isn’t too bad. The only real difference is that all 4 roads are on you from the start, and the eastern one will bring forth savage hunters instead of spiders. The rest is, by and large, the same.

And likewise, so are the tactics. Start by establishing a strong line near your starting point (working around the debris) and then expand out once you’ve got some decent upgrades and more money rolling in. In fact, you probably won’t even have to clear out many spots until the final wave.

The only real difference is not to focus on building around the north road as much this time. The trickle from the east negates this luxury. But the spear maidens are still as formidable.

Iron

Though you have a lot of starting gold, don’t try to cover the map. Gather everything around your starting point and level them up to the max. Again, just work with the available plots for now. The spear maidens are your only real source of area of effect attacks, so you’ll want them leading the way, supported by your hero and reinforcements. You have one chokepoint, so chuck everything at it.

The wasps can be a pain in the backside – so plug the gap directly. It might seem like a waste of mage towers, but it at least gets them out of the picture entirely.

Save your rain of fire for the Spider Matriarchs. Their high magic resistance will make them a real headache in this level.
8. Snapvine Bridge


Do not feed the plants… well… with your troops anyway.

The plants covering the level periodically munch anything nearby, whether friend or foe. So make sure you don’t station anyone nearby. Also be careful when moving your hero about the place.

This level introduces Savage Hunters: weaker versions of the warriors, but ranged. They’re nasty if left unchecked, but are actually quite easy to take down. It’s only in high numbers that they become difficult. Drop reinforcements on their head often (particularly in range of a friendly tower). They have no resistances, so mage towers can also lend a hand this time.

The second new addition are the Earth and Spirit shamans. They project an aura giving high armour / magic resistance respectively. So if you don’t have the appropriate tower, they can be an absolute nightmare. Where possible, try to isolate them (so their allies fall out of range of the protective aura). But additionally, as luck would have it: Your new Axethrower Tower comes with ‘Totem of Spirits’, which negates this aura!

Campaign

This is a painfully awkward level, so expect a lot bit of scrappy fighting here. The snapvines tend to occupy places suitable for infantry and debris covers the rest. The southern road, in particular, can become frustrating where the tower spots are stretched apart. Even the scumm bar is located badly!

So let the enemy bring the fight to your side of the river. It’s very easy to spread yourself thin, so focus on creating 2 solid Kill-zones where you can safely tuck your infantry without them getting munched. You’re unlikely to be able to get more than one barracks on each site, so you’ll want some heavy towers up and rolling, particularly upgrading the mages first.

The first headache will likely be the snorkelling hunters from the north. Get a good ranged tower overlooking where they appear, so they’re given a fitting welcome. Don’t be afraid to use reinforcements to tie them up too. Once you can best them, the north road tends to be ok.

Your second headache will likely be the earth and spirit shamans to the south (especially when they decide to tag-team). The Axe Throwers’ totem abilities are the key here. Focus on Totem of Spirits first, as it will negate the shield auras cast by the shamans, giving your towers a chance. Your line will still likely break though, purely due to numbers… so it’s not a bad idea to hire a few corsairs as back-up for any that get through.

Heroic

Stay on your side and dig in… You’re in for another messy one. Thankfully, the structure that worked for the campaign will work just as well here – you’ll just have fewer towers… so make ‘em count. Quality over quantity is a biggie in this level, but don’t worry too much about most of the level 4 tower abilities… just get the damage.

You’re hit by less enemies this time, but they have nastier combos of shamans and witch doctors (they basically all heal and protect each other), so the Totem of Spirits is a must-have. It’s your only real way of cracking through this formidable shell… that and rain of fire of course.

Iron

If the gorrilions from the get-go aren’t enough of a hint… This level is horrible. We’re talking you’re geography teacher level of horrible here.

Yeah. That bad. Despite the epic starting gold, most attempts will have your lines effortlessly pummelled or overrun by poison darts.

But there is a sneaky trick to it. The secret is in one of your towers – specifically one of their special abilities. You might not know it, but one of them is very handy at crowd control.

You’re not going to be able to defend multiple fronts, so pull right back and ensure your towers can take on enemies from both roads. As you progress, extending north to catch more of the hunters is a good move. Use your first rain of fire when the first gorrilion and savages congregate. The second is for either the mix of shamans or hunters (fun tip: the 2 shamans are right at the back, so use reinforcements to stall them – stopping them buffing the squad they’re with). Play it right and you might not even need the third one.

It tends to help if you use a melee specialist for this one; particularly Alric, with his ability to summon limitless sand warriors. It’s do-able with a ranged user, but tends to be a bit more touch-and-go.
9. Lost Jungle


The map looks deceptively large, but in reality you’re working with your back against the wall. The problem is that annoying spaceship that’s crashed in the north-east.

Throughout the level, the eggs next to it will keep spawning parasites.

And, by goodness, they are annoying. They render your infantry useless and, if they kill them (which doesn’t take long), you get a reaper in your face. Both are magic resistant and, just to rub it in, aren’t even worth any gold. As such: Your infantry ultimately have to be under the watchful umbrella of several powerful artillery and archer towers, lest they get reaperfied. Grudgingly, this renders your line of defence to the west of the map. Venture any further and your infantry will just get consumed.

The second annoying pain in this level are the Poukai Riders. They are like flying Desert Archers (as if they needed to be any scarier). The annoyance is that the flight means you cannot tie them up with infantry (other than short-term target practice), so lines of infantry will quickly get cut down. Strong ranged towers are key for these buggers.

The good news in all this is that you now get the Necromancer tower. The skeletons are parasite-resistant and the legions of enemies will give you a plentiful supply, so is well worth checking out.

Campaign

Don’t get too attached to your infantry here. Everything is pretty much out to eat or skewer them.

This is where the game takes off its gloves and says “I’m sick of being nice to you”. It’s a doozy! You have a viciously compact map with a lot to build and very little to do it with. Start small. It’s tempting to spread out, but focus on getting a solid core of level 3 towers first. Ranged towers get priority here (your infantry would be wasted otherwise).

The parasites are, by far, the biggest headache. Where you’re restricted to the west of the map, the east road should only ever see ranged towers. It’s not a lot to work with, so big towers to maximise the limited chokepoints are the key.

It’ll be very scrappy, but you’re ultimately working your way to 3 key things:
Firstly, acquaint yourself with your shiny new Necromancer tower (You know you want to)! Aim to get this around wave 8, as things start to really get nasty shortly after. The skeletons serve a dual purpose: Firstly, the inexhaustible supply of fallen foes is vital for stalling the Savage Hunters and Poukai Riders – as your infantry won’t stand a chance otherwise. Secondly, the skeletons waste the parasites’ ability. They die, but create no reapers… a fair trade-off (as the parasite dies with it). The bunched up fighting also makes the Pestilence upgrade well worth trying out, just to add to the area-of-effect goodness.

You’ll then want some DWAARP (yes, plural) with Blast Furnace and Crossbow towers with Barrage ability. Whilst obviously great against the assortment of spiders and tribesmen… they’re really there for the parasites. If you can deal with them, the level almost solves itself. As an added bonus, the Crossbow towers are perfect against the pesky Poukai Raiders.

As a final tip, the isolated tower spot to the north-west overlooking the chokepoint is placed quite fortuitously… it overlooks just where the Poukai Riders tend to hang back, but far away enough that it can’t shoot the enemies at the front. So pick a good ranged tower wisely to help take ‘em down!

Heroic

Thankfully the parasites are a lot quieter here. You only have to deal with a handful. However, if you didn’t like Poukai Riders before… you’re going to hate them here!

To be honest, it’s not actually a difficult level... The problem is just keeping enough troops around to distract the Poukai Riders, whilst ensuring you have powerful ranged towers to take them down.

The secret is not to bother with infantry at all. This time you actually can have your cake and eat it: A strong ranged tower plus the ability to create plentiful infantry… Place it correctly and you’re sorted. The rest is ultimately support ranged towers. The savages and Gorrilions are annoying later on – but if you can crack the Poukai Riders then the rest should, by and large, go down with them. The multiple shamans might look intimidating: But so long as you don’t let them merge, they’re actually pretty easy to manage with the appropriate counter-towers (ones that negate their resistances).

Iron

In the words of a certain admiral… It’s a trap!

Don’t be bowled over by the pre-fab barracks: It’s a setup. They’re not handy troops, but a spawning ground for the parasites. So don’t give them the chance: Get rid of most (if not all) of them. Even take particular care when calling in reinforcements or sending in your hero – make sure they’re covered by your towers.

The real challenge here is gold. You get a great starting amount, but the enemies here are worth so little that you’ll barely be able to expand. So it’s all about getting the setup correct. You don’t need much… just get them in the correct place and upgrade them like crazy.
10. Ma’qwa Urqu


After the menagerie of the previous level… this one’s comparatively a walk in the park.

Oh sure, it has Blood Tricksters, a volcano and the short roads mean that the odd enemy might sneak by… but compared to your infantry being turned into life-sucking space monsters… I’ll take it!

The challenge of this level is simultaneously defending 2 completely independent roads. Though shorter, the north road lends itself to kill zones more readily with its winding bends. It’s the southern which is straighter, so harder to get a solid line down.

You might have spotted your new friends: Blood Tricksters. Basically, they make any dead enemy in range rise again as a zombie (and this overrides your Necromancer tower as well). In effect, you now have to kill everything twice. The only saving grace is that, when killed again, you can get skeletons from them still. The Tricksters are also a pain as they tend to lurk behind the lines and have decent HP, so are rarely the first to die. So where possible, try to isolate them with reinforcements or heroes. The Axe Throwers’ Totem of Spirits can also disable their ability (though is a bit harder where the spell targets the guys at the front). But truth be told… rain of fire the suckers.

The zombies themselves aren’t that bad… there just tends to be a lot of them. They pack a heavy punch so can crush an infantry line in short time, but they have low HP so it’s just a case of blasting the heck out of them. Keep an eye on your heroes here. If caught in melee for too long, they’ll quickly go down.

Campaign

Where the southern road is harder to defend, keep your hero there for most of the fight. In particular, at the start of the level: Let them do the heavy lifting so you can quickly get some stronger ranged towers set up in the north (as you have get ranged enemies the right off the bat, so infantry would be useless there).

Both roads ultimately get an even balance of badnicks… So make sure you keep both evenly updated as you go through. Gold is, thankfully, quite plentiful in this level – so you’ll at least be packing some souped up towers in no time. This is probably going to be one of the first levels where you’ll be toting a ton of level 4 towers.

And just as well: The compact fighting and lots of enemies mean one thing: you want to be packing some heavy artillery. Whilst the Battle-Mecha T200 is great fun… this one calls for the DWAARP, to be honest. It’s the best way to counter the wide clumps of enemies. You’ll want it and… yep, you guessed it… Blast Furnace. You’ll quickly get overrun by zombies without it.

You’ll want one on the northern road by wave 10. And one on the southern by wave 13.

These waves bring you get a nasty mix of Blood Tricksters with both Earth and Spirits Shamans… making a super-tough wall. Area of effect attacks (especially ones that avoid resistances) are the best counters: Blast Furnace, Necromancer pestilence or Axethrowers with the Totem of Spirits (to negate the auras) all work well. If, later on, you can boost the Axethrowers to also include the Totem of Weakness, then the large mobs in the final waves shouldn’t be a problem.

To be honest, if you can crack wave 10, the level should be yours. (It’s a good idea to save your Rain of Fire for the 2nd batch of wave 10, as that’s when it gets really nasty).

One thing to note – in all the excitement of the artillery towers, make sure you’re packing plenty of other ranged towers too. There’s a lot of flying enemies throughout the level which can easily sneak by the short roads – so you’ll want plenty to send them packing. Even tuck a ranged tower or 2 nearer the exit to catch any stragglers. To be honest, you’ll barely need barracks at all for this level.

Heroic

Another challenge with a lot of enemies and very few towers to do it in. It looks tricky, but it’s manageable with 2 simple steps:

Step 1: Get artillery rolling. It’s the only way to crack the starting mobs of Savage Warriors. Feel free to give the Mecha a spin!

Step 2: Get ranged towers up and running.

That’s about it. Some starting infantry to hold the line to begin with are useful, but you don’t really need much for this level.

It also helps to have a ranged tower near the exit to catch any Poukai that skirt by. There’ll be quite a few, so it’ll save your skin on many occasions.

You don’t need a lot of towers, they just need to be good. Level 4’s are definitely needed here. The north gets hit by Earth/Spirit Shamans and Blood Tricksters, so tends to get busy very quickly. Focus more on crowd control in the north. The southern road is quieter but has Witchdoctors and Gorrilions later on, so there you’ll want more concentrated damage.

Iron

Remember Snapvine Bridge…?

If you do, you’re most of the way there. That is… up until after the Gorrilions.

At that point you’re hit by an obscenely large number of Blood Tricksters and Savage Hunters. Your lines will get hideously swamped with zombies, poison darts and dramatic cries of “Nooooo!”

The secret to surviving the final assault is… actually quite bizarre. All I will say is: Whatever you’ve done with the towers to get up to this point… Do the complete opposite. It might feel like a stupid panic-move, but by goodness does it work.
11. Temple of Saqra


This is it! You’ve made it! The seat of the Ma'qwa Tribesmen (You’d think it’d be bigger). Conquer this and you’ll never have to look at another Blood Trickster again. Tantalising isn’t it?

Thankfully, there are no new surprises popping up in this level. You’ve already seen the denizens the tribesmen throw at you, and by now should be well versed in taking them down.

The map is once again split into 2 separate paths (with very little overlap). However, the roads wind brilliantly to create some pretty fantastic Kill-Zones. So if anything, it works in your favour.

Well what are you waiting for? Go kick tribal butt!

Campaign

After all of the levels you’ve been though… this is… actually pretty easy.

The layout makes the level less of a headache but rather elegantly simple. You have 2 distinct paths, but they work in such a way that the entire roads both act as a pair of Kill-Zones. The west road is easier to defend, as you can tuck a pair of barracks at the bottom and they’ll still be in range of everything. The eastern road, not so much. You’ll only really have well-placed 1 barracks to play with – so your hero will be helping out there for the most part.

The rest… All you really need to do is fill them with the biggest, baddest towers you have!

A good way to pace your progress is artillery: You have 2 prominent waves of spiders which you’ll likely need them for. As such: you’ll want them at Level 3 on Wave 6 – And then Level 4 on Wave 12. It’s a bit tight, but it’s doable (even if you have to get part-way through the wave before you can do it). If you can keep your head above the water and meet this: The level’s yours.

Now a naughty trick to make this level easier is the central doorway where everyone comes from. Whilst it’s not in range of your towers… that doesn’t mean you can’t hit it with your reinforcements, hero or rain of fire! It is the best place to harass, as you can hit the biggest cluster of enemies here. Rain of Fire is particularly fun, as the burning ground will scorch so many enemies running over it!

So pay careful attention to each incoming wave to see which the Shamans to aim for. As soon as you see them: Dump reinforcements on their head to tie them up… then rain down that fire!

In the earlier waves, it’ll be the Earth and Spirit Shamans.

Once the Blood Tricksters turn up: It’s all about them. Keep an eye out for every wave they appear in (as sometimes they only appear on one side) and have a nice, big, meteorite-shaped surprised for them. If you can nip them in the bud early, that’ll make them a non-issue for the bulk of the level. By the time several of them rock up… pfft… your towers will be storming it and will make short work of them.

Heroic

How well can you specialise?

Where to build is less of the issue here, but what. Each side brings with it a very distinct combination of foes – So requires a very different layout.

The west side is predominantly gorrilions with Poukai Riders to harass (and later on, Savage Hunters too, as you can never have enough pointy projectiles flying at your head). The mage towers are the easy bit… it’s how you buy yourself the time to take them down which is the problem. You have 2 solutions (and I recommend both): One is a punch bag. The other… check out the abilities of some of your towers. You might find one you haven’t used particularly often… But it’s a lifesaver here.

Later on, don’t forget to use reinforcements (or even your hero) to harass and stall the savage hunters / Poukai. It’s easy to miss as you might be a tad distracted by several Gorrilions blasting through your lines… but it’s the ranged units that are letting them do so.

The east side brings you a lot of savages. A lot. Worse, you get wicked combinations of Shaman auras right off the bat. Now you could try and muster come voodoo counter… but you want to be dealing with crowd control first. So leverage that instead. Let’s just say fire and poison don’t care about no aura.

If you still get stuck: Don’t skimp too much on the barracks this time. You have less ability to set up a wide array of towers, so having enough troops to pin the enemies in place by the handful you do is very useful indeed.

Iron

Well this is… unusual. Some pretty sweet freebies from the off!

As you might probably quickly find out though – It’s not the lifesaver it might look to be. You need a lot of towers, but lack both the gold and barracks to hold the line properly.

You already start off with the mage towers… so put the rest into artillery – you need something to counter the magic resistances. It can be tough to split the upgrades evenly between both sides, so don’t. Let your hero do the heavy lifting on one side and quickly get some strong crowd control on the other.

Now Rain of Fire is critical in this level... So use it carefully. You’ll need the first one to deal with the Reapers – it’s near impossible without it. Don’t give them the chance to split up – catch the lot as they leave and it’ll make the start so much easier.

The second tends to be the first Gorrilion. If you can, try to hold it off as long as possible. You ideally want to catch it when the Spirit Shamans also show up.

The third is the Blood Tricksters. Don’t get too trigger happy though, as there are 2 of them spaced slightly apart. Again, try to hold out so you can get both of them under the fire.

Crack that and you’re left with one final, nasty surprise. A whole troupe of Gorrilion! (I know I know, you wanted the Toaster) – Don’t split your forces… Your best bet with this final push is to take on each side one at a time. Throw everything at them. If you can clear one squad entirely, you can then sell everything on that side and go all-out on the other.

Hey, nobody said you had to play fairly…
12. The Underpass


Going underground!

Where the 80’s kids start singing along and then realise that nobody gets that reference any more.

Welcome to the Saurian caves – the last area of the Kingdom Rush campaign! If I’m brutally honest though… if you’ve cracked the levels before this: You should be fine. Oh sure, you have the Saurian technology (and a freaking dragon)… but once you get the gist of how to counter them: It’s actually pretty straightforward.

The normal Saurian Broodguard aren’t actually too bad. Like the Savage Warriors, just don’t leave level 1 infantry standing in their way.

Your first real headache will be the Saurian Nightscales. They’re magic resistant and deal a lot of damage in melee: Cutting through troops and skeletons with ease. The annoying facet is that, at around half damage, they turn invisible and sneak by your troops. In effect then, you need 2 lines of infantry and something covering the exit (as the cloak will always wear off just before it). Archers and multiple lines of infantry are the early counter. But later on, the DWAARP relegates these guys to dust. It cares not about whether it can see them – it smashes everything around it. Providing there is a visible enemy for it to target: The DWAARP will catch all hidden Nightscales trying to sneak by.

The second headache are the Saurian Brutes. These guys are Gorrilions on steroids: Twice the health and decimates anything standing in front it. Hitting it with ruthlessly powerful towers are a given… but 2 specialised counters are the DWAARP Core Drill (insta-kill) and Archmage Twister (stalls). They thankfully turn up late enough that it’s viable you’ll have these counters available.

Other than that… it’s pretty much just business as usual.

Campaign

The hardest part of this level is, by far, the start. You go through 10 waves of light skirmishes until things actually start to heat up. But until that point, you have little to work with.

Annoyingly, the best place to defend is covered in debris that cost 200 a throw to clear. You ultimately need it established at some point though, so might as well start now. Work with the available spaces (and clear a couple) to get a rudimentary defence set up.

Your primary aim is to counter the Saurian Nightscales. Their penchant for turning invisible when wounded mean that a single, conventional Kill-Zone is not quite sufficient. What you need are 2 lines of infantry on either side of your defences: One at the very front (to deal the damage) and one at the very back to catch the ones that sneak by as they reveal. They’re very damaging, so you’ll need some strong archer towers up sharpish so they don’t just cut through your troops. Keep an eye on both lines and move your hero or reinforcements to support where necessary.

As you hobble along the level, Rain of Fire will deal with the messier bits. Remember that, even invisible, the Nightscales are still vulnerable to its effects. Your towers can’t see it, but explosions don’t care for sight. Your expansion will likely suck, so don’t fret about it. Just upgrade and strengthen what towers you have.

At wave 10, the gloves come off – you get a lot of enemies and plenty of gold rolling in. This will finally give you a chance to sprawl out and get some very heavy towers going. You’ll want a number of good mage towers to compliment the archers from earlier (especially with the larger numbers of armoured Saurians). Artillery is also a very key investment – especially as the collateral damage hits Nightscales whether visible or not. But it all really comes down to powering up for the Saurian Brutes on the last wave. Say goodbye to your infantry and just hit the Brutes hard. If you’ve been able to snag a DWAARP Core Drill and/or Archmage Twister: This will become considerably easier.

Heroic

This level is… strangely easier than the campaign one.

Oh sure, you have more enemies. But you have a vast starting pot of gold and all of the debris is cleared… so you can actually now build that super-duper Kill-Zone you wanted to in the previous level right from the very start.

So do just that! Make that epic chokepoint and wreck all that comes near. Mirror the layout you ultimately used for the normal level. If it worked for you then, it’ll replicate its success here.

Iron

Crowd control with just arrows and barracks? We know the drill.

Station yourself in the old favourite chokepoint and have some souped up ranged towers watching the area. You’ll have a lot of Saurian Nighscales, so will need them up early. Don’t forget the double-infantry line too. Even use Rain of Fire to to help out (use early enough and it’ll recharge in time for the good bits). Your first priority with this level are your archer towers.

By the time the first Saurian Myrmidon hit your lines, your ranged towers should be nearly ready (as is your Rain of Fire!) – The second half is basically going full reverse: Upgrade your infantry to create a tough-as-nails barrier. You’ll need the staying power in time for the final charge off Myrmidon. The first battalion can be seen off with your third Rain of Fire. The rest you just have to overpower. But with fully-upgraded infantry, you’ll have no trouble.
13. Beresad’s Lair


Forget the dragon… they have laser blasters!

Your main new headache are the Saurian Blazefangs. Magic resistant and toting a big cannon that can vaporise infantry in a single shot. Keeping them away from your front lines is the biggie. Thankfully, if you can melee them, it stops them shooting. So dropping reinforcements on their head in the range of archers tends to be the reliable counter. It can be annoying though, as they still tend to get a shot in before the reinforcements engage.

The other new recruits are quirky but… To be honest it’s still the Nightscales and Brutes that suck.

As for the dragon… notice that tempting pile of gold it’s sitting on? Don’t you just want to pilfer it? If it leaves its lair, you might be able to… (Kudos to peckyami for highlighting this!)

Campaign

You can see the chokepoint. You know what to do.

For the most part, the real threat won’t actually be the enemies hitting from the front – it’s the ones climbing up behind you that you need catch. There’ll be a lot of them! As such, you need to expand backwards from the chokepoint, covering everything up to both exits. It’s predominantly Nightscales and Darters that will sneak through there.

The east road will give you your Blazefangs. Keep your attention here. If you leave them be, your front lines will be history: So drop reinforcements and arrows on their head early. And once they bunch up… Rain of Fire the heck out of them. Keep them down and this level will be a breeze.

Ideally, you want to get to a point where you’re able to hold the back lines with little support from reinforcements – as you’ll need them available later on to tie up the Blazefangs when both they and the sneaky climbers attack simultaneously. If you’re forced to defend the climbers, it’ll be too easy to allow the Blazefangs free reign over your lines.

Weirdly, you don’t need to worry too greatly about the west road. If your chokepoint is solid enough, you’ll seldom need to expand there (you’ll likely be spending gold elsewhere, to be honest).

Heroic

This level is bizarre… It’s awkward to play and yet you can tend to fumble through it without really knowing what you’re doing (I still don’t).

What makes it sucky is that you don’t have a lot to work with, but are forced to sprawl (which you cannot overly afford to do).

The chokepoint is once again key… which is just as well, as the DWAARP is king in this level. It sees to the bulk of your early crowd control, but will also play a very key part later on…

You then just need a way of taking down armoured enemies. Don’t get too caught up fortifying the front though… You’ll have flying enemies from behind your lines on wave 2, so you’ll want to start getting the back lines set up too. Weirdly, you want keep your archers at the back and your mages at the front for this level. The only exception is likely some archer loving along the north-east road to help whittle down the Blazefangs that emerge later on.

Curiously, the bulk of the fighting is likely to emerge from numerous climbing foes behind your chokepoint. They’re not majorly strong, but there’s a lot of them and they’ll draw your attention away from the vital chokepoint (which sees the bigger chaps). Don’t panic against the big guys though… stall them and crack the climbers instead. You’ll need a lot of troops and some strong towers in range so you can see them off quickly. Be careful not to rally your troops too close to the ledge that the fighting moves out of range of the support towers.

The last challenge is a nasty cohort of Brutes. Your flimsy towers will barely scratch it… that is… unless you were wise enough to invest in a DWAARP and can abuse the Core Drill. You built one earlier on, you say? How very shrewd of you!

Iron

This level is just fun.

You have flying enemies on you right from the start… and between barracks and artillery there is only one counter (that’s not your hero). You have a lot of gold at the start for a good reason…

Honestly: Kick back, enjoy yourself and just make sure you keep the back routes covered as well. It’s not unusual for darters to sneak by. If you play this level right, you completely slow the game down (that’s how awesome you’re being).
14. The Dark Descent


Quickly! I know the world is about to be destroyed, but we have to save our Dwarven allies because reasons! If we help them, they will do absolutely nothing to help us in the final level… so what are you waiting for? Let’s do this.

The layout of this level sucks. You have 2 parallel roads: So 2 avenues to simultaneously defend… but the tower spots make it difficult to really get a solid foothold. So pick a spot and make the most of it…

No new enemies… but you get some freebies this time! The southern path starts with a Dwarf Hall (similar to Paladins from Kingdom Rush), 2 Dwarven Bastion (similar to Musketeer Garrison) and a hammer-wielding Dwarven hero. The hero is a great, tanky unit… but the real beauty are the Bastions: Fully upgraded, their damage is obscene. Well worth investing to bolster the line.

The nudge to Amnesia: The Dark Descent is also very cool.

Campaign

There’s no “clean” way of doing this. The straight roads make it hard to establish a decent defensive line, so it will be a scrappy fight however you cut it. Even the normally formidable DWAARP doesn’t work overly well here, so dust off the Battle Mechas if you haven’t been trying them out.

The real saving grace in this level, however, are Necromancer towers. You need infantry, but are limited on spaces. More to the point, when you’re facing off against multiple Saurian Brutes and Blazefangs later on – even the best infantry will crumble in seconds. So effectively, the barracks is rendered useless. Let the innumerable undead keep them busy instead. Get 1 barracks up top to help you get started: But after that, focus on ranged towers and let the reaper do the dirty work for you instead. Get one on each road at the key areas.

The Dwarven setup at the bottom is pretty well placed to be honest. The only thing it lacks are magic towers… And wouldn’t you know it, armoured enemies are on that road from wave 2! So magic coverage is your first priority there. As you progress, boosting the Bastion ranged damage is an excellent call once you start getting more mixed enemies. Full upgraded, it exceeds the damage of any tower you own!

Up top, you have a lot of light / magic resistant enemies. So a collection of archers are your best bet. Keep your hero here to help you establish a solid foothold. And make sure the exit also gets covered for the Nightscales that sneak by!

Now no matter how well you build up… the last wave is always a doozy! They just seem to chuck everything at you. It gets completely frantic and you’ll have more Saurian Brutes than you can count, rendering your lines to whip-shaped dust. All I can say is: Upgrade the bejeezus out of everything. Archmage Twisters, Crossbow Barrage, Totem of Weakness, Necromancer Pestilence… Just keep dropping reinforcements in front of the Brutes to protect everyone else and buy as much time as you can. You have one Rain of Fire, so resist the temptation to throw it early. It only dents Saurian Brutes, so on this wave try to claim what Saurian Blazefangs / Savants you can with it. It’ll greatly reduce the pressure on your lines if you do (if you can dent a Brute in the process… even better!)

Heroic

Seems the Dwarves have had a little switcheroo! Just to keep things fresh.

The Necromancer towers are once again very powerful in this level, especially when the Savants show up on wave 5. You might not be able to get gold from their summoned forces… but they can still fight for your side with a bony grin! You’ll spend too much on infantry otherwise.

You can’t afford to sprawl on this level, so don’t. Keep your lines quite rigid and hold back (especially in the south). Stronger towers will win over higher numbers here.

Now the northern road can predominantly be held with the existing Dwarven towers… you just need the right upgrades! Get it right and it’ll take off the pressure so you can focus on the south. As you go back later on to plug a few holes (especially near the exit when the Nightscales turn up), you might be interested to know that you face no armoured enemies up top. They’re all busy partying along the southern road…

Down there, you get Saurian Myrmidons from the start, so you’ll want enough high-level wizardry to see them off. You’ll have Savants later on, so plan for some serious crowd control!

Your targets in the final wave are the Saurian Savants. You want to intercept the trio on the north road with Rain of Fire as soon as all 3 are in one place. If you time it when they start summoning, you won’t have the frustration of them moving out of the way. Once hit, use reinforcements to keep it that way! Take them down and the rest of the wave will be a cinch, Brutes and all!

Iron

Now where did all of those guys suddenly come from?

This level is ultimately a test in your ability to ration. You have very little coinage and a ton of rubble. You’ll be playing with only a handful of towers, so pick carefully!

Your primary aim is to fortify the northern road. This might sound counter-intuitive, as the southern road is the one that gets clobbered more… but you ultimately want the northern pass to be completely self-sufficient so that both heroes and your reinforcements can place their undivided attention on the southern road. To begin with, station your hero up top to hold the road whilst you fortify it.

Don’t worry too much about the south for now. You can hold it with what you’ve got and some tasteful rain of fire when things get messy.

Once the north road is secure, go all out on the south. To be honest, don’t even bother trying to bolster the outpost on the far right… it’s too isolated. Place the your gold, heroes and reinforcements to the leftmost garrison. The last test are the pair of Saurian Brutes. You sadly only have one rain of fire… which tends to work best on the northernmost one, as you have less heavies there to block it. The other you just have to plain-old out fight. Throw some reinforcements under its feet before it reaches your troops, so it uses up its deadly triple strike on them. I know it’s mean, but hey… better them than your heroes.
15. Emberspike Depths


This is what it’s all come down to… Are you ready to save the world?

Campaign

The immediate temptation here is to rush and try to hold the centre. This is actually quite deceiving though, because the side roads predominantly bypass it. As such, the main problem is that foes will tend to break through the flanks. Whilst you should certainly seek to capitalise on the centre coverage… the start is not the time to do it. You lack the gold to do it properly.

So as counterintuitive as it seems: Defend all 3 roads separately first. Work with the exposed tower spaces and get a decent array of level 2 towers running. Keep your hero mobile, as they’ll likely be moving around to plug gaps a lot with reinforcements. It also tends to help if you resist the urge to rush to get a Tier 4 tower rolling early. It’s hard for a single, powerful tower to provide enough coverage whilst you build momentum, so try to build up a strong collection of level 3 towers around the exit and centre ground instead.

Don’t panic when you see the first Saurian Brutes. I know your towers are still only just rolling… But Let them come to you. Once they converge in the centre… then Rain of Fire the heck out of both of them.

After then, the party starts. You should begin to be raking in plentiful amounts of gold to start toting the big guns. If you start getting into trouble with the numerous amounts of Brutes you run into… try investing in a Core Drill. Your Rain of Fire should ideally be kept for the Saurian Savants. They will prove particularly bothersome later on, so having artillery right at the front of the Kill-zones is a sound tactic to be able to take them down.

Now… when you hit wave 15: Try to spend nothing. Just hold on and save…

Once Lord Malagar conveniently releases Umbra as the last enemy is dispatched (he’s a jerk, but you cannot fault his sense of timing) – the gloves come off. Put your hero into the centre and kick Umbra when it shows up. To be honest, the first phase isn’t actually that difficult.

Oh yeah, I did say phase. Once you crush Umbra and take down some of the blobs, it resurrects and then it does something that no other enemy in the entire game has ever thought of…

It wrecks your towers.

Like… it completely disintegrates them. No money, no nothing. Is it even allowed to do that?

This is why you needed that gold in your piggybank. When a tower goes, don’t panic. Just replace it if it’s in an important location. Don’t replace any lost bombard towers (they’re too expensive) and don’t worry about Tier 4 upgrades - Just keep archers and mages popping up and reasonably upgraded. The square of 4 tower spots in the dead centre are the most vital, as they all cover the spot where Umbra shows up… so keep these top level.

With enough bludgeoning (and plenty of Rain of Fire) – Umbra should eventually crack.

Heroic

This one’s a good challenge. It’s tough, but there’s a distinct knack to it.

First up, pay close attention to what’s lumbering your way on first wave. Both sides need very distinct solutions, so specialise with the appropriate counters. Unlike before, you have plenty more gold - So get a few Tier 4 towers going – you’ll need heavier damage right from the off. You also might want some more infantry to help keep enemies by them. So long as you cover the flanks well, the centre road should take care of itself. Rain of Fire the side you like the least and let your hero bolster the other. No matter how you cut it, one side will always get messy.

If you can make it to wave 3 – you have yourself a breather. Your next step for the coming waves will be to think about crowd control. You’ll be dealing with Saurian Savants, so keeping their numbers in check will be vital. Wave 4 is the biggie: Whilst the mob of Blazefangs are an incredibly tempting target… you need to save Rain of Fire for the Savants that turn up on the west road. They approach staggered, so it’s hard to catch all 3. But so long as you can get 2 of them down, you should be ok. Hang tight and use your reinforcements to try and stall the Blazefangs that will be inevitably wrecking your lines (they’ll be heading for the centre road). So long as you don’t have the Savant mobs to deal with, the Blazefangs will be annoying, but manageable.

If you can crack wave 4 – You’re pretty much there.

From then on, it’s pretty much just about finishing off your upgrades and maximising the carnage. Try to save your Rain of Fire for whenever you can catch 2 Savants in one go.

Iron

Holy smokes… That is a lot of Saurian Blazefangs.

To be honest though, this level is pretty much a Frontiers-by-Numbers. Just create the appropriate counter to the enemies showing up and you’ll be fine. You won’t even miss those Necromancer towers.

The Blazefangs at the start are numerous, so you’ll need hard-hitting towers to break them quickly. You have an obscene amount of starting gold… so go crazy and don’t skimp on the Tier 4 upgrades. You might want to sit your hero out for the beginning (unless you like them getting vaporised). Just kick back and let the towers do their thing. If you can survive the Blazefangs, that’s most of the level completed.

But what about the Myrmidons? They’re armoured! Weird as it sounds – if your counters to the Blazefangs were good enough… you can pretty much take down the Myrmidons by pure attrition (but you can always Rain of Fire the heck out of them too). Remember as well that fire ignores armour.

As for the Brutes later on. Let’s not mess about here… Gib them with a Core Drill. Oh sure, you might be able to take them down with the combined weight of your towers, but why give them that chance?
16. Port Tortuga

This is the tale, of Captain Jack Sparrow!
Pirates so brave, on the seven seas!

A Mystical Quest, to the Isle of Tortuga!
Raven locks sway on the ocean breeze!


Sorry, don’t know what came over me.

Welcome to Port Tortuga! Many of the enemies here are the desert ones you’ve faced before along with some new fishy faces, which aren’t too scary… that is, until the Blacksurges rock up.

Hoo boy they’re fun. And, by fun, I mean a complete pain in the backside. They routinely disable your towers (even when tied up in combat) and, just as you beat the pants off of them, hide in their shells (becoming immune to damage) and shuffle towards you: recovering 50% of their HP in the process. Yeah, like I said. Fun.

Truth be told though, they’re not actually that deadly… just hard to take down quickly.

The first trick is not to focus on them too much (no, really). The bigger problem will likely be everything else running through whilst your towers are disabled. As long as you can clear them first, the Blacksurges aren’t actually too bad. So if you can: Stall them to keep them away from your front lines and deal with them after (it’s not actually that hard to do – level 2 infantry can do it).

The Totem of Silence can stop them freezing out your towers (handy bonus indeed) and the Core Drill is always wonderful – particularly as it bypasses their protective shells. Additionally, the Assassin’s Sneak Attack punches through their armour (and might even score an insta-kill if you’re lucky!)

There’s obviously Rain of Fire… but truth be told: It tends to be better used to clear out the other enemies instead. Against the Blacksurges, they will tend to shell-up part way through, so the spell is effectively wasted. If you are going to use it against them: Save it for when they’re near the exit, when they can no longer use the ability.

Another handy way to de-Blacksurge your lines is to stock up on plenty of infantry and Battle Mechas. Both operate ‘away’ from their tower; meaning that, even when disabled, they’ll still be duking it out on the road. So even in a worst-case scenario, you can at least have functional defences.

On a good note – you can hire Boatswains from the Scumm bar! They’re very tanky and carry a lovely area-of-effect move (they’re swinging an anchor, what do you expect?) - And believe me, you’ll need it!


Campaign

Weirdly, you have to start a bit off-beat here. Instead of working to establish a gentle foothold: You must basically be ready to repel a massive glob of enemies in wave 2. Bluntly put: With the sheer weight of numbers, you need some serious high-level crowd control early. Annoyingly, you won’t be able to buy much else. When you see the Gunboat, Rain of Fire the heck out of it so it doesn’t scupper your flimsy lines.

Once you’ve deflected the early assault, it’s time to set up shop (for reals). Spread out and occupy the whole southern strip. It will see the broadest range of action, so put your focus here and get plenty of towers rolling.

A quick note on wave 4: Whilst the gunboat can be a right sod… it tends to be better to take it on the chin and save your Rain of Fire for the desert archers. It sucks, but the boat at least passes – the archers, do not.

Your particular focus should be the set of planks in the crossroads. You’ll be getting sea-bound foes from the north on wave 5, so be ready. It’s a small jetty, so you don’t have much to work with. As such, Artillery and a Necromancer are 2 very sound investments. Also plonk your hero here to bolster numbers when it sees action.

Wave 10 sees the final avenue opened: Sneaking across the beach near your back lines. If you haven’t visited the Scumm bar already: Do so. The back lines cop it hard – especially once the Blacksurges turn up, so make sure everything around the final stretch is ready to counter them. There are many options – but Axe Throwers with both Totems tend to be the clincher – particularly where you can tend to end up with a backlog of Blacksurges chain-blocking everything. At the very least, the Scumm bar cannot be disabled… so keep those Boatswains coming!

Personally, I’d play this level until you can complete it perfectly. Once you get the hang of Blacksurges – you should be ok for the rest of the campaign.

Heroic

Less is more when it comes to this level.

Surviving the first waves rests on one, very key tower. Let’s just say this: You need something able to beat both Immortals and Desert Archers (keeping in mind the archers tend to stay back), be able to lend fire support to the crossroads and be Blacksurge-proof (as you get them on Wave 2). Only one tower fits this bill.

Crack that and you’re most of the way there. Just build around it (not venturing too far from your corner) and make sure the small crossroads are also covered.

For the Blacksurges in this level: Just hold them back and deal with everything else first. On their own, a mob of Boatswains can hold them off by the exit with ease – so don’t sweat it. You can deal with them later. If you can do this, the level is actually pretty straightforward. Hack, wave 5 is almost a breather! Just keep an eye on the crossroads to ensure no enemies slip by from the ocean. Use heroes and your reinforcements to bolster it.

Iron

By now you should be well-versed in crowd control with just barracks and archers. The good news is that the same tactic works here as well. The better news is that the Boatswains provide a very nice area-of-effect attack (which comes in very handy).

The bad news are those damned Gunboats… You have an armada on you this time. This is pretty much where your Rain of Fire will be going for the whole level. Not only does it stop them shredding every soldier you have left – but it’s also a very valuable source of much-needed gold.

Throughout the level, the important bit is to boost the attack speed of the watchtowers overlooking the gunboat’s path. You can’t nuke them all, so you’ll need a counter instead. Later on, be sparing with your Rain of Fire: Some ships launch a couple of rockets, but others will launch a seemingly infinite amount. If you see the latter: Blast ‘em to hell.

The Blacksurges might look scary… but seriously, just keep them occupied with some infantry. When everything quietens down, meet them by the Scumm Bar and have a troupe of Boatswains bash them with an anchor.

What? We’re pirates. Don’t give me that look.
17. Storm Atoll


Sadly no Boatswains here… but you do get a really fun new ally! The Black Corsair! He chugs around in his boat, leaving underwater mines and hurling explosive ordnance to the shore. Though he has mobility in water, it tends to be best to keep him close to your front lines where his barrels can deal the best splash damage.

The new fishy fiends are also particularly interesting. The Bloodshells are the ultimate tanky unit: Massive armour and impervious to artillery. Worse, you can’t even best them with a Core Drill. Whilst high-powered mages are a solid counter, your real ace-in-the-hole is, curiously, assassins. A lesser-known quirk of their Sneak Attack upgrade is a small chance to insta-kill a foe, which is precisely what you need. You’ll need their dodge at top level though to keep them in the thick of it long enough to strike.

The Bluegales hit the opposite end of the spectrum: Ranged and immune to all magic (thankfully Rain of Fire doesn’t count!) – They are the absolute scourge of your infantry with their storms. Not only does it mask what’s going on, but deals damage too. So keep them busy in melee with reinforcements and, like the Blacksurges, try to keep them away from the action. Pin them in range of a Crossbow Tower and let its Barrage take them down: It’s easily one of the best counters.

Campaign

As you can probably tell, this level leaves you at the mercy of sea-bound assault. You have very few places to be able to muster a solid defence, and any that do only have a handful of towers overlooking them. The islands are nice but, at best, are more there to chip away at foes than hold them off. The good news is that all but one of the routes converge on the exact same spot… the top exit.

As you can probably guess then, this is the most important site on the map. However… you only really have 2 towers watching over it (with another 2 only just in range). And herein lies the fascinating challenge: You need to specialise around the exit, but ideally cover as many counters as possible. So aside from the barracks (which tends to be a must) – Think about which towers might be able to play multiple roles (perhaps with their upgrades). The bigger range of enemies it can counter, the better. Just be aware: It’s going to see a lot of enemies.

Park the Black Corsair nearby too, so he can lend fire support. Usefully, this also places him in a perfect position to place underwater mines right in the path on the Deviltides that make a beeline towards you.

At the very least: Aim to counter either Bloodshells or Bluegales (as their requirements are mutually exclusive). The rest of the map is then about countering the other. What you end up with is essentially a key Kill-Zone that can fend off most of the foes – and everywhere else geared towards picking off the enemies that the primary spot would struggle against. As you can probably guess then, you need to keep those enemies at bay and in range of the more suitable towers.

You’ve hopefully also spotted the Shrine of Regnos (If not, it’s the statue by the small lighthouse). It’s very expensive to repair, but grants you a personal death laser. It’s area-of-effect and, fully upgraded, can carve a massive chunk out of Bloodshells: Think of it as a second Rain of Fire. It’s hard to get it rolling early (not without a massive sacrifice to your defences) – but if you save some coins for it later in the level, it can help out if you get the wrong side of several nasties.

Just keep an eye out on the lower exit. Whilst it tends to only get Greenfins (until the last wave) – Redspines from the other road will still not hesitate to skewer your infantry en route, potentially leaving a tiny gap in the defences.

Heroic

How good is your crowd control?

The good news is that the lack of Bluegales mean that you don’t need to worry about archers at all. And just as well, as you have a ton of whale-bound Deviltides on you. Thankfully though, you don’t have to worry about the small exit to the south for this round either.

Crowd control is the name of the game here. There are far too many enemies to be able to reliably focus on high-power single-target-based defences. You need to be able to simultaneously take on several enemies: Many of whom drop right on your doorstep.

Despite the busy waves, you don’t actually have a lot of gold to play with beside the generous starting pot. In some respects though, this is a useful clue: You should be able to set up the crux of what you need right from the off. The rest of the level is just cashing in on the good upgrades and expanding a little. The bulk of the fight will be by the exit, so make sure that’s top-notch: The rest can actually be left empty. Fun as the Shrine of Regnos is… I feel it might be a bit too pricey, considering the near constant assault you’ll be under. Anyways… There are other ways of quickly breaking a Bloodshell…

Iron

This is a relatively straightforward level… you even have a functioning shrine right from the start! As long as you can get enough strong towers rolling, you don’t even need to worry about purchasing their abilities. Just get a solid magical defence set up around the key chokepoint (not forgetting some attention to the small southern exit) and you should be good to go. Regnos the crap out of anything big and scary.

When it all quietens down and you just get a trickle of greenfins; it’s time to think about beefing up the Shrine… you’ll need it! The first full-powered blast is just perfect for the trio of Bloodshells when they congregate!

The Bluegales are, understandably, the final nasty challenge. Your mage towers will be useless and they stand back from your infantry. Worse, they’re both never in a place where you can hit them simultaneously. Great.

Your hero and reinforcements will play a key role here. You could even enlist the Black Corsair. Keep the Bluegales occupied in melee, and let Rain of Fire and nautical laser beams do the rest. You can even get barracks units joining in if required: Set their rally point so they are as far away as possible. Once the Bluegale is close, you should be able to run them forward to engage.
18. The Sunken Citadel


This is it! Time to ink this mofo! You know everything you’re dealing with now (and more importantly, how to fight back) so let’s get to it.

Campaign

This is bit of a wicked level. It teases you with a wide range of tower spots… but the reality is that your expansion is very limited.

The level can look a bit convoluted… but the paths are pretty straightforward: One road attacks the island on the right (extending to the water exit) and the rest pummel the small bay to the south. The paths wind a bit, but that’s where they all end up (and where the bulk of the fighting will likely happen). As such: Pretty much everything will be going into your 2 key islands. So don’t expect to sprawl much.

The big challenge is, bizarrely, the first wave: How to hold back the tide of Greenfins. There’s always just a few too many of them. Even if you rush to Necromancers or Artillery, they cannot seem to clear the clusters of them fast enough. Well… something can. It might feel unreliable at this early stage – but it appears to be your ace in the hole.

The rest of the level is then primarily about readying to counter each enemy type that appears. Funds are tight, so it cuts it pretty fine. You have Bloodshells on Wave 6, and a Bluegale hitting your right island on Wave 7 (followed by a trio in the next wave!) – So plan your development to repel these, making sure you have crowd control adequately covered as well. Tick these 2 and you should be fine.

Things get pretty crazy at wave 11. You have no fewer than 9 Bluegales all hitting the southern bay. This is the big one to prepare for. As such, you generally need to go quite heavy on archers in this level. Unusually, Mages can actually take a bit of a backseat.

Once you get to wave 13 (the wave of just Deviltides), now’s a good time to focus on getting the Shrine of Regnos up to full strength. The final waves can get nasty, so it’s a good call having a bit of clout by your side. More importantly, it’s your best bet against Leviathan.

Truth be told, Leviathan itself isn’t too bad. The problem is simply that its path avoids the majority of your towers. However, if you clobber it with reinforcements, Rain of Fire and your super-duper laser beam, it shouldn’t stick around for too long: Just remember to Rain of Fire when it’s stationary, so you maximise the damage.

Heroic

This is a fascinating and bizarre level.

Unfortunately, the Shrine of Regnos was knocked down to make way for an Arcane Wizard tower (Regnos blows things up with aquatic laser beams and this is the thanks we give it?) – So it’s back to plain-old out-thinking the enemy here.

What makes this level interesting is that it’s less about holding off a massive enemy wave… but reducing it to a manageable trickle. If everything hits your lines at once, you’re finished: There’s far too little cash to play with to mount the proper defences. So take the enemy on your terms. Pick who you take on and when.

Thankfully, Bloodshells and Devlitides are the worst to hit the east island, so you can specialise to counter them. The main bay, however, you need to be able to handle the full range. Ultimately it’s all about getting a few key towers up and managing the flow to them. Crack that and the level’s yours.

Iron

Feeling bad for trashing the shrine before… we now have 3 of them! Better still, all of them are ready to use.

This level is ultimately about your micromanagement (and aim). Your towers can only do so much, so it’s ultimately about torching the big things with lasers. Where possible, try to stall any nasties (that is; anything but greenfins) so that you can hit as many as possible. It often means cutting it fine and letting them close in… but your shots are limited, so you need to be economical.

Don’t worry about upgrading the shrines just yet. They’ll suffice for now: Just aim to get some form of defence rolling to buy you time. The lack of barracks leaves you with only one feasible alternative (and don’t forget the life-prolonging upgrade too). The rest is building a strong enough artillery to make the most of it.

The eastern island only gets greenfins… Meaning so long as you get some reasonable coverage there, it can (thankfully) be left to its own devices.

When you see the first Bluegale, that’s the time to start thinking about boosting the shrines. Sadly this leaves very little cash for your defences: So dig in and keep those reinforcements coming. Remember to be patient with your shots: Wait until you get as many enemies together as possible. This is critical in the final attack, as you have little otherwise to crack those Bloodshells.
19. Bonesburg


1 new level… ah ah ah…

The naughty surprise with the Shadowmoon levels are the introduction of full moons. In the top of the screen, the small window shows the night sky. At periodic intervals during the level, the full moon will appear: Granting a nasty buff to all enemies on the screen. For most, it’s a speed boost. Others get damage or regen increases. These can tend to come at terrible moments: So it pays to reserve your Rain of Fire for these to give you the edge.

The enemies themselves aren’t overly fearsome… there’s just a lot of them. Werewolves have pretty high attack, so make sure you start rolling out level 3 infantry for them and take care not to leave your hero in their face for too long.

The Abominations are an interesting one. Whilst they have a lot of HP… they’re not particularly powerful, so are surprisingly easy to hold off. The problem is that they’re essentially oversized, waddling timebombs. Once they die, they explode: Taking your troops with them. As such, the Necromancer towers suffer quite heavily – so aren’t a great idea in this level. Crusaders tend to be your best bet, seen as they have the most chance of surviving the blast (or at least resurrecting from it).

The good news is that you get some new friends in the form of the Dark Forge: A nice multi-purpose Mage Tower with a built-in minion. It’s surprisingly strong and both upgrades are fantastic.

Campaign

The first level places you against an ever increasing tide of zombies! The problem is less of big’uns cutting through your lines… but simply getting completely swamped.

Sprawl and cover the level quickly. You’re ultimately engaged in a war of attrition; so the more towers, the better. You’ll also quickly discover that zombies do not necessarily care for roads… any patch of dirt is fair game, so they will often pop up wherever they damn well feel like it (especially in a full moon). Make sure the exits are covered.

Though the Dark Forge is strong… it’s not particularly well placed, so don’t rush to upgrade it – as it’s a bit too isolated to hold its own without the proper support (though later on, is worth giving Frankie a spin). Keep an eye on your lines and just level up everything gradually (you don’t necessarily need to rush to any single tower here). The road to the right can quickly become messy, so make sure you can thin the enemy waves further down the path (the fork in the road by the chapel is a particularly nice spot). The road to the south doesn’t get a great deal – The only real problem there are bats sneaking by: So make sure you have suitable ranged coverage.

When you see bats: Put reinforcements in the way to pepper them with ranged fire. They tend to swarm (often skimming past when your towers are distracted), so you want as much fire directed at them as possible.

Keep your rain of fire in your back pocket for when a full moon hits, as that’s the surge that can tend to break your lines.

Wave 6 is when you get to find out if you’ve got the setup correct: The road to the right completely cops it against a wannabe-Zombie Apocalypse. The good news is that the zombies are slow enough that you can squeeze 2 Rain of Fires out in the wave if you can stall them long enough (and there is thankfully no full moon to worry about).

The other wave to beware of is 13: You get a lot of bats and a full moon near the end, which gives them a hefty speed boost. You’ll want the ranged towers along the bottom / centre up to scratch to ensure you nab them all.

As you start getting mobs of Abominations: That’s the time to really start bolstering your foot soldiers (and spreading them out if you can). Their ghastly boom will wreck your lines, so it ultimately comes down to digging in and waiting them out.

Heroic

How good is your crowd control on a budget?


This is another fun level that pits you in a war of attrition against innumerable zombies and, later on, angry hoards of abominations. The secret to this level ultimately rests on 2 very key facets: Your ability to kill clusters of enemies very quickly… and your ability to keep them there while you do so.

Get the former rolling first. You need to get killy and pretty sharpish. It’s impossible to cleverly cover both roads simultaneously, so just suck it up and build on both. Try to bunch your infantry where you can, to capitalise on any area of effect goodness you might have. Keep Rain of Fire in your back pocket to lend a hand when the full moon hits. The beauty is that fast-walking zombies mean they walk into the smouldering ground faster. Result.

The second phase is predominantly your infantry. Your line is going to get caked with Abomination debris – so there’s nothing much you can do other than to keep your infantry rolling out. Split them up too, so a single blast doesn’t take them all out. The bottom road quietens sooner, so sell up everything when it does so you can give any remaining towers a handy boost.

Iron

An interesting level that, again, forces you to play on a tight budget. Curiously though, you already have most of what you need. You just need to do the right things with them. If you can crack the small mob of Abominations at the beginning – you’re most of the way there.

The main target is, interestingly, the bats. They will often sneak through when your towers are distracted, so you want to make sure the exits are covered. If you can hit the bats and Abominations at the same time… even better.

Once you’re rolling – the main phase is simply getting some semblance of a land force together. You don’t have a lot to work with, so keep them in range of friendly towers and let your hero and reinforcements plug the inevitable gaps.
20. Desecrated Grove


The Desecrated Grove is where the enemies start to take a nasty turn: Once again hitting opposite ends of the resistance spectrum.

Ghosts and Phantom Warriors are only affected by magic. So there’s no sneaky tricks here… a solid collection of mage towers is your only feasible counter. Additionally, ghosts bypass infantry: so you’ll need to make sure your roads all have decent coverage of mages. Phantom Warriors are deadly where they drain the life of infantry (but not skeletons) so don’t expect to hold them off for long. So long as you have Arcane Wizard towers though, you should be fine. If you need to stall them a bit, remember the Arcane’s Twister spell!

Lycans, on the other hand, are uber werewolves. Once the human form is knocked out – they emerge: Stronger, deadlier and any of your killed infantry gets turned into a Werewolf. Left unchecked, they can very quickly turn the tide against your lines… So don’t give them the chance: Go for overkill and rain of fire them before they can do anything nasty. Failing that, ensure you have some high level infantry or skeletons standing in their way.

Campaign

This is a bit of a cruel level: You have a lot of awkward roads to defend and not a lot of spaces to do it with.

The large numbers of ghosts make mage towers an absolute must here. You’ll need several covering all of the main roads and avenues to ensure that none sneak by. Get coverage set up early and play defensively: Build up your side of the map before you start to venture over to the outskirts. Once you’re nicely ghost-proof, you can start to expand out.

So long as you keep the mage towers upgraded throughout the level – the ghosts will be no problem.

That just leaves the Werewolves and Lycans. The mages dominating the map might appear to leave you at a disadvantage… but you can still counter them. Sure there’s arrows or silver bullets… but I honestly feel that the effectiveness of giant fire-laden meteorites is woefully undersold. I’m serious: Your primary counter is to blow them to hell with Rain of Fire. So be sparing when you see them in the coming waves. Most only ever come from the right entrance (with the exception of a small pack of in the north on wave 12) – So you can always get them in one place. Always target the Lycans and, when they engage your troops, let ‘em have it: The hot ground will finish off their wolfish form in no time at all. Make sure you buff your lines with reinforcements to keep them in place too, as you need to make this spell count.

If you need a hand – give the Necromancer a try. The Abominations stop hitting the central road part-way through: So you can actually build up a nice army of skeletons from the wolves this time.

As for the Abominations: Make sure the slip-road to the south has a few lines of tough infantry. Just like before, this road primarily comes down to being able to shoulder their explosions.

Periodically you’ll see Jack O’Lanturn ride in. He’s not a massive threat (until later on, when he summons Ghouls) – but if you can afford to Rain of Fire the sucker: do it. He’s worth a hefty amount of gold, and if you can keep picking him off as he appears, you’ll be swimming in it.

The bulk of the level is then just buffing the heck out of everything. If you keep your infantry rock hard, your mages busy and can find some space for artillery: You’ll crack it.

Heroic

Much like the Heroic challenge on Beresad’s Lair – this is an awkward level but one that you can generally fumble through if you’re careful.

By and large, you’re aiming for pretty much the same layout you did with the Campaign level. The only difference is that you’re more broke than before, so it’ll be more of a mishmash than a meaningful replica. Forget the outskirts and focus on getting some semblance of a foothold on your side. You’ll need some high level towers early on, so pick a few key spots and make do. It won’t be pretty, but it’ll be functional. Start with the central island and expand above and below to cover the adjoining roads once you get some gold in.

Rain of Fire is initially for Jack O’Lanturn if you can catch him. Whilst it sucks that you’re left without your spell (especially against the Lycans in Wave 1) – It can be a good long-term gamble to get some much-needed income early on. If you can muddle by this wave, you should be ok. In Wave 4 – time your Rain of Fire so you can catch all 3 of the Phantom Warriors in one go.

You still have plenty of ghosts, so don’t skimp on the mage towers. Once again, make sure you have a good coverage. You have bats too, so use reinforcements (and maybe even archers) to keep the lower road in check.

Iron

You should know by now never to trust a Kingdom Rush freebie… get rid of that barracks! It’s nothing but Lycan fodder.

The aim with this level is a good collection of archers. Infantry are merely there to hold the line, but fall far too quickly against wolf-kind. You ideally need a way to slow down their inevitable death… but upgrading them isn’t necessarily your only option…

Start with the centre, and quickly expand to the north road. Then spread south once you’re rolling.

The good news is that, for the most part, the Lycans almost time themselves perfectly around your Rain of Fire. Each time the next batch arrives, you should pretty much be ready to go again (though it cuts it fine). Abuse this very convenient turn of events and give them hell each time you see them. The only exception is a trio to the south about 2/3 of the way through… so make sure you can take the hit.

As for Jack O’Lanturn? I’m sure you can find an upgrade that makes short work of him. Pick your best laugh and rake in the gold.
21. Dusk Chateau


We’ve found the source of these horrors!

It’s coming from a desolate, evil-looking chateau, which sits isolated in the middle of a spooky forest… who’d have thought it!

The final nasty surprise the Shadowmoon Campaign throws are you are the Vampiresa: Magic resistant and frequently drains the life of your soldiers… understandably making them an absolute pain to kill. Worse, they bypass the roads and fly in about half-way down, right in the middle of everything… so you don’t even get a good run-up. Top-level archers are a must: Either toting Barrage or the Totem of Weakness respectively (preferably both). But your real Ace in the Hole here is Lucrezia.

If you haven’t met her yet: She’s your fantastic new ally for this fight. Her stats are pretty sweet (low health but has life drain and high armour) but more importantly: She has a decent area-of-effect ability that insta-kills Vampiresa. And it’s precisely this which will give you the edge in this otherwise difficult fight. So you need to keep her alive when they show up. Make sure she doesn’t go using that spell on trashy mobs when there’s Vampiresa to kill!

Good use of Lucrezia is the key to cracking this final level.

Campaign

Do you remember the Temple of Saqra? The final Shaman level by the temple entrance?

The exact same principles apply here: 2 isolated roads that must be guarded simultaneously. You have a balancing act on your hands and some truly awful nasties heading your way.

The saving grace at least is that the 2 roads have distinct sets of enemies: Allowing you to at least specialise to counter them respectively.

The western road predominantly sees Werewolves, Lycans and Abominations. So don’t worry too much about mages this side. Whilst it sounds like a pretty hideous combo, this is perhaps the easier road to defend: You can specialise more and the curve at the bottom directs everything into a pretty peachy killzone.

The eastern road is the trickier one. It will see the entirety of the ghosts and phantom warriors… but… you can’t go all-out on the mages like you did before, as you also get plenty of Vampiresa. You’ll need to carefully balance both counters. And it sucks. Expect a lot of dead infantry. They start showing up on wave 5. By wave 8 their numbers get really nasty, so you’ll need a lot of decent infantry at this point. There’s only one Lucrezia and you basically need to buy her time between her spell cooldown. Jump her between lanes, taking down the biggest clusters.

Like the Temple of Saqra - Artillery also plays a big part, seen as everything tends to descend into a small point on either side of the map.

You’ll also want to be playing with a lot of top level archers in this level. A good coverage of Crossbows and Axe Throwers will buy you a serious advantage in the later waves when things get pretty crazy. Keep your heroes mobile as well: Once you get the upper hand on one road, team them up on other to take the edge off that one too. Things can get pretty tight, but the roads are at least close by.

Once you annoy Vasile enough to coax him out: target his acolytes first. He can regain life from your troops, so trying to stall him at the top of the road is meaningless. Your rain of fire will annoyingly be used up on the mass of Lycans just beforehand, but should recharge just in time for Vasile to hit your lines.

The bad news is that he doesn’t stay dead (oh yeah, vampire and all that…) – And subsequently floats down the eastern road with a death aura: Taking down anything in his way in seconds. Don’t bother sending your heroes over – let them take on the Vampiresa on the other road. The only thing you can do here is dig in let your towers open fire… Upgrade them to hell and send him back.

Heroic

This level is pretty unpleasant. Between roving bands of werewolves and Vampiresa, this is predominantly a war of attrition against Abominations. You don’t have a lot of money to put into everything, so it ultimately should go into the key things: Some heavy artillery and enough peoples to keep enemies in its blast zone… oh and some wizards to keep the ghosts from the west at bay.

You’re not going to able to set everything up straight away (especially as the mages need to be decent enough for the ghosts) – so aim for the artillery as best as you can and just let large numbers of troops pick up the slack.

In the opening stages the zombies are, curiously, the key target. The abominations are manageable with enough infantry… but the zombies can swamp your lines quickly under their bloated umbrella. So don’t be afraid to rain of fire them (and their overgrown chaperone). Try to keep your barracks units split up so a single abomination doesn’t blanket-wipe the lot of them.

This level is as much about patience as it is strategy. Waves 3 and 4 hold some key moments that require good timing. Firstly are the Vampiresa (which thankfully only hit the eastern road) – it’s ultimately down to Lucrezia to defeat them: So like before, make sure you have enough infantry to buy her time. Wait for each batch of Vampiresa to congregate into one place, then swoop Lucrezia into the middle of them so her that her cloak attack wipes them all out. Then pull her out of combat entirely (as you don’t want her wasting the spell on a pointless foe) and send her back in when the next batch are clustered. It takes a bit of finesse to get this down, but makes this level considerably more bearable.

The next key moment is at the end of Wave 4. It might be hugely tempting to rain of fire the werewolves that hit the west… but resist! You need that spell for the Lycans that show up at the end. It might get hairy (and wolfish) in the interim, but keep your troops levelled up and holding that line.

Waves 5 and 6 are all about those Abominations… At this point it’s really just about holding out. Make sure you have plenty of Crusaders and keep them spread out. Rain of fire when you get the biggest cluster of foes and try to keep them on scorched fire as long as possible. There’s no easy or clean way of doing this… so dig in.

Iron

As levels go… this one can get pretty intense! Think of it like a whistle-stop tour of everything you’ve faced condensed into a couple of minutes. Oh and… predominantly under a full moon. Enjoy!

Whilst you cannot build barracks, you get 2 freebies for each road. And unlike before, you definitely want to keep them all. Though it can appear daunting: This level is a lot easier if you pay careful attention to what comes down which path. Money’s tight, and knowing where certain towers are effectively useless is a big advantage here. Once you’ve sussed it, it’s quite conceptually easy.

The challenge is in your execution. You need to make careful use of Rain of Fire and Lucrezia in this level – as there are many elements that would be otherwise unwinnable without them. Vampiresa, in particular, are a deathblow to your lines – so getting skilled at clustering them and flying in Lucrezia to take them all down in one go is pivotal to this level.

Don’t try to expand much: Keep everything in range in your barracks and level it all up heavily. You need to pack a solid punch, especially when the Lycans and Phantom Warriors rock up. If you start getting into trouble: Lucrezia is excellent at holding off both (she’s immune to the Phantom Warrior aura) - so when she’s not off hunting Vampiresa, keep her at the front taking the heavy hits. Just don’t let her die.
22. Darklight Depths


The Saurians return with one more trick up their sleeve… Saurian Deathcoils. They make you take back every mean thing you’ve ever said about desert archers, and even wish for vaporisation by laser blaster again. They’re snipers with obscene range (roughly half a screen). They’ll be picking off infantry by the exit just as they themselves are turning up for the party.

Truly: They suck. Your infantry and heroes are not safe in this level.

The way you counter them is, ultimately, the same as you do any ranged unit: Keep your infantry back and strong ranged towers overlooking where the snipers tend to cluster… it’s just here the distance between your guys and them is the majority of the map. Thankfully, they have no resistances, so you can clobber them with anything.

Campaign

With the exception of the Deathcoils… there’s nothing here you haven’t seen before: So it’s ultimately just dusting off the tried-and-tested methods you picked up from the campaign levels. That’ll get you most of the way. Heck, you don’t even have Savants to deal with this time.

The only annoying element here is the lack of coverage overlooking the exit (so Nightscales and Darters will often sneak by). A ranged tower tends to be better in the spot closest to the exit (especially where you have razorwings passing by later on) so you’ll need to make sure you keep your hero and reinforcements back to catch anything that slips by.

Now the Deathcoils ultimately shape how this level plays out. Plan for them and everything else will largely take care of itself in the process. Your infantry aren’t safe in this level, so to be really honest… don’t even bother. Focus almost entirely on ranged towers and let your hero, reinforcements and rain of fire pick up the slack.

The key is to make sure you have a powerful ranged towers overlooking where they appear. The first Deathcoils appear in the West on Wave 5, so make sure the furthest tower spot (the one closest to the entrance) is ready with a strong ranged tower. You don’t have to worry about the East until Wave 9, but that, too, should get the same treatment.

To keep the Deathcoils distracted: A Necromancer tower is also very good investment in this level. Your skeletons will barely last… but if your ranged coverage is good enough, you have plenty of bodies to keep them topped up.

When things start to get very heated on wave 12 – you can even use a few dead spots to make barracks, purely as targets to distract the Deathcoils (the pair of isolated spots at the very top are perfect for this)

Xyzzy himself is very much like Vasile from Dusk Chateau: Anything around him gets killed very quickly (only this times it’s by hammers with a massive area of effect – equivalent to Deathcoil’s range) - so it’s largely digging in and letting your ranged towers do the talking. He’s armoured: So Arcane Wizards (with critical mass) are excellent calls. And though you can’t use infantry to slow him down… the Battle Mech’s Waste Disposal still does!

Heroic

Now where did that difficulty spike come from?

This is one of those levels you’ll likely need to play several times. Each wave is particularly nasty and has a certain technique to it: So you’ll probably need a few attempts to get a feel for each one. So don’t panic if you get whooped (a lot).

… and this time, they remembered to bring the Savants. But curiously, they’re not your biggest threat here… neither are the Deathcoils.

It’s the Myrmidon.

You get a hefty mob of them in waves 1, 3 and 5. Each requires careful use of Rain of Fire to survive: You need to cluster as many of them together (and keep them there) to knock out the largest chunk.

The naughty trick to deal with the Deathcoils is to give them plenty to shoot at. They’re far too numerous early on to be able to quickly break, so you have to go on the defensive and crack them by attrition. If you see dead space in the level: Stick a barracks there. But of course, that’s not your only option… Ironhide have sent many darters and savants your way for a reason. Use it to your advantage.

Wave 1 rests on your Rain of Fire. You have 5 Myrmidons and want to take out the first 3 before your brittle lines crack. Though it’s tempting to fortify the south, try to stake a bit further up too (near the middle) as that’s where you’ll want the bulk of the fighting later on. Start to think about artillery coverage there too (you’ll need it later on)

During wave 2 – Get a ranged tower near the western entrance immediately to start picking off the deathcoils. Harass them where you can with reinforcements (and even your hero). Expand your ranged coverage to cover more patches of the road too – so the darters can get chipped away whilst they run down. Pull the Dwarves back to catch any that sneak by.

Wave 3 can get pretty tense, as you have both Deathcoils and Myrmidon. At this point quickly get a ton of cheap infantry coverage going: Both to draw fire and to gather the whole Myrmidon cohort into a single clump to Rain of Fire. Wiping out the lot in one go is critical, so don’t be afraid to pull in your dwarves for this too.

Wave 4 is ultimately bracing yourself for wave 5: Remember I mentioned the artillery? Yeah… You’ll want 2 for the next wave. With the sheer weight of Myrmidon and Savant summons… it’s your only chance. Your defences should hold this wave: So dig in and get buying. Keep harassing the Deathcoils and tie them up in melee.

Wave 5 is the biggie: Crack this and you’ve pretty much won! Use your first Rain of Fire on the 2 Savants as soon as they appear from the eastern road: It’ll buy you a bit more breathing space. Sit tight and wait for the Myrmidon to start gathering… Put all of your gold to get solid infantry and gather everyone around the middle: To hell if they get shot! Once the Myrmidon are gathered: Open fire! If you can crack the lot, then you’re pretty much now on the home straight: Keep the ranged upgrades rolling, the Deathcoils busy and the Saurians thoroughly annoyed.

Iron

Another unforgiving toughie. What’s particularly nasty is that you’re fighting on two fronts: The dwarves are in the north (and vital for success) but you’ll need ranged coverage in the south against the swarms of razorwings.

There’s no clever way around it… You grudgingly have to split everything. Get some artillery in the north (in range of all 3 dwarven barracks) and archers in the south. Use reinforcements to whittle down the razorwings whilst you get set up: As it’s better to get some heavy artillery in place first.

Sadly your rain of fire is on Deathcoil duty for this level. Your dwarves are too in range of their bows to be able to lure them near towers… and your reinforcements are busy with the razorwings. So yes… even though there’s only one of them: Blast it to hell.

Your likely breaking point will be about part-way through where you get swamped with Myrmidon and razorwings (one always manages to get through). Keeping the Myrmidon at bay is the key, which is tough where they’re armoured. But there is one upgrade that ignores armour. It’s pricey but, if you can get the right tower set up early, will just about save the day.

If you can keep the Myrmidon down – your archers should be able to handle the razorwings (with some help from reinforcements). If they can’t: They need more upgrades on them.

Once you’ve cracked this mid-way point… you’ve beaten the hardest bit. Get a second artillery going and go full-pelt on the archers in the south. You’ll see an obscene number of enemies heading your way; but they’re actually pretty manageable by this point. Even though the Deathcoils will eventually decimate your lines… if your archers are good enough: They’ll shred any Myrmidon that get near.
Bonus A: Specialist Towers [Archer / Barracks]
Crossbow Fort

An excellent, balanced ranged tower. Great range and fast firing rate – it tends to be the better archer tower to pick for general use.

Barrage – Surprisingly powerful. 10 bolts of 30-40 damage every 6 seconds is nothing to sniff at and perfect for crowd control on lightly-armoured enemies. They are still mitigated by armour, however. But they’re well-worth getting if you find yourself more overrun by foes.

Falconer – An interesting, more subtle support upgrade. It basically boosts the range of all towers within a small radius around it: Also adding a crit chance to their hits. Barracks are unaffected. So if you intend to use this, you’ll want to ensure the Crossbow Fort is sitting neatly in the middle of many ranged towers. After all, the more towers you boost, the better! This tends to be good to get if you’re getting more armoured enemies – so you can bolster nearby mage towers.

Be aware – the ability doesn’t stack. So if a tower is in range of 2 crossbow forts with this, they still only get the single bonus.

Tribal Axethrowers

You want these for their abilities. To not get the totems is just wasting the tower. Their damage is ok, but the range and slow rate of fire means they’re not as versatile as the Crossbow in terms of basic damage.

Totem of Weakness – This one’s the biggie! Halves enemy damage and increases all damage dealt to them by 40%. It’s an exceptional upgrade to get, especially around artillery towers and areas that get a lot of attention. Obviously only get this upgrade once you actually have a solid set of towers to make use of it.

Totem of Spirits – Negates magic users. Primarily handy against the Earth / Spirit Shamans in the Jungle levels, whose combined auras can make all nearby enemies near-impervious to damage. It’s a sod to use, however, as it’s targeted at the front-enemy (where the magic ones tend to loiter back) – so you generally need it fully upgraded (to get the maximum duration) so that it lasts long enough for the magic users to walk through it.

Assassin’s Guild

To be honest, there’s no real right/wrong barracks unit to use. Both have their quirks and I’d argue is purely down to your preference.

The assassins have less health and damage, but attack faster and can dodge enemies in melee. As an added bonus, they also go invisible when not moving / fighting: meaning ranged enemies aren’t able to target them (often until they’re up close with a wrist-mounted blade in their face) – very valuable when the desert archers show up.

They have two primary weaknesses though: Firstly they cannot dodge area-of-effect attacks (like the Gorrilion’s smash) – so bulky units like that can quickly plough through them. Secondly, they fall quickly to ranged enemies if revealed (Poukai riders are a particular butt-pain). But for mobs of lighter units, they are exceptional.

Sneak Attack – Bonus attacks that deal a pretty cool armour-piercing bonus. Once you have the dodging upgrade down (see below), this one’s very handy to letting the assasins dispatch of foes quicker – whether it’s weaker mobs or giving them something to take down the bigger brutes.

Dodge – If you’re in melee a lot – get this. It greatly increases the survivability of the assassins: letting them negate a lot of the damage coming their way. Even the level 1 upgrade gives them a 50% dodge chance, so generally get this one first.

Pickpocket – A fun little upgrade. You should only use it on assassins who are repeatedly in combat. If you're going to do this: Get the full upgrade. I *believe* that it jumps from 1 gold a pop to 1-3 when you do, which gets you so much more in the long run. Keep them busy over several waves, and it’s a nice little boost to the coffers.

Knights Templar

These tend to be good choices if you need a mega punch-bag. It sounds a little cruel, but they’re primarily there to block. They basically die the slowest, which makes them better choices if you’re struggling with beefy or ranged units. Beware though, they take longer to respawn, so are riskier in places where enemies might insta-kill them.

Toughness – Bonus health. What’s not to like?


Arterial Strike – Gives their swords a decent boost. If they’re duking it out with a lot of enemies (but are otherwise faring well), this is a great bonus to let them clear enemies sooner. In general though, the health and resurrection tend to be more useful.

Holy Grail – Knock ‘em down and watch them get right back up. This is perfect for when you’re swamped by large amounts of nasty enemies that cut through your lines – buying you several valuable seconds for your ranged towers to do their thing. This and Toughness are both very handy, so there’s no real right-wrong order to upgrade them.
Bonus A: Specialist Towers [Mage / Artillery]
Archmage

Don’t let the rustic look fool you… These towers deal the best one-off damage out of the lot and, for that reason, it tends to be a must-have: Whether it’s taking down large foes or just disintegrating smaller ones. There’s always a good use for it. It’s slow to fire though, so make sure it’s in a suitable position that enemies cannot just whizz by.

Twister – Like the teleport ability of the Arcane Wizard tower, this grabs a handful of enemies and takes them further back up the path. It’s pretty cool though, because it temporarily takes them out of the picture for a good 5 seconds or so – splitting up enemy forces. This gives your towers a chance to deal with the remaining enemies before the ones in the twister re-emerge.

It recharges slowly and can only pick up 5-7 foes, so it’s best used to buy yourself time when you get a lot of beefy enemies barrelling through your lines. If you can’t kill ‘em quickly – you can at least stall them.

Critical Mass – Gives the archmage some area-of-effect goodness. It’s not overly powerful so, like artillery, is only really useful when enemies are clumped together: Particularly when they’re armoured.

Its particular beauty is against Poukai Riders in the Jungle levels. They clump together when shooting enemies, meaning a single explosion will catch the lot.

Necromancer

Remember how annoying the graveyards were in Kingdom Rush? Every killed enemy returning as a skeleton?

Now it’s your turn!

This is possibly the coolest tower in the game. Its damage is so-so, but that’s not what you’re here for… it’s the skeletons you want!

Basically, any bipedal living enemy (i.e. not aliens, zombies, spiders…) killed in its range will rise again as a skeleton. This is a fantastic ability, letting you create a solid blockade in an area. And the best bit? The more enemies that get chucked at that spot, the more skeletons for you! Every enemy killed is another they have to get through. Just be aware, the skeletons are quite flimsy – so don’t purely rely on them to hold the line. Always have some infantry around still.

In general, necromancer towers are best placed centrally. You want them in range of where most of the killing happens, so you can get as many skeletons as possible. This also keeps the skeletons within range of other towers (the same way you would infantry).

Just don’t get too carried away that you only build Necromancer towers (it is oh so tempting). Against single, large foes – the Archmage is more formidable, so make sure you pack them both.

Pestilence – A very cool area of effect ability (that negates all resistances too). This tends to be the go-to to increase your stopping power at huge chokepoints. Large armies of skeletons just support this ability perfectly (and helps give you even more for the ranks!) Just be aware it doesn’t affect flying units.

Death Rider – Useful if you want to get some more survivability out of your skeletons. The first upgrade will bolster the armour and attack of nearby skeletons. Any further upgrades just benefit the rider itself. This is best used around key chokepoints where you’re expecting large mobs. Big enemies will still just pound their way through the skeletons – so isn’t as useful there.

DWAARP

This one changes everything.

The normal artillery fires a single shell that explodes in a small radius. This bad boy inflicts damage across its entire radius every shot. It no longer has to hit a single point. Everything in range gets an even share of loving.

This dramatically changes where you can place it. So plan carefully if you intend to promote an artillery tower to a DWAARP:

Instead of tucking it near the back, you want it covering as much ground as possible. U-turns and winding bends are just perfect for it – as everything will keep getting hit by it as they walk around. You definitely want this in front of infantry, as it lets you hit all oncoming enemies as well as the ones tied up in melee. This is especially useful when ranged units come into play (like desert archers or savage hunters) – Even though the ranged units hang back, they can still often be in the blast zone of the DWAARP. Nothing is safe!

Well… except flying units. Yeah, this does absolutely nothing to them: So make sure you have enough archers and mages present.

Core Drill – Single insta-kill attack. It’s a ridiculously expensive upgrade though so, to be honest, you’re unlikely to use this for most of the game. It’s only really later on when you’re getting the huge enemies with tons of HP on your doorstep that this becomes viable.

Furnace Blast – You pretty much always want this upgrade on your DWAARP. It scorches the entire ground in a radius around it, basically adding to its damage and coverage. The damage is also constant, so you don’t have the headache of fast enemies moving through the radius between shots. Truth be told, this upgrade tends to become a necessity in the mid-to-late game to make the DWAARP viable. It’s pricey, but the crowd-control is unparalleled.

Battle-Mecha T200

I’m not going to lie… the battle mech is just fun. It’s hard to dislike a walking robot... Especially when it's Wall-E on steroids.

Instead of firing from its launch pad: The Battle-Mech moves around on the road like infantry does (but cannot block / be attacked) and simply peppers the ground beneath it with a ton of bombs. The bombs have a very small blast radius though, so unlike the DWAARP: The Battle-Mech is all about concentrating damage in a very small area.

In lieu of this, you’ll need them stationed almost directly above your infantry. Anywhere else and the low blast radius will cheapen its damage.

That said, there is a useful quirk to the range of fire being limited to a small radius around the mecha… do you know those annoying ranged units that stand just back from everyone else, but never get shot because they’re not at the front?

Well walk your battle mech just behind them. The limited radius means that the mech will drop its bombs directly on top of them, instead of hitting the enemies at the front. This is a useful way of picking off ranged enemies (especially summoners) if your lines start getting overrun.

Waste Disposal – Creates an oil slick that slows all enemies in the radius. It’s useful to give your mech more time to bomb the heck out of anything beneath it, but tends to be wasted unless you have large mobs of enemies and a solid line of infantry to hold them with. Only then is this worth getting.

Wasp Missiles – Infinite-ranged seeker rockets. You can’t go wrong with this upgrade. Also gives the mech something to be able to deal with flying enemies, which is always very handy.
Bonus B: Sir Alric
Incredibly formidable for a starting hero (and arguably the best for the main campaign). Less of a training-wheels-dullard for the people too cheap to buy real heroes (in IOS anyway…) Alric is surprisingly well-balanced and versatile. Good health, armoured and decent damage. If you have no real hero preference, you can’t go wrong with keeping him in your lines.

The main thing you’ll want from him though are his Sand Warriors. When summoned, they fly down the path and take on any enemies they come across. Whilst not particularly strong, they don’t need to be… Alric can summon them very quickly (10 second cooldown) so you generally have a plentiful supply of free cannon fodder. At max level, he can simultaneously delay 4 enemies – invaluable for the points that tend to get swamped. Whilst you obviously need the towers to back this up – this gives you a great way of holding the line – particularly in awkward chokepoints.

Flurry is the other ability you’ll want early on. It recharges stupidly quickly (6 seconds) and essentially gives him an attack worth double, quadruple and octop octupple 8 times his regular damage (per upgrade, respectively). A very quick way of giving him the ability to finish off mobs and heavy enemies alike.
Bonus B: Mirage
Surprisingly nimble for someone who clearly stashes 200-od daggers up their butt – Mirage is your first ranged hero and useful, providing your ability to micromanage her. She’s fragile and poor in melee, so you need to keep her out of trouble: generally tucked behind a solid wall of infantry.

This dependency creates her core weakness: If the line breaks, she’s out. So her ability to lay down fire is entirely reliant on the front line’s ability not to die. As such, your key abilities should be Shadow Dance and Lethal Strike. You need to make her a multi-shot swiss-army knife of… well… knives. The more firepower she can lay down, the less likely the line she’s supporting will break.

The only thing to beware of is that her knives are physical – so she’s not particularly useful against armoured foes. Think of her as a mobile archer tower. Keep her moving about to hunt the lightly armoured enemies or station her around high-level mage towers: They synergise very well in negating each other’s resistances.
Bonus B: Captain Blackthorne
If you’re going to use this guy… you’ll want to capitalise on one key thing: Looting.

This awesome passive ability means that any enemies killed in his vicinity reaps more gold. In big levels with tons of enemies, this can amount to an exceptional advantage. So you’ll need to keep him close to the action. He shuffles about though (in his defence, he does have a pegleg) so tends to be better suited to levels with a big, meaty chokepoint where you can leave him and be done with it. Otherwise, you’ll need to keep him moving to be nearer the larger, more profitable foes. Whilst he doesn’t quite have the same staying power Alric has, you’ll tend to get stronger towers up and running sooner if you use him correctly – which negates this somewhat.
Bonus B: Cronan
Warrior without fear! He’s more powerful than any man, his legend spreads across – wait… sorry… wrong person.

Cronan is your ultimate source of crowd-control. What he lacks in single-target direct damage he makes up for with a cavalcade of useful abilities and animal summons which help to tear through mobs of lightly armoured foes. Unlike some other heroes, it’s generally best to try and level up all his abilities equally to really start cashing in on their range of uses early. He can take a solid hit, but lacks armour – so keep an eye on him, especially around ranged units. Pull him out if struggling and let his formidable regeneration get him fighting fit again.

Keep him around sites that get inundated with mobs and watch him do his thing.
Bonus B: Nivus
Get Disintegrate!

All his abilities are ok… but this is really where he earns his keep (and potentially gets an upgrade from the cellar). Insta-kill of a few smaller foes (or even finishing off a larger one) is nothing to sniff at, so well worth procuring early. It’s an absolute life-saver when your lines are getting swamped.

It also pays to boost his range with Arcane Reach. His original range means you have to get worryingly close to the action… and it’s not like this guy can take a beating.

He is, essentially, the Mirage of the magic world. His damage is stalwart (nothing to shout about) but magic-based – so useful against armoured foes. He can teleport all over the map, making him very handy for lending fire support where it’s needed and beaming him out of trouble (which isn’t uncommon). He can bit fiddly, but it’s ultimately about keeping him assisting with areas where your lines are getting mobbed.
Bonus B: Deirdre
The ideal excuse for anyone wanting to mute the game to listen to their own music instead.

Either that or you get to listen to an ‘aah’ every 5 seconds as she consecrates another tower… which sucks, as you really want this ability.

Deirdre is the ultimate support hero. Less of a damage dealer, her purpose is more to make everything around her work better. So make sure you buff those abilities first to start cashing in on it! (Health and armour can come later). Holy Light and Consecrate are easy – she casts and they heal allies / boost towers respectively. Wings of Light, however, make things a bit fiddly. The good news is that it gives her a teleport and buffs ally’s armour… the bad news is that this only triggers when she actually teleports.

What this means is that you need to keep her moving when your infantry are engaged. Beam her out then straight back in. It can last up to 30 seconds at max level, so thankfully you don’t need to overdo it. What this does mean however, is that she is fantastic when you have to defend multiple fronts. A single jump between locations will buff both sides: Ultimately allowing her to strengthen the defence on multiple avenues – no matter how far apart they are.

Once you have spare points to upgrade her armour and health, she also becomes unusually tanky (and her regen is pretty good in general). Once you get this, it can actually be worth beaming her into the front line and melee it up, taking the heat off the barracks soldiers for a while… heck, it’s not like her ranged attack was any good…
Bonus B: Grawl
Grawl is just fun. A completely unsubtle, no-nonsense tanky mofo that just stands there beating everything up… what more could you ask for?

His health and impressive armour give him formidable durability – allowing him to toe-to-toe almost every enemy in the game. As such, you always want him stationed where the big’uns hit.

Be aware though: His attack is still on par with most other melee heroes, so he’s not necessarily able to take heavy units down faster… more just put up with them for longer. As such - always ensure he’s still covered by towers. He’s a walking oversized shield, not Godzilla.

The main problem though… there’s only one of him. So even though he’s able to duke it out with a heavy opponent; nothing stops all the little ones from scurrying by when you have a mob on you. As such, you want to bolster his crowd control early. Boulder Throw, Stomp and Shard Punch are all excellent skills to jump on, as they enhance his ability to clear the board much faster. Get these under his belt and he becomes surprisingly versatile. He will always be slow though, so try not to move him about too much.
Bonus B: Sha’tra
Fun fact: His phrase “Edihnori” is Ironhide backwards! The rest are anagrams / reversals of the names of the founding members of Ironhide.

Sha’tra is your typical glass-cannon assassin. Deadly in melee, but cannot hang around there for long. It can be frustrating keeping him alive, as you generally need him slicing things to have made bringing him along actually worth it… so be prepared to pull him out of combat often.

Weird as it sounds: The best way of using him is to treat him like a ranged hero who happens to kick butt in melee. Once the level picks up pace and the front is no longer safe, tuck him behind your infantry to lend support with his awesome ranged abilities and engage any who sneak by. This lets him stay out of trouble but remain very valuable.

He lacks the staying power to hold a line properly, so the trick is not to treat him like a blocker - But a hunter. His aptitude in melee also lends himself to another curious role: Intercepting and disrupting key enemies. Keep him moving and tag-team with reinforcements to make a super-cool hit-squad to take down the nastier foes. Let him harass and then retreat when he takes a beating.

Get Vibroblades immediately. Just level 1 will do. Ignoring armour is no small bonus – giving Sha’tra excellent damage against any foe. The next focus should be on the ranged attacks: Abduction and Purification Protocol in particular. Not only are they very cool, but they give him something to stay out of direct combat.

Consider Final Countdown a nice bonus, not a tactic. It tends to be better to let him heal up than sacrifice him and have to wait for the lengthy resurrection.
Bonus B: Ashbite
You know you’re awesome when a dragon wants to fight for you. Ashbite is your ultimate crowd control (and just generally looking like a badass).

It flies, so obviously cannot block enemies. As such, its strength is ultimately about laying down solid damage from the skies to support your troops. Its multiple area-of-effect moves make it specialised against big clusters of enemies, so the more you can catch in its radius, the better. In effect: Ashbite is your flying artillery (with bad breath).

Its basic attack can be a bit awkward, however. It cannot target enemies directly beneath it, so you’re limited to a sort of ‘ring’. If it’s not firing where you want to, move it around a bit. Your safest bet is generally to hover behind your primary infantry line – which is just as well, as that’s where you’ll be getting the biggest clusters of foes!

You want Wildfire Barrage right off the bat. It’s a big boom and does delicious amounts of damage. Fiery Mist and Blazing Breath are also worth getting to give Ashbite plenty to do. Thankfully, all of these have a better range and radius than the basic attack, so hits will be more reliable.

Feast is a curious one. Unlike the other moves, it only hits enemies directly beneath Ashbite, putting it at slight odds to the other moves. This is handy though once you get larger enemies showing up, who need a slightly bigger wallop. Once they’re isolated (i.e. the mobs are cleared) – Move Ashbite over them to let it use feast, and then pull back to continue your fire. It recharges in about 30 seconds – so roughly every 3 sets of reinforcements. If you get the insta-kill… win!
Bonus B: Karkinos
I must confess… “Angry Cyborg Crab” was not my first thought when it came to D&D-style heroes, but hey… He’s on our side, so I’m not complaining.

At a basic glance: He’s like Grawl but has traded off staying power for greater attack. As such, he’s a bit more crowd-oriented: Less effective against single targets but better with mobs of small-to-medium foes.

So just stick him in the middle and let him start cracking things open with his mecha-pincers. He hits very well (when fully upgraded). Contrary to his look though, he’s not the most armoured (at top level, he’s only 100HP stronger than Sha’tra) – however, Battle Hardened is his secret party trick: Up to 65% chance of gaining invulnerability if attacked when under 40% hp. This grants him obscene staying power against mobs of smaller foes (whose single attacks are inconsequential). Or at the very least, the activation noise gives you a nice alarm for when you might want to thinking about giving him a timeout. Worth grabbing early.

Offensively: Pincer Attack is where it’s at! Great for mobs around him – particularly where it punches through armour. Iron Pincer also confers +20 attack at top level, so worth getting early. The Shoulder Cannon is… alright, but nothing special.

Handy tip: His Burrow can let him traverse water in the Rising Tides levels, helping him get to other spots.
Bonus B: Kutsao
I don’t care if he’s an offensive stereotype with a big head… this guy’s fun! There is no shame in enjoying a hero ninja kick your enemies whilst shouting “Hwa!”

He’s squishy as heck though. But the good news is that he’s fast and his regen is awesome… so you can basically chuck him in, pull him out when battered and he’ll be good to go again in a matter of seconds. Unfortunately this can make him annoying in areas smashed by large groups of heavies, so you tend to want to keep him dealing with mobs – as he can take them pretty well.

To push his longevity: Crane Style is an excellent one to grab early. It’s very much like the Assassin’s dodge and, at 60%, you are technically more than doubling his HP (plus funky counterattack) – which should at least keep him in the action. Once you have that down, just load up with the abilities that look fun and let rip!

Whilst you tend not to want to put him right in front of a 10 foot heavy with a bad attitude… if you happen to have Snake Style at top level; send him in (perhaps under the cover of some reinforcements) to land the attack. When you see his distinctive green punch: You know it’s landed and you now have yourself some decent damage reduction. Not so much for his sake, but your front lines will at least be grateful.
Bonus B: Dante
Though he runs around like a one-man weapon shop, Dante tends to work best as a combat support hero. His attack is quite awesome, albeit a tad slow – though he lacks the staying power of other heroes to really be able to duke it out with angrier foes. So keep him nestled with your troops and let his guns do the talking.

As such, Akimbo Style and Silver Bullet are perfect starting points to get him rolling. They’re good all-rounders that work well in any situation (and for the Shadowmoon Campaign – Silver bullets deal double damage to werewolves / lycans!) If you’re going to use Beacon of Light, make sure you use some good infantry to play with (like reinforcements or strong mercenaries) seen as most infantry damage is pretty laughable… so the effect can be a bit meh (but hey, better than a punt in the love spuds).

Holy Grenade and Relic of Power are his more situational moves, so better used once he’s levelled up and more able to hold his own. They only hit one target, so are ultimately there to help take down single, troublesome foes (they’re wasted on mobs). Isolate them and send him in. Just make sure you have enough towers around to capitalise upon this.
Bonus B: Bonehart
He brings pestilence, he brings death… and he’s a freaking dragon.

Bonehart is exceptional fun when it comes to low-level crowd control. Played correctly, mobs are rendered to nothing more than wisps of green smoke. His direct damage isn’t overly hot - so the key is that you need the enemies clustered together.

That’s where Bone Golem comes in. This creates a land-based monster to engage enemy troops. They’re pretty hardy and you can have up to 3 at a time (and they get boosted by the Necromancer Death Rider too). This gives Bonehart an excellent ability to stall enemy forces… which is just as well…

Unstable disease is where the fun comes in. Upon death, a diseased foe (one affected by Bonehart’s spells or basic attack) will explode; poisoning and dealing damage to enemies around them. On its own, it’s certainly a real boon with crowd control… But with a big (and clustered) enough mob, you can pretty much set off a Mexican Wave of death. This is also excellent if there are enough weak enemies clustered around a larger one: As it can give you an edge against them.

It’s all about keeping Bonehart where you can get the biggest clusters. Match that and you’re in for a real treat.
Bonus B: Bruxa
*Sounds of metalwork and ominous welding*Played correctly: This formidable lady is nothing short of a magic Gatling gun.

In effect, she is a walking (talking) Necromancer tower. An enemy killed in her vicinity is claimed as a magic skull that dances around her, shooting lasers at nearby foes. Fully upgraded: She can have up to 5 laying down an absolutely withering hail of lasers. As such: Laughing Skulls and Bone Dance are absolute must-haves to start getting the most out of her quickly – The more skulls (and the stronger their attacks): The better! They do not last forever though… so in order to keep her firing all cannons, you need to keep Bruxa where the chaos is (so she has a steady supply of replacements).

Unfortunately this can make her quite poor for running around to plug the gaps (as the skulls often cede by the time she arrives). So treat her as having a “set up time” of sorts.

She’s quite flimsy too, so a line of strong infantry is also quite important here. The good news is that her skulls still fire even if she’s forced into melee, so it’s not too bad if she’s attacked… but her HP still means you can’t keep her there for long.

But once she’s in place and fed skulls… mobs just get absolutely decimated. So sit back and enjoy!
Bonus B: Kahz
Kahz can be annoying to use. The problem isn’t his stats (which are decent) - but the fact that 2 of his abilities just synergise awfully: Bull Rush and Daedalus' Maze.

Basically: The former has him zooming around the landscape... The latter has him summoning (normally powerful) enemies right by his feet. This makes him a magnet for death (his own). If you pull him back to recover, he either charges back to the front or pulls enemies to him instead… And the last thing you want is a high powered enemy right by your back lines next to a nearly-dead hero.

Worse… he will often pull an enemy to him and then Bull Rush away to another foe: Leaving a powerful enemy right by your lines with no one there to stop them.

For this reason, it’s a good idea to not invest any points in either ability whilst you level him up. Only at top level (when the stun is greater) are they workable… and even then, Daedalus’ Maze is very map-specific: It only really works on maps where your hero will likely be nearer the front lines (as opposed to the back) – as that actually gets the advantage of pulling enemies back down the road, rather than forward.

His other abilities are pretty sweet though, especially Roar of Fury: A universal boost to all tower damage is nothing to sniff at, especially when the level is in full swing.

He can be a sod to use, but once you get the hang of him – is pretty strong.
Bonus B: Saitam
Much like Kutsao – he’s a fast, light melee combatant with a good range of attacks and makes hilarious noises in combat.

His key difference is Angry God: Which increases damage dealt to all enemies on the stage. He has an annoying knack of using it at the start of a wave (when the enemies are only just showing up) – so you tend to need a few waves for it to start working at appropriate times. But once you have broad tower coverage: it’s exceptional and quickly decimating crowds – so a real boon in later waves.

Monkey Palm is also a good (and cheap) upgrade to deal with nasty spellcasters if they’re on the levels you’re using him. Saitam is very quick to move around the map (especially as he flies): So you can basically paradrop him in on top of the target and let him stun the magic out of them. Against Savants, Bluegales and Blacksurges… this is super-useful.

Other than that, all his abilities are equally useful: Making him a solid all-rounder.
Thoughts and Suggestions
Any hints too obvious?

Any hints not sufficient?

Disagree with any of the above and want to challenge me to an assault course of bombard towers?

Then give me a shout! This guide is organic, so the aim is to update and tweak it based upon how much or how little people require help with certain levels. The only traps here are those I stumble upon, so if these aren’t working for you – Let me know and I’ll see what we can do!

I also entirely appreciate that there are many ways of completing most of the levels. If you find another way, kudos! This guide isn't an attempt to spell out the "ultimate" way - Just one that works and to simply give those struggling some sort of direction (and be a good laugh, hopefully). So don't worry if you've found a slightly different way of doing things... you've just found another way of being awesome!

Happy Gaming
66 Comments
spacejumper 13 May, 2024 @ 9:27am 
Awesome guide. I'm nearly done with the game but the love you put into this is amazing.
Happiness Officer  [author] 17 Sep, 2022 @ 9:23pm 
Thank you so much, Evanflame1667! I really appreciate it.

And you make an outstanding point that I agree wholeheartedly on. I've adjusted the 'change something' section to include this very astute point of yours. It dawned on me that whilst I call it out on a handful of specific Heroic/Iron challenges where it's key, that this is very much a solid rule of thumb to always keep in mind and should be given more of a shout out.
Evanflame1667 22 Aug, 2022 @ 10:56am 
This Guide is absolutely amazing, but one thing I'd like to add:

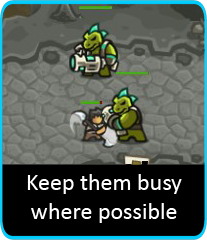
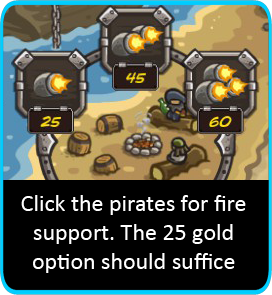
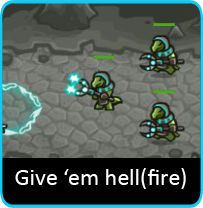
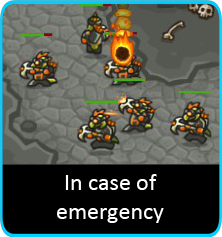
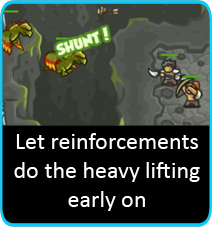
If you try a strategy you think is pretty good, but fail? Try again doing the exact same thing, only utilize your rain fire and reinforcements diffferently.

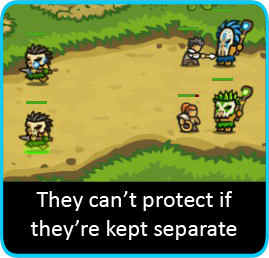
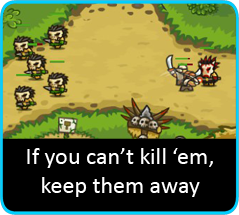
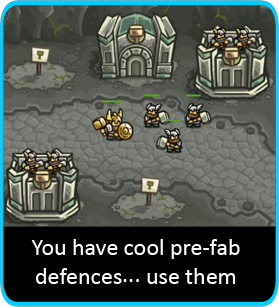
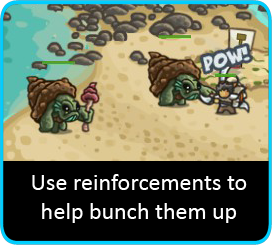
I can't tell you how many times by just saving the rain fire for a bigger group coming later I was able to get by with 3 stars on a stage I got destroyed on. Same with reinforcements. Sometimes, you put them in juuust the wrong spot so they don't block the enemy you were trying to block.
Smappleback 8 Sep, 2021 @ 7:16am 
Unfortunately, it looks like with the update the method I hinted at no longer works. Basically, what would happen was only blazefangs (I tried this out against other ranged enemies) would, for some reason, stop at their attacking distance away from hidden assassins, as if trying to shoot, but wouldn't actually shoot. This meant that as long as the assassins remained concealed, blazefangs would be stuck in place trying to shoot an enemy they can't target. I discovered the glitch thanks to my strategy for Emberspike's campaign, where I start with an assassin's guild in the top left.
Happiness Officer  [author] 3 Sep, 2021 @ 2:19pm 
Hehe Smappleback, I admire that you wrote your hint in an equally secretive way :D When I next boot this to try out the endless mode, I'll be making a point of paying Emberspike a visit to see if I can figure out your alternative plan...
Smappleback 20 Aug, 2021 @ 7:35pm 
Hint for Emberspike's Iron Challenge: one of your tier 4 towers is extremely effective against blazefangs, but only when other enemies aren't around. Use this tower in tandem with artillery and clean house.
rock_apocalipse 20 Feb, 2021 @ 2:20am 
Hello! I'm just russian player, and i be amazing this great work. I want to translate your manual in russian language so that our players who do not speak the language can familiarize themselves with this information. I will leave a link to the source in the description. :tr_neko:
Orion 28 Dec, 2020 @ 2:27am 
Oh, dont worry about it, also i got them, thanks again!
Happiness Officer  [author] 27 Dec, 2020 @ 7:03am 
Ah that's great to hear, thank you so much, Orion! (Apologies for the delay in getting back to you). Hope you managed to snag those 110 stars!
Orion 22 Oct, 2020 @ 3:36am 
This guide is great! I recently got into the Kingdom Rush franchise and been having a blast, im currently trying to get 110 stars and this guide has been of great help already, amazing job!