DARK SOULS™ II

DARK SOULS™ II

490 ratings
Dark Souls II 100% Achievement Guide
By ponkberry
Praise the Achievements!
5
4
11
2
2
3
3
2
   
Award
Favorite
Favorited
Unfavorite
Disclaimer
Requirements
  • You do NOT need to play online to 100% this game; however, online play does make this game decidedly easier.
  • I'm excluding the spells that Chancellor Wellager sells in NG++, that is already decidedly the easier way to farm those to begin with.

Miracle: Sunlight Spear
  • This miracle is available by achieving Rank 3 in the Heirs of the Sun covenant which can by obtained by submitting 30 Sunlight Medals.
  • Online Method: By summoning golden phantoms or fulfilling your duties as a gold phantom, you will receive a Sunlight Medal.
  • Offline Method: Farm Banediggers and Falconers

Sorcery: Hidden Weapon
  • This sorcery is available by achieving Rank 2 in the Bell Keeper's covenant which can be obtained by defeating 30 invaders of Bell towers.
  • Online Method: In either Belfry Sol or Belfry Luna, you will be forcibly summoned when a human host enters the bell tower with the boss still alive.
  • Offline Method: In Belfry Sol, there is a chance for the Mad Warrior to spawn as a red invader, killing him counts towards the invader count. Use the Ironhearth Hall bonfire in Iron Keep.
Basics
Pre-Note: While Dark Souls II and Dark Souls II: Scholar of the First Sin share several similarities, the primary difference is the location of items. If you're playing the SOTFS version, please see the related guides at the bottom of the guide.

In the Base Game version, DLCs elements are not required in regards to all hexes, miracles, pyromancies, and sorceries. As such, they will not be covered here.

This is Dark Souls - Die for the first time.

Welcome to Dark Souls!

This section will cover some basics of how Dark Souls 2 works that is important to this guide.

Stat Respec
You can respec your stats using the Soul Vessel. It'll reset your character to the base level and base stats based on your starting class. Your souls remain unchanged while being given the same number of stat points you've leveled up. Below are required stats if you only want to respec just once.
  • Licia of Lindelt - 30 Faith to receive Saint's Set and Chime
  • Carhillion of the Fold - 8 Intelligence to engage speech/move to Majula; 30 Intelligence for Northern Ritual Band +1
  • Felken the Outcast - 8 Faith/8 Intelligence to engage speech; 20/20 required for Sunset Staff without killing him for Assassination Quest.
  • Straid of Olaphis - 3 Faith/3 Intelligence to shop and trade; requires a Fragrant Branch of Yore
  • Cromwell the Pardoner - 35 Faith for Ring of Resistance

Soul Vessel Location
1. The most common Soul Vessel is located in the chest in the basement of Majula mansion.
2. Crestfallen Saulden gives you one after you get at least 4 exiles to Majula
3. Two are located inside a chest in Drangleic Castle, where you find a guy strapped to a door.
4. Wooden Chest behind a Pharros' Contraption illusory door.
5. Wooden Chest before the second bonfire in Undead Crypt, drop down the gap instead of going through the doorway
6. Corpse loot in Memory of Orro
There are a few more not listed.
Soul Memory Tiers & Multiplayer Items
Multiplayer/Coop
Dark Souls II uses an interface known as Soul Memory which contains every single soul you've ever earned during your playthrough and places you in tiers and provides the structure for matchmaking. This goes for player invasions and player summons.

Straid of Olaphis sells the Agape Ring which absorbs all souls earned by the player and thus preventing you from gaining souls and prevents your soul memory from increasing. Using this ring helps you balance your souls with someone you want to play coop with should you have too much and have them catch up to you.

Soul Memory Tiers and Multiplayer Items courtesy of DSII Wiki[darksouls2.wiki.fextralife.com]

Tier
Soul Memory Range
1
0 - 9,999
2
10,000 - 19,999
3
20,000 - 29,999
4
30,000 - 39,999
5
40,000 - 49,999
6
50,000 - 69,999
7
70,000 - 89,999
8
90,000 - 109,999
9
110,000 - 129,999
10
130,000 - 149,999
11
150,000 - 179,999
12
180,000 - 209,999
13
210,000 - 239,999
14
240,000 - 269,999
15
270,000 - 299,999
16
300,000 - 349,999
17
350,000 - 399,999
18
400,000 - 449,999
19
450,000 - 499,999
20
500,000 - 599,999
21
600,000 - 699,999
22
700,000 - 799,999
23
800,000 - 899,999
24
900,000 - 999,999
25
1,000,000 - 1,099,999
26
1,100,000 - 1,199,999
27
1,200,000 - 1,299,999
28
1,300,000 - 1,399,999
29
1,400,000 - 1,499,999
30
1,500,000 - 1,749,999
31
1,750,000 - 1,999,999
32
2,000,000 - 2,249,999
33
2,250,000 - 2,499,999
34
2,500,000 - 2,749,999
35
2,750,000 - 2,999,999
36
3,000,000 - 4,999,999
37
5,000,000 - 6,999,999
38
7,000,000 - 8,999,999
39
9,000,000 - 11,999,999
40
12,000,000 - 14,999,999
41
15,000,000 - 19,999,999
42
20,000,000 - 29,999,999
43
30,000,000 - 44,999,999
44
45,000,000 - 999,999,999

Multiplayer Items
Multiplayer Items each have specific properties in interacting with other players in the game. The ranges are based on your current tier and you can go up or down from your tier.
Multiplayer Item
Down Range
Up Range
White Sign Soapstone
-2
+1
White Sign Soapstone w/ Name-Engraved Ring
-5
+4
Small White Sign Soapstone
-3
+1
Small White Sign Soapstone w/ Name-Engraved Ring
-6
+5
Red Sign Soapstone
-5
+2
Dragon Eye
-4
+4
Cracked Red Eye Orb
0
+3
Cracked Blue Eye Orb
-2
+2
Bell Keeper's Seal
0
+3
Rat King
-1
+3
Walkthrough - Introduction
This Storyline guide will point you where you should or shouldn't go while mentioning the required items for all the achievements for Dark Souls II.

Tutorials
Self Recollection - Reclaim flesh and set out as an Undead

This achievement is awarded as you finish creating your character during the tutorials. May be your first achievement provided you somehow didn't die before this.

Majula
After you exit the tutorials, you'll find yourself in Majula.
  • Estus Flask given by Emerald Herald.
  • Covenant of the Meek can be obtained through Crestfallen Saulden.
  • Covenant of the Fittest can be obtained through the Victor's Stone.
  • An Estus Flask Shard can be obtained by attacking the rock at the well.
  • The 'Welcome' gesture is given by Crestfallen Saulden. (Gesture Maestro)
Forest of Fallen Giants
From the path you took to get to Majula, there should be a tunnel pathing under you which leads to your next area.
  • Merchant Hag Melentia is located here. Exhaust her dialogue to relocate her to Majula. (Gathering of Exiles). She sells the first Pharros Lockstone.
  • Small White Sign Soapstone in room above Cardinal Tower bonfire
  • Optional encounter for Pursuer outside of the Cardinal Tower bonfire
  • Great Soul Arrow sorcery in the ballista room.
  • Titanite Slab in the Pharros lockstone contraption under ballista room (Supreme Weapon)
  • White Sign Soapstone given by Pate after escaping his trap
  • Cale the Cartographer is here; exhaust dialogue to gain access to Majula Mansion and return here to relocate him after you've cleared the basement. (Curious Map/Gathering of Exiles)
  • Door before boss fight requires 'Iron Key' from Iron Keep. (Important later)
  • Pursuer Boss; you can fight him on the platform (one time occurrence) or fight him in his natural spot. There was a door before the last fog in the area with a giant sword in the wall that you can walk on, requires the Soldier Key (see below). This leads to the Pursuer fight should you not have killed him earlier. Required to complete the game, can be saved for later.
Last Giant - Defeat the Last Giant

This is the main boss for the Forest of Fallen Giants and has two NPC summons available. If you got through Pate's trap successfully and exhausted his dialogue, then his sign will be before the fog gate.

Upon beating the Last Giant, you will be awarded the Soldier Key which opens three doors.
1. Door to the Pursuer
2. Door to the fourth bonfire; Soldier's Rest
3. Door to the King's Gate for Memory of Vammar

After that, your next task is to collect all four Great Souls. Pick any section you wish or follow this guide chronologically.
Walkthrough - Lost Sinner Primal Bonfire [1/4]
From Majula, head towards the stone pathway next to the cliff closer to the Mansion. This will lead to a rotunda with a mechanism. The path leads you to Heide's Tower of Flame.

Heide's Tower of Flame
  • There are two switches you want to activate in this area which alters the boss area to be easier
  • Switch 1: Behind the Old Knight after the gate
  • Switch 2: Near the door of the circular room you enter after the gate
  • After the second switch, head to your right for the end of the area.
  • Masterless Glencour can be summoned; a red phantom guards his sign. Shade Sellsword Lute is also available
  • Licia of Lindeldt is located after the boss fight. Exhaust her dialogue for Gathering of Exiles.
Cathedral of Blue
  • From the second switch of Heide's Tower of Flame, head to the left this time.
  • When you aggro the Heide Knight at the top of the stairs, bring him down and dispatch of him. Head across the bridge and fight the other Old Knight.
  • After the Old Knight is defeated, you can lower the drawbridge to fight the Old Dragonslayer
  • After the boss, you can light the bonfire down the stairs.
  • At the balcony, Blue Sentinel Targray leads the Blue Sentinels covenant and you can get the Protector's Covenant achievement as well as the Duel Bow gesture if you have a Token of Fidelity.
  • Token of Fidelity can be obtained by defeating a boss in co-op while not a member of the Heirs of the Sun or the corpse loot next to the Bridge Approach bonfire in Huntsman's Corpse
No Man's Wharf
  • First instance of Lucatiel's Quest: After you cross the docks and meet the first set of stairs, she's up the first set then in the building to the left. Exhaust her dialogue. Allows her to be summoned later in this level.
  • After going all the way up, you'll find a bell to ring that calls the ship to the docks.
  • On the way down, there is a house with poison jars inside and a chest. The chest has a 'Fragrant Branch of Yore'.
  • After descending back to the docks on the opposite side of the bonfire, kick the bridge down to set the shortcut.
  • Take the other dock path close to the bridge shortcut and you will find Carhillion of the Fold. You need 8 INT for him to talk to you (only need it once, not everytime). Exhaust his dialogue for him to move to Majula (Gathering of Exiles). He sells sorcery spells.
  • Taking the dock route to the ship, before the docks narrow, Lucatiel's sign will be on the corner to the right. She can be easily used as bait against the Flexile Sentry.
  • Flexile Sentry will be the boss on the boat.
  • After the boss, head up the ladder and you'll see a map and a chest containing the Fireball Pyromancy.
  • Use the map to go to Lost Bastille.
Lost Bastille
  • Activate the Exile Holding Cell bonfire, and proceed up the stairs and to the drop down. Continue left and the alley contains an Estus Flask Shard. Pull the lever to open the gate.
  • At the top of the stairs, an undead jailer will kick an explosive barrel down the stairs. You want this barrel to hit the giant crack in the wall to blow up the wall to gain access to Steady Hand McDuff and the bonfire. If the barrel doesn't explode, push it to the wall, then ignite with fire. Access the bonfire and warp to 'A Tower Apart' bonfire.
  • Now from the 'A Tower Apart' bonfire:
  • To the left in a chest will be the Antiquated Key if you have any interest in that.
  • Once you leave the area, you can head straight passed the Undead Jailer. You'll want to break the boxes in front of the door as it's jamming it shut (use a firebomb if you're on the other side.)
  • In this tower are two important things: The first is Lucatiel's second spot. Exhaust her dialogue here so she can be summoned during Sinner's Rise. She is not available for summon for the boss of this area.
  • Near the tower, cross the rubble and open the doorway. Both ways lead to the boss fight.
  • Boss Fight: There are 3 Ruin Sentinels. If you use a weapon buff, use it before entering the fog gate. Best strategy is to split the Ruin Sentinels up. Defeat the first on the platform you first land on. The second will most likely be under you by that time, have him jump up and defeat him there before dropping for the third. The third can jump up.
  • Boss Soul trades for Heavy Homing Soul Arrow with Straid.
  • After the boss fight, all of the walls for illusory doors. They're all opened with the confirm key. One of the rooms will have a ladder in it, climb up and open the chest for the Hush Sorcery.
  • Continue into the next room minding the explosive mummy and to the Servants' Quarters bonfire.
  • Take the one way path until you reach a gate. The gate will lead you to Sinner's Rise. At the gate, the stairs will lead up to the cell with Straid of Olaphis. You will need a Fragrant Branch of Yore to rescue him as well as 3 INT and 3 FAITH to talk to him. He is the NPC to trade boss souls to.
Belfry Luna
  • From the Servants' Quarters bonfire, head down the ladder.
  • Place a Pharros Lockstone into the contraption to reveal a illusory door that leads to Belfry Luna. Once you step onto the bridge, you're susceptible to grey phantom invasions, up to 3 per life. (Melentia sells one or see Sinner's Rise)
  • Once inside, you can speak to the dwarf to the right until he offers you to join the Bell Keepers and unlocking the 'Clangorous Covenant' achievement.
  • Head up the stairs and go up the ladder and pull the lever to open the gate that leads to the boss. Head down and go through the boss gate.
  • While Rank 2 is required for the Bell Covenant, at the time of this guide, you won't find many people to invade. So, see Belfry Sol for a solo farming method.
  • After the boss fight, you'll find the Bastille Key after the bonfire at the bottom.
Sinner's Rise
This is the separate tower near Straid's cell. Simply cross the bridge and go up for a bonfire. Else, go down.
  • Once you head down the lift, you will immediately see Lucatiel's Summoning sign.
  • Region contains Sublime Bone Dust and a Pharros Lockstone.
  • After navigating to the gates, use the Bastille Key. Cross the catwalk over the water and open up both doors and light the oil to illuminate the boss room.
  • The Lost Sinner is an easy boss fight if you lit up the torches allowing you to lock on.
  • After the fight, open up the chest for a Fragrant Branch of Yore then use light the Primal Bonfire.
Sinner's Bonfire - Light the primal bonfire in Sinner's Rise.

1 down, 3 to go.
Walkthrough - Iron Keep Primal Bonfire [2/4]
Huntsman's Copse
With Licia of Lindelt moved to Majula, she'll be in the rotunda and you can pay her 2,000 souls to move the gate allowing you to access Huntsman's Copse.
  • The first NPC you'll meet is Felken the Outcast. Should you have 8 Faith/Intelligence, you can access his shop of hex spells. 20 Faith/Intelligence will get you his Sunset Staff w/o killing him.
  • Continue on the path until you reach the second bonfire of the area. Across the bridge gap is a Token of Fidelity and a Pharros Lockstone.
  • Continue along the cliff side and cross the bridge. Head straight and you'll notice some loot in a hut to the right. Inside the hut is the Soul Spear sorcery (1 of 2).
  • From there, go up the hill and the hut to the left will have the lever that lowers the bridge.
  • Across the bridge is another hut with a bonfire and Creighton. You will need the Undead Lockaway Key in order to open this area. Creighton offers the 'Fist Pump' gesture for Gesture Maestro.
  • Cross the smaller bridge and follow the cliffside. You will find a hill to the left, ignore it. Continue straight into the hut with the Undead Lockaway Key.
  • The Combustion pyromancy can be found in the cave to the right hanging on a corpse off the broken bridge.
  • Proceed to the boss fight: Skeleton Lords shouldn't be hard, just dispatch of the weaker enemies while kiting the boss then move to the boss.
Undead Purgatory
Starting from the Bridge Approach bonfire in Huntsman's Copse.
  • After the first bridge, take the right where you'll cross tons of dark warriors.
  • You will find a Sublime Bone Dust just at the end of the bridge before the fog gate to the right.
  • Boss Fight: Use the divots in the wall to dodge the Chariot each time it passes. There are two necromancers that will keep reviving the skeletons so take them out then the skeletons. Get to the end of the path to close the gate on the chariot then finish him off.
  • After the boss fight, you'll find Titchy Gren who leads the Brotherhood of Blood as well as sells pyromancy. You'll need a Token of Spite to get her to talk which can be found in a chest before The Gutter.
Harvest Valley
  • After arriving in Harvest Valley, you'll find Stone Trader Chloanne at the top of the peak. Exhaust her dialogue to relocate her to Majula (Gathering of Exiles).
  • Nothing of importance so you can make your way to the second bonfire after the gate. From here, the second set of poison mist contains the Chameleon sorcery. This is its only appearance.
  • Across the wooden bridge then take the path left to discover the Heirs of the Sun Covenant. Talk to the altar until it asks you to join for the 'Brilliant Covenant' achievement. The altar will also teach you the fabled 'Praise the Sun' gesture for Gesture Maestro.
  • Otherwise, go ahead and fight the Covetous Demon. You can shoot the pots inside to drop undeads and bait him into eating them while you dish out damage.
Earthen Peak
  • Once in, you'll find Lucatiel at the first bonfire.
  • Not much unique loot here, so proceed to the second bonfire. Just before the second bonfire, you should see a giant windmill. Light your torch with the bonfire, then light the windmill on fire. This will drain the poison making life easier.
  • From the second bonfire, head up the stairs and head out the door way. Break the wooden fence and head left to find Laddersmith Gilligan. Pay him 2,000 souls then exhaust his dialogue to move him in Majula (Gathering of Exiles). He also teaches you 'Prostration' gesture for Gesture Maestro. His ladder leads to a Pharros Lockstone.
  • Go back into the doorway and up the ladder. Take the narrow path and up the stairs. You can go up stairs and get the bonfire behind the illusory doors or go ahead and fight the boss.
Iron Keep - Part 1
In Iron Keep, you'll notice quite a bit of lava. So be prepared for fire defenses should you need them.
  • Go straight across the bridge and open the doors. You will be ambushed by some invaders. To the right is Magerold of Lanafir who leads the Dragon Covenant, but you cannot access it until later. He also sells a Fragrant Branch of Yore for 7,500 Souls.
  • Up the stairs from Magerold you'll find a corpse containing a Pharros Lockstone.
  • In the main room, you'll notice some loot under a flaming bull head. You can no longer take it without dying, but you do need it later on so place a mental note here. It's the Iron Key.
  • Head into the next room and out the door. You should be able to see a bridge in mid air and a lever down straight ahead. Pull the lever in order to lower one side of the bridge and cross the bridge.
  • The area to your right will have a chest and an Alonne Captain Knight. The building with the broken stairs contains the Dull Ember that you need to use Steady Hand McDuff back in Lost Bastille.
  • Lucatiel's summon sign will be just outside the boss gate fog. The one with the archers.
  • Smelter demon has some pretty strong attacks, but has no real health of its own. The only note is that you cannot drag out this fight and his fire aura does do damage (immolation).

Belfry Sol
You're going to need a Pharros Lockstone in order to access Belfry Sol. From the Ironheath Hall bonfire, head into the door way and across the bridge. Head into the room to the left and use the Pharros Lockstone to reveal a ladder that leads you to the Belfry Sol bonfire.
  • Head up the ladder and should you skip Belfry Luna, you can join the Bell Keepers here and get the 'Clangorous Covenant' achievement.
  • Overall a very short area, but go in make sure to pull the lever near the towers to ring the bell and lift the gate.
  • At the end of the area, you'll find a chest with the Immolation pyromancy.
Iron Keep - Part 2
You can continue in Iron Keep right after Belfry Sol, or you can start from Ironheath Hall bonfire.
  • The key thing to note here is the Chaos Storm pyromancy. In the second room with the lever that lowers and raises the platforms, you will notice a chest in the back left. To access this, you'll need to combine the Smelter Demon armor purchasable from Maughlin the Armorer in Majula, the urns of water at the very top, and either flash sweat pyromancy or small orange blurrs. Do the urns last and make sure to clear out the mobs so you have a clear path. Once that's all done, roll through the urns then drop down twice to the lava path and then run towards the chest. Heal when necessary.
  • Once you get that, proceed in the area until you reach the fire-breathing bull mechanisms. There is a ladder to the left in the back that leads to a phantom and another ladder. Climb that for a bonfire and then pull the lever to disable the fire.
  • Overall, the boss is pretty simple. Most of his attacks are easy to dodge, and he leaves al ot of openings after you recognize his attack patterns.
  • After the fight you can get a sublime bone dust then head down and light the primal bonfire.
Iron Keep Bonfire - Light the primal bonfire in the Iron Keep.

2 down, 2 to go.
Walkthrough - Black Gulch Primal Bonfire [3/4]
The Pit
You will have to revisit this area later on as there are some important items in here once you've retrieved the Forgotten Key.
  • It's probably important that you have Laddersmith Gilligan in Majula so you can buy ladders that makes going down much easier. He sells three ladders: 500 souls, 3,500 souls, and 12,000 souls.
  • You'll also want the Silvercat Ring and/or remove armor to lower fall damage. The cat in Majula sells the ring.
  • To skip Grave of Saints, go down the 12,000 soul ladder and then drop down until you find the doorway.
  • You need Grave of Saints for two reasons, so head down the 3,500 soul ladder or the 500 soul ladder. Or no ladder if you can survive the fall. The first doorway you see will lead to Grave of Saints.
  • There is a Pharros Lockstone on the way down.
Grave of Saints
  • Once you step foot in here, you're fair game to be summoned into a world hosted by a member of the Rat King covenant so be careful.
  • The only unique loot is the Whisper of Despair hex. Once you get to the bridges, use a Pharros Lockstone on the spot where a bridge could drop down at. Head across the bridge, and up the stairs will be the hex spell on a body.
  • Head to the end of the level with the bonfire. Large AoE attacks are extremely useful and you do need this boss soul to trade for Toxic Mist with Straid or if you're melee you can use Alluring Skulls to distract the smaller rats once the boss spawns.
  • After fighting the Royal Rat Vanguard, enter the next area and you should see the Rat King on some bones. Talk to him for the Rat King Covenant and the 'Gnawing Covenant' achievement.
  • There is a pharros lockstone after dropping down.
The Gutter
  • Following the Grave of Saints and dropping down a ton, you'll end up on a bridge with a Crystal Lizard. Under you are explosive mummies and you can see the Great Heal miracle on the ground (1 of 2 locations).
  • Once down, you can go through the tunnels and descend some ladders. At the bottom will be a chest containing a Token of Spite required for joining the Brotherhood of Blood in the Undead Purgatory.
  • Upon entering the Gutter, you'll be in a near pitch black area so you may want to bring a torch with you to light up all the scones.
  • Once you reach the second bonfire, go back to the area with all the ladders. Go down the ladder with the pots blocking it. Dropping down will lead you to some pots and then a chest with the Great Club. Drop down some more for the Dark Fog hex.
  • From there, climb down. You'll notice some spiky pots. Do not attack them as they're filled with corrosive acid. Break them from afar with iron arrows, or urns. Drop down and loot the Fragrant Branch of Yore. Head through the fog gate.
Black Gulch
  • To the left is the first bonfire. Continue down the path. All these statues you see, they all shoot poison so you will have to break a majority of them. At the bottom of the slope before you even encounter the first poison pool, you can drop down off the cliff and onto a platform leading to a tunnel.
  • Inside the tunnel will be Lucatiel provided you kept up with her side mission til now. Exhaust her dialogue to move her to her final location in Aldia's Keep as well as make her available to summon later on in this level.
  • Go up and drop down. Head to your right and into the cave for Great Magic Weapon sorcery in the chest.
  • Go back out and down. The corpse near the first razorback will have the Scraps of Life hex.
  • After the second razorback, you can actually drop down once more. The first drop will lead you to a stone door that requires the Forgotten Key and has Darkgiver Grandahl behind it for the Pilgrims of Dark.
  • From the spot you landed, drop down once more into a cave. This cave will lead to two Forgotten Giants. Kill them for a Soul of the Giant as well as the Forgotten Key.
  • Take the cage elevator back up and you'll be in the wider lower part of the level. Don't forget to revisit the locked door to talk to Darkgiver Grandahl and get your first condition to join the Pilgrims of Dark.
  • Head straight to the edge and you'll notice a cave with a small ledge path you can walk on to the bonfire. Lucatiel's summoning sign will also be next to the bonfire. A Pharros Lockstone will be in the pot nearby.
  • Proceed to fight The Rotten behind the giant fog gate. Lucatiel has a high chance of dying here due to both the Rotten's potent attack and the lava pits so you'll want to dish out damage fast or summon additional NPCs/players to help.
  • After that, there is a fairly well hidden cave that leads to a chest with a Sublime Bone Dust. Then the primal bonfire afterwards.

Gulch Bonfire - Light the primal bonfire in the Black Gulch.

3 down, 1 to go.
Walkthrough - Brightstone Cove Tseldora Primal Bonfire [4/4]
Shaded Woods
You should buy the Ring of Whispers from Sweet Shalquoir. From Majula, there is a woody door that leads to a building. Take that path.
  • Outside of the building will be Benhart of Jugo, exhaust his dialogue.
  • Head inside and use a Fragrant Branch of Yore on Rosabeth of Melfia.
  • After she's back to normal, she will request clothing. Anything works and you only need one. After that, exhaust her dialogue then go back to Majula to prevent killing her in the following encounter. (Gathering of Exiles)
Change of Clothes - Give Rosabeth of Melfia something to wear


  • Once you make it back, talk to Benhart again who will give the 'Joy' gesture for Gesture Maestro. Exhaust his dialogue to progress his sidequest.
  • In the following room, you'll find a bonfire in the left door and an estus flask shard in the right room.
  • Follow the path. The spot where you encounter several hollows in the open, you can find a Pharros Lockstone on a corpse on the cliff to the left. Proceed to the bonfire.
  • From here, you can go three ways: You will be taking the right path here where Creighton is sitting.
  • In the fog, follow the left wall until you reach a ton of broken rubble on the ground. On top of the rubble you should see some red cloth. It is Vengarl's head.
Reflections on Disembodiment - Inherit equipment from the head of Vengarl.


  • Exhaust his dialogue to receive his helmet and the achievement. Talk to him again and learn his 'Decapitate' gesture. How ironic.
  • After that, again follow the left wall and make a mental note of the ground. Should you get lost, you want to be going up hill. If you went the right way, you should be seeing the fog dissipate.
  • In the Shaded Ruins, you will find a bonfire. There is a petrified Lion mage near by who holds the Fang Key required to save Ornifex that's at the bottom of the bigger broken wooden pit.
  • However, you want to head left into the building with the cursed pots which also has a Pharros Lockstone. Continue here and you should arrive at a sand pit. Equip the Ring of Whispers and talk to the giant manscorpion named Tark. Once you clear the area boss for Shaded Woods, you pickup the 'Warm-up' gesture from him. This also lets you summon Tark. Either walk back or go forward if you have enough Fragrant Branch of Yore (waste).
  • Head back to the main area and you can find another Pharros Lockstone behind the basilisk.
  • If you want to access Weaponsmith Ornifex, walk over the wooden boards and open the door with the Fang Key. You can find an Estus Flask Shard next to Ornifex.
  • Head over to the buildings at the main area. The petrified lion mage here grants access to the Lion Mage set as well as giving you back a Fragrant Branch of Yore. This set increases casting speed.
  • Walk past the building and look for some planks on the ground. Walk over them to drop down to Darkgiver Grandahl. This is his second position. The Homing Soulmass sorcery is in the chest nearby.
  • Head back to the main area and up the hill to the fog gate. Tark's summoning sign will be here as well.
  • For the most part, Scorpioness Najka is easy especially while using Tark as bait. When she is underground, stand on the piece of stone. She cannot surface there. If you're curious, the item on the tree is a Flame Butterfly.
Door of Pharros
Note: The spiral staircase is automatically open to begin with. But boss soul still required.
  • Run through the area. Only thing you want here is the Twisted Barricade hex at the top of the first ladder. Also the upper level stairs, you'll find a Pharros Lockstone next to it.
  • Once you reach the second bonfire, you'll be next to the boss arena. The boss itself isn't hard, the fight is just annoying due to the other toxic rats. You'll want an AoE spell or a horizontal swinging weapon to quickly dispatch of the smaller rats. After that, it's easy.t
Brightstone Cove Tseldora
  • The most important part of this area is to simply summon Benhart of Jugo whose summoning sign is in one of the bigger tents.
  • You'll just need to take Benhart all the way to Prowling Magus & Congregation which is an extremely easy fight.
  • Just to the left of the boss fog gate is an illusory wall leading to an Estus Flask Shard.
  • After the boss area, walk out the doorway. To your right is a bonfire. To your left up the ladder is Cromwell the Pardoner who you may need for specific miracles or hexes.
  • You can skip most of the level by rolling down the rock platforms to reach the sand.
  • Continue through the door and through the next sandy area. Head straight up and into the building. The only note here is the door on the right has the Great Fireball pyromancy opened by the Brightstone Key dropped after the next boss.
  • Head through the gate and up the ladder then drop down onto the webs. There are tons of spiders around this area as well another Pharros Lockstone.
  • Only note about Duke's Dear Freja is that you can only attack one of her two faces. Dispatch the smaller spiders, then hug the edge of the wall. This will cause her AI to use the soul stream attack which leaves her open for damage. Also after the boss fight, be sure to examine the red glowing cloud near the ledge to embrace the Great Soul.
  • Next room you can kill the Duke for a Fragrant Branch of Yore and the Brightstone Key.
  • Continue and light the primal bonfire.

Brightstone Bonfire - Light the primal bonfire in Brightstone Cove Tseldora.

4/4 Done. Shrine of Winter activated.
Walkthrough - Ashen Mist Heart
Shrine of Winter
From the Shaded Ruins crossroad bonfire, take the path to the left.
  • Once you've arrived at Shrine of Winter, the door will open (4 primal bonfires or enough soul memory)
  • After the Shrine, go down and right for the Repair sorcery
Drangleic Castle
  • At the gates, you need to kill enemies near the two statues to sacrifice their souls to animate the statues. To the far right of the gate is the Great Combustion pyromancy in a chest.
  • Once inside, you will find Chancellor Wellager midway up the stairs. Exhaust his dialogue for the 'This One's Me' gesture.
  • In the King's Gate bonfire room, you'll notice tons of stone statues and 6 doors. The only two doors you need to worry about are the farthest door on the left and the closest door on the right.
  • Farthest door on the left leads to the third and final location of Pilgrims of Dark. He should allow you to join now and obtain the 'Abysmal Covenant' achievement. There's also a bonfire down here.
  • Behind the door closest on the right, allows you to progress the area.
  • Continue through the level until you reach the throne room with Nashandra. Exhaust her dialogue and proceed to the boss room with the Twin Dragonriders. Go for the black armored one first.
  • After the Twin Dragonriders, you'll be at Central Drangleic and you should see Benhart of Jugo sitting at the wall. Exhaust his dialogue.
  • Go up the ladder and proceed through the door with the statues inside. Make sure to kill off one of the enemies near the golem to activate the elevator.
  • Soul Greatsword sorcery located inside the chest.
  • Proceed to the next area with the foyer. The metal chest has the Firestorm pyromancy upstairs.
  • Once the elevator is activated, return to the Central Drangleic bonfire and the elevator should have gone down. Take it up. inside you'll find the Key to King's Passage and the Strong Magic Shield sorcery in the chests.
  • Go back down and go through King's Passage. Benhart's summoning sign is on the left right before the boss gate. As for the Looking Glass Knight, his shield repels all projectile attacks and can also summon an npc or player to help him.
Looking Glass Knight - Defeat Looking Glass Knight


  • After the fight, they merged the two chests into one. Open the remaining chest to receive Soul Bolt sorcery and then head down the elevator.
Shrine of Amana
  • After the second bonfire, you'll encounter an Ogre. Behind the Ogre is a narrow path along the pillars containing an Estus Flask Shard and a chest with Sunlight Blade miracle. Also sold by Straid.
  • After the third hut (one just before the third bonfire), inside the water is Fire Tempest pyromancy. Only guaranteed spawn. There is a chest you have to navigate to that's after the hut and towards the right.


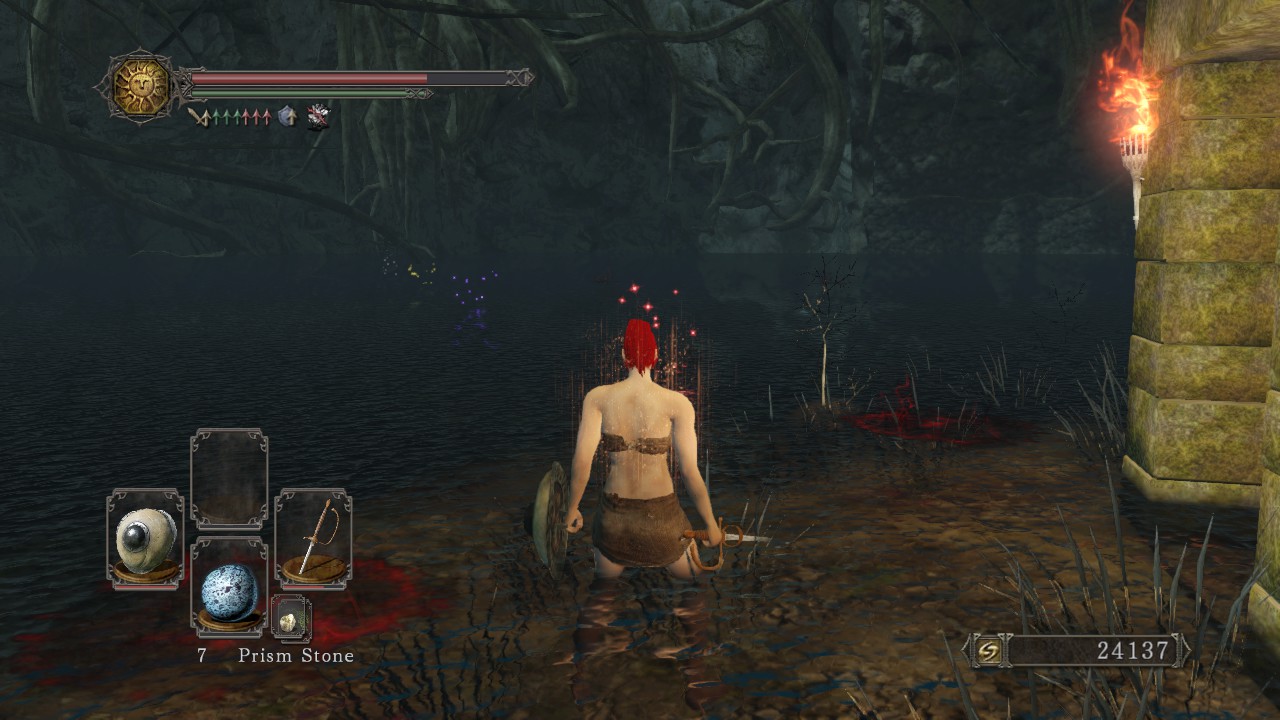
The four prism stones show you the direction you want to go for the chest. There are no holes in the ground to be wary of.
  • After the third bonfire and the cave with the corrosive mists, you'll encounter a circular arena with pillars. You will find the Homing Crystal Soulmass sorcery on a corpse near a broken pillar.
  • Continue on until you reach the boss.

Undead Crypt
  • Advance until you see someone asking you to not produce light, and do not produce light. Walk in and head to your right to find Grave Warden Agdayne. Exhausting his dialogue gives access to his shop, the 'Have Mercy' gesture, and his summon sign later on. His rarest spell is the Warmth pyromancy followed by the Soul Spear sorcery.
  • Continue in the level until you reach the second bonfire. Destroy the grave looking statues to prevent pyromancers from spawning.
  • After the hallway with the two greatshield enemies, you'll drop down into a trap. The path you want to go has a line down the middle of the path. There are illusory walls with a Pharros contraption, use it to find the Pharros door with the Great Lightning Spear miracle inside; not unique.
  • Continue on and pull the lever to unlock the shortcut. Proceed to the boss gate.
  • After the boss fight, you can actually still fight King Vendrick and he still is weak during the first encounter. However, you need to deal bleed damage or use corrosive acids to trigger the boss fight; otherwise, he ignores you. Pick up the King's Ring on the corpse.
King's Ring - Acquire the King's Ring
This will give you the ability to open all King's Gate.


Aldia's Keep
You'll have to go through the King's Gate in Shaded Woods at the fork bonfire, middle path.
  • Lucatiel's ending is here. MAKE SURE NOT TO TALK TO HER UNLESS YOU'VE COMPLETED HER SIDE QUEST. If she is here, then you've completed the dialogue portion of the side quest. However, in order to inherit her equips, you must have summoned her at least 3 threes with her surviving each encounter. See 'Lucatiel' section for more details.
  • Enter Aldia's Keep and the dragon will move automatically.
  • Quick note: Do not pull the lever under the staircase.
  • If you go straight and to the right, you will find Royal Sorcerer Navlaan. If you are human, he tells you to go away. If you are hollowed, he will ask you to kill various NPCs in his stead. This is required, see the Clean-up section of the walkthrough. Recommended to do later in the game when you can complete his quest without killing NPCs.
  • On the top floor on the right, a chest contains the Great Magic Barrier miracle. Sold by Chancellor Wellager.
  • Proceed to the next area with the gates. On the left you will find a door. Enter and go down. A bonfire is hidden midway down the stairs on the left. Inside the corrosive pit, you will find the Soul Geyser sorcery. After dispatching the dogs inside, unequip your equips and loot. This is a unique spawn. Aldia's Key is also in here.
  • Continue on the level. There are a few ambushing ogres through walls so be careful. The doors on the right are accessed with Aldia's Key.
  • There are no summons for the Guardian Dragon. His attacks are simple, dodge his fire and attack when he's down.
Dragon Aerie/Dragon Shrine
  • Speak with Emerald Herald to receive the Aged Feather. No achievement related items here. Make your way to Dragon Shrine.
  • Once you head up, pass the first Old Knight and at the second Old Knight take the path behind him. At the top of the stairs, instead of passing the two knights here, turn left and cross the bridge and drop off and you'll be near two chests (right is mimic). Follow this one way path to the Petrified Egg. Return to Magerold of Lanafir in Iron Keep to join the Dragon Remnants covenant.
  • Drop down on the ledge and look to your right for the Crystal Magic Weapon sorcery in a chest.
  • Proceed to the end of the area and talk to the Ancient Dragon for the Ashen Mist Heart.
Ancient Dragon - Acquire Ashen Mist Heart
Walkthrough - Finale
Now that you have the Ashen Mist Heart, we're going to take out Vendrick before reaching the end of the game.

Black Gulch Revisited
  • This area depends if you've already taken out the Elite Giants at the bottom of Black Gulch who holds both Forgotten Key and Soul of a Giant.
  • If you have, ignore this portion.
  • If you haven't make your way from the second bonfire in Black Gulch and drop down. Drop down again into a tunnel and head through to find two Elite Giants. Dispatch of them for the Forgotten Key and the first Soul of a Giant.
  • You can go in a loop and open the door with the forgotten key if you'd like to talk to Darkgiver Grandahl for Pilgrims of Dark covenant.
Memory of Orro
  • The first memory we're visiting is the area where you should have fought the Pursuer boss with the bird's nest.
  • Speak to Benhart of Jugo here and exhaust his dialogue.
  • Enter the memory of the giant nearby to enter Memory of Orro.
  • Once inside, you'll find Benhart of Jugo sitting on the ground before the stairs. This is his final location, you can come by later when you've gained your third summon if you haven't already. Exhausting his dialogue enables you to summon him for Memory of Jeigh.
  • There are no items related to achievements in here so you can run to the end and pick-up the Soul of a Giant from the Giant's Corpse.
Memory of Jeigh
  • It's preferred to do Memory of Jeigh before doing Memory of Vammar so you do not have to revisit Memory of Vammar for Captain Drummond's inheritance.
  • Head to the Cardinal Tower Bonfire and go down the ladder. Cross the bridge, open the door with the Soldier's Key then open the King's Gate with the King's Ring.
  • You can exclusively summon Benhart of Jugo or Captain Drummond provided you exhausted their dialogues in their respective locations inside memories. For achievement purposes, we'd prefer Benhart.
  • The entire level is just a bridge, you can run across the bridge and wait until the head starts rolling as it'll do immense damage to Benhart as well as the bombardments. Rush across to the end to encounter the Giant Lord. While the Giant Lord is easy, you are on a time limit and Benhart could've sustained immense damage early on so dispatch quickly. He'll drop the Soul of a Giant.
Memory of Vammar
  • The giant is where you first encountered Pate but on the otherside of the wall, not inside the trap.
  • Once in before you encounter some closed doors, Captain Drummond is on the ground. Exhaust his dialogue and learn the 'Hurrah' gesture, the final gesture for 'Gesture Maestro'. If you also followed this guide, then you will also receive 'Holder of the Fort'.
Holder of the Fort - Inherit Captain Drummond's equipment

The only requirement is to have defeated the Giant Lord, so if you followed this guide you'll get it. If not, revisit Drummond after you've done so.
Gesture Maestro - Learn all gesture

If you missed a gesture, you can visit the Gesture Maestro section to compare which one you missed as well as figure out how you obtain it.
  • There is also nothing required here so you can get to the end to examine the Giant's corpse to obtain the Soul of a Giant.

Ancient Dragon
  • If you revisit the boss room where you fought The Duke's Dear Freja, you can enter the petrified dragon's memory and obtain the Ancient Dragon's Soul which aptly describes the Ancient Dragon in Dragon Shrine.
  • If you go to Dragon Shrine and kill the Ancient Dragon, he drops the fifth and final Soul of a Giant. You do not need it, but you can.
King Vendrick
  • The whole purpose of collecting all those Soul of a Giant was to lower Vendrick's defenses. Vendrick's default defense is 32x and each Soul of a Giant will decrease it by a multiple of 2. So one Soul of a Giant lowers it to 16x, another to 8x, then 4x, then 2x, then finally to 1x.
  • Vendrick is fairly easy, just hug the leg opposite of his wielding hand.
  • First moveset is when he swings vertically down. If the second swing comes in succession, he will not swing horizontally afterwards. If there is a pause between the two vertical swings, then he will swing vertically.
  • Second moveset is when he starts with a horizontal swing. If he pauses too long, he will not swing again.
  • Do not stand too far behind him, try to stand to his side that he's always rotating towards you until you bait him to attack. If you do, he'll jump backwards.
Vendrick - Defeat Vendrick


Throne of Want
  • Now that Vendrick is gone, we can proceed to the finale. Head to King's Gate bonfire in Drangleic Castle. Open the King's Gate and head to the end.
  • You will be able to summon Benhart here if you need him for his sidequest.
  • Depending which attempt this is, you will have 3 boss fights in succession with 4 bosses.
  • First fight is against the Throne Defender and Throne Watcher. The only thing I'll note here is that you'll have to kill them in succession; otherwise, the other will get back up. Should you have Benhart summoned, he will disappear after this.
  • Against Nashandra, swing at the curse mist to destroy them, otherwise easy fight.
  • Against Aldia, just be careful of where he warps, it'll glow red with fire. Attack him when he's not engulfed in flames as his defenses are lowered then.
The Heir - See the Ending

It'll unlock once you complete the credits.
Walkthrough - Clean-Up
Selfless Giver -
Max-out devotion to covenant.

You only need to max one covenant for Selfless Giver, but there are two covenants that you must max out to get 100% in Dark Souls which are the Pilgrims of Dark covenant and the Heirs of the Sun. The easiest covenant to complete is Way of the Blue, but it's not required overall for 100% achievements.

Heirs of the Sun
- You need 30 sunlight medals in order to max out the Heirs of the Sun as well as pick up the Sunlight Spear miracle. Unique occurence.
- Sunlight medals can be obtained by defeating bosses either as a member of the Heirs of the Sun or by summoning a player who is a member of the Heirs of the Sun.
- Sunlight medals are dropped by Falconer Knights located in Things Betwixt (NG+) as well as the Mounted Overseer in Harvest Valley. (The guys who launch dark magic balls at you).

Pilgrims of the Dark
- You have to complete Pilgrims of the Dark in order to obtain the Climax hex as it is a unique occurrence in the game.
- To max out the covenant, you have to complete all 3 Abyss as well as the Darklurker boss. The first attempt at an abyss is free; every subsequent attempt costs a human effigy.
- To join, you must have spoken to Grandahl at all 3 locations first.
- Location 1: Behind Forgotten Door in Black Gulch
From the second bonfire, head backwards to the razorbacks and drop down off the cliff onto a ledge. Go in and talk to Darkgiver Grandahl. Join if necessary. Enter the abyss, light the torch, defeat all enemies and drop into the abyss.
- Location 2: In a pit at the end of Shaded Woods
From the Shaded Ruins bonfire, you can run passed all the ghosts without aggroing them so just run straight up the pit and turn right until you get to the bottom of the hill leading to Najka. Head straight and there is a wooden plank straight ahead. Walking on it breaks and you'll fall right next to Darkgiver Grandahl. Complete the Abyss.
- Location 3: Drangleic Castle third bonfire
From the King's Gate bonfire in Drangleic Castle, the far left soul door in the room with statues has a Ruin Sentinel and a fragile flooring where you can drop down to the third bonfire and Darkgiver Grandahl. Complete the Abyss.
- Darklurker will appear right after you complete the third abyss and he is a boss fight. If you fail to defeat him, you have to go through an entire abyss and then fight him again. Personally, I found the Abyss in Shaded Woods to be the easiest for me.
- After you've defeated Darklurker, speak to Darkgiver Grandahl and he'll give you Resonant Soul, Great Resonant Soul, and Climax hexes in their respective covenant rank of 1, 2, 3.

Curious Map - Light all the flames on the map in Majula.

You should already have Cale relocated to Majula and at this point in the walkthrough, you've already beat the game and thus speaking to Cale should get his helmet and the achievement.

Supreme Weapon - Reinforce a weapon to its limits.

All you need to do is get a regular type weapon to +10. You can infuse the weapon if you like as it plays no part in influence the amount of materials you need. If a weapon requires twinkling titanite, then you'll have to find a different item to use.

Garrolous Miser - Inherit Laddersmith Gilligan's equipment

If you haven't gotten this, you can head to Majula and speak with Gilligan next to the pit. Purchase his 12,000 soul ladder then exhaust his dialogue to receive the Melu Scimitar and this achievement.
Walkthrough - Spells
Shop Spells
I essentially pointed out all spell locations you could get for free while you progressed through the stages, but now we need to cover the rest and some that required revisiting. We'll go over the purchases first.

Licia of Lindelt
  • Heal for 1500 souls
  • Med Heal for 3000 souls
  • Great Heal Excerpt for 4500 souls
  • Replenishment for 3000 souls
  • Resplendent Life for 4500 souls
  • Caressing Prayer for 2000 souls
  • Force for 1800 souls
  • Lightning Spear for 6000 souls
  • Homeward for 2400 souls
  • Guidance for 3700 souls
Carhillion of the Fold
  • Soul Arrow for 1500 souls
  • Great Soul Arrow for 3000 souls
  • Heavy Soul Arrow for 2000 souls
  • Great Heavy Soul Arrow for 4500 souls
  • Shockwave for 1800 souls
  • Soul Spear Barrage for 2600 souls
  • Magic Weapon for 2000 souls
  • Yearn for 3000 souls
Rosabeth of Melfia
  • Fireball for 1200 souls
  • Fire Orb for 3400 souls
  • Combustion for 1500 souls
  • Poison Mist for 3400 souls
  • Flash Sweat for 2300 souls
  • Iron Flesh for 3500 souls
Blue Sentinel Targray
  • Emit Force for 4200 souls
  • Heavenly Thunder for 3300 souls
Stone Trader Chloanne
  • Soul Appease for 8800 souls
  • Dead Again for 4000 souls
Straid of Olaphis
  • Homing Soul Arrow for 6500 souls
  • Strong Magic Shield for 6300 souls
  • Cast Light for 3000 souls
  • Unveil for 2200 souls
  • Sunlight Blade (after Undead Crypt) for 12,400 souls
  • Great Lightning Spear (after Undead Crypt) for 13,000 souls
  • Dark Orb for 600 souls
  • Dark Hail for 1500 souls
  • Dark Fog for 5200 souls
  • Affinity for 11,500 souls
Titchy Gren
  • Firestorm for 4500 souls
  • Great Combustion for 4800 souls
  • Fire Whip for 3800 souls
Magerold of Lanafir
  • Fall Control for 4800 souls
  • Dark Hail for 1500 souls
  • Dark Storm for 4700 souls
Cromwell the Pardoner
  • Scraps of Life for 2200 souls
  • Great Heal for 8000 souls
  • Emit Force for 4200 souls
  • Heavenly Thunder for 3300 souls
  • Perseverance for 3500 souls
Felken the Outcast
  • Magic Barrier for 2700 souls
  • Dark Orb for 600 souls
  • Dark Weapon for 2700 souls
  • Resonant Soul for 1100 souls
  • Great Resonant Soul for 3400 souls
  • Resonant Flesh for 3400 souls
  • Resonant Weapon for 4000 souls
Weaponsmith Ornifex
  • Homing Soul Arrow for 6500 souls
  • Homing Soulmass for 6000 souls
  • Fall Control for 4800 souls
Chancellor Wellager
  • Great Magic Barrier for 9300 souls
  • Wrath of the Gods for 8200 souls (NG++)
  • Bountiful Sunlight for 11,000 souls (NG++)
  • Great Chaos Fireball (NG++)
Grave Warden Agdayne
  • Soul Spear for 12,000 souls
  • Soul Vortex for 10,400 souls
  • Soul Appease for 8,800 souls
  • Warmth for 5,200 souls
Darkgiver Grandahl
  • Cast Light for 3000 souls
  • Dark Orb for 600 souls
  • Dark Hail for 1500 souls
  • Darkstorm for 4700 souls
  • Profound Still for 13,000 souls
Royal Sorcerer Navlaan
  • Remember to be hollowed when you talk to him.
  • Great Magic Weapon for 6000 souls
  • Strong Magic Shield for 6300 souls

Boss Soul Trading
List excludes NG+ souls and DLC souls. Those are in their respective sections.
  • Toxic Mist: Royal Rat Vanguard Soul (Grave of Saints)
  • Acid Surge: Royal Rat Authority Soul (Door of Pharros)
  • Sacred Oath: Soul of Velstadt (Undead Crypt)
  • Soul Shower: Scorpioness Najka Soul (Shaded Woods)
  • Heavy Homing Soul Arrow: Ruin Sentinel Soul (Lost Bastille)
  • Lifedrain Patch: Darklurker Soul (Pilgrims of Dark)
  • Repel: Giant Lord Soul (Memory of Jeigh)

Other Spells
  • Head to Aldia's Keep as a hollow and speak with Royal Sorcerer Navlaan under the staircase who will ask you to assassinate specific NPCs in his stead proving so by showing specific items. This guide will tell you how to do so without killing anyone.
    1. Buy the Ladder Miniature from Gilligan's shop; receive Dispelling Ring
    2. Complete Curious Map for Cale's Helmet; receive Simpleton's Spice
    3. With 20 faith and intelligence, speak with Felken for Sunset Staff; receive Forbidden Sun pyromancy
    4. You already have the Aged Feather; receive Unleash Magic sorcery
  • Revisit the Pit in Majula, climb down ladder closest to Sweet Shalquoir. Climb up the ladder next to it and open the door with the Forgotten Key. Inside you will find Great Lightning Spear miracle.
  • After buying all the miracles you need from Licia of Lindelt, invade her using the Cracked Eye Orb. Once you defeat her you will receive Soothing Sunlight miracle.
  • As a member of the Bell Keeper, you'll have to get to Rank 2 for Hidden Weapon sorcery which consists of defeating 30 red phantoms or hosts. You can do it online, or offline. For offline go to Belfry Sol and go up the ladder. If you go to the tower, at the bottom of the first tower there's a chance of a Mad Warrior spawning. Aged Feather or Homeward Bone recommended to reset spawns. Memory trick no longer works so you have to check every time. Talk to the Dwarf to see if you ranked up.
Walkthrough - NG+ and NG++
Before we begin, I'll quickly cover which key items are reset or not reset upon entering NG+ and further.
  • Fragrant Branch of Yore will be removed from inventory.
  • All keys will be removed from inventory.
  • Aged Feather will not be removed from inventory.
  • Estus Flask upgrades will not be removed.
  • Soapstones will not be removed.
  • King's Ring will be removed from inventory.
  • Ashen Mist Heart will be removed from inventory.

NG+
To enter NG+ and further, you must return to the Far Fire bonfire in Majula. Rest at the bonfire and select to begin a new journey to Drangleic.
  • Defeat Last Giant
  • Defeat Pursuer at Forest of Fallen Giants
  • Defeat Ruin Sentinels accessed through bird's nest at Lost Bastille or skip using Pharros Lockstone/Antiquated Key
  • Defeat The Lost Sinner [1/4] (loot Branch of Yore from chest afterwards)
  • Defeat Dragonrider at Heide's Tower of Flame and move Licia of Lindelt to Majula
  • Defeat Skeleton Lords in Huntsman's Copse
  • Defeat Covetous Demon in Harvest Valley/Earthen Peak
  • Defeat Mytha, the Baneful Queen in Earthen Peak and move Laddersmith Gilligan to Majula.
  • Buy Gilligan's 12,000 soul ladder, climb down and roll down to the Gutter and move to Black Gulch while picking up the Fragrant Branch of Yore at the beginning of Black Gulch.
  • Defeat the Rotten. [2/4]
  • Free Rosabeth and defeat Scorpionness Najka in Shaded Woods.
  • Defeat Prowling Magnus and Congregation in Brightstone Cove Tseldora.
  • Defeat The Duke's Dear Freja in Brightstone Cove Tseldora. Kill the duke for Fragrant Branch of Yore.[3/4]
  • Defeat Smelter Demon in Iron Keep.
  • Defeat Old Iron King in Iron Keep. Loot Fragrant Branch of Yore. [4/4]
  • Free Straid in his cell and trade all four Old souls (NG+ of each Great Soul) for their respective spells.
  • The Rotten drops the Old Dead One's Soul which trades for the Numbness Hex for 10,000 souls. Bonfire Ascetics can be used to obtain earlier at Black Gulch's second bonfire. This is the final Hex of the game and you should unlock Master of Hexes. Soul relates to Gravelord Nito.
  • The Duke's Dear Freja drops the Old Paledrake Soul which trades for Crystal Soul Spear for 10,000 souls. Bonfire Ascetics can be used on the third bonfire in Brightstone Cove Tseldora. This is the final sorcery of the game and you should unlock Master of Sorcery. Soul relates to Seath the Scaleless.
  • The Lost Sinner drops the Old Witch Soul which trades for the Flame Weapon pyromancy for 5,000 souls. Soul relates to the Bed of Chaos, or the Witch of Izalith.
  • The Old Iron King drops the Old King Soul which trades for the Binding Bolt miracle for 5,000 souls. While this should align with the final king of Dark Souls, 4 Kings, it could refer to Gwyn.
  • Defeat the Twin Dragonriders and Looking Glass Knight at Drangleic Castle.
  • Defeat the Demon of Song in Shrine of Amana.
  • Defeat Velstadt, the Royal Aegis in Undead Crypt and pick up the King's Ring.
  • Defeat Guardian Dragon in Aldia's Keep.
  • Obtain Ashen Mist Heart in Dragon Shrine.
  • Defeat Giant Lord in Memory of Jeigh. Other memories not required.
  • Defeat Throne Defender, Throne Watcher, and Nashandra
  • Aldia only spawns if you kill Vendrick then Nashandra.

NG++
  • Defeat Last Giant
  • Defeat Pursuer at Forest of Fallen Giants
  • Defeat Ruin Sentinels accessed through bird's nest at Lost Bastille or skip using Pharros Lockstone/Antiquated Key
  • Defeat The Lost Sinner [1/4] (loot Branch of Yore from chest afterwards)
  • Defeat Dragonrider at Heide's Tower of Flame and move Licia of Lindelt to Majula
  • Defeat Skeleton Lords in Huntsman's Copse
  • Defeat Covetous Demon in Harvest Valley/Earthen Peak
  • Defeat Mytha, the Baneful Queen in Earthen Peak and move Laddersmith Gilligan to Majula.
  • Buy Gilligan's 12,000 soul ladder, climb down and roll down to the Gutter and move to Black Gulch while picking up the Fragrant Branch of Yore at the beginning of Black Gulch.
  • Defeat the Rotten. [2/4]
  • Free Rosabeth and defeat Scorpionness Najka in Shaded Woods.
  • Defeat Prowling Magnus and Congregation in Brightstone Cove Tseldora.
  • Defeat The Duke's Dear Freja in Brightstone Cove Tseldora. Kill the duke for Fragrant Branch of Yore.[3/4]
  • Defeat Smelter Demon in Iron Keep or skip.
  • Defeat Old Iron King in Iron Keep. Loot Fragrant Branch of Yore. [4/4]
  • Go to Drangleic Castle, exhaust Chancellor Wellager's dialogue. He now sells Wrath of the Gods, Great Chaos Fireball and Bountiful Sunlight. The final three spells of the game as you should unlock both Master of Miracles and Master of Pyromancy.
The Dark Soul - Earn all achievements.

Congratulations!
Covenants
All covenant achievements only ask you to get the dialogue to ask you to join a covenant. You do NOT need to join it and abandon your current covenant. It will unlock prior to then. Covenants will be listed in a logical order which you can access them.

Covenant of the Meek - Discover the covenant of the meek
Name: Way of the Blue
NPC: Crestfallen Saulden
Location: Majula Monument
Rank
Condition
Reward
0
Join
Blue Seal
1
Defeat 1 Invading Phantom
Bloodbite Ring
2
Defeat 5 Invading Phantoms
Hush Sorcery Spell
3
Defeat 10 Invading Phantoms
Blue Tearstone Ring
A man is sitting at the top of the steps named Crestfallen Saulden. Talk to him and exhaust his dialogue before requesting to join his covenant.

Covenant of the Fittest - Discover the covenant of the fittest
Name: Company of Champions
NPC: Victor's Stone
Location: Majula
Rank
Condition
Reward
0
Join
Champion's Tablet
1
Offer 10 Awestones
Great Magic Weapon
2
Offer 25 Awestones
First Dragon Ring
3
Offer 50 Awestones
Vanquisher's Seal
From the Majula monument, if you peer over the to the left, you'll notice a cliff path next to the path that leads to Heide's Tower of Flame. At the end of that cliff is a corpse and an item as well as the Victor's Stone.

Protector Covenant - Discover the covenant of the protectors
Name: Blue Sentinels
NPC: Blue Sentinel Targray
Location: Cathedral of Blue
Rank
Condition
Reward
0
Join with Token of Fidelity
Guardian's Seal
1
50 Victories
Spirit Tree Shield
2
150 Victories
Wrath of the Gods
3
500 Victories
Bountiful Sunlight, Targray's Set
Blue Sentinel Targray is on the balcony right after you defeat the Old Dragonslayer. You must have a Token of Fidelity in order to trigger dialogue with him. One can be obtained through co-op or a corpse loot next to the Bridge Approach bonfire in Huntsman's Corpse.

Gnawing Covenant - Discover the covenant of rodents
Name: Rat King Covenant
NPC: The Rat King
Location: Grave of Saints/Door of Pharros
Rank
Condition
Reward
0
Join
Crest of the Rat
1
Offer 10 Rat Tails
10 Small Smooth & Silky Stone
2
Offer 20 Rat Tails
10 Smooth & Silky Stone
3
Offer 35 Rat Tails
Slumbering Dragoncrest Ring
The Rat King appears in both the Grave of Saints and Door of Pharros right after each boss. So be careful not to attack him. This also means you have to defeat at least one of the bosses.

Clangorous Covenant - Discover the clangorous covenant
Name: Bell Keepers
NPC: Dwarf
Location: Belfry Luna/Belfry Sol
Rank
Condition
Reward
0
Join
Bell Keeper's Seal, 5 Rusted Coins
1
Defeat 10 Trespassers
Titanite Slab
2
Defeat 30 Trespassers
Hidden Weapon Sorcery
3
Defeat 100 Trespassers
Bell Keeper Set
The dwarf sits at the start of each Belfry zone on a cabinet. You can also progress this covenant by defeating the NPC Red Phantom that has a chance of spawning in Belfry Sol. He spawns out near the towers.

Sanguinary Covenant - Discover the covenant of the bloodthirsty
Name: Brotherhood of Blood
NPC: Titchy Gren
Location: Undead Purgatory
Rank
Condition
Reward
0
Join with Token of Spite
Crest of Blood
1
50 Rank Points
Curved Twinblade
2
150 Rank Points
Crescent Sickle
3
500 Rank Points
Great Chaos Fireball Pyromancy, Gren Set
After fighting the Executioner's Chariot, you can proceed upstairs to Titchy Gren. There is a bonfire here so you can easily access Titchy Gren and join should you not have a Token of Spite. One is right before the Gutter. The rank points are net points; lose -1, win +1.

Brilliant Covenant - Discover a most brilliant covenant
Name: Heirs of the Sun
NPC: The Sun
Location: Harvest Valley
Rank
Condition
Reward
0
Join
Sun Seal
1
Offer 10 Sunlight Medals
Sunlight Parma
2
Offer 20 Sunlight Medals
Sun Sword
3
Offer 30 Sunlight Medals
Sunlight Spear Miracle
After the Mines bonfire, proceed in the area until you're met with another set of poison mist pits. The path on the other side leads to an altar with the covenant. Sunlight medals can be obtained by completing bosses in Co-op as a member. Also dropped by Dark Magic Giants and Falconer Knights.

Abysmal Covenant - Discover the abysmal covenant
Name: Pilgrims of Dark
NPC: Darkgiver Grandahl
Location: Shaded Woods/Black Gulch/Drangleic Castle
Rank
Condition
Reward
0
Join
Abyss Seal
1
Clear 1 Abyss Dungeon
Resonant Soul Hex
2
Clear All 3 Abyss Dungeon
Great Resonant Soul Hex
3
Defeat Darklurker
Climax Hex, Xanthous Set
In order to join, you must find him in all three locations.
Shaded Woods: Before the stone buildings before the hill to Najka, there is some wooden planks on the ground (not the one near the ghosts, further down), walk on them to fall down onto Darkgiver Grandahl.
Black Gulch: Using the Forgotten Key, from the second bonfire, you can see a platform under the edge of the cliff. Drop down and enter the stone doorway.
Drangelic Castle: From the King's Gate bonfire, there are 6 gates to open. The furthest gate on the left has a fragile floor that leads you to the third bonfire and Darkgiver Grandahl.

Covenant of Ancients - Discover an ancient covenant
Name: Dragon Remnants
NPC: Magerold of Lanafir
Location: Iron Keep
Rank
Condition
Reward
0
Join with Petrified Egg
Dragon Eye, Ancient Dragon Seal
1
Offer 10 Dragon Scales
Dragon Head Stone
2
Offer 20 Dragon Scales
Dragon Torso Stone
3
Offer 30 Dragon Scales
Black Dragon Greatsword
After obtaining the Petrified Egg in Dragon Shrine, head back to Magerold of Lanafir in Iron Keep (merchant). He will let you join.
Curious Map
Curious Map - Light all the flames on the map in Majula.


In Forest of Fallen Giants, after climbing down the ladder from the Cardinal Tower bonfire, go through the fog gate and you'll find yourself on a giant tree root. Drop down and progress to the cave. At the top of the cave will be Cartographer Cale. Exhaust his dialogue for the House Key. Return to the Majula Mansion, open the house then go to the basement and clear out the skeleton that's down there. 1 Skeleton spawns per bonfire intensity at the Far Fire. After that, go back to Cale and relocate him to Majula.

This achievement pretty much asks you to finish the game. Each number corresponds to a flame on the map.
1. Defeat the Last Giant
2. Defeat the Lost Sinner
3. Defeat the Rotten
4. Defeat the Old Iron King
5. Defeat the Duke's Dear Freja
6. Obtain the King's Ring
7. Obtain the Ashen Mist Heart
8. Defeat Throne Defender and Throne Watcher (Credit to Idiotic for pointing it out)

After you've beat the final boss, simply return to Cale in the basement and you'll get his helmet which you need for Royal Sorcerer Navlaan's assassination quest.
Garrulous Miser
Garrulous Miser - Inherit Laddersmith Gilligan's equipment

From the second bonfire in Earthen Peak, head up the stairs and out the door and you should notice wooden fences. Break the fence and head left to find Gilligan. After finding Gilligan at Earthen Peak, buy his ladder for 2,000 souls and exhaust his dialogue to relocate him to Majula. Once he's in Majula, he will sell you ladders for the Pit. Buy the 12,000 ladder then talk to him to receive the Melu Scimitar and this achievement.
Gathering of Exiles
Gathering of Exiles - Increase the Population of Majula

In short, this achievement wants you to find all the NPCs that can be relocated and relocate them to Majula. There are a total of 7 NPCs that can move to Majula for your convenience.

Merchant Hag Melentia
Location: Forest of Fallen Giants - She sits right next to the Cardinal Tower bonfire. To relocate her to Majula, simply exhaust her dialogue. She'll relocate to the wall near the Far Fire bonfire after the Last Giant is defeated.

Cartographer Cale
Location: Forest of Fallen Giants - He's in a cave right after descending the ladder from the Cardinal Tower. When you climb up the root, you can drop down at the top of the root to the building under you. The cliff has a cave in it with Cale inside.

Exhausting his dialogue the first time gives you the House key for Majula's Mansion. Return to Majula, enter the house and head to the basement. A skeleton will spawn for each bonfire intensity Majula is at. NG+ has 2, NG++ has 3, etc. Once the threat has been neutralized, return to Cale and exhaust his dialogue and he'll relocate to inside the mansion.

Licia of Lindeldt
Location: Heide's Tower of Flame
Right after fighting the Dragonrider, head up the stairs and to the bonfire. Licia will be staring off over the water. Exhaust her dialogue and she'll relocate to Majula. Her location is the rotunda before you get to Heide's Tower of Flame.

Carhillion of the Fold
Location: No Man's Wharf
Before you ever worry about Carhillion, in order to get him to talk, you need at least 8 Intelligence. Otherwise he'll shrug you off and you won't be able to do much to him. He's on the alternate dock area right before the ship. He relocates to the tree between the monument and Blacksmith Lengrist.

Rosabeth of Melfia
Location: Shaded Woods
You're going to need a 'Fragrant Branch of Yore' for this one. You may also want a useless armor piece as well. One is sold by Merchant Hag Melentia. From Majula, there is another cave entrance near the path to Things Betwixt. From there, head through the linear path and you'll see a building with a man sitting outside. Inside is a petrified NPC, Rosabeth. Use the Fragrant Branch of Yore on her. Once she's unpetrified, you can also pick up Change of Clothes by giving her an equipment piece. Once you've given her clothing, she'll relocate to the bottom of the steps to the monument.

Stone Trader Chloanne
Location: Harvest Valley
She's located at the ledge of the cliff at the beginning of Harvest Valley. Exhaust her dialogue to relocate her to Majula. She is actually Lengrist's daughter and ironically she sits on the rock near his workshop.

Laddersmith Gilligan
Location: Earthen Peak
From the second bonfire of Earthen Peak, head up the stairs and out the doorway. Break down the wooden fence and trace the ledge to the left to find Gilligan. Buy his 2,000 ladder then exhaust his dialogue. He also has a gesture. He moves himself right around the pit in Majula.
Gesture Maestro
Gesture Maestro - Learn all gestures.


Welcome
NPC: Crestfallen Saulden (Majula)
Conditions: Exhaust his dialogue, then request to learn his gesture.

Duel Bow
NPC: Blue Sentinel Targray (Cathedral of Blue)
Conditions: Activate speech by having a Token of Fidelity; obtained either in The Pit or completing a boss as a summon.

Joy
NPC: Benhart of Jugo (Shaded Woods)
Conditions: Unpetrify Rosabeth before the Shaded Woods, then speak with Benhart.

Mock
NPC: Straid (Lost Bastille)
Conditions: Rescue Straid from petrification, then rest at the bonfire. After that, talk to Straid and request to learn his gesture.

Fist Pump
NPC: Creighton of Mirrah (Huntsman's Corpse)
Conditions: Rescue Creighton in Huntsman's Corpse near the final bonfire using the Undead Lockaway Key located at the top of a peak. Once you've freed him, talk to him to learn the gesture.

Praise the Sun!
NPC: Ruined Altar (Earthen Peak)
Conditions: Simply find the altar for the Heirs of the Sun in Harvest Valley. Before entering Earthen Peak, there is a path down left before you run into a bunch of jars after the first hammer guy. The altar has sun beaming onto it.

Prostration
NPC: Gilligan (Earthen Peak/Majula)
Conditions: Buy his ladder for 2,000 souls at Earthen Peak, then learn the gesture from him by request. You may also want to exhaust his dialogue to move him to Majula.

Decapitate
NPC: Head of Vengarl (Shaded Woods)
Conditions: Simply find the head of Vengarl inside the thick fog on the left path from the crossroad. He's wearing red fabric; after listening to his story, you can learn his gesture.

Warmup
NPC: Manscorpion Tark (Shaded Woods)
Conditions: Talk to Tark with the Ring of Whispers equipped. Sweet Shalquoir (cat) in Majula sells this ring. Must be after you beat Scorpioness Najka.

This One's Me
NPC: Chancellor Wellager (Drangleic Castle)
Conditions: Exhaust his dialogue until you can access his menu and learn his gesture.

Have Mercy!
NPC: Grave Warden Agdayne (Undead Crypt)
Conditions: Exhaust his dialogue and do not use any forms of light to prevent any hostility.

Hurrah
NPC: Captain Drummond (Memory of Vammar)
Conditions: Exhaust his dialogue to learn his gesture.
Lucatiel
Lucatiel - Inherit equipment from Lucatiel of Mirrah
The achievement 'Lucatiel' requires you to fulfill two conditions in order to inherit her equipment.

Dialogue 1: No Man's Wharf
Right next to the first bonfire.

Summon 1: No Man's Wharf
On the second half of the area, after ringing a bell, the player can access a shortcut activated by pulling a lever. Lucatiel's summon sign is right next to this.

Dialogue 2: Lost Bastille
The corner where the wall meets between McDuff's shop and the Tower Apart bonfire (via Pursuer). Simply exhaust her dialogue.

Summon 2: Sinner's Rise
Must have corresponding dialogue: Lost Bastille. Once you reach Sinner's Rise, head down the lift. Her summoning sign will be at the bottom before you enter the water portions. There is a good chance she could die in this area, so you may want to clear it out before summoning.

Dialogue 3: Earthen Peak
Right next to the first bonfire: Lower Earthen Peak bonfire.

Dialogue 4: Black Gulch
This spot is located in the early stages of Black Gulch before you hit the water pools. Over off the cliff, there is a small ledge you can drop down to that leads to a tunnel under the intended pathway. She'll be at the end of the tunnel. Exhaust her dialogue.

Summon 3: Black Gulch
Must have corresponding dialogue: Black Gulch. By tracing the cliff, you'll eventually find a pathway leading into a cave as well as revealing the second hidden bonfire of the area.

Summon 4: Iron Keep
Must have at least 3 dialogues cleared. Her summoning sign appears right before the Smelter Demon door surrounded by tons of archers.

Final Dialogue: Aldia's Keep
WARNING: Do not talk to her if you haven't cleared at least 3 summons. You will need all previous dialogues. If you have no summons left to get to 3, then you may use a bonfire ascetic to try it on a higher NG+. Else, you'll have to wait til next playthrough to attempt it again. Once you're certain you're ready, feel free to talk to her and viola!
Master of Hexes
Master of Hexes - Learn all Hexes
Hexes will be listed as they appear in your inventory thus making it easier to cross reference. For Scholars of the First Sin, you do need the DLC Spells.


Spell Name
Location
Merchant Price
Dark Orb
Straid/Felkin/Grandahl
600 Souls
Dark Hail
Straid/Magerold/Darkdiver
1500 Souls
Dark Fog
Straid of Olaphis
5200 Souls
Affinity
Straid of Olaphis
11,500 Souls
Dead Again
Stone Trader Chloanne
4000 Souls
Dark Weapon
Felkin the Outcast
2700 Souls
Whisper of Despair
Grave of Saints
Across the valley; Pharros Lockstone
Repel
Straid of Olaphis
Giant Lord Soul
Twisted Barricade
Door of Pharros
Corpse loot at ladder
Numbness
Straid of Olaphis
Old Dead One's Soul (Rotten NG+)
Scraps of Life
Cromwell the Pardoner
2200 Souls
Darkstorm
Magerold/Darkdiver
4700 Souls
Resonant Soul
Felkin the Outcast
1100 Souls
Great Resonant Soul
Felkin the Outcast
3400 Souls
Climax
Pilgrims of Dark
Rank 3
Resonant Flesh
Felkin the Outcast
4000 Souls
Resonant Weapon
Felkin the Outcast
4000 Souls
Lifedrain Patch
Straid of Olaphis
Darklurker Soul
Profound Still
Darkdiver Grandahl
13,000 Souls
Master of Miracles
Master of Miracles - Learn all miracles
Miracles will be listed as they appear in your inventory thus making it easier to cross reference. For Scholars of the First Sin, you do need the DLC Spells.


Spell Name
Location
Merchant Price
Heal
Licia of Lindelt
1500 Souls
Med Heal
Licia of Lindelt
3000 Souls
Great Heal Excerpt
Licia of Lindelt
4500 Souls
Great Heal
Cromwell the Pardoner
8000 Souls
Soothing Sunlight
Invade Licia of Lindelt
Cracked Eye Orb
Replenishment
Licia/Cromwell
3000 Souls
Resplendent Life
Licia/Straid of Olaphis
4500 Souls
Bountiful Sunlight
Chancellor Wellager (NG++)
11,000 Souls
Caressing Prayer
Licia/Cromwell
2000 Souls
Force
Licia/Cromwell
1800 Souls
Wrath of the Gods
Chancellor Wellager (NG++)
8200 Souls
Emit Force
Blue Sentinel Targray/Cromwell
4200 Souls
Heavenly Thunder
Targray/Cromwell
3300 Souls
Lightning Spear
Licia of Lindelt
6000 Souls
Great Lightning Spear
Straid of Olaphis
13,000 Souls
Sunlight Spear
Heirs of the Sun
Rank 3
Soul Appease
Stone Trader Chloanne
8800 Souls
Binding Bolt
Straid of Olaphis
Old King Soul (OIK NG+)
Magic Barrier
Felken the Outcast
2700 Souls
Great Magic Barrier
Chancellor Wellager
9300 Souls
Homeward
Licia of Lindelt
2400 Souls
Guidance
Licia of Lindelt
3700 Souls
Sacred Oath
Straid of Olaphis
Soul of Velstadt
Unveil
Straid of Olaphis
2200 Souls
Perseverance
Cromwell the Pardoner
3500 Souls
Sunlight Blade
Straid of Olaphis
12,400 Souls
Master of Pyromancy
Master of Pyromancy - Learn all pyromancies
Pyromancies will be listed as they appear in your inventory thus making it easier to cross reference. For Scholars of the First Sin, you do need the DLC Spells.


Spell Name
Location
Merchant Price
Fireball
Rosabeth of Melfia
1200 Souls
Fire Orb
Rosabeth of Melfia
3400 Souls
Great Fireball
Brightstone Cove Tseldora
Brightstone Key
Great Chaos Fireball
Chancellor Wellager (NG++)
17,400 Souls
Firestorm
Titchen Gren
4500 Souls
Fire Tempest
Shrine of Amana
Chest near Third Hut
Chaos Storm
Iron Keep
Chest on Lava post-Smelter
Combustion
Rosabeth of Melfia
1500 Souls
Great Combustion
Titchy Gren
4800 Souls
Fire Whip
Titchy Gren
3800 Souls
Poison Mist
Rosabeth of Melfia
3400 Souls
Toxic Mist
Straid of Olaphis
Royal Rat Vanguard Soul
Acid Surge
Straid of Olaphis
Royal Rat Authority Soul
Lingering Flame
Straid of Olaphis
6700 Souls
Flame Swathe
Straid of Olaphis
9500 Souls
Forbidden Sun
Royal Sorcerer Navlaan
Assassination Quest
Flame Weapon
Straid of Olaphis
Old Witch Soul (Lost Sinner NG+)
Flash Sweat
Rosabeth of Melfia
2300 Souls
Iron Flesh
Rosabeth of Melfia
3500 Souls
Warmth
Grave Warden Agdayne
5200 Souls
Immolation
Belfry Sol
Chest at the end
Master of Sorcery
Master of Sorcery - Learn all sorceries
Sorcceries will be listed as they appear in your inventory thus making it easier to cross reference. DLC spells not required and will not be listed.


Spell Name
Location
Merchant Price
Soul Arrow
Carhillion/Magerold
1500 Souls
Great Soul Arrow
Carhillion/Magerold
3000 Souls
Heavy Soul Arrow
Carhillion/Magerold
2000 Souls
Great Heavy Soul Arrow
Carhillion/Magerold
4500 Souls
Homing Soul Arrow
Straid/Ornifex
6500 Souls
Heavy Homing Soul Arrow
Straid of Olaphis
Ruin Sentinel Soul
Homing Soulmass
Weaponsmith Ornifex
6000 Souls
Homing Crystal Soulmass
Shrine of Amana
Corpse Loot after 3rd Bonfire
Soul Spear
Grave Warden Agdayne
12,000 Souls
Crystal Soul Spear
Straid of Olaphis
Old Paledrake Soul (Duke's Dear Freja NG+)
Shockwave
Carhillion of the Fold
1800 Souls
Soul Spear Barrage
Carhillion of the Fold
2600 Souls
Soul Shower
Straid of Olaphis
Scorpioness Najka Soul
Soul Greatsword
Drangleic Castle
Chest after Elevator Statue Room
Soul Vortex
Grave Warden Agdayne
10,400 Souls
Soul Bolt
Drangleic Castle
Chest after Looking Glass Knight
Soul Geyser
Aldia's Keep
Corrosive Acid Cage
Magic Weapon
Carhillion of the Fold
2000 Souls
Great Magic Weapon
Black Gulch
First Cave after Bonfire
Crystal Magic Weapon
Dragon Shrine
Chest on Ledge after Petrified Egg
Strong Magic Shield
Straid of Olaphis
6300 Souls
Yearn
Carhillion of the Fold
3000 Souls
Hush
Lost Bastille
Ruin Sentinel Boss Room Illusory Room (Ladder)
Fall Control
Ornifex/Magerold
4800 Souls
Hidden Weapon
Bell Keepers
Rank 2
Repair
Shrine of Winter
To your right at the bottom of the path.
Cast Light
Straid/Grandahl
3000 Souls
Chameleon
Harvest Valley
Corpse Loot in 2nd Mist Pit
Unleash Magic
Royal Sorcerer Navlaan
Assassination Quest
Moonlight Greatsword
Moonlight Greatsword - Inherit Benhart of Jugo's equipment.
Just like Lucatiel, you'll also have to track down Benhart before he shows up as summons and summon him a minimum of three times. Then engage his final dialogue for his equips. He has a bright blue greatsword, it's hard to miss him.

Dialogue 1: Shaded Woods
From Majula, head towards Shaded Woods. You'll meet a gate that's blocked by a petrified statue who is Rosabeth. Benhart will be sitting outside of this blinding to the left. He states that he can't get passed the gate. Talk to him until he exhausts his dialogue.

Rescuing Rosabeth: To unpetrify an NPC, you need a Fragrant Branch of Yore. Earliest instance of a branch will be in Harvest Valley before and after the Mines bonfire. Another located at the end of the Gutter just before Black Gulch (after the drop).

Dialogue 2: Shaded Woods (Same as 1)
Once you've saved Rosabeth, go back to Benhart. He'll thank you for solving his predicament and award you the 'Joy' gesture. Exhaust his dialogue and you'll be done with him for a long time.

Summon 1: Brightstone Cove Tseldora
Provided you cleared his first two dialogues, his summoning sign will be inside a tent near the first bonfire of Brightstone Cove Tseldora. There aren't very many dangerous points in this are except the fact that he can fall off of the cliff.

Dialogue 3: Drangleic Castle
After the Twin Dragonrider's boss, you'll be at the Central bonfire and you'll see him sitting against the wall. Exhaust his dialogue here for the Looking Glass fight.

Summon 2: Drangleic Castle
Right before the Looking Glass fog gate, his sign will be on the ground. Benhart has no trouble surviving this fight and makes for a rather useful diversion; however, it may take a while before the Looking Glass Knight changes his attention from you.

Dialogue 4: Forest of Fallen Giants
Between the Pursuer official boss area and the giant corpse, Benhart will now be sitting near the steps to the nest. Exhaust his dialogue here to enable him for the Memory of Jeigh fight.

Dialogue 5: Memory of Orro
Oddly enough, the memory near Benhart's sitting area isn't where you summon him. He appears in the memory closest to him sitting on the ground. Exhaust his dialogue here. This is his final location.

Summon 3: Memory of Jeigh
Should you visit Memory of Vammar before this and talk to Drummond, he will be available to summon here; however, you cannot summon them both. Now in here, it is very easy for Benhart to die. The boss isn't much of a problem, but a rolling statue head and bombardments are fairly effective on Benhart so moving quickly is recommended.

Summon 4: Throne of Want
You can summon Benhart here until you fight Nashandra, so if you summoned him against Throne Defender and Throne Watcher and you couldn't fight Nashandra at the time, you can summon him once more. I do not know if this counts as two successful summons or they overlap.

Summon 5: Dragon's Rest (DLC - Crown of the Sunken King)
While the DLC isn't covered in this walkthrough at all, Benhart still shows up here and the summon will count towards his sidequest should you require it or want to save your Bonfire Ascetics.

Right before the final boss with Elana, you can summon Benhart here with his sign being situated right next to some pillars in the same area as the boss fog gate.

Once you've finished the requirements of moving him to Memory of Orro and summoning him at least 3 times where he survives the fight, then head back to his spot in Memory of Orro and exhaust his dialogue where he gives you his equipment and unlocking the achievement.

Note: You can use bonfire ascetics to resummon Benhart at the same boss fight over and over if needed to gain 3 victories.
Smith for Life
Smith for Life - Inherit Steady Hand McDuff's equipment.
Steady Hand McDuff is located in Lost Bastille. You can access it by either obtaining the Bastille Key which is located after the Belfry Gargoyles in Belfry Luna near the following bonfire. Or, use the explosive barrel at the top of the stairs on the wall to break it open revealing a bonfire. You can have the Undead Jailer kick the barrel down into the wall and have it explode automatically or roll it down yourself. If it does not explode then you can use a fire weapon or fire bomb to trigger the explosive manually. In order for McDuff to be used, you'll need to light up all the braziers in his shop and warp afterwards.

Next, you'll need the Dull Ember. This is located in Iron Keep. Just before the Smelter Demon, there's a body hanging on a ledge of stairs leading into the lava. This is the same building with the pharros lock.

You need to spend 14,000 souls total on SERVICES. Purchasing items does not count. Repair, reinforce, and infuse are the only ones that count. After that, use his talk dialogue to receive a Titanite Slab and the achievement. The Titanite Slab is useful for the Supreme Weapon achievement.
Supreme Weapon
Supreme Weapon - Reinforce a weapon to its limits.

All you need to do is get a regular type weapon to +10. You can infuse the weapon if you like as it plays no part in influence the amount of materials you need. If a weapon requires twinkling titanite, then you'll have to find a different item to use.

Weapons can be upgraded by Blacksmith Lengrist in Majula, Steady Hand McDuff in Lost Bastille, or Weaponsmith Ornifex in Brightstone Cove Tseldora.
Shards are sold infinitely by Stone Trader Chloanne after beating Iron Keep.
Large Shards are sold infinitely by Steady Hand McDuff after acquiring the Dull Ember or through Chloanne after defeating both the Old Iron King and the Looking Glass Knight.
Chunks are sold infinitely by Stone Trader Chloanne after beating Nashandra.
A slab is given as a result of the Smith for Life achievement, Rank 1 reward of the Bell Keepers covenant. Chloanne sells one slab after obtaining the King's Ring. The mini-boss Prowling Magus and Congregation in Brighstone Cove Tseldora also drops a slab.

+1: 1 Titanite Shard
+2: 2 Titanite Shards
+3: 3 Titanite Shards
+4: 1 Large Titanite Shard
+5: 2 Large Titanite Shards
+6: 3 Large Titanite Shards
+7: 1 Titanite Chunks
+8: 2 Titanite Chunks
+9: 3 Titanite Chunks
+10: 1 Titanite Slab
Related Guides
If you own Dark Souls II: Scholar of the First Sin, use the following guide.
http://gtm.steamproxy.vip/sharedfiles/filedetails/?id=419088382
If you need a Dark Souls III guide:
http://gtm.steamproxy.vip/sharedfiles/filedetails/?id=663773813
41 Comments
Myslovitz 7 Oct, 2023 @ 8:06am 
There are things in this guide that does not apply to the regular version of the game, there are no fragment of yore in no mans wharf, there is no shortuct either etc. fix it
Zoutje 7 Sep, 2023 @ 6:37am 
also: ''After descending back to the docks on the opposite side of the bonfire, kick the bridge down to set the shortcut.'' there is no bridge shortcut in the original only in SOTFS.
Zoutje 7 Sep, 2023 @ 6:32am 
is this guide copy paste from your other scholar guide? because of this line: On the way down, there is a house with poison jars inside and a chest. The chest has a 'Fragrant Branch of Yore'. (wharf) is from SOTFS and not in the original. There is no branch in that room.
OkLAN 30 Aug, 2023 @ 12:47pm 
The Fragment of Yore in the house of the poison jars applies to SotFS not Vanilla
ponkberry  [author] 25 Jul, 2023 @ 6:12pm 
Lucatiel does need to survive the boss fights.
Gohan 24 Jul, 2023 @ 10:08pm 
does Lucatiel need to survive after you summon her?
Spider 9 Jul, 2023 @ 3:24pm 
Great guide! Helped me a lot! :praisesun:
☿ TEST-SUBJECT-0 ☿ ⸸ 13 Mar, 2022 @ 7:59pm 
Wow man, so much work. This is just amazing for me. You earned a Award man. Hopyou do good!:steamthumbsup:
私の名前はジェフです 7 Mar, 2022 @ 5:01am 
Thanks for the guide. Used it to 100% base Dark Souls 2 today. Definitely the most cancerous part is getting the Warriors of Sun covenant. I used full item discovery on the Falconers in NG+ to farm those, probably took 5 hours or something. Good luck to everyone else who wants to get the max achievs
Excylis 20 Jan, 2022 @ 9:04pm 
You really shouldn't put this under DS2 when half of it is only true for SOTFS (For instance No Man's Wharf fragrant branch)