Borderlands GOTY

Borderlands GOTY

86 hodnocení
How Not to Die of Old Age in the Underdome
Vytvořil: lagamemnon
A perfect run of Moxxi's Underdome Riot is 375 waves of nearly constant battle, separated by frantic grabs for health and ammo. That's 6.25 hours of maximum effort if you can sustain a wave a minute. Here are some ways to make it go faster.
2
   
Ocenit
Přidat do oblíbených
Oblíbeno
Odebrat z oblíbených
Who Cares? It's Just a Game!
I care, obviously. I haven't got all the achievements yet. If I can help people finish the Underdome faster, someone out there will know how to help me finish faster. Win, win, win, as they say.

A perfect Underdome Achievements run is 375 waves: Three "Prove Yourself" arenas of 25 waves, and three long versions of 100 waves.

Speed is key! Completing a long arena can take about two hours. That's about 72 seconds per wave, which isn't bad. That includes time spent hunting down stragglers, replenishing health and ammo between waves, and Moxxi's announcements.

So welcome! If you do well, you'll only be killing things in the Underdome for around 7.5 hours.
Knowing is Half the Battle
Which means killing things for 7.5 hours must be the other half of the battle.

Read the other guides.

Covering everything sounds like work, and I'd rather be playing. Read the other guides that already cover the Underdome, optimal skill trees, and the best class mods and items.

DarkNeSS' guide is pretty good, but it's in Russian. Like most of Steam, you can open it in a browser and run it through a translator. Here's a machine translation of DarkNeSS' guide.[translate.google.com] It's not a great translation, but it's good enough.

Get familiar with the maps.

Enemies know their way around the maps. You should, too.

Solo each arena with a character you won't be using to finish the achievements. Kill off all the enemies except one in an early wave. Explore. If the last enemy is a psycho, you may have to look while running.

Things to look for include:

  • Places to hide with limited lines of sight. You want somewhere you can go to heal.
  • Places where enemies can't follow. The horde waves are mostly harmless if psychos can't get to you.
How to Solo the Underdome
Let's just get this out of the way: Don't solo the Underdome.

You can solo the "Prove Yourself" arenas, but every additional second it takes you to complete an average wave adds 1m40s to a long arena.

Plus you'll be sent back to the previous round if you die and you're alone. And that usually happens on wave 4 (Badass) or 5 (Boss) of a round. So you're usually going to redo 8 or 9 waves, which can add 15 minutes or more to the arena. It doesn't usually start happening until you're over halfway done. The first time you're set back will just make you angry. After two or three times, it gets depressing. You'll want the arena to be over already!

But hey, if you love a challenge, or you're a glutton for punishment, go ahead. Here are some tips:

Be a Support Gunner.

A turret's like having an extra soldier on the field. It's a distraction while you flee. It can cover you with an elemental type you don't have on hand. It'll aggro the hordes where you can quickly dispatch them with a rocket launcher. I like to set mine to Shock, so it can tear down shields while I get busy with a different weapon.

Max out skills, class mods, and items that regenerate ammunition, grenades, and health. There are resupply drops between waves, but you don't want to rely solely on them.

Start each wave near the edge of the map.

It reduces the number of enemies who can shoot you, and some of them may not even realize you exist until you're ready for them.

Commit to playing solo.

Set aside 8 hours for a long arena. You probably won't need all that time, but it would be terrible if you had to exit the game after 16 rounds.

Be prepared to pause the game. Verify in advance that pausing and resuming won't crash anything. If you need to sleep or hibernate your computer, verify that won't crash the game before you invest a lot of time in an arena.

Don't host a public game.

Pausing a game will surely disconnect anyone who has been helping you. That will ruin their day, and you'll probably die a lot after resuming the game without anyone left to help you.
Get Good Gear
Later waves will have weapons-based challenges. For example, some waves may favor a sniper rifle, while others favor a pistol.

What they say you'll need:

  • Sniper rifle.
  • Pistol. Revolver and repeater both count.
  • Shotgun.
  • Assault rifle.
  • Rocket launcher.
  • Sub-machine gun.
  • Elemental weapon.

They're not wrong. You'll do well if you have high DPS (Damage Per Second) versions of those weapons. Other guides cover which weapons are good. Go read them.

However, high DPS can compensate for the wrong kind of weapon. You can especially tolerate the inefficiency of an inaccurate or lower damage-per-round weapon if you're regenerating ammunition.

You'll still want a shock weapon, or a turret that can erode shields. An Orion sniper rifle isn't bad, and it can even be used up close if you know how.

You'll need a fire weapon. A lot of enemies burn well, and you can save time by letting the fire finish enemies off while you switch targets. For example, a fast, accurate Hellfire will do a lot of damage up close. You can even snipe with it, if you don't mind wasting some ammunition.

Something with huge spash damage will be handy. Like a rocket launcher. You don't want to spend all day picking off a horde of accelerated psychos one by one. Drop a rocket in their mosh pit, and take 'em out.
Make This Easy on Yourself
The host should start at level 15.

Whoever is going to host the Underdome should start "Prove Yourself" at level 15. Starting below that level will just slow everyone down.

  • Enemies won't be easier. Underdome enemies track the player who hosts the game, but they don't go below level 15.
  • Your kill rate will be slower if you're underpowered.
  • You'll die more often.

Dedicate a character to host or help, but not both.

You must complete all the high level arenas with a single character to earn all the achievements.

If you start by hosting the Underdome at level 15, stick to hosting the Underdome. Don't level up between arenas, or your enemies will level up with you.

If you start out with a high level character to help someone, stick with that. Hosting with your high level character makes the enemies harder to kill.

That's all a lie. You can certainly start a character out by hosting low-level arenas, then level them up and switch to helping other people. There will be a long stretch of levels in between where you're not optimal at doing either, but you can make it work with maximal effort.
It's Dangerous to Go Alone, Jerkwad!
If everyone dies in the same wave, Moxxi will send you all back to the previous round. That means having to redo up to 9 waves, depending on when you all died. If you're going fast, that "only" adds another 5-20 minutes to the arena.

It's trivial to get sent back when you're playing alone. Bring in additional players as backup.

Helpers should be OP. Enemies will stay at the host's level. The OP players will be a lot less likely to die, and they'll be able to kill enemies really fast.

Prioritize personal survival over reviving others.

The penalty for individual deaths is relatively low. People who have died can still snipe from the Penalty Box.

The penalty for everyone dying is very steep. The more people who die, the more important it is for you to survive.
Help People Find You
The multiplayer lobby list won't tell anyone you're working on an Underdome achivement, but you can. Set a server name like "lv 18 gully 20rnd". Anyone looking for Underdome help will know what that means.

You can also post a note in the Borderlands General Discussion forum. Advanced notice helps. Start a thread, and schedule a session.

This thread is a good example of coordinating a group.
No Time for Lazy
Even the low-level host should be killing everything they can.

They'll only be killing a fraction of the enemies that OP players do, but it should be a respectable and consistent ratio.

Leaderboards are posted between waves. People will know if you're not doing your part.
Pace Yourself
The Underdome arenas are marathons, not sprints.

Fatigue and impatience will get you killed. Dying will set you back. Setbacks add time to the arena. The longer it takes, the more tired and impatient you'll get.

Take four days.

Do all four "Prove Yourself" arenas in one day. If you can't manage this, you've got no chance of surviving the long arenas. "Prove Yourself" is only 75 waves. Longer arenas are 100 waves each. "Prove Yourself" doesn't unlock all the difficulty modifiers, but each long arena does.

Then do one long arena per day. Take breaks in between each arena to do something fun.
Divide and Conquer
Think globally, and kill locally.

Divide the arena into zones for each player. Clear your own zone before helping someone else. Spend less time running around, and more time killing things. It'll also help players avoid shooting the same enemies--a waste of time and ammunition.

Don't stress too much about this. A group of mature players should find a natural rhythm after the first 10-20 waves.
Avoid the Horde
Every map has at least one place where the Horde can't reach you.

Hell-Burbia

In Hell-Burbia it's the rooftops without stairs. You can get to them through a variety of means. If you look closely at doorways, there's a little ledge at the top you can jump on to reach the roof.

Yeah, you can jump onto that from the box by the doorway.

The "staircase" of shipping containers by the stage is my favorite place. There's a nice view of the stage for Boss Waves. The cement base for the crane provides decent cover. You can jump to the adjacent rooftop for a different vantage point without leaving the relative safety of the rooftops. You can snipe a lot of enemy spawn points from these rooftops.

You can get up there from the shipping containers at the top of the stairs.

Also, the grating on the floor at the top of the stairs delivers excellent splash damage for taking out Horde waves.


"I've killed a lot of people." --Brick.

The Gully

There's a mushroom shaped rock formation where the bottom level meets the ramp up to the middle level. It's just left of the stage where bosses emerge.

Between the mushroom and the stage is a shipping container and a staircase of boxes. You can get onto the container by jumping up the boxes, and you can get on the mushroom from the container.

Mushroom to the left, and shipping container to the right.

Angelic Ruins

At the edge of the map near Moxxi's tower are a couple ramps and platforms. Go to the platform where the arrow is pointing. Jump on the boxes there, and then onto the ledge. Get away from the platform, and the Horde will only be able to throw buzz axes at you.

Drop a turret on the ground to aggro them faster.
Useful Abilities
There are ammo and health drops between each wave, but I believe they exist because Moxxi and the crowd love watching us run around like fools.

Optimize your class, skills, and items for regeneration. Other guides cover this, so do your homework.

  • Regenerate health.
  • Regenerate ammunition. Get a Support Gunner on your team.
  • If your class can make more grenades, do it. Roland can. Bloodwing and Brick can make enemies drop additional stuff.
  • Minimize skill cooldown time.
  • Maximize shield speeds, if you can.

Avoid aggro. Most characters' skills will distract enemies:

  • Roland's turret.
  • Lilith's phasewalk.
  • Bloodwing.
  • Brick... sorry, Brick sucks at avoiding trouble. Maximize the chances he'll survive all the additional fisticuffs he'll inevitably endure.
Hell-Burbia Notes
The blue floors and walls dampen splash damage.

Rockets fired at these areas will do little or no splash damage. Aim for boxes, shipping containers, metal floors, etc. Whatever the stairs are made of works great. A direct hit on an enemy seems to do maximum splash damage, but that kind of accuracy can be hard with rocket launchers.
The Gully Notes
Use the Teleport

It's not necessary to divide the map into top-and-bottom. You can also divide it into middle-and-edges. The "edge" player can start by the teleport at the top or bottom of the map and quickly switch areas once one is clear.

Enemies won't follow you through the teleport, so it can be a quick means of escape if you're overwhelmed or cornered by a boss. Or you can end up much worse if the other side hasn't been cleared yet.

Roland can dash through the teleport, drop a turrent, and dash back out.

The platform at the top of the map is a good place for a weaker player to snipe bosses. Sometimes the teleport is the fastest way to get there.

You may emerge from the teleport slightly off-center of the portal. Returning through it may be a little more complicated than just backing up.

A safe place to hide.

There's a place at the back of the middle tier with limited lines of sight and where enemies rarely spawn. It's a relatively safe place to be if you find yourself woefully underpowered.

Angelic Ruins Notes
There's an alcove at th back corner of the map with limited lines of sight. It's a relatively safe place to hide, especially if you can cover the entrance with one or more turrets.

Psychos will ignore your turret and go after you. The only way out of that alcove is through them. Don't be there for Horde waves.

The alcove's not safe from Eridian electric mortar fire. If they're firing at you, shots that land just outside the alcove will hurt you.


Work In Progress
This guide is a work in progress. I'll be changing it as needed. Let me know what I've missed or got wrong, and I'll try to incorporate it in a future revision.

Thank you for reading my guide. I hope it helps.
Počet komentářů: 13
[RKHAN] Transforceraptor 1. bře. v 22.19 
My man, thank you! The first time my Co-op buddy and I attempted Moxxi's Underdome, it was a rough time. Since, we've avoided it like the slog fest grind that it is. But recently I convinced him to finish a complete 1 & 2 playthrough with me, so we jumped back in with post Knoxx, post Robolution Soldier + Siren. We just tackled the "Prove Yourself" mini challenges, and needed some direction for what we have gotten ourselves into. This guide will be of tremendous help for the seemingly endless onslaught we are about to face.
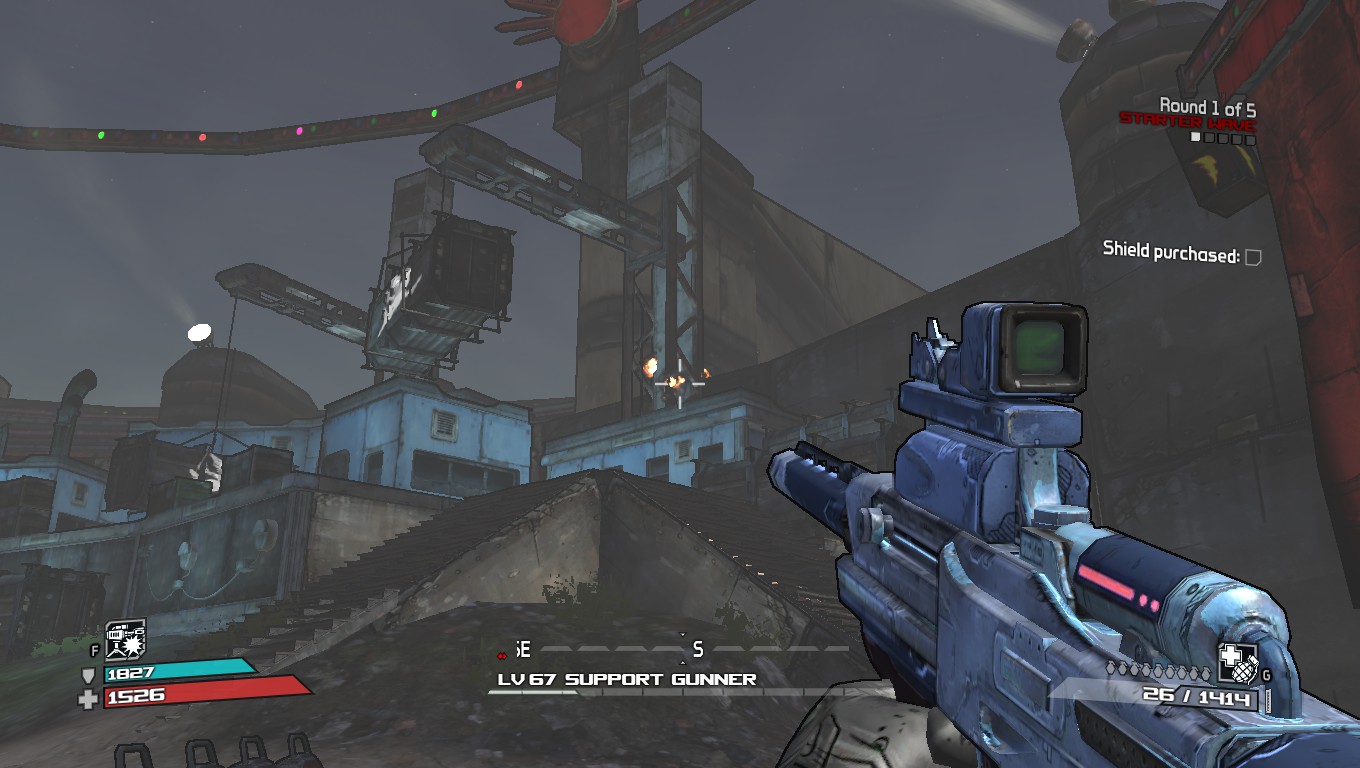
For anyone wanting to plow through, take heed. Soldier, Hellfire, and Shock, you'll be in good shape.
Glaze 10. lis. 2024 v 13.36 
I just did hell burbia yesterday, it took me 5.5 hours to beat while being reseted 5 times, two of them at round 19, Flyint at higher rounds is incredible scary.
Alucard 16. kvě. 2023 v 21.33 
@Dust_ruction only level 50? I'm level 67 and most my weapons are around the same. 4x fire SMG works beast for most of the enemies.
Alucard 16. kvě. 2023 v 21.32 
I've managed 2 of the long ones solo, will be doing my 3rd for achievements tonight SOLO.
khaytiil 20. dub. 2019 v 10.43 
Find a way to open 2 games at the same time and open a local game with low level character, then join your low level character with your high level character and leave the low level afk while butchering all the enemies
Relic62 18. bře. 2017 v 1.39 
Good guide, however to cut down the time on the larger challenges, just get someone to start at lvl 25 and invite lvl69 players, takes about 2hrs for each one. Solo, it will take at least 4hrs each arena at lvl 69.

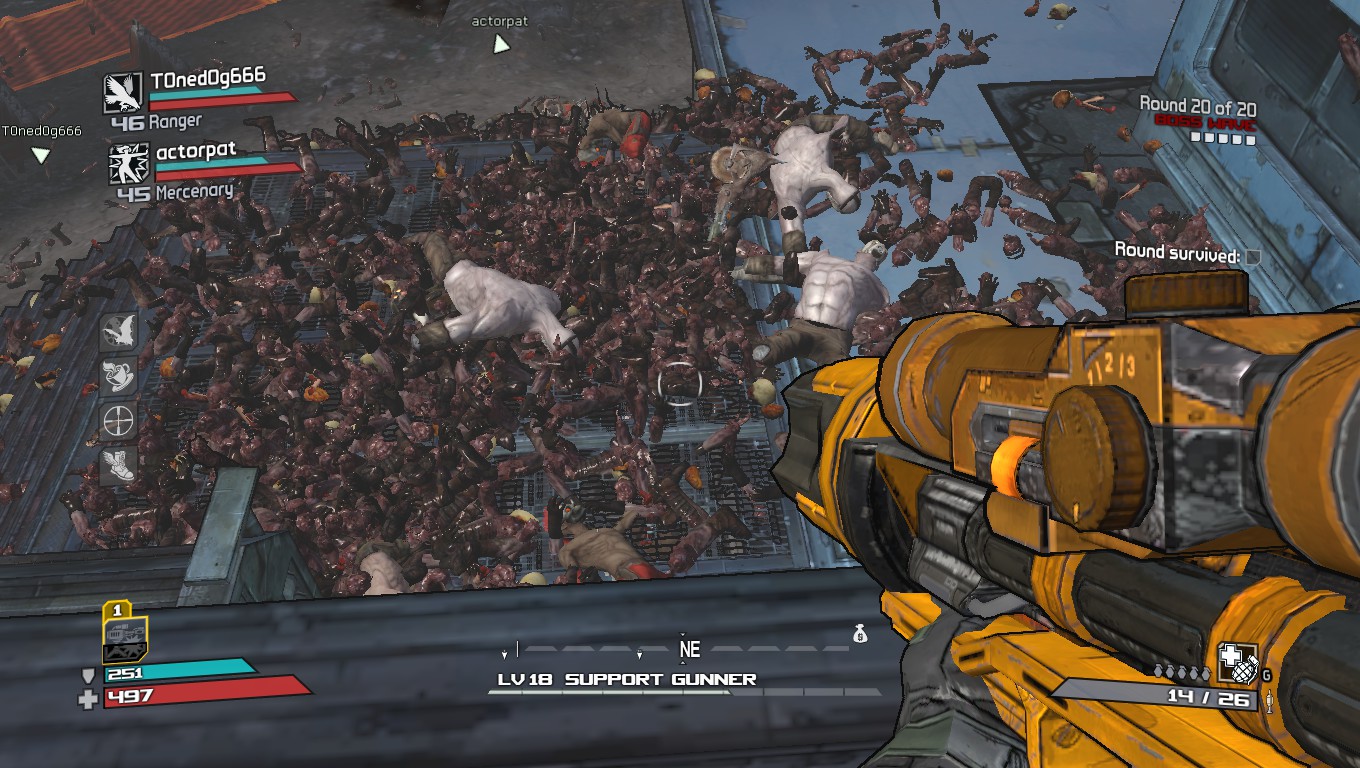
I really don't care if its cheating the system, as 100 rounds per arena is over the top and time is precious to some of us.
󠀡󠀡T.TV⁧⁧UNDASTELARุ _ 6. led. 2017 v 2.04 
Pfff. speedhack on. Unbreakable 16000 trillion shields on, 1 hit kill weapons. Less than 15 minutes.
Flynn Taggart 26. pro. 2016 v 21.33 
This looks like it could be fun, but I literally just got the game 4 days ago, so idk, looking for people to do this? LV31 (as of now) Blast Master Brick willing to f*** s*** up.
Dust*Ruction 13. říj. 2016 v 14.35 
Having your favorite weapons at level 50 helps alot as well
Dust*Ruction 13. říj. 2016 v 14.34 
not a bad guide, but honestly, doing it solo with mordecai is just "cake". even the last rounds. just get a decent survivor class mod, transfusion grenades and a shield with a high capacity and if possible with shock resistance. then just get 4 guns of your choice and you're good to go. Of course you need the trespassing skill at 100%.
Of course, there are other ways arround it, but for me, this was the easiest.