Guardians of Orion (Phase 2)

Guardians of Orion (Phase 2)

31 ratings
Tips Tricks & Tools! [Intermediate]
By ikke2902
Featuring a handy tool to find the best Critical Chance (CC) Critical Damage (CD) ratio. Want to level up super fast, like 3-4 times or more? Also featuring simple minor Tips & Tricks that can improve your gameplay!

Have a suggestion or found some mistakes? Feel free to drop a comment :)
   
Award
Favorite
Favorited
Unfavorite
Decent guide for inspiration
Unfortunately, I don't have much time to play this game like I used to due to study. So I won't be able to keep this guide up to date. However, this guide still provide some inspiration for different strategies that might or might not work anymore. Thank you for your understanding.

ikke2902
Latest Update
Latest changes regarding to this guide will be featured here.

Google Drive isn't supporting online webhosting anymore. Therefor I've made the CC-CD tool available to download.
Critcal Chance & Critical Damage ratio
Imagine you've 100% Critical Damage bonus (CD) and 0% Critcal Chance Bonus.
Same for 0% Critical Damage bonus (CD) and 100% Critcal Chance Bonus.
What will your bonus damage be?
It will be zero.
Intuitively we multiply CD with CC to get a number. The bigger this number is, the higher your bonus damage will be.

Based on this analogy, I've made a tool to assist you to find the best CC/CD combination and also finding the best way to spend skilltree points (Striker and Precision skills).

Here is the downloadlink to the tool (V1.02)[mega.nz]
Decode key if they ask for it:
!VmQclnnIa1uMyR-D5HufL6B7U4xLPljVoG8jggcjUK4

Instruction to open it:
Unzip the file
Open the "index.htm" with Google Chrome or Firefox browser.

Have fun :)
Experience Points Explained
The Experience Points you get can be devided into two groups.
The first group are the mutual Exp and the second one is the bonus Exp from the Augments.

  • Mutual Experience Points
    This ammount of Exp is the same as you making the kill, making an assist kill, or simply killed by others without your help. Getting the kill doesn't matter for the Mutual Exp.

    Mutual Exp are calculated as follows

    Levelerskill ranges from 1.0 to 1.5. It is 1.5 when Leveler has been maxed out (a perk from the skill tree)
    Difficulty multiplier on noob is 1.15 and on redikulous 9
    DinoBaseExp for raptor is 50

    It is unknown if double Exp orb applies when the kills are made by others.

  • Bonus Experience Points
    These Exp are added on top of the Mutual Exp. These are only awarded by making the kill. To get most value of your bonus Exp, you will want to kill as many as possible. This happens through killing small enemies like compy/raptor.

    Bonus Experience Points are calculated as follows


    Having Leveler maxed out and 40 bonus Exp from augments doubles the Exp received from killing a raptors.

  • Bonus Experience Points anomaly
    When you have a primary weapon with +20 Exp and you use it to make kills, you will receive about 100% (compy) to 200% (boss) more Base Bonus Exp.
    I don't have sufficient data to figure out how it works and it doesn't seem like a linear formula. However, I don't plan on finding the correct formula. The goal is to raise awareness on how to level up fast.

My example
Without Exp buffs (still on redik), a raptor kill only gives 450 Exp
With Leveler maxed out, primary +20 Exp bonus and a total augment bonus Exp 166.
Killing a raptor yields me 2430 Exp consistently. With Exp orb I get 2988. That is 5-6 times more Exp on a raptor kill!

Side note:
It might be a good idea to start building a complete loadout purely for leveling up new guardians
Orbs
Orbs are those little buffs that will be dropped by dead enemies once a while. However, I figured not many understand how strong these really are. If one is trying to get the "Gotta Catch 'em All" achievement (6 orbs active at the same time), then this chapter is something for you aswell!
Firstly I'll give a short explanation how these buffs works. Then I'll present an orb build to take full advantage of their power.

Orbs has 6 type of buffs

  • Double damage (Red)
    This is obviously the number 1 choice for every player to pick it up. It increases your damage output from all your sources (i.e. primary, secondary, grenade, tech turrets everything)

  • Double attack speed (Blue)
    This really shines when this is paired with an automatic weapon in conjunction of infinite ammo augment.

  • Heal (Green)
    Heals you over time till full health. Whenever you are at full health, your shield will start to regenerate.

  • Damage reduction (Orange)
    Having this will allow you to survive a tail wip attack from any bosses. You'll feel somewhat invincible

  • Speed (Purple)
    I believe this is an underestimated perk. This comes with 2 bonusses.

    Firstly, It improves your survivability and your dps.
    This skill allows you to fire at the bosses while walking to a safe distance, maintaining a constant high dps. Without this perk, you have to run away from the boss-attack to a safe distance. Then you can fire a couple of times and repeat.

    Secondly, it imrpoves your loadout in the long run.
    The speed increase allows you to collect IONs faster, before they dissapear. Gathering more IONs means you can buy more augments, hence it improves your loadout. When you have the skill where you get healed by picking up IONs. Then this speed orb increases your survivability even further.

  • Double Experience points (Yellow)
    It doubles the base Experience Points gained from killing dinos. Orb build is highly recommended for leveling a guardian. This orb loses its value once the guardian hits the highest level. For more details regarding to Exp gain, I refer to the earlier chapter.

Having one of these orbs active is a huge advantage on its own. However the real power is that multiple orbs can be active at the same time! You will become monstrous more often then not.
Now imagine when two of these orbs are active at the same time. I'll name a few top notch example (other combination are great aswell).
Double damage and fire speed orb - increases your dps up to 4 times.
Healing and damage reduction orb- Increadible tanky, allows for boss dive to get those IONs below them
Speed and damage reduction orb- Swift through the horde for loot, their attacks are too slow to hit you
Speed and double damage- Get in position to hit the most dangerous enemies like bosses and droids

The list can go on with all possible combination and ultimately having all 6 activated. The idea stays the same, having more orbs actvated makes your guardian stronger.
With the following orb build, having 6 orbs activated at the same time will become fairly common. Implying that having 2 orbs and more active is very common.

Orb build


To increase the orb drop by 50%


To make the orb last 15 seconds longer, so its total duration becomes 35 seconds.


This is self explanatory.

Orb build
-Makes your guardian overall stronger
-Improves your load out by gathering loot through speed orb
-Is great to level up your guardian with Exp orb
-will get you the ''Gotta Catch 'em All !'' achievement
-Is mandatory in my opnion, no other builds allows such a huge bonus (if there are better builds, let me know. I'm open for improvement :D )

Sidenote:
There is a legendary boots which increases the orb duration by 10 seconds. It is not being used for a simple reason as the poison dilo pool are too strong and the dilo boots turns the dilo pool into healing pool. This makes dilo boots mandatory in my opinion. However, I've been notified by other guardian that the dilo poison isn't that bad on redik 600. The option to pick orb boots is there.
Grenades
Neutralising Grenades
Grenades are neutralised once the owner is terminated. For instance, the orb drone throws a grenade. Now he got destroyed before his grenade exploded. The grenade will then be neutralised and deal zero damage.
The grenades (including tech grenade turret) from the guardians works in a similar way.

Detonating grenades near instant
When a Grunt (sword bot) or Namor (Giraffe) is chasing you closely, throw a grenade to them will often detonate the grenade on impact.Make sure to keep running in the sam direction before and after throwing the grenade.
On the othe hand, when you are running toward an Orb Drone and he fires a grenade. The grenade will explode when it hits your body before reaching the ground.

This method is really hard to execute since 1.5.3
Advanced Technique (top down view)
Throw a grenade in the running direction. The grenade will detonate when he collides with the body before reaching the ground. This technique is handy for situation where a really big horde is chasing after you. Practice this first by running to the south and throw a grenade to the south, where I find the most success with. Doing this in a diagonal direction is hard, but not impossible.
At some point, one doesn't need to throw the grenade in the running direction.
I hardly play in third-person-view, so I don't know how this work beyond top-down-view
Small Tips & Tricks
Newest tips will be featured at the end of the list.

  • Run Jump Action
    Run away from the horde. Jump to maintain your momentum. While being in the air, you can use your weapon/regen gun. With this trick, you can circle around the harvester with a horde behind you and still being able to repair the harvester.
  • When the red X appears on a dino, you have to move closely and aim at the X then perform a fatailty move (defaultkey V). I've find the most succes performing a fatality move with by using this method. [ I can't remmember who taught me :( ]
  • Efficient ION farming. Ask party members to kill enemies around the harvester.
  • Pyro napalm grenade is actually quite good. It will set the enemies on fire first. If you have a frag grenade augment, it will crit the enemy (pyro lvl 50). EMP augment will also crit.
  • Tech turret doesn't need to be in range of the Double Damage Healy Bubble to benefit the buff. As long as the Owner of the turret is within the Bubble, the turret will have the double damage bonus. [Kudos to Zephkiel]
  • Reviving a downed the harvester takes twice as long compared to repairing it.
  • Type /suicide in the chat box will kill your guardian instantly. Works in Harvest, Slaughter and Orbital Command
  • Dieing or suiciding between waves won't be added to the death counter

Thanks for reading!
Updates History
Older updates will be placed here.


30-05-2016
Added a chapter about grenades with advanced techniques!
Added 2 Tip & Tricks

28-05-2016
CC-CD Tool has been updated to V1.02
Previously, one needs to substract the CC-CD with base CC-CD before using it as input. It was confusing and counter intuitive. Now one can insert the CC-CD value as seen from the stats directly.
Kudos to NNMBLEZ for pointing this out!

24-05-2016
The EMP will crit just like frag augment when it is used by pyro. Kudos to Desirous (ign Voidsword)

23-05-2016
The CC-CD tool allows to enter up to 95% CC (before it was 75%).

Changed the way of wording in the Exp chapter for better clarification.
Added a comment in the Orb chapter where dilo boots is not necessary.
In small Tips&Tricks added: Defaultkey to perform fatality is V
22 Comments
Quesder 16 Mar, 2017 @ 7:26pm 
The CD CC tool doesnt work, all i get is a black screen
Mohl 6 Feb, 2017 @ 7:45pm 
One thing to point out, pyros have a skill that gives them a 100% crit rate on burning enemies.

If you have a weapon augment with fire damage, that means you can disregard the CD/CC tool and just pump damage, because whatever you hit is going to be on fire anyway, and thus give you the bonus.
ikke2902  [author] 25 Sep, 2016 @ 10:59am 
@hariharakhil I've updated the link, I think a decryption key isn't needed now. I don't have experience with google script unfortunately :/
hlcw 25 Sep, 2016 @ 9:54am 
And what is the decrytion key for the mega link
hlcw 25 Sep, 2016 @ 9:52am 
how about using google script if google drive were to not support it.
ikke2902  [author] 25 Sep, 2016 @ 8:03am 
@hariharakhil Thank you for notifying me. Apparently googledrive doesn't support webhosting anymore. Thus now one can download the tool instead.
hlcw 20 Sep, 2016 @ 4:53am 
502 error when loading sw.js file for your cc-cd tool webpage
nmmblez 23 Jul, 2016 @ 8:23am 
Also:

* Don't revive people, continuing to kill stuff will revive them out of assists almost as fast and more safely than stopping to revive them

* Don't attempt to kill stuff when you're down, attempt to assist in everything, you'll be revived out of assists faster than you can kill anything.
nmmblez 23 Jul, 2016 @ 8:20am 
These may be more preferences but I believe it significantly improves the total team DPS:

* Stay behind the harv, on the opposite side of where most dinos are coming. Why not take advantage of a bait that can detonate nades on impact ?

* If you have the lowest kills and there is a large gap between you and everybody else, you are expected to heal the harv at all cost. You don't want the guy with 1500 kills to stop shooting.
ChemicalFrost 8 Jul, 2016 @ 2:53am 
"Orb Builds are nice but you have to consider the time you spend without Double Damage or Increased Rate of Fire"

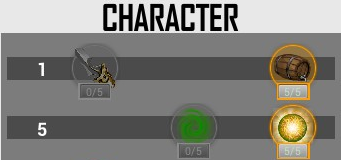
with the legs you always have it up 90-95% of the time, it just comes down to managing your jetpack CD while avoiding shit like crazy. throughout a game, ill always have at least 10 orbs laying about and the additional ones my team mates kills have dropped. like ikke has mentioned about the importance of all orbs, this makes me a tank, self healer, speed demon as well as a beast damage dealer. at the end of the day tiniestkuriboh has sacrificed the dps for survivability/mobility and probably wouldn't be getting the most optimized DPS

when referring to the orb build, the assault class IS the best guardian (in my opinion) to use it on mainly because of the legendary ability augment that synergizes so well with it all, not needing to rely on pistol kills either

once again, love your work ikke. good shit (Y)