
Install Steam
login
|
language
简体中文 (Simplified Chinese)
繁體中文 (Traditional Chinese)
日本語 (Japanese)
한국어 (Korean)
ไทย (Thai)
Български (Bulgarian)
Čeština (Czech)
Dansk (Danish)
Deutsch (German)
Español - España (Spanish - Spain)
Español - Latinoamérica (Spanish - Latin America)
Ελληνικά (Greek)
Français (French)
Italiano (Italian)
Bahasa Indonesia (Indonesian)
Magyar (Hungarian)
Nederlands (Dutch)
Norsk (Norwegian)
Polski (Polish)
Português (Portuguese - Portugal)
Português - Brasil (Portuguese - Brazil)
Română (Romanian)
Русский (Russian)
Suomi (Finnish)
Svenska (Swedish)
Türkçe (Turkish)
Tiếng Việt (Vietnamese)
Українська (Ukrainian)
Report a translation problem


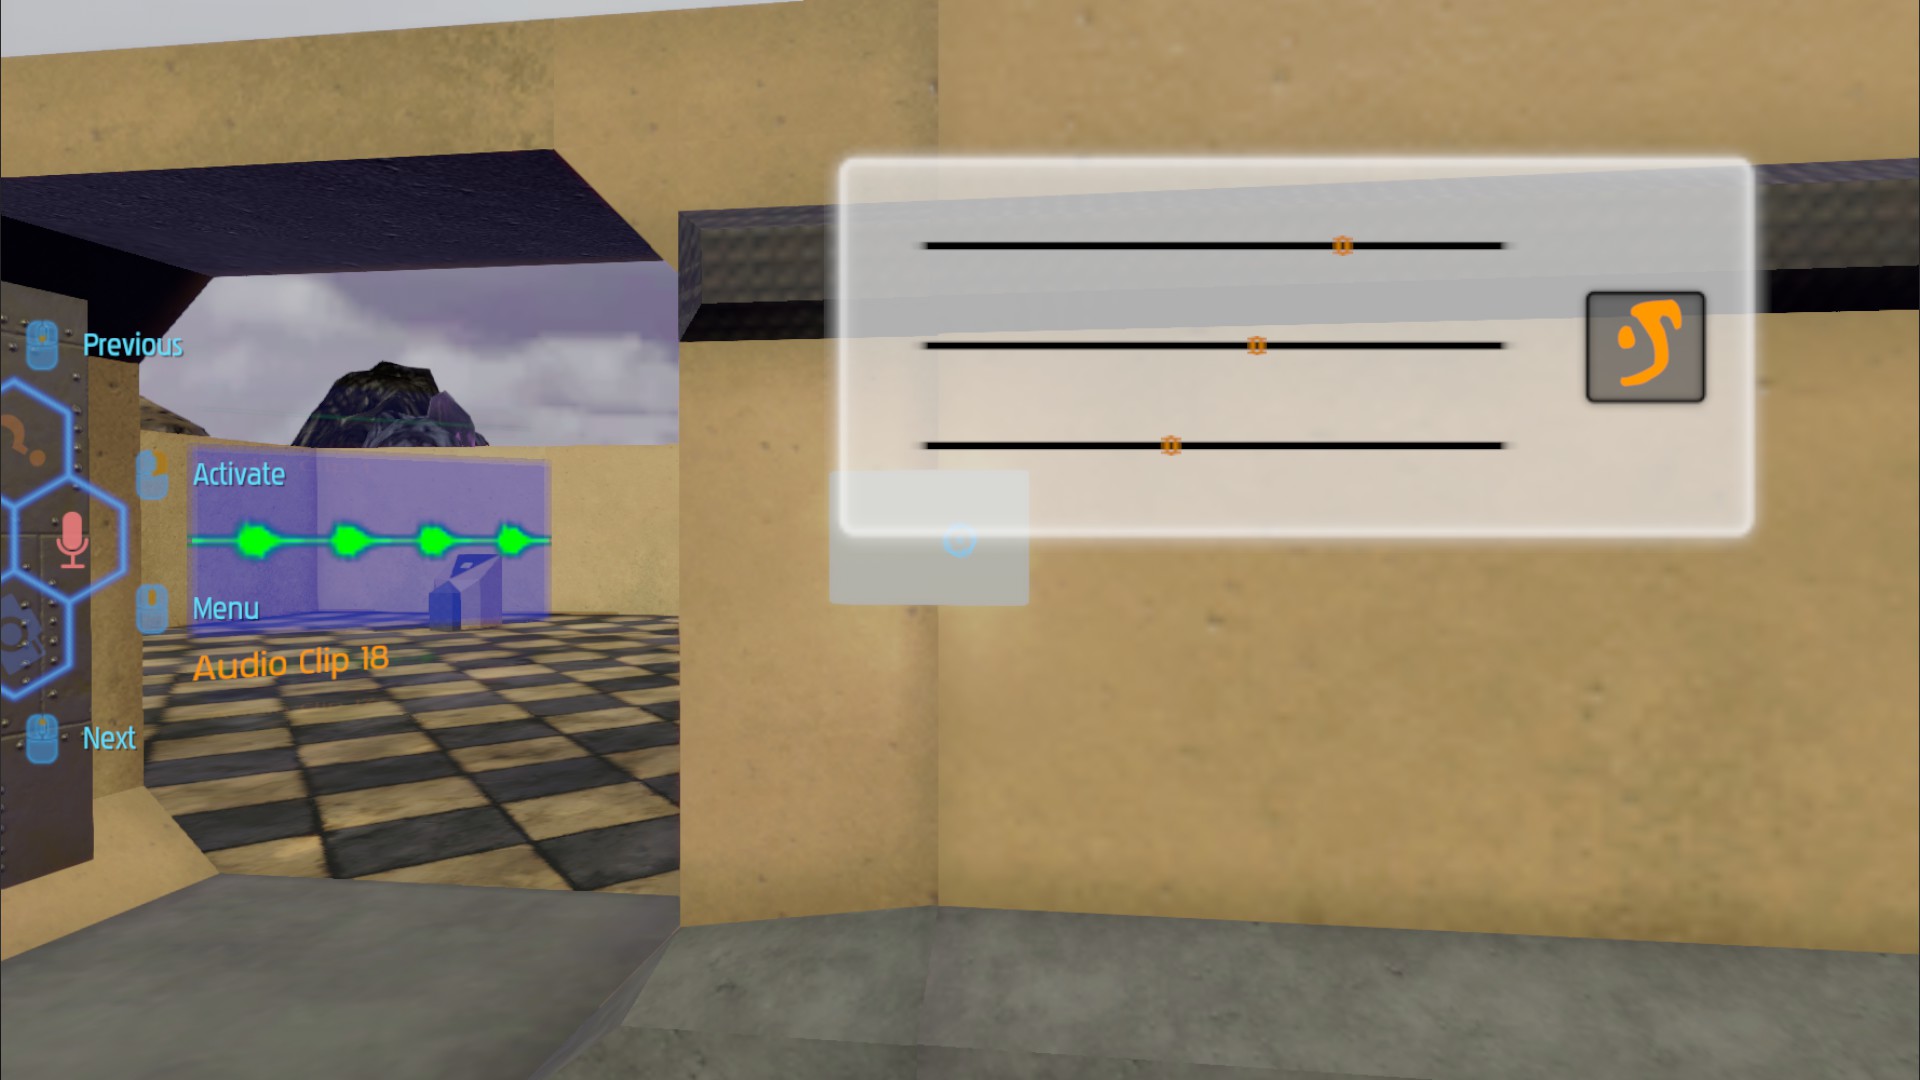
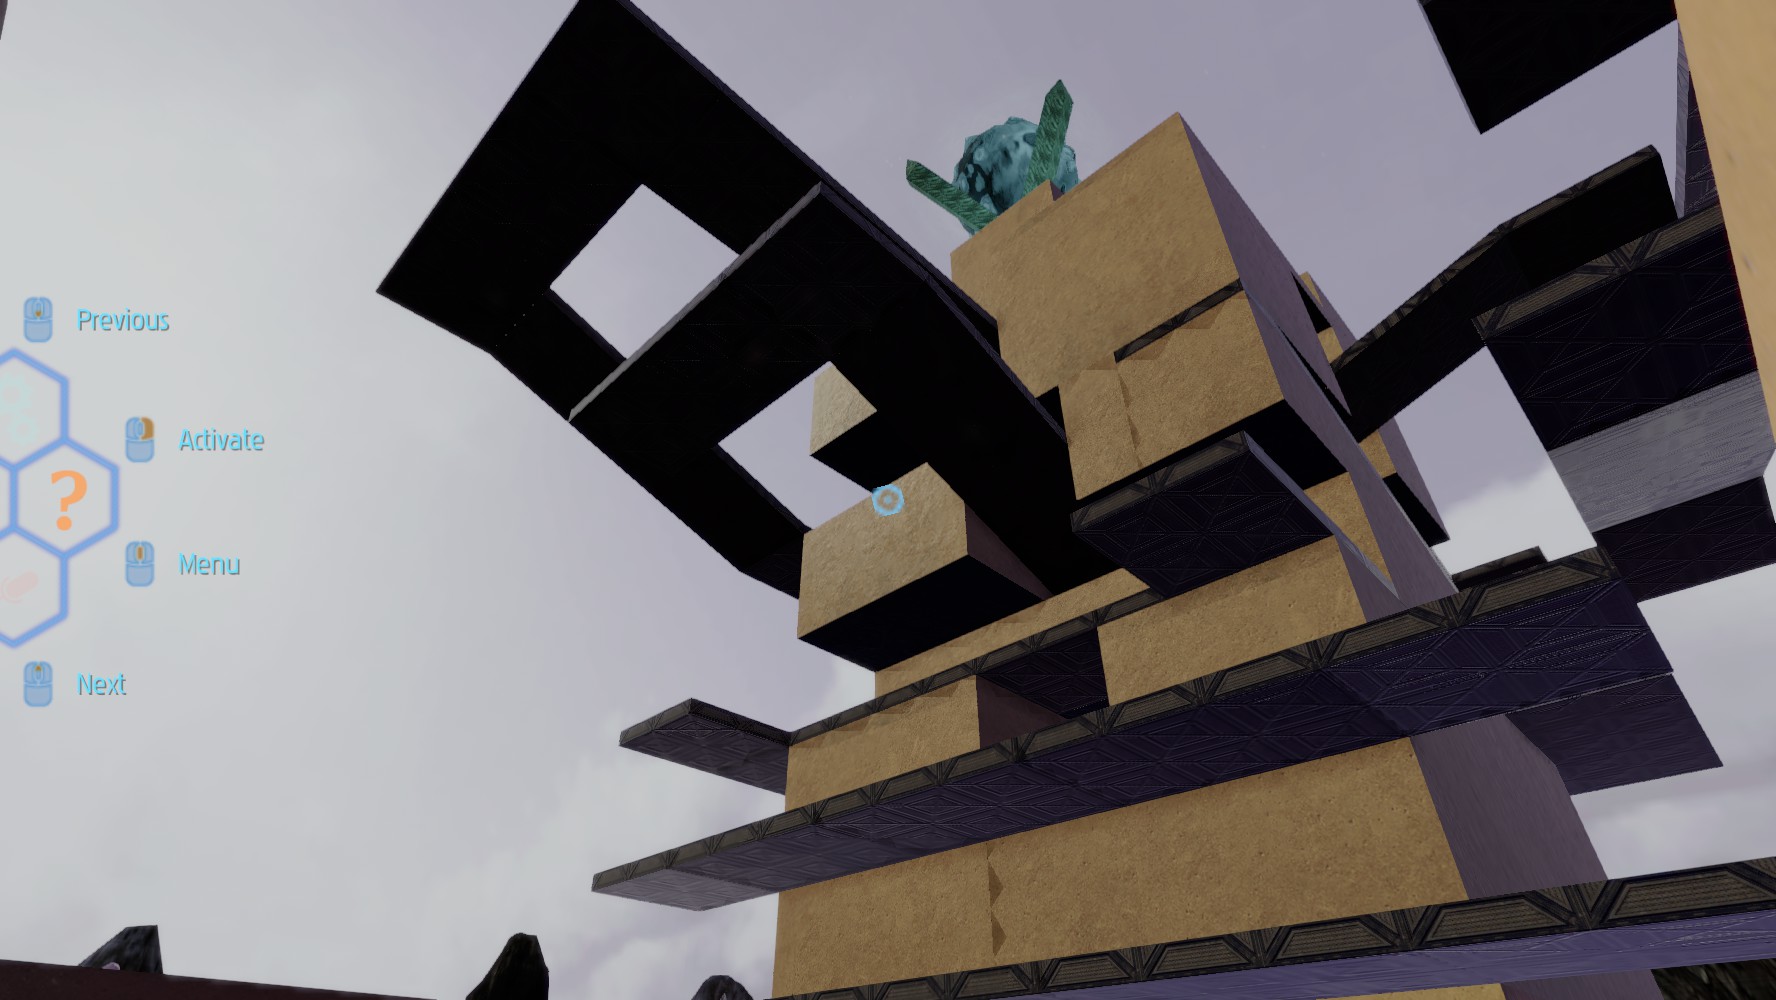


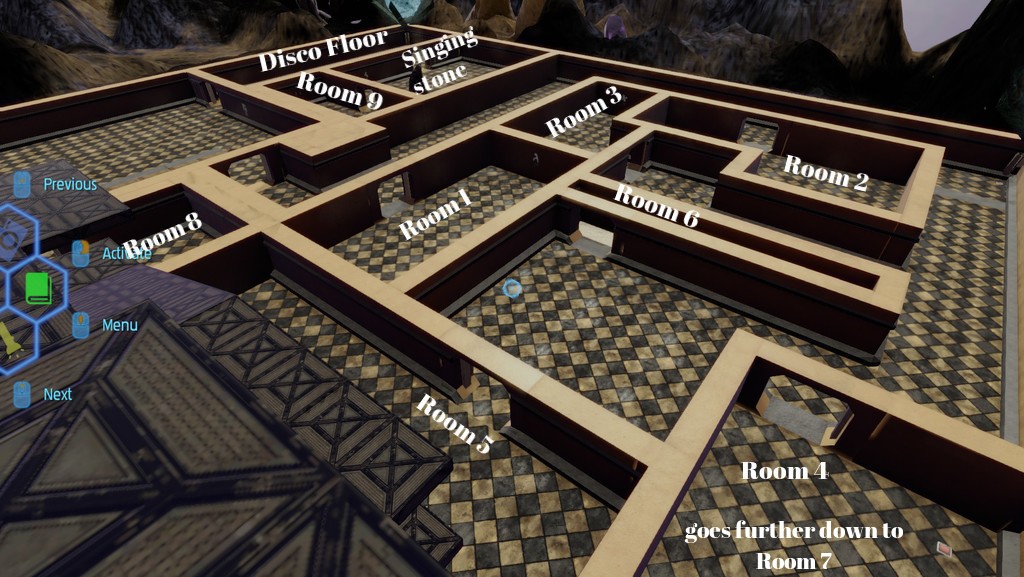


1. A Number Glyph is missing (for Paint by Numbers). In Alien Temple, go right at the entrance at look at the walls near the first Singing Stone.
https://gtm.steamproxy.vip/sharedfiles/filedetails/?id=2900857997
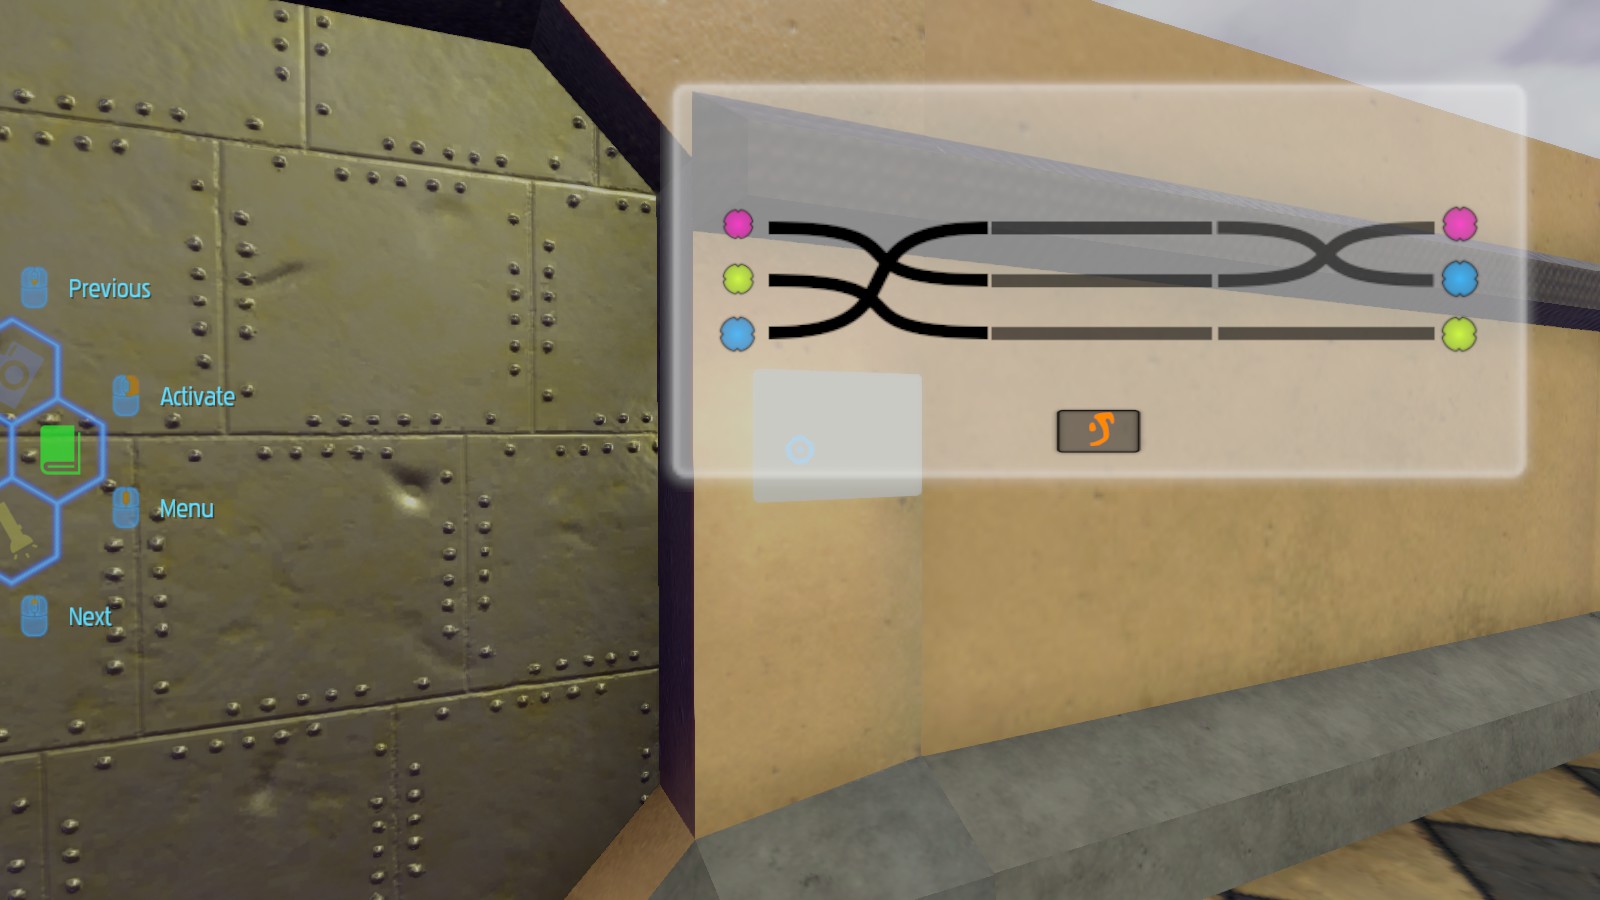
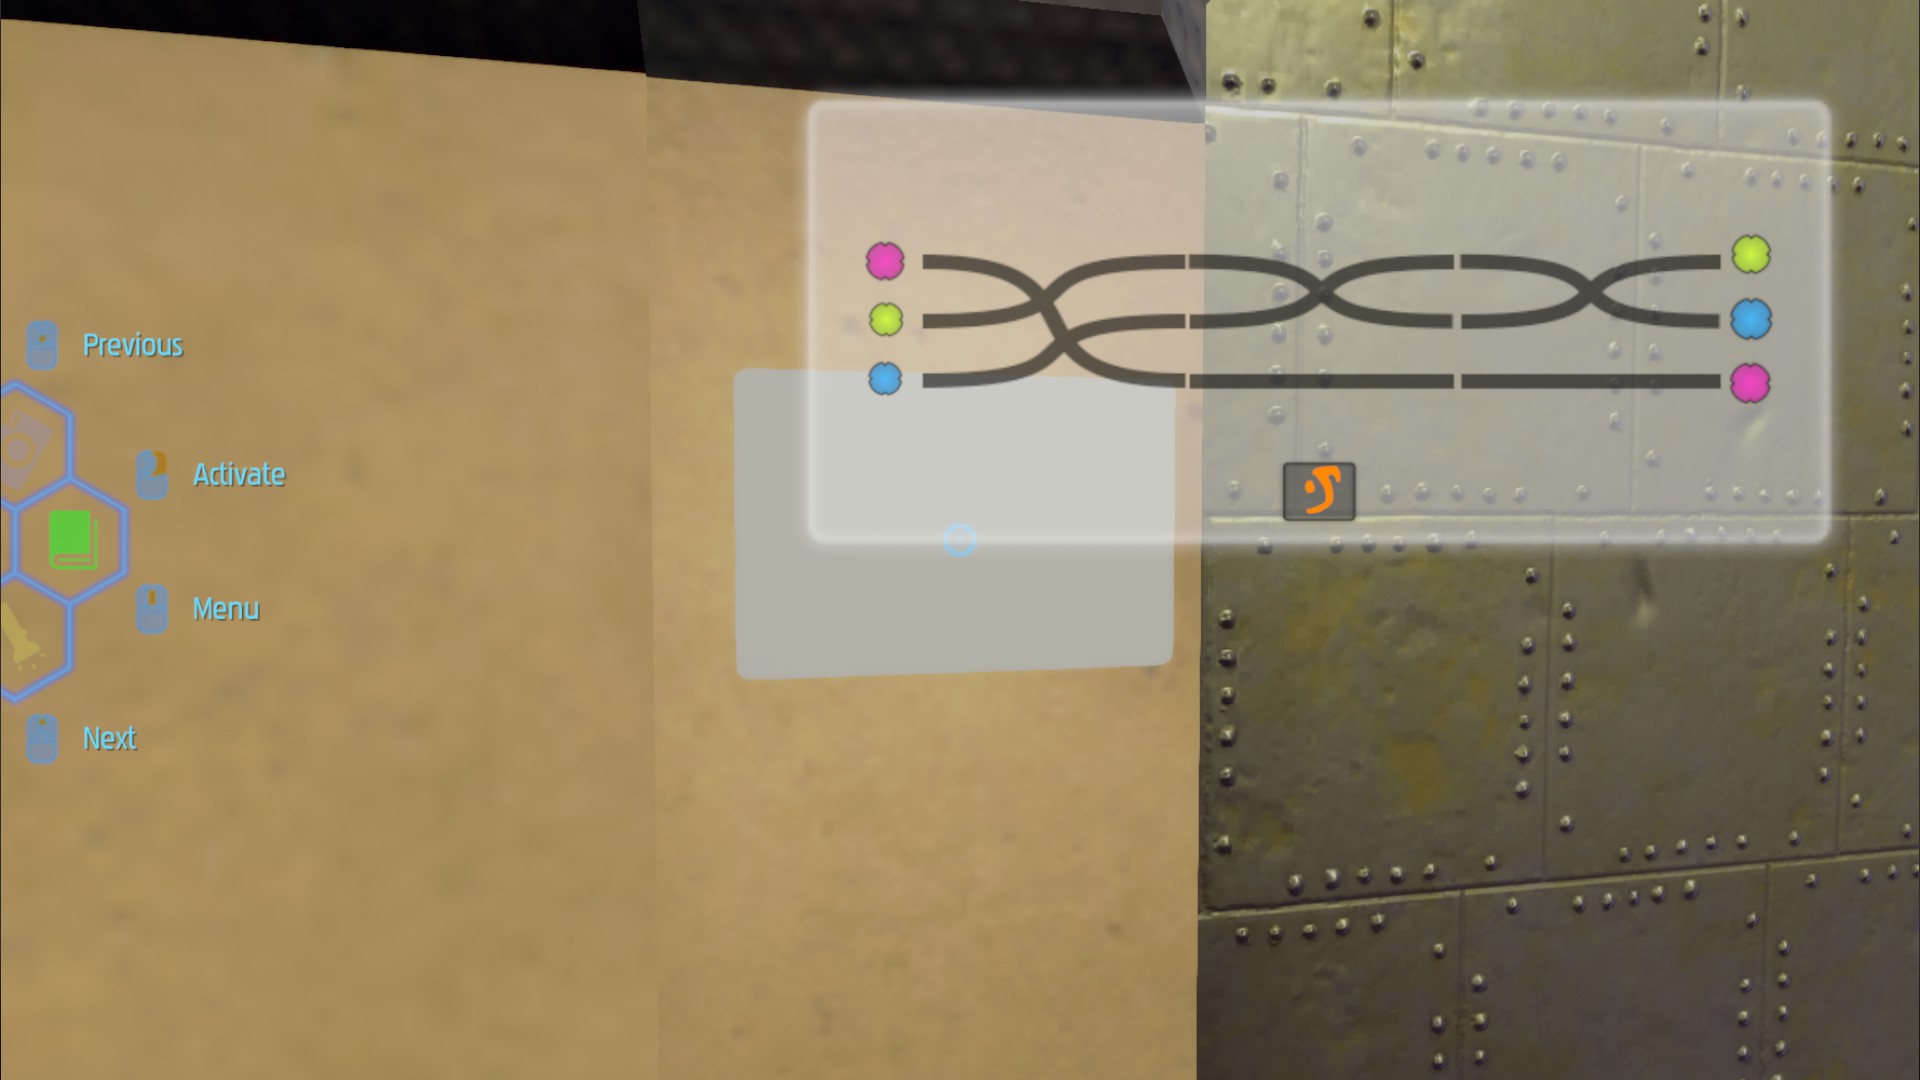
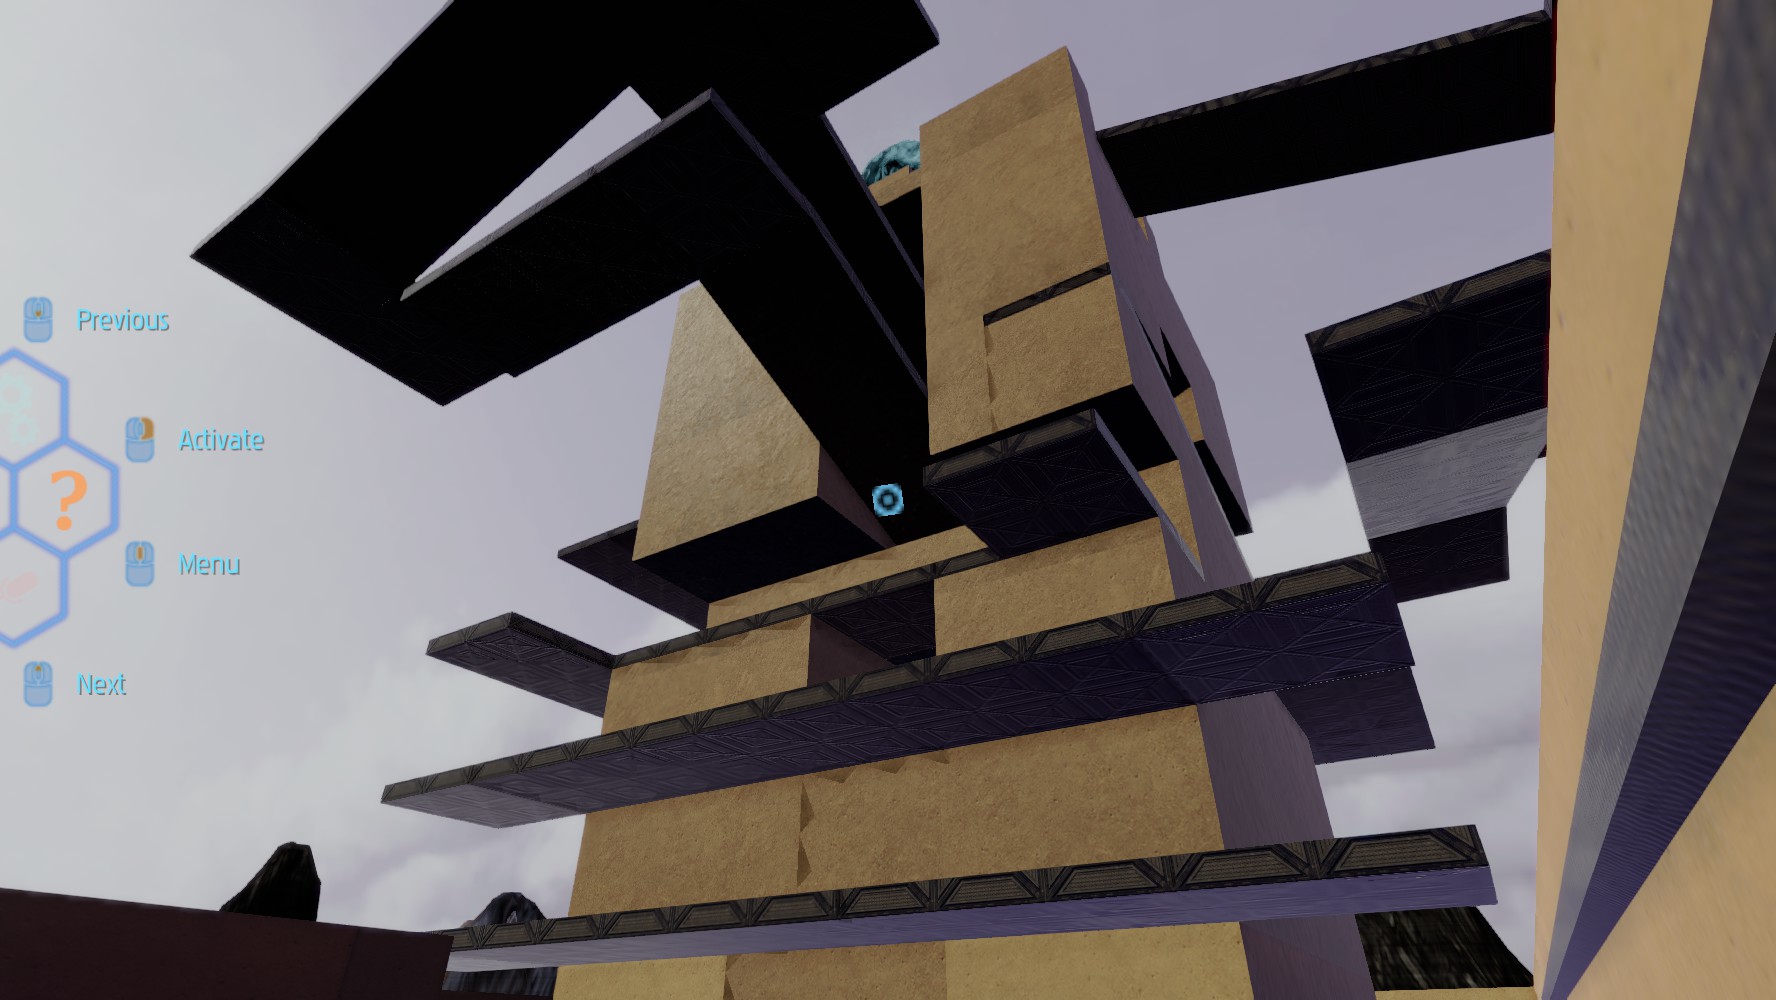
2. Last area of Alien Temple, I only needed to:
1st: 1x Right
2nd: from above, 1 x Right
3rd: from above, 2 x Middle
Screenshots are fine though, so anyone can just follow those.
3. Issue #4 only occurs when starting a new game on an existing save slot. Though counters can also be reset easily by:
- start new game (on existing file)
- pick up Holo Man
- quit to menu
- start new game (on same slot)
It works because the meta.sav file is deleted on new game but isn't written to disk until you open the first door.
Hardly matters since the game isn't even for sale, but just wanted to note these things down while I still remembered.
Thanks for checking out the guide!
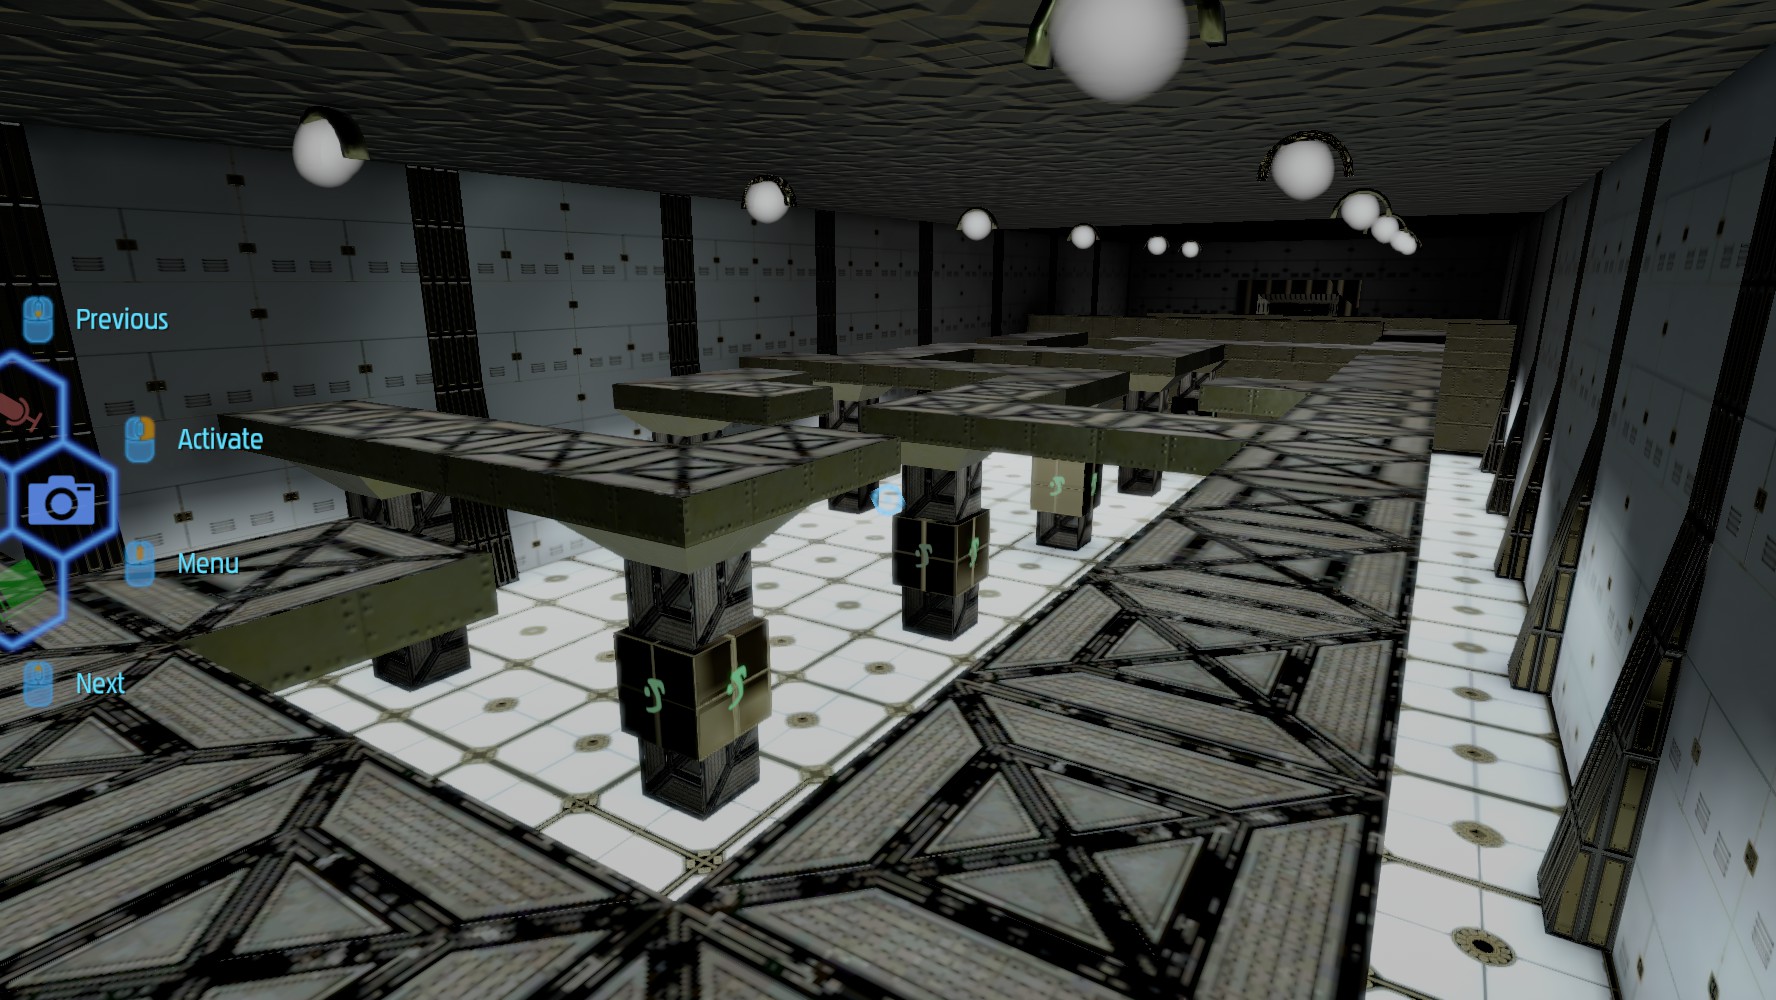
Esentially, my sequence and yours are the same, the difference is the point of view you look at it. Let's assign letters to the tiles (I think it's easier this way)
ABCDEFGH ~ 81637524 means:
- first step (corresponding to number 1 from my sequence) is B = second tile counting from left to right and the first number of your sequence (your 2)
- second step (corresponding to number 2 from my sequence) is G = seventh tile counting from left to right and the second number of your sequence (your 7)
- third step (corresponding to number 3 from my sequence) is D = fourth tile counting from left to right and the third number of your sequence (your 4)
etc.
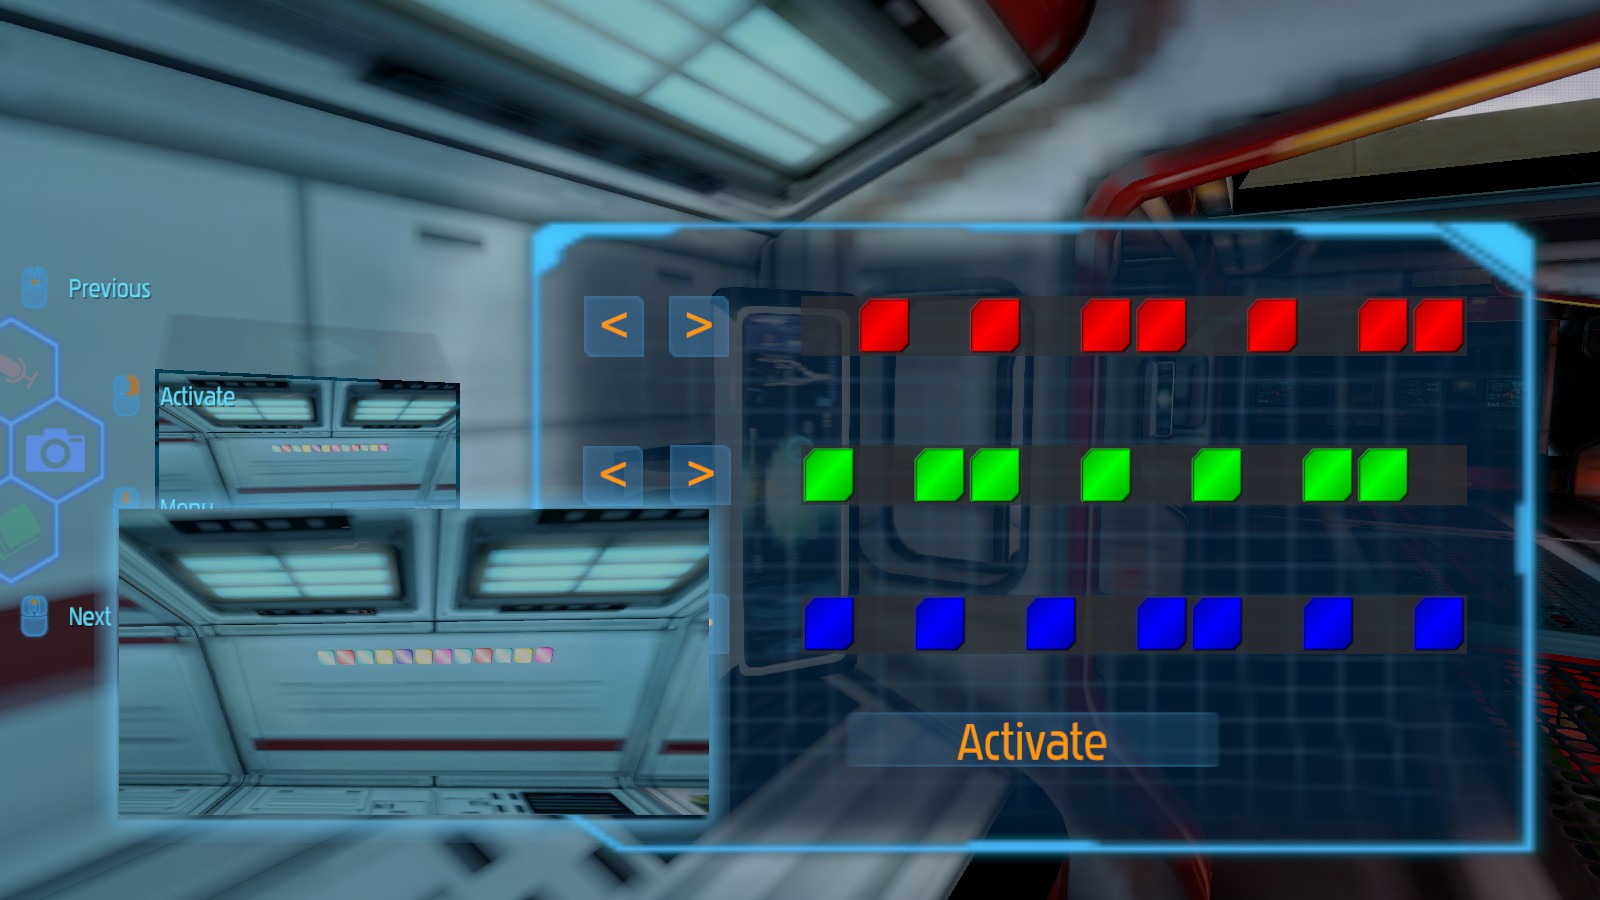
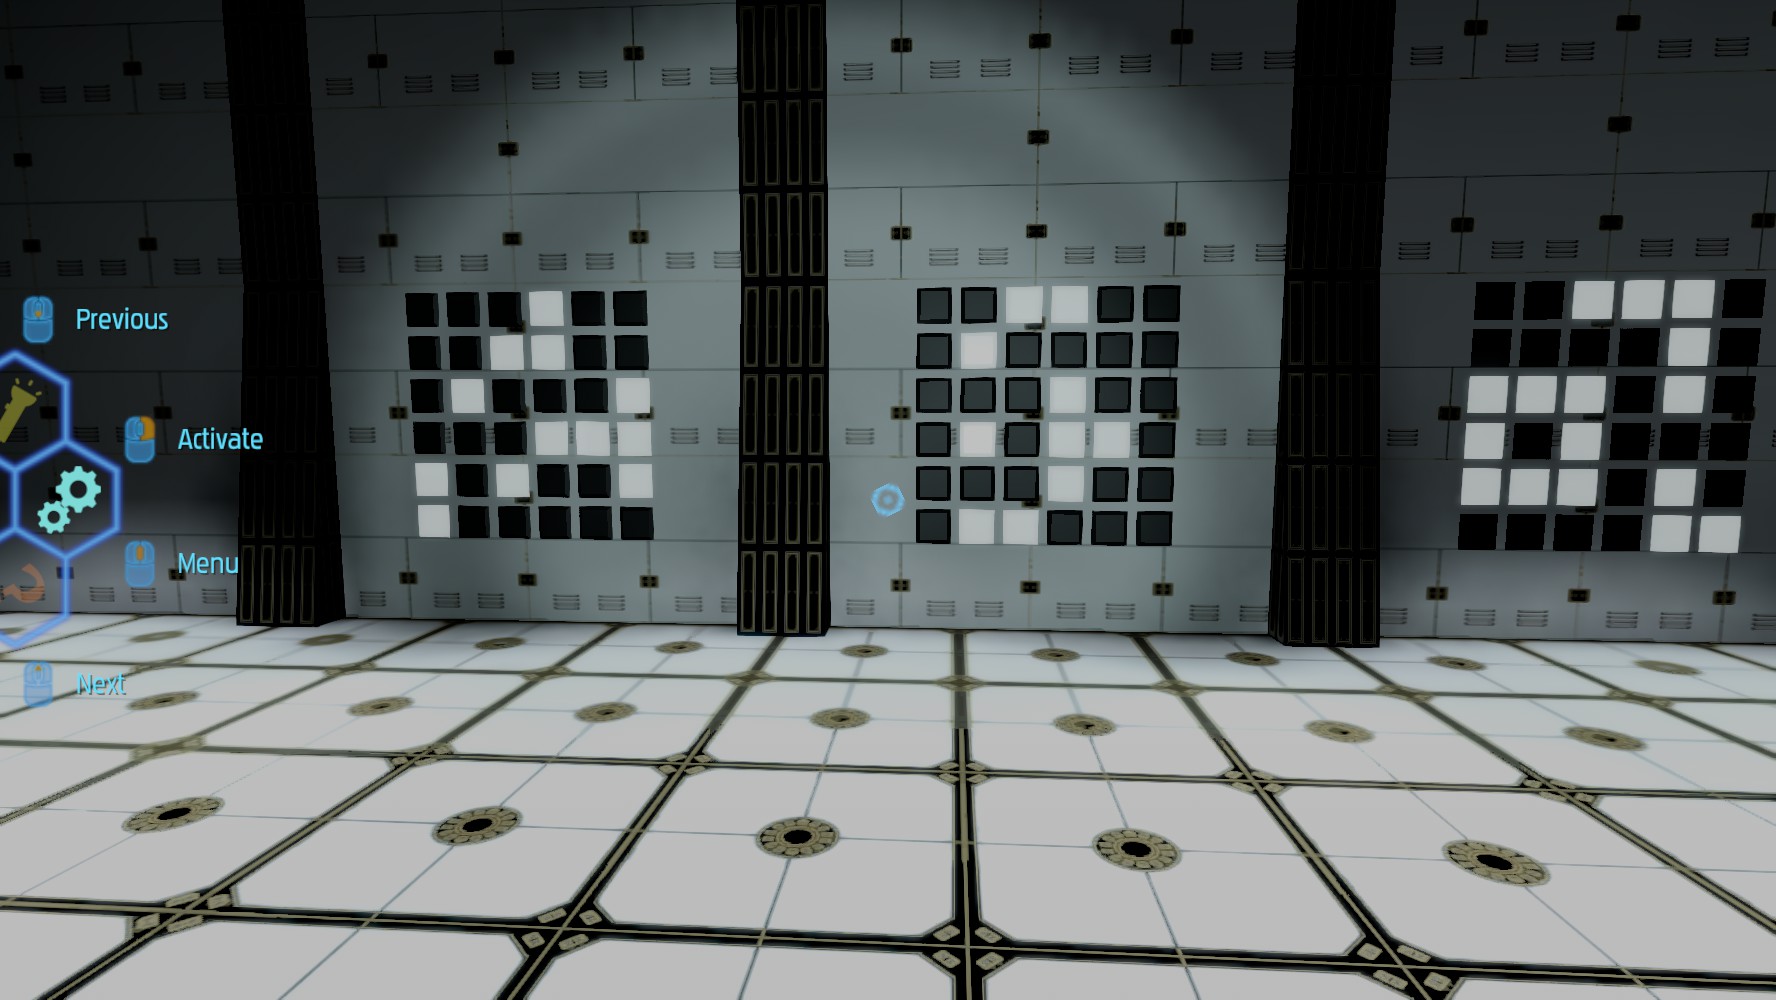
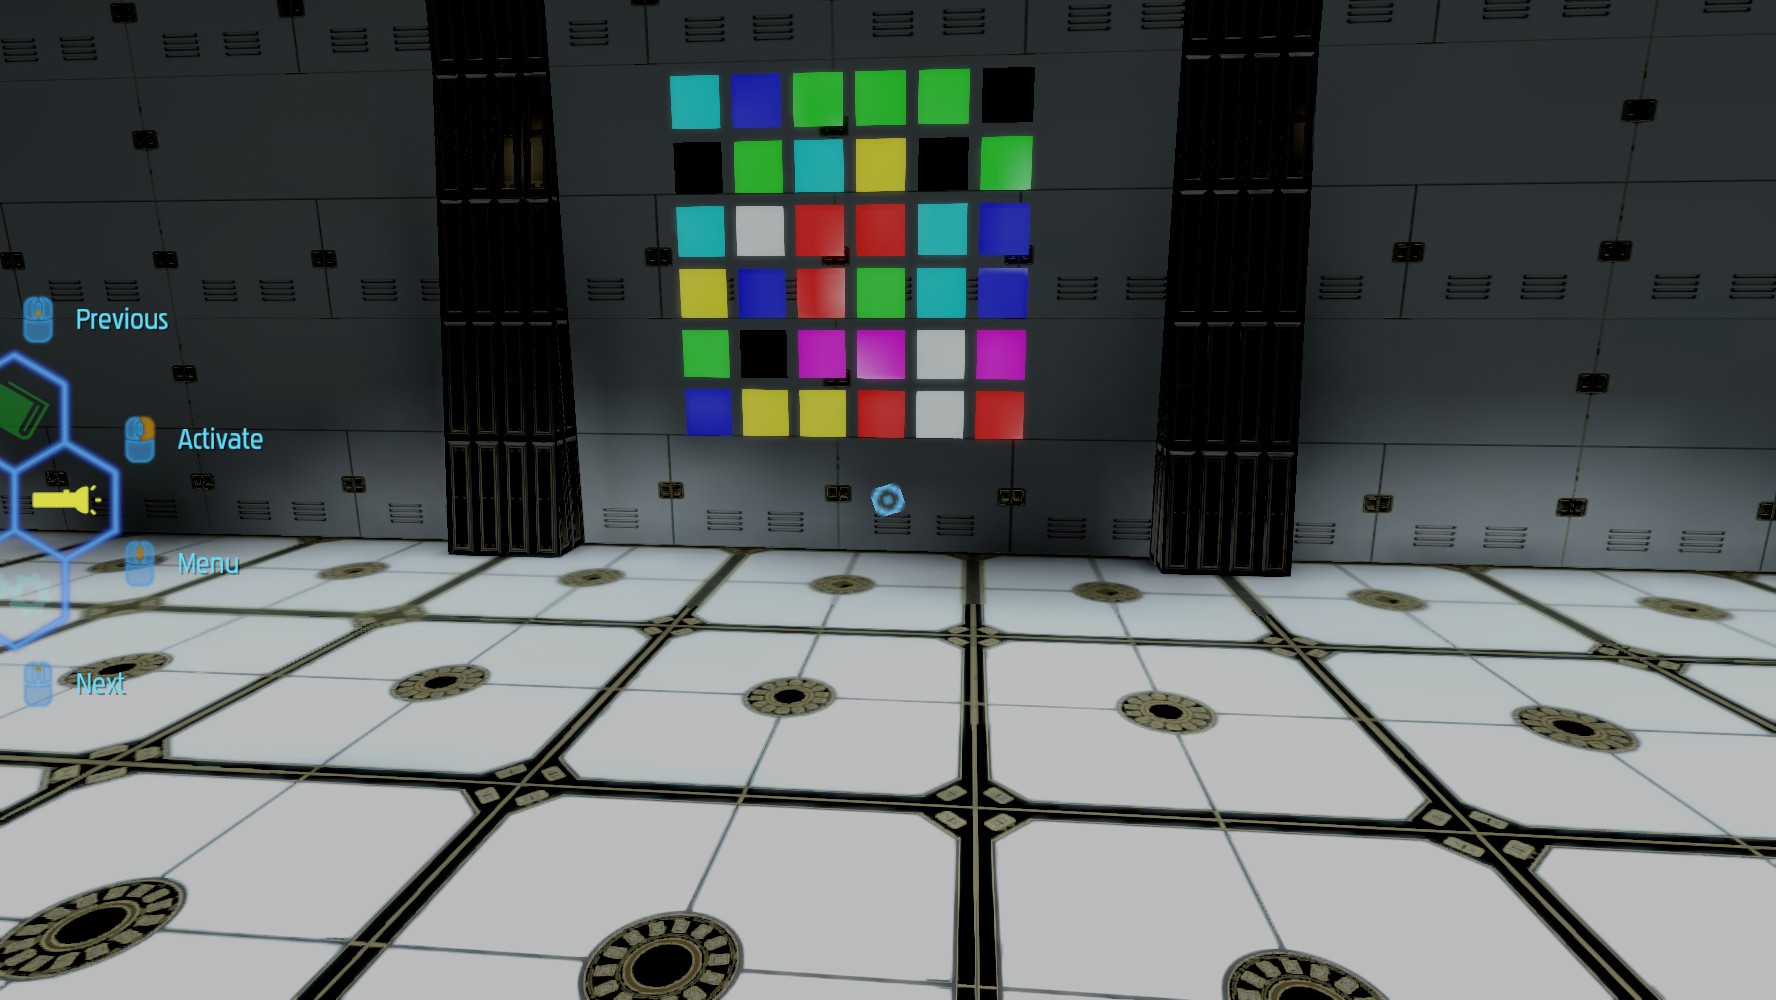
Access code: If we count from 1-8 the tiles that we can step on, the correct order is:
8 1 6 3 7 5 2 4
For me this sequence was 2 7 4 8 6 3 5 1