Starchaser: Priestess of the Night Sky

Starchaser: Priestess of the Night Sky

Not enough ratings
Walkthrough [& not yet 100% Achievements] - WIP
By Anzu
Walkthrough for the story labyrinths [including Star Minds] & Old-Age Globe (Work in Progress)
   
Award
Favorite
Favorited
Unfavorite
Before we start ..
THIS GUIDE IS A WORK IN PROGRESS - but i will try to complete it ASAP

(If you're searching for certain Achievements/Levels, don't forget to use Ctrl + F)

  • my solution isn't always the only or best one!
  • some tips may seem too simple or unnecessary but i wrote them down anyway, just in case
  • if you dont know the level (played it before), you maybe won't understand my description of the solution
  • feel free to give feedback or suggestions!
The Constellation Labyrinth (Story)
Small overview:
The Constellation Labyrinth consists of the 6 Story-Levels: Leo Labyrinth, Scorpio Labyrinth, Pisces Labyrinth, Libra Labyrinth, Virgo Labyrinth, Sagittarius Labyrinth.
You will beat them in this order. Each Level has around 11 - 13 Stages, including 1 boss-stage (always the last one) and before the boss-stage the "Just go to the portal"-Stage.


Note: "/" (e.g. "1F - /") means there's nothing to say about it, the solution is simple like going along the given path.
Leo Labyrinth
Boss: Leo
Stages/Floors: 13
S-Rank: 15:00 Minutes
A-Rank: 60:00 Minutes

Solutions/ Secrets/ Tips for S-Rank:

1F - 7F Tutorial

8F - /

9F - Star Mind

10F - / 11F - / 12 - /

13F - Only note would be: You don't have to go to the next hole in the hallway but can go to the hole after the next, his charge attack takes long enough for that
Scorpius Labyrinth
Boss: Scorpius/Scorpion (Mr. Crayfish ~)
Stages/Floors: 12
S-Rank: 17:00 Minutes
A-Rank: 50:00 Minutes

Solutions/ Secrets/ Tips for S-Rank:

1F - Fastest way: Go backwards right after spawning until you go to the next side of the cube, then jump from there to the portal

-------

2F - Don't be fooled by the cactus and the other ways, just go up from the starting platform to the other platform and from there go straight to the portal
(btw: killing all the cactus and the fake portals will do .... nothing! Surprise Surprise)

-------

3F - Nothing special here (/)

4F - / 5F - / 6F - /

7F - Star Mind (See Star Mind section)

8F - Same strategy as for 1F - you can jump to the portal right away from the first platform


9F - /

-------

10F - You can just run through it really easily - for a faster way again do the strategy from 1F and jump to the portal right from the start

11F - /

12F - Really easy boss - avoid the gravity changer, if it comes near you jump away with a simple double jump
Pisces Labyrinth
Boss: Fish Pair (Pisces & Baby Pisces)
Stages/Floors: 12
S-Rank: 14:00 Minutes
A-Rank: 45:00 Minutes

Solutions/ Secrets/ Tips for S-Rank:

1F - / 2F - /

3F - It takes useful time, but you don't have a choice then running around in circles. Argh.

-------

4F - (Just lock/focus the cube and spam Z - but don't jump! best stay on the edge of two cubes and keep going from the one to the other just a bit so either the monster won't spawn or you can easily dodge.) [picture]

-------

5F - /

6F - Ignore the purple thingies, you just have to kill the bunnies

7F - / 8F - /

9F - Hit the first and the last 5 [4th, 5th, 6th, 7th, 8th] / you should see the path now

10F - Star Mind (You can actually see it just in the beginning while warping there)

11F - /

12F - You have to hit the baby into the mother, she will get knocked out and you can hit her. Doing this twice should be enough.

Libra Labyrinth
Boss: Libra
Stages/Floors: 11
S-Rank: 16:00 Minutes
A-Rank: 60:00 Minutes

Solutions/ Secrets/ Tips for S-Rank:

1F - / , 2F - /

3F - Just go down the first "Elevator" thingie and hit the green box - fall directly into the portal. To save even more time you can skip the elevator and just jump down and hit the box in midair

--------

4F - Go into the green portal, lower the first and second elevator but skip the third one. (Go forward to go back to the starting area)
Now go into the yellow portal and straight to the second elevator, go to the backside of it to lower it (it has a gravity field) & back to the yellow portal. Now you can reach the exit. Doesn't actually matter which portal you do first

-------

5F - Ok this is a bit hard to explain ... the fastest way i could think of was: right after spawning go backwards until the next side of the "cube". Ignore the elevators completely. From there you can see that 2 of the 8 enemies are always in a line. Like this you can kill 2 enemies per jump, wont get hurt and wont get confused because of the elevators.
Either land your jump on the platform with the exit and jump from there again or just fall into nothing and spawn back at your jumping place.
If you plan ahead you can either land your last jump at the portal or spawn right next to the portal after falling to nothingness in the last jump.


Keep your distance from the enemies or otherwise the focus won't lock properly on them.
I'm also not sure that this is the fastest way, but using the elevators always wasted so much time for me (not just the time it needs to lower itself but also time you need to coordinate yourself)

-------

6F - Great trick. Jump from the cube in the beginning and hit the box thingie (with the red point) in the end. You will spawn IN the cube, right next to the portal. Saves so much time!

-------

7F - Go right into the yellow portal to the right area - simple fighting.
Now hit the box and go to the middle area - go left and then on the gravity floor of the cube/elevator, the other elevator with the box should appear, go the the side with no gravity floor on (->picture) and jump there, hit the box.


Now go to the last, left area. Position yourself like this:


Jump down to the floor (without touching any other gravity floors).
Get into the yellow portal - you should now be able to go to the exit.


-------


8F - if you have problems doing it first try, then try (a zick-zack with) uncharged double jumps
+ if you fall -> restart the floor, going back takes too much time and makes it hard if you don't even the elevators out again

9F - Star Mind

10F - /

11F - after understanding the stage design it's a way too easy boss
Virgo Labyrinth
Boss: ???
Stages/Floors: 12
S-Rank: 15:00 Minutes
A-Rank: 50:00 Minutes

Solutions/ Secrets/ Tips for S-Rank:

1F - First some invisible walls and in the next room there is a hole in the ceiling to get to the button


-------

2F - Star Mind (see Star Mind section - also for map solution)

3F - /

4F - Enemies are invisible if not locked on, look especially in the corners

-------


5F - From the place you spawn go left and up, there is a false "locked" door (+ a false portal) but if you come near it disappears (unlike the false portal)
(picture - > frame=false door)


-------


6F - Coordinate yourself with the help of the (the position of the) portal
Go right, there's a wall blocking your way (while looking to the portal), get over it and go to the bottom of the cube (look at the portal, so that the portal is on the ground). From there go to the upper right corner (of the bottom floor). Up the wall to the next corner, turn left and go one square further and turn left again and you should be there.
[A map or pictures or both will follow.. maybe]

7F - /

8F - Just follow the main route

-------

9F -


-------

10F - I have no tips, even tho i have the feeling that there must be a faster way ...

11F - /

-------

12F - Easiest boss in the game. Lock/focus and spam Z, if you unlocked it maybe some of "Chamali's Arrow" (Charge Attack 2) to kill the nearby enemies, but really, they are more or less harmless. The ghosts don't damage you [green = can't jump, pink = reverse controls, black = smaller sightarea] and everything else won't have time to damage you enough because the boss will die pretty quickly.
Sagittarius Labyrinth
Boss: Sagittarius
Stages/Floors: 12
S-Rank: 25:00 Minutes
A-Rank: 90:00 Minutes

Solutions/ Secrets/ Tips for S-Rank:

1F - Same strategy as in scorpius 8F, change gravity as needed and "fall" to the jumper.

2F - /

3F - Star Mind

-------

4F - First: upper left , Second: upper right , Third: bottom


-------


5F - /

-------

6F - Press the button in the first room 3 times [it should look like on the picture]. The button in the next room should be pressed 3 times too, its not ultimately necessary but it helps alot.
Now go to the yellow button and hit it, gravity will be reverse now. Back on the bottom of the big cube go into the same direction (to the yellow button) as before again and follow the path. Step on the gravity floor and hit the button again, you can now fly straight to the portal.

-------

7F - /

8F - Pay attention to the red (not pink) ghosts, they will prevent you from moving.

-------

9F -


First Map (Left) as you start, second map (right) is reverse to the first because its how you see the map on the ceiling of the cube (so ->reverse). ->its for better coordination
The yellow floor with the numbers show the gravity changer and the light(er) numbers show where you will land after using the gravity changer.
Fastest way is: 12 - 4 - 5 - 7 - 9 - 10

-------


10F - I really don't know what the buttons at the beginning ("off") are for .... so you can just ignore them... i guess. And at the end you can jump right on the roof of the exit cube and get into it through the water


11F - /

12F - The Charge Attack 3, which you get from the Star Mind of this level, helps a lot (beause its often used after the normal Z - spam combo)
Achievements
Generally the Achievements of this game are easy - you dont have to be really good or smart (most times at least) you just need some patience. The times for getting an S arent too hard, at least if you know the fastest way.
Achievements - Story related (Easy)
Listing them here is more or less useless, nothing much to say to them.
If you are stuck on a floor -> go to the sections above

First Labyrinth
Clear the Leo Labyrinth


Dawn Over the Desert
Clear the Scorpio Labyrinth


Stellar Depths
Clear the Pisces Labyrinth


Beyond Mere Tricks
Clear the Libra Labyrinth


Maidens of the Night Sky
Clear the Virgo Labyrinth


Starchaser
Clear the Sagittarius Labyrinth
Achievements - Easy Peasy
Resident's Wisdom
Find a complete resident's page in the Starchasing Book


Just look into the Starchasing Book after you beat Sagittarius (and watched the Credits) and go to the last page you can get to – there should be the target rabbit (8)
(That’s when I first noticed it, at least I think that you can’t find it earlier)


Astral Wisdom
Find a complete labyrinth lord page in the Starchasing Book


After finishing the game beat any Story-Level again (Leo would be ofc the easiest) by going to the statues in the church and talking to the statue of the level you want to do again. Afterwards go to the Starchasing Book, go to the page of this boss and:


Another Night Sky
Clear 1 Star Globe


After the Credits you can go to the star-globe, just beat the first lvl and :


[Need help? -> Star globe section]

Achievements - Star Minds
You can find one Star Mind per Story Labyrinth but you probably won't find them on your first playthrough (in the moment im not sure if they only appear after you beat Sagittarius for the first time or if i just didnt see them before - Yeah you can get them on your first run). Also you will only obtain them if you beat the stage after collecting the Star Mind. Furthermore they will give you some upgrades!

-------

Leo Labyrinth:
Where: 9F
Upgrade: +30HP

[While standing near the Mushrooms, look up (with C + up key)]
To get it, simply jump on one of the Mushrooms (not the one which the game wants you too/ which shoots you to the portal) and jump again (X) when you're at the highest point. In the small extra room is a gravity floor (where the Star Mind is on), so dont worry, if you're high enough then it will suck you in.
The Navigation to the Star Mind may take some tries but you will get it.

!!! !!!
Wish Upon a Star
Find a Star Mind


-------

Scorpio Labyrinth
Where: 7F
Upgrade: New attack (Charge Attack 1: Shaula's Flame)

I'll try to explain the way: take the middle shooter thingie to the gravity floor cross. You will see another shooter, go the opposite direction to the next site of it, where you see another shooter. Use it and follow the new route.

-------

Pisces Labyrinth
Where: 10F
Upgrade: +30HP


The Star Mind is almost right next to you when you spawn but its locked by a wall. Finish the stage as always but DONT go into the portal. Another room will slowly open up and you will see a "Last 1/1" in the upper right hand. In the extra room is a bunny, kill it and go back to the starting area, now you can get into the locked room with the Star Mind.


-------

Libra Labyrinth
Where: 9F
Upgrade: New attack (Charge Attack 2: Chamali's Arrow)

After spawning jump down to the platform. On a closer look you can see that it has a gravity floor on the backside (picture 3), you can get there by wandering off the platform + a timed charged jump. From there lower the elevator shown on picture 1 & 2 and continue the stage normally (except collecting the Star Mind at the end).

Picture 1(left): Before lowering , Picture 2(right): After lowering


Picture 3 (left) , Picture 4 (right)


-------

Virgo Labyrinth
Where: 2F
Upgrade: +40HP

To reach the Star Mind go to the ceiling of the start cube (theres gravity floor) and then take the path to the right (you will find a hole and eventually a Star Mind)

......


-------

Sagittarius Labyrinth
Where: 3F
Upgrade: New attack (Charge Attack 3: Alnasl's Lightning)

Just take the path shown on the pictures (didn't use an arrow for EVERY move/jump you have to make, but you get the idea)


------


!!! !!!
Star's Desire
Find all 6 Star Minds
Age-Old Globe
- appears after beating Sagittarius
- includes 25 Extra - Levels
- i'll leave it with just an explanation when i feel like its enough, anyway, if you want a video, map or more tips/detailled explanation then feel free to tell me and i'll see what i can do :)

No further explanations for #3, #11, #14 .. since they're either only/mostly fighting and/or easy levels (or just need practice). If someone needs advice on any of those levels then feel free to ask me :)

#1


-----

#2

part 1 - (mid-air) Chamali's arrow straight ahead can help alot

alternative: Just jump from side to side and keep dodging, fight if necessary (tornados in the end normally can't hit you, so just ignore them)

part 2 - well .... try to survive? i would suggest you having Leo, Pisces and Virgo Star Minds for the HP, and Scorpius Star Mind against the potato enemies
  • if you just want to survive: kill 2 of the first 3 pink spikeys and then try to dodge the obstacles while listening to the sound the spikey makes when it shoots (whenever it shoots just jump once) and kill the waves from the platform when you're behind the yellow walls)

  • for people who are as GREAT in fighting as me (*cough* not *cough*) : jump as if there's no tomorrow! and maybe you can try to learn the pattern of the obstacles, so you know where you have to stay. Also dodging the yellow wall thingies is easier than trying to shoot them down .. in my opinion

  • for S-Rank you have to defeat the enemies on the platform before the platform comes to an halt

-----

#4

This one is pure training, you will get the hang of it eventually. For the last part (after the last fight) - use 2 uncharged jumps instead of 1 charged jump when the next (disappearing) platform is on the top. Charge Attack 3: Alnasl's Lightning in the fights because of the multi-target shot.

-----
#5 - Great Reversal Labyrinth


Map on the right is reverse to the map on the left (since youre on the roof then)

1 -> 4 -> 16 -> to the button (you have to jump to be able to target it) -> 17 -> 15/14/13 -> 2 -> 7 ->10 -> 11 -> End (portal)


-----

#6
Explanation: Just go to the right platform, lower the elevator to the left of it. Then go back and go to the left platform and follow the way to the portal, there is an invisible floor under it, so you just have to make a little jump around the corner. Easy enough, but this should be the fastest way .. i think :p
(Because my explanation sucks the vid - also i lowered all 3 elevators in the vid for no reason ... so jusrt ignore that: )

-----

#7


-----

#8


Floor 1: 0:00 - 0:32
Floor 2: 0:33 - 1:12
Floor 3: 1:13 - End

-----

#9


-----

#10

The simple graphic shows the 4 building- .. thingies with their colour, below you can see the boxes (with the red button), the colour which it has means the building that will move when you shoot it. The numbers shows the order in which you press them. After 3 you can also just remember: if the button moves the white building, you will shoot the new revealed button in white, if this button moves orange, you will shoot the new revealed button in orange and so on

Coordinate with help of the Portal or the places without boxes.


-----

#11

Not speeding up the screen helps with the timing of the geyser, but not nessecary for the S

-----

#12

First shoot the button with the arrow that shows to the right. Go towards the enemies and forward until you fall off the platform. Turn right, jump off the platform again. Turn around tothe platform you just came from and there you will see a portal.
It brings you to the first red button. After going through the portal you will find a gravity changer in front of you, pointing to a portal. This portal brings you back to the beginning, go through it.

Now shoot the button with the arrow that shows to the left. This platform will bring you to another 2 green buttons, shoot the one that shows to the left again. Through the portal you will arrive at the second red button.
Go through the portal, (press the gravity changer,) jump to the next platform and press the green gravity changer. Again, go to the portal that brings you back to the beginning.

Finally, shoot the button again that shows to the left. This time press neither of the next gravity changer and just fall (and press the up arrow key) until you arrive at the third button. The portal bring you right to the entrance to the "endportal" you just opened.

-----

#13 - Great Current Labyrinth
Huge thanks to CSMES for helping on this one! [ http://gtm.steamproxy.vip/id/csmes ]

Directions you have to go:

(Notice: The direction is in relation to the direction you look in after you go through the water.
That is, assuming that you will always be facing forward when you walk into the water.
- CSMES

"Up" means changing gravity(with the gravity floor in the said direction)
)

  • Forward, left, forward
  • forward/up & forward
  • left/up, forward [, down]
  • right [or: you can see the starting area (area without water), you have to go the opposite direction]
  • left, right/up, forward, forward, right
  • left/up, forward, right, right


-----

#15

Another (almost) pure training level. Anyway, theres a trick for floor 3 where you can go over the water instead struggle with the wall thingies or little things you should put attention on (1:22), e.g. that on floor 4, for secondto last jump back to the moving platform, you should wait a bit before going on it, or otherwise you wont make the final jump(3:04).

Part 1: 0:00 - 0:30 III Part 2: 0:31 - 1:07 III Part 3: 1:08 - 1:57 III Part 4: 1:58 - End

-----

#16

Nothing much to say, 2 buttons under his "feet", 2 on his "arms". Go through the yellow portal to spawn enemies. Kill them to free the portal. May take some tries to make it in the time limit.
Do the left ones first to save time.

-----

#20

For S 1 KO is allowed. Preferably 6F 1st room or 7F 1st room.

Floor 2 - You can skip all of the yellow things in the end, e.g. go under them and safe some time with that.
Floor 4 - ~
Floor 5
Floor 6
Floor 7

-----

#21 - Great Gravity Switch Labyrinth


-----

#24

For help on any boss look above at the walkthroughs for the story levels
Basics
In case you forget:

Combo 1: 1 tab Z
Combo 2: 2 tab Z
.
.
.

After obtaining it:
Charge Attack 1: Shaula's Flame - holding Z while doing nothing OR after combo 1
Charge Attack 2: Chamali's Arrow - holding Z after Combo 2 or 3
-> both great against e.g. potato amoeba
Charge Attack 3: Alnasl's Lightning - after Combo 4 or 5 [Great against boss enemies]
!!! WORK IN PROGRESS !!!
To do list:
  • Old-Age Globe
  • Complete Achievement section
  • Map Virgo 6F
  • Correct misspellings/mistypes & grammar / Check the text
  • Map/ Video/Description for Scorpius Star Mind

Complete:
  • Walkthrough [Leo, Scorpius, Pisces, Libra, Virgo, Sagittarius]
  • Star Minds
30 Comments
[HYBRID BEING] 15 Feb, 2018 @ 2:43am 
> There's no real way to allocate time for boss 3 to 6.
> Alnasl can also be cleared within 6 min if you are agile enough, and under 5 min with extreme luck.
Well, could probably allocate time for Libra seeing as you can finish her off in 2-3 stuns. Probably could be done for Virgo, as well. 5-6 minutes for Sagittarius, and you can calculate the remaining time for Pisces.

> Combo 4 is Alnasl's Lightning
That's Charge Attack 3, combos are just chained Z-attacks (5th is multiple homing shots).

> from when it actually appears to a bit after the wave goes past the stage
But then the wave won't disappear, so there is not much point - it's hard to damage Alrescha during the wave anyway (and you gotta keep track of Samakah, while standing a top of the block). Also, having balloonfish around is really to player's advantage - if Alrescha lands pretty close to one you can score massive damage on her. Just gotta be careful not to get blasted yourself.
CSMES 14 Feb, 2018 @ 4:30pm 
Good tips, I very agree.

Being lucky with Libra-Chamali; winning in 2 stuns instead of 3 helps a minute or two indeed.

The fish though, being unlucky would be the thing keeps summoning waves. Those take quite a bit of time. You can easier aligning the two if you keep lock on the big one and chase it, the small one will just come around in front of you, so I generally take 2-4 minutes depending.

There's no real way to allocate time for boss 3 to 6. Alnasl can also be cleared within 6 min if you are agile enough, and under 5 min with extreme luck.

Haven't confirmed about Leo, but Combo 4 is Alnasl's Lightning.
Also adding this
- Alrescha can be interrupted by throwing Samakah at her (even when she appears shielded) when she is summoning wave (<from when> it actually appears <to a bit after the wave goes past the stage>) or explosions <or harder but possible, at the time she's summoning a balloonfish, you only attempt this when they're already aligned when she stops to summon>.
[HYBRID BEING] 8 Feb, 2018 @ 4:04pm 
Um, a little correction on Leo - it's left side of the right wall (when facing Leo).
[HYBRID BEING] 8 Feb, 2018 @ 4:00pm 
Libra.
- When Libra recovers shield it's best to be closer to the wall - there is a small chance a spike block will teledamage you.
- Easiest boss to avoid damage.

Virgo.
- Chamali's Arrow is a life-saver, helps to pick off enemies on the other side of room.
[HYBRID BEING] 8 Feb, 2018 @ 3:59pm 
Scorpius.
- It's easy to evade charge attack if he is targeting the floor he's on - just jump when he raises his legs.
- Evading charge attack when he is targeting the opposing side is harder, safer to switch floor.
- Spike attack has a huge blind spot on the opposite floor.
- Pretty straightforward, hardest part is avoiding attack from the second Scorpius, while attacking the first one.
- It's possible to finish this fight in 3 min, but 3.5 min is fine too. I usually restart when i lose more than 40HP (although even that feels way to much, gotta git gud).
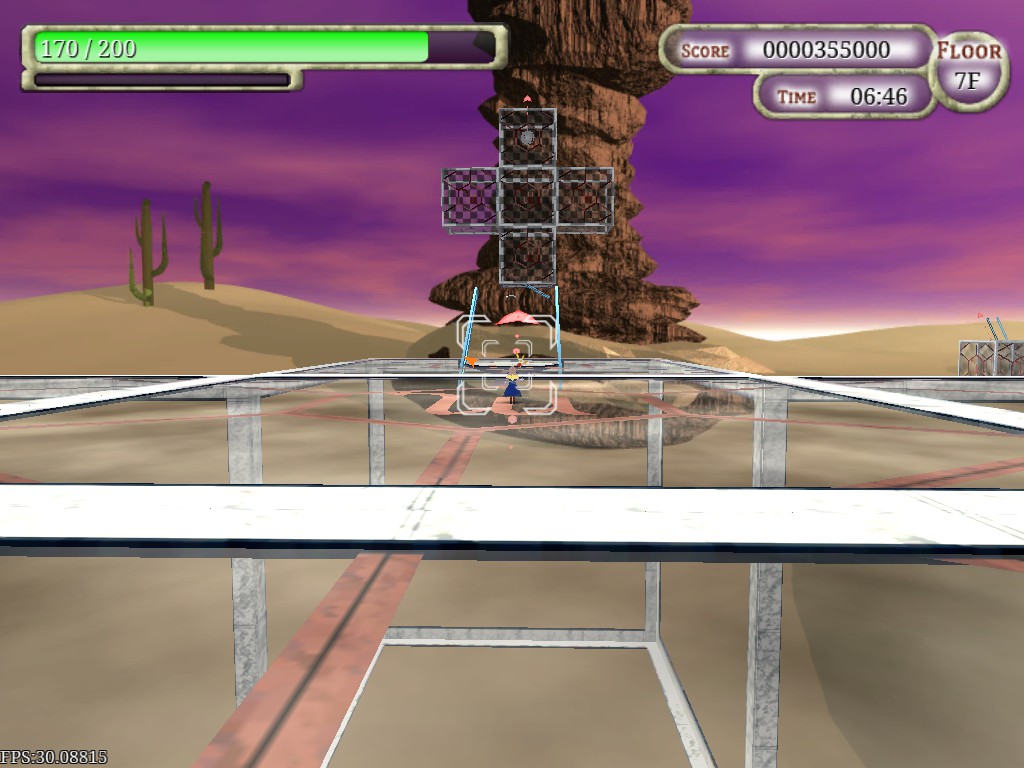
Pisces.
- When Alrescha is down baloonfishes deal her quite a damage, although it's no easier to drop her close to them than aligning her with Samakah for a shot.
- Alrescha can be interrupted by throwing Samakah at her (even when she is shielded) when she is summoning wave (until it actually appears) or explosions.
- Not sure about maximum time one should allocate for this fight, but it's not that hard to avoid damage.
[HYBRID BEING] 8 Feb, 2018 @ 3:57pm 
Damn, at 19 min i only managed to reach Saggitarius (once out of several times - most of the time it took me ~21 min). Guess you've been quite lucky with Pisces and Libra.

So, here's something to add about powered-up bosses:

Leo
- When spawning you can shot him with Chamali's Arrow before being pushed away - not much, but gives you a few seconds.
- For some reason Combo 5 (multiple homing shots that deal 3 damage each) doesn't home in on him for me, so i found fastest to be Combo 4 + Chamali's Arrow.
- When he's at one third of his HP it's best to approach him on the the left side of the left wall so as to avoid being suddenly pushed into spikes (still possible, take caution).
- Best complete below 3 minutes, and without losing more than 10HP (since it's the first boss, it's much easier to restart than try to make up leeway on latter bosses).
CSMES 3 Feb, 2018 @ 1:06am 
Goshhhh! Cleared! At 10HP! (< 19 min)
My finishing blow was a lightning strike while he's charging from very far away, so satisfying.

Apparently these bosses have their own name.
In order:
Regulus, Shaula, Alrescha (Big), Samakah (small), Chamali, Spica, and Alnasl
You have seen these names before, I'm sure.

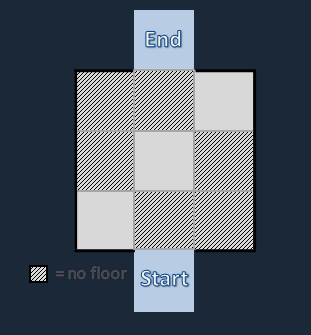
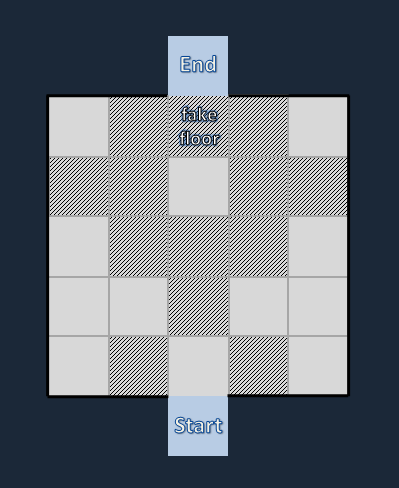
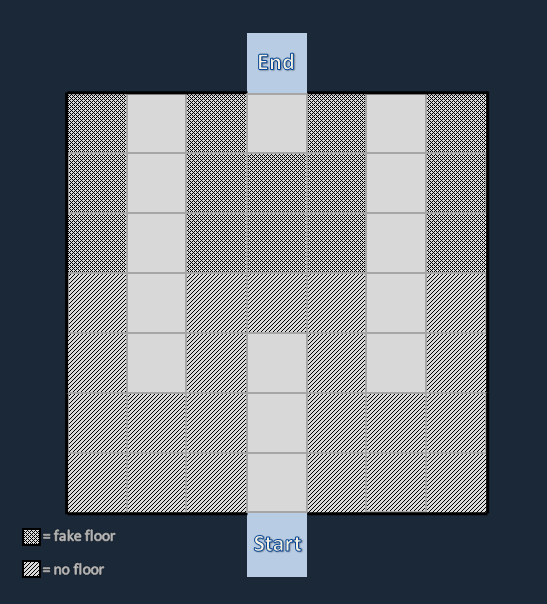
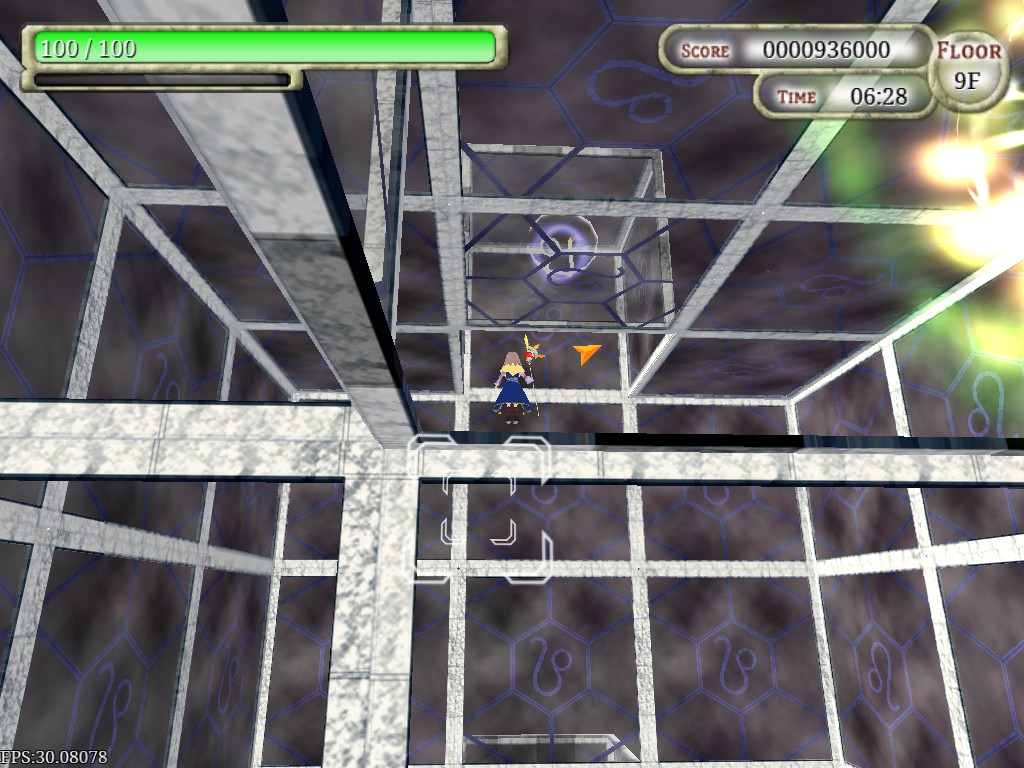
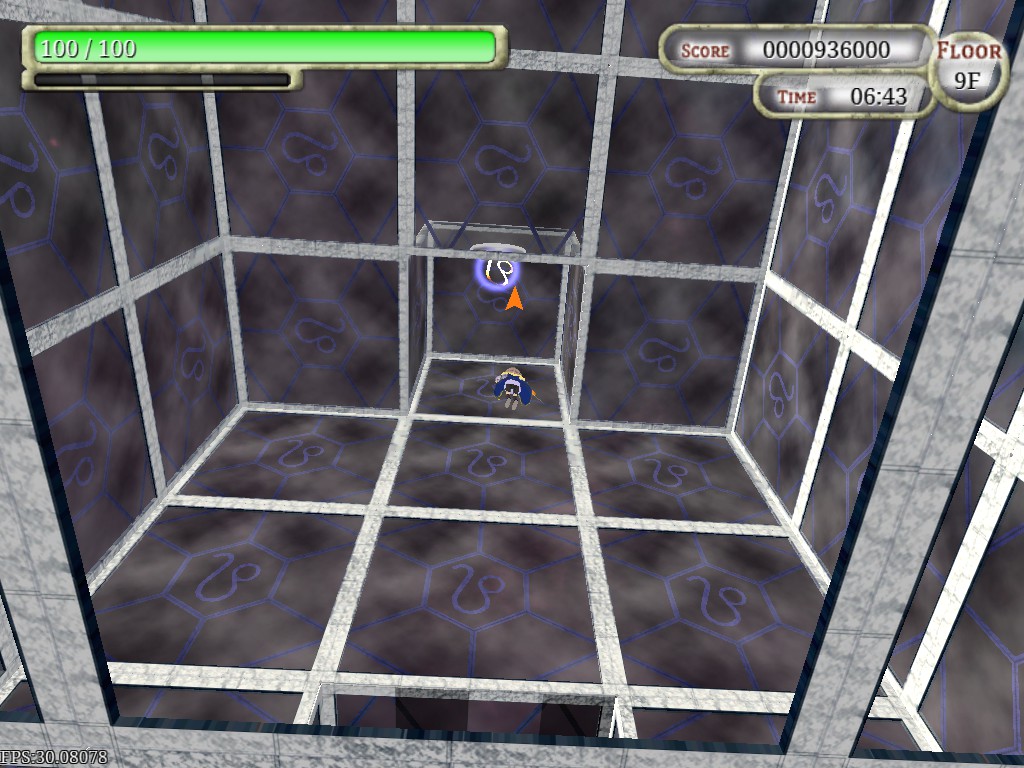
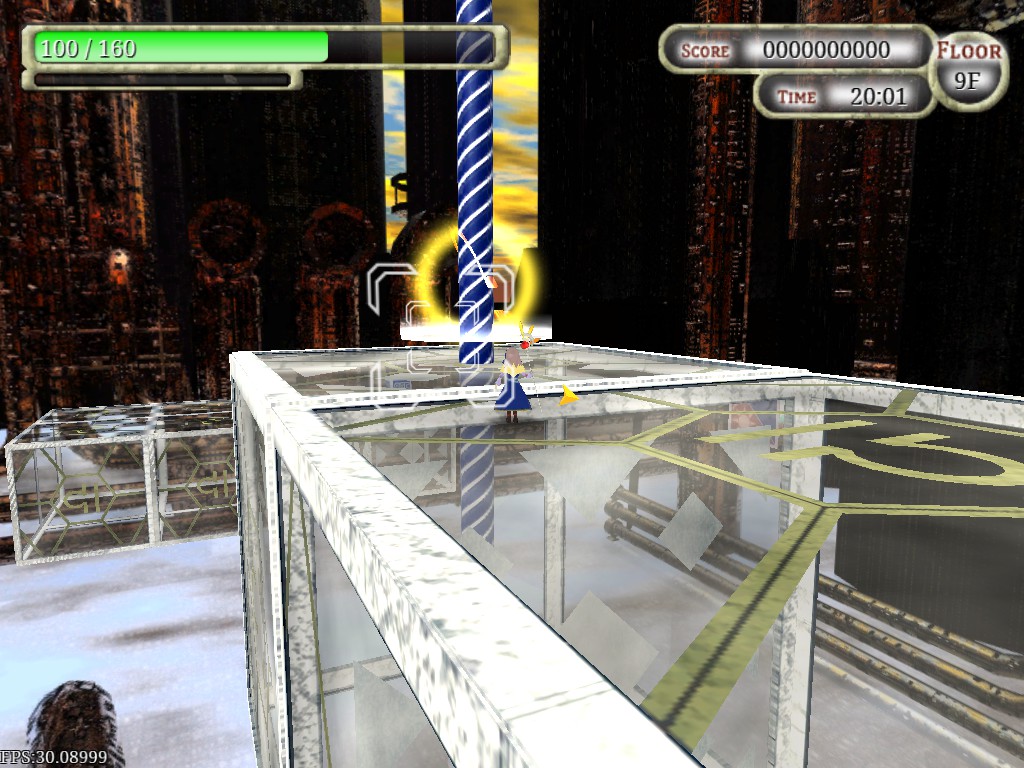
Alnasl has 3500 HP and you may need more than 5 min to clear. His chance to destroy all panels on a side just by arrows is high.

The only real source of damage this stage is spikes but that alone can possibly amount to 100++. Finding somewhere to jump to first before trying to deal any damage, you really can't be in rush.

Samakah "began to realize that his mother was stronger without him around" lol
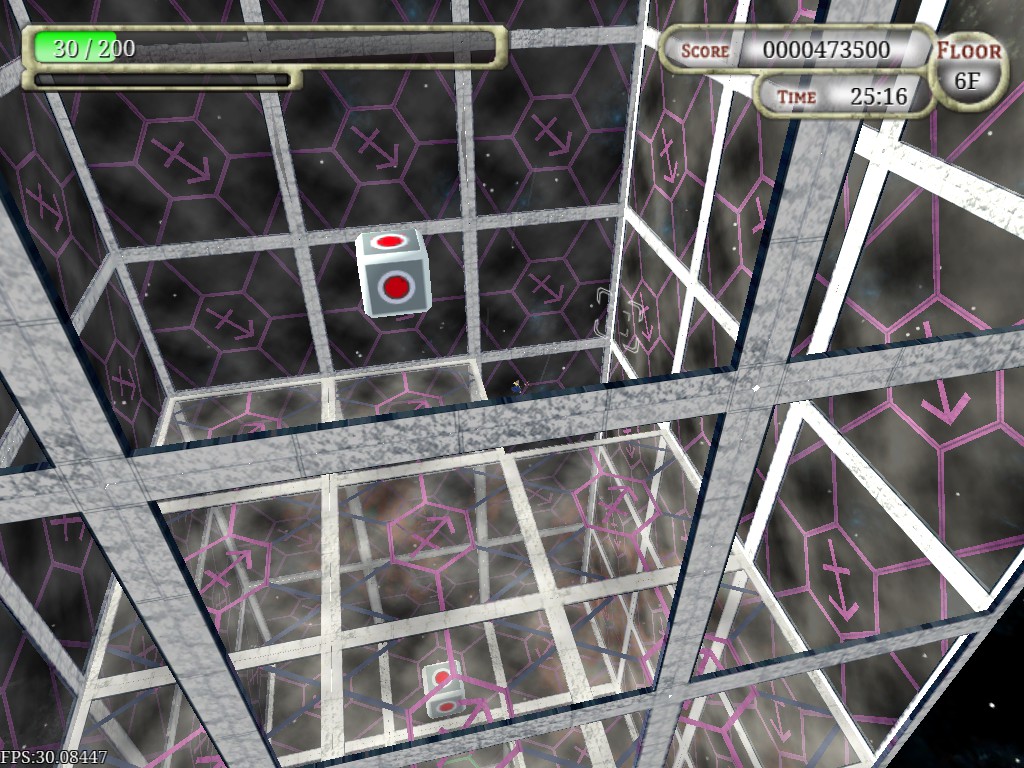
and Alnasl is revealed to be bad at Rubik's Cube.


With all that done, I'm sorry I may have been commenting too much here. That's just me being really into it, got excited, and can't help but type something here.
Hope you're updating this soon, Anzuko.
CSMES 30 Jan, 2018 @ 9:03am 
Interestingly Virgo proved to be more dangerous than I had thought.
My main problem is now Pisces and Virgo.
Now I dare say that getting S on this stage is not hard at all. If you can clear it that is.

I have reached Sagittarius quite often but never with more than 20 HP.
I know I could beat him with that much but I almost always forget how his floor slamming attack damage could reach other sides of the cube and lose from that...

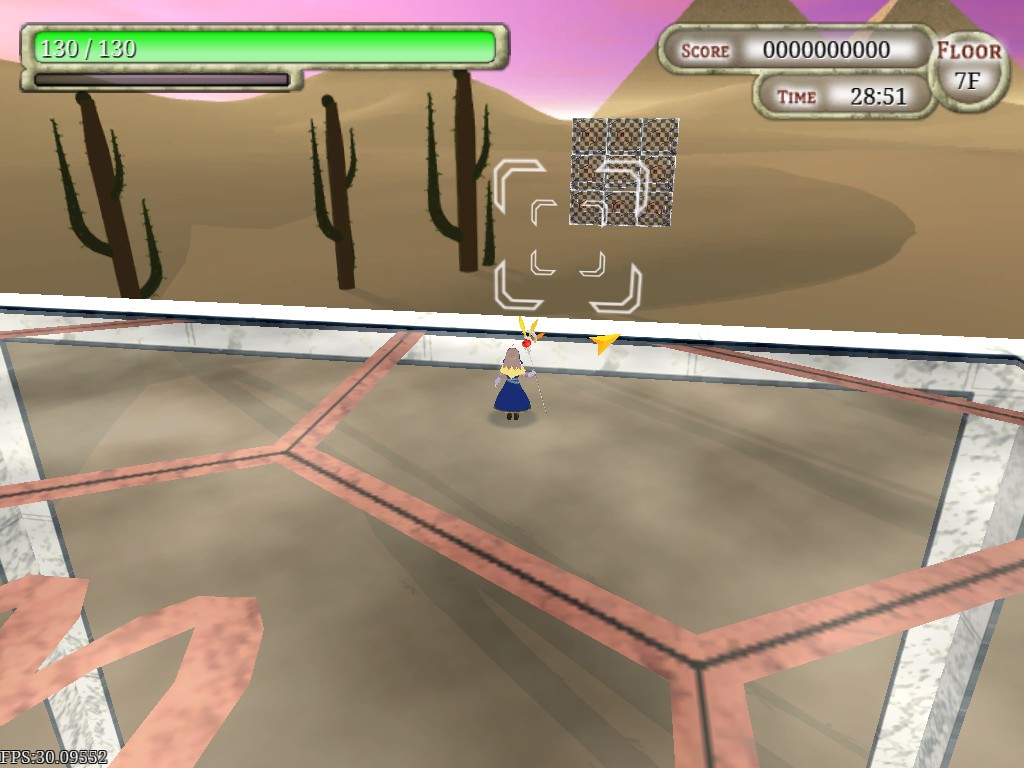
I think I might have found a way to make lining up Pisces easier but I'm not sure yet.
Somehow if I stayed near the big fish and face it, the small one would come to my front.

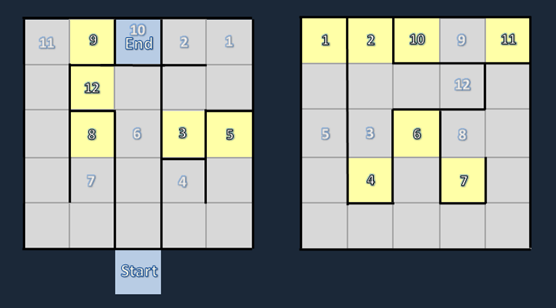
And Libra, I'm sure you've figured this out now but the correct, um, cube is the matching in both 'color' and 'axis'. If lucky enough, 2 stuns would be enough, but it normally takes 3 or 4.
[HYBRID BEING] 29 Jan, 2018 @ 1:28pm 
Oh, yeah, reached Libra (twice with 20 HP). Baby Pisces gets boost to accuracy and Mother Pisces throws baloonfishes around while evading stuns. And Libra keeps teleporting around before i figure out which block to push (there are like three of the same color, wtf?!). sweating_towel_guy.png
At least i S'd Nonstop Comet, heh.
[HYBRID BEING] 29 Jan, 2018 @ 10:16am 
Didn't find original Pisces to be that dangerous, tbh (just hard up to line up for a shot at times). How's hard version in that regard?