
Install Steam
login
|
language
简体中文 (Simplified Chinese)
繁體中文 (Traditional Chinese)
日本語 (Japanese)
한국어 (Korean)
ไทย (Thai)
Български (Bulgarian)
Čeština (Czech)
Dansk (Danish)
Deutsch (German)
Español - España (Spanish - Spain)
Español - Latinoamérica (Spanish - Latin America)
Ελληνικά (Greek)
Français (French)
Italiano (Italian)
Bahasa Indonesia (Indonesian)
Magyar (Hungarian)
Nederlands (Dutch)
Norsk (Norwegian)
Polski (Polish)
Português (Portuguese - Portugal)
Português - Brasil (Portuguese - Brazil)
Română (Romanian)
Русский (Russian)
Suomi (Finnish)
Svenska (Swedish)
Türkçe (Turkish)
Tiếng Việt (Vietnamese)
Українська (Ukrainian)
Report a translation problem


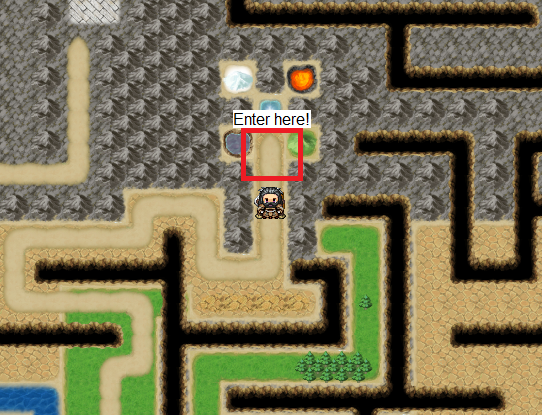


the direction of to east, then to south, and then west is obviously clockwise, not the one i wrote while thinking about the corret one
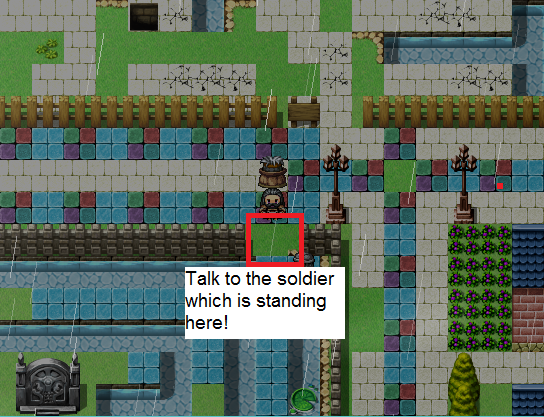
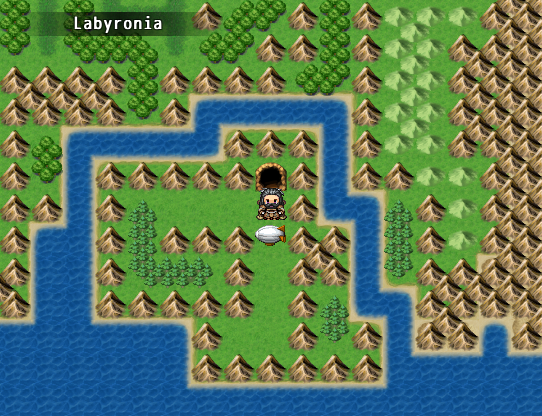
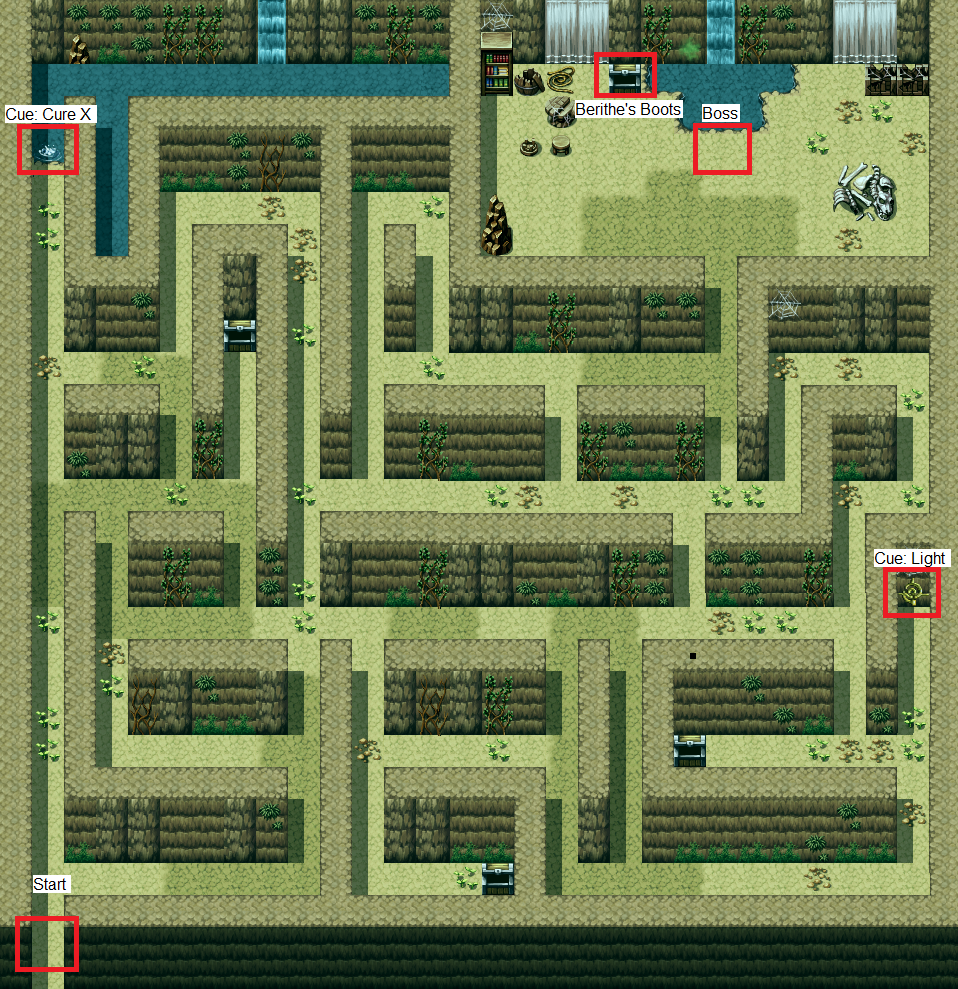
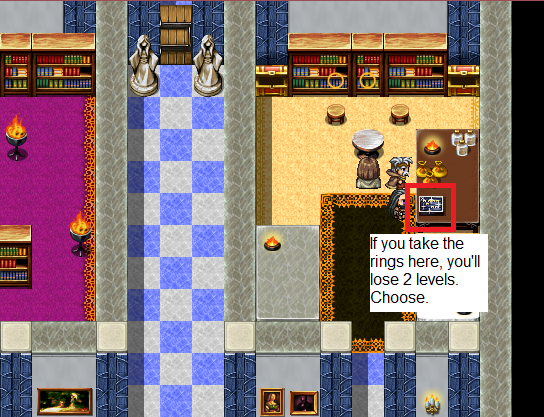
then i progressed further, according to guide, killed the first guardian, went back to kill the second, left to fight the cue robot, got the replica air crystal and equipped it on arres, went back to mysteria tower, once again fought all the baddies in the first secret room (where on of the guardians is) and on the same 4-party in the bottom right, got message "obtained Staff of Areatha" after killing them - this is a very powerful staff (just by stats)
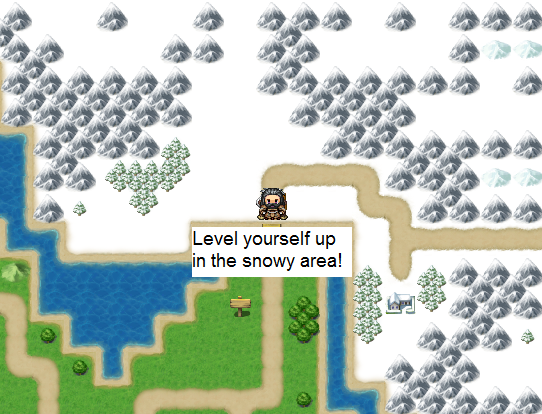
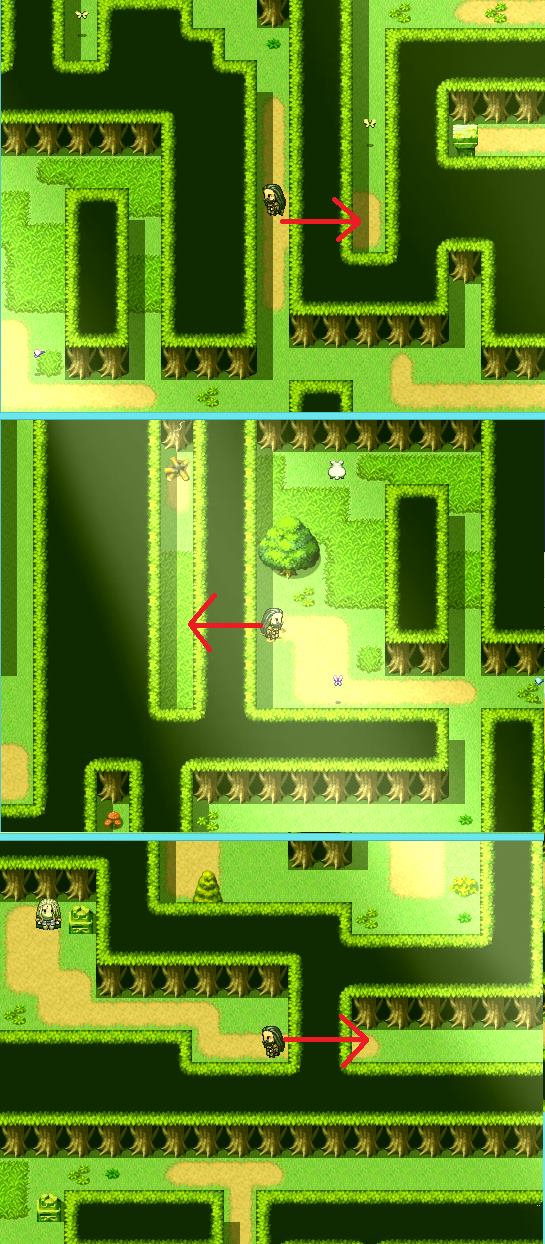
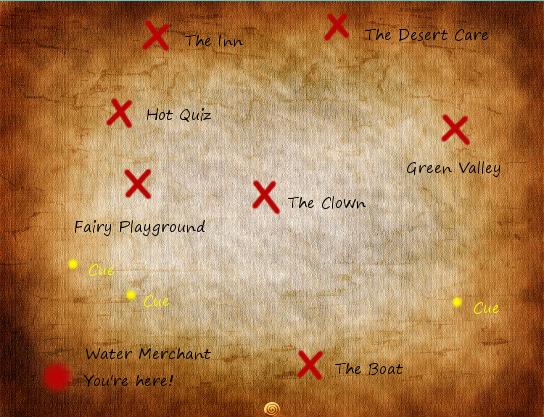
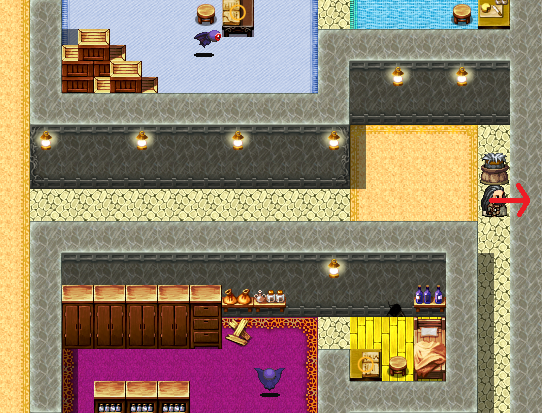
While collecting all the cues, you can also get free 1000 coins from an npc in the Desert of Illusions. The closest marking point to find him is: from the Green Valley entrance, go east and then south (counterclockwise) across the mountain, first npc you'll meet will ask have you seen hairy apes with giraff necks - then go southwest from this npc and you'll find the said 1000 coins giving npc. I can't say if this gift was always there or only appeared after some progress in the story
from the entrance to the green area (where the scorpion is to find), go across this cliff clockwise for like 180 degrees, comtinue a tiny bit to the right until, almost immediately, the cliff goes furthe south instead of west - there you'll meat a wanderer talking smth about hairy ape with giraff neck - then go a little bit southwest from them and you'll find the said 1000 coins giving npc