Tempest

Tempest

159 ratings
Tempest, The Captain's Manual v0.861
By Frontoffme
An easy to read, in depth manual/handbook styled guide for the game Tempest. Made from over 100 hours of gameplay experience and helpful developer feedback.

Good Hunting, Good Luck, And Watch Out For The Kraken!
   
Award
Favorite
Favorited
Unfavorite
v0.861 WILL UPDATE FOR v0.862 AFTER PLAYTESTING
This is an early release cause I noticed alot of people asking for help in the discussions.
WELCOME TO TEMPEST!
WELCOME TO TEMPEST!


Tempest is an open-ended pirate fighting game with ship battles with a fantasy twist. It contains full ship customization and ship-to-ship battles. It continues the line of great pirate games with its own take on the world and its inhabitants. This guide will help you get started in the game. I hope you enjoy playing it as much as I do.

Below you will find an easy to read and hopefully understand manual on how to play the game what you need to know to have fun. Read this as you play the game and by the end you will understand how the game works. There is no information on how to progress through quests as this is not a walkthrough. Lets get started.

ANYTHING YOU READ BELOW IS SUBJECT TO CHANGE BY THE OWNERS AND CREATORS OF THE GAME. I AM NOT ONE OF THOSE PEOPLE.

This guide may not be 100% correct, but I strived to stay as close to the facts as possible

There will never be any formal information concerning quests or how to do them. This is not a *walkthrough*. I believe you should figure this part of the game out by yourself.

You can expand any of the images below by clicking on them. If you are having trouble expanding the images, move your cursor to the top of the image.
Chapter 1: Game Settings, Captain's Log, And Ship Overview
Game Settings


  • This is the GAME SETTINGS page. You get here by clicking Settings on the launch screen or by pressing ESC in game and selecting Settings
  • Map Time Speed controls how fast you progress through the overworld and the speed time passes by. Subsequently it controls the speed you play the entirety of the game at. Because of this, I have mine turned down. I recommend sliding it to before the M in MEDIUM above the bar. This sets the game to a more appropriate pace.

The Captain's Log


  • This is the Captain's Log. You get here by clicking the icon with the image of a book in the lower left hand side of the Overworld Screen
  • The Captain's Log contains various information about your progess through the game
  • It contains pages on Current Tasks, Notes About Legends, Property being stored in ships and settlements, Factions Attitude Towards You and Personal Reputations, and Game Progress


Ship Overview


  • This is the Ship Overview. You get here by clicking the icon with the image of your ship in the lower left hand side of the Overworld Screen
  • The Ship Overview contains various information about your ship
  • It contains menus on Ship Stats, Ship Customization, Artifact Equipment, Crew Managment, Ship Equipment, and Ship Holdings
Chapter 2: Navigating The Overworld And Controlling Your Ship In Battle
THE OVERWORLD
By holding down the RIGHTMOUSEBUTTON and dragging, you can draw in the route to where you want to go.


IN BATTLE CONTROLS
You can use the mouse to select the type of cannonballs you want to use, but it's best to use keybindings for everything else

Below are all the controls you will need to know
  • W, S = Cycle Speed-Full Stop, 50%, 100%
  • A, D = Turn Left and Turn Right
  • Q, E = Cycle Cannon Accuracy And Width
  • TAB = Cycle Cannonball Type
  • CTRL = Toggle Telescope
  • 1,2,3,4 = Activate Artifact
  • SPACE = Fire Cannons
  • RMB = Select, Target Ship, Place Marker
  • LMB = Camera Control
  • MOUSE WHEEL = Camera Zoom

Place Markers And Camera Control
  • Left clicking on the open ocean will place a marker that your ship will sail towards
  • Holding the RIGHT MOUSE BUTTON will allow you to rotate your camera
Chapter 3: Before Doing Anything, Do This.
Do these simple tasks without worrying about what they mean. These are just things you have to do to play the game. While doing this ignore all battles with the ESC key and escape if you get DEEPWATER


  • Sail over to this Trade Coalition settlement


  • Right Click on the cities icon to enter it.


  • Click on the icon with the barrels, crates and green -10% to enter the store
  • Click on the image of the telescope on the bottom floor and purchase it


  • Sail up towards the Dominion settlement and enter it
  • Enter the store and purchase the Accurate Pistols on the Top Floor

    After Doing this you can sail back to where you started and begin the game
Chapter 4: Managing Your Crew And Understanding Positions, Team Distribution, And Combat Efficiency
"Garr! What does the symbol with the curved part mean?"


  • This is the Crew Managing screen of the game, You get to it by selecting the Icon with the people on it while at port. Or while out at sea, by selecting the image of your ship in the lower lefthand side of the screen.

    Positions


  • Through questing you receive different types of permanent crew members with their own unique bonuses and identites.
  • You place them by selecting the empty circles in the postion section and then selecting and using the crew member.
  • Remember to place all of your crew members.

    Team Distribution and Healing

  • Each Ship can hold a certain amount of crewmates.
  • The ship you start out with can hold 16.
  • If your crewmates become injured during battle, you can heal them by dragging them out of the bottom of the shipback up to where you want them to be for a cost of *medicines*
  • You will have to keep a small amount of medicines on you and it is good to store a little away
  • If they die in battle you have to go to port and purchase them from the tavern on the right side of the screen.
  • Different settlements have different ranks of crewmates to purchase.

  • Each different image of a crewmate is a different rank. Going from 1-5, Greenhand, Sailor Boy, Sailor, Salted Seaman, and Pirate.
  • Each rank gives its own bonus to efficiency percent and in-battle health for their according positions of Sails, Boarding Crew, and Hull/Cannons
  • You level your crewmates by earning XP in battle and spending in by dragging the crewmate you wish to train into the circle that says *TRAIN*. Dragging more will level more crewmates at a time
  • Through a properly leveled and distributed crew, you can achieve a ships thats 100% or more efficient in all areas
  • The members on the sails control how fast they open and close. Allowing you to reach top speed slower or faster
  • The members on the main deck are part of the Boarding Crew. They control how much damage you do each time you fire in Boarding Battles, the amount of health your boarding crew has, and the amount of crew power you have.
  • Pirate ranked crew mates have 100 crew strength, so if you have 5 pirates on your Boarding Crew, You will have a 1150 health and 500 Crew Strength in battle.
  • It takes a Boarding Crew with a Strong Crew strength and Damage per shot to win Boarding Battles with ships that are much stronger than yours

    Combat Efficiency


  • The big percentile number is an overview of the 2 numbers below. It represents how fast things get done. Whether it's how fast your sails open, how strong you are during Boarding Battles, or how long it takes your cannons to switch ammo, reload, or reach top accuracy
  • The second set of numbers are your current crew efficiency and the required amount of efficiency you need to be use the items without drastic penalties
  • Above you can see my sails are at 120% Efficiency, 183/60, or 183 crew efficiency out of 60 required
  • My Boarding Crew has NO crewmates distributed, but still has 7% efficiency, 5/70. This is because of the permanent bonus that the positioned crew members give.
  • My Cannons/Hull has NO crewmates distributed or permanent crew members positioned. While like this my cannons will NOT be able to load or fire, and I will have very low Hull Health while in battle


    Higher Boarding Crew Strength And Health
  • You should only distribute Pirate ranked crewmates on the Boarding Crew for the most part. They provide 100 crew strength. A higher crew strength is more important for Boarding Crew, and you can still manage you get to 100% efficiency in the other areas with pirates
  • This technique is only necessary when you don't have a full crew of Salted Seaman and Pirates

Chapter 5: Managing Your Artifacts Equipment, Ship Equipment, Ships Hold, And Cannonball Types
Artifact Equipment

  • Artifacts are powerful and versatile items that your ship can equip
  • They are one of the games key components and are part of what makes this game unique
  • You get to the Artifacts Equipment page by clicking the center icon with the large blue shard in it on the Ship Overview page


  • There are different types and strengths of Artifacts
  • Artifacts consume Energy. Each ship has a different amount of energy reserves. The ship you start out with has 160
  • You get full Energy at the beginning of every battle
  • This is a Weak Stone of Storm, I have 2 equipped. It does damage to enemy sails, crew, and hull accordingly
  • These particular Artifacts can only be used if it is raining during a battle
  • Artifacts have a max range and cooldowns


Ship Equipment


  • This is the Ship Equipment screen. You get to it by clicking the icon with the image of tools in the Ship Overview screen
  • It contains information about your sail and hull strength, the efficiency required to use your sails, cannons and pistols, telescope recognition speed, and pistol and cannon stats
  • It is where you equip new sails, cannons, hull pieces, telescopes, and guns
  • Different cannons fire different amounts of cannonballs and have different reload speeds, firing ranges, widths and accuracy, and required efficiency


  • There currently is only one pistol in the game and 1 pistol expansion module that it available later in the game


Expansion Modules


  • Expansion modules are equipment attachments for your Sails, Cannons, Hull, Telescope, and Pistols that give different kinds of bonuses
  • You unlock the slot by clicking the smaller icons with the locks in them underneath your equipment
  • You purchase modules in settlements and loot them from ships
  • I recommend using the following modules on your cannons until you loot better ones


The Ships Hold


  • The Ships Hold is where all your items go. It stores your Cannonballs, any new equipment or various treasures you acquire, and the medicines you use to heal your crewmates


Cannonball Types


  • There are several different tiers and types of cannonballs
  • Cannonballs revolve around doing different amount of damage to enemy sails, crew, hull
  • Some cannonballs special effects on the enemy ship
  • Different cannonballs have different ranges
  • More powerful cannonballs cost more gold
  • It's important to have different strengths and types of cannonballs in your hold
    Chapter 6: Ship Stats And Other Purchasable Ships
    Ship Stats


    • This is the Ships Stats page. You get here by clicking the icon of your ship in the Ship Overview screen
    • Different ships have different Movement Speed, Maneuverability, Sail Opening Speed, and Hold Volume. As well as different Sail, Crew, and Hull Strength, Max Crewmates On Board, Magical Energy Reserves, Chance To be Hit, and Collapsibility.


    Other Purchaseable Ships
    The Sparkling
    The Night Kiss
    The Fire Dawn


    • You purchase ships by clicking on the ship in a bottle on the bottom floor of shops in settlements
    • New ships must be refurbished with Sails, Cannons, and a Hull at port before they can leave
    Chapter 7: Battling Enemy Ships With Cannons, Artifacts, Boarding Crews, And Ramming.
    The Basics


    • Every time you enter battle it affects your faction relationship
    • Battles consists of you and a number of teamates fighting against a number of enemies
    • Each team consists of different types and ranks of ships
    • When you first enter battle you want to get a good scope of your surroundings and where the enemies are
    • In the fight above there is 2 enemy ships and a tower
    • If you don't make use of all the way of sinking enemy ships, you will spend all your gold on cannonballs, not be able to afford upgrades, and eventually be caught off guard and sank


    Using The Telescope


    • If you're safe, you immediately want to get out your telescope and reveal the enemy team
    • This is a Teir 1 Dominion Frigate, a powerful enemy ship. It has an average crew strength of 900 in Sails, Boarding Crew, and Cannons/Hull. Meaning, that he has the rough equivalent of 9 Pirate ranked crew members distributed in each section.
    • My ship has only 4 Pirates in Boarding Crew, so Boarding would be an immediate defeat.
    • The Enemy Ship has 2 hull armor. This means he is going to take reduced hull damage.
    • You can win against stronger enemy crews if you weaken them with Cannons and Artifacts


    Targeting Enemy Ships


    • Clicking on the red health bars beneath an enemy ship will target them
    • Targeting an ememy focus your camera on the enemy and locks it in
    • Targeted enemies cone of fire is revealed in a red hue
    • Your cannons will fire on the ship you have targeted if there are multiple enemies in the cone of fire
    • Your artifacts will fire on the enemy you're targeting. If you don't target, artifacts will fire on the nearest enemy ship


    Cannons


    • Cannons are your primary way of damaging the enemy ships. You can outrange enemy ships and disable or sink them from escaping with as little as 30 shots.
    • Each cannonball fire does its own amount of damage
    • I've highlighted a few things in the picture above to help explain the next few things
    • Depending on where enemy ships are in your cone of fire you will receive a -15% or +15 change in the accuracy of your shot
    • The spot on enemy ships where they enter different zones is around the middle of the their ship, I've highlighted this in orange.
    • Unless you are in the middle of a Boarding Battle, you should mostly fire in the most accurate mode. With the starting cannons, the most accurate setting starts out at around 26% accuracy and rises to 30% in no time at all with a cap of 83%. The least accurate setting starts out around 11% and rises slowly to a maximum of 33%. Adding or subtracting the bonuses from which zone they are in and revealing them with the telescope; you can acheive an instant 45-60% accuracy shot. This allows you to fire on an enemy instantly and finish them off without waiting for your cone of fire to fill like in the picture above.


    • This strategy is reinforced even more while using Bomb Cannonballs


    Fighting with artifacts


    • Artifacts allow you to damage the enemies crew and ship in a multitude of ways
    • The Weak Flame Thrower Unit does a massive amount of damage to the enemies boarding crew and sets the enemy hull and sails ablaze for a short period time. It enable you to successfully board enemy ships that are much stronger than yours
    • The Mortar allows you to damage enemies Hull, sails, and crew from afar. This comes in handy when enemies are out of the range or outside the Cone of Fire and are nearing escape
    • Artifacts are very important for battle because they allow you to damage the enemy ship and crew without firing pricy cannonballs.


    Boarding The Enemy Ship


    • You board enemy ships by clicking on the Lay Aboard button that appears when you are within range
    • With a strong crew, boarding enemy ships is an efficient way of sinking weak enemy ships or taking stronger ones out of the battle


    • You damage enemy crew by repeatedly clicking the icon with your pistols that appears on the screen. Each click fires your pistol and you must wait a short time for them to reload
    • The goal is to bring them to 0 health as fast as you can and continue on with the battle.
    • The first ship to reach 0 crew health is sunk instantly (death). You must be careful boarding ships stronger than yours, but it is possible. You need strong pistols and correct artifacts.
    • Sinking enemy ships from boarding has a higher chance to find loot
    • You can still fire your Cannons and Artifacts. With proper set up and targeting, you can fight several ships at once


    Ramming Enemy Ships


    • Ramming your ship into enemies will damage their hull, and do minor damage to yours
    • Ramming is a good way to finish weak enemys off quickly
    • You can ram the front of an enemy ship and change their trajectory, sending them crashing towards an island to get stuck or heading straight towards a floating bomb for massive damage.
    • Be careful ramming as enemy can board you if you are near enough. This is incredibly dangerous if you have a Boarding Crew with low health
    Chapter 8: Looting, Gold Caches, And Floating Bombs
    Loot From Sunken Ships


    • After the battle is over, you can sail to any loot that sunken ships may have dropped and pick it up
    • Clicking the Speed Up icon will increase the flow of time by 170%, allowing you to sail from spot quickly
    • Clicking the Pick Up Loot icon will automatically loot all the loot from sunken ships and the floating gold around the map. It is important to note that this only picks up 25% of the combined gold and dropped items. Doing this allows valuable items to not be picked up and missed entirely.


    Floating Gold And Bombs


    • Hidden around the ocean are floating caches of gold with flashing lights above them. They can contain anywheres from 50 to 300 gold and are one of the primary ways of making gold. There can be 0 or as many as 5 floating caches in a single battle.
    • There floating bombs that explode for massive hull damage if you get near. It is wise to note where these are.
    • You can ram enemy ships into floating bombs for massive damage.
    Chapter 9: After The Battle, Ship Repair, Crew Injury And Casualties
    After The Battle

    • After a battle a window opens showing an overview of the battle. It consists of how many allied and enemy ships there were and how many were destroyed, how many crewmate injury or casualties there were, and how many cannonballs were fired and XP was gained.
    • Losing a battle makes you lose large portions of your gold, anything in the hold of your ship, and sometimes even your ships precious artifacts. It also heavily damages the Sails and Hull of your ship and you must go to port for Repair.


    Ship Repair And Crew Injuries and Casualties


    • You can repair your ship at port for a nominal fee.
    • You must be at a TEIR 1 to repair to 100%. Villages will repair your ship to an operable state
    • To heal injured crewmates simply drag them from the hull of the ship to where you want them placed. This costs different of MEDICINES depends on the rank of crewmate
    • To hire a new batch of Greenhand crewmates click the Hire Sailors button inside the tavern.
    • Alternatively, you can select the rank of crewmate you want to purchase from the tavern by dragging them over to your ship. Different taverns in settlements offer different ranks of crewmates.
    • You can also hire and store crewmates in the top of the tavern for later use.

    Chapter 10: Factions Attitude Towards You And Personal Reputations
    Faction's Attitude


    • Every battle raises and lowers the attitude different factions have towards you.
    • Different stages of attitude affect the way factions will treat you.
    • -500 (outcast) is the point where factions will no longer allow you to port at their settlements.


    Dev quotes
    Joruba: "at this moment only negative relations have any impact on gameplay - you get banned to visit ports and forts appear on the global map, in future it will affect trade, prices, quests etc"

    Joruba: "you have to really piss them of intentionally"


    • You will not be able to get new information and progress through quests if you can not port at certain factions.


      Personal Reputations


      • Through battle, you will gain reputations based on different methods of fighting that give you bonuses in battle highlighted in RED.
      • Each Reputation will rise and fall every battle depending on how much you correspond with the description.
      • It is possible to maintain multiple reputations.


    Chapter 11: Trading, Storing Items, And How To Make Gold
    Trading


    • Selling treasures and items is your main method of gaining gold.
    • Each sellable item/treasure has its own Base Value.
    • The price items/treasures sell for is based on the attitude of the faction that controls the settlement.

    Dev quotes
    Joruba: "at this moment, only negative relations have any impact on gameplay - you get banned to visit ports and forts appear on the global map, in future it will affect trade, prices, quests etc"
    Chapter 12: Completing Current Tasks And Notes About Legends
    /notes/
    You no longer have quest notifications past a point. After that just sail from settlement to settlement looking for information. The quests/tasks are based off game progession and time passing. You'll get them eventually.


    There will never be any formal information concerning quests or how to do them. This is not a *walkthrough*. I believe you should figure this part of the game out by yourself.
    Chapter 13: Multiplayer Battles And Co-op
    Explaining multiplayer:

    Every time you engage into a fight on the global map there is a chance to meet a living player there as an ally or as a foe.

    For this to happen, the following conditions are required:

    1. The players are close to each other on the Global Map
    2. The players engage into the same type of fight (Pirates vs Dominion for example)
    PVP FIGHT CLUB LOCATION PROPOSAL
    Around the map of the game there are 7 images of ships drawn down. Above Kingdom's island to the east of the Grey Land there is one of those images. I propose that if you are actively trying to engage in PVP, you place you ship DIRECTLY ON the image of that ship, drop anchor by clicking the icon with your ships wheel, and choosing sides between Kingdom and Dominion battles while clicking leave on all others.


    There is also a Discussion for this idea

    http://gtm.steamproxy.vip/app/418180/discussions/0/458604254424964409/
    WIND
    37 Comments
    !Supreme Grand Wizard Yoodiv 15 Jan, 2024 @ 11:58pm 
    Wow, the game has been updated a lot since this guide...it's not so useful as-is.
    Rockets 22 Jun, 2021 @ 11:19am 
    I like that you are very honest. Go here and here, buy these two items, and then start the game.
    USS Midway veteran 29 May, 2021 @ 5:36pm 
    Thanks for this. I was almost ready to give up the game and give it a very bad review until I saw this.
    Kaprrice 6 May, 2021 @ 10:07am 
    je réouvre le jeu après quelques mois, peut être années d'interruption, et hooo surprise, mon bateau vole ... il fait des bonds, ....
    Trustfear 28 Apr, 2021 @ 1:52pm 
    Hello,by holding down the RIGHTMOUSEBUTTON and dragging doesn't do anything!
    Vysebane 13 Sep, 2018 @ 8:55pm 
    Chapter 2: Navigating The Overworld

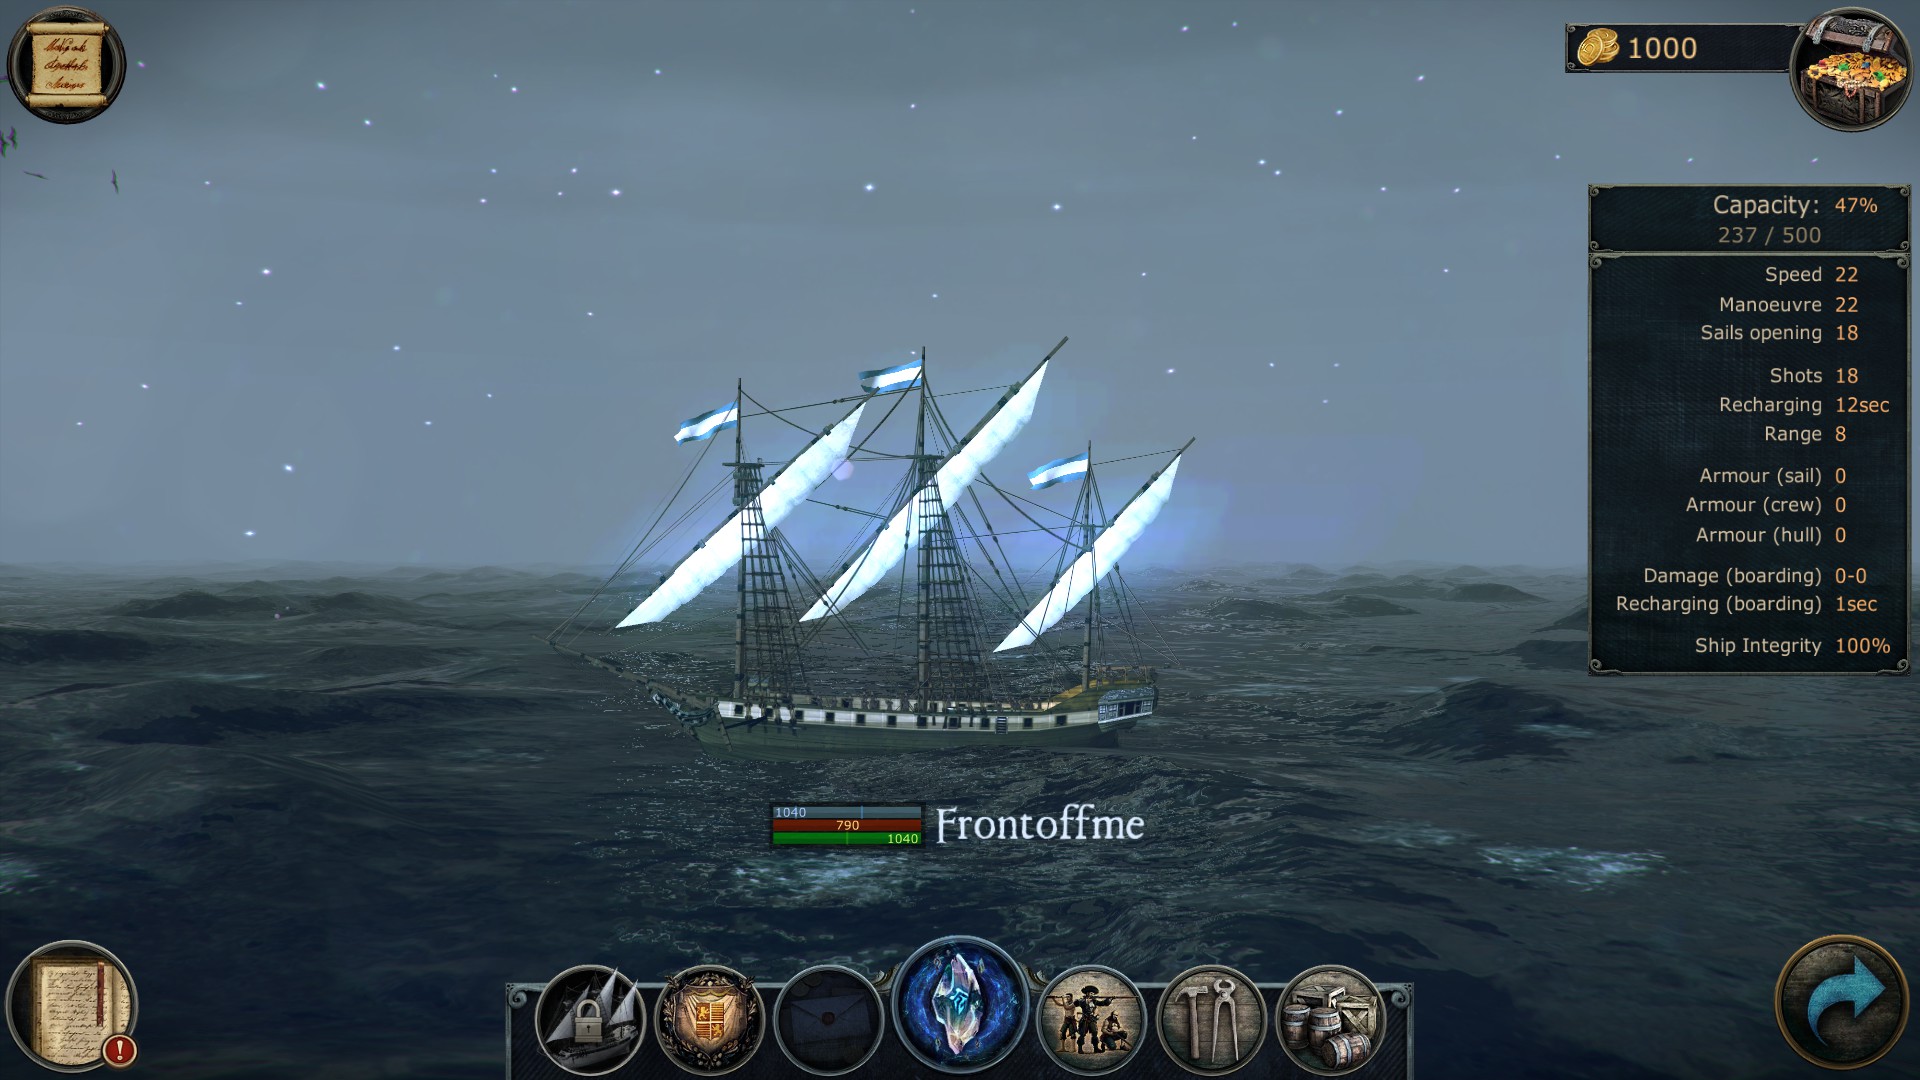
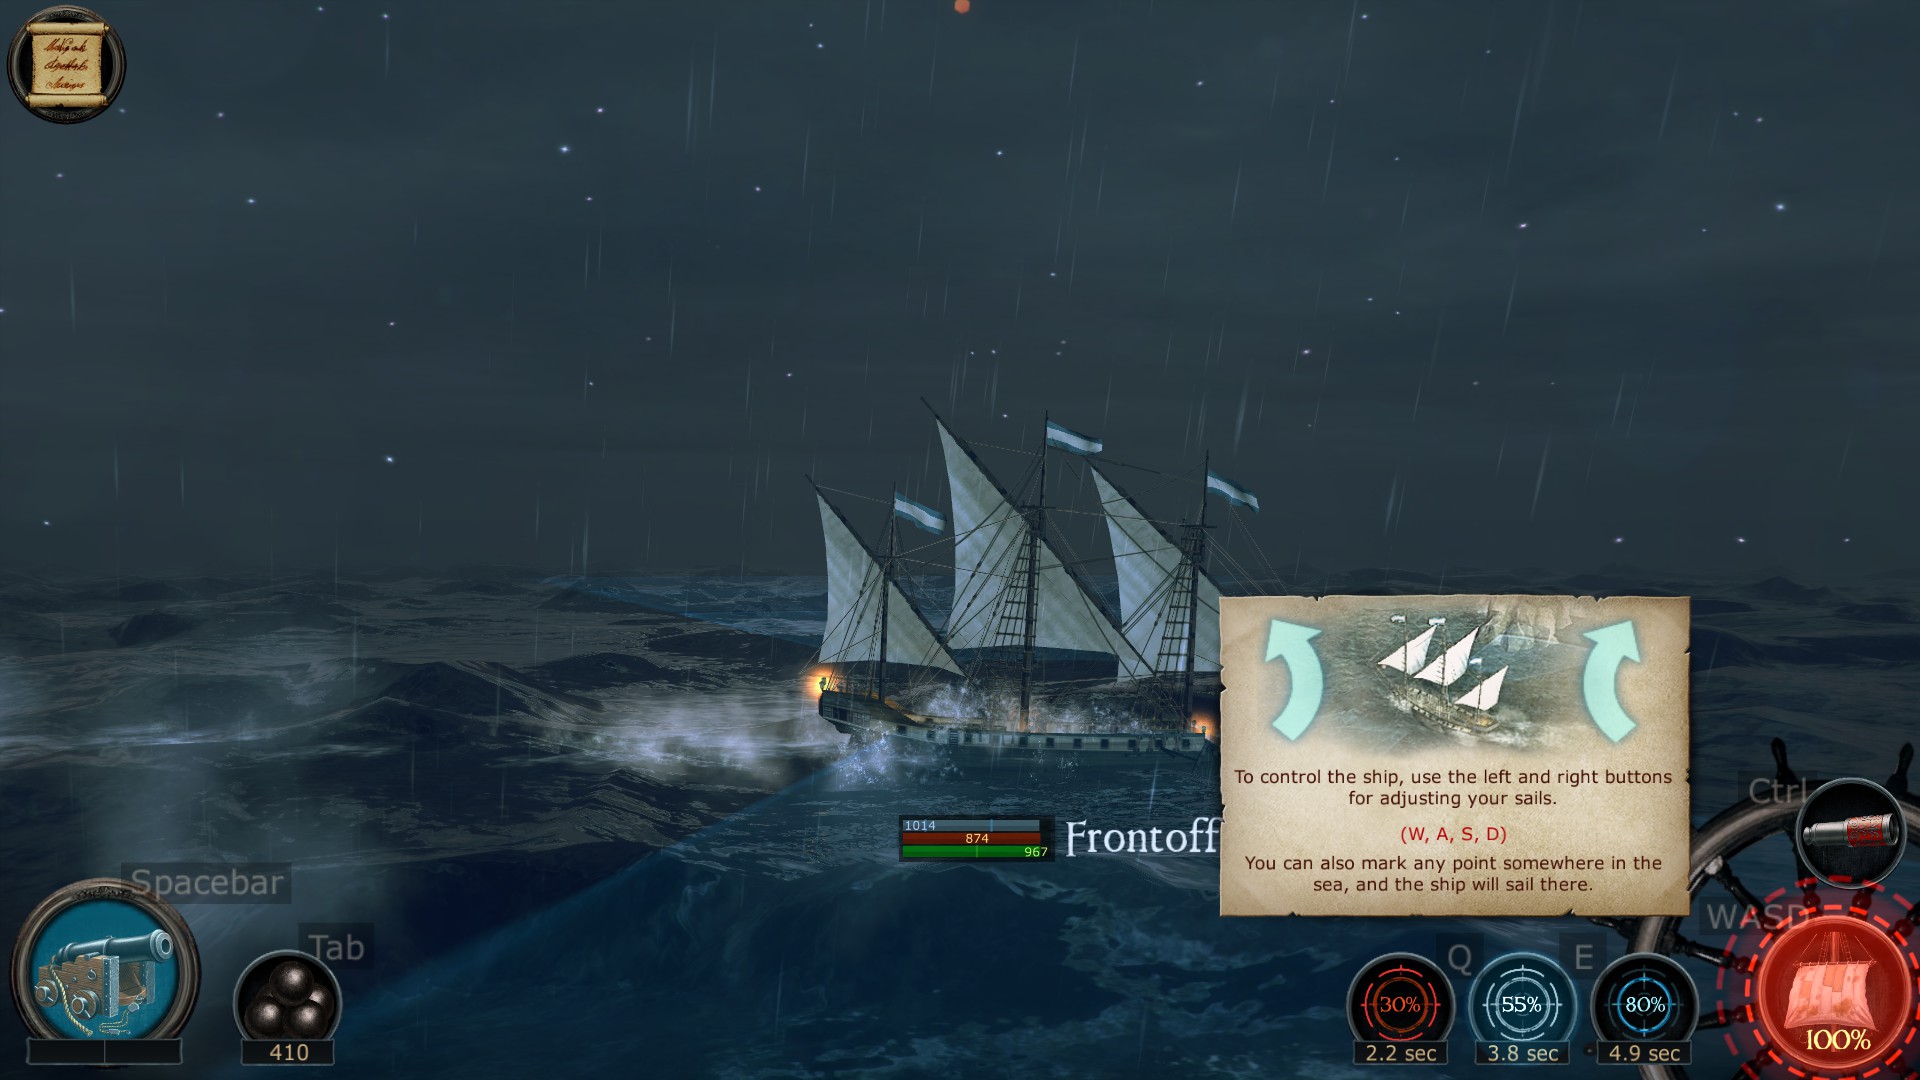
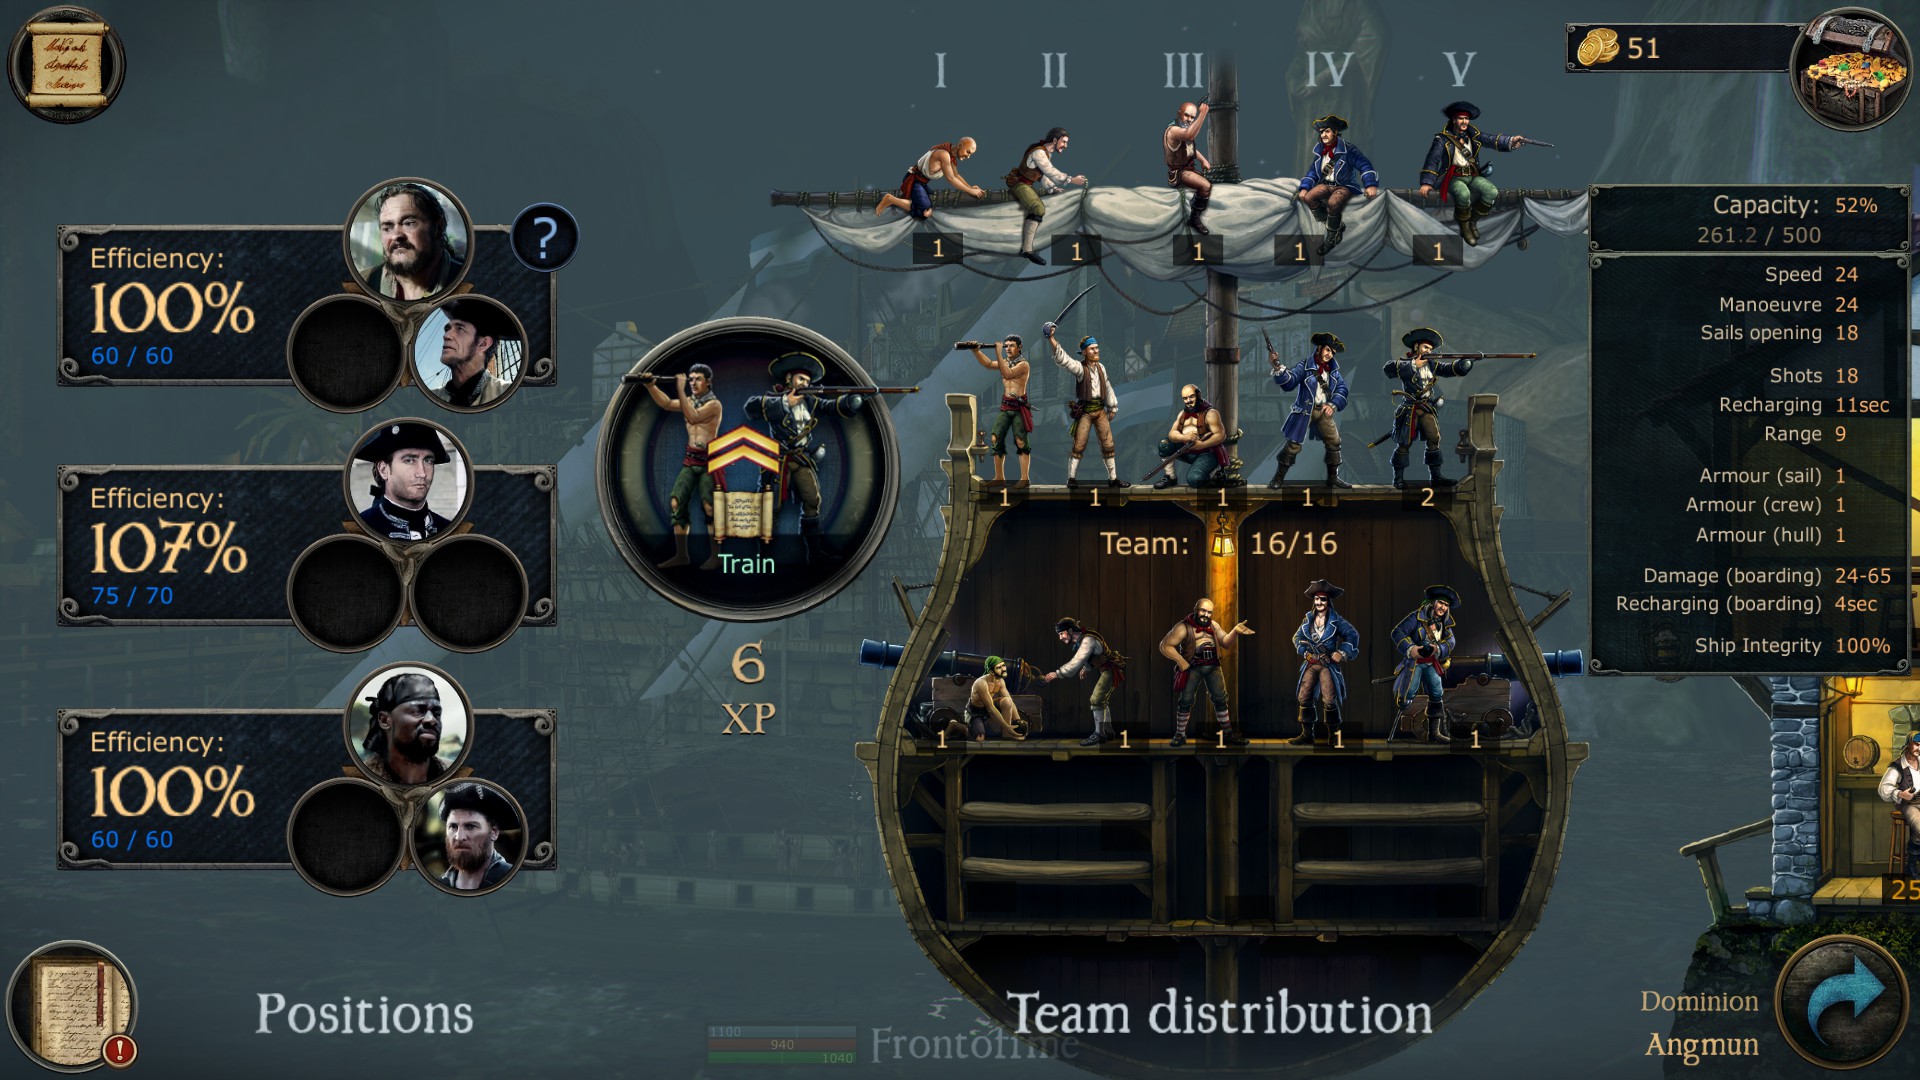
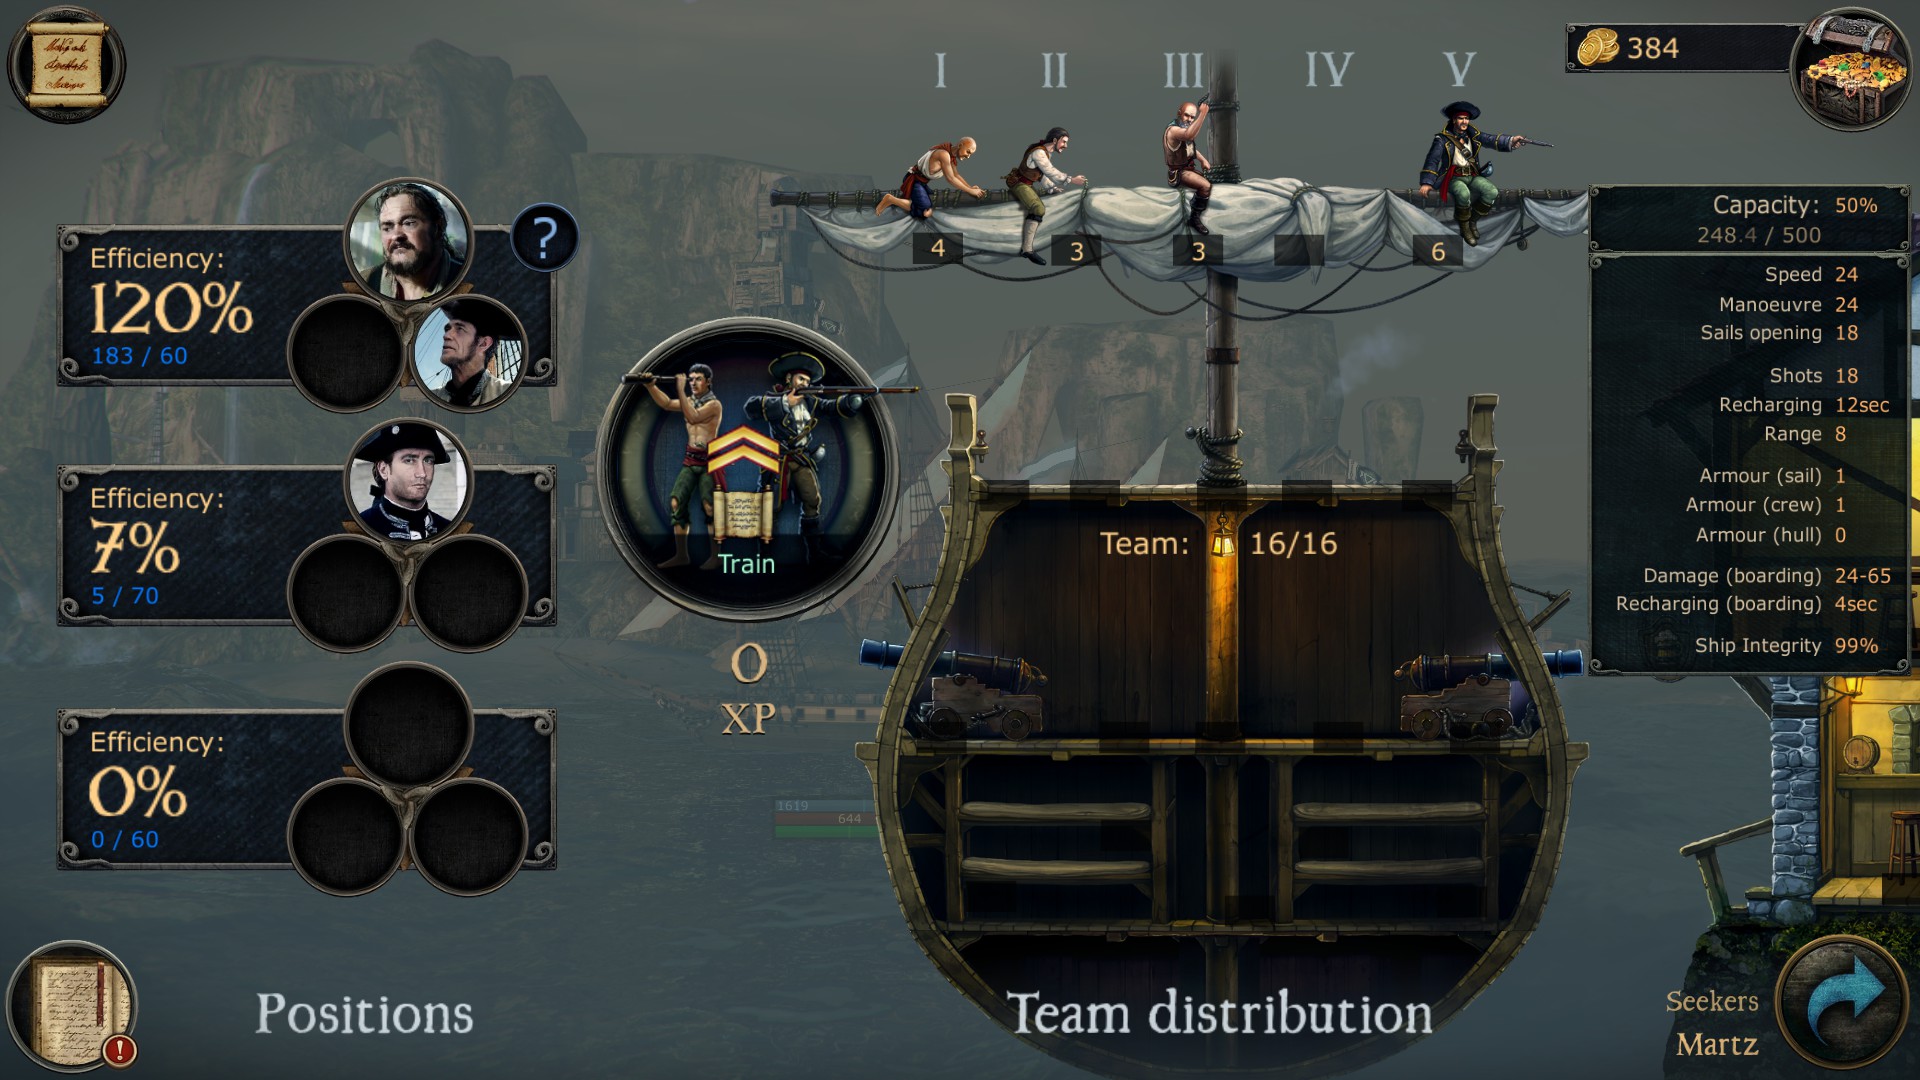
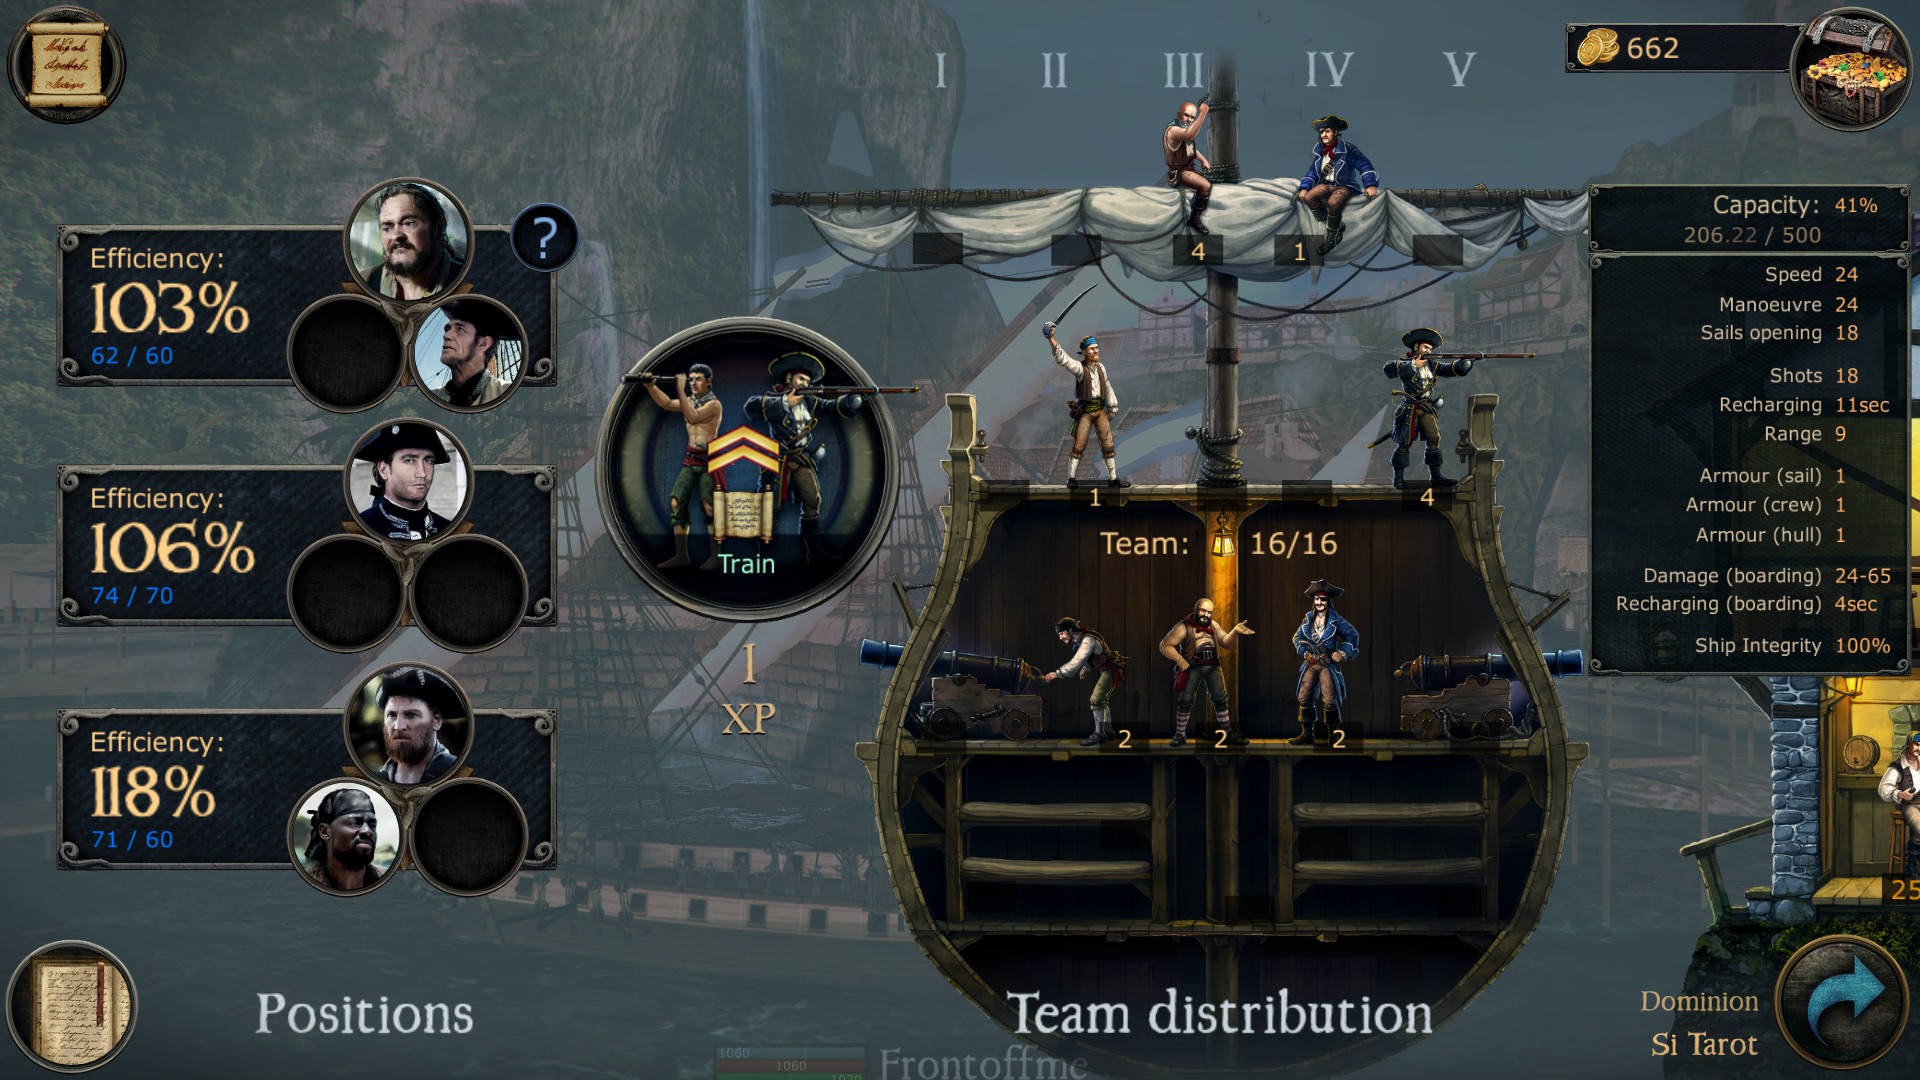
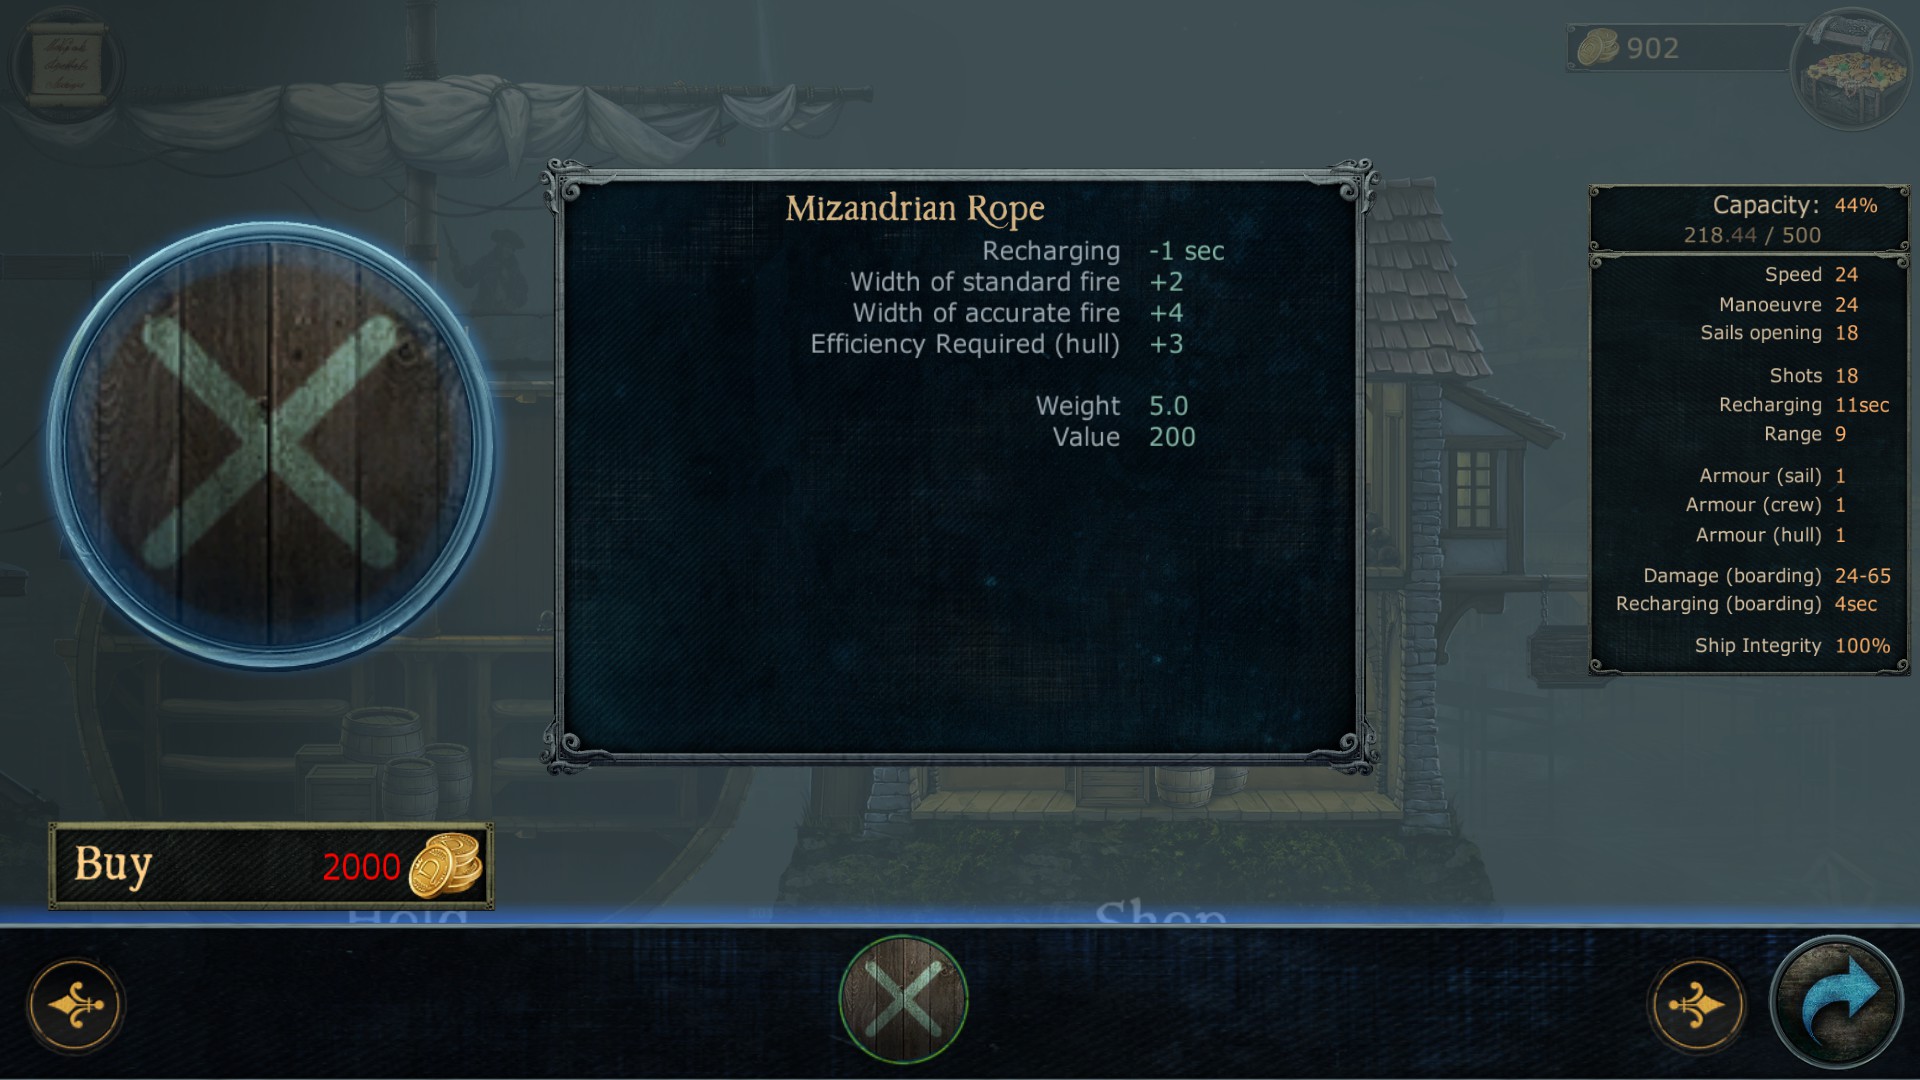
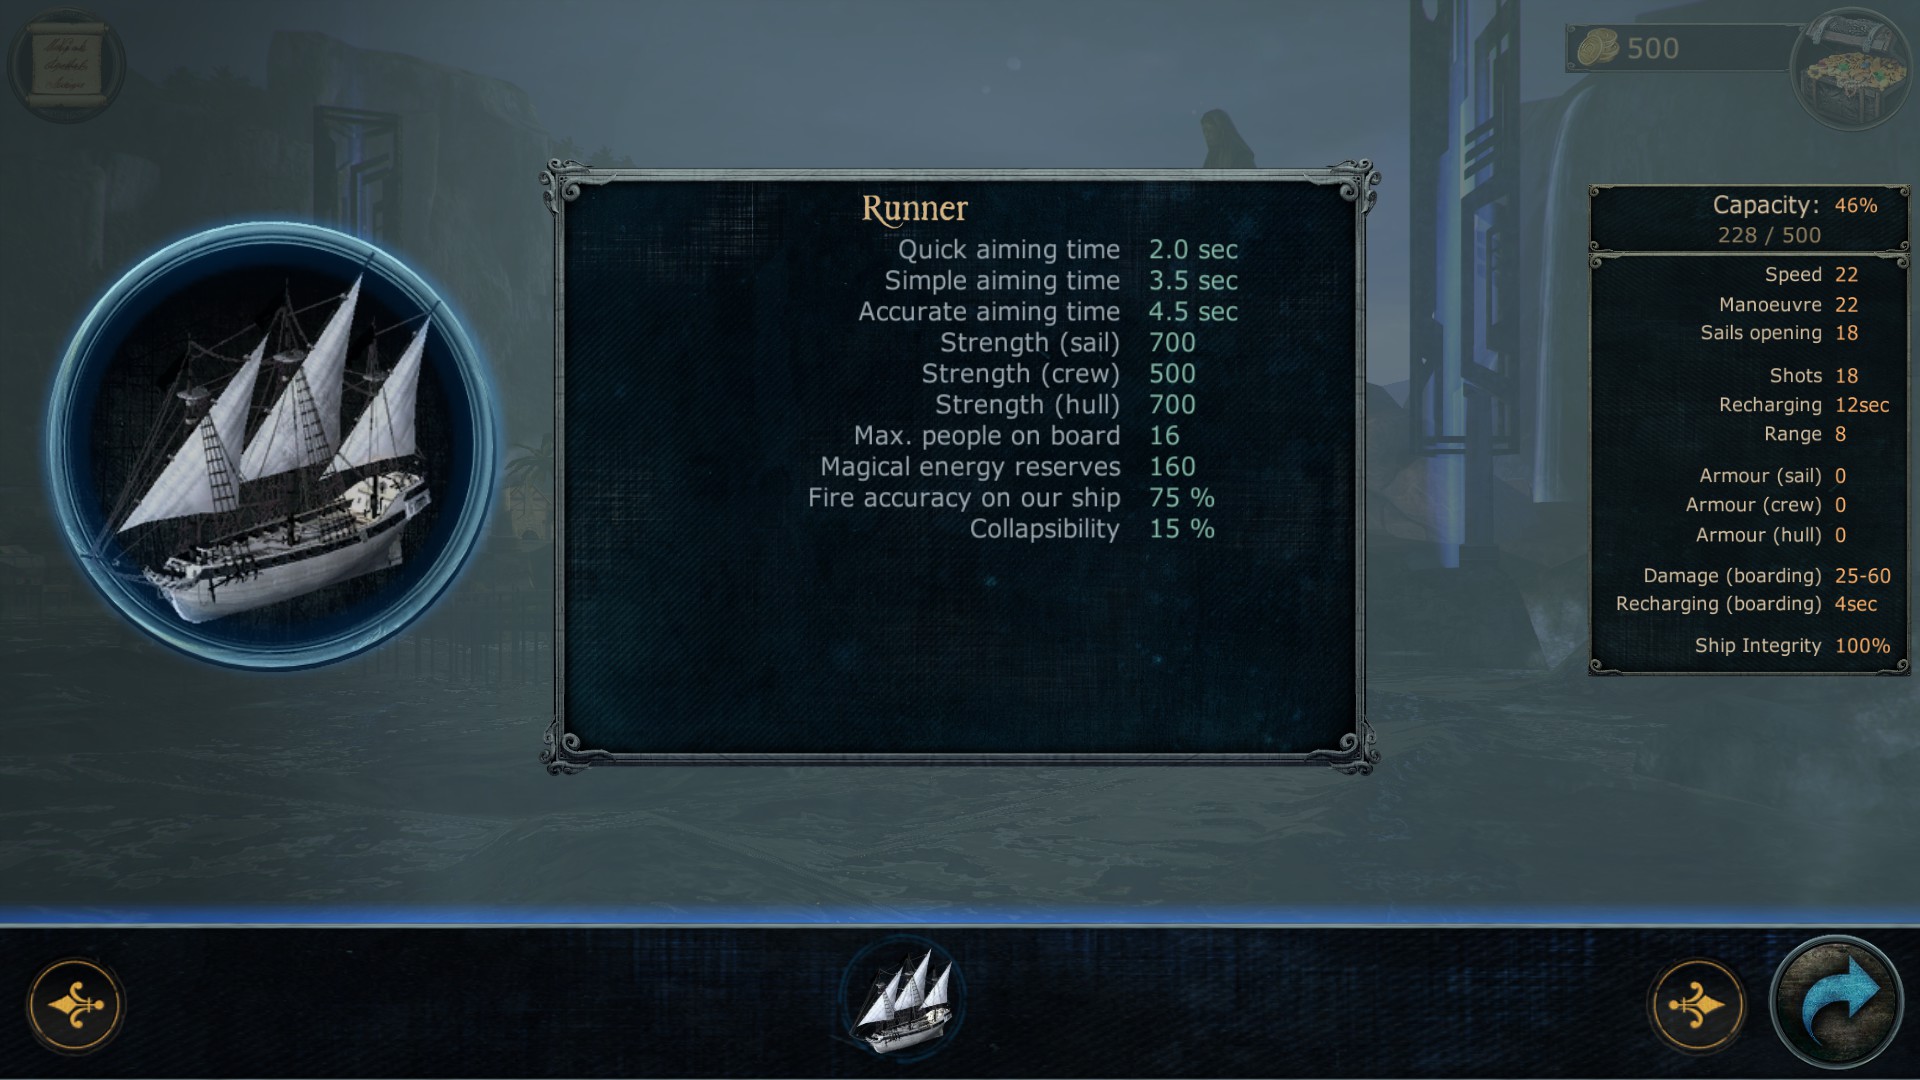
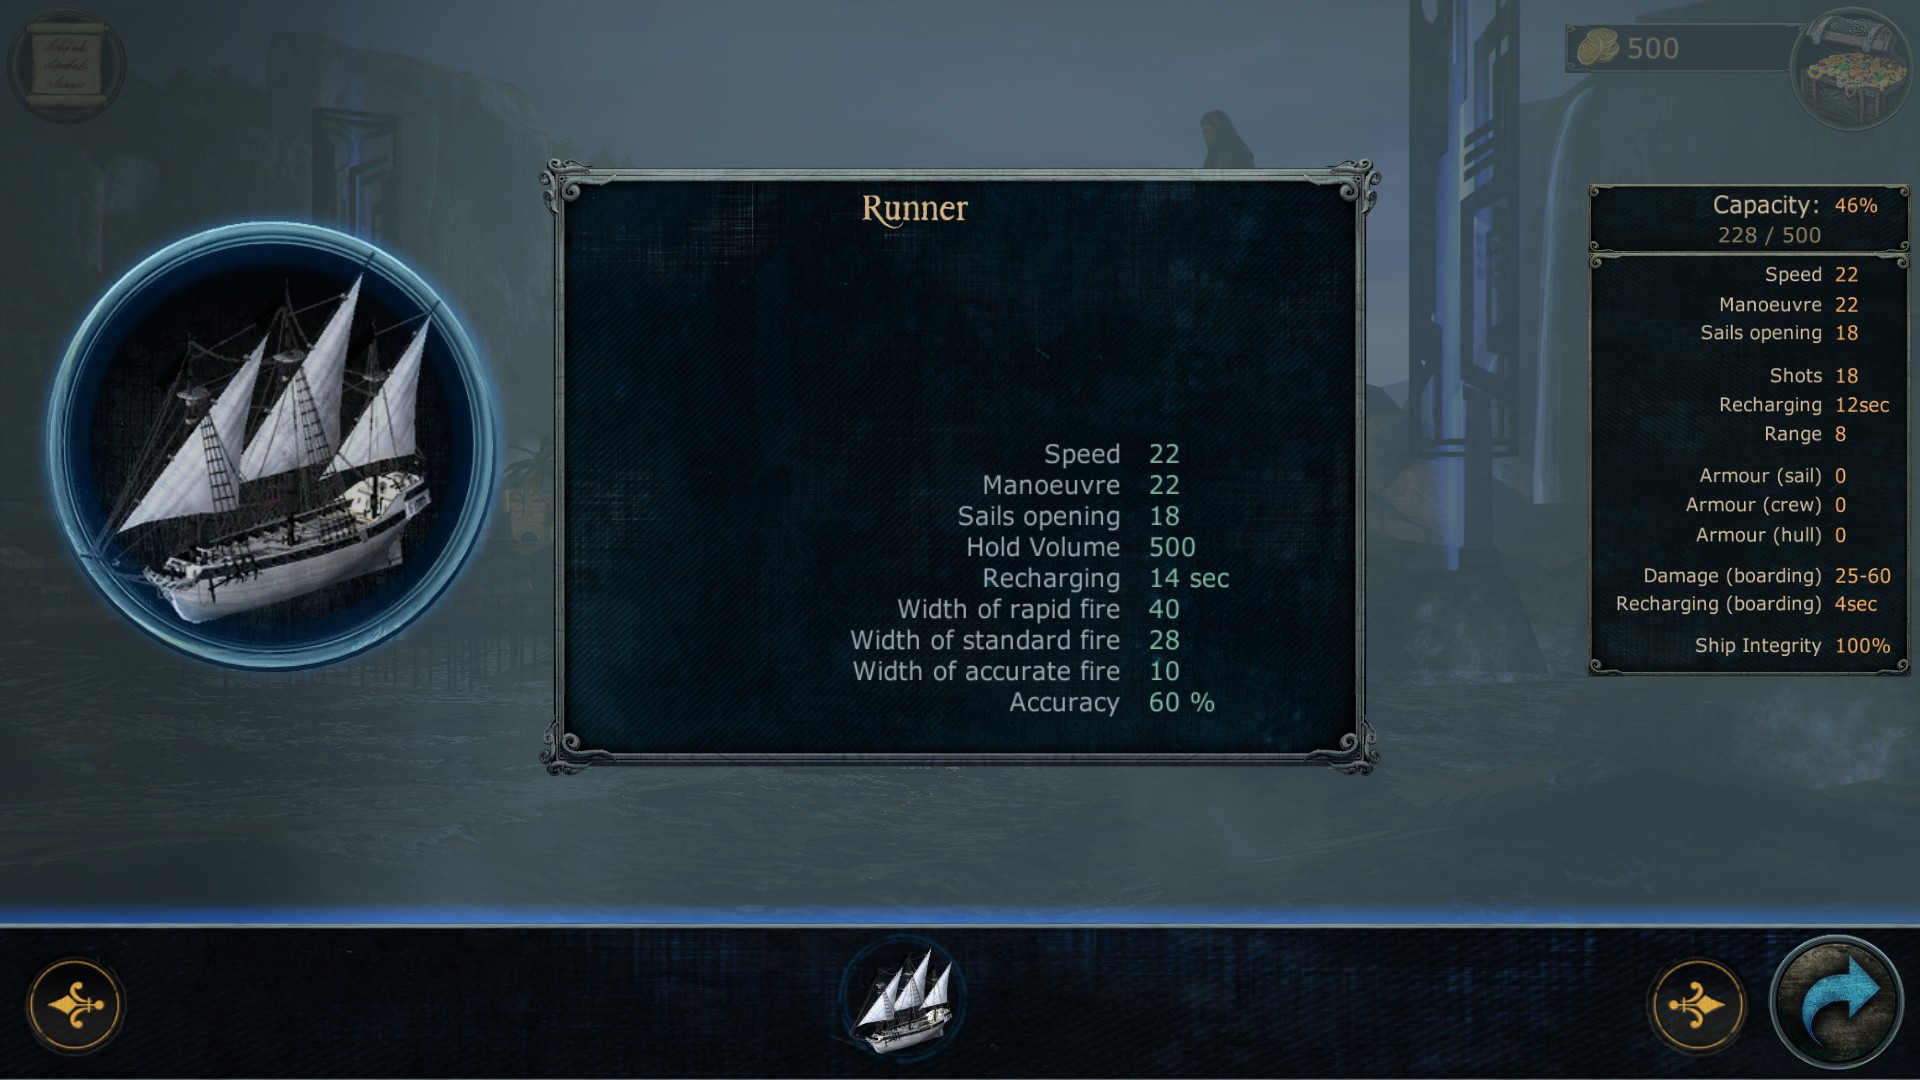
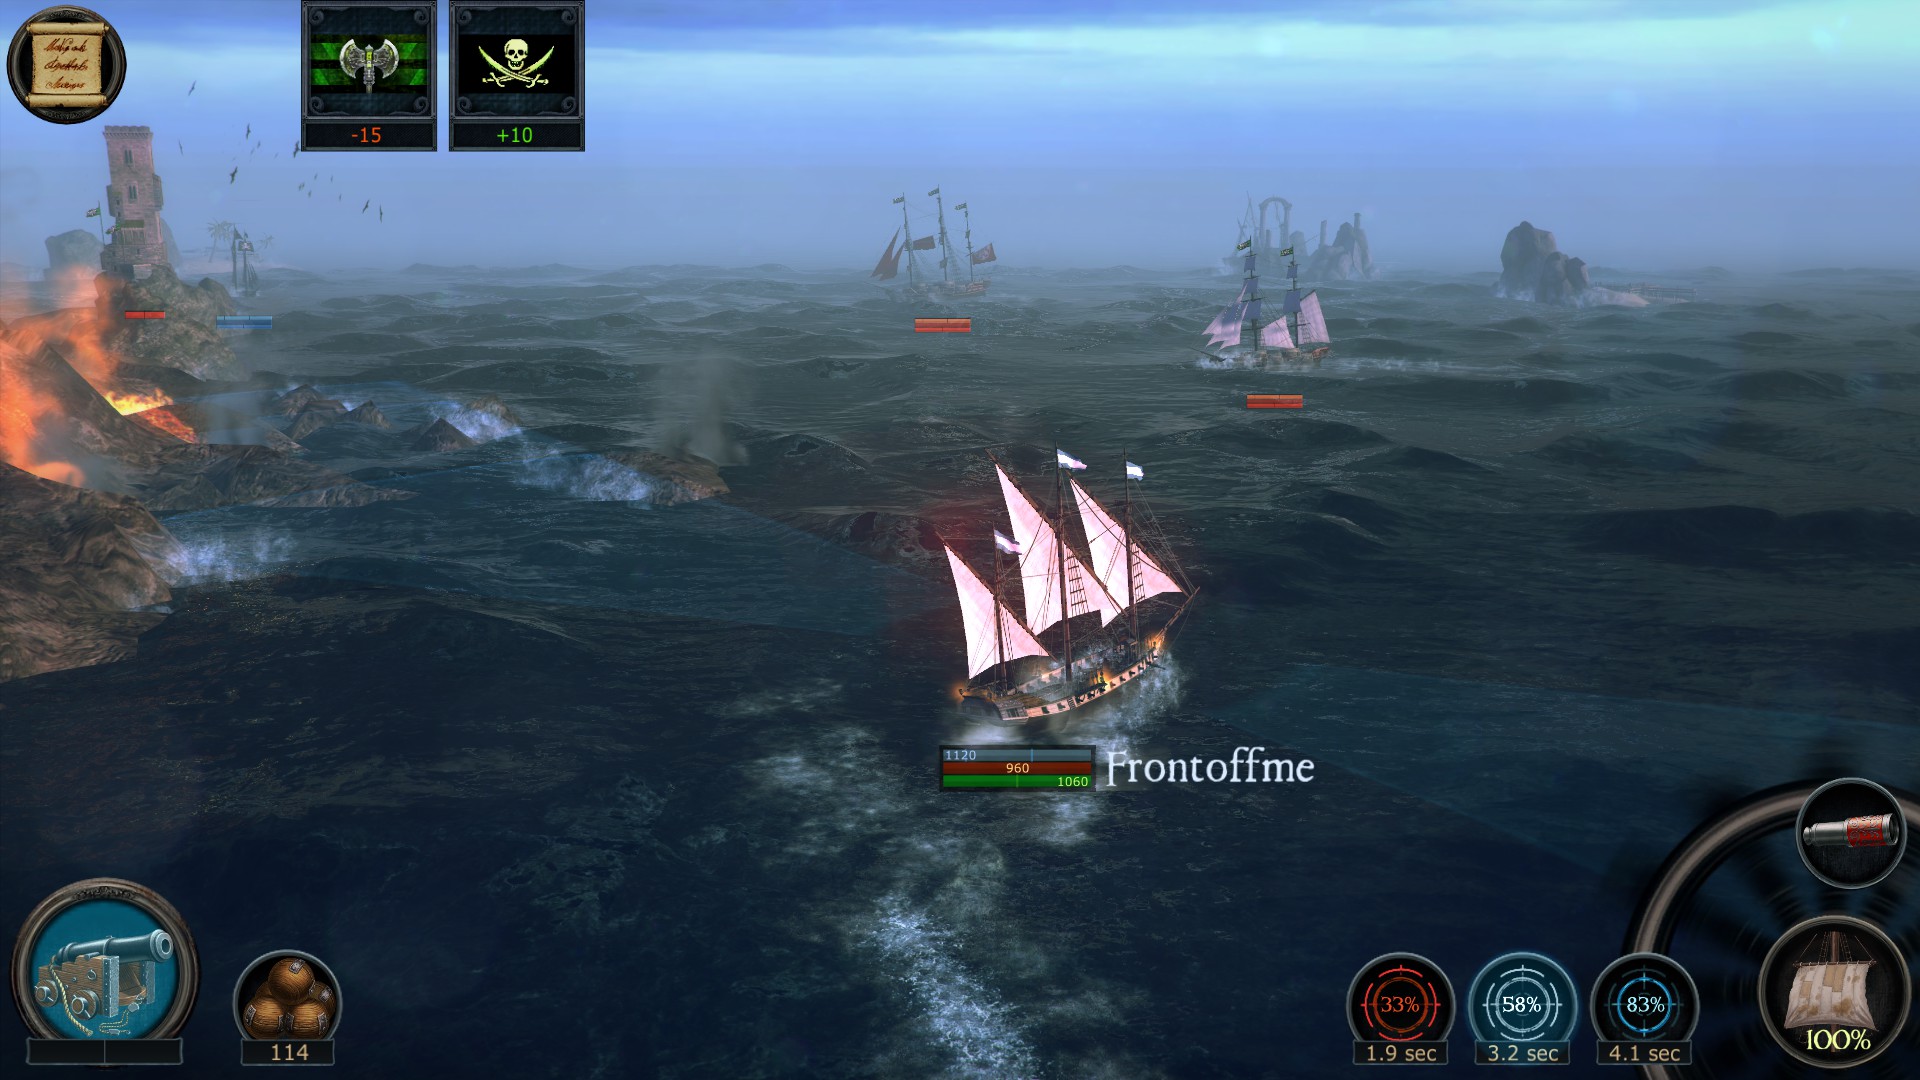
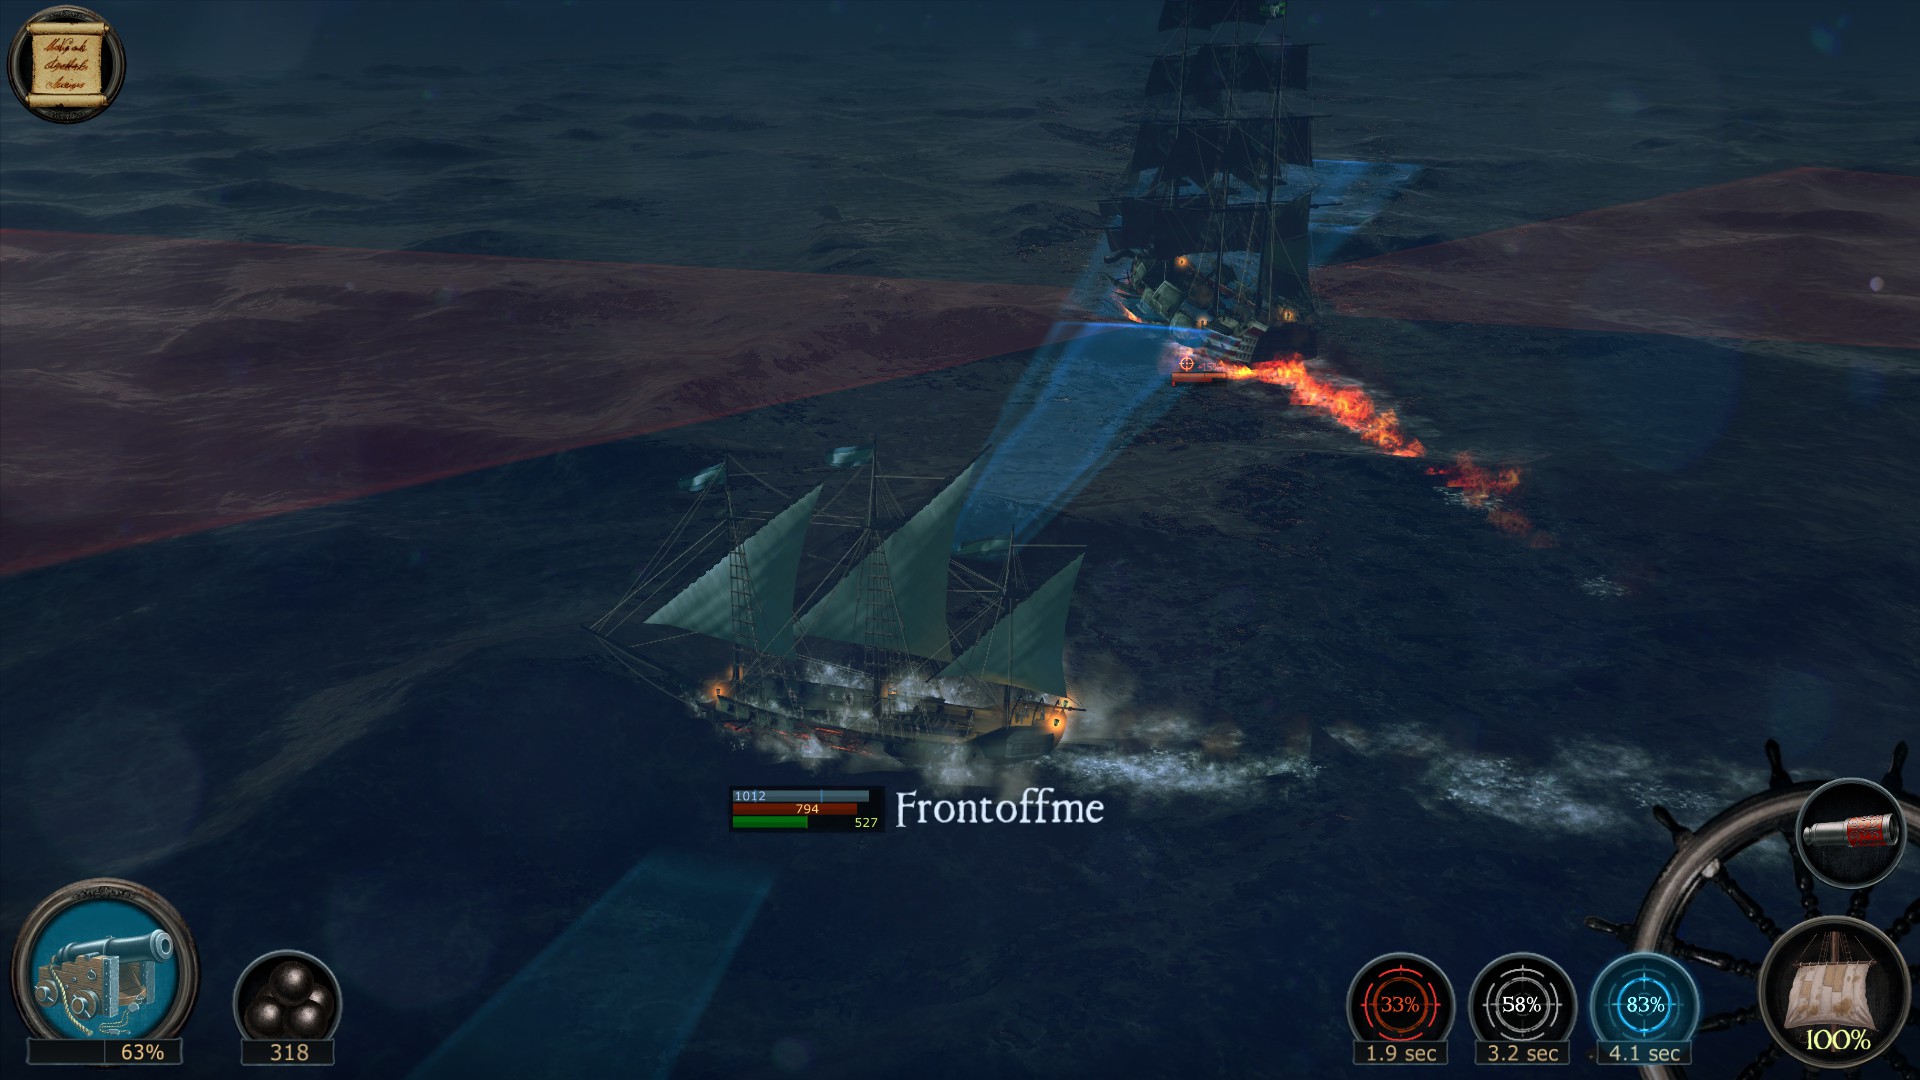
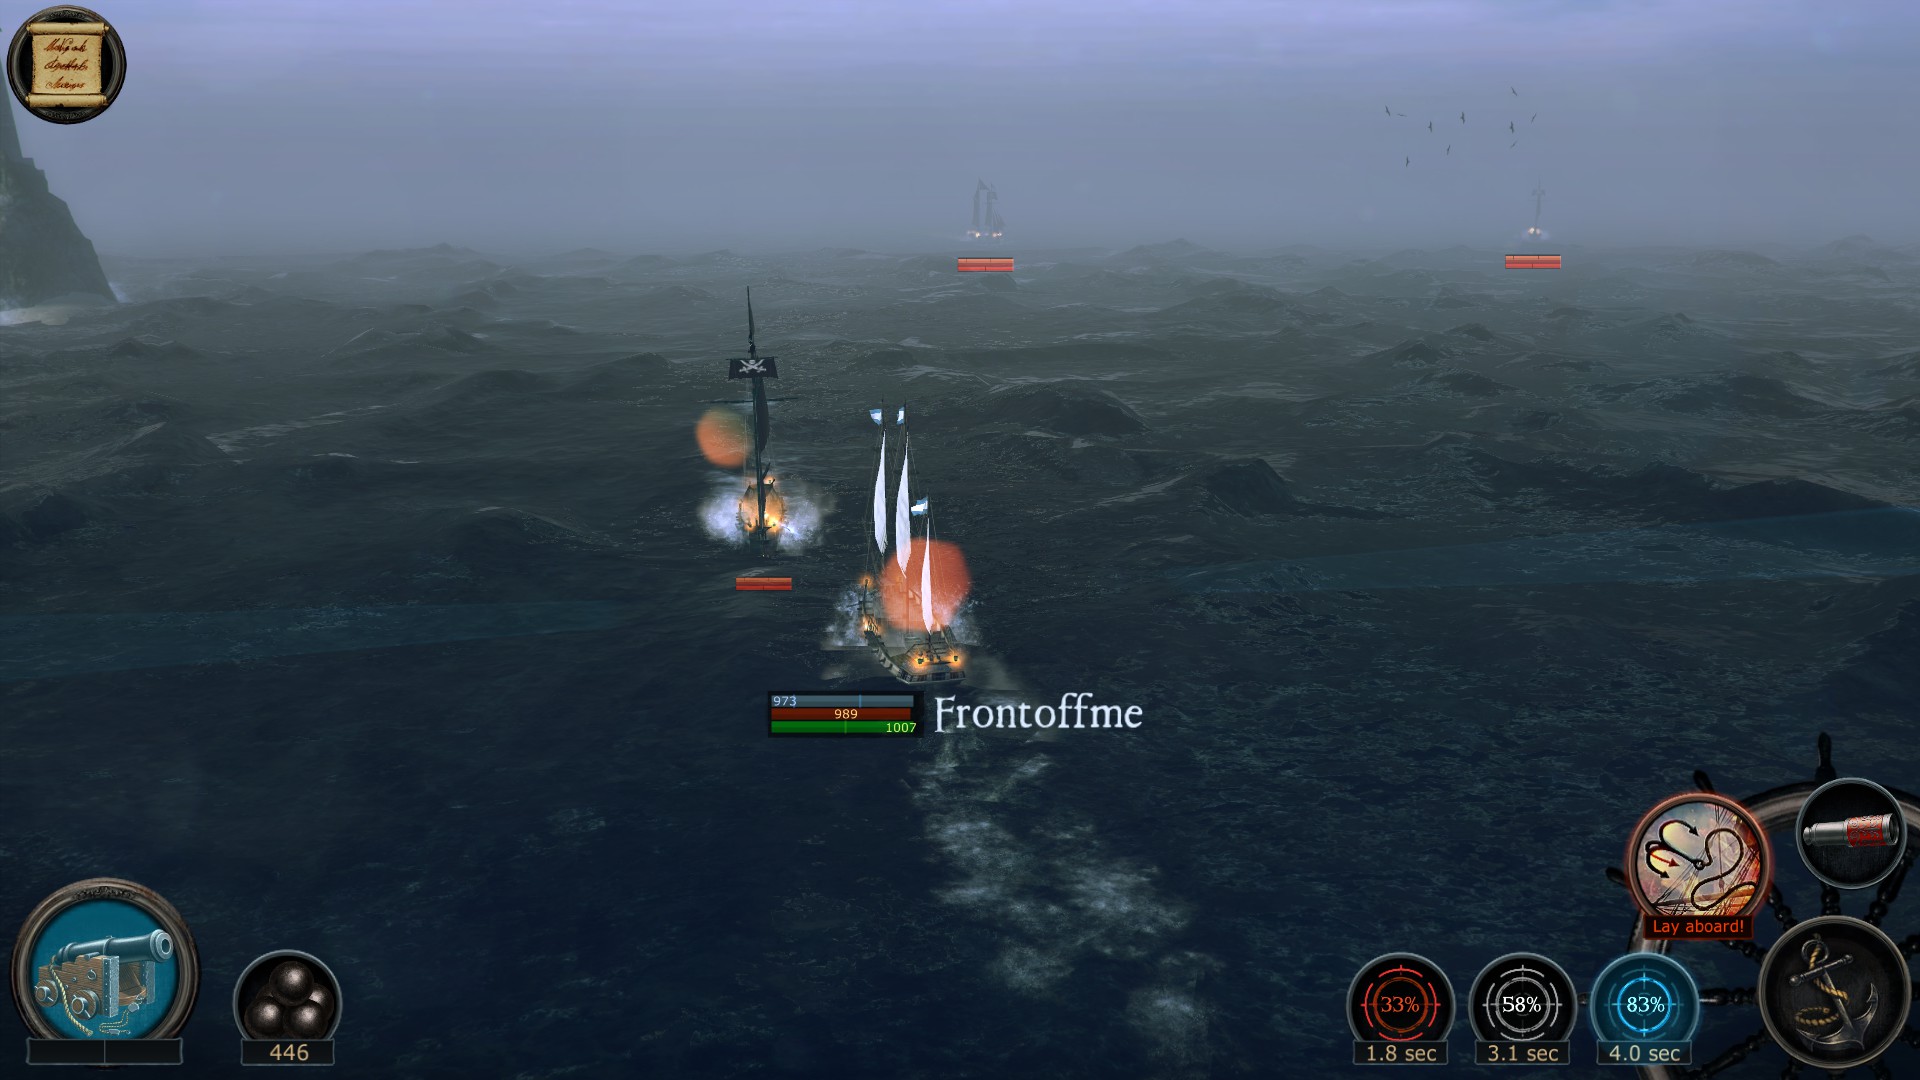
    Neither the iPhone nor Steam version of the game allows me to draw a path. I was looking forward to that mechanic.
    Enigmatic 6 Apr, 2017 @ 7:33am 
    I read thru your guide looking for the trading info on the % symbols on the ports the only thing I found happens to be the red and green you used on your example to sell a barrel of wine. I assume your telling us that if red % you purchase and at green % you sell to earn profits... Great guide and remember to tell your friends it is Multiplayer ( you have to complete tutorial first ) and Multiplayer is limited to only 3 in game at a time... Complete your Tutorial ( friend also ) then Resume Game ... There is a Globe Icon bottom right corner of your screen in game to create or join another for Multiplayer ;) There is also an adjustment to difficulty easy med hard :steamhappy:
    {DHD} Snuggles101 27 Nov, 2016 @ 5:52pm 
    Ok, How to I get the faction names. I am looking for the Order and I do not know who they are by the flag.
    Calico-Jack 27 Jun, 2016 @ 12:00pm 
    Note on boarding - there is more than 1 type of gun ingame and there are gun mods too.
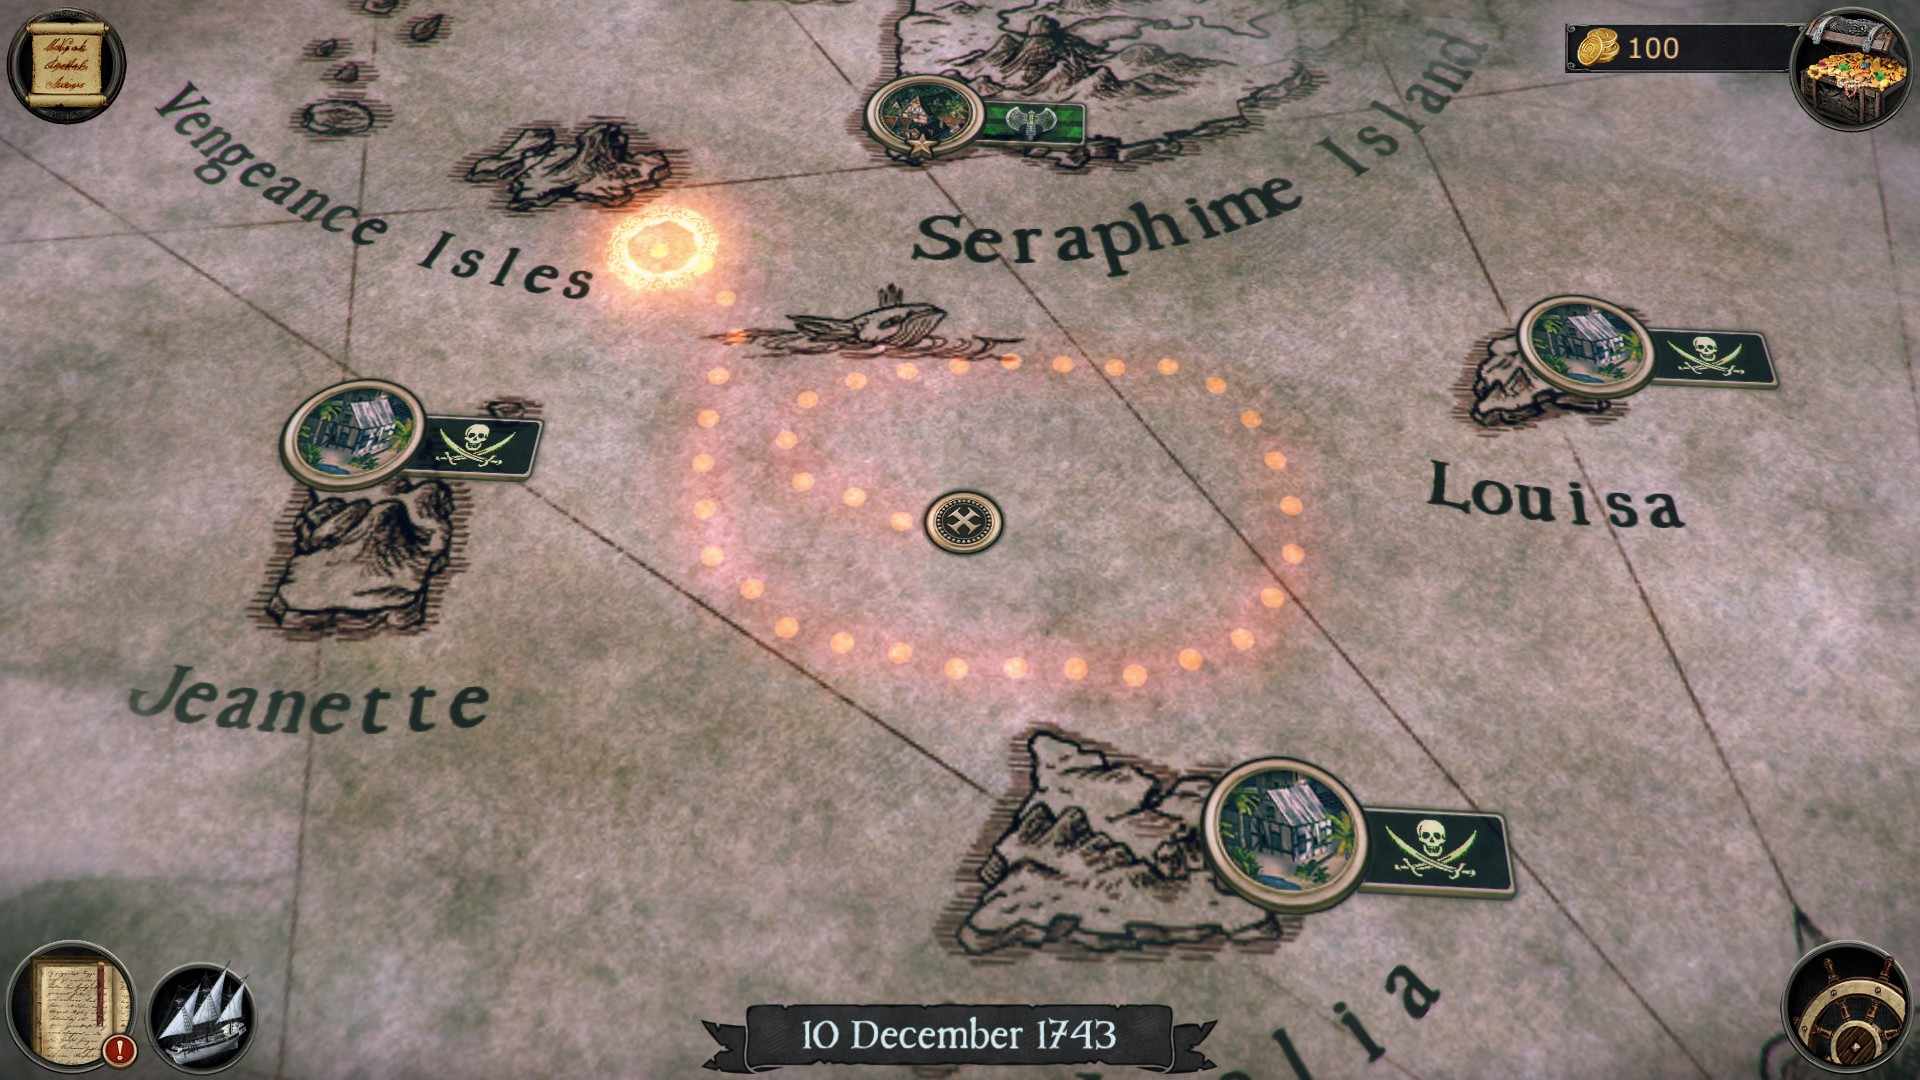
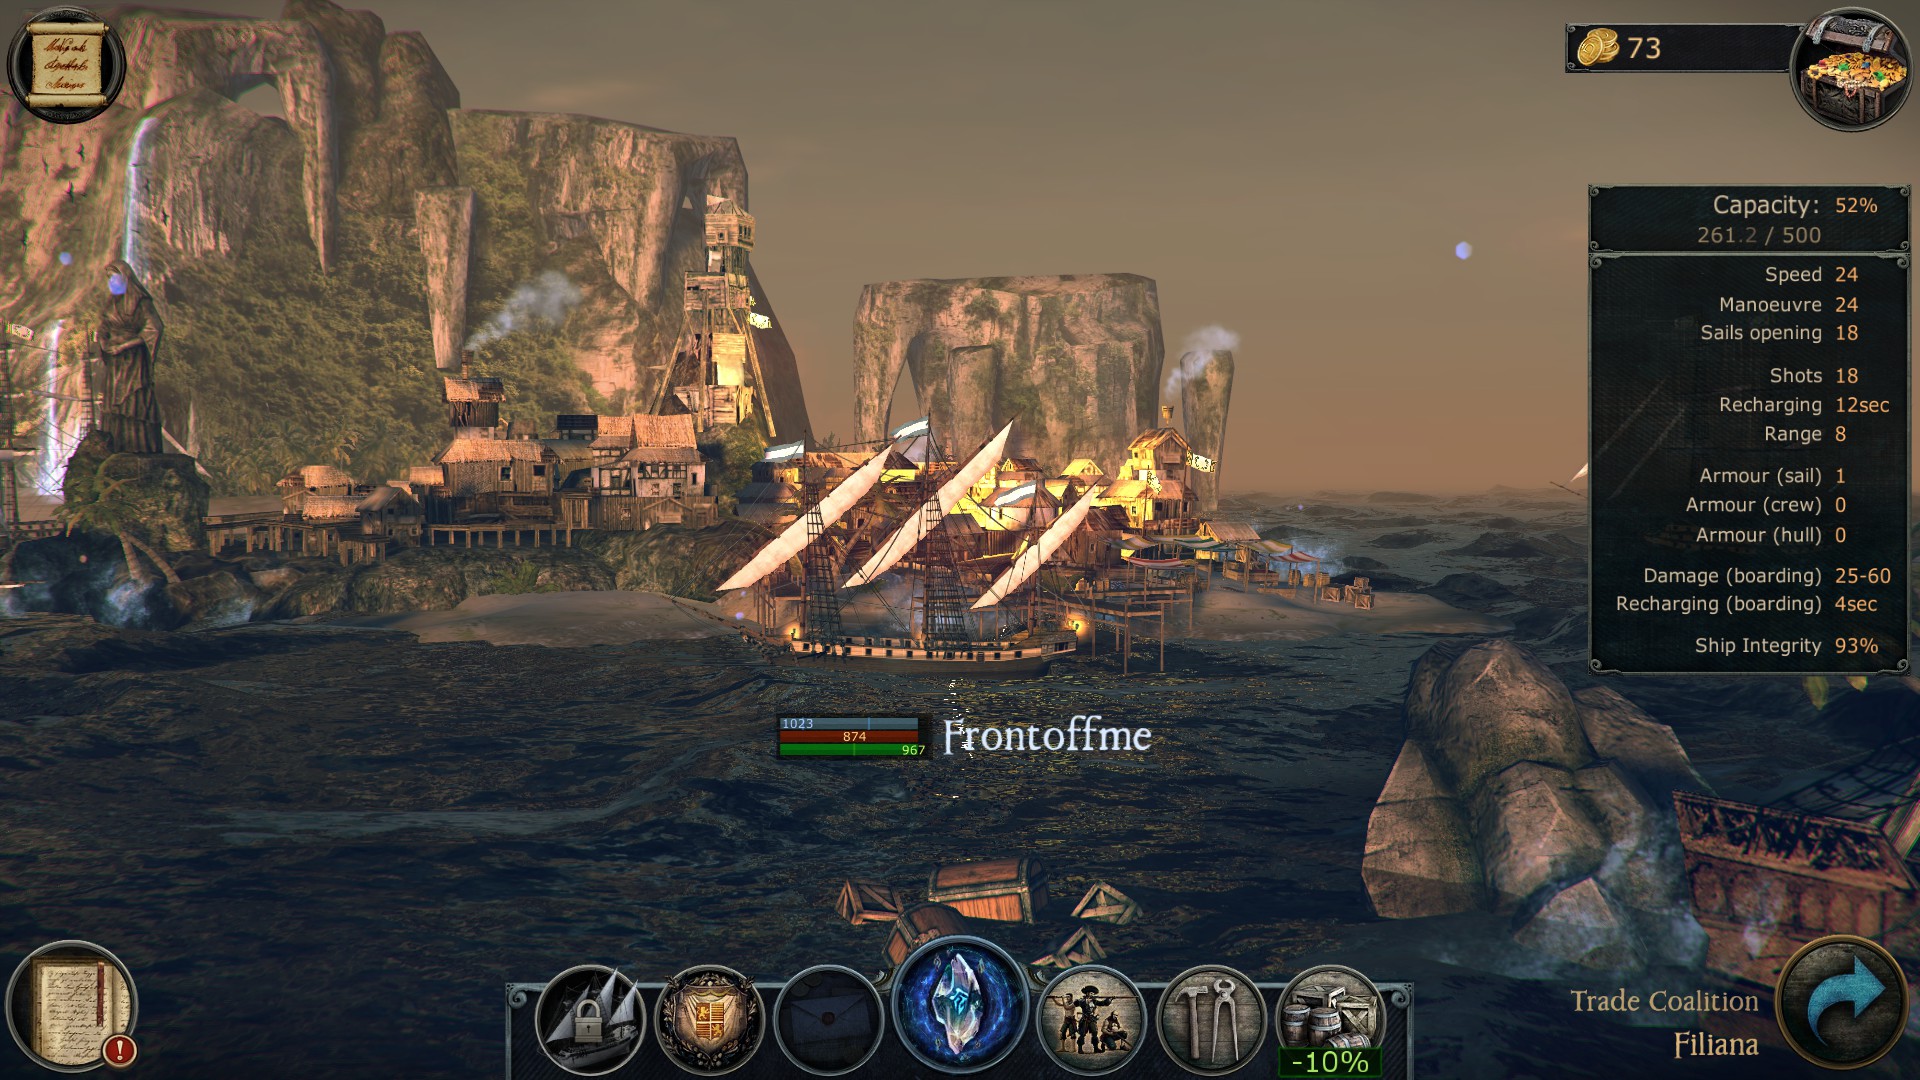
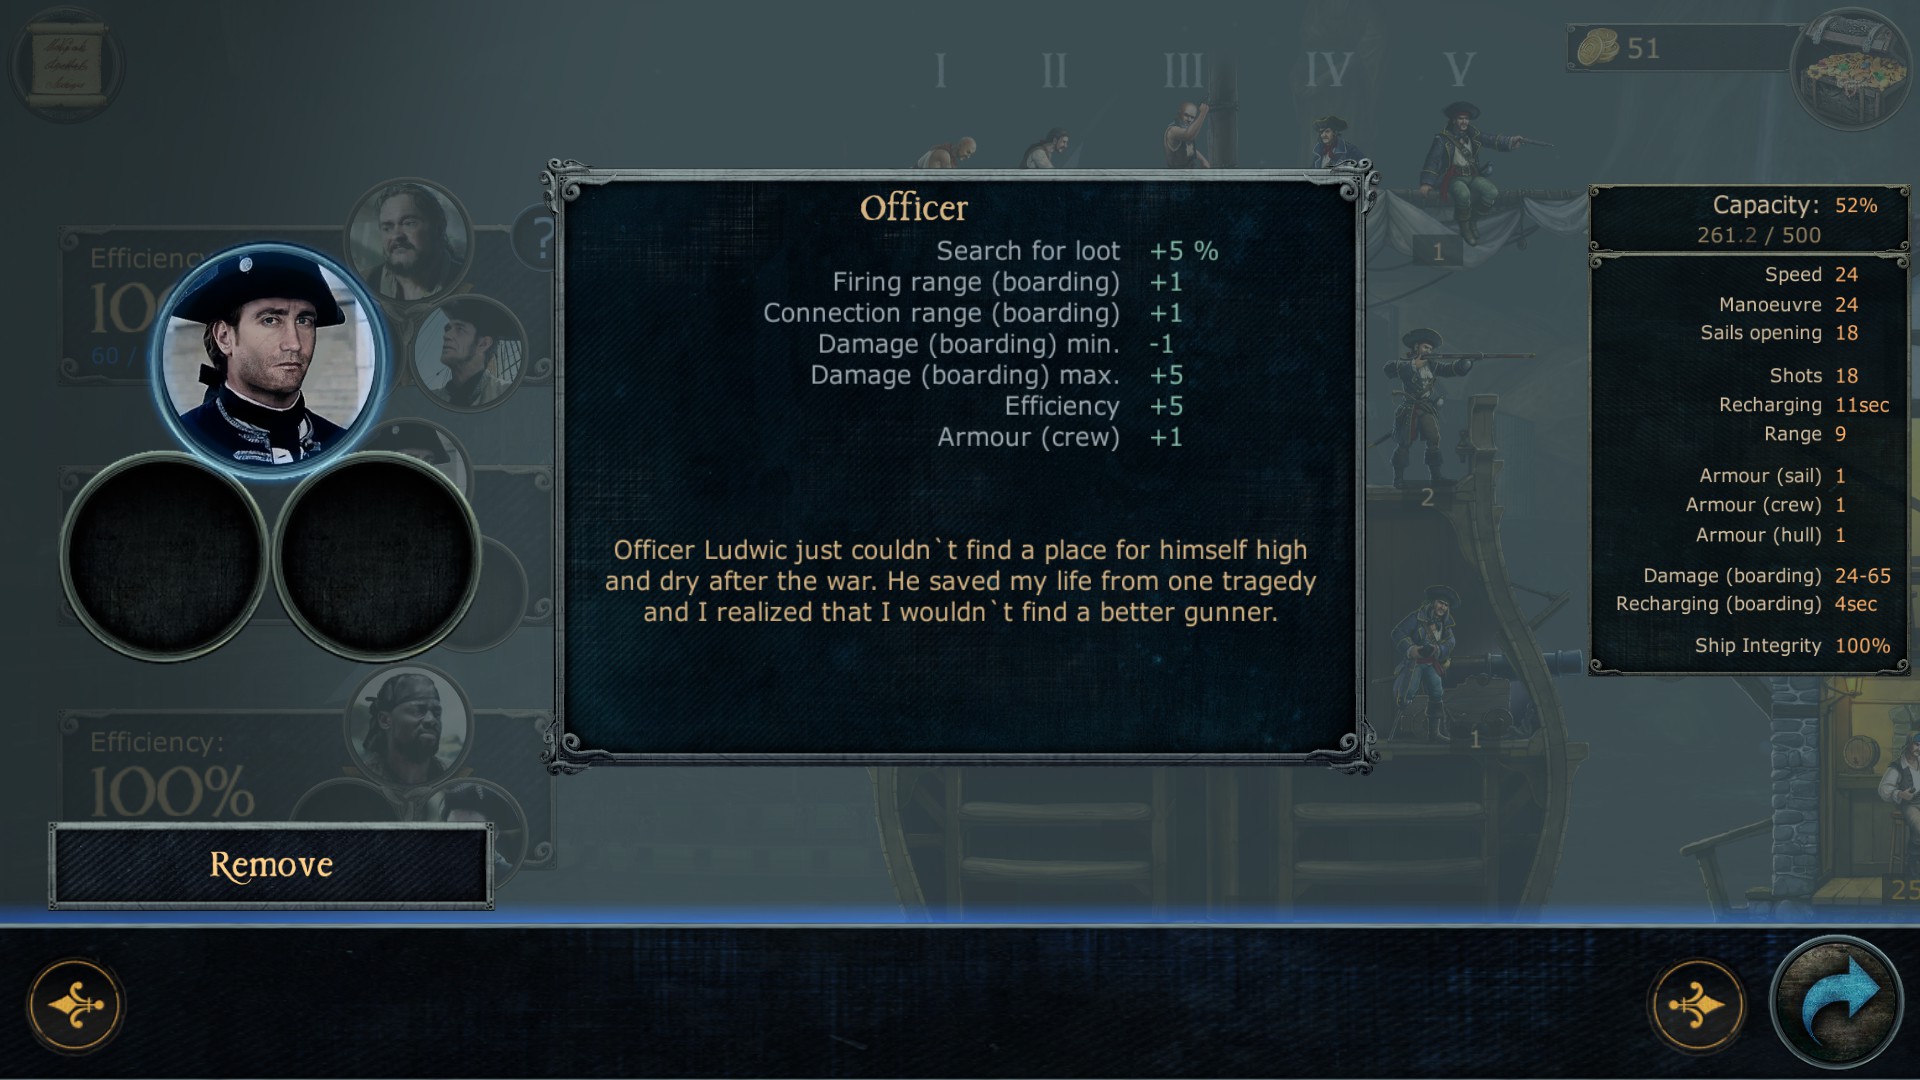
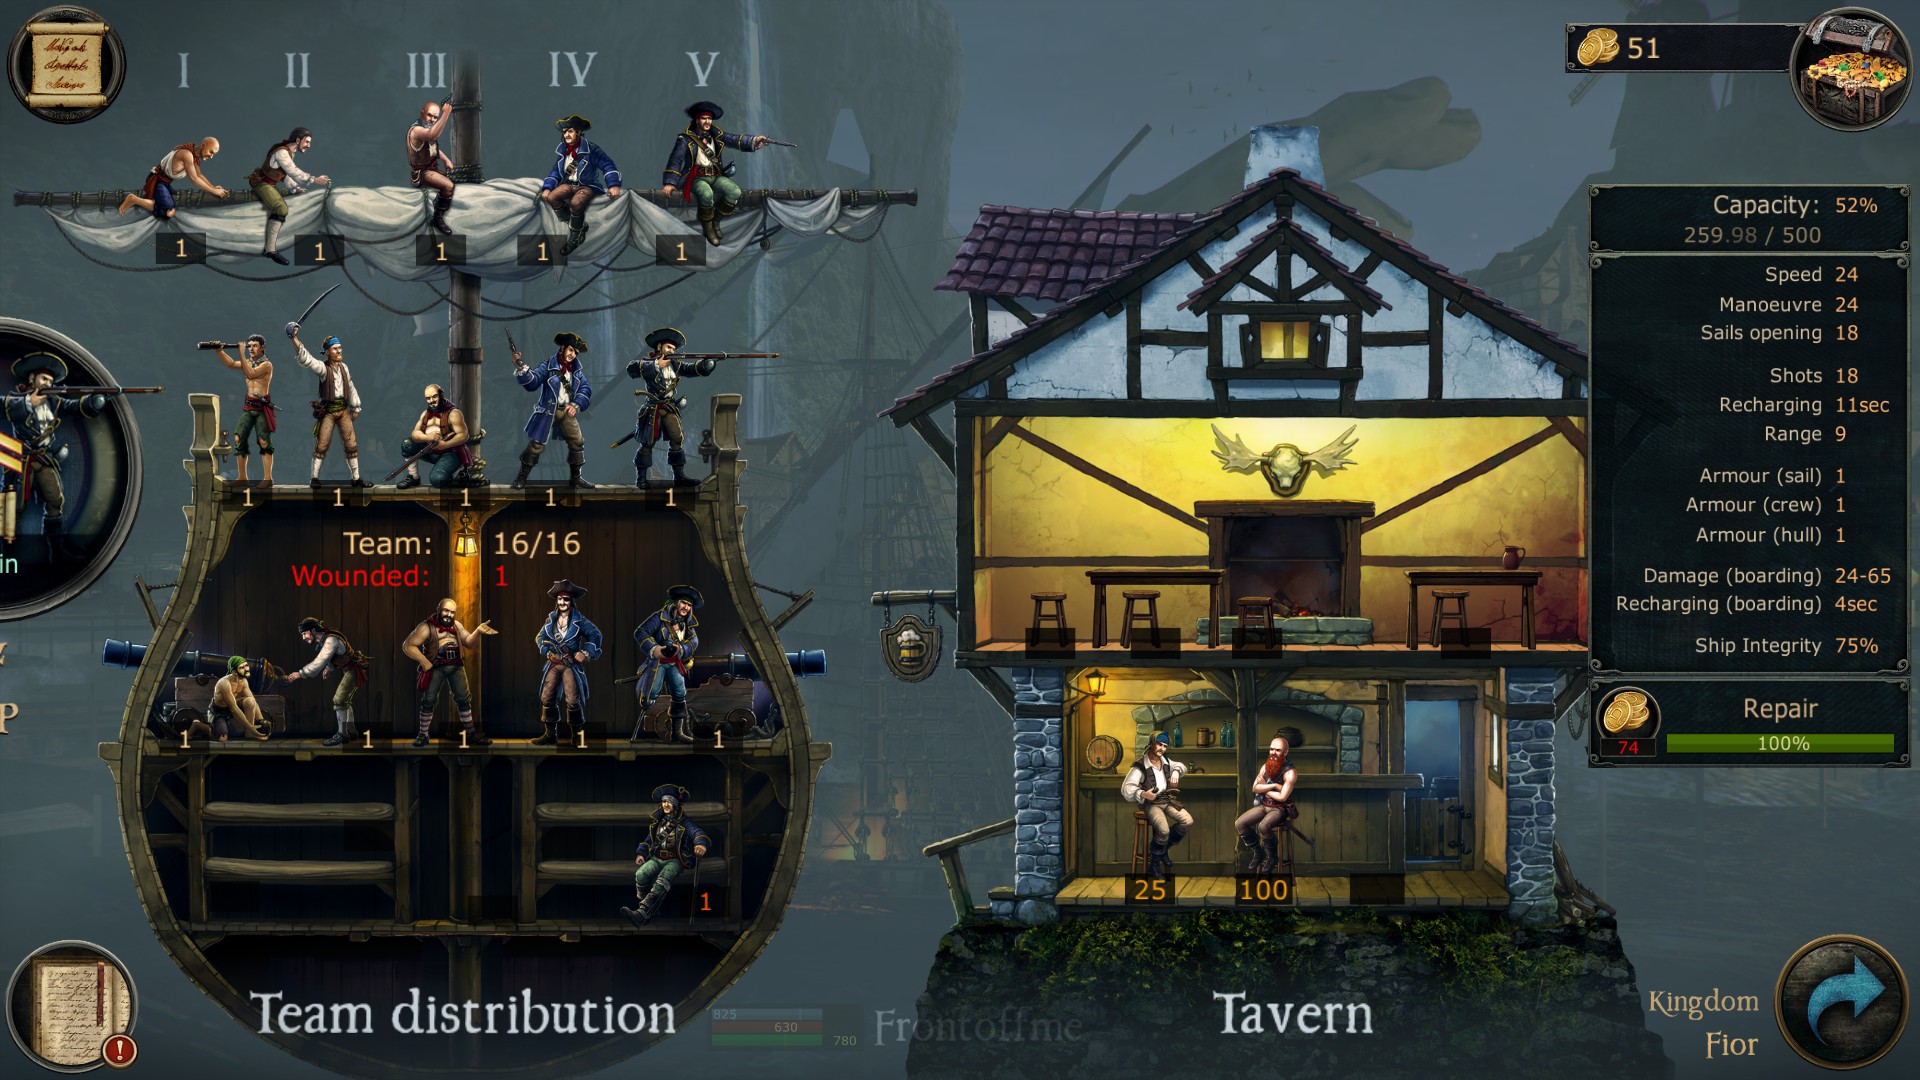
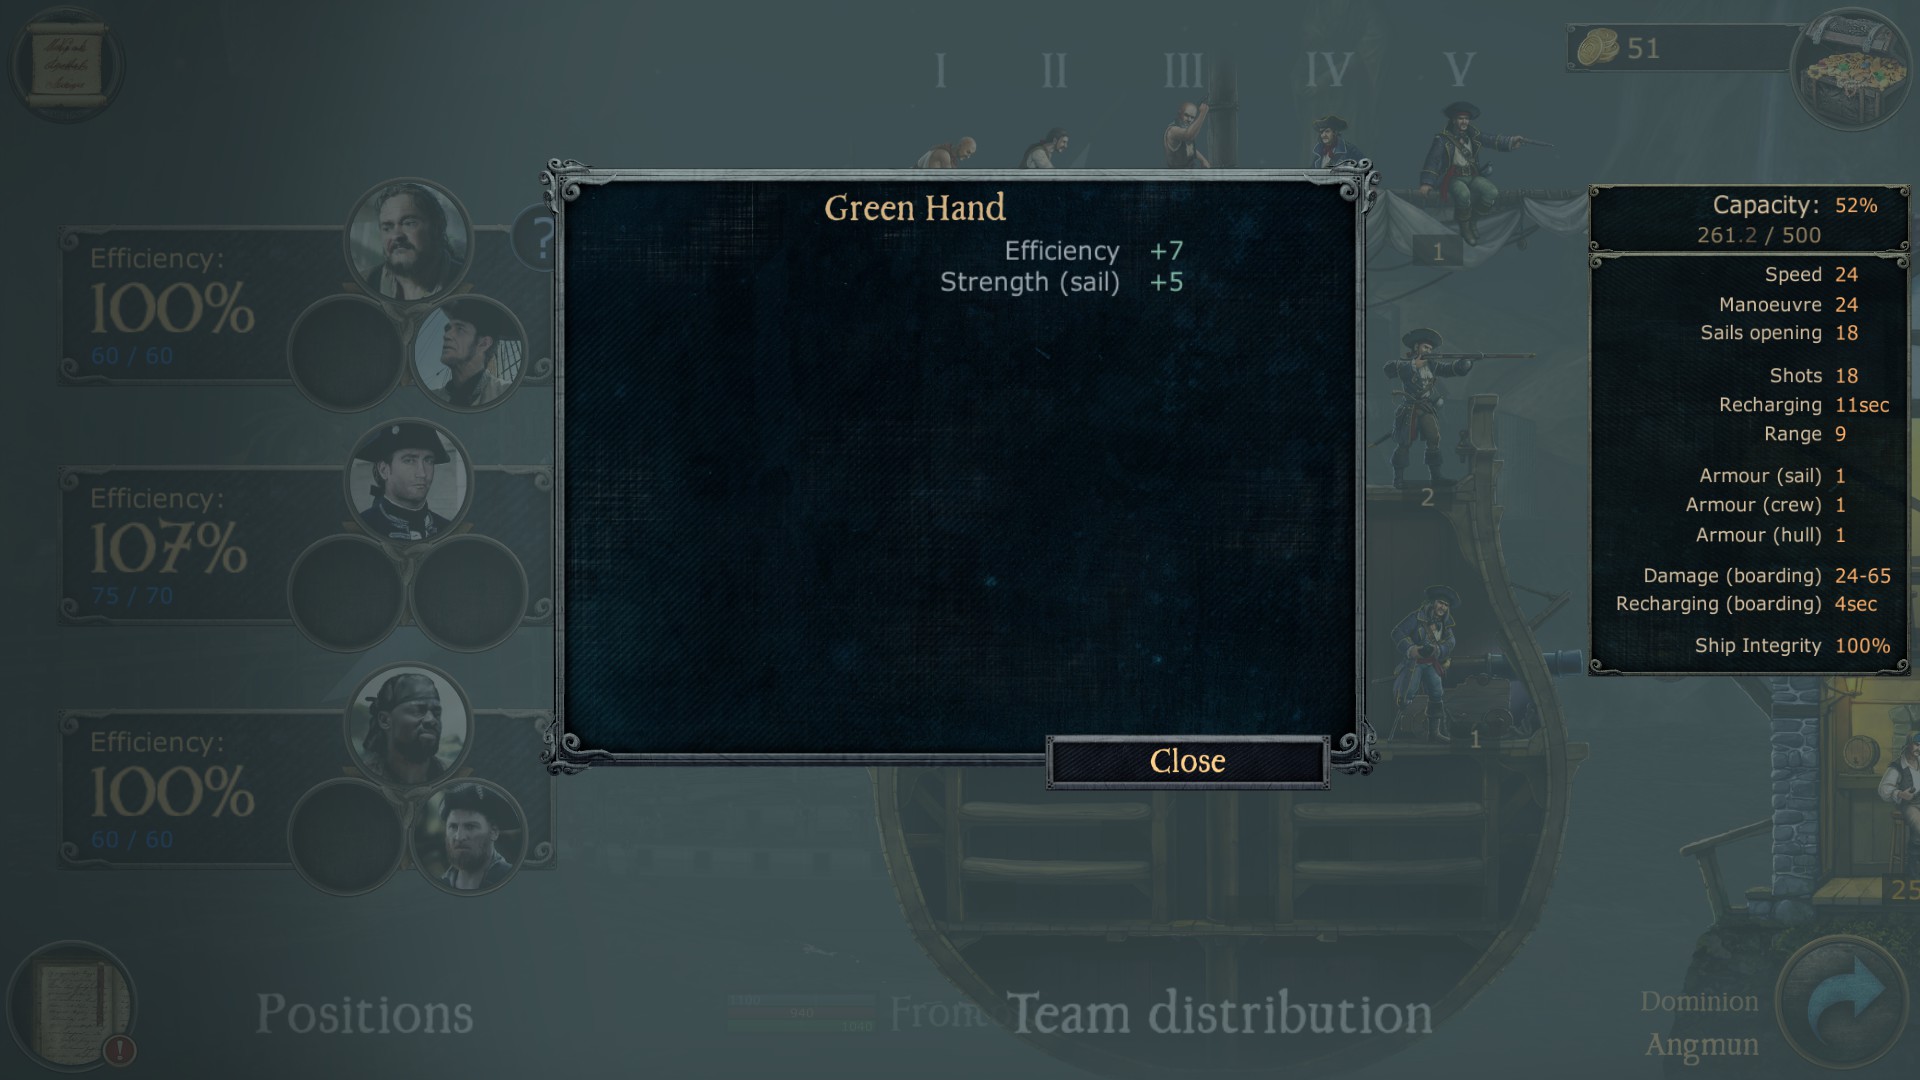
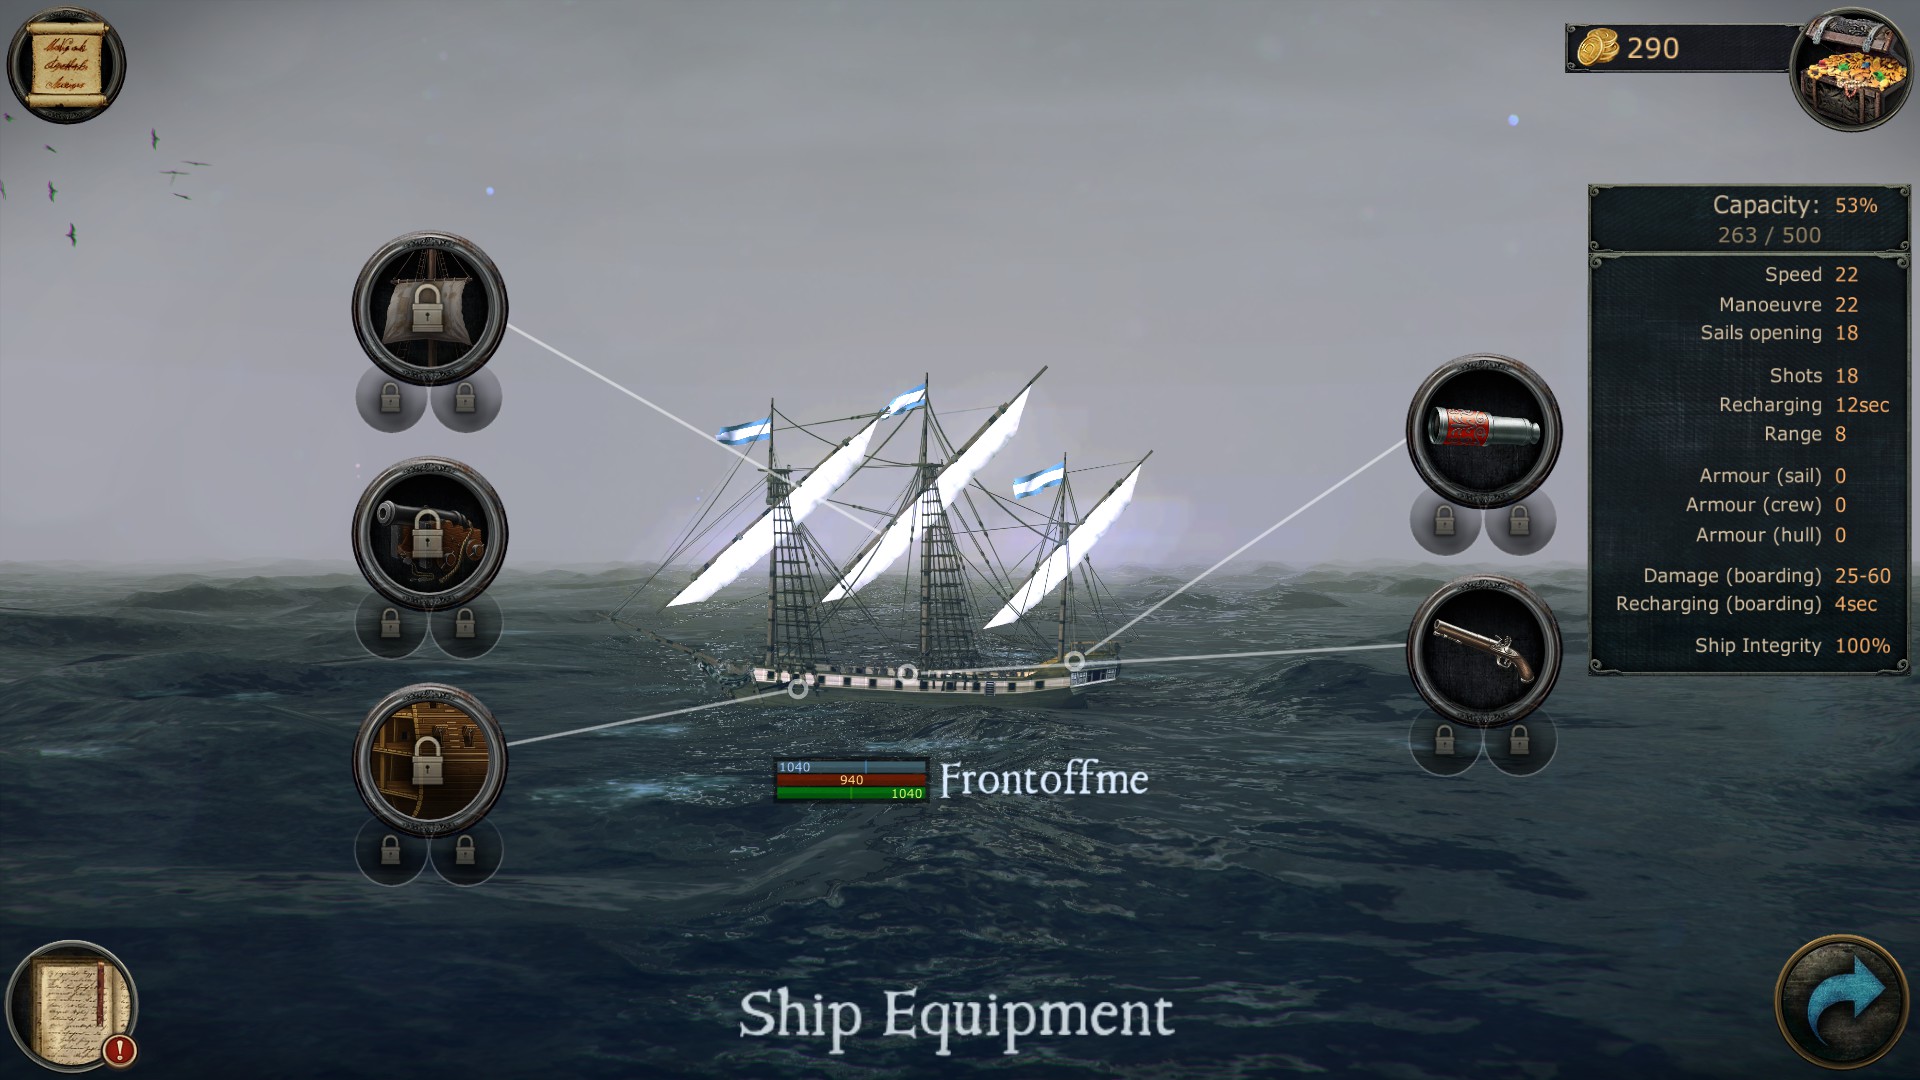
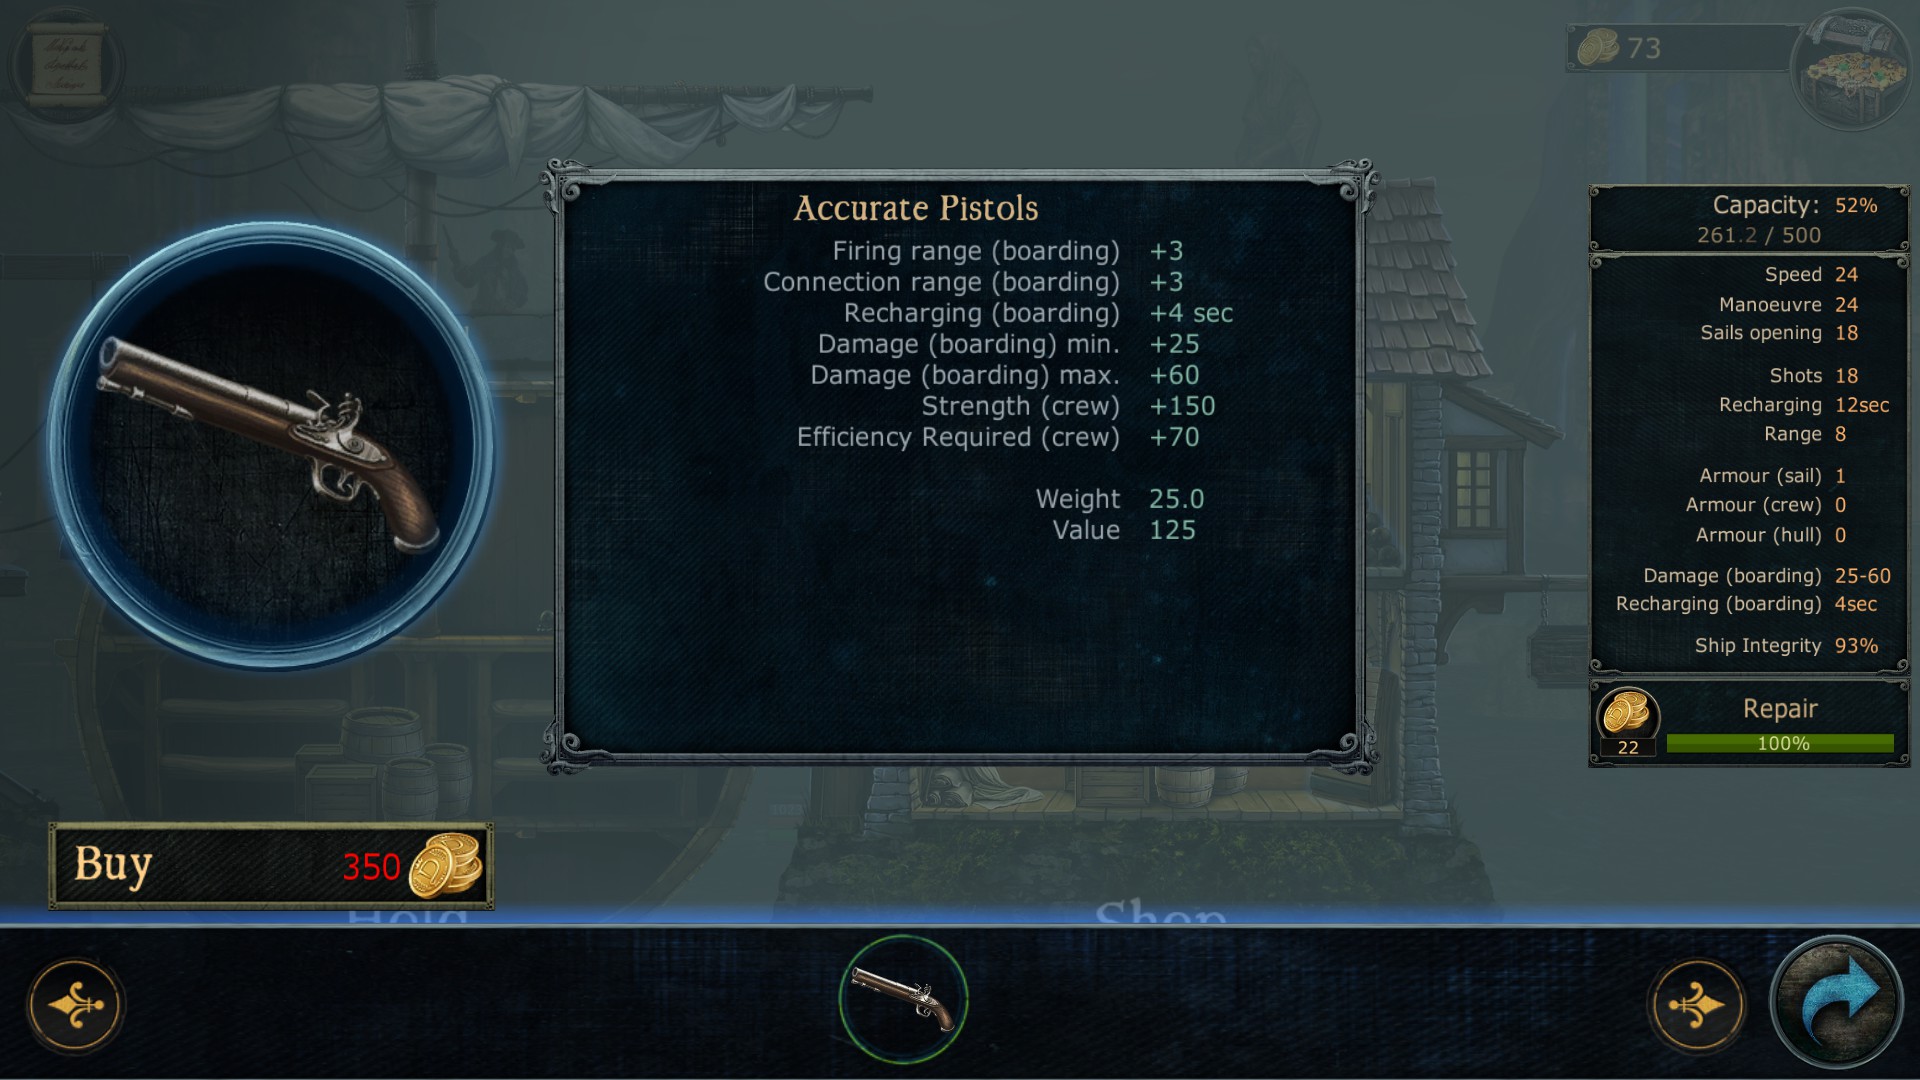
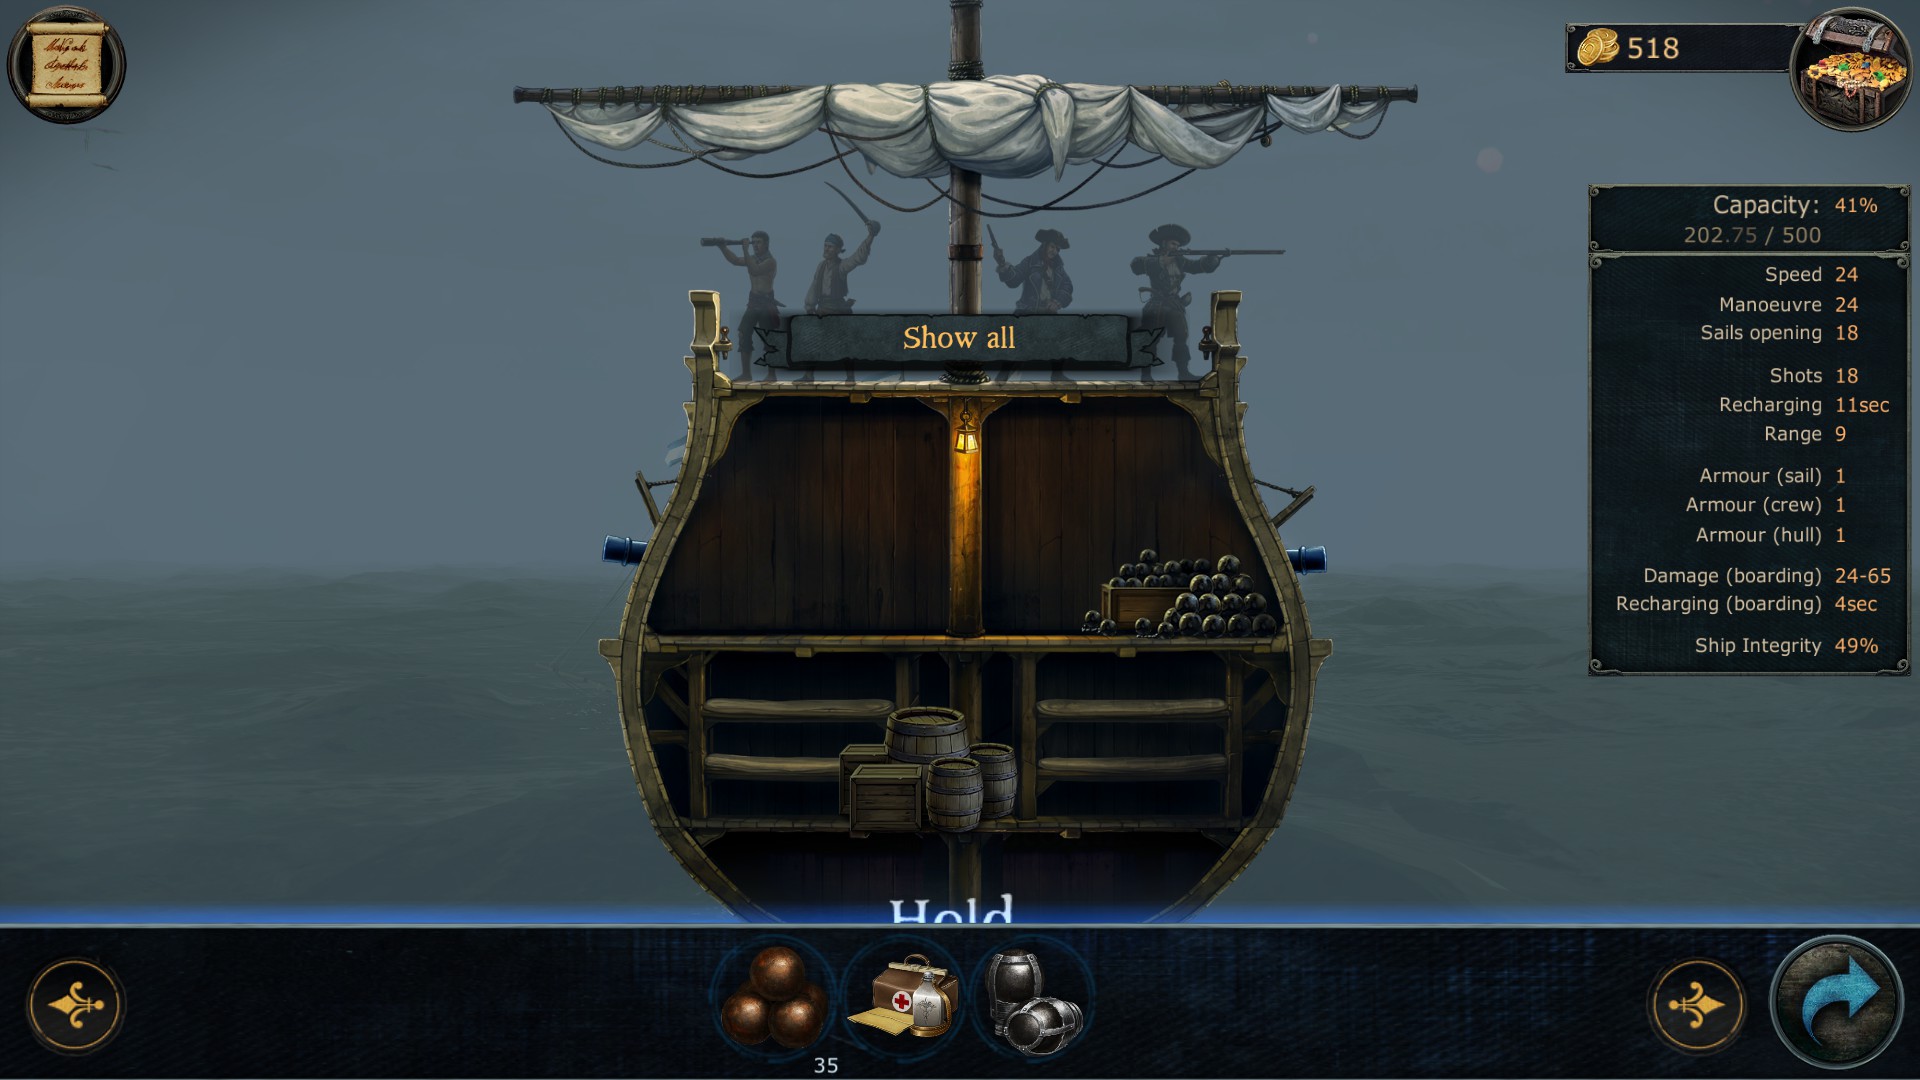
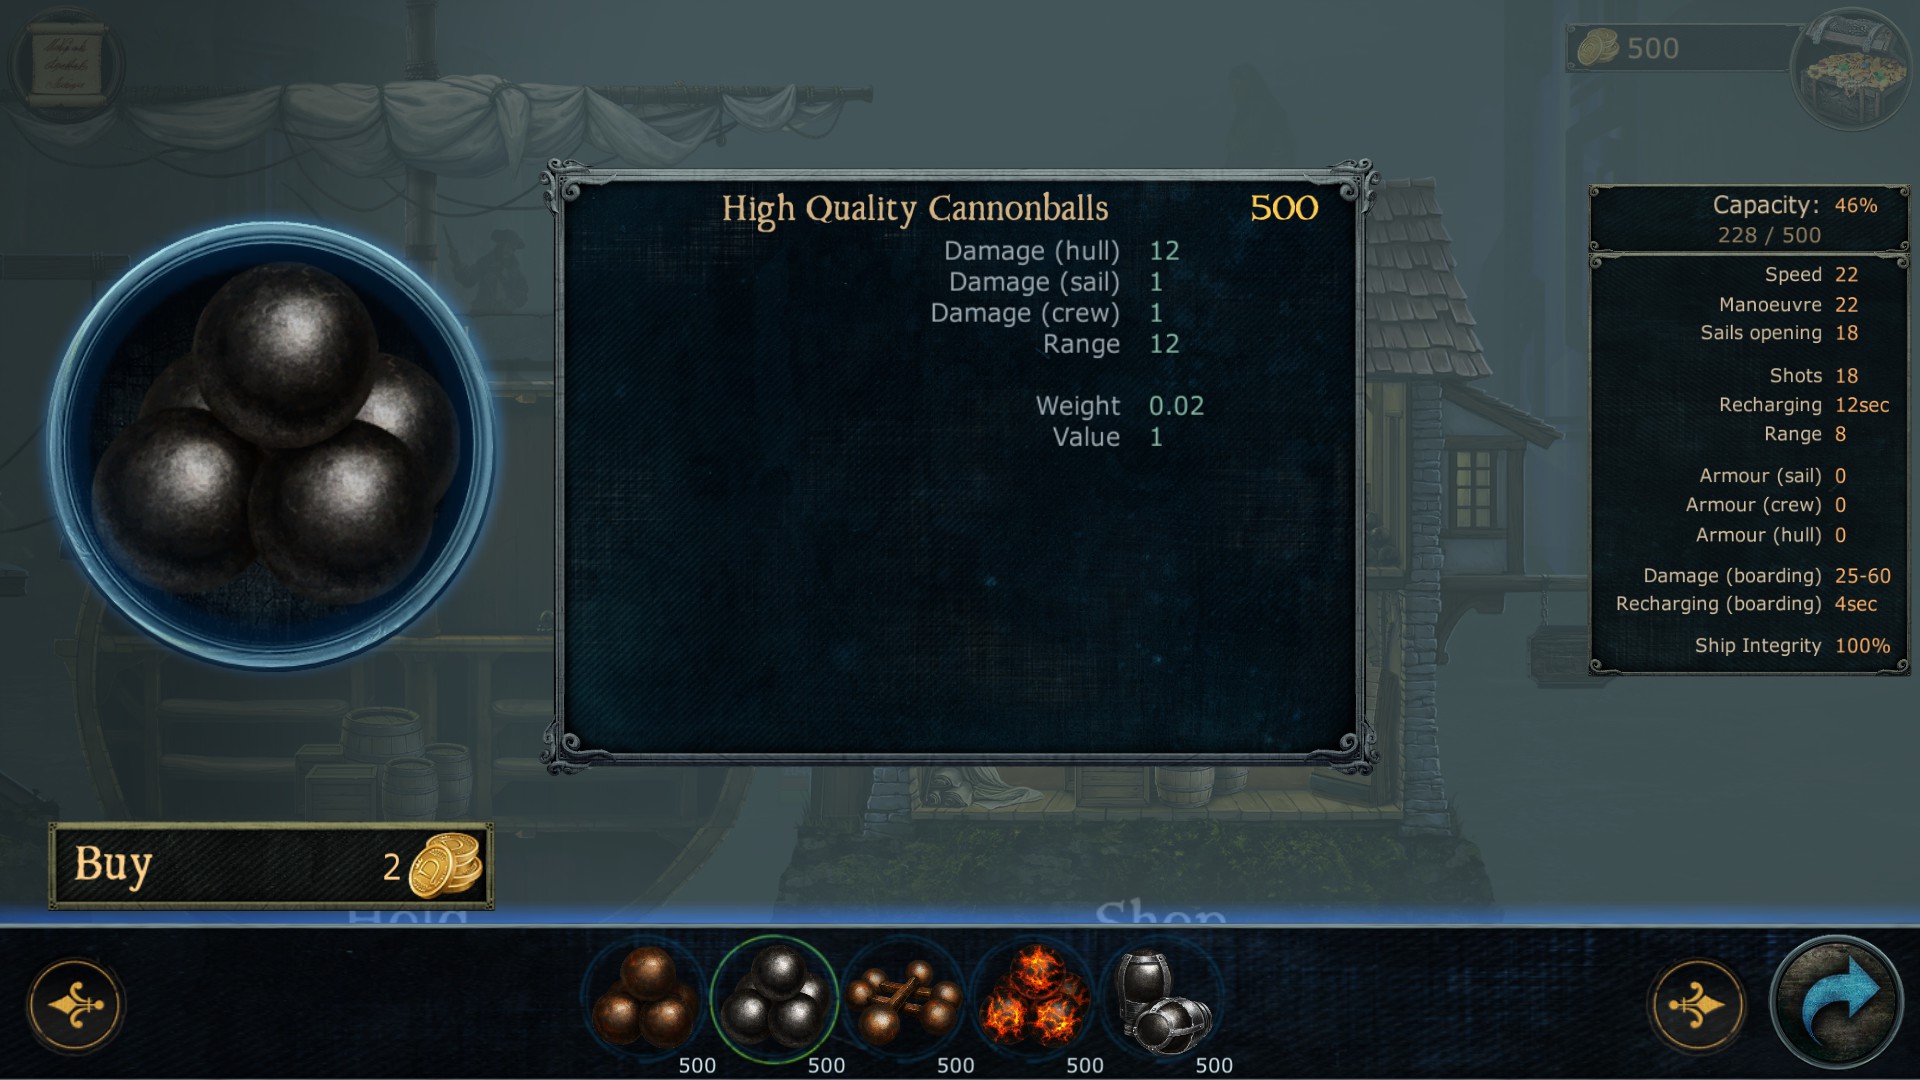
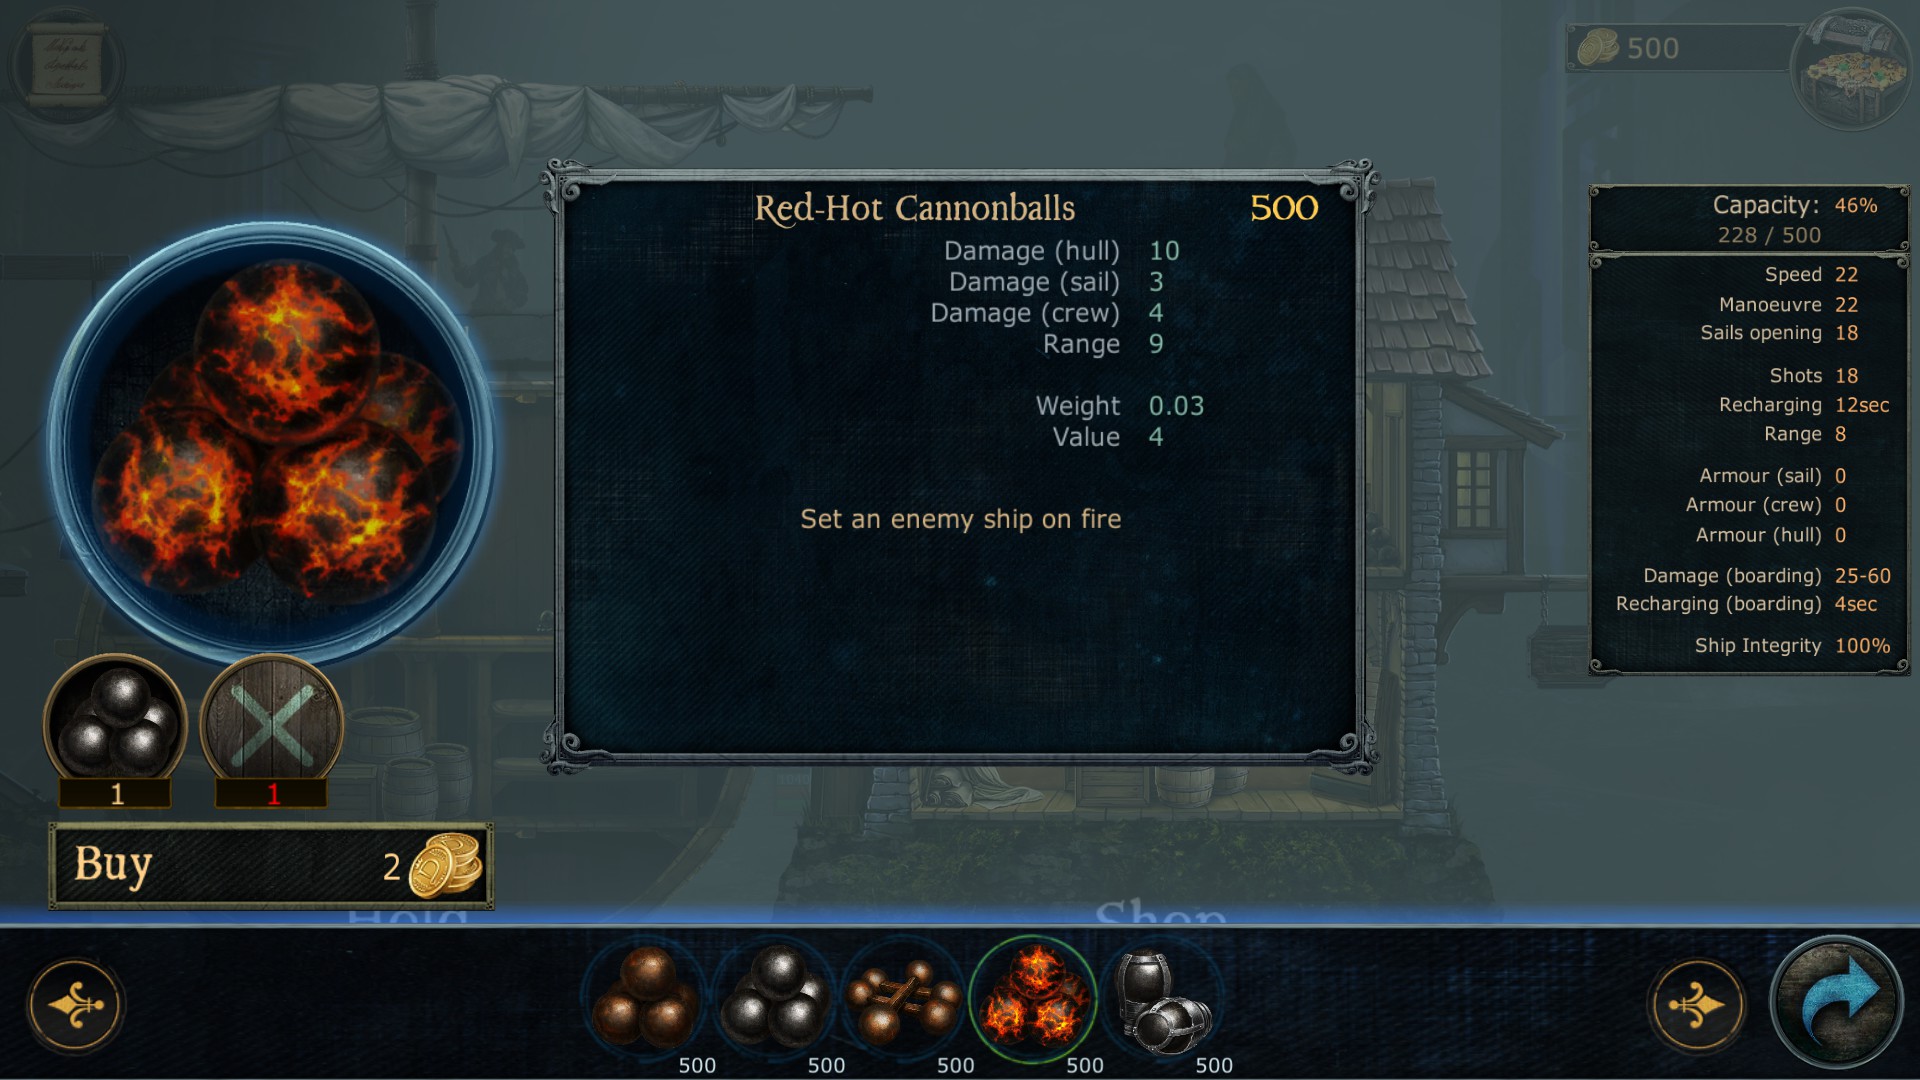
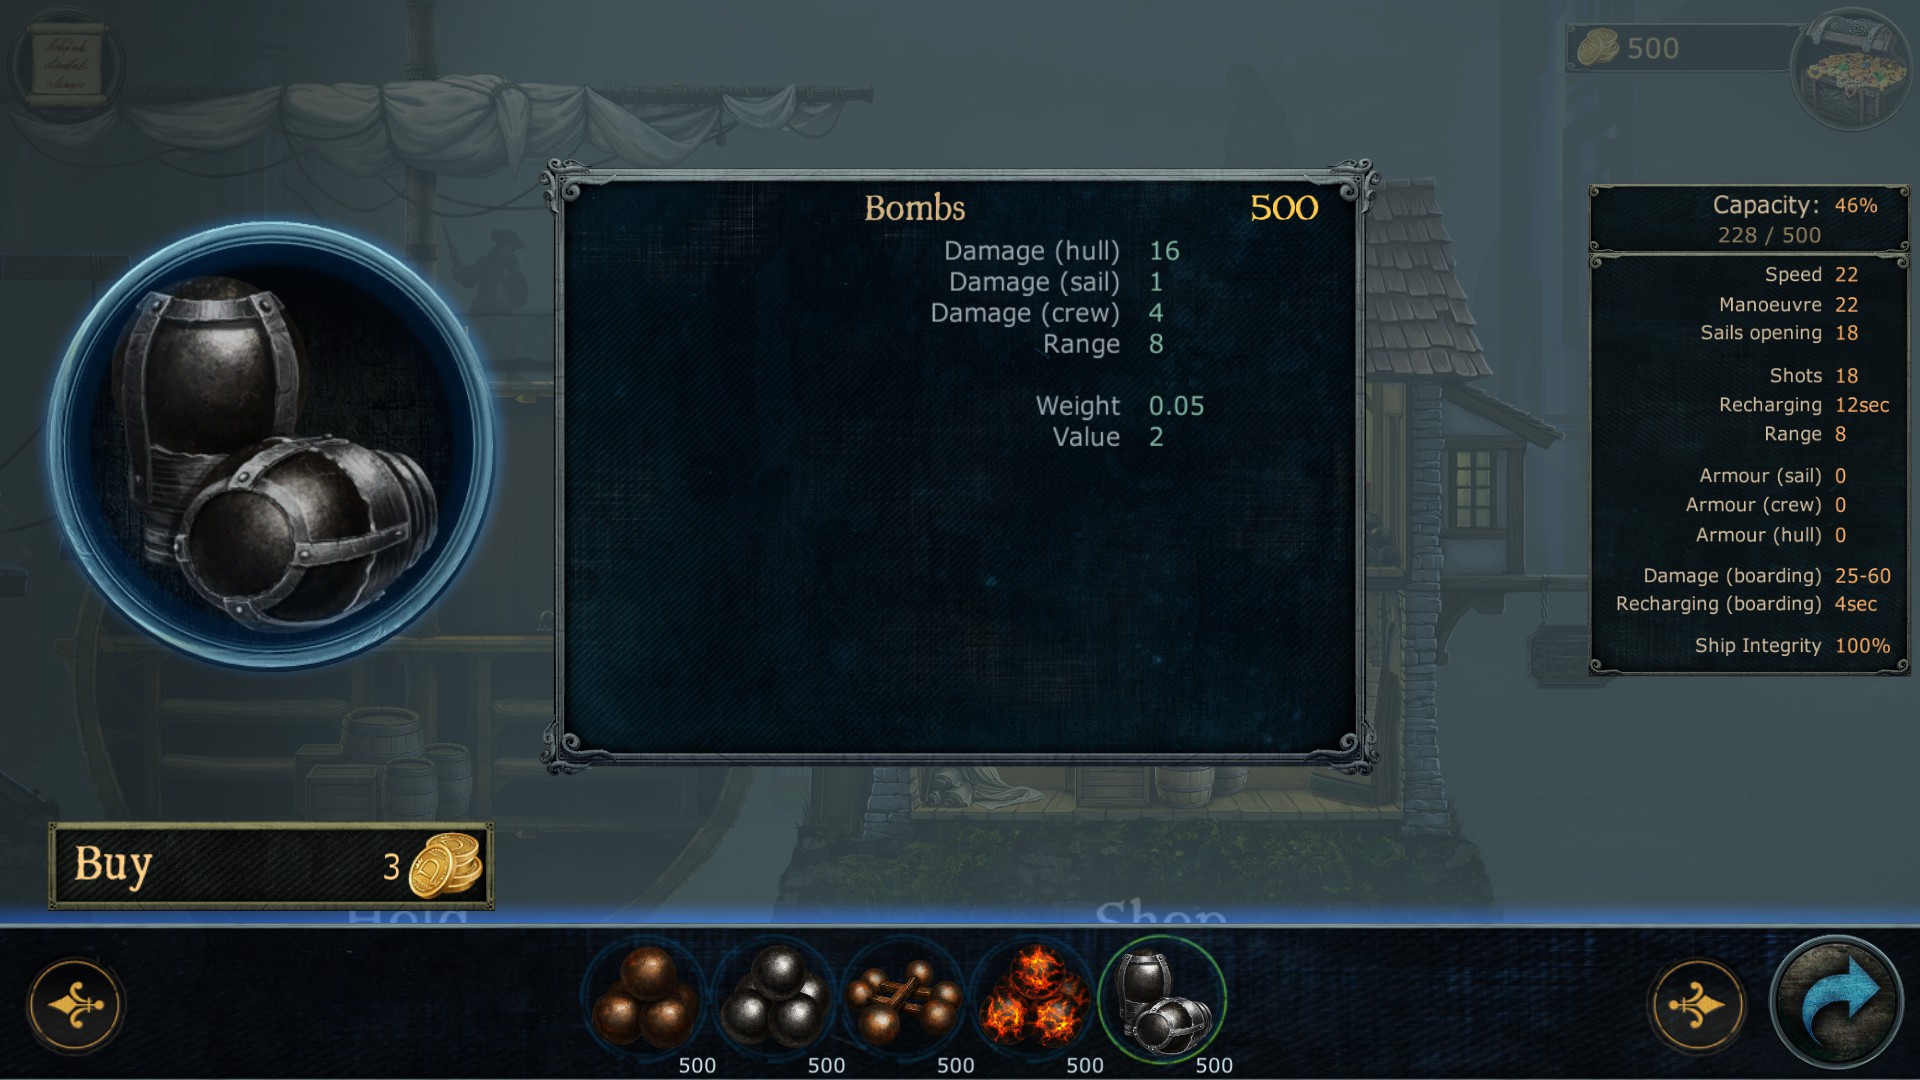
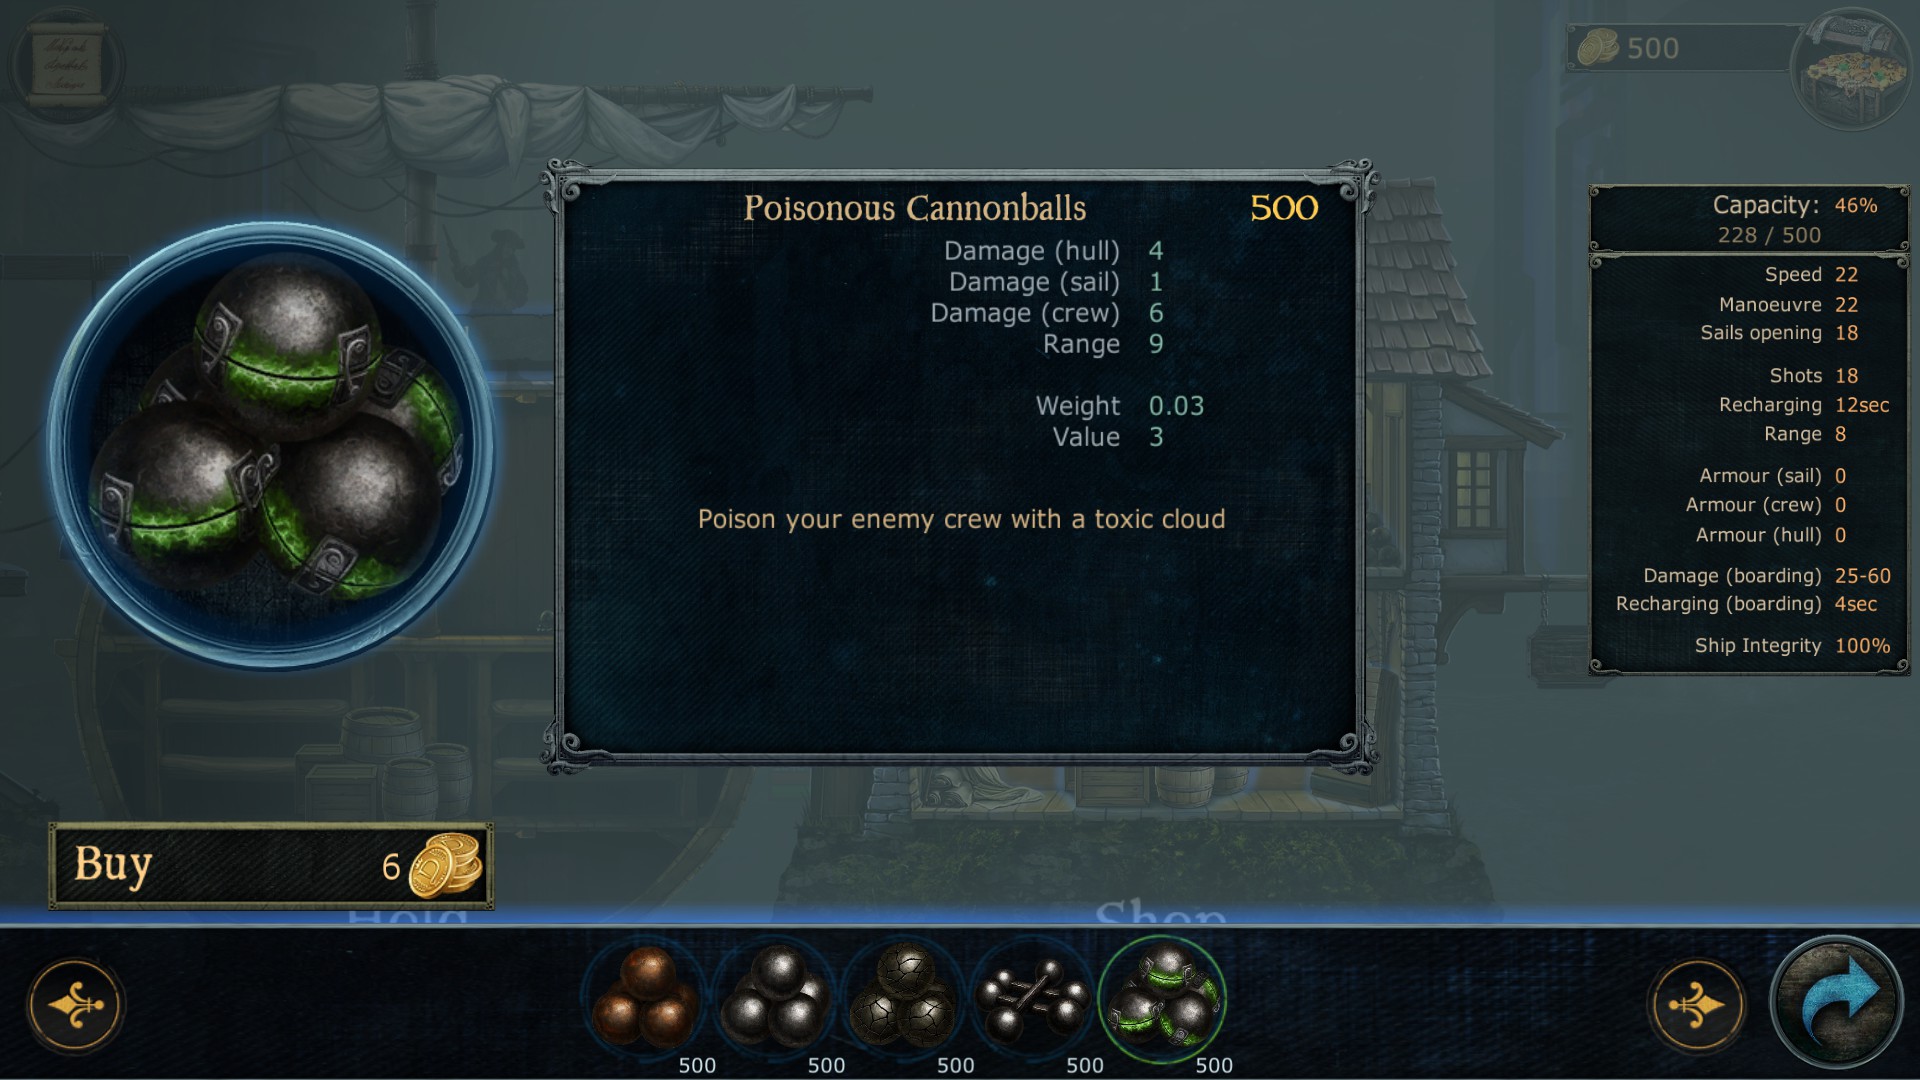
    For Ryuoji - assuming you are using the starter ship: once you disable a ship, circle it and use shrapnel rounds to thin out its crew 2-3 food salvs should do, then retreat until you can access the crew menu. Pull all your crew onto the deck except for 2 or 3 on the sails so you can still manoever then go and board. You should see a grapnel button allowing you to send your guys onto the ship to tie up their gunmen
    Ryouji 22 Jun, 2016 @ 3:14pm 
    Also rather miffed that anytime I do anything with my crew, move them to a different deck, I lose ship integrity.