Waste Walkers

Waste Walkers

26 ratings
AceHangman's Guide to Competent Survival
By AceHangman
A basic understanding of how to become a competent survivor in Waste Walkers. Updated for Final Release, Dec, 1st.
   
Award
Favorite
Favorited
Unfavorite
Introduction
This guide was written during the Beta version of Waste Walkers (1.7.5) As such, things are subject to change and not all the final touches are implemented. This is a suggested course of action based on knowledge I've gathered from many, many resets and restarts over the course of Waste Walker's beta. If you want the really short version, you can skip to the very end but that will only help you if you already have some experience with Waste Walkers and know your way around.

There's certainly many options and paths you can follow to achieve your goals, this isn't the only one. This is not a map to every quest or location, and in fact it will take you past quite a few, so you're still going to need to explore and seek things out on your own. Follow this guide and you will become a force to be reckoned with and you'll be able to handle anything that gets in your way as you explore Ashen City. Hopefully, you will find it helpful.


Final Release: As of Dec. 1, Waste Walkers is in final release and, barring patches for typos or such, it should be in its full, butterfly glory. I have gone through and redacted what may not apply and I will note any differences in a section like this one. Fortunately, the method and strategies aren't impacted too much, only some encounters.
Character Creation
So you've started a new game. You've chosen your gender, you've chosen your character skin, and you've got the name you're about to carve into the ruins of Ashen City. Now it's time to set your stats and skills.

In the interest of covering the basics:
Str: Strength. How hard you hit in melee and how much you can carry.
Dex: Dexterity. How fast you act in combat and your chance to escape.
End: Endurance. Your ability to reduce damage taken.
Con: Constitution. Resist status effects like Bleeding and Stun and you ability to inflict them.

I recommend you spend your first 3 points on Str and Dex, preferably 2 in Str and 1 in Dex. Strength is used in melee and that's a weapon you start with, but more importantly, you'll be able to carry more loot, which is why you're taking it. If you're planning to swing weapons in combat, then you're pretty much set with Strength, with a dip into Dexterity for initiative speed. If you plan to wield firearms and such, then you should still pick Strength for now. In the future, Dex may influence ranged combat, but for now, it does not and most firearms have a large combat speed bonus anyhow.

Next you'll have 5 Skill Points (SP) to spend on Skills and Techniques. Ignore Techniques, you can do just fine without a single one. Read over the list of Passive skills. Certain skills unlock higher levels as you learn them. For instance, you can learn Accuracy II after learning Accuracy I. My recommendation is that you take Fast Learner, and then Accuracy I and II. Fast Learner will give you bonus XP, so you level faster. You may as well take it early on. Accuracy will help ensure you hit your target. Even doing a little damage is better than round after round of missing.

Next you choose a Trait that describes your character:
Tough: +25% Max HP, +25% Morale.
Nimble: +10% Evasion (EVA), +5% Critical Evasion (CEV), +1 Attack Speed.
Aggressive: +5% Critical Chance, +10% cause Bleed, +10% cause Stun.
Focused: +10% Accuracy, +5% Critical Chance, +5% Critical Evasion, +5% Shock resistance.

Focused is a solid choice for you, but I recommend Aggressive for now. I always prefer a Stunned opponent, since they can't hit you back and Aggressive helps with that.

Now choose a starting weapon. They're all obligatorily terrible, as starting weapons are wont to be. I recommend a Table Leg because it has the highest bonus to stunning. You still won't want to be using it in a fight if you can help it.

Final Release: You now start with a predetermined weapon, likely a Pocketknife. Fortunately, weapon finds are increased, so you'll likely find an upgrade, such as a Hammer or Tire Iron within easy reach.
Getting Started
You start out in a basement that you've been hiding out in for some time. The bombs fell and you left your family to look for supplies. Finally things have calmed down and you're ready to move out once more.

Down in the basement, you'll find a bed and a safe used for stashing items you don't want to be carrying around. All such stashes are connected, so you can access them from any location with such a safe. The bed can be used to Rest, which gives slight healing, Sleep, which grants more healing but takes more time (which means you use more food and water) or Sleep and Save. Go ahead and Save now.

There are some boxes to search around the basement. The loot in Waste Walkers is randomized so there's no telling what you may find. Without spoiling anything, most such items are worthless to you, but that doesn't mean that others won't give you valuable Tabs (the currency) for them. Here's some things you may want to hold onto however, placing them into the basement stash for later: Deck of Cards x1, Jewelry Box x1, Dirty Water (up to 5), Scrap Metal, Duct Tape x1. Anything else you can pretty much sell, though some can also be used to craft useful items if you find the Schematics to do so. There's a good chance you'll find a Shopping Bag. Go ahead and equip this now, it will increase your carrying capacity. Head upstairs when you're ready.

Final Release: You shouldn't need a Shopping Bag any longer, you should start with a Sack, which has a higher carrying capacity. Also, the weapon drops in loot containers have been increased, so you'll probably find something (slightly) better than your starting weapon in the basement. Equip it from the Menu on your character. Upstairs, there's a high likelihood of running into a Bandit Intruder. This is a good test for learning combat. Luckily, you followed my advice and saved downstairs just in case.

Whenever you're ready, head outside.

You'll only have a limited range of visibility and the radius will increase and decrease during day and night. This is called the Fog of War and can be adjusted in the Settings menu. The screenshots are taken with the Fog of War setting turned off for clarity. You can also turn Stamina (which affects how long you can Sprint) on or off, as well as Survival mode (which handles your Hunger and Thirst).

Ultimately such choices are up to you, Fog of War will definitely make the game feel more intense and claustrophobic. Enemies will seem to rear up upon you if you run about carelessly (there are also randomly encountered foes to keep you on your toes, but these are rare enough that they work well). The guide will assume you keep the setting at default, at least at first.
Outside
You're probably anxious to head north/northeast and start looking for your family right away. There's a map available in your Menu. You can use it to get a good idea of Ashen City's layout. Your current location is in the northwest area of the map, near the 3 brown buildings beneath that field of hedgerows. Your house in the neighborhood one block north and east, on the cul-de-sac with the 6 houses.

Final release: Your house is helpfully marked with the tag 'Home' and circled.

Search the truck (specifically the cab) in the driveway outside your Basement Hideout. Vehicles are good places to scavenge loot. You can also check the Barn and Shed nearby although there's very little in either one. The Barn is good practice for spotting the doors on the east and west sides of buildings.

When you're ready, head east down the driveway until you reach the street. Instead of going north, towards your home, head south along the sidewalk. Stay on the left side to avoid two Bandits lurking outside the West Gas Station to the east. If you wish to dash inside the building and loot it, feel free, but avoid fighting the bandits for now. Definitely check out the Post Office on the corner and loot it thoroughly. You'll want more stuff to sell when you find other survivors.

After that, cross the street to the south and bear east. You might spot some mutated fruit-flies buzzing around. These are known as Gore Flies and you can probably handle one or two of them on your own, but you risk being poisoned or infected by their stingers.

If you go too far south, you might spot a survivor in a hazmat suit lurking behind a barricade, this is Toxin, a chemical engineer researching the Gore Flies. You can investigate him and his problems later. For now, head east along the south side of the road.

The next building you'll find is the Bus Station. If you check inside, you'll find three grizzled- looking survivors who don't seem inclined to share their shelter. Unfortunately, you're outnumbered and there isn't much you can do about it. Make sure you check the garbage cans outside as you head to the next building on the road, the Derelict Warehouse.

Inside, as well as lots of boxes to loot, you'll find Thorne, an injured survivor. Assure Thorne that you aren't there to kill him and offer to help. You should be carrying a First-Aid Kit. If not, you may need to seek one out. Otherwise, offer him the First-Aid Kit and he'll agree to join you if you ask. Offering a Bandage will save him, but he'll only offer you some Tabs as thanks.
Teamwork
Now you've got a teammate, so here's the details on how that works. You can attract followers who will join you and share in your travels. Only one companion can be active at a time, the others are considered to be in reserve. Most of the benefits of having a companion should be obvious: an extra person attacking and dealing damage, and an extra target for enemies to spread their damage around. Active companions also increase your carrying capacity, which means you can carry more loot around, depending on the companion's strength and equipment capacity (backpack size, etc.).

Each companion also has a unique trait. Thorne's trait, for instance, grants him Hit Point (HP) and Morale (MP) regeneration. He also has a chance to intercept attacks meant for you if your hit points get low.

With Thorne in your party, you should look into your Menu and check his equipment. He's probably better equipped than you are, but leave his stuff alone except maybe to add a Shopping Bag to his Accessory Slot. What you really want to do is go into Skills and spend the unspent Skill Points he has. It shouldn't be complicated, Fast Learner and Accuracy, just like you.

You can find many companions, but typically only your active companion will provide their Trait benefit or assist in carrying items (although the gear they carry doesn't factor into your inventory weight.)

Now here's a key thing to remember if you want to keep yourself safe in fights: The enemies in Waste Walkers scale based on your level. Certain enemies or locations might have different scaling range than others, but in general, assume your foes are going to be around the average level of your party.

What's that mean? It means gather as many companions as you can, but only use 1 of them. Keep the others as low level as possible. True, you won't benefit from their traits, so eventually you should figure out who you like and stick with them. This may change in the future, but for now, this strategy will keep you safe until you're ready to get into fights.
Making a Difference
With your new teammate, you're now ready to start making your mark around the city. Head east from the Derelict Warehouse and past the parking lot outside. There are ghouls roaming the area, but stick to the sidewalk until you reach the intersection and then turn south. If you're feeling quick, and have some Stamina built up, you can make a dash for the police car and check it for valuables.

Avoid getting into fights, especially with humanoid opponents like bandits and ghouls, they tend to be tougher, have better armor, and, in the case of bandits, use weapons that inflict Bleeding and cause Shock. You'll find that animals like Feral Dogs and Gore Flies are much easier than an equally-leveled humanoid foe.

In the alley behind the next building, a Mechanic's Shop, you'll see someone slumped against the wall. Check the situation. It seems this man hired a guide that turned out to be a robber. Of course, you could just put him out of his misery, but it sounds like he doesn't have much to take. Get the story and offer to retrieve Samuel's belongings.

Keep heading south past the burning building. You may notice the brick walls of a graveyard on the east side of the street. Take note of its location as you continue south and duck into the white building on the left. It's the former office of a game development studio.

Inside the old Corrosive Studios building, you'll be challenged by a survivor wearing a gas mask and wielding an assault rifle. Assuming you manage to not get shot, the man introduces himself as Corrosion and gives you leave to roam about the building.

If you ask about helping him, Corrosion will mention receiving a radio transmission from the east, near the Thrift Store. Offer to investigate and leave. Now you could easily head east to check out the transmissions but you're probably almost weighed down by scavenged loot. Carrying too much weight will cause you to slow down dramatically.

If you want more salvage, the office building south of Corrosive Studios (its door is on the west side) is a good source of supplies (check the desks). If you're feeling really sure of yourself, however, you can head east across the street and into the Pawn Shop there. The parking lot is full of ghouls, so be very careful dodging around them. Inside the Pawn Shop you'll find plenty of loot and likely some ammunition in the boxes behind the counter. You may or may not find a firearm in the gun case, but if luck's with you, you will.

Continue heading south from Corrosive Studios or the Pawn Shop to the next intersection and head east. You should come to a walled compound around the old City Hall being watched by guards. This is Free Haven, a settlement where you can unload some of the loot you're carrying and pick up some new supplies of your own. There are three traders in the compound outside, one sells miscellaneous items, one sells pharmaceuticals of the less-than-medical variety, and the trader on the right sells weapons and equipment.

The equipment trader should be your first stop. The first item you should purchase is a Sleeping Bag. This functions like a bed and will allow you to rest and, more importantly, save your game at any point (costing a little thirst and hunger as time passes). Buy one, and use it now.

Buying Gear
Taking a little pause in the action here to talk about equipment.

You've now got a chance to unload a lot of interesting, but useless, loot that you're been lugging around. If for some reason you find that you cannot purchase a Sleeping Bag, or any item, despite having the Tabs to afford it means you're over-encumbered. You won't be able to buy anything until you bring your inventory weight down.

Now might be a good time to take a look at your Thirst and Hunger levels. You might want to consume some Beef Jerky or Canned Food and drink some Water or Soda just to top yourself off before you sell your things. You shouldn't need to hold onto more than 2 or 3 drinks and 4 or 5 food items.

Sell off all your Condoms, Pencils, Beef Jerky, Cigarettes, etc. Pretty much everything. Don't forget to switch categories and look at any Armor you might have to sell. Must likely you'll have about 8 or so Shopping Bags you don't need. You may also have a bit more Tabs socked away than you expect. You may have collected Handfuls of Tabs here and there. These can be sorted out into a random amount of Tabs from Inventory under Special items (also where you'll find your Sleeping Bag).

There's some reasonable gear available here in Free Haven. It's serviceable, but not the best. It also doesn't have all types of ammunition. You might find it lacking in 9mm and 5.56 rounds. If you have to buy a gun, it will cut heavily into your funds. If you're lucky enough to have found one, check the Ammo situation, and if you choose to equip the firearm, don't forget to equip the appropriate ammo in the Ammo slot.

If you're going to stick with melee weapons, make a choice of whether you want to use one- or two-handed weapons. Most two-handed weapons will tell you via 'Restrict: Shield', which means they take up your off-hand. Two-handed weapons tend to do more damage, but one-handed weapons will allow you to use a shield, which reduces damage you take.

There are so many weapons available that you should eventually play around with all of them, but this guide will recommend that if you're going with two-handed weapons, you may as well go for a Sledgehammer. It's got one of the best Stun ratings you'll find. If you prefer one-handers, then the Crowbar or Hammer is a solid choice. Unfortunately, a Trash Can Lid is all you'll find as a shield here.

As for armor, the best gear you'll find in Free Haven is Riot Gear. While the Riot Helmet (without faceplate) and the Riot Vest are solid choices, Kevlar gear is better. Since this guide will assume you aren't a pro, play it safe and buy a Riot Helmet and a Riot Vest. Definitely equip yourself, but if you have enough Tabs, don't forget your teammate. A pair of Glasses for each of you is also a good buy. Your Face Wrap isn't much help and the bonus to Accuracy and Critical Chance from the Glasses is much more useful.

You may have to save up or make another scavenging run before you can do this, but if you manage to save up 250 Tabs, you can hire the Mercenary named Bastion who's camped outside Free Haven in the Condemned Building just to the Southwest. His ability will earn you extra Tabs when you fight enemies with him active. Early on would be a good time to decide what companion you want to focus on.
Free Haven
Exploring the settlement of Free Haven, you should head inside and look around. You'll find some people to talk with. A dangerous-looking character in the group of three to the left grudgingly reveals that his name is Jackal and he's hunting a low-life named Psy who's been hiding out in a settlement called New Veil to the northeast. You can offer to take care of his problem for him if you wish.

There's a couple of enterprising young women on the right-hand side of the building, near a bed that you can use to rest in and save your game. One, Cataleyah, will mention that she's spotted graverobbers just north of Free Haven. Her former husband's buried there and she would like his wedding ring before it ends up in some grubby, thief's hands.

You'll also find a doctor in the back office and a stash safe in the northwest corner of the building, near a metro access hatch. You can access any items you've stored in any stash from this safe. You may also choose to explore the Metro tunnels below if you wish, but this guide takes you back outside to find the crooked guide that robbed Samuel.

You'll find the robber wandering about the front of the compound. If you've followed this guide's advice, you'll obviously look too competent for him to try his normal scheme, so you can't trick him like that. Best to just come right out and demand the old man's belongings. If you get violent, be warned he's packing a pistol.

Time for you to head back out in the Waste. So head out of Free Haven and back west, then north. Pass the Pawnshop (ducking in if you haven't looted it yet) and find the graveyard. There's a trio of bandits plaguing the area and you'll find the ring Cataleyah wants on one of them. Tuck it in your pocket and then head east. Past the cemetary Shed, you'll find the Thrift Shop. Loot them both and then head around back of the Thrift Shop into the field.

You'll find a malfunctioning radio near a pack of supplies just under the tree. The groundwater around here has been contaminated and you'll soak up some radiation if you come in contact with it. You can check your level of irradiation in the HUD status bar. It's measured in MSV. Grab the supplies and the radio and then head west. Sure, that might get your little booties wet but, what? Afraid you'll melt?

Directly west of the radio's location, you'll find Samuel. He'll be overjoyed to have his things returned and give you a little reward. Now it's back south to the Corrosive Studios building to tell Corrosion about the radio you found. Ask if he wants any more help and he'll tell you that he got a transmission from some soldiers in a building south of Free Haven. Offer to check it out for him.

Return to Free Haven to sell any salvage and then head south past the Condemned Building, stopping in to hire Bastion the mercenary if you haven't already. You'll come to a Workshop with a military jeep parked outside. You'll know the place by the pool of groundwater outside the door. Suck up some rads and head inside to find out the soldiers' fate.

Looks like the soldiers didn't survive their encounter with the mutant inside. Luckily, you should be more than capable of dealing with this abomination. Take a souvenir from your battle as a trophy. Don't forget to equip it in the Trophy slot of your equipment.

Before heading back to tell Corrosion the news, head south from the Workshop and you'll see a large group of well-armed Bandits roaming outside a Gun Shop. With a little effort, you can probably lure them away from the door and dart inside, just be warned that when you step back outside any Bandits you didn't defeat will be laying in wait for you.

Fortunately, the Bandits must have decided to use the Gun Shop as a base and stockpile rather than just looting it bare and carting the merchandise away. You'll find boxes and boxes of ammunition and a few guns left in the case behind the counter. Grab what you can carry and head back to tell Corrosion about the fate of the soldiers.

He's not happy about the outcome and he wants you to find the tipster that pointed the soldiers towards the mutant-inhabited ambush. He's sure the informant is still in Free Haven. Go and find him. You may need to interrogate a few people, but you should find the shady anarchist responsible in short time. Deal with him and report back to Corrosion.

Corrosion tells you he needs to move on, but he gives you some supplies for helping him out. You can find them in your inventory under Plot items. Corrosion's Survival Pack should help you immensely, go ahead and use it now.

Finding your Family
You should be ready to return home now that you've got some back-up, some supplies, and some skills. Speaking of skills, you and your companions may have gone up a level. You'll have assigned your new attributes automatically, but you may have forgotten to go to the Skills section in the Menu and select Learn Skills.

Stick with the Passives, you will have almost no need for any Techniques at all, especially if you're using ranged weapons. Almost every ranged weapon has a Weapon Specific skill. For your skills, you should look into Delayed Reaction (keeps your Action Points between fights), Brute (increase Stun chance), and Counter Measures (chance to counterattack opponents). Truthfully, there's a lot of good Passive skills, you almost can't go wrong.

Head north to the intersection and back west past the Bus Station. Head north up the street back towards your Basement Hideout. If you want to stop in and stash any Scrap Metals or Canned Food for emergencies you can.

If you feel up to doing a good deed on the way, then head directly east across the street from the driveway leading to the Basement Hideout. You'll see a building with two doors north of the street and a door into the Library on the south side. If you explore the Library, heading to the second floor, you'll meet an artist named Nora. She's losing her vision and asks you to retrieve her last painting from the gallery across the street so she may enjoy it before it's too late.

Don't head directly across the street like Nora says, that's the Bank and it's been taken over by Bandits. Instead, head east around the Bank and through the parking lot to the Gallery. There's a ghoul and some hounds wandering about. One of the canines is a Necro Hound, more dangerous than the Feral Dogs it resembles. Inside the Gallery, you'll find the orange abstract painting Nora told you about. Return it to her, then continue north to the cul-de-sac containing your family's home.

If you check your neighbors' houses, you'll find them mostly barricaded, but in one house near the street you find a grisly scene. The family there has been killed and eaten by a psychopath. He's lurking in the garage, so you can slip away without danger, but you should probably take this madman out. It's the least you can do for the deceased. They lent you their lawnmower that one Easter when yours broke and you still have that Tupperware dish from the brownies the wife baked your family.

When you reach your home, you find it quiet. There's no sign of struggle and it looks like things have been packed up. They must have moved somewhere else for safety when you didn't return. Looking for clues, you should find a letter on the table. It seems they went east but your spouse left your Lucky gun hidden in your desk. So thoughtful.

Your Lucky pistol is a basic model, but thankfully you've practiced with it so much that you can land some impressive hits. It has a 10% higher chance of Critical hits than a typical 9mm pistol. Best grab that and maybe take a nap in your bed one last time to Save before moving on. The nearest group of survivors to the east is New Veil.
Eastbound
Before you head to the east looking for New Veil, you'll need to know the location of some of the better weapon suppliers in Ashen City. From your house at the end of the cul-de-sac, head south and you'll run into the back of the Fire Department. Go around the building and continue south across the parking lot, avoiding any foes and a strange fire anomaly.

South of the parking lot and around a Storage Shed, you'll find a fortified Abandoned Warehouse. Duck inside and you'll find a group of Bandits lurking about. Most aren't great conversationalists but a few can be approached and, luckily, they're looking for someone who can do a job for them.

Check with the Dog Trainer on the north side of the building. He's having some trouble with his ♥♥♥♥♥, a German Shephard named Nadia. Offer to help and maybe you can get a better reaction than he can. If so, you can buy the dog off of him and you'll have a new companion. Nadia can't use weapons and armor like other companions, but the trainer will sell you some canine-specific gear that does just as well.

One of the best talents that Nadia has, aside from her loyalty if you earn it, is the Howl skill. If you ever find yourself getting depressed and stressed out, with your Morale Points running dangerously close to calling it quits, you can use Howl. Howl not only increases your combat effectiveness, but the boost to Morale should keep you from ever having to worry about it again.

The Bandit Quartermaster is willing to talk with you, but he's not willing to trade with you. He does tell you about a crate of supplies his group had to leave behind in the Fire Department. He offers you some tools to open the crate and asks you to retrieve them. Agree and then head back north. The crate is inside the Fire Station, just as stated, grab it and return it to the Quartermaster and he'll trade you supplies.

These guys have some of the best gear you can find. Make sure you save at least 100 Tabs, you'll find out why later, but otherwise, pick up a Kevlar Jacket and Helmet and some Combat Boots or Gloves. The Military Rucksack is also great for carrying capacity. There are larger backpacks, but they also slow you down. If you're going the one-handed route, picking up a Riot Shield is paramount. If you need some rest, there's a bed available to sleep in and Save your progress.


When you're ready to continue, head east from the Fire Department and you'll see the walled compound of the Police Station. It's a good place to loot, though you won't be able to break into the armory. You can find a key to the cells on the floor of the office upstairs. One of the cells has a dead police officer and some supplies stashed in there. They could be valuable to someone, bring them along.


Follow the road until it ends. You're just outside New Veil, but the entrance to the compound is on the south side. You'll find another survivor here named Seeker, he's posted near some crates around a truck and he's watching for a mutant hiding in the Radiology Labs to the north. Offer to help and then head into the Radiology Lab. Be careful, some of the equipment is broken and giving off radiation but you can also find some meds in the cabinets. The mutant should be no match for you, but watch out for its mind-control powers. Once the threat is eliminated, return to Seeker. Having helped him out, he'll join you if you ask.

The Arena
You're really close to New Veil now, and no one would blame you for heading there and checking it out. There's a different route to take from here however. Head northeast from Seeker and across the parking lot. You'll come to a Storage Facility being guarded by Bandit Sentries. The Storage Lot has been converted into an Arena and one of the sentries will offer to let you in for 100 Tabs. Buying your way in not only allows to fight, but also grants you access to the Quartermaster in the west building.

Talk with the Match Master and he'll set you up with a fight. I recommend getting some firearms and about 30 rounds for each one, possibly a handful of specialty rounds as well. You should have little trouble dealing with any of the combatants if you've followed this guide and kept your companions, other than your active one, at a low level.

You can rest in the bed after each fight in the Arena and if you run low on rounds, head over to the Quartermaster again between fights. If you can survive 10 battles in the Arena you'll have made a name for yourself, earned a sizable amount of prize money, including a gift from the Quartermaster, and attained a new trophy. You'll also have made enough Experience to have gone up a few levels and you should have learned more than enough to handle any fights you come across in the future, including fighting multiple opponents.

Afterwards, you can head south into New Veil and you should be able to find clues to your family's whereabouts by questioning the inhabitants there. This is as far as this guide takes you. You should be competent enough to handle any challenge now, and there's plenty more waiting for you and plenty of places left to explore, since this was just one possible route to take.

Best of luck in your journey and hope you don't run into me,
AceHangman.
The Really Short Version
Okay, so maybe you've read the guide or maybe you've played before and don't need any handholding. So here's the really, really condensed version.

Leave your Hideout.
Go to your house and get your gun.
Help the Bandit's south of the Fire Department and get Nadia.
Go to the Arena and fight.

The End.
9 Comments
AceHangman  [author] 3 Oct, 2018 @ 2:11pm 
I am glad it was helpful. Happy scavenging!
Pirren [THC] 3 Oct, 2018 @ 12:34pm 
Thanks, very useful!
AceHangman  [author] 16 Jul, 2016 @ 4:51pm 
Well, that's pretty much the end of the story, and I was joking about the commercial. I made all that up. I hope you enjoyed the game. (=Corrosion=) put a lot of work into it, I suppose a few more tiny clues to find Snare might have been added.
Ayase_Eli_Proxy 16 Jul, 2016 @ 5:58am 
@AceHangman Thanks so lot on this man. Now I can continue the story.

And yes, I never heard that jingle in the game.
AceHangman  [author] 16 Jul, 2016 @ 1:27am 
@Scargaze_Proxy,
So you were observant and took a look a look at the note you were left huh?

Spoiler alert:
It looks a bit like that waxy paper you'd see deli meat wrapped in. That pig stamp reminds me of that commercial. You remember?

The family's on a picnic. Dad opens the picnic basket and the cartoon pig in the overalls pops out. Then the jingle starts up and the pig is cartwheeling along the bottom of the screen right over top of the sub-titles:

"Our ham's no sham and neither is the lamb.
Try the turkey or the jerky. It's the finest in the land!
For a tasty treat that hard to beat,
ask your grocer for a kosher slab of Ashen City Meat!"
*Boom diddly-boom-boom!*


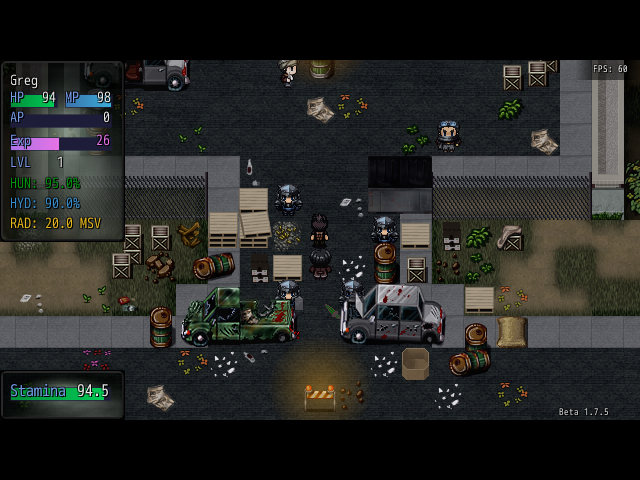
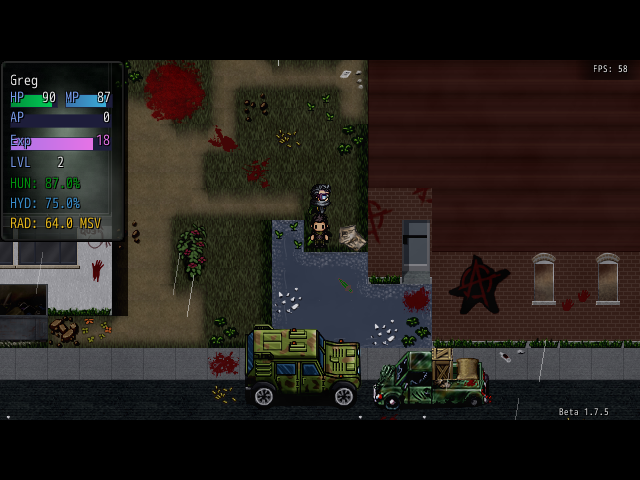
Ahh... a classic! What I'm getting at is that it looks a lot like the paper they used to wrap meat in down at the Meat Packing plant. The one on the south side of Ashen city.


And yes, I made all that up.
Ayase_Eli_Proxy 15 Jul, 2016 @ 9:29pm 
help. i'm stuck at mission at the letter which has pig stamp. help me:SadSkyhammer:
AceHangman  [author] 5 Jun, 2016 @ 2:08am 
You're welcome. It's the first guide I ever made and I hope it helps you enjoy the game without taking away any of the excitement of exploring and facing the challenges.
scarletteshadow333 4 Jun, 2016 @ 9:47pm 
This is incredibly helpful, Thank You. :steamhappy:
Cryptic  [developer] 18 Nov, 2015 @ 7:14pm 
Looks good.