Novus Inceptio

Novus Inceptio

94 ratings
Beginner's Guide to Novus Inceptio
By Mardiray
Welcome to the beginner's guide to Novus Inceptio. This guide should give you the basics to get you started and survive your first few years in the game.

Novus Inceptio is made by McMagic Productions, and designed by Martin Masny.

This guide is a work-in-progress and may contain spoilers.
[Guide begun October 15.2015]
   
Award
Favorite
Favorited
Unfavorite
Starting out
Novus Inceptio is a survival sandbox game set in a post-apocalyptic future. DISCLAIMER: The game is in early alpha at this time, so there will be changes occurring frequently that may invalidate parts of this guide.

After taking a few minutes to create your account and log into the game, you will begin in one of the towers. The towers are located in safe zones, so feel free to take a few minutes to explore.

Use the mouse to aim your cursor, WASD to move.


You will be on the second floor. Look around and find two blue and white boxes. When your cursor hovers over them, they will say 'Box from the Creators'. Press E, and you will be able to access their contents. Pressing I will open your inventory. Transfer the contents from the creator's box to your box by double-left-clicking, click and drag, or shift-clicking the items.


In one of the two boxes you will find 25 blueprints and a knife. If you right click the stack of blueprints while they are in your inventory, you can choose to learn them. This is a good idea, as they are the basis of the crafting system.


You might also pick up the knife. The knife can be equipped on your character and used to kill wildlife and to defend you from predators. If you press C, your character window will come up, and you can click on the knife to equip it.

Placing the knife on your character weapon slot also leaves it available for crafting. The reverse is not true, placing the knife in your hot bar makes it available for crafting, if it is selected, but does not equip it for fighting. For now, put the knife in your character weapon slot. Once you have either a better weapon or more tools, you can change things around.


The second Creator's Box will contain additional items. It may even contain more blueprints. If it does, you will be able to see which blueprints you have already learned and which you have not by right clicking the stack.


Also nearby, you will see a brightly colored rotating cube in the air. This is an anomaly. If you get close enough, you will be transported within the anomaly. This is a good idea. There will be more Creator's Boxes within, and at this time there are no threats.

See the next section of this guide for information on anomalies.

Once you have completed the anomaly, you will be returned to the same spot. Time may have passed. Go down the stairs to the first floor of the tower.


On the first floor of the tower you will find a machine that you will not need now. Head outside and begin to explore!
Displays
In the upper left of your screen is a display that will give you information. Your character's age in years is displayed, followed by the date (day.month.year), the time of day (24 hour clock). Below this is the temperature in Celcius and the current weather. Across the bottom are the status effects. These include Cold, Heat, Hunger, Thirst, Exhaustion, Injured, and Overloaded.


When you are hungry, thirsty, injured, exhausted or overloaded, the color of the bar will change from green to yellow. Your stamina will refill more slowly, and you may move more slowly as well.


On the lower left are the System and Fight messages. The active window will be white. Red indicates information is in the window but not displayed.


In the center top is your compass. It tells you what direction you are currently facing.


The compass, combined with the map (M key) can help you navigate around the world. Notice that the map is lit during the day and dark at night. You can use the scroll wheel on your mouse to zoom out on the map.

In the center bottom of your window are four scales, HP (health) in red, hunger in yellow, stamina in green, and thirst in blue. All are important. Below them to the left are the hotkeys numbered 1 through 9. On the right are the Control hotkeys, again numbered 1 through 9. In the center will be displayed your current active tool.


The top right corner of your screen displays the current version of the game.

The center right of your window has a list of current shortcut keys. The list will change depending upon the circumstances.


You may notice that when you move from indoors to outdoors your view toggles from 1st to 3rd person. You can switch this back and forth manually, when outdoors, with the F1 key.
Anomalies
Upon entering an anomaly, you will find yourself in a different environment than the one you just left. Time does not pass within the anomaly, although it does pass outside. There are no predators.

There are currently 4 types of anomalies in the game.

Each anomaly should hold between 2 and 5 (sometimes more) Creator's Boxes. The boxes will be found on the ground. You may have to turn around, look behind an obstacle, climb a small steep incline, or a fire escape to find them, but you should not have to jump off a cliff or scale a cliff face.

You can botanize in one of the anomalies and forage in all of them. You can craft inside an anomaly, apply a healing cover, eat, and drink. You cannot place objects on the ground like campfires or anvils. The map shortcut, M, does not work in anomalies.


Anomalies can be exited by either stepping very close to a cube within them or pressing the 'Exit Anomaly' button at the bottom center of your screen.


The first type is the Underground Cave anomaly. You will begin at the west end and progress east.


You will notice Ancient Mushrooms. If your cursor is over them, you can use the E key to gather them. You can also botanize for Ancient Mushrooms within this type of anomaly. They can be eaten or used as cooking materials for crafting.


You will notice Ancient Crystals. If you have made a pickaxe, you can gather them.


You can forage in the underground cave anomaly. You may find Ancient Crystal; Ash, Bone, Raw Iron Ore, or Raw Stone.

The Second type of anomaly is the Desert Island anomaly. You will begin at the West end of the anomaly. The cube is at the opposite or Northeast end. There is nothing to botanize in the desert island anomaly. You can forage Bone and Sand.


You can also forage on skeletons for fossils.


You can also fish on this island.

The third type of anomaly is the Winter Airplane Graveyard anomaly.


You will proceed east, go down an elevator,

go west under your previous path, go down a circular staircase, and proceed back east to find the cube. You cannot botanize within this anomaly, but you can forage snow.

The fourth type of anomaly, and by far the most complicated is the Post-Apocalyptic City.


You will enter at the far west end. the city will stretch north, east, and west. There are many objects that can be foraged here.


You can find some materials here not found elsewhere like cola, electromechanical devices, electronics, mechanical components, oil, scrap metal, and wine.
Gathering Materials and Inventory
Botanize and Forage

At the bottom left of your screen is a hotbar with numbers 1 through 9. These represent the number keys on your keypad.

Number one hotkey is pre-filled with the Botanize command. This allows you to gather plant materials, usually foodstuffs or herbs, for consuming or crafting. Find a grassy spot, aim your cursor at the grass and press 1.
If you receive materials they will go into your inventory (I). You can see a list pass across your screen.

Number two hotkey is pre-filled with the Forage command. This will allow you to gather other crafting materials. After you have Botanized, try Foraging in the same spot.

At the bottom left of your screen are chat windows. These also carry messages from the System. Make sure the System tab is highlighted (White, not Grey or Red). If you find nothing when Botanizing or Foraging you will get one of two messages that show in yellow text. The first reads, 'Nothing was found-try it to search again.' This message means you should keep trying. You will find something in this spot. The second message says 'There's already nothing-try it later.' This message means that you have already Botanized or Foraged all the materials from this spot. It's time to move to a new spot.

Don't worry if the Botanize or Forage commands go missing from the buttons. Just open the Character window with C, and go to the skills tab. On the right, you will find the ability to add the Botanize and Gather skill back to your hotbar.

You can also obtain materials from some objects when your cursor is over them. You will see a menu appear. There may be several options. For example on this rock,
There is an option to use the E key to mine the rock with a pickaxe, if it is the active item, or to forage the rock with the F key.

Fishing and Climbing

Under the C or character window, you will also find the Fishing skill, feel free to add that and the fourth skill, climbing, as well. Fishing requires a fishing pole. With the pole equipped, walk into the water. The fishing button, which you have already put onto your hotbar (available in the C or character window) will now no longer be red, and you can fish. You may obtain Trout, Alga, Branches, Ancient Crystals or even Blueprints by fishing. While you are in the water you can also forage to get water.

Overloaded?

If you have been doing much gathering, your inventory is probably filling up, and you have received the pop-up window regarding over-loading. You may even find you can't move! Try pressing the N key. This will open the inventory of A2-A, your flying robot companion. Its inventory is infinite. Transfer items from your inventory (I) to A2-A (N), and over-loading will no longer be a problem.

The Crafting window X; Character window C; and Inventory windows I and N can be moved across your screen. You can drag them by the title across the top.

When you have your inventory, I, open and any other inventory (whether A2-A's inventory, N, or a barrel, campfire or another such inventory) left-clicking an item in the inventory that is not yours will move it into your inventory by default. So, if you want to move items between 2 inventories other than your own (say between A2-A and a campfire) you should close all inventories except those two. Then if you left click any item, it should move to the other inventory. This saves you the need to drag stuff around your screen.

Salvage

Occasionally, A2-A can help you to obtain useful materials from scrap. This is true of scrap metal. Select a piece and right click, the option to salvage will appear. You may get iron ingot, or raw iron ore.


Extract

A2-A can help you to obtain some specialized raw materials. Starting with ancient crystal, you may get silicon. Starting with bone or fossil, you may get calcium.

Crafting and Repair
Crafting
You are probably getting hungry, thirsty, or notice that you are cold by now. If not look in the upper left of your screen where your condition is shown. If you would like to make some more satisfying food or some clothing to keep off the weather, it's time to start crafting.

Press the X key. This will open your crafting menu. The tabs at the top, from left to right are: Parts; Weapons; Cooking; Raw; Tools; Alchemy; Survival; Furniture; Armors; and Farming.

Let's begin with a piece of clothing. You will need many gathered Alga, Cotton, Grass or Leaves to begin the process of making clothing.

With the crafting menu open (X), choose the Parts tab at the top. Click on Fiber. You will need 3 of any of the following: Alga; Cotton; Grass; or Leaves

Click on any of these in your inventory (I) or A2-A's inventory (N) to transfer them into the crafting window. Then click on the craft button, that will appear in the lower right part of the window once the materials are in place. You will make a fiber.

Once you have 2 fibers, you can make a thread.

With 2 threads, you can make cloth.

Now look and see what we need to make the Tier 0 cloth Chest piece.
This piece takes 3 cloth and 2 fiber. Botanize or gather your materials and soon you will have clothing.

Next let's make some food. To cook food, you must have a campfire or another fire.
You will need some branches. Open the crafting menu, select the Survival tab, and choose Kindling.
Make at least 2, more would be good.

Now from one of the kindling, make the basic camp fire.
Once you have made it, place it on the ground. (Right click in inventory, choose place, left click on ground).

Select the E option to light the campfire with the kindling you have left in your inventory. With a burning campfire, you can cook food, make raw iron ore into ingots, or burn branches down to make ash. To make ash choose the Burn (F) option on a burning campfire and drag or place branches in the fire inventory. Close the campfire's inventory and open it back up. You will find some ash.

To make food from the starting blueprints, you will need 1 Water and one of the following
2 Fish or Meat;
10 of various Mushrooms; or
10 of various vegetables.
With these you can make the Tier 1 cooking dishes, which give much more hunger than raw materials.

You will probably also want to make some tools. The first tool you will need to make is a hammer. First look at the hammer recipe in the crafting window. It requires 2 heads, 1 handle, and 1 rope. The rope is easy, that's made of 2 threads, and we made those before when making cloth armor.
The recipe for the hammer has options of one or another. The first hammer will be made of all wooden materials. Later, we'll use the wooden hammer to make iron ingots and iron parts, so that more durable tools can be made.

The heads are made of shafts. Each shaft requires 1 branch. So, 2 heads requires 2 branches. A handle is made of a shaft or an ingot. We don't have any ingots yet, so we will use a shaft.
That will require 1 more branch. 3 branches in all. Make 3 shafts, and turn 2 of them into heads and 1 into a handle.
Combine the heads, the handle and the rope and you have your first hammer. Now you can make better tools and weapons.

If you have been watching the system messages as you craft, you may notice that the quality of the items you make are increasing.

Don't worry if you fail to craft an item the first time. Each time you craft, your skill increases. You can see your skill level by looking in the character, C window.

Repair
Items in the game decay over time. Some items like tools and armor, also decay with use. It's important to repair them when they decay.

One place to see the decay is on the item tooltip. look at this Fishing Rod.
Fishing rods seem to decay very quickly with use. If you have one equipped or on your hotbar, you may notice the stripe on the right of the icon has turned yellow. This is a warning that the tool needs repair.

If the tool is the selected tool in your hotbar, right-click on it. This brings up the repair option. If the tool has less than 5% decay, the repair will be red and you will not yet be able to repair it. If the option to repair is shown in white, the tool is more than 5% decayed.
Repair it now.

Repairing your tools will help to avoid making new tools out of expensive or hard-to-find materials. You will also gain repairing skill points.
Farming
While you have been botanizing, you may have found some seeds. These can be used in farming. Farming will grow you a more reliable supply of Herbs and Vegetables than you will find if you Botanize and Forage. If you build your house in an area that is rocky or sandy, farming may be your major source of these ingredients.

When you have a seed in your inventory, right-click on it. It will give you the option to place it on the ground.

A 1x1 horizontal tile will be placed on the ground or surface. Seed plots can be placed on flat floors or decks of buildings.

You will notice the option to water the seed plot is available immediately after you place the seed. Water the plot with water from your inventory or from A2-A.

More advanced farming involves making things like compost, fertilizer and straw from blueprint recipes.

Here, the plot is being fertilized.

Your seed plot will indicate when it is ready to be harvested by allowing that action when your cursor is over the plot. To harvest the plot, you will need a rake. If you do not have one, make one. You will receive at least one seed back as well as a few of the crop.
Combat and Death
As you have been gathering materials, you may have seen some deer and rabbits fleeing from the game's predator, the wolf. Wolves are the only animal that will attack unprovoked. Crabs will attack if you attack them. Deer and rabbits will not attack. You will need to be able to defend yourself from wolves.

Things to do before you meet a wolf. Equip a knife or an axe on your character. Create and equip some armor. Create some healing covers.

When you meet a wolf, turn so that you are facing him. Your view will have switched to third person, (if you were in first person) when combat began. You may hear the wolf howl, as well.


The cursor will turn red when over the wolf. Left-click will perform an attack. Right-click will perform a defense.


If you are injured, your screeen will get a red border around the edge. It is hard to ignore. Once you are away from the wolf, apply one of your healing covers. You will gradually regain health points.


If you defeat the wolf, gather the pelt and meat. The Tab key will take you out of combat mode so you can gather. You can also toggle the camera between first and third person by using the F1 key.


If you die, don't worry.

First, you will see a brief animation of your character dying. Your consciousness will move into A2-A. There will be a banner across the top of the screen.


Your upper left display will also change.


There will be a blue effect around the edges of the screen.


Now, travel with A2-A. Navigate to the nearest tower and activate the machine on either the first or second floor.


The message that had been inaccessible (red) is now white. The cloning station is now active.


Press E. There will be a progress bar across your lower screen.


You will now inhabit a clone. You will have the same skills as before, but a new, young body. Your armor, weapons, and inventories are all intact. You might notice something has changed on your character window, your generation has increased.

Building
Ready to build your first house?

Press B. This will open the build menu. Here you will be able to plan your house before you commit those materials you have worked to gather.

The image will zoom out, showing the building parts across the bottom of the screen. The default is to build north of where your character is standing.


Begin by selecting the foundation. Without foundations, your house will be hanging in the air off the ground. Place a few of these side-by-side on the ground in front of you.
You want the footing posts to go down into the ground. If they are hovering above the ground, use shift and your scroll wheel to adjust the height.

Now, place a door into your house. If you don't like the orientation, you can rotate the door with your mouse scroll wheel.


And some walls with windows.


To finish your house, put some flat sections on top for a roof. More elaborate roof blueprints can be found in anomalies or through fishing.


To exit the planning stage use the escape key. Your house will now be a ghost-like blue silhouette in front of you.


Approach one of the sections until it is highlighted in green. The E key will open a window allowing you to construct that section.


Once a section is constructed, you can either stow it in your inventory for use later, or finalize it by using the E key again.

You can walk on the silhouette. You can also place items on the silhouette, like small static torches. This can help if you are trying to plan a building at night.


If you finish a section of a building and you don't like it, you can destroy that section. Press the E key with a hammer equipped. Once the damage is more than 5%, it will be indicated. When the damage reaches 100%, the section will disappear. You will not get any materials back.

Similarly, if a section of your house takes damage and it is more than 5%, it will show in white instead of red. You can then repair the damage.

Thank you for reading this guide, now please, enjoy the game!
Intermediate Crafting
Now that you've gotten the basics mastered, it's time to examine crafting in more depth.

The Crafting Window

When you view recipes within the crafting window, notice the colors of the symbols in the right column of the left half of the window. Take a look at the example below:


Notice that some of the symbols are white, some are yellow, and some are red.

White means you have the ingredient, either in your inventory or in A2-A's inventory.

Yellow means you can craft the ingredient you need for the recipe.

Red means you do not have the ingredient. You will need to gather or make it first.

Let's take a closer look at the recipe displayed on the right of this window, the one for a fiber. Notice that the one box missing an ingredient has a small orange plus (+) sign in it.

+ means you must place an ingredient in this spot to craft the recipe. There may be more than one ingredient that will do. For the Fiber recipe, Alga, Cotton, Grass or Leaves will all work in this spot.

Now let's look at the recipe for the Head of a tool. There are three symbols on the left. One is yellow and two are white. The yellow symbol stands for a Shaft. You can examine the recipe for a shaft to see what possible ingredients may be used, for example, a branch. The two white symbols here are for a Metal Ingot and a Raw Rock.

Notice, in the right half of the window, the orange OR in the boxes. This indicates that you need only have one of any of these three things in order to craft this recipe. If you have a raw rock, a metal ingot, or a shaft, you can make a head.


Also notice that all the ingredients in A2-A's inventory and your inventory are red (unusable) except the raw rock and the metal ingot. This makes it much easier to find the ingredients you need even when you have many ingredients in your inventories.

Quality
Let's examine some things that we have not discussed so far, Item quality and Item decay. To look at an Item's quality and decay, hover over the item in your inventory. If there's more than one of them, right-click the stack, and hover over one. You should see a tool-tip with the following stats:


When you are crafting, the quality (and decay? not sure of the formula here) of your materials contributes to the final product. We will see how in just a moment.

Now let's look at your skill. Your skills can be found in the C window on the skill tab. The related skill (and sub-skill?) also contributes to the final product.


Let's look at an example. Let's craft a shaft of a branch. If I open the crafting window with nothing in it, it looks like this:

Notice there is no branch in the material box. There is no tool (knife) in the tool box. The skill involved is Carpentry 1. With nothing in these boxes the quality of the shafts made will be between 0.15 and 0.16. This is based solely upon carpentry skill.

Now, I add a branch. Watch what happens to the quality of the shafts made.
The quality is now between 22.90 and 24.3. If I add a branch of lower quality, the quality of the product is also lower.

Now, add the knife, and look at the quality again.
The quality is now between 23.37 and 24.8.

So, your skill, the quality of your materials, and the quality of your tool all matter in producing the quality of your finished product.

The quality of a tool or armor piece affects how fast it decays. A lower quality object will decay faster than a higher quality object.
Intermediate Building
Translating Blueprints

To start off the intermediate building section, a little Czech-English translation is necessary. You may have noticed that some of the building blueprints are labeled things like "plot_stone_wood_roh" to understand this better takes some knowledge of Czech, or at least Google translator.

Czech English
dvere = door
okno = window
patro = storey (literally, but better understood as floor)
pec = furnace (not quite sure why pec is also the unit of currency)
plot = fence (nope, has nothing to do with the word plot in English, fooled you!)
pricka = prick (let's just go with pointy here and save all the snickering for elsewhere)
roh = corner
schody = stair(s)
slama = straw (or thatch, as in roof)
sloup = column
strecha = roof
stit = gable, (all thanks to Ebonyize for finding this)
zabradli = railing
zaklady = foundation
zed = wall

The game designer uses stone to mean stone, wood to mean boards or sawn wood, and trunk to mean logs, like in a log cabin.

So, a strecha_slama is a thatched roof piece. However, there are usually some numbers as well, like this: Blueprint(#strecha_slama_1x1).


This does not necessarily mean that the thatched roof piece is completely flat (horizontal), nor does it necessarily mean that the piece occupies a 1x1 horizontal or vertical area of the building grid. The materials needed for this particular piece are 1 log, 1 rope, and 1 straw.

Materials and Building

As of the current version of the game, all wood is wood. So a Pine Log looks exactly the same when made into a column (sloup_trunk) as a Birch Log, as a Cedar Log, as a Willow Log...etc. The same is true for stone.

The first piece of wood (board or log) you put into the crafting window when making your wall, floor, fence, etc., will set the type of wood for the piece. So, although it makes no visual difference, you may, for finesse, want all your wooden walls to be Cedar. If so, start each one with one Cedar Board. the rest can be anything else, the wall will still say Cedar when it is done.

Calculating Materials Needed

Let's calculate how many materials will be needed to make a simple one room log cabin.

Start out by going into building mode and selecting the log foundation, zaklady_trunk. Place on down into the ground. (You will be able to hop up on this without stairs if it as far down as it goes.)


As you look at the symbols to the right of the picture of this piece on the bottom bar of your screen, you notice it takes 2 logs and 1 rope to make it. You can later confirm this by placing your cursor over the piece in silhouette, selecting E to manufacture and looking at the materials necessary. As you can see it requires 2 logs and 1 rope.


Place a back wall with a window, zed_trunk_okno.


This also uses 2 logs and 1 rope.

Let's make the side walls solid logs, zed_trunk, and the front a door, zed_trunk_dvere.


You see that the door requires also 2 logs and 1 rope. However, the solid side walls require 3 logs and 1 rope each. Now place a flat roof, patro_trunk.


The roof requires 2 logs and 1 rope.

So I need: 4 pieces of (2 logs and 1 rope), and 2 pieces of (3 logs and 1 rope). This is actually algebra.

4(2L + 1R) + 2(3L + 1R) = 8L + 4R + 6L + 2R = 14L + 6R

We need 14 logs and 6 rope.

Ropes are crafted.


Each rope is made from 2 thread. Each thread is made from 2 fiber. Each fiber is made from 3 of the raw material. I have three of the four raw materials here that can be made into fiber, cotton, grass and leaves. Again, this is algebra. (x is the raw material) We need 6 rope.

6R = 6(2T) = 6(2(2F) = 6(2(2(3x) = 72x

We need 72 raw fiber materials.

So in order to make the one room cabin, it will take 14 logs and 72 raw fiber materials (alga, cotton, grass, or leaves).

You don't have to use algebra. But, it saves you under-, or over-gathering and having your materials rot away in your inventory.


45 Comments
doodle0429 26 Feb, 2021 @ 8:58am 
Abandonware
Otterious 22 May, 2020 @ 8:28am 
Great tutorial, well written and you really put some thought into this. Ofc, this is abit outdated. But some parts of this tutorial is still worth reading, for sure. It's a great game, hope it gets worked on further on. I wish there were some way to help fund the creator to keep him/her going.
Karroth 29 Sep, 2018 @ 2:29pm 
its a bit outdated, but except for the start its maybe accurate, im corious if the 2 boxes are still there
Good Old Gamer 29 May, 2018 @ 7:01am 
dude as people are starting to scream at you... you need to update ;)
Chaos.Queen.Aeria 22 Mar, 2018 @ 5:31pm 
I started at the Clone center near the Start Temple, not one of the towers :/
Chicken Gamer 30 Jan, 2018 @ 6:37am 
I can not find out the 2nd floor
CrazyGamerLady 17 Nov, 2017 @ 7:46pm 
@Obscure

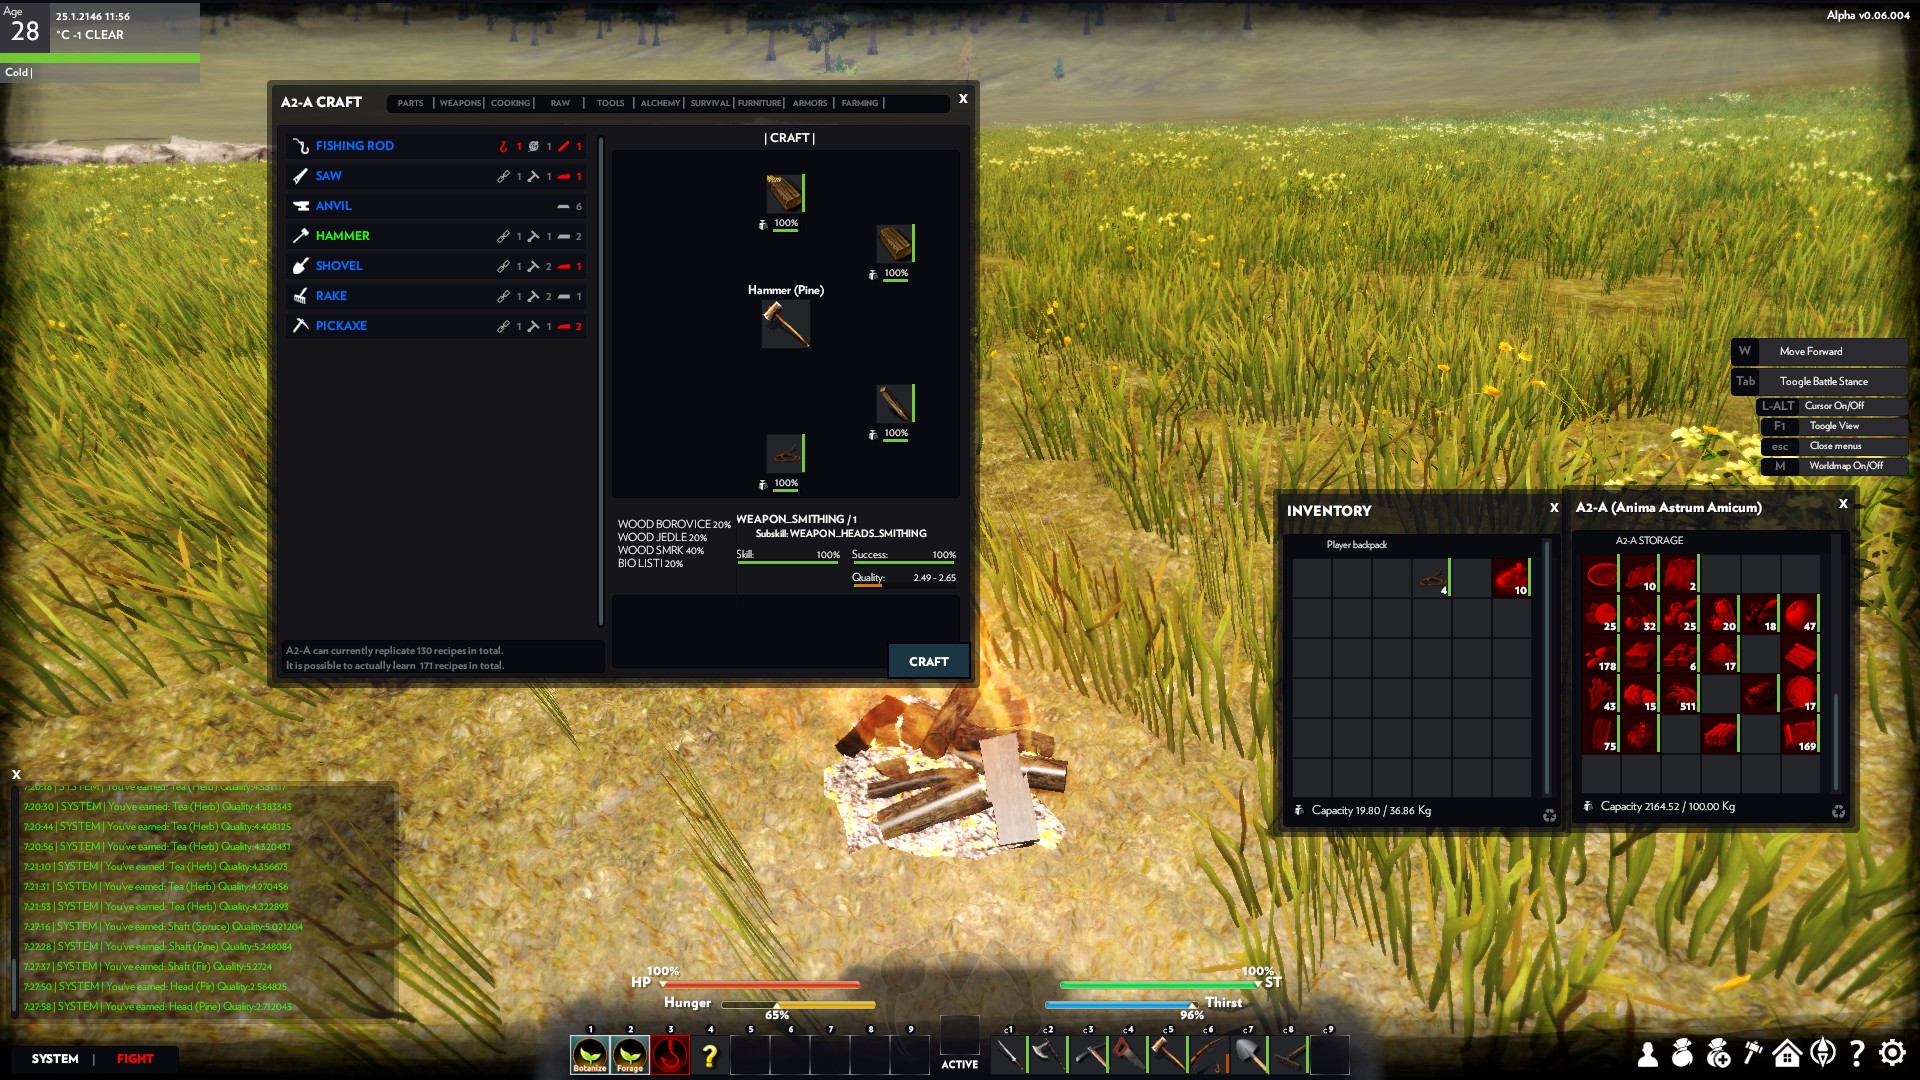
I just got this game, but I wouldn’t mind updating your guide, if that’s ok? I need to play the game some more, but I love helping!
Anvil Pug 3 Nov, 2017 @ 6:45am 
Outdated
flying dutchman 23 May, 2017 @ 5:22am 
it is a very nice game but with that it has become less fun
flying dutchman 23 May, 2017 @ 5:21am 
sorry for complaining but when you build a game make it so that people have in the start the basic building blueprints so that they can build a bed and storages and not like it is now that you find decoration blueprints all over the world and not the improtent one,s make it so that you start with the basic workbench and anvil and fireplace after that you can go and find the decoration ♥♥♥♥
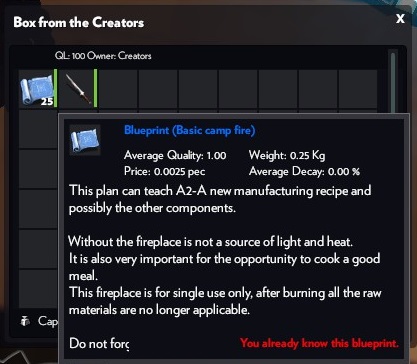
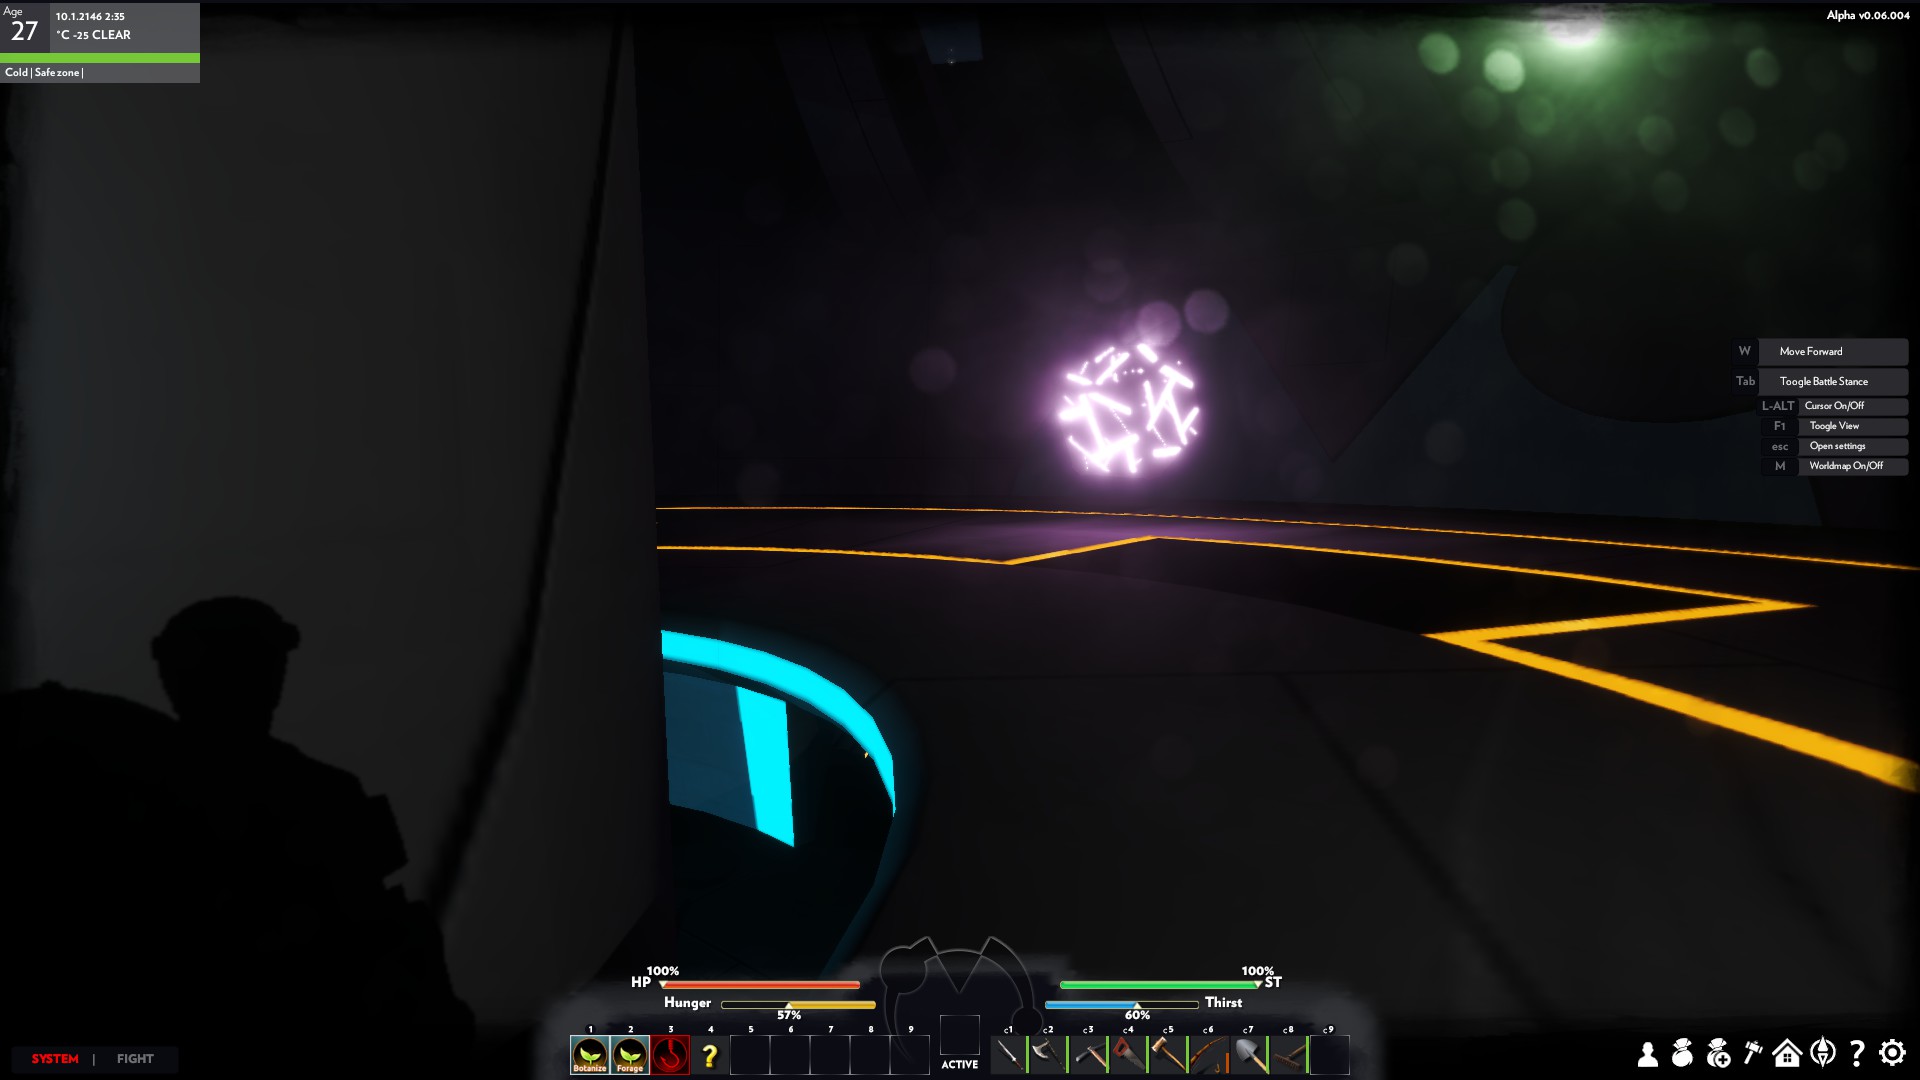
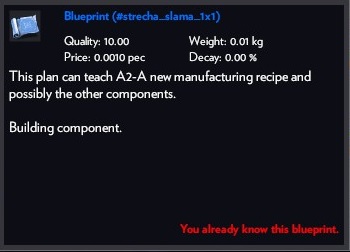
no you let use look all over the world to find one blue print that is so improtent for ahving fun in the game the games need to be fun to play not to irritait the hel out off the people .