Big Pharma

Big Pharma

232 ratings
Belts and Belt Crossing
By DelScorcho
This guide is designed to help you design machines with multiple large components such as the Multimixer, Autoclave, Cyrogenic Condenser & Chromatograph. I generally do not recommend building more then 1 or at most 2 of these larger components as they take up an enormous amount of factory floor. I believe it is best to utilize more of different types of cures versus more output of single high level cures.
3
   
Award
Favorite
Favorited
Unfavorite
Belts & Belt Crossing
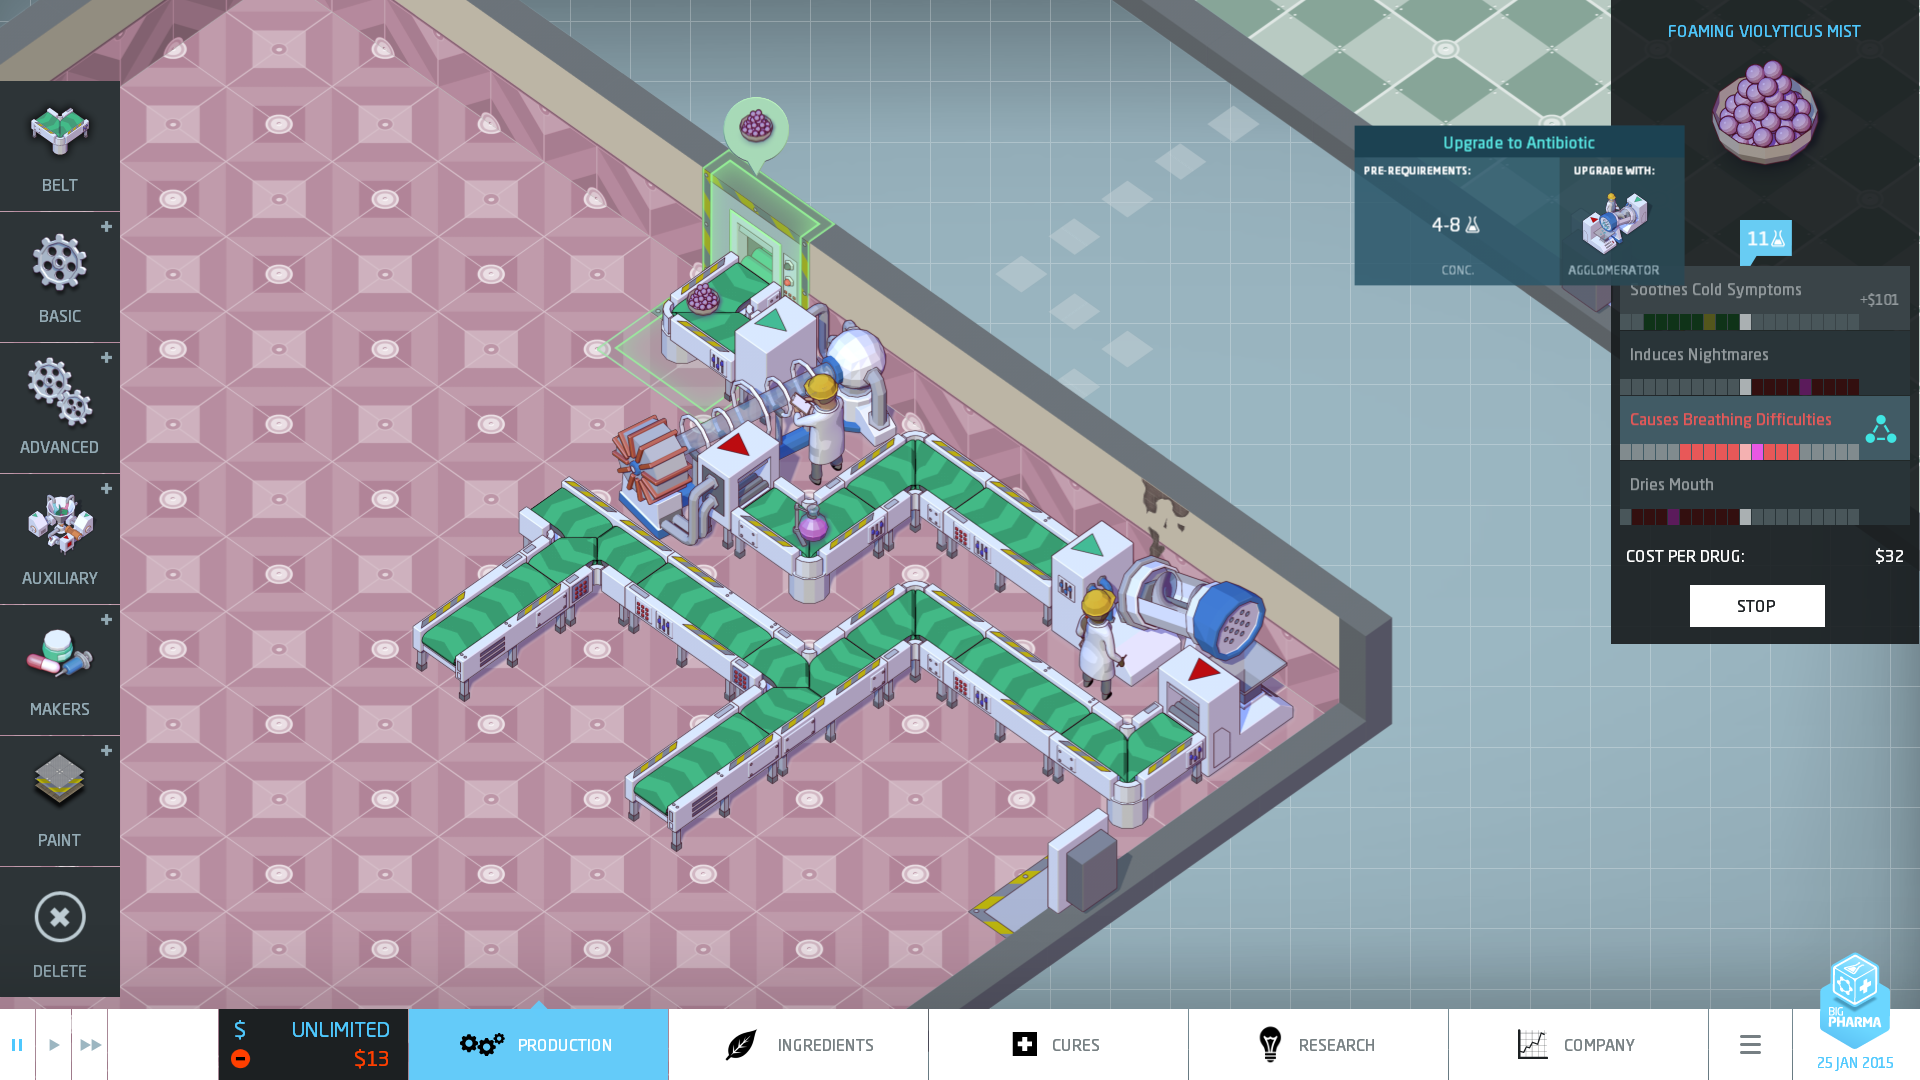
Unbeknownst to everyone in the Tutorial it is possible to cross belts to get a desired outcome of input/output to your cure machine components. In this section I will demonstrate how this is done. First point that is important is to note at all times the arrows that are clearly drawn on the belt. They show the obvious direction of travel of ingredients. When crossing belts to input/output of machine components two things must be met.
  1. The belts from the output of your previous component, for example the Ionizer must be facing the input of the next two or three components you are going to chain, example Multimixer. If it is coming the opposite direction the belt crossing will still work but it will not create the proper gap in the belt in the next point.
  2. The belts must create a gap in the system between ingredients somewhere to allow for proper exit timing from the, example Multimixer. Without this gap to allow for the exiting ingredient to immediately move on the belt system the ingredients will get bogged down and you will have many gaps along a system that should have none. Sometimes the gap will get screwed up when you first start your machine. You will notice this almost immediately when your output belt chain doesn't have a one per day output. To fix this you need to delete one or two ingredients prior to the input of a component to restart the gap, to delete ingredients on a belt use Left Ctrl + Right Click.

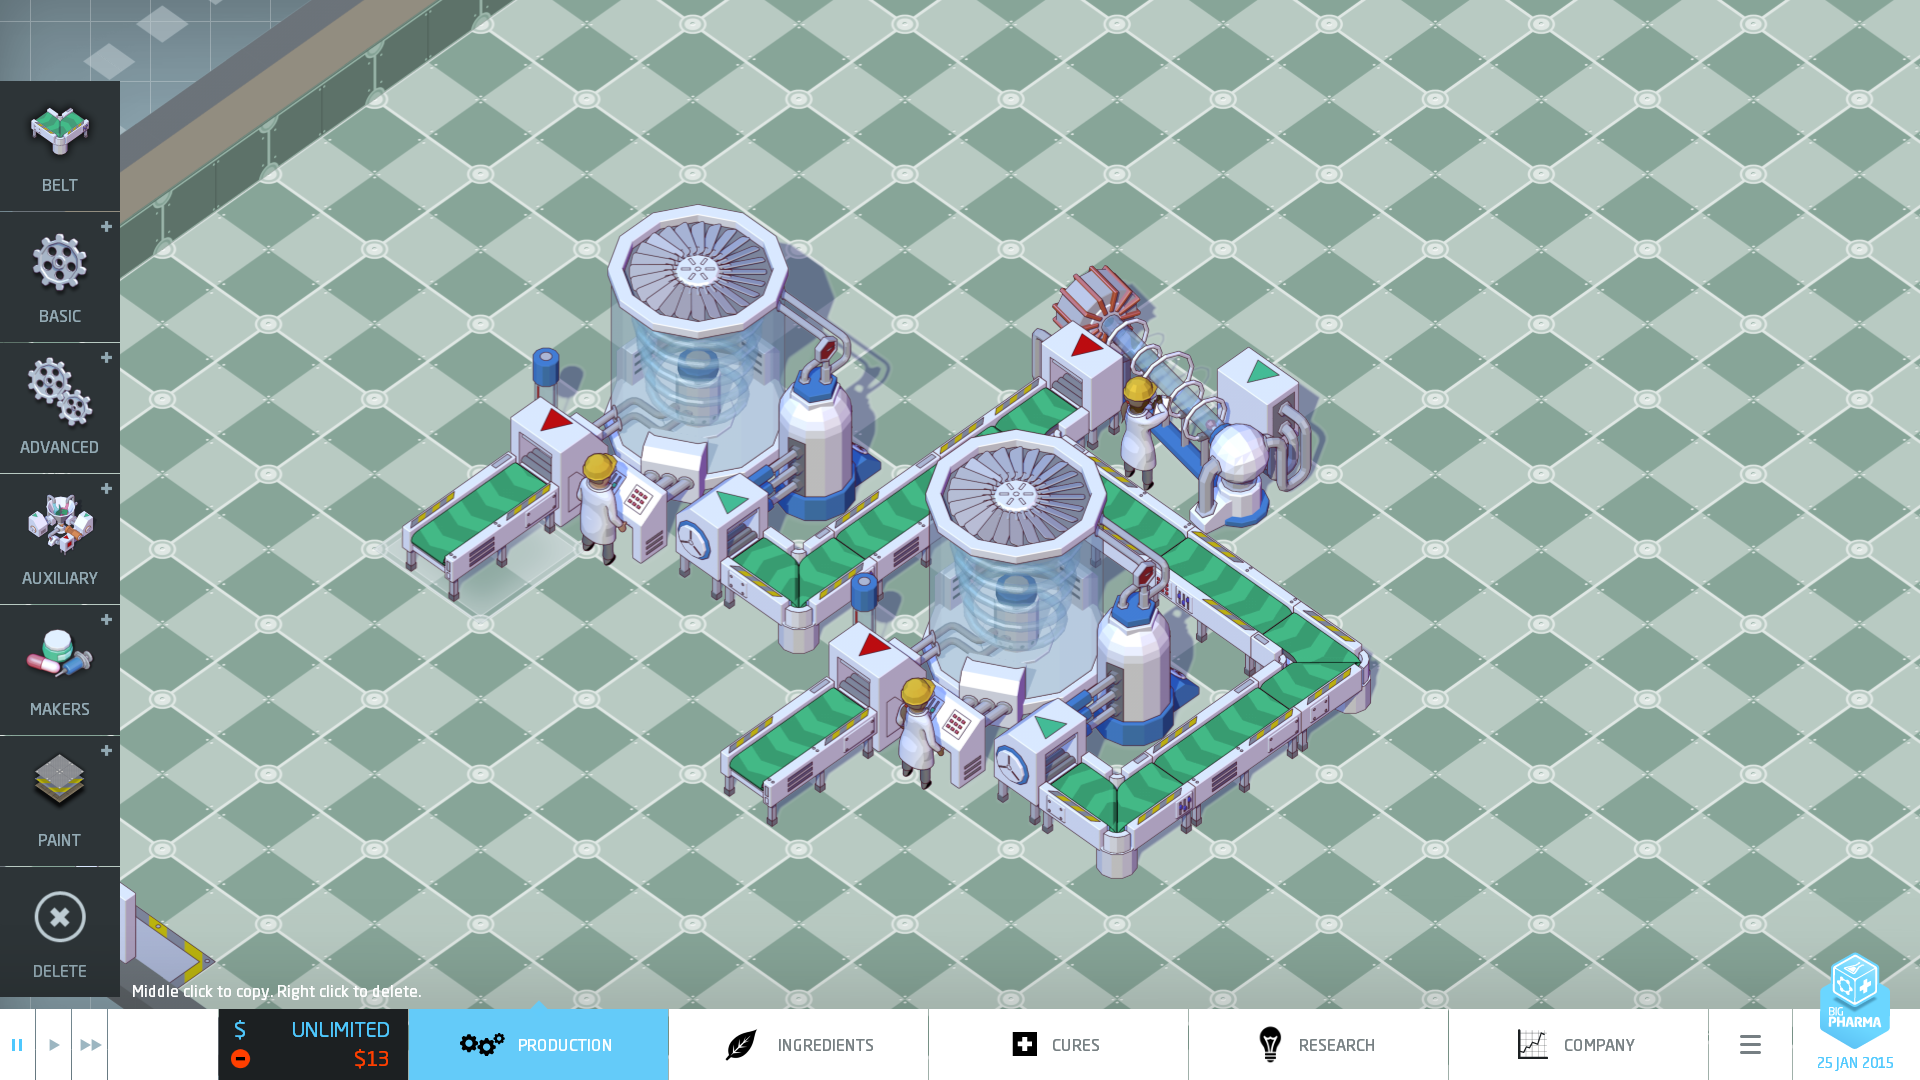
Review the two screenshots below to see exactly what I mean.

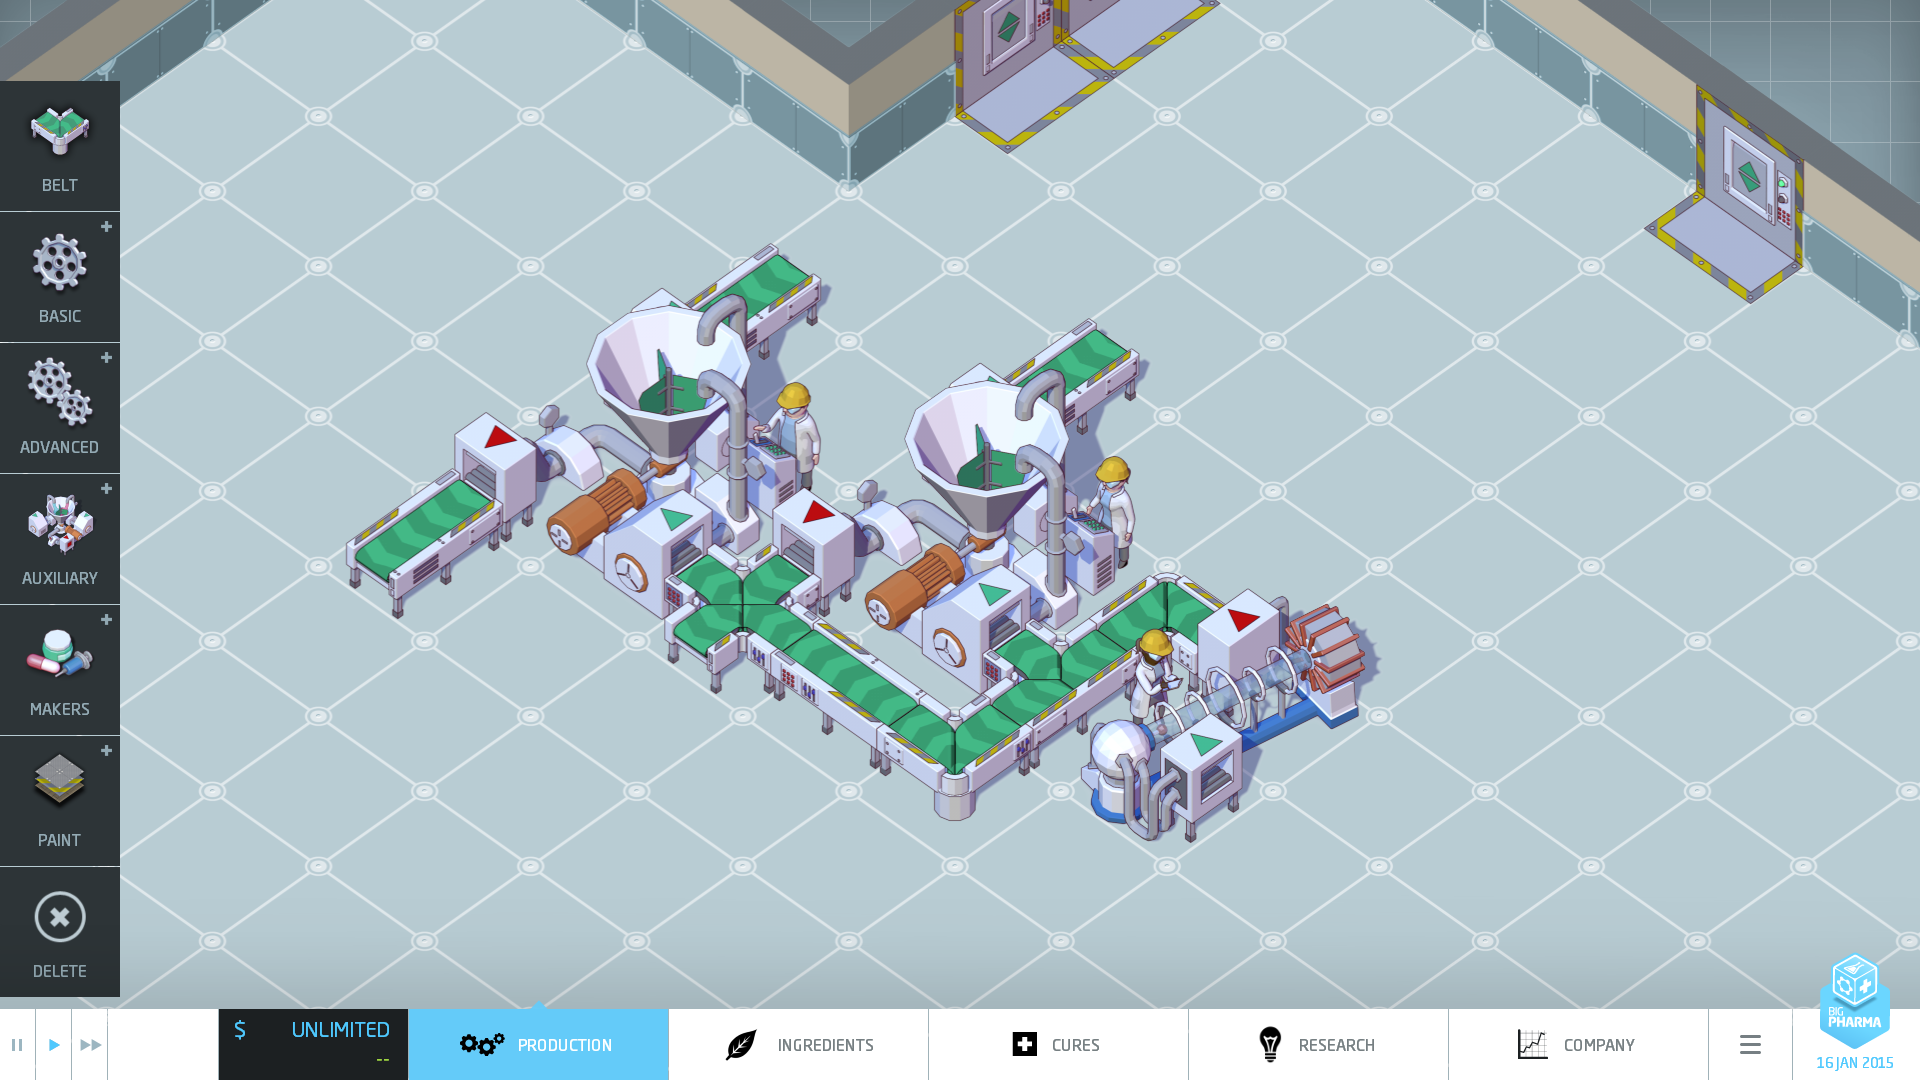
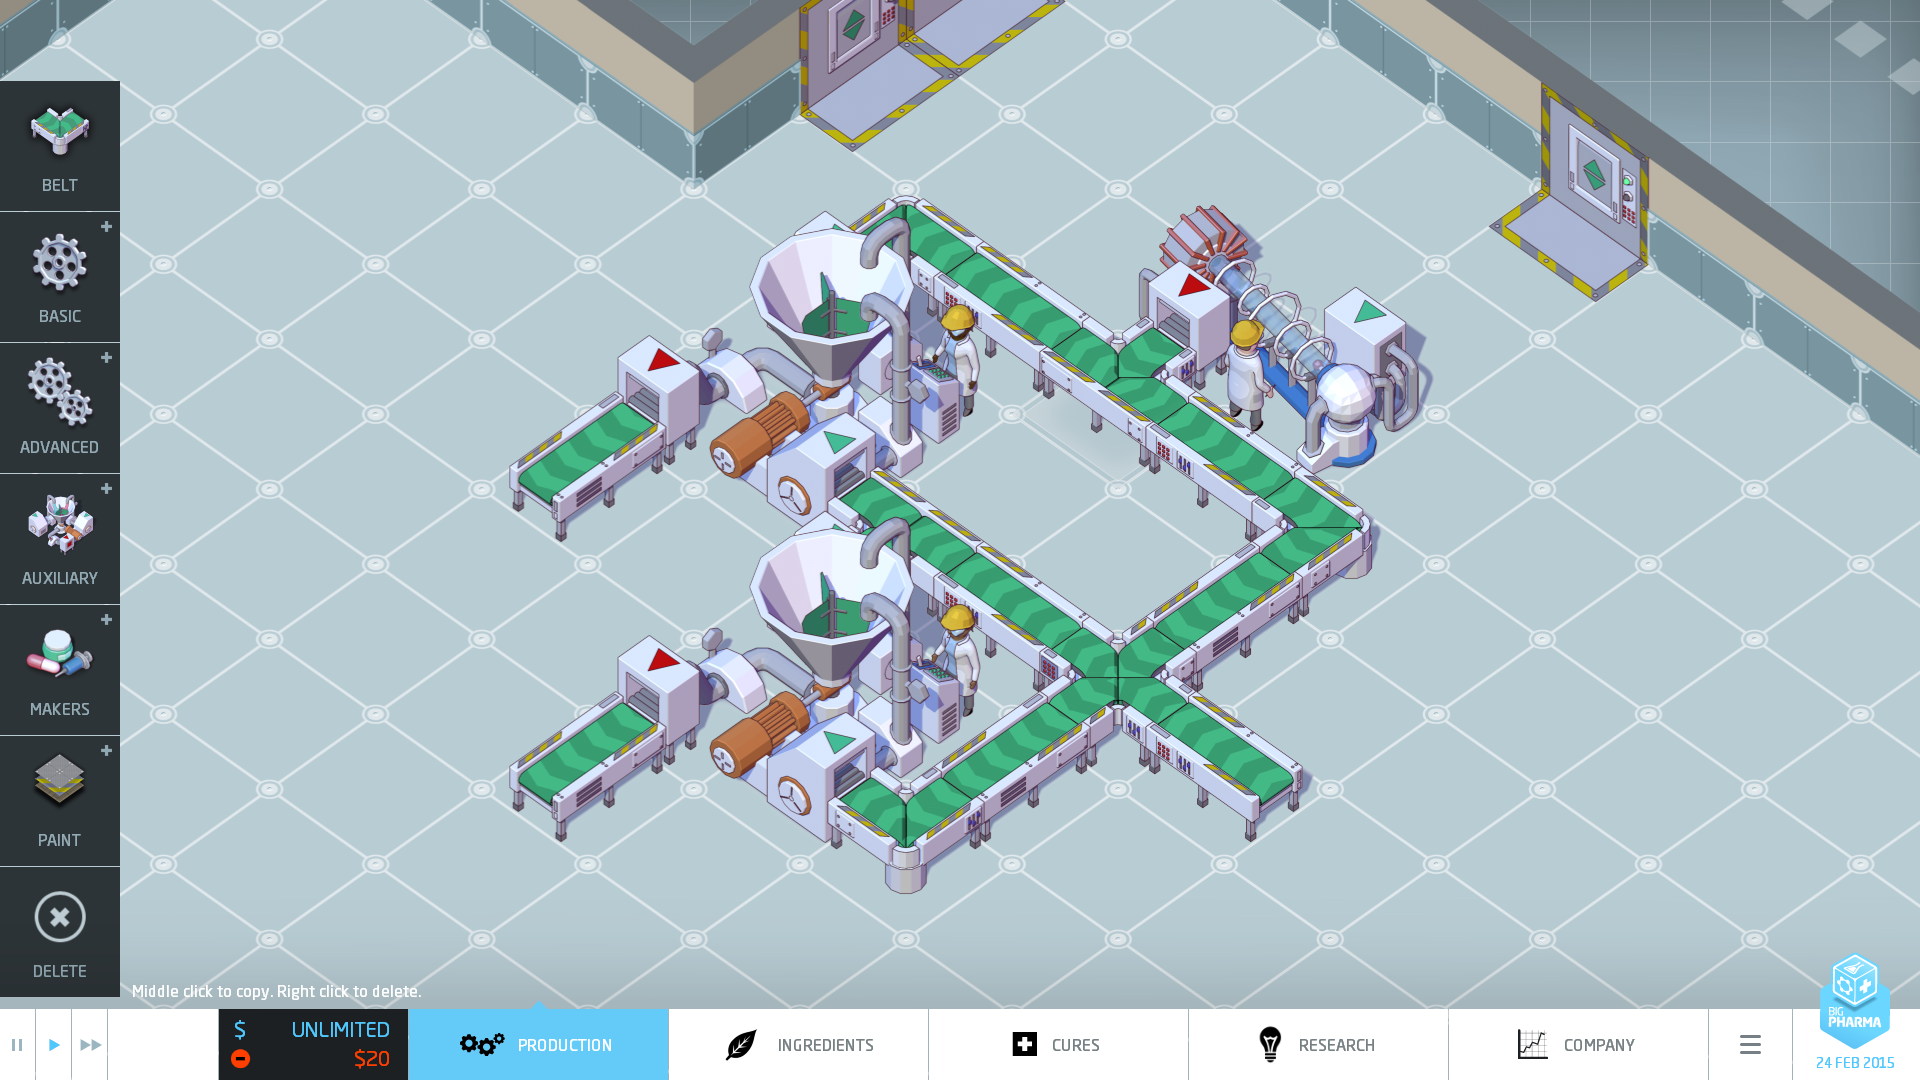
As you can see above it is quite possible to cross the belts at the Input & Output of the two Multimixers. If you notice the gap in the belt between the two Multimixer that allows the exiting output from the lower multimixer to immediately move onto the progressing belt system. In the next sections I have provided screenshots of belt machine designs that work for belt crossings, just be sure to check that the direction of travel of the belt always matches up to the input side of your next chained components.
Multimixer Crossing Examples
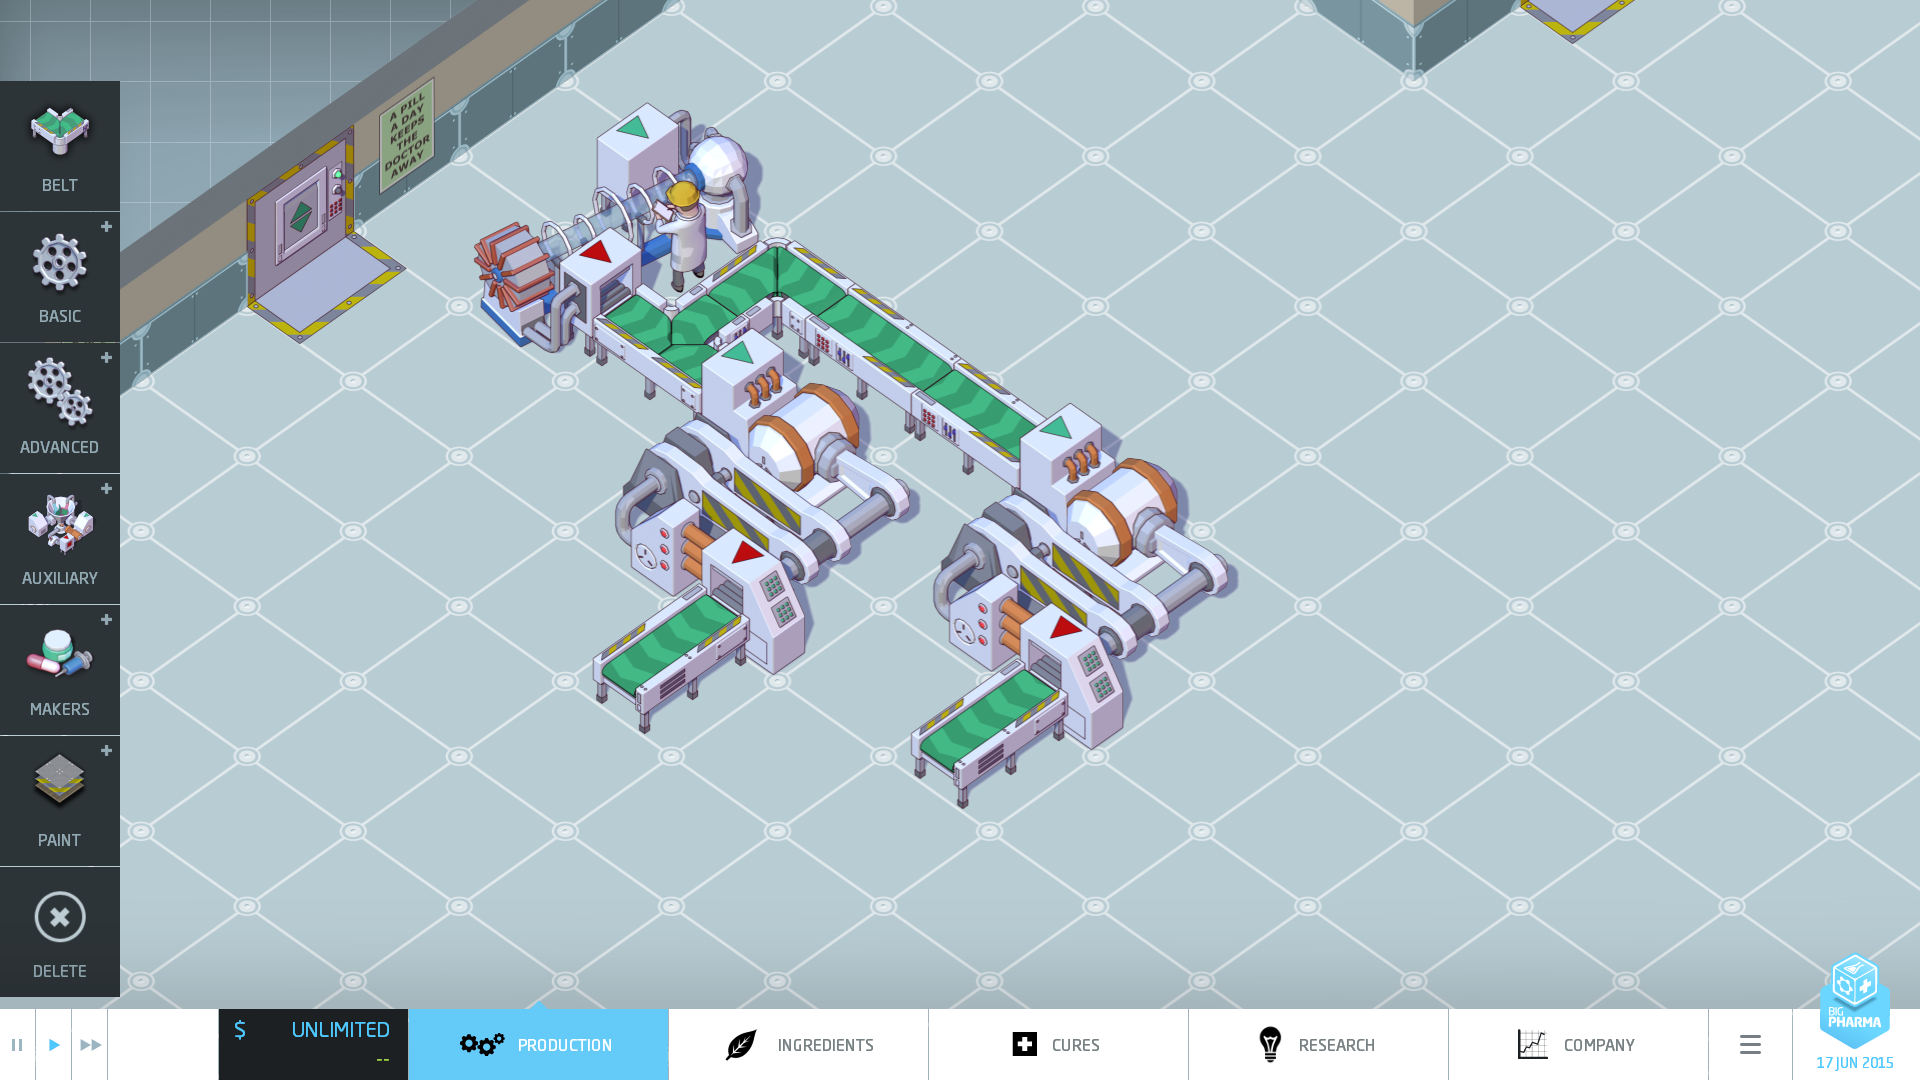
Ideally for the Multimixer would be example #1. This example takes up the least amount of space but sometimes it is not possible to fit larger components into the little nooks along a system. You need two Multimixers to maintain an output one ingredient per day.
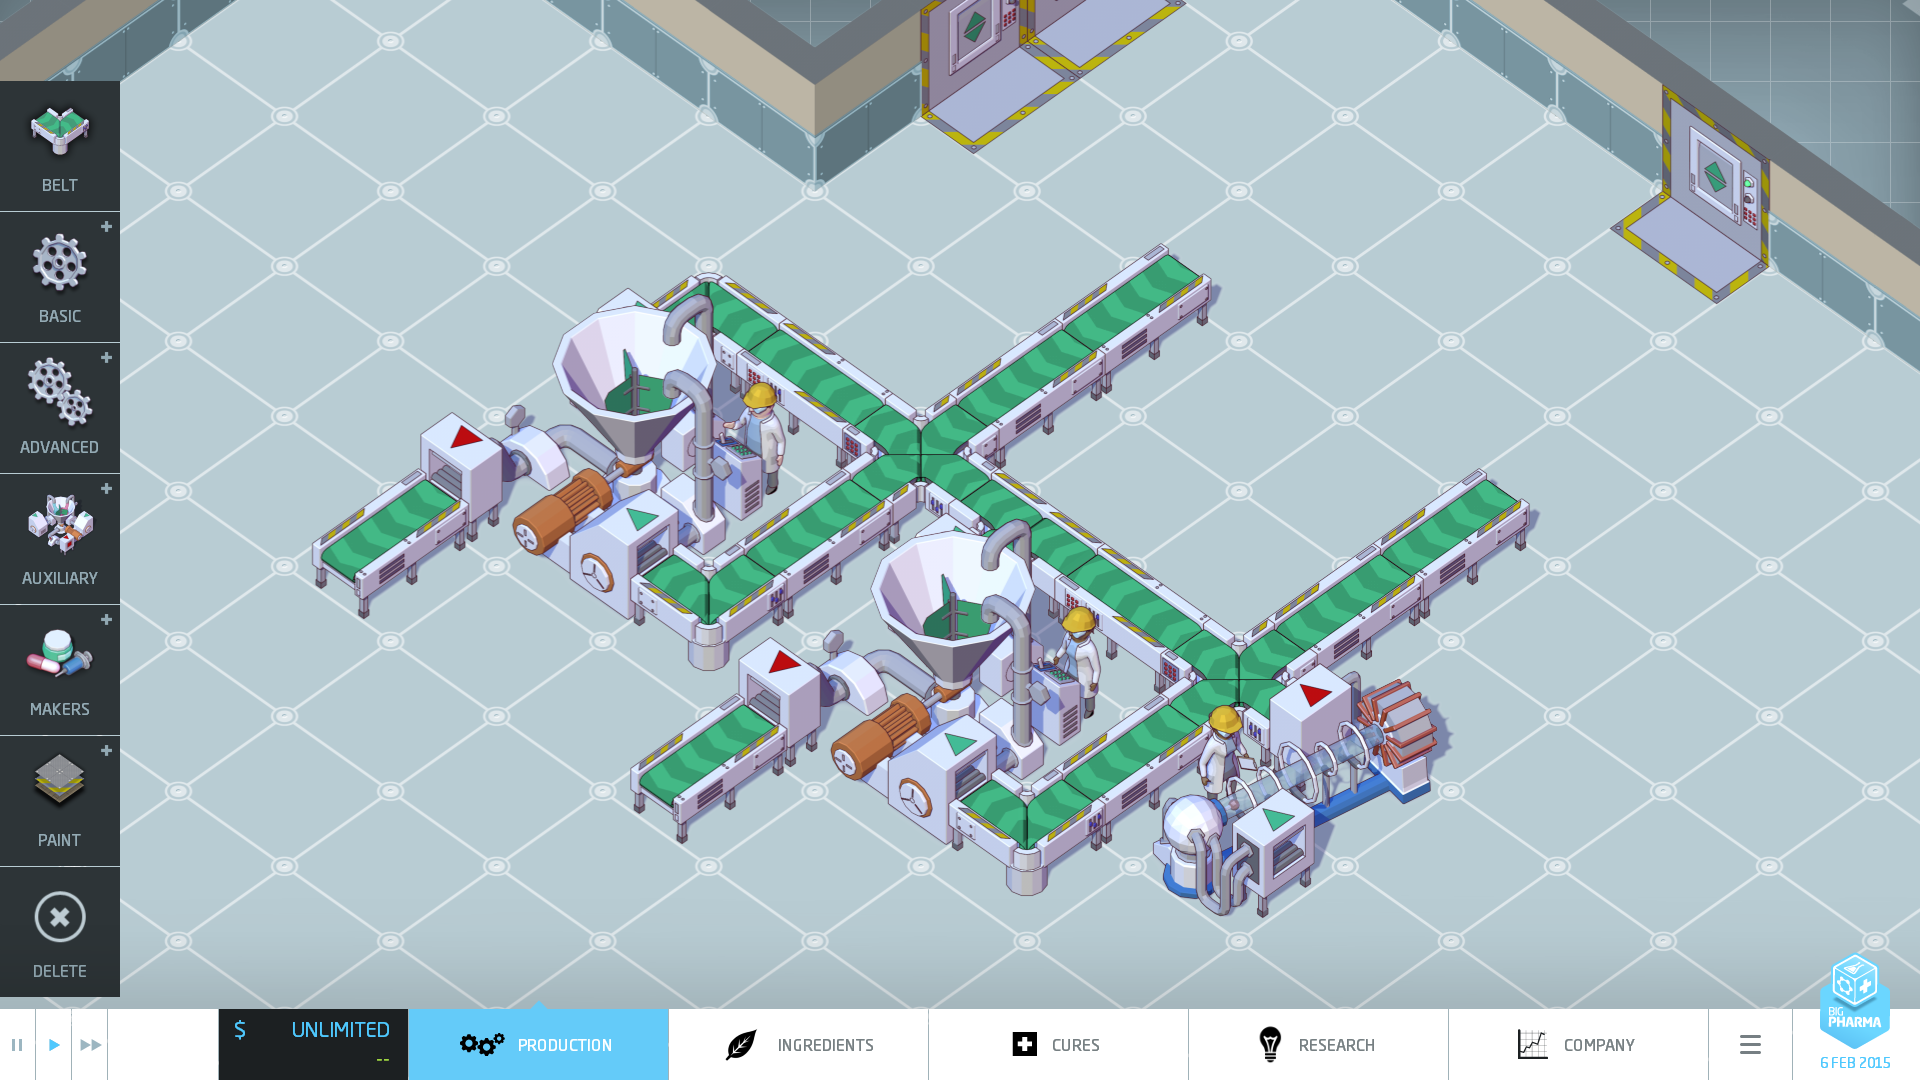
As you can see in this example the Output from the Ionizer will cross the lower input belt and the ingredient will follow its straight path, it will not turn onto the perpendicular belt.

Make sure to check your Multimixers for the right mixing settings, Upper or Lower. In Example #3 the lower belt feeds different inputs on the two Multimixers so Multimixer #1 will for example mix the upper ingredients and Multimixer #2 will mix the lower ingredients to have the same output from the two.
Shaker Example
Ideally the Shaker does well in corners and I usually try, if possible, to start off a cure design by Shaking the ingredients into place for Mixing right out of the factory ingredient input doors. You will need two Shakers to maintain an output of one ingredient per day. Also a Shaker upgraded half way can move effects up to two positions and fully upgraded Shakers can move effects up to three positions, so you wont have to chain Shakers. Be sure if you adjust the position of the Shaker you check the settings for effect position. Moving the Shaker will reset the Shake back to one position if you had it set at two or three.
Autoclave Examples
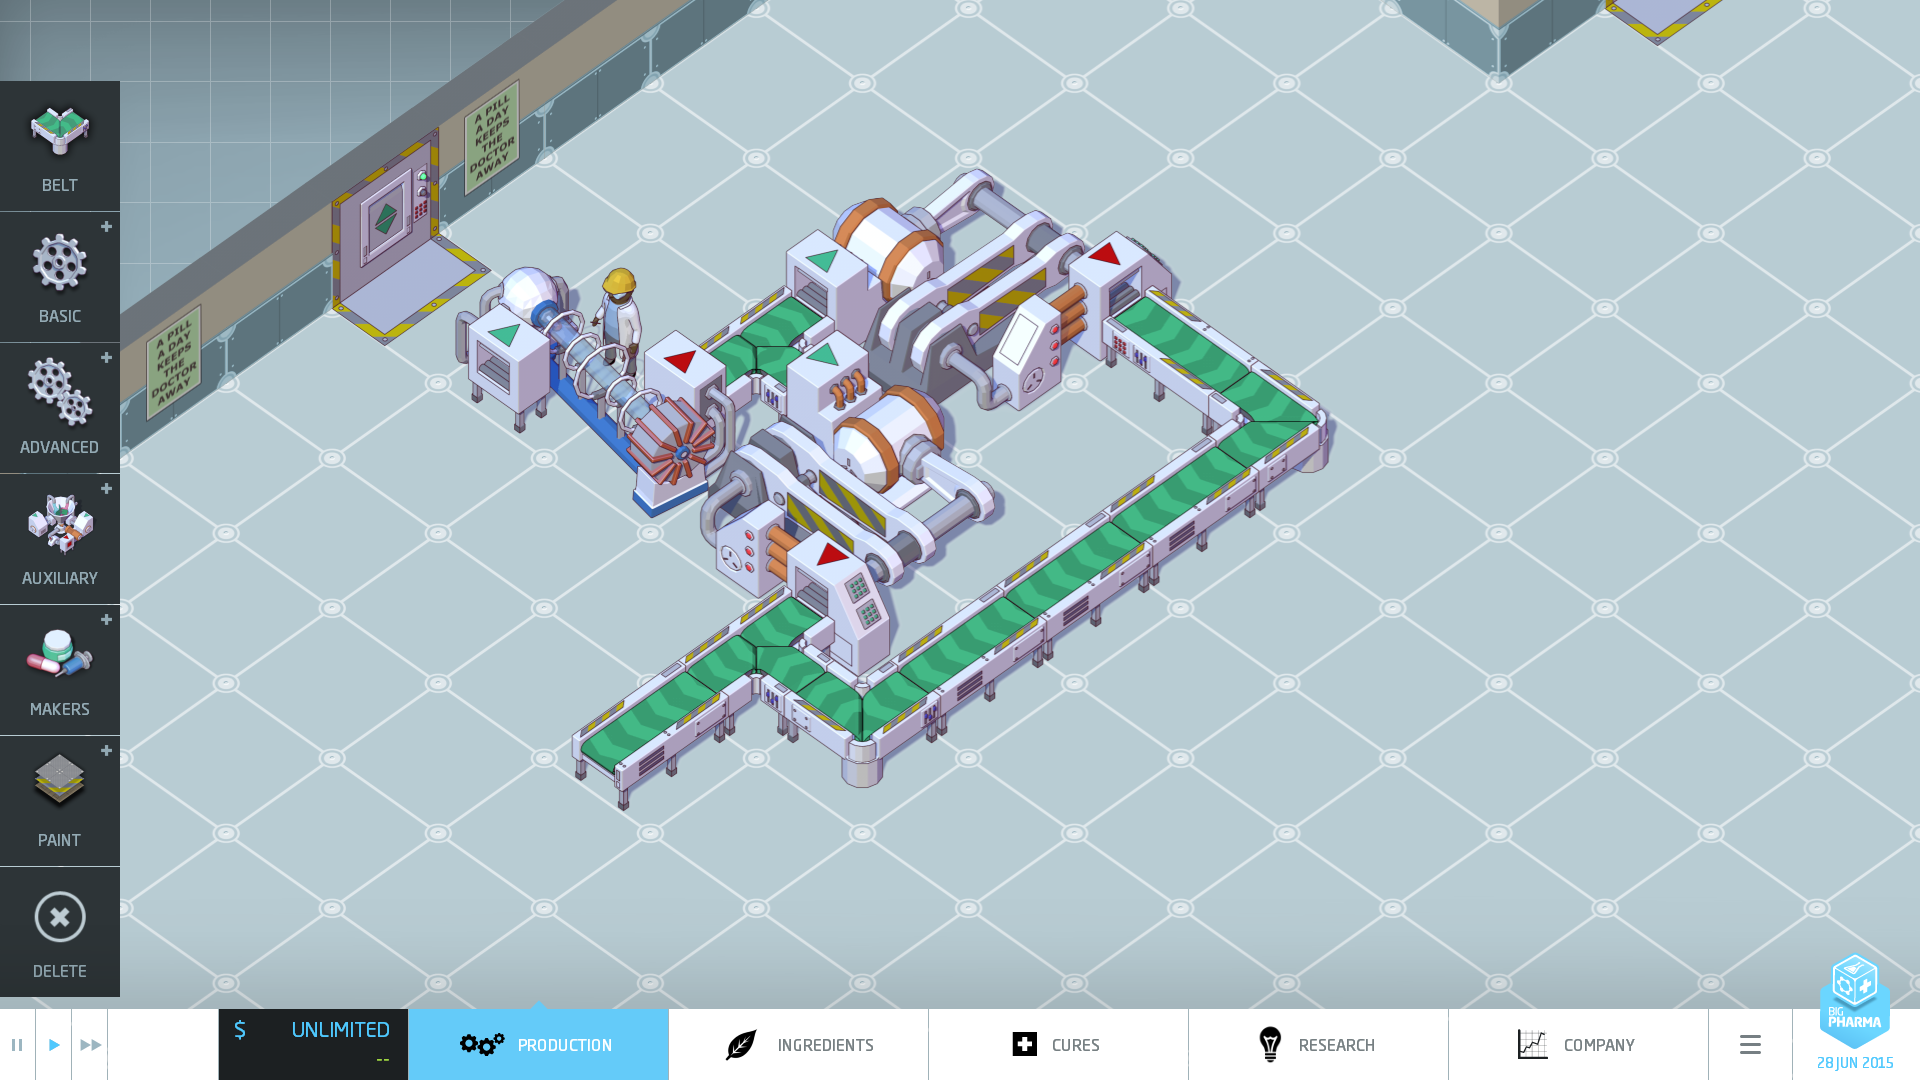
You will need two Autoclaves to maintain an output of one ingredient per day.
This Autoclave example is ideal only for use somewhere in the middle of your factory as you will lose the 2x2 squares in between the Autoclaves if this example is stuck in a corner.
This is the ideal overall Autoclave design, it works best in corners. Be sure to check that your output from a previous component faces the first input of the Autoclave as seen in the picture from the Ionizer.
Cryogenic Condenser Example
The Cryogenic Condensers can be a pain to get into place because of the way their inputs/outputs are orientated. Example #1 is really the only ideal way to do it but unfortunately sometimes space doesn't permit this and you have to fudge around with the belts to go behind or around the Condenser. You will need two Cryogenic Condensers to maintain an output of one ingredient per day.
In this example I put the belt behind the second Condenser but I could have crossed the belt in front of the output of the second Condenser. You may want to put the belt behind the Condenser though sometimes, perhaps the output of the two condensers may flow downward directly in front of them and belt crossing isn't ideal.
Cromatograph Example
The Cromatograph is pretty straight forward. Below is the only ideal way I see of doing it. You will need three Cromatographs to have an output of one ingredient per day.
Sequencer Example
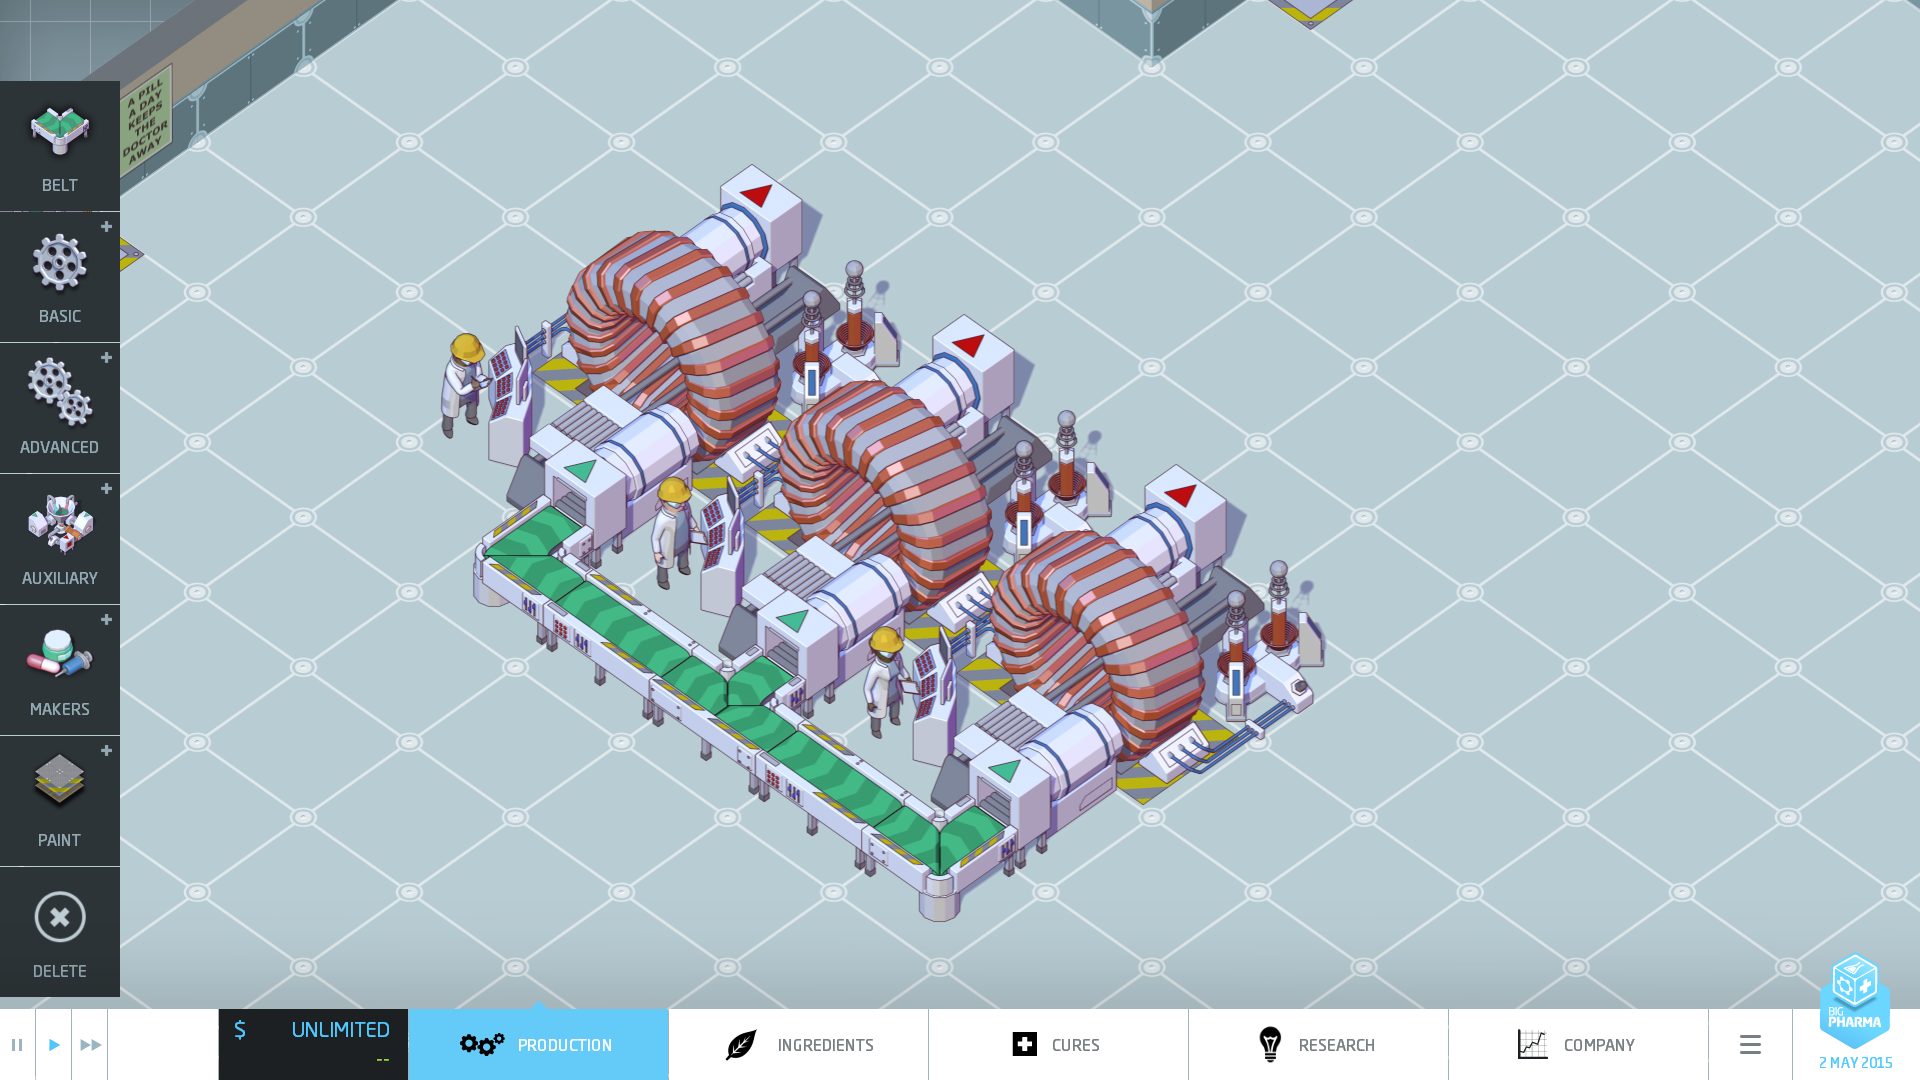
This is the only way I see the Sequencer working with the minimal amount of space. You will need three Sequencers to maintain an output of one ingredient per day. As you can see this is beginning to take up lots of factory floor space, not only for the size of the Sequencer but the belt puzzle as well.
Centrifuge Example
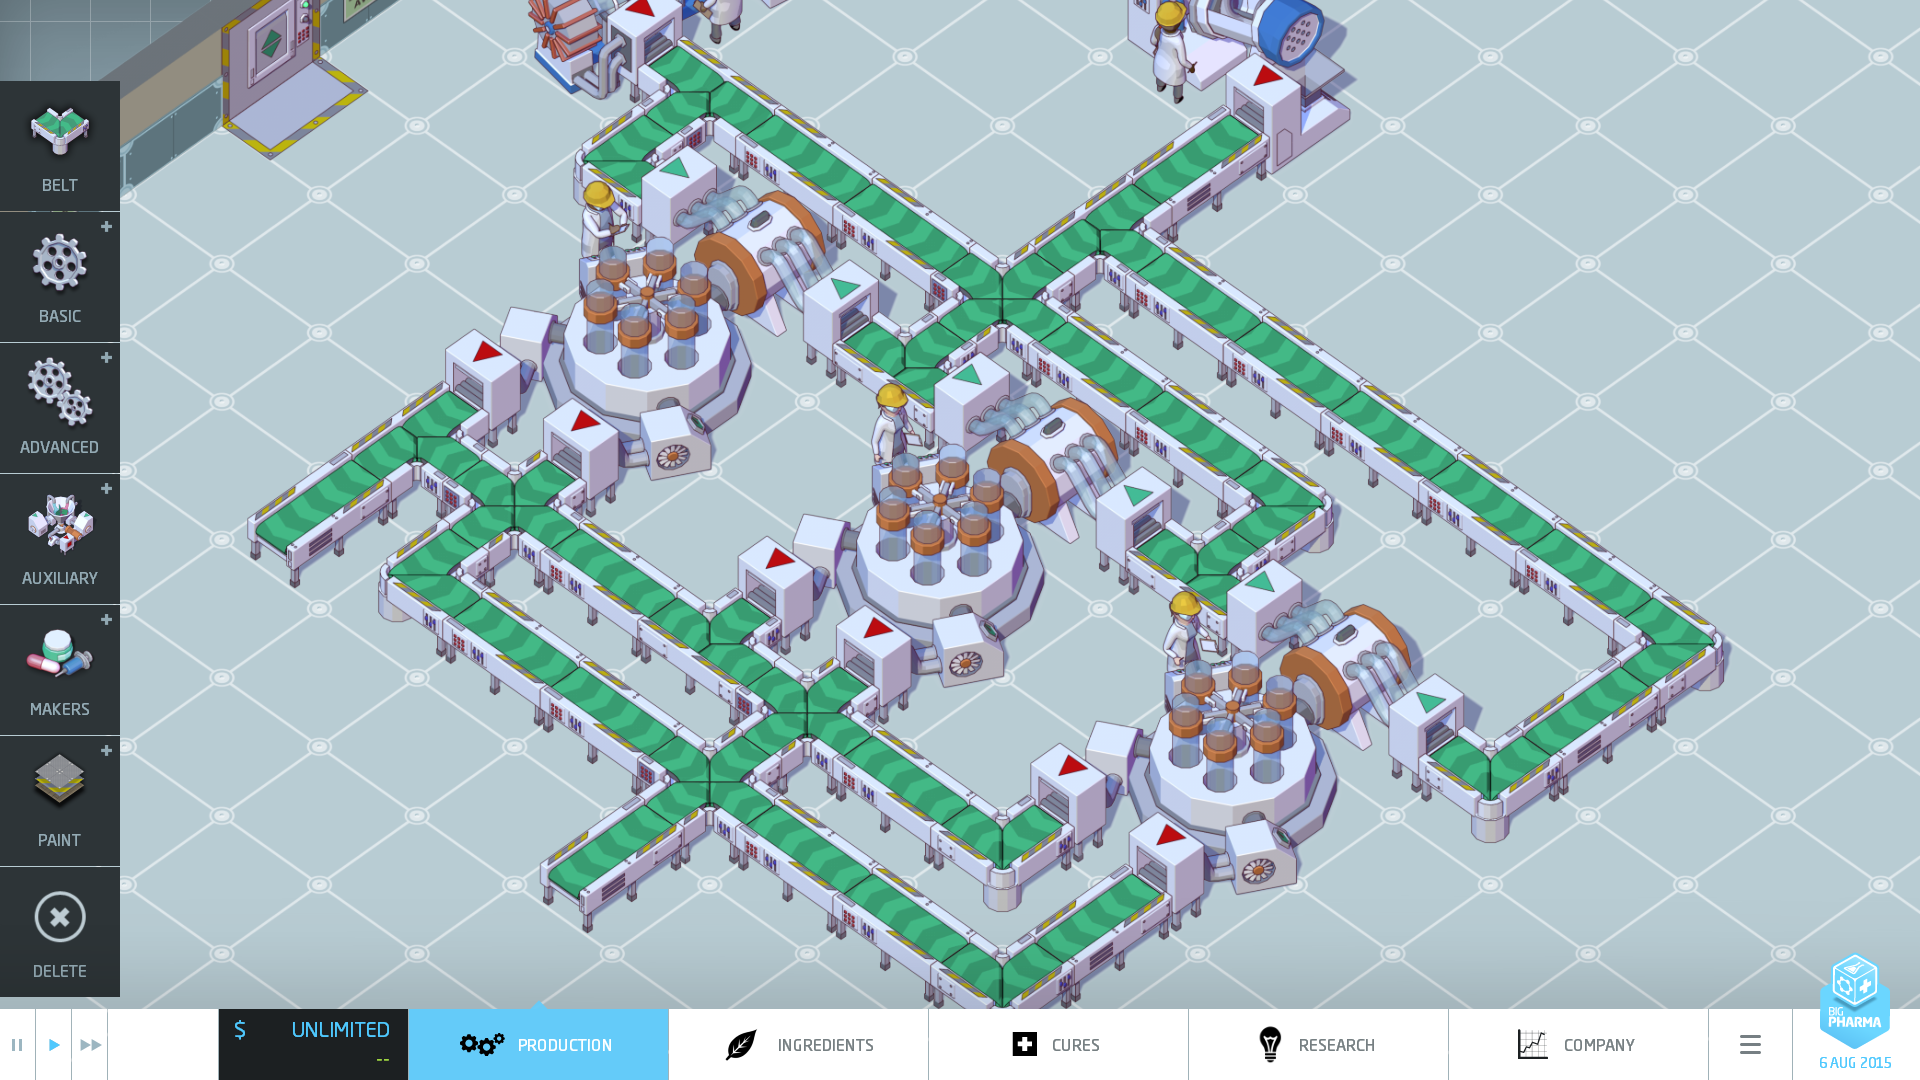
This is the Centrifuge Example. You need three Centrifuges to maintain an output of one ingredient per day, now we are talking lots of space usage. Generally I do not recommend doing something like this as you are taking up enormous factory space and its probably better just to stick with one. (See Ending)
Now with the Centrifuge you need to take care to check the outputs. Since the ingredients are crossing to the inputs on different sides for different machines you may need to adjust the output crossings a bit to make sure that your matching output ingredients are on the same path.
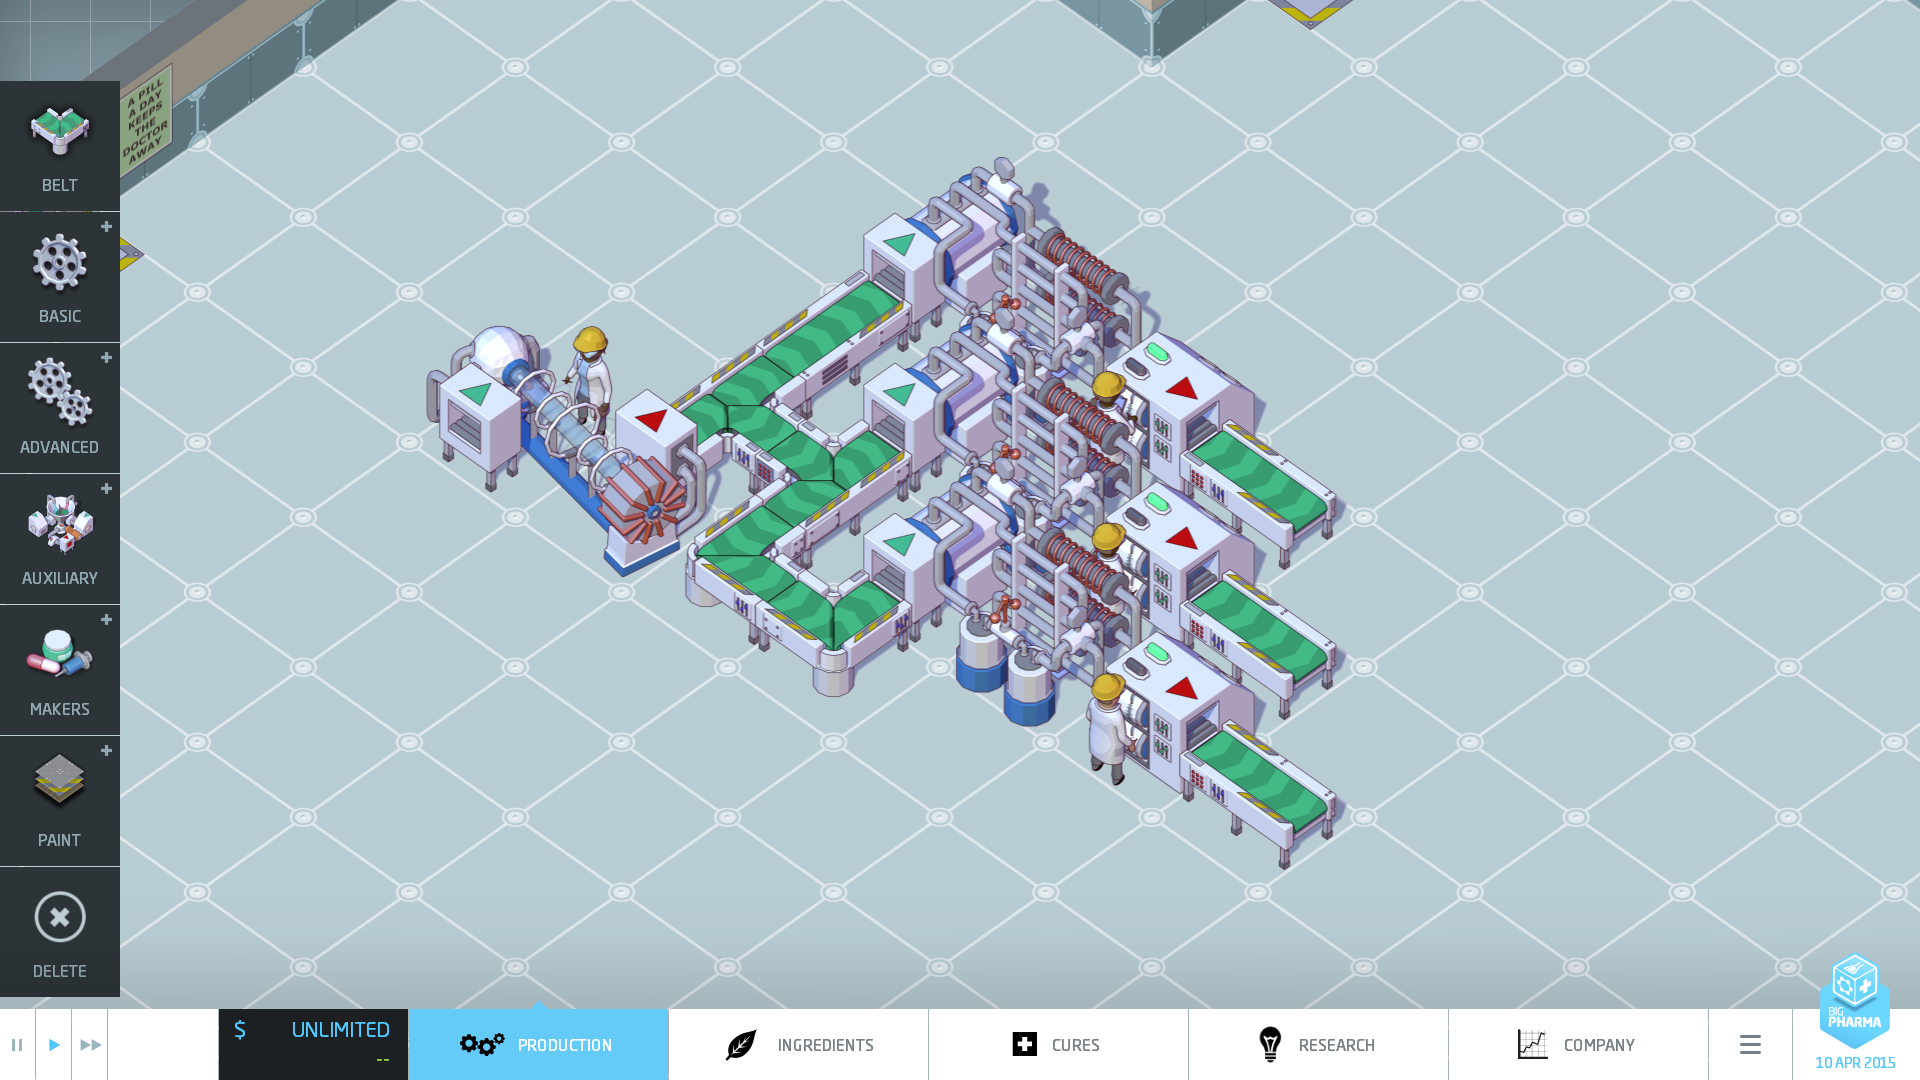
Ultraviolet Curer & Hadron Collider
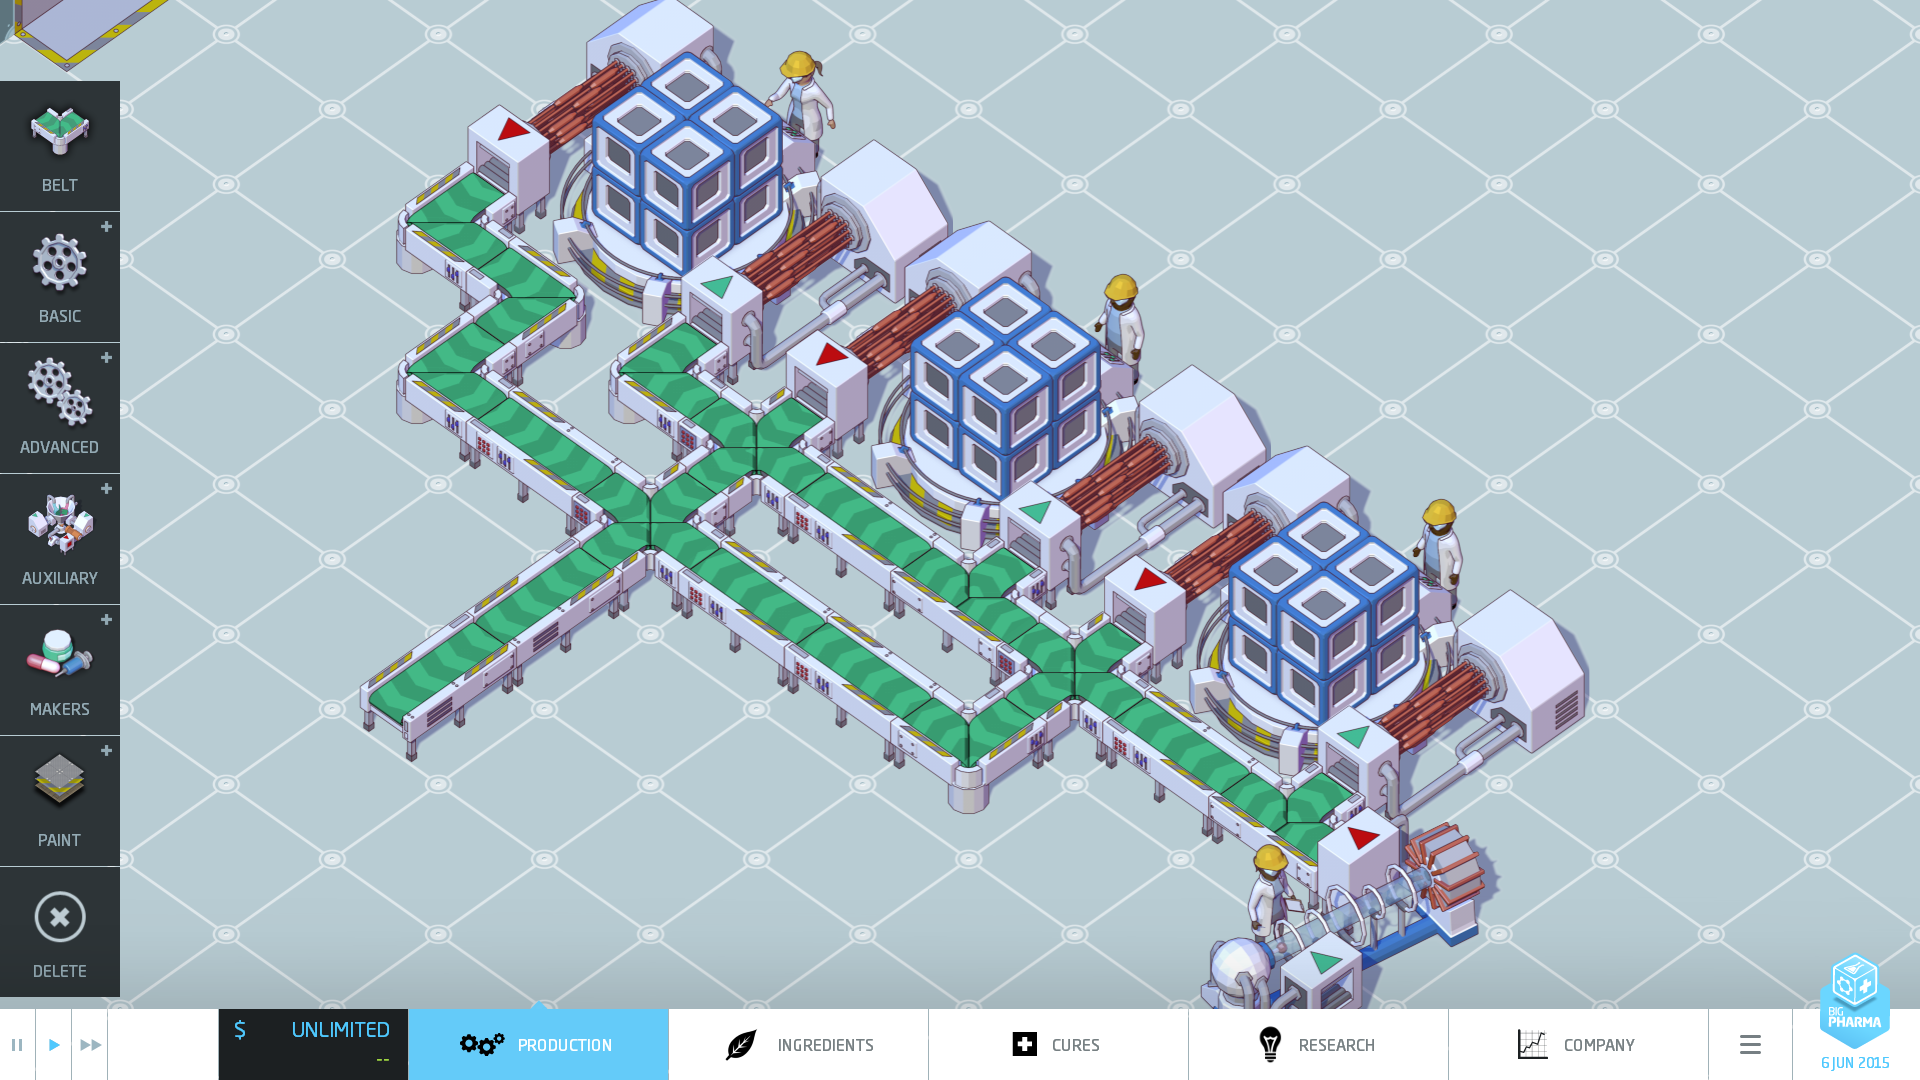
The Ultraviolet Curer & Hadron Collider follow the same premise. Input on one side output on the opposite side. You need three Curers and four Colliders to maintain an output of one ingredient per day. These also take up an enormous amout of space so as with the Centrifuge and others I don't recommended using three or four.
Satchet Maker Example
Same with the other large components multiple Satchet Makers take up a lot of space and you need three to maintain an output of one cure per day. In my Cure & Catalyst guide I mentioned this and I will mention it here. I don't feel the Satchet Maker is useful. It seems that having multiple cures in a Satchet the price of the cures do not stack, i.e. Cure A = $1000, Cure B = $900 sepearately sold, Cure A & Cure B in a Satchet = $1200. You're probably better of not using the Satchet and selling them seperate.
Utilizing Corners in Factory
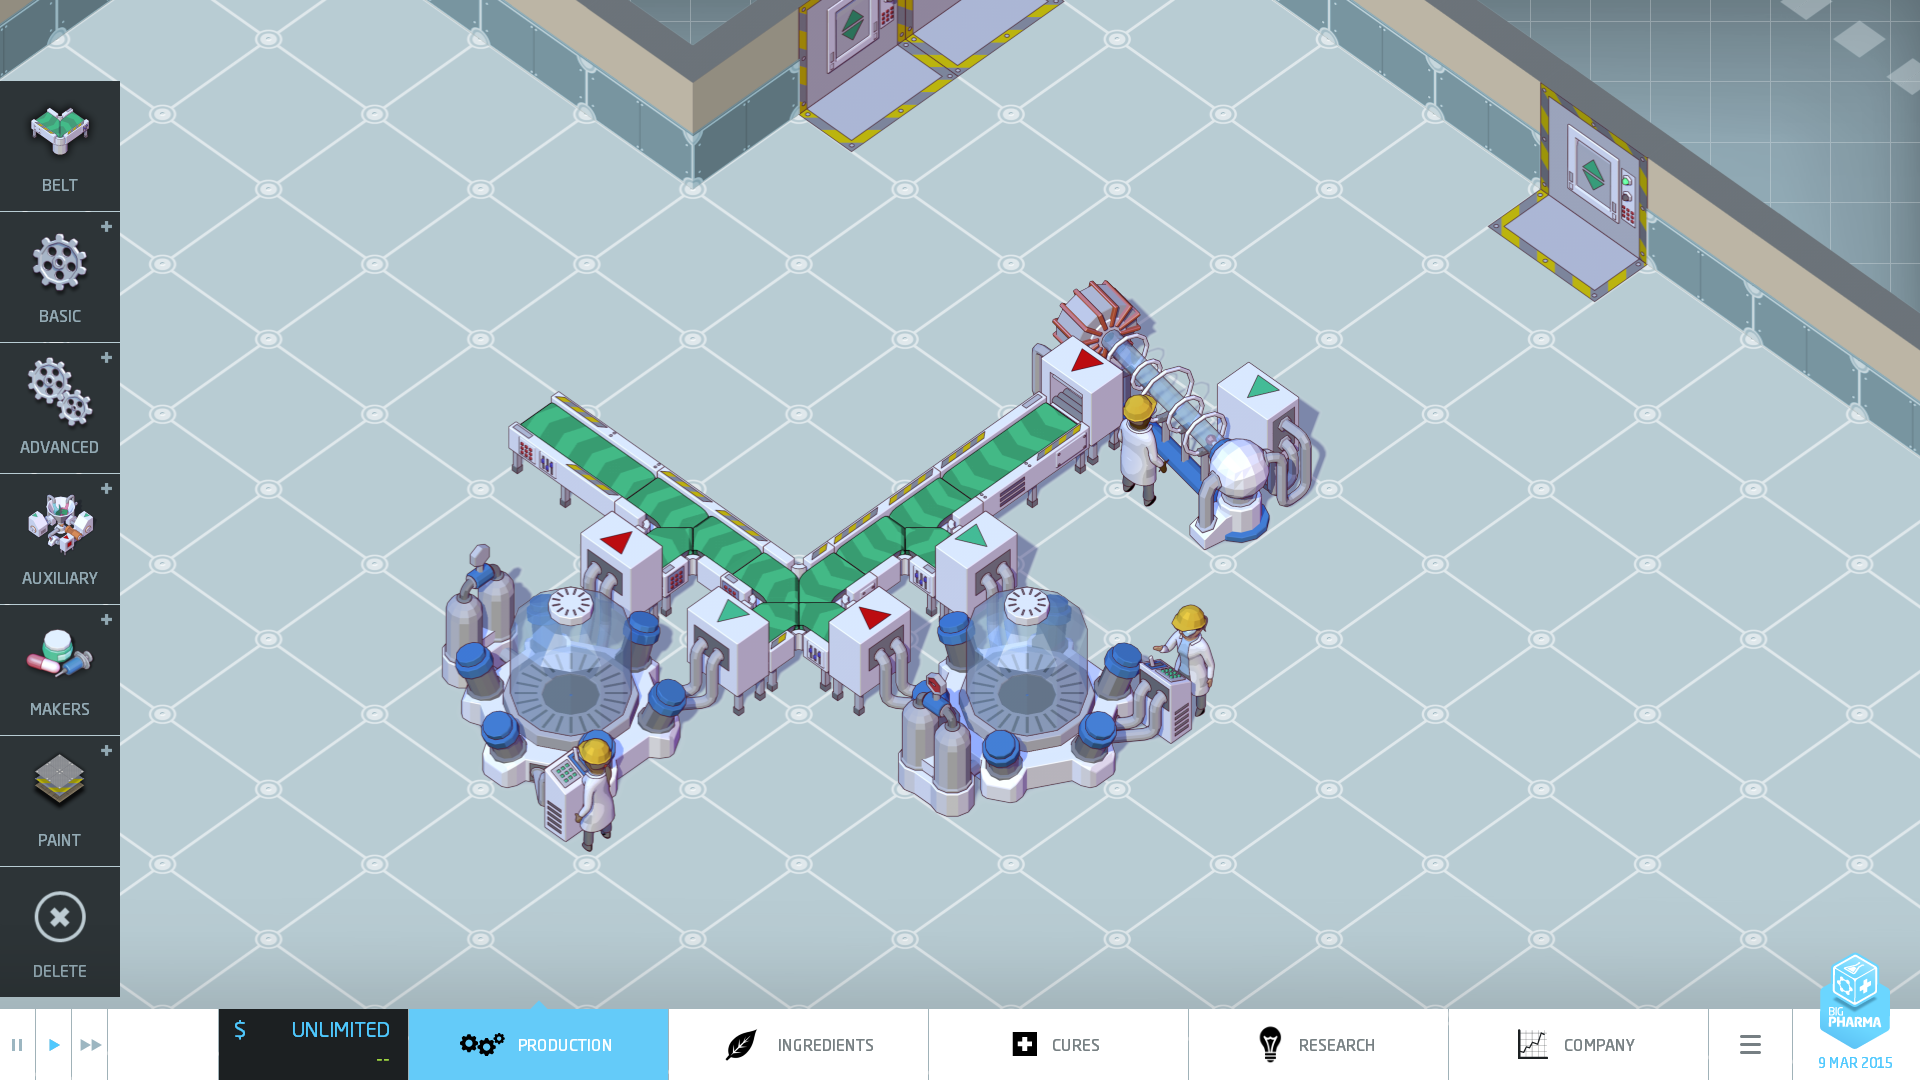
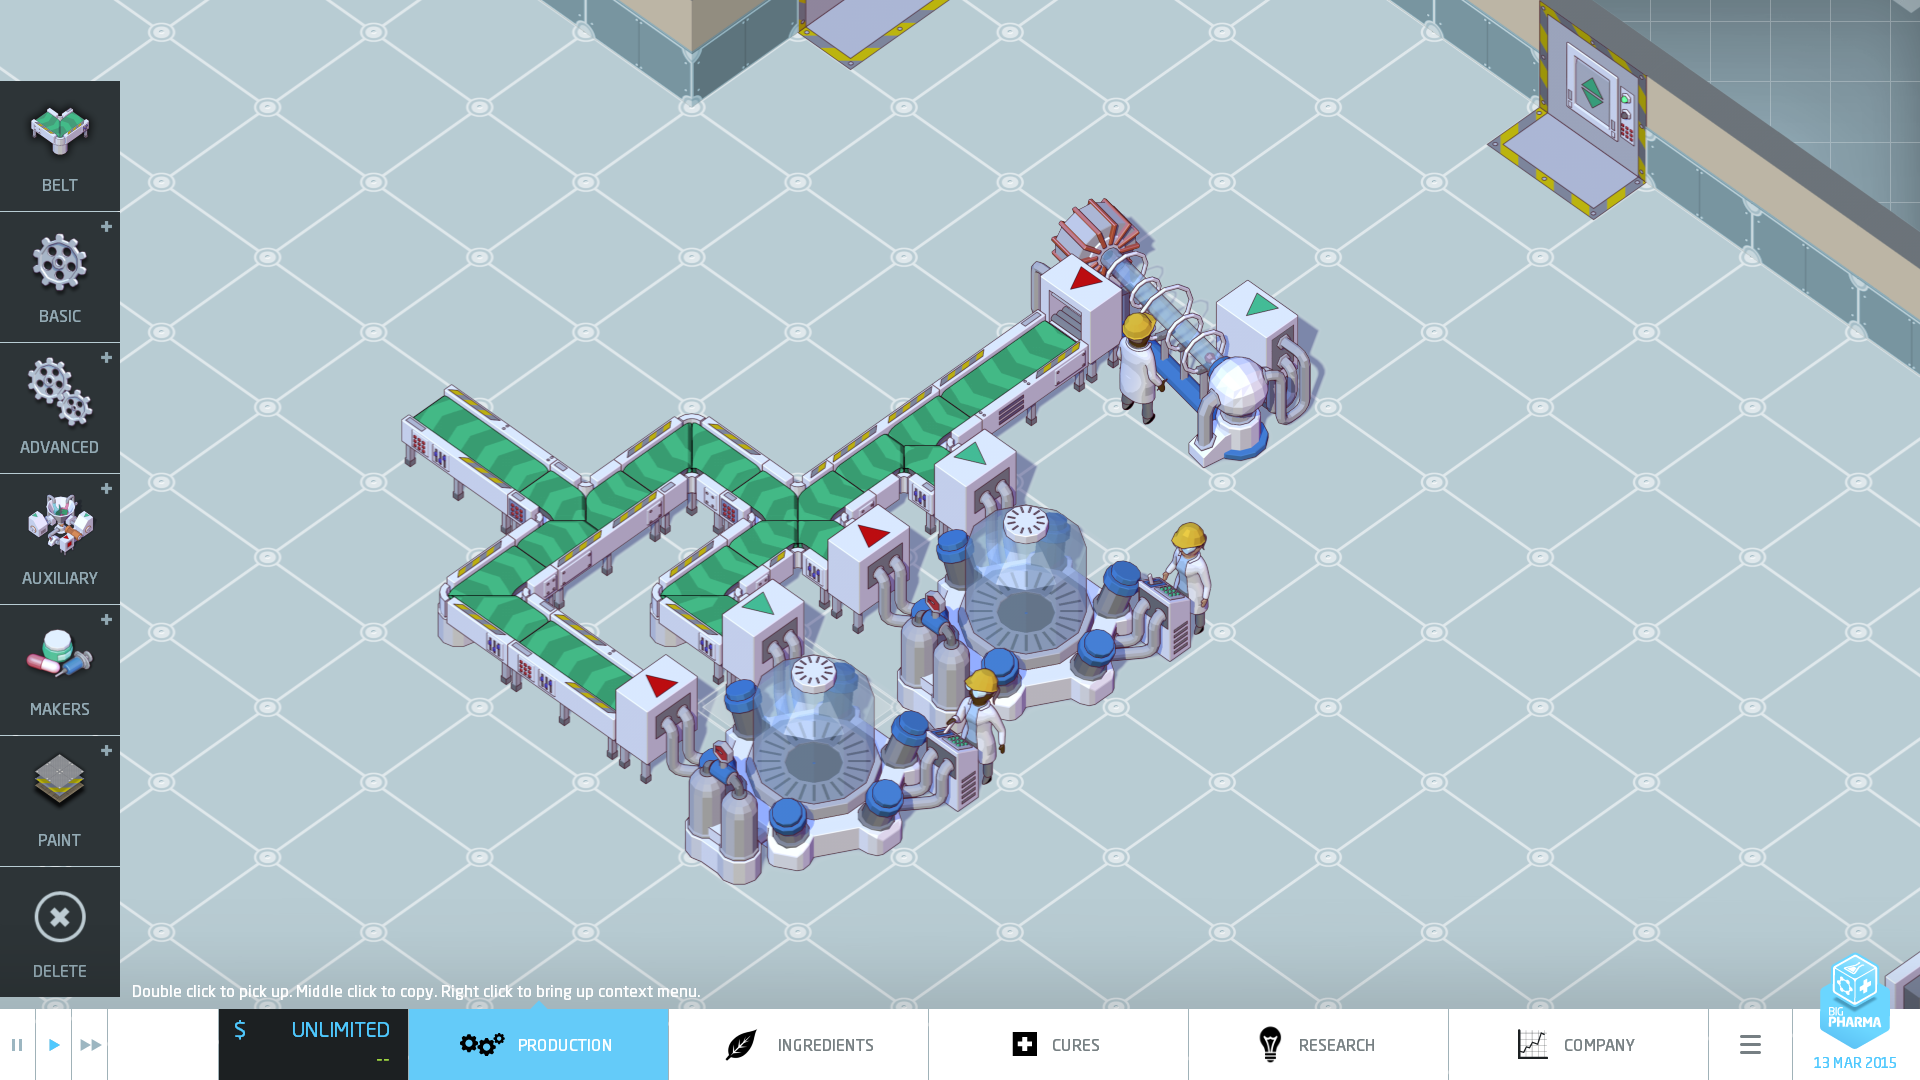
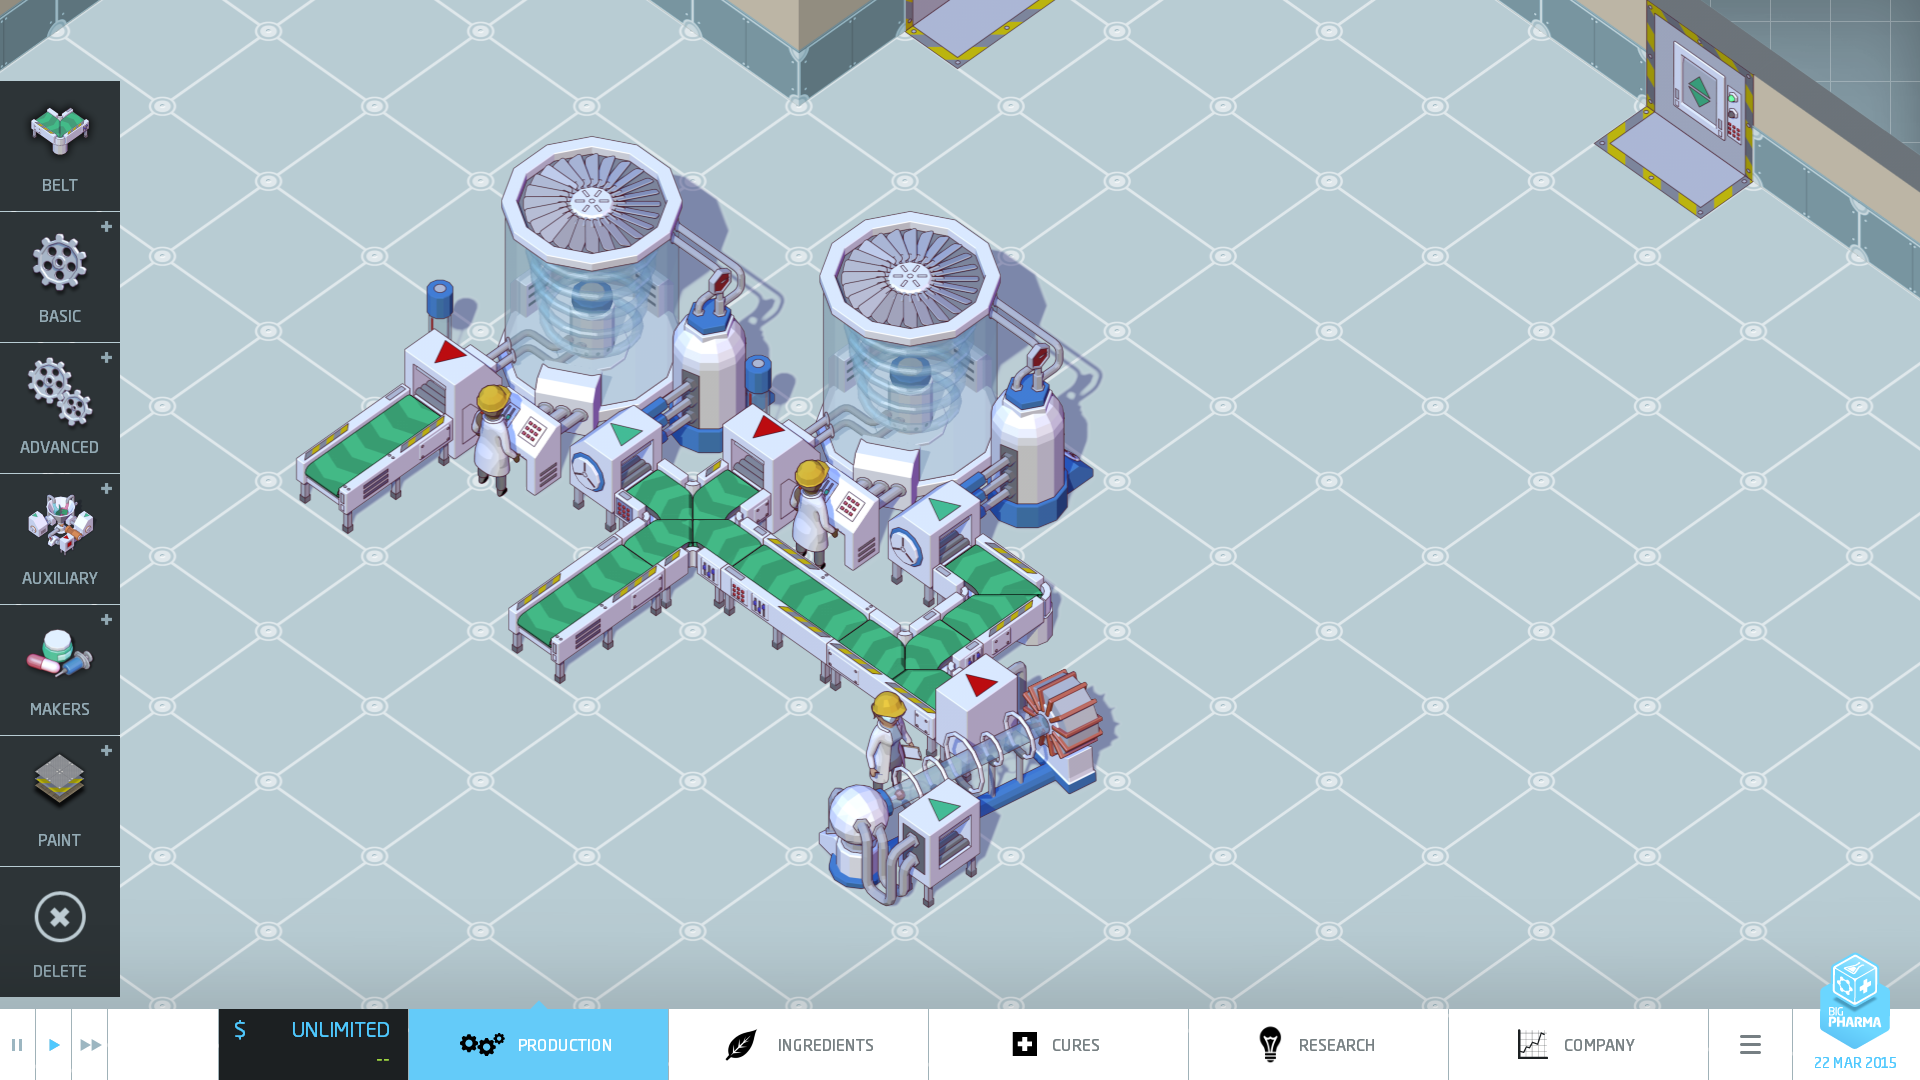
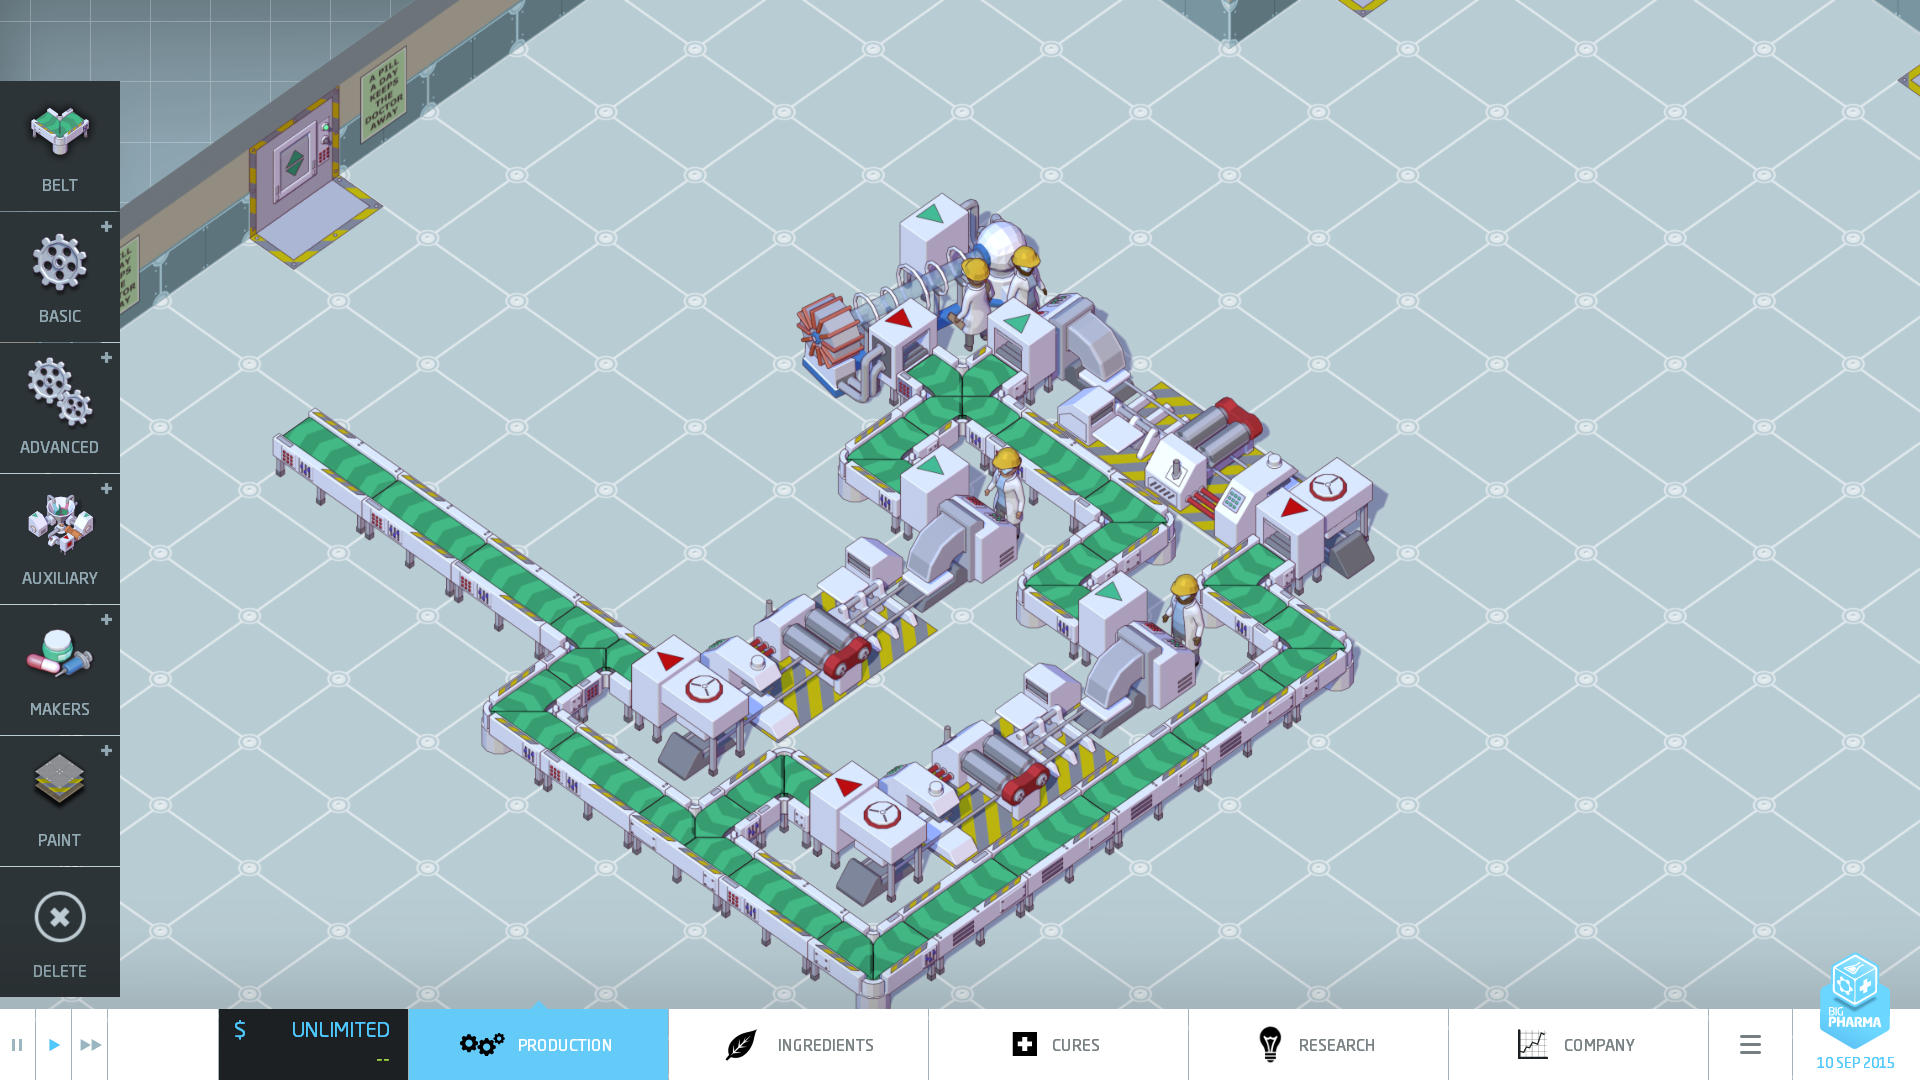
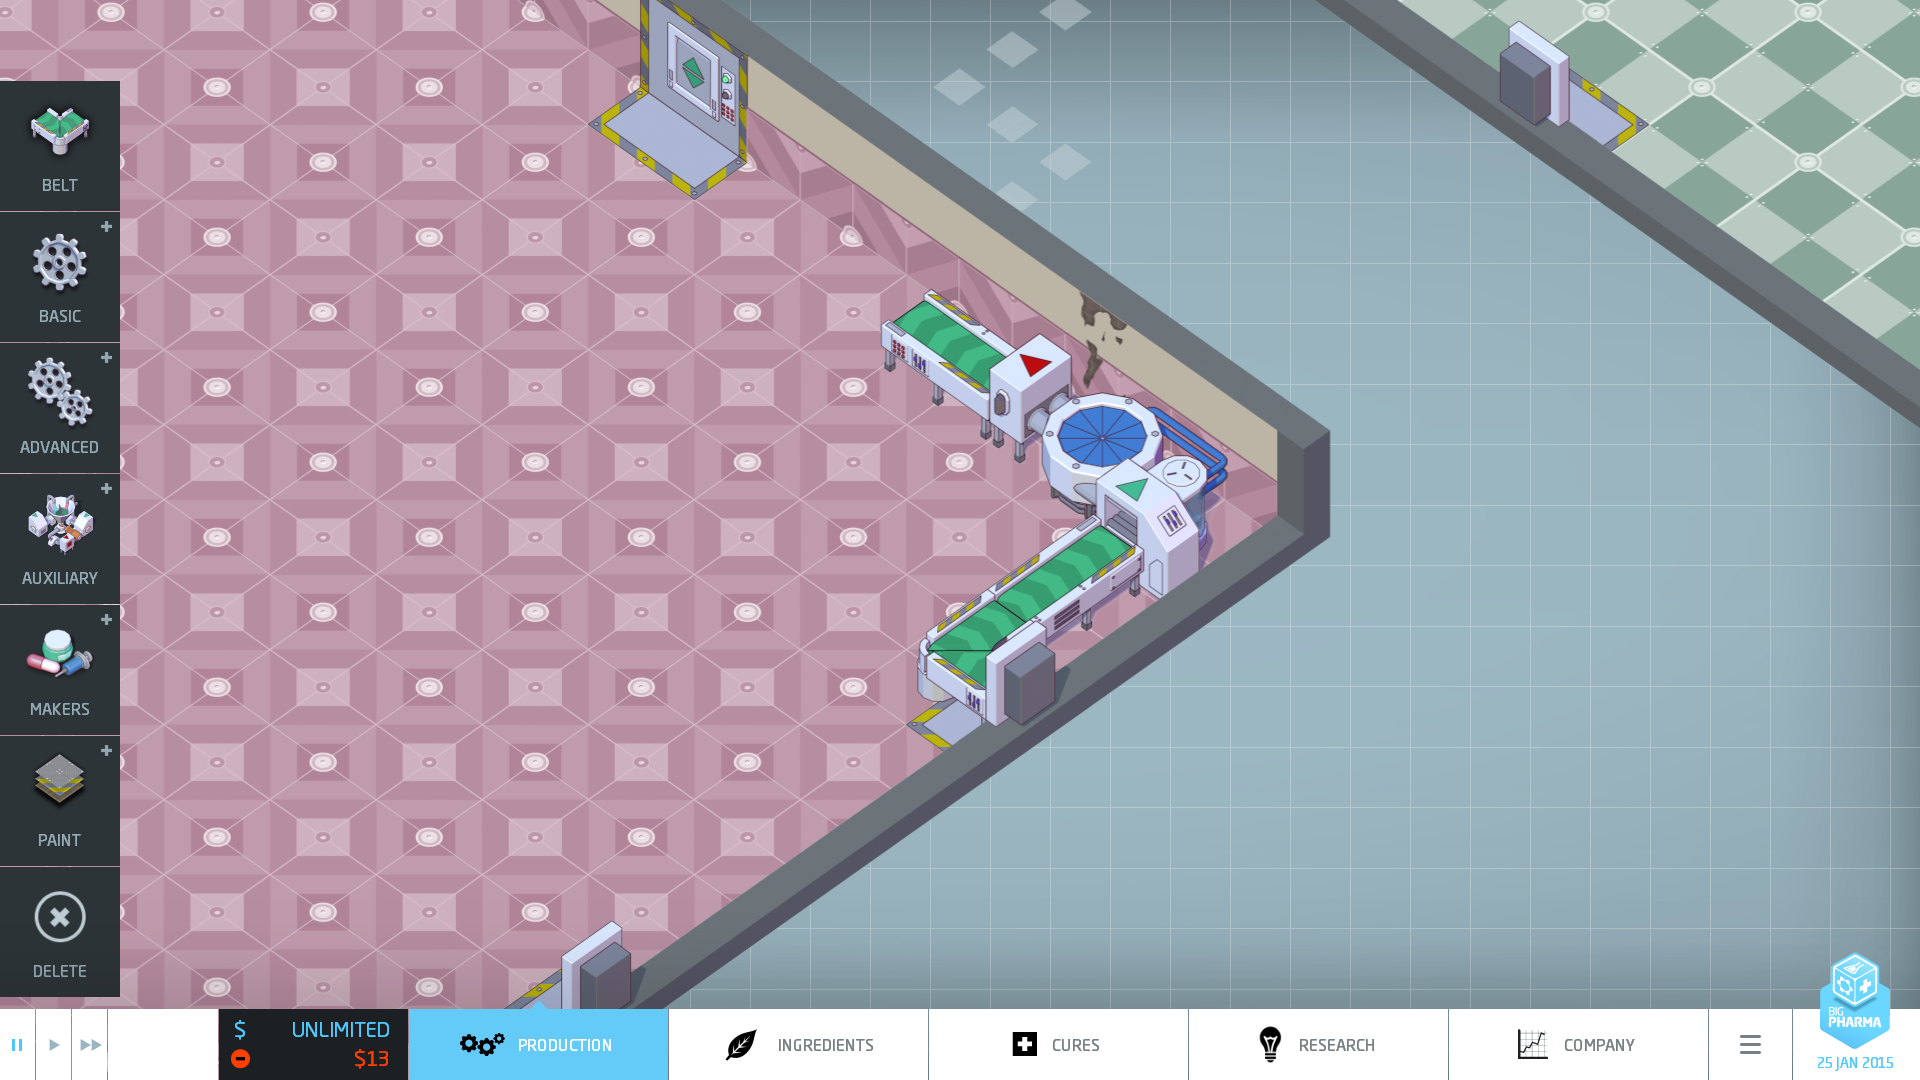
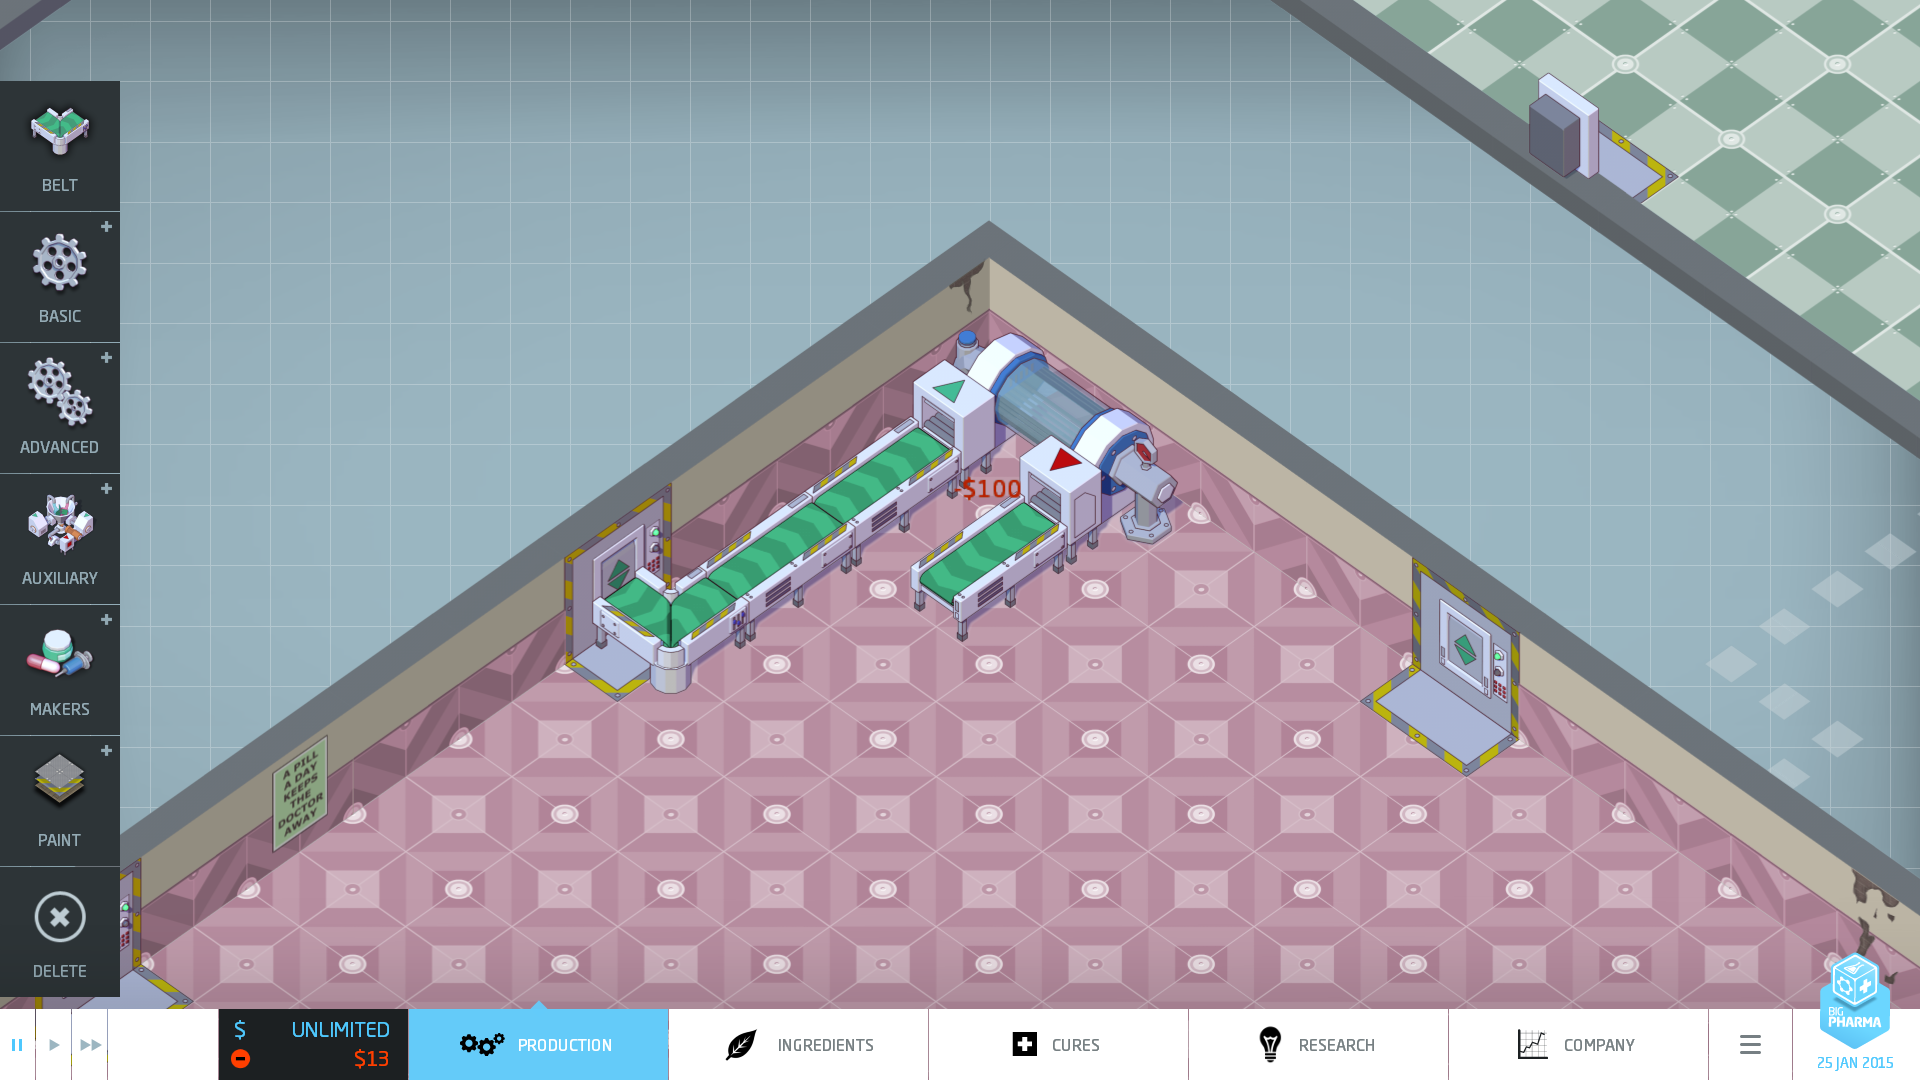
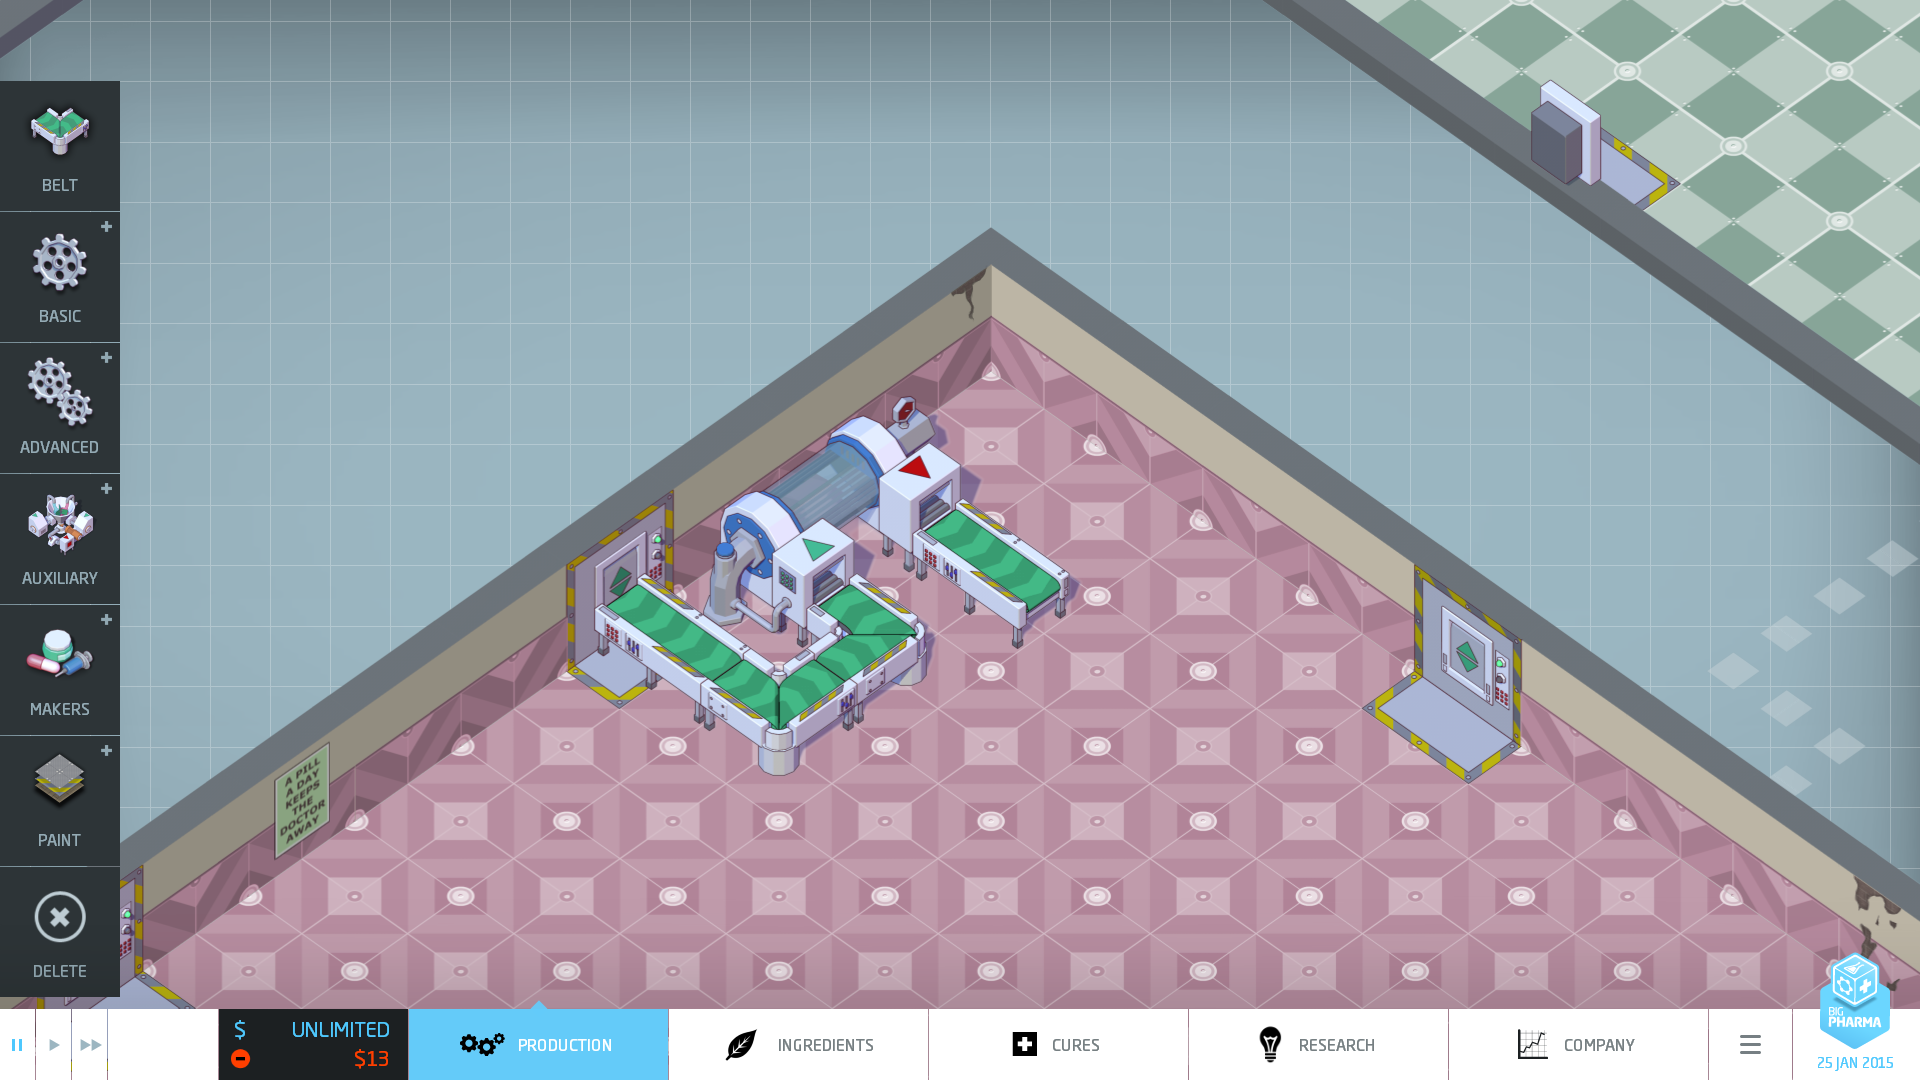
I have included some basic examples from personal experience that it seems to be always best to start your first components shoved into the nearest corner from the factory input door. Utilizing those corners early on even though the belt is a bit longer will save space in the long run. See the examples below.
As you can see from the two examples with the Dissolver utilizing the corner with a longer belt you save space.
Ending
All in all this is a basic guide on belt crossings. I am positive there are many other configurations that I don't have listed here. This is just to get you started. Trust me it will take some practice and trial and error to get the belt crossing systems right. I recommend saving your game a lot just in case you screw up. I have stated this many times and generally I do not recommend building huge machine processes to output maximum amount of high level cures (one per day) as you will need many larger components and take up huge amounts of factory floor. You will have a ton of wasted space, saturate the market and have diminishing returns on your cures. Comments and ratings are appreciated. Good luck.

Originally posted by author:
Written by Delscorcho
29 Comments
XTS - Away 8 Sep, 2023 @ 5:20pm 
It sure does. You are very welcome :) Some designs I need to remember but I've done better than before with my massive systems. I'm still working out some things because I have not finished the tutorial. I do pretty well, imho, for having not done more than the first set of tutorials. :D haha I like making my own challenges. I have found you can put the pill creator in the gap between the sachet entry/exit points :D If it doesn't get messed with, it works great, even with packaging. :D

Thank you so much for the guide. It was the person below me that led me here. BLA, in a post. :)
DelScorcho  [author] 8 Sep, 2023 @ 4:37pm 
Thanks XTS, glad my guide continues to help players.
XTS - Away 8 Sep, 2023 @ 3:50am 
Wow, thanks~! I have been trying to figure out the cross-section part for a while now. This is super helpful. Rated, Faved, Awarded :kittyheart:
[BLA]Unmortal 2 Jul, 2023 @ 6:06pm 
This guide should have had more comments + views it always has helped me figure something out thanks for creating this.
vezrilx 3 Jun, 2021 @ 5:53pm 
Time and time again, the basics described here are a helpful reference.
Gamma Core 20 Jan, 2021 @ 7:27am 
The booster effects come from the game's dlc. Do you have it? If so, is it enabled?
Diatere 14 Dec, 2020 @ 7:46am 
What happened to the yellow booster effects - irrelevant but I really want to know please!
They look fun, but I never got to use them.
Electricbluebee 3 Nov, 2018 @ 4:12am 
I had no idea!!!! Mind blown. Thank you for blowing me :steamhappy:
[BLA]Unmortal 18 Aug, 2018 @ 3:06am 
i sometimes revist this game its truely a gem and a mind twister to play youre guide is stil usefull for me to review things i forgot about the game. like a cheat sheet a bit xd =)
Cacaphrakt 6 Aug, 2018 @ 7:04am 
Thank you very much for this VERY VERY helpful guide