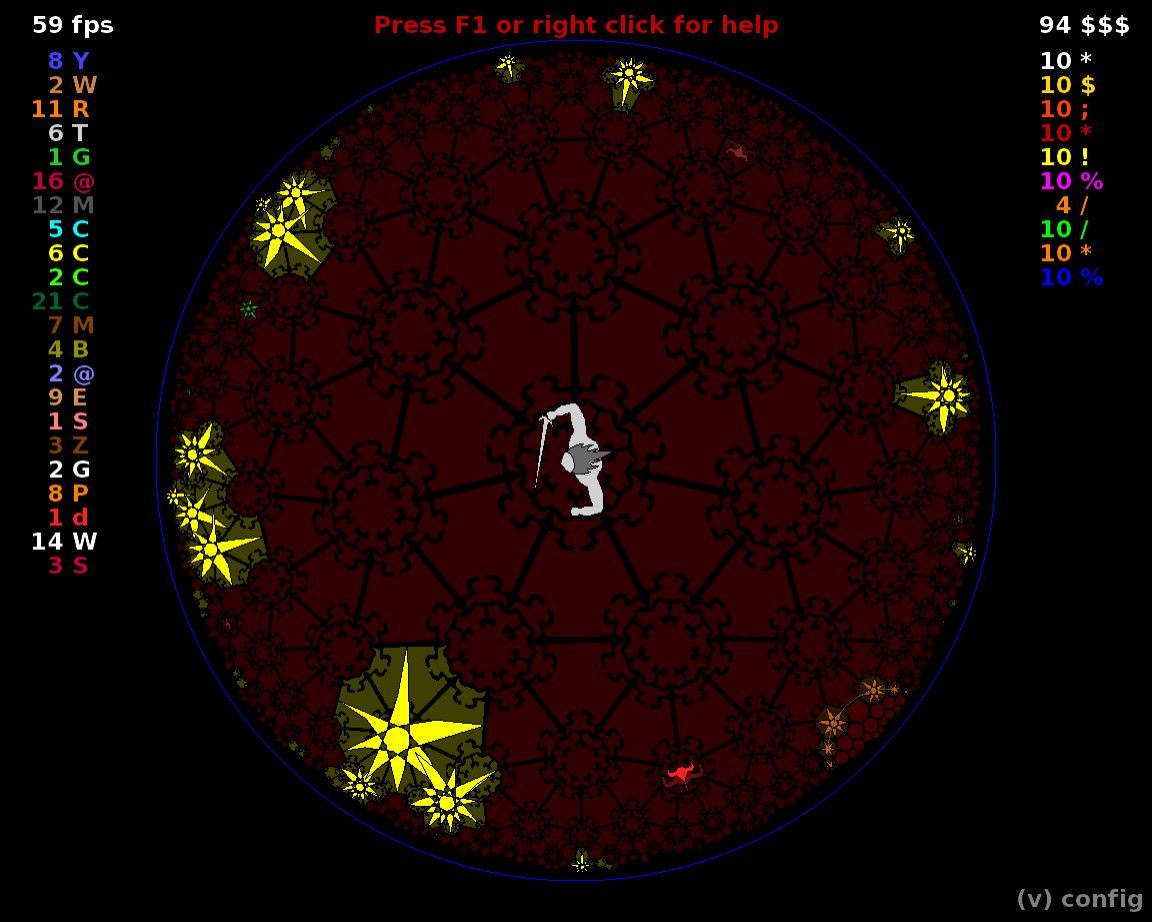
HyperRogue

HyperRogue

148 ratings
The Official HyperRogue Guide
By Fulgur14 and 1 collaborators
HyperRogue is a puzzle/roguelike hybrid played on a hyperbolic plane. This guide attempts to explain some of the peculiarities of the geometry and some basic tips, tricks and tactics.
5
   
Award
Favorite
Favorited
Unfavorite
Introduction (to hyperbolic geometry)
For millenia, best mathematical minds were puzzled by one problem: so-called "Euclid's Fifth Postulate", one of the cornerstones of geometry. This postulate has been stated in many equivalent forms, with two of the best-known are:

"Sum of the angles in a triangle is 180 degrees."
"If you have a straight line and a point outside that line, you can construct exactly one parallel line through that point."

Compared to other Euclid's postulates (like "All right angles are equal"), this seemed unneccesarily complex. Was something like that really needed?

Spoiler alert -- it was. But in the process of finding out that the Fifth Postulate is, indeed, essential for Euclidean geometry, a whole new world of non-Euclidean geometries was discovered.

HyperRogue is a game played in one of these geometries -- a hyperbolic geometry -- and before you can hope to understand it, you must first understand some basic facts about hyperbolic geometry and the way it's represented in-game.

We all know one example of a non-Euclidean geometry; the spherical geometry that governs distances and angles on the surface of Earth, at least if the distances involved are large enough. A sphere is an example of a surface with POSITIVE curvature. This means that a triangle drawn on a surface of a sphere will have sum of its angles greater than 180 degrees. Not only that, but there will be a direct correlation between its "excess" (sum of angles minus 180) and its area -- bigger triangles have bigger excess.

Hyperbolic plane, on the other hand, has NEGATIVE curvature. In a sense, it's curvature is actually smaller than of our common Euclidean space, which has curvature of zero. On hyperbolic plane, the sum of angles in a triangle is smaller than 180 degrees, and once again, there's direct correlation between the "defect" (180 minus sum of angles) and area.

Unfortunately, hyperbolic plane cannot be faithfully represented in our world since its curvature is smaller than zero. And thus, we have to resort to using tricks like the Poincaré disk model, which is what HyperRogue uses. In this model, the whole hyperbolic plane is shown inside of a disk that can comfortably fit on your screen. This model deforms straight lines, so they show up as parts of circles, and things seem progressively smaller as you get closer and closer to the border of a circle. The whole effect looks quite like a fish-eye lens, but it is not -- it is simply the most useful system to show the glory of hyperbolic space to your Euclidean eyes. (If your eyes are not Euclidean, please continue directly to the section titled R'Lyeh.)

Some things for advanced players:

The circumference and area of a circle grows exponentially with the radius. Even a relatively small circle will cover a huge area.
Unlike Euclidean space where big circles look almost like straight lines, ANY circle in hyperbolic space looks noticeably curved.

Walking next to a straight line will take a longer time than walking on the straight line, as you have to move on a curve called a hypercycle or "equidistant curve". This effect is very useful in Land of Eternal Motion.

Both circles and equidistant curves approach, in a limit, a unique curve called "horocycle". Horocycles are used in several places in the game. A horocycle has a center at infinity, meaning you can never reach it, no matter how far you go.
Introduction (to HyperRogue)
HyperRogue is played on a grid of hexagons and heptagons, specifically two hexagons and one heptagon meeting in every corner (so-called "truncated {3,7}-tesselation").

This is sufficiently close to normal hexagonal grid in Euclidean plane to, perhaps, not notice much of a difference until you look far enough. And you don't actually see very far -- with the default settings, you only see in a radius of 7 cells around you. However, in hyperbolic geometry, the relationship between distances and areas is different, and so this 7-cell radius actually contains much more cells than it would in Euclidean geometry. You can compare this by opening the configuration by pressing 'v', pressing space twice and activating Euclidean mode by pressing 'e'.

Basic controls:

You can move by numpad keys, or by key blocks qweadzxc or hjklyubn. If you use the keyboard, the game displays a cross that helps you see which key will take you to which cell. But it's usually easier to just use your mouse and click on any neighbouring cell to move into it. You can also wait in the same place by pressing 's', '.' or clicking on your current cell.

After you move or wait, the game elements (like monsters) execute one move of their own. Then it's your move again.

Combat:

Combat is very simple. HyperRogue has no HP or equipment, so the combat system is similar to puzzle games like Deadly Rooms of Death. Simply said, if you attempt to move to a space occupied by a monster, you kill that monster (barring some exceptions I'll mention later). Conversely, if a monster moves to your space, it kills you and the game is over.
This means that a basic strategy is simple: never end your turn with a monster next to you. Fortunately, the game will not allow you to do this -- you can only get a game over by getting to a position where you will end up next to a monster after EVERY possible move, i.e. you get yourself into a checkmate situation.

Lands:

The game is divided into areas called "Lands". Each Land is infinite. In hyperbolic space, you can have infinitely many infinite regions which all fit together comfortably. You could spend the whole game exploring a single Land (but it is not a good idea, for reasons I'll get to shortly).
When i say "infinite", I mean, more precisely, "boundless". The game will generate new places as you move. It's actually impossible to fully explore even a moderately-sized hyperbolic region in the human lifetime; your path through the game will be more like a zig-zagging line.
Once something disappears behind your 7-cell "horizon", it's still there and you can still return there if you want. However, the further you go, the more difficult it is to return. A single mistake on your path will send you to a completely different area.
In this game, you must accept that you will be always leaving things behind. This is normal. In fact, you will WANT to leave behind things you can't deal with (like Ivy or Sandworms).

While each region is different, they all have some common properties: all of them (except the Crossroads) contain monsters, and all contain treasures and magical Orbs.

Treasures:

Treasures are precious things that lie scattered in the various Lands. By collecting them, you get $$$ (i.e. score, since you can't actually spend anything). However, the number of monsters in the Lands grows with the Treasures collected. This depends on the Land type: for example, collecting Ice Diamonds in Icy Land will result in more monsters appearing in all Icy Land regions.

Orbs:

Glowing items of power. Some Orbs have one-shot effects that are performed immediately; some can be saved and used later (but you usually have a time limit to use them before their power fades).
Each Orb starts appearing in a Land once you collect 10 treasures. Most Orbs will also start to appear in Crossroads and in the Ocean at this point. If you collect 25 treasures in one land, the Orb of this land will also start appearing in other lands, except lands when they would be overpowered, dangerous or useless.

Goal of the game:

To find and obtain an Orb of Yendor. However, to do this, you must first collect many treasures and kill many monsters.
Overview of the Lands
This is a list of all lands that exist in the game, as well as the conditions to unlock them. No land can appear next to another land of the same type, in addition, several other combinations of lands are forbidden.

You can see the gallery of all current lands on Zeno's page here:
http://www.roguetemple.com/z/hyper/gallery.php

Basic lands:
Alchemist Lab -- always available.
Crossroads -- always available. The Crossroads also has a higher chance to appear than the other lands. Crossroads cannot appear next to any other Crossroads type.
Icy Land -- always available.
Desert -- always available. Appears more often next to Red Rock Valley.
Hunting Ground -- always available.
Jungle -- always available. Never appears next to Land of Eternal Motion, as of v7.0.
Land of Eternal Motion -- always available, as of v7.2. Never appears next to Jungle, as of v7.0.
Living Caves -- always available. Never appears next to Dead Caves.

Mid-lands:
Caribbean -- requires at least 30 $$$. Always appears next to the Ocean.
Hall of Mirrors -- requires at least 30 $$$.
Ivory Tower -- requires at least 30 $$$.
Living Fjord -- requires at least 30 $$$. Often appears next to the Ocean.
Minefield -- requires at least 30 $$$.
Ocean -- requires at least 30 $$$. Until you complete R'Lyeh (by collecting either 10 Statues of Cthulhu or 10 Grimoires), Ocean and R'Lyeh will be often adjacent.
Palace -- requires at least 30 $$$.
Warped Coast -- requires at least 30 $$$.
Whirlpool -- a subzone of Ocean. Available immediately when Ocean is unlocked.

Burial Grounds -- requires at least 30 $$$; in addition, you must have at least 10 Sunken Treasures.
Dungeon -- requires at least 30 $$$; in addition, you must have at least 5 Hypersian Rugs and at least 5 Ivory Figurines.
Jelly Kingdom -- requires at least 30 $$$; in addition, you must have at least 10 Elixirs of Life.
Kraken Depths -- requires at least 30 $$$; in addition, you must have at least 10 Garnets.
Reptiles -- requires at least 30 $$$; in addition, you must have at least 10 Elixirs of Life.
Yendorian Forest -- requires at least 30 $$$; in addition, you must have at least 10 Ivory Figurines. Never appears next to Volcanic Wasteland.
Zebra -- requires at least 30 $$$; in addition, you must have at least 10 Phoenix Feathers.

Advanced lands:
Blizzard -- requires at least 60 $$$; in addition, you must have at least 5 Ice Diamonds and at least 5 White Dove Feathers.
Camelot -- a subzone of Crossroads. Requires at least 5 Emeralds.
Clearing -- a subzone of Overgrown Woods. Requires at least 5 Mutant Saplings.
Crossroads II -- requires at least 60 $$$. Never appears next to any other Crossroads type.
Dead Caves -- requires at least 60 $$$; in addition, you must have at least 10 Gold. Never appears next to Living Caves or Emerald Mine.
Dry Forest -- requires at least 60 $$$. Never appears next to Graveyard, Land of Power, or Volcanic Wasteland.
Emerald Mine -- requires at least 60 $$$; in addition, you must have at least 5 Gold and at least 5 Fern Flowers. Never appears next to Dead Caves. You can bypass the usual requirements for Emerald Mine by killing a Vizier in the Palace; then you just need the 30 $$$ for Palace itself.
Lost Mountain -- a subzone of the Jungle. requires at least 60 $$$; in addition, you must have at least 5 Rubies and at least 5 Ivory Figurines.
Overgrown Woods -- requires at least 60 $$$; in addition, you must have at least 10 Rubies.
Red Rock Valley -- requires at least 60 $$$; in addition, you must have at least 10 Spice. Never appears next to Graveyard. Appears more often next to Desert.
R'Lyeh -- requires at least 60 $$$. Until you complete R'Lyeh (by collecting either 10 Statues of Cthulhu or 10 Grimoires), Ocean and R'Lyeh will be often adjacent.
Temple of Cthulhu -- a subzone of R'Lyeh. Requires at least 5 Statues of Cthulhu to appear.
Vineyard -- requires at least 60 $$$. Never appears next to Land of Power.
Volcanic Wasteland -- requires at least 60 $$$; in addition, you must have at least 10 Elixirs of Life. Never appears next to Dry Forest or Yendorian Forest.
Windy Plains -- requires at least 60 $$$.

Bull Dash -- requires at least 90 $$$. Often appears next to Prairie.
Crossroads III -- requires at least 90 $$$. Never appears next to any other Crossroads type.
Prairie -- requires at least 90 $$$. Often appears next to Bull Dash.
Rose Garden -- requires at least 90 $$$.
Terracotta Army -- requires at least 90 $$$.

Crossroads IV -- requires at least 200 $$$. Never appears next to any other Crossroads type.
Crossroads V -- requires at least 300 $$$. Never appears next to any other Crossroads type.

Dragon Chasms -- requires killing 20 different types of monsters.
Elemental Planes -- requires killing all 4 types of Elementals.
Galápagos -- unlocks with Dragon Chasms. Always appears next to Dragon Chasms.
Graveyard -- requires at least 100 kills. Never apears next to Dry Forest or Red Rock Valley.
Haunted Woods -- a subzone of the Graveyard. Requires at least 10 Necromancer's Totems.
Hive -- requires at least 60 $$$ AND at least 100 kills.
Ruined City -- Requires killing a Skeleton.
Trollheim -- requires killing all 6 types of Trolls.

Hell -- requires at least 10 treasures of each of any 9 different types.

Cocytus -- requires at least 10 Demon Daisies.
Land of Power -- requires at least 10 Demon Daisies. Never appears next to Dry Forest or Vineyard.
Icy Land

You start the game in Icy Land, unceremoniously dumped. No point standing there -- you'll have to start on your quest!

At the beginning, you might just want to move around and explore. Icy Land is full of Ice Walls that block your progress, but not for long: each cell in Icy Land has defined temperature, and as your body heat spreads, the temperature of Ice Walls can rise above 0 degrees Celsius, which will make them melt. This means you can't really get stuck in here. If you don't like wasting your body heat (who would?), you can occasionally come upon a bonfire. Just touch it and it will spring to life without even using up a turn, automatically melting lots of walls around it.

See the white stars? Those are Ice Diamonds, the treasure of this Land. Collect them, but be careful of monsters.

There are two kinds of monsters in the Icy Land:

Yetis are simply always trying to move towards you if they can find a path.

Ice Wolves are more interesting -- they actually track you by your body heat, which means you can sometimes confuse them by leading them near the bonfires. This also prevents the Ice Wolves from moving to other Lands (while Yetis cross the boundaries to get you). Be careful, as they might block an opening in the Great Wall, preventing you from approaching it. (This, however, is usually not a problem, thanks to the nature of the boundaries in this game.)

You can find two types of Orbs in Icy Land:

Orb of Flash will surround you with white circles and first attack you make after finding it (unless you wait more than 77 turns, after which it will expire), will kill all monsters in 2-cell radius. It also generates lots of heat, so it will melt Ice Walls. It also destroys many obstacles in other Lands, except Great Walls.

Orb of Winter causes you to be followed by freezing wind for 30 turns, creating Ice Walls behind you as you move, until the effect expires. This Orb also allows you to freely move through fire.

Once you satisfy the basic Icy Land quest by collecting 10 Ice Diamonds, you can find Orbs of Flash in the Crossroads.
Great Walls and the Lands Beyond
As you move across the Icy Land, you will eventually see other Lands in the distance. It doesn't matter where you go -- they will show up eventually.
Two different Lands are separated by a border called Great Wall. The Great Wall follows a straight line (though it will appear more or less curved, depending on how far from it you are). Its structure (barring some glitches) is predictable: you have a block of wall formed from two heptagons and two hexagons, then a free spot where hexagons from two different regions meet and you can move from one to another, then another four-cell block of Great Wall, etc. The openings in the Wall are natural chokepoints where you can easily get rid of monsters that pursue you. On the other hand, being caught by monsters from both sides at once is a great way to lose the game.

One important feature of Great Walls that will really hammer home the idea of hyperbolic space is that they never cross. Any two Great Walls are parallel -- actually, they are what is known as "ultraparallel". Any pair of Great Walls always has a unique place where the distance between them is minimal; follow either one in either direction, and the other one wil start to "curve away" very quickly. Also note that Great Walls are infinite: you can walk along any boundary of two Lands as long as you want .(Perhaps to watch for Treasures generated close to the boundary so you could make a quick, daring raid into a dangerous Land, grab them and run back?)

There are several possible Lands beyond the Great Walls at this point (unless you picked up 30 Ice Diamonds in your starting Land, which is pretty unlikely). The most important of these Lands is the Crossroads.
Crossroads

The Crossroads, with its red paving, is a welcome sight for any HyperRogue explorer. That's because it's the only land without native monsters, making it relatively safe, at least as long as you keep moving. New features start appearing in the Crossroads as you collect treasures in other Lands.

The special feature of the Crossroads is that Great Walls are generated there much more often than in other Lands. This means that Crossroads usually looks like a narrow path that keeps forking around more and more Great Walls. In other Regions, you can become "totally lost", not seeing any Great Wall from your position; this doesn't happen in the Crossroads, which also means it's slightly easier to keep your bearings there. Note that I said "easier", not "easy".

There are no Treasures in the Crossroads -- at least not when you start out. If you complete the Hyperstone Quest (collect 10 Treasures from each other Land), then a special treasure called Hyperstone starts to appear here in large quantities, though.

From the Crossroads, we can make our way to three new Lands (plus Icy Land where we were before): Living Cave, Desert and Jungle.
Living Cave
Living Cave

The Living Cave is a maze formed by cave walls; made more complicated by the fact that the walls and floors are alive... somehow. Cells of the Living Cave are basically a simple cellular automaton based on the majority rule -- walls grow in spaces that have more walls around them than floor, and recede from spaces that have more floor around them than walls. For most part, this rule creates stable structures, but you can encounter an occasional oscilator, where a wall seems to move from one space to another every turn. Note that the walls will never try to grow into YOUR cell.

Living Cave is easier to navigate than most other lands. Since lots of directions are blocked by the walls, you can usually find your way back even if you lose the sight of your original Land.

The treasure in Living Cave is Gold. Gold has a special rule: it's counted as three floor spaces instead of one, which means that spaces next to Gold tend to stay empty (but may start to grow in the moment you collect the Gold!).

There are three monsters originating from the Living Cave:

Goblins are Yetis of the cave -- same AI, they just pursue you.

Rock Trolls are the most dangerous type of enemy here; even if you kill them, they might still cause you to lose. That's because their bodies do not disappear after death; they turn into "dead trolls" which are basically walls -- plus, they erase any treasure or items on their, or any adjacent cell! As if that was not enough, the cellular automaton counts dead trolls as five wall cells; this means that if they are close to a wall, the wall starts to grow around them, which might cause you to be trapped in a small space, leaving you with no choice but to press 'r' of F5 to restart the game (on the other hand, you might use a dead troll to seal a corridor and prevent more monsters from coming after you).
If you lure a Rock Troll into different Land and kill him there, he will still turn into a dead troll that blocks your movement, but he won't cause any wall growth. There is an amusing effect if you do this in Icy Land: the temperature of a dead troll is EXTREMELY low.

Seeps are ghost-like monsters who live in the walls and move through them. They can't leave the Living Cave.

Living Caves is also a host to two Orbs:

Orb of Life will create a Golem when you collect it. Golems are friendly familiars with the same monster-killing powers as you. They try to follow you; they generally last until you either leave them behind by going somewhere they can't follow or until a monster kills them. You can switch places with a Golem by moving into its cell. With proper management, you can have large number of Golems at once!


Orb of Earth will give you, for 77 turns, a wall-repulsion ability, causing the walls to recede from you. As long as it's active, you can walk wherever you want in the Living Caves and you can't be trapped. You can be trapped the moment the Orb expires, of course; you can see, on the right side of the screen, how many more turns it will last, so you can plan accordingly.
Orb of Earth might have slightly different effects in other Lands -- for example, in Dead Cave it causes you to leave a trail of Dead Walls behind you. Generally, though, it eliminates walls around you --with the exception of Great Walls, of course.

Once you satisfy the basic Living Cave quest by collecting 10 Gold, you can find Orbs of Life in the Crossroads.
Desert
A hot, dry area referencing Frank Herbert's Dune saga. It's full of impassable, indestructible Sand Dunes and it's treasure is Spice.

Two kinds of monsters live in the Desert:

Desert Men are yet another instance of basic-AI enemy. If you lead them to the Icy Land, you may notice that they have pretty high body temperature.

Sand Worms are the main threat in the Desert. First of all, they are huge -- their snakelike bodies are many cells long. Second, they are invulnerable to your weapons.
But there are good news too! Only the head of the Sand Worm can actually kill you, its body segments are safe. And the head moves only one every two turns. If it has the same color as the rest of the body, it is safe to end your turn next to it. When it glows yellow, the Sand Worm will move on its next turn and it's not safe to end your turn next to the head.
The only way to kill the Sand Worm is to make it impossible for it to move. As you can imagine, this is not easy. One way to do this is to clog the Sand Worm's path with other monsters, which has obvious dangers of its own. Another way is to lead it into the Jungle (see the next section) and hope the growing Ivy will do the job. If you DO manage to kill the Sand Worm, the reward is considerable -- up to 3 segments that are still in the Desert Land transform into Spice.
But in the end, Sand Worms are slow. If it slithers out of the Desert in pursuit of you, you can always (well, usually) simply outrun it.

You can find special Objects called Thumpers (another Dune reference) in the Desert. When you stand next to them, you can activate them, attracting enemies to them instead of to you. I presume it depends on if they are closer to you or to the Thumper. If you are pursued by a large group, try it, by any means -- it doesn't use up a turn. Clicking on an active Thumper will push it into another space, if possible. You can use this to block the path of the Sand Worms.

The Desert only contains one Orb, the Orb of Shielding. This will make you invulnerable for 15 turns, meaning you can safely end your turn next to a monster (good for blocking Sand Worms). Orbs of Shielding start to appear in the Crossroads after you collect 10 Spice.
Land of Eternal Motion


Note: Land of Eternal Motion used to be a mid-land opened after collecting 30 $$$. In version 7.2, it was moved to a basic land available from the start.

In the Land of Eternal Motion, you must think quick on your feet. Iit is a featureless plain without any walls, but with a twist -- every time you step on a cell, it falls away, leaving just a bottomless chasm. You can't wait on spot -- you must move to a fresh cell on every turn. Fortunately, the hyperbolic geometry comes to your rescue -- it's much harder to get trapped than in Euclidean geometry (though, with dedication, it is possible!).

The treasure in the Land of Eternal Motion are Phoenix Feathers, which are light enough to not disturb the ground. There is also only one type of monsters, Running Dogs. Another basic-AI type, but this time, they cannot even follow your exact path and are forced to move along the equidistant curves, meaning that even a single Running Dog can be outrun.

Note that Eagles are even more annoying here than elsewhere -- since they fly, they can actually move over the chasms.

The Land of Eternal Motion has one new Orb (which starts to appear in the Crossroads as well, once you collect 10 Phoenix Feathers): Orb of Safety. This Orb has two effects:

First, it teleports you to a safe location (i.e. with no Enemies in sight). This actually discards the whole world generated so far and creates a new one, where you stand in the same type of Land as before. Second, if you quit the game during the next 7 turns, it will be saved and you can continue it later.
Jungle
Jungle

The lush green of the Jungle is easy on eyes, but not on the hapless adventurers. This is the most dangerous of the starting lands and I suggest you to try and get 10 Rubies from it as soon as you come across one so you won't lose that much progress if you get killed here.

There are 3 monsters in the Jungle:

Giant Apes are normal, basic-AI monsters.

Eagles are fast monsters. For every move you make, the Eagle makes two moves. However, it will still only kill you if you end your turn next to it; if you end it one cell away from it, it will move next to you and stay there.

Let's make a short digress here and talk about running away from monsters in a hyperbolic space. In Euclidean space, you can't really outrun something which is as fast as you -- wherever you move, your pursuer will move in the same direction. And this is true in hyperbolic space as well -- as long as there is only one pursuer. If there are two, they either have to line up, or one of them has to move next to the other. In Euclidean space, this second pursuer would move along a parallel line, but there's no such convenient thing in hyperbolic space. Instead, the second pursuer has to move along a "pseudocycle" or "equidistant curve", which is longer than the straight line.
What this means: if you are next to two monsters, meaning you can't kill either one because the other would kill you, you can get out of your predicament by simply moving in a straight line away from them. Only one monster can keep pace with you, the other must eventually fall behind.

Unless it's an Eagle (that's why I'm making this digress here). The Eagle moves so fast that it can keep up with you even when it's moving along the equidistant curve. To get rid of a pursuing Eagle, you'll have to use a chokepoint or another trick. Sorry.

The final monster of the Jungle (and one truly monstrous) is the Ivy.

The Ivy is another multicell monster like Sand Worm. But the Sand Worm is linear, while the Ivy branches and has complex structure.
The Ivy grows from a single cell called Root (light blue). From there, it grows branches to each of 6 or 7 surrounding spaces not occupied by anything else. At any given time, one of the branches is "active" while the others are "dormant". When you end your turn, the active branch grows, extending one space towards you. Usually the end of the branch extends, but in some cases, another segment will extend, forming a branching point. The branch can also retract, getting rid of its end segment, if there's no space to grow into. After the active branch executes an action, the next branch, clockwise, around the root becomes active.
Dormant branches are harmless and you can end your turn next to them. Only the active branches are dangerous (but then again, the active branch changes every turn).
You can attack any part of the Ivy. Attack on the end of active branch usually does nothing (you hack the end off, but it will immediately grow back). If you attack a cell that is not at the end of a branch, you will destroy that part and everything connected to it (only cells connected to the root can survive). If you destroy a dormant cell adjacent to the root, that branch is permanently gone (meaning that it's skipped when selecting next active branch). After you do this, you can move next to the root itself and kill it -- this will immediately destroy the whole plant. Note that roots on heptagonal cells always (or almost always) have a Ruby on their cell, which you can collect after you kill the Ivy. On the other hand, hexagonal cells with Ivy Roots don't contain Rubies.
Ivy is very dangerous because of its unlimited growth. If you hack and slash at one Ivy, you can usually make your way to the root and kill it. But you must always keep an eye on other Ivy plants which can grow and surround in the meantime. Finally, you will often encounter a configuration of two Ivy Roots on adjacent cells (one hexagonal, one heptagonal), which is more common at high treasure counts. Each plant of such a pair blocks some branches of the other, meaning they have fewer branches each, and so each of the branches grows faster because it's active more often! Such sets of twins can be beaten, but they might cause some Game Overs before you learn the proper tactics.

My advice? Don't try to fight your way through the Ivy if you are seriously outnumbered. You don't have to collect every treasure. The world is infinite; there will always be more chances to get treasure, whether in this Jungle or in others.

Similarly, don't stay in one section of Crossroads too long if the Ivy starts to grow out of its Jungle. They grow slow, but they WILL complicate the situation around you, and that might cause you to die. Go elsewhere.

The Orb associated with the Jungle is the Orb of Storms. After you collect it, you will start to glow with electricity. Any attack against a monster before the Orb expires (which happens in 77 turns), will discharge the Orb into massive lightning strike. This strike reaches far away and can kill many monsters at once, but be careful -- it's discharged mainly along straight lines, it's not a true area attack. Some trial and error with these Orbs is necessary to use them properly. They also destroys many obstacles in other Lands, except Great Walls.
Alchemist Lab


The Alchemist Lab uesd to be a Mid-Land that started to appear after collecting 30 treasures; since version 8.3, however, it was brought down to a starting land. It's a much more confusing place than the Desert or the Land of Eternal Motion.
The floor in the Alchemist Lab is covered by slime. Actually, there are two kinds of slime, red and blue. If you enter the Lab through red slime, the red slime will serve you as floor and the blue slime will be impassable. If you enter through blue slime, the blue slime will be passable, but the red slime won't. If you enter through a space that contains an item, it will become a purple, neutral slime, from which you can go wherever you want -- but once you step on red or blue slime, the cycle starts anew.
Unlike Euclidean plane, the hyperbolic plane has enough space for endless networks of BOTH colors at the same time.

The treasure in Alchemist Lab is the Elixir of Life. You can collect the Elixir from both red and blue slime; the cell will then change to the color you entered it from.

Only one monster appears in the Alchemist Lab: the Slime Beast. Slime Beasts appear, once again, in two colors: red and blue, with red Slime Beasts moving through red slime and blue Slime Beasts through blue slime. When you kill a Slime Beast, it explodes into slime, which sets color of all spaces in 2-cell radius to the color of the killed Slime Beast, including cells with items (those are destroyed), your own cell and any other Slime Beasts on affected spaces. This allows you to change the color you move on.

The Orb found in the Alchemist Lab (and in the Crossroads, once you collect 10 Elixirs of Life) is the Orb of Speed, which doubles your speed for 30 turns, meaning that monsters only get a turn after TWO of your turns. You can use the indicator of remaining time to figure it out: if you have even number of turns remaining, monsters won't move and you can safely end turn next to them, but if the number is odd, they will move after your turn as normal. Funny thing is that Eagles now make two moves after two of your moves instead of one move after each of yours. Your time axis is probably not entirely aligned.

Both kinds of items, Elixir of Life and Orb of Speed, can be accessed from both colors of slime; they however block the movement of the Slime Beasts. The same is true for prize orbs from other lands.

Flash and Lightning spells also change the color of affected spaces to yours. If they hit any Alchemist Lab cells while you're not on slime yourself, they toggle the color of slime between red and blue.

Flying monsters, such as Eagles and Bomberbirds, can fly over any type of slime without restrictions.
Hunting Ground
Added in 10.1, the Hunting Ground is the newest land available from the beginning. In most of the game, you hunt for treasure. In the Hunting Ground, dogs hunt you!

The Hunting Ground is an open place with no walls. There are Turquoises scattered around. Be careful, as collecting a Turquoise will cause an ambush! For the first ten treasures, two Hunting Dogs are guarding each treasure, and they will go after you when you collect it. In addition, some dogs will appear on the edge of the screen, too! No dogs appear for the first treasure, 1 does for the second, 2 for the third, 9 for the tenth treasure, etc.

After the 5th treasure, Hunting Dogs will retreat after you have "escaped" the ambush. Make sure that all retreating dogs are offscreen before you collect your next treasure; they will go back after you if you collect it too early. After 10 treasures, Turquoises will not have any dogs guarding them. At this point, your strategy should change: instead of trying to go between the dogs, go toward one dog so that you can kill it, and then continue going outward after that.

Ambush generation changes further once you collect more treasures. At some point, you will not have one more dog per treasure, and the number of dogs will start decreasing until it reaches 6 dogs at 27 treasures. It remains at 6 after this. However, if you have 23 or more Turquoises, Hunting Dogs can appear anywhere, even if you aren't ambushed, and they won't retreat anymore. This means that if you want to keep the Hunting Ground a safe land in the same way that the Prairie is safe, you should not get to 23 Turquoises.

The orb of the Hunting Grounds is the Orb of Ferocity. Whenever you attack, you will also attack the space behind you if you're on a hexagon, or the 2 spaces behind you if you're on a heptagon. Be very careful, though; picking up almost any orb (or using almost any orb in Orb Strategy Mode) will cause extra dogs to appear on the edge, and this includes the Orb of Ferocity! Dead Orbs, Orbs of Yendor, and Orbs of Safety do not cause any additional dogs to spawn.

Orb of Earth leaves chasms in the Hunting Ground.

If you have not collected 23 Turquoises, Hunting Grounds can be used to safely get from one land to another, similarly to Crossroads.

Side note: For all lands, if you are near a land border where the difference in treasure count is 10 or more, treasure spawn near the border will be reduced in the land where you have collected more, and none will spawn if that difference is 20 or more. With the Crossroads, this means that unless you have any Hyperstones (in which case you have higher priorities), you cannot find treasure near a land border if you already have 20 or more of that treasure. If you have some Turquoises, you can get some treasures by "dipping" into and out of the land, as long as the number of treasures collected in that land is less than 20 more than the number of Turquoises.

And that's it -- all the starting areas! Now let's move to the mid-level places!
Introduction to the Mid-Lands


After collecting at least 30 treasures, the game opens up a bit. You will still encounter the seven original Lands, but now you have a chance to encounter several more, as you move to new places: Hall of Mirrors, Minefield, Ocean, Caribbean, Palace, Ivory Tower, and Living Fjord. Another reason to not stay in one place!
Hall of Mirrors


Before the update 10.0, this land was called Mirror Land, which was mostly open space. The current Hall of Mirrors is much different. There are narrow corridors bounded by mirrors that show reflections of the world. The Mirror Land is unique in that its treasures actually come in two forms: as blue Magic Mirrors and pink Clouds of Mirages. These treasures block monster movement, unlike other treasures. Collecting either one will give you a Shard, and a bonus in form of blue Mirror Images or pink Mirages. These two types of your doubles differ only in where and in what orientation they are originally created. Once created, they replicate your moves. If you make a step forward, they make a step forward. If you make a step to the left, they make a step to the left. To make the navigation easier, the game provides you with green "X" marks as sort of ghost mouse pointers, showing where your doubles will move if you click where you click. The doubles should generally keep to the same cell type as you.
In Euclidean mode, the doubles keep pace with you (especially the Mirages, which are created facing the same way as you), but on the hyperbolic plane, their paths soon start wildly diverge.
As long as you have the images, they will kill monsters if they move into them. Monsters will kill your images if you end your turn with an image next to a monster. If an image moves into a wall, it will also disappear, except mirror walls do not remove them; instead they move through the walls.
Be careful! Your doubles can also break Magic Mirrors and Clouds of Mirages and replicate further; however, you do NOT get Shards for this.

The Hall of Mirrors has two enemies. One is Narcissists, a basic enemy. The other type is Mirror Spirits. If a Mirror Spirit is killed by hand in the Mirror Land, another one will appear on the edge of the screen. Killing it with an image will destroy it permanently, and destroying it far enough from a Hall of Mirrors land will also destroy it permanently.

Spawn rate of both enemies is extremely high, but it is decreased to counteract this if you are not in the Hall of Mirrors. Be careful when in adjacent lands, as mirrors don't spawn within a few blocks of a Great Wall, which means there are more tiles where enemies can spawn.

There are no Orbs to be collected in the Mirror Land. Once you collect 10 Shards, Magic Mirrors and Clouds of Mirages start to appear in the Crossroads. When you collect them there, however, they only create images -- to get a Shard, you must collect them in the Mirror Land itself.
Minefield


The nasty Bomberbirds have created an even nastier minefield and you have to go there in order to find their valuable eggs.

Actually, the Bomberbirds are not really as attentive parents as they should: you will probably be able to collect lots of their eggs without being disturbed. Which is a good thing since the Minefield is a place where any mistake bears heavy penalty.

The cells of the Minefield start covered. As you walk over them, you'll uncover them. You will always see a message telling you how many mines are next to you. Colored dots on the cells will also warn you that mines are nearby (color corresponds to color of numbers in standard Windows Minesweeper). After collecting 1 (previously 10), 20 and 30 Bomberbird Eggs, your mine detecting powers will improve, allowing you to automatically uncover cells next to "no mines nearby" ones. But beware! The more Bomberbird Eggs you collect, the more mines will appear!

In version 9.0, the Minefield was updated to include a possibility to "mark" spaces as mines (with the "m" key), as well as auto-marking mines when you step on a space where all unrevealed cells around it HAVE to be mines. You can now also see which spaces are "safe" because of Items or because they were stepped on by someone else. In addition, your allies now don't trigger mines they know of.

Note also that Bomberbird Eggs will be always generated on "safe" spaces. You won't blow up by trying to pick one up.

Any monster except birds and ghosts will set up the mine if it steps on it. This will create a permanent fire on the cell with the mine and on all surrounding cells. Of course, if there are two mines next to each other, the fire will set the second mine off as well!

The Bomberbirds fly and so they don't trigger the mines. When they die, though, they will create a mine on their space. And if they happen to die over an existing mine, then they fall down and set it off (this holds for all types of birds). Unless you backtrack, you will not encounter any Bomberbirds until you collect 20 Bomberbird Eggs. Backtracking may cause a few eggs to "hatch" and turn into Bomberbirds; you will never see this happen on-screen.

The Orb of this land, Orb of Friendship will summon a Tame Bomberbird. Tame Bomberbirds work similarly to Golems, except that they retain the ability to place a mine upon death. And unlike the Golems, you can attack and kill Tame Bomberbirds to make use of this special feature.
The Orb, just like the Eggs, will be never placed on a mine.
Ivory Tower


Ivory Tower (unlocked at 30 treasures) is an unique land based on gravity. The force of gravity is warped there, making things fall towards the Great Wall. The Ivory Tower is a prerequisite for all other gravity lands.

Unlike other lands who border infinitely many Great Walls, Ivory Tower only borders one -- you can only leave through the same Great Wall you used to enter, and thanks to the nature of this land, you'll probably leave very close to your entrance spot.

Each "floor" of the Tower is an equidistant curve, which means that as you go further and further up, the floors will start to look like horocycles. The empty cells in the Tower can be either stable or unstable: a cell is stable if it has at least one impassable cell immediately below (each cell has 1-2 neighbours in the "lower" layer). You can't move from one unstable cell to another except downwards and you can't wait a turn on an unstable cell either.
Two main terrain features in the Tower are the Platforms (which serve as your support) and the Ladders (a Ladder is automatically a stable cell so you can use them to climb up).
You can make "jumps" of sorts -- you can move from a stable cell to an unstable one, as long as you move to another stable cell after that, allowing you to do feats like leaping up a ledge, switching ladders mid-air, and so on.

The length of equidistant curve grows exponentially with the distance from the ground. This means that even a long sideways trek in the upper floors of the tower is translated into a very small movement on the ground level. It is therefore pretty unlikely you'll lose your way here.

The treasure in Ivory Tower are the Ivory Figurines.

There are two types of monsters here. Familiars are basic monsters, but the Gargoyles are more interesting. They fly (so they ignore gravity) and they transform into stone when defeated. This has several different effects based on where they are.
If you kill them in Ivory Tower on a cell that is not connected to anything firm, they will simply disappear.
If you kill them on a stable cell, they will become a "stone gargoyle platform", and will work like normal platform.
Outside the Ivory Tower, Gargoyles will normally make a wall (like dead Trolls), but they can also create a walkable floor/bridge if you kill them over a chasm or water.

Ivory Tower is one of the lands where you can be trapped inside walls easily. Usually, this happens if there are rows of platforms both below and above you, and gargoyles to the left and right. Don't get trapped!

There is another non-obvious way to die in Ivory Tower. If you are in the air, and an enemy is two spaces below you, it is possible that the only moves that are not against gravity would cause you to be adjacent to that enemy. Usually a single enemy with no special powers cannot kill you in open space, so a game over in this way can be unexpected.

The Orb of this land is the Orb of Matter. This allows you to create the same structures dead Gargoyles make (platforms, walls, floors or bridges), but they will only exist for a limited time and then disappear.
Palace


The Palace was added in the version 7.2 and it's unlocked by collecting 30 $$$. It's based on a new way to tile the plane with 50-cell "circles" that was developed by me (:D). This gives the Palace a regular structure.

The treasure of the Palace are the Hypersian Rugs.

The Palace contains Trapdoors and Gates. Trapdoors are cells that disappear when something moves on top of them (unless it's something flying or ethereal). Gates are 2 cells wide and they can be open (permitting passage) or closed. Green and red pressure plates are strewn throughout the Palace: green plates will open all nearby gates while red plates will close them (make sure you have an open path somewhere before you do that!). You can kill monsters by squishing them with a gate!

The Palace monsters are unique in being more resilient then others. They cannot be killed in one hit; instead your attacks just push them back and stun them for a few turns. You need several hits to actually kill them. This number depends on the number of Hypersian Rugs you've collected: it's 2 for 0-2 Rugs, 3 for 3-9, 4 for 10-20, 5 for 21-34, 6 for 35-49 and 7 for 50 or more.

Palace Guard is the basic type of monster (but with the Palace properties).

Skeleton is an advanced version of Palace Guard that can replace it if you have at least 5 Hypersian Rugs. (The more you have, the higher chance; with 18 Hypersian Rugs, half of the Palace Guards will be converted into Skeletons. With 50, more than 75% will be converted.)
Skeletons have no HP. They can be pushed away and stunned by your attacks, but not killed. You can kill them in other, indirect ways, though -- pushing them into trapdoors or closing the gates on them.
As immortal Skeletons would be pretty dangerous in more open terrain, they are a bit easier when outside the Palace: their stun will last much longer, allowing you to escape.

Fat Guard is also similar to Palace Guard. The difference is that your hits can't push them away by your attack, so it's harder to escape from them.

Vizier is the most dangerous type of Palace monster. You will usually have to collect at least 8 Hypersian Rugs before they even start to appear. Viziers are tougher version of Flail Guards from the Emerald Mine; you can't attack them directly, but you will score a hit on them when you retreat from them -- but, of course, they take more than one hit to kill and they can't be stunned, so you'll have to escape from them for a while.

The Orb that can be found here is the Orb of Discord. While active, this Orb will make the monsters fight among themselves, though that doesn't mean they are willing to neglect you!

You can also found Orb of Frog that allows you to "leap" two cells in one turn. This Orb is actually more common than Orb of Discord, but nonetheless it's the Orb of Discord that the Palace unlocks.


The Princess Quest

The Princess Quest (or Prince Quest -- it changes with your PC's gender and you can even set Prince/Princess of the same gender as you in character customization menu if you're so inclined) is a new addition in version 7.3. You have to get deep into the Palace and save the Prince/Princess who is imprisoned there. (I will use "Princess" consistently to avoid confusion.)

The quest starts by killing a Vizier. As Viziers are fairly rare monsters, there is a crutch: collecting 13 Hypersian Rugs will force a Vizier to appear.

Once you kill a Vizier, a Mouse will appear. As the Mouse is pretty small, it announces its arrival with a Flash visual effect which should help you locate it.

You now have to follow the Mouse through the Palace until you reach the Princess. When you move to the space with the Mouse, you'll swap positions and the mouse will squeak. The closer you're to the Princess, the happier the Mouse will be :)
While enemies won't try to kill the Mouse, they will do it if they have nothing better to do. But don't despair! There is always another Mouse to take the baton...

The "prison" part of palace has a few changes to make the quest a bit simpler:

1. There are no treasures (only Orbs), so HP of enemies won't increase during the quest.
2. Monster generation is set to the same level as if you only had 5 Hypersian Rugs. This means that Viziers and Skeletons will NOT appear here, only Palace Guards and Fat Guards. However, the HP of enemies is still based on the number of Hypersian Rugs you've collected.
3. Trapdoors occur less frequently while Plates occur more frequently
4. 70% of plates are Opening Plates and only 30% are Closing Plates.

When to take this quest? There are two main options: take it at 9 Hypersian Rugs (this still gives you a chance to generate a Vizier, but enemies will only have 3 HP throughout the quest), or get the guaranteed Vizier at 13, but enemies will have 4 HP. There's also a third option for minmaxers (using Orbs of Yendor to increase the difficulty of Palace without collecting Hypersian Rugs), which could theoretically allow you to do the quest with enemies at mere 2 HP.

On this quest, you will really become overly familiar with the structure of the Palace -- it's composed of open corridors and chambers enclosed by walls. When you finally find the Princess, she will be in a unique cell with Giant Rug (taking up 8 spaces) on the floor. All 7 gates around the cell are closed. You have to walk around it and find a panel that will allow you to let her out.

Once the Princess is out, she will start following you. The quest is not over yet, though! To save the Princess, you must get her out of the palace.

First you must escape the "prison zone", which is around 150 cells wide. Don't worry about the direction -- almost any random direction will lead out. Once Hypersian Rugs starts to appear, you can start looking for the Great Wall that would take you out, fulfilling the quest.


But of course, the Princess is no mere Damsel in Distress; she can make herself useful. If she comes next to a stunned guard, she will kill it, grabbing herself a weapon along the way. From that point on, she will kill enemies just like a Golem. (There is an achievement for having a Princess kill a Flail Guard while unarmed, but if you're not trying for it, just let her arm herself.)
But unlike a Golem, the Princess has HP! Attacks just take 1 HP from her and stun her -- and enemies won't attack her in the stunned state, so you can still save her.

A new Orb, Orb of Love, will start appearing in the Crossroads after you save a Princess (note that the "Saved Princess" item you have will disappear if the Princess dies, and Orbs of Love with it!). Orb of Love increases your Treasures by 30$$$ while active (as love is a great treasure -- just not as great as Orb of Yendor), and will regenerate the Princess at your side once it runs out. This will refill her HP (and you can collect more Hypersian Rugs to increase her HP up to maximum of 7 at 50 Hypersian Rugs) as well as bring her back to you should you lose her somewhere (for example if you leave her behind while going through the Land of Eternal Motion).

Saving the Princess also unlocks the Princess Challenge.
Ruined City


Ruined City is a land with gray heptagons and green hexagons. To unlock it, you need to kill a Skeleton, which can be found in the Palace. Ruined City has six invicible monsters (you cannot kill any of these without the land's orb):

  • Skeletons act like they do in the Palace. Stunnable, but not killable.
  • Red Raiders always move in pairs, which slows them down slightly. Red Raiders can break through walls.
  • Gray Raiders never step on gray cells (heptagons), so they are limited to hexagons only.
  • Green Raiders alternate between green (hexagon) and gray (heptagon) cells.
  • Brown Raiders never move next to an item.
  • Blue Raiders, when they would attack, instead attack the cell next to them on the next turn, so you have an extra turn to move away. This attack can kill other enemies, even invincible ones.

The treasure of this land is the Chrysoberyl.

The orb of this land is the Orb of Slaying. This orb allows you to kill these enemies, as well as other "tough" single-tile enemies.
Dungeon
The Dungeon is another trap land, like the Haunted Woods. It is a gravity land with only one entrance, which is at the top. Treasure is fairly easy to get, but getting treasure and then getting out is difficult. Unlike the Haunted Woods, treasure is counted even if you don't escape.

You need 5 Hypersian Rugs and 5 Ivory Figurines to unlock the Dungeon.

The Dungeon has ladders that function exactly like the ones in the Ivory Tower, some permanent walls, and palace gates, sometimes with green and red pressure plates above them. If you hit a green pressure plate, you may fall through with no way to get back up, so be careful!

The treasure in the Dungeon is Slime Molds.

There are three types of enemies in the Dungeon. Two are used in other lands: Ghosts, the same ones in the Graveyard, and Skeletons, the same ones in the Palace. There is another type of enemy that cannot kill you by attacking, but they are very hard to kill. They are Bats. They fly, but they never get next to you unless another non-Bat enemy is next to you (or if they have no other choice). When another non-Bat enemy does get next to you, the bats swarm you, blocking ways to escape. Remember that bats cannot attack you; they can only block your way.

The orb is the Orb of Recall. When you collect this, nothing happens, but your position is kept track of. When the charges of the Orb of Recall run out, you will return to this original spot.
Zebra


Zebra is another one of the Mid-Lands, unlocked by gathering 30 $$$ (10 of which must be Phoenix Feathers from Land of Eternal Motion). Zebra is covered in a pattern of light and dark cells that looks like infinitely branching stripes; the light cells are safe, but the dark cells are trapdoors that disappear once you or a monster pass over them, similar to the cells in Land of Eternal Motion.

The only monster in this land is a basic one -- a Striped Dog, but there's a lot of them, so you need to use the terrain to your advantage.

The treasure of Zebra is Onyx.

The Orb that can be found here is the Orb of Frog. It allows you to "leap", moving two cells in a single turn. You can leap over "ground" obstacles like chasms, but not over "high" ones like walls. The orb begins with 45 charges. Moving normally uses 1 charge (like all orbs), and leaping uses 5 charges, so it runs out more quickly if you use it more.
Free Fall
Free Fall has sideways gravity. It is unlocked by getting 5 Ivory Figurines and 5 Phoenix Feathers.

There is only one exit (the one you came from), and there are no walls (unless you somehow create one). The way inwards/outwards is clearly marked, so unlike trap lands, it is easy to get out again. When you finally do get out, you will only be a few screens away from where you entered, due to how hyperbolic geometry works.

The treasure is Meteorite; they fall down the same way that the player does. Staying in its "lane" will not allow you to catch up to it; you must move inward, fall below it, and then move outward again.

The orb is Orb of Gravity, which alters gravity in a small area around you depending on your immediate actions. In gravity lands, this means either it stays the same, reversing it, or levitating (i.e. move in directions that are neither up nor down). In non-gravity lands, anti-gravity makes it possible to move only when next to walls and levitation lets you move over traps, chasms, and water safely.

As a practical example, if you were in the Crossroads moving next to a Great Wall, anti-gravity would trigger and keep anything in an open space from moving.

Enemies here are:
Falling Dog: Standard AI enemy.
Western Hawk: Ignores gravity.

Note that in a particular configuration, one each of a Falling Dog and Western Hawk can force you to move in a straight line outwards with no other choice, inevitably killing you when you meet a third enemy.
Reptiles


Reptiles is a land inspired by the work of M. C. Escher (although you could say that in a way, ALL lands are). Reptiles are strange creatures that play double role of monsters AND floors in this chasm-filled land. The treasure in Reptiles are the Dodecahedra, as you can see on M. C. Escher's "Reptiles" lithograph (http://www.mcescher.com/gallery/back-in-holland/reptiles/).
Reptiles often occur next to Dragon Chasms, if both are unlocked.
To unlock the Reptiles, you need at least 30 treasures, 10 of which must be Elixirs of Life from the Alchemist Lab.

The floor in Reptiles is made out of tiles that look like stylized reptilian creatures – except not all of them are actually stylized! Look for presence of eyes on the reptile heads; this signifies that the "tile" is actually a living, albeit dormant, creature. If you mouse over it, you will see a counter telling you in how many turns it will wake up. If the Reptile starts flashing, it's very close to waking up! If you, or anything else, step on a dormant Reptile, its counter will reset to the maximum of 255 turns. Newly-generated dormant Reptiles will start with lower counters; the value is random, but the more Dodecahedra you have, the lower the maximum will be.

Once a Reptile awakens, it moves out (leaving a chasm in its former place). Reptiles chase you like regular monsters, but with one special rule: a Reptile will happily step into a chasm to get closer to you, which will turn it into a floor again. Reptiles can't be killed by your normal attacks (though they are vulnerable to other methods of murder), but they can be stunned and pushed; pushing a Reptile into a chasm will, once again, change it into a floor. This is important because the Dodecahedra are only generated on "islands" surrounded by chasms, and you must build Reptile bridges to get to them.

Killing a Miner from Emerald Mine next to a dormant Reptile will disturb it, so the Reptile will wake up on the next turn.
Changing the tile with a dormant Reptile to another type (for example by killing a Troll over it) will kill the Reptile.
Once a Reptile changes into a floor, it will stay in this form for the currently set maximum number of turns (decreases with collecting Dodecahedra and/or Orbs of Yendor)
If a Reptile moves into water (or Sulfur Lake in Hell), it will change into a "Reptile Bridge" and restore the original terrain once it awakens.

Since Reptiles can't be killed, they can surround you easily – if you run from them, try to change directions abruptly so the shortest path towards you will lead over a chasm – the pursuers will go there and happily fall asleep.

The Orb here is the Orb of Vaulting. While active, this Orb allows you to "vault" over a monster and move two cells in one turn; you hit the monster while vaulting, stunning or killing it.
Jelly Kingdom
Similarly to Alchemist Lab, Jelly Kingdom has red and blue Jellies. Jellies can only move if they are not the color of the floor; if they are the color of the floor, they are walls. However, instead of there being two colors on the floor, the floor is one color, but it switches every time you pick up a Tasty Jelly, which is the treasure of this land. Whenever this happens, jellies that were previously walls now try to attack you, and ones that tried to attack you become walls. Jellies can move with no restrictions outside the Jelly Kingdom, unlike Slime Beasts, which won't move if there's no slime there.

To unlock Jelly Kingdom, you need 30 treasures, 10 of which are Elixirs of Life.

You can move next to a Jelly if picking up a Tasty Jelly causes it to become a wall. You cannot move next a Jelly in wall form if you would pick up a Tasty Jelly that would cause it to kill you.

The orb is the Orb of Phasing. This allows you to phase through 1-tile-thick walls, moving two spaces in one turn. You are never inside the wall; you just click on the cell past it (or shift-click, depending on settings), and you will move there.

Orb of Space also appears as a secondary orb. This orb is very useful; in this land, it allows you to pick up a Tasty Jelly without having to move there, switching the colors immediately. You can also pick up other Orbs of Space with the original one!
Ocean


The Ocean, introduced in version 7.1, is a land of new type -- you can now leave the "continent" you are on and sail across the sea to find new lands and loot them.

The Ocean consists of Coasts that are separated by deep Sea. There are also dangerous Whirlpools that appear on the sea. Each Coast ends at a Great Wall, but there are also Sea Borders -- a variant of Great Wall that can be sailed through, which separates two "water-type" lands (Ocean, Caribbean, Warped Coast, Living Fjord, Kraken Depths).

The coast of the Ocean is ruled by the tides. As the turn count ticks, the coast gets flooded by the sea and then revealed again. The treasure, Amber, can be found on the coast, but only when the ground is uncovered. You will also find many boats stranded on the sand. If you get in the boat when the tide comes, you can take it to get out to the sea.

The basic monster here is the Albatross. Albatross can fly over both land and sea, but unlike Eagles, it can only move one cell at a time. Albatrosses only appear over the Coast -- further on the sea, you'll encounter Sharks and Pirates on boats (more on these in the Caribbean section).

The Orb that will appear here and on Crossroads after collecting 10 Ambers is the Orb of Air. It allows you to spend 1 charge to blow any enemy 1 tile from you (and since this doesn't use up a turn, you can use it multiple times in succession).

Second Orb (currently the "main" one) is the Orb of Empathy. Orb of Empathy will spread the effects of your other Orbs (where reasonable) to your minions.

On the coast, you will only find the Orb of Air and Orb of Empathy. But on the open sea, a boat might contain any Orb you have unlocked in the Crossroads!
Warped Coast


Warped Coast was added in 8.2. It requires 30 $$$ to enter. Its gimmick is that it has a bit different geometry than the rest of the world.

Instead of truncated {3,7} tiling used in the rest of the game, Warped Coast uses rectified {3,7} tiling. This means that each vertex is surrounded by two triangles and two heptagons. You can only move through edges, not diagonally through the corners, so you must always move from a triangular cell to a heptagonal one or vice versa.

Warped Coast is divided in two types of areas, Warped Coast and Warped Sea. The Coast contains trees like Dry Forest (but all trees can be cut down in a single move). The Sea contains boats. The treasure of Warped Coast, Coral, can be only found on the boats.
The borders between coast and sea are straight lines. You can leave Warped Coast through both Great Walls on land or through Sea Borders on sea. Each entry point is flanked by "warp gates" -- inaccessible triangular cells.

The only enemies in Warped Coast are Ratlings. Ratlings are intelligent monsters capable of using boats; moreover, they are wary. Ratlings don't move if you skip a turn; you must actually do something to make them move. (Except skipping a turn while NEXT to a Ratling, of course.)
This means that if a Ratling is on the same type of cell as you (triangular or heptagonal), he's hard to kill since every time you move (and change cell type), he will do the same. Here's where the trees in Warped Coast come in handy -- by cutting down a tree, you will make the Ratling move without moving yourself.

It is very easy to get trapped by Ratlings without getting a game over, being able to stand still but not move in any direction. If this happens, you can wait in place for almost 100 turns, and ghosts will start spawning (ghost spawns occur any time you stand still for many turns, anywhere in the game). Sometimes, but not always, these ghosts will save you, as killing a ghost will cause the Ratlings to move.

Ratlings will follow you to other Lands, where it's much easier to kill them -- but it's not without risk. Killing Ratling on water in another land, or near to one, will cause the adorable Ratling Avengers to spawn and pursue you -- and killing Ratling Avengers on foreign seas will summon even more of them. Since Ratling Avengers spawn pretty quickly, your best bet is to escape -- if you get far enough from the Warped Sea to make it disappear from the view, the Avengers will stop spawning.

The Orb, unlocked by collecting 10 Corals, is Orb of the Warp. It has two effects. One, it allows you to move diagonally between triangular cells (not between heptagons). Two, if you're in any land except for Warped Coast, it will warp a radius-4 region around you, changing shapes of the cells and imposing Warped Coast movement rules on all other creatures.
Living Fjord

Living Fjord is one of the lands added in the version 7.2. It's unlocked by collecting 30 $$$.

Living Fjord runs on the same rules as Living Caves, except that instead of walls and floors, it's floor and water. Water can invade land cells surrounded mostly by water and recede from those surrounded mostly by land. Boats are supplied on the sea.

Thanks to its dual nature, Living Fjord can have both land and ocean neighbours.

The treasure of Living Fjord is Garnet.

There are three types of monsters in Living Fjord:

Viking is the basic monster. Vikings can move on land and sail on boats, like Pirates.

Fjord Troll is similar to Rock Troll from Living Caves. Killing them will create a Dead Troll, but it won't destroy items nearby. Dead Trolls in Living Fjord help keeping the cells around them dry. Note that once a Troll is dead, its effects are the same no matter if it was a Rock Troll or Fjord Troll.

Water Elemental starts appearing when you have 5 Garnets. It has a permanent Orb of Water effect, which means it keeps creating water around itself. It will also destroy boats, so you might find yourself stranded in the water. There's a special exception to drowning rules: you won't drown on a water cell if your move is to kill a Water Elemental.
Water Elementals always drop Orb of Water upon death; however, the Orb will appear underwater so you might not see it or be able to collect it right away!

The Orb (unlocked by collecting 10 Garnets) is Orb of the Fish. This will transform your character into a merman/mermaid for 30 turns, allowing you to enter the water without penalty. When you are in water, you dive to the bottom, so the enemies can't see you; you can also see and collect the submerged items. Collecting multiple Orbs of the Fish will extend the timer above 30; the maximum is 77.
Kraken Depths


Kraken Depths is a land added in the version 9.0. It unlocks by collecting 10 Garnets from the Living Fjord.

Kraken Depths is a fairly uniform land -- almost all spaces are sea, with just a tiny amount of small islands. The sea borders around Kraken Depths are unusual -- while normally, these borders have solid heptagons, here they have solid hexagons; this in effect creates larger openings the Krakens can use to escape. Because of possible conflicts, Kraken Depths cannot be generated adjacent to the Warped Sea.

There are two kinds of monsters in Kraken Depths. One type are Vikings from the Living Fjords who sail on the sea in their boats. Each Viking generated in Kraken Depths will have an Orb of the Fish on his boat. Orbs of the Fish are also scattered in the sea, as well as other Orbs (if you have unlocked them everywhere by collecting 25 treasures). It bears repeating here that if you are diving, Vikings can't see you and will sail in a straight line.

But the main attraction of this land are the Krakens. These enormous hexapuses (they can't be called "octopuses" because they only have six tentacles) take seven cells -- a central hexagons and all adjacent cells. Kraken's Head can only move to hexagons.

To kill a Kraken, you must hit each of its tentacles -- hitting a tentacle prevents it from attacking you that turn. When fighting Krakens, you must "dance" around them, striking from heptagonal cells -- if you are on a hexagonal cell, a Kraken can position itself to have two tentacles adjacent to you, so you can't attack either one; if you are on a heptagonal cell, a Kraken can't have more than one tentacle adjacent to you.

The treasure in Kraken Depths is the Sunken Treasure. Every time you kill a Kraken, one Sunken Treasure drops on the cell where its head was; after you kill the first Kraken, they also start to appear randomly on the seafloor.

This land is built on the use of Orb of the Fish; to collect the treasures, you must dive down into the sea. If you enter the land with a boat, there are two basic ways to transition to free swimming: either disembark on one of those tiny islands that occur in Kraken Depths, or go near a Kraken. If you are in a boat, Kraken's attack will destroy the boat, but it won't harm you.

The Orb in Kraken Depths is the Orb of the Sword. However, since this Orb has very complex effects, I have decided to not write its description here and leave it for the Burial Grounds, a land built all around the use of this Orb.
Brown Islands
This land is accessible only by sea. As it is not marked by Sea Walls, you have to follow the Acid Gulls to find it, although it can also be found randomly.

Treasure is Tiger's eye.
The Orb is Orb of Choice- as a reference to the Banach-Tanaski paradox, if you pick up an orb while this is active, you will recieve that orb's effects but the orb itself will remain where you found it; this expends the Orb of Choice's charges instead.

Quoting Zeno on this description: "Well, the Brown Islands have been generated by ancient underground creatures, who moved randomly and raised lands in their path... adults spawned larvae in each move, which also moved randomly and also raised lands in their path, and eventually became adults and spawned their own larvae. In a Euclidean plane, it is well known that a creature moving randomly on a two-dimensional grid will get back to the original starting point (and in fact any other point) infinitely many times, so even if our creature did not multiply, it would eventually destroy the whole world with its terraforming action. The same happens if the creature moves in more dimensions, as long as it multiplies -- the space simply grows slower than its spawn. But the hyperbolic plane grows exponentially, and faster than the spawn... allowing our creatures to create interesting terrain! "

Islands consist of rocks of varying elevation, identical to Red Rock Valley. The four levels of elevation correspond to normal ground, Rock I, Rock II, and Rock III. You (and monsters) cannot move up two or more levels or down three levels. Interactions work the same way as in Red Rock Valley; e.g. killing a Rock Troll on the Brown Islands will increase the elevation by 1, and killing an Acid Gull in the Red Rock Valley will decrease the elevation by 1.

Enemies are:
Pirates
Bronze Beasts: Invincible but can be stunned and knocked back with attacks; stun time is increased if they're pushed down a level of elevation. They can't move down levels very well, and if knocked into water they drown, creating a new elevation 0 tile. Pushing them down three levels will also kill them.
Acid Gulls: Like other flying birds that move only one space per turn, but when they die they decrease the elevation of the tile they're on by 1. If the elevation is 0, it becomes a water tile instead.
Caribbean
Important note: The Caribbean was changed between 7.0 and 7.1. Now you can no longer find it next to most lands; it can be only reached through a Sea Border of the Ocean.

If you feel too stressed by the game by this point, you may try relaxing on the beach. The Carribean is a relaxing vacation spot full of Pirates and Sharks. OK, so not that relaxing.

This land is divided into sea and islands. The sea is impassable, but it contains a large amount of Boats that you can board and use to sail (the Boats also allow you to sail on any other body of water, should you find or make one). The islands are horocyclic (i.e. infinite) landmasses comprised of open terrain and dense forests. The Trees in Caribbean can burn, but unlike Dry Forest, the fires don't spread here.

Three types of monsters appear in the Caribbean:

Pirates are intelligent enough to use the Boats, allowing them to move over both land and sea. If you kill a Pirate in an island's interior, (sufficiently far from the edge), he will drop a Compass.
Sharks move through water only, so you're safe from them if you're inland.
Parrots live in the forest, so they can only move through Tree cells. You're safe from them if you stay away from the trees.

The Compass is an item that can be dropped by Pirates or may appear randomly on the island. The compass has a red/black needle; the red side points to the center of the island (as the island is horocyclic, the center is actually at infinite distance). The black side points to the edge, allowing you to find your way to sea easily if you get lost in the interior. When you step on a compass, you'll see a point on the horizon indicating the island center, with number signifying your distance from the coast.

The treasure in the Caribbean is the Pirate Treasure (looks like big red X). The Pirate Treasures are not placed randomly -- they appear in the island interior, as far from the coast as you can get before hitting impassable forest.

The Orb found in the Caribbean is the Orb of Time, unlocked after getting 10 Pirate Treasures. The Orb of Time will stop your Orb powers from counting down when inactive (i.e. when they had no effect on the game during the previous turn). This results in weird "barber paradox" behavior if you have no other active Orbs, making the Orb only count down every other turn. Orb of Time has 78 charges when initially acquired.
Whirlpool

Out on the Ocean, you might encounter a Whirlpool. A Whirlpool is a horocyclic area of water with lots of boats and Pirates. You don't have to worry about being sucked in (as the center of the Whirlpool is infinitely far away), but of course, there are other dangers... lots of Sharks and Pirates, etc.
Empty boats in the Whirlpool will move one cell clockwise every turn. Manned boats and Sharks can stay on the same spot, but either way, everything can only sail clockwise or inwards. But you can move in the outward direction by jumping to another boat! Of course, so do the Pirates.

The treasure in the Whirlpool are the Pearls. They appear on the boats; the further in you are, the more Pearls will appear (though you'd have to travel hundreds of cells inward to actually see a notable increase).
After getting 10 Pearls, Orb of Water will start to appear (but you must be sufficiently far in the Whirlpool). Orb of Water will allow you to ignore the currents and sail wherever you want. It will actually allow you to sail on dry land as well, creating water wherever you go!
You can also encounter Orb of Safety in the Whirlpool, so you don't have to worry about being unable to escape. In Orb Strategy Mode, you get an Orb of Safety after collecting 10 Pearls instead of being able to find Orbs of Safety randomly.
R'Lyeh

Ah, R'Lyeh. Ancient underwater city, famed for its columns and its non-Euclidean geometry... oh yes, and for Cthulhu. Are you ready to explore it?

R'Lyeh is a high-level area and you will need to collect at least 60 Treasures before it starts appearing.

R'Lyeh is tiled with an interesting mosaic and it's full of columns that block your way. The treasure here are the Statues of Cthulhu.

Four types of enemies appear here:

Ivy is the same monster from the Jungle, but now it grows around the columns, which changes the strategy to fight it a bit, and its root may hide a Statue of Cthulhu. They are, however, not nearly as numerous as in the Jungle. Be careful, though -- if the root is next to a column, it will have fewer branches (usually 3), which, once again, means that the branches will grow faster!

Cultist is a basic-AI monster.

Fire Cultist is upgrade on the basic Cultist model, with added fire. They can attack you with fire, even from afar; this will change the cell you're in into a Bonfire. Since, of course, you don't want to burn, you must leave the Bonfire on your next turn. Until it burns out, noone can enter that cell, which blocks your movement even on top of that whole "columns" thing. Fire Cultists throw fire at you once they are 4 spaces from you. Afterwards, they revert to normal Cultists.

Tentacle is similar to a Sand Worm. However, while the Sand Worms have a tail and a finite length, Tentacles simply grow ever longer. Their base is on a Statue of Cthulhu, but to collect it, you must first kill the Tentacle.
How to do it? Well, like Sand Worms, the Tentacles move (grow) every second turn, and like Sand Worms, they die if they can't move because something is blocking their way. The difference is that a Tentacle won't die immediately -- instead, its end will start to withdraw, retracting one cell every turn until it disappears completely.

You can find Orbs of Teleportation in R'lyeh (they start appearing in the Crossroads after you collect 10 Statues of Cthulhu). These Orbs allow you to teleport to any empty space. Be careful when moving using your mouse -- clicking on any eligible non-adjacent cell will use up the Orb!

Temples

Temples are a new addition to R'Lyeh. They introduce a new kind of curve: a horocycle.

If you take a circle in Euclidean plane and just move its center further and further away, its curvature will decrease. If you moved the center to the infinity, the circle would transform into a straight line. In hyperbolic plane, the same process will get you a horocycle.
A horocycle has a bunch of definitions and a bunch of special properties, but imagining it as an infinitely large circle is probably the most useful one for the game.

The Temples start appearing after collecting 5 Statues of Cthulhu. They can be recognized by slightly different shade of floor and by presence of big statues of Cthulhu (they look similar to small statues you gather, but gray). When you move on space occupied by the statue, the statue is pushed to your original space -- this gives you a way to escape Tentacles and other annoying monsters. However, you can't push the statue into a fire, so Fire Cultists can cause you trouble. Another problem are Cultist Leaders -- new type of monster that appears here which can also push the statues like you do.

(Cultist Leaders can also appear in R'Lyeh proper -- however, you need to collect at least 26 Statues of Cthulhu before this can happen.)

Temples have their own type of treasure: Grimoires. Grimoires count normally for most purposes (for example, 10 of them counts toward unlocking Hell etc.). They just have one special property: you can only get one Grimoire from each "circle" of the temple. Basically, the game keeps track of which circle you're currently in and will only allow you to get a Grimoire if this number is greater than the number of Grimoires you currently possess. This means it's possible, for example, to move several circles in and then gather several Grimoires at once.

Gathering 10 Grimoires unlocks Orb of the Dragon which allows you to throw fire to distant spaces like Fire Cultists do. Every use of this Orb costs 5 charges.
Crossroads II
The Crossroads II was added in v7.0. It can appear once you have 60 $$$. Crossroads II, unlike normal Crossroads, has a regular pattern (similar to the pattern in Vineyard). It's a very efficient way to see lots of other lands, but it's a bit cramped for space and, unlike the regular Crossroads, it never contains Camelots.
Dry Forest


The Dry Forest, another place that starts to appear after you collect 60 treasures, is a quiet, peaceful place overgrown with trees... dry trees... and grass... dry grass... No smoking, please!
In this forest, you, too, can be a lumberjack. You can "attack" trees to cut them down. Big trees (currently light green; previously yellow as shown in the screenshot here) require two turns of attacks before they fall.

Of course, your attempts to grab the elusive Fern Flowers from this forest attract significant attention from the two monsters that call it their home (or, in some cases, their fireplace):

Hedgehog Warriors protect themselves from attack by always facing you with their bad side -- the one with nasty spines. You can't kill them with normal attack, but they actually have a weakness -- if you move to a different cell adjacent to the Hedgehog Warrior, you will automatically "stab" him, killing him. This means that you can't kill Hedgehog Warriors in narrow corridors. Be especially careful if you face a mix of these and other types of monsters!

Fire Fairies are the nightmare of Smokey the Bear. These critters have basic AI, but, like Rock Trolls, they can be more dangerous dead than alive. They will change into a fire when they die -- and the fire spreads in this forest like, well, a wildfire. Grass takes some time to catch fire, but trees catch fire immediately.

Note that this is not the only way the forest can catch fire -- Fire Cultists from R'Lyeh are also a notable fire hazard.

If the Dry Forest catches fire, the best thing to do is to head right for the nearest Great Wall and escape into another Land. It's not recommended to venture too far into the heart of the forest.

The Orb that can be found in the Dry Forest (and in the Crossroads, once you collect 10 Fern Flowers) is the Orb of Thorns. This will give you, for 77 turns, a Hedgehog Blade like the Hedgehog Warriors have. This has two effects: first, you can attack and kill Hedgehog Warriors normally. Second, you become capable of using the stab maneuver against other monsters that you can normally attack. Basically, anything vulnerable to either direct attack or stabbing will also become vulnerable to the other.

Orbs of Winter also sometimes appear in the Dry Forest, which is useful when you're surrounded by the fire.
Vineyard


The Vineyard is the first of the 5 new lands added in 6.0. It's unlocked by collecting 60 $$$, at the same time as R'Lyeh and Dry Forest. The Vineyard has a regular structure based on the pattern - a symmetrical group of 40 cells (28 hexagons, 12 heptagons) that tiles the hyperbolic plane.

The Vineyard contains vines -- ultraparallel lines that are infinite (unless they terminate on a Great Wall). The vines are absolutely everywhere and they divide the Vineyard into a whole bunch of disconnected areas (each of them infinite in its own right). Vines are so straight that they take just a half cell at some point, and highly flammable -- if you manage to set a fire next to a vine, it will burn like a fuse and completely remove itself from consideration in a very short time. Orbs of Flash or Orbs of Earth don't affect the vines. On the other hand, Orbs of Storms are very effective, setting fire to any vines they hit.

The half-vine cells are strange: the general rule is that you can't move between two cells separated by the vine. Vins Spirits, similarly, can't move between two vine spaces separated by normal floor.

The treasure in Vineyard is Wine. There are two monsters you can encounter:

Vine Beasts move in the empty spaces and transform into vines when they die.

Vine Spirits are the opposite -- they move inside the Vines and remove the Vine from their space when you kill them.

The Orb found in the Vineyard is the Orb of Aether which starts to appear here (and in the Crossroads) once 10 Wine is collected. This Orb makes you intangible for 30 turns, allowing you to pass through normally impassable spaces, including Great Walls. You can also freely change between colors of slime in Alchemist's Lab and pass over chasms in Land of Eternal Motion, where the floor no longer falls down from under you as long as you are under the effect of this Orb.
Dead Cave


The Dead Cave will start to appear after you collect 60 $$$. An additional condition is that you must collect at least 10 Gold in the Living Cave (this can be as a part of the 60 $$$ total).

The Dead Cave is a bleak place. It looks very similar to the Living Cave, except that is, well, dead. The cellular automaton algorithm doesn't run and the cave is static. The floor has piles of rubble at some points, but generally it is a maze of twisted passages, all alike.

The treasure in Dead Caves is the Silver.

As for monsters, Dead Cave contains two monsters from the Living Cave -- Seeps and Goblins and two new types. Seeps, in particular, appear more often than in the Living Cave and can be very dangerous.

Dark Trolls are another simple monster variant, Dead Cave version of Rock Trolls. Unlike them, they don't leave anything behind when they die.

Earth Elementals are monsters with special affinity to walls. They destroy walls around them when they move, but they also leave walls in their wake. The net result is that they tend to leave two "corridors" behind.

Two Orbs that can be found in Dead Caves once you collect 10 Silver were both mentioned before: Orb of Earth and Dead Orb. Orb of Earth can be also found in Crossroads once 10 Silver is collected.

Finally, it is possible to animate the Dead Caves. If you lure a Rock Troll there and kill it, its corpse will jump-start the process and Dead Cave will transform into Living Cave. This gets you an achievement.
Graveyard

All previous Lands appear when you have a certain number of treasures. Not the Graveyard -- to trigger its appearance, you must kill 100 monsters. This is, I should note, far from difficult.

The Graveyard has a curiously regular structure: the hexagonal cells form the paths, while all heptagonal cells are graves, either fresh or ancient.

The treasure collected in the Graveyard is Necromancer's Totem.

The Graveyard contains monsters of four different types:

Zombies are standard, basic-AI monsters.

Ghosts are more tricky, as they are capable to move through walls and other obstacles. However, they will never move next to another Ghost.

The Shadow (only one appears at time) is invulnerable and cannot be defeated. It follows the history of your movement, "shadowing" you a few steps back, so it's generally only troublesome when you need to go back. The Shadow won't pursue you outside of the graveyard.

Necromancers are nasty, as they can create Zombies and Ghosts (summoning them from fresh graves which change to ancient ones during the process). Kill them first, if possible.

The Graveyard contains Dead Orbs which start appearing in the Crossroads once you collect 10 Necromancer's Totems. Dead Orbs have no effect, but you can collect them in multiples and you can drop them on the ground. This allows you to leave a trail like hyperbolic version Hansel and Gretel. Should you ever need to come back somewhere, Dead Orbs can help you...

Once you collect 10 Necromancer's Totems, you can find Haunted Woods inside the Graveyard.
Haunted Woods


Haunted Woods is a subzone of Graveyard added in version 8.1. You need 10 Necromancer's Totems to unlock it.

Haunted Woods is a "trap zone". It's easy to enter, but it might be pretty hard to leave if you don't know what you're doing.

The border of Haunted Woods is an equidistant curve. Haunted Woods is the "inside" of this curve, including the guiding straight line and the whole half-plane beyond it. This means that the further from the entrance you are, the easier it is to get lost -- moving in a random direction will take you further and further inside. In this way, it's the exact opposite of a horocyclic land like Caribbean where you need to follow a specific path to find your way IN.

Haunted Woods has small number of graves on heptagonal cells, just like the Graveyard, but it also has trees that can be cut down like Dry Forest or Overgrown Woods. Cutting large swaths of trees is one way to mark your way so you wouldn't get lost.

The only monsters in Haunted Woods are Ghosts. The treasures are Black Lotuses. The problem with Black Lotuses is that the more you have, the deeper into the Haunted Woods you must go in order to find more.

Dead Orbs can be found anywhere in Haunted Woods, but its true Orb, available after getting 10 Black Lotuses, is the Orb of Undeath. Orb of Undeath transforms every monster you kill into a Friendly Ghost, an etheric minion who can move through walls. However, like other Ghosts, two Friendly Ghosts won't occupy adjacent spaces. And unlike other allies, Friendly Ghosts don't follow you.

Note that to get any collection achievement connected to Haunted Woods, you must not only get the specified amount of Black Lotuses, but also leave the Haunted Woods. There is also a special achievement called "Master Survivalist", which requires you to collect 25 Black Lotuses and leave Haunted Woods without seeing any monster there apart from Ghosts, Zombies and Necromancers, without dropping any Dead Orbs, without cutting down any trees and without using any Orb Powers.
Hive


The Hive, which is unlocked by a combination of collecting 60 $$$ and killing 100 monsters is an endless plain (of course) peppered by impassable weird rocks. These rocks have various colors, allowing them to be used as navigational aids. In theory, of course -- and only if you have an exceptional orientation sense.

Another feature of this place are the colored concentric circles drawn on the ground. These are the Hyperbug Hives, and they, like the Hyperbugs themselves, appear in three colors: red, green and blue.

The circles themselves show the size of hyperbolic space -- the first circle (3-tile radius) is composed of 28 cells, the second circle (6-tile radius) has 147 tiles and the third (9-tile radius) has a whopping 714 tiles!

The Hive is mostly empty, but if you go inside any of the Hyperbug Hives, a swam of Hyperbugs appears to attack you. The Hyperbugs are regular monsters with one unique property: they attack not only you, but also any other monsters except the same-color Hyperbugs. This means you can lead two swarms against each other and only dispatch stragglers personally. The monsters killed by Hyperbugs are recorded in your kill list, but by this point, you're past unlocking anything with your kills anyway.
When Hyperbugs pursue you, you will see three numbers on top of the screen, showing the number of red, green and blue hyperbugs in pursuit.

The Hive's treasure is Royal Jelly. This treasure is not randomly scattered around the level, however: instead it's hidden in the center of the Hyperbug Hives, 8 pieces per hive. This means you have to exterminate at least 2 hives before you get requisite 10 treasures for the Orb.

As you collect more Royal Jellies, blue Hyperbug hives become more common than red and green ones. In addition, wandering Hyperbugs can appear if you have enough Royal Jellies.

The Orb is Orb of Invisibility, which causes monsters to ignore you for 30 turns. They won't move towards you, but they will still attack you if you get too close -- ideal for watching Hyperbug battles. If you pick up a treasure, you are not considered invisible for that turn, and monsters will move toward you on that turn. You can also see where Hyperbugs have been the most while the orb is active (these tiles will be reddened), which lets you track your way to the center of the hive.
Red Rock Valley
Red Rock Valley was added in v7.0. It's a higher-level version of the Desert and it is unlocked after getting 60 $$$; you also need at least 10 Spice from the Desert.

Red Rock Valley is a "3D" area, as the cells can have different elevation. There are three levels of elevation (Red Rock I, II and III) and it's not possible to move two or more levels up or three levels down in a single move, but attacking is possible through any height difference.
Initially, the Red Rock Valley only contains "spires" of Red Rock III. Red Gems, the treasure of this land, are also only found on the spires. Of course, they are too high for you to get to.

Cue the monsters.

There are two kinds of monsters in Red Rock Valley:
Red Trolls are third type of Trolls to be introduced (after Rock and Dark Trolls). Similarly to Rock Trolls, they turn into rock after death. In case of Red Trolls, they turn into Red Rock, building Red Rock I on spaces where no Red Rock was before, or increasing its level by I if it was already there.
Rock Snakes are bigger, meaner cousins of the Sandworms. They are incredibly long (50 cells!) and they move every turn instead of every other turn like Sandworms. However, they have one weakness: they can only move on hexagonal cells and the heptagons are barred to them.
Like Sandworms, Rock Snakes die if they run into a dead end. As they can never have more than two choices of movement, this is easier than with Sandworms. After death, their head and tail turn into one level of Red Rock while the rest of their body turns into two levels.

You must use these monsters to construct "stairs" that would allow you to get up and collect the Red Gems.

There is some unexpected behaviour when you kill the monsters outside their usual habitat. Dead Floors will turn into Rubble, then into Dead Walls, Living Floor will turn into Living Wall and water spaces will be filled first and only afterwards Red Rock can be built on them.

The Orb available in Red Rock Valley and Crossroads is the Orb of Space, unlocked after collecting 10 Red Gems. This Orb will only appear on the spires, but it can appear anywhere in the Crossroads. Orb of Space comes with 78 charges and allows you to collect items that are not adjacent to you. Each use costs d^2 charges where d is the distance of the item. You can't use the Orb unless you actually have the required amount of charges.
Yendorian Forest


The Yendorian Forest is a gravity-based land added in version 8.3. You need 10 Ivory Figurines from the Ivory Tower to find it.

The forest is made of infinitely large trees. The trunks of the trees branch every few cells, but with the huge amount of room in the hyperbolic space, they can keep branching forever. You can move on the trunks however you wish.

Outside of the trunks, most of the space of the tree is taken by canopy. Canopy cannot support you and is treated as empty space.
Branches appear in the canopy. Strong branches can support you, while weak branches offer only limited support -- if you move "up" from them, they will break and turn into normal canopy.

There are two types of monsters here: Yendorian Researchers are normal monsters who move like you. Sparrowhawks are bird enemies who can freely fly through the canopy, but cannot cross the trunk.

The treasure of Yendorian Forest is the Apple, growing on the trees.

Don't play with fire in the Yendorian Forest! If any spot burns, the whole tree burns. For this to happen, the fire must come from an outside source or an Orb, but you still need to make sure this doesn't happen.

The Orb in Yendorian Forest is the Orb of Energy. Whenever you use another Orb (this only works for Orbs that have some activated effect, not for those with continuous effects like Orb of Speed), you only lose half the charges (rounded up) than you would use normally. One-shot Orbs like Orb of Flash use up all charges with their activation, so Orb of Energy causes the current charges to drop to one half instead.

The Orb of Teleport can also appear in the Yendorian Forest as a secondary orb.
Dragon Chasms


Dragon Chasms is a land that was added in version 8.3. To access it, you must kill at least twenty different types of monsters.

The terrain is made of plains and chasms, with occassional eternal fires. Two types of monsters appear here: Fire Elementals, who leave a trail of fire in their wake, and Dragons.

Dragons are serpentine lizards with long bodies. They move every two turns, but unlike Sand Worms and their ilk, they can move their whole bodies sideways and contort them into various configurations. In addition, their heads are capable of throwing fire on your location if you are nearby.
And to top it all, the Dragons can fly and move through fire.
So, how to kill them? Well, to kill a Dragon, you must first hit each segment of its body. The "joints" in those segments change color from orange to brown to signify that they've been hit. Head also counts as a segment, but it regenerates after a short while; thus, you will have to hit it last in order to kill the beast. Once the Dragon dies, he leaves some Dragon Scales in its place, the treasure of this land.

The more Dragon Scales you collect, the bigger dragons will appear. In addition, if you have fewer than 10 Dragon Scales, it is very rare for another dragon to appear when you are fighting one, but this restriction is removed once you collect 10 Dragon Scales.

There is actually a second type of treasure appearing in the Dragon Chasms: Baby Tortoises. About them, see the section "Galápagos".

The Orb of Dragon Chasms is the Orb of Domination. This Orb allows you to mount big monsters like Sand Worms or Dragons and ride them; in addition, you can also force them to move as you want.
Galápagos


To access Galápagos, added in version 8.3, you must first find a Baby Tortoise in Dragon Chasm. Once you collect the Baby Tortoise, it will appear on your character, and Galápagos lands start being generated around the Dragon Chasms. Once you enter Galápagos, all exits from them will also be only to Dragon Chasms.

Galápagos is a land with varying terrain -- there are walls, trees you can fell, and small pools of water. There is also a large amount of Tortoises there. Tortoises move very slowly (once every three turns) and your attacks can only stun them (because they are very tough AND protected by hyperbolic law!). Moreover, like Fat Guards from Palace, you cannot push them away after stunning them -- they are way too heavy.

Each tortoise has some combination of 21 distinct traits (for example long or short neck, light or dark heads, various traits for shell markings, etc.). The total amount of distinct Tortoises is therefore 2^21 = 2,097,152. Your goal is to find a tortoise that exactly matches the 21 traits of your Baby Tortoise.

You can only have one Baby Tortoise (counts as 1 treasure while you carry it). If you pick up another, you will drop your original tortoise in its place.

Each cell in the Galápagos has some combination of the 21 factors as well (they are not really visible, but prevalence of trees, water, etc. counts among them). Tortoises are usually in places whose factors match their traits. When you are in Galápagos, cells that are "worse" (share less factors with your baby Tortoise than the cell you are currently in) are shown darker while "better" cells are shown lighter. In addition to that, mousing over any cell (or Tortoise) will show you exactly how many factors match your Baby Tortoise.

Your Goal is to find a region that matches your Baby Tortoise perfectly, and find a perfect match for the Tortoise (recognizable by white circle underneath it). Once you hand the Baby Tortoise over, the parent tortoise stops moving and you will be rewarded by 5 permanent "Baby Tortoise" Treasures.

The Orb of Galápagos is the Orb of the Shell. This is a longer-lasting but a bit weaker version of Orb of Shielding -- you lose 10 charges whenever you are physically attacked, but you are not protected at all from abnormal attacks like fire or being eaten.
Lost Mountain
Lost Mountain is a subland of the Jungle. It requires 5 Ivory Figurines and 5 Rubies. If you have the requirements, you will see Lost Mountains very often in the Jungle, much more often than Temples of Cthulhu in R'Lyeh or Haunted Woods in Graveyard.

Lost Mountain is a horocyclic gravity land where there are more options downward than upward (unlike Ivory Tower), and gravity is toward the edge of the land (like Ivory Tower and unlike Dungeon).

There are platforms in Lost Mountain. Some of these are permanent and block movement. Others are branches, which work exactly the way they do in Yendorian Forest. Ivies, which appear in the Lost Mountain albeit at a much lesser rate than the Jungle, are also considered stable platforms, but they can still kill you!

The treasure in the Lost Mountain is Amethysts.

Apes and Eagles appear in the Lost Mountain just like they do in the Jungle. Tree branches block Eagle movement, while Apes use branches as platforms.

The orb in the Lost Mountain is the Orb of Nature. When you have the Orb of Nature, you become an Ivy, specifically a Friendly Ivy. When you move to a cell, Friendly Ivy grows where you came from. You can also target any cell adjacent to the Friendly Ivy to attack there or grow there. Monsters will attack Friendly Ivy as if it was an ally.

In a gravity land (like the Lost Mountain where the Orb of Nature is normally found), if you move against gravity in a way you normally would not be able to, the Friendly Ivy breaks. This allows you to move up an additional tile from what would normally be allowed without the orb. Additionally, all Friendly Ivy goes away when the orb charges run out.
Overgrown Woods

Overgrown Woods is a land added in the 8.0 update, unlock by collecting at least 60 $$$, at least 10 of which must be Rubies from the Jungle. Its basic structure is similar to Dry Forest -- it's filled with trees and big trees that can be cut down. (At the beginning, the trees cover 60% of the Overgrown Woods, though collecting the treasures will decrease this.)

The basic type of monster in Overgrown Woods is the Mutant Ivy. Mutant Ivy is a bit similar to regular Ivy, but its rules are a bit different. First of all, it has no designated growing branches: on each turn, ALL ends of its branches grow, to all surrounding spaces. After growing, the Mutant Ivy will wait for 16 turns before trying to grow from the same space again; this can be seen visually by its color, which moves from yellow to green to red as the space is getting ready, and by a counter you can see by mousing over a section of Mutant Ivy.
Mutant Ivy is still growing in a tree structure and killing any of its sections will also destroy all "daughter" sections stemming from it. All Mutant Ivy grows from a single originating cell that contains Mutant Sapling, the treasure of this land; you must kill the original Mutant Ivy to collect it.
For fighting Mutant Ivy, it's best to find yourself a nice corner -- in open space, it will overgrow and kill you.

The second monster is the Forest Troll. Like other types of trolls, he's a regular-moving monster who turns into an impassable wall when killed.

The Orb in this land is the Orb of Luck. Orb of Luck has two effects:
1. It modifies the rules for generating new lands. Each time, three new lands are actually generated, and the land where you have less treasure collected gets the precedence; Crossroads-type lands also become more likely.
2. It increases the chances of generating Orb of Safety in the Whirlpool.
Clearing


Clearing is a subzone of Overgrown Woods, accessible once you collect 5 Mutant Saplings.

The Clearing is a horocyclic zone surrounded by trees and filled with a single Mutant Ivy. This Mutant Ivy is infinitely large so it doesn't actually have a root -- only branches. In Clearing (like elsewhere except for Overgrown Woods proper), it grows only on hexagonal cells.

Apart from Mutant Ivy, you can also encounter Red Foxes, regular enemies.

The treasure is Mutant Fruit. The Mutant Fruit requires the Mutant Ivy to exist -- if all Mutant Ivies next to it disappear, the fruit is lost.

The Orb of the Clearing is the Orb of Freedom. Orb of Freedom is basically a huge version of Orb of Flash which hits everything in radius 5 when activated, but in order to activate it, you must get yourself into a situation where it would be impossible to reach any cell in distance 4 without making illegal moves or dying.
Land of Storms


Land of Storms is another land added in the version 8.0. It is unlocked by collecting 60 $$$ and it is a place filled with dangerous electric currents.

The land is filled with various types of walls -- the most important to start are the charged walls (blue) and the grounded walls (red). There are also sandstone walls which yield the treasure of this land, Fulgurite, when you manage to discharge electricity through them.

The electricity stuff is pretty complex, so here is how it works:
Each possible cell is classified as one of four possible electric stater: Charged, Grounded, Conductive, or Isolator.

Charged: Charged walls
Grounded: Sea or Grounded walls. Almost anything outside Land of Storms.
Conductor: Sandstone Wall, any dead troll, vines, metal walls or slime when in Land of Storms. PC is also usually conductive, unless you have Orb of Shielding or Orb of Aether.
Isolator: Great Wall, any cell not covered under other rules, the PC if protected by Orb of Shielding

Most monsters count as Conductors in Land of Storms and Grounded elsewhere. Using Orb of Storms has a short-term, but profound effects: all spaces with lightning on become Charged while PC becomes Isolator.

Normally, the electricity tries to flow between a Charged cell and a Grounded cell, but it can only flow through Conductors or other Charged cells, not through the empty cells which are Isolators. However, if anything steps on these cells, it can close the circuit, causing a discharge to fire. There is no limit on how big the circuit can get, but of course, the bigger it is, the harder it is to arrange.

It might not always be clear to you when a cell is dangerous to step on, but fortunately the checkmate rule of the game will won't let you step to your doom (unless you're in Hardcore mode!).

Charged and Grounded walls occur more or less randomly (they depend on the zebra pattern), but only on hexagonal cells. Sandstone walls appear on heptagons only (unless adjacent to one of these huge blocks). No special walls can appear on the edge of the land.

There is an exception from the above rules: sometimes a horocyclic block of charged or grounded walls is generated. Any cell adjacent to such a block can be a Sandstone wall, even if hexagonal.

Monsters:
Storm Trolls are another type of troll who leaves a wall behind when it dies. The important thing is that the trolls are conductive both alive and dead. A discharge destroys the dead troll, so a living troll killed by electricity won't leave a wall behind.
Metal Beasts have similar logic to Demons, moving every other turn. They are too tough to kill with your normal attack, but you can stun them for a few turns and push them around while stunned. This allows you to connect them into a circuit, which will kill them.
Rich Metal Beasts are a less common variant of normal Metal Beasts. They work under the same rules with one exception: they transform into a Fulgurite when killed by electricity.

The Orb in Land of Storms is the Orb of Stunning which allows you to stun most types of monsters at distance, preventing them from attacking you.

There are two extra achievements for the Land of Storms. One achievement requires you to kill 10 monsters in a single discharge. The other requires you to be in Hardcore Mode, and you need to get 25 Fulgurites without escaping from a discharge. If you see the message "That was close", that means you escaped from a discharge and are ineligible for the achievement. Be very careful, as it's not always obvious where discharges happen, and Hardcore Mode does not prevent you from stepping into one!
Windy Plains


Windy Plains was added in 8.1 and requires 60 $$$ to enter.

This land is composed of infinite strips. The corners where the strips meet have Fans that create (or maybe utilize?) the winds that blow all over this land. The wind is animated, so you can see its direction on each cell.

The terrain is mostly open except for fans and an occassional chasm.

If you are on a cell with a wind, you cannot make a move that is closer to the incoming wind that to the outcoming wind (generally restricting you to half of directions). You can still wait on your space. In addition, by pressing 't' (or clicking the destination cell), you can "go with the wind", moving two cells in a single turn, but only in the exact direction of the wind. Birds of any kind can also utilize this form of movement.

There are two types of enemies: Wind Crows are generic birds and Air Elementals will not let you come closer to them when they are nearby. Air Elementals also completely cancel the normal winds around them.

The treasure is White Dove Feather. The Feather is very light and so it doesn't stay in one place (unless it's in the calm center of the strip), but moves with the wind. You might have to utilize the wind to catch up with it.

The Orb is Orb of Air, which you have probably already seen in the Ocean.
Blizzard
The Blizzard has very strong winds, much more than the Windy Plains. In addition, it runs on a temperature system like Icy Land and Cocytus. You have to melt the walls to get the treasures inside the walls, Forgotten Relics.

You need 5 Ice Diamonds and 5 White Dove Feathers to unlock Blizzard.

Each tile has a wind number. By hovering over a tile, you can see its number relative to you; your tile will always say 0. You can move to any tile where the wind number is greater than yours, the same, or slightly less (within 7). Hovering over a tile, including your own, will also put green or red arrows on adjacent tiles as a visual marker. Red arrows mean that the tile hovered over is 8 or more than the tile with the red arrow; you cannot move from the hovered tile to the tile with the red arrow. Green arrows mean that the tile with the green arrow is 8 or more greater than the tile hovered over; you can move there, but it's one way. No arrow will appear if both tiles are within 7.

This means when hovering over your own tile, green arrows will appear on tiles 8 or more, red arrows will appear on tiles -8 or less, and -7 to 7 gets no arrow. You can move to any tile with a green arrow or no arrow, but those with green arrows are one-way. You can almost always move from one ice wall to the next after melting it; there is almost no wind flow within a group of ice walls.

It is never impossible to make a move from the wind patterns alone. If this situation could happen due to a combination of the wind patterns and a Great Wall, the inescapable tile will have an Orb of Safety instead.

There are two types of monsters in the Blizzard. One is the Ice Golem. They turn into a very cold ice wall when you kill them if you are in the Blizzard. (They simply die without leaving a wall outside the Blizzard.) They are subject to the same wind restrictions that you are. The other is the Void Beast, which moves against the wind, but is otherwise a normal enemy.

If you have an Orb of Winter, you will collect any Forgotten Relics next to you, as they would otherwise be impossible to collect until the orb runs out.
Volcanic Wasteland
The Volcanic Wasteland is full of lava. Can you handle it?

To unlock Volcanic Wasteland, you need 60 treasures, 10 of which are Elixirs of Life.

Each tile is on a 64-move timer. For 40 moves, you can walk on it normally, and for the other 24, it is a lava tile, which means that it is inaccessible. Lava begins bright yellow, and then it turns orange, red, and dark red, before finally disappearing. You can see lava approaching 2 turns before it appears, and you can also see the exact number of any tile by hovering your cursor over it. If lava covers you, you have to get out the next turn, in the same way that you have to move away from water if you are standing over water.

There are two enemies in the Volcanic Wasteland. There is a basic AI enemy, the Lava Wolf. The other enemy is more interesting. It is the Salamander. Salamanders cannot be killed. They are pushed back and stunned for 6 turns if you hit them, or 9 turns if something is preventing them from being pushed back. In addition, they cannot move while they are in lava, but fire and lava do not kill them.

The treasure of the Volcanic Wasteland is the Lava Lily.

The orb of the Volcanic Wasteland is the Orb of Lava. This orb puts fire on every heptagonal cell adjacent to an enemy, forcing them to use hexagons and allowing you to outrun them more easily. The fire lasts for one turn only; the fires will be in a different spot every turn.
Rose Garden


Rose Garden was added in 8.2. It requires 90 $$$ (formerly 60) to enter. It's an open land full of beauty and alluring scents.

The land contains Rosebushes. Each 8 turns, the bushes emit a wave of scent that spreads outwards.
On each turn, the front of the wave advances 1 cell (up to distance of 5), the original "front" becomes "back" and the back dissipates. Any creature, including you, that is on the front of the wave must move to one of the adjacent "back" cells in the next turn, even if such move is suicidal. Notably, if you're caught by the wave while adjacent to the rosebush that generates it, you'll be forced to move into the rosebush itself and die on its sharp thorns.

The Rose Garden contains several different monsters. Each appears in both genders, depending on your set preferences:

False Prince/False Princess: No special rules.
Rose Beauty/Handsome Gardener: These monsters are exceedingly beautiful, which means that you can't attack them directly. However, they won't normally leave the Rose Garden.
Rose Lord/Rose Lady: These monsters are immune to the scent waves and can move as they wish.

The treasure in Rose Garden is Thornless Rose. Thornless Roses can only appear on cells adjacent to Rosebushes, so they are pretty dangerous to pick.

The Orb in Rose Garden is the Orb of Beauty. It will stun (for 1 turn), any monster that enters an adjacent cell. In addition, you will be able to ignore the rose scent, and also to directly attack Rose Beauties and Handsome Gardeners.
Terracotta Army
The Terracotta Army is unlocked by collecting 90 treasure. Can you avoid waking up the Terracotta Warriors?

The Terracotta Army has many Terracotta Warrior statues on heptagons, and the treasure of this land, Ancient Weapons, adjacent to them. Ancient Weapons can only appear on hexagons.

If your turn ends next to a statue, it will be one step closer to awakening. You do NOT want to awaken one, but it is perfectly fine to move or stand still next to them as long as you don't do it enough to awaken them. Statues take 3 to 5 steps to awaken at the beginning, but it can be as low as 1 if you have enough treasures (theoretically 1 treasure is enough, but in practice, about 20). Each step looks different; if it has a hat, the next step will awaken it. Other living enemies can awaken these warriors, too. Terracotta Warriors and Jiangshis (mentioned below) are not considered living.

If a statue is awakened, it becomes a Terracotta Warrior. These have 7 HP. Hitting it stuns it for 1 turn the first time, 2 more turns the second, 3 more the third, and so on, except it cannot be stunned for more than 6 turns. These numbers are cumulative; if you hit it three times in a row with no moves in between, it will be stunned for 1+2+3 = 6 turns.

The other type of enemy in the Terracotta Army is the Jiangshi, which is a basic AI enemy. Hitting a Terracotta Warrior will cause a Jianshi to spawn, so if have awakened a single warrior, make sure to kill some Jiangshis after a few turns, and then finish off the warrior. (If you've awakened two, run for your life.)

There are arrow traps in the Terracotta Army, which activate one turn after you or an enemy steps on them. This means that if you activate it, you cannot stand there, and it also means that any enemy there on the next turn will be killed.

Mercury rivers appear in the Terracotta Army. These have the function of Great Walls, except they don't separate lands; they're just impassable straight lines with bridges across them the same way that Great Walls have gaps.

The orb of the Terracotta Army is the Orb of Slashing. For 50 turns, attacking an enemy will also attack adjacent enemies.
Prairie
The Prairie is a land unlocked at 90 treasure. It has a regular pattern, unlike most lands. Tiles have a color gradient; reddish tiles are close to Great Walls, which are not randomly placed. Greener tiles are closer to rows of Orbs of Safety. This means that if you enter a Prairie, you can save very easily.

If you don't have any treasure and aren't trying to get any, the Prairie is completely safe. If you do have some treasure, Gadflies will spawn.

To get treasure, you have to get past rows of Bulls, similarly to Frogger. Bulls move along the path; they do not target you (unless they become a Raging Bull). These rows have dark brown tiles. You cannot attack bulls. If you throw a knife at one in Shoot 'Em Up Mode, it will become a Raging Bull (see below). When you get to the other side, 2 or 3 Green Grass will be waiting for you. This is a reference to the proverb "the grass is greener on the other side". Green Grass is generated as you cross; you cannot find any by walking along the edge of the brown area.

If a Bull has its path blocked, usually by another enemy (this is why Gadflies are a problem), but sometimes in other ways (like slime spilling onto the bull's normal path), it will become a Raging Bull. Raging Bull behavior is described in the section Bull Dash below, where they are much more prominent.

The orb is the Orb of the Bull. This gives you the effects of three orbs: Shielding, Thorns, and Horns (see Bull Dash section), but only when moving two or more cells in a straight line.

Prairie and Bull Dash are often found next to each other.
Bull Dash
Bull Dash is a land unlocked at 90 treasure like Prairie is. It is easy to die even at low treasure counts, so be careful.

At the beginning, there are three types of enemies in Bull Dash. Butterflies move along obstacles in a fixed pattern. They don't target you, but they can still attack, and you can't move next to them. You cannot kill Butterflies. Sleeping Bulls stay in place until you come within 2 tiles, where they become Raging Bulls. Gadflies also appear in Bull Dash, and they can awaken Sleeping Bulls, making them even more of a problem than in Prairie.

Raging Bulls move in a straight line, and when they hit a wall or another Raging Bull, they get stunned for a few turns before moving toward you again. Because straight lines don't exist exactly with HyperRogue tiling, when a Raging Bull reaches a heptagon, it has two choices to go to, and it chooses the one closer to you. You cannot attack Raging Bulls.

When a Raging Bull hits a non-Bull enemy, it kills the enemy. If that enemy is a Butterfly, which it usually will be, a Spinel is generated, which is the treasure of this land.

The orb is the Orb of Horns. After you move, you will attack the cell in front of you, or 2 cells, if on a heptagon. This includes stunning enemies that you can't normally kill.
Burial Grounds


Burial Grounds is a land added in the version 9.0. It's a desolate ground with occassional "barrows", the graves of ancient Vikings. To unlock it, you must collect 10 Sunken Treasures from Kraken Depths.

Your main goal in the Burial Grounds is to get inside the barrows and collect the treasure -- Ancient Jewelry. Ancient Jewelry, unlike most treasures, is not limited to one piece -- the barrows contain two or three pieces each, always on a single space. However, the barrows are all made of solid material you can't pass through.

The solution is the Orb of the Sword -- this peculiar Orb is unlocked by collecting 10 Sunken Treasures and it's quite necessary in this land.

When you get the Orb of the Sword, a magical energy sword appears next to you. Now for the fun part -- the sword can be aimed in one of 42 different directions, chosen at random.

The sword is always aimed into one of neighboring cells. You will see a sort of "protractor" around you with 42 "ticks"; some ticks are larger, separating the protractor into sections. Each section corresponds to one neighboring cell, so you will see either 6 sections with 7 ticks each (on hexagons) or 7 sections with 6 ticks each (on heptagons). In heptagonal mode, you will see just 14 ticks (2 per adjacent heptagon).
Important notice: the graphics of cells in various lands might vary, so the longer ticks won't always align with the cell borders. Nevertheless, the ticks are what's important to decide where the sword is, not the actual land graphics.

The cell occupied by the sword is marked by a circle. Any monster in the cell you pass with the sword will suffer normal attack. If the monster has more than 1 HP, it will stay on the cell and suffer an attack every turn the sword stays there.

The sword, however, is a bit better than your default attack. It can destroy living walls (turning them into floor), and also destroy plants in general, including chopping down big trees in one turn and killing trees in the Caribbean and rose bushes in the Rose Garden.
Also, the sword can kill normally unkillable Skeletons, and also... the Draugar, undead Vikings that appear in this land. Part zombies, part wraiths and all ugly, the Draugar (singular: Draugr) are the only type of monster in Burial Grounds and you will need the power of the sword to deal with them. (If a Draugr moves outside of Burial Grounds, its movement slows down so you can escape it if you have no way to kill it).
And of course, the sword can destroy the barrows. The barrows are actually made of two types of walls: barrow wall (indestructible by sword) and just "barrow" which can be destroyed.

The problem is that you can't rotate the sword. Or can you?

It was mentioned before that the sum of angles in a triangle is smaller than 180 degrees. It's a well-known fact, but it has some surprising consequences. Generally, if you walk along closed loop in the hyperbolic geometry, you end in the same place, but NOT in the same orientation -- the game world will be rotated. And this is the key to proper use of the sword.

If you walk in a clockwise loop, the sword will turn counterclockwise relatively to its original position. Similarly, if you walk in a counterclockwise loop, the sword will turn clockwise.

The number of ticks the sword will turn is equal to the number of tiling vertices in your path. This means:

If you move around a vertex, in a loop of two hexagons and one heptagon, the sword will turn one tick.

If you move around an edge (3 hexagons and 1 heptagon or 2 hexagons and 2 heptagons), the sword will turn two ticks.

If you walk around a hexagon, the sword will turn six ticks.

If you walk around a heptagon, the sword will turn seven ticks.

Exercise for the reader: find a closed path that has exactly 42 internal points, so you end up with sword in the exact same orientation.

Using these techniques, you can rotate the sword as much as you can.

The Orb in Burial Grounds is Orb of the Sword II. By itself, it has exactly the same effect as Orb of the Sword, except the sword it creates is orange, not yellow. However, if you have both sword Orbs at once, you will possess two swords sticking out in the opposite direction.

There is an achievement (Master Swordsman) that requires you to slash two monsters with your sword in a single turn. This is done by moving from hexagon to heptagon (or vice versa) with your sword in a particular orientation to make it pass through two cells in a single turn.
Burial Grounds Geometry Bonus!
So, what is with the sword rotation? The answer can be gleamed by studying triangles (just like answers to most questions).

Imagine you have an equilateral triangle in Euclidean plane. Now walk around the triangle's circumference. At each corner, you must make a 120-degree turn from your original direction of movement to accomodate the acute 60-degree angle of the triangle. So you turn 120 + 120 + 120 = 360 degrees. You turn all the way around.

This is a general property that will hold for ANY polygon -- walking around it will turn you 360 degrees.

But the basic triangle in HyperRogue is different -- walking in the shortest hexagon-hexagon-heptagon loop has you walk around a triangle with angles 60, 60 and 51 3/7 degrees. And so your turns on the way will be 120, 120 and 128 4/7 degrees, summing up to 368 4/7 degrees -- you turn MORE than 360 degrees, and so you will end up facing another direction. Normally, the effect is that the screen rotates 8 4/7 degrees (which is 1/42 of the full circle), but with the sword, the effect is more visible.

And what's about the counting of inner vertices on your path? Well, the area of a polygon in hyperbolic geometry is proportional to its "defect", i.e. to the difference between its actual sum of inner angles and the sum it "should" have in Euclidean geometry. Any path you tread in the HyperRogue tiling (if you presume you're always walking from the center of one cell to center of another) is basically walking around a perimeter of some shape made out of the basic triangles. And since each basic triangle has one vertex of the tiling inside, you can simply count those vertices to find out how many triangles you've walked around, then multiply it by 1/42 of full circle to find how much you have rotated. Easy!
Emerald Mine


The Emerald Mine is unlocked with 65 $$$, which must include at least 5 Gold from the Living Caves and 5 Fern Flowers from the Dry Forest. This place is basically a variant on Living Caves -- the same living walls and floors growing according to the same rules, but instead of random corridors the whole mine is dug according to the pattern you could already see in the Vineyard, with both floors and walls in endlessly repeating chunks.

The treasures in the Emerald Mines are, of course, Emeralds. The interesting part of the Mine are monsters. There are Seeps from the Living Caves in the walls and Hedgehog Warriors from the Dry Forest on the floor, but apart from those there are three more types:

Pikemen attack all spaces around themselves on every turn. If a Pikeman would come next to you, he would kill you immediately. Fortunately, they won't attack their friends (so they can't attack if there's another monster next to them) and they are so used to enemies running away from them that they can't handle someone coming TOWARDS them -- moving next to a Pikeman kills him.

Flais Guards have the opposite problem -- while they can't be attacked directly, they will kill themselves if you are next to them and move away.

Miners are something like anti-Rock Trolls. When you kill them, their space and all surrounding spaces become dug out, eliminating anything that's there including walls. Moreover, the absence of living floor will generally cause the walls to recede and open new passages.

Once you collect 10 Emeralds, Orb of Mind starts to appear in the Emerald Mine and the Crossroads. This Orb lasts 77 turns and allows you to kill any enemy you see simply by clicking it without spending a turn. However, each such kill will reduce the remaining charge of the Orb by 30. The Orb is still usable when its charge is under 30, but using it will immediately end the effect.
Camelot

Camelot is a land that appears when you gather 5 Emeralds from the Emerald Mine; this condition exists because it uses the monsters from there.

Camelot is the only finite land; ironically, it feels the largest -- mainly because its finiteness allows its size to be expressed and that size is HUGE.

Camelot appears in the Crossroads; it's a castle surrounded by impassable moat. You can get in by numerous entrances. Inside Camelot, you can find huge amount of Knights who are friendly and don't attack you -- but you also can't enter their spaces.

The Knights surround the Round table -- a big circle. There are special rules for movement: you can move on top of the table, but in your next move, you must leave the table to one side or the other. Monsters (with exception of flyers) can't move through the table so they can't get in -- or, more likely, out!
The Knights have a quest for you: to find the Holy Grail. However, unlike their Arthurian predecessors, the hyperbolic Knights don't travel far lands to find the Holy Grail -- they have it right there in the middle of the table.
All you have to do is to get to the center of the table. The table's diameter is fairly small, so it shouldn't be a problem...

Hm?

It IS a problem?

Well, yes -- the Round Table shows the difference between extent and content in hyperbolic space. Even though it's not very big in size, it contains millions of cells -- even its circumference is gargantuan and walking around it would take days. Together with grid nature of the game which makes "circles" a bit inexact, you need to use some sort of trick to reach the center.

A trick I use is to mark an arbitrary straight line with Dead Orbs. Once you do that, find its center (by counting cells) and construct another straight line, perpendicular if possible, through that space. This second line should be longer than the first one. Then you find the center of THIS line and repeat -- it will take a few tries, but eventually you'll reach the Holy Grail -- both figuratively and literally.


Each Holy Grail counts as 10 $$$ for your score. Once you collect one, you unlock Orb of Trickery which allows you to place your illusory copies that attract monsters.

Talking to a Knight after collecting the Grail will reward you with a cape for your character. Then you can seek other Camelots (all castles are named the same -- the Knights don't mess with perfection), but they will be larger, with larger Round Tables and Knights with different capes. Collecting more Grails will allow you to upgrade your capes.
Irradiated Fields
Unlocked by getting a total of 30 Chrysoberyls, Emeralds, and Necromancer's Totems combined.
Treasure is Tobernite. Orb is Orb of Intensity- while it's active, all orbs start with 20% extra charge and can gain 20% more maximum charge.
This land uses a similar mechanic in varying its terrain as Galápagos, but this time it does so by blending in enemies and game mechanics as well. Nearly anything you've seen so far can show up, along with these new features:
*Fire Trap: Explodes on the next turn after something steps on it. It is perfectly safe to step onto one, as long as you move off it on your next turn.
*Explosive Barrel: Can be pushed, and explodes if hit by fire and certain attacks.
The only unique foe to this area is the Mutant, which is just a standard AI enemy. Others that can appear include:
Hedgehog Warriors
Ratlings
Zombies
Ghosts
Necromancers
Cultists
Fire Cultists
Blue Raiders
Pikemen
Flail Guards
Ivies
Skeletons
Elemental Planes


Elemental Planes are a very special land that starts appearing once you defeat all four types of Elementals. The Elementals are:

Air Elemental -- found in Windy Plains
Water Elemental -- found in Living Fjord
Earth Elemental -- found in Dead Caves
Fire Elemental -- found in Dragon Chasms

Elemental Planes are not a single land, but rather four lands that appear together: Plane of Air, Plane of Earth, Plane of Fire and Plane of Water. Land called "Elemental Planes" in-game is a border that separates them.
All four Planes have a lot of borders generated around them, so they look a bit like Crossroads. Each of them has a different type of barriers that impede your movement: chasms in Plane of Air, limestone walls in Plane of Earth, fire in Plane of Fire and sea in Plane of Water. The borders are also formed by these obstacles. The borders cross at right angles, forming "corners" where all four Planes meet. The opposite elements (Fire/Water and Air/Earth) are never adjacent directly, only diagonally.

The monsters in Elemental Planes are, of course, the Elementals. Each Plane contains Elementals of the same type.

Fire Elementals leave a fire trail behind themselves.
Air Elementals are surrounded by strong winds. If you are 2-3 cells away, you cannot move towards the Elemental. To kill it, you have to wait for it to come to you.

The treasure of the Elemental Planes is the Elemental Gem. However, it is not found anywhere. You have to construct it.

There are Shards of Air, Earth, Fire and Water found in their respective planes. Once you collect 1 of each, they will transform into 4 Elemental Gems. However, the monster generation in each plane grows with the number of its Shards you have, so it's advisable to "use them up" as soon as possible.

The Orb here is the Orb of Summoning.

This Orb allows you to summon monsters, who will be incapable of attacking for several turns. While the monsters are normally hostile, the Orb has variety of uses.

Monsters can be summoned almost anywhere. The symbol and color of cursor when targeting will tell you, what can be summoned. A list of all 60+ lands would be excessive, but here are the potentially useful ones:

Boat, Chasm, Ivory Tower or Plane of Air: Air Elemental
Caribbean Island, Stranded boat, Sea in Elemental Planes, Jungle, Hell or Plane of Water: Water Elemental
Dead floor, Limestone wall, Desert, Ocean or Plane of Earth: Earth Elemental
Frozen lake, Fire, Icy Land or Plane of Fire: Fire Elemental
Giant Rug: Vizier
Hive: Red Hyperbug
Land of Storms: Storm Troll
Living Fjord: Fjordtroll
Living floor: Rock Troll
Opening/Closing Plate: Palace Guard (who will immediately activate the plate)
Overgrown Woods: Forest Troll
Red/Blue Slime: Slime Beast
Red Rock anywhere or Red Rock Valley: Red Troll
R'Lyeh/Temple: Fire Cultist (kill it before it throws fire for an Orb of the Dragon)
Rubble in Dead Cave, or Emerald Mine: Miner
Rubble, Gargoyle floor, Gargoyle Bridge or Ladder: Gargoyle
Sea in Living Fjord: Viking (comes with a free boat)
Sea anywhere else: Pirate (also comes with a free boat)
Vine: Vine Spirit (can be killed to destroy the vine and let you through)
Vineyard: Vine Beast
Trollheim


Trollheim is a land added in the version 9.0. It's a homeland of Trolls whose varieties appear in several places throughout the game.

There are six types of Trolls:
Rock Trolls (from Living Cave)
Fjord Trolls (from Living Fjord)
Dark Trolls (from Dead Cave)
Storm Trolls (from Land of Storms)
Forest Trolls (from Overgrown Woods)
Red Trolls (from Red Rock Valley)

After you kill at least one Troll of each of those types, you gain access to the Trollheim. Trollheim is a plain full of dead bodies of Fjord, Storm and Forest Trolls. These three types are also populating the land. They mostly appear in "nests" -- small circles filled with Golden Eggs, the treasure of this land.

To get the eggs, you will have to fight off the Trolls. However, there is a lot of them and you'll have to run far away -- and each dead Troll turns into another wall, making it challenging to find your way back to the empty nest.

I recommend building "Trollidors" -- long corridors of dead Trolls that can be followed back. If you happen to enrage another nest while killing the previous one, you should probably give up on the first nest -- fighting two nests at one is a challenging problem by itself.

The Orb of this land is the Orb of Stone. This Orb transforms any monster you kill into a stone statue. This creates a wall, which might be useful for some strategies, and not that useful for others (for example, it's a bit troublesome fighting Ivies with it).
Hell


Abandon all hope!

Hell starts appearing once you collect at least 10 treasures from 9 different Lands. Hell contains impassable sulfur lakes, but it's still mostly free space.

The treasure in Hell are Demon Daisies (see the game 'Ancient Domains of Mystery', also on Steam, for further informations about this interesting flower).

There are two monsters in Hell:

Lesser Demons are actually weaker than standard monsters. While they share the same basic AI, they move at half your speed; when they are dull in color, they are safe, and only when their colors are bright they will move after your turn. But what they lack in power, they make up in numbers: Hell is full of monsters from the very beginning.

Greater Demons are very similar to Lesser Demons with one little change: they are invulnerable. To destroy them, you must keep killing Lesser Demons. Every time you defeat ten of them, all Greater Demons on the screen will transform into Lesser Demons. Of course, new Greater Demons can appear, still invulnerable until you slay another 10 Demons, etc.

After you collect at least 10 Demon Daisies, you will unlock Orbs of Yendor (which start to appear in Hell and in the Crossroads). You will also unlock the last few lands!
Crossroads III


The Crossroads III starts appearing after unlocking Hell. This Crossroads variant is blue and features a new trick: the Great Walls bordering other lands now cross at right angles. Any two "diagonally" adjacent lands are the same, so Crossroads III, once created, naturally creates a whole network of other Crossroads III lands.
Cocytus


Cocytus appears after you collect at least 10 Demon Daisies in Hell. This final Land has actually a lot in common with the first Land, the Icy Land.

Cocytus, too, runs on a temperature system. Each cell has a temperature and your body heat heats your tile and surrounding tiles, which then cool down when you're no longer near. But in Cocytus, there are no Ice Walls, but ice FLOORS -- the whole Cocytus is a surface of a frozen lake, with icy paths around open, deeply sub-zero water. This means that you can't stay on one place for too long, or the ice melts; however, you don't need to move constantly like in the Land of Eternal Motion. However, you should never enter Cocytus when carrying Orb of Flash or Orb of Storms -- using their special attack generates a LOT of heat. While Icy Land has a default of -24°C, Cocytus has a default of -36°C.

The treasure in Cocytus are Ice Sapphires.

Cocytus contains three kinds of monsters:

Ice Sharks are basic kind of monsters. Ice Sharks live in the water and you are safe from them if you're not near the water. Well... until the ice melts, that is.

Demonic Sharks are more dangerous. These sharks are hot, which means they are fully capable of melting their own paths through the ice.

Crystal Sages are not very strong by themselves. You don't even need to attack them -- your mere proximity will raise the temperature above -30 degrees Celsius, which kills them. However, they can project heat into you, greatly accelerating the melting of ice in your vicinity. Since they are weak to heat, they never venture outside of Cocytus.

Apart from these, Yetis from the Icy Land also make a guest appearance.

Cocytus contains Orbs of Winter, just like the Icy Land. You can use them to slow the thawing.

The main orb in Cocytus is the Orb of Change, which can be used to turn an enemy into one with no special powers. It does not work on multi-tile enemies.
Land of Power


The Land of Power is unlocked by collecting 10 Demon Daisies in Hell. It's a dangerous, chaotic place full of Witches, Orbs and treasures.

The Land of Power is full of rivers of fire, 2-tiles thick straight linesof eternal fires. In fact, the underlying structure of the Land of Power uses the regular pattern from Vineyard and Emerald Mine once again, though in a different way.

It's difficult to actually get inside the Land of Power -- all entrances are either guarded by monsters or blocked by fire. You will probably have to use an Orb power to get inside.

The Witches, the main type of enemies here start as mostly harmless Apprentice Witches, but they have the power to grab Orbs that are lying everywhere in this region. Almost any type of Orb can appear here, but the Witches can only grab 6 of them:

Orb of Life: This will create an Evil Golem to fight against you. Any Witch can grab Orb of Life, even if she already has an Orb.
Orb of Speed: The Witch will transform into Speed Witch, moving twice for every one of your moves. If you have Orb of Speed yourself, Speed Witches make only one move for every one of yours.
Orb of Flash: The Witch will transform into Flash Witch who can kill you with the Flash spell once you get 2 spaces from her or less. However, she won't use the spell if this would kill other monsters.
Orb of Fire: This is a new type of Orb that appears in Land of Power. It doesn't require you to collect 10 Powerstones, but if you do, it starts appearing in Crossroads. This Orb will cause you to leave a trail of short-lived fire (9 turns) behind yourself for 30 turns, but it won't allow you to enter fire. The Witch that grabs this Orb will transform into Fire Witch with the same power.
Orb of Aether: The Witch will transform into Aether Witch, capable to pass through objects and fires.
Orb of Winter: The Witch will transform into Winter Witch, capable to move through fire.

Some Orbs and all Powerstones, the treasures of this land, are enclosed in crystal cabinets. You can break these cabinets by the Flash spell or you can move inside them with the Orb of Aether -- but you must get out in the next step and the Orb of Aether will be completely drained by this.
Crossroads IV and V


Crossroads IV (pictured), added in 8.2, is another Crossroads layout. It's a highly advanced land, only appearing once you collect 200 $$$.

Crossroads IV is still bordered by straight lines; however, it's a different kind of straight lines that doesn't require Great Walls. This makes it a very open space. It's easy to enter other lands from it, but it's also easy for the inhabitants of those other lands to come to you.

Crossroads V is another form of Crossroads, but it does not look anything like the others. The Great Walls are close enough to touch each other. So close, in fact, that the land has only four unoccupied cells between the three lands it separates. This makes moving through it very dangerous, as it is easy to become surrounded! Crossroads V requires 300 treasure.
Crossroads, revisited
Once you manage to gather 10 of EVERY treasure (but not Holy Grails and Orbs of Yendor, which are special), you unlock the final treasure — the Hyperstones. The Hyperstones start to appear in the Crossroads, but now the Crossroads also starts to swarm with monsters.

But there are also Orbs of Yendor — to unlock these purple spheres, you only need 10 Demon Daisies — you don't have to unlock the Hyperstones as well. When you try to pick up an Orb of Yendor, it will inform you that it needs to be unlocked. You will be given a pointer that shows you the right direction to the key. Of course, the hard part is to come back with the key — the Orb will be lost in the hyperbolic space at that point, and you won't be able to find it.

Here is where Dead Orbs come in handy: drop them as you go for the key, close enough to see each one from the next. That will allow you to come back, unlock the Orb of Yendor and win the game!
Wild West

Wild West is a special land added in version 8.0. Wild West never appears in the main game and can be only played in challenge modes.

Wild West contains regularly spaced small circles of Salloon Walls.These provide some cover from the Outlaws who can shoot and kill you from up to 3 cells away.
Luckily, you can find Revolvers strewn around. A Revolver allows you to shoot and kill a monster up to 3 cells away. A Revolver has 6 bullets and you can never have more than 6, no matter how many you collect.
A dead Outlaw will drop the treasure of this land, the Bounty. Since they are armed, you will also collect their own revolver together with the Bounty, setting your bullets back to 6. Note that outside of Wild West, you will start to lose 1 bullet per turn so you can't go on a shooting spree elsewhere.
Challenges
If you think the basic HyperRogue game is too simple or too boring, there is a number of special modes waiting for you.

There is a separate guide for these modes of playing; this is just an overview.

Orb Strategy Mode
Orb Strategy Mode gives you orbs for collecting treasure that you can use at any time. If you would be checkmated, you can use an orb to get you out of checkmate. Scores can reach well over 1000.

Hardcore mode - no "checkmate rule" in effect. If you make one wrong move, you'll die. Two achievements are hardcore-exclusive. One is for winning the game in Hardcore Mode, and another is described in the "Land of Storms" section.

Shoot-'em-up mode - in this mode, HyperRogue loses its turn structure. Space and time are now continuous, so you can run all over the hyperbolic land and fight. Instead of sword, you're now armed with throwing knives. This mode is also available for two players in local coop!

Princess Challenge - this challenge can be attempted any time after you save your first Princess. You're thrown into a Palace and have to find the Princess. There are no Great Walls and other lands and the special rules in the "prison zone" no longer apply (except the "no Treasures" rule).

Random Pattern Mode - in this mode you're thrown in one of several possible lands with altered generating rules: the walls and floors will be randomized, but they will repeat in certain patterns. In addition, the "floor plan" of the lands might be different, leading to things like R'Lyeh with forest tile graphics or Land of Power with the Ivory Tower graphics.

Pure Tactics mode - in this mode you try to achieve a high score while exploring a single land. You must unlock various lands by collecting 20 treasures there in the main game, except for Camelot where 2 Holy Grails are enough. Treasure generation rate is initially higher than normal mode treasure spawn rates, but it is static and doesn't increase with number of defeated enemies. If you play in any Crossroads type, Hyperstones will be unlocked from the start and you can find most types of Orbs. Crossroads will look weird, though: they will still have Great Walls, but on the other side will be more Crossroads.

Strange Challenge
This challenge is only available once every 77 hours. Each challenge has two lands chosen at random in a random geometry, which could be hyperbolic (sometimes more curved than usual, sometimes less), spherical, or rarely Euclidian (in the form of tori and Klein bottles). You have only one chance to play (unless you quit before collecting your first treasure). You also start with random orbs as in Orb Strategy Mode (see below), usually from 6 to 10. Your goal is to collect as many treasures as possible.

Experiment with Geometry
This is more of a tool than a game. Standard HyperRogue uses tiling with 2 hexagons and 1 heptagon at each vertex. The Experiment with Geometry menu allows you to use almost any tiling you want.

Yendor Challenge
These challenges will force you to use nonstandard ways of collecting the Orb of Yendor.
Bonus section: Cheat Mode Controls
There is a handful of powerful commands available in the cheat mode. Here is the list:

An important concept here is that of a "last active cell". When you start the game or teleport via Orb of Safety or equivalent, no cell is "last active cell". Otherwise, it's the cell you've moved from last (the one behind you) or the cell you've attacked last. You can also use the Spin command (Shift+Z) to rotate the player. The last active cell will then be the cell you are facing.

Bonfire (Shift+B):
Summons a bonfire on the last active cell.
You can also summon things from the Map Editor.

Change Display (Ctrl+W):
Toggles several auxiliary displays:
Net display -- any two adjacent cells are connected by a cyan line so the game world is overlayed by triangular net.
Tree display -- each heptagonal cell shows its connections to its ancestors and descendents as cyan lines. This displays the underlying combinatorical structure of the HyperRogue world.
Alternate structure display -- this shows the internal structure of the "alternate maps" as purple lines. Alternate maps are the circular/horocyclic structures in some lands. This display cannot be activated unless you're currently in such structure or close to it and doesn't display properly when you leave it (as there can be several competing structures nearby).
Pressing Ctrl+W can also activate two or more of these views at once. The full cycle is None -- Net -- Tree -- Net+Tree -- Alternate -- Net+Alternate -- Tree+Alternate -- Net+Tree+Alternate -- None.

Dead Orbs (Shift+D):
Gives you 10 Dead Orbs.

Depletion (Shift+P):
Removes all charges from Orbs you possess. Doesn't remove any Dead Orbs.

Draw Player (Ctrl+D):
Toggles whether your character should be displayed or not.

Emergency (Shift+F):
Gives you 1 charge of the following Orbs: Flash, Teleportation, Storms, Speed and Shield. This allows you to escape from just about any danger. You can activate this even after you die, destroy the enemies or teleport and continue the game.

Golem (Shift+G):
Summons either a Golem or a Tame Bomberbird (selected at random) on the last active cell.
You can also summon things from the Map Editor.

Hyperstone Quest (Shift+C):
Teleports you to Crossroads with Orb of Shielding with 10 charges and sets all your treasures to 10, enabling you to find Hyperstones. Also gives you enough kills to activate the lands that depend on them.

Ivy (Shift+I):
Summons an Ivy Root surrounded by branches on the cell beyond the last active cell.
This is actually better than using Map Editor, as the Ivy parts created through Map Editor are not automatically connected.

Kills (Shift+K):
Gives you 10 kills for every type of monster. Note that the kill list will be pretty hard to read if you do this.

Land (Shift+L):
Shifts the starting land to next available land in the list. You will see a message informing you where the game will start next.

Lose Treasure (Shift+J):
If you have at least 1 treasure in your local land, the local treasures are set to 0. Otherwise, ALL of your treasures are lost.

Map Editor (Shift+A):
Activates the Map Editor.

Mirror (Shift+M):
Summons 3 Mirror Images and 6 Mirages around you (as if you stepped onto a Magic Mirror and Cloud of Mirages at once). This command has no effect if you are currently standing on a heptagonal cell.
You can also summon things from the Map Editor.

Monster (Shift+E):
Will summon a random monster on the last active cell. The possible monsters are: Eagle, Fire Cultist, Ghost, Rock Troll, Miner, Vine Beast, Red Hyperbug, Bomberbird or Skeleton. The monster will be stunned for 3 turns.
You can also summon things from the Map Editor, though those won't be stunned.
Multi-Monster (Ctrl+E):
Summons a Red Troll or a Dark Troll on each cell around you.

Orbs (Shift+O):
Summons Orbs on all passable cells around you. Overwrites existing items. Orbs are summoned in a specific order, so multiple use of this cheat will eventually get you the Orb you want.
This is mostly superseded by the Land Overview, where you can simply click on any Orb to gain its power.

Safety (Shift+S):
Activates Orb of Safety as if you just picked it up. Will give you only 3 charges instead of normal 7.

Sandworm (Shift+W):
Summons a Sandworm on the last active cell.
You can also summon things from the Map Editor.

Shield (Ctrl+F):
Gives you 30 charges of Orb of Shielding.

Teleport (Shift+U):
Teleports you to the land currently set as starting (through the Shift+L cheat).
Superseded by Land Overview where you can simply click on a land to teleport there.

Thumpers (Shift+H):
Randomly summons a Thumper, a Big statue of Cthulhu or a Boat on each cell around you.
You can also summon things from the Map Editor.

Treasure (Shift+T):
Gives you 10 copies of a random treasure. If you have less than 10 treasures of your current land, it will be always selected, otherwise it will select a treasure you have the least of.
More Treasures (Ctrl+I):
Gives you 25 copies of a random treasure. If you have less than 10 treasures of your current land, it will be always selected, otherwise it will select a treasure you have the least of.
Even More Treasures (Ctrl+U):
Gives you 50 copies of a random treasure. If you have less than 10 treasures of your current land, it will be always selected, otherwise it will select a treasure you have the least of.
Lots of Treasure (Ctrl+T):
Gives you 25 copies of a random treasure. If you have less than 100 treasures of your current land, it will be always selected, otherwise it will select a treasure you have the least of.
You can also gain treasures by clicking on them in Land Overview.

Vector Graphics Editor (Ctrl+A):
Currently crashes the game -- don't use!

Yendor Summon (Ctrl+Y):
Summons an Orb of Yendor on the last active cell.
You can also summon things from the Map Editor.
Yendor Gain (Shift+Y):
Gives you 1 completed Orb of Yendor.
Bonus section: Order of Movement
Unless you're playing in the shoot-'em-up mode, HyperRogue is a turn-based game where things move one at a time. For advanced players, here are the detailed information about the order in which things take their turns.

After you move, first to move and act are the "ghosts" -- here, this is a generic term that also includes Demon Sharks, AEther Witches and Winter Witches: in other words, monsters with least movement restrictions.

Next, "normal" monsters move, i.e. those with no special movement rules like Yetis. After those are, in order, Ivies, Slimes and other monsters with high restrictions like Vine Spirits, Eagles, Air Elementals, Earth Elementals, "intelligent" monsters like Pirates that can use sail on Boats, Rock Snakes, Mutant Ivies and Hyperbugs.

Then Whirlpool and Windy Plains move things via currents or wind. After that, friendly "monsters" move (Golems, Knights, Tame Bomberbirds, Prince/Princess and Friendly Ghosts). This means they aren't able to save you when you're next to a monster because that monster will move before them! Then, at the end, the Worms and such creatures, as well as the Shadow moves and the turn is over.
66 Comments
Jason1527 5 Nov, 2023 @ 12:56am 
im not seeing cursed canyon on here...
i feel like thats important since it currently has the rarest achievement in the game.
(the 50 treasure one)
WITCHDAGGAH! 8 Jan, 2023 @ 11:43pm 
When will this guide be updated with the new lands?
d0sboots 13 Sep, 2020 @ 7:49pm 
zachgalaxy - "If you trap yourself in the living caves, the ghosts will let you out."

If you're exceedingly lucky... most of the time, you just remain stuck until you die.
zachgalaxy 6 Sep, 2020 @ 11:01pm 
If you trap yourself in the living caves, the ghosts will let you out.
Fulgur14  [author] 22 Mar, 2019 @ 10:23am 
OK, anothergamer1234, thanks :)
anothrgamer1234 22 Mar, 2019 @ 10:14am 
I've PMed my write-ups over to you, Fulgur14. Be sure to go and check the lands for yourself before adding them as they are, though- I'd rather not let any mistakes on my part slip in by accident.
anothrgamer1234 21 Mar, 2019 @ 1:48pm 
That would be nice, but you should probably check what I've got to make sure it's correct. I'll friend you and then I can PM you the write-up when you're online.
Fulgur14  [author] 21 Mar, 2019 @ 11:54am 
anothrgamer1234 - I can add you to this guide if you want.
anothrgamer1234 21 Mar, 2019 @ 10:35am 
I was considering drafting a guide for the new lands introduced in 11.0, but I'm not sure it'll be worth it since I'm much less experienced with the game than most people here and haven't been to one of the new lands myself yet.

Fulgur14, would you like me to PM you my write-up to use as a placeholder for a full guide?
Eivihlo 16 Feb, 2019 @ 4:40am 
How about Free fall?