Sonic Racing: CrossWorlds

Sonic Racing: CrossWorlds

59 ratings
Time Trials [Updated 07/10] - Build, Gadgets and Advanced Techniques for All S-Ranks
By Asahaka
Here are a few tips, tricks and techniques to improve your gameplay in Time Trial mode!
Whether you're chasing for the all A-rank achievement, or if you want to get good, give this a quick read. You might learn something (hopefully)
4
4
2
   
Award
Favorite
Favorited
Unfavorite
Changelog (& Introduction)
This guide is here to give you simple guidelines to help you figure out things about the game.

This is NOT a cheat sheet, this is NOT a "do this and GG" guide.
The game is complex, has nuances for every track and every build.
Therefore, PLEASE experiment with the content included in this guide.

EDIT: So, actually, there's one "best" way to play the game. Scroll down, read through, test it and you'll see for yourself.

That being said, here are a few tips to lead you the right way.

Changelog
  • [07/10/2025] Added the questionable universal build, which is just better than any set of gadgets you can think of.
    Edited Gadgets recommendation, kept the old one in case you wanna have fun.
  • [02/10/2025] Several basic driving tips added.
    Video for snaking & GIFs for all major techs added.
    All remaining S-Rank requirements added.
    Chapters reorganised.
    Techs per track coming soon (after my holidays, back 19/10), please be patient!
Driving Techniques
Snaking

Snaking, literally going in an S-shape around the track, will help you charge your boost constantly even during downtime.

Drift right, release, drift left, release.
If you're running counter-steer boost, charge a level 2 or even 3.

More boost = more speed, maths are fast.

But here is a comparison video with equivalent gadget slots used, if you need facts.

Video: https://www.youtube.com/watch?v=B4J5gMcYhI0

Soft Drifting

Are you wondering why you can't charge that boost gauge fast enough, even with the same build as the replays you're watching?

The answer is: Soft Drifting.

Instead of holding a direction while drifting, try releasing any directional input while drifting.
Your drift gauge will charge much faster than counter-steering.

This technique can be used on every single straight line or soft turns. You'll still turn, you'll get more boost than counter-steering, it's just... better.

Taking sharp turns while steering the same way as your drift will always be faster. As everything, it's all about adaptability. Add this to your driving skills, and you'll instantly see improvements.
(Can't really showcase this one with a video, so you'll have to try it out by yourself)

Jump Drifting


Hard turn right after a jump? Try drifting before that jump, you'll turn much sharper.

Some jumps may feel slow or have some downtime after your initial trick boost. When that happens, charging the drift before taking off will let you land with a pre-charged level 1 (or even 2) drift boost.

Careful, this does not work on all jumps.


Any "autoscroller" jump (the ones where your vehicle follows a path that links to the other side of the track, either really high or really low) will most likely break your drift charge. You'll learn which ones can or cannot be jump drifted by experimenting.


Showcase (on Timestamp, 31:46):
https://youtu.be/e1D_BAEOqBw?si=WVy_7mGTdsjJ-iCl&t=1906

Boost Trajectory correction

If you're hitting the edges of the road in a drift, you are most likely holding your drift for too long.

Drift boosts are a good way to correct that trajectory if you're about to slide out because of a wide drift.
It sure is painful to release your drift earlier than expected, but keeping these 100 rings while taking a tighter turn is much more valuable in the long run.

Common examples would be Wonder Museum's spiral climb, where you most likely end up on the outside line when you didn't intend to. Release your drift earlier, hold left stick, and you'll keep that beautiful inside line with good speed.


Minor Driving advices
  • Keep drift boosting when using mushrooms speed wisps. Yes, you're gaining speed on top of the item boost.

  • When flying, Boost Lv.1 is faster than Lv.2 if you're going on a straight line. Alternate L/R drifts and release on Lv.1 to keep the best possible line while always boosting.
    Use Lv.2 whenever the air track has a turn.

  • Your Water Boosts should ALWAYS be Lv.2. This allows you to trick once (twice with Trick Adept/Expert). Lv.1 is to be used only if you need a small boost before setting up for a full Lv.3 sharp turn. As such, Lv.3 is only used after a sharp turn.

  • Charging Lv.2 instead of Lv.1 on straight road is debatable. Don't feel pressured to drift switch if you can't do it, that's not a major time loss (difference as far as I tested is milliseconds, depends on the sharpness of the turn, if you can soft drift, etc...).

  • Do not press the brake input constantly if you need to take a sharp turn. The best way to turn during a drift is to release the acceleration button. Hold your drift, you'll keep most of your speed while being able to turn much sharper.
    Of course, brake if you really need it, but only use light taps.

  • You have air control during jumps and tricks. Holding your stick in one direction will make you turn that way, even mid-air. Don't shake that stick all around to hope for tricks, hold it where you want to go, and you'll trick while turning.
Gadgets
Forget about character differences, Gadgets will actually make significant changes on your racing times.

There are plenty of gadgets, and most of them are useful.
While there's no clear winner so far, here is a list of good ones you will always rely on.

There is a best in slot for Gadgets. Whichever track you wanna hunt, the same set of gadgets will be used. Here it is:

Gadget Name
Gadget Icon
Description
What it actually does
Ring Gain Boost / Mini Boost
Get a burst of speed when obtaining Rings.
The broken Gadget.

You should run this on every track, all the time. It is overpowered.

Mix it with any gadget that gives rings depending on which track you're playing (Air Tricks bounty, Boost Panel bounty, Transform bounty, etc.), and you'll suddenly be faster than everyone.

No need to drift. No need to use any fancy tech. This gadget does everything for you.
The entire Ring Gain Package
Get Rings when doing things.
So, once you have your 3 slots filled with these two gadgets above, fill the rest with any of these depending on the track you're playing.

Lots of boost offroad? Runoff Bounty.

Lots of tricks? Air Trick Bounty + Air Trick Expert/Adept.

Lots of panels? Dash Panel Combo Bounty.

The more rings you get, the faster you get.

I pray for a nerf, because it makes any other gear, any other tech from drifts and movement uninteresting and ultimately under performing.


The Fun Zone

You're still here, so you most likely want to have fun, and actually race for your S-ranks.
Well, here is the entire list of what was once the best Gadgets you could use!

Gadget Name
Gadget Icon
Description
What it actually does
Starting Boost Bounty
Get Rings with a successful Starting Boost
Does what it says on the tin.

+30 rings when starting the race. Since you're always rushing for these precious 100 rings in Time Trial, this is extremely good if the first rings are out of the optimal path.

Time Trial Staple.
Counter Quick Charge
Fill 1 level of the gauge once when doing a Counter Drift in land form.
The goat. The legend. The one everyone wants to be.

This playstyle is quite hard to pick up, and if you're uncomfortable with drifts, I'd keep you away from this one.
But, if you know how to switch your drifts... You'll be fast. Really fast.

Time Trial Staple, if you know what you're doing.
Drift Charge Kit
A kit that makes the Drift Gauge fill faster, and slightly improves handling
This Gadget is the all-in-one drifting staple for good movement.

This combines Lv1, Lv2 and Lv3 Quick Charge Gadgets in a single, three-slot Gadget.

I've used this one for all my S-rank Time Trials, and is just extremely efficient.
Air Trick Expert (/ Adept) + Air Trick Bounty
Expert (/ Adept): Perform Air Tricks much faster (Adept: Faster).

Bounty: Get a small number of Rings for each rotation from an Air Trick.
My personal favourite combo. When a track has these long, unskippable jumps, spamming tricks and building your ring collection during downtime is insanely useful.

Starting Boost Bounty, Air Trick Adept and Air Trick Bounty could very well be your three go-to Gadgets if you like this playstyle.
Perfect Charge Boost
Release the Drift as soon as a Charge Level is filled to Boost even faster.
If, like me, you like drifting all the time, this is easier to pick up than it sounds.

Good speed boost with a perfectly timed release as the drift gauge is filled. Shame it's two slots imo, but I've seen a lot of people play this one.
Speed Machine Kit
A kit for getting more Rings and accelerating with them.
Speed Machines get stat adjustments.
Misleading. This kit is a patch of Ring Gain Boost + Ring Collection Range UP gadgets. It won't help you get more rings, but it will help you get them more easily (Thanks @Lily for figuring this out!)

The useful part is +20 to your speed (up to 100), and -16 to acceleration. Still, 3-slot for this is quite expensive for what it is, but hey, it could work.
Lv1 / Lv2 / Lv3 Quick Charge
Level 1 / 2 / 3 Drift Charge fills faster
Same thing than the kit above, but for specific gauges. Your pick, I prefer having all three boosted with the kit, with the handling bonus.
Just know it exists if you're short one slot, and don't care about the second level quick charge.

Or, combo Lv.1 + 3 kits, slap Counter Quick Charge, counter drift that second gauge to skip it, and
you'll be good to go.
Air Drift (/ Charge Boost) Mobility UP
Too long for this small box
If you're struggling to stay in line with these alt-vehicles, picking one up could be interesting.

The boat one is much more useful (because you'll most likely overdrift in air form anyway, why would you want more of that), but can be tricky to use since it only works DURING TRICKS.
Your call.
Dash Panel Bounty
Get Rings when using a Dash Panel or Dash Gate
Stronger than you think on some tracks.

Some tracks are littered with these Boost pads, so if you're running all track into them... why not?
I could see one of these becoming really good on some tracks.
[Easy] Universal Build for ALL S-Ranks
Here's the best plate you can use for any track. Good on all main tracks, extremely good on all CrossWorlds.
Just adapt it a little bit. If you don't trick much, slap something else that gains rings.

The bottom row always stays.
That build bores me to death and killed my interest in Time Trial. For example, the S-rank for White Cave can be obtained without drifting or using any item. The World Record line doesn't drift a single time.


Gadgets:

- Ring Gain Boost
- RIng Gain Mini Boost
- Anything else that gives rings.

Vehicle:

Don't care. Speed vehicle if you don't drift much, Boost vehicle if you do.

Character:

Doesn't matter. Just max out your speed, or boost if you're drifting. That's it.
[Fun] Universal Build for ALL S-Ranks
So, I know why you're here.
I know what you want. You want the best build ever.

I'll keep telling you to adapt your gadgets/vehicles for Time Trials during this entire guide, but... truth is, you can clear all S-Ranks with the exact same build.

Check out my compilation of all main tracks S-rank with this build here:
[CrossWorlds Tracks coming soon]


It's stupid, some S-Ranks are brutal (hi Metal Harbor), but 90% of the tracks are quite easy with this kit.
I did it, so you can certainly do it as well.

Gadgets
- Air Trick Expert (Technique Upgrade)
- Air Trick Bounty (Ring Gain)
- Drift Charge Kit (Standard)

I told you this was a stupid build, didn't I?

Vehicle
Front: Dark Reaper
Back: Speedster Lightning
Wheels: Dark Reaper

Yes, these are default parts. Did I tell you I was really stupid?

Character
Just pick a speed character. Blaze is the correct pick though.
S-Rank Requirements
Main Tracks

Track
S Rank (Sonic Speed)
S Rank (Super Sonic Speed)
E-Stadium
2:16.000
2:00.500
Rainbow Garden
2:26.000
2:00.500
Water Palace
2:41.000
2:19.000
Metal Harbor
2:37.000
2:18.000
Sand Road
2:27.000
2:07.500
Colorful Mall
2:15.000
2:00.000
Mystic Jungle
2:01.000
1:44.000
Apotos
2:19.000
2:00.000
Wonder Museum
2:42.000
2:23.000
Crystal Mine
2:26.000
2:05.000
Ocean View
2:26.000
2:02.000
Pumpkin Mansion
2:43.000
2:18.500
Urban Canyon
2:36.000
2:18.000
Market Street
2:11.000
1:51.500
Coral Town
2:02.000
1:47.000
Blizzard Valley
2:45.000
2:22.500
Radical Highway
3:01.000
2:42.000
Chao Park
2:22.500
2:06.000
Donpa Factory
2:21.000
2:02.500
Aqua Forest
2:37.500
2:16.500
Eggman Expo
2:49.000
2:27.000
Kronos Island
2:55.000
2:30.000
Northstar Islands
2:31.000
2:12.500
White Space
2:25.000
2:05.000

CrossWorlds

Track
S Rank (Sonic Speed)
S Rank (Super Sonic Speed)
Sky Road
2:11.000
1:54.000
Roulette Road
2:06.000
1:50.000
Kraken Bay
2:29.000
2:09.500
Golden Temple
2:31.000
2:12.000
Magma Planet
2:26.000
2:04.000
Hidden World
2:23.000
2:02.500
Steampunk City
2:25.000
2:04.000
Dragon Road
2:44.000
2:25.000
Holoska
2:28.000
2:10.000
Galactic Parade
2:34.500
2:17.000
Dinosaur Jungle
2:21.000
2:04.000
Sweet Mountain
2:04.500
1:49.000
White Cave
2:15.000
2:00.000
Cyber Space
2:35.000
2:16.000
Digital Circuit
2:25.500
2:07.000


Credits: Sonic Fandom Wiki[sonic.fandom.com]
[COMING SOON] Individual Tracks Breakdown
Final Worlds
I would've never thought I would write an entire guide for a Sonic game, yet here we are :v

Enjoy the game. Have fun. Experiment with builds and tracks.

Instead of fishing for award points, I'd rather have you rate the game on Steam directly.
Guide ratings are appreciated if it helped you, but please show your support to the devs instead.
18 Comments
Newtox 6 Oct @ 2:39pm 
bruh that sucks
Asahaka  [author] 6 Oct @ 2:35pm 
Guide will have to be revamped.
A broken combo was found, which makes almost every S-rank easy as hell.

All S-ranks for Crossworlds are recorded with this tech, will be uploaded and added to the guide shortly.

tl;dr: Use Ring Gain Boost with any other gadget that gives rings depending on what you're doing in this race (Tricks, boost pads, very rarely drifts).
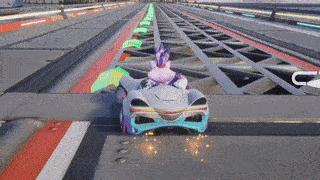
Any car (Extreme Gear recommended for 50% of the tracks), any char.

This combo killed my interest in Time Trials. You can get S-rank on White Cave without drifting a single time, this is boring.
I'll just upload everything and be done with the guide.
Newtox 5 Oct @ 10:50pm 
It doesn't include the reward when you do all challenges on the special page when the chao reaches the finish line :/
Asahaka  [author] 5 Oct @ 5:46pm 
There's a title to unlock once you have all S-ranks on Sonic and Super Sonic speeds.
Check out this guide, category Special Challenges (+Titles):

https://gtm.steamproxy.vip/sharedfiles/filedetails/?id=3573539227
Newtox 5 Oct @ 5:20pm 
Has anyone completed all on S yet and unlocked any special rewards?
Sayaka Miki 5 Oct @ 9:31am 
It did! Gave you a Take my Points award :)
Asahaka  [author] 5 Oct @ 9:30am 
Ayyy congrats, glad to hear it helped! :D
Sayaka Miki 5 Oct @ 9:16am 
Thank you Asahaka! used your Advice, took me three times, now S ranked!
Asahaka  [author] 5 Oct @ 8:38am 
Eggman Expo Track specific: I know how tempting it is to boost all the time, but that turn is vicious. Make sure to not overboost by counting how many you're doing.
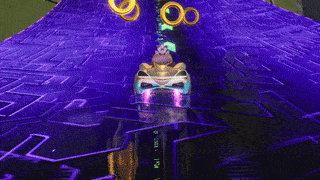
My strat for this specific turn is : One Lv.1 to jump over the crate, One Lv.2 because it's a straight line, take that turn you're struggling on by drifting but WITHOUT BOOSTING, release only when your car is straight to the track.
Don't hesitate to brake tap early if you see you're going to slide out (emphasis on *early*, don't wait until you're almost sliding out. Your objective is to hug the left wall as soon as it turns sharp, don't follow the guide line)

Good luck!
Asahaka  [author] 5 Oct @ 8:38am 
@Sayaka Miki Absolutely! Water physics is quite tricky, so these techs are track-dependant.

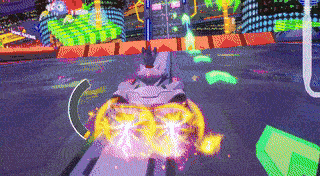
General advice: The best tech is to use boost trajectory correction to reorient yourself in the right path. With water physics, you can charge your jump sideways. Your landing will boost you the way your vehicle is facing.

Charge your jump, turn the way you want to go *very early*, release while almost touching the (left) wall, don't touch any input other than tricks, and your landing should (hopefully) propel you where you want to go.