Jump Space

Jump Space

58 ratings
Pathfinders guide to Jump Space
By Severaice and 1 collaborators
The Pathfinders guide to Jump Space. Showing you every Item, every ship, every.... well you get the Picture. This guide is meant to help people on how to get started, and help people who need information on the go, so don't have to minimise the game to search something up. As new things get added to the game this guide will be updated.
3
2
4
3
   
Award
Favorite
Favorited
Unfavorite
Update News
Pathfinder’s Guide • Last updated: {26 Sep} • Game build: v0.4.10.98 During EA we’ll keep this updated frequently-but keep in mind that numbers and behaviors may change a lot!


V.1.0 Basic Information and Layout
V.1.1 Added First Steps and Crew Roles
V.1.2 Added Enemy Ships and Artifacts. Added Girafz as an Editor

More Large Scale updates coming soon.
Any Comments, Suggestion or Concerns please shout out!
(and psssst, dont forget to rate if you found this useful ;D)

Alright that's all the stats for the different tiers done for all components, all artifacts added and enemy ships documented. Next up are enemy ground units and some build suggestions and ideas!

Coalition Soldier's Sev and Girafz - over and out

Recent Patch Updates!


Hotfix 5 - v0.4.10.98
Thank you all for reporting feedback and issues!
Bugfixes
  • Fixed severe performance degradation when Buddy bot shoots ship turrets

Hotfix 4 - v0.4.10.96
Thank you all for reporting feedback and issues!
Bugfixes
  • Fixed some memory leaks
  • Fixed an issue that prevented you from starting a solo session without Internet connection
  • Fixed so you don’t get stuck after watching cinematics
  • Fixed inspected items showing wrong info text
  • Fixed bug where multiple jammers would mess up objective icon and enabling/disabling of the teleporter button
  • Adjusted some logic to waves to fix multi loot spawn issue
  • Fixed enemies spawning outside of geometry in Sulfur
  • Fixed Schism, Remains and Deep Rock so jammer stations don't spawn inside of objects
  • Optimized performance in the prologue

Design
  • Adding support for broken components once players have found over a certain amount of components in a mission
  • Added subtitles to intro cinematic

First Steps (works for me - not “the” meta)
This isn’t the only way to start, just what’s been the most reliable and fun for me.


1) Do the Prologue.
Gives story context and quietly teaches the movement/ship basics you’ll use everywhere.

2) Unlock an Aux. Generator ASAP.
More energy fields early = smoother power routing and fewer outages through storms or radiation.
PATHFINDER TIP: After you unlock the Railgun or the Bio Fission Generator, manually slot a second copy in the Hangar.
By default only one slot is auto-filled, so your C-3 Catamaran’s second slot can remain empty unless you add it.

3) Prioritise early upgrades: start with Bio Fission Generator.
It’s the only Aux Gen that actually increases net power when upgrading (others mostly add protected power). That extra budget makes everything else easier.

4) Rush 3× MK3 components early.
You’ll soon get a mission that requires three MK3 components. I hit it fast with:
Bio Fission Generator MK3 – raises real power headroom
Null Wave Reactor MK3 – balanced output + protection
Mass Ejector Engine MK3 – the flare ability is game-changing; its cooldown roughly matches a single corvette’s missile cadence, letting you blank their volleys reliably

5) Then mix & match.
Once those are done, experiment freely. I like bumping a few other parts to MK2 just to preview MK3 and plan next steps without over-committing.

6) Region cadence: clear and move on.
I stay in a region only while there are map fragments or components left to discover. When it’s tapped out, I move on. It’s probably not the min-max path (some components drop in multiple areas), but it keeps difficulty ramping at a comfortable pace while you learn.

7) Keep your shields topped up (Catamaran C-3)
Recharging ship shields is done outside the hull after crafting a Ship Shield Unit at the fabricator.

How to:
• Craft: Ship Shield Unit (Uses: 4; Fabrication Cost: 30 Materia)
• EVA to the exterior of the C-3 Catamaran
• Locate the four shield recharge points on the hull
• Press Interact at each point to apply a charge and refill that shield node

PATHFINDER TIP: If it’s not in use, stash the Ship Shield Unit in shared storage so crew can see you’ve got spares and don’t waste materials crafting more. Recharging takes a moment-do it between waves or right before a jump. That said, don’t be afraid to top up mid-fight if it keeps you alive; the survivability boost is worth it.

Before: shield node depleted.

After: shield node recharged.


Controls


Designation: Character Movement
Normal Gravity/Zero Gravity
W/A/S/D
Basic Movement
E/Q
Rotate Left/Rotate Right
Space
Jump / Strafe Up
Left Control
Crouch / Strafe Down
Left Shift
Sprint / Boost
F
Interact / Pick Up / Grappling Hook / Exit
G
Drop
Left Alt
Free Look
RMB
Zoom In
C
Flashlight

Combat
RMB
Fire Secondary
LMB
Fire Primary
R
Reload
H
Draw / Holster
V
Melee

Social
T
Text Chat
X
Emote
MMB
Callout - Ping
B
Ready Key

Designation: Ship Controls
Pilot Controls
W/A/S/D
Basic Movement
E/Q
Rotate Left/Rotate Right
Space
Up
Left Control
Down
Left Shift
Boost / Evade
X
Toggle cruise control
C
Dock / Hyperjump
Left Alt
Free Look

Pilot Combat Controls
LMB
Fire Primary
RMB
Fire Secondary
Z
Ship Ability
MMB
Callout - Ping

Combat Station Controls
LMB
Fire Primary
RMB
Zoom In
1
Firegroup 1
2
Firegroup 2
MMB
Callout - Ping

Ships


Designation: C-3 Catamaran


Built for versatility, the Catamaran C3 light corvette has long been a reliable favourite among small-scale merchants, smugglers, and bounty hunters alike. The ship balances speed and manoeuvrability with both defensive and offensive capabilities, along with a generously sized cargo hold.

This is the first ship you unlock as part of the Pro-logue of the game.

PATHFINDER TIP: I think this ship works best for crews of 3 or 4 players

Stats:
MK
Hit Points
Shield Units
Materia Max
Speed
Manouverability
0
4
4
800
70/100
60/100
1
5
4
1000
70/100
60/100

Component Slots:
Pilot cannons
Special weapons
Artifact slots
1
2
5


Designation: DT-4 Dart


Engineered for speed and agility, the Dart DT-4 is a heavy fighter frame for combat pilots and small crews. It's compact frame and forward mounted weapons make it ideal for dogfights and quick strafing runs.

This is the second ship you unlock by finding it's Blackbox during any mission in the Tyvian Expanse region.

PATHFINDER TIP: I think this ship works best for solo or 2 player crews

Stats:
MK
Hit Points
Shield Units
Materia Max
Speed
Manouverability
0
4
2
600
80/100
80/100

Component Slots:
Pilot cannons
Special weapons
Artifact slots
2
1
5

Crew Roles & Weapon Control (1-4 Players)
Works for me - not “the” meta.


Who controls what
Pilot: ALWAYS controls Pilot Cannons.
Combat Station: controls Special Weapons + Multi-Turrets (turrets are C-3 only).
Buddy (AI): If your crew size is 1 or 2, Buddy takes the Combat Station automatically.
PATHFINDER TIP: Under 3 players, assume Buddy handles specials/turrets. Favour forgiving turrets (Assault/Flak) and long-cooldown specials (e.g., Railgun) so timing isn’t critical.


Solo (1)
You control: Ship, Pilot Cannons, systems, nav.
Buddy controls: Specials + Turrets (C-3).
Frame pick: DT-4 for speed or C-3 for safety.
  • Keep firing windows short: burst with Pilot Cannons, then reposition.
  • Let Buddy provide background DPS while you handle flares, shields, objectives.
WIP - screenshot coming soon


Duo (2)
Roles: Pilot/Guns • Engineer/Scanner/Boarder
You control: Pilot Cannons (Pilot) • Systems, EVA shield top-ups, fabricator (Engineer).
Buddy controls: Specials + Turrets (C-3).
  • Pilot calls targets; Engineer keeps ammo/shield kits flowing and boards opportunistically.
  • There’s no in-game voice yet-use text chat + pings (MMB) to call missiles, low Materia, or repair needs.
WIP - screenshot coming soon


Trio (3)
Roles: Pilot • Gunner (Combat Station) • Engineer
You control: Pilot Cannons (Pilot) • Specials + Turrets (Gunner) • Power/repairs/shields (Engineer).
  • Gunner times specials (Railgun/Targeting) with Pilot’s approach to delete priority targets-don’t fire early and waste ammo/cooldowns.
  • Engineer tops hull shield points, restocks ammo, and handles fires/repairs.
WIP - screenshot coming soon


Full Crew (4)
Roles: Pilot • Gunner (Combat Station) • Engineer • Support/Scanner/Boarder
  • Support runs sector scans/uplinks, boards to disable enemies, secures/loots, and helps with fires/repairs as needed.
  • Pilot focuses on vectoring and flare timing; Gunner owns all DPS timing from the Combat Station.
  • Engineer keeps hull shield points topped, restocks ammo, and stabilises the power grid.
WIP - screenshot coming soon


Station Duties (quick card)
Pilot: Fly, Pilot Cannons, flare timing, target calls.
Gunner (≥3 players): Specials + Turrets, swap firegroups, finish targets.
Engineer: Power grid, protected load, fabricate ammo/shields, EVA to recharge hull shield points (C-3 has four).
Support/Scanner/Boarder (4 players or Duo opportunistic): Sector scan, uplinks, boarding actions (initiate self-destructs), secure/loot, assist on repairs.
Components: Sensors


Sector Scanner
Max tier: Mk1
Power plug shape:
Description: Standard issue light weight sensor unit. Good for detecting near-space objects.
How to unlock: You unlock this by finishing the Prologue

Supply Uplink Unit
Max tier: Mk1
Power plug shape:
Description: A Sensor able to call in supply beacons from the sensor view when highlighting your ship.
How to unlock: You can first find this in the Tyvian Expanse Region

Vector Targeting Module
Max tier: Mk1
Power plug shape:
Description: A tactical combat sensor able to mark enemy ships from the sensor view. Marked target takes +20% damage
How to unlock: You can first find this in the Krynn region

Components: Engines


Drift Phase Engine
Max tier: Mk3
Stats:
Mk + Upgrade Cost
Ship max speed
Ship boost charges
Ship boost recharge time
Ship turn speed
1
100%
2
7.0
100%
2 + 4 Materia Ingots
110%
2
6.0
105%
3 + 16 Materia Ingots
120%
2
5.0
110%
Power plug shape:
Description: A balanced multi-purpose engine with large boost capacity
How to unlock: You unlock this by finishing the Prologue

Nitro Pulse Engine
Max tier: Mk3
Stats:
Mk + Upgrade Cost
Ship max speed
Ship boost charges
Ship boost recharge time
Ship turn speed
1
110%
3
9.0
75%
2 + 4 Materia Ingots
110%
4
8.5
80%
3 + 16 Materia Ingots
110%
5
8.0
85%
Power plug shape:
Description: A powerful engine featuring very high boost capacity and speed, but low manoeuvrability
How to unlock: You can first find this in the Icarion Reaches region

Microplasma Engine
Max tier: Mk3
Stats:
Mk + Upgrade Cost
Ship max speed
Ship boost charges
Ship boost recharge time
Ship turn speed
1
80%
1
8.0
90%
2 + 4 Materia Ingots
85%
1
7.5
95%
3 + 16 Materia Ingots
90%
1
7.0
100%
Power plug shape:
Description: Compact engine with a very small power footprint, but low speed and manoeuvrability
How to unlock: You can first find this in the Krynn region

Mass Ejector Engine
Max tier: Mk3
Stats:
Mk + Upgrade Cost
Ship max speed
Ship boost charges
Ship boost recharge time
Ship turn speed
1
90%
2
8.0
70%
2 + 4 Materia Ingots
100%
2
7.5
80%
3 + 16 Materia Ingots
110%
2
7.0
90%
Power plug shape:
Description: A defensive engine able to eject buffered fuel pellets as flares for missile evasion
How to unlock: You can first find this in the Tyvian Expanse region

Components: Pilot Cannons


Fragment Cannon
Max tier: Mk3
Stats:
Mk + Upgrade Cost
Damage per second
Ammo consumption per second
Base damage
Fire rate
Mag size
Reload time
Power plug size
1
36
3.2
11
4.0
6
0.4
3
2 + 5 Materia Ingots
53
3.8
13
5.0
6
0.4
4
3 + 20 Materia Ingots
71
4.3
16
6.0
6
0.4
4
Power plug shape:
Description: Well rounded cannon that balances power consumption with ammunition usage and damage output
How to unlock: You unlock this by finishing the Prologue

Rapid Pulse Cannon
Max tier: Mk3
Stats:
Mk + Upgrade Cost
Damage per second
Ammo consumption per second
Base damage
Fire rate
Mag size
Reload time
Power plug size
1
37
3.8
4
8.0
60
1.5
6
2 + 6 Materia Ingots
60
3.9
7
8.0
60
1.1
6
3 + 24 Materia Ingots
87
3.9
10
8.0
60
1.1
6
Power plug shape:
Description: High rate of fire and high damage output at the cost of high burn rate of ammunition
How to unlock: You can first find this in the Pillars of Quara region

Disruptor Laser
Max tier: Mk3
Stats:
Mk + Upgrade Cost
Damage per second
Ammo consumption per second
Base damage
Fire rate
Mag size
Reload time
Power plug size
1
?
?
?
?
?
?
?
2 + 6 Materia Ingots
25
0.0
0.3
100.0
60
1.0
3
3 + 24 Materia Ingots
31
0.0
0.4
100.0
80
1.0
2
Power plug shape:
Description: Designed to cut through steel hulls of enemy ships. This weapon requires no ammunition, but relies on steady power flow to function
How to unlock: You can first find this in the Pillars of Quara region

Bolt Accellerator
Max tier: Mk3
Stats:
Mk + Upgrade Cost
Damage per second
Ammo consumption per second
Base damage
Fire rate
Mag size
Reload time
Power plug size
1
32
0.8
39
-
1
1.2
5
2 + 6 Materia Ingots
44
0.9
49
-
1
1.1
5
3 + 24 Materia Ingots
61
1.0
62
-
1
1.0
5
Power plug shape:
Description: Low fire rate but very impactful projectiles makes this weapon suitable when conserving ammunition is a priority
How to unlock: You can first find this in the Icarion Reaches region

Components: Multi Turret Systems


Assault Turrets
Max tier: Mk3
Stats:
Mk + Upgrade Cost
Damage per second
Ammo consumption per second
Base damage
Fire rate
Mag size
Reload time
Power plug size
1
52
7.5
7
25.0
8
0.8
4
2 + 5 Materia Ingots
82
8.4
9
28.0
8
0.7
4
3 + 20 Materia Ingots
108
9.8
10
36.0
8
0.6
4
Power plug shape:
Description: A well rounded turret system with good balance between damage, power and ammo consumption
How to unlock: You unlock this by finishing the Prologue

Flak Launcher Turrets
Max tier: Mk3
Stats:
Mk + Upgrade Cost
Damage per second
Ammo consumption per second
Base damage
Fire rate
Mag size
Reload time
Power plug size
1
58
5.3
16
4.8
20
1.5
6
2 + 6 Materia Ingots
75
5.4
21
4.8
22
1.5
6
3 + 24 Materia Ingots
102
5.5
28
4.8
24
1.5
6
Power plug shape:
Description: Armed with a small explosive charge that explode at distance, these projectiles are efficient against large swarms of enemies
How to unlock: You can first find this in the Pillars of Quara region

Gattling Turrets
Max tier: Mk3
Stats:
Mk + Upgrade Cost
Damage per second
Ammo consumption per second
Base damage
Fire rate
Mag size
Reload time
Power plug size
1
65
20.7
1.1
90.0
100
3.0
7
2 + 6 Materia Ingots
93
20.6
1.4
90.0
110
2.5
7
3 + 24 Materia Ingots
130
20.4
1.8
90.0
120
2.0
7
Power plug shape:
Description: Very powerful turret system with very high fire rate and damage output at the cost of high ammunition cost
How to unlock: You can first find this in the Tyvian Expanse region

Mining Lasers
Max tier: Mk3
Stats:
Mk + Upgrade Cost
Damage per second
Ammo consumption per second
Base damage
Fire rate
Mag size
Reload time
Power plug size
1
25
0.0
0.8
100.0
10
2.3
3
2 + 6 Materia Ingots
34
0.0
1.0
100.0
10
1.9
3
3 + 24 Materia Ingots
47
0.0
1.2
100.0
10
1.5
2
Power plug shape: reduced to on MK3
Description: Re-designed to also cut through ship hulls these weapons rely on using energy rather than ammunition. Low damage output, but useful when low on materia
How to unlock: You can first find this in the Icarion Reaches region

Components: Special Weapons


Lance Railgun
Max tier: Mk3
Stats:
Mk + Upgrade Cost
Damage per second
Ammo consumption per second
Base damage
Fire rate
Mag size
Reload time
Power plug size
1
19
5.0
190
-
1
10.0
7
2 + 6 Materia Ingots
24
5.0
220
-
1
9.0
7
3 + 24 Materia Ingots
30
5.0
250
-
1
8.0
7
Power plug shape:
Description: A powerful turret capable of accelerating a small projective to near the speed of light. Very high damage, but long reload time
How to unlock: You can first find this in the Atira region

Missile Launcher
Max tier: Mk3
Stats:
Mk + Upgrade Cost
Damage per second
Ammo consumption per second
Base damage
Fire rate
Mag size
Reload time
Power plug size
1
14
7.4
30
5.0
6
11.0
9
2 + 6 Materia Ingots
21
8.0
40
5.0
6
10.0
9
3 + 24 Materia Ingots
28
8.8
50
5.0
6
9.0
9
Power plug shape:
Description: Fires an array of missiles, each capable of tracking their own target. Suitable for swarms of lighter enemies
How to unlock: You can first find this in the Krynn region

Burst Shield
Max tier: Mk3
Stats:
Mk + Upgrade Cost
Active time
Recharge time
Damage reduction
1
3.0
16.0
-80%
2 + 6 Materia Ingots
3.5
14.0
-80%
3 + 24 Materia Ingots
4.5
12.0
-80%
Power plug shape:
Description: Temporarily projects a shield like energy field around the ship absorbing energy from incoming projectiles
How to unlock: You can first find this in the Icarion Reaches region

Targeting module
Max tier: Mk1
Stats:
Target damage increase
Active time
+20%
60.0
Power plug shape:
Description: Capable of tracking one target at a time, this module grants increased precision and damage for all weapons aimed and shot at it's target
How to unlock: You can first find this in the Pillars of Quara region

Components: Reactors


Split Reactor
Max tier: Mk3
Stats:
Mk + Upgrade Cost
Power generation
Protected power
Unprotected power
Power grid layout
1
22
0
22
2 + 5 Materia Ingots
22
4
18
3 + 20 Materia Ingots
22
8
14
Description: Optimised for pure and raw power output, this reactor is very vulnerable to ion storms and radiation
How to unlock: You unlock this by finishing the Prologue

Solid State Reactor
Max tier: Mk3
Stats:
Mk + Upgrade Cost
Power generation
Protected power
Unprotected power
Power grid layout
1
16
8
8
2 + 5 Materia Ingots
16
12
4
3 + 20 Materia Ingots
16
16
0
Description: Designed to be very robust and with its large amount of protected power will keep it supplying power during the worst conditions
How to unlock: You can first find this in the Atira region

Materia Scatter Reactor
Max tier: Mk3
Stats:
Mk + Upgrade Cost
Power generation
Protected power
Unprotected power
Power grid layout
1
24
4
20
2 + 5 Materia Ingots
24
8
16
3 + 20 Materia Ingots
24
14
10
Description: By isolating its power units, the reactor achieves high output at the cost of a fragmented supply grid
How to unlock: You can first find this in the Pillars of Quara region

Null Wave Reactor
Max tier: Mk3
Stats:
Mk + Upgrade Cost
Power generation
Protected power
Unprotected power
Power grid layout
1
20
6
14
2 + 5 Materia Ingots
20
10
10
?
3 + 20 Materia Ingots
20
14
6
Description: Balanced power and protection, this reactor delivers strong output while providing some shielding during harsh space weather
How to unlock: You can first find this in the Tyvian Expanse region

Components: Aux. Generators


Bio Fission Generator
Max tier: Mk3
Stats:
Mk + Upgrade Cost
Power generation
Protected power
Unprotected power
Power grid layout
1
6
0
6
2 + 5 Materia Ingots
8
2
6
3 + 20 Materia Ingots
10
4
6
Description: Providing solid power for components with long and slim shapes with good upgrade opportunities
How to unlock: You can first find this in the Atira region

Materia Shift Generator
Max tier: Mk3
Stats:
Mk + Upgrade Cost
Power generation
Protected power
Unprotected power
Power grid layout
1
8
0
8
2 + 5 Materia Ingots
8
4
4
3 + 20 Materia Ingots
8
6
2
Description: This auxiliary power generator is a good choice for evenly split and mostly protected power generation once fully upgraded to MK3
How to unlock: You can first find this in the Krynn region

Null Tension Generator
Max tier: Mk3
Stats:
Mk + Upgrade Cost
Power generation
Protected power
Unprotected power
Power grid layout
1
8
0
8
2 + 5 Materia Ingots
8
2
6
3 + 20 Materia Ingots
8
4
4
Description: This auxiliary generator provides very solid power output for larger condensed component shapes
How to unlock: You can first find this in the Pillars of Quara region

Artifacts


Below is a list of all Artifacts currently found in game in alphabetical order
PATHFINDER TIP: Our personal favorites are the Legion Blueprints, the Ship-Fed Fury and the Mass Proxy artifact, but in the end they all give some form of benefit, so it's better to slot artifacts if you've got empty slots than leaving them lying around or recycling them.
Anti-Ship Arsenal
  • Class: Common
  • Max Level: 5
  • Effect: On-foot weapons deal 22/26/30/34/38 times more damage to enemy ships

Boarding Blitz
  • Class: Common
  • Max Level: 5
  • Effect: When a ship is boarded and destroyed by self-destruct, all players deal +20/30/40/50/60% damage for 40/50/60/70/80 seconds

Component Stabilizer
  • Class: Common
  • Max Level: 5
  • Effect: Components have a 35/45/55/65/75% chance to auto-repair when they become critical

Desperate Barrage
  • Class: Common
  • Max Level: 5
  • Effect: When the ship's shields go down, the ship deals +7/10/13/16/19 damage for 40/50/60/70/80 seconds

Force Fields
  • Class: Common
  • Max Level: 1
  • Effect: Gain 1000 ship shields, this bonus is increased for each jump by 1000

Forceful Recycling
  • Class: Common
  • Max Level: 5
  • Effect: Heal 30/40/50/60/70 player health on melee kill

Friendly Fire
  • Class: Common
  • Max Level: 5
  • Effect: Shooting other players heals them for 10/15/20/25/30hp

Legion Blueprints
  • Class: Legendary
  • Max Level: 5
  • Effect: Damage dealt to an undamaged enemy is increased by 70/110/150/190/230%

Mass Proxy
  • Class: Common
  • Max Level: 5
  • Effect: Up to +60/80/100/120/140% Ship Fire Rate, scaling with Materia Tank fill percentage.

Numbed Carnage
  • Class: Common
  • Max Level: 5
  • Effect: After destroying an enemy ship. your ship takes 20/25/30/35/40% less damage for 20/24/28/32/36 seconds

Pineapple Power
  • Class: Common
  • Max Level: 5
  • Effect: When someone is healed by eating a pizza slice, gain +1.5/2.0/2.5/3.0/3.5 bonus player damage

Pizza Brawler
  • Class: Common
  • Max Level: 5
  • Effect: Gain 150/200/250/300/350% melee damage while holding a pizza

Reassembler
  • Class: Common
  • Max Level: 1
  • Effect: On install, reroll all installed artifacts

Reflective Wrath
  • Class: Common
  • Max Level: 5
  • Effect: When the ship's shields absorb a hit, the ship deals 30/40/50/60/70% damage for 10/13/16/19/21 seconds

Resonant Amplifier
  • Class: Common
  • Max Level: 2
  • Effect: Adjacent artifacts have +1/2 level

Scrap Mechanic
  • Class: Common
  • Max Level: 5
  • Effect: Consumables last 100/110/120/130/140% longer

Shield Recycler
  • Class: Common
  • Max Level: 3
  • Effect: When the ship's shields absorb a hit, heal the ship's core by 10/15/20/25/30hp

Ship-Fed Fury
  • Class: Common
  • Max Level: 5
  • Effect: Up to +90/120/150/180/210% more on-foot damage, scaling with Materia Tank fill percentage

Squad Tactics
  • Class: Common
  • Max Level: 5
  • Effect: When within 10 meters of another player, heal for 3/4/5/6/7 HP every 4.0/3.8/3.6/3.4/3.2 seconds

Telmarian Stabilizer
  • Class: Common
  • Max Level: 1
  • Effect: Uninstalled artifacts are no longer destroyed during jumps

On-Foot Combat


Weapons

PATHFINDER TIP: All weapons have their pro's and con's. I personally like using the SR.99 Javelin as it let's me engage from a distance. But they all have their moment to shine!
Rocket Launcher
  • Class: Heavy Weapon
  • Ammo: 3
  • Materia Value: 5
  • Salvage Value: 8
  • Fabrication Cost: 40

Railgun
  • Class: Heavy Weapon
  • Ammo: 4
  • Materia Value: 5
  • Salvage Value: 8

CX-305 Sideclip
  • Class: Submachine Gun
  • Ammo: 24/280 (MK0) 28/300 (MK2)
  • Materia Value: 5
  • Salvage Value: 8
  • Fabrication Cost: 20

Ironbelt LMG
  • Class: Light Machinegun
  • Ammo: 40/230 (MK0) 55/210 (MK2)
  • Materia Value: 5
  • Salvage Value: 6

SR.99 Javelin
  • Class: Marksman Rifle
  • Ammo: 6/30 (MK2) - 8/30 (MK3)
  • Materia Value: 5
  • Salvage Value: 6 - 8 - 10

MAW-23
  • Class: Shotgun
  • Ammo: 7/23 (MK2)
  • Materia Value: 5
  • Salvage Value: 8

VSR Halberd
  • Class: Assault Rifle
  • Ammo: 28/60 (MK2)
  • Materia Value: 5
  • Salvage Value: 8

On-Foot Combat Item's

On-foot ammo box
  • Uses: 4
  • Materia Value: 5
  • Salvage Value: 6
  • Fabrication Cost: 10
  • Description: Once deployed it can be used to reload the ammo of any weapon, excluding heavy weapons.

Deployable Shield
  • Materia Value: 5
  • Salvage Value: 6
  • Description: Grants a temporary shielded area of effect around the position it is placed in. Once placed it cannot be picked up again

Damage Amplifier
  • Materia Value: 5
  • Salvage Value: 6
  • Description: Grants a temporary damage boost area of effect around the position it is placed in. Once placed it cannot be picked up again

Med EM-8
  • Materia Value: 5
  • Salvage Value: 4
  • Description: Grants a temporary healing area of effect around the position it is placed in. Once placed it cannot be picked up again

Med Stim
  • Uses: 2
  • Materia Value: 5
  • Fabrication Cost: 10
  • Description: Used to recover health


Ship Items


Ship Shield Unit
  • Type: Utility Item
  • Uses: 4
  • Materia Value: 5
  • Fabrication Cost: 30

Small Ship Repair Kit
  • Type: Utility Item
  • Uses: 1
  • Core health restored: 1000
  • Materia Value: 10
  • Fabrication Cost: 30

Small Ship Repair Kit (3-pack)
  • Type: Utility Item
  • Uses: 3
  • Core health restored: 1000
  • Materia Value: 10
  • Salvage Value: 10
  • Fabrication Cost: 80

Fire extinguisher
  • Type: Utility Item
  • Uses: Unlimited
  • Materia Value: 5
  • Fabrication Cost: 5

Ship ammo (single)
  • Type: Utility Item
  • Uses: 1
  • Materia Value: 5
  • Fabrication Cost: 7

Ship ammo (4-pack)
  • Type: Utility Item
  • Uses: 4
  • Materia Value: 5
  • Fabrication Cost: 20

Loot


Disassembly Item's
Materia Container
  • Materia Value: 10-30
Scrap
  • Materia Value: 15
  • Salvage Value: 10
Nisse
  • Materia Value: 30
  • Note: You can find this in the area before making the first jump. There is a crashed ship in one of the nearby asteroids that has Nisse floating nearby
Valuable Loot Item's
Map Chart Fragment Pod
Component
  • Materia Value: 1 Materia Ingot if returned
Credit Case
  • Materia Value: 15
  • Salvage Value: 100
Objective Item's
Salvage
Cargo

Resources


Currently there are essentially 4 resources in Jump Space. See a breakdown below
Icon
Name
Purpose
Materia
Used during missions to fabricate useful items or components
Experience
Gained by completing missions to level up your character and unlock new titles
Credits
As of the current state of early access these have no use, the intention is for these to be used in trading with vendors at the Hangar
Materia Ingots
These are gained by completing missions or returning components. Once secured these can be used to unlock permanent upgrades for your ships components in the Hangar

Enemy Ships
WIP section. Pictures will be added/improved when photomode is released.
Elite Variants
Any enemy can spawn as an elite. We think that an elite means that it is harder to dodge their shots. Possibly that means the projectiles are faster or they are simply more accurate. They may also be more resilient.
Fighter
The most common ship often spawning in swarms. Performs strafing runs. Will fly straight at you and fire a quick burst of shots then continues about 1.2km away before turning around and performing another run.
Priority Low: The deal very little damage and have low health, can be taken out if it is an easy target.
Weak Fighter
Only appears on easier difficulties. Same as a fighter but worse in every way.
Priority Low: You could probably forget about these and be fine.
Heavy Fighter
Not much different than the normal fighter. Has the same attack pattern.
Priority Low: Don't go out of your way to get these instead of a normal fighter.
Gunship
Also a common ship. It flies in close radius to the player ship firing a longer burst of shots.
Priority Medium: They can do some serious damage if you don't dodge any of the shots, but as long as it isn't right in front or behind you it should be easy to dodge.
Heavy Gunship
An upgraded gunship. Has the same attack pattern but with even more damage.
Priority High: They hit hard but are quick to take out. Go for these when possible.
Missile Gunship
A gunship that fires missiles instead of lasers. They fly in wide circles around your ship.
Priority Low/High: If you can dodge missiles or you have the mass ejection engine these are lower threat than fighters. If you cannot dodge than take these out quickly as each salvo does a lot of damage.
Sniper
A rare ship. It fires a single high damaging shot from far range. Watch for the enemy aiming indicator to spot where they are shooting from and when to dodge. They will boost away very quickly up to 2km when approached.
Priority Very High: Even if you know how to dodge these the constant need to be evasive makes these extremely dangerous.
Mine Layer
A very rare ship. They deploy 3 mines at a time with a low fire rate and circles your ship in a very wide circle.
Priority Top: While not directly dangerous, the mines they produce can change how a fight is going quickly. They will almost always get one volley of mines off but do not let them get more than one.
Mine
Can be found in groups of 3 when entering a new sector or produced by the mine layer ship. When within about 1km of them they will fly towards your ship and attach. If left alone they will inject enemies into your ship and after long enough they explode.
Priority Top: Boarded enemies can kill the pilot which can ruin a fight. Either shoot these from long range, out run them, or put terrain between you and them and they will crash into it.
Corvette
The largest and highest damaging enemy ship. It will fly in wide circles around you or flee if you chase it. It has a railgun similar to a sniper, burst fire like a gunship, and missiles like the missile gunship.
Priority Bottom: Strange enough this is the lowest priority enemy. Fly away from it and destroy all the other enemies before engaging this. They should almost exclusively be dealt with by boarding unless you have a rocket launcher. They have too much health to use your ship cannons for, it is a waste of ammo unless you have no other option.
Funny Glitch Stories


This section is for funny glitches that have happened in game, if you have a story and want to share it here, just message me or put it in the comments section below :D

Random Fact: Did you know that the reason for bugs being called that way, is because the very first bug ever to occur was due to an actual bug getting stuck/squished in a touring machine.
  • I was playing with some randoms when one of them tried to launch themselves out of the Eject tube whilst we were parking. This made them fly all over the place only to end up back inside the ship.

24 Comments
Severaice  [author] 28 Sep @ 3:03am 
@Jinsoku Shirotsuki hmm I think this boils back down to some components having overlapping areas, I'll shift the first found in for both of them to Tyvian Expanse
Severaice  [author] 28 Sep @ 3:02am 
@iLXeNk @Brain Damage inc is correct, it's the same for the targeting module. Have added some quick notes to the components description for clarification
Jinsoku Shirotsuki 27 Sep @ 2:43pm 
pretty sure that components are random as i got gatling and null wave from Tyvian Expanse
Brain Damage inc 26 Sep @ 10:30pm 
U can go to your scanner and call a resupply on your ship icon. It will call a lil unmarked satellite to loot.
iLXeNk 26 Sep @ 10:07pm 
I got the Supply Uplink Unit Sensor but I honestly don't understand what it's supposed to do. I don't see any extra options when using the Sensor. What am I missing?
Girafz  [author] 26 Sep @ 12:51pm 
@Pie while using the sensor station you click on an enemy ship and it marks it. I believe the mark only lasts until it goes off cool-down.
Pie 26 Sep @ 10:26am 
Question, how are targets selected using the targeting module? Is it like passive or is there a manual button?
MercenaryGrok 25 Sep @ 11:28am 
You can get outside of bounds within the hangar, Travel to the gunrange and scamper up that far left wall when facing the two rings. Once you get the the ledge, just start booking it further left. eventually you will fall onto solid ground.

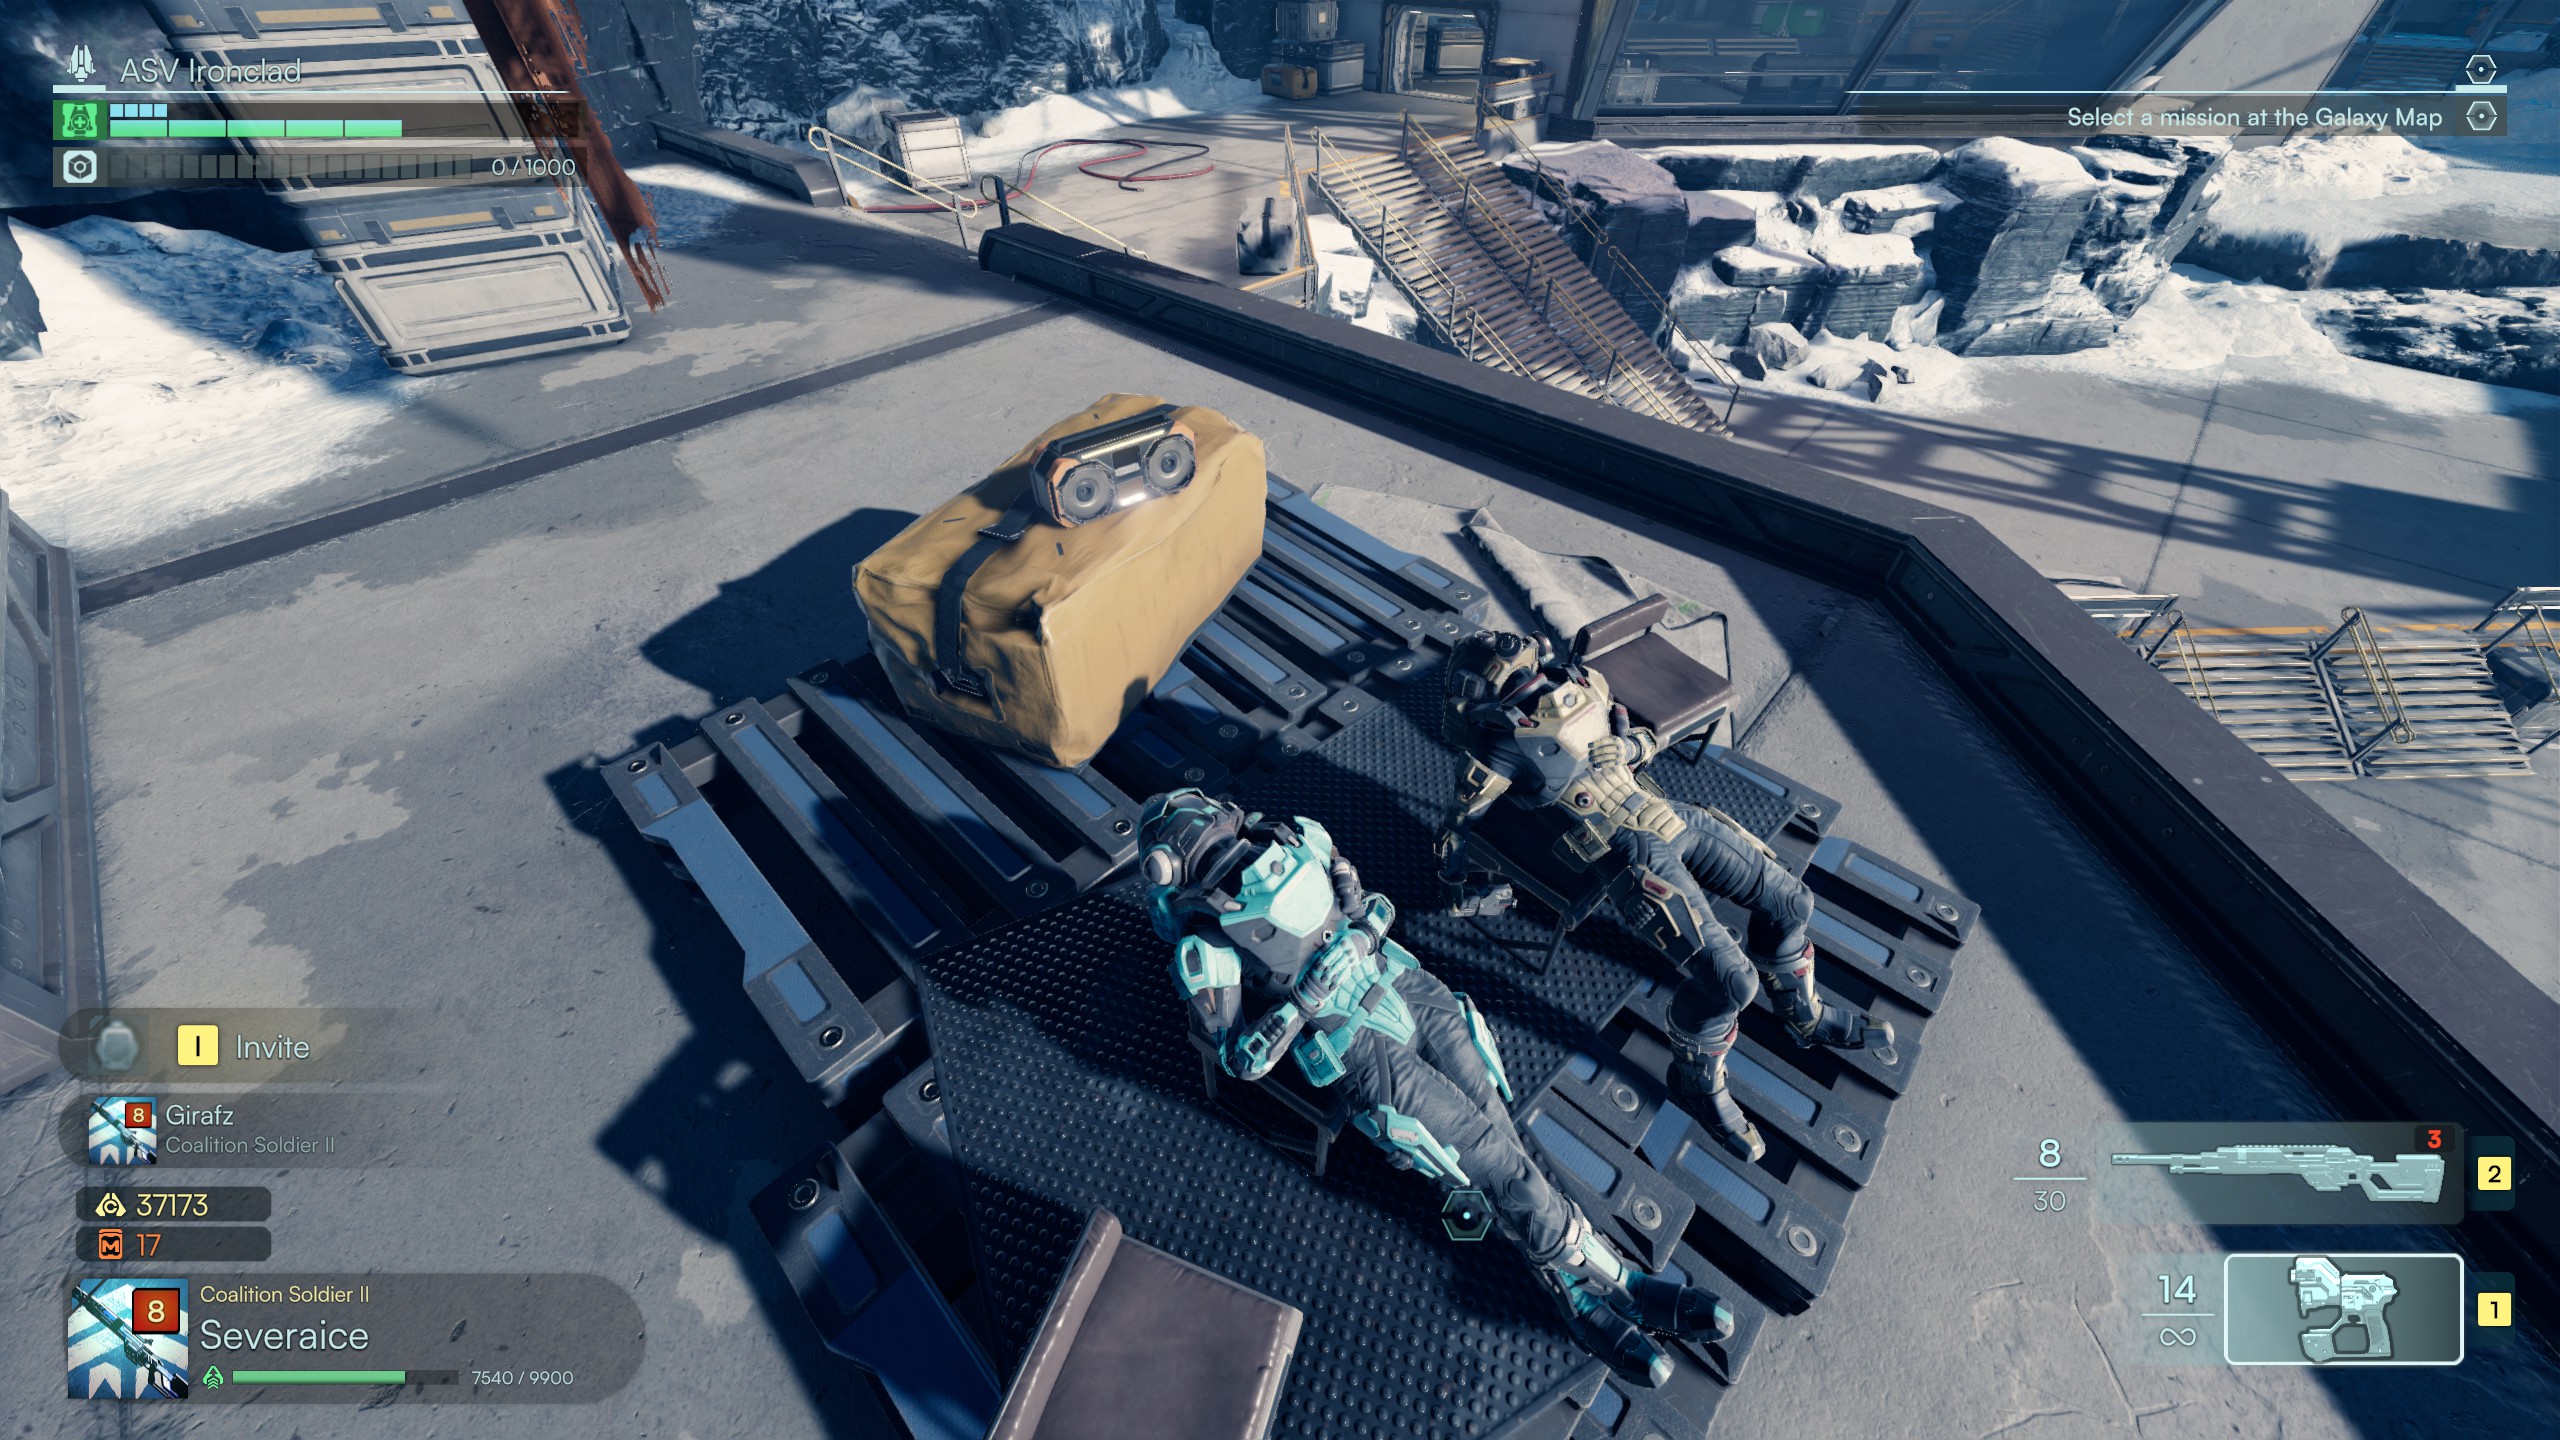
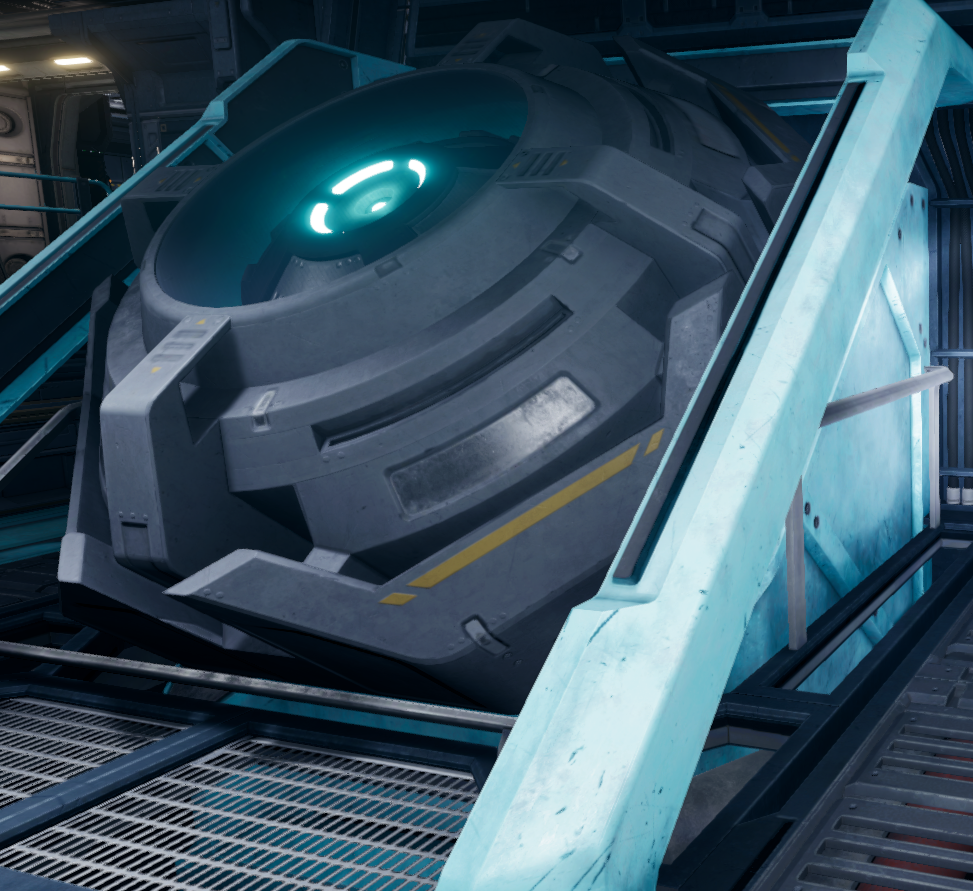
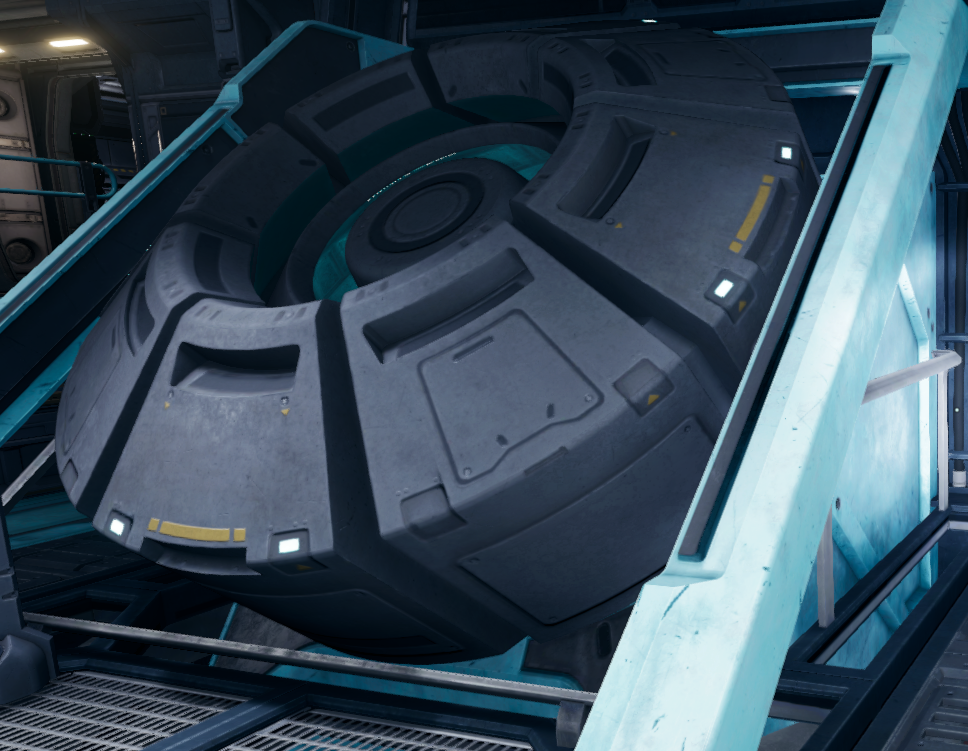
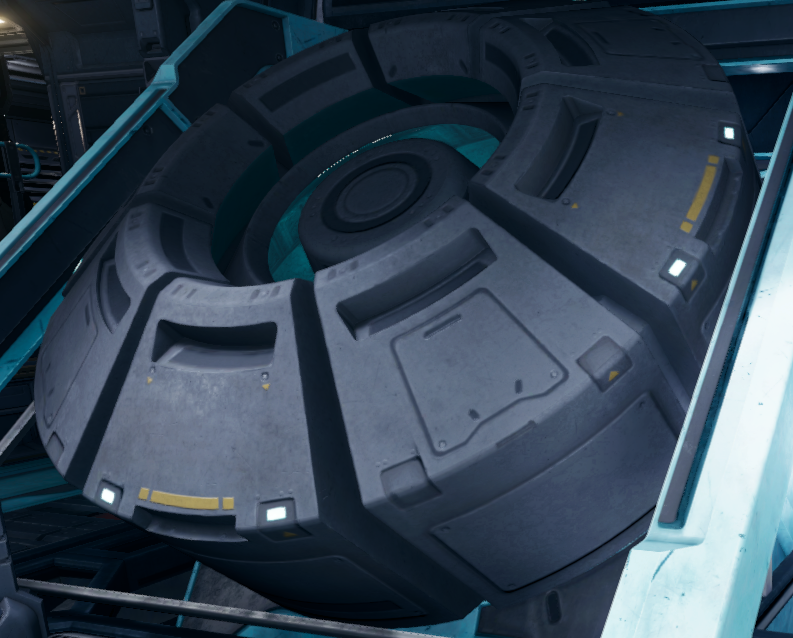
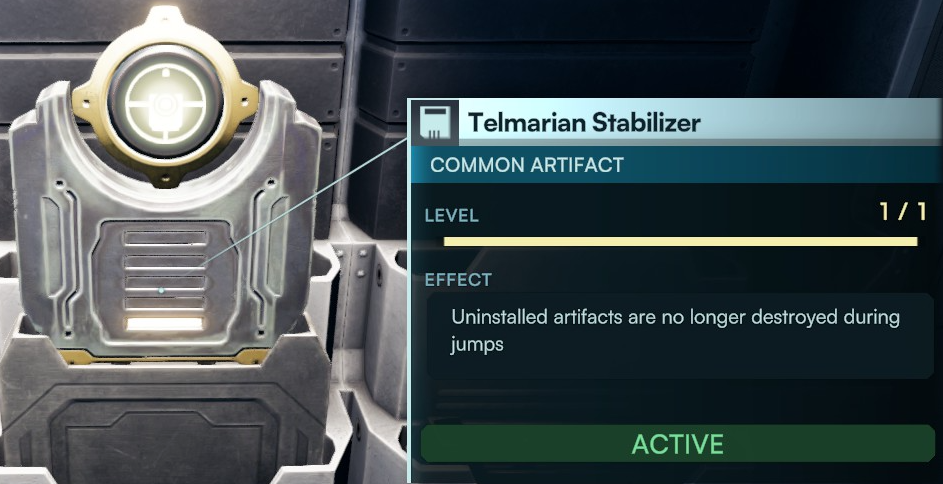
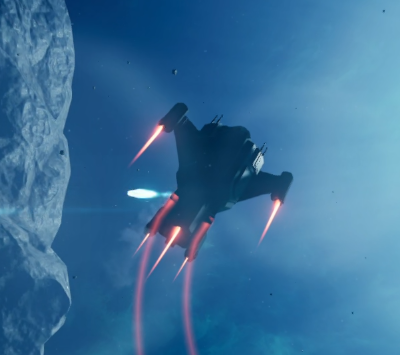
Congrats you are outside of bounds with no killboxes.
Severaice  [author] 24 Sep @ 3:12pm 
@lionoob thanks a lot! Glad it helped :D

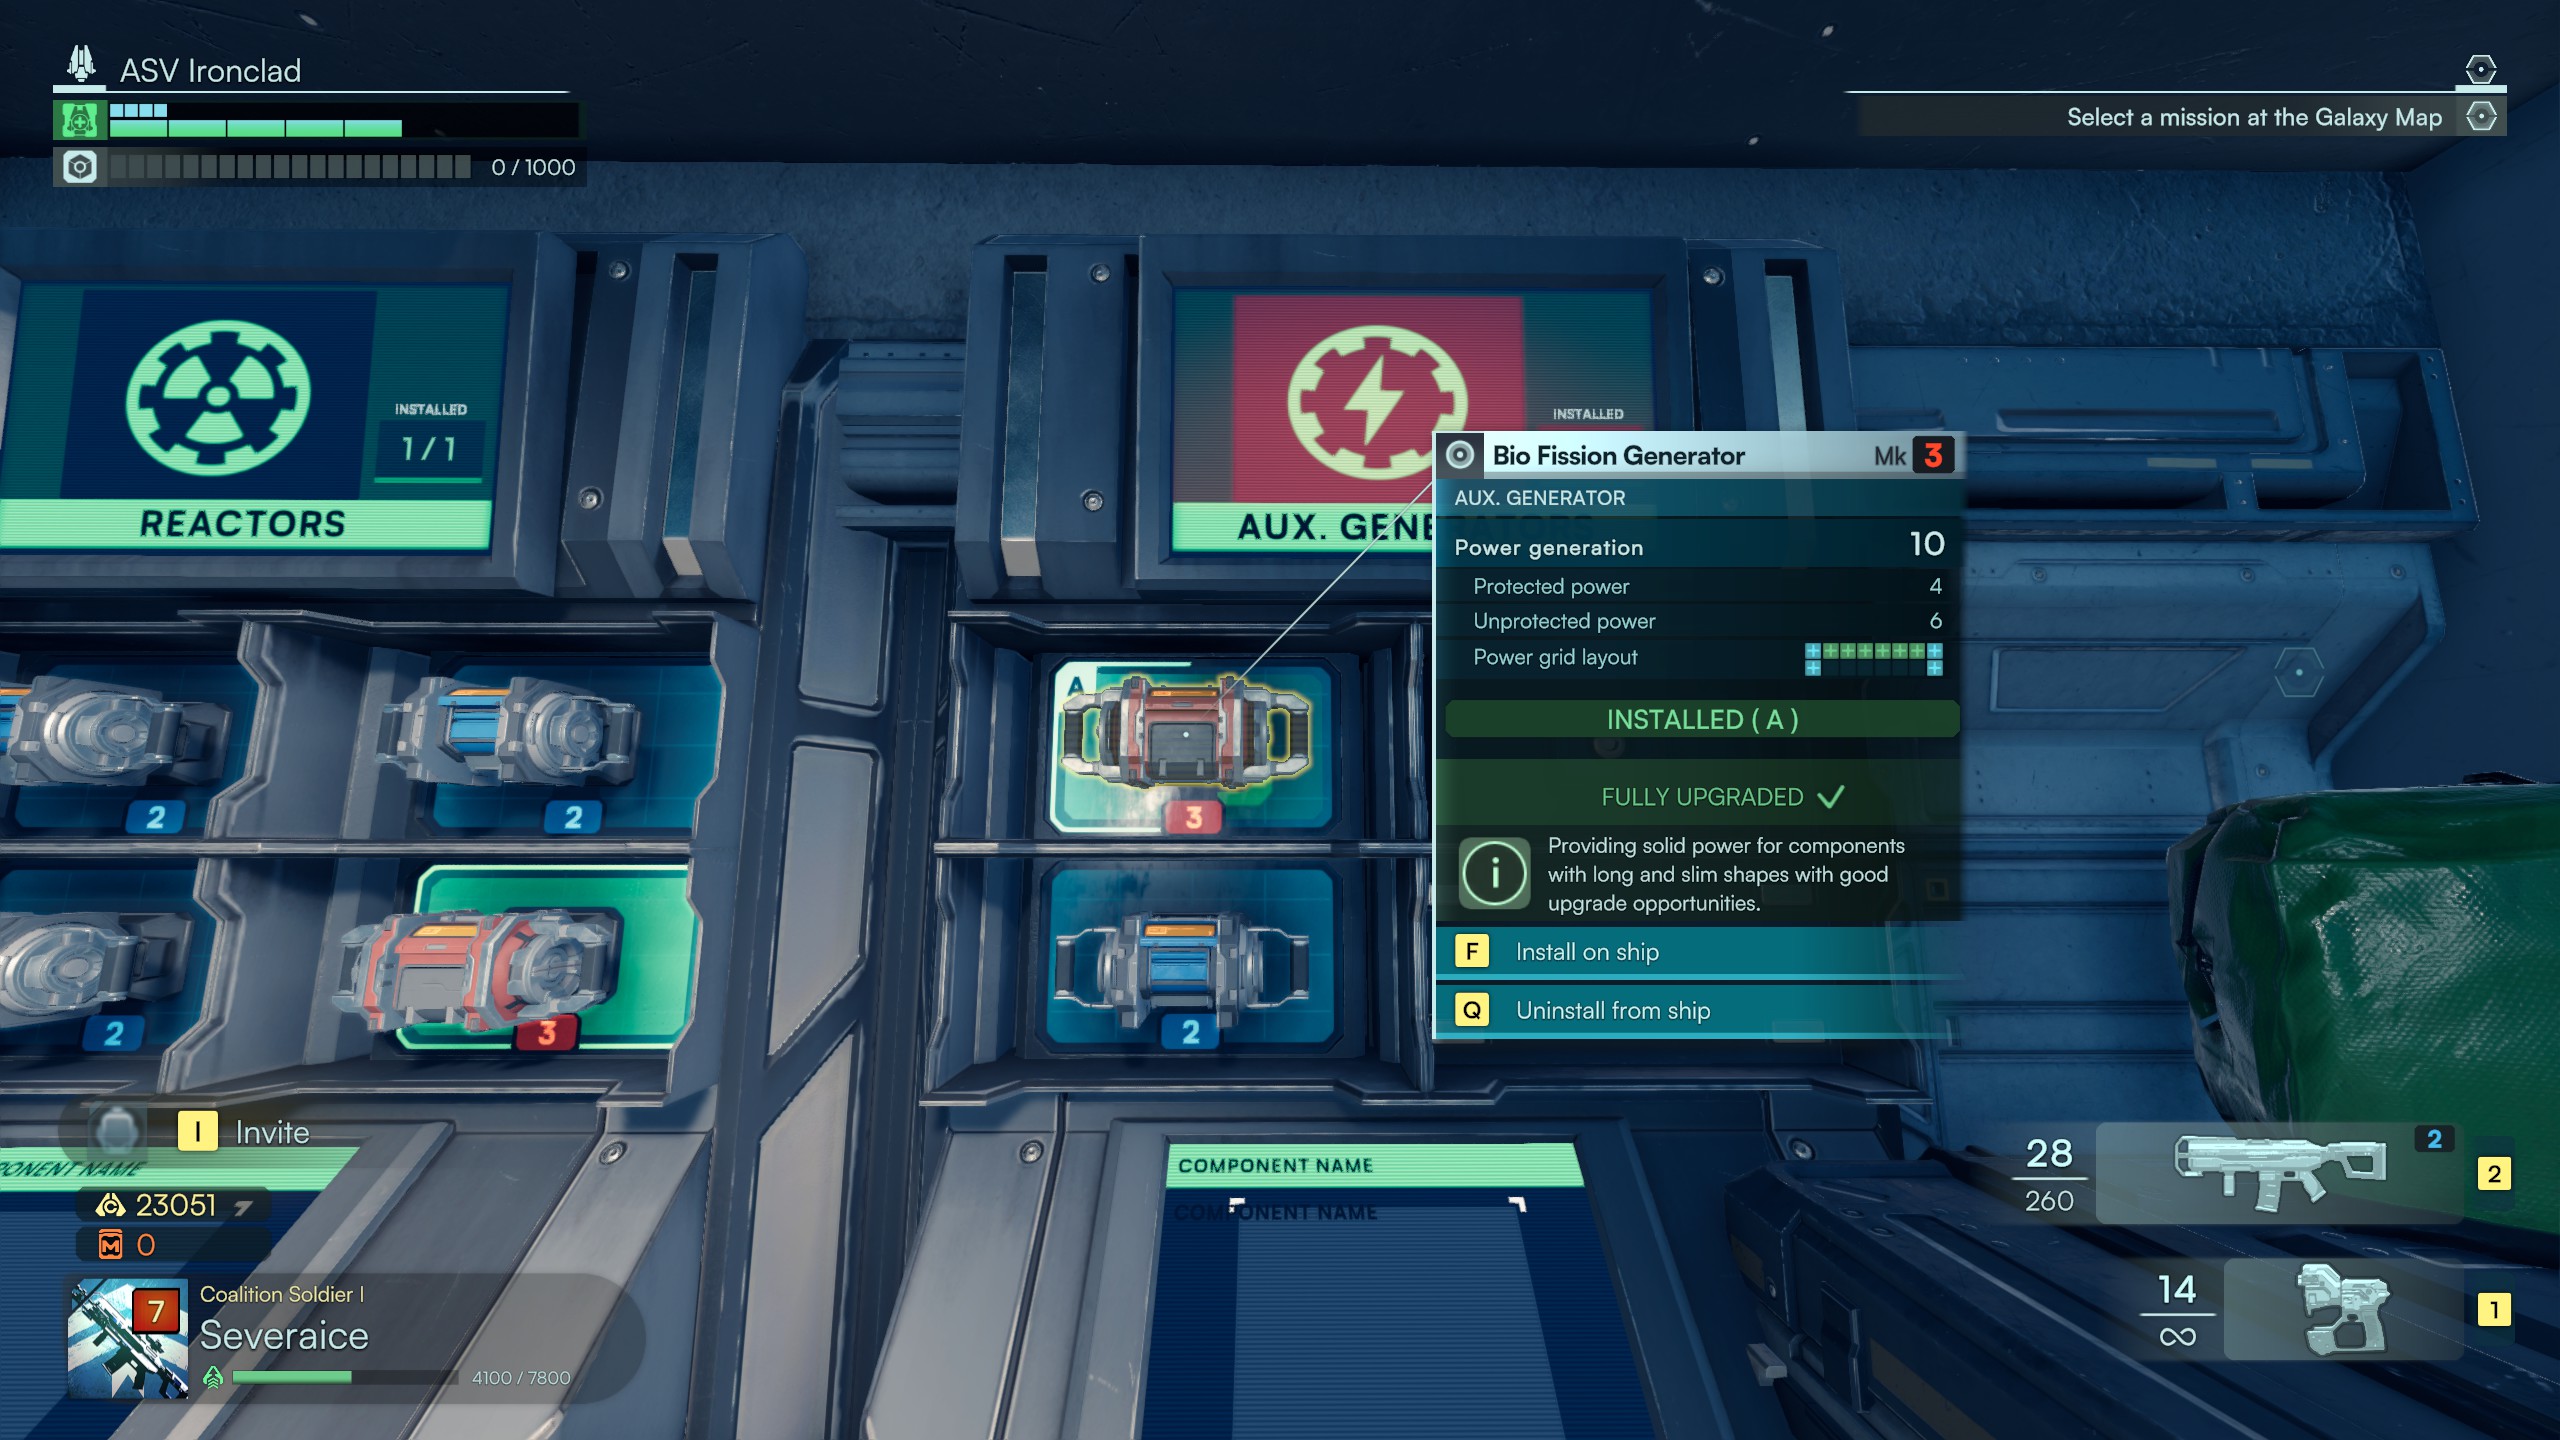
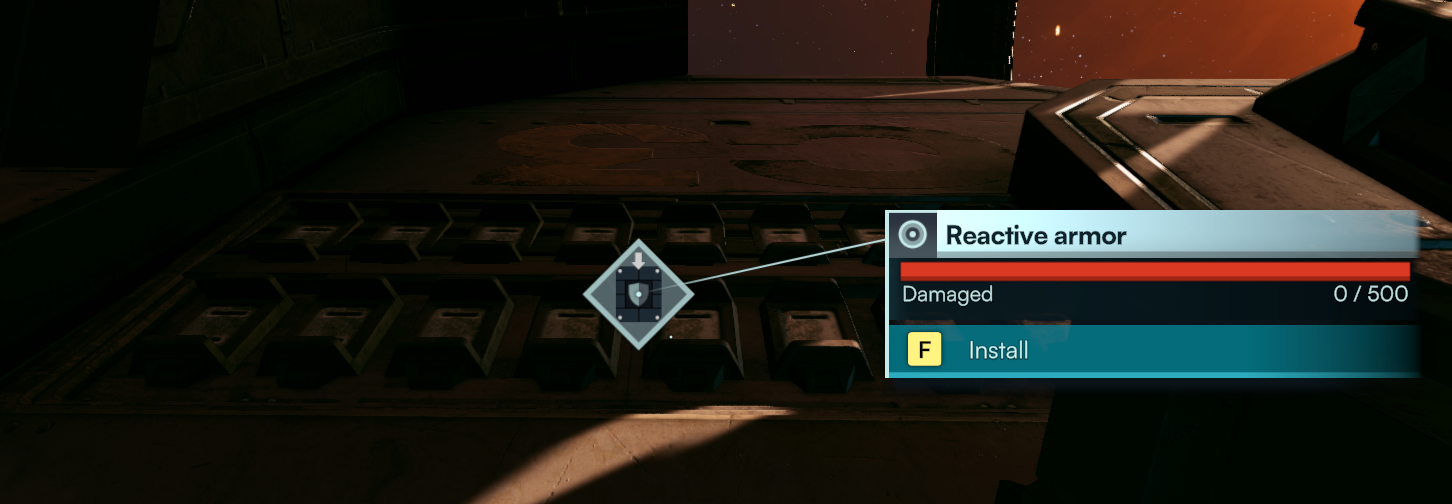
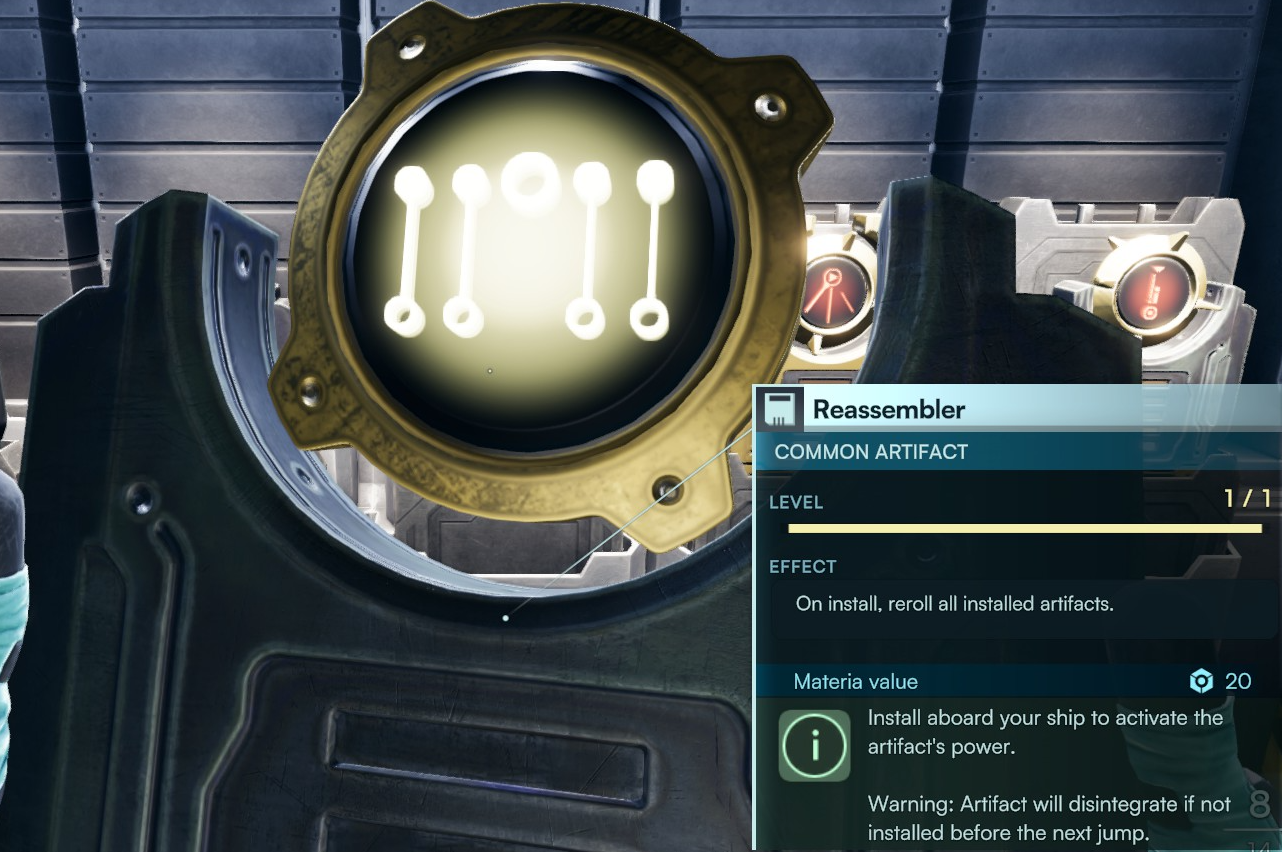
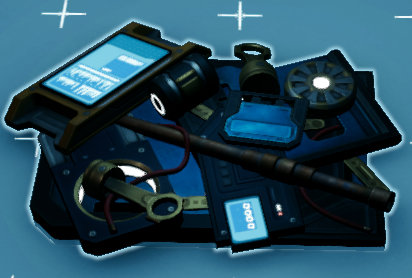
@Firegod381 almost, it doesnt actually destroy it, just dumps it into space, so if you weren't moving you could actually EVA back outside and collect whatever you flushed! Might add this somewhere in case someone flushes something they diddnt mean to. It's not actually gone! :D
Firegod381 24 Sep @ 12:18pm 
The bathroom, if you flush it will take whatever you have active in your inventory and flush it(aka destroy it).