Touhou: Lost Branch of Legend

Touhou: Lost Branch of Legend

Not enough ratings
In-Depth Advanced Guide to Reimu A L7 Act 1
By Seven ate you
A in depth guide on how to handle act 1 of L7 with with Remiu A, while hopefully building a deck to beat the rest of the game.
   
Award
Favorite
Favorited
Unfavorite
Change Log
I've been changing a decent amount of stuff with this guide, so I decided to add a change log. It's mostly just going to be listing more major stuff I change and the date I change it on.
Prior to this change log, I believe the only major change I made adding exiling archetype in the archetype portion of this guide and I added some stuff to general advice.

10/19/25
Added exhibits synergy section. I negelected to add this simply because I didn't want to spend a bunch of the guide simply talking about exhibits. But I ended up adding it and making it reasonably short.

10/5/25
Added the Reimu B section. Figured I could quickly summarize her playstyle, and this guide can be somewhat of a proxy to a Reimu B guide.

Just realized I've been calling white mana yellow mana.
Although it looks like that, and I call it yellow mana to myself, I gotta change it to white mana because that's what it's called to not confuse people.

10/3/25
Added Change Log

Touched up on "Which boss to fight" as I felt like it needed to talk about why I make the boss choices I do typically choose while also talking about the other options more.

Added that a card that does 20+ damage is a good first pick because it one shots kedama[lbol.miraheze.org] Which I forgot to mention initially, even though that's a big deal.

Fixed some of my poor English throughout the guide
Wiki link
If you take nothing else from this guide, at least be aware of the wiki[lbol.miraheze.org].
It has a lot of information you can't find elsewhere.
What does the title mean?
In-Depth
This is going to be a bit wordy.
Advanced
This guide is going under the assumption that you know basic mechanics and strategies.
Reimu A
Reimu A refers to the Reimu who has 3 red in their mana base, as apposed to the Reimu B that has 3 white.
L7
Lunatic Difficulty with all 7 requests. Which requests are similar to the ascension system in slay the spire.
Act 1
This guide is mostly going to be only covering the first act of the game. Although I'll still try to give advice that's good throughout the game.
Why I made this guide
This game as a whole has a lack of learning material. It is a rather hard game that's a StS-like that's drawing in a lot of touhou fans into the genre.

I'd like to make this guide for any players struggling to learn how to play the higher difficulty, as the lower difficulties are a cake walk in comparison. And I can understand the jump up in difficulty can be disencouraging. Even for those who are being careful by staying on a lower difficulty and might want to play a higher difficulty.

I also believe that Reimu A is the easiest character to play while being powerful. Making it an ideal choice for those wanting to beat L7.

If you're simply learning to get into this game I'd recommend reading this guide.
https://gtm.steamproxy.vip/sharedfiles/filedetails/?id=3457681940
For Slay the Spire players
Reimu A is has a very similar playstyle to Ironclad.
That being said, you should understand that this game has a bigger power level and you should be building your decks with that in mind.

This game's version of true grit is much better comparing to the StS counterpart but it's not a card I'd consider putting in my deck, compared to true grit, despite loving it in StS. Not to say it's a bad option but it's somewhat power crept. Although awkward cost, 2 white when we only start with 2 white, does somewhat go against it.

What you should know about myself
About my characters
I have beaten Slay the Spire ascension 20 with ironclad, which plays very similarly to Reimu A.
I have beaten this game L7 with Reimu A.

I have some achievements outside of those but I want to emphasize I am more of a specialist then a generalist. I want to be great with more with a character then I want to be good with multiple characters.

This isn't just me flexing my achievements, but rather I want you to understand that this guide and it's suggestions are going to be tailored for Reimu A more so then general rules to follow.
I'll also somewhat phrase this guide like she's the only character. Not because I don't play other characters but rather I believe it's unhealthy to look at other characters when analyzing how to play one character.

I don't think I'm exactly one of the strongest players for these types of games, but I'd believe I'm qualified enough to make this guide.

About the difficulty I play
I should also say, that I didn't include it in the title, mostly because the community doesn't have official terminology for it yet, but I also
  • Don't restart (unless I actually have to go or something)
  • Play unknown fate
  • Don't repeatedly make new runs to reroll starting cards
  • I always treat anything that's not a perfect resolution as a loss
This is because I believe these types of games are best when you have to adapt to what you get, good or bad, and have to deal with your own actions.

Not to say that I believe you shouldn't do this, rather that my advice will be limited on how to take maximum effect of these strategies.

Although I will leave this little bit here because there isn't a good place to put it in my guide. If you like to restart, don't restart just because you're going to die. Restart when you play drastically worse in a fight then you should or if you could've done something to strengthen yourself for future fights, like playing devour history.
How you should expect to play Reimu A
Reimu A is overall an offensive character, who shouldn't neglect defense.

Reimu A can build her deck in a lot of ways, but certain themes tend to be more common then others, which I'll list.
  • Using Multi-Hitting attacks to do a lot of damage
  • Stacking barrier
  • On the map, pathing more aggressively

Using Multi-Hitting attacks to do a lot of damage
Multi-Hitting attacks tends to do more damage then normal and Reimu has a good selection of these cards. They also synergize with her due to the following.
  • Starting exhibit increases firepower when killing a enemy
  • Numerous ways to increase firepower through cards
  • A good chunk of exhibits tends to increase firepower
Overall lots of ways to increase firepower.

Stacking barrier
Stacking barrier is typical with Reimu because she has a lot of cards that give her barrier, and it helps with her aggressive playstyle.

Given her aggressive playstyle you'll want a lot of attacks/offensive scaling cards in her deck.
That means you'll have less cards that actually protect yourself.

So how barrier helps this is you can stack barrier on one turn so won't take damage for only playing attacks on another turn.

On the map, pathing more aggressively
Reimu A is able to heal a good amount of life simply by killing enemies.
That means she has more effective health overall simply because she'll heal by taking fights.
This means quite a few things
  • You should be willing to take some damage to get rewards
  • Taking damage to become powerful in fights will be worth it if you can heal in said fights
  • Healing at max health is a waste, because you lose on the health you would've had otherwise
Although try not to be too suicidal with this knowledge. As it's very easy to turn the statement "My health is a resource" to "My health is non-existent"
First event
At the start of a run, you'll immediately either get a choice of 3 or be forced to gain 100 currency.
Assuming you have a choice, I'll be going over what options are more desirable then other options.

For unknown fate
In terms of my opinion, what I consider to be the best to worst options
I should preface this list by saying I prefer consistency over likely hood of high strength but I consistently follow this list.
  1. Training
  2. Trade
  3. Recall
  4. Alter
  5. Enlighten
  6. Relieve
  7. Sponsor
  8. Swap

Training
The reason why this option is the best is because you get to upgrade your youkai buster. This makes it go from 14 damage to 21 damage. This is a huge improvement in damage and helps solve a lot of fights just from the get go.


Upgrades in general are very valuable, so getting this card that desperately wants a upgrade out of the way really helps.

Trade
The more rare exhibits you see the more likely you are to find one that makes you busted. And the earlier you find rare exhibits the more likely they are to help you and allow you to build your deck around them. That and the fact you lose hardly any money makes this a strong option.

Recall
The uncommon cards have some good cards that are good throughout the game and cards that are good from the get go. Having options to choose from lets this be more consistent then other options that force you to get a option you might really not want.

Alter
This allows you to remove, ideally, one danmaku protection (2 cost defense) and replace it with a random card. A huge majority of cards you can get are an upgrade to that. I can't go over every possible draw because there's just too many but overall, defensive cards are typically upgrades, attacks are overall good but can lead you taking damage where you normally wouldn't, and abilities can be easier really strong or really weak.

Enlighten
This option can give you cards that range from stupidly strong start to actually harmful.
I'll give a list of what I consider high rolls so you can get a feel for what the good is.


I consider these to be the cards listed to be high rolls. Some of them just give you a good spike in damage that you need, increase your card quality, and/or have a clear advantage for having early.


These are overall her low rolls. Immortal Flame and Great Barrier are both too slow for a good amount of the fast paced fights you have to deal with. Crossing the Border is 2 cost gain 5 barrier until you find a actual good synergy card. You aren't strictly worse for having them but they do hurt you until you develop your deck more.

Relieve
Typically you want to be adding cards, not removing them at the start. That being said removing cards will more likely lead you to drawing your good cards. But you typically want to be adding more good cards to your deck before removing cards because it'll increase the likelyhood of you drawing a good card.
Alongside that at the start of the game Reimu A has a good balance of offense and defense which this kinda kills. It does make it harder to add even more offense but it does make defense picks better.

Sponsor
Getting 100 extra currency isn't enough to justify going to a shop without another spike of money, due to Reimu's low starting money. Considering this also doesn't help you immediately makes this a pretty weak starting option.

Swap
If you know you're going to get a high roll with this swap, it's worth considering. Without that knowledge there's a lot of whiffs and hardly anything worth replacing the strong starting exhibit, let alone the opportunity loss by not choosing other options.
I'm not going to go too much into detail into why I don't like this option.
But assuming you get a color that's not red, youkai buster becomes harder to cast which makes the early fights harder.
Most red, white, or non-specified color exhibits, are overall worse then not swapping. That's a lot of potential flops.


For reveal fate
Starting options are a lot less risky for you and need to be evaluated on a case by case basis. You should overall just ignore this section and just pick what you think is best.


More HP vs more power
Just always pick power.
More HP is a greedy long term pick.
While more power helps you short term, which is where you're most likely will die.
It'll also give you the ability to pass into the first elite fight, which I'll talk about later.
Pathing on the map
On the map, there will be areas you can go to, which we will call nodes.
Hopefully you know you go from left to right, and you can branch off diagonally if the pathing allows it.
Typically what defines the path the most if how many events there are on the path, what is on the end of the path, and if the path is 4 long, if a shop or rest site is on the 2nd to last node of the path.

The most commonly desired path is one that lets you do 2 fights, 1 rest shop (if applicable), and 1 elite fight. With somewhere on that path having an path off said path into a shop/normal fight if circumstances change (shop more desired if event is on the initial path.)
Don't forget that you can use a diagonal path to make your ideal path as apposed to just going straight.

The only time when you want to start taking events over fights is when your deck is good enough to beat all fights in this act, and the start of the next act. This is because you're more likely to skip cards for being subpar, and (if I'm not mistaken) the next act always has a higher chance of offering an upgraded card as apposed to a not upgraded card.

The only times you don't want to take on a elite is when you run the risk of fighting an elite that will either kill you, leave you crippled, or take too many resources to reasonably kill (like 2 spell cards).

For the first act first path, you can reasonably choose to either go after the elite immediately (assuming you didn't chose max HP) or path into a more safer route.
They're both reasonable but ideally, if you have a weaker then average start you take the safer path and vise versa.
I believe this choice is up to preference but I always take the elite path, unless I somehow roll a start that's weaker then normal.
I should note that the reason why Reimu A can path into the elite is because her spell card can reasonably solve every fight, so you won't outright die.
The ideal first card pick
The first card you get can have a big impact on the short term. So I'll try to list out what qualifies as a ideal first card.

Without going into too much details on how you should shape your deck as a whole, you pretty much want to have a card that
  • Is accurate
  • Does over 20+ damage
  • Doesn't spread out it's damage
Going over the reasons why each one is important

Is accurate
Graze is a big problem against the crows, the bats, against Aya Shameimaru, sometimes against the three fairies elite and sometimes against the boss.
This is enough reason to make accuracy a priority.

Does over 20+ damage
This is important because of two things.
  1. You want damage to end fights sooner
  2. It increases the likely hood you can attack to kill an enemy as apposed to defend against their attack.
  3. Helps you kill Kedama[lbol.miraheze.org] in one hit before they start blocking
Going over each point briefly, the shorter a fight is, the less times the enemy will attack to kill you.
For killing enemies quickly, lots of enemies act 1 will attack you in a group. Lots of times it'll typically be some enemies attacking you and some other enemies debuffing you. Having high damage cards lets you focus down on the ones attacking you.

I should also briefly note that a card doesn't have to have all 3 of these to be a strong pick.

Doesn't spread out it's damage
The problem with attacks that hit everything at once or randomly select their targets is it typically leads to no enemy dying quickly and leaving you open to their assault for longer. If playing your attack card leads you to take a bunch of damage, you don't want to play your attack card. And that situation is typically very bad in a lot of normal fights.
The general rule is hitting everyone is typically good but if you aren't actually killing anything quickly then it's better to focus on one person to kill them.
The regular good first card picks
Now that I went over what's ideal, I'll start talking about what's just regular good.
I won't be making a entire list, because that's too subjective and long for my taste. But rather I'll be going over what you want to be looking for.

Anything that increases Reimu's damage is automatically a consideration due to the fact that damage early is important.
Pretty much any card that cleanly adds more damage, then simply playing starter attacks, is a consideration.

That being said, cards that aren't damage cards, but are generically strong are good considerations.
Examples of this being are


They don't directly deal damage but they typically help you deal damage by either scaling your damage up or being strong defensive cards that allow you to play and then spend more time attacking.

Good cards are somewhat subjective, and you want to use your intuition. But to summarize, the main goal of your first card should be to get damage into your deck while focusing on stuff that's good for your deck.

Your first card should typically be a damage card though, so it's typically better to pick the damage option over the generically good option.
How you should be attempting to shape your deck overall
There are only a few things you should consider when adding cards to your deck, but you should always think of these things.
  • Does this card add something my deck wants
  • Does this card help solve any upcoming threats
  • Will this card bloat up my deck
Going over these examples

Does this card add something my deck wants
Overall a deck wants a lot of things. Without going down a full list, a deck typically wants a source of good damage, good block, graze, a source of vulnerable and scaling.
I could make a much bigger list, but the main point being does the card add something to your deck that you want. And even if you have that said thing, consider if adding this card makes you do that thing but better.
For example, adding a certain attack card makes you do more damage on average. Or adding a second vulnerable source lets you keep up vulnerable for longer or set it up more consistently.

It's hard to put this down to an exact science. But typically it's more so understanding that after a while of putting attacks into a deck, adding more attacks is less impactful. But adding a defensive card might be more impactful in that case.

Does this card help solve any upcoming threats
Picking a card to help solve a threat is a very simple concept. You pick up a card, not because it makes your deck better, but because it deals with something you would be weak against otherwise.

For example, let's say you're about to fight the act 1 boss. You know you're weak or are going to outright lose to this boss in current conditions. You're offered The Immortal Flame which helps you scale quick enough to kill the boss. In this fake situation, the card will overall make your deck overall weaker but it will help you deal with the boss because the scaling damage is good against bosses. The correct decision here is to pick it up despite the card making you overall weaker because it helps solve the boss.


A more clean and cut example of this concept is taking the Ritual of Exorcism to deal with the Pure Rabbit Duo[lbol.miraheze.org] which only have 20 health.


Will this card bloat up my deck
Very simple concept. The more cards you have in your deck, the less likely you are to draw each specific card in your deck and the more time it takes to cycle through your deck once.
These are both typically bad things.

Adding a card to the deck is there to increase the average quality of cards of your deck, add options you were lacking before, or to help solve a upcoming issue. If adding the card to the deck doesn't do any of these 3 things noteably then it's potentially bloat.
Traps on how some players try to build their deck
Less skilled players tend to make certain mistakes when building a deck.
Those include
  • Forcing archetypes
  • Picking cards based on what they want
  • Picking cards while ignoring the upcoming threats

Going over each of these mistakes
Forcing archetypes
A player might decide to add Orb of Duality to the deck. Maybe even a second one or even a Secret Orbs.


This is a mistake. This is under the assumption that the draft is going to give cards that give pay off to making orb cards. This also undermines potential cards that could open them up to other archetypes, while also being good picks for their current deck.

Picking cards based on what they want
Maybe you had a good run with a particular deck type and you pick up cards that are good in that deck but bad in your current deck.

Maybe you like one source of vulnerable so much that you skip/undervalue other sources of vulnerable.

These are just two examples, but any of these are bad. You have to remember that in higher difficulty, you need to play more towards what's the correct thing to do. Even if it might be taking cards you don't like or not taking cards you do like.

Picking cards while ignoring the upcoming threats
Let's say, in a fake (but possible) situation, that a player gets to choose between these 2 cards after defeating Aya Shameimaru in the first path of act 1.


Let's also say that they choose The Immortal Flame over Expanding Border because they feel like their deck is lacking scaling and that this will help deal with the boss.

This is overall a mistake, because you still have the second and third path of act 1 before getting to the boss. The card is overall better against the elite enemies too because the both remaining elite enemies have more then one enemy, benefiting from area damage.
Even if your deck is strong against the rest of act 1, you'll still want to take expanding border because it helps secure the victory and makes your deck more consistent against the upcoming fights. As apposed to the immortal flame which is mostly only good against the boss in this situation.

Now, let's say you beat another elite that's not Aya Shameimaru, or you beat the second elite, the situation changes a bit.

The Immortal Flame is strong against Aya Shameimaru because the fight itself can be really slow, if you want it to be. It's also later into the act, giving you less time to find another strong card to deal with the upcoming boss.

The main advice is don't be choosing cards in a void, think about what enemies you'll be fighting against and their strengths and weaknesses.
Utility you can add for your deck
Typically a deck will have ways to do damage, prevent damage and hopefully scale up these things. This is, hopefully, a obvious statement. But what isn't as obvious is a deck can typically be stronger by adding certain things into their deck that I'll be listing and some example cards that fit will.
I'm mostly going to be listing stuff that's less common to find. Which means the opportunities to find these things are rarer, so you usually want to get them if it's appropriate. Most things I list are typically desirable things to have, so more times then not it's correct to have it.

I'll try listing stuff that can typically be added to most Reimu A decks.
I will be only listing stuff that Reimu A can get normally. If I list a card that's upgraded, it typically means the non-upgraded version is bad. I'll also only list cards I find myself okay with, in most circumstances or correct circumstances.

Barrier
Barrier is good because, if the enemy isn't attacking you, you can still play barrier unlike block. This allows you to have less weak draws and allows you to use that barrier to attack in cases where it'd cost you life if you didn't have the barrier.
I won't be listing orb cards but cards that get you barrier by themselves.


Damage each enemy
Lots of times, you'll be fighting more then one enemy. Having at the minimum of one way to damage all enemies can typically be good in these situations.
One thing I will say though that having a card that's bad and does area damage is typically (but not always) worse then just having a good single target damage card.


Vulnerable and Weak
Unlike a lot of ways to boost yourself, both vulnerable and weak are a raw percent. This makes them pretty good overall and you typically want a form to apply both where you can. You don't want to have too many cards that apply vulnerable and weak, but by the end of the game I try to have 1/2 card/s that says weak and 2 cards that say vulnerable, and try to upgrade them because these cards get a lot better when they're upgraded.


Graze
You probably realize graze in general is good.
There's a decent amount of attacks in this game that do high damage in a small amount of hits where a card with graze just effectively nullifies. Sometimes it can be a dead card against attacks that are accurate but it's typically worth having it because when graze is good it's typically really good.


Exiling other cards
Hopefully you understand that scaling yourself throughout a long fight can be a good thing. One way you can scale yourself to make your character strong, that's not obvious, is by exiling cards that aren't good in the fight you're in.

For example, you can exile your starter cards or cards that are bad in the fight you're in.

And if you draw one on turn one you can exile the long night to have it tax your cards more, in later acts.

Although the obvious using it to exile curses/statuses is the obvious and good thing as well. But I'm trying to showcase that it's good in every fight where you have to reshuffle your deck. You typically want one card that exiles other cards, that doesn't exile itself on use.


Draw
Cards that draw other cards are strong and they only get stronger the later you get into the game. In early game it allows you to draw more cards, which will lead to playing non-basic cards more often, which will typically lead you to having more strong turns on average. You want to have draw cards that don't exile themselves and don't add trash to your deck. Or else you'll find the consistency is only good in shorter fights and horrible in longer fights.
I'll also be listing cards that draw multiple cards. Because using a card to draw 1 card doesn't help consistency that much. Although be careful for adding cards that cost more then 1 to play early on. As you have less mana, it makes it much harder to actually play.


Upgrading cards mid combat
Upgrades are very valuable in this game. You very rarely will have a deck full with upgrades, so it's nice to have cards upgrade other cards in fight.


Advantage that lasts outside of the fight
Obviously most things you gain in a fight are lost after the fight. Like firepower, cards upgraded mid fight, barrier.
There are some things that persist between fights though, like life being the easiest example.

Typically you want cards in your deck, assuming you aren't weak, that let you push an advantage from one fight and have it be persistent. They don't help you in the final fight (may it be act 3 or 4) and they don't help you if you're struggling in a fight, so be careful when you put them in your deck.


Mana generation
Obviously Reimu isn't green, so she doesn't have the high quantity of mana generation green has. But Reimu has good access good mana generation, and that having cards that generate mana and then exile themselves allows Reimu to play expensive powers more easily. For this list I'm more so talking about cards you can play and then get positive mana instantly. Not banking mana for the future.


Yes I added an entire section to talk about one card. You get more access if you get another color but ultimately this card is good enough to put in your deck, unless you're running a bunch of cheap cards.
Archetypes Part 1
Reimu, like most other characters, has access to certain archetypes unique to her. I'd say you don't want to focus too hard on a archetype, because it makes you worse at drafting. But you typically want to be aware of archetypes, because if you got the right cards in your deck to lean into it, you should lean into it.

Also be aware that you can potentially have a card that's effective in two archetypes and lean into multiple archetypes at once. I'd say one of Reimu's strengths is how effectively she can mesh multiple archetypes together and be extremely effective.
Also be aware that some archetypes are easier to get into then others, and are easier to draft then others.

In general, archetypes have 2 types of cards in them. Cards that enable the archetype to function, and cards that benefit from having the archetype. I'll be listing the cards that benefit from the archetype and then list the cards that enable it.

Temporary buffs
Reimu has access to a lot of cards that give her a buff that goes away after time. She also has a good amount of cards that benefit from that.
Going over all of the cards that benefit from temporary buffs.


They all benefit from temporary buffs differently, some being more pickier then others.
Going over cards that I feel like are really noteable with these cards.


So, as you might be able to tell, the top cards aren't really good by themselves. But the cards that enable those cards are so common and typically stuff you'd have.

Orbs
The nice thing about orbs is they typically fit in a lot of decks and enable you to go into other types of archetypes. Although orb itself is an archetype so I will talk about them.


Not a lot of cards that give a strong pay off, but overall orbs are just good normally. But orbs are good normally. Going over the cards that are good for generate orbs normally.


With somewhat of an exception with secret orbs, all of these cards are very solid to have in a void.

Firepower and cards good with firepower
Reimu has a decent amount of cards that directly get better with firepower by having an extra effect with it, and cards that hit a lot of times that benefit from multi hitting. And considering you're most likely going to be killing things with attacks, firepower is always helpful.
Here I'll list cards that very noteably benefit from firepower. Although all attacks benefit from firepower.


Every single one of these cards are respectable without firepower, but with firepower they start becoming powerful.
Now listing cards that focus on gaining reliable firepower, without requiring another archetype to function. I'll also be listing divine favor cards because they act as firepower when it comes to scaling.


Drawing for damage
Drawing isn't a big part of Reimu's kit, but can become a very powerful part if you support it with the right cards. Certain characters would kill to have the payoff cards that Reimu has for simply drawing cards. Reimu can make a deck that really appreciates these cards too, but the cards that draw cards from Reimu's base kit are a bit more limited compared to other characters. Listing cards that benefit from drawing.


Overall only rares, so it makes getting into this archetype extremely inconsistent. But if you have the cards to support them, they can be very powerful. For cards that benefit these cards.


Not a big list of drawing cards, but you typically want some ability to draw cards, so you can potentially enter this archetype by accident and get a big payoff.
Archetypes Part 2
Barrier
This is much more of a Reimu B archetype then a Reimu A archetype, but Reimu A can pull off this archetype quite well as well. For the cards that benefit from having barrier.


These cards are above rate when you have barrier, with barrier slam making barrier hoarding actually have a purpose.
Now going over cards that focus on gaining reliable barrier, without relying on another archetype to function.


Also notably orb cards give you barrier as well. A good chunk of these cards are really generically good, so getting into this archetype isn't hard. But being focused enough in this archetype to where you can consistently gain barrier to justify having cards that require it is the hard part.

Exiling deck
This archetype doesn't exactly have a formal name, although it's a widely known archetype among more skilled players (at least in slay the spire).
The goal of the archetype is to improve your deck by aggressively exiling cards.

Pretty much any deck can benefit from having cards that exile other cards. But the expectation of a deck running this archetype heavily is that you exile all your basic cards and the cards that aren't good for the fight you're in, to have a more refined deck.
In some cases, you can try building towards an infinite towards that end of act 1. The infinite comes from, at least typically, keeping as many or less cards then you draw a turn. And then running 0 cost cards that draw. There are other ways to make a infinite but this is the most clean and cut.

Although, if you do run a infinite, you have to make sure to have ways to beat stuff that stop infinities.

Now going over the cards that very noticeably get better when you're exiling a big portion of your deck.


Now, the list I listed may be a bit weird, so I'm going to talk about why some of the cards are here.
The first 3 cards I listed can go infinite if you have two copies of the cards and that's all in your deck, they'll draw each other, being an infinite.

Three Gods of Sumiyoshi, when upgraded, becomes free if you have the Tactical Conductor (makes skills cost 1 less) or have played Descendant of the Inchlings. This is important because it allows a infinite to draw a surplus of cards.

Trace On and Breaking Boundaries are listed because you can use the benefit of having a infinite to stall out for benefits.

Hakueri Illusion and Edge of Fantasy is mostly good if you're exiling a bigger deck and gives damage and block respectively. If you're trying to keep your deck small and quickly exile it for an infinite, then it becomes worse.

I should make note here though, you don't need a infinite to benefit from aggressively exiling your deck. If your deck ends up being any 5 cards of your choice, of the cards in your deck, in a fight, it'll probably have higher odds of winning then if it was just your normal deck.

Now going over cards that can aggressively exile your deck.


You might have noticed that there are more cards in the game that can exile other cards. I'm listing cards that don't exile on use, because the you pretty much have to use the card repeatedly.
The nice thing about this archetype, every character in the game gets benefits from exiling their basic cards, simply to improve the rate of cards they get.
Although the cards themselves can be awkward. Cleansing Ritual being 2 white cost really makes adding duplicates bad, which is something you'd want otherwise in this deck type. And Yin-Yang does technically can but has the problem that it indiscriminately nukes your hand.
Elite fights summaries
I'll be explaining how to deal with elite enemies. I don't want to go into too much detail because the enemies themselves are straight forward and I usually have a straight forward way of dealing with them.

Aya Shameimaru
For Aya Shameimaru[lbol.miraheze.org] the fight itself is two things.
  • A check to see if you have accuracy
  • A check to see if you have scaling cards
If you have a good amount of accuracy cards, you can kinda just hit her until she dies very effectively. As her main thing is abusing graze.
If you have a good amount of scaling cards, you can use the fact that she won't attack you (unless provoked) for the first 3 turns to scale yourself up to make the fight easier. Just realize though she's adding trash into your deck while you scale up so make sure to ask yourself if scaling up is actually worth it.

Three Fairies of Light
For Three Fairies of Light[lbol.miraheze.org] you want to do two things
  • Kill one of the two fairies that'll attack you turn 2
  • Have good defensive options that deal with their consistent attacks
Killing one early is important so you don't take 30+ damage at once on turn 2. I typically try to have my spell card for this.
For defensive options, you typically do want to be putting offense into your deck in early act 1, so you can't control this as much. But if you do have good defense in your deck, the fight will reward you. The starting block cards are passable for this fight, it's just having good defensive cards can make you excel in this fight.

Rin Kaenbyou
For Rin Kaenbyou[lbol.miraheze.org] How the fight goes is kinda complicated and is the fight you can optimize the most as the player. But how the fight goes typically depends on these following.
  • How much damage you have in your deck
  • If you have a good attack that hits all enemies
If you got strong damage, you typically want to just focus fire Rin and end the fight quickly.
If you got good damage or got a attack that hits all enemies, you typically want to do a mix of attacking the spirits and attacking Rin when there are no spirits. This is because the spirits tend to do sustained damage and debuff you and it hurts in a longer fight.
If you have no good damage, then you want to focus fire Rin because the longer the fight goes, the worse it'll be for you.

Something I should note that's important, if you can kill Rin on the turn she's summoning more spirits, don't kill her in most cases. Let her summon more spirits and then kill her. You'll gain health for the spirits being defeated and there is typically no risk of doing this.

Cards noteably strong in elite fights in act 1
These cards are good in, at the minimum, 2 elite fights. So you want to add these cards when you're thinking about the elites.


I should say that Secret Orbs upgraded is wrong here and I can't find a proper image. It costs 4 upgraded, not 5. That's important because you can't play it turn 1, without extra mana, which is really important.
Which boss to fight
I find myself going after only Marisa and Koishi, prioritizing Koishi and using Marisa as a back up. I'll be going over why further down.

The main reason why I got with this mentality of "Pick this boss option" is because you have to pick the boss you're fighting early on, which is typically too early to know how your deck is going to be when you get to the boss.

I will say a couple things, as a note, Marisa gets worse the more firepower you have (obviously) due to the boss fight being harder, while Sakuya's rewards gets better because throwing knives like firepower.

Koishi's cards gets worse the less aggressive your deck is, as passion because worse, while Cirno's card gets better the more defensive your deck is due to having good cards for defensive play and rewarding defensive play.

There's only two considerations you should have when choosing which boss to fight.
  • How easy it is to kill the boss.
  • How much you want their cards/exhibits
I should make a quick note, that if a character's cards aren't helping you, they're harming you.
You will draft them, so if you don't end up using them, they were bloating your draft and preventing you from getting cards you do want.
And overall not sharing colors is better then sharing colors because a character's best cards are typically for colors they don't have.

Going over each one

Sakuya
I find Sakuya to be harder to fight, but I also don't fight her often to confirm how accurate that statement is.
What I can say though is her cards aren't helping you too much and her exhibits are so amazing.
Without putting too much talk on this subject, orbs are better then throwing knives. And there isn't too much synergy between knives and orbs.

The extra turn cards are good but Reimu, in most cases, can't draft them because a lot of them require 2 blue. And the other blue cards are too specialized on discarding or wants you to have more then simply 1 blue mana.

For the exhibit themselves the blue exhibit is the best one simply because more drawing is more consistency.
The white one is awkward because I personally think all the generic white exhibits are better. And it'll turn the exhibit that's supposed to be your color into a red exhibit. Which you typically don't want a 4th red exhibit.

So overall I find Sakuya to be best avoided because she isn't notably easy, nor is her rewards that good.

Cirno
Cirno isn't a tough fight, as long as you have a way to scale your damage well. But how true that statement is really depends on what abilities she gets because it's kinda random. That fact also makes it harder to prepare for her but it's not so bad.

As for cards, her blue cards that aren't cold cards you want. So if you have a good deck base deck already then the bloat won't hurt you and you may benefit from her blue cards.

For green, they're all mostly teammates and Reimu isn't interested in doing teammates.

Cirno and Reimu don't share colors so that means that Reimu can benefit from Cirno's off color cards really well.

Overall I usually avoid Cirno but picking Cirno can certainly end well.

Koishi
I find Koishi not too hard to fight at all, simply because her gimmick is being random. But the random part of her fight doesn't really effect you on the turn she does her random action. So you can easily just react to it when it happens.

Both her exhibits are good, with green being noteably better of exhibit, while black being solid.

Reimu doesn't want to put the effort to get into emotions or follow up cards too much. But Reimu can pick up 1 passion card and really spike in power in certain fights.

And given the fact that Reimu and Koishi don't share colors, Reimu can really benefit from Koishi's off colors cards. As I find all of Koishi's off color cards to be really good.

Marisa

Overall I find Marsia to be not a hard fight, assuming you aren't relying on firepower.

Her black exhibit is good and her red exhibit is okay but it's kinda weird so I'll explain her red one.

Her red exhibit is fine because it allows you to easily start using charge, making Marsia's charge cards less of bad drafts and making your card options overall good. This is good because charge gives you a flat multiplier to your damage, which can make your late game better.

Her black exhibit is generically good.

For her cards, a lot of her cards you don't want are double black. So you mostly get cards you do want from her, and he charge cards which you may or may not want. Although I should say that charge is overall easier to dip your toes into then cold. And it has a bigger impact then throwing knives, which are typically inferior to orbs.

Marisa doesn't exactly excel with her rewards but her rewards are consistently not bad which makes me like her more then Sakuya and Cirno.
Boss fight summaries
So, there are more bosses then there are elites, but there are also less variance between the bosses. So I'm mostly just going to quickly summarize what all of the fights have in common and what's unique in each fight.

For all fights

In all fights, the boss will add trash to your deck. In some fights the trash exiles themselves and others they don't. In fights that don't, you want cards that exile other cards to deal with them. In all cases you want some draw cards to help deal with the fact that you're going to have trash in your deck.
They will eventually play a card a big attack that you can't graze and does noticeably more damage then they typically do. It's good overall to have scaling for the boss, regardless of the boss.

For unique boss traits

Sakuya punishes you for spamming cards and adds trash to your deck that doesn't exile itself normally. Exiling cards and expensive cards are ideal.

Cirno becomes more powerful the longer the fight is. You want to kill her quickly. But it's not a matter of "Just have good damage cards" and more so "have good scaling damage"
Although what abilities she gets is also kinda random. Like she might have passive block at the start of the fight or passive damage. And you'd prepare for them differently if you knew which one she had.

Koishi is just quirky. She does scale herself throughout the fight, but it's not really that punishing for staying in the fight long. She also gives you a status effect that makes you discard cards so drawing cards is better then normal and barrier is better for when you don't have draw.

Marisa mostly just punishes you for building towards firepower and adds a mix of self exiling and not self exiling trash to your deck. As long as your deck is good and doesn't use firepower this fight is pretty easy.

I would like to say more in this section but most bosses are rather the same. Just get good scaling and ensure you respect the bosses quirks and you'll be fine.
Reimu's rares
So, because I don't want this to end up being a card review, I'm going to be talking about rares that I feel like need to be talked about and group them together somewhat.


These 3 cards are cards that help you out by generating other cards. The main point of this is to ideally have this card be more what you need it to be in a fight. They're all overall good picks because they're flexible, but they can also whiff on the card selection, so try not to be reliant on them.


These cards are both somewhat uncharacteristic for Reimu.
They don't entirely synergize with Reimu's playstyle well, but other characters would kill for these cards.

Increasing damage output by drawing cards is crazy. Despite the limitations of Reimu, if you get the right cards and exhibits, you can outright build your deck around these cards. That being said, these cards are typically cards you end up skipping because they don't fit your deck, and don't fit Reimu's playstyle.


Expanding border is one of my favorite rares. It can be somewhat bad though, because it wants you to stick with red and white and get philosopher's mana. That being said it can potentially carry your deck if you build around it. Although when you get into act 3, you ideally want to be doing more then playing it for 4 red and 3 white without it doing something extra.


Apotheosis is good in any deck and can be taken by anyone who doesn't already have a copy of Apotheosis. Upgrades are very valuable in this game and this just hands it out like they're candy.
When you have this card in your deck though, you still want to upgrade cards though. Mostly cards you want to be strong before you cast Apotheosis. Like attacks that hit multiple enemies and abilities, so you don't have to choose delaying playing the ability to have it be upgraded and just playing it unupgraded.


So, crossing the border is weird. Because it can be easy to overvalue it and undervalue it, so I'll try explaining what makes this card more desireable to add to your deck. Because the default state of this card is not wanting it.

If you have cards that gain you value outside of the fight and exile themselves, you can use it to play those cards a second time.

If you have a card with exceptional damage, but exiles itself after use, you can use crossing the border to get it.

If you have a card that your deck greatly values so much, but exiles itself on use, you can consider crossing the border to be a second copy of that card.

You can also notably get it to get cards that generate mana to make this card be better for your mana.

Overall though, this card is typically worse then having a second copy of your card in the fight, but you get to choose what card you want to bring back between the fights, and it allows you to have another copy of a card that you might not get drafted again.


These cards I wanted to talk about because I feel like they're a bit weak in most typical times.
I'm not saying never draft them, they all have a purpose. But be more picky when you do draft them.
To quickly summarize why each one is bellow rate.

The Great Hakurei Barrier assumes you're going to have a big load of block that you're wanting to translate to barrier. Which is typically not the case. Effect is nice but it's not worth the card slot. I'd say the one thing that this card is best at is stalling fights, which you typically don't want a card for that.

The Immortal Flame is bad in anything that's not a long fight. Most fights you don't want to take long. It's also slow overall for how long it takes to get firepower.

Hakurei Illusion is under the assumption that you have a lot cards being exiled. Which I find simply using orbs normally to not be enough to justify adding this card into the deck. If you don't have ways to greatly increase your firepower, I wouldn't even consider it.

Dichromatic Lotus Butterfly Pretty much requires you to be making bunch of small blocks/barrier to be worth it. It can be worth it in a orb deck, or a with the exhibits later on though. But it has a secret downside of making it a lot harder to stall fights out to get value.


So, let me just say that this card is crazy on Reimu. It has to be in the right deck but the right deck is typically a deck that Reimu has. The abilities that give Reimu temp firepower and temp spirit every turn get a lot better. Cards that are cheap but give her temp firepower are also really good.
And the fact the upgrade makes it cost 1 is what makes this card very dumb. As you don't really need to think about playing it when it's upgraded.
Which color to pick from the boss part 1
Ignoring exhibits that give you character cards, I'm going to be going over what colors do for you ultimately.

I should say broadly that adding a color you don't have to your color base does effect drafting, with the exception of getting your 4th red. It will increase the amount of cards you can get, for better or worse.
If you want a smaller card pool, staying with 2 colors is actually a respectable strategy.

When you get access to a color you didn't have access to before, you get certain color combinations that no starter characters has. And some of these cards are powerful, so I will make note of them. For example, if you get access to blue, you'll have blue and red, which no starting character has.
I'll only talk about these cards when I find them to be very noteable, because it's just too much to talk about otherwise.

White
Adding white to your deck, despite being a color you already have 2 in, will give you more cards.
The nice thing about this is it gives you cards you typically want, as apposed to a bunch of neutral cards that you might not want. I will list the cards that it adds to the pool.


Taking about each one.

Faithful Meditatoin
Faithful Meditation is good, not only for orbs, all cards that make other cards. That includes the skills that makes attacks/defense/commons and the ones that make the needles. Faithful Meditation is so good that it makes a good excuse to get into orbs. Although if you don't have much cards making other cards, it can be kinda a bit before you actually get it out of being not helpful.

Devour History
Devour History is nice to have 3 white for early on, because the earlier you have access to it, the more often you'll have it be drafted. You just use it to trim down your basic cards so you draw your actual good cards more often. This card is actually really good.

The Falling Moon Rabbit
The Falling Moon Rabbit is a bit expensive and requires a small amount of life to use to face tank the 1 damage you'll take. But overall Reimu is one of the best characters to have this with because she can heal with her starter exhibit. And it's possible for her to start making enough mana early on in the fight to have the fact it's expensive be less of an issue.
It's also really helpful in short fights where you want to be able to go all out attacking.

Blue
A color I don't pick too often, but not because it's a bad option. All of the unique cards are ultimately good, with only one being awkward, and 2 of them having synergy with orbs.
I'll list the Reimu cards it adds to the draft pool, and 1 noteable one.


Sunlight Prayer
Sunlight Prayer is as good as a regular green mana cards are typically upgraded. It's solid but not exceptional. But when it gets upgraded it generates a total of 4 mana, which is actually crazy. This is one of the best cards in the game to use to play your expensive powers early. And blue in general has great use for extra mana because you'll probably have some way to draw cards.

Spread Amulet
You do damage, you get barrier for it. Hard to talk more about this card because it's just outright crazy. It allows you to convert your probably high damage potential into defensive ability and is outright dumb in multi enemy fights. It's only not good if you already have a deck that generates high damage and barrier, in which case your deck is probably powerful and towards winning the game.

Lakeside Dance
Pretty much ultimately what you're hoping to get when you get blue, assuming you're doing orb stuff.
This allows you to draw a card when you use a orb, which is more crazy then you might think it is.
You get to hold onto your orbs until you get a bad hand, and then use your orbs to draw out of the bad hand.
So effectively it allows your orbs to turn into drawing tools.
It's also makes cards that exile, themselves and/or other cards, just really dumb good.

Receive Guidance
I consider this card to be the most awkward card of the bunch.
Ideally you use this card in a regular fight to prepare for an elite fight or a boss fight.
This is good if you're trying to get a normal victory.
The main issue with this card is, if you're going for a perfect resolution, you have to choose between using the card before the act 3 boss while missing it on act 4, or using it on act 3 boss for act 4 and missing out on it on act 3 boss.

Ultimately that one thing is the only reason why I don't love the card, because it's good until you're put into that situation. But if you aren't going for a perfect resolution then it's just good in general.

Unmoving Great Library
Hard to talk about this card for too much because you've probably seen many like it. It's a card that generates a selection of cards you get to choose from. It's overall really generically good.
Which color to pick from the boss part 2
Black
Overall, I consider black to be a solid color pick regardless of what you're doing. The regular black cards are overall helpful, and the noteable cards are always helpful. So you typically won't get weaker for picking this color. It's more of a question of could you have been even more powerful for picking another color.


Furious Purification Rod
So, let me just say, you actually can't have too many copies of this card in your deck.
If you somehow managed to get too many copies of this card into your deck, to the point where one could argue it's being harmful to you, then something silly is happening in your run.
This card isn't dumb dumb busted or anything, but rather, if you got nothing better to pick, you always pick this card.

Embrace the Darkness
So, I'm mentioning a generic black rare on here, simply because it has so much synergy with Reimu. She can generate orbs to block with barrier to deal with the downside of this card.
It's only bad in long fights where running out of non-attack cards is actually a huge problem.
It overall has synergy with Reimu's playstyle because she wants to kill things quickly, even if you don't have orbs to block with.

Prism Concerto
This card can be very good, but you need to have the right cards for it.
It can prevent your mana being converted into colorless, which is really helpful for decks that have a good amount of colors, but it's not worth it to put it in just for those fights. It's more so for decks that are somewhat clunky in the mana base without it, and for decks that are playing the X cost spells that check the mana that's being paid into it.

Ace Exterminator
This card is pretty good in group fights. But it's good against the act 4 boss because it gives you ward 2, and that boss might be summoning enemies to benefit from this. So it's overall a solid pick.

Gap Lady
You pay a small amount of life, that Reimu typically easily gets back from her starter exhibit, to draw cards and hopefully play either expensive powers or attacks to quickly finish the fight. A solid card overall.

Trick of the Wicked Hermit
Upgrades are good, comparing to the card that gives you money when you kill things, I consider this to be an upgrade. You get enough money to buy an upgrade with the other card but with this card you can use those upgrade opportunities to do something else.

Red
Red overall is the weakest color to pick, but it isn't horrible. If you're using a good amount of cards with only red cost and no generic/other color costs, it can actually be your best pick in cases.
It's also good for expanding border to do more damage quickly.


But overall, not much to talk about.

Green
I'd consider green to be overall the strongest pick for Reimu, but not one you should always default to.
You get access to two color types that characters don't default into (Red + Green, White + Green) and I'd consider a lot of generic cards you get from the new color combos to be really good.
Like I actually don't want to talk about how good they are because that'd turn this into a card review more into a actual analysis of Reimu.

To summarize them the cards you get, you get a lot of cards that give you graze, benefits from grazing, and ways to increase firepower. Overall really good cards that I'm not going over because there are so many good cards. Check the wiki[lbol.miraheze.org] if you want to see them for yourself.

I will go over the 3 color card though, because it's pretty unique to Reimu in the fact that she's the only one who can get it by adding more extra color, and talk about the Reimu cards.


Magic of the Mallet
So, this card doesn't effect cards that don't have a generic cost. And to you need to play at least 5 cards to make it worth it (playing 4 cards is mana neutral). That and you need to realize with a minimum of a 3 color deck, you're going to be restricted by not having the right color a good amount of the times. Unless you're running cards with 2+ generic costs.

That being said, this card is really strong and can go into any deck that doesn't have a reason not to add it. I mostly opened with the weaknesses of this card because the card is obviously good and it's easy to overlook when you shouldn't take it.

Spring-Colored Path
So, I like to say that these types of cards are good for getting your expensive powers out of the way quickly, or killing enemies fast. The only problem in this case is you can really hurt your turn 2 running this card, so just make sure you don't use it without thinking of what could go wrong.

Blossoming Fantasy Seal
This card gets commonly overly evaluated by a lot of people, at least I feel like it.
It's a good card, don't get me wrong, but Reimu A typically wants to end fights quickly. And to maximize this card you really gotta ensure the fight lasts a while. Assuming your deck only goes through one or two cycles, the card that gains you 4 life for 1 mana is superior in life gain.
But overall still good.

Aggregate Border
This card is what I'd consider a win harder card. If you have a lot of barrier to exchange for damage, you were probably going to win that fight anyways. If you weren't in that type of situation where you had a lot of barrier to deal damage with, it's 4 mana to 40 barrier, which then makes you eject all of your remaining barrier.
I don't think this is a good card.

Misumaru, Skilled Crafter
So, if you're using orbs a decent amount, this card is really good.
In a short fight, you can just convert it into free orbs now. In a long fight, the card gives you passive barrier that then turns into scaling, which multiplies your power as apposed to adding a linear value to it, which is powerful.
General Advice
There is advice that I'd like to give but I couldn't find any good place to put in the guide. I'm putting it here because I believe it's worth talking about.

Stalling
Sometimes you are at a position in a fight where you can win the fight. But sometimes you can do more then win a fight. You can use a card that gives you benefit outside of combat to generate advantage for your run. You can also use one of these cards to generate cards that generates cards that benefit you outside of combat.


These cards can potentially generate cards that gain you life, among other things.

Taking your time
You don't get any benefit for beating the game quickly. It usually takes me a bit over 15 minutes to get through each act. Taking longer is good and I even recommend it as I play a bit fast. Going faster then my time can be bad because you aren't actually considering your options. This game requires a decent amount of thinking, both in and out of fights, so don't rush it.

Doing things you typically don't
I've talked a bit about being too biased towards a strategy but another piece of advice is don't be afraid to try out things, even if it didn't work out for you in the past, if you have synergy, or your deck looks like you needs that piece even if it isn't good.
It's a good way to grow as a player and improve to understand how these cards interact in these type of situations and you won't understand that unless you do it.

Build around your exhibits
Deck synergy is important, yes. But your exhibits are equally as important when it comes to synergy.
If you have the exhibit that gives you mana for not playing a defense cards, try to reduce the amount of defense cards your deck needs to play. If you get the exhibits that makes skills 1 mana cheaper, try to get more skills then you typically would.

This game is about adapting to what you get, and you typically want to do that equally to the upcoming threats, your deck, and your exhibits.

Skip card rewards
Sometimes the draft doesn't offer you a card that's good for your deck or your situation. During these times, it's very important that you skip.
Similarly to the simple concept of players not wanting curses in their deck because it makes their deck worse, adding the wrong cards to your deck will also make your deck worse.

In all of my games I skip, I'm guessing a approximate, 1/4 of my cards on average. Sometimes more or a lot more depending on what my deck is.

Don't be too picky with how your deck is
Effectively the opposite of the previous point and I've mentioned this throughout my guide, but I'd like to make a point to highlight this.

You don't need your perfect deck to beat the game. Having the mentality of "I need such and such cards to with this deck" or "I'm going to build this type of deck because it's best" is very unhealthy mentalities.

You don't need anywhere near the perfect deck to win the game.
With Reimu A on L7 I have
  • Beaten this game with a orbs deck without any cards that directly effect orbs
  • Beaten this game with a deck that didn't have graze, vulnerable, weakness (I removed youkai buster), draw cards and attacks that hit everything
  • Beaten this game without getting any firepower cards in my deck
You don't need the perfect deck, you just need a deck that's good enough to beat the game.
Even more so if you're not trying for perfect resolution, allowing restarts and/or just playing on a lower difficulty.
Exhibits synergy
I'll be going over exhibits that have very noteable synergy with Reimu A. I don't want to simply go over every exhibit because that'll be too lengthy for the scope of this guide. Use the wiki[lbol.miraheze.org] to know the effects of the listed exhibits.

Dream Diary
Dream Diary gives more mana then a boss exhibit. It can potentially be your best exhibit if you have the right deck for it. It may seem like you have to leave yourself open to damage to use it, but that's far from the truth. Reimu has probably the best synergy in the game with this exhibit.
She can use orbs to block for her, she can stack barrier on one turn and not use defense cards the next turn, and she can use skills to graze attacks. If you see this card in your deck, you want to see how much of it you can use.
I've had decks that never played defense cards, and part of the reason why they never needed to use defense cards in the first place is because Dream Diary was generating enough mana for me to play extra orb cards.

Three attacks in a turn
This includes Hannya Mask, Fox Mask, Hyotoo Mask, and Mask of Hope.
Reimu may be potentially the best character for taking advantage of these exhibits.
She can retain attacks to use them another turn and she can use orbs to avoid damage if she needs to.

Here are cards that noteably have synergy with these exhibits.


Old Lunar Snake
Reimu has a good amount of cards that generate other cards, then those cards exile on use. The rares that generate cards that exile on use (that still have a cost), the orbs, and more. And a good amount of them cost only 1, and the orbs cost 1 when upgraded. This allows you to generate a lot of mana with this exhibit. Outside of just, you know, playing regular cards that exile on use. Reimu gets a lot of use off this exhibit.

Temporary Firepower
This includes Heavy Bass Drum, Wolf Tengu's Shield, Beer, and somewhat Oni Sake Dish, Kasen's 100 Medicines, and Parasol.

These have a lot of synergy with Instant Dimensional Rift, with Heavy Bass Drum being very major.
Obviously they have synergy with the entire temporary buff archetype, with dreadful raging waves being the 2nd most noteable. But Instant Dimensional Rift can get absurd with these exhibits due to how quickly you can just stack up temporary firepower for free.


Other uses at Gaps
This includes Moriya Purification Rod, Shiny Bulb, Dowsing Rods, and Donation Box.

This isn't Reimu Synergy, but I just want to say that resting doesn't actually upgrade your character, so you want to only do it when needed, and upgrading cards costs money that slowly adds up.
Having other things to do at the gaps can be useful. Just be mindful that upgrading your cards might still be the best thing for you to do, even with it costing money.

Tactical Conductor
Reimu has a good amount of skills that are very useful, that cost only a generic mana. This is better than having skills that cost 2+ cost because you get to play a lot of free skills easily, although some of the 2+ cost skills are just so good that they don't need the full on synergy.
Not much I can really preface more than that, outside a good amount of them draw cards, so they somewhat become free to add to your deck.


What to expect from Reimu B
This is a Reimu A guide, but I figured I'd add this small section to cover Reimu B because they both share the card pool, nearly the same colors and I can summarize her well enough. And you can use this the Reimu A section as a proxy guide.

Reimu B is effectively the opposite of Reimu A in terms of how they handle damage. Reimu A thinks about quickly dealing damage and blocking is a after thought, while Reimu B thinks about how to avoid damage and then deal damage following up.

Obviously Reimu B can fall into a more Reimu A playstyle and vise versa, but this is pretty much what you'd expect from them from the get go.

This is because two reasons.
  • Reimu B's exhibit doesn't give any healing, but instead gives barrier, which allows Reimu B to store barrier to not take damage on a future turn.
  • Reimu B has duplex barrier, which does more damage depending if you have barrier. Meaning having barrier rewards you with damage.


Reimu B has a much easier time getting into the barrier archetype and the exile archetype, due to having triple white to play the cards heavy that focus on white, and for being able to have barrier from the get go.
Example cards are played much more easily because of this.


Early on Reimu B wants to find a ways to stack barrier and have ways to preserve that barrier to use duplex barrier to do lots of damage.

Just like every other character, she can't ignore damage. She may end up taking damage cards that lean her into a more typical Reimu playstyle.
But her duplex barrier does such good damage to where she can lean on that for the first part of act 1 and maybe the second part.

I should say though, comparing Reimu B's exhibit to A's, it's a weird comparison.
Reimu B's deck and exhibit allows her to build towards barrier early, which is the best type to stack. Which can potentially allow her to build a better deck later on comparing to Reimu A.
But Reimu A's exhibit is better after act 1 (Reimu B's is better act 1, I'll die on this hill) but their exhibits start to matter less as the game goes on.

So, even though it's popularly said that Reimu A is better then Reimu B, I'm not entirely sure if that's true.
Although I can say, without a doubt, that Reimu B is harder to play. Although it might be similarly to Ironclad vs Silent in StS where people lean towards one or the other.
Let me know if this guide helped you
I held back on adding more to this guide because I'm not sure how many people will read this.
If this ends up being desired I'll probably add more to it, like listing out things I decided to not go into detail and making this look prettier.

Also let me know if I did anything wrong with my guide or if you disagree with anything.
Constructive criticism is welcomed.
6 Comments
Seven ate you  [author] 29 Sep @ 4:22pm 
Thanks for the positive feedback, I'm glad this guide helped you!
EmiHoshino 29 Sep @ 9:26am 
thanks for the guide, helped get a better perspective which turned into one of the most busted runs I've had
Seven ate you  [author] 15 Sep @ 2:46pm 
Although I just realized you're talking about orin in particular, which I glossed over that on her elite summary. I didn't highlight it for too long because if I talked about every niche thing the player can do then this would be, at the least, 3 times as long and half as useful.
Seven ate you  [author] 15 Sep @ 2:40pm 
Part 2

Also I didn't see mention of Reimu's starting exhibit

I covered it in "How you should expect to play Reimu A".
Seven ate you  [author] 15 Sep @ 2:39pm 
Going in all your points in order

unreasonably effective thin decks

That's kinda a inconsistent strategy. Unless the guy taught who taught you the strategy also taught you how to manipulate the draft pool, it's not consistent.

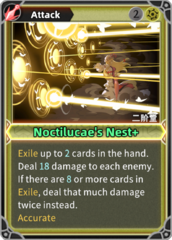
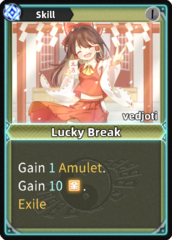
This is going off the assumption that you will in fact get a exile card early, which is reliant on RNG that has no reason to favor you.
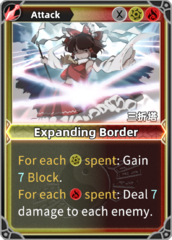
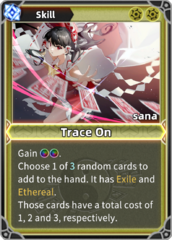
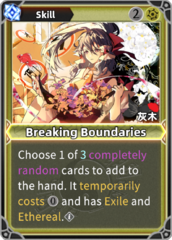
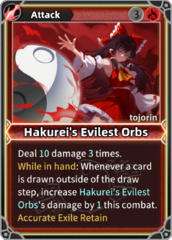
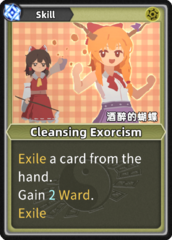
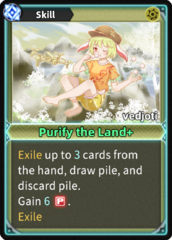
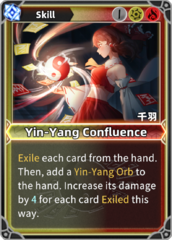
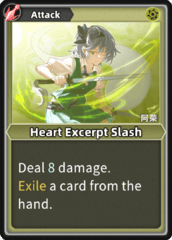
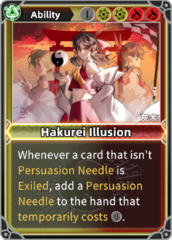
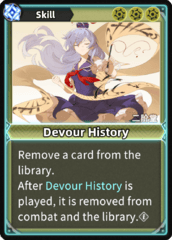
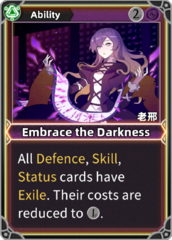
Reimu only has 3 cards (at base) that can exile cards without themselves being exiled and one of which is a rare.

Assuming you do get the cards, the deck works fine, but that's pretty much any functioning deck types. Being reliant on 3 cards is kinda a inconsistent strategy.

I do believe I probably should've covered that in the archetypes, but I did kinda overlook the archetype (I typed half of this out in a day, so it was kinda rushed just for the sake of me finishing it) so I will add that and thank you for bringing the archetype to my attention.
neo 15 Sep @ 12:43pm 
I agree with most of the guide. I used to play like that until certain someone enlightened how unreasonably effective thin decks are and how to consistently get them in nearly every run. Not gonna go into detail, but targeted exile cards and very calculated plan for A1 boss to get away with minimal draft are key.

Also I didn't see mention of Reimu's starting exhibit? Imo, it's very powerful but I feel like some players wouldn't use it to its full potential due to being too attached to hp. I.e. Orin is basically a bloodbag even if you take a big hit on turn 2.