
Install Steam
login
|
language
简体中文 (Simplified Chinese)
繁體中文 (Traditional Chinese)
日本語 (Japanese)
한국어 (Korean)
ไทย (Thai)
Български (Bulgarian)
Čeština (Czech)
Dansk (Danish)
Deutsch (German)
Español - España (Spanish - Spain)
Español - Latinoamérica (Spanish - Latin America)
Ελληνικά (Greek)
Français (French)
Italiano (Italian)
Bahasa Indonesia (Indonesian)
Magyar (Hungarian)
Nederlands (Dutch)
Norsk (Norwegian)
Polski (Polish)
Português (Portuguese - Portugal)
Português - Brasil (Portuguese - Brazil)
Română (Romanian)
Русский (Russian)
Suomi (Finnish)
Svenska (Swedish)
Türkçe (Turkish)
Tiếng Việt (Vietnamese)
Українська (Ukrainian)
Report a translation problem


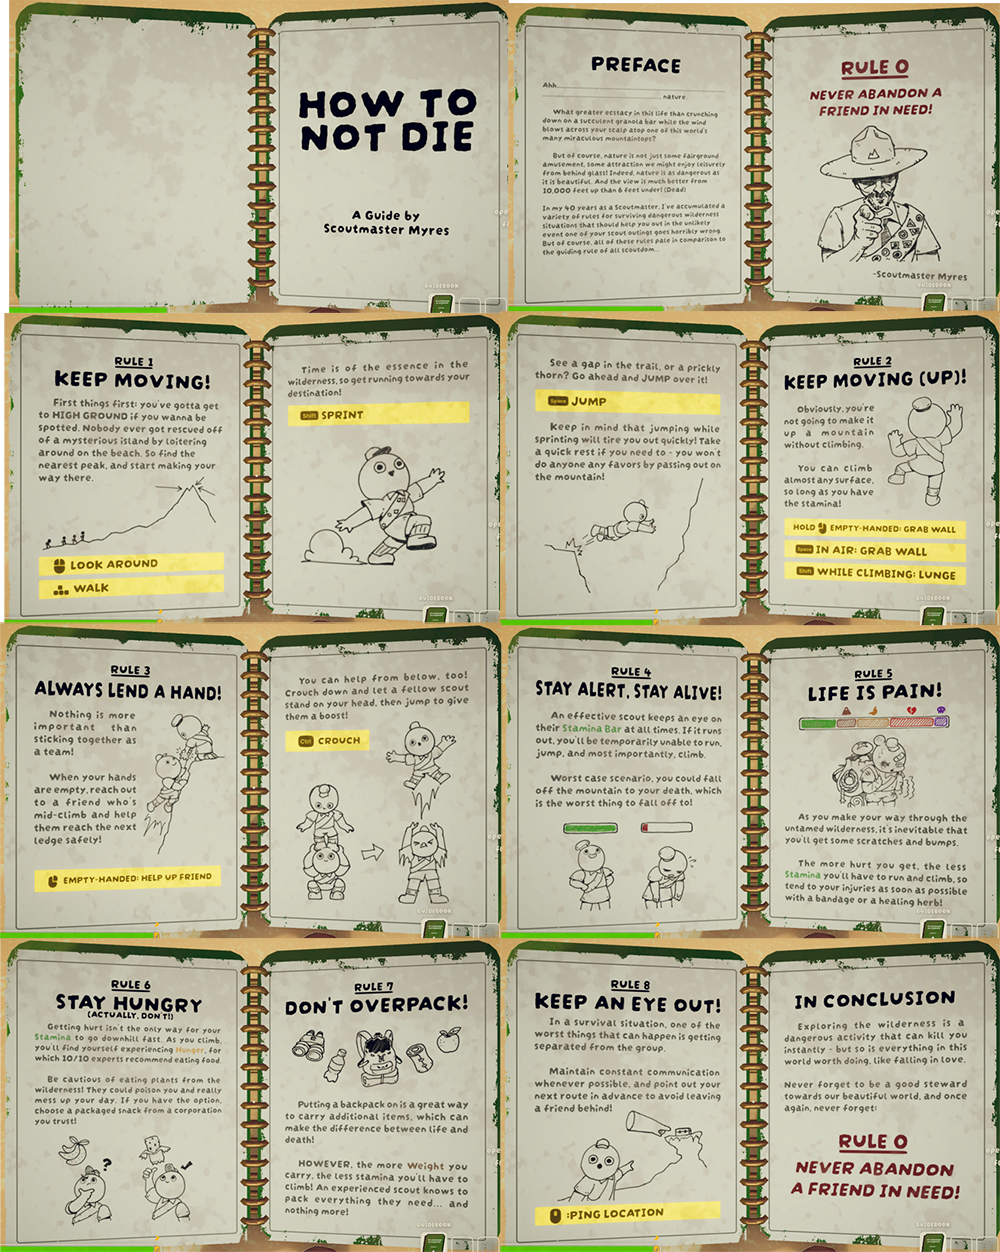
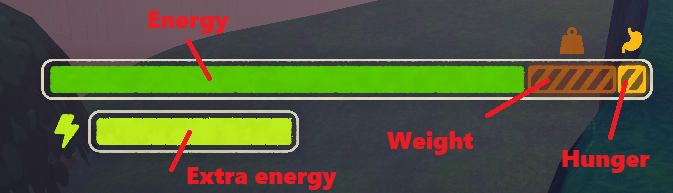


Also at the top of the stamina section, specifying how many points of stamina you have by default would be extremely helpful so people can understand the gravity of 8 hunger or 4 poison. 8 points of hunger means jack if people don't know if they have 10 points or 100 points or somewhere inbetween.
me and my friends on difficulty 5 (haven't finished it yet).. and if you count all the previous ones, only not a beginner (4) by 1920.. then it comes out to 7680m... then HOOOW to get these 5000m?