Majesty Gold HD

Majesty Gold HD

141 ratings
The campaign missions
By Reality
I first played the game on the physical disc, and as I go through it again, I decided to make a guide on how to beat the missions. Will also have breakdown of mechanics, and show some easter eggs. All art from this game is publicly available from www.MAJESTYQUEST.com
4
   
Award
Favorite
Favorited
Unfavorite
Playing Order
The levels that are south of the mountains in the middle of the map are the one's from the original release, and they do a better job representing traditional gameplay, making them a good place to start.

With the exception of Darkness falls and Clash of Empires, all of the Northen Expansion levels are counter intuitive to the rest of the game, so you shouldn't play them until after you do the day of reckoning (the last southern quest), even though many of them are labeled "advanced" and you might think they are easier than the southern "expert" missions. (don't trust the in-game ratings)

Start with the begginer quests (except Scions of Chaos).

Move on to playing most of the Southern advanced quests
leave out (quest for the crown and elven legacy)

Then play the Southern Expert quests
leave out (Tomb of the dragon king)

After this play Elven legacy, as it's difficulty is in between the completed and upcoming levels.

Next you should do quest for the crown. I reccomend going on to Tomb of the dragon king right after because you will want to be in stride for such a difficult level, but you can choose to take a breather by playing the easy Fertile Plains (despite it's expert rating) you just unlocked first.

I don't see how you could resist playing day of reckoning as soon as you get it.

I'll just tier the expansion quests. Their "in-game" ratings tend to lie even more often than the southern quests.

Easy: Clash of Empires, Trade Routes, Urban Renewal

Medium: Rise of the Ratmen, Fortress of Ixmil, Scions of Chaos, Darkness Falls, The Siege.

Hard : Valley of the Serpents

Master: Legendary Heroes

After beating all of these, you unlock the acatual master quests, but if you beat Valley of the Serpents or Legendary Heroes without cheats, then you'll make short work of them.

*I wrote this after the rest of the guide, which is in the order of Beginner>advanced>expert>Northern Expansion.
The Beginner Quests
The Bell, The Book, and The Candle

The game prompts you to go to this mission the first time you load it up, and there is a good reason for this, it is loaded with information pop ups on basic gameplay, and the randomness of it prevents you from completing it too early, giving you time to settle into the gameplay of majesty.
The most important things to learn are placing flags, recruiting heroes, and placing buildings. You win once you destroy 3 lairs.

The Forsaken Land

The real tutorial level, this restricts you to just rangers, rogues, and warriors. It provides tooltips on some of the most important support buildings, blacksmiths, inns, trading outposts, and it recomends you purchase a market place.

Generally you will only need one marketplace, as they are fairly expensive, and the additional money generation of duplicates is beaten by upgrading that first one or using the caravans from trading outposts. All the lairs for this level are on the edges of the level, including the target evil castle. Your own settlement will be in little danger. Blacksmiths help your heroes upgrade their equipment, and therefore, stats. Most heroes dislike buying armor (some can't do so at all), and will only do it at high levels, but almost everyone will run for a weapon upgrade as soon as possible. For this reason, I usually try to save money by only taking the blacksmith to level 2 and then only buying the third level weapon upgrade, with the exception of when I want to use dwarves, only warriors/elves/paladins/and dwarfs will realisticly buy third or fourth level armor, other heroes will wait till a time that you should have beat the level. Still, the first two levels make a noticable difference, and it does passively reduce the cost of all other buildings, making it an important starter building for every quest. Inns are used so your heroes don't have to run all the way to their indivual guild when they flee in terror. Paired with a guard tower, it helps protect slower or squishy heroes. The outpost is your heroes best place to get potions, as while you build it later in the game than the market, it will be closer to the action. It also throws out caravans that provide plenty of money (held money increases depending on distance it has to travel, additionally, it is multiplied by the level of the market, making even small caravans valuable once you have upgraded.) Remember to deselect the tax option for buildings far away from the palace, as it puts too much strain on your tax collectors, who probbably won't survive the trip. You may want to upgrade the castle, even though you can't use the next tier of buildings in this level, you still get a second tax collector and more henchmen to speed up construction, remember this on other levels where you simply don't want to use temples.

To win you have to find the evil castle and destroy it. Rangers will explore on their own, while rogue's and warriors will want money from an explore flag. Then you should put an attack flag on it. Higher level rangers will ignore it, but low level rangers and your other heroes will be happy to burn the building down. The level does start with a single minotaur, so you might want to use the ranger guild's move camp ability to put it by the palace so they'll have a few levels before fighting it or you can trick it into doing suicide against a guard tower.

Rescue the Prince

This level is your introduction to wizards, who you will have a love-hate relationship with. Wizards are horrificably frail early on, having pitiful hit points that make them jealous of peasants for their first few levels. They also can't buy armor. To make up for this, they use magic, which does plenty of damage, and is much more accurate and likely to do full damage due to most monsters having low resistance. This means they can take on some common things at range without taking a single hit. They also give boosts to armor and weapons to other heroes, making their guild a decent source of money. While they are slow, they learn to teleport after a few levels, and will wander out of your city to fight and raid lairs. Later they learn spells that give them temporary high points in dodging various attacks and reducing damage that does get through.

The level one guild gives you invisibility, which is perfect for saving level 1-4 wizards about to die as you are watching them, especially since they can't really survive long enough to get out of range of the spell. It also lets you build wizard towers and libraries. Librariries are visited by wizards, most temple heroes, and rangers, usually to increase intelligence/magic resistance, and also to give the stock wizard attack and defense spells to heroes. For wizards themselves comes the upgraded fire blast, which does splash damage, and the over the top meteor storm, which can kill high level enemies in seconds, even if the wizard just teleports away, it will stick around and keep killing things. Towers let you cast wizard spells without making the prohibitively expensive guild again, and also provide a much higher level of protection than guard towers in later levels. Spending money to enchant them seems annoying, but their much higher damage, ability to be built in henchmen-dangerous areas, and lasting long enough to recast at any gamespeed a human can handle, make them pretty good.

You won't need to upgrade the wizard guild, just buy wizards, a warrior and rogue's guild, and the usual marketplace and blacksmith. You can use the farseeing spell if you want to, or just have rogues run at low exploration flags. The prison isn't actually that far away. You need the diversity of heroes either way as the level is inhabited by the medusa enemy, whose huge magic resistance makes it a death sentence for any wizard it encounters (unless you see the fight and turn them invisible) After you've found the lair, level up your heroes a bit if neccesary and then put an attack flag on it.

The Barren Waste

None of the inhabitants of this level like go far from their lairs or attack buildings, so you have all the time you need to upgrade your palace, find and destroy the evil castle, and build a fairgrounds.

The Wizard's Curse

This is really easy for rangers, as they will just clean up the map. The only real danger is the daemonwoods. To kill one of these safely, you can put a guard tower right next to it, it will research arrows before the peasants get back to your settlement, and with their "healing" it will overpower the tree, possibly giving huge XP to any hero who shows up (they should not start the fight themselves though). The hooligans will be arrested without your attention. There are a couple lairs that you can burn down if you want cash boosts and your heroes to level up. The last hooligan will attack you, but since rangers level from exploring, they will be able to deal with it. Then the wizard orders you to kill 3 werewolves. You only really need to put a flag on one of them, as its hard to start a fight in the area without getting all their attention.

If you want the alternative victory condition, you will have to wait a long time to level heroes enough to take on a level 20 wizard, as he can dodge arrows and magic extremely well. However, his Hit points are still pitiful, and if you wait to start the fight until a melee unit is right next to him (use inns) or train dwarfs who have high magic resistance, then you can beat him despite the fact that he also carries a ton of potions. For a truly safe win. Build a dwarven settlement and a ballista tower right in front of his house, he won't attack them until you actually put a flag on something he owns. They will make swiss cheese out of him. Note that he is powerful enough to kill a dwarven settlement on his own, it needs some support as it can't be healed mid fight like with the daemonwood due to the wizard having splash damage, which will instantly fry any peasant who comes close.
Deal with the demon

You have to raise 100000 gold. The monsters are really weak on this level though, so exploration and grabbing treasure chests might seem ideal... unfortunatly, there is a neutral rogue's guild. I don't reccomend bother looking for them. Instead, fill out your prietess guild, any skeleton they encounter will make them flee in terror, due to them being unable to touch skeletons, and the priestess herself can one shot them due to their low magic resistance.

First, clean out half the map and turn off taxation for the inn, blacksmith, and warriors guild. Set the minimum pickup for the tax collectors to 100 so they only check misc buildings every 6 or so cylces. You don't need to bother exploring or building guilds other than your initial 3. Then build a level 3 market place and upgrade the palace. Next buy an elves guild, the doubled money from marketplaces is vital here. All scouting of uncharted map will be done by the random wanderings of your unlimited skeleton army.

At this point, hit options and crank the game speed up to the maximum.

Now build another marketplace and upgrade it to level 3. Repeat at least twice. Every time you do this, throw up a single guard tower for random attacks from sewer animals. Max out heroes and get a level 3 palace for slightly more gold income. With the bonus provided by elves, four fully upgraded markets will be enough. Go ahead and order any lair you see to be destroyed. Don't worry about the rogues, once your skeletons randomly scout them, putting flags on their guilds will cause them to attack themselves.

You can also win the quest with enough royal gardens or higher numbers of marketplaces, but this is the simplest way.
Hold off the Goblin Hordes

Goblins use all three forms of damage, physical, arrow, and magic. They are also extremely fast and rush your city in groups. However, they pay for this by being frailer than wet paper bag. .Warriors can tank their attacks out, as can rangers, if you take the trouble to use the move camp function to bring their guild to safety (it's not replacable) The allied wizards give you plenty of cash, so you can rebuild anything lost early, especially hard to defend marketplaces (guard towers can only really shield with hitpoints, as they lost to most goblin waves 1v1, especially goblin champions) I find the best way to complete this level is to erect two temples to krolm, and fill them both, before charging using explore flags and the super speed given by wrath of krolm to uncover all the goblin lairs on the map. Barbarians and the warriors of discord you start with won't even need to attack flags on enemy houses, they'll just attack on sight, and with the speed boost, their sluggishness isn't even a problem anymore. They can manhandle most any physical opponent, and the goblin archers and priests can't really get around their high HP either. You can also try to hold out and explore and flag the lair's normally, but other heroes or temples will need time to level before being able to survive in the wilderness so take what is good for your personal pace.

As with all levels, telling your first tax collector to do a minium pickup of 100 stops him from standing still by going between all those generic houses and guilds, and makes him concentrate on the big three, wizardguild-marketplace-blacksmith. This is often enough once you have multible collectors, but if your going for the long haul in the later "outpost levels" you may also want to take even the inns and guilds off the tax route entirely, keeping them in a heavily protected triangle where your supply of gold is pretty consistant throughout.
Free the Slaves

You face a mix of enemies here, including medusas, so you should have mixed attackers. The gimmick of this map is that whenever you destroy a slave pit, you will get up to 4 free heroes (heroes without guilds do leave the kingdom after 7days, but this is a relatively short mission. If you want to permenantly keep these heroes, build their respective guild, and they will join its roster (possibly preventing you from recruiting straight from the guild) You have to build the guild after you free them, they won't join an already existing one, even if it isn't full. This is most useful with the warriors of discord and paladins you can get on this level.

You can explore any way you want to, but keep in mind that after destroying the second or third slave pit, an enormous wave of rats will rush your castle , which will seriously threaten any building with under 250 health on the edge of your kingdom, (have your market surronded by other builds by this point) It shouldn't seriously be a problem for the palace, and your heroes should be able to one shot the rats with a little experience.

After you destroy all of the slave pits, Url Shekk will come out. As a boss monster, he has tons of health. He relies on a magic fire ball attack that comes out faster than heroes can use healing potions, so it's helpful to cast a temple spell on him, like wither. Alternatively you can figure out which hero he is attacking, and repeatedly use healing (from Temple to Agrela or Temple to Fervus) on them.


Quest for the Magic Ring

Right off the bat you will notice the other kingdom's inn. In fact it will probbably be burnt down by goblins. Since they are friendly, their heroes will use your blacksmith, marketplace, and inns, which will provide gold fast, but will cause problems if you want to wipe them out. Because goblins are on the map, take approiate action to keep your own marketplace and blacksmith safe. Also don't research teleportation amulets, even if you feel the need for a level 3 marketplace, giving the other kingdom's heroes mobility is a bad thing. The solari you start with are like a combintion of ranger and warrior, and can use a weak magic splash attack in addition to melee. Their speed is their biggest selling point, and they are known to attack lairs without reward flags. They can heal inside guardhouses in addition to inns, but since those are prone to attack, they can be forced outside if they use this ability.

This mission is pretty safe, until you find the hidden ring site. First of all, it is completely surronded by daemonwood. A high level solari with potions (or any hero backed up by your healing spells) can solo it, as can a handful of other heroes, otherwise, build an inn nearby and give people time to retreat in between wailing on the trees or just cheese it with a guard tower.

After the ring site is destroyed, a bunch of black phantoms come out. Not only are they immune to non-melee damage, they can also kill most heroes (including the solari) in one hit. There are 4 of them. Enough barbarians (use the demolish command on your temple to helia) or warriors of dicord (requires both fervus and warriors guild) can kill them, or you can let any melee hero have magic protection from a wizard guild for invincibilty while attacking it (it's own attacks won't hurt it, but their low hp will make the short duration of the spell neglible) As always when talking about magic, dwarves can eat them for breakfeast, although you will want to keep the ring site alive to get them, which conflicts with the way solari work.

You are warned that the enemy kingdom might grab the ring first, but they don't have the means to kill off the phantoms, and unless you are extremely unlucky, the path between the ring and the destination will be completey clear. You can also win the mission on accident if a fast hero like a cultist or elf grabs the ring and simply outruns the phantoms to the mission exit.
Quest for the Holy Chalice

You cannot rebuild your market, so keep it safe, or else. I recomend taking the trading posts off of the tax and repair routes (unless you choose gnomes) Your main city isn't under severe threat, but this map has many of the strongest non roaming monsters, destroying layers may unearth a vampire, or even an evil oculous. Only the strongest heroes can survive these super monsters. The map size is also much bigger than usual, so you will want to explore.

The temple to dauros you start with lets you recruit monks, while they do boost their melee and arrow dodging to huge levels, they are also slow as mollasses, and unlike their barbarian and discord bretheren, they hang around the city instead for looking for trouble. They have above average magic resistance, but if they ever end up fleeing in terror, their absurd movement speed will allow even the lasiest of monsters to chase them down. Adding insult to injury, they cost over standard price.

The temple of dauros does have a redeeming quality though. Owning one means that any warrior's guild you own has an alternate recruit option. At 1000 gold, paladins are the most expensive of all heroes. However they are also the best. They have speed, power, survivability, willingness to act without flags, are one of the few heroes willing to upgrade armor and weapons evenly. Really, paladins are only flawed by their slight weakness to magic attackers and slow build time on top of their great cost.

The fairgrounds is a luxury building, it will continually attract whatever type of hero the tournament is set to (or all heroes) and can level them both quickly and safely. It's far more potent in moving heroes than even reward flags and inns. Unlike other support buildings, it is almost never destroyed, since it has enormous heatlh, and attacking it ticks off all heroes inside, making it a veritible wall.

It's best to build about 2 warriors guilds before you find the free paladins in the wild, since their building will add to the inflation for the building even though you didn't place it on the map. The lack of raiding monsters gives you time to scout at your leisure, and then send the paladins to go ham on everything. The chalice site is usually in a far corner, it's defended by the Predator, but since both the monks and paladins will have over 90 parry by the time you find it, you can go all Arnold Swharzenger on it.

Elven Treachery

This is the first secret mission you will unlock. Note that it is actually one of the hardest of the advanced levels. You can win two ways. Make a lot of gold.. or slaughter everything. Either way, the elves will attack you, and due to their ranged attacks, choosing the wrong heroes will allow them to flee to their guild for healing before you can finish them off, as well as make survival difficult. Elves are also greedy and like to attack money rich targets like caravans.

The best way to start off, is by throwing up a gnome hovel, and a ranger guild, and then your market and blacksmith in the far corner of wherever you start (so the palace is between it and the center of the map) Your next order of business is two guard towers. With good placement you can place one on each corner of the palace, which will deal with sewer monsters heading for your market, and elves. Finally, throw up an inn and one more guard tower facing the center on the other side of your palace, as well as one more rangers guild. Don't bother upgrading your blacksmith past level 2, or your palace for that matter. after you've done this, the elves that occasionally come over will be killed before they can level and run, and about 3 of your rangers will survive to become immortal(given what's on the map) However, they won't attack buildings without excessive reward flags.

This is where you bring in temples. daruos is basically a passive temple, even though normal warriors always lose to elves, paladins will boost their evasion to about 60% and can run almost as fast, making them the perfect choice. don't bother upgrading temples or getting monks/healers. you can use healing spells and stone skin yourself if you want, but it only speeds up the inevitable, the elves are no match for 3 paladins.

Alteratively, you can do this phase with barbarians ands and wrath of krolm (their lower recruit cost lets you use the more expensive spell and as a bonus, the normally pacificstic rangers will support them, even if they are high level and the barbarians are level 1) Building a wizards guild behind enemy buildings and flagging them tends to work, but they'll always die when they walk to town afterwards, so you'll have to demolish and rebuild it by another group of buildings to make the cheese worthwhile
Quest for the Crown

Notice the ring of wizard tower's you start with.. This is here for a reason.. the default raiding monster you will face here isn't some little goblin, varg, or troll... Instead you must face a legion of minotaurs.
This makes this mission, the hardest of all the advanced missions by far, and its difficulty even encroaches all but one of the expert missions.

Start this mission by upgrading the wizard's tower to level 3. When the minotaur's come, use lightning storm to kill entire groups of them at once. Enchanted towers can kill single minotaurs, and force them to bunch up if other, more important buildings are closer to them. Only buy rangers and wizards at this point. It's fine to let the blacksmith and rogue's guild get destroyed. You want to start with a market and library instead for this level. Also try to get an inn on the side of your castle opposite of the wizard's guild, since they don't appreciate having to walk all the way home when they flee in terror. Whenever a ranger finds a lair, put a flag on it. When the wizards come to waste it, keep a watch on them and make them go invisible if they are in danger.. when monsters come out mid fight, they won't switch off of attacking the lair until the monster tries to hit them once, and with the kind of firepower on this level, that one hit is all it takes. This is less costly in both gold and time, than replacing dead wizards. If you kept the warrior's guild alive, get either a fervus or dauruos temple (ignore it afterwards) and buy some warriors of dicord or palladins to support your 4 wizards. If the warrior's guild didn't survive the blitz, use a temple to krolm instead. Once you've mopped up the lairs that keep spawning minotaurs at your palace, you are safe to look for the crown site. Regular warriors are next to useless. Elves and dwarfs are optional, but not reccomended unless you are extremely confident in your ability to make the limited gold in this level stretch to its furthest.
The Fertile Plain

Another secret mission, you fight off increasginly difficult waves of monster and even heroes, all of which come after your buildings instead of hanging out in the wild.

To prepare you for this, you're given more startup gold than any other mission. A Level 3 wizard guild should be a priority. After that, throw up the blacksmith and two marketplaces. This is actually the most wizard friendly map in the game. find a lair (not hard) and get your level one wizards to wail on it for about 3-4 free levels before the first wave. By the end, they'll mow down the rock golems and dirgo before the lumberig things get a single attack on them.

You should probbably give them some melee backup to be safe, it dosen't matter if you pick discord, paladin or barbarians. You should definately prepare some wizard towers and use thunderstorm, especially against things that are strong against wizards, like elves and dwarves. You can consider a rogue's guild (for extort) which will let you recast the thunderstorm spell once or twice when money is tight. Keep in mind that while it will one shot minotaurs and elves, dwarf and rock golems should be hit with two... therefore always let them get close so you can hit as many enemies as possible with each spell.

Using Paladins, Warriors of Discord, Adepts, Solari, Normal Warriors with help from Healers is also quite effective.

Normal Warriors and Warriors of Discord want a little more help with the last waves than the others since they can't handle rock golems as well as the others.
Slay the Mighty Dragon

This mission seems easy, but then a two headed dragon comes out of nowhere and murders everyone. Actually he tends to leave buildings alive in his initial attack. Don't buy guardhouses until the solari have managed to find another guild... while they explore adequately in some situations, owning a guardhouse adds the "garrison" to their choices for action, which means that they'll hang around your doorstep more often. Each guild you find comes with 1 impossibly leveled hero. You can build a second market if you want, but all you really have to do is upgrade the blacksmith. Despite the restrictions on all other guilds, you can build dwarven settlements. You need to do so after you destroy the magic sword site, which is a medium distance away. A level 20-30 hero from a discovered guild can do this, making a joke out of any evil oculous or minotaur who comes out to stop him. The solari are suprisingly bulky at higher levels as well. You can use the tournaments to level new heroes or the solari early on, but it's not neccesary, as its difficult to lose your special heroes unless you personally kill them with spells. The dragons spawns waves of enemies and occasionally lairs, but this mostly just saves you the time needed to explore there.

After you scout out the magic sword site and destroy it, you will be prompted to get dwarves to help you, and vendrall will enter permeant attack mode instead of running away. Once you have completed building a dwarves guild he becomes vulnerable and you can dispose of him at your leisure, although he spawns a horde of regualr dragons to sic your settlement and discovered buildings, their attempted baserace shouldn't kill anything with over 400 HP before vendrall himself goes down.
Vengeance of the Lich Queen

The building restrictions you face this time are more severe than in Dark Forest. Rangers (and the unavailable rogues) are once again a poor investment due to them fleeing from most of the laired monsters on the map (skeletons, vampires). The easiest way to start is with a gnome hovel and a warrior's guild. Skeletons are signifigantly dumber than minotaurs, and once they've started attacking a building, they will keep doing so even if it is being healed faster than a group of 7 of them can handle, unlike the minotaur who will only do so if the building actually attacked him.(guard tower, wizard tower) This allows your markets, temples to agrela, and guard towers some leeway against the skeletons set to raid mode, as well as the occasional goblin pile.

The biggest problem is the vampires, who will wander in small numbers immediately, and later as repeating 2-4 raiding party. However, they can be beat down if they are at the warrior's guild doorstep and you hurl level ones at them, or by any melee hero with healer support. (high level heroes, as against daemonwood, can do fine. Build two marketplaces, as is usual on expert missions, to ensure plenty of gold. Additionally, the very first vampires can be dealt with by guard towers, as they attack as single units, and your warriors can wail on them for XP without risk of being counterattacked.

After you've got some money, you can upgrade your palace and build the other lawful temple (daurous) to unlock the paladins. Although you don't get a blacksmith, a wizards guild can substittue in a pinch, as heroes will go there for armor and weapon boosting enchantment,s and they get great damage against al of the monsters on the level (although if they don't kill vampires within 2-3 shots they will end up attacking themselves). To deal with this problem, a fairgrounds right next to their guild set to magic tournament will allow them to level safely, without attracting too many of your other heroes. Once they are about level 4, they're magic dodge rate and attack power should be enough for the vampires.

All of the lairs are extremely far from your settlement, but if you keep in mind that the enemies take the direct route, you can backtrack to the source. Their is also a blacksmith+rogue+inn combo to discover, as well as a seperate dwarf+inn+baliista (will still join even if you have elves or gnomes already). I don't usually bother finding these, as it's pretty easy to pin down the lich queen's lair since it has three or so other lairs around it and is in the direction that that constant army of undead is coming from.

The lich queen functions pretty much 100% like the witch king. Summons hordes, will be beaten down due to you overleveling due to how long it took to find, etc. In fact, the healer-paladin combo may tank the poor thing as soon as it leaves its building, even with the high level monsters that come out with it.
The Dark Forest

You can't build guilds until you find the temple to fervus. There will be a signpost on the directline between it and your palace, once you find it, just put your next explore flag behind it. The monsters aren't interested in attacking your settlement, unlike the other expert levels, so you don't have much pressure. Just hope your warriors don't run into deamonwood or hellbears at too early levels. Meanwhile, go ahead and build two marketplaces in addition to a blacksmith, so when you do gain the ability to make guilds, you can quickly max out whatever you want.

After you find the temple you have to search the map for the witch king's lair.
The level is huge and sadly, rangers and rogues aren't good at exploring it due to their inability to handle common enemies. The best thing is to either get wizards, or a second warrior's guild (using the warrior of discord option that was opened up by the temple) and then give them explore flags. You can use a temple to lunord and the speed spell on heroes already strong enough to solo a daemonwood, they make the best explorers. Even though these heroes don't prioritze explore flags, raising the reward a bit will entice them over anway. The trading outposts you find should have the "one time tax option used on them to capitize on the 8000 gold they spawn with.

When you do find the witch king's lair, destroying it lets him out for you to fight. At first, he'll teleport around, notably summoning spiders (a joke) and special AI daemonwood who will rush your city like minotaurs and smack buildings if they can't find any heroes. You can literrally spell them to death personally if it catches your fancy. If you put a giant reward on the witch king, your melee heroes will eventually catch him out of position and murder him.. most likely it will take so long to find him that they will be overleveled and fully geared (blacksmith and wizard guild enchantment) and do most of the fight without you noticing.
Brashnard's Ultimate Sphere of Power

This mission allows you to simulate prehistoric ardania. In fact, it's probbably the easiest of the expert missions. To start, you will want to fill out both of the temples to krolms with heroes. Then use wrath of krolm. The slow barbarians will not get in range of the rust spitters in time to kill them anyway. Once you've passed this initial rush, lone rock golems, minotaurs, dragons, and evil oculus will attack you, and occasionally you'll get 3 of a kind or mixed waves. simply replace any barbarian who dies. You mine as well throw up a blacksmith and 2 fully upgraded markets (the generated money will fuel the constant replacement of heroes and casting of wrath of krolm). Expect a graveyard or two before the end of this one. Build a ranger's guild or extra temple to beat the quest more comfortably. Two of the shard sites summon waves of enemies, but its nothing serious compared to the default raiding enemies you already have to deal with. Barbarians do a decent job of exploring (given speed boost from wrath of krolm) or you can use explore flags. Order any lair you find to be destroyed on sight.
Tomb of the Dragon King

The difficulty of this level isn't actually expert. It's sadomachostic.

Build one ranger, if your lucky he will find one of the 3 lairs. It dosen't really matter because you won't be acting on it for a long time to come. At home, you want to upgradethe wizard's guild, and build a wizard tower between it (or depending on angles, the palace) and the ranger's guild. Start recruiting from the temple to krypta, you want it full all the time to maximize the amount of skeletons walking around. Gnomes are helpful here because of the constant need to build quickly and inability of the peasants to outheal a dragon attacking a wizard tower.

The first dragon will kill the ranger and his guild and then charge into the unexplored land in between you and the ranger. Enchant the wizard tower you built during this time. (you shouldn't have purchased wizards) build a market, but not a blacksmith. You will not be upgrading it quickly. After this, you will want another wizard tower, (two if the dragons come at inconsiderate angles) The dragons will usually only appear attacking the wizard guild, and at two points, one slightly to the side of it, and the other along the edge of the map, but still on the same side of the wizard guild as the former. Do not waste money on a perfect ring. Identify where you do need it (almost always the side closer to ranger's guild original position). Fairly soon, you will be attacked by a raid of three dragons, this will happen in the latter position. You should be able to hit them with a lighting storm. This won't kill them, but it will put them within range of a spell or two from eitehr your units or wizard tower (the tower will only attract one dragon's attention other dragon's attacking it will be able to switch to focusing on the peasants/gnomes healing it)

The fire attacks that dragon's use are treated as arrows, so skeletons have a native 90% chance to dodge them, this allows them to provide a natural buffr as your priestess summons more of them. You will want to take the tax route off of any building far away from your palaces door (make sure that is where you place market) as money for enchanting and lightning storms will be extemely tight.

Semi Nearby is a trading post, if you want to risk it, send a one time tax option to collect the 8000 gold it starts with in its target, this can fuel you upgrading the palace or getting a second (preferrabky third) temple of kyrpta. By now you should firmly know which side dosen't have enemies attack it. Build a second market there, and continue to rely on your 3 towers, skeletons, and lighting storm to buffer out attacks.

When money stops being tight, use wizards or warriors of discord to destroy any lairs that have been scouted out.. At this point you can use explore flags to tempt them across the map, the lairs tend to be far back and equallly distant from each other and your palace. On the far side you can find 3 free temples to krolm, which will probbably allow you to clean up th map. Keep in mind when destroying these lairs that, the first two have a chance to spawn normal monsters when they die... or a group of 5 dragons, which will likely kill heroes afield.

Once you destroy the third lair, (when looking with them, you can extend a line from the 3 directions the dragons come from) the tomb will spawn in the middle of the map. this will cause also cause a one time raid of six dragons to immediately beline from it to your settlement, so have a thunderstorm ready. The heroes who took on the other lairs will be good enough to kill the tomb.

For an alternate solution to this level, use educated guesses and explore flags to guide your original ranger(s) to the hidden temples to krolm and then use them to clean up the level by pumping out more of them when they die and using the rage ability to allow them to close the distance with the ranged dragons, not to mention getting a huge buff to their chance to dodge.. Basically the same procedure that is used on Brashnard's sphere of power. If you do opt for this, don't forget to build an inn somehwhere in your settlement so they don't always go out to the middle of nowhere after buying potions.
The Day of Reckoning

Before you can unite ardania under a single banner, you must survive the end of the world. You are given a lot of money, two level 50 heroes to start with, and all recruited heroes start at level 5.

Jack the tax collector's min pickup to about 500-600, this is faster than unclicking all the temples, random houses, etc, and does the best to make sure he just walks the 10 feet to the market, grabs the money, and returns intact. If you want

To begin with, there are a couple of minotaurs and Dirgo the Cyclops attacking some random building. Your level 50 wizard should kill him. Build a marketplace as close as possible to the front of your palace's door for the tax collector, and then a blacksmith, rogue's guild, and inn. Fill out the ranger (for killing black phantoms), warrior and wizard guilds (for tanking waves of spiders) and begin upgrading the support buildings and rogue's guild . The 4 corners of the map will randomly contain the lawful temples, chaotic temples, other races, and level 3 temples+krolm. Monks and Adepts are the only ones worth getting (and still arguably worse than getting a second rangers guild)on this map, although keeping temples alive for spells is importantish-usually they will only be in danger of dying from the witch king and final wave, the second of which doesn't matter... Which groups are in which corner is determined randomly. Flag 3 of the cornercorners before your stuff finishes building, so you heroes get time to get out there before the next big wave. The dwarves can give you ballista, of which you'll be able to place 2-4 before the end, but they aren't neccesary. Warrior's of discord or paladins should be recruited once they are available, with the discord being preferable since they are equally bad at resisting magic attacks and start with higher atk and HP, which gives them an advantage over paladins due to the relatively low amount of melee bosses. . Also find the rogue's guild, and hit the down arrow so it appears in your lower left window, this way you can find it and use extort at will when money for spells gets tight.

The witch king will come out to spawn giant hordes of spiders at arond this time. Hopefully he'll wander into your castle, if he doesn't his spiders will constantly destroy buildings.

If he's still alive by day 6 (check upper right corner) then your buildings and heroes will be at risk at the same time, as this is when the first wave of black phantoms comes out. Either level 50 heroes can tank them for a decent time, but will still die to their outragous power. It's best if this happens near your castle, since the rangers will all attack the phantoms from out of their range while they are destracted by the lvl 50, especially if you spam the healing majesty spells on the warrior/wizard. Weirdly this makes rangers bassically the most useful hero on this level. I don't usually get a second guild for them though. The Lich Queen comes out, but her skeleton horde is much less threatening than the spiders, so you can deal with it slowly, and focus on preparing for the next wave of black phantoms on day 15. If you are making good time, you can flag her to ensure at least some of the heroes fighting it are melee and it goes down with minimum casulties. Revive spells should be used if you let at lvl 50 hero die, since rangers can't cheese the black phantoms if they don't have one of the two to tank for them.

The final wave comes on day 20, this time it's vendrall, url shrekk (flag), and a third batch of black phantoms. Once the black phantom dies it's pretty easy to clean up the last three bosses, without.

If the level 50 heroes die and yuo miss the chance to use resurect/reanimate on them (this is what extort is for><) It's best to fight the black phantoms and other bosses using discord/paladins with support from the blessing spell, or if it hasn't been found, wither on the boss(including magic ones)

This absolute most important thing to do is get access to either healing spell before the day 6 black phantom attack and to eliminate the witch king quickly... these two events are the most likely to wipe out your heroes.

Scions of Chaos
Generally the 3 bosses are weak to their own hero type : so make priestess first, cultist 2nd, and discord 3td

Using the wither spell from the temple of krypta is extremely helpful for all 3 bosses

qhen you beat the 1st boss (priestess + skeletons) , the 2nd boss will appear with an animal army.
Cultist and Discord should fight him, but it's helpful to get a lvl1 sorcerer abode and a ranger guild before he dies.


Two level 35 heroes down, one to go. However, as soon as the cultist dies, your palace gets surronded by about 14 flowering strangleweed. Thw best way to get rid of them is to put frost field on a skeleton. Rangers can kill them because they have longer range and the flowers won't fight back.. worst case scenario, you can use cultist / discord and a lot of heal spells

When the last boss gets to your city , you can keep the wither spell on him and your own discords should win. When the boss uses the howl of discord , you can use the heal spell to make your heros stop running away , even with no sorcerer abode

Alternate strategies :
All priestess + ranger (my old favorite)
2 Guild All Warrior of Discord

Northen Expansion Advanced Quests
Unllike in the base game, the advanced quests are actually easier than the expert quest this time.

Fortress of Ixmill

Advisor Briefing tells all, it teleports, it summons hordes, and you must smash it. Needs high leveled heroes as it also acts as a wizard's tower. There should be two goblin camps first of all, so your immediate concern should be them. building two markets and a blcksmith and fending with a stock warrior's guild is possible. Once you are ready, taking krolm or the other advanced heroes does nicely. Don't bother flagging the fortress until it summons shadowbeasts... or else it will teleport and regenerate off any damage you do to it. It takes the daemonwood with it, so ideally you will have decent heros. The ratman waves and undead waves it sends at you, along with the native goblins, should be enough. There are yeti caves far away, so definately don' trush at it if it appears on the border of the map.


Trade Routes

I recommend using greedy heroes (rogues, elves, barbarians) to quickly destroy obstuctions. The single enemy rogues will destroy their own guild if you flag it. Your own settlement will be under a little pressure from goblins, but 2 guardhoues and 8 rogues can tough it out early on, and high level elves and barbarians can wade through hordes of them with ease.. The worst of the random events are the barbarian and gorgon rushes(dragon is kinda laughable) Constantly sweep the trade routes for the respawning flowering strangeweed and flag them. Go ahead and torch any goblin cities you find regardless of whether they are on the route. Don't start flagging actual lairs until after you've survived the initial goblin attacks, youlll need heroes at home until you have 4 elves or a barbarian guild. it's rare but creature dens should also be flagged, since giant spiders are just fast enough to chase down a caravan. If rust spitters show up flag one at the back of their group, this should get your heroes to be shot(and thus notice) the rest of them with one flag.

Clash of Empires.

It's basically an easier version of Hold off the goblin hordes. A consistent building order is gnome hovel, blacksmith, two marketplaces , and two warrior's guilds (on the edges of town pointing toward the enemy corners of the map). this will allow you to have 8 warriors of discord before the enemies start spawning. There is no point ever reasearching in the blacksmith above the level 3 weapons, since money is tight for a while and the heroes don't use it often, you will need to use call to arms a few times to get by. Replace warriors of discord when they die. A rogues guild/ level two palace can help with the high rate of tax collector death on this map, but nothing major should be done before the 8 warriors are in place, as this map can end very quickly otherwise. You can grow attached and heal people if you want. COME TO PAPA.

Rise of the Ratmen

You're completely surronded by moderate level monsters, so early leveled heroes face extreme danger. I recomend starting with a temple to dauros, an elven bungalow, a warrior's guild, and a market on your safeflank. Put up a two guard towers and upgrade them to lvl 2 for the HP boost. The lawful hero's thankfully won't use the elven lounge this creates. Paladins will be able to hold the rats off long enough for you to either build a second market or warrior's guild. Rebuild a blacksmith. Going to palace level three creates less tax collectors than building the new outpost building, and you don't need to explore or deal with expanding at all. This leve is all tanking. If you want to train actual monks in tandem with your 8 paladins, make sure to manually delete the inns and royal gardens.... they will try to visit them at full health. I recomend getting a magic bazarr up to the strength boosting potion before attacking the far away sewer main. When it breaks rhoden appears and summons about 8 sewer mains right in next to your castle. Even though this swarm is about 4times bigger than what you've fought throughout the level, 8 paladins and 4 elves will make short work of it.

Urban Renewal

You can easily cheese this mission by taking advantage of their neutral stance toward you and reliance on arrow units. Build two temples to krypta, a marketplace inbetween two guard towers, and then , once you have eight preistesses and a good number of skeletons, just flag a building. The chain lightning from sorceror's abode just tears through level one heroes later, but for now, just watch them constantly flee in terror everytime they encounter a skeleton, and how the strongest of them is two shot by a drain spell due to you not building a blacksmith for them to abuse. This startegy leads to a slight problem with the goblin raid event, but even then you are unlikely to lose more than two heroes, and any other deaths are easily covered because they can't approach your buildings without encountering skeletons and either running away or dying in vain. Absoultely do not resaerch the fire balm at the magic elixer, as they will benefit from it with all their units while you only benefit with rangers.
Northern Expansion Expert Quests
Legendary Heroes

Remember Tomb of the Dragon King?
This takes its place as the hardest level (technically the spires of death and valley of serpents are also harder than that, but nowhere near this montrosity). Heroes spawn between level 10and level 18. If the Solari finds an ancient barrow with their special ability, use the sorceror's abode to change of heart on them (until you have at least 5 heros). It's best to have elves and a second marketplace as early as possible. Because killing the barrows spawns monsters directly into your buildings, it's tricky to place them.

There is a trick you can do with outposts to get around the 1 hero per guild restriction. Outposts still hold 6 heros, so build the first hero of a guild you want (recomend wizard/helia), then demolish their building. The hero will move to the outpost and you can build another guild at its lowest price since it still technically the first one on the map. You can do this 6 times. Because of the time limit, you should only do this with one outpost.

The Barrows never spawn along the furthest side of the map from the palace, so you should fan out only to 3/4 of the map when placing explore flags.

Their spawn rate is very low, so a lone hero can often kill one without being forced to flee in terror or distracted by combat. However, once killed, the wave of monsters spawned can be dangerous, even with the high level heros. For the last few barrows, don't be afraid to either use the Gate spell from a level 3 sorceror's abode, or to build a wizard guild directly on top of them (a newly recruited wizard will go for a flagged building over healing potions if it is close enough). Use invisibility on the wizard to prevent him from being distracted if you opt to do this.

The last two barrows will probbably push the time close to the 30 day limit. I've never managed to beat this in under 27 days when playing cleanly.

Alternatively you can cheese the map using Wizard Towers. While this is reliable, I feel like most people can get down to 2-3 barrows with normal strategies easily, and only recomend doing this if you don't want to replay the level a few times.


The Siege

This is a surprisingly easy level to win. It is more a fun "sandbox" than a challenging level. Ignore the trade caravans: the other king uses heal on them constantly, so they can only be killed if you have a wizard or a critical strike unit (monk/barbarian/warrior of discord). The enemy kingdom uses elves, warriors, wizards, priestesses, and cultists, and has every building. Most notably, they have a fairgrounds, and will power level their heros if you play slowly. One positive of the map, is that only the warriors/elves/wizards are greedy enough to go after the enemy reward flags, and you will only fight the other heros at their base (in fact if you attack the middle you can even finish without killing any temple heros). You aren't under much pressure at first, so you can set up 2-3 marketplaces and use them through the entire game. You can build guilds directly behind the middle guardhouse because of the lack of (yellow) threats to your peasants. This saves walking time. If you don't research arrow at the other guardhouses, he won't attack flag them. Don't rely on the guardhouse to stop the enemy, since the elves have more range than it, and once the fairgrounds starts going, the other heros can simply run over it. With a very safe source of money, you can start making temple heros, and they will usually "battle enemy heros" without even needing reward flags. Heros die pretty frequently (due to lightning storm abuse), but this hurts the other king, and you can win by simply re-recrutiing. It's best to leave the temple to Krypta alive so that he runs his money out with reincarnate. He usually runs out of money after losing the 2 elf guilds and the warrior guild. This quest usually takes 20-25 days.

If you use Rogues/Warriors of Discord, make sure to put a statue up so they don't take attack flags on your own buildings.

Darkness Falls

Features two bosses who must die within a few days of each other. Neither is really that strong though. However, you do face an intense struggle in the early game due to the raiding shadow beasts (and you thought minotaur/ dragon raids were evil!) Lairs can release evil oculos and vampires on release, so weak heroes not reccomended. Pretty easy to just build two markets and couple of temples to krolm, and just let the level play itself. If one of the big baddies dies, the other will teleport away, but he doesn't really try to stay hidden, and may actually teleport into a place you've already explored.

Valley of the Serpents

Immediately upgrade the palace to level 2, you need extra peasants. After this, order them to build a market at your doorstep, and get started on your guilds since it's imporant to have a medium group of heros recruited early. Two (normal) warriors guild can handle the first big event. Normal Warriors work fine instead of Paladins or Discords since the healers will actually follow them, making them better than normal.

You will get an event where 4 elves join your kingdom, right after, a giant wave of medusas will rush the elf guild. The second rightmost spell on the list (provided by the pre-built sorceror's abode) is Gate. Using it will teleport all of your heros to any place of your choice. As long as you make sure you keep an extra 2000 gold before this event happens, then you will be fine, the monsters aren't too strong for a group of 6 or more heros.

After this rush, the elves shouldn't be in danger again until day 15. It's better to play quickly though, and start exploring and flagging guilds as soon as you've rescued them. Consider even building multiple ranger and rouge guilds.

The gimmick of this map is that the Monster Lairs can multiply. Fighting the Greater Gorgons is best with heros that can group up, since they can't quite kill a hero that's turned to stone in the time that another hero is attacking them. Build new guilds as close to the center of the map as your peasants can handle without being killed to help them reach the serpent lair's more easily.

If you can't finish before day 15, ice dragon pairs start spawning from the edge of the map in addition to the occasional raids by gorgons and medusa.
If you reach this point, the quest basically goes from "advanced" to "expert"

If you do reach day 15 (and are not extremely close to finishing the serpent lair's), abandon the original elf guild and focus on the ones close to your base. Use Change of heart (the first sorceror's abode spell) to force heros like wizards to fight if they are fleeing in terror. Skeleton's can fight Ice Dragon's similiarly to normal Dragons, but it takes too long for the skeleton's to kill them back.

Another Northern Expansion building, the magic bazaar, can help if you've upgraded it well in advance of day 15. Fire balm lets elves and rangers do serious damage to ice dragons, and shapeshift (at lvl3) helps a lot of heros, but most of all wizards and priestesses, who buy it the most often, and benefit from the HP boost in addition to the damage boost. Ice dragons are much more vulnearble to ranged attacks than melee heros.

If you manage to make breathing room against the ice dragons, then you can finish off the serpent lairs. If the Ice Dragons slow you down too much, even if they aren't destroying buildings, then you should restart the sceneario, since the serpent pit lairs will keep reproducing until they double their original number.

An alternate strategy is to destroy your original temples, and use only rogues (to get enough to upgrade castle) and Temple to Krolm (2-3). Barbarians almost gurantee that you destroy all the monster lairs before day 15 (possibly even by day 10). They can also manage the starting rush on the farway elf guild just as well as other heros.

Spires of Death
You have to kill 5 respawning (so by the end you'll probbably rack a minimum of 11 tower kills, and realistically get 20)

Whatever you do, don't flag any spires find early on. You should flag other lairs on sight however. The spires will send hordes of goblins>spiders>werewolves as time progresses. Fill out the initial warrior's guild, and build two markets and a blacksmith to get on sound footing. After you've upgraded your palace, build a wizard's guild, a magic bazzar and begin work on a sorcer's abode (you will really need it) in addition to the temple group of your choice (warriors of discord/paladins/barbarians) Then upgrade the palace to level three and pay dirt to get two dwarves guilds, as well as about 6 ballista towers (in pairs of two for maximum effectiveness and put at intervals along the left, bottom, and top right borders (count the dwarf guilds themselves as part of the grid. You will want more peasants, and hence an outpost (edge of your city should meet the distance requriement) Build a tournament and set it to magic to level wizards, who have trouble beating down mobs of weak enemies... If you do this, they can easily overtake the other heroes in levels, and their meteor storm can show the raids you are about to face who's boss.

Like other raid levels, you can find them by backtracking the direction the hordes come from. Set your attack flag default to 500, this will get dwarves to respond first. Hopefully they will have lunord or krolm's rage to speed up the trip. The spires cannot really hurt dwarves, and once they've gotten enchanted level four stuff from the blacksmith, neither can the the goblins they spawn. Paladins and other heroes rely on potions, but will out-HP the towers provided that enough of them are attacking at the same time.

When you destroy your first spire, all of the other spires will spawn a raid made of goblin overlords that have all the buffing spells on them, and they will get to your town pretty quickly. With bulky ballista on the edge of town to protect your low HP buildings and a good number of non greedy heroes around town, they will be too distracted to do serious damage. I like to build a second outpost on the left side and an embassy to stock them, although its nice to keep heroes after an oversight causes their guild to burn down. Upgrade all guilds and temples regardless of whether you use their spells, the HP increase is important on this level. The default raids of the towers will be enchanted goblin overlords for the rest of the level. Take down your next tower after things have calmed down on the home front. You will most likely have to repeat these steps until your heroes have levled and you've seen enough of the map to cover the towers respawn points.

The gate spell from the sorceror's abode is a huge help in this level. Continue until you get two towers to spawn next to each other. Then use gate and flag both of them, they should fall within seconds of each other. If there are two towers left, each will spawn a double raid of goblin overlords, making it exactly the same force as when there was 4. Once there's only one tower left, it will spawn yetis and ice dragons until their numbers increase (and the rubble of the second last tower) Let your heroes deal with this until gate recharges and then warp them all to the spire, regardless of damage to your settlement. It should fall quickly and give you your victory.
Vigil For a Fallen Hero
You can't do much of anything at the start but build two marketplaces and a blacksmith. Provide a couple inns as well, as the lack of guild prevents healing. All of the buildings you find in the wildnerness are precious, so throw up an inn and cludters of guardhouses around them. You need the sorceror's abode for the boss, and of your default heroes will room in the outposts... if either is destroyed half of them will leave ardania, even though the heroes with no assignment stick around forever.

If you are having trouble with this outpost causing heroes to leave nonsense, do not explore until after the Day 13 Shadow Beast raids, This is the largest attack you have to deal with and at around this time your heroes count is solid for the ordinary raids.

Be cautious exploring, as large hordes will spawn as you uncover more of the map, don't try to have more than 2 flags up at once. The abomination itself is basically a super fast evil oculous. Instead of a paraylsis spell, it uses a fear spell, which is where the change of heart from your irreplacable sorceor's abode sees use. It will also constantly try to run away into unrevealed parts of the map, esepecially if htere's no one fighting it (likely due to its fear aura nonsense).

You have to wear it down slowly, and uncover and clean out the entire map, which is covered in high level lairs, hidden triggers that spawn hordes of shadowbeasts and other monsters, and a lot of unpleasantness. Once there is no where left undiscovered, it will usually come up to your palace and fight slowly, chasing people away after they hit it a few times, but not really killing them, which means that the next wave of heroes to come out of your inn will be able to hit it twice as well before they too are feared away. This level is more annoying than hard. To speed up killing hte thing once you've found it on the edge of the map, cast dismiss on it from the sorceror's abode. This will teleport it to your palace or an outpost, and if there's any guardhouses it will get stuck on them until they are destroyed, giving time for a hero group to catch up to him. You may want to crank up game speed for this level due to the rather long phases of just general cleaning up by your heroes and the enormous cooldown on the level 3 sorceror's speels (compered to the fast cooldown for change of heart)
Downloadable Quests
To find these in the HD version, scroll all the way to the top left of the map. Click on the purple circle in the ocean to access a drop down list and play them.

Three of these come with the HD version, and represnt levels once availalbe on the 2000s Cyberlore website. This list is also used for community made workshop maps.

Balance of Twilight

This map features Black Phantoms that will attack your buildings. They are programmed like Vendrall, and will usually go back to their lair after doing about 200 HP of building damage. (they can do any amount of damage to heros before being trigggered to go back). If you build a high health guild and keep it empty (warriors preffered) at the farthestest toward the center of the map, then that should be able to block them for the entire game. If you kill the Black Phantoms, they use the resurrect mechanic that the Healers from the Temple to Agrela have, so don't put attack flags on then.

There are two goblin encampments, which will raid at the Goblin Overlord level. There's also a bunch of evil castles that spawn out lone minotaurs. The opposite corner of the map holds a mausoleom for you to discover. Don't worry about the Mausoleum being attacked. After you find it, build a third marketplace and increase game speed to get the huge amount of money needed to resurect him. Then wait for him to walk all the across the map.... You can use Lunord's Winged Feet or Krolm's Rage of Krolm to speed him up. Once he gets there the Black Phantoms will no longer respawn, and once you kill them all, you finish the quest. This happens even if the game forgets to give you the message scroll / voice clip telling you this! (which happens pretty frequently)

Wrath of Krolm

You normally win this quest by destroying all altars. The boss attacks after every altar but will run away (off map) after he uses his summon spell 3 times (18 animals)
Do not destroy the krolm temples until you are prepared - I recommend 12 melee heroes OR having lightning storm ready.. you cannot rebuild your marketplace - keep it very safe because you need a lot of money to survive. It's safe to destroy the 6 normal monster lairs. The first two altars the boss summons rocs, 3/4 he summons vatgs, and for 5 he summons hellbears
The boss has 4,000 HP usually takes about 250-300 damage per fight - If you really want to kill him is to have multiple monks or warriors of discord when he attacks (critical strike does 600 damage to him so you still need multiple fights) . The animals in this level are special - cultists cannot charm them and they have boosted stats- even without the rage buff they are stronger than minotaurs.

Vampiric Revenge

The "demo" level, which was available for download seperate from the main game, a common practice in the 2000s. It is a very short quest, but it actually has a little bit of a bite to it compared to the Beginner Quests that shipped with the actual game (personally I think Quest for the Holy Chalice would have made the best demo level).

Vampiric revenge has an all-normal hero restriction and also limits building upgrades for the palace and the wizard's guild. Rangers, Wizards, and normal Warriors are some of the worst heros to fight a vampire with, and because he is accomonied by building attacking skeletons and undead, it isn't easy to lure him into a guard tower either.

Do not destroy the evil castle until you are well prepared. You have two main options - 1: Try to get a wizard to kill the vampire in 2 hits before the vampire puts up his reflect magic shield the wizard must be high enough level to use fireball, and also must not flee in terror.. 2: Get the vampire to fight a guardtower and heros at the same time. This is difficult due to how easily heros will flee in terror in this level (due to the enemies being clumped up). You want to build your guilds CLOSE to the guard tower to get the heros to berserk instead of running away, but still have the guard tower nearer to the evil castle. 3: Use the level 2 wizard guild spell, lighting bolt on a vampire about 3-4 times.
Cheats
Helpful Cheats

fill this bag -------------------- Gain 10,000 gold!
build anything -------------------- All Buildings Available!
give me power -------------------- All spells available
revelation -------------------- Full Map View.
grow up -------------------- Selected Hero gains 5 levels!
restoration ------------------- Heals everything alligned with you, completes building construction.
cheezy towers ----------------- Unlimited spell range
frame it ---------------- View Frame Rate.
victory is mine --------------- Win current map.
now you die ------------- Instantly Kills the currently selected hero, monster, or building.
you must die ------------- Replaces above cheat when Northern expansion disabled.
Shift and ' ------------- Plays the easter egg dialog of the selected hero or building. Northern expansion only, only player units (not monsters), higher levels of building have same dialogue.

You can enter commands that spawn monster attacks by doing the following: Hit enter while playing,type in the command (just like a chat message), and hitting enter again. The commands are:

“NIGHT OF THE LIVING DEAD.” “PREPARE TO DIE,” “PUMP UP THE VOLUME,” “GOBLIN RUSH” and “GIVE ME ACTION."
26 Comments
MΛRCUS HΞLIUS 14 Oct, 2024 @ 9:24am 
What a useless guide for The Day of Reckoning.
Wisemantobes 18 Mar, 2024 @ 1:49pm 
Thank you so much for your tips on Deal with a Demon, it's helped me in all further missions as well. There's so little information on the game economy, I did not realize the few simple things I was missing and was constantly struggling with gold.
zanitzeuken 14 Nov, 2022 @ 10:58am 
Fertile Plains is not easy. Vampires seem to hunt my Wizards down and we just can't take Golems down fast enough. They always grind everything down. The Paladins seemed to do better than the Wizards on Golems.
Sutasu! 11 Nov, 2021 @ 12:01pm 
You have italic after The Siedge
Reality  [author] 19 Jun, 2021 @ 1:50pm 
If you get palace on left, right, or bottom spawn there is only one chance, and if you get top spwn there is two chances? I don't get the hostility, I didn't say NOT to flag places.
Dark Sun 19 Jun, 2021 @ 1:42pm 
>By the looks of it there can only be a single opposite map edge barrow AND it specifically reqquires the game not to (50/50) that particluar barrow into its alternative slot.

More bullshit. Doesn't really take that long to go and check.
Reality  [author] 19 Jun, 2021 @ 1:24pm 
Guide was written with the "go bck to game after 15 years and beat levels without cheats methods" rather than deep-diving

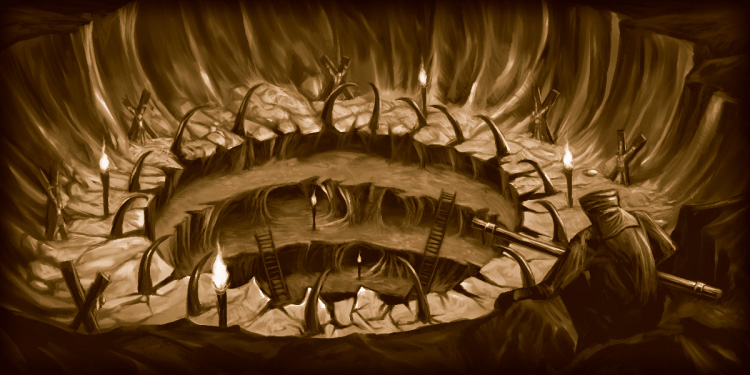
Anyway for Legendary Hero - Palace can spawn in any 0 location, Barrows are 1-5 --- Any number that is used multiple times represtens multiple options tht the game narrows down to one at the time of map generation -
https://discord.com/channels/854278863063744532/854282344096858132/855904243411582976

By the looks of it there can only be a single opposite map edge barrow AND it specifically reqquires the game not to (50/50) that particluar barrow into its alternative slot.
Reality  [author] 12 Jun, 2021 @ 8:34am 
Recently remembered a little trick for Elven Treachery - The elves outrange guard towers, but if you have 2 built and put an attack flag on the one closer in, the elves will actually aggro the that one instead of the one on the edge like usual.
libers.pertz 4 Nov, 2020 @ 8:29am 
Deal with the Demon is around 5 days in-game time max. Use the save game option and the initial elven gambling hall or whatever its called. Always go for RED (win earns you 5k gold) and every time you win SAVE and every time you lose 5 times just LOAD. I know right its an exploit but I feel that Deal with the Demon is just a hard and boring map thats worth skipping it with the little exploit.
Xhavez 12 Apr, 2020 @ 7:10pm 
One important and very useful thing for Elven Treachery is you should find and destroy the Statues when you find a settlement of Elves/Rogues. Statues raise the "loyalty" of the elves/rogues. However once you destroy 2 or 3 of the statues, they'll start attacking their own buildings with like 300 gold put onto it.

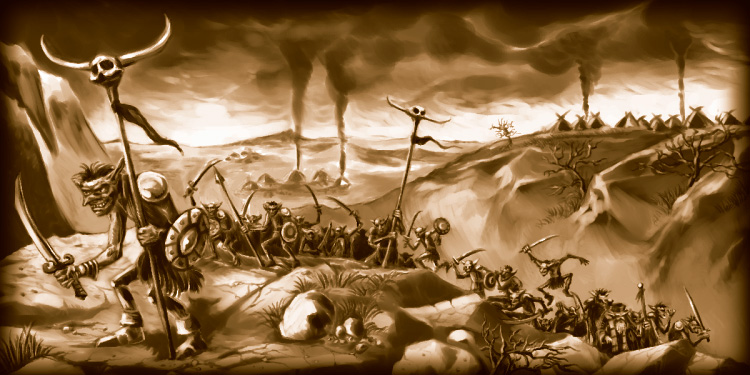
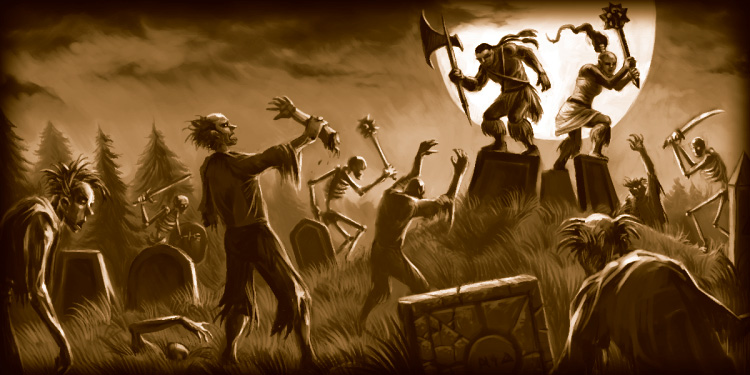
Taking those statues out can help greatly to whittle down the enemy buildings.