The Killing Antidote

The Killing Antidote

Not enough ratings
Getting started with Challenge Map Creation
By Cindy Lennox
This guide will help you to get your UE4 map from Unreal Engine to The Killing Antidote
3
2
   
Award
Favorite
Favorited
Unfavorite
Overview
This guide is a step by step on how to get your map from Unreal Engine 4 to The Killing Antidote and the basics on gameplay elements.

What this guide will cover:
-Packet your Map and have TKA load it
-Spawn Zombies and weapons
-Tips on where to get free assets

What this guide will NOT COVER:
-How to install Unreal Engine 4.27.2, this is your homework, i'll provide links but there are many tutorials on this already
Setup
Here we'll check the starting point, first of all, what you need is UE4.27.2 installed, then we'll extract the developers kit inside a folder under the Unreal Project folder:

Unreal Engine 4.27.2, download from here: https://www.unrealengine.com/en-US/download

Developer's kit, download from here: https://gtm.steamproxy.vip/workshop/discussions/18446744073709551615/598517419154103054/?appid=2254890

Guide from the developer to get started with the dev kit for a challenge map.
https://gtm.steamproxy.vip/workshop/discussions/18446744073709551615/598517419154104305/?appid=2254890
This resource is for references only we dont follow it on this guide.

After installing UE4.27.2, and extracting the Developer's kit into the Unreal Projects folder, your UE should look like in the screenshot.
The name of the folder doesn't really matter,
(Ignore the 5.5.4 instalation)

The Unreal project folder and Epic games launcher should look like this:


Now, we'll open the project "The Killing Antidote" by double clicking on it.
The Killing Antidote devkit overview
After opening the project, the editor will pop up and look something like this:


At the bottom we have our content folder, the main folders are Mod and Project

1)Project: This is the Devkit, the stuff here will allow you to:
-Spawn Zombies and weapons, game logic like Time or Survival modes, and other as Time challenge start and end. Do not change anything at all with this folder, we'll just use a few stuff, leave as is.


2)MOD: Everything under here is our Mod or mods, here we'll create our level and place all custom assets we'll use, not directly under Mod but we'll create a folder under

Under mod, you'll see many folders, the one we care about is "TKA_Workshop_Tomb", this is the DEV's example map, the other folders are clothing/animation/makeup/etc mods, we dont need those in this case, so i'll delete all folders except the tomb one.

This is what my MOD folder looks like now:


You dont need to delete those, but it will make compile times a bit quickier and keep the project a bit more clean as there is less stuff

Next section we'll check the DEV example map and do some dissection.
TKA_Workshop_Tomb
So lets open the TKA_Workshop_Tomb folder and look at its content:


The folders Actor Mesh and Picture are just Folders that contain other assets for organization purposes
Mesh contains the level assets, textures, materials, static meshes etc.
Actor contains custom actors like triggers
Picture contains the PNG picture you'll see in the Challenge Map menu

The tables are very important (Green icons):
Lets look first at Mod_Level_Table:


I have marked the picture with two colors:
Blue is the Path, its the same path as the folder name TKA_Workshop_Tomb, this will also be the name of the .pak file that we'll see later.
Magenta is the level name, the row name in the table must be the Level name, and you need a Row for each level.

TKA_Mod_Table contains info about the Mod in the MOD section of the game, like the version, name and a description

The TKA_Sample_Tomb_6 file contains ifo about the Packhunk that will be generated, the Chunk ID its the most relevant info here for us


Now lets look at the map, the time one:
Double click TKA_Sample_Tomb_Time to load the map:


Hold right click, and press WASD to move around, next up we'll pak this map, and have it load on TKA


UE4 to TKA
How do we get this map, from the editor into the game?

First go into File > Package Project > Windows (64 bit)


Here a window pops up, letting you select where the packaged project will be, i like to create a Packaged Folder inside the project folder and throw it there like in the screenshot


You can do as you like with this, it doesn't matter, click on select folder and it will start the process

On the lower right side "Packaging project for Windows(64 bit)" will show up, it might compile shaders also, give it a few minutes, the compiling shader thingy only should happen once or every time new assets or major changes are done.

Packagin Complete! and the sound effect plays, now lets go to our folder:

Look at the folder path, and see the two pakchunks?


One is Pakchunk6, that 6 is the same number we have seen earlier on the previous section, Pakchunk6 is the .pak for the TOMB map, as indicated by the TKA_Sample_Tomb_6 data asset file.

Ignore Pakchunk0.

We need to:
1- Rename Packhunk6 to the folder & path name, that is TKA_Workshop_Tomb
2- Move this TKA_Workshop_Tomb.pak file into the mod folder of the game.

Should look like this, look at the path, thats where the .PAK goes:


Time to run the game now:


Its there, i see it and im able to run the map no problems

At this point you can modify this existing map to build your own, in the next section we'll create from 0, our own map, we'll not modify TOMB and instead it will remain there so you can use at as reference.
Our own map
First we'll create our own folder under mod, name it something special, i'll name this:
TKA_Workshop_Tut_Boxes

Go into the mod folder, right click on a empty space in the content view and select new folder

Our new folder:


Go back to the Tomb Folder and we'll copy the following files:
Both Tables and the TKA_Sample_Tomb_6
With the files highlighted, i do CTRL+C

Then in the newly created folder: Cltr + V

I rename TKA_Sample_Tomb_6 to TKA_Workshop_Tut_Boxes_10 and inside i change the Chunk ID to 10:


Nice, now we need to create a level, in the content browser under our mod folder, right click and select "Level", i named this "Boxes"

Double click on "Boxes":


A couple of points to keep in mind:
1- In our level, there is nothing,
2- Even if there was something, there is no light source
3- Even if we had that, there is nothing telling TKA if this is a Survival or Time map

Lets solve this issues:
1- First of all, we'll toggle the Unlit view

2- Now on the left side (Place Actors), go to geometry and drag a "Box" into the level

(Take a moment to look around, play with Unlit and Lit views, on the right side in Label you'll see this box brush you just added)

Now we have a box, lets scale it to 20 on X and 20 on Y


After that, look again on the Place actors menu, click on all Classes, and search at the top for "player start" drag a player start somewhere into the "floor" we have

The player start is the spawn point for Jodi


Before we compile this and try our map, we need to tell TKA that this is a Time map and modify the Tables
Go into the world settings for the Boxes map and set the Gamemode override to Time_Gamemode_Challenge


Before we modify the tables, lets copy the image for the tomb map
Copy the image file under "TKA_Workshop_Tomb/Picture/", create a new folder in your mod folder, named picture and paste this image there, then modify its properties by double clicking the image/texture as seen in this screenshot

This is so we see our map with a different picture:


Change Saturation and RGBCurve to 0.5

Now time to edit the Table:


Make sure:
1- Row name is the same as the Level name, in this case "Boxes"
2- Path is the same as the folder name, that is TKA_Workshop_Tut_Boxes
3- Change Caption, Content as you like and set the CaptionImage to our new modified picture

Changes to the other table and the data asset file:


Now, time to package this project and see if we can have this run in TKA

Package the project, look for Packunk10, and rename to TKA_Workshop_Tut_Boxes and throw into Mod folder:


In game screenshots:


Ok why it looks all dark? this is because we never added a light source into our level, so it looks like that, turn the flashlight on and enter photomode to see anything
(If we add a Black color to the floor, this will lookl ike the 4 kings boss fight arena from dark souls )


But we accomplished our goal in this section, this is our very own map, loaded into the game and "working"

Next up we'll add some lightsources, guns and a few zombie spawns.
Adding stuff to our map
We'll begin by adding some lights to our level, the first light i'll add is the Directional Light, this simulates light from a very far away source like the sun


I also added another box and scaled it like that, i plan to add weapons there

To add the directional light, its the same process as the boxes, go to the Light section in Place actors

You might have noticed that when you add the light, it starts to increase its brightness level, this will happen with any light, try removing the Directional Light and adding a point light, the same happens

This is EYE ADAPTATION, used by TKA, we can control the Eye Adaptation by adding a Post Process Volume

In the Place Actors menu, look for Post Process Volume, add one into the world, nothing will change, we need to configure a few things first:

1- Have it affect the whole level:
Select the PPV, and enable Infinite Extent


2- Modify Eye adaptation brightness: Set the Min and Max Brightness, in this case i set them to 1


After this your lightning should be consistent, meaninig that if you add a source it will not change its brightness, play around with those settings to get the look you want

Lets add some weapons and ammo, in the Project folder, search for "spawn", for all my item spawns i use "ItemsShuffling_Spawner"
Drag ItemsShuffling_Spawner into the world, click on it and remove all values for items map by clicking on the trash can icon:


Now click on the "+" sign, and on the left side its the item name, on the right its the quantity
To add a Glock with 13 bullets do Glock on the field to the left and 13 on the right:

Add a few more, you can duplicate with CTRL+W

Add one with GlockAmmo 50
And another with Shotgun 7

NExt we'll add more boxes to make the level something more than a floor, i added a few boxes, then i pressed on the Build button at the top, its to the left of play, the level looks weird:


The shadows are too dark, we can try to counter this with a skylight, add a skylight from the Place Actor menu, at first it does nothing, ideally we would use a cubemap, there is one in the engine files that we can copy into our project folder and use, but for now lets do something more simple, set the values like this:
Sky Distance Threshold = 1
Intensity = 2

Press Build again


Now the shadows dont look like the abyss so thats a bit better, lets add some zombies and the game end trigger

First i changed the directional light from Stationary to movable, and finished the layout


Now to add zombies, we need to do two things, add a Zombie Spawner, configure our zombies and then, a Trigger that when Jodi activates it, the zombies from our Zombie Spawner will spawn


Adding the zombie spawners, i copy pasted the ZombieSpawner_Comp component, now i have 3 total, the attributes are
AI: Active for all of them
Hearing = 0 all of em
Zombie Names: Zombie_01 Squirter Brute

Then i moved every component, to the right i moved the components, not the actor, if you want to make things simplier, just add 1 zombie, one ZombieSpawner_Comp

Now that we have the zombies ready, we need a trigger that spawns the zombies from this ZombieSpawner

Search for GameTriggerBox in the search bar under project folder, then scale this actor so the trigger fits and then select your ZombieSpawner as the activate actor


Where it says None in the image, click and select the ZombieSpawner Actor

Now we'll add a level finish trigger on top of the box, behind the zombies,

Search for and add a RecordPointTrigger, configure the Index as -1 like seen here:


After this, package project, rename .pak and test

When i tested the map, all worked fine except the zombies, this is because i forgot to set the ZombieSpawner as the activate actor.

This is your first map, not the biggest thing but its honest work

Next we'll look at FAB, from here we can get free assets, so our level wont look like Street Fighter Training stage


Where to find free assets
The go to site is https://www.fab.com/

Follow this step by step:
1- Discover > Unreal Engine
2- On the left side click Enviorments
3- On the header, set price to: Free, and compatibility to: Min = 4.0 Max = 4.27

List will look something like this:


The Wild West Town - Relive the Western Adventures by Nimikko is a good lightweight free pack, useful for getting started and testing assets, you would have to add this pack to your library, then on the Unreal Engine

I'll improve the guide over time and add more stuff/tips
My Kit
This link is a download to my KIT i use, i comes with custom funcitonality, you might find something usefull

(Special thanks to MaxavierCN for letting us know how to add the items from the main game like clothing)
https://drive.google.com/file/d/1aDLEO5Yl7UEydevWA3JkamEMgPYjgXkz/view?usp=drive_link
6 Comments
Frank West 20 hours ago 
Is there a guide like this, but for making/adding guns to TKA?
Cindy Lennox  [author] 23 Jun @ 10:10am 
Awesome, glad to hear the guide was useful to you and the map now loads without issues!!
[REDACTED] 23 Jun @ 9:58am 
Thank you for your quick reply. I'll think ill join the discord. And you were correct I made an error in the Mod table. I tried it again with a path name where I can't make typos and it worked.

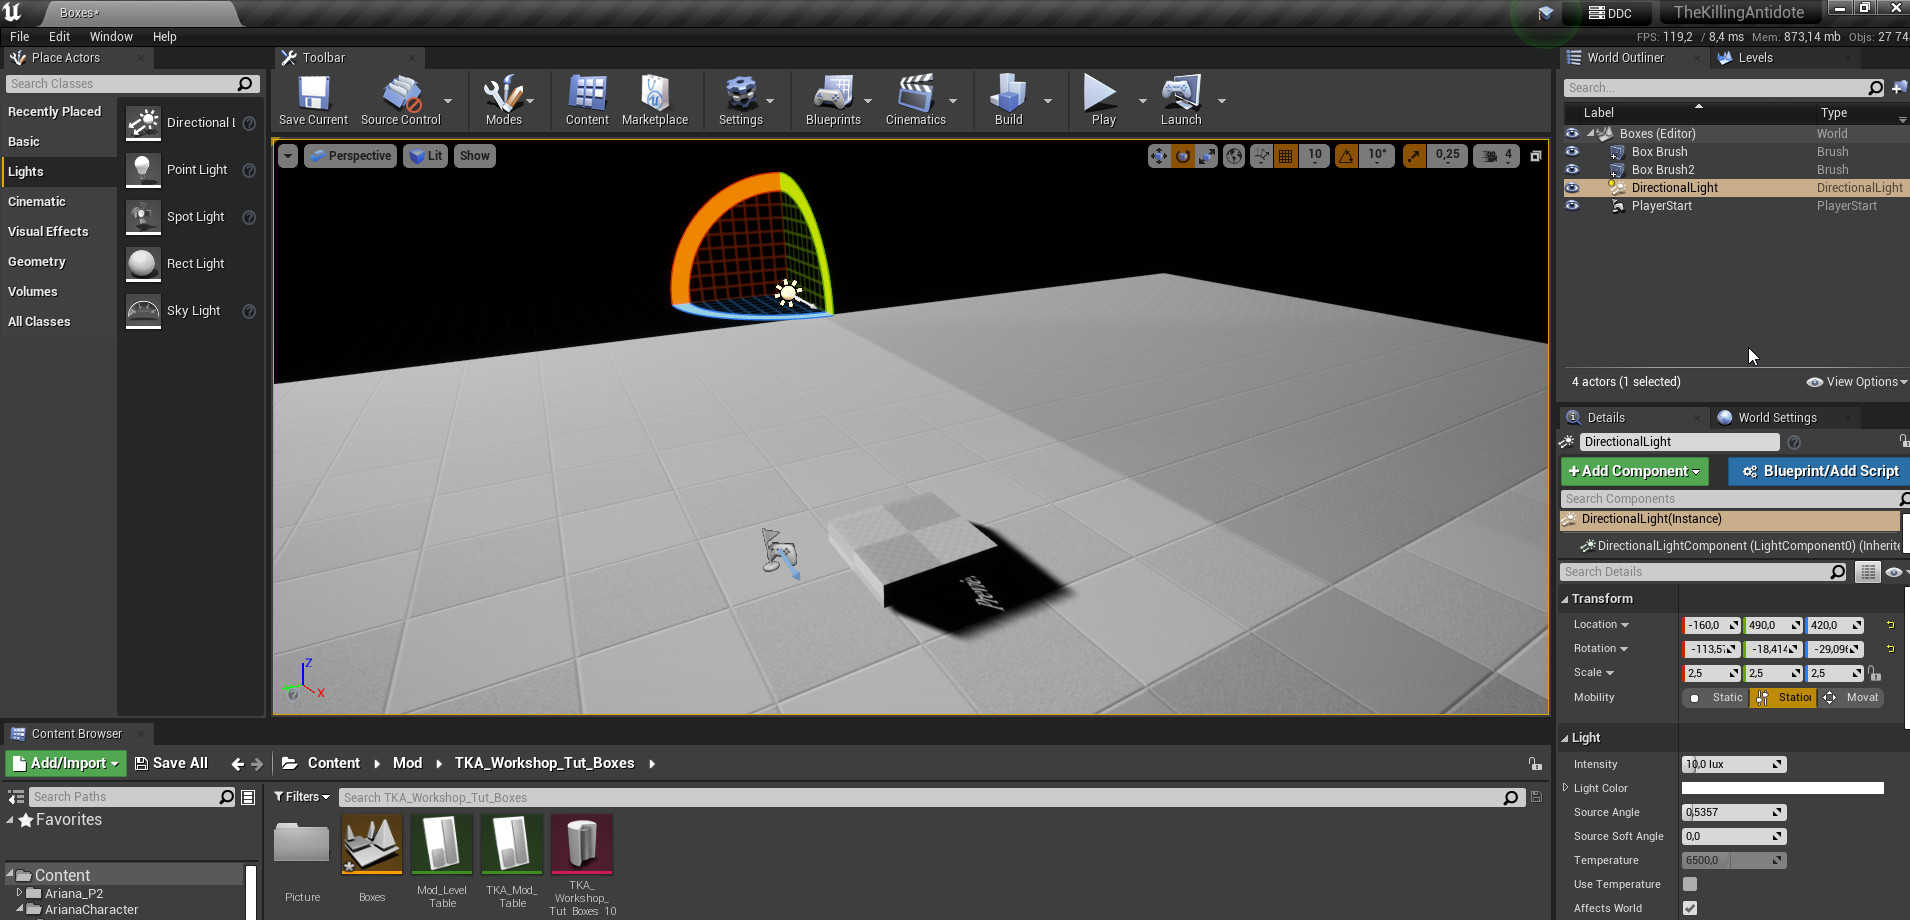
You're awesome and your guide and provided tools really helped me.
Cindy Lennox  [author] 23 Jun @ 9:51am 
@[REDACTED] im not sure if i had that particular issue
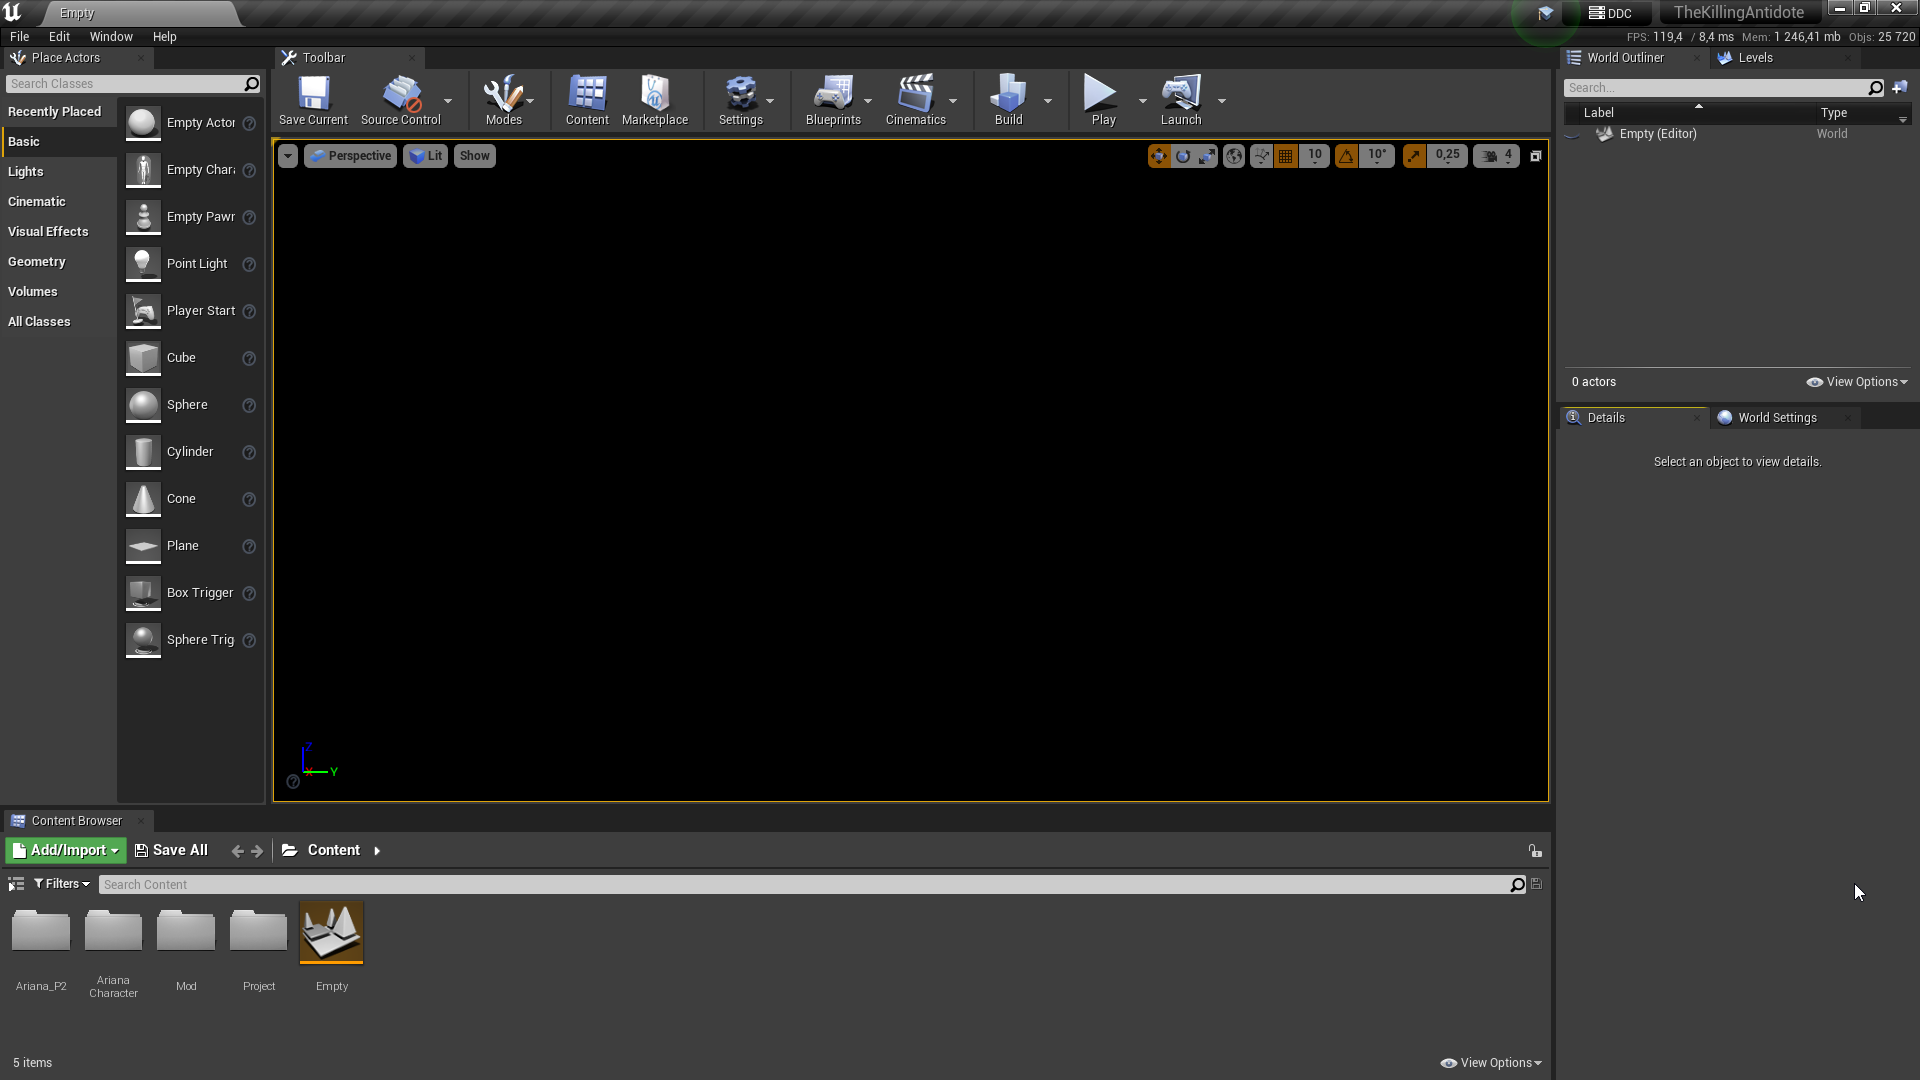
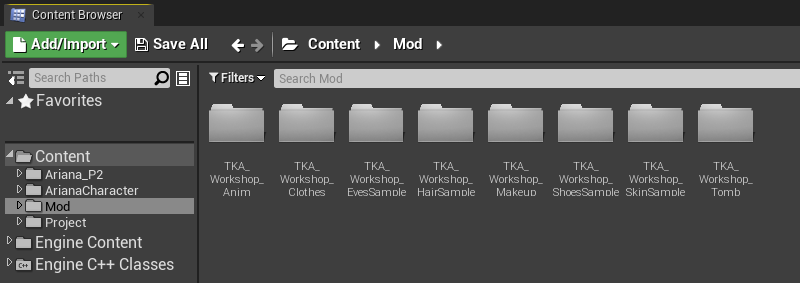
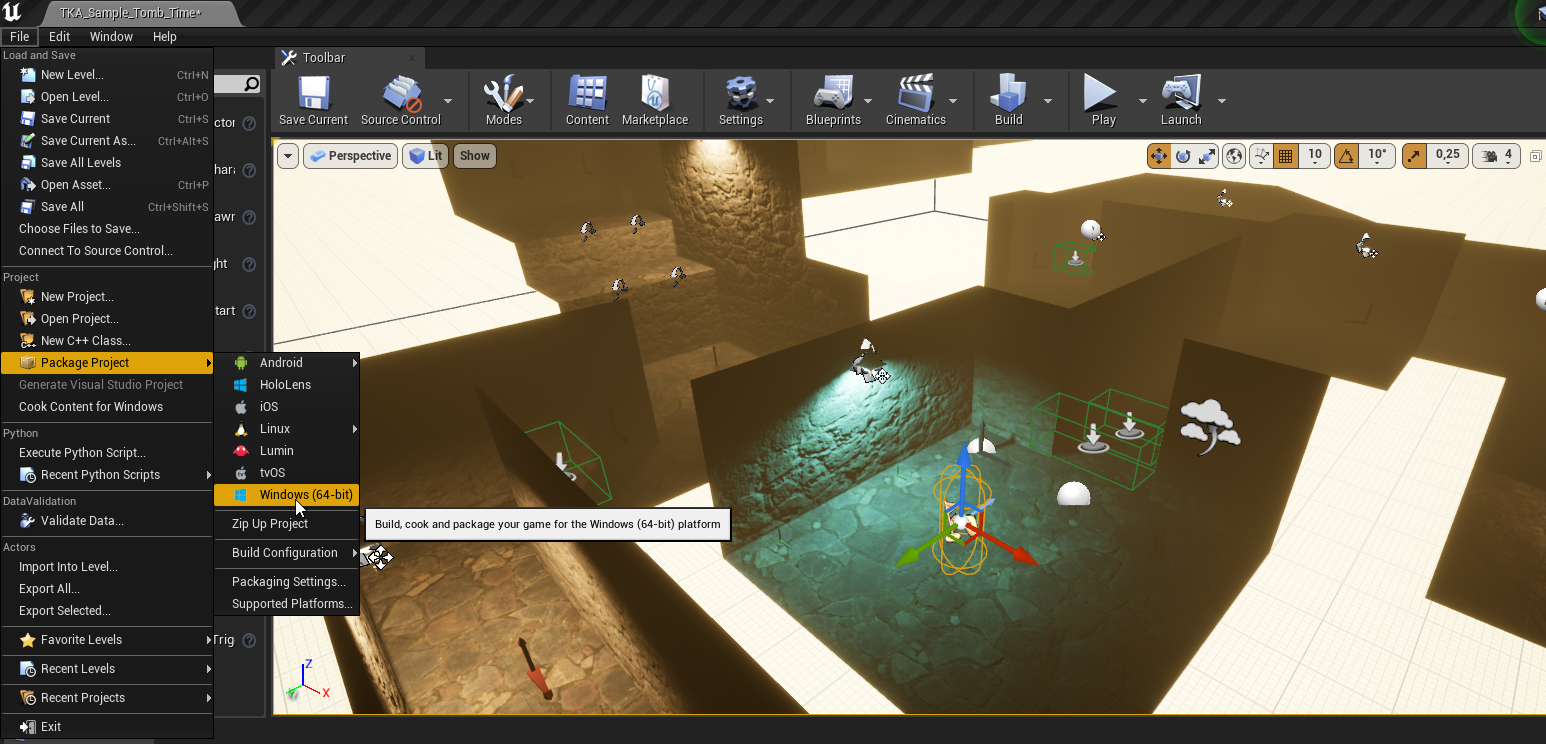
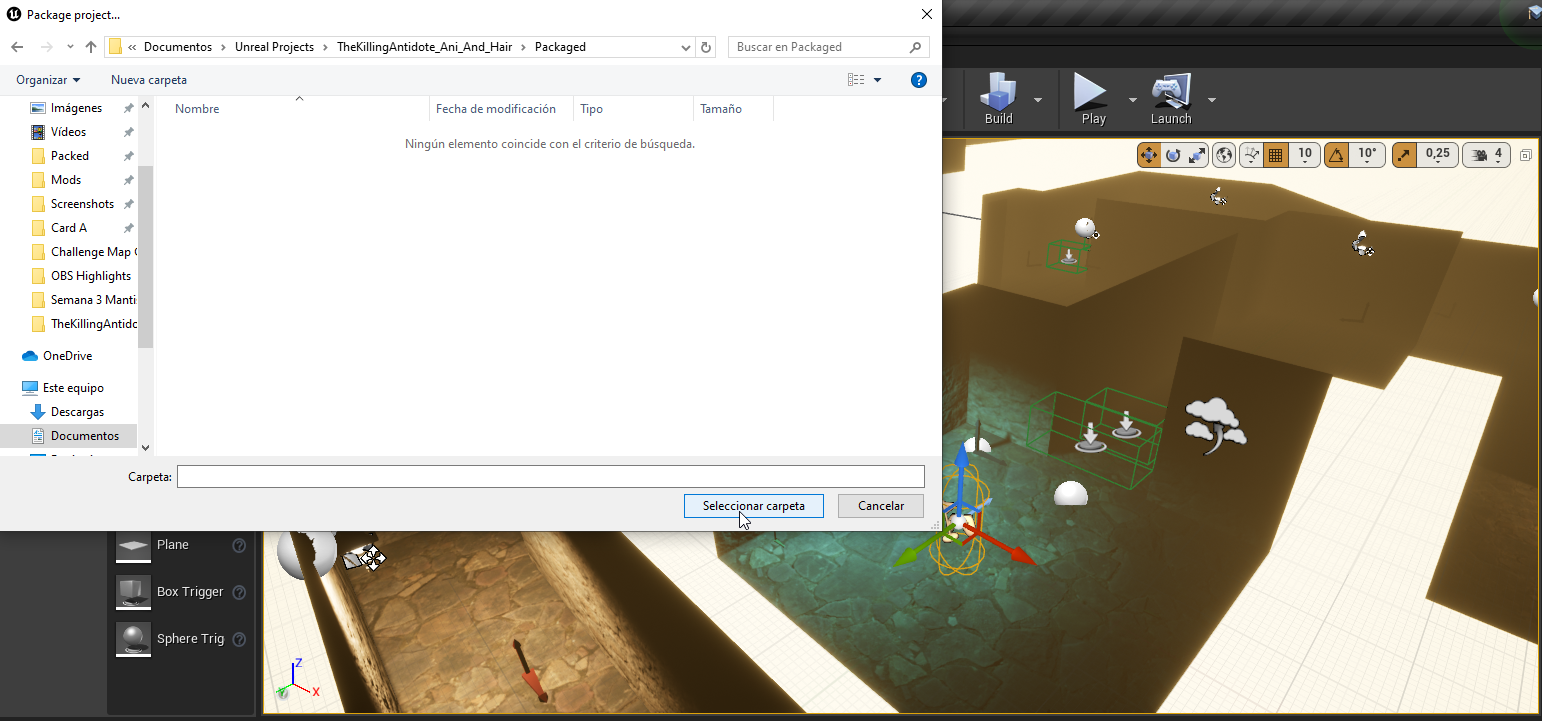
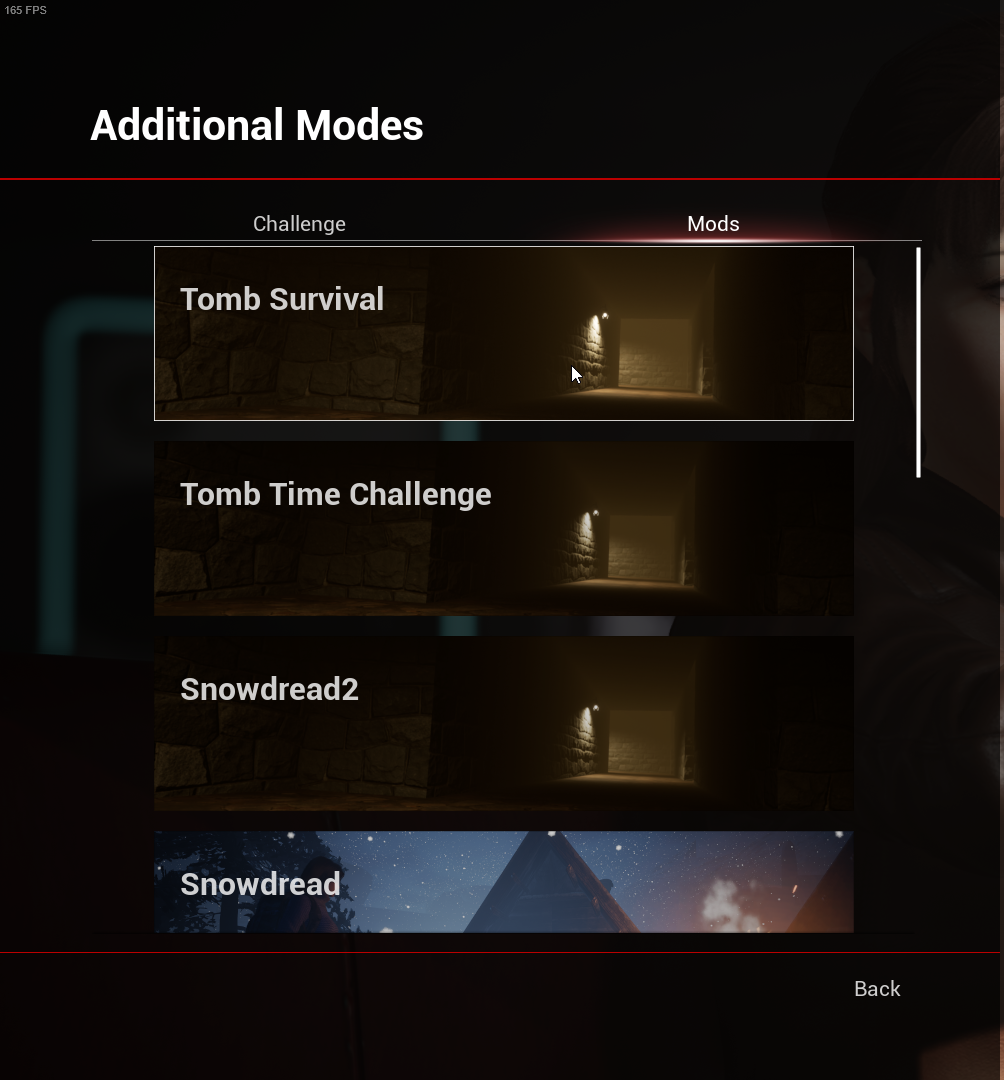
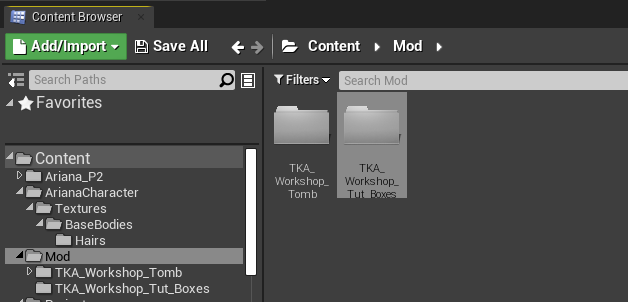
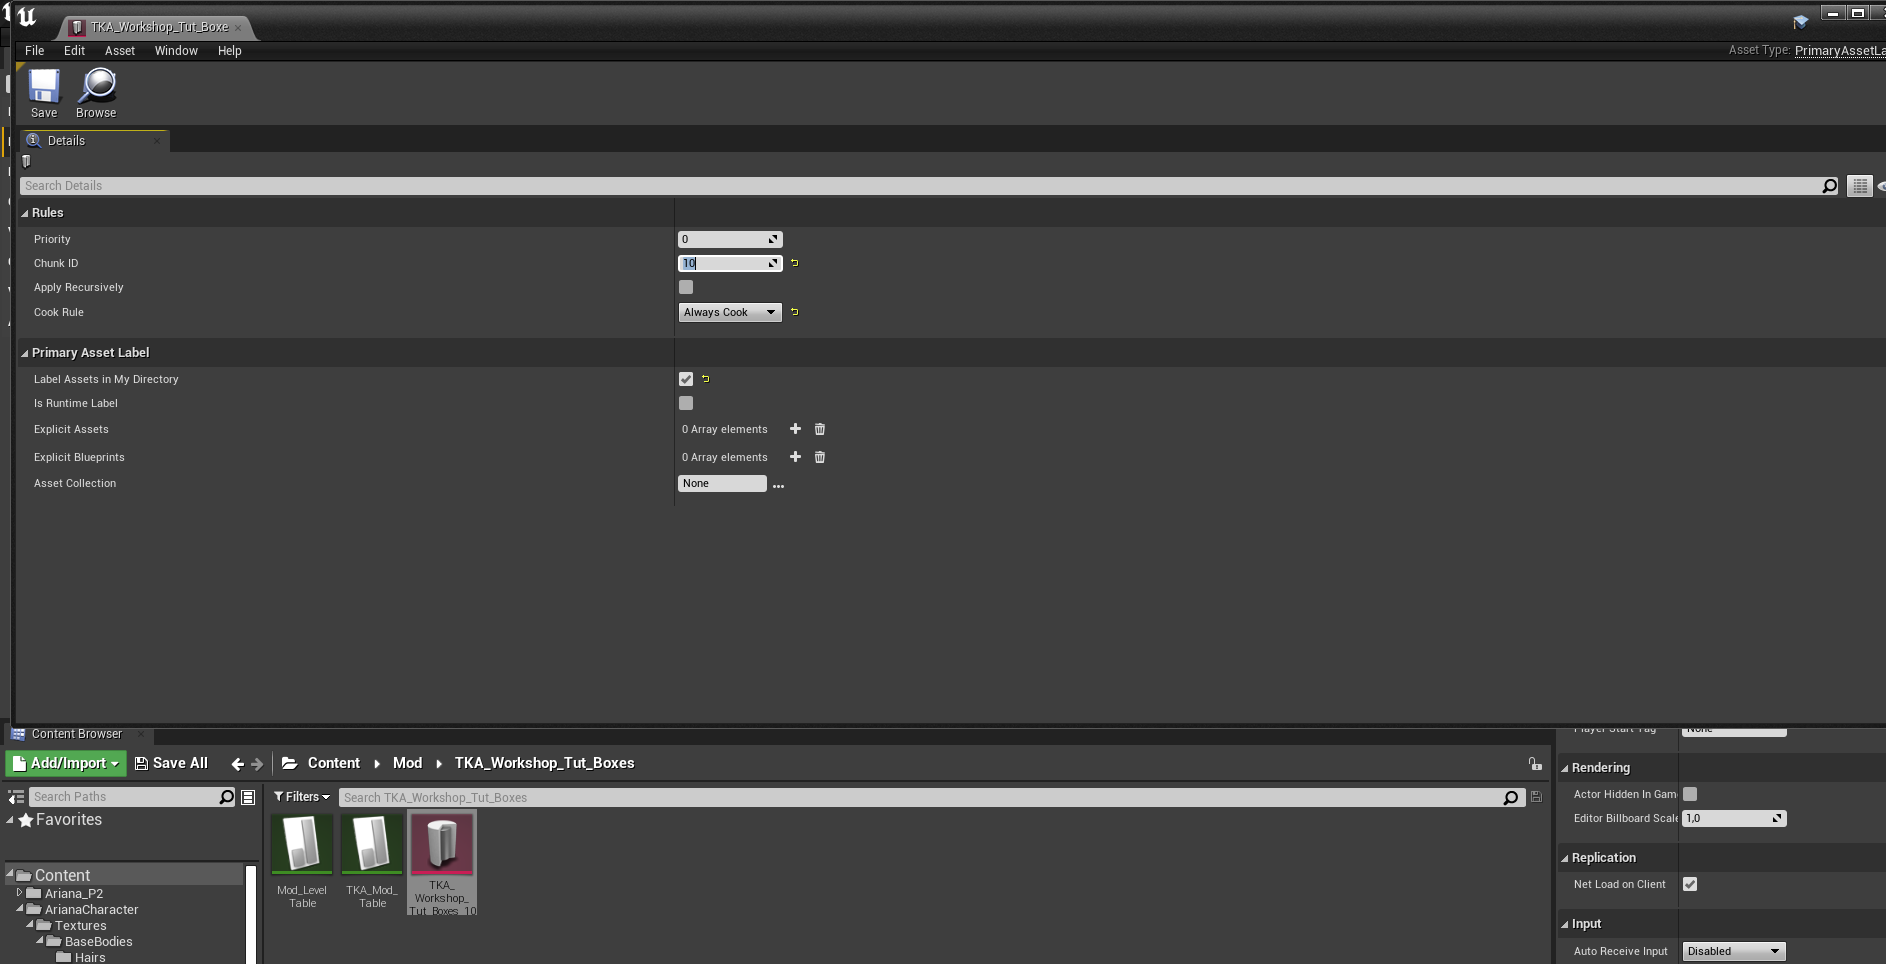
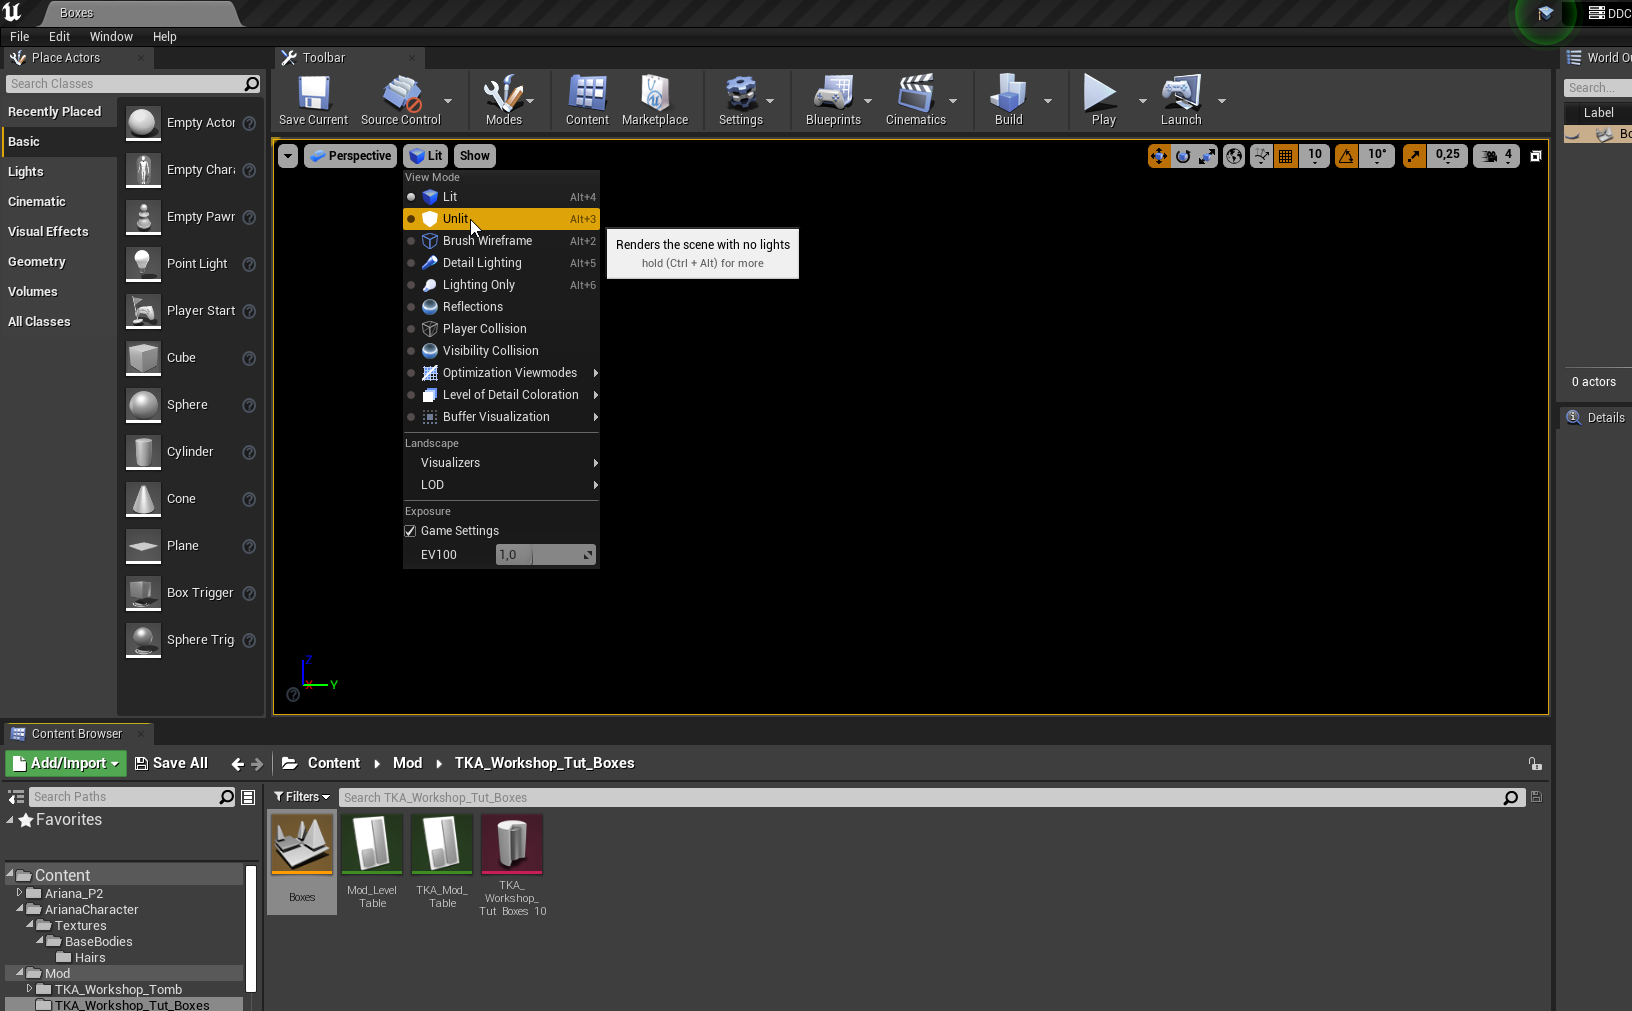
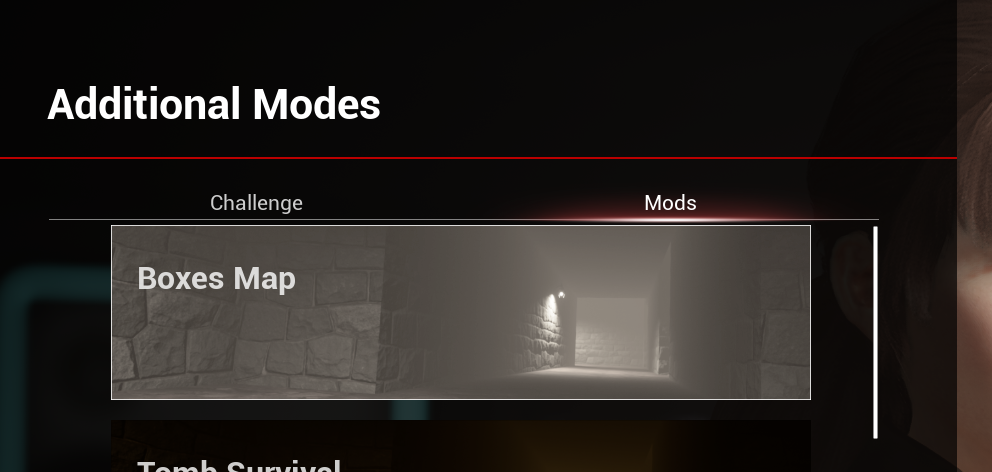
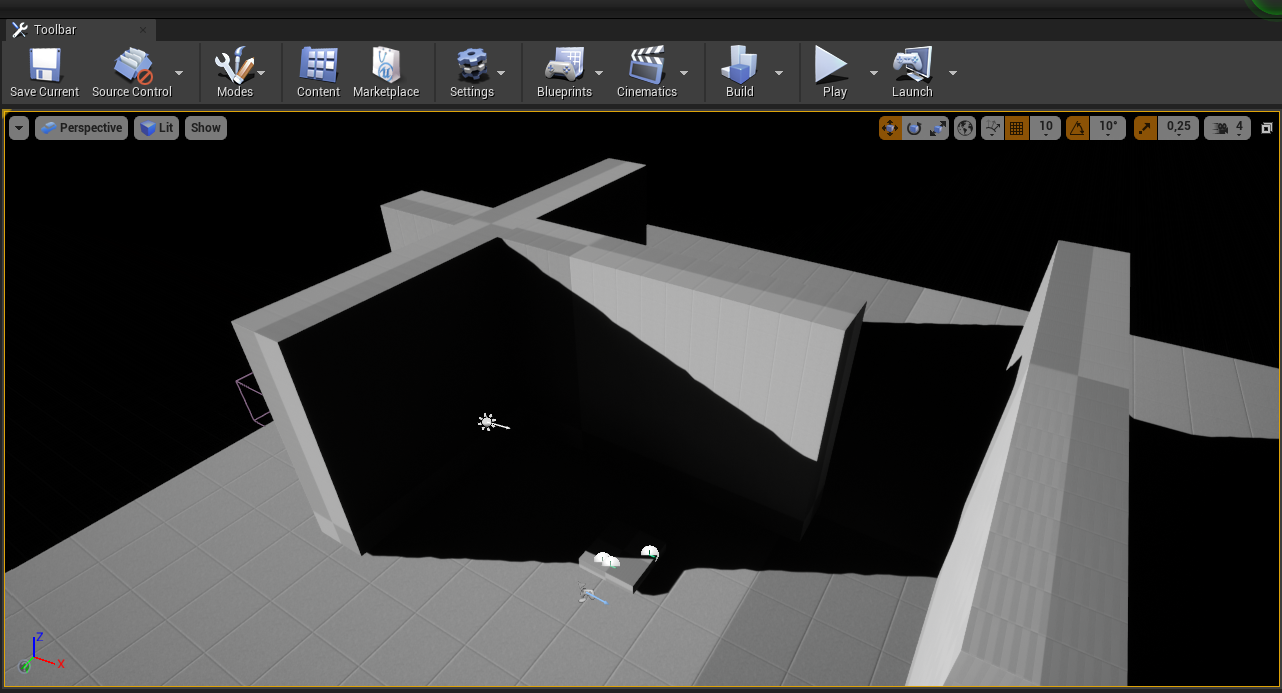
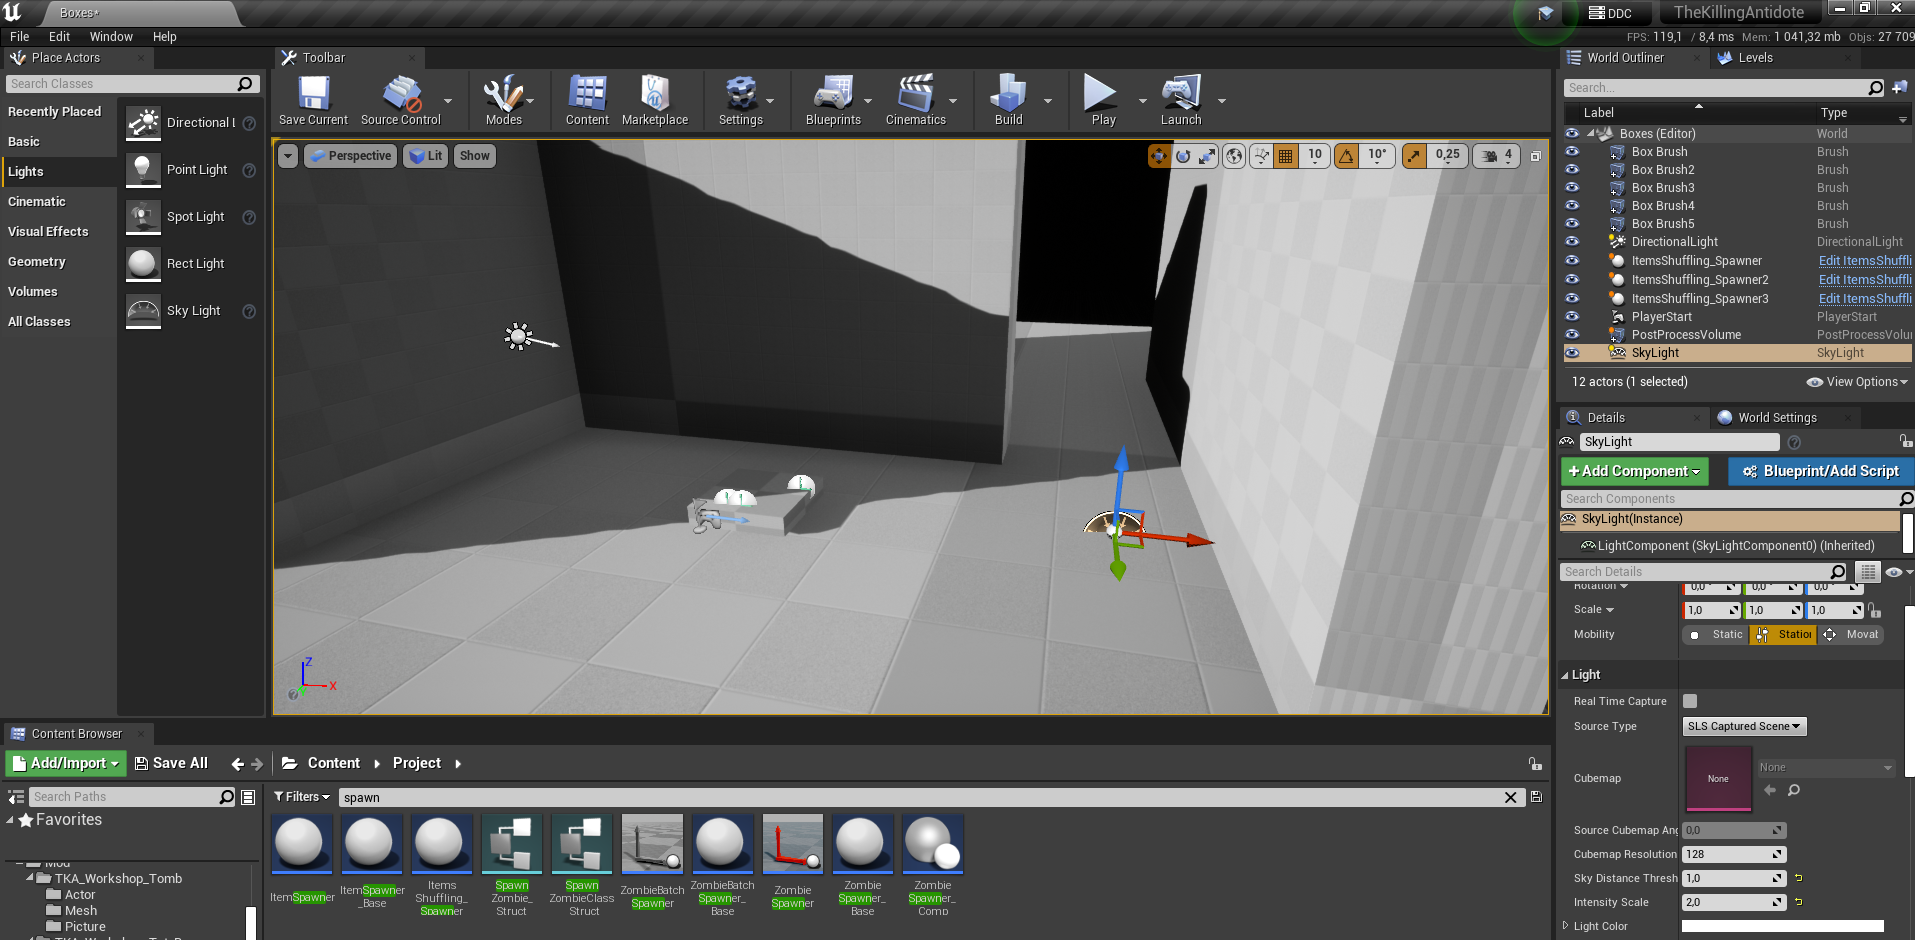
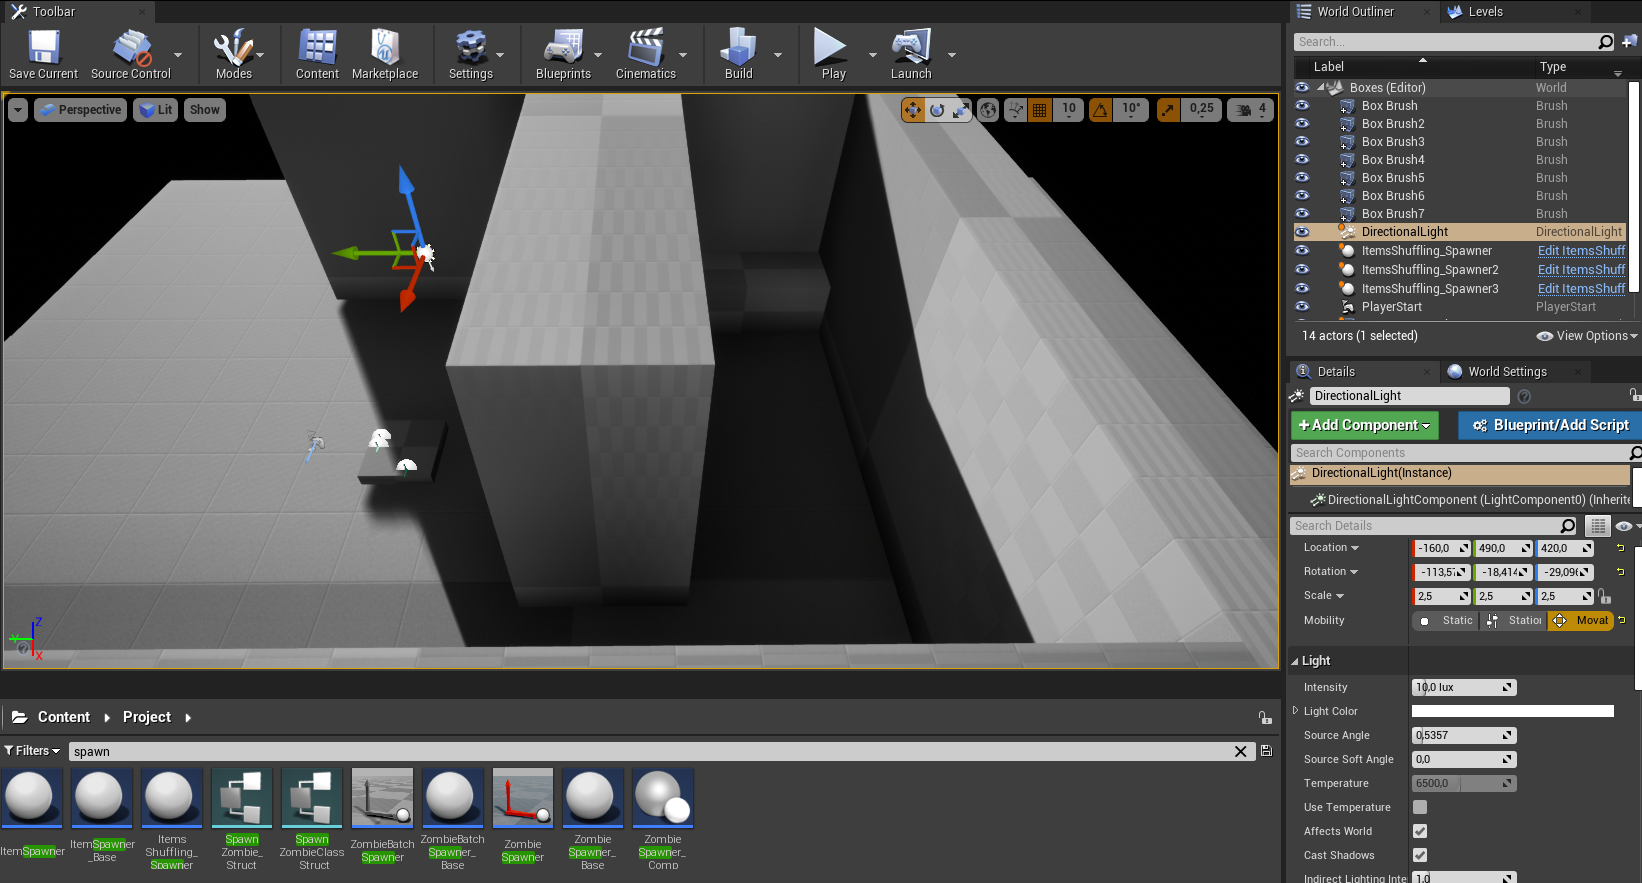
Are you able to compile the TOMBS map and it loads just fine?
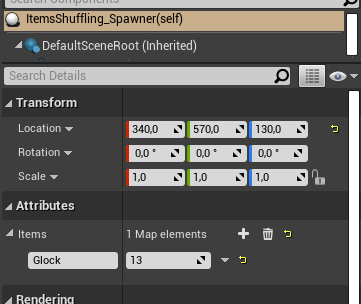
If you are on the official discord the modders here might be able to help you with more details (screenshots etc)

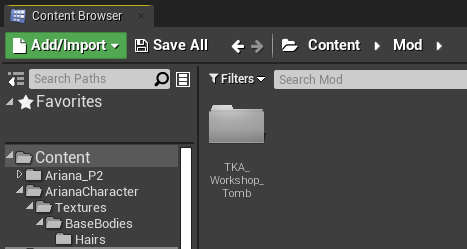
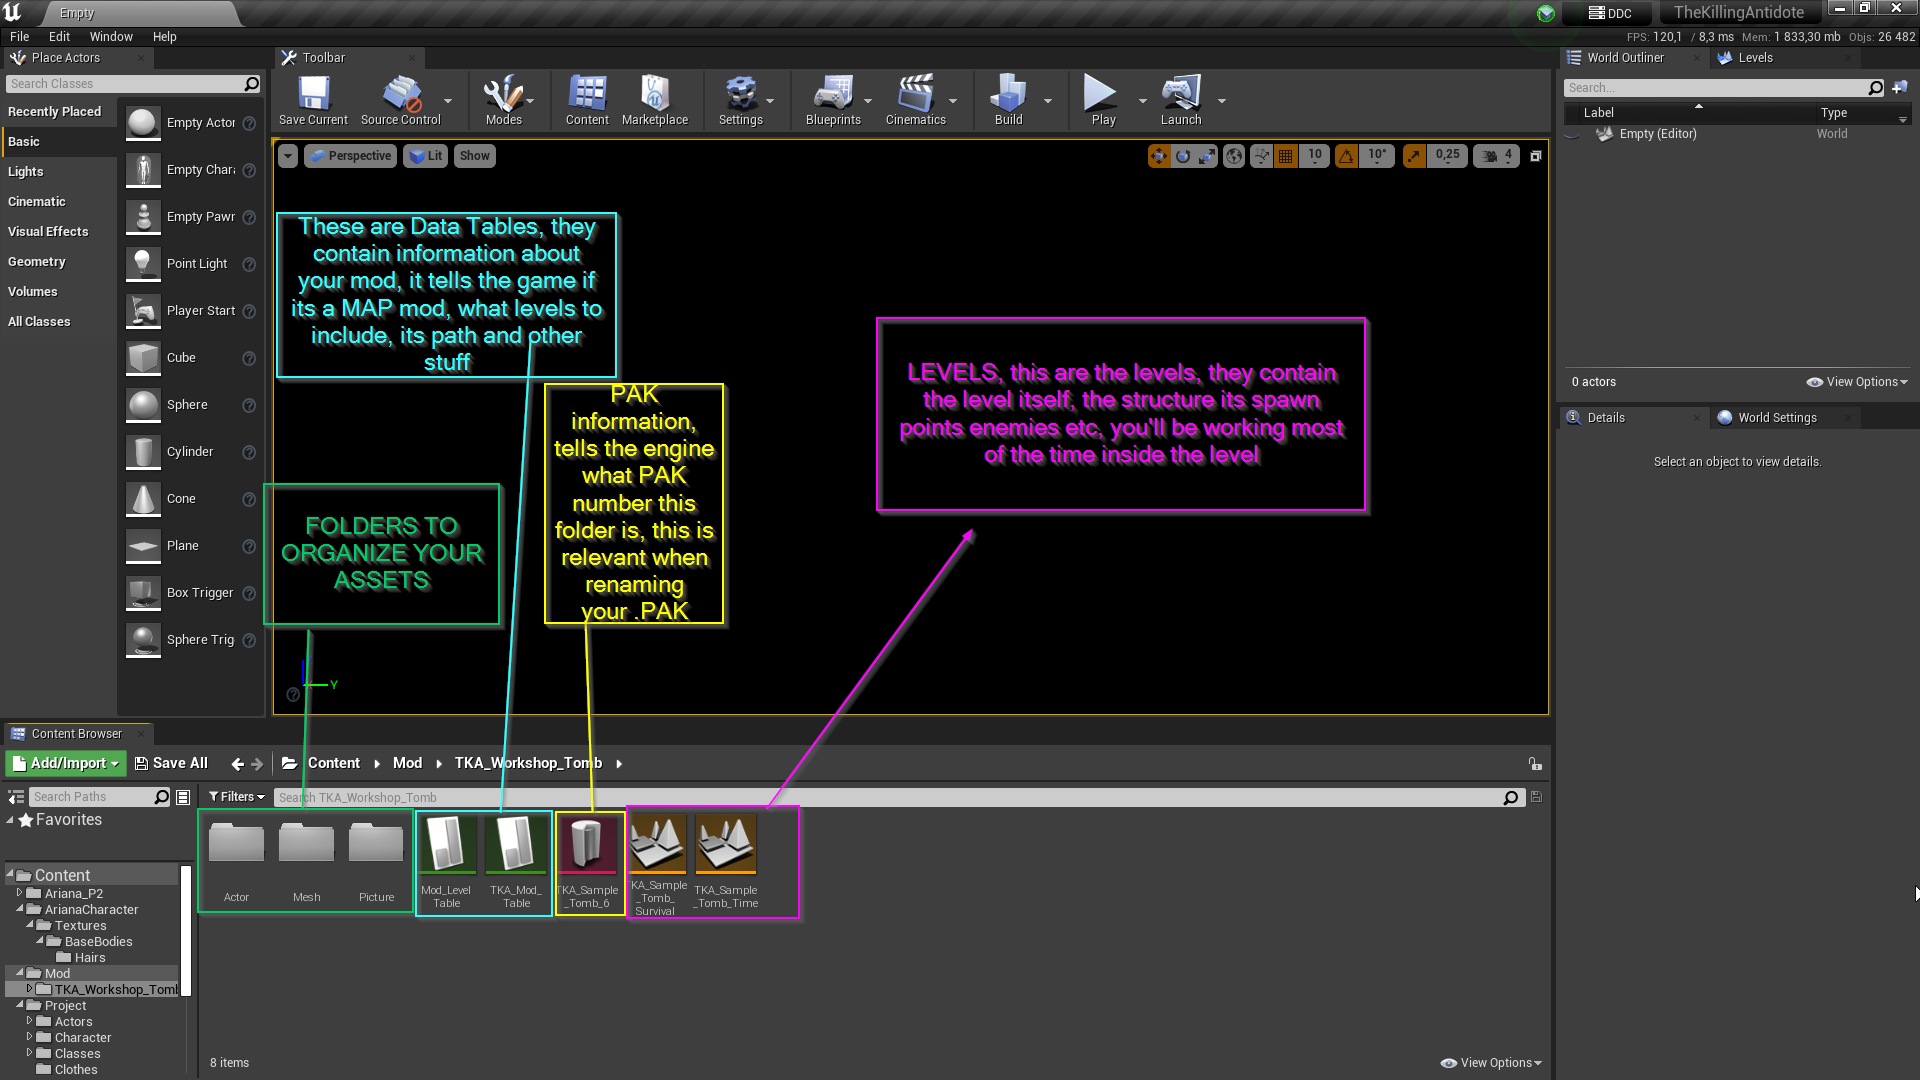
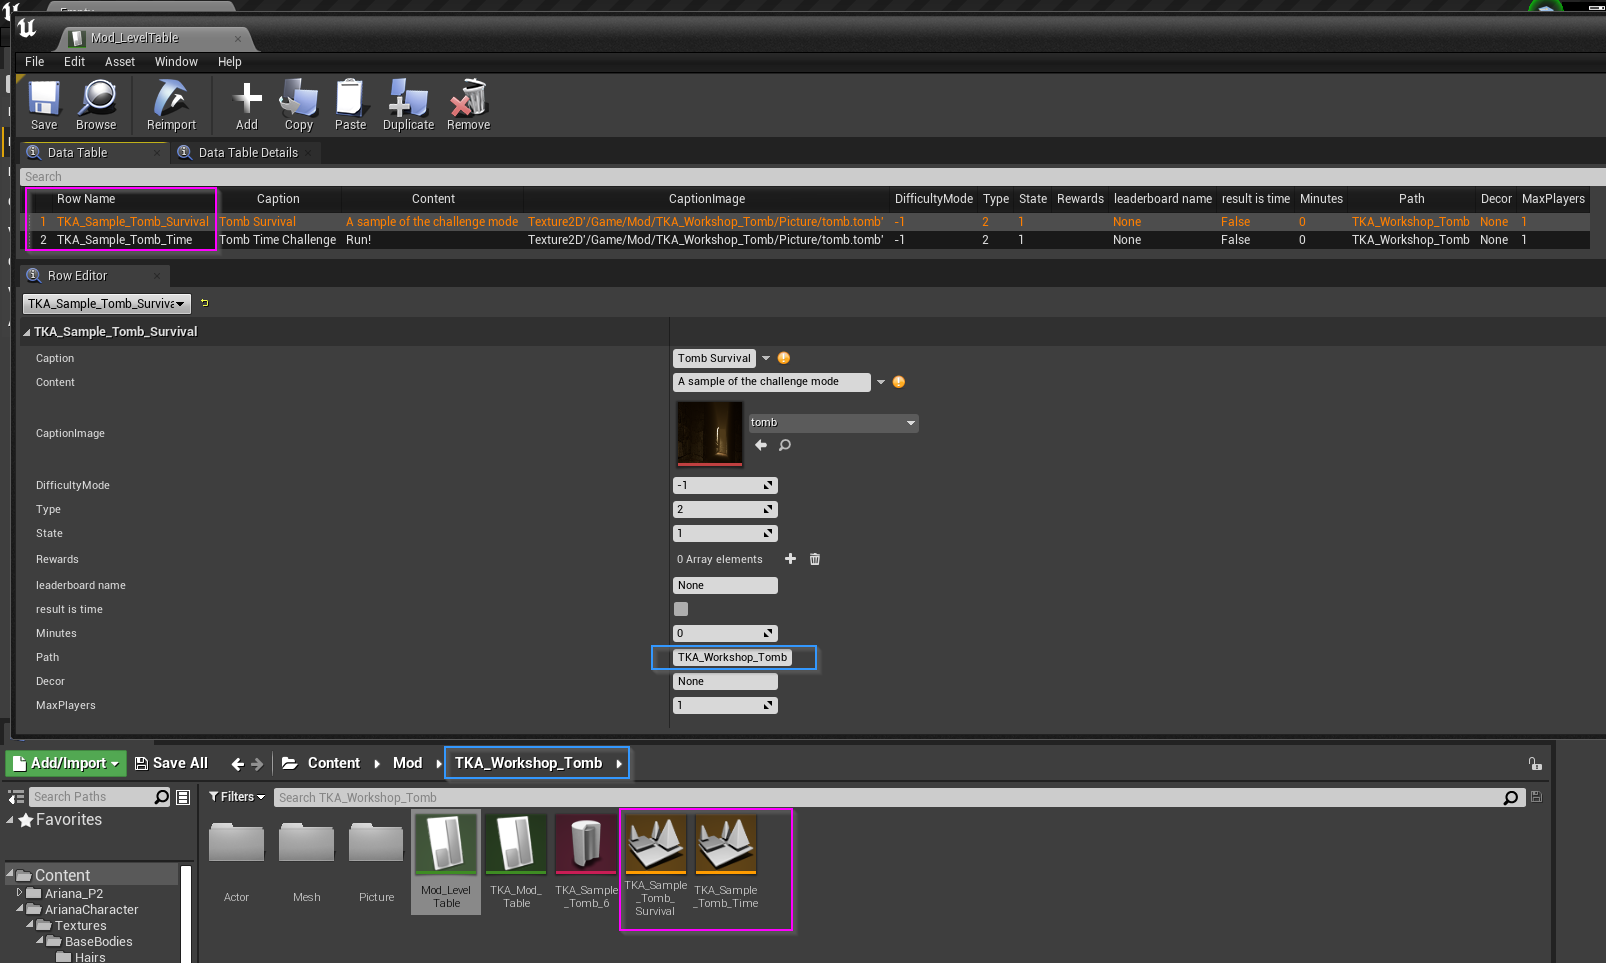
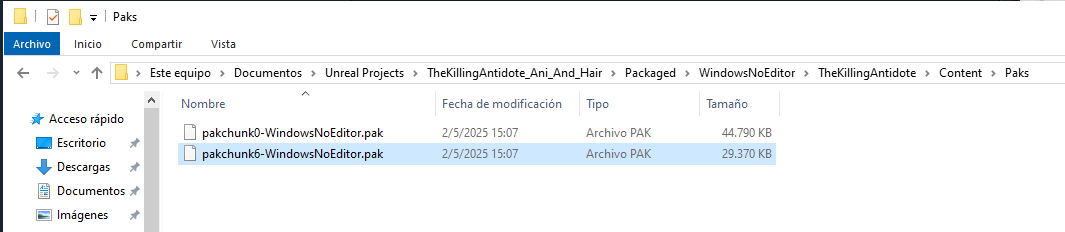
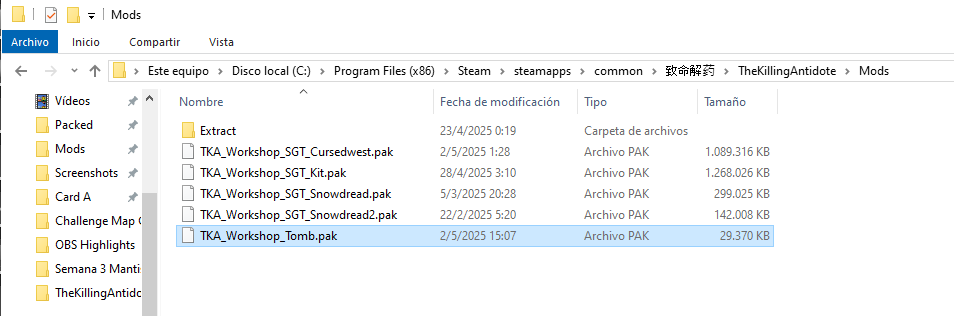
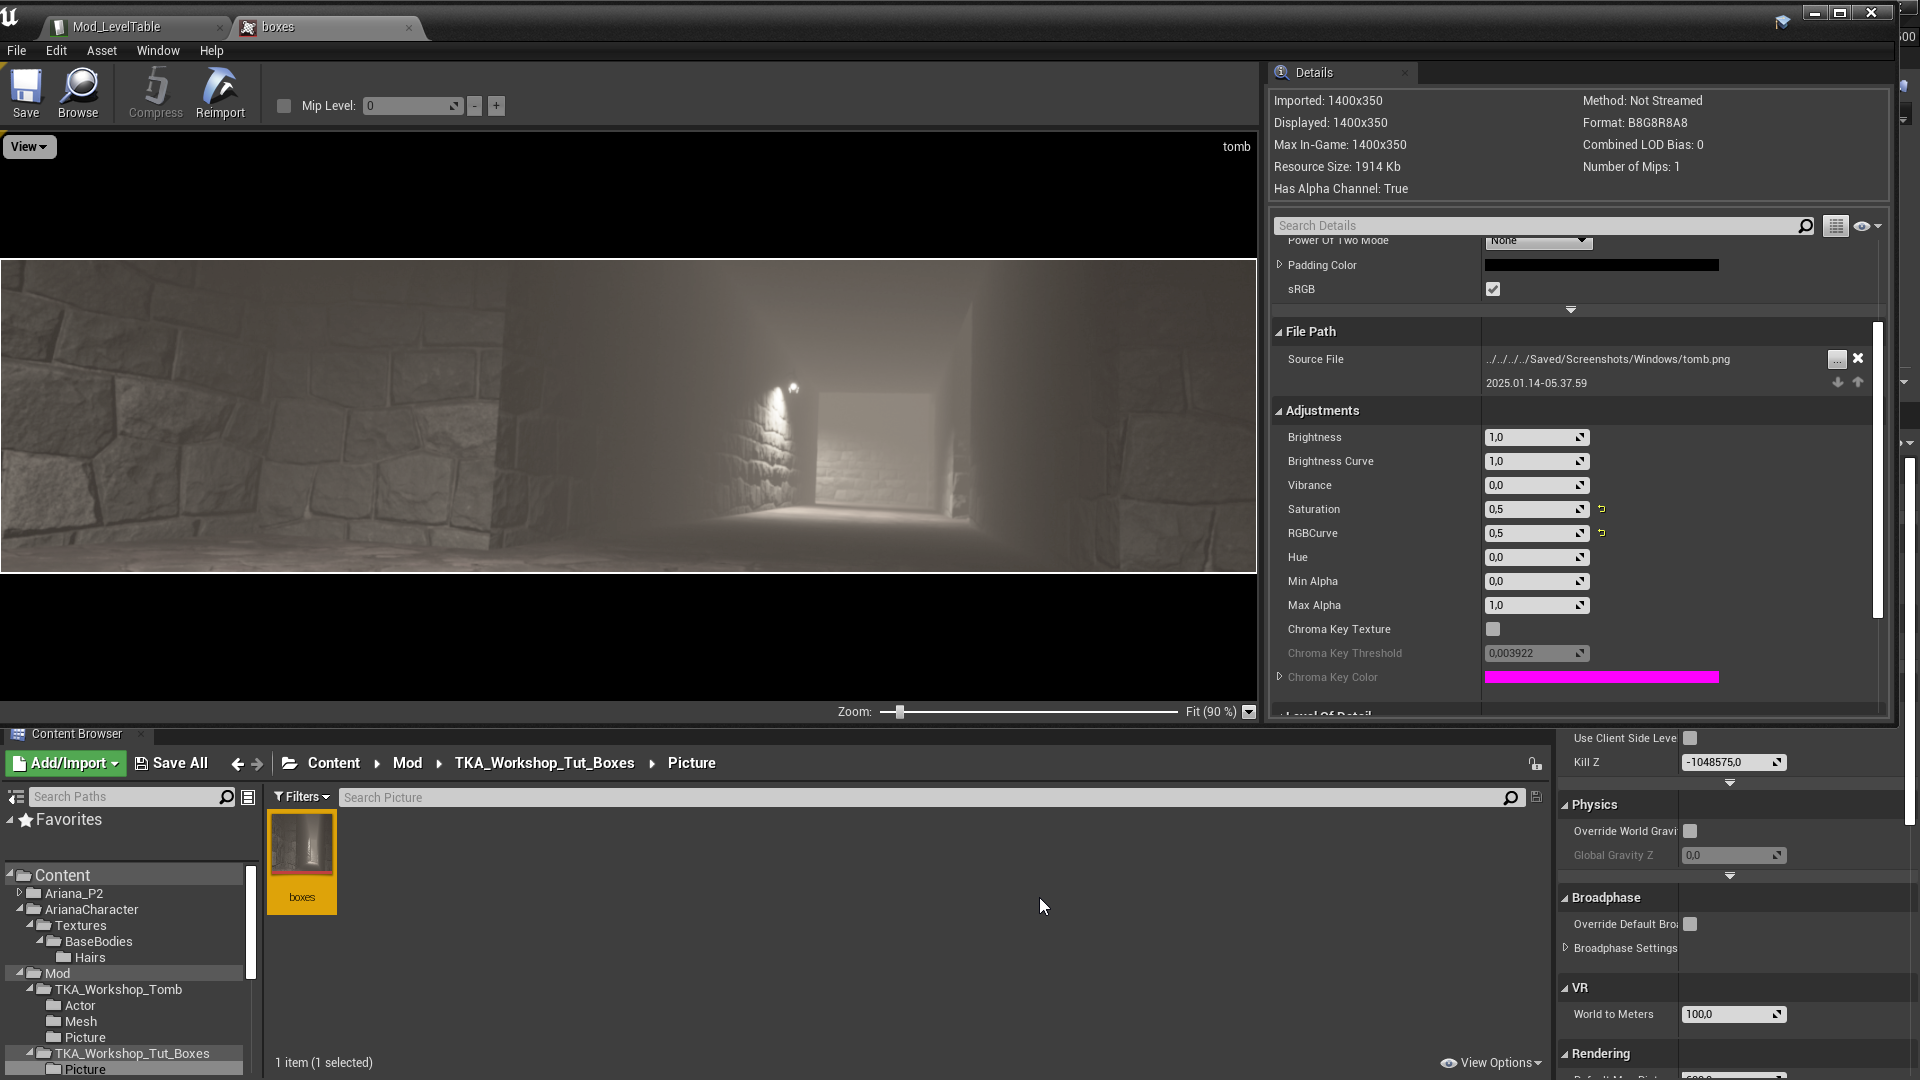
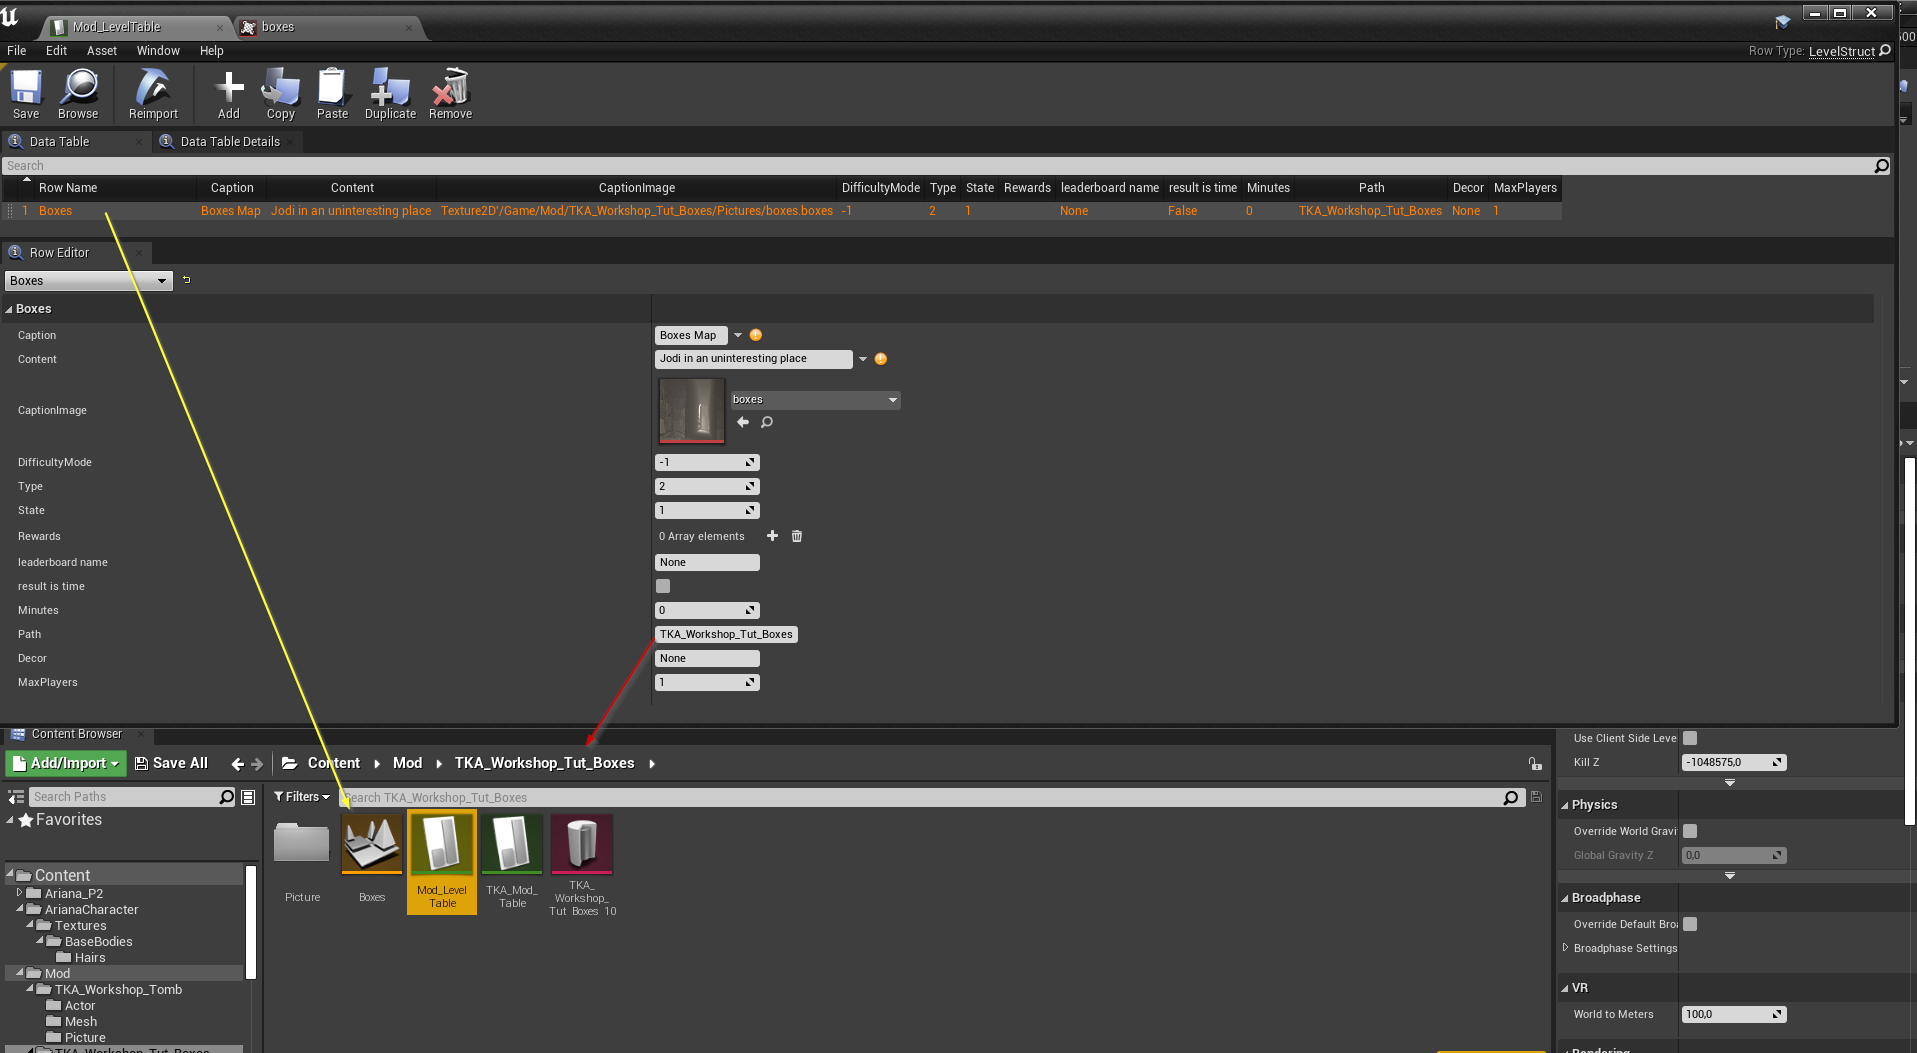
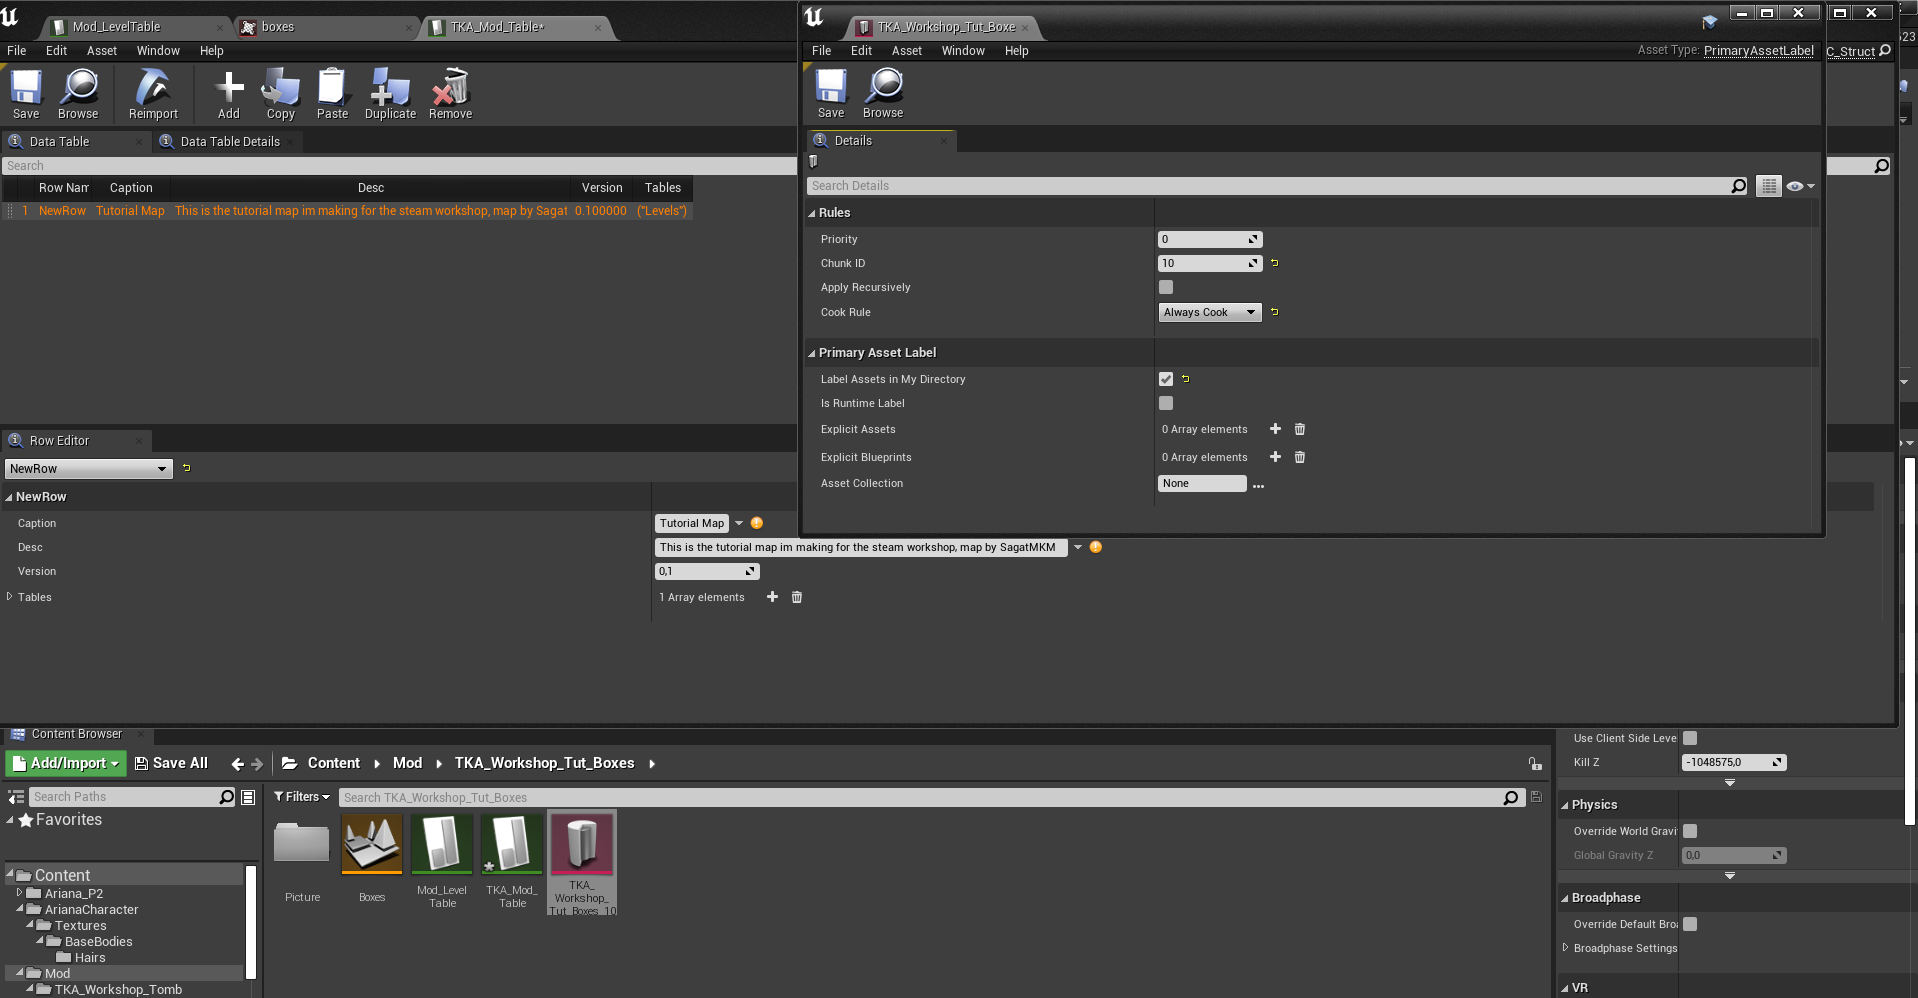
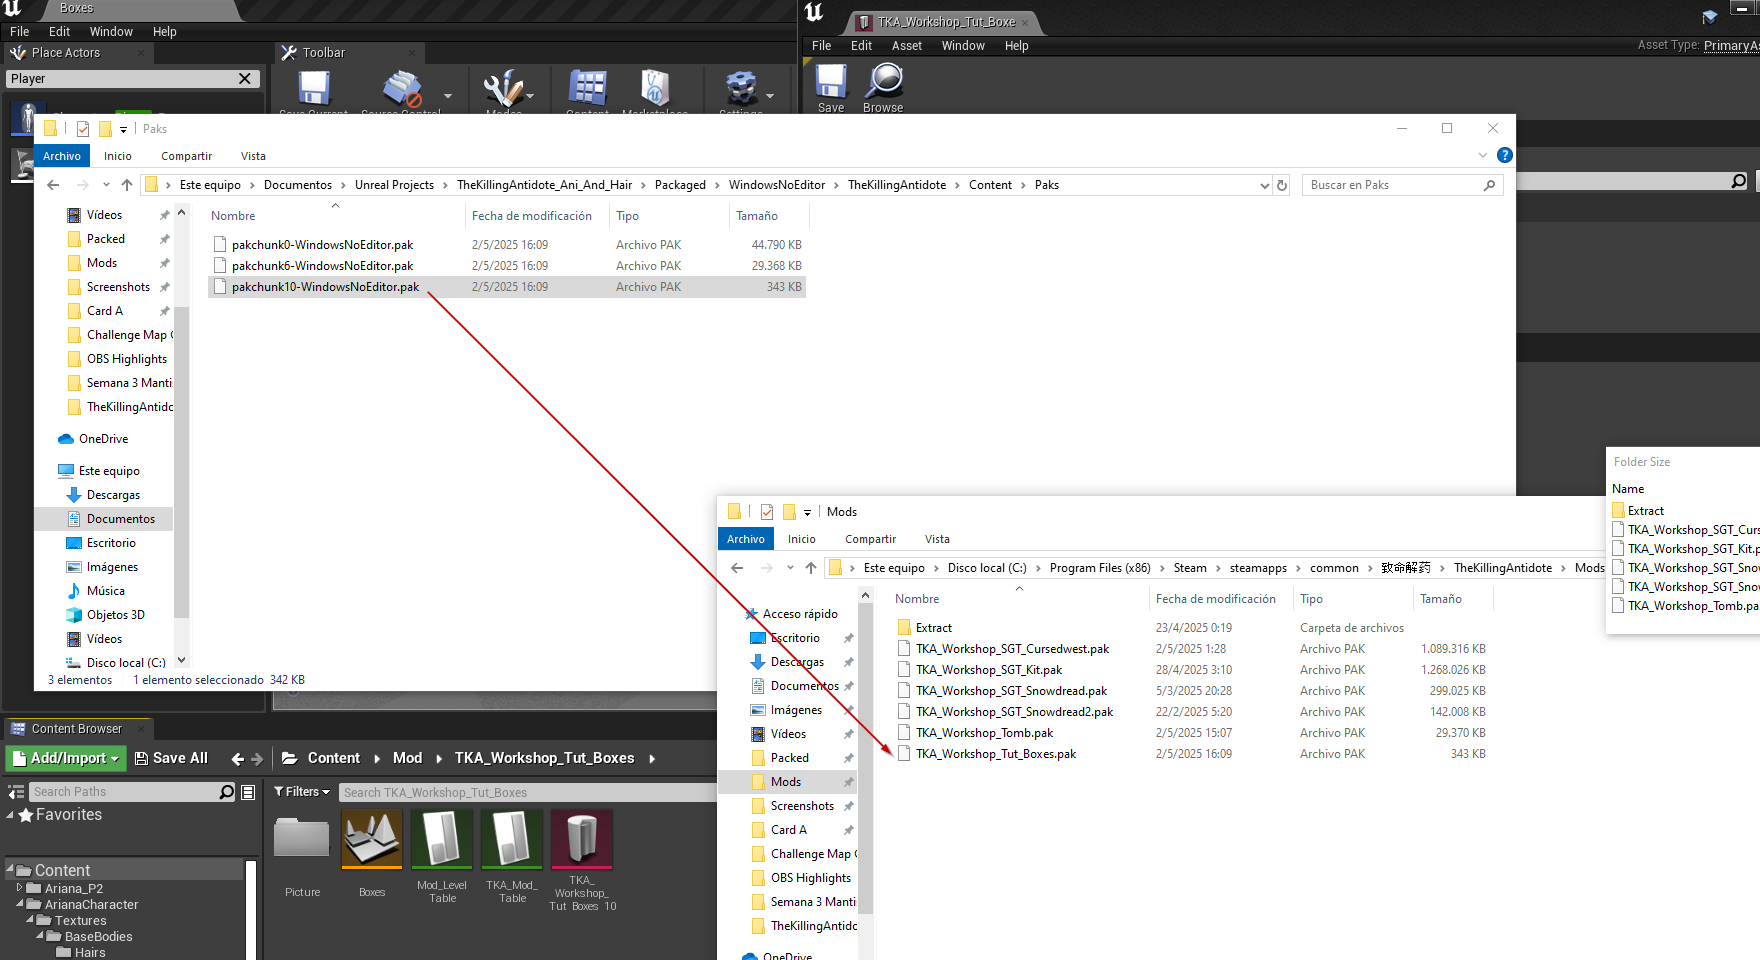
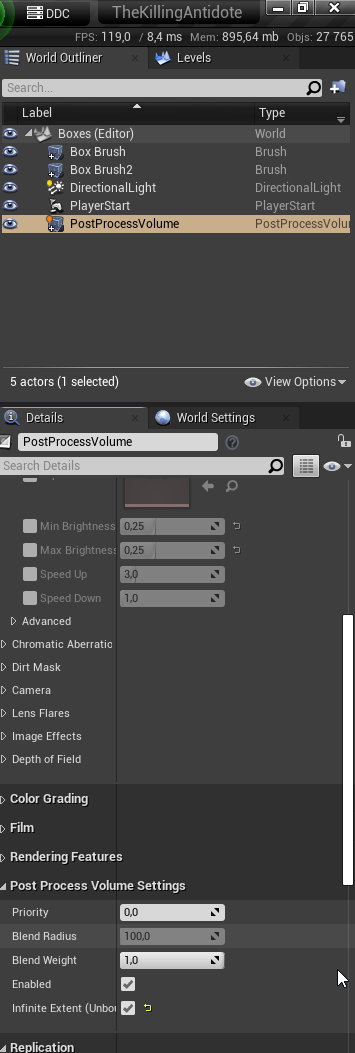
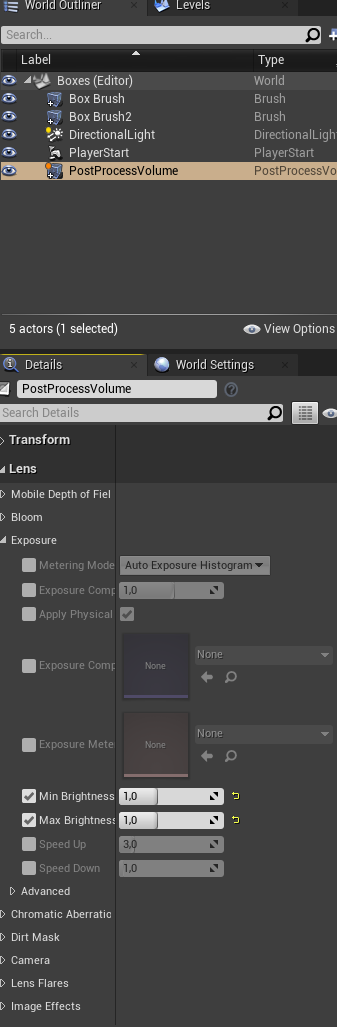
I know that endless loading is caused by wrong path on the tables, but a black screen crash on loading might have something to do on the level itself

Do you have a error message?
[REDACTED] 21 Jun @ 10:34am 
Here take my points. Thank you very much for this guide!
John Doe 6 May @ 12:30pm 
Great work