Blue Prince

Blue Prince

45 ratings
The Quarteress's Guide to Mount Holly's Halls[Spoilers]
By Whaleton
A lover of architecture's guide to the various rooms found in Mount Holly, as well as lesser known details that may prove useful in making full use of your house's layout.

Focused primarily on the mechanics of drafting and uses of rooms, and less on the puzzle elements. Contains spoilers regardless for most content up to finding Room 46, as well as rooms obtainable after.
2
2
   
Award
Favorite
Favorited
Unfavorite
A Foreword
In accordance with the desires of my ancestor, I, Quarteress "Whaleton" Erin, do humbly present these collated notes to one Simon Jones, in the hope that his exploration of the Baron's manor goes smoothly, and that he may find what he seeks.

This guide will be primarily focused on drafting-if you're looking for puzzle solutions, seek elsewhere! That being said, there probably be incidental puzzle spoilers, though I've tried to keep it to a minimum-sometimes mechanics are spoiling the puzzle, after all. And sometimes I've forgotten what counted as a puzzle!

Things this guide will have:
  • A list of the rooms you can draft in-game, accompanied with gem cost, as well as the upgrade options you can obtain via Upgrade Disks.
  • Their mechanics, as well as what items they usually contain, as well as "hidden" items and mechanics that are non-obvious, such as special drafting rules.
  • My very subjective opinion on which rooms are good.

Things this guide will not have:
  • Puzzle solutions. If an item is only used to solve a puzzle, I probably won't include it. Upgrade Disks, Sanctum Keys are also excluded if they're the only reward for a puzzle. This guide is about making the most out of the drafting itself, not reaching the endgame. I will also not be giving information on where to find the hidden floorplans.
  • All of the information. I'm still missing a few of the possible upgrade paths for various rooms, plus I might've missed a few. All the upgrade paths are added, but I haven't personally drafted all of them. Additionally, rarity on rooms is excluded, because I have absolutely ruined the listed rarities of my rooms via the room that allows you to do so. I'm going to try to add pictures at some point, but it'll take some time before I can get them all There are pictures now. I will not be adding images of the upgrade options.
  • Strategies for drafting in the challenge modes. Those tend to have different considerations, especially given whatever Dare you're forced to follow, so it'd be a bit time-consuming to go over the rooms again for it. Hopefully by the time you do those modes you've got a decent grasp on drafting.
  • Reasons that rooms I think are bad are actually good.

"But why should I listen to you about which rooms are good?"
My opinions are just my opinions, after all, but I do have quite a bit of experience in how each one functions.


Without further ado, then:
Numbered Rooms: 001-012
The first twelve rooms in the directory are primarily composed of rooms that you're likely to see quite often, with two exceptions. Learning these will be critical in making the most of each day.

01-Foundation
Items/Mechanics: 2/3 dig spots(guaranteed), Elevator to Underground(requires activation). Elevator from Underground, with Keycard. Permanent.

Foundation's nice! A three-exit room, guaranteed dig spots, and permanent-once it's set, you can access it as an alternate entrance to the house with a Keycard. Just make sure you draft it in a good spot, because it's a pain to adjust.

02-Entrance Hall
Items/Mechanics: Your allowance, Locked trunks(laboratory experiment required), trophies(skill required)

It's the entrance hall. You can't really change anything about it. Remember to grab your allowance!

03-Spare Room
Items/Mechanics: None. The base room never has an item in it by default unless affected by a spread or item luck boosting item. Get this thing upgraded.

Upgrade Options:

Bedroom Path:
Spare Bedroom
  • "Bedroom Pool" items can be found here(Coin Purse, Rabbit's Foot, apple/coins/key/gem, etc). Upgrades further to mimic another bedroom:
Spare Her Ladyship's Quarters
  • Gain 10 steps next time you enter the boudoir, and 3 gems next time you enter the walk-in closet.
Spare Master Bedroom
  • Gain 1 step per drafted room.
Spare Servant's Bedroom
  • Contains 1 key per bedroom drafted.

Hallway Path:
Spare Hallway
  • "Hallway Pool" items can *(presumably) be found here(Key, etc?). Upgrades further to mimic another Hallway:
Spare Foyer
  • All Hallway doors are unlocked.
Spare Great Hall
  • Contains seven locked doors.
Spare Secret Passage
  • Allows you to choose the room color drafted from this room.

Green Room Path:
Spare Green Room
  • "Greenroom Pool" items can be found here(Shovel, Watering Can, Sledgehammer, Metal Detector, gem, etc). Upgrades further to mimic another greenroom:
Spare Veranda
  • Find items in green rooms more.
Spare Terrace
  • Green rooms no longer cost gems.
Spare Patio
  • Spread gems in green rooms.

Spare Room is a super common trash room that can be upgraded to be an actually useful room once you find the right disks. In my opinion, the best option is Spare Terrace-Terrace is hard to draft, and given that you're probably going to draw Spare Room on one of your first three draws pretty much every run, negating gem costs for every single green room allows you a lot of freedom. The other options are okay, but are weaker in general. Until you upgrade it though, it's pretty useless.

04-Rotunda
Costs 3 gems.
Items/Mechanics: Can rotate. Pressing the button in the center rotates the two doors clockwise 90 degrees. Additionally, all rooms drafted from the Rotunda can be rotated.

Rotunda pretty much does what it says on the tin. A bit pricy gem wise, but useful, especially at higher ranks or later in the day when you're trying to fit all the rooms together.


Numbered Rooms: 001-012(cont.)
The description for all of the Spare Room upgrades caused this section to hit the character limit.

05-Parlor
Items/Mechanics: Contains the Parlor Game, rewarding two gems if you pick the right box. Occasionally contains miscellaneous items(Coin Purse, Car Keys, Apple).

Upgrade Options:
  • Now rewards 3 gems.
  • Two Wind-Up Keys are provided.
  • Funeral Parlor: Becomes a Red Room. Gem prize is equal to the number of red rooms in the house. If you open an empty box, lose 30 steps.


Parlor Room's one of the two bread-and-butter puzzle rooms, with the option for a safer upgrade, an easy mode upgrade, and a risk-reward upgrade. Funeral Parlor can be very profitable if you play your cards right, but the downside can be a bit too much to stomach. In that case, the three gem reward is also good. Don't take the two wind-up keys, though-just learn the rules. Gem rewards are always great in general though, so it's a good room to play early(or slightly less early, in the case of Funeral Parlor).

06-Billiard Room
Items/Mechanics: Contains the Dartboard Puzzle, rewarding either two keys or a Special Key on completion. Can contain various items on the barrel next to the dartboard(Ivory Dice, Broken Lever) or the bar counter(Apple, coins, Car Keys).

The other bread-and-butter puzzle room, focused on keys instead. A great room to draft, especially if it gives you a nice Special Key.

Upgrade Options:
  • Break Room: Ending the day here provides a Keycard tomorrow.
  • Speakeasy: Makes the puzzle easier.
  • Pool Hall: Adds a Foyer, Great Hall, and Secret Passage to the draft pool.

Don't take the Speakeasy, because even if you're bad at math, you can literally just hit the numbers until you get it right. There's only so many answers, and you have unlimited attempts. Pick one of the others.

07-Gallery
Items/Mechanics: Contains the Gallery Puzzle. Stays solved once solved, reward boxes always contain gems, coins, and Key 8.

A fairly annoying puzzle the first time, followed by a room that just gives free rewards every time after. The only way to obtain Key 8, which is useful occasionally, plus a decent gem bounty. You just have to solve the paintings first. A bit rarer than the other rooms in this segment.

08-Room 8
Can only be drafted by using Key 8 on a locked door leading to an eighth rank room.
Items/Mechanics: Contains the Room 8 Puzzle. Can be solved every time you enter, rewarding an Allowance Token every time, as well as a trophy on the first time.

You have to do this puzzle each time if you want the reward, but this is a source of farmable allowance tokens. The strict requirement for drafting does make it not as valuable as it could be, though.

09-Closet
Items/Mechanics: Contains two items.

The beloved child of my Day 1 runs. There's a wide variance of items actually contained within, but drafting this is always a good way to get a shot at some of the more useful items.

Upgrade Options:
-Bedroom Closet: +2 items if drafted from a Bedroom.
-Hallway Closet: +1 item if drafted from a Hallway.
-Empty Closet: Now starts with 0 items. +4 items if drafted from a Red Room. If Sheltered, starts with 2 items.

You can't really go wrong with more items, but Empty Closet is probably a bad idea. I chose it because I like to live dangerously, but it limits your Closet drafting options sharply. Bedroom Closet is not great though, because most Bedrooms are dead ends.

10-Walk-In Closet
Costs 1 gem.
Items/Mechanics: Contains four items.

It's like the closet, but better(mostly)! The gem cost can be a bit of a hindrance, but you have a pretty decent chance of one of the four items being gems. Also synergizes with Her Ladyship's Chambers, which will get you the gem cost back and more.

11-Attic
Costs 3 gems.
Items/Mechanics: Contains eight items. Possible for one of the eight items to be a chest, as well as a rarer item(Battery, Lockpick Kit, Compass).

Similar to the last two, you can't go wrong with more items. The gem cost and rarity of this one make it a bit harder to get as consistently, but it's got a lot better spread of rewards. One of the few places I've been able to find Battery Pack consistently.

12-Storeroom
Items/Mechanics: Contains 1 key, 1 gem, and 1 coin. Occasionally contains a dig spot or locked trunk.

The platonic ideal of a dead end. A very good room to draft even before upgrade.

Upgrade Paths:
  • Contains 2 keys instead of 1.
  • Contains 2 gems instead of 1.
  • Contains 10 coins instead of 1.

They're all good, but coins is probably the least useful, given allowance farming. Take keys or gems.
Numbered Rooms: 013-024
This section of the directory contains a mix of common-yet-useful rooms, as well as rare valuable and expensive rooms.

13-Nook
Items/Mechanics: Contains 1 key. Can contain an item(Coupon Book) or a locked chest.

Upgrade Paths:
  • Now contains 2 keys.
  • Reading Nook: You will always draw Library when drafting from this room.
  • Breakfast Nook: Contains a Bacon and Eggs(adds Morning Room to draft pool)

Breakfast Nook is good, sure, but Reading Nook is vital to get easy and consistent Library access, and Library is extremely useful. Why would you take two keys???

14-Garage
Costs 1 gem. Can only be drafted from a North or West door leading to the West Wing.
Items/Mechanics: Contains 3 keys. With Car Keys, can interact with the car trunk to obtain a useful item(Battery, Magnifying Glass. Upgrade Disk once). If powered via power or the Utility Closet's switch, allows access to the West Path. Synergizes with Secret Garden, provided Secret Garden is drafted in the West Wing on a lower rank.

A useful source of keys, plus an important access point-drafting this late allows easier access to front of house if you open the garage door, in addition to the usual permanent upgrade. The narrowness of where you can draft it makes it more difficult, but still extremely useful whenever it shows up.

15-Music Room
Costs 2 gems.
Items/Mechanics: Contains 1 key, and 1 Special Key(Keycard, Prism Key, Secret Garden Key, Silver Key, Sanctum Key, etc. Sanctum Key only appears if it hasn't been used.)

Kind of expensive. Only really useful if you've got gems to spare, and are hunting for a Special Key. Otherwise, just pick a cheaper key generating option that gives more keys.

16-Locker Room
Costs 1 gem. Requires "Pool" to be drafted to appear in the drafting pool.
Items/Mechanics: Spreads keys throughout the house. The lockers contain various items(gems, coins, fruit, keys, Keycard, Running Shoes), requiring keys to open each one. Keycard can also be found on the benches occasionally.

A good room, but hard to obtain, given Pool's rarity. Don't open the lockers unless you have a lot of spare keys-the locker locks can't be picked, and don't always have loot.

17-Den
Items/Mechanics: Contains 1 gem. Can contain a locked chest.

Another extremely common room. Not much to say about it. It's useful.

18-Wine Cellar
Items/Mechanics: Contains 3 gems. Can contain a dig spot, or an item on the barrels(Broken Lever, Keycard)

A useful(if rarer) room, with the main downside being that it's a dead end that tends to appear a lot later than you would want dead ends. If you can fit it in though, three gems is always good.

19-Trophy Room
Costs: 5 gems.
Items/Mechanics: Contains 8 gems. And your trophies.

If you have five gems to spare, it's good. If you don't, it's terrible. Pretty much a "win more" room.

20-Ballroom
Costs 2 gems.
Items/Mechanics: Whenever you enter the Ballroom, set your gems to 2. This WILL lower your gems to 2 if you have more than 2 gems.

This room seems a lot more useful than it is. As soon as you get above 2 gems, it becomes a dangerous liability. And it costs two gems!

21-Pantry
Items/Mechanics: Contains 4 coins, and a random fruit.

Useful room to draft because guaranteed fruit is always nice, but extremely bland. It sure exists.

22-Rumpus Room
Costs 1 gem.
Items/Mechanics: Contains 8 coins, and THE GREAT ALZARA, who will tell your fortune for a coin.

The existence of Alzara singlehandedly justifies anything negative I could say about this room.

(It's fine. I wouldn't draft it most times. Gem cost isn't worth the reward.)

23-Vault
Costs 3 gems.
Items/Mechanics: Contains 40 coins. Can contain a key. Various vault doors can be opened with keys found throughout the house for Allowance Tokens, an Upgrade Disk, and other one-time rewards.

Useful for the one-time rewards, but once you get Treasure Trove running, becomes a worse version of it. Hard pass nearly every time it comes up. I'm not made of gems.

24-Office
Costs 2 gems.
Items/Mechanics: Contains a gem in the hidden safe, accessed via the desk drawer. May contain a useful item on the desk(Coins, Keys, etc. Upgrade disk guaranteed if not used). Contains the Office Terminal, allowing you to spread gold throughout the house, as well as place Paychecks in the Servant and Maid Quarter rooms if they are drafted, once per week.

The gold spread is useful in earlier days, but once you have a sizeable allowance, drops off in usefulness. At least it only ends up costing 1 gem net once you solve the safe puzzle. Or you could just use Blackbridge to get the gold and never draft this room, ever.
Numbered Rooms: 025-036
Further on, rooms that help with your drafting strategy, as well as rooms containing various machines of use.

25-Drawing Room
Costs 1 gem.
Items/Mechanics: Contains a gem in the hidden safe. Allows you to redraw the rooms drafted from this room once per door.

A very useful room. Redraws are extremely valuable, and it costs net 0 gems once you solve the safe in this room. Pick it often and redraw to your heart's content.

26-Study
Items/Mechanics: Allows you to spend gems to redraw floor plans up to 8 times per room if drafted. Contains a gem in the safe. Can contain a useful item(keys, gems, Keycard, Apple).

Useful if you have a lot of gems, or have Hovel. Even if you don't, the gem from the safe and the item on the table is still nice.

27-Library
Items/Mechanics: Drafting from the Library gives you Unusual or Rare rarity rooms, as well as a chance of the Bookshop. If you have the Hall Pass, Bookshop is more likely to be drawn. Allows you to order a book from a list, that will appear next time you draft Library(even if on the same day). Contains your records on the second floor. Can contain a useful item(Apple, gems, keys).

Extremely useful both for puzzles and drafting. Getting a shot at your high rarity rooms is always very nice.

28-Chamber of Mirrors
Items/Mechanics: Allows drafting second copies. The buttons in the room open various panes of glass. The button from the initially-drafted room always opens the opposing side's pane leading to the center, which if accessed, takes you to the ceiling, where you can obtain a key, coins, and two PERMANENT copies of rooms you already have(picking from a somewhat limited pool which includes Den, Parlor, Billiard Room, Passageway, Workshop, etc?), allowing you to draft them multiple times on any day. The copies are exact duplicates in terms of upgrades/effects. Each corner of the room also contains an item(keys, coins, gems, fruit). Any "spread" into this room is duplicated to four times.

A useful but hard to utilize room. You need to have doors leading to each of the four walls of this room to be able to access a large portion of the room, especially the door directly opposite the "real" door. Even so, permanent second additions of bread-and-butter rooms is extremely strong-I've got multiple Dens and Billiard Rooms in my pool, allowing me to draw them multiple times a day for their rewards. Plus, being able to draft second copies is strong! Be careful with where you draft it, though.

29-The Pool
Costs 1 gem.
Items/Mechanics: Adds Locker Room, Sauna, and Pump Room to the draft pool for the day. Can contain a key. If the water is drained, coins can be found one time. If Swim Trunks is obtained from Mount Holly Gift Shop, two locked trunks will be accessible in a fully-drained Pool.

Extremely useful room, and the bane of my day 1 runs. Why don't you show up more!!! Spawning three good rooms(and two guaranteed chests, once you set it up) is fantastic.

30-Drafting Studio
Costs 2 gems.
Items/Mechanics: Allows you to add new, useful floorplans a limited number of times(eight). Contains the day's layout for the Great Hall, allowing you to avoid opening one of the two "dummy" doors.

Very useful the first eight times you draft it, then you're just paying two gems to look at the Great Hall layout for the day. Hard pass.

31-Utility Closet:
Items/Mechanics: Mechanical Room. Contains the breaker box, allowing you to do the following:
  • Disable the Keycard System(which synergizes with the Security Terminal).
  • The VAC puzzle, for a permanent +2 starting gems a day, one time. Repeat solves do not have a benefit.
  • Disable the Gymnasium's step penalty.
  • Enable the Dark Room's lights again. This requires the Dark Room to be drafted and entered before flicking the switch, as drafting the Dark Room after will cause the lights to turn off.
  • Enable Garage power, allowing access to the West Path.
Pretty useful dead end. Less useful if you have a keycard, but being able to nab an item from the Dark Room and make Gymnasium just a regular room is still nice.

32-Boiler Room
Costs 1 gem.
Items/Mechanics: Mechanical Room. Contains the Boiler Room Puzzle, which allows you to provide power by activating the various boiler pipes and pumps. While the pipe setup remains across runs, you will have to reactivate power every time you draft it. Can contain dig spots. Cannot be rotated to be drafted from the possibly-closed door(the leftmost in the image).

One of the only sources of power, which is important for quite a few things. Less useful once you stop needing power as much, but still a good room. Even if it's annoying setting up power every time.

33-Pump Room:
Requires "Pool" drafted.
Items/Mechanics: Mechanical Room. Contains the Pump Room Puzzle, allowing you to adjust waterflow in various places:
  • Fountain, allowing access to the Underground
  • Reservoir, for various puzzles
  • Kitchen, which doesn't do much but does provide a water source for the Watering Can.
  • Aquarium, for various puzzles
  • Greenhouse, causing gem flowers to sprout in it if you fill the Greenhouse's water capacity.
  • Pool, allowing you to access the coins and chests if fully drained.
If powered, allows you to use the side tank, which is required for some puzzles. Can contain dig spots or a locked chest.

Very useful room, but once you've set it up, it becomes less useful, since the water levels stay across days. Maxing Greenhouse and draining Pool is quite useful for drafting purposes, though!

34-Security
Costs 1 gem.
Items/Mechanics: Mechanical Room. Contains the Security Terminal, allowing you to view all items in the estate, as well as adjust Keycard Doors' appearance rate, as well as their unpowered behavior(allowing access without a Keycard via Utility Closet).

Useful if you have a Keycard or Utility Closet. Otherwise, this sure is a room that costs a gem to access.

35-Workshop
Items/Mechanics: Mechanical Room. Allows you to combine items for powerful effects. Always contains an item that can be used in a contraption(Metal Detector, Broken Lever, Sledge Hammer, Shovel, Battery Pack).

Useful if you can combine items, or just want a guaranteed item. Solid room, no real complaints-pick it when it comes up.

36-Laboratory
Costs 1 gem.
Items/Mechanics: Mechanical Room. Contains the Lab Puzzle, allowing you to permanently access Blackbridge if the Laboratory is powered. Contains the Laboratory Terminal, allowing you to perform an experiment for a reward, both of which are chosen from a random selection of 3. Later, gain ability to modify the selection pool. Can contain an apple.

Lab experiments range from very useful to totally useless. Laboratory(and Office, and Security) falls off in value slightly once you get Blackbridge, but it's still good to access. The best terminal, in my opinion.
Numbered Rooms: 037-046
Rounding out the numbers, rooms for tomorrow's gain, and today's benefit.

37-Sauna
Requires "Pool"
Items/Mechanics: Tomorrow Room. Provides 20 steps the next day. Usually contains a gem in the sauna rocks.

Very useful room, if somewhat hard to see show up. Steps are nice.

38-Coat Check
Items/Mechanics: Tomorrow Room. Allows you to store an item for use in future runs, or withdraw a stored item. Can only store one item at a time. Storing an item causes Coat Check to have inreased chance of showing up on the next day.

Useful if you have an item, otherwise it's not. You can store a lot of things in here-showroom items, crowns, workshop items, and so on. Pick something valuable and put it in here before ending a day!

39-Mail Room
Items/Mechanics: Tomorrow Room. Drafting this room when there is not a package causes a package to appear in it next time it is drafted. The package contains a random amount of gems, keys, and useful items(Sleeping Mask, Lockpick Kit).

Another useful room. Getting free items is always nice, even if it's delayed.

Upgrade Options:
  • Priority Shipping: The package now appears in the Entrance Hall.
  • Same-Day Shipping: The package now appears once you reach rank 8 on the same day, instead of tomorrow.
  • Freight Shipping: The package now appears 3 days after drafting, but contains many more items, and can include "larger" items(Shovel, Sledge Hammer, Running Shoes, Metal Detector).

They're all good, but I'm partial to Freight Shipping, because it's not like you see this room more than every 3 days anyways, and the big package is very useful. The game definitely favors going "all in" on days.

40-Freezer
Items/Mechanics: Tomorrow Room. Upon drafting, "freezes" your gem and coin total, preventing you from using them, and carrying them over to the next day. If drafted, cannot appear in the drafting pool the next day(sans Blessing of the Monk). Frozen assets can be dethawed via entering the Furnace or Sauna, but will refreeze if you enter the Freezer again, provided the Freezer temperature is low enough(i.e. far enough away from the Furnace). Various items(gems, coins, keys) are frozen, and can be melted either via the lighter items, or by drafting Furnace in close proximity(though the small freezer at the back requires the items). The frozen wall can also be broken with the power hammer as well as heat, and contains an Upgrade Disk.

Useful if you're actually looking for it, extremely painful if you're not. Being able to carry gems and coins from a day where you have a lot of them gives you an extremely strong start. Or you could be forced to draft it early and ruin the chance of actually going anywhere on a given day.

41-Dining Room
Items/Mechanics: Contains a meal that restores 20 steps, with a bonus 10 steps added if a specific room(randomly selected from a pool) is drafted. The meal can only be accessed after entering(not drafting) a room at Rank 8 or 9. Contains Lunch Box if purchased from Mount Holly Gift Shop, giving you 10 steps if it is in your inventory and you are in Rank 5 or higher. Can contain a key or gem on the side table.

Extremely useful room. Consistent steps are always good.

42-Observatory
Costs 1 gem.
Items/Mechanics: Contains the Observatory Telescope, which when adjusted, allows you to view the stars for various benefits based on your count. The benefits will only activate once the stars are selected in the view, allowing you to avoid activating all of them, if you so choose. If you have the Handheld Telescope, can view the stars a second time. Gives +1 star on draft. Can contain a gem, key, or locked chest.

Another very useful room, especially at higher star counts. Another common pick, even with the gem cost.

43-Conference Room
Items/Mechanics: Redirects all "Spread" mechanics into it, allowing easy access. Can contain a key, coin, or apple.

Again, extremely useful-being able to consolidate spreads into one room makes them a lot stronger.

44-Aquarium
Costs 1 gem.
Items/Mechanics: Is every color of room. Always contains a dig spot. Usually contains an item on the barrel next to the dig spot(key, gem, coins, fruit).

Useful for synergies, even un-upgraded. A common pick again.

Upgrade Paths:
  • Goldfish: Contains 10 gold.
  • Starfish: Gives +1 star on draft.
  • Electric Eel: Room is now mechanical, and a power source.

Electric Eel is the clear winner. Allowance farming negates Goldfish, if you want more stars just use Chamber of Mirrors(though Starfish can be useful as a quick farming method if you have the aquarium experiment!) . This is the only other power source, apart from Boiler Room. Once you fully get past the point of "needing" power(i.e. pump room fully dealt with), it's not as useful, so maybe try to swap to Starfish?

45-Antechamber
Items/Mechanics: Permanently in the center slot of Rank 9. Requires hidden levers to open the various doors. Contains the Basement Key.

Bane of my existence slash life's goal.

46-Room 46
Items/Mechanics: Permanently behind the North Antechamber door. Contains the Crown of Blueprints, allowing you to remove the first red room that appears in a draft from the draft pool, gaining 1 gem and rerolling. The first time you access it, you get credits and the day will end.

See previous. Once you've reached it once, it's useful if you can to dip back into it for the Crown. The Crown's nice.

Bedrooms
Bedrooms allow one to rest for a moment, giving energy for the rest of the day. Make sure you seek one out if you grow tired.

Bedroom
Items/Mechanics: Gain 2 steps every time you enter this room. Can contain a locked chest or an item(gems, Car Keys, key, Ivory Dice, coins, Apple).

The "default" bedroom. It's fine? As far as I'm aware, you can't use Running Shoes and this room for infinite steps. Much to my chagrin.

Boudoir
Items/Mechanics: Contains a gem in the safe. If this room is drafted on December 25th ingame, contains a bounty of keys, gems, and coins. Merry Christmas! Can contain keys or coins.

Even without upgrades, a consistent gem is always nice. Plus, on Christmas, it's the best room in the game.

Upgrade Paths:
  • Contains 1 gem.
  • Contains 2 Ivory Dice.
  • Contains 3 fruit.

Gem and dice are both good(fruit's not super useful, given that steps are generally not the primary thing you run out of). I went with dice-having two on a common room is quite useful.

Guest Bedroom:
Items/Mechanics: Gain 10 steps upon entering for the first time. Usually contains an item(keys, gems, Compass, Keycard) on the table.

Even without upgrades, it's good. 10 steps and an item(usually)-what's not to like?

Upgradable:
  • Guess Bedroom: Random bedroom effect-This includes all possible Bedroom tags, including Hovel and Maid's Chambers. Form on the table lets you guess the bedroom, with a "+?" bonus if you are right.
  • Quest Bedroom: Spawns an Allowance Token in the Antechamber.
  • Geist Bedroom: +2 Ivory Dice. If Tomb is drafted, +4 Ivory Dice.

Quest Bedroom is the best. Dice is nice, but this is the primary way to farm allowance tokens. Get yourself a 100+ allowance with this baby. Guess Bedroom is really bad because you can get Hovel or Maid's Chambers, wow! Don't do that one!


Nursery:
Costs 1 gem.
Items/Mechanics: Whenever you draft a bedroom, gain 5 steps. Contains an item(key, gem, coins) on the nightstand.

Useful! Steps are always nice, especially if this is early drafted.

Upgrade Paths:
  • Nurse's Station: If you have less than 10 steps when entering this room, set your steps to 20. Can be used infinitely.
  • Gain 8 steps when drafting a bedroom instead.
  • Indoor Nursery: Becomes a Green Room, and whenever you draft a Green Room, spawns two gems inside the Indoor Nursery.

Nurse's station is just so strong. Putting a Nurse's Station in a good location allows you to extend the day basically forever. It's fantastic.

Servant's Quarters:
Costs 1 gem.
Items/Mechanics: Contains 1 key for each bedroom in the house. Can contain Ivory Dice or coins. Ending a day in this room halves your steps tomorrow, and gives you one Ivory Die.

It's fine. You usually don't see it until late when you're kind of already at the key breakpoint, but it can be useful.

Bunk Room:
Items/Mechanics: Counts as 2 bedrooms. Contains 2 items(keys, coins, gems, or fruit). Ending a day in this room results in the Tomb containing a gem flower on Simon's grave if drated the next day.

Useful room, always has consumables, and synergizes by being two bedrooms(and also two dead ends). The day-end use is niche, but a free gem is a free gem(provided you draft Tomb).

Upgrade Paths:
  • If you have exactly two hallways when drafted, double your keys.
  • If you have exactly two shops when drafted, double your coins.
  • If you have exactly two greenroom when drafted, double your gems.
They're all pretty good. I went with shops so I could get some expensive items, but doubling your resources if you draft right is useful. Just remember which one you upgraded when you're drafting before it, so you have exactly two.

Her Ladyship's Chamber:
Can only be drafted from a South door in the West Wing.
Items/Mechanics: The next time you enter Boudoir, gain 10 steps. The next time you enter Walk-In Closet, gain 3 gems. Contains a useful item(Telescope, gems, keys). Ending a day in this room subtracts 10 steps from your starting count tomorrow, and adds 1 star.

Extremely difficult drafting conditions, but useful. If it pops up, take it.

Master Bedroom:
Costs 1 gem. Can only be drafted on the East Wing.
Items/Mechanics: Gain 1 step for each room in your house. Contains an Upgrade Disk(once), or a useful item(keys, gems, Keycard). Contains a Mora Jai box for an Allowance Token. Ending a day in this room gives you 10 extra steps tomorrow.

Sounds a lot more useful than it is, again. You do usually end up drafting it late enough for a high step reward, but also it's kind of stupidly rare?
Hallways
The hallways of the manor tend to open many doors for those so inclined.

Hallway:
Items/Mechanics: None.

It sure is the default hallway.

Upgrade Paths:
  • Contains 1 key.
  • Contains 1 locked trunk.
  • Adds 1 Hallway to tomorrow's draft pool when drafted. This can stack for every hallway drafted each day.

You can do some goofy things with the added hallways if you get enough of them(Clock Tower synergizes with them quite well), but personally I go with the key. Keys are nice.


West Wing Hall:
Items/Mechanics: Can only be drafted on the West Wing.

It's like Hallway, but limited.

East Wing Hall:
Items/Mechanics: Take a guess.

It's like West Wing Hall, but East. These two are both good rooms but also have nothing really special about them.

Corridor:
Items/Mechanics: Always unlocked.

It's alright. Always-unlocked seems nice but the rarity of this room means that you end up getting it on a low rank a lot of times, when the door is already unlocked.

Passageway:
Costs 2 gems.
Items/Mechanics: Can provide power routing, unlike other hallways.

A very useful room. Four-ways are great! A bit pricy gem-wise, but I pick it fairly often(on higher ranks, of course)

Secret Passage:
Costs 1 gem.
Items/Mechanics: Picking a colored book will open the passage to a door with the draft pool containing only rooms of that color. If all three rooms have gem costs, the leftmost room's gem cost is removed for this draft. Can contain a dig spot or keys in the secret passage. Can allow for certain rooms(Morning Room) to appear without meeting the requirements, as well as previously-drafted rooms.

Extremely useful. Allowing you to target a room of a specific color is great. I usually go with green(consistent way to get cloister if the passage is pointed at an inner room) or orange(very consistent way to get foyer).

Foyer:
Costs 2 gems
Items/Mechanics: Unlocks all doors in Hallway Rooms, including Hallways already drafted(looking at you, Great Hall), turning every Hallway into a Corridor.

Fantastic room. The gem cost is well worth the effect, especially if you have Great Hall. The "best" Hallway.

Great Hall:
Items/Mechanics: Contains seven locked doors. Three of them lead to the exits, two are dead ends, one leads to an Upgrade Disk(once) or item(keys, gems, coins), and the other one leads to the Right Antechamber Lever, as well as an item(coins, key, gem, Broken Lever). Opening one of the side exits from another room does not unlock the locked door corresponding to it.

If you have keys(or a lockpick kit), it's great! If you don't, it taunts you. Very useful room to draft, as it contains an Antechamber Lever-it was actually the way I got into the Antechamber on my day 1 run. If you can get this and Foyer, you're set.
Green Rooms
Except for Courtyard and Cloister, these rooms only appear on the West or East Wing.

Rooms of greenery are excellent sources of both gems, and nature.

Terrace:
Can only be drafted from a West or East door.
Items/Mechanics: Green rooms do not cost gems to draft. Usually contains an item(gem, fruit, key, coins) on the chair table.

Valuable room, but difficult to draft. If you can get it in a decent spot without ruining your rooms, removing gem costs is great. But also, Spare Terrace is better.

Patio:
Costs 1 gem.
Items/Mechanics: Spreads gems in all green rooms, including itself. Can contain an item(key, fruit, Metal Detector, Shovel, Sledge Hammer) and 1-3 dig spots.

Useful room, even if you will have to go track down gems in the already drafted green rooms(unless you drafted Conference Room). On the bright side, one of them is in the Patio(unless you drafted Conference Room).

Courtyard:
Costs 1 gem.
Items/Mechanics: Contains 1-3 dig spots. Usually contains an item(Sledge Hammer, Shovel, Metal Detector) or a locked chest.

A pretty consistent source of items. Useful to pick, even with the gem cost.

Upgrade paths:
  • Contains 1 gem.
  • Contains 5 digspots.
  • Corriyard: Always unlocked, is now a Hallway in addition to being a Green Room.

I'm a fan of Corriyard, but the gem is useful as well. Dig spots are not super great, given that you're going to get them regardless, and having 3 more is not worth the tradeoff.


Cloister:
Costs 3 gems.
Items/Mechanics: The Inner Cloister contains an Allowance Token(once) and dig spots.

Expensive. Unupgraded, not worth it if you have to pay the gem cost.

Upgrade paths:
  • Cloister of Rynna: For every Green Room drafted from this room, increase your Luck(chances of finding extra items in any room).
  • Cloister of Mila: Every Bedroom drafted from this room has an item in it.
  • Cloister of Joya: Permanently adds 5 steps to the dining room meal for every Kitchen, Pantry, and Dining Room drafted from this room.
  • Cloister of Veia: Find 8 dig spots in every room with a fireplace drafted from this room.
  • Cloister of Dauja: Add 2 stars for every room with a pet or depiction of an animal(i.e. Nursery) drafted from this room.
  • Cloister of Draxus: Becomes a Red Room and removes gem cost. All rooms drafted from this room are dead ends, and gain 4 Ivory Dice for each dead end drafted from this room.
  • Cloister of Lydia: Add 2 to your allowance for every Shop drafted from this room.
  • Cloister of Orinda: Open a random antechamber door for every Blackprint drafted from this room.

Rynna is my favorite Cloister by far-if you can draft 2-3 green rooms from it, you boost the amount of items you get over the course of a run greatly. Upgraded, this room becomes a lot more appealing, even if you have to pay the gem cost. Pick one of the upgrades that gives good rewards, like Rynna, Joya, Lydia, or Draxus, and draft it a bunch. Veia, Mila, and Dauja are kind of bad, though. Orinda could be good but there are barely any Blackprints to actually draft, so I wouldn't count on it.


Veranda:
Costs 2 gems. Can only be drafted from a North or South door.
Items/Mechanics: Greater chance of finding items in Green Rooms. Contains two dig spots. Can contain an item(gem, Shovel, Metal Detector, Hammer) or a locked chest.

A useful, if costly, room. If it comes up and you have the gems, it's great, though. Item luck is very useful.

Greenhouse:
Costs 1 gem. Can only be drafted from a North door on the East Wing, or a South door on the West Wing
Items/Mechanics: Increases chance of drawing Green Rooms. Usually contains an item(Watering Can, Sledge Hammer, Shovel, Metal Detector). If fully watered, contains gem flowers. You can use the Broken Lever to activate the South Antechamber Lever in this room. You can use the Power Hammer to permanently add a second exit to this room.

A very useful room. If you've used the Pump Room to max its water recieved, this also will always have gems. Without that, getting an item and access to an Antechamber Lever is nice-you will need to fix the lever every run, though, so it's only useful if you have Broken Lever. Breaking the wall is useful, too, even if it stops being a dead end.

Morning Room:
Requires consumption of "Bacon and Eggs" item. Cannot be drafted from a North door on the West Wing, or a South door on the East Wing.
Items/Mechanics. Tomorrow Room. Contains 2 gems. Adds 2 gems to tomorrow's starting gem count. Contains an Upgrade Disk(once) or a useful item(Car Keys, Rabbit's Foot).

Very useful, but extremely hard to see unless you have Breakfast Nook. Not much else to say about it.

Secret Garden:
Can only be accessed via using the Secret Garden Key on a locked door. The key can be found via any Special Key method(Locksmith, Music Room, Billiards Room, etc.), or by digging(yes, really).
Items/Mechanics: Spreads fruit. Contains 1-2 dig spots. Contains the Secret Garden Puzzle, allowing you to use valves to gain access to the West Antechamber Lever. If you draft this room below the garage, the East Antechamber Lever can also be accessed from the West Path. Using a Power Hammer also allows access to a third valve for the puzzle, allowing permanent access to both the West Antechamber Lever and the East Antechamber Lever via this room. Can contain an item(Broken Lever, Shovel).

Extremely useful room, giving you steps, items, and an Antechamber Lever(or two!). If you get the Secret Garden Key, use it.
Shops
The gold scattered throughout the house can be spent in shops for items to aid in your discoveries.


Commissary:
Costs 1 gem
Items/Mechanics: Sells four various "generic" items(and an Upgrade Disk, once). Accessing one of the Terminals in various rooms allows you to order an item here, guaranteeing it will appear as one of the four the next time it is drafted. Contains a (sadly inoperable) arcade machine. Special items that appear in it can still appear elsewhere in the house, and will be marked as "sold out" if obtained elsewhere.

The basic shop. It's good if you've got cash.

Kitchen:
Costs 1 gem.
Items/Mechanics: Lists the meal being served in the Dining Room. Always sells three food items: Banana, Club Sandwich(15 steps), and one of the following:
  • Bacon and Eggs(8 steps, adds Morning Room to draft pool)
  • Tomato Soup(5 steps per Red Room)
  • Garden Salad(5 steps per Green Room)

A solidly mediocre room. Bacon and Eggs are good, but not guaranteed. The Dining Room preview is not very useful. Just draft Dining Room.


Locksmith:
Costs 1 gem.
Items/Mechanics: Sells keys, as well as a Lockpick Kit and one random Special Key. If you bring the Electromagnet in, you will steal all the keys off the rack, getting approx. 30 keys. You monster.

Extremely funny Electromagnet interaction aside, not super great. The lockpick kit and special key are nice, at least?

Showroom:
Costs 2 gems.
Items/Mechanics: Sells expensive, extremely useful items. Hope you saved your allowance.

If you can afford this stuff, it's a great room. Otherwise, it's a two-gem waste. Extremely situational.

Laundry Room:
Costs 1 gem.
Items/Mechanics: Allows you to swap around your consumable totals for a gold fee. Keys<->Gems and Gems<->Coins cost 5, Keys<-> Coins cost 10. If powered, gain access to three special trades:
  • Allowance<->Stars
  • Current Steps<->Current Gems
  • Keys<->Ivory Dice

Situationally useful. If you have a high allowance, being able to get a lot of gems and keys is nice. Or you can swap allowance and stars, if you power it. Otherwise, skip.

Bookshop:
Costs: 1 gem. Can only be drafted from Library.
Items/Mechanics: Sells books that contain useful clues, that are then permanently added to the Library's list. Fairly costly.

Useful in the sense that you need to buy its books to solve puzzles. After you buy the books it becomes 99% useless and an easy skip.

Armory:
Requires "Blessing of the Knight" to appear in the draft pool.
Items/Mechanics: Sells powerful items:
  • Morningstar: A sledge hammer that also gives +1 star on day end.
  • Torch: Lights things on fire.
  • Knight's Shield: Allows you to negate a single red room when you draft it.
  • Axe: Allows you to PERMANENTLY "Axe" the gem cost of a room. Can only be used three times before it vanishes, forever. Choose wisely.

Extremely useful once you have access to it. The Axe is extremely powerful-I recommend knocking
the cost off some high gem cost rooms you draft frequently. I went with Cloister, Foyer, and Throne Room. Removing Classroom's gem cost is only useful when you're going for the trophy, but if you want to, it's an option.

Mount Holly Gift Shop:
Requires you to reach Room 46 at least once.
Items/Mechanics: Sells various permanent upgrades to rooms, as well as unlocks for the challenge modes.

A similar problem as the Bookstore. When you're trying to buy its upgrades, it's good. Some of the upgrades are also very expensive. Once you've bought them all, it's not very good, though it's better than Bookstore by virtue of not costing a gem and having three doors.
Red Rooms
Red Rooms, as implied by the color, cause nothing but problems, though if you are prepared, you can work around their downsides.

Lavatory:
Items/Mechanics: Contains 3 items, and then removes those 3 items. If Shelter or Knight's Shield is used, it will contain 3 items.

The least dangerous Red Room, by far. It's just a bog standard dead end. Usually gets drafted early by virtue of being a dead end, and not a threat.

Chapel:
Items/Mechanics: Whenever you enter the Chapel, lose 1 gold. If you light the ruby torches, it reveals a Piggy Bank, containing all lost gold over every run. You can smash this once to get the gold back. Use it carefully.

Another less-damaging Red Room. The gold fee can hurt before you have a high allowance, but once you build it up, this room becomes very useful. Or you can get the Blessing of the Bishop to make it only a benefit.

Maid's Chamber:
Items/Mechanics: Also counts as a Bedroom. Lowers the chance you will find items in rooms.

Deceptively bad. Item luck is important for being able to sustain your resources, so this room ends up affecting you a lot more than would be expected.

Archives:
Items/Mechanics: "Archives" one of the three rooms in every draft selection, hiding it from your view. Also contains an Upgrade Disk(once).

Dangerous, but has benefits, being both a four-way room, and a laboratory experiment option requiring archived floorplans. If going for specific rooms, probably a bad idea, but if trying to get places in general, good to take.

Gymnasium:
Items/Mechanics: Whenever you enter, lose two steps. This penalty can be disabled via Utility Closet. Can contain Running Shoes or Keycard.

Damaging up until you get Utility Closet, then becomes just another 3-door room. A useful draft.

Dark Room:
Items/Mechanics: You can't see the rooms drafted from this room, though you can see their power status/gem cost. If the power is turned back on via Utility closet, disables that effect, and contains an item(key, gem, Broken Lever, Battery Pack, Lockpick Kit, Keycard).

Drafting blindly is an extremely bad idea. If you can, either put this one in a dead end, or use the utility closet to turn the lights back on. Or just have Shelter negate the lights turning off.

Weight Room:
Items/Mechanics: Halves your current step count when drafted. Can use Power Hammer to reveal South Antechamber Lever.

By far my least favorite Red Room. Halving step count when you don't have an easy way to regain is devastating, even if there's an Antechamber Lever. If you can work around it, it's a useful four way room, but personally, I just skip it.

Furnace:
Items/Mechanics: Makes it more likely you will draw Red Rooms. Contains a dig spot. If powered, contains a key. Melts the Freezer if placed near it.

A double-edged sword. Red Rooms can be played around(mostly), and have a few synergies(Funeral Parlor, lab experiments, Crown of Blueprints), but also: you're going to be drawing more Red Rooms. The key's nice if it's powered, though.
Studio Additions
These rooms are all added via Drafting Studio.

There are rough drafts for some new rooms, that perhaps, in the future, might be added...

Dovecote:
Items/Mechanics: Allows you to rotate floorplans if it's drawn in your draft selection. Contains two dig spots.

Weaker, no-cost Rotunda. You don't actually want to draft this, just draw it, as once it's placed it has no benefit. But it's not terrible.

Kennel:
Items/Mechanics: Whenever you dig in a room, you unlock all doors in that room. Contains 0-3 digspots. And some very good dogs.

Extremely useful-many rooms have dig spots. A go-to pick when it shows up.

Clock Tower:
Costs 1 gem.
Items/Mechanics: Tomorrow Room. Gives you 1 key tomorrow for every Tomorrow Room drafted today. Can contain an item(key, coins, Silver Stopwatch-hope you like running down stairs!)

Useful in the way most Tomorrow Rooms are-tomorrow. Sometimes it has a useful item, though! If you're drafting a lot of Tomorrow Rooms, no reason to not draft this.

Classroom:
Costs 1 gem. Also added by Schoolhouse.
Items/Mechanics: Every Classroom contains an apple. Allows you to redraw rooms for every room with a Drafting tag in the house. Subsequent Classrooms drafted in a day will increase in Grade, providing different hints and answers for various puzzles. The ninth Classroom has a final exam, which allows you to get a trophy if you get a good grade.

Decently useful on its own. Vital for the final exam(huge pain to do), but the gem cost can add up. You can redraw a lot from the room if you draft from it late.

Solarium:
Costs 1 gem.
Items/Mechanics: Increases chance of drawing Unusual/Rare rarity rooms. Contains a dig spot, and can contain an item(gems).

Very useful, as Unusual and Rare rooms are better! Not much to say. It's good. Does become less useful the more you use Conservatory, but given that Conservatory takes many runs to fully "sort" your rooms by rarity, it'll see a fair bit of use until then.

Dormitory:
Items/Mechanics: Whenever you enter Dormitory after drafting a Drafting tag room, gain 10 steps. Can contain an item(key, Ivory Dice) or a locked chest.

Decently useful bedroom. Generally not going to be worth it to go back every time you're able to gain 10 steps, though.

Vestibule:
Costs 2 gems.
Items/Mechanics: Every time you enter this room, 3 doors unlock and 1 door locks.

Yeah, it kind of sucks, especially if you're not starving for keys. If you are, you're going to be playing roulette, which also sucks. You can reset the locked door by dipping in and out at the cost of two steps, though.

Casino:
Costs 2 gems.
Items/Mechanics: Can spin the Roulette wheel in the center once, gaining various rewards depending on the amount of gold bet. Can play the slot machines. Can use the Broken Lever on the gold slot machine for access to the five-reroll slot machine. Can contain gold.

Not very useful. Winning any amount of useful gold from the Casino will take a while. Dipping in to spin the roulette wheel once a day can be useful(it can have Allowance Tokens!)
Found Floorplans
Of course, what would exploration be without a few rewards, as well? Perhaps even some valuable rooms, nestled away...

Planetarium:
Items/Mechanics: Tomorrow Room. If you end your day here, gain 2 stars. If you bring a Handheld Telescope to this room, you can observe the planets once per day, gaining various permanent additions to the Planetarium depending on the planet observed(unclear if in sequential order or based on which planet you are looking at when you use the Telescope):
  • Large Planet: Dig spot
  • Red Planet: Apple
  • Ringed Planet: Locked Trunk
  • Smallest Planet: Ivory Dice
  • Earth-like Planet: Prism Key

Useful room, especially once you use the Telescope a few times. Before that it's less useful, though, unless you're trying to build up stars/need a few extra dead end spots filled.

Mechanarium:
Items/Mechanics: Mechanical Room. Has one door per Mechanical Room in the house, up to 8. The diagonal doors contain items, a Sanctum Key(once), and a West Antechamber Lever. If one of the cardinal directions would lead to a wall of an already drafted room, that door is skipped, reducing the total number of Mechanical Rooms required.

Situationally useful. The Antechamber Lever is nice, but requires planning, and getting lucky with a lot of Mechanical Rooms. If you don't have mechanical rooms already drafted, though, it's just bad.

Treasure Trove:
Costs 1 gem.
Items/Mechanics: Contains 5 gold for every time it has been drafted. If the Royal Scepter Puzzle is solved, contains the Royal Scepter.

Extremely valuable room. Once you visit it more than 8 times, it becomes better than the vault! Crucial for getting some of the most expensive items.

Throne Room:
Costs 5 gems.
Items/Mechanics: Part of a lategame puzzle. Also contains a North Antechamber Lever, allowing you to access Room 46 without having to go to the Underground.

A very expensive room. However, if you use the Axe on it, it becomes quite a useful room, by being the only in-house North Antechamber lever. Highly recommend doing so. If you don't, though, this room is going to be not very useful.

Tunnel:
Items/Mechanics: One of the three rooms drawn from the door in this room will always be another Tunnel. This can chain until you hit a border. If drafted North-South to Rank 9, has a one-time Mora Jai box reward.

Not a very good room. You don't have many reasons to spam Tunnel all the way up.

Conservatory:
Costs 1 gem. Can only be drafted in one of the four corners.
Items/Mechanics: Allows you to permanently adjust rarity of three random rooms. Can contain a dig spot.

A fantastic room. Drafting this consistently allows you to tweak all your rarities, removing the rooms that roadblock you, and pulling the rare but useful rooms down to commonplace. It's random which ones you get, but given enough drafts of this room, you can reshape your entire house's gameplan.

Lost and Found:
Items/Mechanics: Contains two rare items(Can include Silver Stopwatch and Repellent Spray, two extremely rare items). Every time you enter, lose a random item from your inventory.

Useful, but only if you treat it as a dead end. Try not to walk into it with items. You're always going to lose the one you don't want to lose.

Closed Exhibit:
Items/Mechanics: Doors in this room are Keycard Doors. Can contain Lockpick Kit. If you access the wall without a door, reveals a panel, which allows you to access the Paper Crown(provided you can reach it in 10 seconds from the panel), allowing you to redraw if your selection has no red rooms.

Useful if you have a Keycard or can bypass them. The Paper Crown is also pretty good, if you can get it. Solid room, if situational.
Outer Rooms
While the manor is vast, it's important to tend to the grounds, as well.

These rooms only appear in the West Path hut.

Toolshed:
Items/Mechanics: Two special items.

Pretty bog standard. Useful to get items, though. One of the few places you can get Gear Wrench, allowing you to change the rarity of Mechanical Rooms you draft).

Shelter:
Items/Mechanics: Contains a gem in the time-lock safe. Contains the Shelter Terminal, allowing you to open the time-lock safe with a date and time, as well as allowing you to open every single locked door in the house if the "radiation"(number of triggers) from the day's Laboratory experiment gets high enough(the precise amount depends on the experiment). Negates the penalty of the next three Red Rooms drafted.

Useful, especially if you do Red Room-heavy draft strategies(remember, the Lavatory has items if sheltered!). The gem will take time to get if you want to get it every time, so I usually don't bother. The radiation feature is extremely situational, but if you can trigger your Laboratory experiment enough, it completely removes the need for keys.

Schoolhouse:
Items/Mechanics: Contains a gas lever. Adds 8 Classrooms to the drafting pool for the day.

Are you going for the final exam trophy? It's useful. Otherwise, hard pass.

Shrine:
Items/Mechanics: Allows you to donate gold for blessings. The type and duration varies every 2 gold, so always donate an odd number. There's a list somewhere else online. While a blessing is active, you can steal the gold out of the offering bowl, cancelling the blessing, giving you the Cursed effect for the remaining blessing days, and unlocking Cursed Coffers in the Mount Holly Gift Shop. Don't do this more than once. Also can contain the Cursed Coffers once purchased, which requires a sledgehammer to open and contains the Cursed Effigy, an extremely cursed item.

One of the most versatile outer rooms-the blessings are powerful, and once you know the costs to obtain each blessing, you can pick the one you want easily with allowance money. Easy pick most times it comes up.

Root Cellar:
Items/Mechanics: Contains a bunch of dig spots. Increases chance of dig spots in every room drafted.

If you have a shovel and Kennel, it's good. Otherwise, not really.

Hovel:
Items/Mechanics: Contains a gas lever. Rooms drafted today will cost extra steps instead of gems.

Useful if you have a way to get a lot of steps, but if you don't, you're going to run out of steps very quickly. Allows you to use gems for Study rerolls, though.

Trading Post:
Items/Mechanics: Allows you to swap items for other items of similar rarity, or for consumables(keys, gems, Ivory Dice). Contains a Mora Jai box with an Allowance Token. If you have a lighter, you can blow up the dynamite for a one-time 40 gold payout. The Microchips can be traded for items, and will respawn the next day in their original spots.

Very useful shop, especially once you have a few items, allowing you to try to pinpoint the items you need for a workshop item, or trading a useless item coupon book for literally anything else.

Tomb:
Items/Mechanics: Contains 5 gold. Adds five gold every time you draft a dead end. If you have a Conference Room, the gold is instead added there. If you have a lighter, can access two hidden rooms, one of which contains Ivory Dice. Provides alternate access to the Underground via the Tomb Statue Puzzle.

Useful for Underground access. The gold is less so, unless you have a Conference Room, but even then, just draft Treasure Trove. When you still need Underground access it's a godsend.
Miscellania
Lastly, a few minor quirks of the house...

The following are tips not necessarily applicable to one room, but are useful for drafting in general.

  • There will always be at least one room that does not have a gem cost out of the three drawn.
  • There will always be at least one room that is not a dead end out of the three drawn.
  • Doors cannot point towards the border of the house. A three-door room will always have its wall facing the outside if placed on the border, and a two-door room will always have its walls facing the corners if placed in the corner.
  • Related, as a result, four-way rooms cannot be drafted on the Wings, Rank 1, or Rank 9, and three-way rooms cannot be drafted in the corners.
  • Related, as a result, the Silver Key, when used on one of these locations, will ensure that all three drawn rooms have the maximum number of valid doors possible for that room's location. (This allows you to attempt to force Pool for day 1 slightly easier).
  • As mentioned in the Secret Garden section, it is possible to get the Secret Garden Key, as well as the Broken Lever, via dig spots, but it is extremely rare and should not be relied on.
  • Locked doors become more common as you move North, as well as moving East.
  • Keycard doors become more common as you move North, and are also more common on any room with steam ducts(i.e. rooms that are power conduits).
  • You can toss a coin into the Fountain outside once per day, provided it is filled. Draining the Fountain with the Pump Room afterwards reveals all the coins tossed in this way, allowing you to pick them up. Useful for a bit of extra cash.
Postscript/Notes
I hope this document will aid you in finding your inheritance, Mr. Jones. Hopefully you will forgive a lady some of her opinions, and make the house truly your own in time.

This guide is mostly complete, though I do plan on updating it in the future to add some images, perhaps.

  • There are a few possible errors on some rooms I haven't seen in quite a while(working off my notes for quite a few of the upgrade paths), so let me know and I'll fix them.
  • If a room has given you an item(WITHOUT luck boosts from Rabbit's Foot/Cloister/Veranda-the luck boosting items make it so basically any room can spawn items), let me know and I'll add it!
  • Any hidden mechanics you might've noticed about a room that I missed would be appreciated! I should have gotten a lot of them, but this game is complex.

Additional thanks to:
  • low rez ooi for information on a few of the upgrade paths I hadn't obtained, and reminding me to include the dayend bedroom mechanics
  • alstroemerium for various corrections and additions on mechanics.
  • snroxy, sazandorable, Phlarx, Saori and Nitori, and Danny Daily for some minor corrections.
  • surael on Discord for help with the images.
Much appreciated.

Thanks for reading, and good luck with your future drafting endeavours! Hopefully this half guide, half opinionated ramble can help you out.
31 Comments
Kirbyo 22 Jul @ 1:20am 
I bet someone already commented this, but the furnace isn't just A key. It's INFINITE keys! You just have to turn it off and back on again between each key.
Hato1 ;) 8 Jun @ 4:09pm 
IIRC Locked rooms are not more common in the east wing. The memo where that is written is red (and not handwritten).
Furmonster 4 Jun @ 6:48pm 
In a run where I had the shelter, the game said I was being protect from all red rooms, not just the first 3
Kalir 31 May @ 1:37am 
Two things: the Music Room only provides a Sanctum Key if drafted on rank 9, and Parlor is eligible to spawn a Magnifying Glass.
Whaleton  [author] 5 May @ 9:54am 
Phlarx: ooh, good catch on the tomb. And thanks for the clarification on Dark Room/Utility Closet. I couldn't remember since the lights do seem to turn off when you enter.

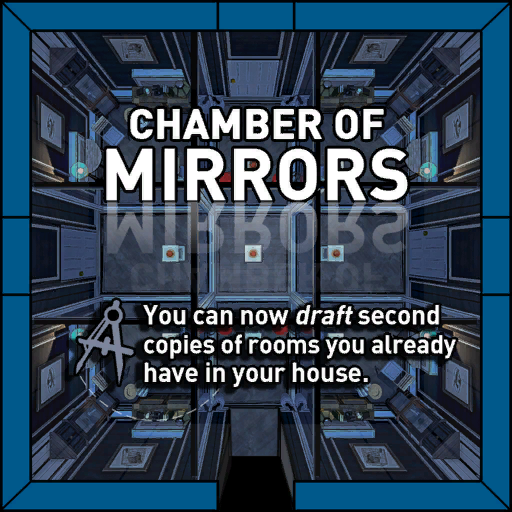
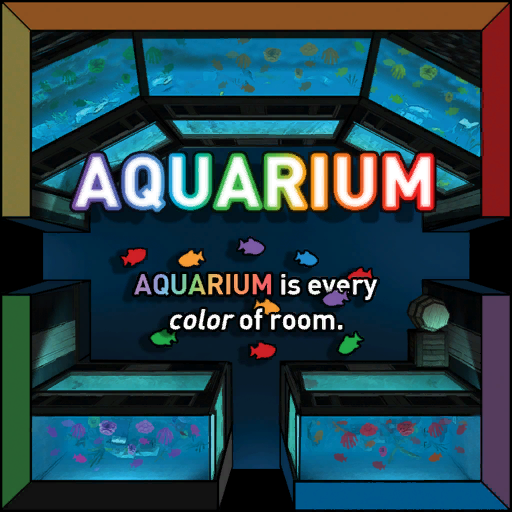
Saori and Nitori: Wow, that's a really bad upgrade lmao. Chamber of mirrors seems to give a decent set of rooms, yeah-I've gotten workshop and passageway as well(double workshop is always nice)? It must be limited somewhat, but the exact mechanics I've got no clue. Good point on the star aquarium!
Saori & Nitori 3 May @ 2:37pm 
oh, one thing i forgot:

- at one point, my parlor puzzles went back to their base difficulty. i'm not sure if this is a bug or a feature, since considering how absurdly difficult they were before this happened this feels like the result of an integer overflow... but i welcomed it anyway, because by then i was regretting going with the 3 gems upgrade instead of the 2 wind-up keys one, lol.
Saori & Nitori 3 May @ 2:30pm 
(cont.)

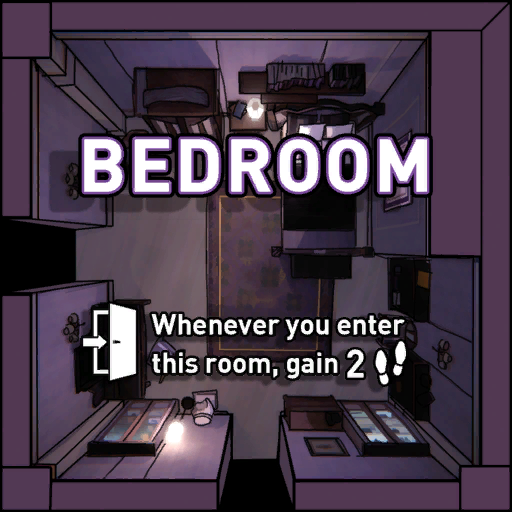
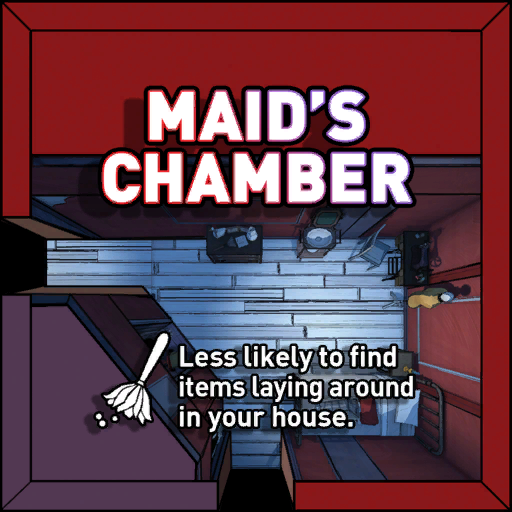
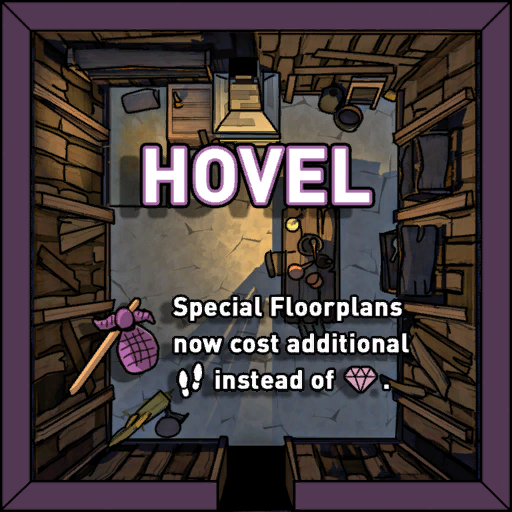
overall, i found it to be a complete downgrade. most bedroom effects are ok, but getting the hovel can instantly kill your run (which happened to me at least once), and the same goes for the maid's chamber. and it can be pretty difficult to guess which bedroom you got if you're not very familiar with which items can spawn where just yet.

at least the name and description are pretty funny!!
Saori & Nitori 3 May @ 2:30pm 
as for the guess bedroom, here's what i've gathered about how it works:

- when you draft it, it takes on every property of a random bedroom. this includes not just the ones in the bedroom tab of the directory, but also the maid's chamber, hovel, aquarium, etc.
- it'll copy all of the copied room's colors, possible/guaranteed items, and effects, including upgraded effects.
- and the main thing: there'll be a form on the table listing every bedroom available, and asking you to guess which one it is this time. if you guess correctly, you get an effect showing a big "+?", which honestly i have no idea what it means lol. if you guess incorrectly, you don't get anything.
Saori & Nitori 3 May @ 2:29pm 
great guide, thank you. a few things i've noticed from my own run:

- the chamber of mirrors gave me duplicates of the passageway, wine cellar, and workshop, so the selection pool doesn't look that limited? (the passageway and workshop both ended up being super useful, btw; passageway is one of the rooms whose cost i axed, and having two of those for no cost can be a godsend, while the workshop is just nice to have more commonly available, especially after you change its rarity with the wrench. helps with the machinarium, too.)
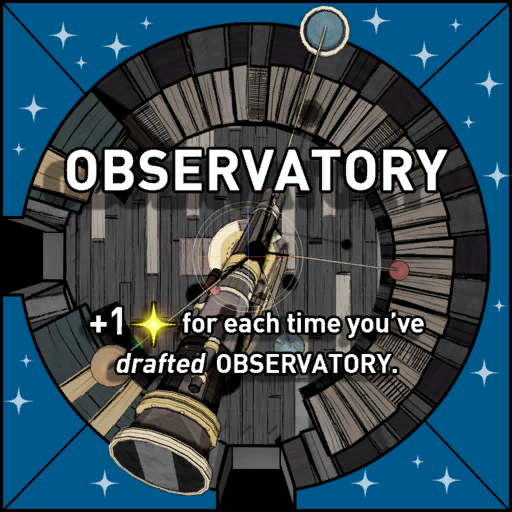
- the starfish aquarium allows you to farm stars super fast if you get a lab experiment like "every time you draft a shop, add 3 aquariums". really helped me make up for using the ink well to solve some puzzles.
Phlarx 3 May @ 9:23am 
Additionally, the Bunk Room places a gem flower on Simon's sarcophagus in the Tomb (the unadorned sarcophagus in the corner opposite Herbert's.