Tower of Kalemonvo

Tower of Kalemonvo

Not enough ratings
The Tower & You (A New Player Guide)
By Mr. Cone
An on-ramp for New players to Tower of Kalemonvo. In this guide, I will walk you through the required information to get you started and up to Floor 6. However, don't expect too much help after that, you're on your own.

Additionally, I'll throw in some basic early game builds at the end.
2
   
Award
Favorite
Favorited
Unfavorite
Introduction

What is Tower of Kalemonvo?
On the Surface, it's an Old School Hack & Slash with the Style of Diablo 1, but that's where the similarities end. Much of of Tower of Kalemonvo is vastly different from the afore mentioned inspiration, which can lead many feeling put off by the sheer changes. This guide is here to help acclimatize you, the reader, to the nuances of the Tower and the many evils that lie there in.
Change Log (4-23-2025)
Current Patch version: 1.1H2

  • Updated the Pro-Tip section with some extra information.
  • (Hopefully there's an update soon...)
Differences from Diablo 1
No Town
  • One key difference in Tower of Kalemonvo is the lack of a Town, that means no town portal and no selling your wares. You will always be in the tower and have to constantly take stock of your resources as you progress as one misstep can send you to your doom. However, that doesn't mean there aren't vendors to help along your journey, but gold isn't the main currency instead choosing "Silver Skulls" as the legal tender of this Tower. Just keep ascending the tower until you reach the top.

Expanded Statistics
  • The next major difference is the amount of character statistics you have at your disposal. Unlike Diablo 1, with only Strength, Dexterity, Vitality, and Magic. The Tower of Kalemonvo has six statistics to meet your acquaintance and expand your character over.

    Additionally, depending on the difficulty mode you play the amount of points you have available on level-up will change. On Normal, you will gain 5 points at level. On Despair, you'll get 4 points per level. Iron man only takes into account your difficulty choice (Normal and Despair) when factoring your allotted points.


Stat
Description
What it do?
Strength
Damage for Melee Weapons
+1 Minimum & Maximum Damage per 5 Points
Dexterity
Determines your ability to hit
+1 Attack rating per 2 points
Agility
Dodge Chance and Attack Speed with ranged weapons
+1 Dodge per 2 points / +?? Attack Speed per ? point
Constitution
Determines your Maximum Health
+2 Life per 1 Point
Mind
Determines your Mana and Wand Damage
+2 Mana per 1 Point / +1 Minimum & Maximum Damage per 5 points
Intelligence
Your Ability to Read and Maximum Quick Spells
+1 Spell Slots per 5 points

Itemization
  • Quality plays a factor in weapons and gear. Weapons will have quality determining whether they're better or worse off, such as Off-balance with less attack rating or Accurate for more or Strong for more damage. Armor will also have some sort of quality, such as Sturdy.

    Additionally, there is no item durability like Diablo 1 so don't feel too bad about getting that new armor scuffed or that fancy sword covered in viscera.

    Beyond quality, there is rarities with Common (White), Rare (Blue), Unique (Green), and Crafted (Yellow) gear. Common is fairly...well, common and will drop from almost everything. Rare will have Prefixes and Affixes associated with them, giving them increased usefulness but are quite varied. Unique items come with set effects, but with varied values so the same Unique might be better or worse. As for Crafted gear, those come from the Golden Goblin Statues which will be explained later in this guide.

Combat Arts
  • One-handed, Two-handed, Shields, and Bows all have new weapon skills associated with them that cost mana to use. These skills include Blocking attacks or reflecting projectiles in the case of shields; Charging headlong into combat or throwing your weapon in the case of Two-handed weapons; Multi-strikes or Burning Life for Attack Speed in the case of One-handed weapons; and finally imbuing arrows or piercing a line of foes with Bows.

Elemental Effects
  • There are some deeper elemental effects obtainable beyond just Fire, Lightning, and Magic.

    Fire, Lightning, Cold, Hallowed, and Poison all make an appearance with respective effects. Fire burns, Lightning stuns, Cold Slows, and Poison melts Health. Hallowed is just basic Magic damage without any effect (to my limited knowledge).
The Tower (Floor 1 to 6 Walkthrough)
You'll be given a choice to choose your appearance [Male/Female] and starting gear [Sword/Bow/Wand/Shield]. Choose whatever you want, or alternatively skip down to the Builds section for some ideas. Once you're in the game, start exploring but be careful as death is swift if caught by too many enemies at once.

Floor 1 (Lower Dungeons)
You'll start off on Floor 1 and encounter four basic enemy types and some varients of those types, but mainly you'll be dealing with Skeletons (and it's variants), Cult Apprentices, Ghouls, Maulers. Most of these enemies are fairly easy to down with ranged attacks. Additionally, once you find your first stairway up to the next floor, you gain the ability to use the Teleport option.

Point of Interest:
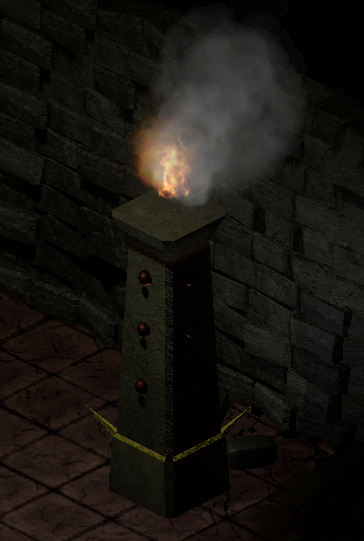
Menacing Obelisk (One-time use)
  • These give random effects. Either raising stats for a cost to another, spawning enemies, giving beneficial buffs, or even refreshing all the chests on a level. They're dubious usefulness and questionable result is ultimately up to you to decide if it's worth the risk.

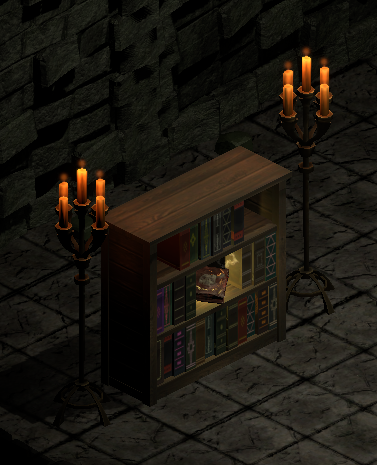
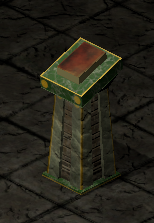
Bookcases and Pedestals (One-time use)
  • Bookcases drop a random book. Pedestals drop either a Potion, Book, or Nothing. Hope you invested in some ability to read.


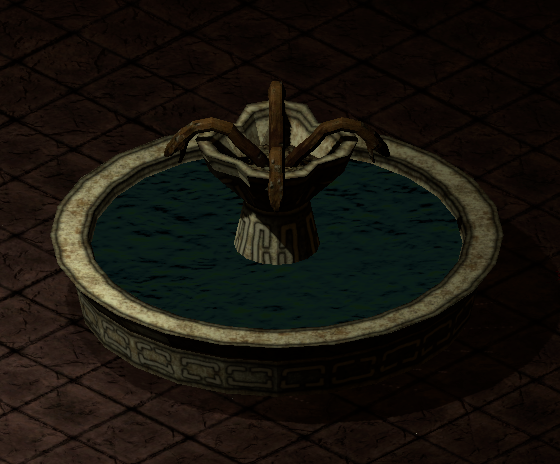
Fountains (One-time use)
  • Restore your Health and Mana. 'nuf said.

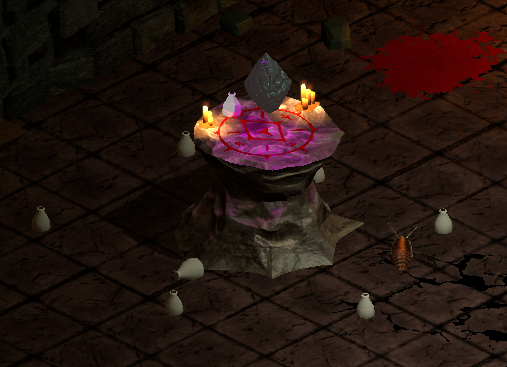
Alchemy Table (Multiple use)
  • This converts potions, from Health to Mana and vice versa. Very useful and has around four or five potions around it. Just drag a potion from your inventory and drop on the table to convert it.

    Due to the ever-shifting nature of the tower, you may not encounter an Alchemy Table until a later floor. So be frugal with your potions until you do.

Floor 2 (Forgotten Passageway)
Forgotten Passageway is your first boss of the game, he can drain your mana and is fairly quick on his feet, but he has no damaging ranged attacks to speak of except to slow you down. You can stun him a bit so he doesn't drain your mana, but I wouldn't try face-tanking him unless you're very good at the shield block. Also, Don't be afraid to go back to the Lower Dungeons (Floor 1) for a breather if it gets too dicey. Once he's dead, be sure to check what he was cooking and move on to Floor 3.

Point of Interest:
Enchanters Lifeblood (One-time Use)
  • First encountered on Floor 2, before the First boss, but can be found else where (even on Floor 1) The Enchanter's Lifeblood upgrades an Item from Common (White) to Rare (Blue).

Floor 3 (Lower Dungeons 2)
Floor 3 is where you get some dicier enemies, with Faceless which are invisible unless close to you, giant bugs called Mammoth Wings, Flaming Skulls, and Bow wielding Skeletons.

Floor 4 (A Short Respite)
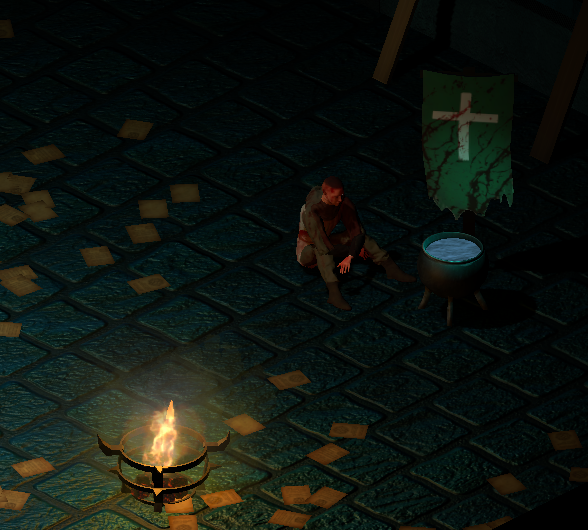
This is your first floor where nothing happens, take a breather. Loot the chest down the hall, talk to the chap at the cauldron and take a sip of what he's cooking. Asking his advice is recommended, so stay a while and listen.


Floor 5 (Halls of Pain)

A welcome change of scenery also brings brand new foes to fight. Sun Cult Vessels throwing fireballs, Sun Cult Sacrifices throwing shade, and Sun Cult Warriors swing their hammers hard. Be warned for a Surprise at the end, the Brides of the Moon Cult are aware of you.

Point of Interest:
Dark Vendor
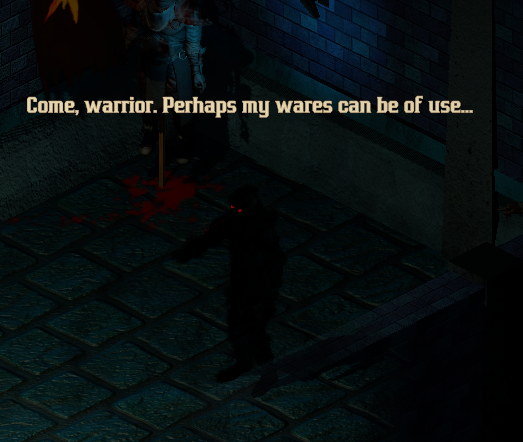
  • First encountered on Floor 5 (Halls of Pain), but can be found earlier. You can trade Silver Skulls to obtain Rare gear to either upgrade, fill out your equipment slots, or horde some stuff for the Golden Goblin Statue on Floor 6.

    [WARNING! It is recommended to not refresh the store here on Floor 5, as it takes away Maximum Mana at a rate of 2 per refresh. Use sparingly if you do.]

Floor 6 (Upper Halls)

Once you're on Floor 6, it's up to you to keep ascending the Tower. I cannot help you further, but I tell you about the first thing you'll see on this floor.

Point of Interest:
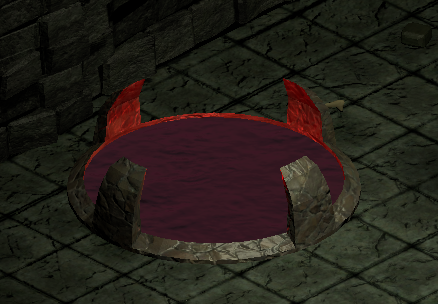
Golden Goblin Statue (One-Time Use)
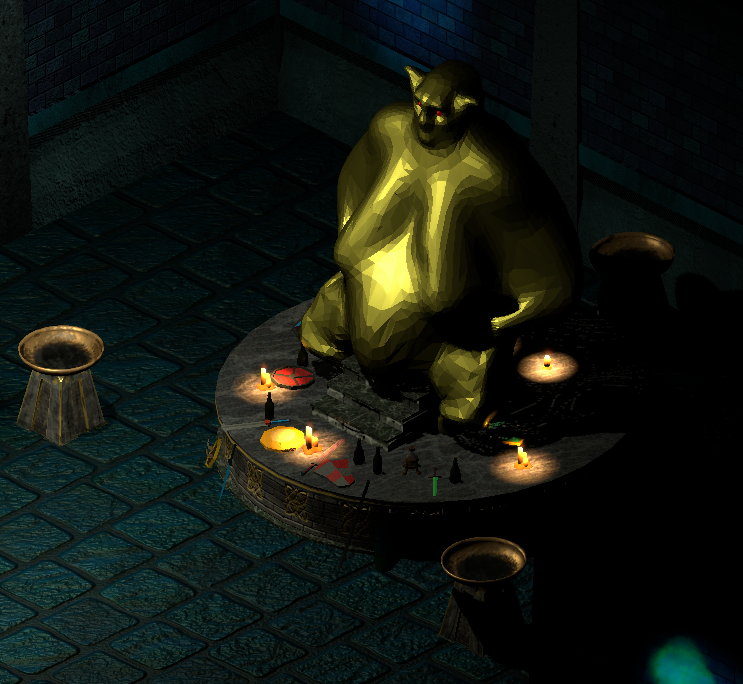
  • First Encountered on Floor 6, after the "Halls of Pain" (Floor 5). You can use this statue to sacrifice three items of either Common (White) or Rare (Blue) to create a brand new crafted (Yellow) item. The newly crafted item will borrow the Prefix and Affix statistics from the sacrificed items, so choose carefully. If in the case you use three common items, it will spit out a random rolled piece of gear.

    Additionally, it the Goblin will try to find patterns in the gear you're trying to craft (i.e. 2 Bows + Item = Bow) and spit out an appropriate item. If no pattern is put in, it will spit out an item based on your third choice inserted.
Starting Builds & Pro-Tips
Pro-Tips
  • Check your "ToHit%" by hovering the mouse over the "Attack Rating" number in your Character screen. Anything greater than 70% is good, anything less and you'll struggle. (Note: You must have attacked an enemy for it to show a value.)

  • Always have a Ranged option (Wand/Bow), as some enemies will be more difficult to handle in Melee.

  • You don't need to use Enchanter's Lifeblood alters or Golden Goblin Statues right away. Sometimes it's best to leave them for later when you have better gear for combining/upgrading.

  • Don't be afraid to retreat to a previous floor to take a breather from a fight and restock your potions. Additionally, you should feel compelled to leave a few potions on the previous floor near the stairs and pick them up later on when you need them.

  • When "Door fighting" as a Melee Character, do not stand in the door frame. Instead stand around the corner next to the door, preferably on the hinge side. This minimizes your aspect of being hit by stray projectiles, and forces enemies to enter the room while you swing towards the open door.

  • Standing in place (Holding Shift Key) is crucial for Door Fighting, Luring Foes to you from across rooms with a bow, and Quick stop-and-pop magical attacks. This also kind of mitigates potential and common miss-click on a moving target, as clicking an open area will move you to that area.


Magical Avoidance (Magic/Ranged)
[Normal Start]
        
  1. Starting Equipment:
    • Wand
    • Shield

  2. Stat Focus:
    • Dexterity (To hit with Wands)
    • Mind (Maximum MP is a must)
    • Intelligence (Read book good!)
    • Agility (for dodge chance and gear)
You'll want to use your Spells sparingly at the beginning as you won't have the mana to spare at first. Instead, rely on your Wand (alternatively a bow) for ranged damage and keep away from foes as much as possible. You can use the shield as a stat stick for extra defenses or the Block skill, but it's really not a good idea to get into melee range. Your first level up (Level 2) should be put heavily into Dexterity for the improvement to hit enemies, as being able to land blows without consuming mana is important. Mind and Intelligence should be split on level 3, you'll need at least 2 or 3 points into Intelligence to read your first books and it's important you do. Some spells to look out for for the early tower are: Fireball (Cheap, Effective, Spammable) Summon Great Snake (3 Free Allies) Slow (Spacing) Haste (You are Speed!) Poisonous Globe (Death by Cuts) After level 4, it becomes more free to get what you desire as Rare gear can fill in the holes you may have in your build a bit.

Sword & Board (Sword/Shield)
[Hard Start]
        
  1. Starting Equipment:
    • Sword
    • Shield

  2. Stat Focus:
    • Dexterity
    • Constitution
    • Strength (For gear and skills)
    • Agility (for dodge and skills)
Sword and Shield is possibly the hardest to take up initially due to a lack of range and the timing involved. Not to mention, You will take some damage and go through potions at an accelerated rate, however take it slow, use doors to your advantage, and try not to get surrounded. You can be a bit aggressive in 1v1 engagements with the shield arts. Take note that the starting shield skill 'Block' can stun foes, but requires keen timing to pull off and costs 1 mana per use. Best reserved for larger or singled out foes. Once you hit your first level up, I'd suggest putting points into Dexterity, Constitution, and Strength in that order. As hitting your foes is more important as a melee fighter and much of your damage will come from your weapon early on. However, putting points into Strength and Agility will unlock better Arts to use and in the case of Strength allow you to hit harder. Once you get 12 points into Constitution the Shield Skill "Reflect Projectiles" becomes unlocked and dealing with ranged enemies become vastly easier. Costing 9 mana per reflect you can stand at distance and kill foes. Good skill, but be sure to have some potions handy.

Running Fire-fight (Throwing Two-handed/Ranged)
[Easy Start]
        
  1. Starting Equipment:
    • Sword
    • Bow

  2. Stat Focus:
    • Dexterity
    • Constitution
    • Strength (For gear and skills)
    • Mind (Optional, For Spamming Skills)
You'll want to main your bow and keep distance from foes until you level up to 2. Remember you can hold "Shift" to stand in place and fire, This will give you a bit of improved control when taking on enemies since they will move quite quickly to pursue you and if you accidentally mis-click you will walk towards them. For your first level up, I'd recommend pumping Dexterity by 5 points as it affects your ability to hit. This will prepare you for your second level up, as you'll need 16 to unlock the next two Bow Combat Arts. Additionally, it will make much of the early game a breeze to nail foes at range. So when in doubt, fire into an unknown space, whether that be a room or hallway, to lure enemies to you rather than you going to them. At the first chance, find a two-handed weapon (preferably one with an "Accurate" prefix) and ditch the sword. You won't need it from here on out as your main damage will come from this and the Strength skills. At your second Level up, get one point into Dexterity and then put the rest into Strength or Constitution. Strength unlocks your two-handed skills faster for more fun, and you want to have at least the Weapon Throw or Charge to help you. Alternatively, Constitution boosts your life and makes your main movement skill (Charge) deal more damage on impact. After that, you're on your own. Smash the world and don't be afraid to use your bow.

Closing Remarks
This game is a diamond in the rough, while keeping somewhat true to the inspiration it's founded from. This is also my first guide ever, so honest critique or suggestion for improvement is welcomed.

And remember...

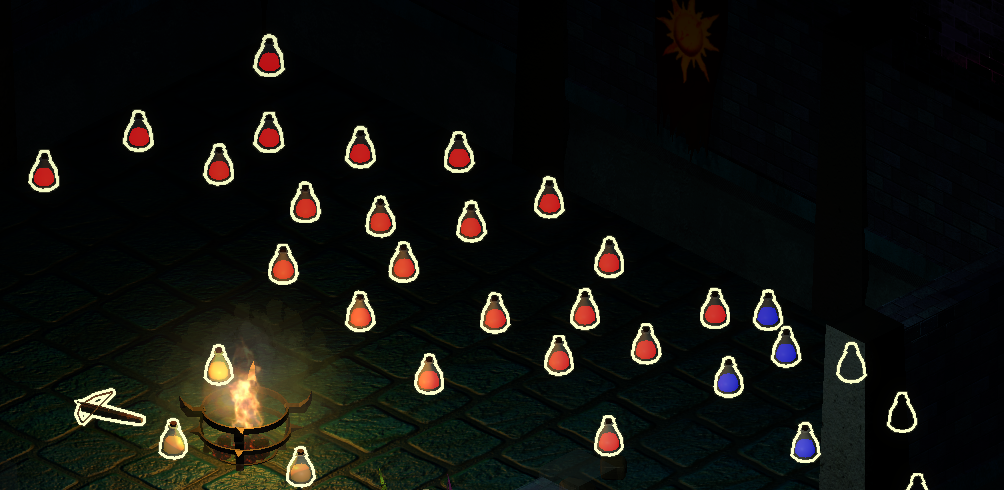
...There are too many potions.
2 Comments
daft73 21 May @ 9:16am 
Just beat the game with an archer build, it was pretty fun :steamthumbsup:
Leveled by putting most of my attribute points into 2 Con, 2 Agility, and 1 Dex each level.
Also added a few points into Wisdom so I could use the Summon Snakes spell... Though they ended up being marginally useful ( note I only put in 2 points into the spell ) It felt better building up my main attributes. The game was tough, but manageable, and I'd suggest not spreading your attributes to far and trying to focus them. I never found a use in weapon swapping, but your mileage may very
Poutine 4 Apr @ 3:37pm 
I've been enjoying this game, but it's also been kicking my ass. Thanks for this! :ts_cats: