R.E.P.O.

R.E.P.O.

354 ratings
R.E.P.O. - The Full Guide
By haZee
Full, detailed guide including monsters, items, maps etc for R.E.P.O!
THIS GUIDE IS GOING TO BE UPDATED WHILE THE GAME GETS NEW UPDATES!
10
4
16
3
2
2
3
2
2
2
   
Award
Favorite
Favorited
Unfavorite
---General game info---
Name:
R.E.P.O. = Retrieve, Extract and Profit Operation

Game release date:
26 February 2025 (early access)

Developer(s):
Semiwork

Publisher(s):
Semiwork

Engine:
Unity game engine

---The Player---
Base health: 100
Base energy: 40
Skills: grab objects, use objects, heal others, fall


If the player still has remaining health, they can grab other players’ backs to replenish their health (in steps of 10).

In addition, players can use the chat function (opened by pressing the T key) to communicate. This allows written messages to be spoken using a robotic voice

The pitch of the sound depends on the player’s viewing angle (looking up = high pitch, looking down = low pitch). Crouching and using the chat function will make the voice sound deep.
---Monsters---
An overview of all monsters in R.E.P.O
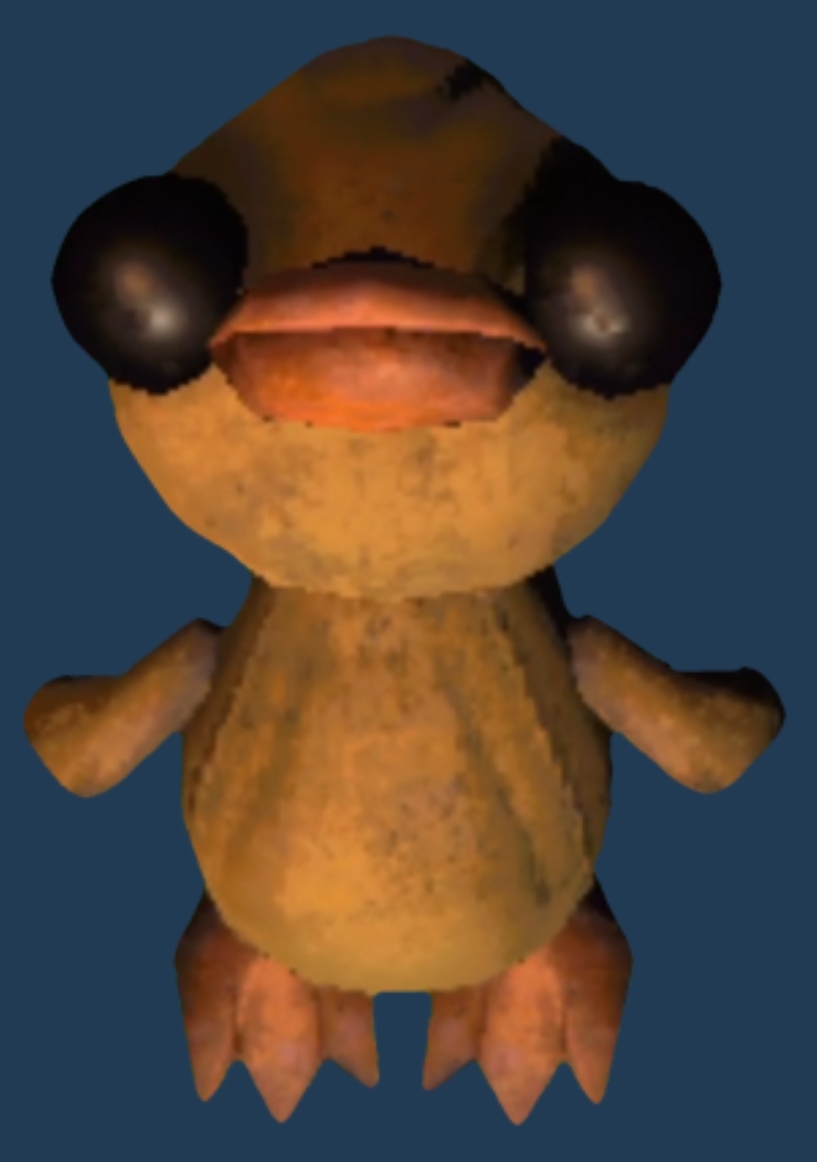
Apex Predator (Duck)


Tier: 1
Health: 150HP
Damage: 10-15HP/bite
Detection: Line of Sight
Orb Value: $2k - $3k
Abilities: Transformation if grabbed/damaged
Behavior: Follows players, wanders, quacks, mimics jumping, tries to intercept grab actions, moves in view field of the player
Strength to lift: cannot be lifted
Quick strategy: Flush in a toilet or lure in cauldron then slam or use flamethrower

· The Duck is a harmless little pest that follows you everywhere, standing right in front of you at all times like an overly attached pet.

· If you try to pick something up, it jumps excitedly, begging to be picked up—and if you give in, it transforms into Apex Predator, chasing you for 10 seconds with fast movement, flight, and a vicious bite that deals 10 damage, three times per second. The Apex Predator is capable of following the player underneath tables or objects. A good way of avoiding the Apex Predator whilst being pursued is to run around a solid object such as a table and loop it.

· It also transforms if attacked or otherwise damaged and will hunt the nearest player.

· Just flush the duck down the toilet to easily kill it. If it hasn’t been damaged before, you need to find where it lands and strike it repeatedly until it stands up again.

· Killing it for cash is tricky since attacking it just makes it mad, but there’s a safe method: position it in an extraction zone, let the piston crush it, and enjoy your easy $2k-$3k. Otherwise, just ignore it and don’t pick it up—no matter how cute it looks.

· The Duck can be killed by one bullet from the Gun. It is more difficult to kill the Apex Predator due to its movement and the Gun's instability while moving.

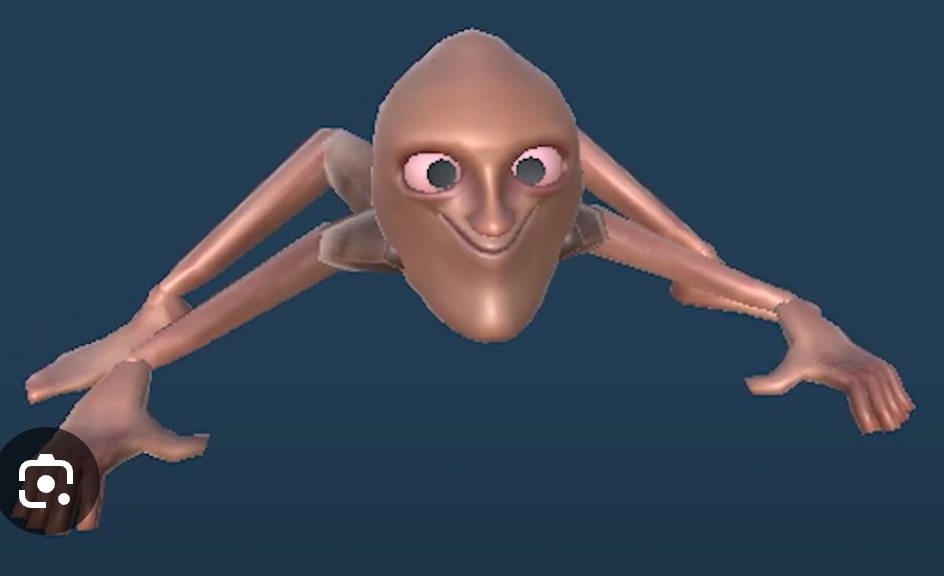
· Pressing the tumble key (Q) and waiting for some time without moving seems to make the Duck lose its interest in the player and it will walk away.

· Apex Predator will try to position itself at the player’s cursor, following it, even jumping when the player moves. This can be used to kill it or move it away.
Animal (Insect like monster)


Tier: 2
Health: 150HP
Damage: 2HP/hit
Detection: Line of Sight
Orb Value: $2k - $4.2k
Strength to lift: 4
Quick strategy: Get high ground, slam it with medium size loot


· The Animal is a fast, erratic roamer with no real threat besides its laughably-slow attack that deals 2 damage. Its movements are random and unpredictable, but it’s mostly harmless and actually useful—since it tramples Gnomes when it walks over them, keeping it alive can be beneficial.

· If you try to pick it up, it speeds up and runs away, but if two or more people grab it at once, it freezes for a few seconds before spinning out of control.

· It would rather run than fight and is incredibly easy to kill with any weapon due to its low defensive capabilities. Honestly, it’s just a chaotic little creature that’s more of an inconvenience than a real enemy.

· The Animal will occasionally collide with objects around the map, damaging itself in the process.
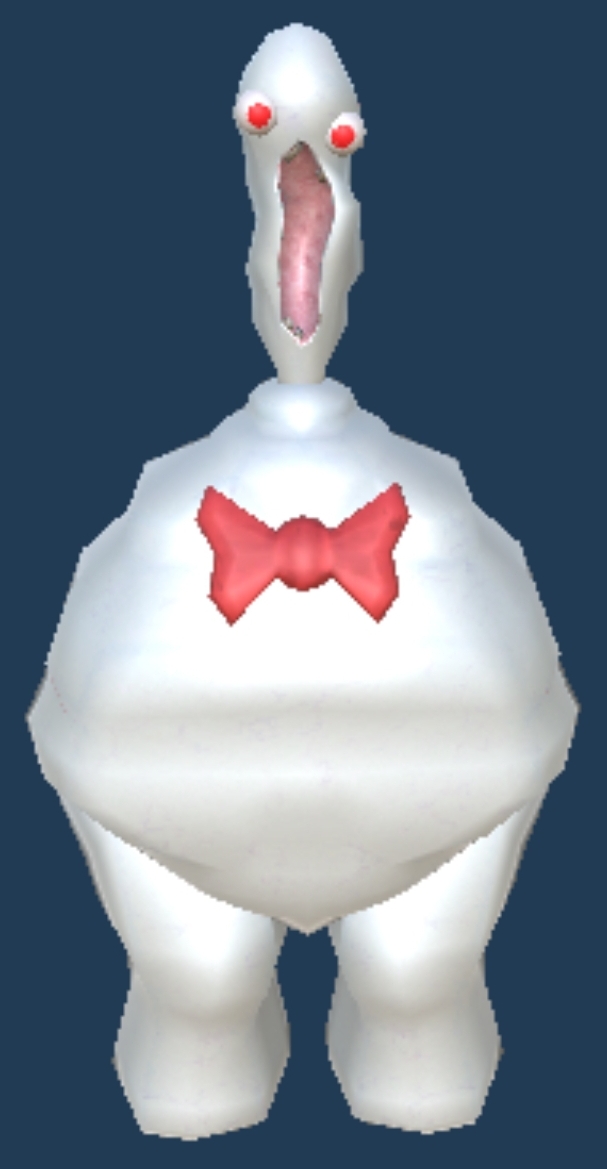
Bowtie (White clump)


Tier: 2
Health: 100HP
Damage: 5HP/hit
Detection: Line of Sight
Orb Value: $3k - $7k
Strength to lift: 7
Quick strategy: Stay behind cover, sneak behind it and hit it with medium size loot


· The Bowtie is a large, puffy monster that roams at a medium pace and becomes a problem once it spots a player. When it does, it lets out a continuous scream, pushing the player back and disabling sprinting and jumping until they escape.
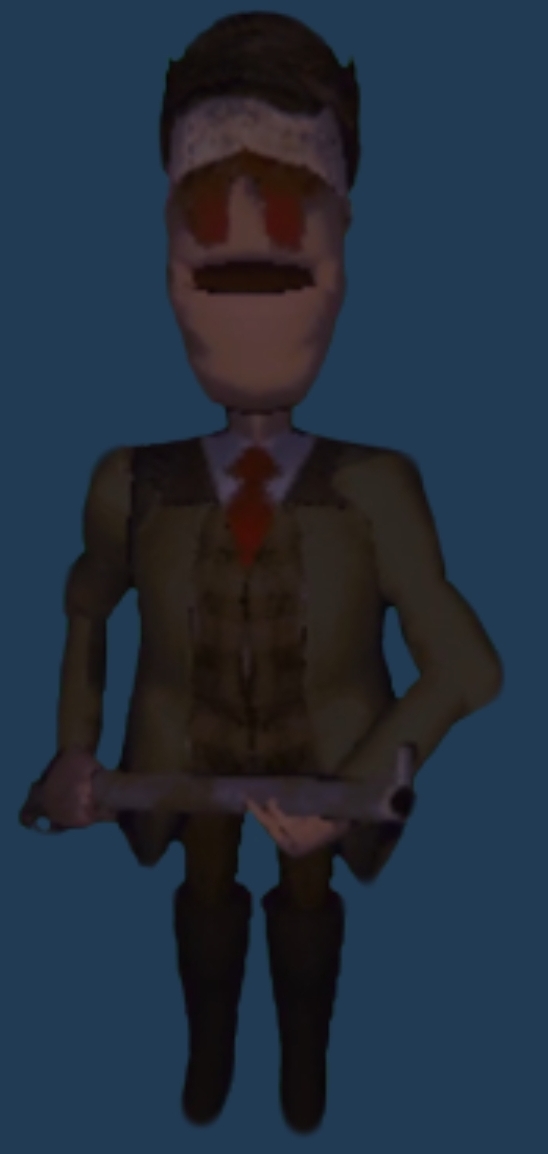
· The scream itself doesn’t deal damage, but if it pushes you into a wall or obstacle, it hurts badly. It can also push small monsters like Rugrats, Bangs, and Gnomes, occasionally causing chaos.

· Sometimes, Bowties will randomly enter a frenzy, stomping around at high speed and damaging everything in their way. Luckily, they are slow when roaming and can’t move while screaming, making them easy targets.

· Tranquilizer Guns and firearms work well, but melee weapons are just as effective, as Bowties have very low HP and go down in a hit or two. If one is blocking your path, just wait it out, and it’ll eventually move along.
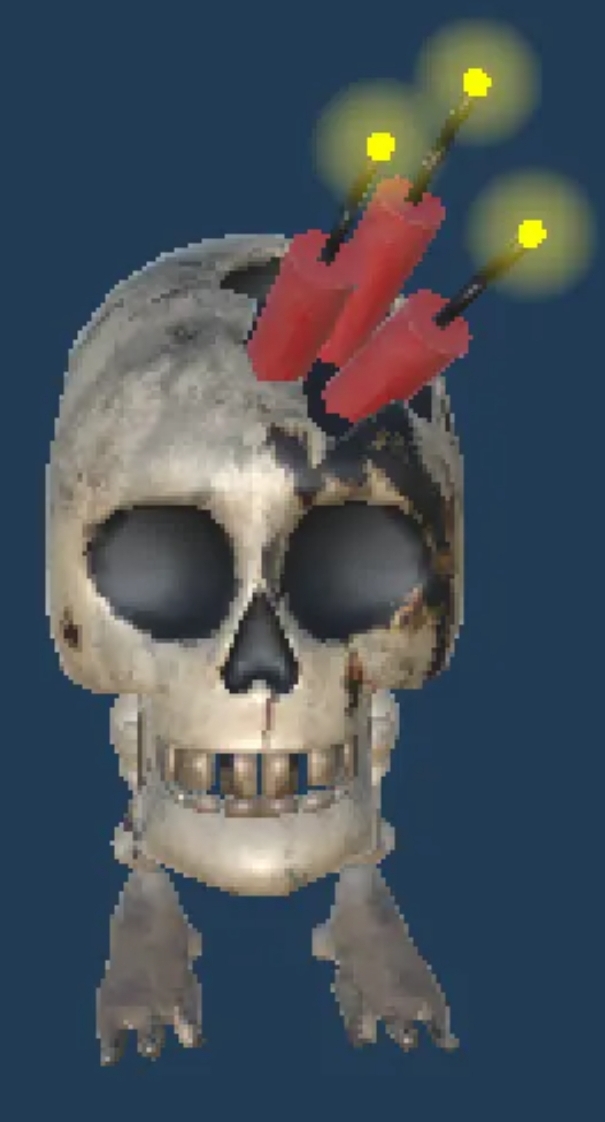
Bangers (Explosive Skull)


Tier: 2
Health: 50 HP
Damage: about 30 HP
Detection: Line of Sight
Orb Value: None
Strength to lift: 0
Quick strategy: Slam it on the floor 2 times, then throw it far away


· The Banger is an explosive enemy that spawns in groups of three and wanders aimlessly—often separating from its group. If it sees a player or takes damage, its fuse ignites, and it charges at the nearest player.

· Once lit, the fuse cannot be put out. The Banger kills any player at close proximity and deals high damage from a distance.

· Bangers can be picked up and thrown like grenades, but they break free after ~3 seconds, so be ready to catch them again.

· They have two fuse sounds: a hidden timer (~10 seconds) and a final warning where they yell quietly before exploding.

· If you don’t want to deal with them, throw them into a well, lava, or acid. If timed right, they can be used to damage or kill other enemies, but when you first spot them, spread out from teammates to avoid a group wipe.

· Bangers take only 3 damage. They can be easily taken care of, for example by smashing them twice against the floor or a wall then throwing them away, whereupon they explode at a safe distance.
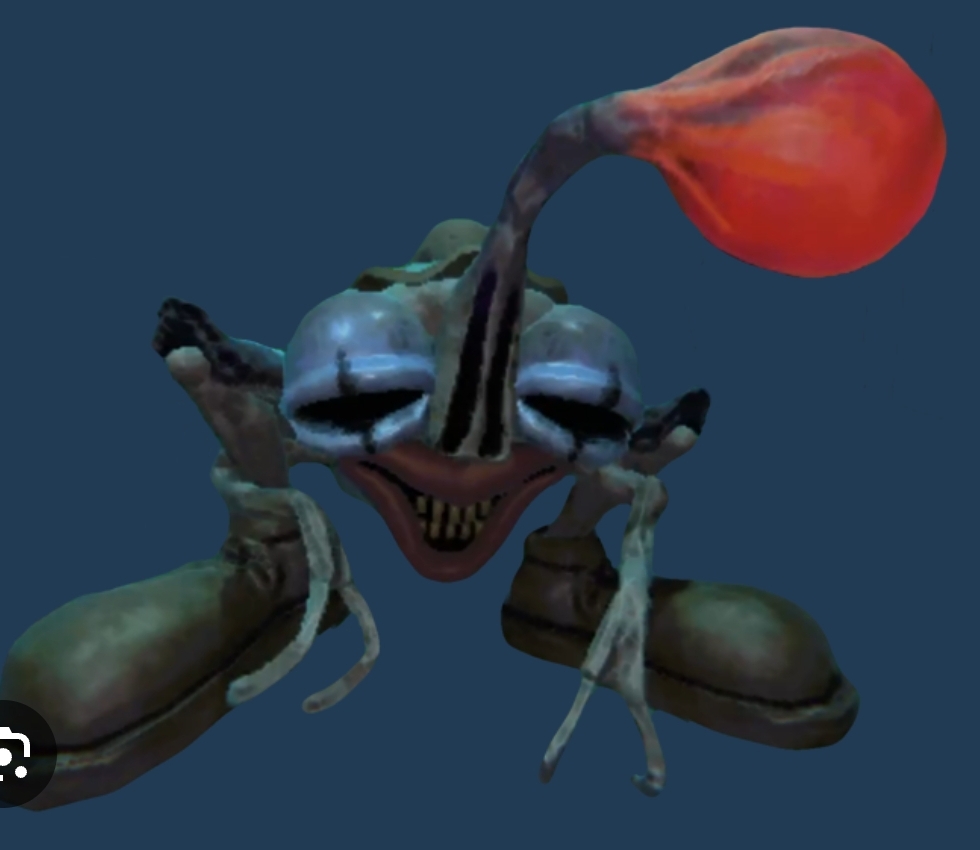
Clown (Beamer)


Tier: 3
Health: 250HP
Damage: 100HP from laser / 60 HP from kick
Detection: Line of Sight, sound, proximity awareness
Orb Value: $5k - $8k
Strength to lift: 13
Quick strategy: Hit it with medium size loot, clown item very effective


· The Clown is a fast, loud enemy that roams around with heavy footsteps and attacks with a deadly laser beam. When it spots a player, it laughs loudly, then sweeps the beam horizontally somewhere between [90°] and [180°] angle, dealing [30] damage on the first proc, and [70] on the second, being further away from the Clown will give you a higher chance of surviving a single hit, being close almost guarantees death without any health upgrade as you will almost always take [2] procs of damage.

· The Clown targets the player's head. If the player is crouching, the Clown's laser will aim low. Inversely, the Clown will aim its laser upwards if the player is at a higher angle.

· After firing its laser, the Clown is stunned for a couple of seconds as it cools down.

· If the laser is on cooldown (~8 seconds), it charges and kicks players instead, dealing 10 damage and launching them, the kick is a special attack which will cause a guaranteed 50 damage on the landing unless you land softly or at a very low velocity, it is possible to a player to catch you during the launch to prevent the additional 50 damage.

· Fighting it is risky, but baiting its laser from a high ledge (since it can’t jump) and attacking while it’s stunned is an option.

· Crouching under the laser works, but has somewhat tight timing, if you are unsure if you have timed it correctly, pressing [Q] will often cause you to be ducked low enough to avoid the laser if you had ducked too early, however hiding behind non-destructible cover is the safest bet. The laser also destroys scrap, so keep your loot far away. Its speed and instant-kill attack make it a major threat, but its brief cooldown is the best chance to escape or strike.
Chef (Frog)


Tier: 2
Health: 250HP
Damage: 10HP/tick
Detection: Line of Sight
Orb Value: $2k - $5k
Strength to lift: 9
Quick strategy: Hit with small size loot


· The Chef is a slow-moving frog-like enemy that stops, smiles, and then leaps at the first player it sees, swinging its cleavers wildly on impact.

· Upon withdrawing its knives, the Chef's lunge direction is locked. The player can safely sidestep the Chef's attack. Alternatively, hiding behind any door or wall is just as effective.

· The Chef deals heavy damage, but not enough to instantly kill the player at full HP. The Chef ragdolls for a moment after missing its jump, giving the player a chance to run or attack while it flails around.

· It’s a simple but dangerous enemy if it catches you off guard, so stay alert, dodge the leap, and strike while it’s recovering.

· Killing it earns $1.5k - $3k, making it a decent payday—just don’t be the one getting chopped up.
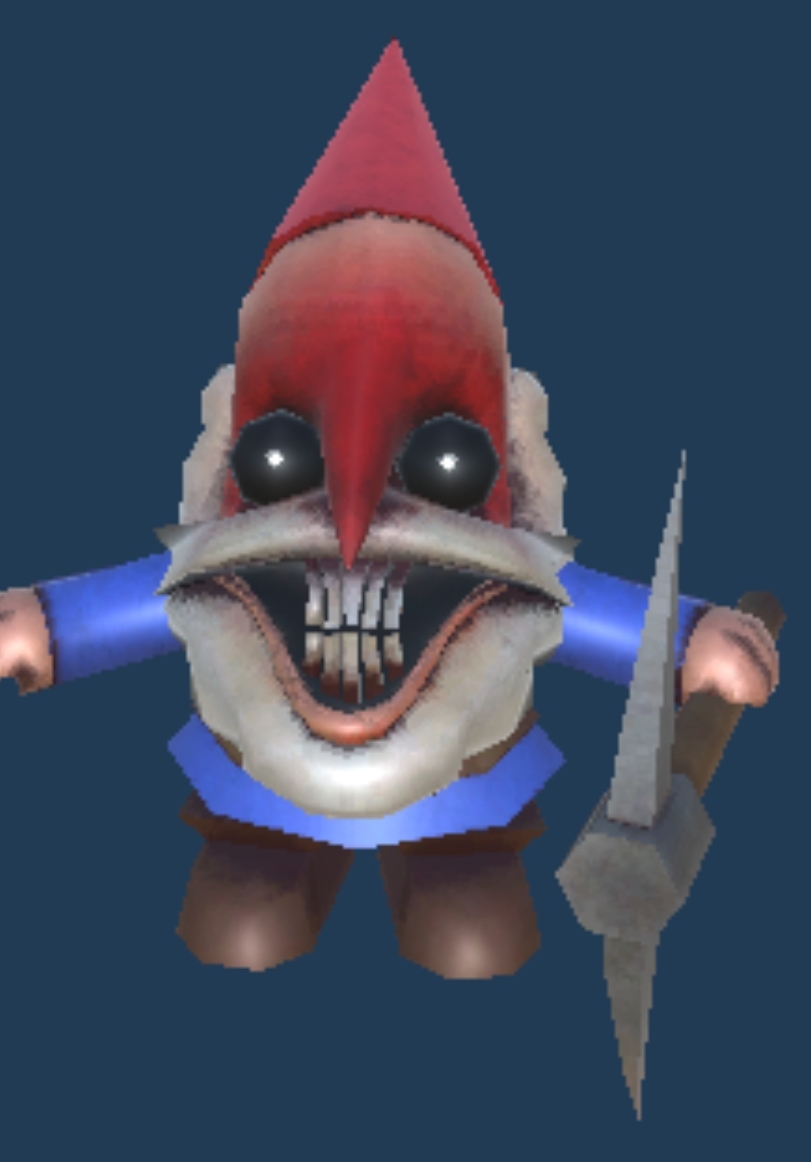
Gnome (Garden gnome)


Tier: 1
Health: 20 HP
Damage: 10 HP
Detection: Line of Sight
Orb Value: None
Strength to lift: 0
Quick strategy: Hold left click permanently and hover over and throw them


· The Gnome can be a very annoying enemy in the game, always spawning in groups of four or more and relying on surprise and swarming. Their damage is low, but they prioritize destroying scrap, making them a huge problem if you’re trying to collect loot.
· Luckily, they’re pathetically weak—the player can pick them up and slam them into the floor to kill them, a recommended strategy.
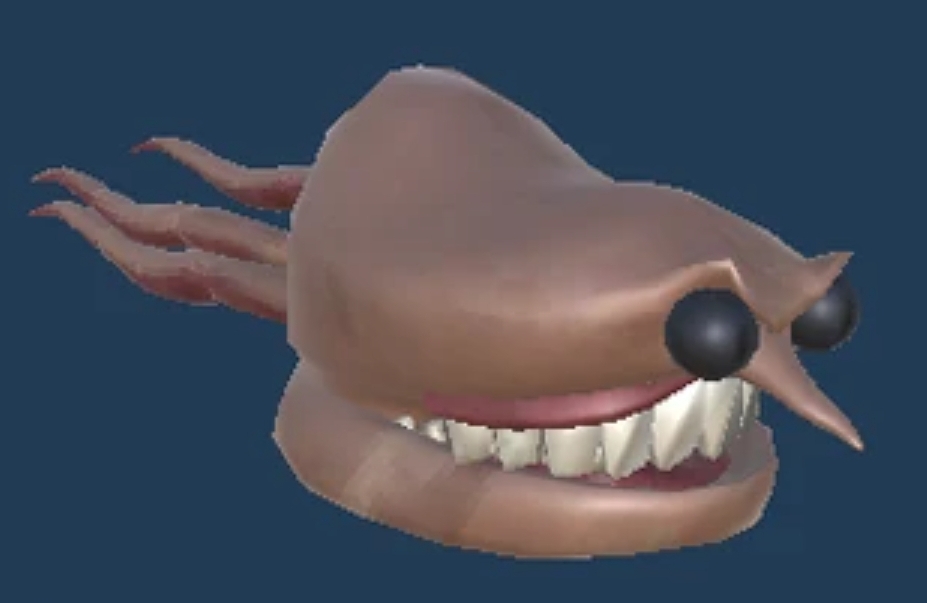
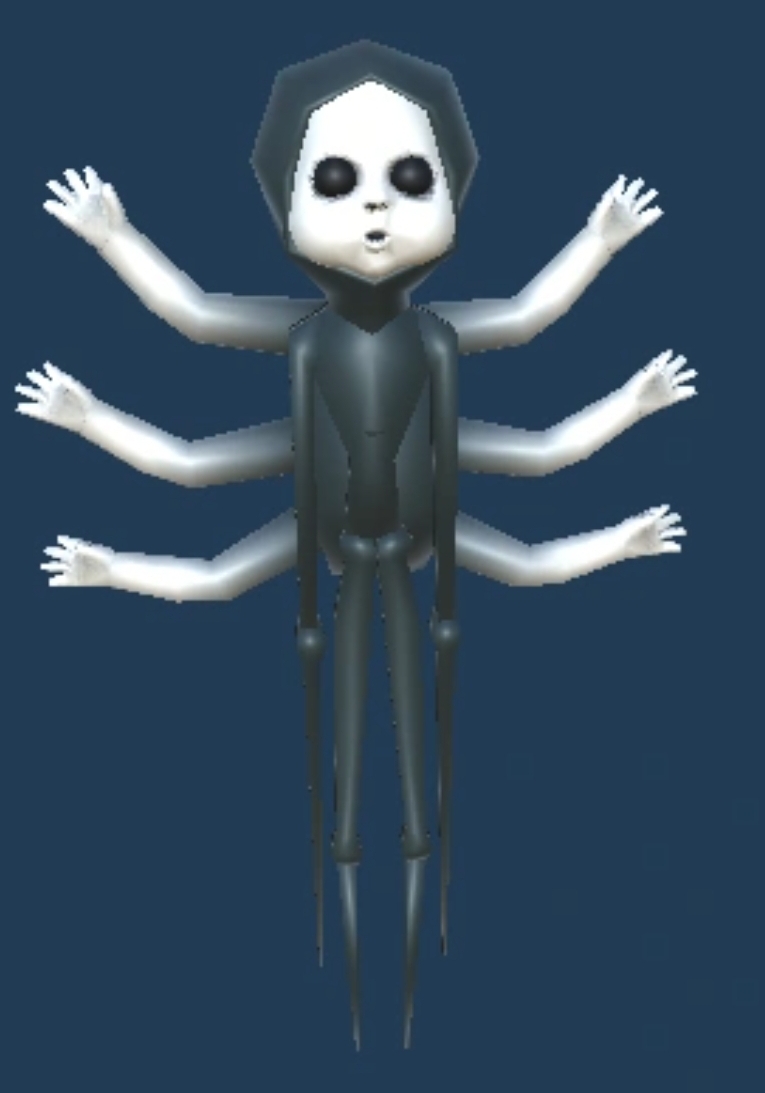
· The player can also fling Gnomes at other creatures, dealing damage and turning them into makeshift weapons. A good Gnome is a dead Gnome.
Headman (Floating head)


Tier: 3
Health: 250 HP
Damage: 50HP/bite
Detection: Line of Sight, sound
Orb Value: $4k- $8k
Abilities: Lunges and bites
Behavior: Wanders, Patrols, Chatters teeth
Strength to lift: 13
Quick strategy: Break line of sight and hide, hit with medium size loot


· Dont run in a straight line

· The Headman is a floating giant head that roams around, making loud biting noises as it looks for players. If it spots a player, it screams, charges, and bites, dealing 50 damage per chomp plus possible knockback damage.

· If it starts chasing you, just turn a corner and hide—it loses interest fast. Fighting it? Wait for it to attack, since it has a long cooldown. Its poor reach makes sledgehammers a great choice (it can’t bite you if you keep swinging), and guns work well thanks to its massive hitbox and low HP.

· The Baseball Bat is an effective weapon due to its innate knockback the the Headman's large hitbox. After striking the Headman once, the player can continue attacking with the Baseball Bat or other weapons while it's down.
Hidden (invisible monster)
Tier: 2
Health: 100 HP
Damage: 0 HP
Detection: Line of Sight
Orb Value: $3.5k - $7k
Strength to lift: 4
Quick strategy: Dangerous around pits and enemies


· The Hidden is a nearly-invisible monster with only a black smoke cloud for a head and faint footprints as signs of its presence. If it touches a player, it screams, grabs them, and carries them around at high speed, stunning them and forcing them to drop their items.

· It’s hard to spot, so you might not even realize one is in the level until it snatches you or a teammate. While it isn’t dangerous on its own, it can drag you straight into other enemies, which is where the real threat comes in.

· If you're quick, you can free a grabbed teammate, but killing one is difficult due to its invisibility. If you suspect a Hidden is nearby, stay alert—because by the time you see it, you're probably already airborne.

· The Hidden leave smoky, black footsteps wherever it moves. If holding a melee weapon, such as a Baseball Bat, you can swing in its general direction in hopes of landing a hit.
Huntsman (Rifle man)


Tier: 3
Health: 250 HP
Damage: 100 HP
Detection: Sound
Orb Value: $3k - $7k
Abilities: Use of a range weapon
Behavior: Patrols a certain path
Strength breakpoint: 9
Quick strategy: Use stairs to make him trip, or hide behind a wall, grab him to bait a shot then rotate him


· The Huntsman is blind but has super hearing—if he hears footsteps, jumps, voices, or objects, he instantly fires his shotgun, which could be an instakill up close, if the player has default health stats.

· When roaming around, the huntsman makes a humming noise, warning you

· He follows a set patrol and won’t chase you, so stay quiet and you’ll be fine. If you need to move, throw objects to distract him, dodge when he grunts before firing, or bait a shot and run past while he reloads (2 seconds).

· He trips on stairs, gets stunned, and his shotgun can kill other enemies. Fighting him is a bad idea—he’s tanky, turns and shoots instantly, and can survive explosions.

· If you must kill him, use grenades, land mines, or make him fall. Otherwise, just be patient and let him wander like the blind, shotgun-happy menace he is.

· The Baseball Bat is effective at knocking the Huntsman prone—if you can manage to get close. Missing a Baseball Bat swing could make noise when swung against an object, instantly revealing your position to the Huntsman.

· The rifle shots fired by the Huntsman don’t seem to penetrate enemies. Use this to your advantage—if an enemy happens to be between you and the Huntsman, you can make a sound to lure him into shooting the enemy, potentially causing the enemy to fight back, giving you a chance to escape or obtain the sphere to earn extra money.
Reaper (Hay doll)


Tier: 3
Health: 250 HP
Damage: 10 HP/swing (blade), 40HP/s
Detection: Line of Sight, sound
Orb Value: $6k - $8k
Behavior: wanders, patrols
Strength breakpoint: 9
Quick strategy: Can knock out items from your hand, sneak attack with medium size loot


· The Reaper is a slow, deaf, and not-so-bright enemy with loud, hay-like footsteps. It has poor eyesight (crouching usually keeps you safe) but don’t push your luck.

· If it sees you, it thrashes its arm blades and charges, though it’s not very fast and has terrible object permanence—just turn a corner and it’ll probably forget you exist.

· It can’t hear voices, footsteps, or jumping, but it does detect the gravi-beam, so don’t pick up items near or around it.

· If you fight it, be aware that its wild swings can knock items out of your hands, and while it’s dumb, it can shred your HP in two seconds. On the plus side, its predictable patrol makes it a great practice dummy for melee and tranq guns.

· Trying to crawl or crouch under things like tables or chairs won't work. Just like with the Robe, it will crouch down and slash under whatever it is you are hiding under. To avoid this, make sure you don't grab it while it passes, don't make any noises to attract it, and don't let it see you hide under when it chases you or enters a room.

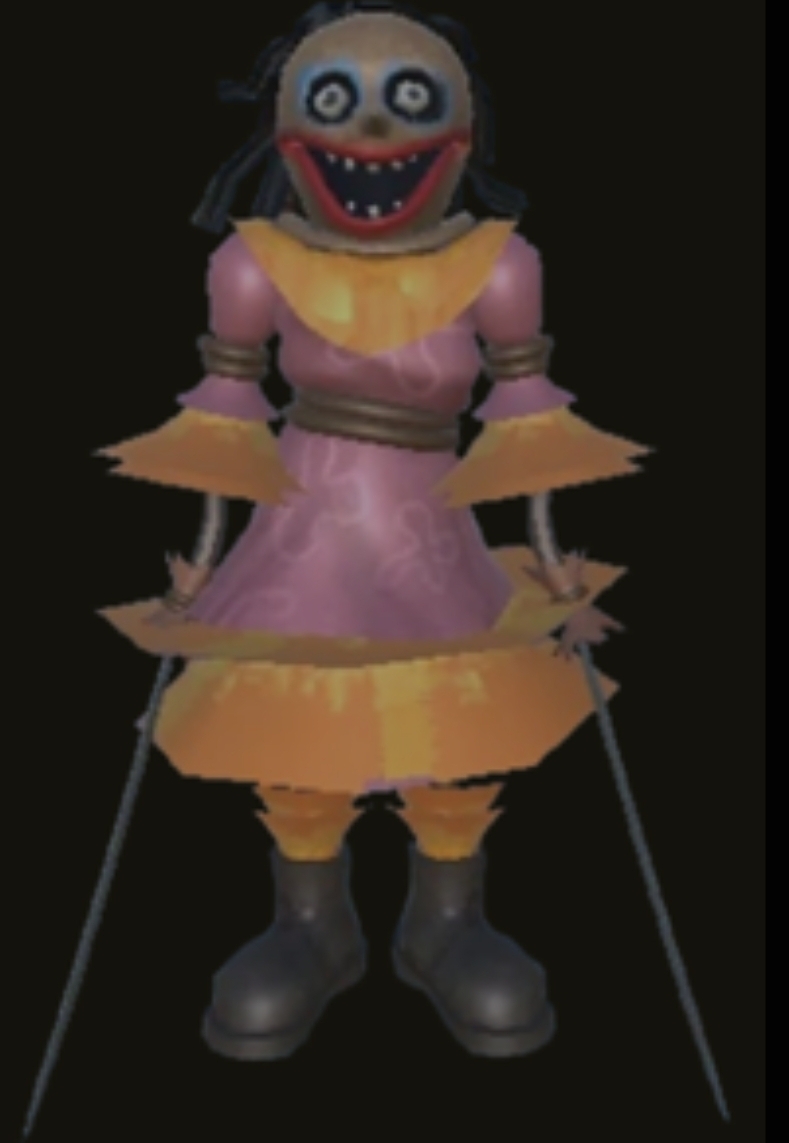
· Close the door behind you when escaping; this should reset the Scissor Sisters because they will forget your existence.

· Endurance and speed are essential to counter it, as running in the long corridors without being prepared is likely to cost you your life.
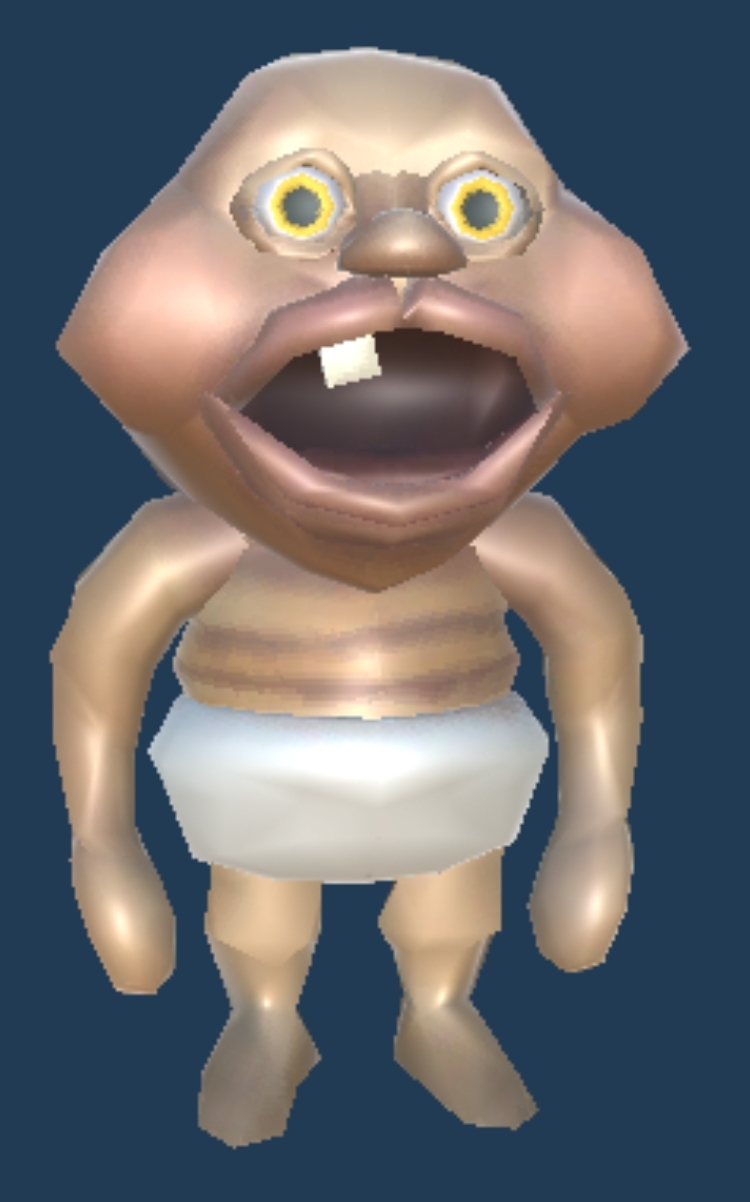
Rugrat (Baby Monster)


Tier: 2
Health: 150HP
Damage: 19-225 (item-dependent)
Detection: Line of Sight
Orb Value: $2k - $4k
Strength to lift: 4
Quick strategy: dont get seen, slam on floor with friends


· The Rugrat roams around grabbing valuable items and, if it sees a player while holding something, it throws the item at them, dealing damage to both the player and the item.

· If it’s empty-handed, it runs away instead. It has no other attacks, but don’t underestimate it—it’s small but strong, capable of lifting and throwing two player items at once, which can one-shot a player, the item, or both.

· It can be killed by smashing it against the floor or walls, but it’s much heavier than Gnomes, needing either 2-3 people or one person with 4 strength upgrades to lift. If you’re unarmed or alone, these little thieves can be a real problem.
Peeper (Eye Monster)


Tier: 1
Health: 30 HP
Damage: 2HP/s
Detection: Line of Sight
Orb Value: $2k - $4k
Strength to lift: cannot be lifted
Quick strategy: Break line of sight using walls, covers or items


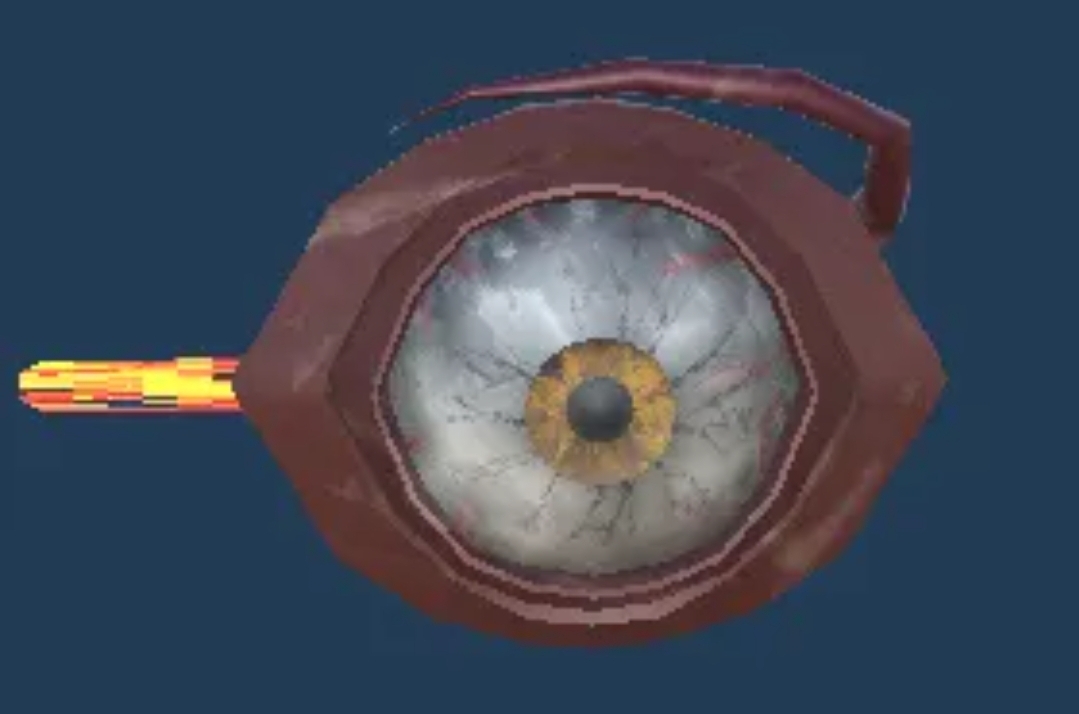
· The Peeper is a ceiling-dwelling monster that remains closed until a player enters its view. Once it opens, it forces the player’s crosshair toward it, and if they stare for ~3 seconds, it deals 10 damage per second until eye contact is broken.

· The effect stops when the player looks away, causing the Eye to disappear after a few seconds. While affected, a player’s voice pitch becomes helium-high, and their FOV zooms in, making navigation disorienting.

· The best way to counter it is to always be ready to retrace your steps and quickly break line of sight. Tumbling into a doorway or under a table is usually effective, and having a teammate nearby helps, as the Peeper can only target one player at a time—letting someone else guide you or close a door to cut off its effect.
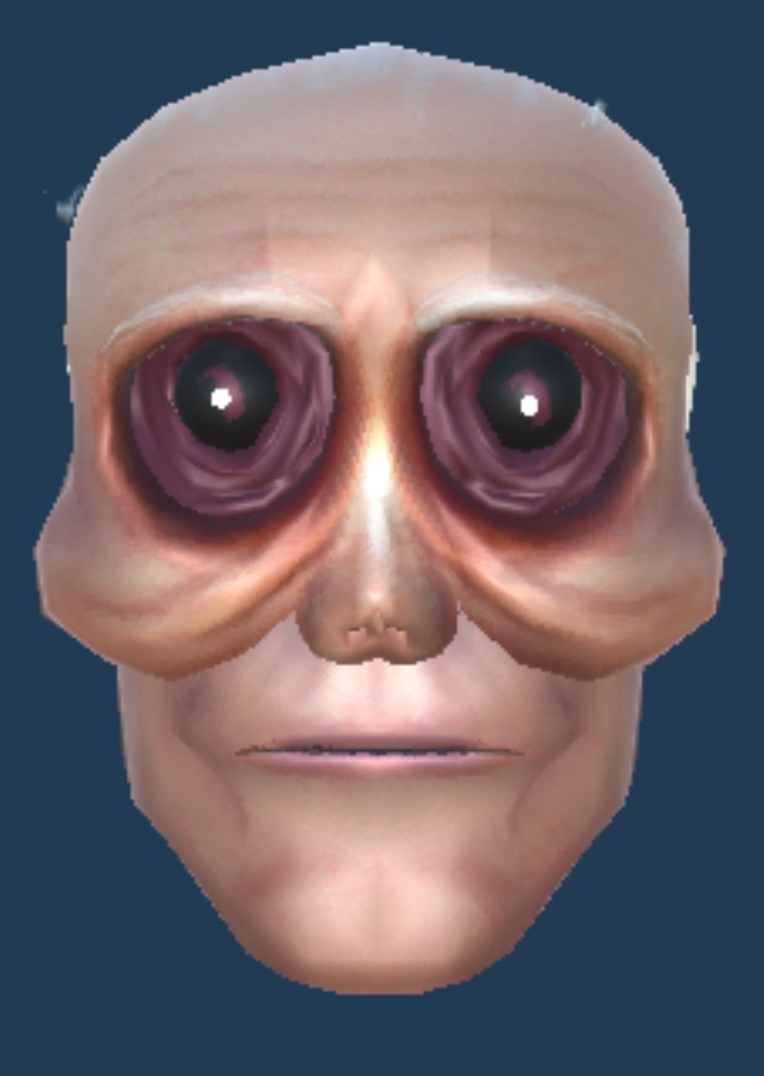
Mentalist (Alien)


Tier: 2
Health: 150 HP
Damage: 50 HP
Detection: Line of Sight, Sound
Orb Value: $3k - $6k
Strength to lift: 4
Quick strategy: If friends are levitated, wait till attack area is red then grab friends away to save them


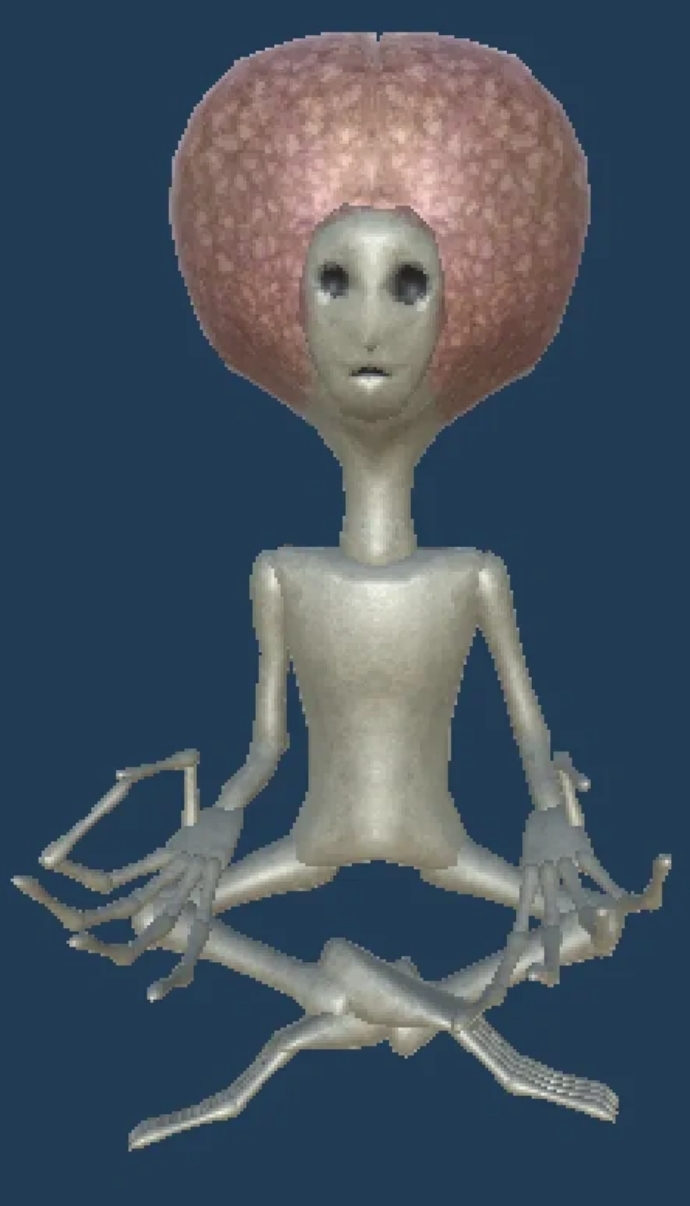
· The Mentalist is a floating, enemy that searches for players and, when it finds one, activates an anti-gravity aura that lifts all players and items nearby, holding them immobile for 10 seconds. After that, the aura turns red, and everything gets slammed back down, often killing players trapped under furniture due to physics damage.

· If lifted high up, though, it just counts as fall damage (40-50 HP loss). It can also teleport anywhere at will, flipping mid-air as it disappears, making it hard to track.

· Killing it is fairly easy with melee weapons, as it has low HP, but if you get caught, have a teammate ready to pull you away before it drops you.
or.

· Hiding is the safest bet, as it's deaf with poor eyesight, but if spotted, it chases at a medium pace. Since it can teleport, always assume it’s waiting behind the next do
· You can avoid that your teammates getting damage by waiting until the red phase begins, then running in and grabbing them to move them out. If it explodes while you are inside you wont get any damage.
Robe (High black ghost)


Tier: 3
Health: 250HP
Damage: 100HP in standing attack, 50HP in crouched attack
Detection: Line of Sight, Direct Eye Contact
Orb Value: $5k - $8k
Strength to lift: 13
Quick strategy: Break line of sight, hit with medium size loot, run and hide


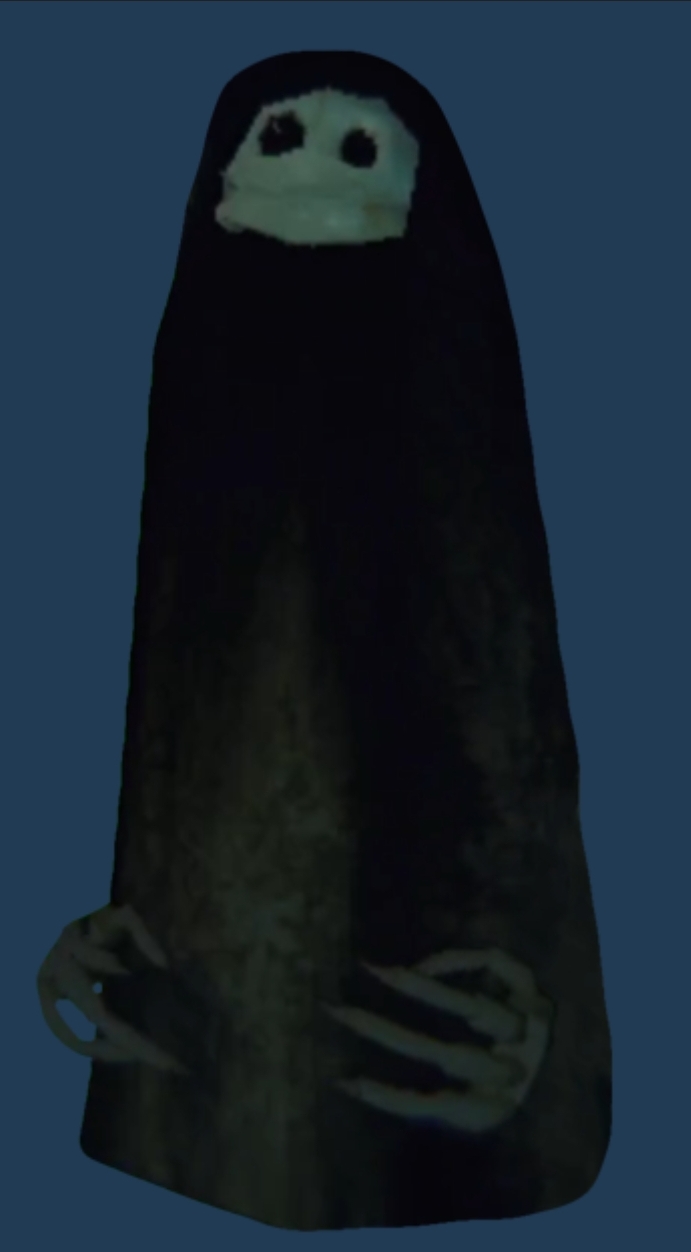
· The Robe is a fast-moving but quietly persistent monster that follows players without them noticing until it gets close enough to knock them back for 50 damage while crouching or 100 while standing, often causing extra physics damage. Looking at its mask makes it rage, dramatically increasing its speed as it chases you down.

· Hiding isn't foolproof—it remembers your location and will reach under tables, beds, and cabinets to drag you out. The best way to survive is to avoid looking at it, stay out of its reach, and wait, as it despawns after a while if it hasn’t found a player.

· Fighting is not recommended, as it has high HP and can tank a landmine without issue. Think of it as a deadly game of hide and seek—just stay out of sight and be patient.
Spewer (Flying dentures)


Tier: 1
Health: 65 HP
Damage: 10 HP
Detection: Line of Sight
Orb Value: $1k - $4k
Strength to lift: 4
Quick strategy: Hit with small size loot


· The Spewer is a fast-flying, enemy that hunts for players and vomits green liquid when it spots one. It either flies in close or screams and pukes after a few seconds if you stay in its sight.

· If it touches you, it latches on for anywhere between 10 seconds to a full minute, dealing no damage but deepening your voice and occasionally making you vomit.

· The vomit damages players (except the host), enemies, scrap, and breakable objects, making the Spewer act as a tool under certain circumstances.

· If grabbed while unattached, it freaks out and flies away, but if cornered while escaping, it vomits defensively, dealing 10 damage per second.

· Avoid facing teammates or scrap if it’s stuck on you, or tumble to interrupt its puking. If you don’t want it to attach at all, just grab it and shake it—it’ll squeal and flee.

· Surprisingly, its vomit is strong enough to kill a Clown within 3 pukes, making it weirdly useful for combat.
Shadow Child (Slender man)


Tier: 1
Health: 150 HP
Damage: 30 HP
Detection: Line of Sight
Orb Value: $2k - $5k
Strength to lift: 9
Quick strategy: hit with small size loot to stun it, look away from the direction of the entire body, not just the face


· The Shadow Child is a slender, teleporting monster that randomly appears and disappears with the sound of a child’s laughter. If you look at it, your screen darkens slightly, and after 2-3 seconds, it jumpscares you, says "yoink," deals 30 damage, and flings you across the room, often causing extra physics damage.

· Killing one isn’t really necessary, but if it’s in a bad spot, just wait it out (it usually leaves within 10 seconds) or smack it with a melee weapon—it has ridiculously low HP and dies instantly to most attacks. Otherwise, it’s more of an annoyance than a real threat, unless you get yeeted into something dangerous.
Trudge (bat knight)


Tier: 3
Health: 500 HP
Damage: 100 HP, Slam: Instant Kill
Detection: Line of Sight, sound
Orb Value: $5k - $8k
Behavior: Wanders, patrols
Strength to lift: 13
Speed: Slow
Quick strategy: Use clown items and explode it near him, or avoid him


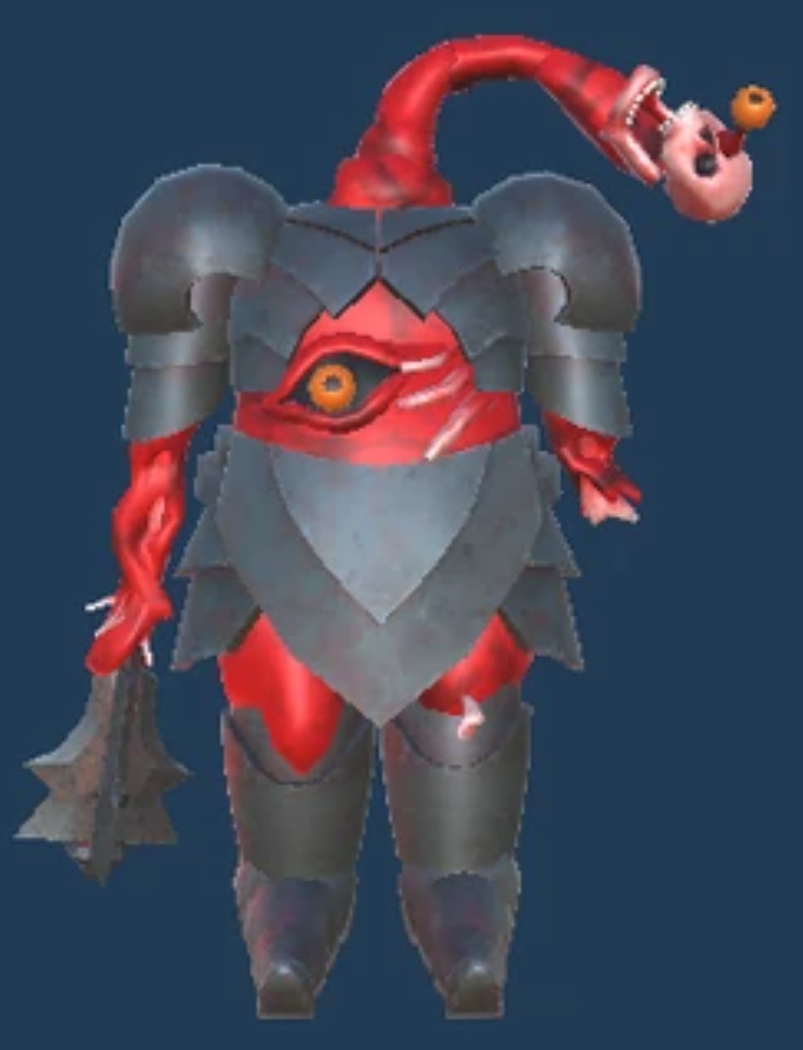
· The Trudge is an incredibly deadly and slow monster that drags a massive mace, creating a loud stone-grinding sound that can be heard through walls.

· Upon spotting a player, it unleashes a shockwave that pulls all players in a radius toward it—this does little damage, but the follow-up mace bash is an instant kill.

· The Trudge can use tendrils to reach under furniture if it knows you are hiding.

· Fighting is not recommended without proper equipment due to its high HP and unavoidable pull attack in tight spaces. Otherwise, it’s best to run, hide, and wait for it to pass—because if you don’t, you’re done.

· Landmines work well due to the Trudge's predictable pathing, however multiple Landmines are required to actually kill it.

· Baseball Bats or other means of knockback are effective against the Trudge. After knocking it prone, the player can continue using melee weapons or scrap to continuously attack the Trudge.
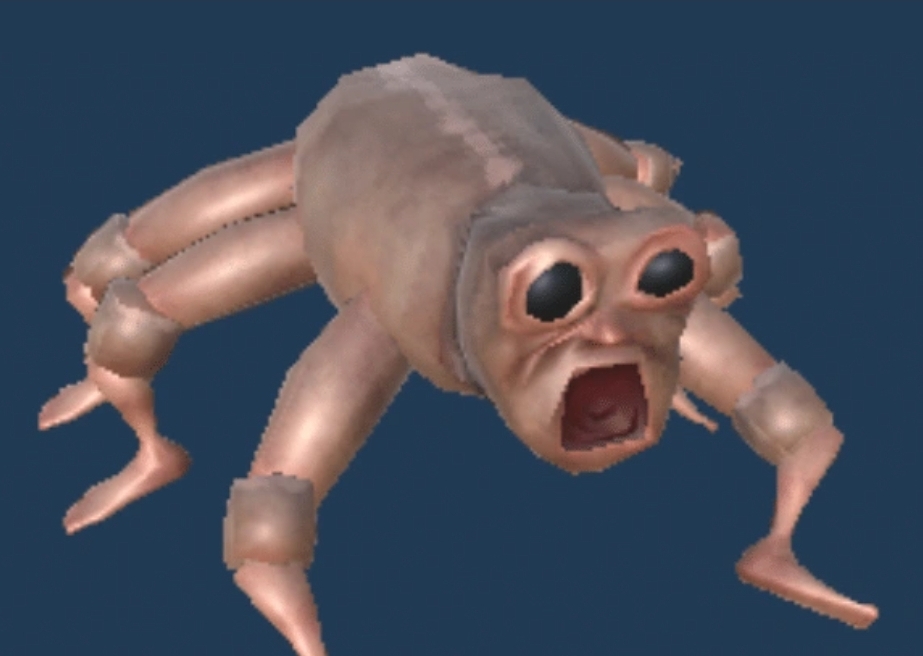
Upscream (Crawling human)


Tier: 2
Health: 50 HP
Damage: 10 HP
Detection: Line of Sight
Orb Value: $2k - $4k
Strength to lift: 4
Quick strategy: Get far away, do not get seen; sneak and hit it with small size loot


· The Upscream is a deformed humanoid that crawls on the floor. When it spots a player, it grabs them, screams, and flings them backwards, dealing 10 damage and stunning them for 2 seconds. The player will likely receive additional damage due to physics damage.

· While a single Upscream is manageable, multiple can be deadly as they can stun-lock a player in an endless loop until they die. If there’s more than one, make sure your team is coordinated or it’s game over.

· The hammer is the best weapon due to their small size, but a Tranquilizer Gun works too, leaving them immobile for a few seconds—at which point you can grab them and treat them like a gnome (which means slamming them into the ground).
---Monster spawn logic---
Monster per game level:

Game level: 1-2
amount of level 1 monsters: 1
amount of level 2 monsters: -
amount of level 3 monsters: 1

Game level: 3-5
amount of level 1 monsters: 1
amount of level 2 monsters: 1
amount of level 3 monsters: 1

Game level: 6-8
amount of level 1 monsters: 2
amount of level 2 monsters: 2
amount of level 3 monsters: 2

Game level: 9-10
amount of level 1 monsters: 2
amount of level 2 monsters: 3
amount of level 3 monsters: 2

Game level: 11+
amount of level 1 monsters: 2
amount of level 2 monsters: 3
amount of level 3 monsters: 3


Note: There is a 4.6% chance that a level 3 monster can be replaced by one of the following:

2x Hidden
3x Animal
3x Upscream
3x Bowtie
3x Rugrat
3x Mentalist
3x Peeper
3x Chef
4x Apex Predator
4x Spewer
4x Shadow Child
6x Bangers
10x Gnomes

Monster inactivity timer:
Time before monsters starts moving after starting a game.
Monster spawn as far from the truck as possible and idle for the times listed:

Level 1: 2-3 minutes
Level 2: 1.7 minutes to 2.6 minutes
Level 3: 1.1 minutes to 1.6 minutes
Level 4: 0.6 minutes to 0.9 minutes
Level 5: 0.4 minutes to 0.6 minutes
Level 6: 0.4 minutes to 0.6 minutes
Level 7: 0.4 minutes to 0.6 minutes
Level 8: 0.3 minutes to 0.5 minutes
Level 9: 0.3 minutes to 0.4 minutes
Level 10: 0.1 minutes to 0.2 minutes
Level 11+: 0 minutes

Note: Monsters can get active inside the inactivity timer if:
· A player is < 20 units away
· The monster attacks something


Respawn timer:
Time until monsters respawn after they despawn.
3x multiplier when you kill the monster.

> 10 minutes: 4 minutes to 5 minutes
10-20 minutes: 3.2 minutes to 4 minutes
20-30 minutes: 2.4 minutes to 3 minutes
30-40 minutes: 1.6 minutes to 2 minutes
40-50 minutes: 0.8 minutes to 1 minutes
50+ minutes: 1 second

Note: After 3-4 minutes have been spent in the level, monsters can despawn if they are further than 20 units away from all players for 20-40 seconds

Monster respawn point:

· Killed monsters always respawn between 18 and 34 units away of a random player


Behaviour after last extraction is activated:

· All dead monsters respawn
· After completing the last extraction, all monsters have a 1 second respawn time
· All monsters will camp truck for 12s
· All monsters within the sound bubble created by the last extraction at the van (will ping 4 times, 100 units wide) will roam towards you


Items manipulating the respawn timer:

· Whenever an item makes a noise, it will subtract 5s from all respawn timers per second
(-> radio, clock, doll, harp, piano, handgun, shotgun)


---Monster vision---
Every enemy has a cone as a field of view.
Depend on the player state the detection of a player changes as following:

Player detection:

Standing player:
· Monster has 100% vision
· needs to see you for 1s

Crouching player:
· Monster has 80% vision
· needs to see you for 2.5s

Crawling player:
· Monster has 40% vision
· needs to see you for 5s

Monster proximity awareness:

Monsters will detect you even when they have no line of sight if you are very close to them:

· 3.5 units when standing for most enemies
· 2 units when crouching/crawling for most enemies
---Monster responding to sounds---
Sound volumes:

coming soon
---Moon phases---
Level 0-4: No moon
- no effects

Level 5-9: Crescent moon
- the truck healer now restores 35 health
- monsters are now harder to knock down with valuables


Level 10-14: Half moon
- monsters now overcharge your grabber
- monsters take heavy damage from pits, but can survive
- the truck healer now restores 25 health


Level 15 - 19: full moon
- monsters now overcharge your grabber by a total increase of 25%
- monsters now take less damage from pits

Level 20+: super moon
- enemy orbs now explode when destroyed
- monsters now overcharge your grabber by a total increase of 50%
- monsters now take even less damage from pits
---Valuables---
All Valuables with their cost and effects.

not updated yet

Frog
Average value: $400
Effect: If dropped, the frog will start jumping around, losing its value and causing damage.

Ring
Average value: $400
Effect: -

Inflatable toy
Average value: $500
Effect: -

Mirror
Average value: $500
Effect: -

Cup
Average value: $500
Effect: -

Crown
Average value: $500
Effect: -

Chalice
Average value: $600
Effect: -

Diamond
Average value: $1K
Effect: -

Plushie
Average value: $1K
Effect: -

Ship in bottle
Average value: $1K
Effect: -

Monkey toy
Average value: $1K
Effect: If you hold it in your hands for a while, the monkey will start clanging cymbals.

Jewellery Box
Average value: $1K
Effect: -

Bonsai Tree
Average value: $1.2K
Effect: -

Green Cup
Average value: $1.4K
Effect: - releases a green cloud of radioactive material, which deals damage

Green Plate
Average value: $1.4K
Effect: - releases a green cloud of radioactive material, which deals damage

Globe
Average value: $1.5K
Effect: -

Small Vase
Average value: $1.5K
Effect: -

Ogre Head
Average value: $2K
Effect: -

Retro Radio
Average value: $2K
Effect: -

Large Measuring Tube
Average value: $2K
Effect: -

Love Potion
Average value: $2.4K
Effect: While carrying it, you will send chat messages raving about either the potion or one of your teammates.

Laptop
Average value: $2.5K
Effect: -

Clown
Average value: $2.5K
Effect: Touch the clown's nose three times to activate it. Then, after a few seconds, it will explode.

[u[i]]Glowing Mineral[/i][/u]
Average value: $2.5K
Effect: -

Champagne Bottle
Average value: $2.6K
Effect: The bottle will pop if damaged.

Hazardous Vials
Average value: $2.7K
Effect: -

Book
Average value: $3K
Effect: If the lock on the book breaks, it will bite you.

Large Potion
Average value: $3K
Effect: -

Trophy
Average value: $3.1K
Effect: -

Guitar
Average value: $3.5K
Effect: -

Music Box
Average value: $4K
Effect: As long as you hold the item in hand, you will spin uncontrollably.

Hazardous Container
Average value: $4K
Effect: -

Flamethrower
Average value: $4K
Effect: Fire when it takes damage.

Diamond Rhino Display
Average value: $4K
Effect: -

Saw
Average value: $4K
Effect: Activates when you pick it up and deals damage to anything the blade touches.

Yellow Scroll
Average value: $4K
Effect: -

HDD
Average value: $4.1K
Effect: -

Propane Tank
Average value: $4.2K
Effect: The valve opens when damaged.

Doll
Average value: $6K
Effect: Starts screaming and waving its arms, causing damage if picked up.

Hourglass
Average value: $6K
Effect: While you carry them, all your actions are slowed down, including your voice.

Big Vase
Average value: $6K
Effect: -

Television
Average value: $6.1K
Effect: -

Weapon in ice
Average value: $9K
Effect: -

Skeleton in ice
Average value: $10K
Effect: -

Sword
Average value: $10K
Effect: -

Explosive Barrel
Average value: $10K
Effect: -

Symbol Cube
Average value: $11K
Effect: -

Broomstick Display
Average value: $12K
Effect: The broomstick will fly if you break the box.

Computer Terminal
Average value: $16K
Effect: -

Wizard Staff
Average value: $18K
Effect: Damage the red crystal to shoot a laser like the Clown monster.

Grandfather Clock
Average value: $20K
Effect: The clock can chime loudly, attracting monsters.

Harp
Average value: $20K
Effect: -

Human Statue
Average value: $20K
Effect: -

Painting
Average value: $21K
Effect: -

Dinosaur Skeleton
Average value: $21K
Effect: -

Fragile Crate
Average value: $22K
Effect: If you turn it the wrong way, namely not with the arrows facing up, the box will start to take damage and then explode.

Server
Average value: $23K
Effect: -

Piano
Average value: $30K
Effect: -

Animal Statue
Average value: $30K
Effect: -

Monster Orb
Average value: Varies between monsters
Effect: -
---Maps---
Service Station
The Service Station is an item shop where players can buy items for earned money.

Detailed information about the available items in category ITEMS.

The Service Station always has a secret room in the ceiling when you lift a specific ceiling plate. To enter it you need a shockwave mine or jump boost.
Headman Manor
Headman Manor is a run down manor (or mansion) that has tight corridors, but has a bunch of good hiding spots for you to hide.

Valuables:

· Ship in Bottle
· Cursed Doll
· Television
· Trophy
· Painting
· Human Statue
· Bottle
· Globe
· Dinosaur
· Glass Case Rhino
· Large Vase
· Uranium Plate
· Cash
· Golden Animal Statue
· Diamond
McJannek Station
This is the McJannek Station. It consists of snowy mountains, and snowy…well, everything.
This map is most notable for the rippable doors, which are funny anyway.

Valuables:

· Cash
· Small Vase
· Orange Vial
· Emerald Bracelet
· Radioactive Plate
· Fan
· Computer Server Tail
· Computer Server Wide
· 3D Printer
· Clown Toy (Bomb)

Swiftbroom Academy
Valuables:

· Love Potion
· Round Potion w/Rope

Cauldrons:
· can be used to launch yourself
· stand of the opposite site in it to launch yourself the other way

Lore:
There are big pits of a yellow substance here and in McJannek Station, which is speculated to have caused the creatures we see in some way. However, there is a sign on one of the rooms that says it's lava, so this has been disproven. The substance has not been disproven in McJannek Station though.

There is a calendar in some places that says "Class of '87" and has a photoshopped image of a guy copied over multiple times in different poses. This was the last graduating class in Swiftbroom, and the beginning of the next school year, in '88, is when the incident happened, and it was abandoned.

If you progress into the late game, you might get a room called "Headmasters Study", it has a large chair with a portrait of the headmaster, there is a skeleton in the chair with a hat that matches the portrait. This is assumed to be the dead headmaster.
Museum of Human Art
Museum of Human Art, originally called "the Avant-Garde" features a museum like tileset with broken statues, giant food items, and other various artifacts as decoration.

Lore:
The Museum of Human Art has a lot of graffiti (most likely by The Human Group) that depict the Semibots and Taxman as evil.

In the launch trailer for the Museum Update, the narrator explains that the museum was made because there was a need for "something new" where "robots and automation" was not allowed. This contributes to the already existing underlying theory that whoever ran the museum viewed the Semibots and Taxman as evil.
Disposal Arena
The unfortunate place where the Taxman sends players when they all fail to meet their tax quota. They are then released to fight, and the last one standing becomes the 'King of the Losers,' earning a special crown for the duration of their next game.
---Items---
A list of all items buyable in the Service Station.
Player upgrades
Health Upgrade:
Cost: $5K - $?K, Increases exponentially
Effect: Increases max health by 20%

Strength Upgrade:
Cost: $6K - $?K, Increases exponentially
Effect: Increases your strength by 10%

Range Upgrade:
Cost: $6K - $?K, Increases exponentially
Effect: Increases your pickup range by 30%

Sprint Speed Upgrade:
Cost: $6K - $12K, Increases exponentially
Effect: Increases sprint speed by 20%

Stamina Upgrade:
Cost: $2K - $?K, Increases exponentially
Effect: Increases max stamina by 10

Map Player Count Upgrade:
Cost: $8K - $?K, Increases exponentially
Effect: Displays how many players are currently alive on the map

Double Jump:
Cost: $10K - $?K, Increases exponentially
Effect: Increases max amount of midair jumps

Tumble launch Upgrade:
Cost: $4K - $?K, Increases exponentially
Effect: Increases Tumble launch distance and speed

Crouch rest Upgrade:
Cost: $4K - $?K, Increases exponentially
Effect: Fills up stamina while crouching

Tumble wings Upgrade:
Cost: $4K - $?K, Increases exponentially
Effect: Let's the player glide while tumbling
Health packs
Small Health Pack:
Cost: $3-$6k
Effect: Heals 25 HP

Medium Health Pack:
Cost: $6-$11k
Effect: Heals 50 HP

Large Health Pack:
Cost: $9-$16k
Effect: Heals 100 HP
Weapons
Weapons:

Baseball Bat:
Cost: average $25k-29k
Damage: 20
Effect: Swing it to damage enemies near you.
Info:
· 10 hits until needs to recharge
· brief stun and immense knockback

Frying Pan:
Cost: average $17K-30K
Damage: 18
Effect: Swing your weapon from side to side to deal damage.
Info:
· 15 hits until needs to recharge

Sledge Hammer:
Cost: average $40k-47k
Damage: 150
Effect: Swing your weapon from side to side to deal damage.
Info:
· 10 hits until needs to recharge

Sword:
Cost: average $25K
Damage: 50
Effect: Swing it to damage enemies near you.
Info:
· 15 hits until needs to recharge

Inflatable Hammer:
Cost: average $9K
Damage: 5 or 250
Effect: Swing it to deal damage, but it explodes when it hits a flat surface.
Info:
· 20 hits until needs to recharge
· has a ~5% chance to cause an explosion, dealing 250 points of damage

Prodzap:
Cost: average $?K-30K
Damage: 5 or 250
Effect: On impact, it deals 8 damage and stuns for 3 seconds.
Info:
· 16 hits until needs to recharge

Gun:
Cost: average $47k
Damage to monsters: 80
Damage to players: 100
Effect: The simple gun deals moderate damage, although it has problems with aiming.
Info:
· 6 shots until needs to recharge
· stuns medium enemies
· 15 bullets

Shotgun:
Cost: average $91k
Damage to monsters: 300 (6x50)
Damage to players: 300 (6x50)
Effect: The Shotgun dishes out huge damage at close range with an intense recoil. It’s the best weapon in the game for hunting monsters.
Info:
· 5 shots until needs to recharge
· fires a total of 5 pellets dealing 50 damage per hit

Tranquiliser Gun:
Cost: average $16k
Damage to monsters: 0
Damage to players: 0
Effect: The Tranq Gun puts the target to sleep for a short time, which is extremely effective against strong and fast enemies.
Info:
· has 8 shots before needing to recharge
· can stun medium enemies for ~18 seconds.

Boltzap:
Cost: average $16k
Damage to monsters: 8 (4x2)
Damage to players: 0
Effect: Fires a shot of electricity that stuns for 1.5 seconds.
Info:
· stuns enemies
· 20 shots until needs to recharge

Pulse pistol:
Cost: average $16k
Damage to monsters: 25
Damage to players: 0
Effect: Fires a shot that deals very high knockback and deals 25 (the knockback may deal additional damage on impacts).
Info:
· 12 shots until needs to recharge

Photon blaster:
Cost: average $39k-48k
Damage to monsters: 270
Damage to players: 100
Effect: Fires a laser beam
Info:
· It will deal 45 damage each hit, 270 damage if all ticks connect.
· 5 shots until needs to recharge

Explosives
Grenade:
Cost: average $3K
Damage to monsters: 160
Damage to players: 75
Range: 10m
Effect: Throw it at an enemy to damage them.

Shock Grenade:
Cost: average $2K
Damage to monsters: 0
Damage to players: 0
Range: 30m
Effect: Throw it at an enemy to stun them and also damage them.

Stun Grenade:
Cost: average $2K
Damage to monsters: 0
Damage to players: 0
Range: 30m
Effect: Throw it at an enemy to stun them, but it won't deal any damage.

Human Grenade:
Cost: average $2K
Damage to monsters: 100
Damage to players: 50
Range: 10m
Effect: Same as a the Grenade, but it deals less damage.

Duct Taped Grenade:
Cost: average $2K
Damage to monsters: 400 (100x4)
Damage to players: 50x4
Range: 10m
Effect: Throw at an enemy to explode them with the first blast, after which several Human Grenades will fly in different directions and explode. It is recommended to use it in narrow corridors or small rooms.

Shockwave Mine:
Cost: average $3K
Damage to monsters: 25
Damage to players: 0
Range: 30m
Effect: Activate [E] and throw it on the floor, after which the mine will stun and damage anyone who steps on it.Takes 5s to arm.

Trapzap:
Cost: average $3K
Damage to monsters: 0-5
Damage to players: 3
Range: 0m
Effect: Activate and throw it on the floor, after which the mine will stun anything that steps on it. Takes 5s to arm.

Explosive Mine:
Cost: average $3K
Damage to monsters: 200
Damage to players: 75
Range: 20m
Effect: Activate and throw it on the floor, after which the mine will explode if anyone steps on it. Takes 5s to arm.

Rubber Duck:
Cost: average $16-20K
Damage to monsters: 50
Damage to players: 0
Range: 10m
Effect: Throw as far away from you as possible and hide; the Duck will start to bounce off surfaces, dealing damage to everything. It can also explode during one of the bounces with a chance of 10% causing 250 damage to enemies only. Gains speed with every bounce.
Utility
Recharge Drone:
Cost: $4k-5k
Effect: Recharges the power for any applicable item.
Info:
· can be attached to a chargeable item to recharge it
· it gives 5 bars of charge to any chargeable item / s
· will lose charge when attached to a fully charged item.

Indestructible Drone:
Cost: $23k-30k
Effect: Renders one item indestructible.
Info:
· can be attached to an item to make it indestructible

Roll Drone:
Cost: $9k-11k
Effect: Improves your dodge roll.
The roll drone can be attached to enemies to launch them forward, stunning and damaging them if they hit a wall.
Info:
· makes the player/monster/item roll when attached
· when attached to an object, it will roll towards you (if not too heavy)
· when attached to an enemy, it will stun and roll the enemy away from the player
· when attached to the player, you will roll in the direction you are looking.

Feather Drone:
Cost: $15k-18k
Effect: Improves your jumping ability.
Can be attached to items to make them lighter.
Info:
· makes the player slightly jump higher and fall slower
· makes items and (stunned) monsters very light

Zero gravity Drone:
Cost: $25k-?k
Effect: Latches onto the nearest object or monster and slows them down while lifting them up.
Info:
· makes the player jump higher and fall slower
· also can be used to hold items in the air

Duck bucket:
Cost: $5k-8k
Effect: Use it on the duck to disable her chasing you, or as mobile hiding spot
Info:
· spawns only in hidden room of the shop
C.A.R.T.s
Pocket C.A.R.T:
Cost: $14-18k
· Smaller C.A.R.T to store little valuables.
· can be put in an inventory slot

C.A.R.T:
Cost: $39-48k
· Normal C.A.R.T to store valuables

C.A.R.T cannon:
Cost: average $26k
Damage to monsters: 500
Damage to players: 50
Effect:
· A cannon which can be mounted into the cart
Ammo: 5

C.A.R.T laser:
Cost: average $26k
Damage to monsters: 800
Damage to players: 200
Effect:
· A laser which can be mounted into the cart
· 100 damage per hit
Ammo: 5

other items
Valuable Detector:
Cost: $15k-18k
Effect: Use it to locate the nearest valuables.
Info:
· when turned on [E] it will point towards the nearest unknown valuable

Extraction Detector:
Cost: $8k-17k
Effect: Use it to locate the next Extractor.
Info:
· when turned on [E] it will point towards the nearest inactive extraction zone

Energy Crystal:
Cost: increases linearly
Effect: Used as batteries for the Energy Container to recharge items.
Info:
· each Crystal provides [5] Energy bars, fully recharging a single item
· maximum of 6 crystals = 30 bars = 6 full item charges

Zero gravity orb:
Cost: $42k-43k
Effect: Creates a zero gravity field
Info:
· items will stay stationary if they were placed inside the field completely still
· if the item was moving when placed in the field, it will keep its momentum.

Phase bridge:
Cost: $20k
Effect: Creates a extendable, portable bridge
Info:
· has variable length


---The van---
· entering the van after a successful mission the green orb in the van heals every player by 25
· after completing round 1 you get a free energy crystal
· a countdown starts after one player clicks the leave button after all level goals are completed,
the timer counts down from 10 - 1, players which are not in the truck will explode

Truck HP gain:
+ HP after rounds:
<5 = +50HP
5 = +35HP
10 = +25HP
---Grab force explained---
(player x 5) + total strength = needed strength

every player without strength upgrade has 5 strength

small enemies = need 2 players
medium enemies = need 3 players
large enemies = need 4 players
---Minimap---
· press TAB to activate it
· helps you navigate through the map
· shows you which rooms were already explored
· gets updated if your teammates explore something
· shows extraction points
· show the best way to the next objective
· show valuables as yellow points
· shows other players as red points
· shows usable items from the shop as blue points
---Lore---
Shopkeeper (known as Barry)
A friendly shopkeeper who provides rare anti-monster equipment during missions, Barry was once a field agent for REPO. However, after a close encounter with death, he became unfit for active duty. His knowledge of monsters and equipment makes him the ideal candidate for running the supply shop. Barry has an exceptional memory, able to recall every item he’s sold and to whom.

Player
Players appear as robot puppets, called half-robots. Players can select their color in the lobby screen or the game's initial menu. Players have 100 health points and 40 energy points. Both attributes can be improved through upgrades at gas stations.

Taxman
Taxman is a central character in Repo Game Characters, known as a little-known and sinister AI system that acts as the player's employer, though little is known about him. He is a being who communicates with the player via a truck monitor, but whose "face" also appears briefly after a 3-second countdown when interacting with shops and extraction points. Taxman is speculated to be the creator of REPO (Retrieval, Extraction, and Profit Operations).
---Achievements---
There are no achievements yet in the game, but they will come with updates of the game.
Coming soon.
---Tactics---
Coming soon
---Tips---
· looking sideways removes the fog on the map -> better visibility
---Eastereggs---
Secret room

In the shop you can push a random plate in the ceiling upwards by grabbing it to open a secret room.
In this room you can find human grenades for $2k.
---Chat commands---
/cinematic
· removes the UI
· use number pad for filters

/greenscreen or /bluescreen
· displays a green or bluescreen
---Update history---
v0.1.0
February 26, 2025
- The game was released.

v0.1.1
February 28, 2025
- A fix for some players failing to connect to voice chat.

v0.1.2
March 1, 2025
- All lobbies are temporarily set to “Friends Only”.


Betas:

v0.1.2.21_beta
May 2, 2025
- New Location - Museum, Server List and Random Matchmaking, Overcharge, 4 Shop Items, Expressions, Upscream texture updated, Chef death effects and sounds added, Robe death sound added, Upgrade prices discounts for each player in the team, other balance changes and bug fixes.

v0.1.2.22_beta
May 3, 2025
- Balance changes and bug fixes.

v0.1.2.23_beta
May 7, 2025
- Bug Fixes

v0.1.2.31_beta
May 16, 2025
- Cart Cannon, Cart Laser, 6 New Museum valuables, Huntsman audio loop updated, Total Value of a level is now more consistent between levels, Balance changes and bug fixes.


v0.1.2.32_beta
May 19, 2025
- Museum tile and graffitis, Balance changes and bug fixes.

v0.1.2.37_beta
May 30, 2025
- 2 Shop items, 2 Player upgrades, More Museum details, Balance changes and bug fixes.

v0.1.2.38_beta
May 31, 2025
- Bug Fixes

v0.1.2.42_beta
June 6, 2025
- 6 New Museum start rooms, 9 New Museum valuables, Toggle Mute, Balance changes and bug fixes.

v0.1.2.46_beta
June 14, 2025
- Moon phases, Ability to open steam profiles of players, Players now appear in your "recently played with" list after playing together, 14 new Museum of Human Art tiles (modules), 2 New Museum valuables, New Museum music, Updated Museum ambience, New Museum graffiti, banners, and paintings, Valuable Monkey Box - Now includes some voice lines, Valuable Monkey Box - Now includes some voice lines, Sledgehammer - Updated hit sound, Value now shown when spectating a player holding an item, Difficulty - Now scales past level 10, Enemies now break free slower when grabbed by multiple players and other balance changes and bug fixes.

v0.1.2.47_beta
June 14, 2025
- Fixed issue where microphones weren't audible in some cases.

v0.1.2.51_beta
June 17, 2025
- Fixed issue where microphones weren't audible in some cases.

v0.1.2.53_beta
June 18, 2025
- Fixed issue where microphones weren't audible in some cases

---

v0.1.3
June 18, 2025
- Museum of Human Art, 8 Shop Items, 2 Player Upgrades, Expressions, Valuables, Moon Phases, Difficulty Scaling. Contains the content from the beta branch for the original game.

---Graphic settings---
Standard graphic settings:


Motion blur: ON
Lens distortion: ON
Bloom: ON
Chomatic aberration: ON
Grain: ON
Glitch loop: ON
Pixelation: DEFAULT

Best custom graphic settings:


Motion blur: OFF
Lens distortion: OFF
Bloom: OFF
Chomatic aberration: OFF
Grain: OFF
Glitch loop: OFF
Pixelation: SMALL


---Fix game freezes---
Reinstall the game on a different drive

· Some people said switching their game from a M.2 SSD to a regular HDD fixed crashing problems

Lower the graphic settings

· Set graphics to low
· Turn off post-processing, motion blur and anti-aliasing
· Run the game in full screen
· Cap your FPS to 60

Update your graphic drivers

· update your GPU drivers to the newest version
· make sure your chipset drivers are current
· your os should be updated


credits
credits:

R.E.P.O wiki
fandom
Wurps
alter ego
42 Comments
Art 31 May @ 3:27am 
how much damage do small items vs medium and heavy items make against monster? I think this is missing or i read over it.
Wolpertinger 27 May @ 9:41am 
You forgot a gun. Zapgun
Bu3(SW) 5 May @ 3:04pm 
This is one of the best guides for any games I have ever seen and is reminiscent of those guide books that use to be sold for games back in the day.
Buzzsaw 10 Apr @ 7:10pm 
countdown happens when someone tries to leave without you
Corrrin 5 Apr @ 6:45pm 
I was playing with friends the other day and after our last extraction point was done, some monsters got in the way of us getting back to the ship. We got a 10 second countdown to get back to the ship. Does this happen after a certain amount of time or does someone have to make it to the ship for the countdown to start? Can't find any info on this
Rascal 5 Apr @ 1:48am 
we need a /twerk in the game
Aga_XD 2 Apr @ 4:51pm 
Peeper - If you are playing with someone - to interrupt attack, press "Q" and your teammate can pick you up and carry you so that you don't die from Peeper. Instead of telling you to run away. He won't attack your friend because he will be focused on you. A random discovery, but helpful.
haZee  [author] 1 Apr @ 9:23am 
thank you, yea i will. steam is kinda buggy with my picture uploads...
Lumos [FR] 1 Apr @ 9:19am 
Heyy nice guide !! Could u add pictures ? It's not that much but it helps a lot identify monster from first glance ! Anyway incrr work helped me a lot !
Sushi :3 31 Mar @ 9:14am 
I'm a lil confused about the strength stuff
If a player has 5 strength without upgrades why do i need 2 players (10 total strength) to pickup a monster that requiers 4 strenght

- hope im not stupid for not understanding this o_o