Escape from the Cursed Convent

Escape from the Cursed Convent

Not enough ratings
Escape from the Cursed Convent Complete Guide
By Niko
Entails a full walkthrough with all endings and achievements.
   
Award
Favorite
Favorited
Unfavorite
General Tips
Saves:
I recommend making a separate Save every chapter and before any choice that directly leads to a specific ending.
You should be able to find everything if you explore thoroughly and save regularly in case you need to redo a choice or continued the story by accident before you explored everywhere you wanted to. If you are offered to make a Save before a Mini-Game, I recommend doing so.

Stats:
If you look at the Ring in your inventory you can check Adeline and Helena's Willpower. If you pick a choice that increases their Willpower, there is a sound cue as well. If Willpower increases past a threshold the sentence beneath Adeline’s Willpower will change.
You pick up a Flower in Chapter 3, which if you look at it in your inventory you can check the Relationship Level. If you do something that increases the Relationship Level, there is a different sound cue.

Endings:
You should be able to reach most main endings while maximizing Adeline’s and Helena’s Willpower as well as the Relationship Level and then make different choices throughout the Final Chapter.
At least two full playthroughs are needed to get all endings.
Three of the four numbered endings should all be accessible via the last few choices if each girl’s Willpower is high and the relationship questline is complete.
Prologue

Pick up the Embroidered fabric on the shelf next to the door. Leave the house.
Behind the house is a Mini Cross.
Head down. In the left upper corner is another Mini Cross.
Head right into town. By the stand with cheese wheels is the man you need to talk to.
This leads into the first choice.
Choice:
>My mom is not a witch (Money -3, Adeline’s Willpower +1)
>......

Leave town the way you came. Head left and interact with the well.
Get ready for the first QTE! Hit the arrow keys in the order displayed, you need to be fast and make no mistakes to get all three Mini Crosses from this. If you don’t get it on the first try there should be an Auto Save right before it, which you can load. The order of arrows always stays the same.
Now head back home. After dinner talk to Luther, then go to bed.
The next day leave the house and talk to Luther from below the fence.
Afterwards head all the way down to the city gate and talk to the man from before.
Head back home and interact with the shelf next to the door.
Chapter 1

Leave the cart and head left.
You just have to walk up to a mural to record it in your encyclopedia, only the first six are accessible right here.
Approach the spot with the lightbulb to continue.
Another QTE where you need to press the arrow keys! The same rules apply as for the first one in the prologue.
Following the Sister’s directions head left and down out of the Courtyard.
Now head left, in the upper left corner is a Mini Cross.
Go back and head right. Pick up the Letter in the upper right corner first.
Head right and talk to the nun in white to deliver the letter. (Sin and repentance Step 1)
Continue heading right following the arrows on the ground.
Around the grassy area of the Outerwall Border you can interact with two Sisters to help them out. In the lower right corner all the way at the bottom of the area is a Mini Cross.
Continue right into the field area of the Outerwall Southwest. In the middle of the area under the pink tree is a Mini Cross. Manoeuvring around the trees can be a bit tricky.
Head to the upper right corner to your destination. Talk to the girl infront of the right building, then go into the left one and talk to the girl inside of it.
This Mini-Game has you match the items to their corresponding chests. Additionally you have to choose the correct label in Latin for them. You need to make no mistakes to get all three Mini Crosses. Adeline will say each item’s name as you pick them up, but you can check the sparkling paper in the chest room as a reminder.
From left to right the items are:
Red - Barley - Hordeum
Yellow - Woods - Lignum
Blue - Wheat - Triticum
Green - Wooden bucket - Dolio Lignea
Afterwards leave the chicken coop.
Another Mini-Game! Match the pattern via a pushing puzzle. Resetting the Mini-Game also resets the timer! However it also resets the order of the puzzle pieces, which is always random. Completing the puzzle in less than two minutes to get all three Mini Crosses.
Right after you are presented with a choice.
Choice:
>There are still kind souls in this cruel place.
>Even so, the cruelty here remains a bitter truth. (Adeline’s Willpower +1)

Before going into the dining hall you can head up to the left and inspect the wall for additional dialogue.
Enter the dining hall and record the mural straight ahead, then walk right.
After dinner head right again. Talk to the girl next to the small tree.
Head into the dormitory.
On the second floor talk to the girl to the right. She will sing a hymn and ask for its name. Answer correctly to get a Mini Cross.
Answer:Hymn of Praise (Sanctus)
On the third floor record the mural. Then head inside and record the next mural as well.
Head into the room indicated by an arrow and go to bed.
Interact with the Stick right above you, then interact with the sparkles.
For this QTE you have to press enter when the marker is in the green. Pressing enter while in the yellow will not cost a heart, but not pressing enter at all will. You need to keep all three hearts to get all three Mini Crosses. Save when given the chance, if you fail here you get a Game Over and have to reload.
Chapter 2

Leave the room.
This Mini-Game has you match the boxes to the respective colours. You can only push or pull the box depending on which side you are grabbing onto it, so you have to change sides quite often. The blue box is located in the lower right corner.
After you clear the way by moving the blue box inspect the wall. While looking around the timer is paused.
Finish the Mini-Game after looking around. You need to do this quickly with two minutes to spare to get all three Mini Crosses.
Talk to the nearest girl.
As Helena head left, then down the steps and further left following the arrows on the ground.
Interact with the shiny spot and you are presented with a choice.
Choice:
>Is it the season for flowers to bloom? (Helena Willpower +1)
>The blossoms are fascinating.

Another choice comes up right after switching back to Adeline.
Choice:
>Perhaps it is a wise choice.
>If only I may escape this place...... (Adeline Willpower +1)

Head up inbetween the buildings slightly to the right, under the large tree at the end is a Mini Cross.
Now head right, then left after talking to Mother Hrotsvitha.
On the next screen head left following the arrows on the ground.
Enter the Courtyard from the left upper corner. Record the mural by this entrance and the one by the staircase to the right.
Talk to the dog and go to observe the murals to record the rest of them in this area.
You can also pet the dog! Go give the doggo some pets. First the chin, then the head twice and lastly the belly three times.
Read each book in this hallway, you won't get a second chance to visit this place. Talk to the dog again to return to the Courtyard.
In the Courtyard in the upper left corner of the green area accessable by the fountain in the lower right corner is a Mini Cross.
Now head up the stairs in the upper right corner. Record the two murals infront and to the right. In the upper right corner is a Mini Cross as well.
Circle back and go down, then up another set of stairs.
Before going into the sewing room head right as there is a Mini Cross.
Now enter the room indicated by the arrows.
Another sliding puzzle Mini-Game! The same rules apply as for the first one. You need to have three minutes to spare to get all three Mini Crosses. This might take a couple of tries, I suggest getting the bottom row in order first, so the rest is just a three by three again.
As Helena interact with the three bodies.
Head right and talk to the man before the crowd. Then head into the crowd.
As Adeline you are presented with a choice.
Choice:
>Claire is acting weird. (Adeline's Willpower +1)
>Maybe I am overthinking it.

Interact with the rabbit.
At night leave the room and talk to the girl in the hallway. She will sing another hymn and ask for its name again. Answer correctly to get a Mini Cross.
Answer:Glorious Anthem (Gloria)
Leave the hallway and go down to the first floor. Follow the arrows on the ground.
This is a stealth Mini-Game. Don’t enter the Sister’s line of sight. Head to the far left and into the last room.
During the day head right into the field area and then immediately up. Enter the Toilet, after the dialogue leave it again.
In the upper left corner is a Mini Cross. This one was inaccessible before now.
Follow the arrows further upwards into the Forest.
Take the opportunity to make a Save. You are presented with a choice of two locations, one of which leads to an Ending.
Choice:
>Forest
>Toilet (Death End)
Chapter 3

Leave the room and then the hallway to the right.
Talk to the girl in the corner above the staircase. She will sing one last hymn and ask for its name again. Answer correctly to get a Mini Cross.
Answer:Lamb's Passage (Agnus Dei)
Head down the stairs to the first floor and follow the arrows on the ground.
Outside head left and down through the archway and one set of steps. Then head right into the field area.
Head up following the arrows on the ground into the Forest.
As Helena gather the Chestnuts on the ground. You can find enough on the path to the right.
Before gathering all of them head down into the lower left corner. Go up the steps, along the small path to the very left and down the second set of steps, there is a Mini Cross.
Adeline is located in the upper left corner. Talking to her increases the Relationship Level, sometimes you have to talk to her more than once.
As Adeline pick up the shiny object beneath the small pine just above.
Helena is located a little to the left and down. Talking to her also increases the Relationship Level, sometimes you have to talk to her more than once as well.
While gathering Chestnuts you can move small boulders out of the way, but you can only move them in the direction you’re facing when grabbing onto them.
After gathering enough Chestnuts, you are presented with a choice.
Choice:
>Worried about Mary (Adeline Willpower +1)
>Pray for Mary

Another choice comes up right after.
Choice:
>If only Kasper still stay alive (Helena Willpower +1)
>May my family find peace in eternal rest

The next day talk to the two groups of girls. (Conscience of amnesty Step 1)
For interacting with the big group you are presented with a choice.
Choice:
>They went too far. (Hand of Friendship Step 1)
>Best to keep my distance from them.

Now interact with the shiny object on the shelf.
This is another QTE, where you need to press the arrow keys as well as the D and Q keys. If done without mistakes you get three Mini Crosses.
As Helena you can gather more Chestnuts and Worms than indicated.
Adeline is located in the lower left corner.
As Adeline if you already gathered all Chestnuts you can just gather one Worm to continue.
Helena is located to the right.
Continue along the path. After having spotted the wolf head back and pick up the Wooden Stick right after returning to the first Forest area.
Now head up again and left. Interact with the big well from above it.
Head further up and push the boulder out of the way. Interact with the mushroom.
Head left and interact with the large barren tree.
Get ready for an arrow key QTE, which also uses the enter key!
Cross the water and head further left following the arrows on the ground.
Save before you start hunting as Adeline, so you can reload if any prey escapes.
The hunting QTE needs you to press enter when the marker is in the green or yellow.
Helena is located by the water with the tree bridge. Talk to her twice. (Hand of Friendship Step 2)
Again you can gather more than what you need, but once you gathered everything you are asked to you will be done. You can also return to the previous area to gather the Chestnuts and Worms again.
As Helena you can go past the next wolf.
Adeline is located to the right on the path back to the area entrance.
When you go close to the vegetable garden in the upper left corner, you are presented with a choice.
Choice:
>They may be a companion
>It is wise to observe before approaching (Helena Willpower +1)

If you approach the boar to the right or run after the warning you will get a Game Over.
You can gather everything you want to freely. Once you are done exploring and gathering return to the Base.
When cooking you need to reach 40 Satiety to obtain all three Mini Crosses. If you gathered everything, using your best ingredients for Roast, Roast 2 and Salad 2 should work.
Head all the way down and leave the forest.
Head further down, then left and then up again all the way back to the dormitory.
Once you answer the door you are presented with a lot of choices in quick succession.
Choice:
>I am without guilt (Helena Willpower +1)
>......

Another choice as Helena.
Choice:
>Trust in Adeline (Helena Willpower +1)
>If Adeline forsake me......

As Sister Agnes interact with the body on the upper left table.
As Adeline you are presented with the next choice.
Choice:
>Concerned for Helena (Adeline Willpower +1)
>Anxious about the convent

Approach the burning stake for another choice.
Choice:
>Others dwell here (Adeline Willpower +1)
>We must heed the vow of "obedience"

As Helena you are presented with the next choice.
Choice:
>Rashly agreed
>Be cautious (Helena Willpower +1)

A last choice for now as Helena.
Choice:
>If she forbid Adeline to join...
>I must ensure Adeline accompanies me (Helena Willpower +1)

Start to gather to your heart’s content! Everything should have respawned in each area of the Forest and a new area is open in the upper right corner of the Forest West which the boar blocked off previously.
Head into the new area to continue.
Adeline is located in that new area as well.
Head down to spot another wolf, then head back where the boar was to pick up the Wooden Stick.
You can continue by gathering everything you are asked to.
As Adeline pick up the Flower to the right.
Helena is located in the upper left corner of the area.
It suffices if you hunt in the current area, I recommend getting both deer.
Once you are done, head to the large tree in the upper left corner.
Take the opportunity to make a Save. If you stray from the path you get a Game Over.
Carefully manoeuvre through the Abandoned Storage and pick up the Axe.
Go back the same way, now interact with the large tree. This will trigger another arrow key QTE, which also uses the enter key.
Head right and pick up the herbs for Sister Agnes. (Sin and repentance Step 2)
Approaching the spot indicated by the “…” at the straight part of the stream triggers an event that raises Adeline and Helena's Willpower by 1 each.
Head into the upper right corner and follow the arrows on the ground into the next area
Head further right and approach the spot with the lightbulb.
Now head down and to the right. Approach the wall.
You can use the map to fast-travel back to Base.
This time during cooking you need to reach 50 Satiety to obtain all three Mini Crosses. If you gathered everything, choose the Veggie Soup to record the recipe, then using your best ingredients for Roast 3 and Salad.
Fast-travel to the Outerwall Border and return to the dormitory.
Your Relationship Level raises two points automatically.
Talk to Sister Agnes just outside the Base.
As Sister Agnes interact with the shelves to the left and right. (Sin and repentance)
At the vegetable garden pick up the Mini Cross.
Then talk to Sister Kaven.
As Helena proceed as usual with the gathering, though you can ignore the area with only Chestnuts and Worms now.
You can chop down certain trees, some to create shortcuts others to reach new places. This prompts the same arrow key QTE with enter each time.
You also have access to every type of mushroom now.
In the Forest North cut down the tree by the water and head across to get a Mini Cross.
In the Forest Northeast cut down the small tree to the right of the large tree surrounded by blue and purple flowers to get a Mini Cross behind it.
Adeline is located further to the right from there.
As Adeline you can cut down a tree in the lower right corner. Head right and interact with the lake.
Go back, head up and to the right.
Helena is located nearby the fish trap.
Once you are done hunting and gathered the fish, fast-travel back to Base.
During cooking you have to reach 50 Satiety to obtain all three Mini Crosses again. Use your best ingredients for Smoked, Soup and Roast 3.
Chapter 4

You are immediately presented with a choice.
Choice:
>It would be wiser to leave me behind
>I must prove to Kaven I won't be a burden (Adeline Willpower +1)

At night to the right you can chop down a tree, which leads to a flower field. Approaching the lightbulb will trigger an event that increased the Relationship Level by 1.
Head down to check on the fish trap.
Afterwards you are presented with a choice.
Choice:
>Kaven is just like the townfolks
>One day Kaven shall accept me (Adeline Willpower +1, Helena Willpower +1)

Fast-travel to Kaven's Base, there you are presented with a choice again.
Choice:
>Change public opinion (Conscience of amnesty)
>Attempt to persuade the nun

At every spot with sparkles you will have to do an arrow key QTE, which also use the Q, D and enter keys. You don't have to walk, so just focus on the QTEs. Make no mistakes to get all three Mini Crosses. Take the opportunity to make a Save, if you fail the QTE three times you get a Game Over.
Afterwards you are presented with a choice.
Choice:
>They shows benevolent face at times
>Do they yet feign affection in this manner? (Helena Willpower +1)

Gather to your heart's content. In the Forest Northeast head to the right next to the tree surrounded by flowers and down to reach the new area, though you can also fast-travel there.
Helena is located to the left.
Head back to the right and down. Chop down the tree to reach the rest of the area.
After chopping down the tree to the left is a Mini Cross.
Finish gathering for this section.
As Helena you can now hunt as well.
Adeline is located right where you start.
Head right and up, the fish trap is at the river bend.
Once you are done, fast-travel back to Base.
During cooking you can obtain all three Mini Crosses by making Cooked Onion Salad, Krapfen and Grilled Fish.
Afterwards you are presented with a choice.
Choice:
>Ask further (Relationship Level +1)
>Forget it

Fast-travel to the Outerwall Border and return to the dormitory.
Back in Helena's room you are presented with a choice.
Choice:
>We must leave this place (Adeline Willpower +1, Helena Willpower +1)
>Pray
Chapter 5

Head to the right into the Forest Northeast or fast-travel there.
Interact with the fish trap by the river bend. Then fast-travel back to Kaven's Base.
During cooking you can only make Fried Crayfish.
If you have a high Relationship Level you are presented with a choice.
Choice:
>Leave
>Stay (Relationship Level +1)

Head down the stairs to the left, the head up.
Interact with the two girls in the corridor.
Head further upwards, then right and around. Interact with the group of girls. (Hand of Friendship)
Head back and down the stairs.
Then head down and around up the stairs. Record the mural infront.
Enter the first door to the left. Head up the small stairs and go through the bookshelves in the back to record the remaining Animals.
Talk to Helena in the center of the room, afterwards leave the room and head left.
Enter the last room at the end of the corridor, there you are presented with a choice.
Choice:
>If the convent......
>If Helena...... (Adeline Willpower +1)

Shortly after you are presented with another choice.
Choice:
>Adeline is most dependable (Adeline Willpower +1)
>Praise be to God, for matters progress favorably

Fast-travel to the Forest West, make a Save and pick up the dead hare by the water.
If your Relatonship Level is high you are presented with a choice that locks you into certain endings.
Choice:
>Go with her (Covenant of Cherishment, completes the Relationship questline, leads to End 1, End 2, End 3, End 4)
>Leave it to next time. (leads to Bad End, End 1, End 2)

Head up to Kaven's Base.
Chapter 6

If you haven’t completed the Relationship questline, you are immediately presented with a choice.
Choice:
>Confront first (leads to Bad End, End 1, End 2)
>Let Helena and Adeline to flee (leads to Bad End, End 1, End 2)
>Kill Katherine (Requires some Adeline Willpower, leads to End 1, End 2)

In Kaven's dream sequence record the two murals. Then leave the room.
Head left and down the stairs.
Head down, left and out of the Courtyard.
Interact with the dead hare.
Walk upwards.
Gather berries.
If you completed the Relationship questline you can pick up a flower towards the middle of the map.
Choice:
>Collect (leads to End 3, End 4)
>Cancel

If you Collect it you get one last arrow key QTE that incorporates the Q, D, W and enter keys a little later. Failing it leads to End 3. Succeeding leads to End 4.
Head down, left and further down into the Flower Field. Talk to Helena.
If Katherine is still alive you are presented with a choice.
Choice:
>Kill Katherine (Requires some Adeline Willpower or Helena Willpower, End 1 Adeline Willpower > Helena Willpower, End 2 Helena Willpower > Adeline Willpower)
>Better to flee first (Bad End)

You manually have to catch Katherine, so be quick and don't forget to mash the interaction key! This may take a few tries.
Endings & Ending Achievements
DE Another nutrient for the forbidden fruit
At the end of Chapter 2, when you are to pick in which place to purge food, choose the"Toilet".

BE Endless nightmare
Do not complete the Relationship questline.
In the Final Chapter choose"Confront first"and then"Better to flee first".

END1 Wathershed Promise
Requires Adeline's Willpower to be higher than Helena's Willpower. If both girls' Willpower is maxed out it will default to this ending.
In the Final Chapter either choose"Kill Katherine"the first time you get the chance to with Kaven.
Or if you leave her alive choose"Kill Katherine"at the Wall of Confession and catch her.
If you completed the Relationship questline, do not pick the Aconite.

END2 Where does salvation lie
Requires Helena's Willpower to be higher than Adeline's Willpower.
In the Final Chapter either choose"Kill Katherine"the first time you get the chance to with Kaven.
Or if you leave her alive choose"Kill Katherine"at the Wall of Confession and catch her.
If you completed the Relationship questline, do not pick the Aconite.

END3 Cosmos
END3 Cosmos
Requires you to complete the Relationship questline.
When interacting with the Aconite choose to "Collect" and then fail the QTE.

END4 Lamb of Desire
END4 Lamb of Desire
Requires you to complete the Relationship questline.
When interacting with the Aconite choose to "Collect" and then complete the QTE.

Unlocked All Endings
Unlocked all possible endings.
Self-explanatory.
Story Achievements
These are all self-explanatory and unmissable as you progress through the game.

Prologue
Complete prologue.


Chapter One
Complete chapter one.


Chapter Two
Complete chapter two.


Chapter Three
Complete chapter three.


Chapter Four
Complete chapter four.


Chapter Five
Complete chapter five.


Final Chapter
Complete final chapter.

Side Story Achievements
Start Journey
Obtained embroidery cloth and left home.
Unmissable. The first achievement you get.

Hymn Enthusiast
Countless souls lie buried deep in darkness, eternally silent.
There is a singing First Year in the dormitory that you need to talk to three times. You don't have to answer her correctly for this achievement, just talk to her.
The first time is in Chapter 1 on the second floor of the dormitory. The answer for this hymn is:Hymn for Praise (Sanctus)
In Chapter 2 at night after leaving your room she stands in the hallway. The answer for this hymn is:Glorious Anthem (Gloria)
Right at the start of Chapter 3 she stands in the corner by the dormitory stairs. The answer for this hymn is:Lamb's Passage (Agnus Dei)

Sin and repentance
Soul burdened with self-blame, decision to repent brings redemption, sins leave eternal marks.
In Chapter 1 when heading to the chicken coop you have to pick up the Letter next to the Courtyard and deliver it to the Sister in white.
In Chapter 3 during the third night, pick up the herbs of Sister Agnes.
During the fourth night Sister Agnes should be waiting by the tree just outside the Base.

Conscience of amnesty
The abyss of retaliation is purified; the light of conscience illuminates the path of darkness.
In Chapter 3 when getting the metal pieces, talk to the two girls in the left corner.
In Chapter 4 when talking to Kaven about Francesca's execution choose to"Change public opinion".

Hand of Friendship
Aid Martha in extricating herself from her predicament.
In Chapter 3 before picking up the metal interact with the group of girls and choose They went too far.
Then during the second night while hunting with Adeline you need to talk to Helena twice.
In Chapter 5 while heading to the Herbal Room on the Courtyard 2F talk to the group of girls in the lower right corner.

Covenant of Cherishment
Under the starry sky in the flowery woods, an unforgettable vow was sealed.
You need to reach a high Relationship Level by talking to Adeline and Helena during their sections in the Forest at night.
In Chapter 3 during the third night pick up the flower with Adeline.
At the end of Chapter 3 during the last night one chop down a tree in the lower right corner of Forest Northeast and interact with the lake.
At the beginning of Chapter 4 as Adeline chop down a tree to the right of Forest Southeast and interact with the Flower Field.
After reuniting with Mary choose to Ask further.
At the beginning of Chapter 5 choose to"Stay".
Towards the end of Chapter 5 choose to"Go with her".
Completion Achievements
Encyclopedia Achievements:
Fungal Forager
Collect all types of mushrooms from the forest.
Obtainable in Chapter 3. You have access to all of them the night after unlocking the Forest Northeast.
There are five types of mushrooms:
  • Chanterelle
  • Saffron Milk Cap
  • Suede Bolete
  • Bay Bolete
  • Porcino

Recipe Collector
Complete data - Recipe encyclopedia.
Cook each recipe as they become available.
You should get this in Chapter 5 near the beginning.
Prologue: N/A
Chapter 1: N/A
Chapter 2: N/A
Chapter 3:
  • Veggie Soup
Chapter 4:
  • Cooked Onion Salad
  • Krapfen
  • Grilled Fish
Chapter 5:
  • Fried Crayfish

Animal
Complete data - Animal encyclopedia.
You should get this in Chapter 5.
Prologue: N/A
Chapter 1: N/A
Chapter 2: N/A
Chapter 3 (60%):
  • Worms
  • Field mouse
  • Hare
  • Duck
  • Deer
  • Brown throut
  • Rudd
  • Squirell
  • Frog
Chapter 4 (80%):
  • Rainbow Throut
  • Capercaillie
  • Eurasion Lynx
Chapter 5 (100%):
  • Crayfish
  • Lamb of God
  • Owl

Plant
Complete data - Plant encyclopedia.
You should get this in the Final Chapter after completing the Relationship questline.
Prologue: N/A
Chapter 1: N/A
Chapter 2 (8%):
  • Black Wheat
  • Almond Tree
Chapter 3 (65%):
  • Raspberry
  • Redcurrants
  • Gooseberry
  • Chestnut
  • Chanterelle
  • Shrooms
  • Carrot
  • Onion
  • Peppermint
  • Rosemary
  • Thyme
  • Basil
  • Sage
Chapter 4 (95%):
  • Water Celery
  • Turnip
  • Lemongrass
  • Salt
  • Sugar
  • Black Pepper
  • Cosmos
Chapter 5: N/A
Final Chapter (100%):
  • Aconite
For Cosmos and Aconite you need to complete the Relationship questline.

Art Connoisseur
Complete data - Mural encyclopedia.
You should get this in the Final Chapter.
Prologue: N/A
Chapter 1: 8 Entries
Chapter 2: 10 Entries
Chapter 3: N/A
Chapter 4: N/A
Chapter 5: 2 Entries
Final Chapter: 2 Entries

Character
Complete data - Character encyclopedia.
You should get this after doing all of the Side Stories and reaching any ending with credits.
Prologue (19%):
Adeline Müller
Mary Müller
The Müllers
Chapter 1 (35%):
Helena Norman
Claire Schaeffler
Hrotsvitha
Chapter 2 (56%):
Kasper Norman
Eldergard
Chapter 3 (65%):
Kaven Manolis
Katherine Braun
Chapter 4 (72%)
Chapter 5 (86%)
FInal Chapter (100%)

Convent
Complete data - Convent encyclopedia.
You should get this after doing Sister Agnes Side Story and reaching End 3.
Prologue: (3 Entries - complete)
Chapter 1: (3 Entries - complete)
Chapter 2: (1 Entry)
Chapter 2: (4 Entries - complete)
Chapter 3: (2 Entries - complete)
Other: (3 Entries - complete)
For Other you have to complete Sister Agnes Side Story.
Chapter 4: (3 Entries - complete)
Chapter 5: (1 Entry - complete)
Final Chapter: (2 Entries - complete)
For the last entry you have to reach End 3.

Prayer
Collected all the Mini cross.
You should get this at the end of Chapter 4.
There are 57 Mini Crosses in total. Look for the white sparkles and make no mistakes during QTEs and Mini-Games!

Miscellaneous Achievements:
Walker
Walked 8000 steps.
Self-explanatory.

Maniac Walker
Walked 15000 steps.
Self-explanatory.

QTE Expert
Achieve a high success rate of 80% in QTE mini game.
If you make a mistake during a QTE simply reload. There should be an Auto Save before each QTE. You should get this in Chapter 4 after the cross bearing QTE.

Skilled Hunter
Achieve a high success rate of 80% in animal hunting.
You aren’t required to hit the green area during the QTE every time, just catching the animal is enough. You should get this in Chapter 4 after you finish the gathering section with Helena.
Mini Crosses

Prologue (5/57):
The first can be found right behind the house.

The second can be found after leaving home to go into town for the first time.

The next three are obtained by getting a perfect QTE when fetching water at the well.

Chapter 1 (21/57):
The first three this chapter are obtained by getting a perfect QTE when hiding the ring in Adeline's braid.
The next can be found in the upper left corner after leaving the Courtyard.

The next can be found in the lower right corner at the bottom of the Outerwall Border.

Another can be found beneath the pink tree in the middle of the Outerwall Southwest area.

The next three are obtained by completing the box matching Mini-Game without making any mistakes.
Another three are obtained by completing the sliding puzzle Mini-Game in less than two minutes right after.
The next can be obtained by talking to the girl on the second floor of the dormitory and answering her question correctly. The answer is:Hymn for Praise (Sanctus)
The last three are obtained by completing the QTE to get out of the burning cart without losing any hearts.

Chapter 2 (33/57):
The first three this chapter are obtained by completing a box pushing Mini-Game quickly.
The next can be found beneath a large tree between two buildings.

The next can be found in the upper left corner of the green area in the Courtyard.

The next can be found in the upper right corner in the Courtyard area with the many murals.

Another can be found to the right before entering the sewing room.

The next three can be obtained by completing the sliding puzzle Mini-Game with at least three minutes to spare.
The next can be obtained by talking to the girl in the dormitory hallway at night and answering her question correctly. The answer is:Glorious Anthem (Gloria)
The last one can be found in the upper left corner of the field area.


Chapter 3 (50/57):
The first can be obtained by talking to the girl just outside the third floor dormitory and answering her question correctly. Answer:Lamb's Passage (Agnus Dei)
The second can be found in the lower left corner of the first Forest area.

The next three can be obtained by completing the QTE to get the metal pieces from the shelf.
The next three can be obtained by reaching 40 Satiety when cooking.
The next three can be obtained by reaching 50 Satiety when cooking.
The next can be found in the corner of the vegetable garden before talking to Kaven.

The next can be found by chopping down a tree in the Forest North and crossing the water.

Another can be found by chopping down a tree in the Forest Northeast to the right next to a large tree.

The last three can be obtained by reaching 50 Satiety when cooking again.

Chapter 4 (57/57):
The first three are obtained by completing the QTE when bearing the cross.
The next can be found after chopping down a tree in the Forest Southeast to the left.

The last three can be obtained by making the three new recipes when cooking.
16 Comments
雪泥 9 Aug @ 10:52pm 
Glad to hear it’s updated!
Thanks for taking the time to adjust the guide, I’m sure it’ll help a lot of players.
Niko  [author] 9 Aug @ 12:36pm 
Fixed the Mini Cross!
Also figured out and adjusted the revised requirements for the Bad End, End 1 and End 2.
雪泥 9 Aug @ 9:05am 
Hi, thanks so much for your guide! It’s been really helpful.
I just wanted to share a couple of things I noticed while trying to complete all the endings and achievements — maybe they could be useful for future updates to the guide.

1. About END1
When I tried to get END1, I wasn’t able to trigger it by following the part where you choose [Better to flee first].
In my case, I ended up getting END1 by choosing [Kill Katherine] and catching her (same as for END2).

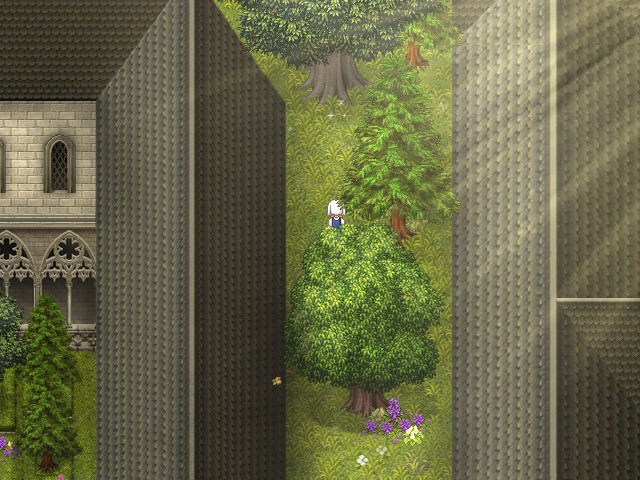
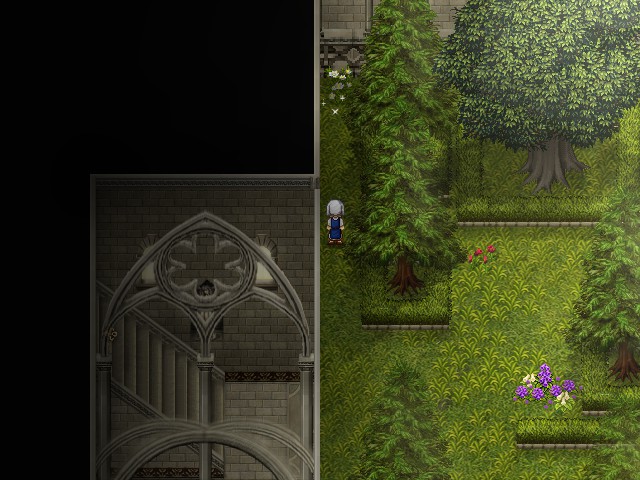
2. About the mini Crosses
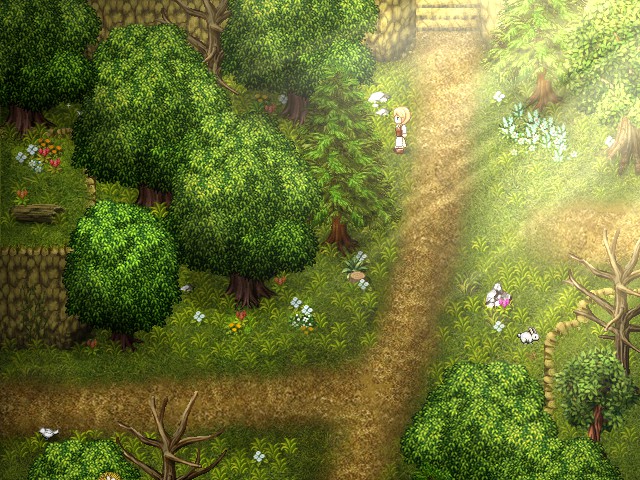
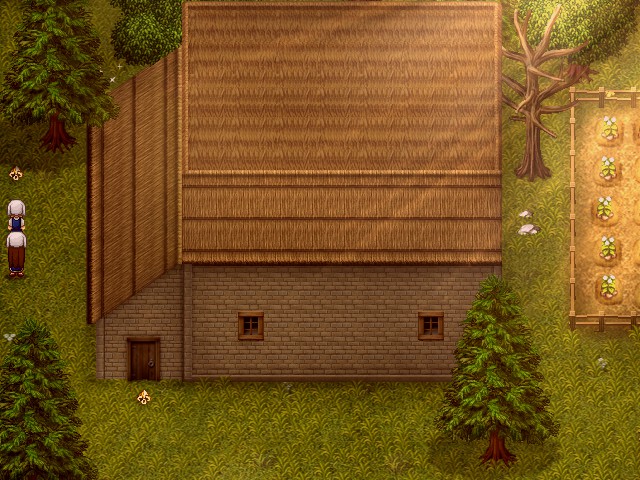
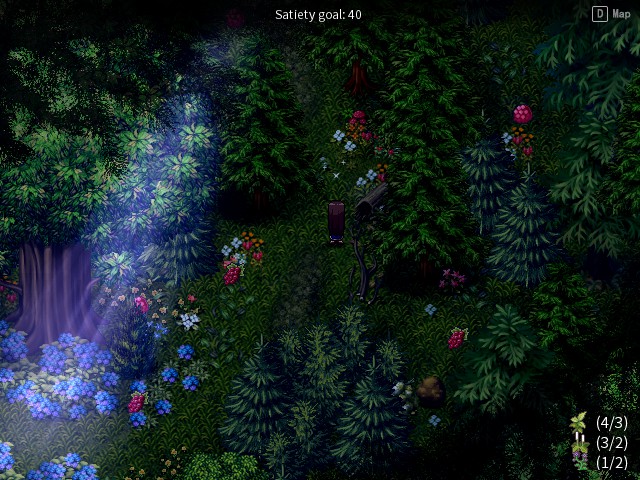
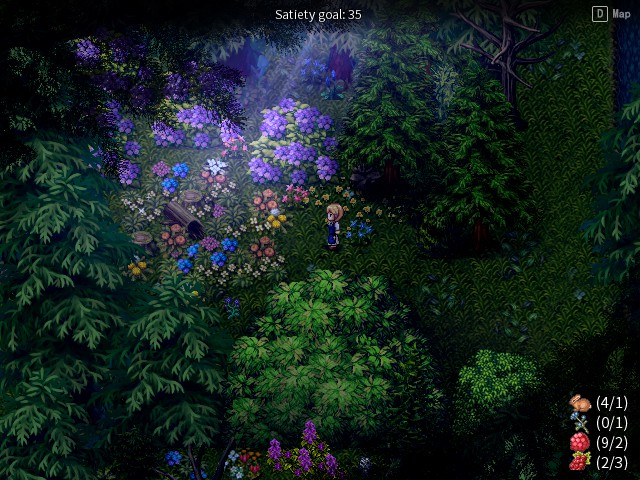
In Chapter 1, I couldn’t find the mini Crosses in the upper left corner of the green area in the Courtyard, since I couldn’t access that area at that time.
After trying several times, I finally managed to get into the green area during Chapter 2 instead.

Hope this helps! Thanks again for putting together such a detailed guide — it’s been a huge help while playing.
Niko  [author] 6 Apr @ 12:35pm 
I don't think you need to get all relationship points, but you definitely do need to go through all relationship events.
SergentInvictus 6 Apr @ 11:29am 
When choosing "Ask Further" near the end of ch4, no significant dialogue is shown. Infact i think it is no different from "Forget it". Is there some prior event i had to trigger for the choice to matter or did the game just bug out? And do you need all relationship points to get endings 3-4 or is there leniency for missing one or two?

Got access to the first 2 endings just need to figure out how to get enough relationship points to get past the other 2.
KimShyuen  [developer] 15 Feb @ 12:02pm 
Great job Niko!!

Thank you so much for putting effort on writing this amazing guide!
(I found some small bugs like: the will power added to the wrong character and fixed it in the newest update!)

Thank you again!
Yan17 12 Feb @ 2:31pm 
Ok, finally got it. Completing the relationship did it.
Thanks again!
Yan17 12 Feb @ 2:14pm 
Well, thanks for bugs, I guess. Managed to get the reversed scene with Helena on the lower end of the wall, but it still resulted in the BE. I had really high Adeline willpower, low Helena willpower and high relationship values (did not complete the quest, though). Both times, the Kill Katherine choices were grayed out. I think it might be bugged?
I am missing four CGs, the first two of Other and three and four of the last chapter (probably for ED1).
At least, I got the 100%.
Niko  [author] 12 Feb @ 11:52am 
You're right, in Chapter 5 one more mural is recorded automatically. Fixed it.
Yan17 12 Feb @ 11:30am 
I think there are actually nine entries in Chapter 1 (you mention them all) and nine in the second one. There is either an additional one in Chapter 4 or 5 judging from my old save files.
Again, thanks for the guide, you are saving me a lot of time.