Etrian Odyssey HD

Etrian Odyssey HD

Not enough ratings
Wyrm, Dragon and Drake boss item drops 100% chance with fixed RNG (Expert difficulty)
By Reiko
Team building and battle actions guide which will drop the Ice Scale, Fire Scale and Volt Scale item drops with 100% chance while playing on Expert difficulty.
   
Award
Favorite
Favorited
Unfavorite
Introduction
In this guide I describe the team and actions I used against the Drake, Dragon and Wyrm bosses in order to guarantee that you get the Ice Scale, Volt Scale and Fire Scale drops respectively (10% base chance) while playing on Expert difficulty.

In Etrian Odyssey HD, RNG (short for random number generator) is initialized with a fixed seed at the time you load your saved game.

This means if you quick save out in the field then reload your save file, then the first random encounter will always be against the same enemy group, and if you take the exact same actions in battle, all outcomes will also be the exact same, including damage numbers, success rate of status effects and the item drops.

This also means that if you load a quick save right in front of a boss and battle it the same way every time and didn't get the drop you want, then by reloading and doing the same thing again, you will never get the drop because the same actions will lead to the same outcome. If you have spent any time saving and reloading doing multiple attempts on a boss, you will have already noticed this yourself - damage numbers and everything else are noticeably always exactly the same.

To change the outcome you need to do something different, such as: do some random battles first (without saving and reloading), carry out the battle in a different way every time, take varying numbers of turns etc in order for the outcome (item drop) to be different.

However, this also means that if you know the actions that will get you the rare drop, then performing those actions every time will get you the rare drop every time.

In this guide I will describe one possible set of conditions (team and battle actions) that will 100% guarantee you get the rare drops for all 3 dragon super bosses if you perform exactly the specific set of actions.

The one team described in the guide is used to obtain all 3 drops.
Credits
This guide is based on the guide at the below link in Japanese but with some adjustments. I will also flesh out the details some more, as I found the Japanese guide is vague in some parts such as the skill build.

https://w.atwiki.jp/sekaiju_maze/pages/1217.html

I found that it didn't work for me exactly as it is described at that page and I had to make changes, but it was very close. I will give you all the information possible for my set up in this guide, as well as how you can (slightly) tweak it to make it work for you if mine doesn't work exactly for you.
Why would I want these drops?
Firstly, if you're aiming to 100% complete the Item Compendium, you'll need the drops.

If you sell all 3 drops to Shilleka's Goods, you'll be able to buy the Dragonbane for 250,000en, a sword which is the strongest weapon in the game (ATK+250, All Stats+20). It can be equipped by characters of any class, but due to skills requiring the use of the class' preferred weapon (e.g. Survivalist's Multihit requires a bow), the weapon is best used on a Landsknecht, Dark Hunter or Protector since they use swords, but could work for other classes which don't have fixed weapon skills like Troubadour or Alchemist.
Required Team - Classes, Equipment and Skills
Before introducing the team, it is important to note that you only need to ensure that the entire battle with the boss plays out exactly the same as how mine did. This means that both your characters and the boss need to perform the same actions, and also that the boss dies to the same final action as it occurs in my instructions described in the next sections.

This means defensive stats which don't affect your damage dealt are irrelevant. If your damage numbers are close enough to mine with slightly different equipment, then what you have may still work fine.

Of further note, based on what I read online, in EO1 the TEC stat affects skill damage for all classes. Only in later games did skills scale based on STR or other stats. STR still raises a character's ATK stat however.

As an example, while testing I tried swapping out the Blood Gage on my Survivalist (+8 DEF, +3 STR) for a Town Medal (+100 HP, +50 TP) while battling the Dragon (Volt boss) and the damage was close enough with only 3 STR difference that the battle played out the same and I still got the drop.

So either match the equips if you have them available, or just get your stats close enough and give the bosses a try anyway if you don't. Or wait til later when you have the same equips before attempting, it is up to you.

Character Level
All characters at level 70. Retirement is not required.

I have also tested with the same team being all level 70, then retired, then each character recreated as the same class and raised to level 70 again and the strategy still works to get the item drop. So if you have retired characters, they are still fine to use.

Classes, Equipment and Formation
Here is the team I used along with their equipment. Please note the party placement positions are important so you should position the team the same way I did.

Placement
Class
Weapon
Armor Slot 1
Armor Slot 2
Armor Slot 3
Front row left
Protector
Duergar
Holy Armor
Holy Aspis
Dyed Boot
Front row right
Troubadour
Arc Drawer
Fairy Mail
King Aspis
Dyed Boot
Back row left
Survivalist
Arc Drawer
Sylpheed
Blood Gage
Speed Boot
Back row middle
Medic
Warhammer
Angel Robe
Angel Helm
Fur Boot
Back row right
Alchemist
Sage Wand
Mobius Alb
Athanor
Fur Boot

Skill Builds
Here are the required skill builds for each character. Remaining points can be spent as you wish, unless specified.

Protector
Skill
Level
Notes
Shield Mastery
10
Required for Smite.
DEF Up
3 or higher
Required for Fortify.
Fortify
5 or higher
Required for Smite.
TP Up
3 or higher
Required for elemental Wall skills.
Fire Wall
5
To nullify fire damage. Higher is also fine.
Ice Wall
5
To nullify ice damage. Higher is also fine.
Volt Wall
5
To nullify volt damage. Higher is also fine.
Smite
10
Damage skill.

10+3+5+3+5+5+5+10 = 46 SP spent with 36 SP remaining.

Troubadour
Skill
Level
Notes
Songs
10
Increase speed for buffs to cast first in a turn.
Bravery
10
Party buff to increase STR by +40% to raise your party's damage to the correct amount.
Erasure
1 (or 3)
Required to remove beneficial buffs from Drake (Ice dragon).
Only need 1, but if you already have 3 that is also fine.

10+10+1 = 21 SP spent with 51 SP remaining.

During the boss battles you'll have downtime to apply a 2nd buff, so pick what suits you (Peace Ballad is a good one).

Survivalist
Skill
Level
Notes
Bows
10
Required for Apollon.
Multihit
10
Damage skill.
Apollon
10
Damage skill.

10+10+10 = 30 SP spent with 42 SP remaining.

Medic
Skill
Level
Notes
Healer
3 or higher
Required for Salve.
Cure
3 or higher
Required for Salve.
Salve
3 or higher
Required for Immunize.
Immunize
10
Party buff to reduce all damage taken by 60% before defense calculation.
ATK Up
10 (or 0)
Optional. Increase ATK by +200%.
Most players get this to use Caduceus and put Medic on the front row. Caduceus not required for this guide, and our Medic will be on the back row for this guide.
Also tested with ATK Up level 0 which works but you may have to adjust the skills you use (explained later).

3+3+3+10+10 = 29 SP spent with 43 SP remaining.

Alchemist
Skill
Level
Notes
Fire Up
5
Required for Fire and Flame.
Higher than 5 might still work but you may have to adjust the skills you use (untested, explained later).
Fire
3 (or up to 5, but not higher)
Required for Flame.
Flame
10
Damage skill.
Ice Up
5
Required for Ice and Freeze.
Higher than 5 might still work but you may have to adjust the skills you use (untested, explained later).
Ice
3 (or up to 5, but not higher)
Required for Freeze.
Freeze
10
Damage skill.
TP Up
3 or higher
Required for Scavenge.
Scavenge
10
Increase drop rates by +30%.
Lower or 0 may work but I didn't test without it.

5+3+10+5+3+10+3+10 = 49 SP spent with 23 SP remaining.

Summary
If you are using a team you found recommended by guides online, you probably already have most or all of the above characters at level 70 and already with the above skills. Equips are all end game equipment, so you don't need to use/buy or hold onto anything weak or obscure.

If you are missing one of the classes, such as if you opted to build a Landsknecht instead of a Protector or Troubadour as I did for my starting team, then I absolutely recommend creating the missing class, as the end game bosses (including the 3 in this guide) are almost impossible without them. Landsknecht is still great at random encounters and against all bosses besides the final ones.

Using the Treefrogs EXP farming method, you can level a single character from 1 to 70 in under 3 hours if you have it in a party solo by itself. Troubadour also has a skill called Divinity to increase exp gained by 30% at level 10 which can help if you're missing the Troubadour.
My Exact team for reference/transparency
Stats
At level 70 without retirement wearing the previous equipment, here are the stats for each of my characters. Differences in HP Up, DEF Up and TP Up skills level may make them slightly different to yours (again, these don't affect damage dealt so don't matter).

All characters had some unused SP except for my Alchemist, as I couldn't decide how to spend the last few points, then ultimately just cleared the game without spending them.

Class
Level
STR
TEC
VIT
AGI
LUC
ATK
DEF
HP
TP
Protector
70
96
68
75
77
75
296
171
597
226
Troubadour
70
65
76
58
85
82
285
127
504
210
Survivalist
70
83
76
60
120
97
303
127
528
202
Medic
70
53
75
53
74
82
184
115
464
270
Alchemist
70
46
122
46
67
68
196
94
355
307

Protector

Troubadour

Survivalist

Medic

Alchemist
Some notes about RNG
This section contains some (maybe poor) explanations about what's going on. If you have matched the required equipment and also have the required skills and don't feel like reading, you can probably skip this section and come back to it for an understanding only if something goes wrong.

I have read a little info about the inner workings online above the RNG in this game, but I don't understand it well enough to be able to guide you on how to calculate the actions to get a specific drop for any given boss or for your particular team or any other team, so I'm unable to help with that.

Note that in the guide, if your damage is too low and the boss doesn't die when it should, I will suggest swapping Alchemist's Ice for Freeze or Fire for Flame to help you make up for it. Both spells consume the same amount of random numbers and will not change the sequence/outcome of the battle, only your total damage dealt will differ.

Some notes that may be helpful to you to understand what's happening in the guide:
  • The random number seed is initialized at the time you load your save file. So you should quick save 1 step away from the boss and then reload the game, then step onto and battle the boss without taking a detour in order to ensure consistent results. Think of it like spinning a Wheel of Fortune but you can always determine the outcome because you know the starting position.
  • Functions in the game which have randomness will consume random numbers in the random number generator. For example, when using a skill, there is randomness in the damage numbers as well as any secondary effects like status effects that may be applied.
  • Normal attacks can consume a varying amount of random numbers (for example, if you miss, less random numbers are consumed than if you hit, because there would be an additional roll on the damage number and also whether it's a critical hit, etc)
  • Skills which deal a multiple number of separate hits will also consume a multiple number of random numbers.
  • The enemy taking varying actions will consume varying random numbers.
  • Functions in the game that do not have randomness will not consume random numbers. This includes defending, as well as using healing spells and buffs, as these always heal/buff a fixed amount with no randomness.
To add to the last point above, this means if you are following my guide for the actions, using Defend in place of an elemental wall, heal or buff would not affect the randomness, and therefore you would still get the item drop as the outcome is unchanged, so long as there is not a catastrophic change to the battle that prevents you from carrying out the actions normally, such as causing party members to die because you didn't heal.

However, if you used something which has randomness like a normal attack in place of where the guide says to heal or defend, this would move the randomness along and thus change the outcome, which could mean the boss performs a different action so the battle occurs differently and/or you may not get the item drop. This is why I suggest adjusting damage with the Alchemists spells if required instead of changing anything else in the sequence.

Other things I read which aren't as relevant to the guide:
  • Random numbers are also consumed each turn based on how many enemies there are in the battle.
  • A fixed number of random numbers are also consumed at the end of every turn.
Wyrm Boss - Fire Scale
Quick Save the game standing one square behind the boss, then quit to the main menu and choose Continue to load your quick save. Once you reload, take 1 step onto the boss to initiate the battle without taking any detours. Attacking from behind will give you a preemptive attack at the start of the battle and skip the boss' first turn. This is a requirement for the strategy to work.


Battle steps — Wyrm
The battle must go exactly as below(*) to ensure you get the drop. If you perform the actions as per the table, then the boss actions will also follow the table.

(Note: For turn 5, "Different buff / Defend" for Troubadour refers to using any other buff except for Bravery which is used on most other turns, or you can simply Defend. The boss' Howling only wipes off the party's Bravery, so whatever buff you choose will be kept for the remainder of the battle.)

Turn
Boss
Protector
Troubadour
Survivalist
Medic
Alchemist
1
(First Strike)
Smite
Bravery
Apollon
Immunize
Freeze
2
Howling
Smite
Bravery
Multihit
Attack
Freeze
3
Howling
Smite
Bravery
Multihit
Attack
Freeze
4
Howling
Smite
Bravery
Apollon
Attack
Freeze
5
Fire Breath
Fire Wall
Different buff / Defend
Multihit
Immunize
Freeze
6
Howling
Smite
Bravery
Multihit
Attack
Freeze
7
Fire Breath
Fire Wall
Attack
Apollon
Attack
Freeze
8
Assault 🡒 Protector
Smite
Attack
Multihit
Salve / Salve II
Freeze
9
Fire Breath
Fire Wall
Attack
Multihit
Immunize
Ice (*)
10
Howling
Smite
Bravery
Apollon
Attack
Ice
11
Howling
Defend
Bravery
Defend
Defend
Ice
12
Tailwhip
Defend
Defend
Defend
Salve / Salve II
Defend
13
Fire Breath
Fire Wall
Defend
Defend
Immunize
Defend
14
Tailwhip
Defend
Defend
Defend
Salve / Salve II
Defend
15
Raging Strike
Defend
Defend
Defend
Defend
Freeze

* - If you finish the above steps and the boss is still alive with a slither of HP after turn 15, and you're 100% sure you did everything correct and the boss also followed everything above, then change Alchemist's Ice on turn 9 to Freeze to increase your total damage dealt to help you finish off the boss in turn 15 as per the steps.

If the boss acted differently to the table above you may have made a mistake.

One reason your damage could be lower may be because of different equipment. That should do it, but if the boss is somehow still alive and again you're 100% sure everything is correct and the boss also followed everything above, you can try changing Ice to Freeze on the subsequent turns (10, 11) as well. This gives you a buffer to make up for the damage if required.

If your damage is somehow higher than mine (e.g. due to using accessories that add more TEC) and it caused the boss to die earlier than it should, and you are also certain that everything else otherwise went as planned, try using Ice instead of Freeze on turn 8 to lower your overall damage.

Video — Wyrm
Characters shown at the start of the video.
Battle starts at 0:55.

Dragon Boss - Volt Scale
Quick Save the game standing one square either in front of, or beside the boss, then quit to the main menu and choose Continue to load your quick save. Once you reload, take 1 step onto the boss to initiate the battle without taking any detours.


Battle steps — Dragon
The battle must go exactly as below(*) to ensure you get the drop. If you perform the actions as per the table, then the boss actions will also follow the table.

In the final turn, Apollon will fall and defeat the boss at the beginning of the turn, so you can simply defend.

(Side note: Medic's action on turn 9 and 10 are swapped compared to the Japanese guide I referenced, this was one of the issues I found.)

Turn
Boss
Protector
Troubadour
Survivalist
Medic
Alchemist
1
Volt Breath
Volt Wall
Any buff except Bravery
Apollon
Immunize
Flame
2
Corrupt Howl
Smite
Bravery
Multihit
Immunize
Flame
3
Attack 🡒 Medic
Smite
Any buff except Bravery
Multihit
Attack
Flame
4
Corrupt Howl
Smite
Bravery
Apollon
Immunize
Flame
5
Volt Breath
Volt Wall
Any buff except Bravery
Multihit
Attack
Flame
6
Corrupt Howl
Smite
Bravery
Multihit
Immunize
Flame
7
Volt Breath
Volt Wall
Any buff except Bravery
Apollon
Attack
Flame
8
Corrupt Howl
Smite
Bravery
Multihit
Immunize
Flame
9
Attack 🡒 Alchemist
Smite
Any buff except Bravery
Multihit
Attack
Fire (*)
10
Volt Breath
Volt Wall
Attack
Apollon
Salve / Salve II
Fire
11
Corrupt Howl
Defend
Bravery
Defend
Immunize
Defend
12
(Defeated before acting)
Defend
Defend
Defend
Defend
Defend

* - If you finish the above steps and the boss is still alive with a slither of HP after being hit by Apollon on turn 12, and you're 100% sure you did everything correct and the boss also followed everything above, then change Alchemist's Fire on turn 9 to Flame to increase your total damage dealt to help you finish off the boss in turn 12 as per the steps.

If the boss acted differently to the table above you may have made a mistake.

One reason your damage could be lower may be because of different equipment. That should do it, but if the boss is somehow still alive and again you're 100% sure everything is correct and the boss also followed everything above, you can try changing Fire to Flame on turn 10 as well. This gives you a buffer to make up for the damage if required.

If your damage is somehow higher than mine (e.g. due to using accessories that add more TEC) and it caused the boss to die earlier than it should, and you are also certain that everything else otherwise went as planned, try using Fire instead of Flame on turn 8 to lower your overall damage.

Video — Dragon
Characters shown at the start of the video.
Battle starts at 0:59.

Drake Boss - Ice Scale
Quick Save the game standing one square either in front of, or beside the boss, then quit to the main menu and choose Continue to load your quick save. Once you reload, take 1 step onto the boss to initiate the battle without taking any detours.


Battle steps — Drake
The battle must go exactly as below(*) to ensure you get the drop. If you perform the actions as per the table, then the boss actions will also follow the table.

(Note 1: For turn 4, "Different buff / Defend" for Troubadour refers to having time to apply a 2nd buff here, so you can use something other than Bravery, or you can simply Defend.)

(Note 2: After the boss uses Attack 🡒 Medic on turn 4, the party never takes damage again, so for Medic you could replace all Immunize with Defend, other than the first one on turn 1.)

Turn
Boss
Protector
Troubadour
Survivalist
Medic
Alchemist
1
Ice Breath
Ice Wall
Bravery
Apollon
Immunize
Flame
2
Iceblock
Smite
Erasure
Multihit
Attack
Flame
3
Glacial Regen
Smite
Erasure
Multihit
Attack
Flame
4
Attack 🡒 Medic
Smite
Different buff / Defend
Apollon
Salve / Salve II
Flame
5
Ice Breath
Ice Wall
Attack
Multihit
Immunize
Flame
6
Absolute Zero
Ice Wall
Attack
Multihit
Attack
Flame
7
Iceblock
Smite
Erasure
Apollon
Attack
Flame
8
Glacial Regen
Smite
Erasure
Multihit
Attack
Fire / Flame († see note)
9
Ice Breath
Ice Wall
Attack
Multihit
Immunize
Fire (*)
10
Absolute Zero
Ice Wall
Attack
Apollon
Attack
Fire
11
Iceblock
Smite
Erasure
Multihit
Attack
Fire
12
Glacial Regen
Defend
Erasure
Defend
Defend
Defend
13
Ice Breath
Ice Wall
Defend
Defend
Immunize
Defend
14
Absolute Zero
Ice Wall
Defend
Defend
Defend
Defend
15
Iceblock
Defend
Erasure
Defend
Defend
Defend
16
Iceblock
Defend
Erasure
Defend
Attack
Flame

† - If your Medic has ATK Up level 10, you should use Fire here or else your total damage will be too high and the boss will die early. Otherwise, if your Medic has ATK Up level 0, you will need to use Flame to ensure the boss dies at the right time. Experiment if necessary.

* - If you used Flame on turn 8 as per above and finish the above steps and the boss is still alive with a slither of HP after turn 16, and you're 100% sure you did everything correct and the boss also followed everything above, then change Alchemist's Fire on turn 9 to Flame to increase your total damage dealt even further to help you finish off the boss in turn 16 as per the steps.

If the boss acted differently to the table above you may have made a mistake.

One reason your damage could be lower may be because of different equipment. That should do it, but if the boss is somehow still alive and again you're 100% sure everything is correct and the boss also followed everything above, you can try changing Fire to Flame on the subsequent turns (10, 11) as well. This gives you a buffer to make up for the damage if required.

If your damage is somehow higher than mine (e.g. due to using accessories that add more TEC) and it caused the boss to die earlier than it should, and you are also certain that everything else otherwise went as planned, try using Fire instead of Flame on turn 8 as per point above marked with † (and turn 7 if required) to lower your overall damage.

Video — Drake
Characters shown at the start of the video.
Battle starts at 0:49.

The End
Have fun with the weapon if you managed to get all the drops.

2 Comments
MushaConvoy 6 Aug @ 4:30pm 
Worked perfectly for me. I had to fire/ice one step earlier as I had Fire/Ice Up at 8 and didn't want to respec, so that adjustment was great.

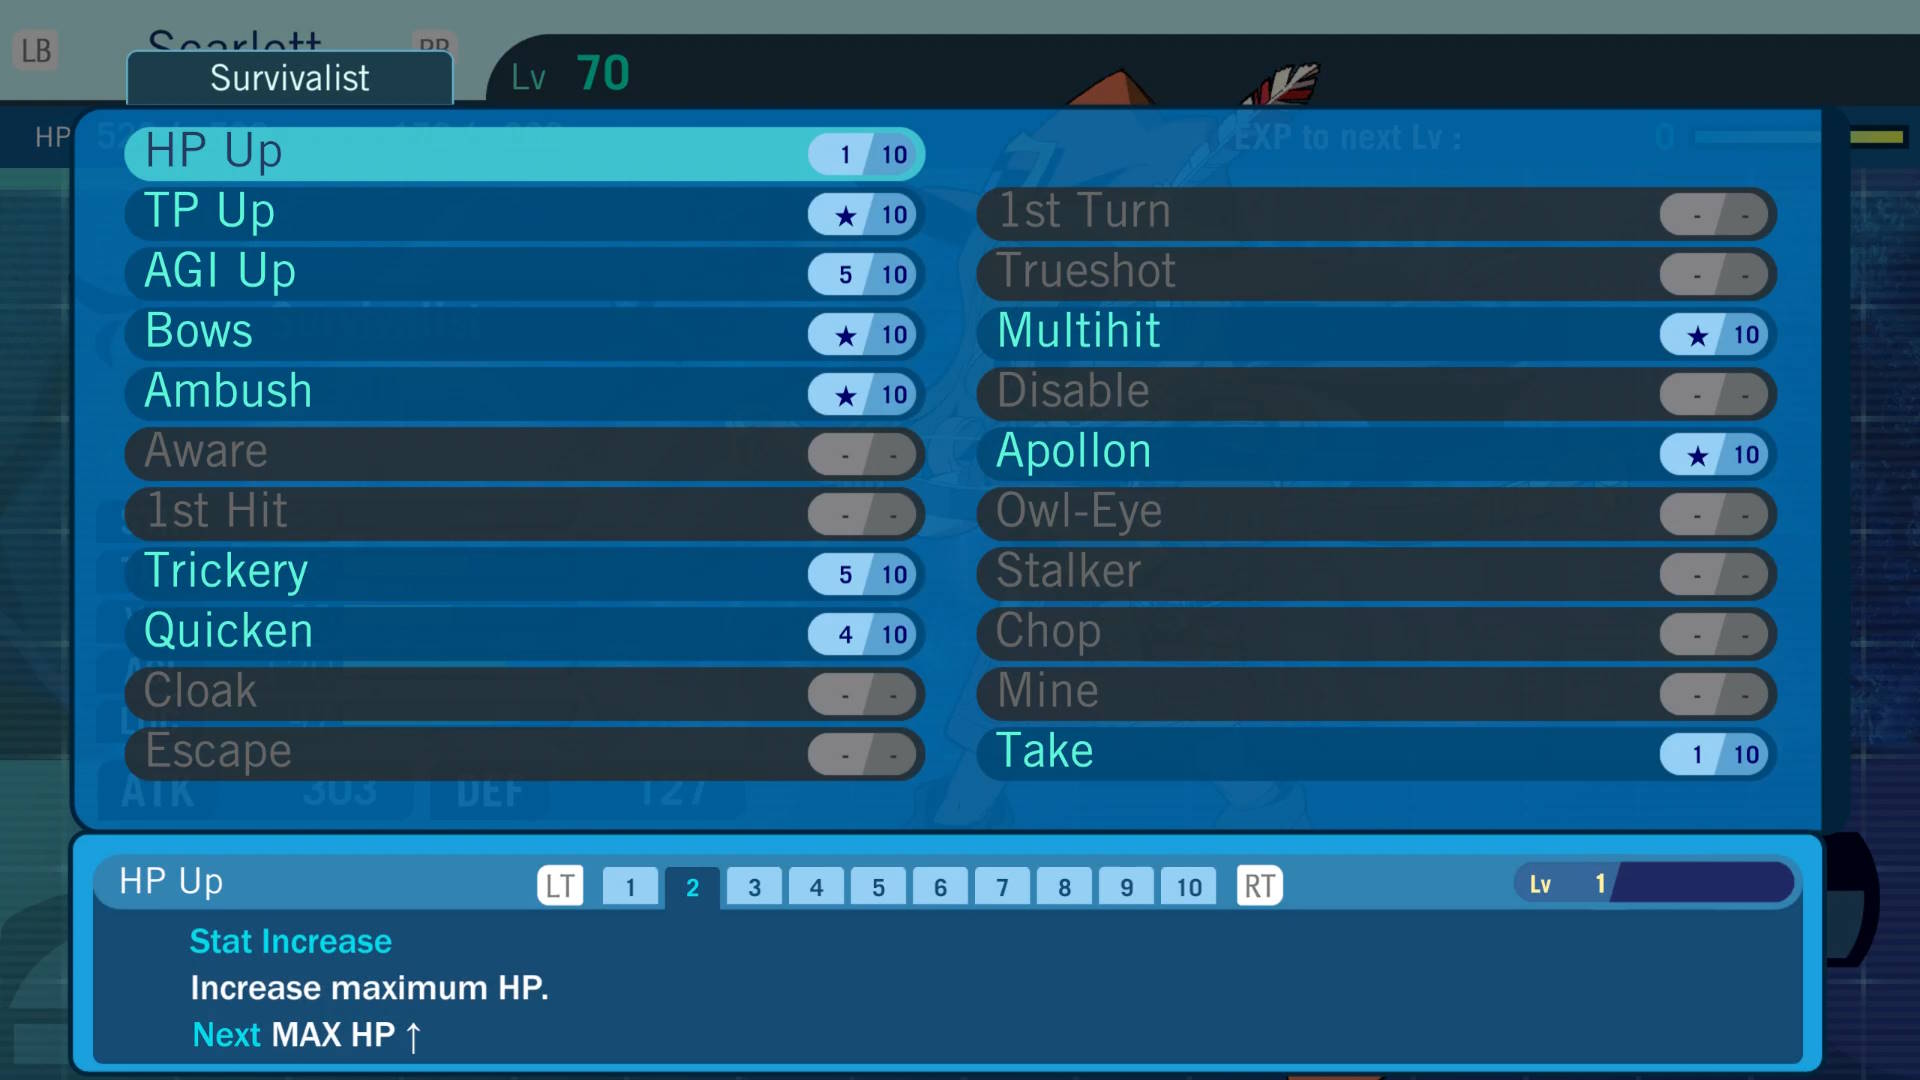
One thing to note, (and you did mention it but I missed it), but for the first two I failed on my first attempt because I got into position, saved game, then attacked. The round played out differently and I didn't get the drop, but when I reloaded the game it played out exactly as you have here. The trick is to reload the game so the RNG is reset before attempting the battle.
Eduard 21 Jul @ 7:32am 
thank you so much for this guide. it worked. got the volt scale on my first try, the fire scale on my second try and the ice scale on my third try.

regarding my failures...

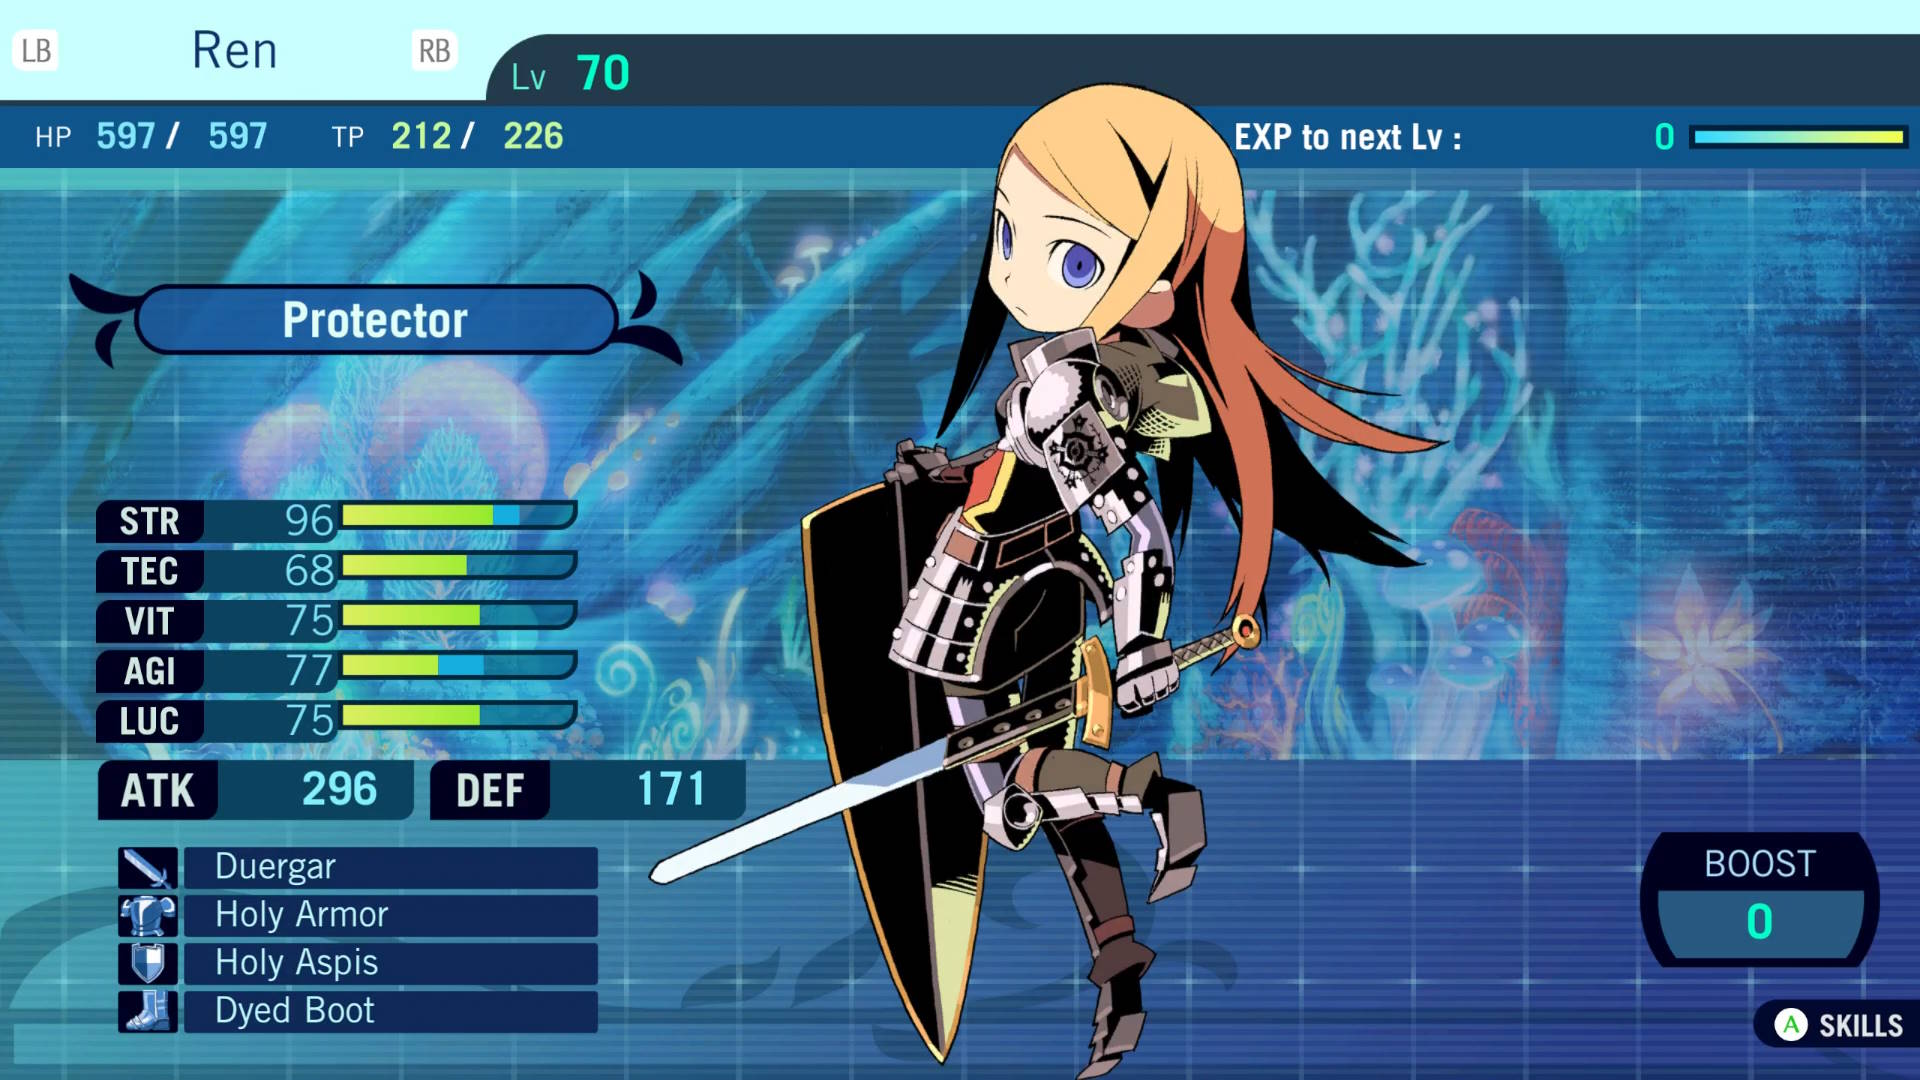
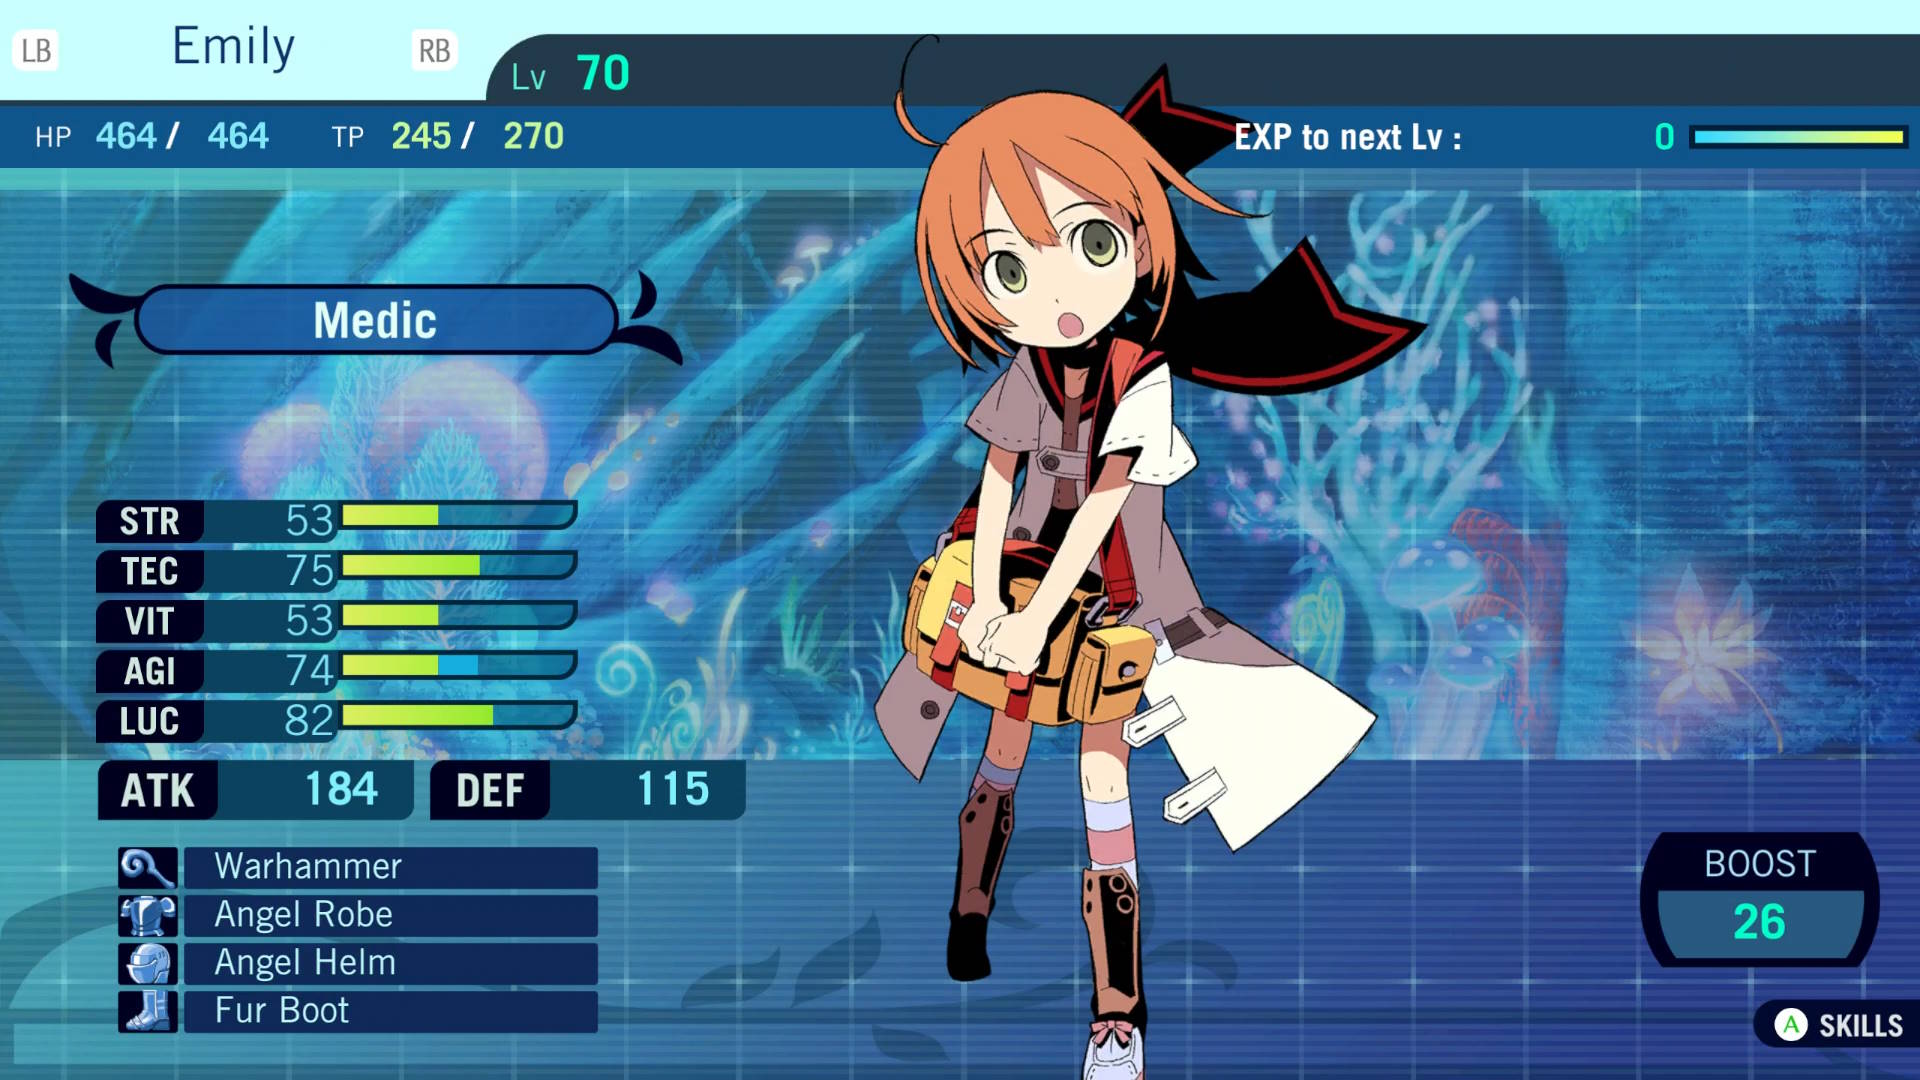
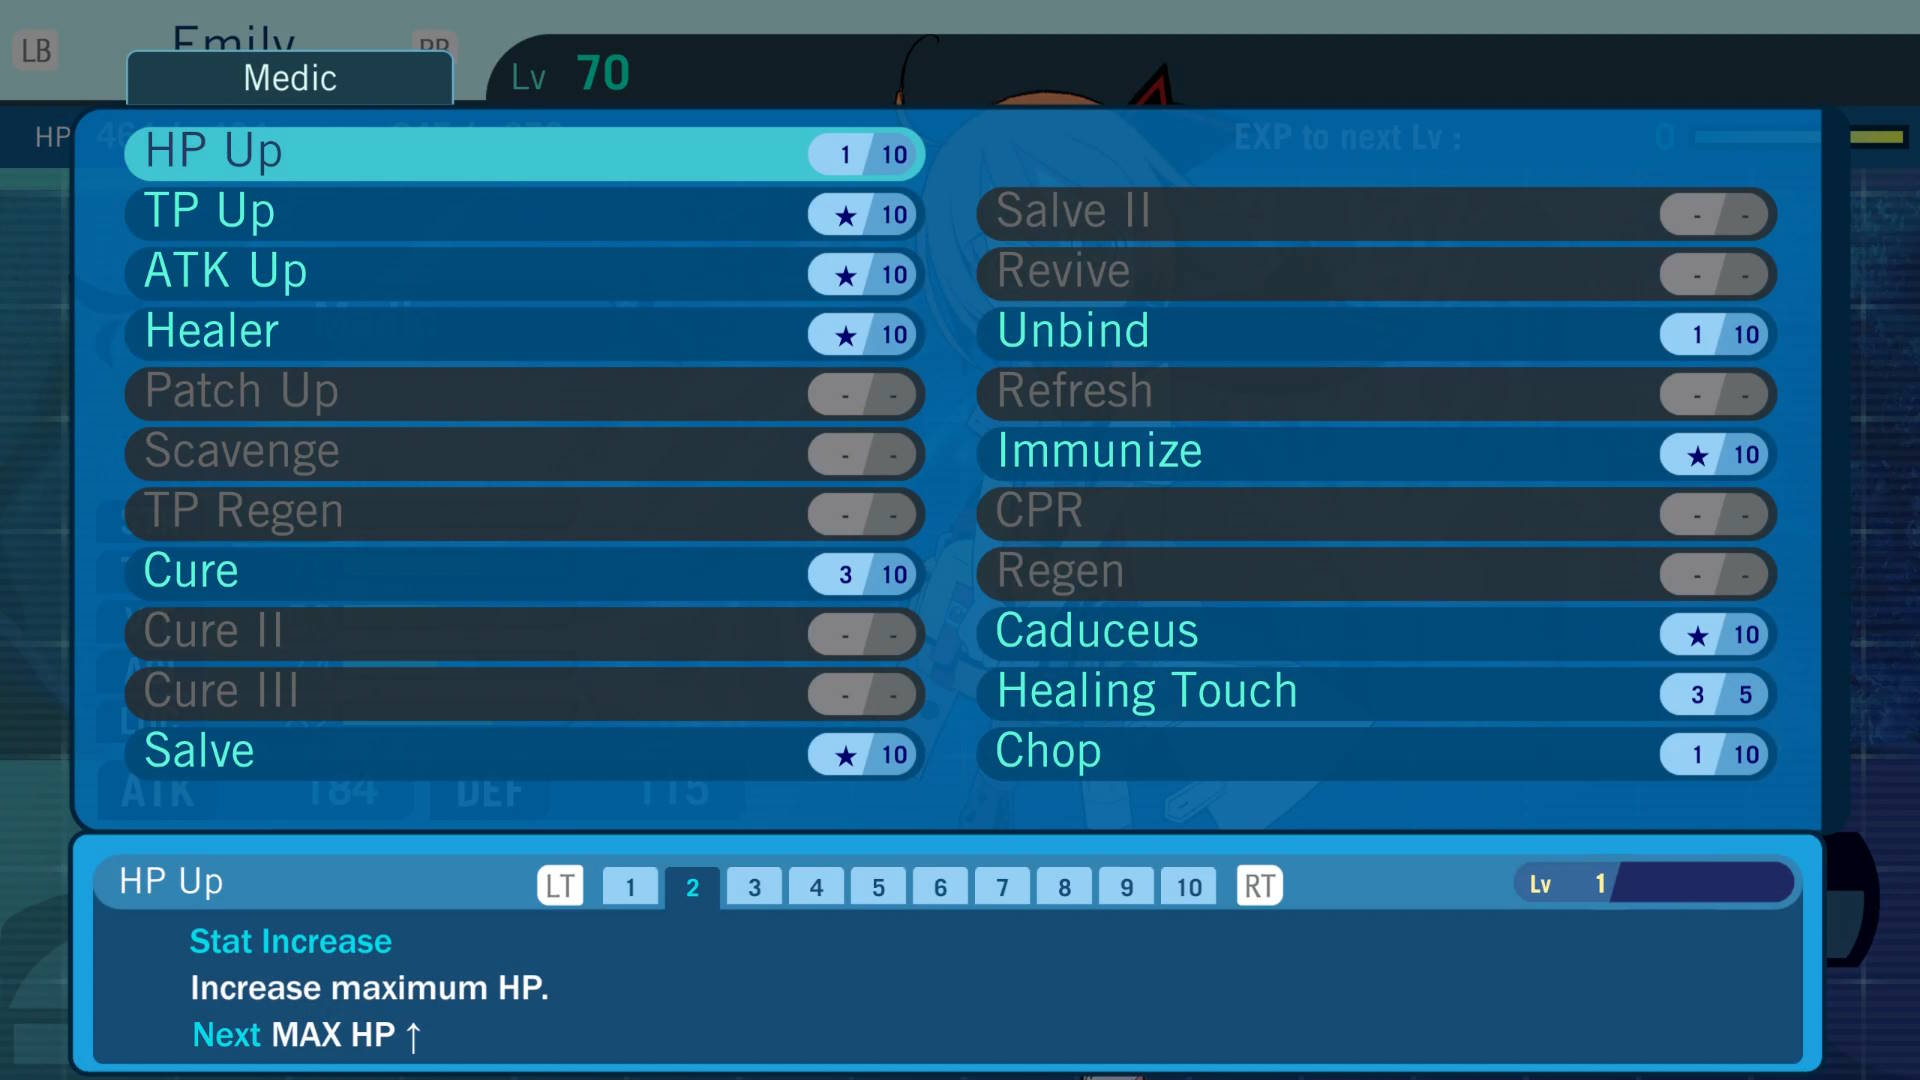
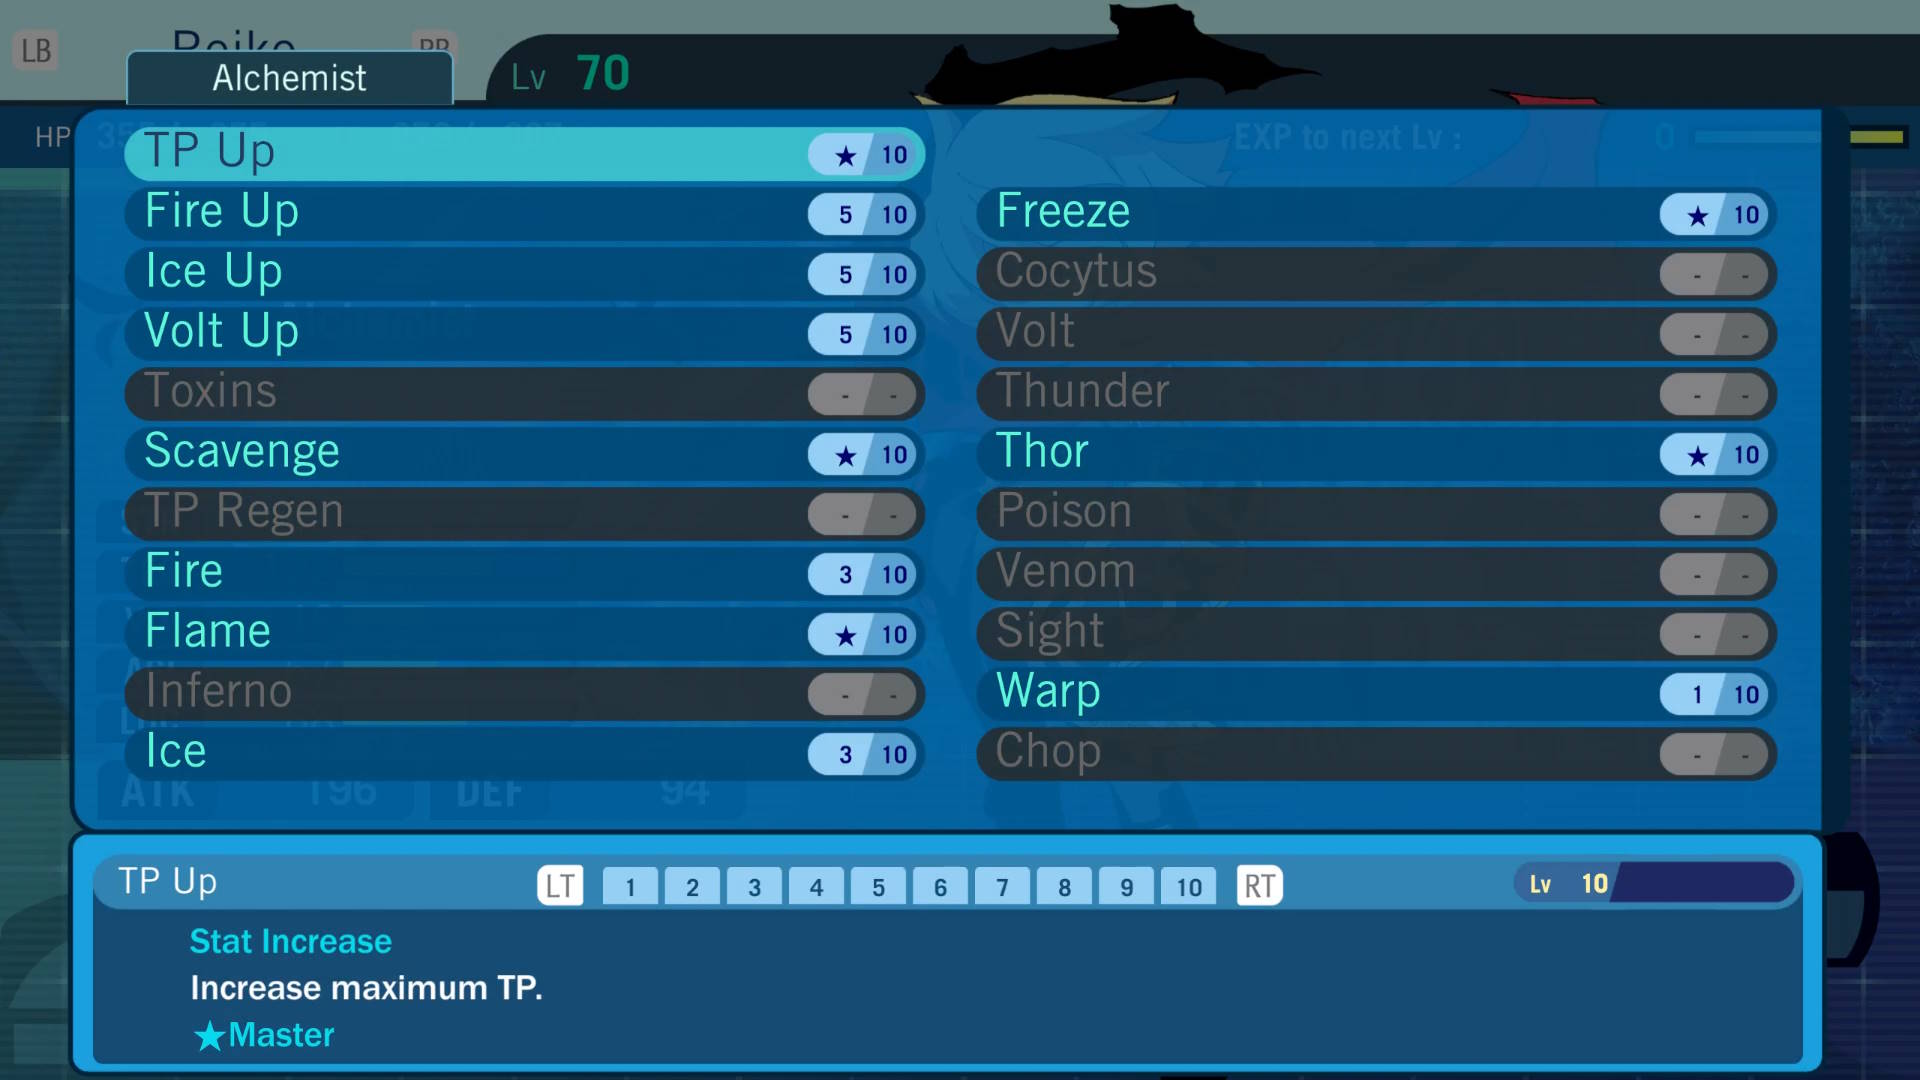
... on the wyrm: I used salve 2 on round 8 instead of salve 1. this may caused that wyrms howl on round 11 landed confusion on my protector and therefore I couldnt finish the run. i switched to salve 1 afterwards and won.

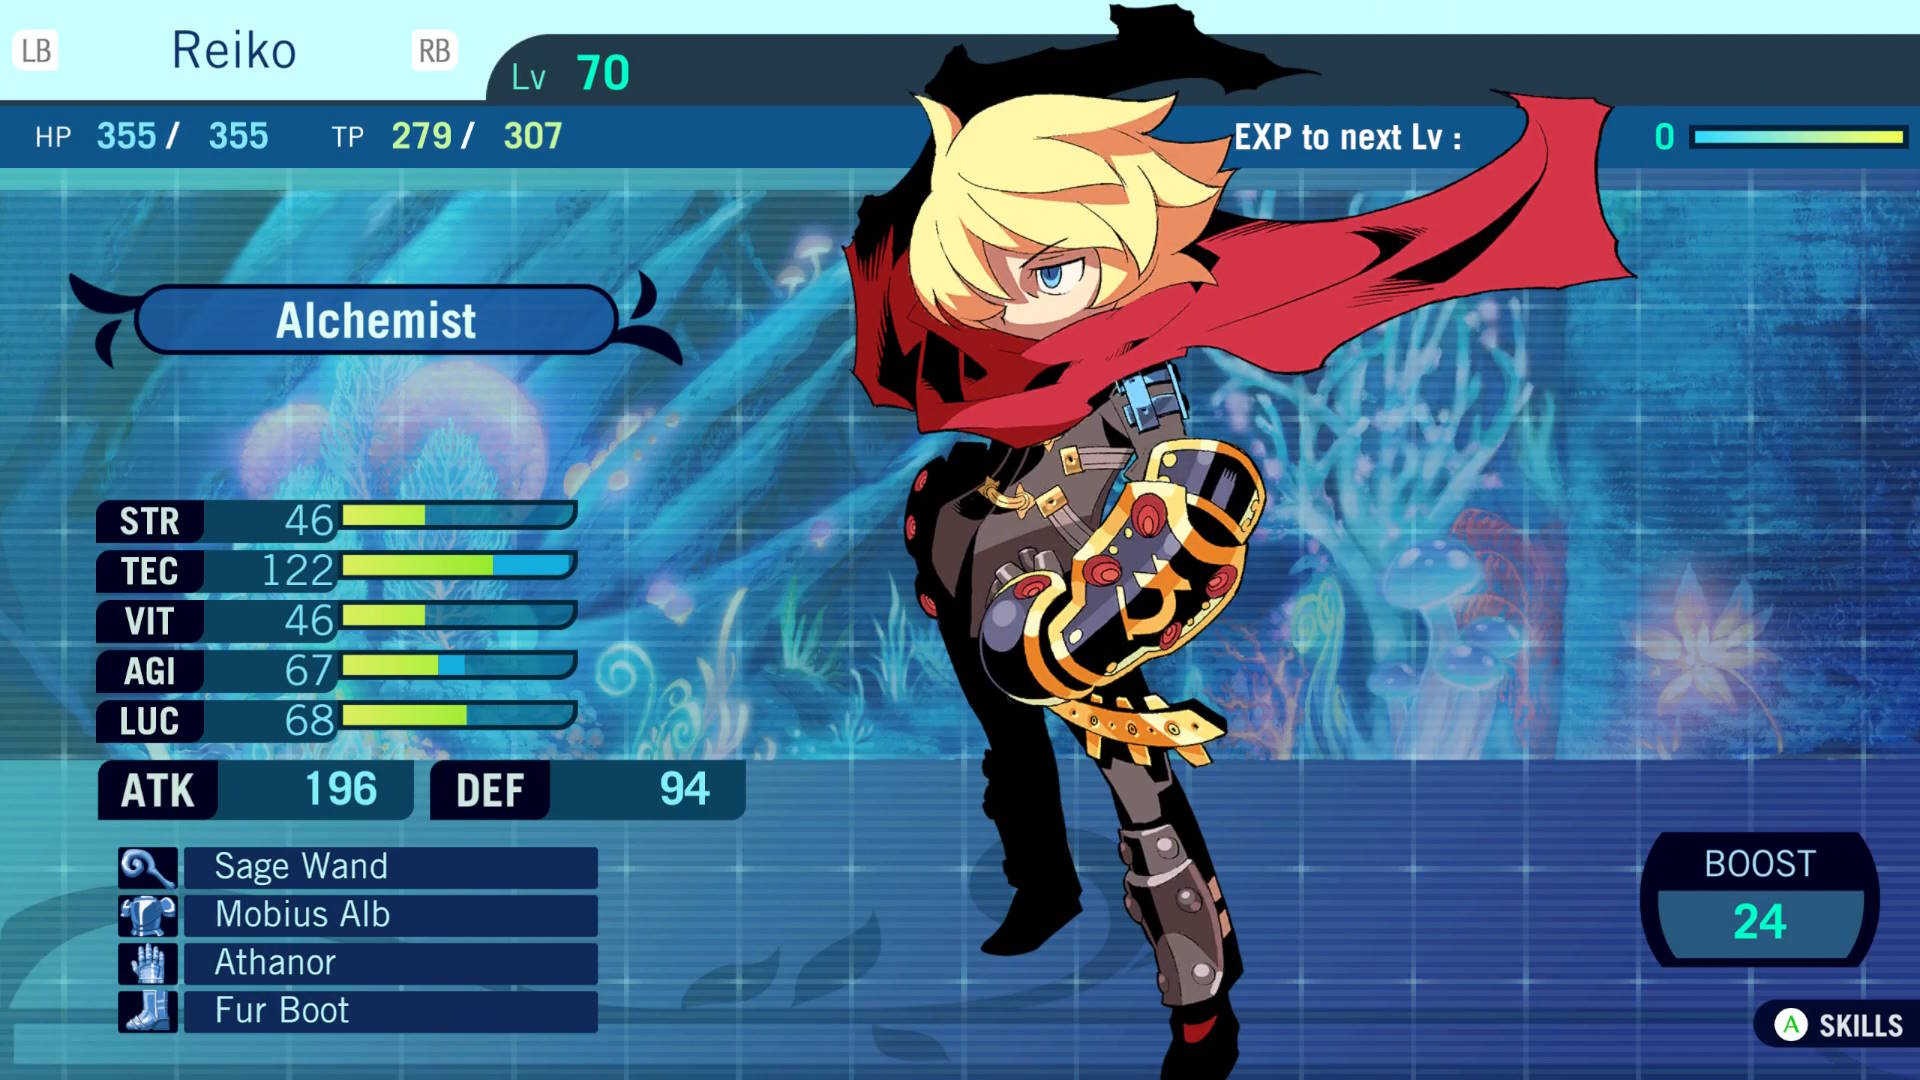
... on drake: in my first attempt I managed to kill him on round 12, so I reduced my alchemists damage output on round 8 and used fire instead. for some reason I fu**ed up my second run, but managed to win on third and final attempt.

I put this information out there just in case... it may be useful for sombody else.