Kingdom Rush 5: Alliance TD

Kingdom Rush 5: Alliance TD

27 ratings
Kingdom Rush 5 Tower Digest
By Pielord
Since the Encyclopedia is no more, i will try to dissect the towers in the game. I will describe them in general, their possible side effects, their strengths and their weaknesess.
2
2
   
Award
Favorite
Favorited
Unfavorite
Intro
With a new game comes new towers and considering how far KR has come, the towers in this game surprise in how different they are compared to past games. This is why i took it upon myself to play with the towers extensively in order to check their unique quirks, side effects and how effective their abilities are when properly deployed. This is to help many players who probably will have a lot of problems in later stages of the game since i will say, from my perspective, this game is a bit hard.
Royal Archers
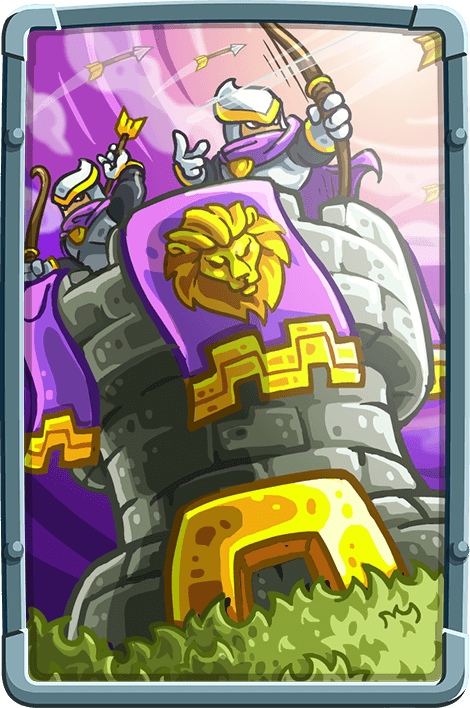
The first ranged tower you get, and definetly the most well rounded in the game. Decent attack speed, not horribly expensive, good damage and good range. This can effectively become your bread and butter for a good time until you go for more niche ranged towers like the Ballista or the Dune Stalkers. But overall, it's great in every sense of the word.

It's skills are also extremely useful. Piercing Shot shoots 3 arrows after a short delay, each dealing damage and ignoring part of the enemie's armor, excelling at brusting down large lumbering enemies that are alone like Abominations or Horrors. Meanwhile, the Rapacious Hunter is different than the crows in Vengance. This rather than being constant damage it instead deals its damage after roughly 5 seconds, making it a great addition to hunt down flying enemies.

Overall, the archers are probably the most balanced ranged tower in the game. Unfortunately, it also means it will get outclassed by other more niche and specialized towers later in the game, but it finds a very great spot being one of the best towers to hunt down flying enemies.
Paladin Covenant
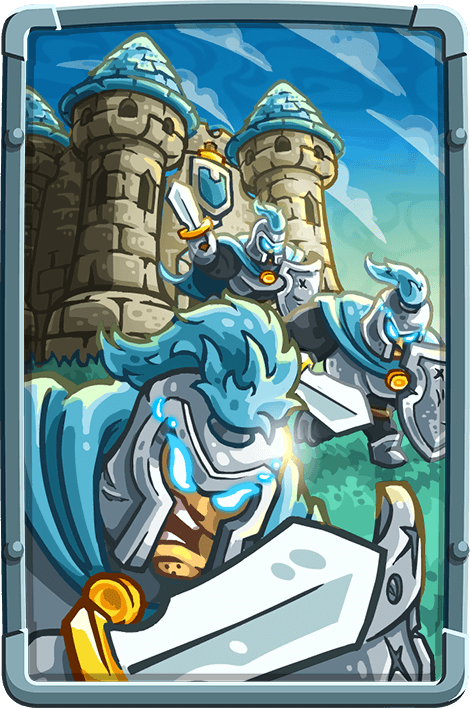
Your first barracks tower in the game and it's mainly geared towards stopping the enemy. Low damage, good armor as you upgrade, pretty tanky, not extremely pricey and they come in squads of three. Paired with other 2 towers can make your Paladins a very sturdy wall against non flying enemies... As long as they don't get stunned or hit with instakill abilities.

When it comes to skills, the Paladins are focused in sustainability and being capable of dealing with enemies for long periods of time. Lead by Example promotes one of the paladins to a Royal Guard, thus boosting the attack damage of nearby units and heroes. This works as an activated buff that the capitain does when enemies are around and during combat. Healing Prayer is what makes Paladins particularly hard to take down, since when they get on low health, they will recover part of their health and be invulnerable for 4 seconds, giving them an extremely important edge when fighting high damage units like clawed horrors. But on the other hand, the health threshold makes them vulnerable to Cultist Abominations, who instakill low health opponents.

Overall, the Paladin Covenant excels at defending for long periods of time and if you want them to be effective, you will support them with other towers since paladins now don't have the Holy Blade skill meaning that tough enemies and large hordes of weaklings will eventually go past them. And unlike the archers, if you want someone to tie down enemies, there is no one better than these guys. Overall in the campaign you can expect Paladins to shine in the early stages where they can brave armies without batting an eye but as the game progresses and enemies deal AOE damage and have much more HP, the Paladins will fall off in utility to the point of being completely useless.
Arcane Wizard
The Arcane Wizard is back once more and he's a bit different from the first game. It is still a heavy hitting magic tower, but thanks to one of its skills it becomes an extremely good tower to have in consideration in certain maps. Overall, while being a bit pricey it deals heavy damage in a short concentrated burst, making it really good against heavily armored enemies with a moderate to large amount of health.

The skills of this tower are really good and if it wasn't for the high price, i would recommend using this tower as much as possible. It's first skill it's the old signature skill Desintegrate, which instantly kills a normal enemy or deals a ton of damage to a minibos/boss enemy. This skill fully upgraded can be a potential miniboss killer. Its second skill, empowerment, boosts damage of nearby towers up to a 40% extra damage. This makes the Arcane Wizard a superb tower to have in certain maps where your strategic points are clumped together, thus boosting damage from nearby towers.

Overall, the Arcane Wizard is pretty damn good. Depending on the map it can be a proper gamechanger by boosting damage from other towers in certain spots, being the best applied to towers that shoot multiple times like the Ballista, Tricannon or Stargazer since it will boost the damage of each shot by 40%, giving you more bang for your buck. And the damage also extends to units created by the tower, like the Halvar the Blunt from the Brewmasters but not to Necromancer skeletons. All in all, it is a magic heavy hitter that works well in a lot of situations except when it comes to large massess of weak enemies or enemies with lots of magic resistance.
Tricannon
With this one we are out of the starting towers in each category and i will say the Tricannon is the one with the longest range in the game while sporting a decent damage and being the most expensive in the game. This in certain situations means this tower can deal outstanding damage since the damage is per projectile, meaning that each bomb of the 3 shot burst will deal that amount of damage. Against a highly packed amount of low to moderate health enemies, this can be devastating.

The skils of the Tricannon also make it a really good weapon when it comes to destroy large amounts of low health enemies quickly. The first one, Bombardment, drops a ton of bombs over a large area in a section of the path, dealing a large amount of damage and keep lobbing bombs even if no enemies are present. The second one, Overheat, causes the attacks from the tower to burn enemies, inflicting damage over time and leaving pools of fire on the path for a short while. This effect starts lasting 6 seconds and goes up to 12.

In general the Tricannon is the best chaff anhialator against small and quick enemies like glarelings as well as being very powerful against concentrated packs of enemies with moderate amounts of health. Plus, thanks to the duration of Bombardment, the tower is capable of dealing damage to flying enemies even if no ground enemies are present.
Ballista Outpost
This is a tower i wasn't initially convinced with but eventually it grew on me. Like most other towers, it's really weak at earlier levels but it can be an absolute beast when fully upgraded. This tower shoots a 4 burst barrage of bolts against an enemy in quick succession and then reloads. One of the biggest problems with this is when an enemy is killed mid barrage, the tower will inmediately switch target to the closest enemy. If the enemies are too far apart, some of the shots will be wasted until the tower fully turns. As well, if the target dies mid attack, all shots will be shot nonetheless. It also struggles keeping up with flying enemies since if one is killed usually all remaining shots of the barrage will be missed.

Its skills are probably some of the best in the game. The first one, Final Nail, increases the damage of the final shot of the barrage (which is shot after a short delay) and stunning the target for a short duration. The second one, Scrap Bomb, launches a ball of scrap metal on the path. This deals a huge amount of damage and leaves a pile of scrap that slows enemies down.

With its low price, high damage and really good skills, the Ballista Outpost is a solid choice overall when dealing with certain enemies quickly or focus firing on enemies with large healthpools. Final Nail helps a lot with big troublesome enemies, allowing you to slow them down a bit while the Scrap Bomb gives the tower utility dispatching large amount of weaker enemies and slowing them down. Overall, pretty good and somewhat flexible tower but as stated before, it can struggle to keep up with flying enemies which will most likely slip past them.
Arborean Emissary
This tower can be considered the baseline mage in this game compared to the other mage towers. While the Arcane Wizard is a heavy hitter, this is much weaker while having an enormous attack range and not being as pricey as other mages. As well, this tower has another feature that is in the description. When hit by the projectiles, enemies will have a debuff on them that will increase the damage they take by roughly 20% (requires further calculation). While this is great, it also means the tower will shoot each enemy in range to debuff them all rather than focusing on the first enemy on the path.

The skills of this tower are aimed to be combined with infantry. Gift of Nature, its first skill, creates wisps that heal allied units over time within its range. The second one, Bramble Grasp, makes the tower inmobilize a certain amount of enemies within range for 3 seconds while dealing damage to them.

Overall, this tower should be treated more like a utility tower to offer support to your other towers in order to maximize damage and prevent your infantry from dying over sustained combat. Having a normal attack speed, large attack range and being fairly cheap, it makes this tower pretty good to keep on your roster.
Demon Pit
As a barracks tower, the Demon Pit is very unique and i struggled for a bit to understand its true use over a few maps. This is because the Demon Pit is vastly different than all previous barracks towers since the created units do not stay nor heal. While other barracks, like the Paladins, are made with sustainability in mind to stop enemies, the Demon Pit is made with damage output in mind. Compared to paladins, the imps from the Demon Pit are horrifically frail but deal higher damage. And on top of that, they explode on death, stunning enemies briefly.

On the skills, Big Boss makes the Demon Pit spawn a large demon every 10 seconds. This imp is very tanky, deals large amounts of damage and causes a large amount of damage on death. And the best of all, it doesn't disappear when there are no enemies nearby, walking down the path and fighting any enemy they find. Master Exploders increases radius and damage imps deal on death as well as setting enemies on fire.

Despite its different use, the Demon Pit is geared towards throwing suicide soldiers against your enemies and if you build these in large amounts, you can potentially bog down enemies in an army of exploding imps since the Demon Pit is still limited to 3 Imps at a time. Aside from that, you should consider the Demon Pit more as a dangerous speedbump when it comes to hamper the progress of enemies. And while the imps can potentially deal well with low damage enemies, they excel at their intended purpose against lumbering, high damage enemies. Still, if you build enough Demon Pits (usually 3 do the trick), you can bog enemies in exploding imps for a long time and bosses will be stuck in place killing imps over and over. And also, the explosion on death deals AOE damage meaning that the Demon Pit can be an unintended artillery tower in a pinch.
Battle Brewmasters
The Battle Brewmasters is a more traditional artillery tower compared to the Tricannon. Its damage is concentrated on a single point of impact, meaning that full damage is done on the primary target and enemies nearby suffer splash damage which is lower. But while the brewmasters sport high damage, they are also a tower made for infantry support, although not in the same way the Arborean Emissary is. Enemies hit by the tower will take a debuff that will reduce their attack damage by 20% (tested on several enemies).

As for skills, the Battle Brewmasters have Elixir of Might and Bad Batch. The first one creates a barbarian that fights on the path and while not the tankiest unit, it hits very hard (fully upgraded and with Arcane Mage boost he can hit for 100 damage per attack). The second makes the tower launch a barrel of poison on the path. The barrel will linger on the spot for a few seconds while poisoning enemies that walk over, slowing them and eventually exploding dealing damage (Note: as of Colossal Dwarfare update, the habilities of this tower were buffed. The barbarian it spawns has much more health than before and the AOE blast from Bad Batch was increased).

While the Battle Brewmasters are a very good artillery tower, they are best combined with infantry since the support they can give with their damage debuff can give an important edge to your soldiers. This and the Arborean Emissary can make your infantry more resilient in a sustained fight and the brewmasters add their own heavy hitter unit to the mix or to keep on guard at the end of the path for slippery enemies like Nightmares. The only thing we could wish is that it would heal allied units with its splash damage.

Necromancer
The necromancer joins the fray once more, but he's not the same fast firing devil he was in KR Frontiers. He's more like the Archmage in that same game, hitting for a moderate amount of damage but slowly. As well, it generates magical skulls that float around the tower to be unleashed against the first enemy in range. Also it's different in another way since the attacks of the Necromancer inflict a debuff on enemies and upon being killed during the effect of the debuff, the enemies will come back as skeletons. Important to note that small enemies (like glarelings) will not generate skeletons, only medium and large enemies will create skeletons and large enemies will create a larger and tougher skeleton.

The abilities of the Necromancer are Rattling Beacon and Death Rider. The first one creates a bone totem that increases skeleton melee damage and applies the necromancer debuff on all enemies that enter its AOE, making it a good combo with artillery if you want a quick mass of skeletons. Death rider on the other hand creates a skeleton knight that tramples every enemy in the path all the way to the beginning of the path, being a potential and useful wave clearer for weak enemies like Glarelings.

All in all, the Necromancer is pretty solid as a magic tower. Average damage, attack rate, good range although on the expensive side of towers, it's well worth it to have it in hand since the skeletons will be efficient speedbumps for big enemies and the Death Rider will be able to flatten hordes of weak enemies in later stages and prevent you from being bogged down. Also, i've noticed a hidden effect that Necromancers have. They prevent on death effects on enemies that have it like Revenant Rangers from coming back as Spectres and Scrap Speeders from leaving scrap piles which makes them extremely useful.
Elven Stargazer
At first i fell in love with this tower but it soon waned when i learned how it worked. And later on, i loved it again. The Stargazer attacks in a peculiar way due to its below average damage, since rather than attacking an enemy at once, it shoots a quick burst of 5 shots against any enemy in range, starting from the enemy further down the path. These shots are divided among the first 5 targets but if there are less than 5, these attacks will target previous enemies, cycling back from the first enemy. This means that if there is a single enemy in range, it will recieve all hits from the tower.

The abilities of this tower are also pretty peculiar and personally, i love them. Event Horizon is extremely simple: it sends enemies back on the path a fixed distance (Up to 6 targets. Effect is an AOE that targets enemies in the area, working best against clumped up groups). Rising Star on the other hand makes enemies killed by the tower explode on a burst of magical stars (up to 5) that will impact on the closest 5 enemies to the target and also stun them briefly upon impact. This skill can be extremely good if properly set up because it can potentially cascade into a massive burst of magical damage to a large amount of enemies.

With all of this, the Elven Stargazer can be potentially be used to burst down lumbering enemies with large healthpools (if properly set up). But usually you will find that it excelts best at taking down multiple small targets or armored enemies with a moderate amount of health. Because of Rising Star, it can potentially mop up large mobs of weak enemies and with Event Horizon it can send back troublesome tough enemies back in the path. For this, i usually put Stargazers on the end of the path as a safeguard as long as i have enough gold since even Event Horizon at level 1 will send back 3 enemies.

(Note: as of Colossal Dwarfare update this tower was buffed. Its price was reduced, damage increased and habilities were improved.)
Dwarven Flamspitter
The last of the artillery towers. While the Tricannon focuses on discretional damage and the Brewmasters focus on infrantry support, the Flamespitter focuses in raw damage. And you may say "But doesn't it have less damage than the Brewmasters?" And while i will say yes and also having shorter range, the Flamespitter does damage in 3 instances while enemies are hit by the flame burst from the tower. So while the Brewmasters do damage in a single concentrated blow, the Flamespitter does it in a short burst that sets enemies on fire, dealing damage over time since the first hit (The damage equals to the level of the tower) over 5 seconds. But the Flamspitter has a major weakpoint. With its limited effective range (since it hits on a straight line), in some situations the effective area of attack will be very small, thus requiring careful positioning in order to maximize it's AOE.

As for its abilities, the Flamespitter has Blazing Trail and Scorching Torches, both highly damaging abilities. Blazing Trail will make the Flamespitter lob a large ball of fire on a group of enemies within range, causing large amounts of damage and setting them on fire. Scorching Torches is an extremely damaging ability that causes columns of fire to erupt a short distance along the path, dealing very high damage and stunning enemies.

In general the Flamespitter is an excellent tower when it comes to dealing high amounts of damage. But with its slow attack speed, slow turning speed and limited attack range, it requires careful placing in order to maximize its effects. But in the right situation it's a beast that can decimate large amounts of quick enemies and eat through large healthpools. Also, as of the Colossal Dwarfare update, this tower can target airborne enemies.
Dune Sentinels
Initially i was curious about this tower compared to the archers, but when i got my hands on it i was dissapointed until i learned about its niche utility. The Dune Sentinels are focused on spreading damage over medium groups of enemies and excel at chewing through large groups of small but fast enemies. As well, they can sometimes be kind of useful when dealing with somewhat beefy enemies as long as there is another unit nearby to bounce the glaive. This is because, like the Elven Stargazer, the projectile shot by the Dune Sentinels bounces up to 5 times onto 5 different enemies (Bounces depend on tower level). If there are no enemies to bounce the projectile to, it will bounce back to one of the previous enemies.

As for the skills of the Sentinels, there is Bounty Hunt and Whirling Blades. Bounty Hunt launches a glaive that deals increased damage against an enemy and bouncing off 4 more. Enemies killed by this skill will yield up to 12 aditional gold, a necessity once you go to the void since Glarelings and Lesser Spawns do not yield gold on death. The second, Whirling Blades, launches 2 enormous glaives that linger on the path that damage all enemies that come in contact with them for 3 seconds and slowing them down.

After a while, i learned the main strength of this tower: tearing through large hordes of weak enemies. With a good attack range, low damage, good attack speed and average gold cost, it's a great addition in later stages to deal with hordes of chaff enemies like Glarelings, specially if you hit them with a fully upgraded Bounty Hunt, potentially giving you 60 extra gold if you kill all targets. Of course, at lower levels this tower is pathetically weak but once it gets to level 3 and 4 it will start to shine. It also combines well with the Ballista Outpost because fo the Scrap Bomb ability that slows down enemies. As a final tip, this tower is extremely good when dealing with Corrupted Stalkers since the initial hit or any of the bounces will trigger the Stalkers to waste their teleportation.

(Note: as of Colossal Dwarfare update, this tower has been buffed. Damage has been increased, bounce range increased and its habilities deal more damage. Whirling Blades triggers with less enemies present and slows down enemies more).
Rocket Gunners
Initially i thought this would be an archer tower that could be moved around like the Wicked Sisters were in KR Vengance. But this is another barracks tower, and a really good one if you want to put enemies on the ground quickly. This tower will spawn 2 rocketeers armed with rifles that will gun down ground and air enemies. While they are initially airborne, you can make them land to block the path of your enemies. I would recommend doing this in a pinch since the gunners, while dealing excellent damage, they are very frail and will go down very quickly against ranged enemies, particularly Noxious Spitters.

The skills of the Gunners are amazing. Sting Missiles makes the tower shoot a missile that locks onto a target in the map and killing it on impact as long as the target's max health doesn't excede the limit (up to 900). Phosphoric Coating makes the Gunners attacks deal AOE damage on a small circle around the target and destroying up to 3% of the target's armor with each attack.

With all of this, the Rocket Gunners are pretty brutal when dealing with enemies because of their high damage, which can get even higher thanks to the Arcane Wizard. Sting Missiles is an excellent ability to destroy medium health enemies that can be very annoying like Noxious Spitters or Vile Spawners while the Phosphoric Coating makes them capable of tearing down heavily armored targets. Having high damage, high speed, great mobility and not being very pricey, they are a really great addition. Meanwhile, its main weakpoint is the rocketeers can be easily killed and their slow firing rate. As a last piece of advice, while on the air the rocketeers are inmune to the stunning gaze of Void Blinkers.
Eldritch Channeler
When i saw this guy i thought the beloved Blazing Gem from KR Vengance came back once more. And while the Channeler is similar, it's different at the same time. The Eldritch Channeler shoots a concentrated magical beam that deals damage over time to a single target over 5 seconds. The peculiar thing about this tower is that the damage is fixed. Other towers have random damage values per projectile while the Channeler deals the same amount of damage with each beam, making him a slow but consistent source of large chunks of damage. On top of it, the channeler slows enemies targeted by its beam, albeit by a small amount. And while the damage on the tower is good and its range is also good, its firing rate is slow and it's also on the expensive side of towers.

The skills of the Channeler are pretty unique. Power Overflow makes the beam overflow to other 3 enemies closest to the main target, dealing part of the damage the main target takes (up to 75%). And most important, the split beam also slow the enemies affected by it. Mutation Hex is the old reliable that Sorcerer mages had in KR 1 and it works the same way. Turns an enemy into a sheep that cannot be blocked, moves at the same speed, has no resistances nor armor and has 50% of the max HP the original enemy had. And funniest of all, you can click repeatedly on the sheep to kill it.

The Eldritch Channeler can be considered your best weapon to deal with big bad bastards that come your way. Bladeclaw Horrors, Flesh Behemoths, Evolving Scourges... As long as the tower can deal full damage, it will do amazing. This combined with Power Overflow to damage other enemies and Mutation Hex to neutralize enemies with large healtpools, the Channeler is great at taking down large lumbering targets.
Grim Wraiths
The last of the base towers in the game. This is a very unique barracks tower due to its unique mechanic. This tower can be switched over to other strategic points on the map, alowing for an enormous flexibility when it comes to planning your defense. As well, it can switch places with existing towers, making the Wraiths an extremely useful asset when it comes to organizing your defense. But aside of it's extremely unique mechanic, the Wraiths can be considered a middle ground between the Paladins and the Imps presenting a balance between survivability and damage and they respawn quicker than Paladins (6 seconds against the 10 the Paladins). As well, probably the most important detal for Wraiths in combat, is that they deal true damage, thus bypassing armor and magical resistance and if you moved them away the Wraiths will respawn with full health. This last part is a neat trick you can use to save your wraiths in a pinch and return them to battle right after.

The skills of the Grim Wraiths are oriented towards damage dealing. Undying Dread makes the Wraiths damage their opponent upon death. This deals damage, slows the enemy and cuts their attack damage in half. Soul Shiphoning on the other hand boosts the damage Waiths deal (doubling their attack damage at max level) after they spend 5 seconds in combat. This debuff goes away after 5 seconds too, meaning that if the wraiths can stay in sustained combat against many enemies, they will keep the buff for a long time.

In general, the Grim Wraiths is a great tower mainly because of its innate ability to switch places.And while this is its most special feature, the Wraiths deal very good damage in combat (more than double the Paladins) while having decent sustainability. Like all infantry, large lategame enemies will tear through them quickly, but against certain enemies that need to be isolated like Vile Spawners or Wicked Sisters, they can make an enormous difference thanks to their high attack damage and movement capability, effectively granting you a second batch of reinforcements. Overall, they tend to shine in later stages where tougher enemies take inmense amounts of punishment and armor makes it hard for infantry to chew through them. And also, fully upgraded and properly supported wraiths can be pretty efficient boss killers.
Twilight Longbows
The new tower in the block introduced with the first expansion and it's amazing. Initially i was very sketchy but after trying it in several levels i just love how this one can snowball out of control, allowing you to chew through waves of enemies with a tower that one shots normal mobs. This should be considered a sniper or "Tank Slayer" tower. Enormous range (that can get even bigger), high attack damage and very slow attack rate. Initially i was reminded of the Golden Longbows in Origins, but there is an enormous advantage the Twilight Longbows have other the Golden Longbows: Projectile is almost instant and while the tower charges its shot it seeks another target within range unless there are none left. All this together with the choice of targeting high health targets makes this a really great boss slayer and big bad bastard destroyer.

Its skills are also extremely good. First, the most important, Thrill of the hunt, which permanently increases tower attack damage by 1 or 2 per kill they score. It's a single level buy and with that you are pretty much sorted. If you rush for this tower and get this upgrade at later waves you can expect it to one shot any enemy with less than 200 hp (Due to damage spread). Paired with the Arcane Magus damage boost this tower can get ridiculous amounts of damage per shot. The second is not that important but still great. Support Blades makes the tower double as barracks, adding 2 Twilight Harassers on the path to attack enemies. Their damage is very good but they are very frail, so you will have to pray they dodge attacks regularly. And if they don't, they will be a pretty efficient speedbump for large and dangerous enemies. (Note: as of the Colossal Dwarfare update, Support Blades were buffed giving them more HP and increasing their dodge chance, making them much better at keeping enemies busy).

All in all, this tower excels at hunting and killing unarmored high HP enemies that might give you serious problems (like Wicked Sisters or Cultist Priests) as well as tearing through bosses. The fact that is relatively cheap (still expensive compared to other archer towers) and the importance of letting it get a lot of kills means that rushing this tower and getting Thrill of the Hunt first and foremost is more or less a priority. If you do, you will have a beast in your hands.
Bog Hermit
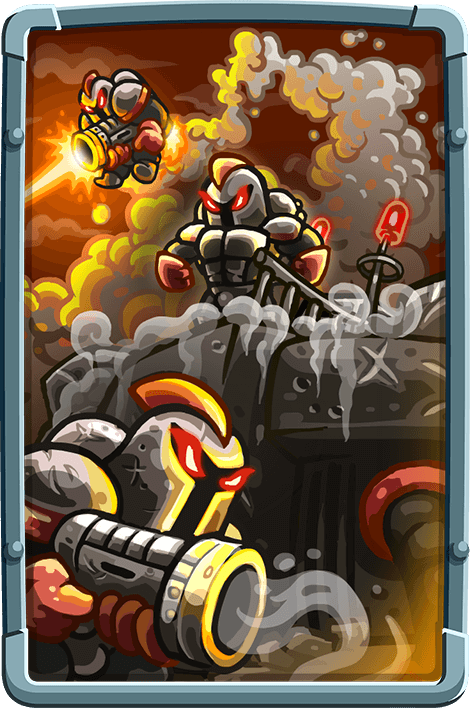
A new tower introduced with the Ancient Hunger expansion and one that quickly became my favourite. While being pricy (starting at 120 gold) its functions and damage don't let down. This tower has 2 attack modes. The basic one is an average damage and fast magical projectile with a good attack rate (on par with a necromancer). The second one is a slow firing long range physical damage projectile that deals AOE damage and slows enemies on impact. In effect this is a mage tower that doubles as an artillery tower.

Its habilities also don't let down and they are excellent. The first one, Ground Pounder, makes the hermit jump out of its pond and land on the path, dealing damage and stunning all enemies caught in the AOE. This makes for an excellent wave clearer and crowd control for groups of tanky enemies. The second, Sticky Tongue, makes the sage instakill an enemy in the path every 14 seconds and while it requires further testing, i've seen it prioretize flying enemies over ground ones. This is a great hability that might dispose of a troublesome enemy in an instant and if my assumption is correct, it would also make for a great anti-air defense.

Overall, the Bog hermit is an amazing tower due to its flexibility. Being able to switch from physical damage to magic allows it to deal with a lot of enemies that otherwise would cause a lot of problems. Also, because of its habilities it makes for a great crowd control tower. The only drawback is that it is a bit pricy but it makes up for every bit of gold invested.
Cannoneer Squad
The new tower added with the Colossal Dwarfare DLC and while i was excited for this tower, it was a huge dissapointment for how lackluster it is. But due to the last update as of writing this, the Canonneers have become a pretty ok tower by infantry standards. It is a barracks tower that spawns 2 cannoneers with pretty good damage, attack rate and range, which is the focus of this tower. They also have very good health and respawn after 6 seconds. And while the idea is great, they are absolutely horrible at melee which means that this tower will require a lot of babysitting, strategy and bodies in order to be effective. And on top of that, until you get to level 3 and 4 the cannoneers will not be able to take down many enemies before they manage to close the gap or overcome your defenders. Thankfully, recent updates lowered the gold cost of this tower and its habilities, making it very affordable for what it provides.

The habilities of the cannoneers focus mainly of beefing up their much needed damage. Growing Ranks increases the squad size per upgrade to a maximum of 5 cannoneers. The second hability, Incendiary Ammo, makes the Cannoneer squad load up their rifles with bombs and bombard incoming enemies dealing AOE damage and setting them on fire. This hability can be upgraded 3 times for 150 gold each time but as i've seen a lot of time they tend to miss their shot because the animation and the projectile are a bit slow and thus, the main target usually ends up dead before they take damage.

Summarizing, as of now the Cannoneers are pretty good if you have some decent defenders to keep them behind since they can burst down enemies pretty well once they are in good numbers. They surprisingly pair very well with Imps because of the explosive damage and constant stream of soldiers the Pit provides and also with Paladins since the Veteran of the Guard can buff their already excellent damage.
Surge Colossus
The new kid on the block with the Arachnophobia update and while i was excited for a new mage tower, this tower is kinda lackluster in several aspects. The Surge Colossus is a tower that deals magical damage to a target within its fairly small attack range with a the same starting price of the Arcane Magus but being overall more expensive to upgrade. This tower was updated shortly before release, being a fast firing yet extremely weak damage dealer. Now the colossus gains attack speed, range and damage per level and its attacks jump onto enemies with damage not decaying unlike the Dune Sentinels. Also, a peculiar trait of the attack of this tower is that it jumps on every enemy, even hidden ones like Nightmares.

While the damage of the tower is not great, the habilities of the colossus are actually pretty damn good. Cristallization (costing 150 gold per level) is a skill that inmobilizes 2/3/4 enemies for roughly 4 seconds, making them take 20% extra damage. This is a great skill since the damage increase stacks with the Arborean Emissary's debuff, making enemies take a whooping extra 40% damage from all attacks on top of being inmobilized, being extremely great to deal with big bad bastards that might lumber your way. Electrical Surge (costing 300 at level 1 and 150 the nest 2 levels) is the second skill this tower has and it's a personal favourite. For 6/8/10 seconds there will be a field of sparks around the tower, dealing constant hefty damage to all enemies and slowing them down considerably. While the damage over time is nothing amazing, the slowdown is actually great and it synergyzes very well with the Ballista's scrap bomb and the Channeler's beam which slow down enemies even further, helping with keeping fast enemies in check. It also damage hidden enemies like Nightmares constantly.

All in all, the Colossus shines mainly for its great habilities which are amazing for crowd control and dispatching slow tanky enemies with the support of other towers. The quick damage dealing along with the attack bounces make it a good way to spread out magic damage much like the Dune Sentinels spread out physical damage. And while it's habilities are amazing, you should consider this tower as an extremely great support tower like the Arborean Emissary or something to soften up multiple enemies before they get in range of much more hard hitting towers.
End
With this, i've given all information i could glean from the towers in the game. I hope all of this was helpful.
14 Comments
CreatorExT 26 Sep, 2024 @ 10:12am 
Wraiths can actually be used to move any tower on the map wherever you want, and you only need one Wraith tower to do it. By swapping the Wraith with another tower, swapping it with the second tower, and then swapping it back with the first tower you moved, returning it to the original position, you can swap the locations of any two towers. And since Wraiths can swap with empty tiles as well, you can move any tower anywhere you want.
CreatorExT 26 Sep, 2024 @ 10:09am 
Lead By Example on the Paladins increases Attack Damage, not defense.
CreatorExT 26 Sep, 2024 @ 10:06am 
I disagree with the Royal Archers being good against flying enemies, specifically with the Eagle, since the long windup time means it only gets 1-2 hits against flyers before they leave its range in most scenarios, and then the eagle has to come back before being launched again. For the amount of damage it does, it's overpriced at best.
Pielord  [author] 2 Sep, 2024 @ 12:48am 
You could do it in 1? I know that in Vengance you can do it to frogs, but i had no idea you could also do it in the very firts. Gotta check it out.

Also, thanks for pointing it out
Spooksies 1 Sep, 2024 @ 9:29pm 
Idk if you knew this, but you can spam click the sheep created by the Eldritch Channeler to instantly kill them, regardless of health.

This is how it also worked in KR1
Pielord  [author] 12 Aug, 2024 @ 4:44am 
>Combo enemies
What do you mean by that? Towers that work well together?
Moimee 11 Aug, 2024 @ 9:33pm 
Thanks, great guide.
It would also be super helpful to see via header or chart which towers target land, air, or combo enemies.
Thanks again for taking the time creating and sharing this helpful info.:steamthumbsup:
Pielord  [author] 8 Aug, 2024 @ 11:31pm 
Just tested it and the slow is so small i barely noticed it. I had to test it on waves of Glarelings and cutthroat rats to notice it.

Very important. Thanks for bringing it up. Also tested the totem and it's like you say: it applies the debuff to all enemies caught in Very useful to know it since the skill description just says it "curses" enemies. Thanks a bunch
Tricking Trapster 8 Aug, 2024 @ 5:52am 
A thing about the eldritch channeler: The beam slows enemies, and this extends to when it does the split beam. This makes it even better when dealing with slow, lumbering enemies. Also, the totem of the necromancer applies the debuff that it normally needs to attack for, meaning that any enemy dying under the totem will turn into a skeleton regardless of if the necromancer hit it or not.
Pielord  [author] 7 Aug, 2024 @ 4:39am 
Noted. Extremely important detail.
I should have tested them individually rather than try the towers in general