Bloobs Adventure Idle

Bloobs Adventure Idle

38 ratings
Game Basics 101 & More!
By Krongarth
From a player of many games of this style, comes a how-to for some of the game basics in Bloobs Adventure Idle.
Mainly some prioritisation, efficiency, and good ways to make the most of idle activities as I discover things while playing. Playing since early access launch on July 15th. The guide is a work in progress, and will be updated as I progress through the game.
4
2
   
Award
Favorite
Favorited
Unfavorite
Game Basics and Beginning Activities
Edit: July 21st 2024 - Recognised by the Developer! Thank you! Thank you for such a cozy fun game!

1. Introduction
Getting started in Bloobs Adventure Idle is fairly simple. Once starting in the game, you spawn in close to a bank location and some trees and can just get going into the world!

It's fairly easy to get lost into all the wide variety of options in the game, but luckily there's a handy 'How to Play' pop up you can utilise to get some of the basics down pat. This menu will get you through the very basics of playing the game, and give you some brief suggestions on where to start.

The game highlights that you start with a basic set of tools. You can equip them by clicking on them in the inventory, as indicated by the neat little chest/backpack icon in the bottom left of your screen. This will move them into the appropriate tool slots (Pickaxe, Axe, Fishing Rod, Magnifying Glass) and be visible to use or un-equip if desired from the Bloob character equipment tab which is the cute bloob icon beside the cogwheel gear which is your options menu.

It's recommended that you equip all four of your starting tools right away to free inventory slots for use.

EDIT!:The bank chest located near your starting point is now north of the home portal in a little house. A short walk further. It's near a home portal which you can teleport to at any time by using Home Teleport on the top left of your mini map.

The bank chest initially has two tabs and ten slots for storage. Additional bank storage can be purchased for 1000 (1k) gold pieces per slot, and this price scales as you purchase more bank slots. There is a hard cap on bank slots, indicated in the bank interface.

You should read through the rest of the How To Play menu then close it with the circled 'X' icon in the top right corner.

You're on your way!

There are a number of options to pursue, but I will be writing below the recommended path for starter activities, along with some overnight AFK suggestions for use.

For reference, here is the starting Tier List for equipment and upgrades, which will be updated as we discover more! (This will just initially refer to metal weapons, tools and armour.)
Tier 1 - Bronze (Level Requirement: 1)
Tier 2 - Iron (Level Requirement: 5)
Tier 3 - Steel (Level Requirement: 10)
Tier 4 - Mithril (Level Requirement: 20)
Tier 5 - Adamantine (Level Requirement: 30)
Tier 6 - Rune (Level Requirement: 40)
Tier 7 - Orichalicite (Level Requirement: 50)
Tier 8 - Necronium (Level Requirement: Unknown)

2. Early Game
Your Bloob will get the most benefit out of overall efficiency by upgrading your tools in an expedited fashion. By having improved tools, your gathering actions complete faster, resulting in more experience, resulting in more levels, resulting in faster gathering. It's a lovely cycle of improvement! The in-game guides indicate gear up to Tier 7, with gear past that currently not in the in-game guides for skills. (As more is discovered, this guide will be updated further.)

Tip!
If you are seeking to play Bloobs as a more active game, watch out for the golden harvest opportunities that pop up with a gold sheen on the resource you're gathering, and a sound effect to go along with it! Golden resource opportunities will award 150% of the experience of a normal completed gathering activity, and instantly award a copy of the resource you're gathering! (Or multiple copies, if you have a multi-gather modifier, like on foraging at higher levels.) This extra experience can bring your experience per hour to a rate 3-4x higher than just AFKing skills alone. Useful if you are looking to get a jump on a gathering skill!

So, with the goal of improved tools in mind, your aim will be to achieve the resources required to upgrade your tools, and the levels with which to utilise your upgraded tools!

Starting out, your biggest benefit will be to go ahead and get going with mining. Opening up the mining skill guide will lead you to Copper Ore (Level Req. 1) and Tin Ore (Level Req. 2). You can begin mining by merely clicking on the resource node icons within the skill guide. (Hint: This works for almost every listed gathering skill guides' resources! - You don't have to remember where everything is!)

Smelting Copper and Tin together will give you bronze ingots, for Tier 1 crafting. You will want to gather enough of copper and tin to get your mining to level 10, where you will have unlocked several more mining node options, and gathered enough copper and tin to power level your Smithing a little bit, before continuing. You want approximately an equal amount of copper and tin.

Take your copper and tin to the forge. The forge can be quickly accessed by opening the Smithing skill interface from the skills tab, and clicking on the 'Move to Forge' option in the bottom left hand corner of the Smithing Information menu.

Once at the forge, you'll have a little while while while your Bloob smelts all these lovely bronze bars together, so don't forget to stand up, take a stretch, drink some water, and maybe even go pet your pet, make a quick phone call, or do something else for a few minutes/several minutes.

The goal of the smelting being done here is to provide you with a ramp of experience points to get your Smithing Skill over level 8, unlocking Iron Smithing options and your first self-made tool upgrades. And to do this, you will utilise your newly crafted bronze bars in a manner that will ensure some efficiency moving forwards. First, with all the bars you smelted, you should have gotten a few Smithing levels. You may, if you prefer, craft a piece of bronze armour for each armor slot, just one, and equip them from your inventory, then move on to crafting a weapon, I recommend a bronze scimitar, then finally, utilise all remaining bronze bars to craft Bronze Arrow Tips, stockpiling a resource to use for another skill to level up later.
(Side Note: I personally crafted 6000 bronze arrow tips doing this to boost my Smithing up initially, I believe it got me past level 20, which was too far, but either way, it worked to help.)

Once you have completed Smithing all of your bars into arrow tips, you may go place the arrow tips into storage at your bank chest that you would have seen at the start of the game. You'll come back to these later when you start in on the Bowcrafting skill.

Next, you are going to want to prepare yourself for making better tools. This will involve some woodcutting for handles for your new tools! Go ahead and open up the woodcutting skill, click on normal tree icon, and get chopping! Get about 50-100 logs, this should get you a few levels, and set you up to have wood for your iron tools. Do note, you'll need Oak Logs to make your iron tools, you should be high enough level after finishing the woodcutting above.

Next, you'll want to get going with mining some iron to get yourself iron and steel tools. Open up your mining guide, click on the iron rock icon to track your Bloob over to the mining node, and let 'er rip on mining iron until you have 20 ores, run back to the forge to process that into bars, and make yourself an iron pickaxe and axe, just as soon as you've grabbed at least one oak log from your woodcutting efforts above. Again, you can just open the woodcutting menu from the skill page and click the oak tree to path to one to get your logs.

Once you've managed to get yourself iron tools, you'll continue down this path for a while. You should be over level 20 smithing and mining in a short period of time (mining iron, making arrowheads) and then be able to go ahead and get steel bars by adding mining coal into the mix. Don't smelt down all of your iron as you get close to level 20 mining/level 16 smithing, as you'll need one iron to every two coal to make your steel bars. You're well on your way at this point!

Tool Progression and Inventory Management
3. Tool Progression
If you're following along with the guide, by this point you have achieved steel tools and some baseline levels in your skills. From this point your goal would be to get to mithril tools and beyond, to improve your efficiency!

Now, this is where we can diverge a little. As you've been mining, you've likely gotten some broken pick heads and possibly some gems, or even an ancient pick. From what I can tell, you can't use the ancient pick or the pick heads, so I've saved one ancient pick aside and sold everything else for inventory space. As the pick heads sell for about 52 gold each and the ancient pick sells for 10000 gold, you'll be able to afford a few bank spaces. Heading to your bank chest near where you entered the world, you'll be able to find the option of buying some bank slots in that interface. Bank slots cost initially 1000 gold each, until you reach 20 slots. Then they cost 5000 gold each until slot 30. This gets pretty steep, and this is where the idle part of the game can start to help you out.

If you're human, like most reading this guide should be, you are going to need to sleep at some point. The great thing about sleeping is, with this game, you can set your Bloob going doing something overnight while you're in dreamland! This can be whatever you want, but I most recommend doing something that will allow you to catapult your progression for your Bloob forwards. Steel, Mithril and Adamant ores all require coal for processing. If you are still working on getting your smithing towards level 42 for rune bars and that tier of crafting, overnight mining your coal for processing your steel, mithril and adamant ores with is a good choice. Secondly, you will need to keep your woodcutting level up to be able to cut the wood for the hafts of the tools you are making as you progress. Mining all day then switching to the highest level of tree you can cut with your woodcutting is a good way to keep both skills relatively evenly matched as you progress onwards.

Tip!
You will acquire some 'scrap' materials as you mine and woodcut. 'Stones' and 'Sticks'. Do not sell these, they come in handy very soon!

Continue like this until you've reached Rune tools, which take 42 Smithing to make the bars, and 50 mining for the Rune ore as well as 40 woodcutting for the maple tree logs for hafts.

4. Inventory Management

Once you've achieved a good baseline of mining, woodcutting and the associated tools and skill ranks, it would be useful to branch out your Bloobs skills to accommodate the other two skill slots as well as combat. As this game boasts a useful auto-eat system, fishing for our dinner and cooking it up is an advantage, as well as being able to use foraging to gather herbs to make potions to enhance literally every other skill as your Herbology skill progresses.

Of course, you're probably wondering "Well, that all sounds nice, but what do I do with all these myriad items with a limited inventory space?!"

If you've been following the recommendations, you probably have smithed several batches of Bronze, Iron, Steel, Mithril and Adamant arrowheads, and have logs from regular logs up to maple logs in your inventory taking up space, as well as any other drops you got from mining and woodcutting along the way.

The good news is, none of this is useless! You can immediately take advantage of the excess logs in one of two good ways. Firemaking and Bowcrafting. We will ignore Bowcrafting for the moment as you'll need to branch into more items immediately and take up more space to utilise this skill at the moment.

Firemaking is useful in Bloobs for illuminating secret paths and dungeons, as well as for the uncut gems that drop from burning logs - which can be crafted into cut gems with some more value. At first, you may find that the drops from firemaking your excess logs clog your inventory, but you can either save the uncut gems to craft later, or sell them for a bit of walking around money. To maximise experience gains I recommend saving the gems until later in your bank.

Using firemaking to use up your extra logs should free up at least 3-4 inventory spaces (even if they are replaced with gems.)

For now, you're targeting 30 inventory spaces in your bank, as that is when the cost increases again for bank slots up to 15000 gold per slot.

Tip!
If you'd rather not go this route, or have a ton of extra materials from overnight AFK farming of materials, feel free to drop a few thousand of your excess materials into a merchant for cash, to buy some bank spaces. It won't really set your progression back. It's all in the name of fun!

Bank Slot Cost Progression (Updated as discovered)
Unfortunately, the Wiki's table for slot progression isn't updated with the new values, so I will list them here:
Bank Slots 1-10: Free (Already unlocked at the start of the game)
Bank Slots 11-20: 1000 GP/Ea
Bank Slots 21-30: 5000 GP/Ea
Bank Slots 31-40: 15000 GP/Ea
Bank Slots 41-50?: 30000 GP/Ea
Foraging Onwards
5. Foraging Onwards!

Next, you'll want to consider practising your foraging skill, because this can get you herbs and reagents to make potions to enhance your other skills and speed your progression.

Jump into foraging, your first goal will be to push it up to the first level where you can acquire our first useful Herb: Meadow Cress. Meadow Cress is a herb that can be decanted using the Herbology skill into four different containers (Vials, Flasks, Bottles, Decanters) which can be made into useful potions for progression. More on this later.

For now, you'll spend some time gathering Bloobberries, Red Bloobberries or even maybe worms, and storing those useful products in your bank for later use. You can randomly get extra stones and sticks and worms from foraging, keep these for use real soon!

Once you've gotten a good chunk of Meadow Cress acquired, 1500 is a fair amount for starters, then you'll need your containers to make potions with!

This brings us back to mining, as you'll need sandstone mined up to make into sand, to make into molten glass at the crafting station, to then make into your vials, flasks, bottles and decanters!

Unfortunately, the crafting skill requires you to be level 16 to make your sandstone into sand, so we'll have to do a couple of things for that first.

Your upgraded mining levels and pick will allow you to quickly gather clay which can be wet into soft clay and fired into bowls to boost your crafting skill up past 16 for making sand.

Mine 801 clay, turn it into wet clay at 1 exp/each for 801 experience to reach level 8, then with bowls unlocked, make 801 bowls to reach 13,617 experience and level 30, which is more than enough to make sand, vials, and flasks, which is our initial goal. Store the bowls in the bank for now.

Mine up at least 1000 sand/sandstone and head to the crafting hut (you can again use the crafting menu to toggle an autopath to the building, the sandstone, and any other needed early-mid game materials, through that skill's menu.) And get to processing into molten glass! You'll also note here that your upgraded lenses for foraging require molten glass, so this is a good time to pop over to the smithy and upgrade your lens to the highest tier available for your foraging and smithing skills. (Should be Mithril or above at this point.) Be sure to return to the smithy to improve your lens as you raise your foraging skill. Be sure to use the multi-craft options where available for making sand/molten glass in the interfaces. It provides a little extra experience and is much faster.

With your initial bounty of molten glass prepared, go ahead and make 500 vials and 500 flasks.

Take your vials and flasks to the well (access the well by using the Herbology menu to path to it, in the bottom left corner) - and fill away! Your 500 vials filled with water will get you to level 5, and your 500 flasks past that should get you just over level 11. With the vials prepared, herbs, sticks and stones in your inventory, and heading to the cauldron, you're ready to make your first batch of useful potions!

Continue in the next section!
Potions, Fish, and Food!
If you've been following along up until now, you'll be on a great path of figuring out aspects of Bloobs Idle Adventure, and charting a fairly efficient course forwards for your progression!

6. Potions!

Make 500 Meadow Cress Vial (Unf) then 500 Meadow Cress Flask (Unf) - the experience for doing all of the tasks up to now should have you at level 19 Herbology.

Finally, we mix the Meadow Cress Vial (Unf)'s with two sticks each for Timber Potions, and the Meadow Cress Flask (Unf)'s with two stones each for Excavation Potions. The combined experience points of doing all this potion crafting should be at least 14,000, and have you at level 30 Herbology, a solid foundation in a very useful skill!

With the Timber and Excavation potions, these increase your woodcutting or mining progress by 10 each action respectively. As something like a Rune Pickaxe gives you 40 progression per action, that's a nice 25% buff! The drawback is that these potions take time to make, and only last so long. But happily, by levelling our Herbology to 30 along the way, we get to take advantage of the Herbology passive perk of duration increase on the potions, which is +5 seconds per potion for every 10 levels in the skill, giving you a nice +15 seconds duration per potion!

With these nice new potions in hand, you'll be in a great position to push your woodcutting and mining levels higher to progress into Orichalicite (level 60 ore) or Yew Trees (level 70 trees) and beyond!

7. If you teach a Bloob to Fish...

It's time for something fun! Fishing!

Fishing in Bloobs is much like the other gathering skills. You can open the fishing skill guide, click on a fishing node you have the level for, and auto-path over and get to fishing!

Initially, fishing isn't very fast. With a bronze rod and just letting the fishing happen afk, your skill isn't going to progress very rapidly at all. However, the golden procs for fishing do occur fairly frequently, and with the 1.5x experience from these procs and the guaranteed fish drop, it's very worth putting 15-30 minutes of dedicated fishing time in if you are looking to push for some food or experience quickly.

(Side-note) I idled fishing overnight for 10 hours to test this for the guide, from level 1 with a bronze rod, and acquired around 2650 crayfish and level 48 fishing. Your results may vary of course, but I was getting this part of the guide started and it was bedtime, so that's how it went.

You'll likely fish up some messages in a bottle and old scrolls while fishing, these are trash items currently and can be sold for gold to use for bank slots! If you get fish bones, feel free to bury these for devotion experience.

Tip!
All those pesky fish bones you got need to be - as of writing this guide - buried one at a time by clicking them in your inventory. Additionally, you can turn on auto-bury and it will steadily bury your bones while you're fishing as well! And, thankfully, you can be auto-cooking/smithing/crafting and click-bury bones as you go! A nice efficiency tip as you keep grinding out your skills! Just beware, those fish bones can also be made into sacrifice pots to use for getting devotion points and experience later!

With the auto eat mechanics in Bloobs, you're going to want to have a good stockpile of food in hand to be able to start combat. Having now gotten a start on all the other main gathering skills, fish until you have acquired what feels like a comfortable amount of food for you to AFK some combat, and go ahead and cook it all up!

Once you've got your pile of food, if you didn't before, go ahead and quickly make a set of bronze armor with your smithing skills and feel free to initiate some combat. There is a beastmastery skill in this game that acts like Slayer in RS, however you are going to be after a particular item with your initial combat run, something to make all those arrowtips you made earlier useful! That's right. It's time to kill chickens.

Un-aliving in the coop (Combat! - And Bowmaking)
8. Ready...? Fight!

If you've been following this guide to this point, you should have gotten yourself at least adamant or rune tools in all your slots with the skills you've learned, and a nice pile of cooked food, some bank slots, and a bunch of arrowtips left from your smithing grind. If not? That's okay, you can do what you want, this is a nice cozy idle game.

In any case, where we left off in the last section was combat! That's right, you've done a nice few days of material gathering and processing, and it's time to get to un-aliving things!

Go ahead and wander back to the bank chest you started near and unload your inventory so that you have at least 6 spaces open, then head on over to the chicken coop just a little south and east of the bank chest, and click on a chicken to start stabbing/slashing away!

Feel free to leave things to idle for a while at this point, as with a stack of cooked food and your Bloob automatically going after chicken after chicken (and auto-looting them!) you'll just have to wait for your skills to zoop up!

(Edit) As suggested by a commentator on this guide, you can go ahead and toggle auto-bury of bones while fighting and this will auto-bury your bird skulls or other bones at a steady rate while your Bloob fights! Good way to get early devotion levels, but will slow your progression if you wanted to make devotion pots - more on that later.

When you've gotten your attack skill to 20, consider switching over to strength, until 20, then finally, defence, until 20, and with some of your excess mithril bars, if you kept any, you can quickly go craft a full suit of mithril armor and a mithril weapon, then head back to the chicken coop! Your goal is to essentially kill chickens until you get enough feathers to make all the arrows with which to tip with all of the arrow tips you smithed earlier if you followed this guide.

Somewhere around an hour of combat with each style (Attack, Defence, Strength) will get your Bloob to around level 20 in each, allowing you to outfit them in mithril gear. If you feel like it and have the excess bars, go ahead and upgrade your weapon when it hits thresholds (5/10/20 - Iron/Steel/Mithril) to keep up your accuracy and damage curve.

At that point you'll likely have a bunch of feathers and can go make a basic bow, a ton of bronze arrows and put those aside for when you want to level ranged and bowmaking for crafting up the arrows.

Personally, I immediately went and crafted up 4k bronze arrows (Headless arrows then tipped them to bronze arrows) and that got my bowmaking to 21.
Mid Game and Beyond
9. Catapulting into "mid game" and beyond

By now you've gone ahead and levelled your core gathering skills up, figured out how to make melee weapons and armor, ranged weapons, and gotten a bit of an understanding of how your Bloob can interact with the world. From here, the Bloobin' world is your oyster, and it's entirely up to you where to continue. I'll add sections to this guide as I play, but these will be more of a "how I did it" more than a direct guide. If you're confident in your bloobs journey, thank you for reading and good luck!

With multiple skills in the 50+ level range, you can safely consider yourself mid-game, even if the conventional "Runescape" wisdom applies of experience points doubling every 7 levels you gain. As most of the guides in the bloob skill guides cap out close to or around level 50.

The next thing I did was overnight fight chickens. I had a ton of food saved up and knew my Bloob would be safe, so I left chicken fighting on overnight. This got me to 56 attack, enough for the top tier of melee weapons that the skill guide displays for crafting, so I replaced my weapon that next morning and started in on a few other tasks.

To set my day going, I set my Bloob to cooking all the chicken that they'd gathered overnight, several thousand worth, and came back to a nice stack more of food. Then I set my bloob to mining clay as I figured out better how devotion works, and the sacrifice pit that can be used to get devotion exp and points both, by converting my bird skulls into sacrificeable pots. I wet my clay and converted a bunch of skulls and clay into pots, and then set my Bloob sacrificing. This took a while, so I set a timer and stepped away.

On my return, once my pots were done, I set my Bloob to some more combat, a small slaughter of goats to push my strength and defence skills up over 40 each. With 40 defence, I crafted and equipped Rune armor, selling my old armor off in the process. Next, I used up potion ingredients I had lying around, I had done a batch of Sunsnap Flasks (Unf) in my testing of Herbology, and used some eggs from my chicken "farming" to finish those into chefs pots. Using my new chefs pots, I crafted up all the goat meat into cooked food. Chefs pots make your cooking actions faster, so that was very nice.

Deciding that my fishing skills were lacking (not over level 50), I set my next overnight to work at the clownfish node, to see where I could end up (These took feathers, which I still had a bulk of from the chickens) and woke up to being at 54 fishing with a bucketful of clownfish. I cooked these up with my chefs potions and went about the rest of my day tiding up my inventory, smelting some excess materials down, and buying some bank slots. (Up to 30 slots)

After the day of cleaning up, I set my bloob to overnight fighting, but decided on a bigger challenge this time - wolves. Specifically black wolves. I came across these while looking for the sacrifice pit, and at combat level 17 they were pretty weak compared to my rune armor T7 weapon Bloob, so I let 'er rip overnight on strength experience combat. I woke up to 68 strength and switched it over to defence exp straight off, and then came to update the guide.

Having played from Monday July 15th until now, Sunday July 21st , here is a snapshot of my Bloob's stats:

As you can see, there's quite a nice spread of stats, but several skills that haven't been worked on yet. As I delve into the mysteries of these skills, I will add some sections to the guide.
Devotion - A Small Primer
10. How to Bury and Use Your 'Unalived' Foe's Remains - For Dummies Bloobs

Just kidding, nobody here is a dummy, you're just a Bloob!

Anyway, the Devotion Skill is one of those things that was confusing even to me at first in Bloobs. So I thought that at the suggestion of one of my commentators I would write about it. Fortunately, if you read, the Devotion skill does outline some of what you should do, right in the skill guide:


There's even a handy-dandy 'go to Sacrifice' button that will path your Bloob right over to the sacrifice pit's entrance, and you just have to go a little north once inside and you're at the spot!

It looks like this:


On the outside, and like this on the inside:


You click on that little Chalice your Bloob stops beside and can get going on rituals for your Devotion skill with your prepared vessels.

Thankfully, the wiki has a well made chart for what kinds of vessels you can make:


And then a chart for what you can use your Bloob's devotional skills for:


There are two ways to get Devotion experience. From auto-burying or manual burying your bones from fishing or combat, to making the vessels and sacrificing them, each has benefits, and drawbacks.

Auto-bury/manual bury gives you devotion experience for minimal time investment (since you can bury while doing gathering skills and processing skills too) but making the vessels takes additional materials (mainly clay) and time to process into the vessels (wet the clay, craft the vessels at the kiln) which can take a while for big stacks of bones.

Frankly, the bonuses rendered from the Devotion Skill do not seem that powerful or effective for your time investment into the skill, at least in the early to mid game.

The best value appears to be for the doubling of resources chance, which will at least yield some decent return on investment as you'll be able to gather/acquire 10-20% more of certain materials and goods and make use of them afterwards.

2% experience gain is very low for a costly booster, as is 3% accuracy. The +5 flat damage ones are extremely expensive for what they are, considering they provide something of maybe a 5-10% boost to damage by the time you're at the levels to use it.

With this information, you're a little better prepared to tackle the Devotion skill with your Bloob.

Strategic Shopping 101
Monster Locating and You (A Bloob)
Where and How to Locate Monsters - For Bloobs, By Bloobs

As requested by a commentator on this guide, I will be adding this section and filling it out, on where and how to locate your monsters for your Bloob to exterminate/un-alive/whatever.

First off, look to the centre of your game screen and contemplate the following:


That's right. It's you. The Bloob. You're the real monster. Un-aliving thousands of creatures in the name of skill development. Terrible.

Just kidding, if the monsters weren't meant to be exterminated, they wouldn't have a stat-block, and anyone that's play a TTRPG will understand that one!

3 Comments
goku90504 24 Feb @ 1:56pm 
what's the point of extend?
Bloobs_Dev  [developer] 20 Jul, 2024 @ 4:51pm 
Great guide thank you for helping new players !!
Amraki 19 Jul, 2024 @ 10:27pm 
Very nice beginners guide!

Regarding burying bones: there is an Auto Bury option in the Combat Style Select menu.
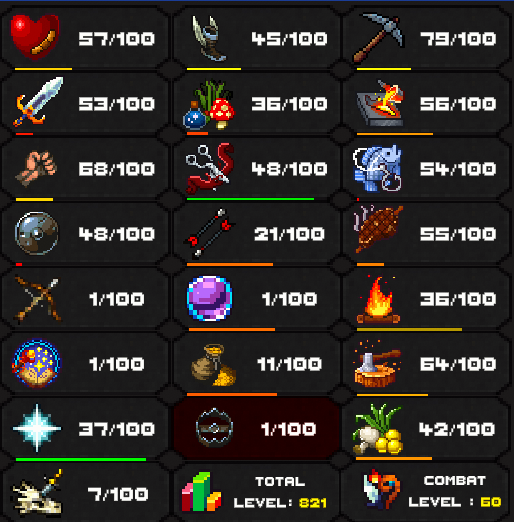
Just remember to toggle it as needed since bones are needed to level Devotion.

I'd also like to suggest adding a section for locating combat targets as it's something I still struggle with periodically. Bonus points for listing which skill auto-path option gets you the closest.

While the goal for most players is to eventually level all skills, taking time to gather resources from low level skills isn't very efficient for idling overnight (or any decent amount of time). If you only need a certain amount of a resource to get over a crafting hurdle or to do another more profitable action overnight, I'd suggest not hesitating to purchase Cotton, Feathers, Wool, or Worms as needed (fish bait, for example).