Elegy of Fate

Elegy of Fate

Not enough ratings
Elegy of Fate - Party Member and General Guide
By Dar
This is an English-language guide to explain some of the more abstruse mechanics and helping you pick your party members. I also cover character creation and a few general tips.

Like Valkyrie Profile Silmeria, many NPCs you recruit in Elegy of Fate are randomly determined, and can be save-scummed. This is a guide to give some advice on which ones to look out for. Every NPC has unique traits, unique stat growths/stats and comes with a transferrable unique Legendary Skill, so choosing the right ones can be pretty important on harder difficulties. Contains soft spoilers.
   
Award
Favorite
Favorited
Unfavorite
Class Basics
There are 5 classes: Warrior, Knight, Mage, Ranger, and Priest.

All classes are capable of doing Magic damage, only Warriors/Knights/Rangers can do Physical damage, which isn't affected by affinities.

Warrior - Melee Damage/Sub tank.


With access to Taunt, Warriors are capable of tanking, but are considered the more offensive of the two tank classes. They specialise in AoE melee damage and are a "selfish" class in that their recovery is limited to themselves only. However, they are easily able to achieve permanent lifesteal/leech later on. They have somewhat poor mobility with long cooldowns. Warrior is heavily skewed towards Fire and ATK scaling, only a few of their attacks use MAG.

Main Elements: Fire/Earth/Dark
Minor Elements: Wind/Thunder/Water/Holy
Elemental Resonance access: Scorching/Cooling/Muddy/Flowing/Electric

Knight- Melee Tank/Party Support


Knights are designed to be the main tanking class. They have fewer elements to choose from, unlike Warriors, but have multiple ways to mitigate damage and can support the party with healing magic, buffs, and debuffs. This doesn't mean they cannot do damage well, however. A properly geared Knight can still compare to a Warrior. However, their coverage is extremely skewed towards Thunder. The elemental component of Knight damage is usually MAG based, but the physical component is heavily reliant on ATK. Knight is also one of the best stat debuffers in the game and has the best mobility skill in the entire game, which can give you ridiculous amounts of invulnerability if spammed.

Main Elements: Thunder/Holy
Minor Elements: Earth/Fire/Dark
Elemental Resonance access: Muddy/Electric

Mage- Ranged Magic DPS


Mage is the main Magic attacker class, having no ATK to speak of. It has full elemental coverage of every element in the game, so you can easily change up your spells to match the enemy you are farming. Mage is a lot less impressive if you aren't exploiting elements and resonances, so it is a class which rewards synergy and planning. Using Resonance is a key feature of Mage, allowing it to crowd control or debuff enemies into oblivion.

The in-game explanation is a bit lacking, so here's how it works.:

1) Hitting an enemy with any resonance skill will apply a resonance debuff on the enemy.

2) If two resonance debuffs which form a combo are applied, both debuffs are removed and the combo effect is immediately applied to the enemy, with the strength of the debuff being determined by the user of the latter skill. Multiple resonances cannot be removed at the same time, only one combo will form, which seems to have a priority order.

The combos are as follows:

Combination
Effect
Description
Scorching + Damp
Evaporation
150% MAG + 300 Water Magic damage. Applies a 10 second -80% HIT debuff, amazing for flooring accuracy and keeping units alive.
Scorching + Muddy
Petrification
-40 SPD and MOV 5 second debuff, preventing most actions. +10000 RDM, making enemies near immune to Physical damage. Note this can often ruin your party's damage.
Scorching + Electric
Overload
Does instant untyped Magic damage, about 200% MAG
Scorching + Flowing
Burn
Applies a DoT doing (8% MAG + 35) Fire damage/sec for 10 seconds
Damp + Cooling
Freeze
Deals (100% MAG + 12 times Character level) WATER damage and a 3 second or so -40 MOV/SPD debuff which prevents movement and casting of spells
Cooling + Electric
Paralysis
~6 second debuff, -40 MOV, essentially preventing movement
Damp + Electric
Thunderfall
250% MAG Thunder damage
Damp + Muddy
Severe Slow
-1.5 MOV, -0.3 SPD for around 6 seconds


Realistically speaking, the best of the lot is Evaporation, and Burn is so bad at a total of 80% MAG + 350 Fire damage that it may as well not exist. I get the feeling the developer missed a 0 somewhere, or Flowing should have had more than one combo.

Main Elements: All (Heavily biased towards Water, then Dark and Fire)
Minor Elements: All (Holy and Wind have significantly less support than other elements)
Elemental Resonance access: All

Ranger- Ranged Phys/Magic DPS


Ranger is a hybrid damage dealing class which deals both Physical and Magic damage. Unlike mage, it has quite poor elemental coverage and extremely limited resonance. However, it is much simpler to use and can deal overwhelming damage by endgame. It has several debuffs, but its best debuff move puts it into melee range and is therefore extremely dangerous. It also has extremely limited ways of recovering its own HP, so it often needs to be babysat. The class has decent mobility too.

When compared to Mages, Rangers tend to suffer more in the early game, but grossly outdamage Mages by the endgame, due to a number of factors: Warrior has a partywide ATK buff, and Ranger has a LOT of incredibly badly balanced skills, the biggest culprit being Rage Barrage, a multi-hit skill which casually crits for 6 digit figure damage multiple times and has a stupidly short cooldown. Mages get a really huge damage staff very early on, but rangers don't get significantly powerful weapons until later. (Remember: Rangers use both ATK and MAG on their weapons)

Currently, I am pretty sure no class does as much damage as Ranger in endgame given equal stats and it isn't a remotely close contest. unless you have very specific min-maxed setups or use certain overpowered Warrior abilities.

Main Elements: Wind
Minor Elements: Fire
Elemental Resonance access: Flowing/Scorching

Priest- Healer/Support


Your main support class, with heals and buffs and cleanses galore. Has extremely limited offensive options, most of which are basic and unlocked at level 1. You'll probably need at least one in the party. There's not much to write because they have very few skills and are very straightforward.

Main Elements: Holy
Minor Elements: None
Elemental Resonance access: None
On Character Creation
Picking a name

Firstly, your character is NOT truly random. They are generated by a seed based on your character's name, which determines their appearance. The traits they have will have based on Name, Gender and Class, so try using your own name for fun. This can be very significant - it can result in a massive 0.4 base enmity modifier or 0.5 Crit Multiplier difference just from name alone!

Additionally, your name determines your growth attributes - Knights usually have 135 hp per level, but depending on your name, this can go up to 162, which is larger than any Party Member. In other words, how strong or weak your character becomes HEAVILY depends on your name. Important stats to look for are:

  • HAT: Determines enmity multiplier. Can make characters unusable, like a Knight.
  • CRIM: Crit multiplier. Criticals are weak in the early game because your usual crit chance is 0%, but they become more useful in the endgame when you can enchant gear for CRI.
  • SPR: MP regen per second. Has large variance. Knights can get 4, 5.5 or 7 MP per second, for example.
  • Growth Attributes: Most stats are useful. I've seen massive outliers, like 17 RST per level or 18 AVD.

Feel free to notify me of any really good names you find and I can put them in the guide. Please use this format e.g.:

Name: Daral - male Warrior. ARP: 7/s and 174 HP/level growth, 1% Crit (Enchantress), 10% Crit bonus. (Rager), Born Protagonist (HP 300, SP 100)

Suggested:
Name: Val - female Knight. ARP: 4/s and 162HP/level growth, Born Protagonist (HP 300, SP 100), Annihilation Engine (1,2 HAT 10%AVD) Aquatic Body (2% Water) with 11RDM/lv

Abilities

This game has a NG+ system which encourages you to repeat it over and over .

Based on how many times you finish the game, you can inherit 1 item from your previous playthrough and receive more points on character creation in the next cycle.

You start with 6 points on the first playthrough, and this changes to 18, 30, then 42 in the next 3 cycles. I'm not sure if you get more beyond that.

Update as of 11/6/2024: According to the developer, the point increase per playthrough was increased recently. I don't know the new values, but I would assume they are larger.

I have posted a table of all abilities at the bottom of this guide since this is more a NG+ concern.

In your first run, I personally recommend the following 2 options:

  • Guardian Angel + 2 Points of abilitles
    - I recommend Shadow Assassin myself or Bullet Deflector if playing a ranged character.
  • Time Traveler + Undying Warrior
    - QoL for the first run

On your second run, just pick "Heavens are envious yada yada". It's very very good.
Stats and Basic Game Mechanics
A simple explanation of stats

I thought this was needed since the game doesn't do this well in the help menu.

Stat
Description
HP
Health Points. Lose it all and your character is dead. Can be refilled to 50% at save points.
SP
Skill Points - Also translated as MP and RP sometimes (hence ARP). Used for casting skills. Can be restored to 50% by resting at save points.
ATK
Attack - Used mainly by Knights, Warriors, and Rangers to calculate damage. Most damage done by Attack is Physical, although there are exceptions.
RDM
Resist Damage - The DEF stat to ATK. Opposes ATK in a seemingly subtractive way.
MAG
Magic - Used by all classes to calculate damage by spells and elemental attacks.
RST
Resistance - Magic Resistance, the equivalent of DEF for MAG.
ARP
SP regeneration - I'm not sure what the acronym stands for, but it was probably machine translated. Sometimes also translated as SPR (spirit?). Determines how much SP your character recovers per second and is an important stat for people with a lot of skill use.
SPD
Attack Speed. This also affects the animation speed of your attack skills. A higher Attack Speed will result in faster skill use. The base SPD is 1, gaining 0.05 SPD is equal to a 5% increase in attack speed; a SPD of 2 basically means your character attacks and animates twice as fast. If reduced to 0, your character is unable to attack (Paralysis and Petrification essentially are a -40 SPD debuff). Speed is quite good, in general.
MOV
Movement speed. The base movement speed is about 4. Reducing this to 0 essentially prevents the target from moving.
HIT
Accuracy rating. Determines the probability that skills will hit a unit.
AVD
Avoidance rating. Works in opposition to HIT in a subtractive fashion.
CRI
Critical Rate. The base crit chance for most characters is zero. Mostly a late game stat.
CRIM
Critical Multiplier. Damage is multiplied by this number during a critical hit. The base rate is about 1.35 times, but Character generation can have a very large variance on this, going up to 1.85 and above.
DAMD
Damage Reduction. A percentage reduction applied to the final value of damage you take. 50% DAMD = a 50% reduction in damage. Every Rune equipped gives 1% of this, so fill out all your slots as soon as possible.
CURE
A multiplier for outgoing HP recovery. The base is 1. Having 1.5 CURE = Heals done by this character heal for 50% more.
HEAL
A multiplier for incoming HP recovery. Works in a multiplicative way with CURE.
HAT
Enmity/hate multiplier. All enmity generating actions will be multiplied by this number. +1 HAT means your character generates 100% additional base hate.

Status immunities are a direct % chance to avoid a specific status.
Elemental affinity is covered below in its own section.

Another thing to note which is not covered in the Help menu: The game is similar to a MMORPG in that there is very extreme level scaling. Consider anything 5 levels or more above you as basically impossible, regardless of your offensive stats. Even if you have 1000 ATK over the enemy's RDM, you will do single digit damage or miss all the time.

The minimum level for doing any content is +4 of your current level.

I estimate damage reduction as follows.
+6: 99.99% damage reduction
+5: 99.9% damage reduction.
+4: No damage reduction.

This was done in NG+ by trying to fight a level 10 enemy at level 4 with an overpowered weapon and slowly gaining levels. At level 4, it was impossible, but at level 6, I basically did 1000 times the damage of level 4.


This system has recently been revised in an update so that damage reduction scaling should be hard capped at 50% damage instead of 99.99%

If you cannot progress in the game due to enemy levels being too high, look for level appropriate content to farm.

Skill Ranks
Note that Skills have ranks to them, getting stronger and decreased cooldowns/SP cost, but do not level naturally unless you have the Ability for it. The feature to rank up skills is unlocked approximately halfway through the game. Ranking up skills will generally INCREASE their overall SP consumption because of the reduction in their cooldown times.
Elemental affinity system re-explained
Elegy of Fate's elemental affinity system is not particularly well explained and can be a bit counter-intuitive due to a misleading diagram in the tutorial, so I'll attempt to re-explain it here.

There's an affinity chart in the game showing Fire<>Water Light<>Dark and the Triangle for Wind>Earth>Thunder, however that just refers to the way the artifacts are paired. If a unit has high Water affinity, attacking it with Fire elemental skills will NOT do more damage.

The only thing you need to pay attention to is here:


You can think of affinity, represented by the numbers under the coloured balls, as "Resistances/Damage Multiplers", such as in Diablo 2 or other such ARPGs. In the picture, 0.33 FIRE translates to roughly around 33% of FIRE damage being resisted entirely.

When affinity hits 1, all damage of that element is nullified. If the resistance exceeds 1, for example - if you have 1.5 WATER affinity, you will start to heal damage taken. 1.5 WATER affinity would heal the character for half the raw damage.

This also applies to damage dealt from that element. 0.33 FIRE affinity means fire spells do approximately 33% more damage.

Negative affinities will multiply damage taken from that element as well as reduce damage of that element which you deal. This is why wearing Urandia on a Holy damage attacker is a bad idea.

Paying attention to elements and changing them is key to making your life a lot easier on harder difficulties. With proper elemental abuse, some bosses can be rendered entirely impotent, making them a cake walk.

This is a short cheat sheet of artifacts you should use to counter elemental affinities:
Element
MOON
SUN
vs Water
Naglazi
Ragnar
vs Fire
Ragnar
Naglazi
vs Lightning
Pennyros
Phenylde
vs Wind
Phenylde
Nigsalon
vs Earth
Nigsalon
Pennyros
vs Holy
Perahaim
Phinheim
vs Dark
Phinheim
Perahaim

Remember that attacks also often have a physical component, which is unaffected by affinities.
Runes and Runewords
Here is the list of Runes and some farming locations:

Rune name
Effect
Earliest Farm
ᚠ (Fehu) - F
3% HP
Emerald Temple
ᚢ (Uruz) - U
2% RDM
Golden Beach
ᚦ (Thurisaz) - TH
0.03 HEAL
Metrati
ᚨ (Ansuz) - A
3% SP
Mystic Forest, Emerald Temple
ᚱ (Raido) - R
2% HIT
Golden Beach, Atlan Volcano
ᚲ (Kaunan) - K
0.05 HAT
Metrati
ᚷ (Gebo) - G
0.03 CURE
Metrati
ᚹ (Wunjo) - W
2% RES
Temple of Water
ᚺ (Hagalaz) - H
2% AVD
Golden Beach, Atlan Volcano
ᚾ (Nauthiz) - N
0.2 ARP
Thunder Plains Dragon's Lair
ᛁ (Isa) - I
1% WATER
Metrati (Lv35)
ᛃ (Jera) - J
10% DEATH
Metrati
ᛇ (Eihwaz) - EI
2% MAG
Atlan Volcano (Lv 49)
ᛈ (Perthro) - P
1% FIRE
Terrania Abyss
ᛉ (Algiz) - Z
1% THUNDER
Dragon Peak Boss
ᛊ (Sowilo) - S
1% WIND
Lizard Nest Boss
ᛏ (Tiwaz) - T
0.1 MOV
Golden Beach
ᛒ (Berkana) - B
1% EARTH
Great Rift (Lv 71)
ᛖ (Ehwaz) - E
0.02 SPD
Great Rift Abyssal Lair
ᛗ (Mannaz) - M
2% ATK
Atlan Volcano (Lv 49)
ᛚ (Laguz) - L
3% HOLY
Dragonbone Plains boss
ᛜ (Ingwaz) - NG
3% DARK
Dragon Peak (Lv 63 boss)
ᛞ (Dagaz) - D
0.05 CRIM
Dragon Temple
ᛟ (Othala) - O
1% CRIT
Dragon Temple, Elf Forest (lv66)

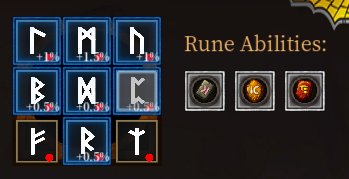
This is a more colour-coded table including the runewords for your reference:

There are a few things to note about runes:

  • All runes give +1 DAMD, so it is recommended to fill out your rune board ASAP.
  • The order of runes does not matter for runewords.
  • Runewords can be made vertically as well as horizontally.
  • There are three multiplier runes:
    ᛟ (Othala), ᛗ (Mannaz) and ᛞ (Dagaz).
    When placed on the rune board, they buff certain adjacent runes and themselves by multiplying their effects.

    ᛟ (Othala) gives +1 to effects vertically and ᛗ (Mannaz gives it horizontally, ᛞ (Dagaz) Gives +0.5 to all adjacent runes.

    This means ᛗ (Mannaz) should ALWAYS be placed in the middle of the rune board whenever possible in a runeword, so that it can buff adjacent runes.

Here is an example of an optimised rune board for farming:


It has 50% to all stats for 30 seconds, 30% Attack increase and a 100% HP shield to stop unfortunate K.O.s at the start of battle.

I encourage you to develop your own rune boards, even if options are currently a bit limited.
Party Members by Zone, Pt 1
This section of the guide covers the NPCs available in each region and helps you determine which you should choose. Usually, if an area has multiple NPCs listed, you may only recruit one, chosen at random, so if you don't get the one you want, make sure to reload your game. I consider accessibility and Unique skills when rating a character.

Metrati


  • Vera (Knight) - Family Heirloom Hat (380 HP, RDM 3%, RST 3%)
    Rating: ★★☆☆☆
    Skill: Life Redemption (Single-Target HoT and ATK buff, triggers 4x over 20 sec)

    Vera's heal is useful early on before you get your first Priest if you have no other way of healing, but its single-target nature and long CD leave much to be desired. She has slightly better offensive stat growth than Marxin.

  • Marxin (Knight) - Brown Enchantress (35% HP)
    Rating: ★★★☆☆
    Skill: Regroup (AoE Damage shield + RDM/RST buff, Taunt + massive DAMD/HAT buff for 15s)

    Marxin's trait scales better than Vera as the game goes on and Regroup is a very good skill which can replace Taunt. Her attack growth is awful, however, being the weakest ATK knight.

Barren Land


  • Eva (Priest) - Compassionate Healer (150 SP, ARP: 2/s, CURE: 0.08)
    Rating: ★★☆☆☆
    Skill: Fruit of Healing (3s cd 15% Heal, buffs HEAL of target)

    Eva's Fruit of Healing is bugged and does not increase the target's HEAL at all, so she is a bad choice since there are much better heals. I've changed her rating especially after I found Natali's skill is much much better than advertised. Pick Natali instead.

  • Natali (Priest) - Energy Flow (300 SP, ARP: 3/s )
    Rating: ★★★★★
    Skill: Soul Concentration - 20 CD Shield Skill + % small SP restore. Triggers 10x over 10 sec.

    Natali has a pretty amazing skill which might not look great at the start, but gets really good once you are able to rank up skills and halve the cooldown. It costs next to no SP and restores 1% of ALL party members' SP ten times, allowing her to be a SP battery. It also stacks a shield on them 10 times, far stronger than the low level barrier skills. Shield skills have no actual duration for the amount of protected HP, so this is useful at keeping everyone fully barriered against accidents.

  • Melody (Priest) - Divine Chanting (MOV 0.2, CURE 0.15)
    Rating: ★★☆☆☆
    Skill: Mental Focus (45s CD AoE Group Teleport to self + Heal)

    Melody's unique skill is used to drag allies out of danger zones. However, it is bugged to only drag a single target, there's already a Noble Phantasm artifact which does the group teleport thing and in most cases, teleporting your melee units on top of her will be incredibly annoying if not disabled in the AI. Her trait makes her heal 15% more hp, but she has low SP regeneration.

Golden Beach


  • Alicia (Ranger) - Princess (3% ATK, 8% HIT) Wind Fairy (SPD 0.1, WIND 8%)
    Rating: ★★★★☆
    Skill: Wind Fairy (45s CD AoE Heal +MOV/SPD 30%HIT/AVD buff for 20s)

    A fairly decent ranger with a small amount of ATK and HIT buffs, but as a mere dabbler in both, she isn't anything to write home about. Her Unique Skill - Wind Fairy is a really useful party buff, especially once upgraded, when it has nearly full uptime. It's a massive DPS and survivability increase.

  • Olivia (Mage) - Lightning Surge (100 SP, ARP: 2/s Thunder 5%)
    Rating: ★★★☆☆
    Skill: Arcane Nova (50s CD AoE Water attack - 80% HIT debuff)

    Olivia is a decent starter mage with minor SP regeneration. Arcane Nova inflicts Evaporation, which is a massive HIT debuff, directly, so you don't need to use a Water+Fire combo. However, her only damage buff is a 5% Thunder affinity, so she drops off pretty fast.

Atlan Volcano


  • Abigail (Warrior) - Blood Sword (ATK 60, ATK 10%, SPD 0.1, Lifesteal 12%)
    Rating: ★★★☆☆
    Skill: Blood Sword Dash (35s CD 5x autohit dash with 3s of Invincibility built in.)

    Abigail is pretty good at this point in the game because she covers her own healing, which is convenient when your healer has long cooldowns because skills cannot be upgraded yet. You don't really get a choice anyway. All warriors can get Perma-lifedrain later on.

Water Temple


  • Angela (Mage) - Core of Thunder (MAG 12%, Thunder 18%)
    Rating: ★★☆☆☆
    Skill: Thunderous Strike (68s CD Large AoE Lightning Attack)

    Mostly notable because she's one of the first mages you have access to. Her skill is rather bad and at this point of the game, she runs out of SP easily because she has no ARP recovery trait. She has decent offensive stats, however.

  • Cassandra (Ranger) - Nightingale's Eye (HIT 35% CRI 5%)
    Rating: ★★☆☆☆
    Skill: Immobilizing Arrows (45 CD Phys AoE with a 5-8 second Root/Snare)

    5% Crit is pretty large, but crit builds aren't particularly strong early on because the base Crit rate is 0% and is very difficult to stack. Her skill is forgettable, but can be useful when kiting. She has the highest ATK growth of the early Rangers.

Mystic Forest


  • Stephanie (Warrior) - Heaven is envious of talent (Level Up Bonus: HP 20/.SP 8/ATK 7/MAG 7,HIT 5, RDM 4, RST 4, AVD 5, SPD 0.01)
    Rating: ★★★★☆
    Skill: Rage of the Rose (30s CD 5 hit Hybrid Dark Mag/Phy Atk dash attack)

    Stephanie has one of the strongest basic traits in the game - Other than HP, it nearly doubles her stat gain on level up. Sadly, the game is full of broken warriors with better traits and stats later on. Her trait is retroactive, so you don't need to worry about getting her late. Rage of the Rose is decent if you need a Darkness attack.

  • Yegis (Ranger) - Cross (HIT 100, HIT: 45%, MOV 0.25)
    Rating: ★★★☆☆
    Skill: Cross (60s CD Autohit single target Wind phys attack)

    Yegis only really has two things going for him: 1) He's one of the few rare male party members and 2) He has the highest HIT rate of all rangers. This lets him apply debuffs pretty consistently. He has low ATK/MAG stats and very high HIT growth (9 per level compared to the usual 5-7).
Elf Forest


  • Eleanor (Ranger) - Shadowmoon Wolf (ATK/MAG/HIT 8%, SPD 0.05, 0.02 SPD/lv)
    Rating: ★★★★☆
    Skill: Moonlight Meteor (25s CD, High Phys/Mag damage AoE)

    Eleanor is a ranger with great attack speed thanks to her passive. Moonlight Meteor is a good attack skill for Rangers, but there is no shortage of better ones later on. Has incredible damage potential, due to attack speed affecting skill animation speed.

  • Mia (Mage) -
    Charming Songstress(SP 220, ARP 3/s, HP 20%, HAT - 0.5 Recovers 5% of a teammate's SP every 10s) Heavenly Tune (MAG 15%)
    Rating: ★★★★★
    Skill: Otherworldly Sound (120s CD, 20s CD reduction buff to group)

    Mia is a fantastic mage, and is endgame-worthy. She has a unique SP recovery trait and the only drawbacks to her are her somewhat low HP growth, bad unique skill and average HIT rating.

Emerald Temple


  • Philomena (Knight) - Rotating Sword Case (58 ATK, 5% ATK, 10% Chance to shoot swords on attack skill usage)
    Rating: ★☆☆☆☆
    Skill: Amethyst Wall (75s CD, AoE Phys Charge attack, 5s Knockback + Stun on enemies, 10s Group Heal + RDM/RST buff )

    Attack focused Knight with bad defensive stat growth and HP. Tanks as well as you would expect. About as useful as a chocolate teapot.

  • Tasha (Warrior) - Flame Inheritor (HP 800, CRI 2%, CRIM 0.05, FIRE 8%)
    Inexplicable (Level up bonus: ATK 5, RDM 4, RST 5)
    Rating: ★★★☆☆
    Skill: Unparalleled Overlord's Blade (60s CD, Phys AoE + 3s Stun)

    Tasha is okay, if not actually pretty good, but outshadowed by Stephanie early on. Her main appeal is that she isn't Philomena. Take her if you didn't get Stephanie.
Party Members by Zone, Pt 2
Thunder Plain


  • Roxanne(Warrior) - (Water Ripple 1.5/s ARP 15% WATER, 10% chance of giving Water affinity buff (30s) to allies on attacks equal to a 26.75% Water Potion)
    Rating: ★☆☆☆☆
    Skill: Heart of Crystal (80s CD 120 MP, Buffs all Element Affinities by 15%+, Rapidly heal the target for a very large amount over 5 seconds, Applies Frozen to target.)

    Roxanne has incredibly bad ATK growth, which puts her on par with Abigail for the lowest ATK stat, except Abigail has a trait which increases her ATK and Roxanne does not. She has low HP growth and the worst RDM, so she cannot tank either. She even has the worst MP regen in the game. I'm not sure what purpose she serves except to be good at using powerful Water elemental attacks... which Warrior doesn't have. She is undoubtedly the worst character in the game.

  • Elisa(Ranger) - (Master of Sacred Feathers 3% ATK 5% AVD 0.1 SPD 10% SPD 3% WIND)
    Rating: ★★★★☆
    Skill: Exclusive Performance (225 CD 90 MP, 1.35 SPD/MOV 500 AVD buff for 15s )
    Elisa's skill says it reduces Cooldowns, but doesn't appear to. Self-only buff, with absolutely terrible uptime. She has above-average growth stats for a ranger and 6 base ARP. Usable, even if her skill is awful.

Takgan Desert


  • Scarlett (Ranger) - Deceptive Eye (AVD 80, AVD 20%, Level up bonus: AVD 3 )
    Rating: ★☆☆☆☆
    Skill: Void Shadow(150s CD, Self buff 8% Crit 0.5 Crit Multiplier )

    Gimmick Ranger who specialises in AVD. Not really useful unless you plan to have her tanking.Her unique skill is uniquely terrible due to it being self-only and having an incredibly low uptime. Use Elisa instead or Eleanor. Strong MAG, bad ATK growth.

  • Perand (Knight) - Soul Tremor (RST 10% AVD 15% Recover 15% life every 15s)
    Rating: ★★★☆☆
    Skill: High-Speed Spiral (100s CD, Thunder PBAoE + Bleed)

    Rare Male NPC, Has a pretty good passive considering Knights tend to suffer when it comes to Magic damage. Also has surprisingly high ATK growth at 9/level when the usual Knight ATK growth is 4-5. Counterbalanced by his abysmal MAG growth, which at 3/level is the lowest of all Knights. The true offensive Knight compared to Philomena, because he can actually tank.

Great Rift


  • Meredith (Mage) - (Sacred Faith 3/s ARP 20 RDM/RST 80 AVD 15% AVD 10% HOLY, Every 60 seconds, gain 30s Holy 26.75% Element.)
    Rating: ★★★☆☆
    Skill: Fusion Magic - (9s CD 120 MP, deal 200% +200 Fire/Water/Earth/Thunder/Wind damage)

    Meredith comes with an extremely powerful spell, if a little costly in terms of MP. Sadly, she doesn't have the traits to make use of that spell because she's Holy aligned. She also has extremely bad stat growth and the low HP of a beginner-tier Mage, so you would just take her for her skill and never actually use her in battle.

  • Gwendolyn (Knight) - (Double-Edged Knight Every 30s, cleanse all negative debuffs on all teammates)
    Rating: ★★★☆☆
    Skill: White Cross Sword (40 CD 120 MP, Huge Holy/Physical multihit AoE)

    Gwendolyn herself is nothing special, but her unique skill is one of the most damaging Knight Skills in the game. Unfortunately, it has stiff competition from the other two Unique skills and probably does the least damage of the three.

  • Virginia (Ranger) - (Swift Arrows - 100 HIT, 35% chance for normal attacks to fire another arrow )
    Rating: ★★★★☆
    Skill: Holy Bullets (60s CD 100 MP, Shoots an arrow rain which lasts for ~14s dealing 300%+550 ATK Holy damage per arrow which hits.)

    Virginia has the worst Magic growth of any ranger, but that doesn't matter because her unique skill is one of the strongest Ranger skills in the game. Holy Bullets can be buffed to a 27.6s CD and its hit count depends on how many arrows collide with the hurtbox of an enemy. On large enemies, this does obscene amounts of damage, and the rate of falling arrows scales with Speed, meaning you get more arrows the more speed you have. This makes it do absolutely amazing damage on Eleanor assuming she's fighting Fatty McFat hurtbox.

Lizard Nest


  • Beirut(Knight) - (Immune to all poisons 8% HP 100% Poison/ Paralysis /Petrification /Frailty /Bleeding Resistance)
    Rating: ★★★☆☆
    Skill: Death Call (160s CD Apply instant death to single target. If target survives, gain a large ATK/MAG/RST/RDM buff for 20s, heal it for 45% and give it 12% DAMD)

    Death Call does not resurrect teammates, like the description would suggest. It is a single target and is bad due to terrible uptime, even after being patched so that it can be resisted by Death resistance.

    Beirut himself has a useful tanking passive, but you can get status immunity from other sources. Enemy DoTs are deadly.

  • Ingrid(Warrior) - Immune to Control (20% HP 100% Paralysis/Freeze/Petrification/Silence Res)
    Rating: ★★★☆☆
    Skill: Dark Scythe (10s CD 150 MP 7-fold AoE ATK sweep, adds minor Fire DoT)

    Ingrid has a nice set of immunities, but is not a very good Warrior because she has extremely bad ATK growth and bad growth all around which makes her unsuited for tanking. Her skill, Dark Scythe, is very good, especially if you're wearing Urandia, but is extremely expensive on the MP.

Terranite Abyss


  • Ivythys(Mage) - Dark Dominator (120 MAG 8% MAG 10% Dark 20% chance to release dark sword on spell use)
    Rating: ★★★☆☆
    Skill: Chaos Cage (Dark Magic AoE, does one large hit, not Continuous damage)

    Ivythys is the worst of the 3 Dark mages, however, this is kind of a niche build. She can be fun, though. Chaos Cage's main problem is that it only does one hit and loses out to Ranger skills.

Thousand Needle Rock


  • Carmen(Knight) - Silver Hand (800 HP 20% RDM/RST 0.5 HAT 0.3 HEAL/CURE)
    Rating: ★★★★☆
    Skill: Like a Mountain (80s CD (36.8s at Max), 15s Self buff + Minor Threat, 6000 RST/RDM, -12 SPD/MOV, 50% DAMD, 1000 Mass)

    Carmen is the tankiest main game Knight, hands down. Her trait, Silver Hand, gives just about every stat a Knight could want. Additionally, she has superlative HP, RES and RST growth. Her only drawback is her average ATK growth of 5, but if you want someone to tank through the endgame, Carmen can do it easily.

    Her Skill gives a ludicrous amount of damage reduction for 15s.

  • Ada(Ranger) - Shadowmoon Wolf (0.35 SPD 15% SPD)
    Rating: ★★★★☆
    Skill: Steel Forge (Magic 50s CD, 120 MP, AoE Fire damage, debuff ATK and MAG 20% for 10 sec)
    Max rank: 23CD. -32.6% ATK/MAG 163% + 358 Fire Magic damage.

    Ada's trait is simple and buffs SPD. She has quite mediocre stat growth with the exception of MAG, which is the highest amongst Rangers. This is probably because her unique Skill is a damaging debuff spell, which is an incredibly rare ATK/MAG debuff. It isn't quite as strong as the Noble Phantasm Cracked Landzatus, but ATK/MAG debuffs are quite useful for keeping your party alive.

Dragonbone Plains


  • Gerald(Mage) - (Legendary Mage 200 SP 4/s ARP 15% MAG/HIT)
    Rating: ★★★★★
    Skill: Meteorite Protection (30s CD, large Holy damage nuke)

    Mainly for people who didn't get Mia. Gerald has incredibly good stat growth for a mage and is only slightly inferior to Mia in that he doesn't have a 20% HP innate and the 5% MP recovery proc. He has slightly higher MAG and much better HIT due to a 15% HIT buff to compensate. Both are contenders for the best endgame non-Babel mage. TLDR: Mia has slightly better survivability and a MP proc and Gerald has slightly better damage. MP becomes less of a problem in endgame, especially once you learn Holy Hymn on your Priest.
    Note: Meteorite Protection can be annoying because the effect looks like dangerous ground AoE markers.

Party Members by Zone, Pt 3
Dragon Temple


  • Xiang Lan - (Exotic Constitution 5% ATK/MAG/HIT 0.05 HEAL/CURE)
    Rating: ★★☆☆☆
    Skill: Sun God Sword (5 large AoE slashes. 45cd 140 MP MAG 200% + 420 ATK 200% Fire + 450 Physical)

    Xiang Lan is not very good because she has early-game-tier stat growth and simply cannot compete with any of the other endgame warriors.

  • Sheryl (Mage) - High Priest of the Temple of Water(3/s ARP 10% MAG 100 HIT 8% Water)
    Rating: ★★★☆☆
    Skill: Queen of the Sea(Multihit Laser Beam Dealing MAG 135% + 180 Water damage + Water Elemental Potion for 30s. Does approx 15 hits?)

    Sheryl is grossly inferior to Gerald and Mia, so you take her for two reasons: 1) She isn't Xiang Lan and 2) Her unique Skill, if maxed and used in combination with a water artifact, can let you repeatedly farm Anlabeert with terrible gear because Anlabeert only does Water damage. This is another good spot to lock EXP and grind out Soul Crystals.

  • Taurissa (Warrior) - God of War's Weapon (1000HP, 15%HP, 20%ATK, 2%CRIT, 0.2CRIM, FIRE 5%)
    Rating: ★★★☆☆
    Skill: Flame Meteor Shatter (Max stats 13.8s CD, 88MP, applies Scorching. Spin and shoot out 6 long range energy slashes repeatedly. Can shotgun at point blank.)

    Please note that Taurissa cannot be gotten through the random recruitment panel. You get her by re-forging the Flame Rose sword.

    Taurissa is the second strongest of the three endgame Warriors. She is much stronger than Horus offensively, but slightly weaker defensively. The big problem is that by the time you can get her, you can probably get the strongest warrior in the game.
Dragon Peak


  • Vinicxina(Priest) - (100 SP 4/s ARP 5% MAG All allies gain a shield equal to 10% Max HP every 10s )
    Rating: ★★★★★
    Skill: Entia’s Guardian (100s CD 200 MP, Instant heal, Heal over 10s, 50% Dam reduction, gives a shield and 50% DAMD)

    Best Priest in the normal game, and it's not even a close comparison because you only really get 1 other priest unless your main character was one. Priest feels like an undeveloped class alongside Knight given how few skills both have. Her skill wastes a lot of text instead of just telling you the character is practically invincible for the next 10 seconds, but its cooldown limits it from being useful.

Holy Monument


For some reason, this place has 2 recruitables right before the end of the game. Even stranger, both of them are male in a game full of AI-generated booby women.

  • Morlong (Mage) - (Erosion Magic Eye AVD 200 15% chance to release dark magic explosion on spell use)
    Rating: ★★★☆☆
    Skill: Painful Light (Max stats: 18.4sCD 146 MP, Large Magic AoE dealing 6 slow ticks of 163% MAG +1059 DARK damage, ending in a large burst dealing 1630% MAG + 1630 DARK damage)

    Morlong has very good stat growth, but lacks a significantly useful trait to back it up. I'm not sure why he even has 200 AVD. As a result, he'll fall behind the other endgame mages pretty easily.

  • Alanmelon (Knight) - (Lurant's Pillar 1500 HP, 10% RDM, 10% RST, 50% chance to survive when fatally wounded)
    Rating: ★★★★★ (More like 4.5)
    Skill: Flash of Destruction (13.8s CD 88 MP, Autohit, deals 815% ATK + 1304 damage 10 times)

    Alanmelon is a decent tank, but he doesn't do anything Carmen cannot. Carmen has better defensive stats, but he has a 50% chance to resist any fatal damage, so there's that - but you can get that from a Runeword, so it is by no means unique to him. Flash of Destruction is a very long ranged line attack which does a truckload of damage.

Semi-secret character -Spoiler Alert!!!-


  • Asnida (Warrior) - Black Bloodsucker (3000 HP 25% HP 120 ATK 125 MAG 150 HIT 0.3 CRIM 12% DARK Skill damage increases 1% per 1% reduction in health.)
    Rating: ★★★★★★★★★★
    This is the strongest warrior in the game and her stat growth is extremely high, gaining 30 more HP per level than the second highest level warrior. Her HP is abnormally high so that she can make use of her Black Bloodsucker trait, which wants her to be at not-full HP. Achieving this may be more difficult than it sounds because lifesteal tends to be extremely strong.

    Recruit her by repeatedly letting your Shelter run out until she challenges you. Do this on a map with lots of artifacts to debuff her and buff yourself and it is an easy victory.

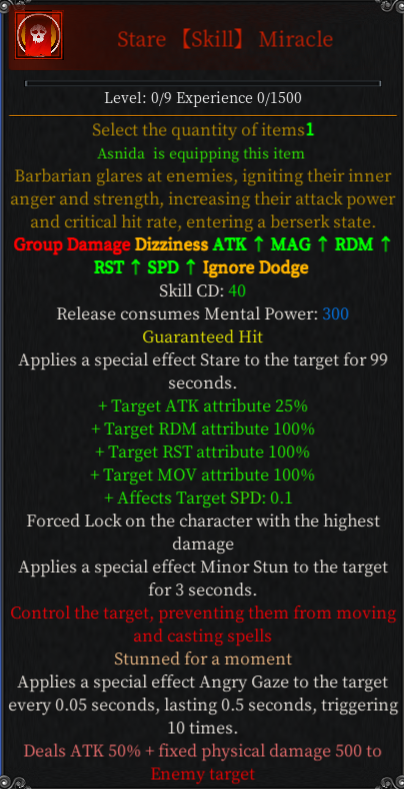
    Her skill is just ridiculous to the point where I don't have much to say about it. You've already beat the game at this point. May as well trivialise Knights.
Party Members by Zone (Babylon, Endgame)
Tower of Babylon


There are a horrendous 7 possible recruits here and you can only pick one. They come with two skills each. Good luck.

Colariness (Knight) - (Thunderous Heart 4% CRI, 20% Thunder, 5% chance to release chain lightning when attacking)
Rating: ★★★★☆

Colariness is a Warrior masquerading as a Knight. She has a base massive 20/s ARP, making it difficult for her to run out of MP. In addition, she has the highest ATK/MAG/HIT/AVD growth of all knights by a significant margin. Her HP growth is good, but her defensive stats are mediocre. She also has 20 innate Thunder alignment, enhancing her Thunder damage.

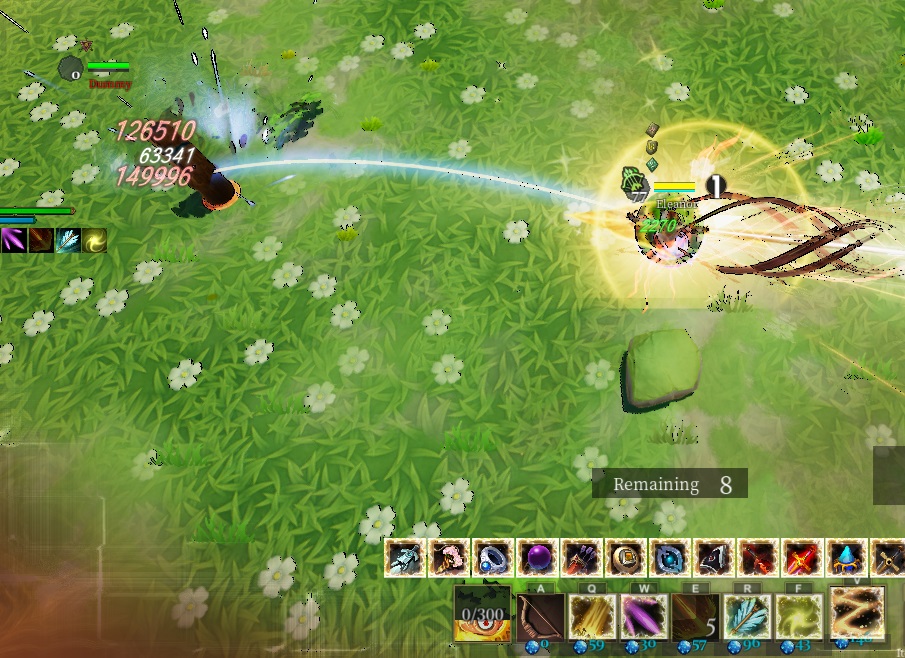
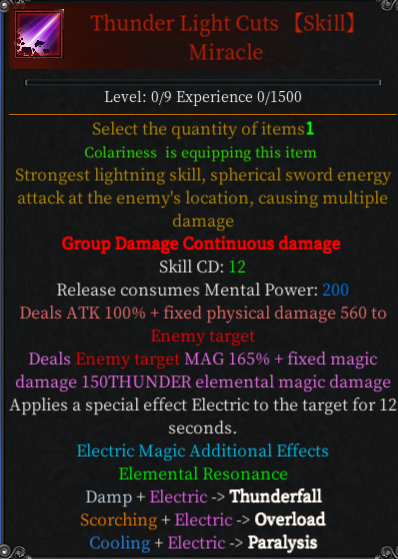
Her unique skill, Thunder Light Cuts, is a low-cooldown spammable skill which does amazing damage, but also costs an amazing amount of MP. After making 2 slashes, you create a small AoE which strikes for the damage listed around 13 or so times.

She also comes with Annihilation Cuts, but chances are that she already taught that to you for free.
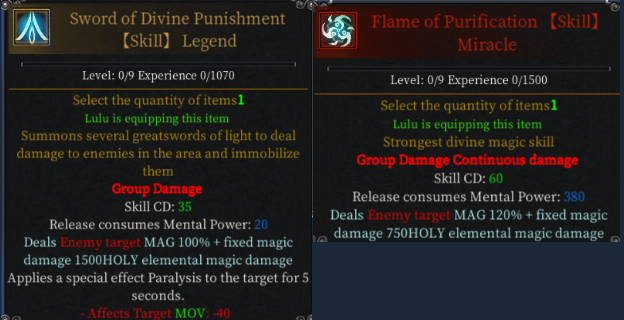
Lulu (Mage) - Sacred Blade (100 SP, 3/s ARP, 50% chance to shoot holy magic bullets on attack)
Rating: ★★★☆☆
If Anastasia is the Dark Mage, Lulu is supposed to be the Holy one - but she has no affinity for Holy, nor MAG buffs. Instead, she has a 50% chance to fire a large piercing Holy bullet on autoattacking, meaning you'd want to give her high Speed buffs and let her autoattack as much as possible. Each bullet does around 3.5 times the damage of an autoattack.

Her 2 spells are decent - Sword does around 10 hits. Flame of Purification nearly does too many to count, but I estimated it on a target dummy as 50 hits (by dividing the difference in HP by the average hit).
Tiamat (Knight) - (Earth Shield 4/s ARP, 3000 HP, 15% HP, 8% Earth. Attacks have a 5% chance to give a shield equal to 1% health.)
Rating: ★★★★★

Tiamat has the highest HP of all knights. He also has extremely high stat growth compared to all other knights with the exception of ATK and AVD, where Colariness has him beat. Simply speaking, he's the best pure tank Knight NPC in the game.

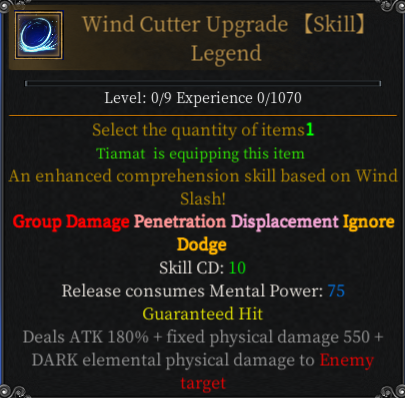
Wind Cutter Upgrade is his unique skill, and is a very spammable Darkness AoE with a small backflip. Tiamat comes wtih Blade of the Earth equipped, which is actually a normal Warrior skill. Note that if you take it off, he can never put it on again.

Like Colariness, Tiamat also has a ridiculous 20/s base ARP, which doesn't factor in his trait.
Horus (Warrior) - (Flaming Heart 100 SP 2/s ARP 2000 HP 15% HP 8% FIRE)
Rating: ★★★☆☆
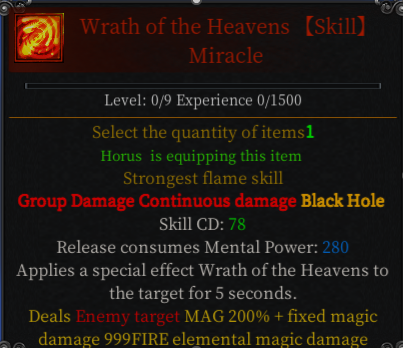
Blazing Leap Slash does not Leap. It is just an extremely fast dash. Wrath of the Heavens is a joke skill which creates a giant flame tornado that drags all enemies (including target dummies) halfway across the map. Very fun, but extremely silly considering the enormous cooldown.

Horus himself has good stats, but is the weakest of the 3 endgame warriors. I don't really know why you'd want to use him. I suppose he is tanky, but much less than the secret character.
Anastasia (Mage) - (Dark Devour (5/s ARP, 12% Dark, 50% bonus skill damage when equipped with Urandia) )
Rating: ★★★★★

Anastasia is a stronger damage mage than either Mia or Gerald as long as you equip Urandia on her. Gaining an additional 50% bonus multiplier makes her do more Darkness damage than any other mage in the game. Her stat growth is as weird as Anlabeert, gaining ATK on level ups and having very high HP growth, but her trait does not buff HP or MAG at all. Additionally, the fact you essentially have to commit to using Urandia on her can hold her back.

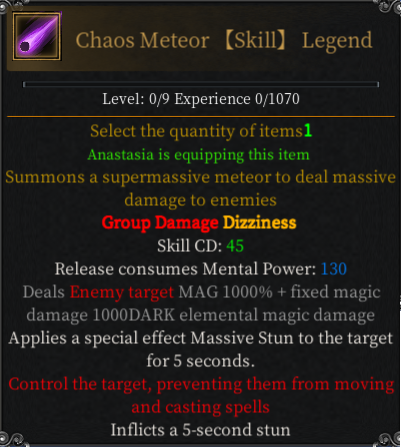
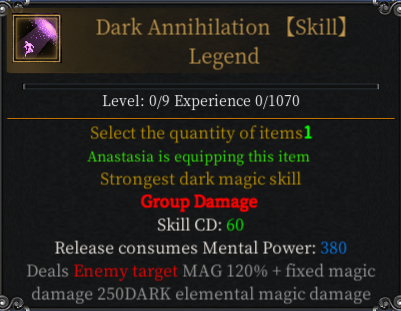
Note that her two unique spells have a very long wind up. Dark Annihilation is a slightly less powerful Anlabeert Ultimate (estimated: 20 hits) and the other is a massive AoE stun. Cancelling the long cast time with another skill or movement will interrupt the skill.
Meti (Ranger) - (Heart of Critical Hits CRIT 6%)
Rating: ★★★☆☆
Meti has 8 ARP/s, almost double of most rangers, and 140 HP growth, which is an outlier since the average Ranger HP is in the mid 90's. She also has the highest ATK and MAG growth of all rangers. That's about all you can say for her because her innate trait is rather underwhelming. Rangers tend to want SPD, and she has none.

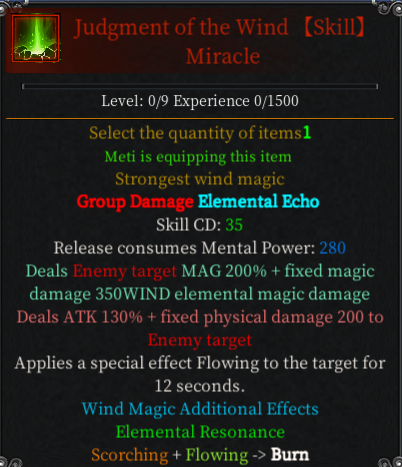
Unlike the other Babylon members, she only comes with one Skill: She does a leap backwards, firing 6 tornadoes in all directions, then does a bunch of hits on a medium sized AoE in front of her. Kind of underwhelming compared to Rage Barrage.
Anlabeert (Mage) - Natural Spirit (300 SP, 5/s ARP, 3% CRI)
Rating: ★★★☆☆

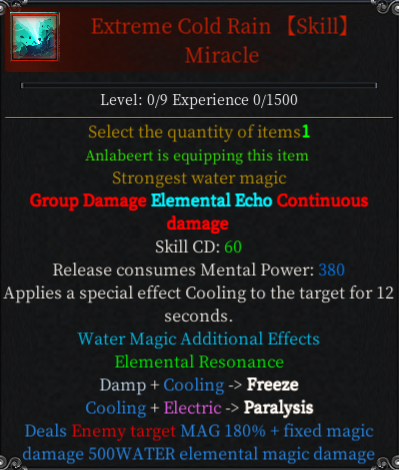
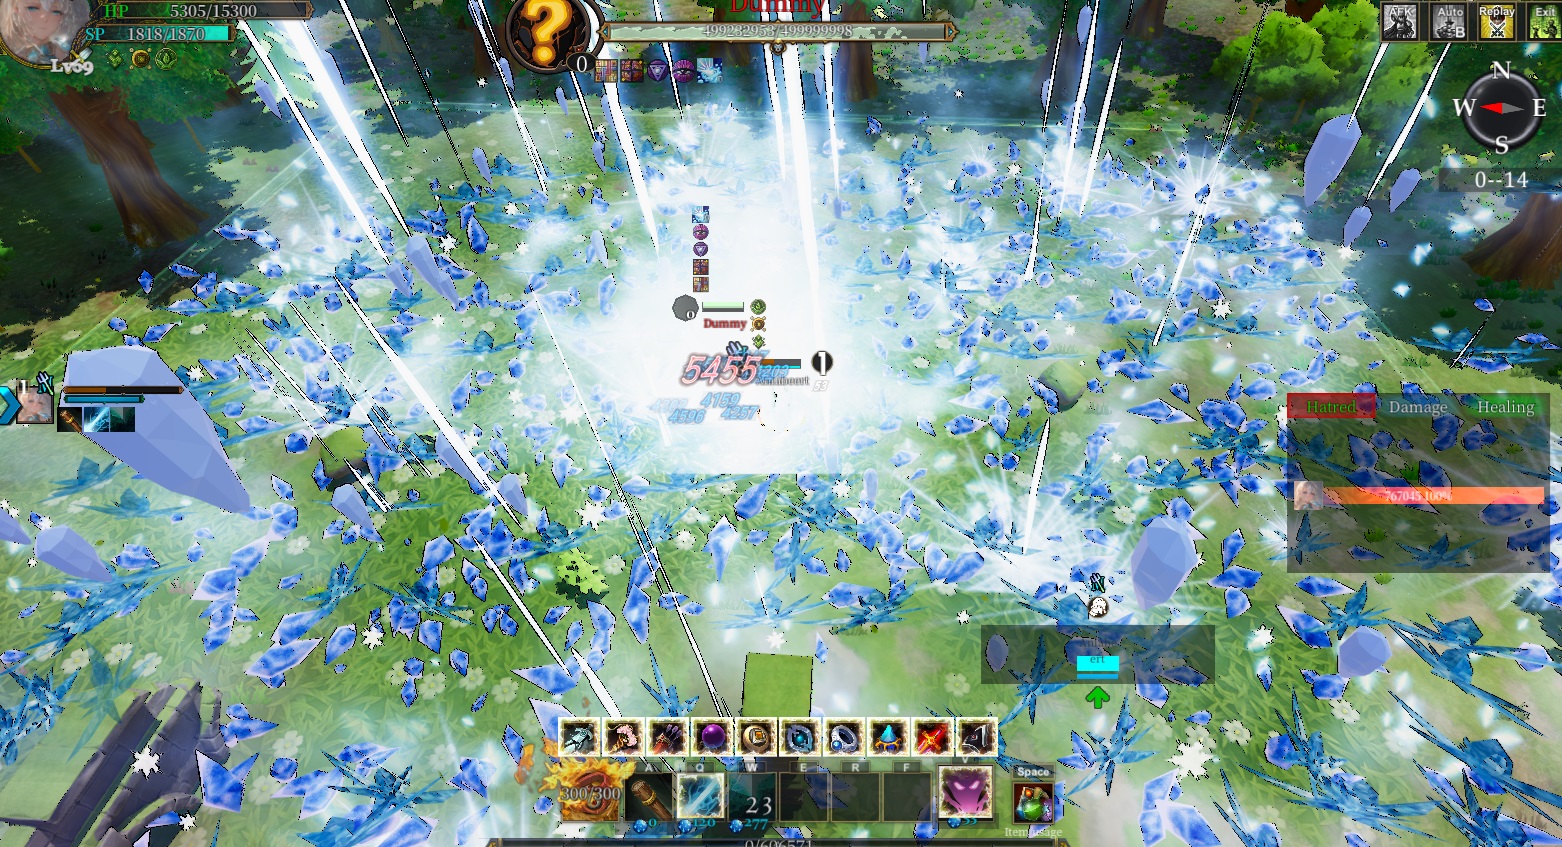
Extreme Cold Rain is the main reason to pick Anlabeert. It's a huge AoE which does so many hits that it's nearly impossible to count how much damage it does. I estimated it at 45 hits. However, compared to Lulu's Holy version, Water damage is much easier to buff.

Anlabeert has Babylon Mage growth syndrome, having 140 HP and 7 ATK growth on a Mage. She also has a natural 10 ARP/s which means her base ARP is 15 mp per second. To compare, Gerald's is 7+4 and Mia's is 6+3. However, she lacks any sort of damage buff beyond her 3% natural CRIT, making her mediocre.

Anlabeert also comes with Deep Sea Impact, which you can get normally through the Skill Star Chart. Sadly, this skill is terrible, so you should ignore it.

There is at least one more hero in the game, but you have to loop the game twice and finish Metrati to get her. Spoilers will follow:


Melodia (Knight) - (Chaos Goddess - ARP: 9/s WIND/FIRE/THUNDER/EARTH/WATER:8% HOLY: -100% DARK:50%)
Rating: ★★★★★★★★★★
Skills: She has 4 of them, 3 of them (Nibelungen's Verdict, Chaos Whirlwind and Dimensional Cutter Upgrade) from the tutorial and the only non-unique one being Wind Cutter Upgrade, which Tiamat also has. All of them do absurd amounts of DARK damage because
Melodia starts the game with insane stats and has crazy stat growth. In addition, they are not class locked, so Warriors can use them too.

To wit: Here are her base stats at level 1:

HP: 30000, SP: 650, ATK: 400, RDM: 650 MAG:500 RST: 450 HIT: 300 AVD:400 ARP 22/S.

She also gains 20-30 in every stat except speed and 200 HP whenever she levels up. Using her will make the game a cake walk, even on the hardest difficulty. I assume if you have her, you don't really need a guide nor other party members for that matter.
Party Members by Class (Recommendations)
This section is data-oriented, for the comparison of different units in case you want to min-max a final party. Skills are not considered.

Warning: Excel tables are included. Click on the image to see the table. Babylon units are coloured red for your convenience.

Warrior

Top Tier Endgame:
Asnida, Taurissa, Horus

Mid-game Recommended:
Stephanie, Tasha

Early-game Recommended:
Abigail (drop at midgame once you get lifesteal, has very bad growth)

Hot Garbage:
Roxanne. Don't use her, she is amazingly bad.

Knight

Solos the entire game and makes this guide redundant:
Melodia

Top Tier Endgame:
Tiamat (Defensive) Colariness (Offensive)

Mid-game Recommended:
Carmen (Defensive) Beirut (Defensive) Perand (Offensive)

Early-game Recommended:
Marxin (Vera is ok)

Mage

Top Tier Endgame:
Mia/Gerald/Any Babylon Mage

Mid-game Recommended:
Mia/Gerald

Early-game Recommended:
Olivia

Ranger

Top Tier Endgame:
Meti, Eleanor/Elisa

Mid-game Recommended:
Anyone, Rangers don't have very large stat variance. Elisa or Cassandra are best if you have MP problems.

Early-game Recommended:

Priest

Top Tier Endgame:
There is no real choice, just use Vinicxina.

Mid-game Recommended:
You don't have a choice.

Early-game Recommended:
Natali or Eva. You can pick Melody if you want, but you miss having a useful Unique skill and Priests don't get many skills in the first place.
Random Notes
You can ignore this section - it's full of soft spoilers for the early-mid game which I'm only putting here in case I expand the guide later on.

Water Temple
Use Artifacts Ragnar + Pennyros on the altars to open the secret section.

Thunder Plain
Dwarf

Do not believe
  • Small Item - Excellent Skill Book (Other classes)/SR Card Scroll
  • Medium Item - Necklace
  • Large Item - Weapons
Believe
  • Wealthier - 30000 gold
  • Healthier - Shelter Pts
  • Smarter - 1500 Soul Fragments

Anholt

Ball guy:
1 - Take off your clothes
1 - Hold the basketball and make a welcoming gesture
2 - Switch hands and clap the basketball
2 - Stop the ball with your feet for half a minute
1 - Rotate the basketball in your arms
1 - Spin the basketball with your right hand
1 - Do several forceful right-shoulder passes from the back
2 - Drop the basketball
1 - You rotate sideways for a flying motion
1 - You raise both hands and make a X-shaped split
2 - You flash a charming smile while half-squatting and making a polishing motion with your hand

Valanbel
Go back to the monument in the middle of Valanbel Lake after chaos dragon. > Unreadable Scroll > Book of the Dead (Legendary Tier enchantments, can NOT be carried over in NG+ on your item!)

-Visit Tiamat for Earth Guard.
-Give Meti the bouquet of flowers for Tornado Targeting (Extremely strong Ranger skill, recommended).

Skills on Return from Ognar:
-Tiamat (Knight - Earth Guard)
-Horus (Warrior - Flame Waltz)
-Coloriness (Mage - Darkling Doom, Dash forward > DARK element large slow moving AoE)
-Meti (Ranger - Tornado Sniper Shot)
-Lulu (Mage - Light of the Sun WATER element large AoE nuke + Stun + Evaporate)

Takgan Desert
Music Puzzle Solution (From left) > 123124

Dragonbone Plains
Goddess Statue results (random):
Wrath of Bahamut - 8% ATK/MAG 12% HIT/AVD
Leviathan's Heart - 7/s ARP
Hide of Yemengade - 3% All Elements, 100% Petrification/Silence RES, 0.2 HEAL/CURE, 10% DAMD
Bone Cleansing Art - 35% HP

Don't forget to come back here after crafting Flame Rose and getting the 8 other treasures to get the last Holy Sword.

- Very good place to farm Soul Crystals with the "Greedy for Gold" artifact to disable EXP gain after handing the sword to Chelna (Lose the ability to do this once boss is defeated). NPC Chelna can oneshot enemies because despite the advice that dragons are weak to wind, they are even more incredibly weak to Holy/Dark.

Dragonbone Peak
Hidden area and Vinicxina are in an area locked off by a quest for Bram's Axe from Marina in Anholt.
Chargen Ability Table - Pt 1
Abilities
Cost
Description
Rating
Notes
Dark Devour
40
ARP:5/s, Dark:12%, 50% bonus skill damage when equipped with Urandia
★★★★★
Only if you plan on using Urandia (starter ring) the entire game
Black Bloodsucker
32
HP:3000, HP:25%, ATK:120, MAG:125, HIT:150, CRIM:0.3, DARK:12%, Skill damage increases 1% per 1% reduction in health.
★★★★★
Massive stat bonuses and a non specific damage increase
Scattered Flowers
30
SP:100, ARP:4/s, MAG:5%, All allies gain a shield equal to 10% Max HP every 10s
★★★★☆
Great in long battles, preventing allies from getting oneshot
Natural Spirit
30
SP:300, ARP:5/s, CRI:3%
★☆☆☆☆
This is not worth 30 points. Terrible.
Lurant's Pillar
25
HP:1500, RDM:10%, RST:10%, 50% chance to survive when fatally wounded
★★★☆☆
A decent survivability skill which is unreliable, but can save plumes
Thunderous Heart
20
CRI:4%, Thunder:20%, 5% chance to release chain lightning when attacking
★★☆☆☆
Only really good in Thunder builds and is expensively costed.
Earth Shield
20
ARP:4/s, HP:3000, HP:15%, Earth:8%, Attacks have a 5% chance to give a shield equal to 1% health
★★★★☆
Powerful survivability skill with a rational cost.
Charming Songstress
20
SP:220, ARP:3/s, HP:20%, HAT:-0.5, Recover 5% SP of an ally every 10s
★★★★☆
A very nice survival trait with scaling SP recovery
Sacred Blade
20
SP:100, ARP:3/s, 50% chance to shoot holy magic bullets on attack
★★★★☆
Actually quite a good dps trait if you have good magic and attack speed.
Heart of Critical Hits
20
CRIT:6%
★☆☆☆☆
This is not worth 20 points. Nightingale's Eye costs 12.
Blood Sword
20
ATK:60, ATK:10%, SPD:0.1, Lifedrain:12%
★★★★★
Decent option for non-Warriors. No healer required.
Flaming Heart
20
SP:100, ARP:2/s, HP:2000, HP:15%, FIRE:8% Immune to any flame damage(?)
★★★☆☆
Much better than Flame Inheritor for most of the game.
Flaming Inheritor
20
HP:1000, HP:15%, ATK:20%, CRI:2%, CRIM:0.2, FIRE:5%
★★★★☆
A lot of useful offensive buffs for 20 points. The HP doesn't hurt, either.
Brown Enchantress
18
35% HP
★★☆☆☆
Still a bit overcosted
Immune to all poisons
18
HP:8%, 100% Poison/Paralysis/Petrification/Frailty/Bleeding
★★☆☆☆
A QoL option because Poison and Bleeding are very dangerous. You can use items, though.
Silver Hand
18
HP:800, RDM/RST:20%, HAT:0.5, HEAL/CURE:0.3
★★★☆☆
Very strong and reasonably costed tank-only ability.
High Priest of the Temple of Water
18
ARP:3/s, MAG:10%, HIT:100, Water:8%
★★★☆☆
For water mages only, otherwise Legendary Mage is better.
Legendary Mage
18
SP:200, ARP:4/s, MAG/HIT:15%
★★★★☆
Better in most cases than High Priest. Reasonably priced.
Immune to Control
18
HP:20%, 100% Paralysis/Freeze/Petrification/Silence Res
★★☆☆☆
Also a QoL option you can use items to bypass, but with a better HP bonus.
Exotic Constitution
18
ATK/MAG/HIT:5%, HEAL/CURE:0.05
★☆☆☆☆
Really overcosted.
Heaven is envious of talent
18
Level Up Bonus: HP:20, SP:8, ATK/MAG:7, HIT:5, RDM/RST:4, AVD:5, SPD:0.01
★★★★★
Almost an auto-pick for the second playthrough. Huge bonuses.
Flame Inheritor
12
HP:800, CRI:2%, CRIM:0.08, FIRE:8%
★★☆☆☆
Get Nightingale's Eye instead.
Rotating Sword Case
12
ATK:58, ATK:5%, 10% chance to shoot swords when using attack skills
★★☆☆☆
Mostly taken for fun with procs.
Soul Tremor
12
RST:10%, AVD:15%, Heal 15% every 15s
★★★☆☆
15s is a long interval, so the heal isn't likely to be too helpful most of the time.
Double-Edged Knight
12
Every 30s, release a big dispel, dispelling all negative effects on teammates
★☆☆☆☆
No. If you have a status ailment on you for 30 seconds, you are probably dead.
Chargen Ability Table - Pt 2
Traits
Cost
Description
Rating
Notes

Compassionate Healer
12
SP:150, ARP:2/s, CURE:0.08
★★☆☆☆
Energy Flow, but for Healers.
Divine Chanting
12
MOV:0.2, CURE:0.15
★★☆☆☆
For healers. Read this as "All heals cast by this character heal for 15% more".
Energy Flow
12
SP:300, ARP:3/s
★★☆☆☆
Max SP only really matters for percentage recovery most of the time.
Lightning Surge
12
SP:100, ARP:2/s, Thunder:5%
★☆☆☆☆
Like Energy Flow, but much worse. Avoid.
Core of Thunder
12
MAG:12%, Thunder:18%
★★★☆☆
Not too bad for a thunder-based Knight, but only relevant in playthrough #3 and beyond.
Dark Dominator
12
MAG:120, MAG:8%, Dark:10%, 20% chance to release dark sword on spell use
★★★☆☆
For building your own Dark Mage. Late-game thing.
Erosion Magic Eye
12
AVD:200, 15% chance to release dark magic explosion on spell use
★★☆☆☆
Similar to the above, but strictly worse in every way.
Sacred Faith
12
ARP:3/s, RDM/RST:20, AVD:80, AVD:15%, Holy:10%, Every 60 seconds, gain a 30s Holy resistance 26.75% Potion
★★★☆☆
About the same as Energy Flow, unless you're making an AVD tank or Holy attacker,
Deceptive Eye
12
AVD:80, AVD:20%, Level up bonus AVD:3
★★☆☆☆
For AVD tanks. Not particularly effective because autohit skills can and will kill you.
Nightingale's Eye
12
HIT:35%, CRIT:5%
★★★☆☆
Like Heart of Critical Hits, but reasonably costed.
Master of Sacred Feathers
12
ATK:3%, AVD:5%, SPD:0.1, SPD:10%, WIND:3%
★★☆☆☆
Strictly worse than Shadowmoon Wolf Two.
Princess
12
ATK:3%, HIT:8%
★☆☆☆☆
No.
Shadowmoon Wolf
12
SPD:0.35, SPD:15%
★★☆☆☆
A sizeable buff to SPD, but inferior to Eleanor Wolf. Two abilities share the name.
Cross
12
HIT:100, HIT:45%, MOV:0.25
★★★☆☆
Taken if you want to avoid missing and love kiting. For solo Rangers and Mages.
Shadowmoon Wolf
12
ATK/MAG/HIT:8%, SPD:0.05, SPD/lv:0.02
★★★★☆
Excellent bargain buff. I shall call this one Eleanor Wolf for convenience.
Water Ripple
12
ARP:1.5/s, WATER:15%, 10% chance of giving Water RES shield to allies on attacks (26.75% Water Elemental Potion)
★★☆☆☆
For Water meme builds, but Queen of the Sea already does this better.
Wind Fairy
12
SPD:0.1, WIND:8%
★☆☆☆☆
What the hell, no.
Inexplicable
12
Level up bonus - ATK:5 RDM:4 RST:5
★★☆☆☆
Poor man's Heavens, and weaker in ATK, to boot.
God of War's Weapon
12
ATK/MAG: 60, ATK/MAG 8%
★★★☆☆
At least it's not Princess.
Swift Arrows
8
HIT:100, 35% chance for normal attacks to fire another arrow
★★★☆☆
Used in autoattack builds.
Heavenly Tune
8
MAG:15%
★★★☆☆
Straightforward and reasonably priced buff.
Healing Hands
8
ARP: 1/S HEAL:0.25
★★☆☆☆
Not useful considering the cost. It's better to increase CURE than HEAL.
One Slash, Two Sever
6
0.1% Chance of landing a fatal blow when attacking
★★☆☆☆
Bad description. Actually gives 1% CRIT, translating to 1.05% somehow, overcosted.
Magician
6
0.5% Chance of silencing the enemy with normal attacks
★★☆☆☆
Typo? 0.5% is very low, perhaps they meant 50%. Not significantly useful as it stands.
Clairvoyance
6
May increase skill experience with equipped skills after battles
★★☆☆☆
Amazing QoL for the early game before you unlock skill ranking. Pretty bad afterwards.
Warlord
6
Double badges on leveling up
★☆☆☆☆
Unnecessary, you will unlock everything normally and have no use for them.
Soul Harvester
6
50% more Soul Fragments dropped by enemies
★★★☆☆
You can always grind for more, but soul fragments are also in high demand.
Wilderness Survivor
6
Gain 1 more herb/ingredients/materials when obtaining them
★☆☆☆☆
Pure trash because gathering spots do not respawn.
Chargen Ability Table - Pt 3
Traits
Cost
Description
Rating
Notes
Family Heirloom Hat
4
HP:380, HP/RDM/RST:3%
★★☆☆☆
Early game trait, somewhat weak later on.
Ghost Hunter
4
No longer calculates hate
★★☆☆☆
Get a better tank.
Vigorous Stamina
4
15 more max Shelter Power
★☆☆☆☆
Shelter Power is a joke. Running out occasionally is good.
Guardian Angel
4
While not dead, all teammates gain 15% RDM and RST
★★★★★
One of the best party based skills. Helps out tanks or keeps your squishies alive.
Frosty Heart
4
Every 10 seconds, emit an aura which gives enemies -0.15 SPD and -0.8 MOV
★★★☆☆
A significant Attack speed and movement debuff to help kiting.
Fountain of Life
4
Nearby teammates recover 5% of health every 10s
★★☆☆☆
Much less useful than it sounds due to the long interval.
Berserker
4
All skill damage increased 8%, gain 0.3 SPD, but continually lose health
★★★☆☆
Not for first runs, but a decent dps buff for its low cost.
Master of Experience
3
Gain 20% more experience
★☆☆☆☆
Not necessary in a grindy game.
Time Traveler
3
10% faster cooldown recovery rate
★★★★☆
Cheap and good, but will increase your MP comsunption rate.
Master of Magic
3
Recover 3% of the SP used by all skills
★★☆☆☆
Effectively functions as a cheap MP/second ability, but not a priority on first runs.
High-Level Swordsman
3
Gain an excellent Warrior skill chest when the game starts
★☆☆☆☆
Randomly gives a low level terrible skill you could have bought instead.
High-Level Mage
3
Gain an excellent Mage skill chest when the game starts
★☆☆☆☆
Randomly gives a low level terrible skill you could have bought instead.
High-Level Archer
3
Gain an excellent Archer skill chest when the game starts
★☆☆☆☆
Randomly gives a low level terrible skill you could have bought instead.
High-Level Shield
3
Gain an excellent Knight skill chest when the game starts
★☆☆☆☆
Randomly gives a low level terrible skill you could have bought instead.
Undying Warrior
3
Regain 0.5% health/sec
★★★☆☆
Useful until you can complete a Regeneration runeword.
Son of the Storm
3
10% chance of releasing a whirlwind which knocks back enemies when attacking
★★★★☆
Does about 1/3 normal attack damage. Short range.
Snow Queen
3
10% chance of creating a freezing explosion when using skills
★★★★☆
Does about 1/2 normal attack damage. Frontal line attack, short range.
Shadow Assassin
2
30% more damage when attacking enemies from behind
★★★★★
Excellent filler for 2 points.
Bullet Deflector
2
Gain a bullet deflecting skill at the start of the game
★★★★☆
Grants a unique skill called "Bounce", which reflects projectiles for 1 second. (5s CD)
High Priest
2
Gain a Priest skill chest when the game starts
★☆☆☆☆
Horrible. Just buy it 10 min into the game instead.
Something from Nothing
2
Gain 20% more earnings (mira?) from enemies
★☆☆☆☆
Not really useful in a farming game.
Wandering Singer
1
10% HP
★★★★☆
1 point wonder.
Shadow Form
1
3% DARK
★★★☆☆
It's okay for 1 point, but only for Dark skill users.
Priest Skills
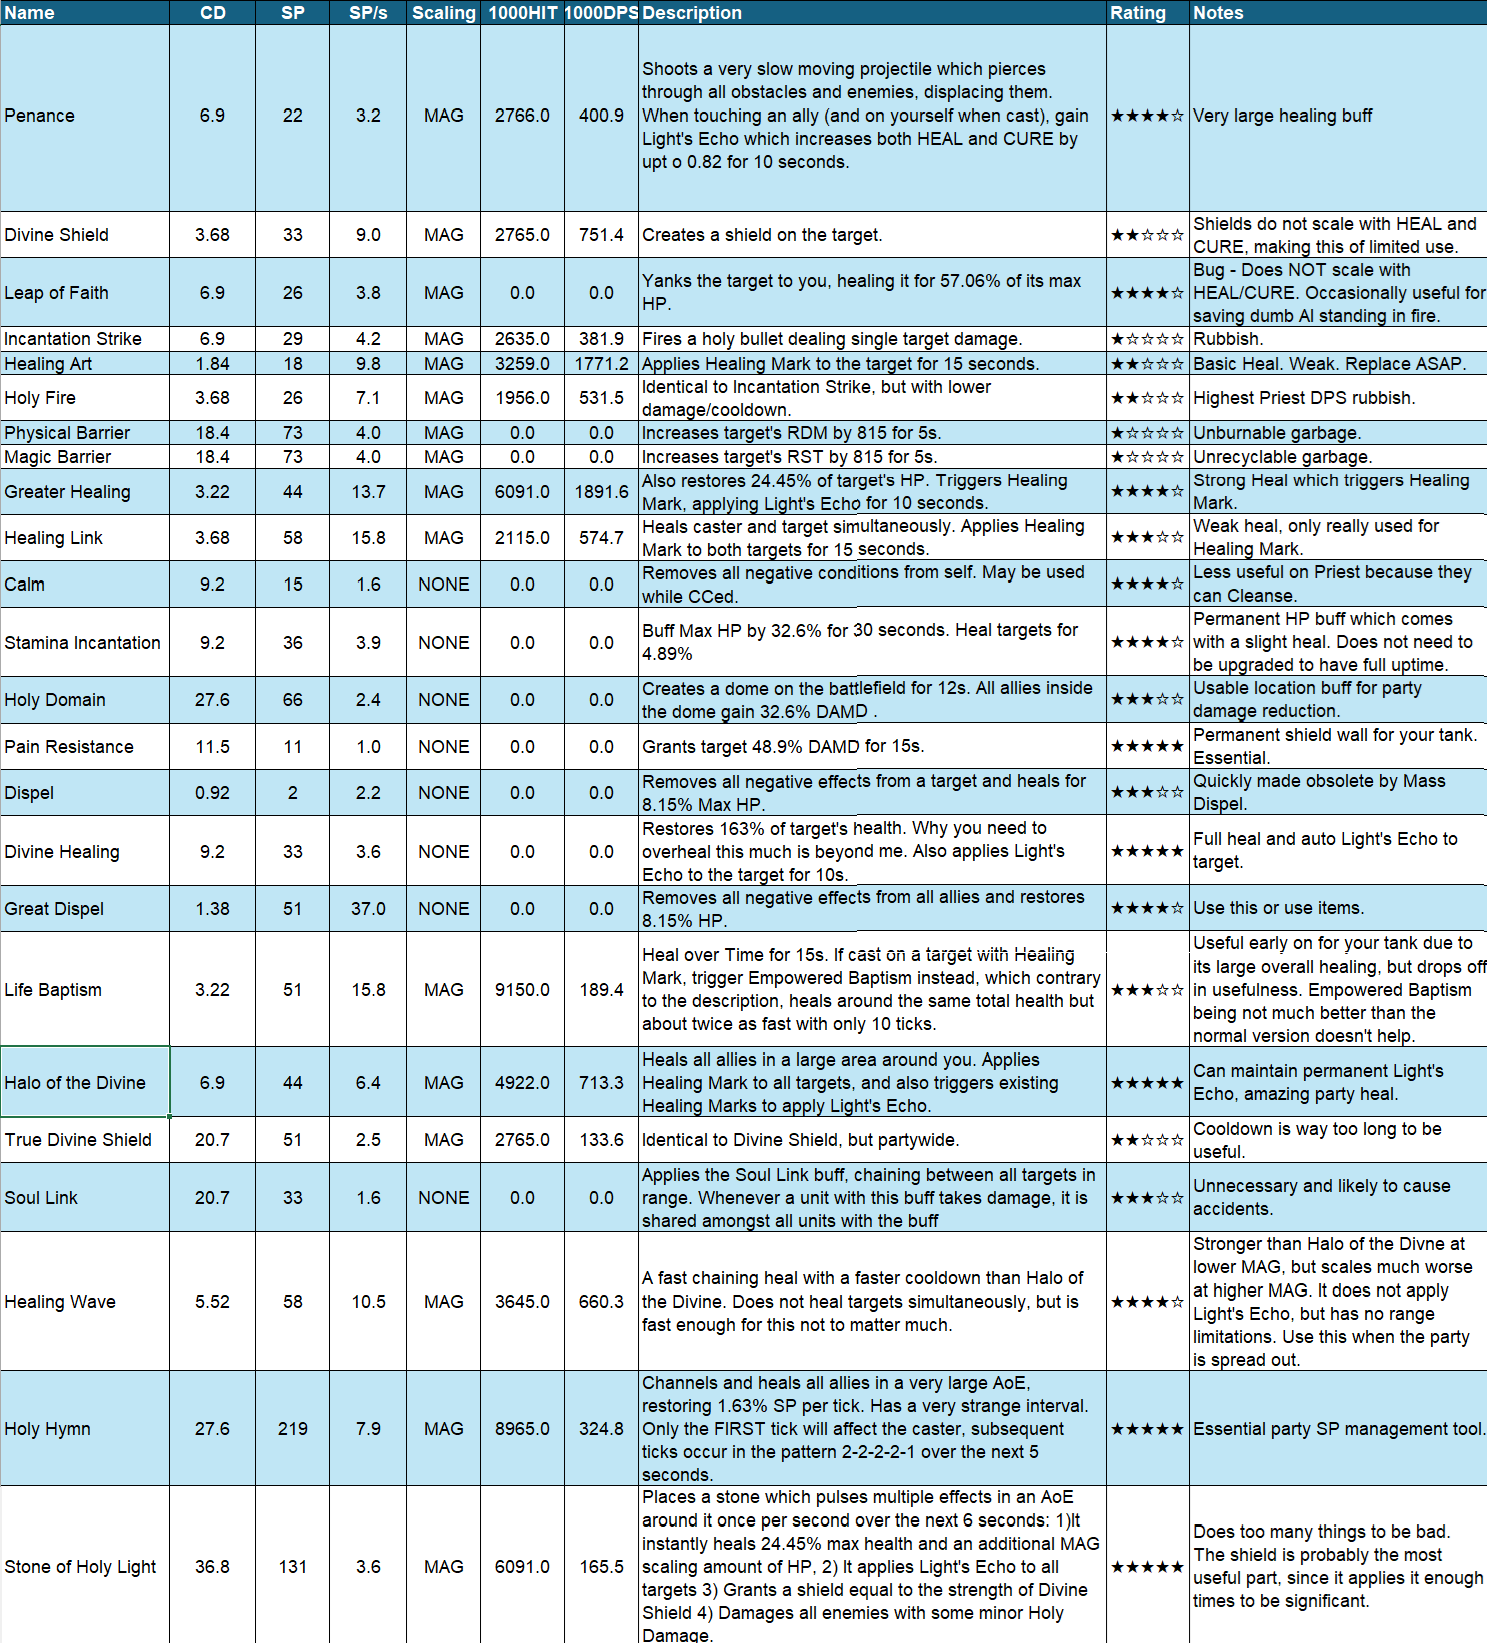
Steam Guides are terrible at posting tables, so this is a truncated version. I felt the need to make this table because many skill descriptions are outright wrong or confusing. All skill data below are shown at Rank 9- skills may be less useful at lower ranks.

Many Priest skills focus around a buff called "Light's Echo", which applies a very large HEAL and CURE bonus to the target for 10 seconds. This means your priest themself needs the buff to benefit from the CURE portion.

Name
CD
SP
SP/s
Description
Rating
Notes
Penance
6.9
22
3.2
Shoots a very slow moving projectile which pierces through all obstacles and enemies, displacing them. When touching an ally (and on yourself when cast), gain Light's Echo which increases both HEAL and CURE by up to 0.82 for 10 seconds.
★★★★☆
Very large healing buff
Divine Shield
3.68
33
9.0
Creates a shield on the target.
★★☆☆☆
Shields do not scale with HEAL and CURE, making this of limited use.
Leap of Faith
6.9
26
3.8
Yanks the target to you, healing it for 57.06% of its max HP.
★★★★☆
Bug - Does NOT scale with HEAL/CURE. Occasionally useful for saving dumb AI standing in fire.
Incantation Strike
6.9
29
4.2
Fires a holy bullet dealing single target damage.
★☆☆☆☆
Rubbish.
Healing Art
1.84
18
9.8
Applies Healing Mark to the target for 15 seconds.
★★☆☆☆
Basic Heal. Weak. Replace ASAP.
Holy Fire
3.68
26
7.1
Identical to Incantation Strike, but with lower damage/cooldown.
★★☆☆☆
Highest Priest DPS rubbish.
Physical Barrier
18.4
73
4.0
Increases target's RDM by 815 for 5s.
★☆☆☆☆
Unburnable garbage.
Magic Barrier
18.4
73
4.0
Increases target's RST by 815 for 5s.
★☆☆☆☆
Unrecyclable garbage.
Greater Healing
3.22
44
13.7
Also restores 24.45% of target's HP. Triggers Healing Mark, applying Light's Echo for 10 seconds.
★★★★☆
Strong Heal which triggers Healing Mark.
Healing Link
3.68
58
15.8
Heals caster and target simultaneously. Applies Healing Mark to both targets for 15 seconds.
★★★☆☆
Weak heal, only really used for Healing Mark.
Calm
9.2
15
1.6
Removes all negative conditions from self. May be used while CCed.
★★★★☆
Less useful on Priest because they can Cleanse.
Stamina Incantation
9.2
36
3.9
Buff Max HP by 32.6% for 30 seconds. Heal targets for 4.89%
★★★★☆
Permanent HP buff which comes with a slight heal. Does not need to be upgraded to have full uptime.
Holy Domain
27.6
66
2.4
Creates a dome on the battlefield for 12s. All allies inside the dome gain 32.6% DAMD .
★★★☆☆
Usable location buff for party damage reduction.
Pain Resistance
11.5
11
1.0
Grants target 48.9% DAMD for 15s.
★★★★★
Permanent shield wall for your tank. Essential.
Dispel
0.92
2
2.2
Removes all negative effects from a target and heals for 8.15% Max HP.
★★★☆☆
Quickly made obsolete by Great Dispel.
Divine Healing
9.2
33
3.6
Restores 163% of target's health. Why you need to overheal this much is beyond me. Also applies Light's Echo to the target for 10s.
★★★★★
Full heal and auto Light's Echo to target.
Great Dispel
1.38
51
37.0
Removes all negative effects from all allies and restores 8.15% HP.
★★★★☆
Use this or use items.
Life Baptism
3.22
51
15.8
Heal over Time for 15s. If cast on a target with Healing Mark, trigger Empowered Baptism instead, which contrary to the description, heals around the same total health but about twice as fast with only 10 ticks.
★★★☆☆
Useful early on for your tank due to its large overall healing, but drops off in usefulness. Empowered Baptism being not much better than the normal version doesn't help.
Halo of the Divine
6.9
44
6.4
Heals all allies in a large area around you. Applies Healing Mark to all targets, and also triggers existing Healing Marks to apply Light's Echo.
★★★★★
Can maintain permanent Light's Echo, amazing party heal.
True Divine Shield
20.7
51
2.5
Identical to Divine Shield, but partywide.
★★☆☆☆
Cooldown is way too long to be useful.
Soul Link
20.7
33
1.6
Applies the Soul Link buff, chaining between all targets in range. Whenever a unit with this buff takes damage, it is shared amongst all units with the buff
★★★☆☆
Unnecessary and likely to cause accidents.
Healing Wave
5.52
58
10.5
A fast chaining heal with a faster cooldown than Halo of the Divine. Does not heal targets simultaneously, but is fast enough for this not to matter much.
★★★★☆
Stronger than Halo of the Divne at lower MAG, but scales much worse at higher MAG. It does not apply Light's Echo, but has no range limitations. Use this when the party is spread out.
Holy Hymn
27.6
219
7.9
Channels and heals all allies in a very large AoE, restoring 1.63% SP/tick for 10 ticks. Has a very strange interval. Only the FIRST tick will affect the caster, subsequent ticks occur in the pattern 2-2-2-2-1 over the next 5 seconds.
★★★★★
Essential party SP management tool.
Stone of Holy Light
36.8
131
3.6
Places a stone which pulses multiple effects in an AoE around it once per second over the next 6 seconds: 1)It instantly heals 24.45% max health and an additional MAG scaling amount of HP, 2) It applies Light's Echo to all targets 3) Grants a shield equal to the strength of Divine Shield 4) Damages all enemies with some minor Holy Damage.
★★★★★
Does too many things to be bad. The shield is probably the most useful part, since it applies it enough times to be significant.

Mage Skills
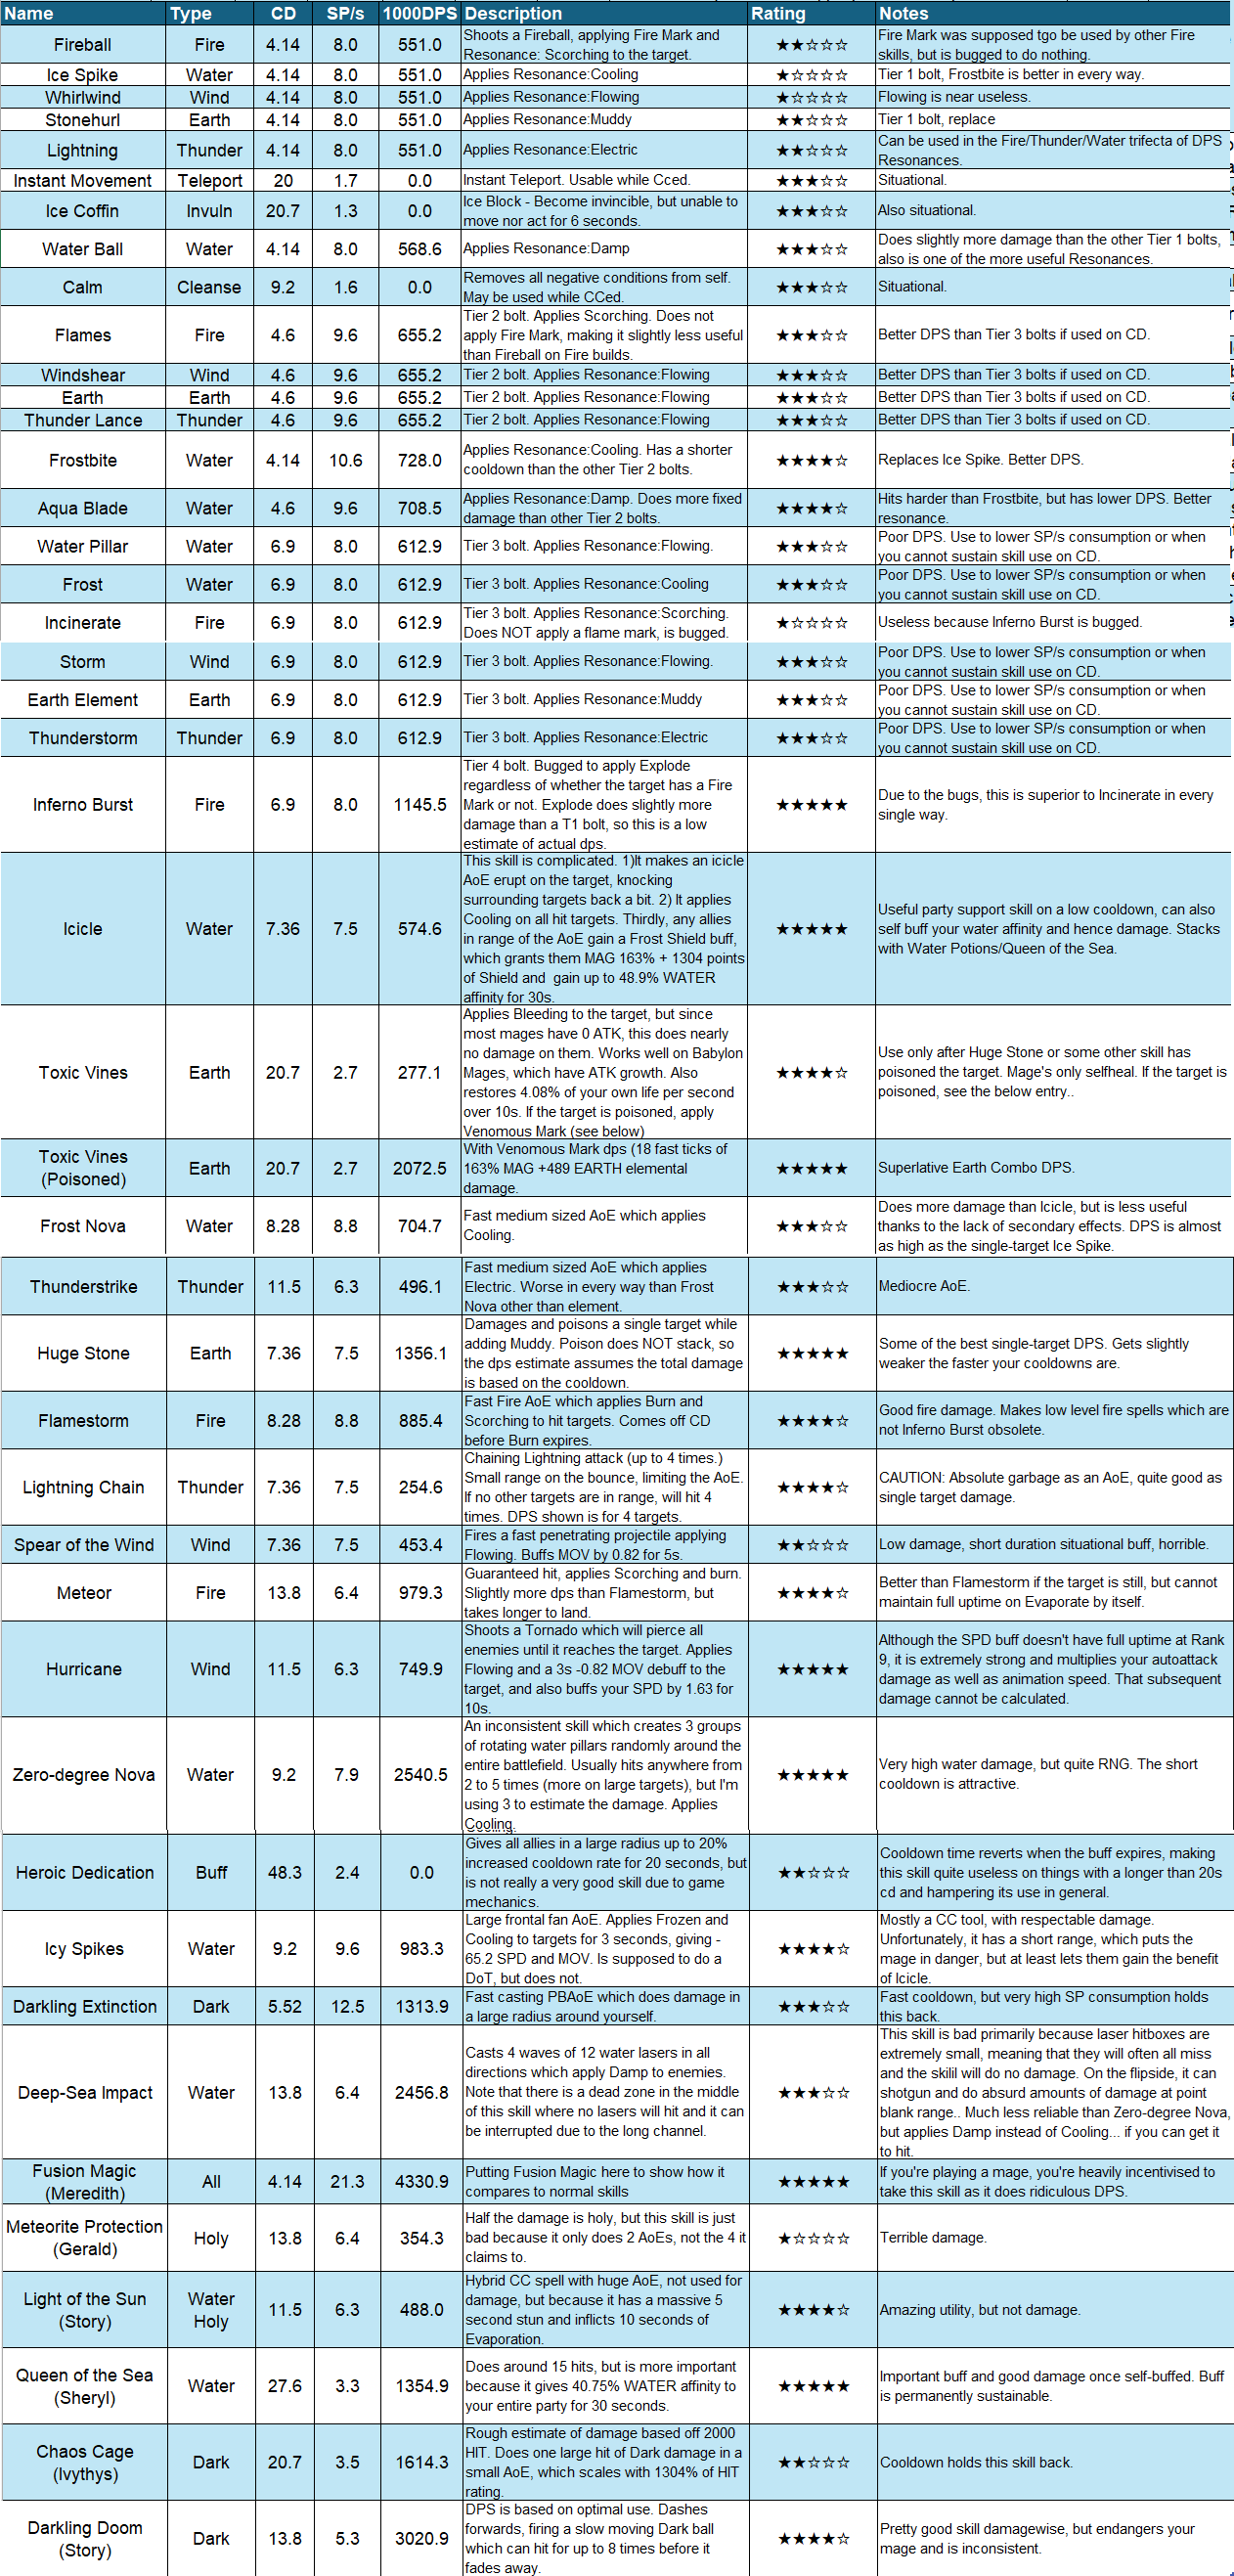
Mage skills are a bit counterintuitive because many of the skills are bugged or have weird discrepancies.

Additionally, generally speaking, if your character spends any time with skills consistently off-cooldown, you should be picking higher burst damage skills instead of high DPS ones. Speed will help your casting animations and increase the smoothness of your rotation. This is mostly important with regard to choosing between Tier 3 and Tier 2 bolts early on - Tier 3 bolts will actually do less DPS than Tier 2 bolts if you consistently cast all skills when off cooldown.

Note that DPS calculations also do not factor in Resonance. Choosing the Tri-Resonance builds (Scorching+Damp+Electric) will increase your DPS significantly since any 2 of those elements will result in a damage-inflicting resonance effect.

Unlike Priest skills, I've added a few popular main-game Legendary Mage skills to this table so you can see how their DPS compares. I realise I forgot to include Blizzard, but it is a very bad spell which does terrible DPS, so you should not be using it anyway.

Sample suggestion builds:
Early game (Tier 2 Bolts):
Resonance build: Water Ball, Aqua Blade, Flames, Thunder Lance, Fireball

Tier 5 Skills:
Inferno Burst, Icicle, Toxic Vines, Huge Stone, Light of the Sun

Water Endgame Build:
Queen of the Sea, Icicle, Zero-degree Nova, Fusion Magic, Icy Spikes OR Light of the Sun OR Deep-Sea Impact.


Additional note: non-permanent CD reduction skills in this game are quite horrible because when the buff expires, all current cooldowns are re-calculated and increased proportionally. Most CD reduction buffs have a duration of 20 seconds. This means if your skill has a cooldown above 20 seconds, the skill will go back to its original cooldown when the buff expires, making your buff completely useless.
Other Class Skills
It's probably a waste of time going through skills for Warrior, Ranger or Knight. They have very straightforward optimal builds. If you absolutely need suggestions, here they are:

Warrior:

Early Game:
Sword of Doom, Power of Tyranny, Tooth of Heaven, Blood Sword Dash, Skill of choice.

War Song is good too.

Just rotate out the last 3 skills as you progress through the game until you get Stare and then whatever skills you use don't matter.

Knight:

Mandatory (tanking):
Taunt, Defensive Formation, Moon Crescent, Wind Cut, Skill of Choice.

Moon Crescent and Wind Cut are such strong debuffs that you want them up until endgame, when you can drop them and add a bunch of fast cooldown lightning skills to do damage instead.

Ranger:
Early Game until Valanbel:
Hawk's Eye, Wind Fairy (L), Spiral Fire, 2 skills of choice.

Valanbel onwards:

Hawk's Eye, Wind Fairy, Tornado Targeting, 2 skills of choice (whatever your SP can sustain)
Optional: Tornado Strike (can get Ranger killed, but is very strong.)

Endgame:
Rage Barrage, Wind Fairy, Hawk's Eye, Tornado Targeting, 1 skill that won't kill your SP.,

You'll have massive SP problems at this point, so pick a nice long cooldown skill or a buff.
12 Comments
MILLIDIA  [developer] 9 Aug, 2024 @ 7:43pm 
太厉害了,感谢:steamthumbsup:
Valandriel 7 Jun, 2024 @ 2:59pm 
If You need some nice Knight go this :
Name: Val- female Knight. ARP: 4/s and 162HP/level growth, Born Protagonist (HP 300, SP 100), Annihilation Engine (1,2 HAT 10%AVD) Aquatic Body (2% Water) with 11RDM/lv
Dar  [author] 4 Jun, 2024 @ 8:30am 
Noted, thanks.
The Gnarled One 4 Jun, 2024 @ 6:42am 
It's Marina in Anholt. In my first playthrough I mistook the text for the end quest telling me to visit Marinda instead of Marina lol :steamfacepalm:
Dar  [author] 4 Jun, 2024 @ 5:55am 
@The Gnarled One - The fight is directly south of the Eastern Moon Altar which is 2 spaces from the Boss. You have to go back after the Dragon Temple and defeat the Energy Device there when told to go there by a Quest for Bram's Axe which starts from the Equipment Enhancer NPC south of the Inn in Ognar (I think).
The Gnarled One 4 Jun, 2024 @ 5:42am 
How do you find Vinicxina and the extra boss in Dragon Peak? Couldn't figure it out in the first playthrough..
Daiyat 4 Jun, 2024 @ 12:40am 
this is really helpful, thx a lot for the guide!
Dar  [author] 3 Jun, 2024 @ 2:17pm 
You get the dig/search glove item early on in the very first zone. Go to Metrati and explore the Ruins.
Razzmuffin 3 Jun, 2024 @ 2:11pm 
Quick question since I can't find the info anywhere, how do you dig during the exploration stuff? I feel like I probably missed an item somewhere but I cannot figure it out.
Dar  [author] 2 Jun, 2024 @ 11:20pm 
Forgot to mention - you get to carry over ONE non-plot-related item on your first playthrough, as well as every Legendary and above tier SSR card. This means you should do your best to craft one very strong piece of gear and avoid using up too many Legendary cards. On second playthroughs and onwards, you can get a really strong bonus item too.