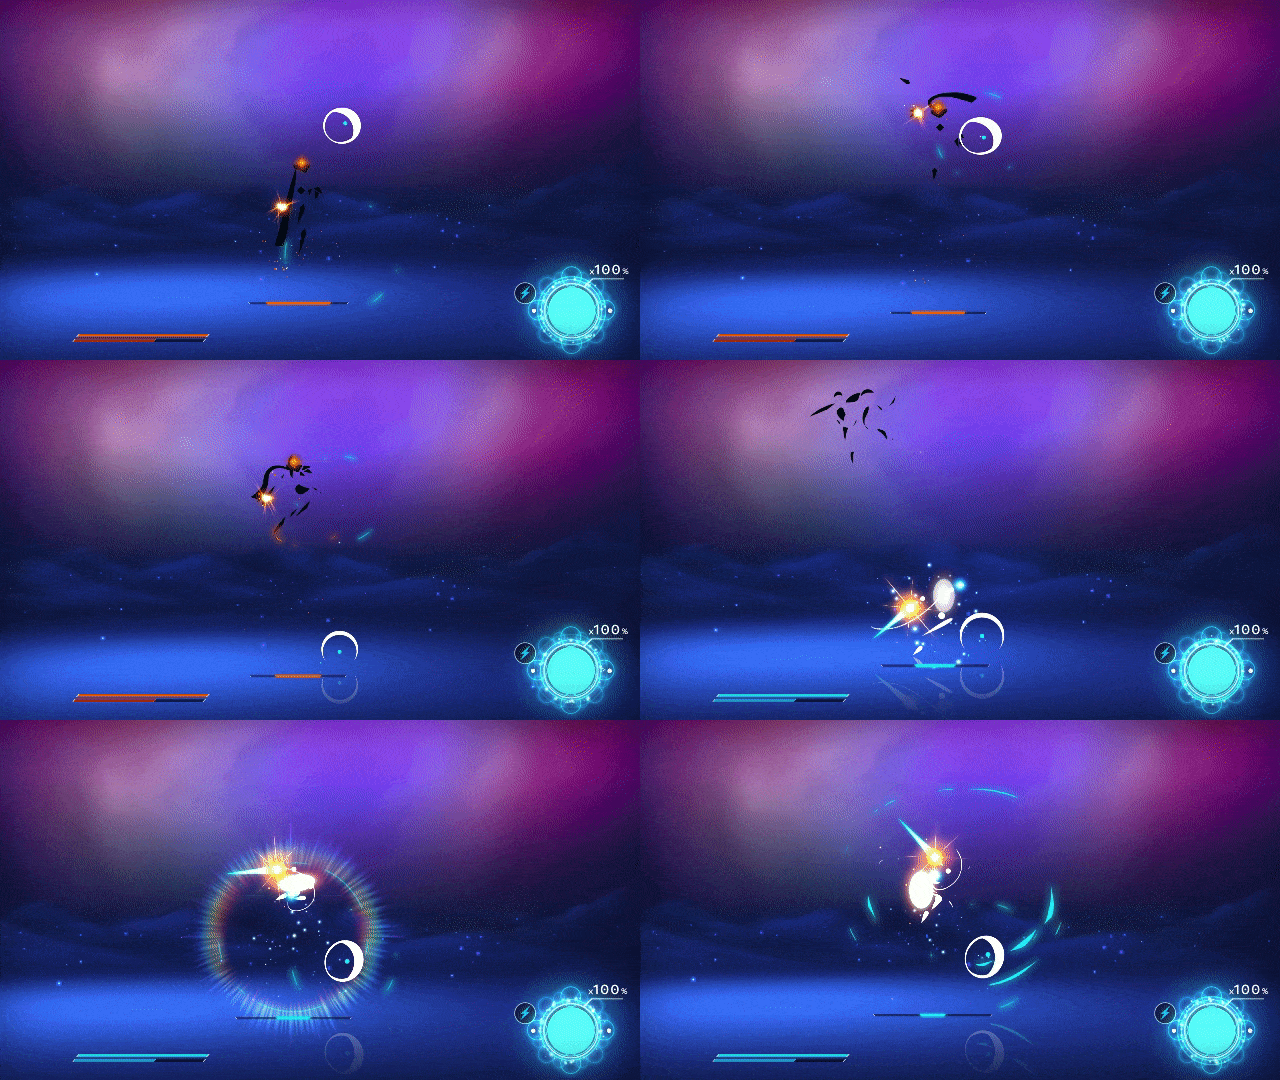
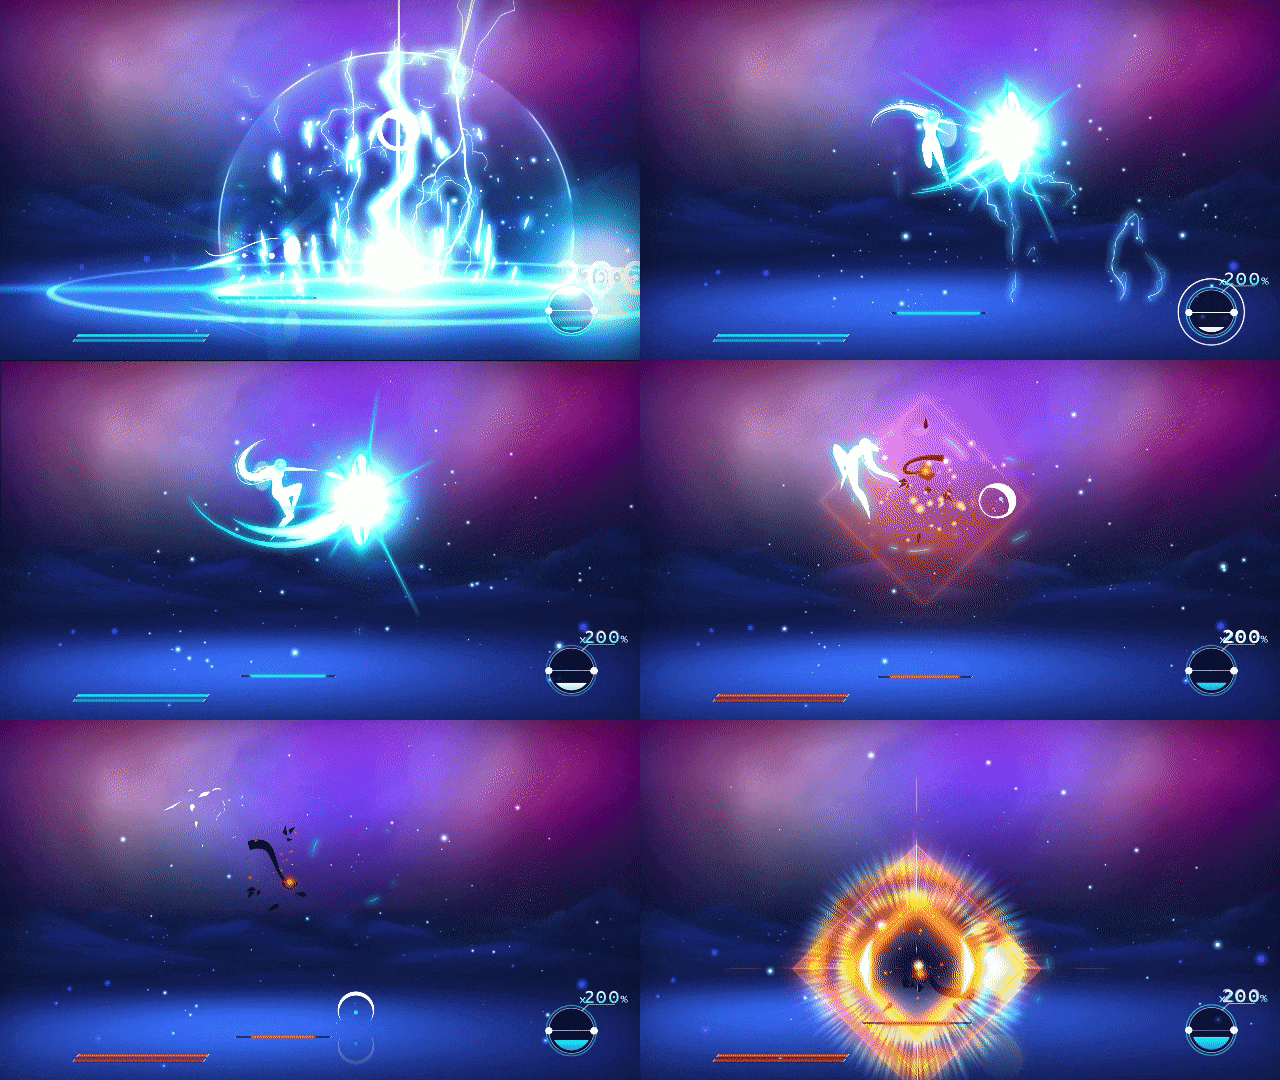
Worldless

Worldless

26 ratings
How to TRASCEND at Worldless' combat
By MezzoMe
With this guide, you'll learn everything there is to know about the game's combat mechanics and how to break the combat in half
3
3
3
   
Award
Favorite
Favorited
Unfavorite
Offense
Most of the guide will be focused on how to optimize your offensive phase, as that's where most of this game's complexity lie.
This will contain spoilers for all skills in the game and a few visual spoilers for some of the enemies
And since there is no place to put it, this will also contain very technical information to explain why things work the way they are
Addendum: August 13th Patch and new breakthrough
As of the latest patch some changes were made to the combat, and I made one more discovery.

I'll put them in their own chapters since most chapters are already at the word limit
The Addendums will be:
  1. All techniques have hyper armor
  2. Inner Will now grants Resist to all types of magic on top of Lightning absorption
  3. Yin-Yang now absorbs the elements on his head instead of being Immune to them
  4. Deflect
They will be located under the relevant chapters

Eventually, I hit the lab on the matter of Axe and Seal's anti-counter, which I'll explain in detail in the chapter Addendum X: Avananche Strings
Multipliers
There are a total of 5 variables affecting how much Absorption damage you deal. The first and most important step in optimizing your combos will be to undrestand them, as they are all(but one) independent and together they allow you to deal up to 5.75 times your normal damage, although that's not always possible. Because of this, they'll each get their own sections

Break

This is the one you will be most familiar with, you break blocks and your absorption damage gets doubled. Actually, the game lies to you: it's not when you break a block, it's when the enemy is left without any block, a distinction that you'll understand in the Defensive Section.
At any rate I shouldn't need to tell you that this is the most important multiplier and every enemy plays around it, except some of the gimmicky ones

Empyrean Demise

Empyrean Demise, or the Seal Special, is the only Additive in the game: from the moment it's cast to the end of your next offensive turn, the enemy suffers 250% absorption damage when broken instead of 200%. If you have trouble with math, that's the equivalent of an x1.25 independent
multiplier


Move Degradation

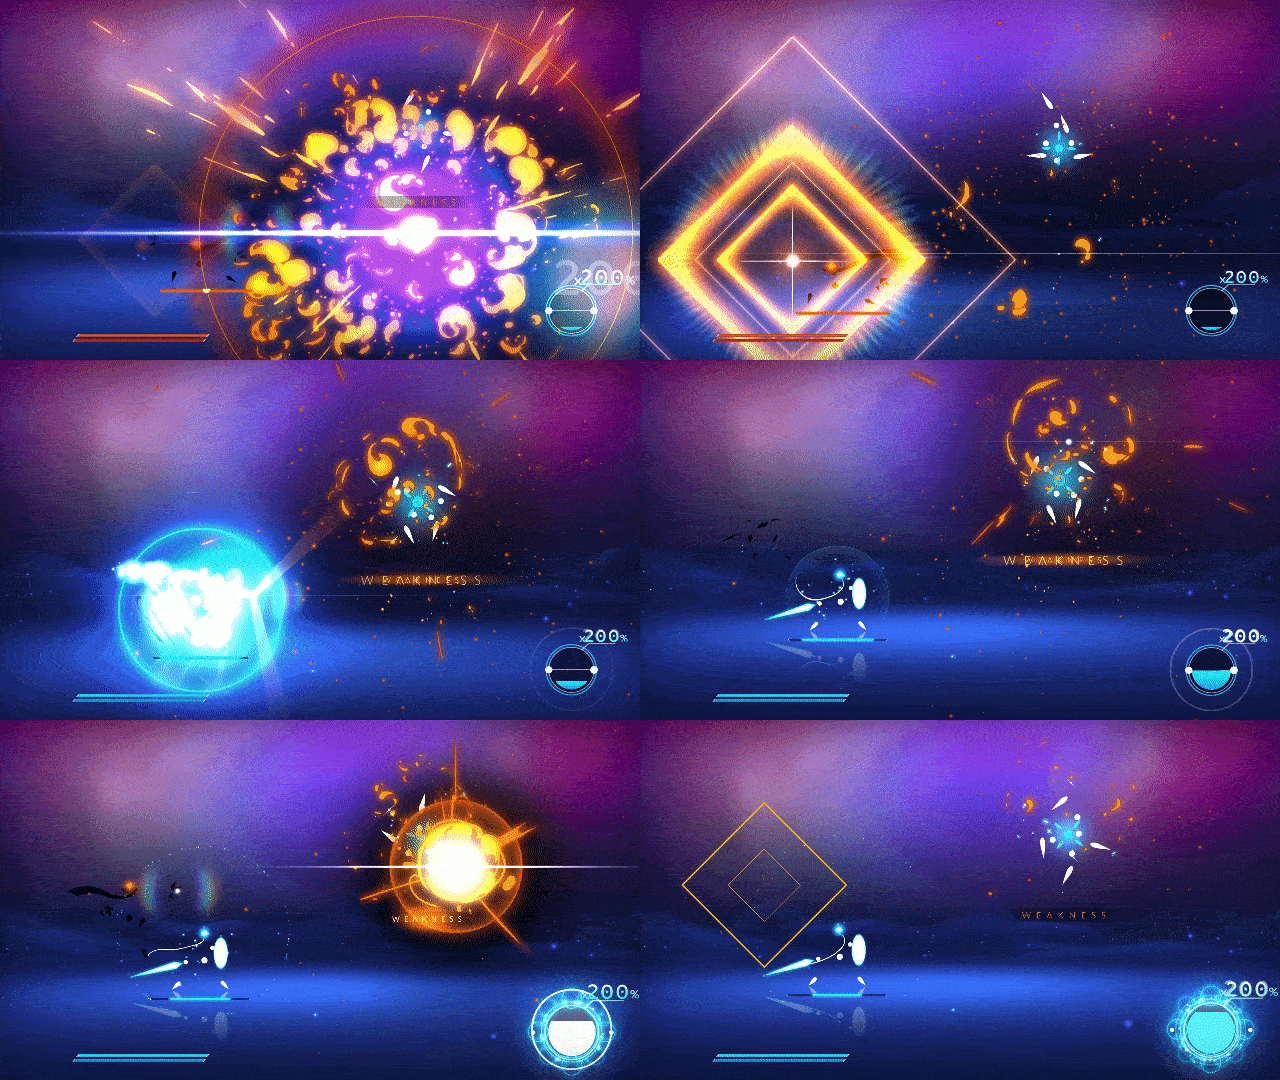
Move degradation, which for brevity I'll call Staling here, is one of the most overlooked aspects of combat. This independent multiplier will halve the absorption damage of a move when you use it for the second time in a turn, and cuts it to a fourth the third time, at least I think, it's hard to tell because by that point the meter barely moves even on the weakest enemies

Elemental Weakness

This is the only multiplier dependent on your enemies, making it the most conditional, but it's impact is nothing to scoff at:
  • When hitting a Weakness, you will deal double absorption and health damage
  • Vice versa, if it hits a Resist it will be halved
  • And if Immune to it they will both be 0
  • If you hit an Absorb, they will heal their health, but not their absorption meter. However, their blocks will take damage as if they were neutral to the element
This is the only variable that affects your block damage

Perfect Cancel

Otherwise known as Perfect Timing or Perfect Chain, they are shown accompanied by an audio and visual cue. On top of cancelling all the move's endlag, they will grant a bonus of an x1.15 independent multiplier, give or take.
This is the weakest multiplier, but can quickly add up, but I find that the moves exclusive to Perfect Timing and the removal of endlag to be more important aspects of it.
We'll call the more general act of stringing two moves together as Stringing
Break
Breaking is conceptually pretty simple, you just hit the enemy with the most health damage corresponding to the block's element until it breaks, you can even spam them since they deal low absorb damage anyway.
Still, there's quite some nuance you may not think of, so for the time being the basic combos you can pull


Charged Attacks

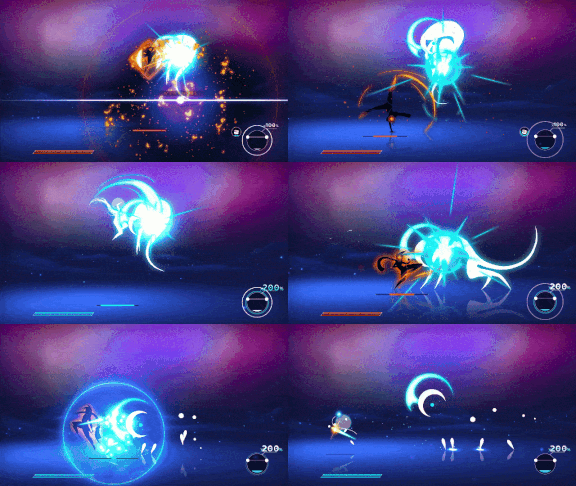
This will be your bread and butter against enemies, especially those who can't be launched. It has the highest DPS out of all non-technique on top of on being the fastest in general, charges your techniques for two points at a time(since the Charged Attack and Charged Attack Release are considered two separate moves),

https://gtm.steamproxy.vip/ugc/2480997707431678670/3E5208DBF5E85FC5B1C56F18BB8A003784BA2756/?imw=256&&ima=fit&impolicy=Letterbox&imcolor=%23000000&letterbox=falseAgainst heavy enemies, you press the Charged Attack+Release command, and then you press it again. Repeat until the enemy dies. Real complicated, I know

https://gtm.steamproxy.vip/ugc/2480997707431720856/2726FB90B35FA418C7CC47ABBE8364E329E6FF11/?imw=256&&ima=fit&impolicy=Letterbox&imcolor=%23000000&letterbox=falseThen, if you are REALLY advanced, unlock Instant Switch and hold down the Switch button so that you split your staling between the two characters. You still with me?

Whip

Now, if the enemy can be launched things get a little more complex. As I'll explain in the Stringing section, it's better to use Whip into Charged Attack than the other way around, but if you don't have time for a full combo, it's better to sqeeze in one more Charged Attack than a Whip combo

https://gtm.steamproxy.vip/ugc/2480997707433364947/4118EE8BA746BDBDF8DB97407A7183B0CE33F2B3/?imw=256&&ima=fit&impolicy=Letterbox&imcolor=%23000000&letterbox=falseThis loop deals about the same DPS of Charged Attack spam

Techniques

If you are like me, by the endgame you probably thought that damage-oriented Techniques were overkill since you could already kill blocks fast enough.

As it turns out, that's a lie. Bow and Whip Techniques deal about the same absorption damage as Charged Whip+Release, and the same is true for Ace Cut and Energy Blast and Charged Attacks. The real asset of (most) techniques isn't their damage, but the fact that the Timer is frozen during the animation

This is the time I found out that block damage isn't equally split, or proportional to the base damage: Ace Cut deals a bit more damage to Health and Padlock Blocks, as well as Physical Blocks, while Energy Blast deals more Launcher damage on top of damaging Fire blocks.

But don't worry, you won't have to learn any of it, because we are forgetting about someone

Hi block. Bye block

Unlike every other move with its aerial counterpart, Divide and Obliteration are significantly stronger than Ace Cut and Energy Blast: they deal almost as much health/padlock damage as two lv 3 Magics, while Obliteration deals slightly more fire damage than lv3 fire. And then deals that much damage to Physical and Launcher blocks too. Timer still freezes by the way

They're so strong, only one enemy's blocks survive it, everybody else's elemental blocks gets one-shot by these two moves. Padlock Blocks fare a bit better, with a grandtotal of three enemies whose blocks can survive one Divide/Obliteration

In fact, Divide one-shots even everyone's physical Blocks, although that's kinda cheating because I needed to damage it a bit in order to perform the Grounded Aerial Trick, which I'll explain in the Stringing section

Inner Will

Finally, we reach Inner Will, strongest technique as far as health damage is concerned. Just press the Inner Will button and use the Charged Attack spam or the Charged Attack->Whip loop. That's it.

And with this, you now know the basic combos that can carry you all the way to the end of the game without too much fuss and while still being a good boy:
  • Charged Attack spam
  • Charged Attack - Whip Loop
  • Inner Will for chunky blocks
  • Divide and Obliteration for instant destruction

On the other hand, if you dare enter the Exploit Zone, you can go even further
Break the Unbreakable
Magic

Now, magic, more specifically level 3 spells, are usually moves you have to use, but don't want to. They have the lowest DPS out of any damage-oriented moves and are the slowest moves in the entire game, which leads to more times of accidentally casting Lv2s because time ran out than I'd like to admit.

So what you usually do is cast just enough Lv3s as you need, sometimes with a Lv1 combo if you need a little more damage. In that regard remember that Wind and Ice Lv1s deal double the damage of Lightning and Fire, in exchange of having only two hits instead of three and more awkward to use Lv2s.

Usually that would be the end of it with the only real redeeming feature being that there's more enemies weak to the Magics than there's to Physical moves.

And then comes an exploit which turns all of this upside down.
So first off, while you usually suffer infinity endlag from using a Lv3, you can actually string other Lv3s so long as it's a different element. Each element can only be used once per string
https://gtm.steamproxy.vip/ugc/2480997707447906017/3BE731B8A2A9E08120B2E8D00EF0D08E839C0751/?imw=256&&ima=fit&impolicy=Letterbox&imcolor=%23000000&letterbox=falseYou are supposed to learn this from the seven-blocks Unstable

This, however, was an intended mechanic. And so was the fact that you could cancel them into physical moves. What wasn't is the fact that since your character walking to an enemy can be cancelled into anything, it could also be cancelled into the Lv3 you just used. This can also be buffered before the animation actually ends.

His channel also has a few other interesting things about some of the final bosses.

With this, you've officially entered the naughty boy zone and are ready to break all blocks in half in a single turn. Except the Volcano.

Now that you know what you want to do in a turn, let's quickly go over the remaining upgrades

Time Bonus

Not much to say about these ones, break blocks, parry and dodge to get more time and collect the rectangle Neutral Shards to get more more time. More time means more damage. More damage is good

Notice that while Parries and Vanish give you white Extra Time, breaking blocks only recovers your regular, colored Time and can't go over the maximum
Because of this, breaking a block with full or almost (regular) time has diminishing returns

Teleport

Also a straightforward way to make you faster. It's always faster to teleport to an enemy than walk to it. Even the game tells you this, as, once you unlock the upgrade, Edda and Aven start teleporting before Absorbing instead of running

After unlocking it the only use for the normal walk is that the afermentioned Repeat Magic exploit depends on how it works.

You can even teleport after launching an enemy to skip jumping at them, although how much you spare depends on the attack. Divide and Obliteration just need to leave the ground so they are already near-instantaneous

Instant Switch

Another way to save time, Instant Switch is a great Quality of Life upgrade that allows you to actually use both of your characters effectively and makes your combos flow much better.

There's some quirks about this skill, however:

First off, while you can Instant Switch in the middle of a basic combo, as the Skill Description shows you, you can't do the same when using secondary weapons.

There's many other caveats due to how Stringing works, which, you guessed it, will be explained there.

Instant Switch is only the second best Union Skill, the first being...

Assist

Assists are a big power spike, but need quite a bit of mechanical knowledge to use them most effectively.

So let's start from the bottom. You press the button and once per turn for each character the other character performs an attack. Meanwhile you can't swap or cast Union Techniques for their duration

But what does it do? It chooses from a total of 5 moves
  • Physical attack, which means:
    • Charged Attack Release if the enemy is on the ground
    • Two basic aerial hits if the enemy is in the air
      • Aven has a unique animation for this.
      • Edda will send the opponent to the ground
  • Lv 1 Magic 1 x 2 (magic 1 is Fire and Lightning)
  • Lv 1 Magic 2
  • Lv 2 Magic 1
Lv 2 Magic 1 is only used against broken enemies, while the Lv 1 version only used against unbroken enemies. Speaking of that, the AI has different logic based on if the enemy is broken or not
Since Magic 2 deals twice as much damage as Magic 1, the two Lv1 magic assists deal the same damage
Now, his decision process looks something like this:
If the enemy isn't broken: Among the enemy blocks that the character can damage: If the enemy isn't Immune or Absorbs Physical: Physical Attack If the enemy won't resist Magic 1: Lv 1 Magic 1 x 2 If the enemy won't resist Magic 2: Lv 1 Magic 2 If you can damage none of the blocks: Physical Attack
Basically what happens is that Charged Attack Release deals about twice as much damage as the alternatives, that's why it's given priority and it defaults to it when he can break no block, and why the enemy needs to be immune to it (or not have a physical block at all) to even consider magic, as even if the enemy resists it, it'll just end up dealing the same damage as them

If the enemy is broken: If the enemy isn't Immune or Absorbs Magic 1: Lv 2 Magic 1 If the enemy won't resist physical: Physical Attack else: Lv 1 Magic 2

The concept is similar to above, except it has one culprit: the fact that the Assist can't cast Lv2 Magic 2. With that limitation, the AI puts Lightning and Fire on a pedestral over Wind and Ice which instead are left dealing the same absorb damage as Charged Attack Release.

So what does it mean in English? Your choice mostly boils down to either casting it while the enemy is broken or not.
For the most part, the Lv 2 Magic and Charged Attack Release are roughly equivalent, but when the enemy is weak or resists the elements, namely Fire and Thunder, as well as wether damaging a block is going to take long(e.g. if it's just sturdy enough that you can't destroy it with a Lv 1 Spell combo, in that case it's faster to use Lv 1+ assist than a whole Lv 3)

There's some faults with how the AI works: it doesn't make a comparison of weaknesses, it only accounts for the attack it wants to use.

Take for instance the Lightning Elemental:

https://gtm.steamproxy.vip/ugc/2459606329277052339/C2AC072B2043346BC5583CD177811881A5DC1B96/?imw=256&&ima=fit&impolicy=Letterbox&imcolor=%23000000&letterbox=falseIt only resists Fire so Aven here will try Lv 2 Fire. However, since the enemy resists Fire AND is Weak to Wind, Lv 1 Wind will be stronger even if at base it deals half its absorb damage

Also remember when I said
their blocks will take damage as if they were neutral to the element
When enemies absorb damage? The Assist forgot about that, and acts as if the enemy is Immune to that damage

Also also, In spite of the AI treating them as equals, Charged Attack Release deals more damage than two Aerial hits

It's still one of your strongest assets when used properly. Even if you aren't sure what to do, you can't go wrong by casting both your assists per turn
Break the rest
Finally, let's have a quick rundown of the remaining skills

Secondary Weapons
While it's not as important for damage-oriented options, avoiding move degradation might make a difference against weaker enemies.

Common to all Secondary Weapons is that they can be used in the air and they can't be interrupted by an enemy block, while also staggering enemies trying to wait for a counter

Countering the counters

There's a total of 5 main options to defend yourself during your own turn:
  1. Dodge with Bow/Whip
  2. Dodge with Teleport
  3. Parry with Axe combo(first frames of first hit only)
  4. Deflect with Seal combo(same as above)
  5. Block with Switch

Here's the thing: your attacks aren't low-commitment like in an Arkham or a DmC. If you are in the middle of an animation you can do nothing but eat the hit.
This makes dodging the easiest options as you can (mostly) do it as soon as you can instead of having to wait for the actual moment they attack
On the other hand, Axe's parries give twice as much time as regular perries, and similarily Seal shoots two Deflects
Most importantly, there is a way to make use of them without slowing down your strings, see Addendum X.


There's two main faults with dodge moves. The first is if you use their aerial version the Whip dodges back only a small distance while the Bow doesn't move at all.
Fortunately Lightning Nightmare is the only enemy that can be launched AND counter after being launched AND hit the air with his counter.

The more pressing problem is that the first two options only work if you are at the right distance from the enemy, otherwise you'll just stay in place

The more more pressing problem is that the first three options deal only damage to Physical(and in some case Launcher) blocks while the fourth just deals no damage to blocks.
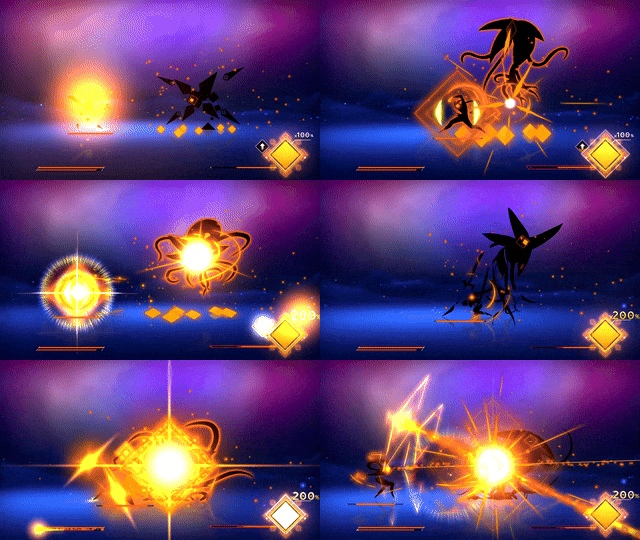
This leaves the block spawned by Switch to be the only real universal option, because, as it turns out, all counterattacks are considered weak moves, with one exception:
https://gtm.steamproxy.vip/ugc/2459606968851273370/3D0F69EED4CAE551018A13112817796721D74E47/?imw=256&&ima=fit&impolicy=Letterbox&imcolor=%23000000&letterbox=falseThis prick's pricks

However, keep in mind field effects, like those that look like your Ice Lv 2 bypass defenses and can only be dodged, not blocked

https://gtm.steamproxy.vip/ugc/2459606968851290579/299CAF21E02BCC6E0DC7390CC2D252CCE5B7BC2A/?imw=256&&ima=fit&impolicy=Letterbox&imcolor=%23000000&letterbox=falseThis counterattack also can't be blocked, I assume that's because it's considered a field, like when he spits that lava out.

Besides these options, some counterattacks can be dodged by going in the air, with those that look like your Lv 2 Ice can even be dodged with a charged bow
One equally niche option is Glance of Tomorrow. It's the only technique with I-frames, making you invincible to even field effects after the start-up is over

Axe

Axe? More like Sux. It's got the slowest animations in the game on top of the third slowest DPS out of any damage-oriented alternative, Inner Will and Charged Axe are the only Offensive moves (beside the Switches) that deal no damage at all

And guess what, on top of that it suffers from two separate bugs. More specifically, the second hit of the combo does.

First off, spoiler for the Stringing section, but you can usually cancel a combo with a technique, including the middle of it. Not here. If you use the second hit of the Axe combo, your only option will be Sword Chain, Instant Switch Melee Chain and wait the whole animation

Second, unlike every single other move with a secondary weapon, the second hit can be interrupted.

https://gtm.steamproxy.vip/ugc/2459606968853003345/A430654F65C69EBD99AF478EBDE8B029FB46FEB3/?imw=256&&ima=fit&impolicy=Letterbox&imcolor=%23000000&letterbox=falseWhat, you thought just because the axe is wider than Edda's cheeks it'd pierce defenses? That's actually a metaphor for how much ass that second hit is.
Fortunately he's the only enemy which interrupts by blocking besides Dark Paladin four-square block, which gets broken by the combined damage of the two hits


There's virtually no reason to use the second move. Sometimes the good damage of the first hit might come in clutch if you immediately break the block with it, maybe with the Sword Chain.
The aerial version also has an additional landing hitbox which deals quite a bit of health damage, but descending hit deals no absorb damage
Charged Axe is slightly faster than just pummeling the enemy, but since it deals no damage it's only relevant for speedrunning the Ultimate Trial. It can be also be used to cheese Lightning Nightmare since all his moves are physical or Fusion
Inner Will can cheese some enemies like Lightning Nightmare(again) and is at very least fun to use when you're tired of using Lv 3 Lightning. Also the lightning strikes prevent enemies from counterattacking, including The Prick

That's the extent of the Axe's utility. The parry function as I said before needs you to wait, and is more of a necessity for the weapon to do anything, on top of needing a physical block


Neutral Magic

Charged Seal is also quite conditional, but for a different reason. It usually has the second lowest DPS, second only to a non-exploited Lv 3 Spell spam. However, Seals are the only non-technique offensive move to deal Neutral Magic damage.

This means they can hit all Magic blocks at the same time. That's why Unified Division and Glance hit all blocks in spite of being only Neutral Physical and Neutral Magic.

Also seals don't rely on the Deflect to deal good absorb damage. About the other options, Unified Division deals much more damage, but still less than Divide and Obliteration.
This is relevant because Neutral Magic is a separate resistance from the other four elements, so you can actually destroy the block's on Yin-Yang's second phase

Not sure why you'd use Glance to destroy blocks, but if you do be aware that only the final hits deal Neutral Magic damage, and the hits before actually deal Orange and Blue Physical, depending on the one that is attacking.
It also deals no damage damage to health while still damaging padlock blocks, somehow.

Hitting multiple targets

Whips, Lv 3 Spells and Unified Division can hit multiple enemies at the same time, in particular UD and Bow normal attacks can hit all parts of Demon's last phase.

Unified Division is also the only move that can destroy Lightning Nightmare's aerial traps
What about Absorb damage

Paradoxically there isn't much to say about absorb-oriented moves, because you don't get the luxury of using just a select few, you have to choose them so that the Multipliers are as high as possible

If I were to pick one, I'd say Charged Whip+Release is one I like to have any time I'm not going for a Technique, as while most options deal about the same amount of absorb, it is much faster than an entire Bow/Seal Combo + Sword/Melee CHain

One exception is Lv 2 spells, which only deal about as much as two Bow hits, but they are also not much slower than those.

Once unlocked, Glance of Tomorrow is an expensive but definitely cost-efficient move capable of single-handedly bending all but the strongest enemies

Once all Multipliers are clear, I'll explain how I build my combos in its own section
Addendum 1: Hyperarmor Techniques
As mentioned, the first change the patch did was to add hyperarmor to every technique

That means you can't flinch for their duration.
This doesn't apply to defensive techniques

You still take damage, both on your health and absorb meter, so it is rarely useful unless you still haven't damaged the enemy
One use it can have is for Empyrean Demise: since you usually want to cast the move as soon as you can, certain counterattacks could delay the whole turn by forcing you to dodge, lest you get hit and just waste the charge. That's not the case anymore.

For other moves, the armor might make combo flow better, since usually the biggest threat of counterattacks are them interrupting you, but since all Techniques are finishers anyway that'll rarely make a difference outside of Empyrean Demise and Inner Will, which want to be used before a string anyway
Empyrean Demise
There's many elements that make Empyrean Demise easily the best technique in the game.

The most obvious one is the fact that before the endgame it's one of three techniques that help with absorption.

The second one is similar to Inner Will: it quickly deals much more damage than the alternatives.
If you remember, I said that Bow and Whip technique deal about the same absorb damage as Charged Whip + Release, a full Bow/Seal combo + Chains and so on. So by some really complicated math, you realize that if your Break Bonus gets increased by a quarter, then to be better than Bow or Whip Technique you just need to cast a more than four of the above mentioned. Across two turns. Even without using other techniques its efficiency is obvious

The third reason is that it can be used almost anywhere. It doesn't matter what the enemy resists, it will always help the same way. Think of the Unicorn, which is vulnerable to fire. The only absorb-oriented fire move is Lv 2 Fire, not exactly the most mileage you can get before staling. Only Empyrean Demise (and assist) can help you dig deeper into that weakness.
The only time you don't use it(besides not planning on breaking the enemy or using a Technique at all) is when you can absorb the enemy in less than 4 moves.

The fourth reason, which is complementary to the first reason, is it allows you to do two-turn burst combos. These obviously are more useful during the Ultimate Trial since it's full of breather waves, that allow you to heal yourself and fill your Techniques.
But even during regular encounter you might consider them for the ability to skip phases, quite a big deal when you consider in this game almost every enemy has phases.
In fact, let's not mince words, once you unlock Glance of Tomorrow Demise+Glance can take most enemies by itself(special mention to the Angel and Yin-Yang which don't reach his second phase if absorbed with Glance, although you have to be precise with the latter as he goes into the second phase if it takes too much absorption damage before Glance)

Finally, the move does actually deal a small amount of Neutral Magic damage. It's even less than Charged Seal+Release(but more than it without release), but you can use it to stagger an enemy preparing for a counterattack, or to reveal an enemy's hidden (magical) blocks. Besides, it has infinite range and its duration is based on turns, not on hit number like Inner Will, so you have no reason not to use it from the start of the turn, it's just free damage
Move Degradation
Pheraps the most overlooked aspect of the game, many new players will find themselves unable to absorb an enemy because of this mechanic.
How do I know that? Well, I'll tell you a secret: You can absorb the Butterfly right at the start of the game with no upgrades.
All you have to do is perform your basic four hit combo and wait until the turn ends, and if you are feeling fancy, also cast the two lightning hits in the middle of it, but it's not necessary.
That's right, doing nothing was better than trying to make another basic combo

If there's one takeaway you keep in this whole guide be it to NEVER repeat twice the same move in a turn if you can help it, atleast not the absorb-oriented ones
Even with damage-oriented moves might make a difference. At the very least it will look snazzier and give Axe half a reason to exist
If you want a move's utility, like mobility or because you want to charge, you should still try not to use them more than twice per turn.

The way it works is pretty simple:
  • Every move has a counter of how much it's getting staled. You use a move in a turn, the counter raises by 1 each time
  • At the end of every offensive turn, this counter is reduced by 2, until it goes back to 0
  • Whenever a move is used, its absorb damage gets cut in half for each point of staling. If you use a move for the third time in a turn its absorb damage will get quartered. At least I think, it's hard to tell because by that point even the weakest enemies only move a couple of pixels

So while you can technically use a move twice in a turn and still have it fresh the next one, keep in mind absorb-oriented moves only deal about twice as much as their respective health-oriented move(e.g. Chosen Arrow compared to Ace Cut). You ever cast Ace Cut on a broken enemy?

But what exactly counts as repeating a move?
  • As a rule of thumb, if the animation is different, it's considered a different move
  • Edda and Aven's moves are considered separate, even if they have the same input
  • Each hit of a combo is considered a separate move. When you tried spamming the basic combo against the moth, the first 3 hits had the counter to 2 and the fourth hit had it to 1 by the end of your turn
  • Doesn't matter if you cast Lightning in the middle of the basic combo or by itself. It's still the same move, and so is every other instance of using a move regardless of where you used it from. Another example is Bow Sword Chain is considered the same move regardless of at what point of the combo you actually did it
  • The aerial versions of your basic combo are considered separate moves from the grounded ones.
  • While they have different animations, aerial versions of your secondary weapons are considered the same moves as their grounded version, cue also the fact that they immediately fling you to the floor after the first input. This might confuse you because Charged Bow behaves differently when you are airborne, but no, that's still the same move
  • Axe, Bow Sword Chain and Whip Seal Melee Chain are all considered separate moves
  • Similarily, Divide, Obliteration, Ace Cut, Energy Blast are all separate, and so are Charged Attack/Whip/Bow and their respective Releases and Teleport with Aerial Teleport
  • For obvious reasons, Deflect completely ignores staling
  • Inner Will's lightning hits will also deal the same damage, even if you cast Inner Will twice in a row. Don't know why you would do that though
  • When an Assist uses a move, it's considered a separate move than when you cast it yourself

So if you are struggling with staling, you can start by just swapping character. If you want to just fill your Technique, consider launching the enemy. Since Aven's aerial fourth hit re-launches the enemy, you can do this:
https://gtm.steamproxy.vip/ugc/2459606968858211494/206176F00C9E107BBA7885CCCBA3E9A23DE6C4E5/?imw=256&&ima=fit&impolicy=Letterbox&imcolor=%23000000&letterbox=falseLauncher->Instant Switch Aerial Teleport->Aven's aerial combo->Instant Switch Aerial Teleport->Edda's aerial combo->Instant Switch Aven's grounded combo->Instant Switch Edda's grounded combo. Fills a Technique and a half and doesn't repeat a single move. In fact, your average turn doesn't even last long enough to do the whole sequence

Launchers
Speaking of aerial combos, remember that not all moves with an upward arrow on the Skill Tree are actually the same, or even those that don't, for that matter. There is in fact four different types of Launcher
Strong Launcher
Strong Launchers deal damage to Launcher blocks and will launch the opponent up to the maximum height. These moves are:
  • Both hits of Edda's Charged Attack
  • Aven's Charged Attack Release
  • Aven's third basic combo attack
  • Aven's fourth aerial basic combo attack
  • All Lv 3 Spells
  • Charged Whip
  • Charged Bow and Charged Bow Release
  • Last hit of Ace Cut
  • Last hit of Energy Blast
  • Divide
  • Obliteration
  • Unified Division
  • Some of the hits of Glance of tomorrow(the ones where they travel upward)
Weak Launcher
They are similar to Strong Launchers, but they only launch the enemy halfway through the maximum height. This is an important distinction because your basic attacks have deceptively tall hitboxes(Except for Lv 2 Ice, which can't even hit Edda while using Charged Bow) and if the enemy is too close to the ground they will perform the grounded version. These moves are:
  • Aven's Teleport
  • The last hit of the Axe combo
  • Aerial axe's landing hitbox
  • Charged Seal and Charged Seal Release
  • The first hit of Energy Blast
  • The last hit of Glance of Tomorrow
Downward Launcher
These are Launchers that send the enemy into the ground. Despite the symbol, that still damages Launcher blocks.
These moves are:
  • Second hit of Aven's basic aerial combo
  • Third hit of Edda's aerial combo, which she uses for her assist
  • Aerial Axe descending hitbox
  • Third hit of Whip
  • One of the hits of Glance of Tomorrow, where Aven travels downward
  • Whip Release(a unique version which bounces the enemy at about Weak Launcher height)
Occasional Launcher
Finally, there's the occasional launchers, which deal damage to Launcher blocks but only briefly stall the enemy in mid-air
  • All moves that don't fall into the other categories fall in this one, so long as they hit an airborne enemy

In particular I want you to remember what weak Launchers are so that you don't accidentally do a grounded attack where you wanted an aerial. Charged Seal hits fast enough with its hits to send the enemy into aerial range. It's also useful to remember that you can do more Launcher damage just by twatting the enemy in the air

Assist
Assists are the only thing, besides Empyrean Demise, that help you dig deeper into a weakness. All you need to do is use both your Lv 2 Spells and the assist
https://gtm.steamproxy.vip/ugc/2459606968862488365/6B223FAB2EAA7B18DE1C25F926FC6FE826F5178D/?imw=256&&ima=fit&impolicy=Letterbox&imcolor=%23000000&letterbox=falseThe ability to do this makes a difference between enemies weak to Fire and Lightning and those weak to Wind and Ice, even with all else being the same
Elemental Weakness
Elemental Weaknesses are pretty simple, but there are still some things under the hood.

On your side, how does it work when you use multi-elemental attacks? Well, nobody resists Launchers, so the only relevant moves in that regard are Energy Blast, Obliteration and Unified Division

That's actually pretty simple. It just takes the best value. So if you use Energy Blast against Yin-Yang's second phase, for instance, you will still destroy the Fire block even though he's immune to Fire.

Then there's Glance of Tomorrow, which lies twice to you. The first I said it before:
the final hits deal Neutral Magic damage, and the hits before actually deal Orange and Blue Physical
Notice I didn't say "is of Neutral Magic/Physical Element". The truth is, not only is it the only offensive move that grants I-frames, it's also your only non-elemental move
It doesn't matter what the enemy is weak or resists, it can even resist or be weak to everything, Glance always deals the exact same damage
Only Shields can affect it. Additionally, so long as the enemy has full absorb meter, there is no way to stop the absorption

Now, I said that some enemies absorb damage, which screws with the Assist AI as they think their blocks will take no damage but they do, but fortunately, only Dark enemies can absorb elements. You can use the fact to your advantage, destroying blocks while healing the enemy can avoid their destruction in a pinch, but if you optimize your turns correctly, you should never resort to this

That's as far as oddities will go. In general you just go there, see if the enemy is using a different animation, then that's probably a sign he has different weaknesses, so just try every element under the sun and you'll have your answers.
Part of this game's appeal is figuring things out for yourself. I'm not out here trying to spoil every thing out of this game.
Only most of them, that's why now I'm going into some most obscure interactions:
  • The four elementals will try to hit you with Lv 1, 2 and 3 spells. After casting a the Level 3 they will enter a weakned state where they will go from being weak to one element and resistant to everything else, to being weak to that element and physical and neutral to the rest. Many don't find this out because they kill them too fast
  • You can extinguish the fire on Phoenix. This will make him lose some moves. This is usually not worth it if you don't want to kill him since you need to basically hit him with two Lv 3 Ice and he will immediately replace its previous blocks with a padlock block, even if he was broken before
  • Some enemies, like Dark Paladin's first phase, Glance of Tomorrow guy and Adaptation, become resistant or weak to everything. All but the Dark Paladin are explicitly designed around you hitting them when they are weak
  • Yin-Yang's second phase becomes immune to the elements on his head, yes, but he also changes resistances to Neutral Magic and Physical depending on how many it has
    • With 0 to 1 elements , he's resistant to Physical and neutral to Neutral Magic
    • With 2 or 3 elements , he's neutral to Physical and neutral to Neutral Magic
    • With all 4 elements he's weak to Physical and resistant to Neutral Magic

So there is many options to tackle Yin-Yang's second phase. An obvious one is use Charged Seal+Release to hit all the blocks through the immunity. However, when that becomes most relevant is also the time he starts resisting Neutral Magic, so you may prefer Unified Division which will instead hit the Physical Weakness.

If you want to get real snazzy, you can purposefully interrupt its first turn with Counterspell so that it remains with all four blocks, then hit it with Unified Division, that way you have him open to abuse its Physical weakness. See minute 8:46

Obvious spoiler for all enemies and the whole Ultimate Trial, if you go over the timestamp. That Charged Bow was a misinput: If he used Charged Whip he could have absorbed him in the first turn. To absorb him on the first turn you need to have dealt a little absorb damage during his first phase, or alternatively save Chosen Arrow/Empyrean Demise for the second phase
Note: this has been changed, see Addendum 3
Addendum 2: Inner Will grants resist to all magic types on top of Lightning Absorption
Another change from the patch, this will override Edda's weakness to Wind

This is almost never optimal for offensive turn for the same reason as the hyperarmor change, except even worse because usually the threat of a counterattack is interrupting the string, not their damage, and on top of that this only applies to "passive" counterattacks, as "proactive" ones will likely have hit you before the effect is actually applied

It does have some niche uses: if the enemy casts field effects, you can cast Inner Will and face-tank them instead of playing around them

Additionally, as I will explain in Addendum 4, it can help(or hinder) Aven's defensive turn
Addendum 3: Yin-Yang's second phase absorbs elements instead of being immune to them
Easily the biggest change of the patch

This allows them to be broken without Unified Division.
Depending on how many Break Block bonuses you have applied, by the end of it the time bar will be full all the same, except you haven't expended the charges

Note: there is an additional change that wasn't mentioned in the patch: it is no longer resistant to Neutral Magic regardless of how many and which elements he has. This makes it so that the combined damage of Counterspell and one Charged Seal+Release destroys all magic blocks
Stringing
I know this has been a lot to take in, but we are now in the final(-ish) stretch

Moves have endlag
During that endlag you can cancel that move into some other moves
If you do that for the earliest frames you get a Perfect Cancel, which will also give multiply the next move's absorb damage by 1.15

A perfect cancel is indicated by the same circle/square you do when using the Sonar.

However, there is a second type of cancel, which we'll call a Glint Cancel where a move is only available through perfect timing. On top of the standard circle/square, a glint of light will also be present. The bonus is still applied. The moves are the fourth moves of a basic combo, all types of Charged Attack Releases(including Axe) and Sword/Melee Chains if done before the final hit of the weapon

That's a lot of particles when you stack Instant Switching also casts the Sonar particle, and then you Instant Switch into Techniques which cast more more particles, but don't worry, they are all there and the bonus still applies correctly
For the sake of clarity, in this section, I'll call:
  • Combo any move that can be cancelled into another with the same input, that means: Edda's and Aven's basic combo, aerial combo, each of the four elemental combos, and each secondary weapon's combos
  • Hit any individual attack of a combo made coming from a single input. In spite of the name, some of these actually hit the enemy more than once, such as Aven's first and second basic hits
  • String any uninterrupted string of cancels, usually including more than one combo.

You can never string into a Union Technique or into the regular Switch. You can string into anything else though, including Absorption. Not all moves can be stringed into anything else though

For one, you can only perform a move if you are in the right position.
That means you can't cancel into a teleport if you are near the enemy and you can't cancel into any Technique in the air outside of Divide and Obliteration, nor can you cast a Spell.
You can cancel into melee, sword, Axe and Seal while distant from the enemy, and your character will just waddle like normal for half an hour before landing the hit. You know, for the 5 minutes you don't have Teleport unlocked.
If the enemy is too high to be hit, they will also jump and perform an aerial.

Opening
You can cancel the start turn animation, right after Edda or Aven's shards flash a bright light. You can cancel it into any move. This animation isn't there if you interrupt the enemy turn with a Defensive Technique

Teleport
Teleports can also be cancelled into anything

Primary course
Your basic combos, including their aerial versions and each of your Spell combos all fall into this category. Primary Course can be stringed into any other eligible move, including other Primary Courses

With the exception of basic aerial combos, your progress in a Primary Course will be saved, so long as it is all done in the same string, preventing you from using and staling the first hits.
However, Axe and Seal will reset your progress on your Sword and Melee Combo, but not on your Spells

The progress of your basic combo is shared between Edda and Aven: after the second hit of Aven's combo, even if you switch to Edda, her next hit will be the third. This also applies to the aerial version
Instead, Spells store their progress individually. You cast two lightnings, Fire Wind and Ice will still be at their first hit.

Now, how Lv 2 and 3 spells work into this is actually pretty simple. Performing a Lv 2 Spell is equivalent of going two hits into the combo for Magic 1 and one hit for Magic 2. Performing a Lv 3 spell is equivalent of doing the entire combo.
That's why if you perform a Lv 2 you can only perform a Lv 1 of that same element and you can only perform a Lv 3 if you didn't cast the element a single time in the string.
Yes, Lv 2 is considered the same move for Staling regardless if you cast it at the start or at the end

An important difference between Primary Courses is what parts of it are are actually cancellable.
All spells can be cancelled, regardless of hit and level.
This makes Lv 3 Spells the only Strong Launchers that can be cancelled out of
The aerial basic combos work the same up until the third hit, but the fourth hit can't be cancelled at all. Additionally, you can't Instant Switch from the third hit of one into the fourth hit of the other.
The grounded combos work similarily with one important difference: the third hit can't be cancelled with normal cancel into anything, it can only be Glint Cancelled into the fourth hit
Grounded Aerial Trick

Well, to tell you the truth, there is actually one very specific way to cancel out of the fourth hit of Edda's combo.
After the fourth hit, you can perform Divide or Instant Switch Obliteration. This isn't an actual cancel and you can't Perfect Cancel into it, but it allows you to use Divide and Obliteration against enemies that can't be launched

Aerial Instant Switch quirks
At this point, you probably realized one thing: during their aerial combos, Aven sends the opponent down with his second hit, Edda with her third. So what happens if you Instant Switch in-between those?

For Aven->Edda, she will use her grounded third hit. That would mean ending the string, and you probably just started it

Meanwhile, for Edda->Aven, he will do the second hit of his aerial instead of his third. Occasionally you might use this to squeeze one more hit

Secondary course
Now, the Perfect Cancel bonus is pretty small, and Lv3 Spells (and axe moves)are the only animations with that big of an endlag, so really, the only thing you really need for this section is knowing how to cancel those moves, and learning the Trick above is nice too. Even with all this, Melee/Sword Chain are usually among the last skills I unlock


Still here? It's time to talk about secondary course attacks. All four weapon combos fall into this category.
There's only 4 options you can do out of a secondary course hit:
  1. The next hit of the combo, if it's not over yet
  2. Charged Attack of that same weapon, also if the combo isn't over yet
  3. Sword/Melee Chain
  4. A Technique
Not only that, but Instant Switch is completely disabled for option 1 and 2

Some of them have additional perks:
  • After the final hit of the Bow combo, you can also string into a teleport. This can be a niche option if the enemy is airborne. Can be Instant Switched. However, if she does the animation where she shoots diagonally, you can only do regular shots
  • During Bow and Whip they get tired of walking, so they can't cancel into Ace Cut, Energy Blast, Divide or Obliteration
  • The second hit of Axe's combo can't be cancelled into any technique

Sword/Melee Chains on the other hand can be cancelled into anything. Seal Melee Chain in particular can be cancelled into teleport

More in general, Sword/Melee Chains are the only way to keep the string going after using a weapon as the other options are...
Finishers

Charged Attacks can only be Glint Cancelled into their respective Releases(Instant Switch is disabled).
In turn, Charged Attack Releases, along with Techniques can't be cancelled into anything.
And obviously, if you get staggered by a block or counterattack, your string also ends
Building combos
Well, you did it. You dug deeper into the systems than you ever needed to defeat this game.
Now, let's put it all together and build our Absorption Combos.

Your main objectives when making up a combo are:
  • Don't have the same move repeated twice
  • Keep into account the enemy weakness
  • Try to only use the first hit of Bow and Seal. Their chain hit as hard and are faster. Additionally you can use both grounded teleports thanks to the Seal Melee Chain. Additionally-er, they build technique
  • Use a Finisher only as the turn is about to end
  • Use both your Assists if you didn't do it for breaking
  • Plan the Assist and the combo so you don't try to Instant Switch while it's still out

How you break the enemy can also dictate your combo. Your priorities should be:
  1. Whip or Axe. Their Sword/Melee Chain are still absorb oriented, so you get the rare opportunity to use those
  2. Spells, as they can be cancelled into everything
  3. Basic combos are relatively weak, but build up technique while breaking.
  4. For how strong Charged Attack and their Releases are, they can't be cancelled into anything
  5. That's also true for the fourth basic hits, and the third grounded hits, except they are actually absorb oriented moves, which will go to waste. The only reason you break with those at all is because you are left with a sliver, to gain Technique, or because you pressed the third grounded hit and didn't think that through, or you just don't plan on using any more basic attacks
  6. Lv 3 Wind and Lv 1 Ice have delayed hitboxes which effectively force you to hit an unbroken enemy if you break with them last


With all of these in mind, here's a simple basic combo to get you started
  1. Assist + Edda's Teleport
  2. Bow->Sword Chain
  3. Instant Switch Seal->Melee Chain
  4. Aven's Teleport
  5. Finisher + Assist
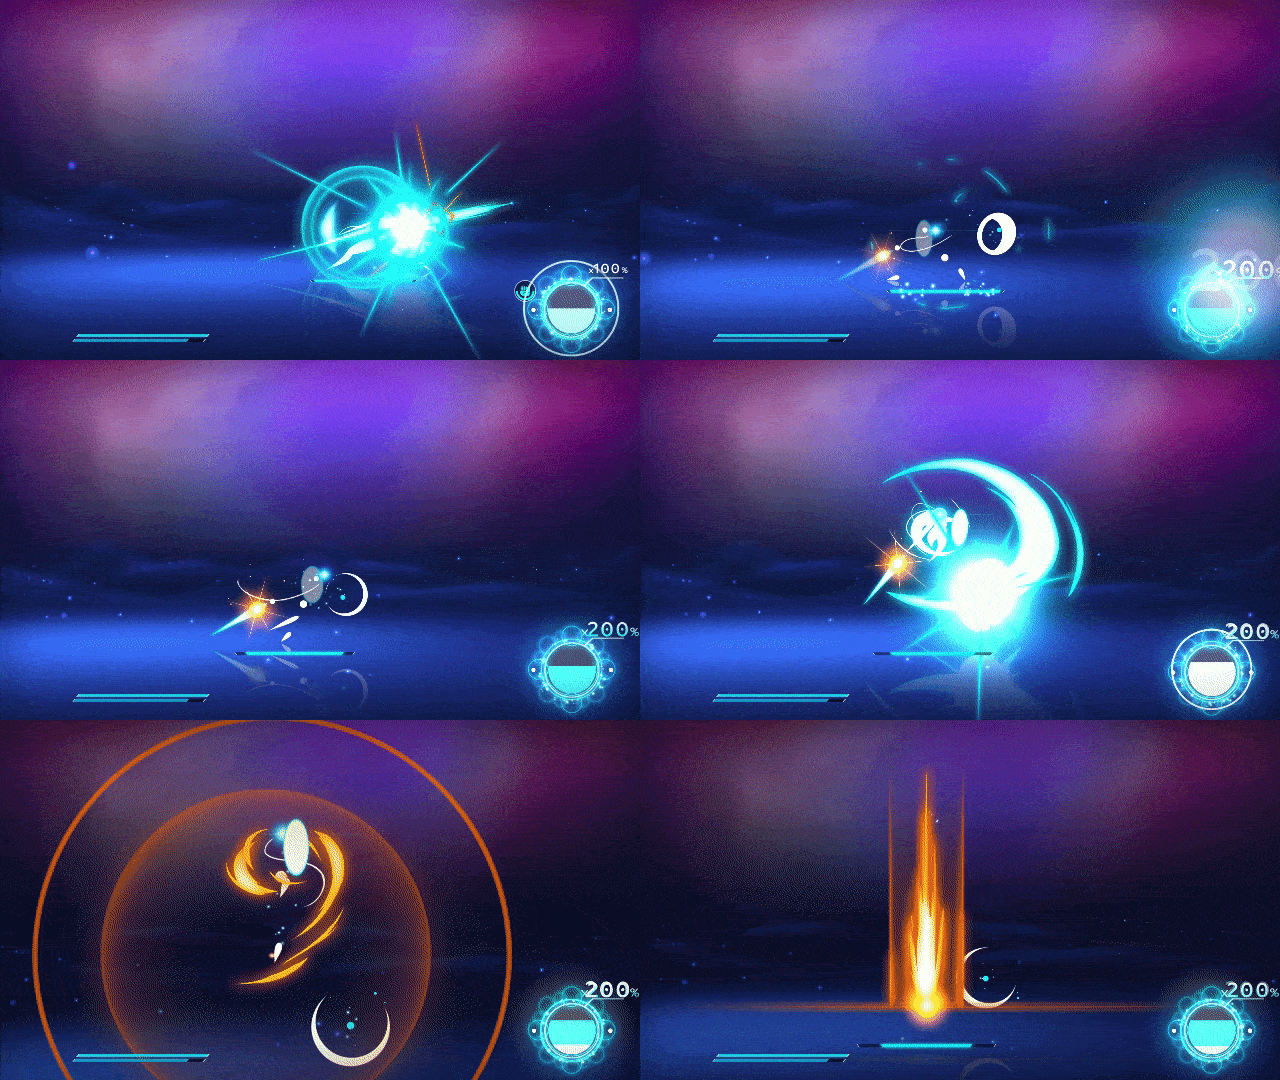
It can be done with about a full turn bar, hits for a good amount of absorb damage without Techniques, charges techniques by two hits for each character, is mostly physical which few enemies resist, and it looks cool. You can squeeze a basic hit from Edda if you don't plan on using Absorbption, but you might end up short on time unless the Finisher is a Technique


Now, think of the various ways you can alter this combo to fit the enemy, or simply because you haven't unlocked the necessary skills yet:
If the enemy takes more damage from Physical attacks, extend those part of the combos and add more basic attacks.
This one I did here is an extreme example. You usually don't need to modify the first combo that much as it's already almost entirely physical. In fact, it'd work just as well in this second case.
On the other hand, this one is easier and needs far less unlocks


Meanwhile, if the enemy is more vulnerable to magic, start using the longer Seal combo, or to use Lv 2 Spells, you may even squeeze some Lv 1s, and eventually use Fatal Ordeal as a finisher.
That's a lot of compression and particles in this gif, but I just cast all non-Fire Lv 2 and then the full Seal combo. Very few enemies are weak or even neutral to all of them, but they are very flexible on where they can be used, so long as you aren't in the air
Also notice the fault in the Assist's AI, using Charged Attack Release where it should have used Lv 1 Wind
Speaking of Wind, Lv 2 Wind is a pain in the arse to deal with, basically forcing you to use only half of your moveset. Even the Seal Melee Chain sends Aven too far back for the particle to hit the enemy. That's why I cast it first, which means I needed to swap twice, which in turn means a harsher timing to use both Assists.


It isn't rare to send an opponent flying when you break them. If you are planning to have them on the ground, you can use Aven's aerial second hit into Seal. You can also use Bow but it has a longer animation and akward timing when used from the air.
If you don't want to use Seal then you will have to use his third hit
One more alternative is to use Axe, if the enemy still has a physical block
However, the most easiest option is start with a Lv 2 Spell so that they have time to get down to ground move range, although it isn't always the best.


These are just some examples of your possibilities. Twist them, experiment and find your best fit for your enemy and the skills you have unlocked.

And that's it. Now you really have dug deeper than you had any need to into this game's combat. Except for...
Addendum X: Building Avalanche Combos
There are Strings that, if done with perfect timing, will land you at the right just the right moment in order to pull of Axe's Parry or Seal's Deflect, which from now on I'll call Avalanche moves.

Now, while for the rest of the guide I let you figure out for yourself how to work out each enemy, there isn't a one-size-fits-all String, so either see the key points below and try to figure them out yourself or prepare to be spoilered of all counters, like the superboss's

But first, what are those key points?
The first thing to understand is that there is a total of four ways the enemies can distrupt your turn, although Avalanche moves are only relevant for the first two.
  • Passive counters: They hit you when you get close. They can be further split into:
    • Physical :The enemy takes a pose. The counter gets interrupted if damaged by magic before the counter or at any point if hit with an Assist or a Secondary Weapon, so Avalanche Strings will side-step either situation. Additionally if the enemy was holding up shields, performing the counter will make him lose them
    • Trap: A trap gets planted on the ground and and hits you after a delay. They can't be interrupted once triggered
    While I always approach with teleport here, you can slow walk toward the enemy and do the exact same string, but only with Edda as Aven's basic hits are slower. Similarly, you can drop onto a Trap with Aerial Axe and still do the same string, and the same is true for falling into it with Aven's regular aerial attacks
  • Active counters: Some kind of orb hovers over your head from the start of the turn and goes down after a set amount of time. Nothing can interrupt them, and obviously if you do those without teleport you'll get hit much sooner in the string but even then, both enemies are among the latest you face in the game
  • Stagger: While many enemies have shields, Dark Paladin and the Assassin(i.e. the Prick) can stagger you if you try to hit them with a Physical attack. The only thing you can do to stop the pricks is use the Switch's shield, but really you should circumvent both obstacles altogether
  • Field effect:Things like Lv 2 Ice, Lv 2 Wind, the magma spits and Lightning Nightmare's thunder dome and his stationary orbs, as well as the Demon's arms, this is the most common and varied way to put you into a pickle during your turn. Basically each one of these works by its own rules, but none of those can be countered or blocked if not with I-frames

And that's the enemies pinned down, but how do we build these combos, exactly?
The first thing to understand is that all three Avalanche moves(first hit of Axe, of Seal and Charged Seal) have their windows at the same time. If you see me Deflect with Seal, you can just as well Instant Switch and Parry with the Axe

But other moves also have similar length, we can put them into three class:
  • Fast: Edda's basic hits
  • Slow: Aven's basic hits, all Lv 1 Spells and Axe-Sword Chain
  • Slow x2: Whip+Melee Chain, Bow+Sword Chain and Lv 2 Spells

    All moves belonging to the same class are interchangable
    You can replace any Fast I'll write with a Slow, the reverse isn't true
    And of course, you can replace any Slow x2 you see with two Slows and vice versa

    The final thing is that this timing assumes you Perfect Cancel every step or almost
    With that out of the way, it's time to style on these enemies
    Roots
    Type: Passive(Trap)
    Timing: Approach->Fast+Slow->Avalanche
    This string is an example of the equivalences I said above
    You unlock both Axe and Seal way later than when you face this enemy. Still fun to do though
    Assassin
    Type: Block
    Trick: Magic->Anything
    While not relevant in the context of Avalanches, the Assassin is probably the most infamous when it comes to its counters.
    The short version of it is that he gets charges (indicated on his spine) when hit with physical attacks and gets them removed when hit with magical damage.
    Which means constantly damaging him with Magical damage allows you to do pretty much anything.
    The best ways are Lv 2 Ice and Wind, but as you can see Lv 2 Fire and Lightning also suppresses his counter for a long time, and the basic combo I showed in the previous section fits perfectly into this
    Tomberi
    Type: Passive(Physical)
    Alternative: Approach->Fast->Avalanche
    As you can see, if the time bar gets filled, the excess is given in white time
    Phoenix
    Type: Passive(Trap)
    Timing: Approach->Fast->Avalanche
    With this one you almost always find yourself launching him and thus you may come from above
    Unicorn
    Type: Passive(Physical)
    Timing: Approach->Avalanche
    The fastest counter in the game.
    This sequence is usually worse than just casting Lv 3 Fire and then Lv1+2 with the Repeat Exploit, but it helps for when he casts Lv 2 Ice and thus can't use the exploit without taking damage.
    It reacts uniquely when you hit with a secondary weapon, getting staggered like normal only by the Axe.
    Lightning Nightmare
    Type: Active
    Timing: Teleport-> Slow x2->Avalache
    Only one attack makes this active orb
    Yin-Yang
    Type:Passive(Physical)
    Timing: Teleport->Fast->Avalanche
    I don't need to tell you to not do this against his Lv 2 Wind
    Big Green

    Type: Active
    Timing: Teleport->Slow x2->Axe-Sword Chain->Avalanche
    It has to be Axe-Sword Chain as the Seal chain would get you out of distance
    Now this is the Axe's time to shine. With this String you can uncover every block type except Lightning and Ice, and that's without the assist, and you get back the lost time spent searching for them. Alternatively you can use Seal for the Avalanche, getting to uncover blocks but losing some bonus time
    Use the Seal-Melee chain to get the distance necessary to perform the Magic Exploit

    This also helps against staggered summum:
    You see, the simplest way to deal with two orbs against Staggered Summum is the following:
    Lv3 Spell->Teleport->Fast x2->Whip/Charged Bow.
    This works because Staggered Summum always has one Magical and one Physical block, difference being that the Charged Bow is a finisher.
    But now if the block is neutral or blue physical, you get a valid alternative thanks to the Axe, you can even make an hybrid sequence of the two:
    Lv3 Spell->Teleport->Slow x2 + Fast->Avalanche.

    Summum is the only enemy that will try to counter even after being interrupted
    Timing(after Shield Impact + Counter): Teleport->Slow + Fast->Avalache->Axe-Sword Chain->Avalanche
    Timing(after Counterspell): Teleport->Slow x2+ Fast->Avalache->Axe-Sword Chain->Avalanche
Absorption
This is a bit late to talk about such a simple concept, but I've seen many people having problem with this.

As a rule of thumb, you want to fill the absorption meter so that you'll get surely get them in a single Absorpton. How much that means depends on the enemy. Stronger enemies give you less time and so they need to basically fill the entire meter.

However, there's still some merit to absorbing at the earliest: each correct input will heal you, and a failed Absorption will reduce the meter, yes, but not by too much, and will also heal the opponent, making it a great crutch if they are about to die.

The heal also happens when you skip the prompt because the enemy is full or you used Glance. Pretty useful for the Ultimate Trial.

Ok, now you know everything.
About your offensive turns
Defense
Fortunately, Defensive turns are much less complicated than offensive ones as you only have 7 options in total

Guard
You hit the right button at the right moment and you won't take damage, giving you time and Defensive Technique.
Pretty much the most universal option, but not always the best: time is granted depending on how many hits you receive, so it will be more effective the more hits the enemy has.

Also because of what I said in the Time Bonus section, it might have diminishing returns with the Block Break bonuses
Block and Deflect
I have a confession to make: I've been lying to you this whole time.
There are actually 6 Multipliers in the game, but let's take it one step at a time.

Block halves the damage you take and charges Assimilation, and Healing Deflect will heal you for half of that, so your final damage will be quartered, provided you deflect everything

But how does deflect work? Basically, Aven's hand has an orange glint when he blocks damage, and if you release the button there you will Deflect.
The timing is reset every time he blocks and the damage will stack, so that it works properly against multi-hits. Notice that Wind Lv 1 is too slow for that, you need to deflect each hit individually.

As I said, Deflect is a multiplier: it deals damage equal to x1.5 times the absorb progress you lost from the attack. This is the final damage: If Aven takes double damage because it was Lightning, Deflect will deal double damage back.*
See Addendum 4

This damage is affected by other multipliers except for Staling and Chaining, for obvious reasons:
  • If the enemy is broken, he'll take double damage from it. This is important because enemies usually refresh their blocks only at the end of their turn, more on that later
  • If you cast Empyrean Demise, it will also increase your damage. Notice that it while lasts two of your turns(including the one you cast it in), it only lasts a single enemy turn.
  • If the enemy resists Neutral Magic, you'll deal half damage, meaning you'll lose meter if the enemy is not broken. On the other hand, if the enemy is weak to it you'll easily get your worth back

Simple so far, but what if the enemy is neutral to it? When is it worth to take damage and to deal damage instead of gaining turn.
To answer the first question: whenever you don't die. You get nothing for winning with full health compared to 1 HP. Given that, health is but a resource no different from your Turn Time or your Technique Charges. Even in the Ultimate Trial you'll rarely take so much damage that the Absorption won't heal it back

But is it more worth than the Turn Time, in which you can do anything? There's quite a few layers to that question
If you haven't unlocked many skills, you might stale them all if you get too much Time. In that case you might consider using Deflect instead

Most importantly, they scale differently: Guards scale off how many hits are parried, whereas Deflect scales off their damage.
So if it's a single-hitting move, especially if it's of the Lightning element, you should definitely consider Blocking it, and the opposite is true for attacks with many weak hits.
At the same time, Deflect is affected by the afermentioned Multipliers and Guard by the Block diminishing returns

Keep these factors in mind to decide the best option for each attack
Vanish
Now, one thing easy to decide is when Vanish is the best option: never.

It gives the same amount of time as Perfect Guard, except it doesn't give you anything but Time and can only be used against a fraction of the attacks thanks to its long start-up and endlag

It is easier to use, and if Edda's Counter is already charged they are equivalent so you may use it those times.
Except the ones it's easier to use with are those with few hits, so Block would actually be the best of the three options there, unless it's being screwed by the other multipliers.

There is exactly one move in the game which, as far as I'm aware can only be stopped by Vanish and Assimilation

Switch
Which is still more of what I can say about the shield you get from switching.

It grants absolutely nothing except for the not taking damage, it's just there as a safety measure when you try to use both Parries and Deflect

No, you can't use the Switch into Deflect. He only gets technique and Deflect depending on the actual damage he takes

In fact, this is mostly a safety measure. You can do it anywhere, you can cancel Deflect into it, Vanish's endlag, even hitstun, so long as you don't get launched. It also lingers slightly longer than the animation

On the other hand, it only blocks a single hit per character. Per turn. Including the subsequent offensive turn, so it's still not the safest thing ever.

It does allow you to do things like this

Use the shield to cover Aven during Vanish's start-up and cancel the endlag. Notice how early I had to switch so that Aven only takes a single hit before disappearing
The second worst defensive move in the game which is at best tied for the best option can be supported by the absolute worst move which is never the best option, what a day.
I shouldn't tell you this is never a good option, but it leaves you protected for a long time and is probably the easiest way in the game to defend yourself with.


Except when it isn't because there's also...
Guard Impact and Assimilation
You hold the Technique button and if you get hit by the right attack you automatically use the Technique.

The first obvious difference between the two moves is the type of attack they block: Guard Impact can only stop Physical and Fusion moves and Assimilation can only block Magic moves.

One less obvious difference is what interrupts the move: For Edda, just Guard Impact ends the enemy turn, but for Aven, he needs to unlock and hit the enemy with Counterspell to do the same. This is especially a problem against the Unicorn which likes to quickly chain a magic hit with a physical one
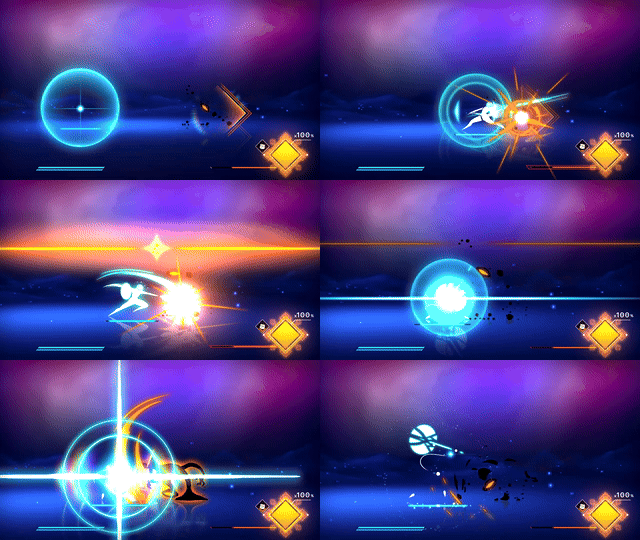
Also the Counterattack and Counterspell are of different elements

Similarly to Deflect, Assimilation will also extend its window each time it takes a hit in order to work with multi-hit attacks. Unlike Deflect, it always heals the same amount of damage regardless of what hit you. Even when hit by multi-hit attacks, the hits after the first heal only a minimal amount of health

Which brings me to the major difference: Guard Impact gives you time, while Assimilation just heals you, so it may only be better because of the damage from the counterattack. Not that you need to choose since they never overlap.

Can you gain health between Block, Deflect and Assimilation?
No. The minimal damage you need to take to charge up Assimilation is about the equivalent of one Lv 3 Ice or Fire(and that's how I found out that Lv3 Wind deals a smidge less).
Assimilation only heals about halfway through that

Anyway, given their static nature you want to use either as late as possible.
The biggest thing about these two moves is that they interrupt the enemy.
This means many things, but the most important one is that, with some exceptions like phase transitions, enemies only restore blocks at the end of their turn, which means if you use these two moves they'll be broken right from the start of your turn

This loses value as you get Break block bonuses, but it's a great asset before then or when they are about to give diminishing returns

Other uses include things that happen mid-enemy turn, the biggest example being Yin-Yang's second phase. Assimilation allows you to do that combo and absorb him as soon as he transitions

The last thing about these is that after either move you will skip the start turn animation, and as such can't cancel it and get the Perfect Chain bonus right from the first move
Addendum 4: How to get Free Deflects
The biggest change of the patch wasn't itself but the fact that it prompted to make this discovery
As it turns out, Deflect interacts with elemental resistances similarily to enemy blocks:
  • While resisting a move Deflect deals half damage
  • Being weak to it means Deflect deals double damage
  • When absorbing an element, even though you get healed, Deflect deals the same damage as if you were neutral to it.
If you need another help with math, those result in the final gains being respectively x0.25, x1 and x1.5 times the original damage, before the other multipliers kick in

Also Block halves the health restored.
Since you don't lose absorb meter with this, this gives the most damage relative to the initial attack strength, but of course you'll have to measure if that is worth using a Technique Charge to cast Inner Will

Another discovery is that while Assimilation doesn't get charged if the damage is shielded, it charges the same amount whether Aven resists, is neutral, weak or even absorbs a move.
Even if he resists the damage, he still can't heal more than he takes, although it's close
Conclusion
Ok, now it's actually over.
I'm pretty sure when I got all the achievements I only had a third of the playtime I have now
But then again, mystery and figuring things out for yourself is one of the main appeals of this game, and I do find fascinating the amount of depth and optimization that you can get out of the game
I hope that, wheter you just want to reach the end of the story or turn the combat system inside out, this'll help you out doing the same
9 Comments
Unspok3n 16 Jun @ 10:54am 
Wow thanks this helped a lot
MezzoMe  [author] 26 May @ 2:17am 
You are correct, besides enabling occasional launchers to trigger and thus giving you another way to break Launcher Blocks, the only discernable benefits are:
* your aerial basic attacks, as well as Divide, Obliteration and Aerial Teleports are separate moves. That means they count individually as staling, have diffent properties(obvious with the basic attacks, slightly less obvious that Aven's aerial teleport isn't a Weak Launcher) and in the case of the Techniques, they are much stronger than the respective grounded ones
* Charged Bow acts differently, and then even more differently depending if you yourself are in the air
But for the most part, you launch enemies because you cast a Level 3 Spell, or you used cast an assist that launches. In the latter case, (and in the ase of Lv 3 WInd) if you time it right, Seal and Bow can halt the enemy's ascension
darky 22 May @ 3:33pm 
Maybe I'm a bit late, and maybe I misunderstood some things but what is the actual benefit of launching enemies? Like do you extend your turn's time or get extra damage? Seems mechanically identical to just bashing at a grounded opponent
pero_a_koule 18 Apr @ 3:46pm 
Very nice guide, I'm glad I found it.
Jvggr 4 Jan @ 10:38am 
ive gotta say I read the entire thing because it put me into a trance.
I love this kind of deep dive
I also probably did not comprehend a single bit of it
I might go and finish the ultimate trial with this new knowledge though.
MezzoMe  [author] 8 Dec, 2024 @ 9:54am 
Four ways:

Perfect Guard
Block(and Deflect)
Vanish
Guard Impact

It looks like you were describing the last one, which is unlockable from the start
Progr1mm3r 6 Dec, 2024 @ 3:26pm 
How do you deflect a fusion attack? The game says you have to unlock the skill first, but what skill? One in the skill tree, or a found skill? I tried holding Y (XBox) but I pretty much always die, so I don't think that's it.
MezzoMe  [author] 1 Sep, 2024 @ 10:02am 
Thanks, but I don't use Discord
YoannBB 31 Aug, 2024 @ 2:37am 
Now, I consider myself a Worldless nerd, and you seem to have a lot of diverging opinions regarding some moves!
But I read everything and yeah you know very well the game too! You even know about the specifics of the move degradation mechanic, which I only fully understood thanks to the debug combat overlay lol.

This guide is insane dude. Would you consider joining the Worldless discord server one day maybe? (not the publisher official one)