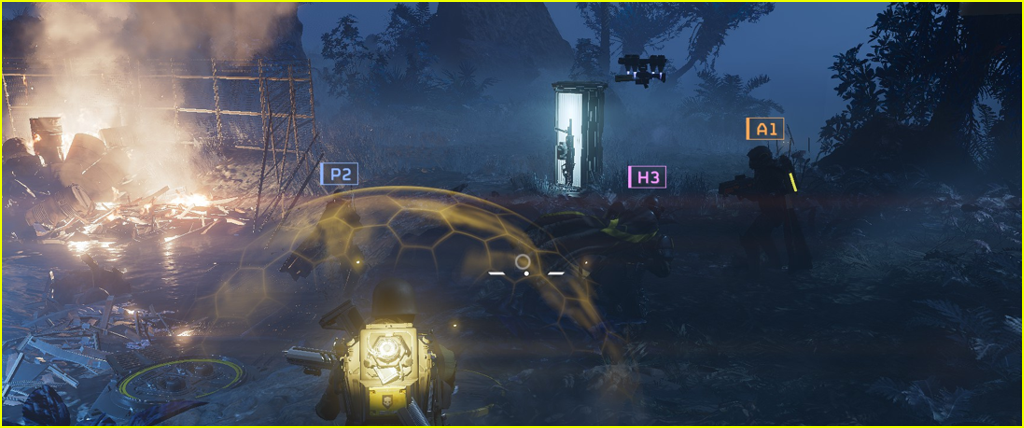
HELLDIVERS™ 2

HELLDIVERS™ 2

247 ratings
Teamwork Tips: How to Co-operate With Strangers
By Majorita
This is a guide for just about everyone. It contains common multiplayer 'meta' strategies and tactics, useful general tips and gameplay information, as well as suggestions about etiquette, and host/client relations. The goal of this guide is to help players to understand one another, to communicate more easily, and work together more effectively.
12
6
17
3
3
3
4
4
2
2
2
   
Award
Favorite
Favorited
Unfavorite
00.0) - Introduction


This guide is intended to to be a compiled list of useful things that are probably not 'by-the-book' as set out by the Helldiver Training Exercise.

Despite this, unorthodox tactics and strategies have commonly been used to great success during the course of Helldiver operations, and when it comes down to brass tacks, all that matters is that beautiful red 'MISSION COMPLETE' stamp on the mission report.

...

Or, in other words, if I were to drop all that 'roleplay nonsense' and talk seriously...

There's many different little things people do in Helldivers 2 that I hopefully can explain to anyone looking for a little information, via this guide. I will tell you about them so maybe you don't have to ask questions of your allies who may or may not speak the same language, so you don't have to feel the impulse to immediately start kicking other players if you're hosting, and so that everyone can maybe learn to work together with better success.

I would like to hope I can maybe help different players with different playstyles coexist.

After all, something I am sure everyone knows, but perhaps doesn't fully understand, is when you play with friends (in the manner Helldivers 2 was created for) you only get a very narrow perspective of how the game is played, since you and your friends will have ample time to play together, understand each other's playstyle, and probably all learn to work together over a period of time. You can afford to only learn as much as each other knows.

With randoms, you don't have that luxury. Many other players will expect you to already play similarly to them, or to follow their lead. So, to collaborate successfully with these people, you have to learn to be adaptable, and to be flexible in your tactics. You need to learn to accommodate others and work with them. Otherwise it all falls apart.

An example is... I recently played a mission where everyone took mines. Now, I at first was skeptical. I didn't understand, but I didn't say anything about it because I chose to trust my team. And then, immediately after we get in they start throwing mines everywhere and I realize oh wait this is an Eradication mission, and on top of that everyone has climbed onto a big rock right next to spawn and just deployed minefields all over the place.

So instead of aimlessly trying to run around all over the map, complaining about the mines, trying to go out and find samples or whatever, I instead stuck with the team and stayed put, dropped my sentries, and we cleared it effortlessly through teamwork.

To put it another way:


(Note: Obviously this is not always true. But what you hopefully get out of this is, it's better to co-operate than to go off on your own.)
01.1) - Not Going Off On Your Own


After that last note from the introduction of the guide, I may as well start with some elaboration on that.

So first things first, the advantages:

- You'll be able to concentrate fire more effectively to take down big targets
- Other teammates can save you from dangerous things
- Samples are more easily recovered if dropped
- Resupplies, which are on a singular global cooldown, can actually be shared
- Team reloads!

And the disadvantages:

- Team 'hivemind' can actually make you do some dumb things (i.e. one Helldiver walks near an Outpost so everyone hard commits to a full clear even though that one guy really just wanted to have a quick look around for some ammo or samples then leave)
- Moving as a group can lead to being caught out more easily by patrols
- Sometimes your teammates can get you killed even with the best of intentions

So despite these, it's generally a better idea to move as a group if you can help it. There are other things to consider too, though.

According to research performed by players, patrols will spawn for as many player groups as exist in the session, when they are split-up. This means going solo will spawn more enemies overall, which possibly might make things more difficult for other soloing players if they intercept their path, or it might make things more challenging for you, too! More patrols walking around is nothing but a bad thing.

Even aside from this, there's other issues to consider too.

Dying while running around solo is entirely possible, even if you're really good sometimes it's just going to happen, and that's not a good feel. Dying with the entire mission's allocation of Super Uranium in some dark corner of the map is a very very bad feel.

So, it's best to stick with other players if you can help it.

Obviously at lower difficulties, the stresses of solo play can be alleviated somewhat, but at the very least maybe duoing might be better since duos can reinforce one another. More confident or skilled players might be able to pull off solo only games where they just run around and sweep the map of loot, but that's a little beyond the scope of this guide, and that's something you probably can figure out on your own with either a group of friends or just a bunch of very confident randoms.

For most ordinary random matches you join, however, consider sticking with the group. Solo tactics can work, but you shouldn't expect to play in this manner every time you play.
01.2) - Always Avoid Patrols


If you can help it, never ever fight a patrol. Ever.

Ever.

Aside from the fact that a patrol doesn't yield any reward or anything for picking a fight with them, you also probably well-know at this point that each one will inevitably get off a flare or summon a bug breach. They always manage it. Even if you have every enemy dead-to-rights, even if you open with a Cluster Bomb directly on top of them, SOME ROBOT is gonna get a flare out and you'll have dropships.

Best to just avoid them!

And hey, I've heard some people even say things like "but I would like to fight them! I want to kill enemies in this game!" and that's honestly a respectable position. However, I think it's much cooler to engage Solid Snake mode and ghost past them. I think it's cooler to be stealthman, and crouch 50 meters away, and just not fight them.

There are only two types of enemies in the game at the moment. Static spawns, also known as outpost or POI (point of interest) guards, and patrols. So basically any time you see enemies walking around, that's a patrol.

I should note too that even if the patrol aggros on you, if you and the rest of your party is wearing light armor, you should actually have a decent chance of outrunning most if not all of them just by running away. There's a few enemy types that can keep up with you like Hunters, Stalkers, Chargers, maybe Berserkers, but odds are you'll bleed a fair few pursuers along the way, and the ones that are left over ought to be much easier to kill once they are alone.

After all, this plays into the notion of patrol timers, and reinforcement timers. The enemy can't call in reinforcements just whenever they want, there's a timer on it.

Those reinforcements too - and this may surprise you - do NOT start aggro'd either, and can be even totally avoided if you simply put enough distance between yourself and them after they're called in. If you see that flare go up or the bug breach spawn, you can pretty much immediately just run away then and there and you have decent odds of never having to engage those reinforcements.

Bug Breaches in particular won't even spawn all their enemies at once, more sort of sequentially, so there's really no reason to stick around.

I think that the tutorial really sets you up, as a player, for a Starship Troopers type game where you run around and blow up every enemy, but in reality Helldivers 2 can be played very much like a stealth game, and when played in such a manner it can often make missions that much easier to clear. Don't be afraid to be sneaky!
01.3) - Check Your Map!


So everyone by now probably knows that you can't just have your minimap up all the time.

However, you CAN sprint with your map out, and while the default keybind is kind of difficult to reach (M), it is very possible to rebind.

Me personally, I use tilde (~) at the moment, which is kind of nice. It's good to have it close at hand, so you can just tap it whenever you want. That radar every player has can be very powerful, and if you're using a 'Scout' armor, you get an even BETTER radar. When using 'Scout' armor, it might confuse randoms if you start spamming it all over the map but you can very much put a pin down just to see what enemies are nearby.

So, if you can manage it, try to run around with your map up as much as possible. After all, at the moment there's no enemies that can prevent themselves showing up on radar. If something is gonna pop out at you, it'll be on the minimap first.

(Do stalkers show up on radar? I don't even know... I assume they do, anyway.)

Additionally, just in case you don't know, you can use mousewheel while the map is out to adjust magnification. This might be useful if you want a nice overview or if you want to zoom in more for better radar granularity. I assume most people know about this but I may as well mention it. I typically play zoomed all the way out but on some later difficulties the greater map sizes can make radar blips much harder to read.

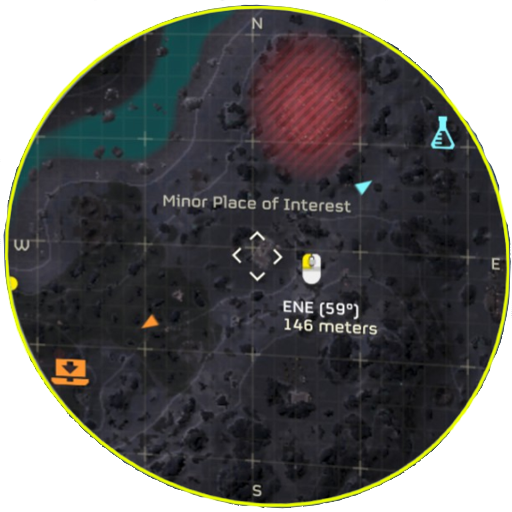
An old release week strat is, you can mouse over random spaces on the map and your mouse ought to highlight POIs even if they aren't yet marked. It'll just say 'Minor point of interest' even if it's not yet on the map!

Even aside from this, even if you can't mouse over it, you CAN zoom in and just see on the map, structures and buildings and stuff, which will show up as little squares or rectangles and such. They have a physical representation on the map, but they can be pretty small and hard to pick out sometimes.

For those specifically hunting Super Uranium (aka the 'purple samples' you need for upgrading the Super Destroyer), the singular location in which these are found shows up on map as a particularly white or silver circular dot basically, though it can be sometimes pretty hard to see, since it might blend into the color tone of the map.
01.4) - Outposts Are Skippable


So let's just get this out of the way.

You don't NEED to destroy all the Outposts. In fact, it might be preferable to not bother with them at all!

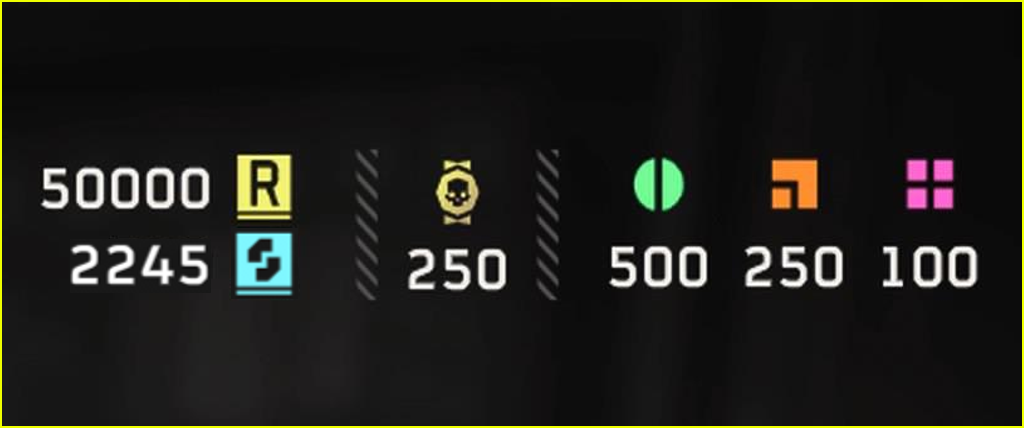
After all, what are your rewards? XP, and Requisition - which can be earned just by picking it up off the ground at a POI, and the devs hard cap it at 50,000. Just clearing missions will give you enough to earn everything in the game with minimal effort, and once you're level 25, at the moment there's nothing else to level for.

What about the samples, you ask? Well, that's certainly true, samples are important, they might only cap at 250 or something but you still need lots and lots of them. However, you can also find these at points of interest.

And on top of all of this, each outpost you destroy, makes the game HARDER. I'm not joking.

If you're reading this top to bottom, I mentioned earlier that research has been done into patrol spawn rates and such. Just being near an outpost makes patrols spawn just that much faster, and the closer to the center of an outpost you get, the faster that timer ticks down basically.

And while destroying up to half of the total outposts on a map will not affect patrol spawn rates at all, if you choose to destroy MORE than half, the spawn rate increases, so you see MORE patrols!

Granted, the effects aren't perhaps as adverse as you might expect, but if you destroy every outpost on the map, you get patrols nearly 20% faster. This might not sound like much, but it stacks with everything else, and makes the game harder. This is much more important to be aware of on harder difficulties, because the higher the difficulty, the shorter the time between patrol spawns.

This is why I suggest, 'Outposts are Skippable' because you really might not lose out on that much in not doing them, and it'll make the mission go smoother. You take less risks by just avoiding all those enemies, too! Saving a few reinforces could mean all the difference in a 30-40 minute mission.

Now, even aside from all this, I wouldn't necessarily say you MUST skip them, but if you ever see anyone in your mission deliberately avoiding outposts, now you have a pretty good idea of probably why those players are doing that, and perhaps why you too should avoid outposts.

It could just be you're seeing level 50s with capped resources not caring about optional objectives - but they also might not be all that selfish, they might be thinking about the good of the team!

Storming a small base, blowing up everything inside, can be fairly fun, but I don't think anyone really enjoys blowing up bug holes, right? So, once again, communication is key. Talk it over with your team, and decide as a group which ones you wanna blow up or avoid, since despite all my recommendations I am sure some people just want to have fun, and it's a video game so fun is a priority here.
01.5) - The Primary Objective Must Be Done Last


On a similar note to 01.4, did you know this about the 'primary objective'?

Completing the primary objective in its entirety, and unlocking extraction, multiplies the enemy patrol spawn rate by about 4x or FOUR HUNDRED PERCENT (400%)! This means you get patrols, four times faster than you would normally.

You have probably seen the loading screen hint by now that tells you missions get more dangerous the longer you are in them. This implies that it's based on the mission timer. This is not true. It might come about naturally, once you destroy some outposts, and in particular clear the primary objective, but it is NOT based on a timer.

So, I can't stress this enough. You might have thought before, "why don't we just do the primary first, then worry about looting the rest of the map"?

Well, now you know. In doing that... you'll make the game WAY harder, because the game expects you to immediately run to extract and get the Hell off-world.

So a better flowchart for completing objectives probably goes something like:

Firstly, clear out ALL small points of interest for loot and other goodies.

Secondly, find the Super Uranium if you're on difficulty 7-9 (aka Super Samples).

Thirdly, drop all these samples that you found at Extract on the GROUND!

Fourthly, optionally, if you and your team are in agreement, blow up some Outposts.

Fifthly, complete the primary objective!

Sixthly, EXTRACT - IMMEDIATELY!

Ideally along the way you keep a weather eye on the timer so you don't go 'over-budget' and into Cinderella time.

Additionally, that note about the samples leads me into my next topic...
01.6) - Samples Belong On The Ground


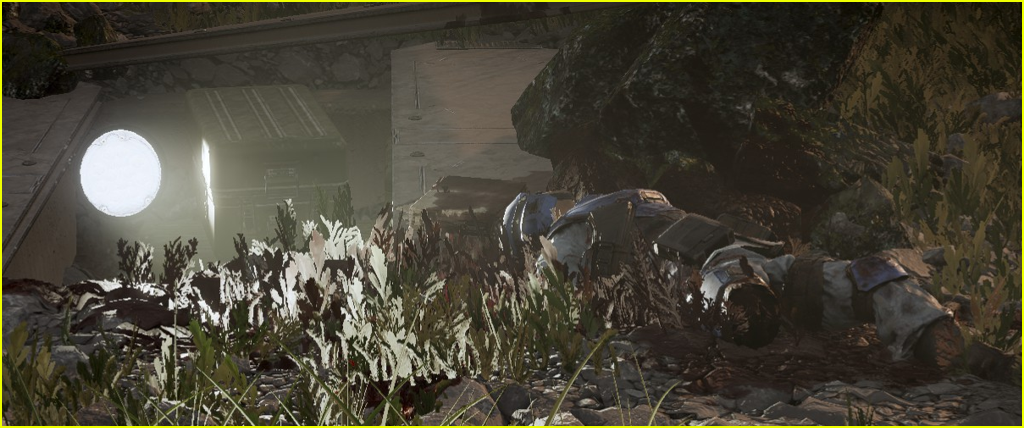
Once you find the Super Uranium, why carry it around the entire map? Do you have some special need to pocket severely radioactive isotopes and sterilize your own dumb self? Helldiver pockets are NOT lead-lined, after all!

So, instead! Let's be clever, and simply deposit them on the ground somewhere nearby the landing pad, at Evac.

And why? Well, for these reasons:
  • Once on the ground they'll be totally safe. No bugs or bots will touch 'em!
  • If you die, they won't even need to be retrieved. No more desperately rushing back to your corpse!
  • Save your reinforcements, too! Samples? What samples? You can just cut your losses and retreat!
  • If someone consolidates all the samples into one pick-up, you only have to keep track of ONE dropped sample container!
  • Since we only pick the samples back up after the drop-ship is descending or even once it hits the ground, the odds of losing them is very slim!
While samples are on the ground, too, they will never despawn and are ALWAYS marked.

The default drop button is X (held), by the way!

As a small side-note, obviously if you are in the middle of running around the map it might be best to have some samples on everyone instead of one person carrying all of them. Otherwise... there are some bad things that can happen, when exploring.

Fall down a natural gas vent? Samples gone. Knocked into deep water by a charger/explosion/smokeshroom? Samples gone. I mostly only mean, if you intend to do the 'ground strats' then that is the best situation, to just put them all in one pickup. In fact, the 'ground strats' can even save you from these other dangers, since your samples will be safe at evac.

Just another reason to consider it!
01.7) - Loot Is Instant


An important note by the way, just for the record...

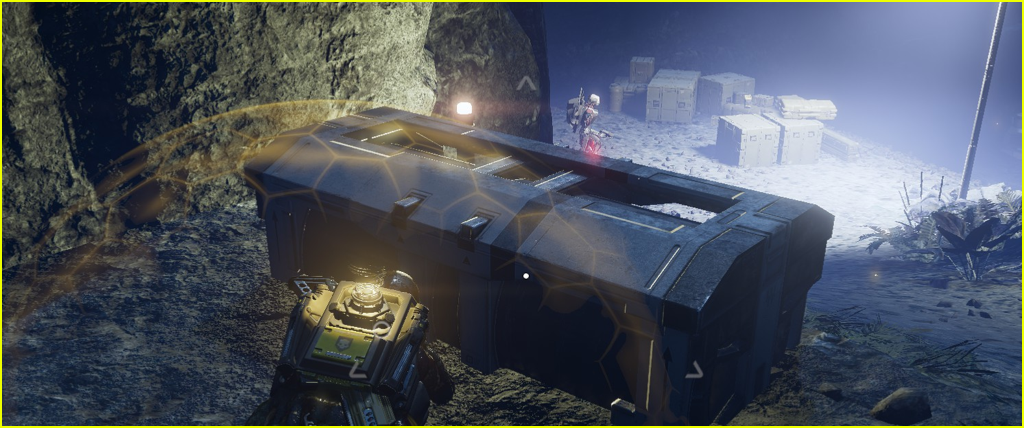
When you step into a point of interest (POI) and look around and find a crate, inside will be some cool stuff! Requisition, medals or possibly Super Credits.

These are shared with the ENTIRE party, when picked up, and are INSTANTLY added to your account. So, if you ever see 'em - you should immediately grab 'em! Don't think you need to let the other guys touch them first, share them around or whatever - you're all being rewarded, so don't hesitate to press E!

Additionally, they aren't counted up at the end of the mission or are included in those end of mission scores, so don't be confused or worried if you ever get to the end of a mission and, you could have sworn you found like 12 medals on some crazy expedition, and yet the end of mission thing only says 'you got 6 medals' or whatever.

They are just instantly, magically added into your tallies, which can be seen when you press ESC at pretty much any time. You don't even have to 'recover' them if you die on a mission! So don't ever worry about that much.

Samples on the other hand... are not instant, and are the only thing that you must extract with by carrying them onto the drop-ship.
01.8) - Samples Are Shared


Just a quick note for anyone not aware, I'm sure all know this by now, but.

Samples are shared! Like other loot.

Or in other words, no need to fight over them. Everyone will get the same amount at the end of the mission! Honestly, I'm not even sure why the game individually tracks 'samples recovered' in the end of mission stats screen because, that number could be very small if you happened to die right at extract, and it could be VERY LARGE if you happen to be the one guy who lives, or if you were following 01.6 and just gave the samples to the dirt earlier.

Anyway, this is a pretty solid - short but sweet - lead-in to my next topic...
01.9) - Don't Steal


If someone calls in a drop pod filled with support weapons or other gear, unless it's a Resupply, it's probably best not to touch that player's gear.

This goes about 4x more importantly for the initial drop. When you and your friends first drop into a mission, don't take anyone else's gear. If someone else called in a few things and didn't immediately run to each of them, it's possible they might be doing some inventorying, looking at discord, setting up their microphone, straight up going AFK, petting their cat, whatever.

It's likely they did NOT in fact give up on picking up that Arc Thrower immediately after calling it in.

Odds are, that other players will offer their gear to you (for example a Shield Backpack after the first cooldown, to a lower level 1-19 player) via text or voice if they INTEND on making it available to you or the rest of the party!

If another player calls in an Autocannon, or other team reload weapon, while it's possible they might appreciate you willing to team reload them, it's best you don't bother picking up their Autocannon Backpack, unless you ALREADY have arranged to work together!

Otherwise, the guy running the Autcannon might just assume you are trolling him.

Avoiding the team reload backpack might sound in some ways counter-productive but I would suggest it is all on the guy running the weapon to INVITE other players, who may already have backpacks after all, to possibly waste one of their own slots - slots that could have been filled with a Shield Backpack for example - just to give that one guy a better reload rate.

This also might sound like I'm being a little too critical of 'team reloads' but they are obviously great on specific weapons like the Recoilless, and in some situations, in a pinch, you might even be able to simply trade backpacks in an emergency to get that team reload going and annihilate a group of chargers, but again that takes some serious teamwork, and you might need to be pre-prepared to understand the strategy involved there.

For most random games, you probably want to keep your expectations low. Obviously when playing with friends, probably on Discord, all with mics, everything changes.

This chapter is all about how stealing is not cool - but like in all things, there are exceptions!

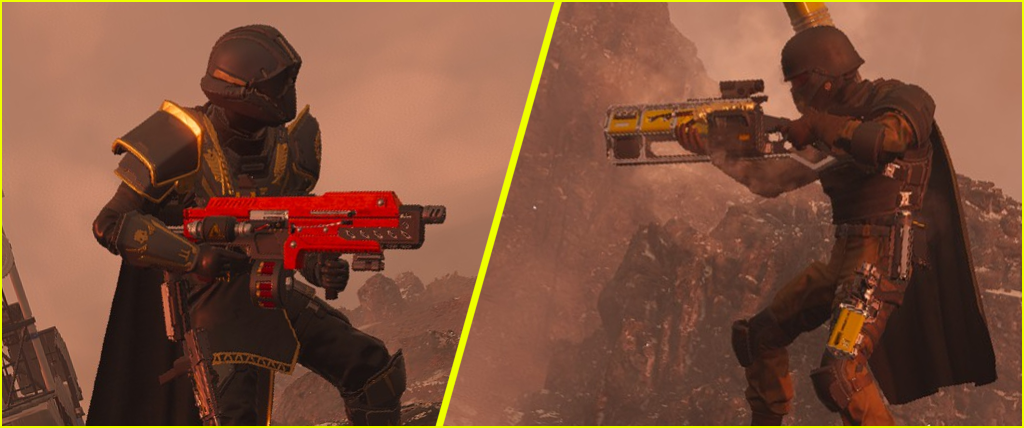
After all, if you find a dead Diver, and he dropped his PRIMARY weapon... well, he'll get another when he respawns. Steal away! In particular, look for guns like the Scorcher, the Sickle, others. Sometimes it might be nice to just have a weapon with full ammo, if it has full ammo, sometimes it might just be nice to try a gun you haven't used before.

It's not a bad way to try out a primary if another player has a weapon that you don't have, and you aren't sure you wanna pick it up on the warbond.
01.10) - Etiquette


In 01.9 we talked about what not to do when faced with the opportunity to steal.

However, I wanted to elaborate on that a bit more with a hypothetical scenario and why it is all pointless.

So let's say you decide to steal from another player. A couple different things are going to then happen.

Let's say you're the host.

You decide to steal from that guy, he has a Shield Backpack (I don't know, this is just my go-to) and now he has to play for the next like 10 minutes or whatever, possibly more, without it. Instead he gets your backpack. You might not even HAVE one! Maybe your stratagems are like, three Eagles and a Grenade Launcher.

But anyway, there's a list of procedures he'll run through:

1. Asks for it back. You say 'no' or don't reply. Maybe he skips this step.

2. He disconnects, leaving you one man down, and it's not guaranteed you'll get a replacement.

OR

2. He teamkills you, and takes it back.

The ball is then in your court.

So what do you do? If you teamkill him back, then you've basically perpetuated a friendly-fire war and I suppose it'll continue until either you kick him outright (leaving you a man down and not guaranteed to get another player in the session) OR he gives up and simply disconnects.

Lose-lose for everyone. Even if you bully him and he just decides to accept not keeping his backpack, you win and he loses. Maybe he drags the team down a bit since he doesn't have all his gear. This would be pretty extra tragic on a mission where you only have 3/4 stratagems, too. You could argue everyone is lose-lose-lose-lose because your team is not running at peak efficiency, for no good reason.

Now, if you were only a client, aka a joiner...

You decide to steal from someone. Maybe the host, maybe some other guy. Either way, you mess with the host or give him any reason to suspect you are some kind of idiot or even a troll, and one of a few things happens:

1. He instantly kicks you.

2. He maliciously keep you around a while... then kicks you right before Evac, before the drop-ship takes off, wasting 30-40 minutes of your time and giving you no rewards.

3. He teamkills you. Then maybe kicks you.

I'm of the opinion personally that it's just not worth it. Be nice, and treat other people kindly.
01.11) - Host / Client Relations


If you are a host, I recommend you do your best to NOT kick anyone unless you absolutely have no other choice.

I don't think it's reasonable to kick players unless they are deliberately attempting to friendly fire you or other Helldivers, or if they are deliberately trolling in some other manner.

Other players simply having lower skill levels than you is not grounds for kicking. Other players trying to pursue other objectives is not grounds for kicking. Other players picking non-meta weapons or stratagems is not grounds for kicking. Since you are the host, you also have more than a fair chance to pick up on what is being brought before a mission even starts, since you set the pace.

Therefore, I think it is fair to warn or suggest other players don't pick some of the more ineffective stratagems, such as Orbital Gatling Barrage. Once so warned, in my opinion, it is on the other player to be paying attention to chat and maybe consider swapping to something else, or explain why they need 'that' particular stratagem.

Perhaps they sadly have nothing better... but maybe nothing WOULD be better than someone bringing the 380mm, which almost seems to deliberately target teammates in a very large radius and only is effective in very small, niche circumstances.

However, as a host, you should not presume that every player understands your own personal prejudices against specific stratagems! Be prepared to talk, communicate, and explain your feelings.

You could probably argue that kicking someone for trying to rush the primary objective is entirely fair, since that can be considered trolling, now that we know it significantly multiplies patrol spawn rates. If you ever see some guy beeline the primary objective when you're just not ready, go ahead and warn them not to do it yet. If they ignore you, then you can kick them. There ARE some valid reasons to kick other players.

Communication and trust goes both ways, though.

I think that the client, aka joiners, ought to also remember that they are guests of the host. If you join the host, you should on some level be willing (as mentioned earlier in this guide) to work with them, understand them, and follow their lead. I am not specifically talking about being the 'pointman' for the group, but rather in all things - if the host asks you NOT to bring something, maybe be open to not bringing that weapon or stratagem. You can also communicate, and find a compromise.

If the host doesn't want to do Outposts, maybe you should be willing to co-operate, and skip Outposts. If the host only wants to focus on farming samples, maybe just ready yourself for some serious sample farming, try your best to help out.

You aren't obligated in any way to follow the host's lead however, and if you're like uncomfortable or unhappy with whatever he's choosing to do, consider leaving the session instead of ruining the host's game and playing your own way. Going solo and destroying outposts when the host just wants to hit up POIs and leave, is probably reasonable grounds for a kick.

If it really bothers you, remember you can always host your own game.

As mentioned, I believe that the host has the right (within reason) to ask you NOT to bring a given stratagem, but the host has no right to tell you what you MUST bring to the mission. The host has no right to outright demand you take a specific stratagem or specific weapon, or threaten you with a kick for not taking the Breaker, or whatever. Use your best judgment, and if they are being unreasonable, maybe tell them so, and leave their game.

If you are willing to 'fill' stratagems or crew team weapons do feel free to make it known, however. The host might not necessarily have any suggestions for you or even care, but If joining mid-mission, picking weapons and stratagems to fill potential holes in the party's arsenal can be useful.

Deliberately asking another teammate if they want you to play as a 'team reload' partner for the mission could be useful, but do it BEFORE THE MISSION STARTS - because then you could forgo a backpack stratagem, and instead have a whole other spare stratagem slot, where you can fit an Eagle, Railgun, Laser, etc.

It is of course entirely up to you how you choose to play, and 'fun' is in fact a priority over picking the 'right' gear - so long as you are not inconveniencing your fellow Helldivers.
01.12) - Secondary Objectives


Phew, that last couple of chapters was kind of intense, but anyway let's move onto something more fun.

I just wanted to add some notes about the various secondary objectives you can find. Not all of them, in my opinion, are created equal.

Similar to outposts, standing close to the middle of a Secondary Objective makes patrols spawn faster while you're nearby, so there's some incentive to get in and get out nice and quick.

In terms of probably the best one to do, is the crashed drop pod. It's fast, gives some rewards and in my experience often has some samples scattered around the base.

Then there's the radar tower, since it updates the map and shows you EVERYTHING, which... obviously can be annoying in the sense that unless you remember which POIs you have cleared and which you haven't, you'll never know which are done and looted and which still need to be looted. Probably worth doing though.

SEAF SAM sites are great IMO just because if they happen to be anywhere near a drop ship, that drop ship is going down like a sack of potatoes. I'm not sure if it's fast enough to stop them actually delivering troops always, but hey it's automatic and requires no input from the player after it's activated, so may as well do it!

Right now as of time of writing, there are hints that the game will include flying Automaton Gunships in the near future. If so, then SAM sites are about to get a significant value boost...

There are some other, more dangerous side objectives too, which, I almost feel I don't even have to mention. Stalker lairs are like, so annoying that in my experience all Helldivers instantly form a hivemind as soon as a single Stalker is seen, and all immediately start hunting for the lair with intent to terminate with extreme prejudice. It's just simply going down, because everyone hates stalkers.

However, I have seen players skip SEAF artillery.

It's up to you whether you want to do it. This goes also for some of the other less important secondaries that don't specifically alter the battlefield. I usually do artillery because it's fun, but this is one of those things where I have seen other players just do a 180 after finding it, and then they proceed to just walk away. All because it only gives XP + some requisition, and the artillery itself is almost only really useful on completely static or, VERY VERY SLOW targets. Like an outpost maybe, or possibly a tank or a stationary hulk.

If you aren't sure which shells are loaded either, just by forgetting or whatever, it is also very possible to blow yourself up or even the entire party if you're unlucky. So in this way, artillery can actually hurt your chances of successful extraction!

Some others too might not be worth your time. Rogue research lab or illegal broadcast for instance. Use your own judgment! Don't be too upset though, if you miss out on one or your party is straight up avoiding them.
01.13) - Do Achievements On Your Own Time


Somewhat goes for personal tasks too.

I have one right now, "get kills with 120mm" and you know what I think I'd rather go host my own mission, friends only, play solo, and grind that out myself before even trying to bring that into a REAL mission. Just my opinion here.

Now OBVIOUSLY, there are some achievements (and personal tasks) you can probably get done in the midst of a regular mission, but, just don't force it. Trust me. Better to efficiently spend like 5 minutes clearing one of these types of tasks or challenges in a difficulty 3 or 4 by running around a bit, rather than spending like 80 minutes across two missions struggling with some bad stratagem or weapon trying to get some weird thing done.

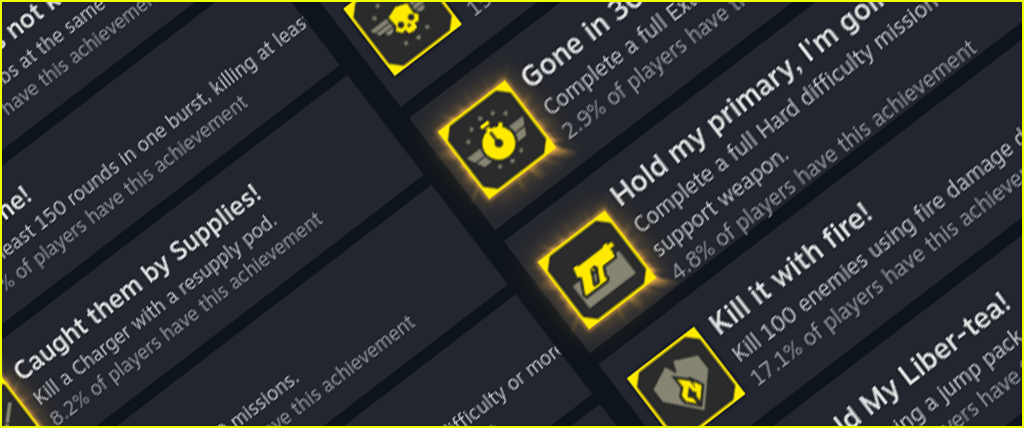
However, if you can communicate with the host - or if you ARE the host, communicating with other random players in the party - that you want to aim for some challenge and would they like to join you in doing it? Then it can be a great time for all. That's how achievements like "Let's call it a draw" are done, often just by randomly saying hey let's blow that Hulk's arms off, and run away. It'll get us an achievement!

There are some though, like, "Gone in 360 seconds!" that you are NOT gonna get in a random lobby. Just don't try it. Don't expect to, either. No one else has any obligation to help you. If they feel like doing so, that's great. If it helps them, even, that's even better. If you somehow do stumble into a party where everyone wants to go for this one achievement, that's just perfect! But, don't anticipate it.

I mostly added this just because I have heard of other people having bad experiences with achievement-hunters in their lobbies being rude and causing trouble because the rest of their party didn't want to help with this or that achievement.

Be polite, ask for help if you must, but don't force anyone into anything they don't want to do. It's best to organize a premade.
01.14) - Pick Your Rarest Booster


Because of the way the booster system works, and the fact that you simply can't see other people's boosters, before simply selecting the 'best' booster that you have, or the most common one you have, how about trying instead to pick the rarest, most uncommon one you have?

Let me explain. This is a little bit convoluted but bear with me.

If you have 'Muscle Enhancement' (near bottom of Helldivers Mobilize warbond) maybe pick that one first! Odds are, most other players are DEFINITELY not gonna opt for that as their first pick. Part of is it's just not that useful of a booster, but it's also one hardly anyone is going to pick up. This can help other players select a booster. Most other players will be compelled to pick a 'sensible' useful booster.

Now, I am sure many players will inevitably have the 'Stamina Enhancement' booster (which is in my opinion possibly the strongest booster in the game at the time of writing). It's just too good to skip.

If you run into a player who only has that booster, it's best to let them pick that one, giving the entire party access to Stamina Enhancement. With that secure, the rest of the party can then start picking other particularly useful boosters. In fact, they will have to. Hopefully the next two guys also have all boosters and can take, like, UAV Recon and Increased Reinforcement Budget.

After this, you can then swap off Muscle Enhancement and pick something else that's much more useful.

This can be helpful to avoid situations where, say... this is a hypothetical situation.

One person picks Stamina Enhancement. Let's call him Player 1. That player has all boosters, but, Stamina is godly, so he picks it. Then the newbie (Player 2) next to him goes, oh, um... well... I guess I have to pick 'Hellpod Space Optimization'. It is the only other booster I have!

So then the newbie next to HIM (Player 3) says, oh well dang I only have one booster, Hellpod Space Optimization. But it was taken already. So, he picks NO booster. Then Player 4 maybe has Vitality Enhancement or something.

But, this situation could have been avoided!

If our Player 1 here had picked Muscle Enhancement, Player 2 might have been able to take Stamina Enhancement! Then, Player 3 could take Hellpod Space Optimization, Player 4 still with Vitality Enhancement, and then every player, even if they aren't all godly picks, would have a booster to contribute. Player 1 could then have swapped off Muscle Enhancement and taken almost literally anything else!

I think too it is important to pick at least ONE booster, and picking a weird rare one that you own is better probably than picking no booster and playing the waiting game with no booster selected, mostly because you probably don't want to get into a situation where 2-3 players are all waiting with no booster, all waiting for each other to pick. At least picking SOMETHING will ensure every other player knows you are active, and that they can maybe go ahead and pick the most useful booster they have.

This is maybe the most 'mind games' thing on this entire list, but it's unfortunately just how the system must work because we have no way to see what other boosters players have. You could also just ask everyone else what boosters they have but you might not even get a response, they might not speak your language, and it might take longer to organize than just clicking around the booster menu until you all have a booster that's powerful and effective.
01.15) - Capped, But Gaming


There's a fair few level 50s (max level as of time of writing) going around, being capped on all resources and with very little else to do or incentive to clear objectives and pick up loot.

Just a friendly reminder to anyone done with progression - do try to sympathize with other players that aren't quite at your level yet! This means do try to be nice, help lower level players with objectives, samples, other loot even if you don't get anything out of it.

I am sure there are lobbies of 50s out there who probably just do nothing but hit up every POI then extract, since Super Credits at least have no hard cap.

But, if you are playing with a bunch of mid-level players, maybe give em a helping hand. I've seen a few 50s complain they are capped on everything, so no resources seem even worth picking up, but at least do it for the newbies!

I know too there are definitely max level players out there who don't care and will do all the objectives all the same, I mostly felt obligated to write this chapter, brief as it is, as a 'just in case' measure more than anything else.

I'd probably feel kinda bad if I saw a guy run past like, a friendship door bunker potentially full of requisition or medals or whatever, just because he doesn't need it at that particular time.
01.16) - Silent Extraction


While hardly something you can always pull off since it's somewhat down to RNG, there are certain types of extracts in maps, and certain times where, if you simply find a nice remote hiding spot, you sometimes have decent odds of calling down extract without being troubled by any enemies at all.

And naturally, this probably is somewhat more challenging or uncommon on higher difficulties, and on bug planets it's probably even harder given just the sheer masses and swarms of bugs that'll head toward extract, BUT.

This is a strategy you ought to keep in mind, because when you can pull it off, it'll make for a pretty chill finale to what was probably a stressful mission.

All you gotta do is call extract or whatever with no enemy aggro, and then when enemies start to approach, they won't magically detect you or anything (or shouldn't anyway), and if you don't engage them, they won't fight you. Extraction relies on you to start the fight before the AI will begin attacking.

So all you gotta do is you and your buddies lay down on the pad preferably, or somewhere out of the way, and just patiently wait. There's two bot map extracts where you have to sort of go up onto a one-way cliff and bots in my experience will ignore that space up there because I assume it interferes with their patrol or pathing.

However, there's a couple of bug map extractions by comparison that are completely open and bugs are instructed just to run up there and if everyone was equipped with a jump pack, it's possible you could scale some rocks or something and lay down, but it might be a bit more challenging to stealth when you're so exposed.

Even if it goes south, I believe that given you can still flex into just blowing every enemy up or even kiting, it's still best to try stealth first, if possible. Make your own judgement, and decide with your team.
01.17) - Extract Mechanics


If you wanted more info about Extraction, I have information for you.

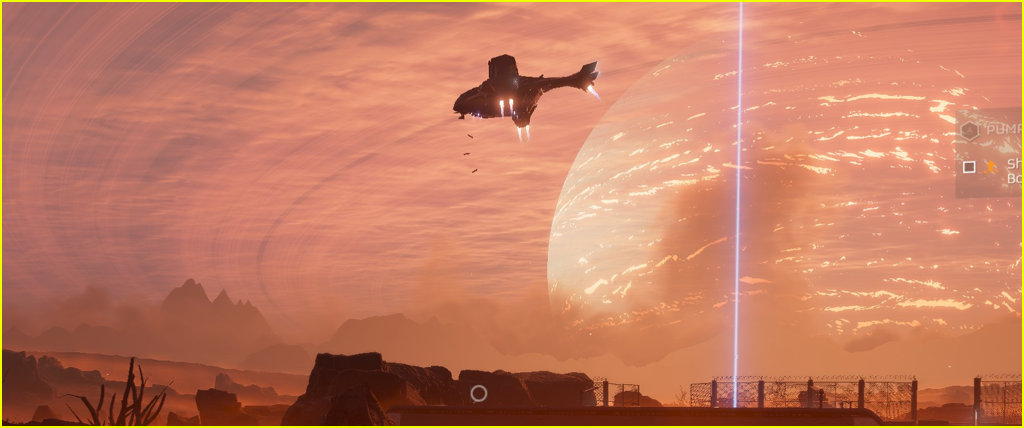
First up, once Pelican 1 (or just 'the Pelican' to many - is this a Halo reference, you may decide for yourself) is called, you have to stay near to extract, or else he simply flies back to the Super Destroyer and leaves you for dead. This is pretty rough on higher difficulties.

Since the reason you tend to get tons and tons of enemies flooding on top of you is in fact based on proximity to the 'evac zone' (which I will call 'extract' here). If you fail or botch an extract mid-way through by lingering outside too long, you might actually have a better time just running to the other side of the map and clearing out some smaller objectives and hunting down POIs for a bit. If you actually have time, of course.

The timed nature of Helldivers 2 invariably makes it a challenge at the end of any mission, if you've been lingering and looting a lot. However, there are ways to alleviate this pressure. There's three things I'd like to share that you might not know about.

Firstly, although during the timer he will leave if you step away from extract, once you call the extract and 'the Pelican' actually appears, he will never leave without at least one Helldiver onboard. Ever. In fact, after that you can actually just go explore the rest of the map if you want. This might even be helpful if you managed to get him to come down but extract is still a little too hot. This leads into my next tip which is...


Secondly, if you actually deliberately LEAVE extract during the narrow window where he first announces himself (see above for English subtitles indicating the dialogue I mean), he will remain 'on-station' like a good little gunship and blow everything he can see into thousands of tiny smouldering pieces. Now, granted he probably won't be able to solo entire armies for you on top difficulties, but you just give him a chance and he'll do some work. In this state, any player stepping back INTO extract's circle of influence will call him straight down to the pad, so be careful. He does have a line of dialogue for this too, by the way, so this is actually intended behavior, which means you don't need to worry about this being patched out later.

Thirdly, it should be noted very importantly, that if NO one is inside the extraction zone, the timer WILL NOT tick down. This means that if your entire party is constantly stepping outside of extract and getting the 'call-off' timer at the top of your screen, 30 seconds left on the ticker might take much longer than you first imagine. It's crucial then for at least one player to be inside the extraction zone at all times so that 2 minute extract timer is really truly 2 minutes, and not 2 minutes stretched over the course of 8 minutes. This also means obviously that a very haphazard, dangerous extract on Helldive at 4 minutes is just that much more difficult.

Either way, once you get him down, he's there for good! This is nothing but a good thing for us Helldivers and this opens up a few different strategies:
  • Since only one player needs to stand near, for some extracts (depends on layout) it might actually be helpful to have one player lay down quietly in a corner so as not to attract attention, and then have the three other players draw as much aggro as they possibly can while standing outside of extract, further away, doing their best to keep enemies away. The game constantly spawns patrols aimed towards a point inside the extraction zone, but they can be lured away.

  • One player calling extract as quietly as they can while three other players are all off doing other things, clearing out bases and so on, might be a legitimate strat! It also means that if that player is hopefully just trying to secure a safe extraction for everyone, there's really no reason to kick him. It might be safer in some instances! And, if he's able to also step out of extract at the right time, the Pelican will chill and be waiting for you patiently with a totally cleared extract whenever you need to leave. This if done right could completely eliminate one of the main challenges of any mission - extracting with all those tasty samples.
01.18) - Stratagem Rebinds


Preface for this section is 'totally optional'.

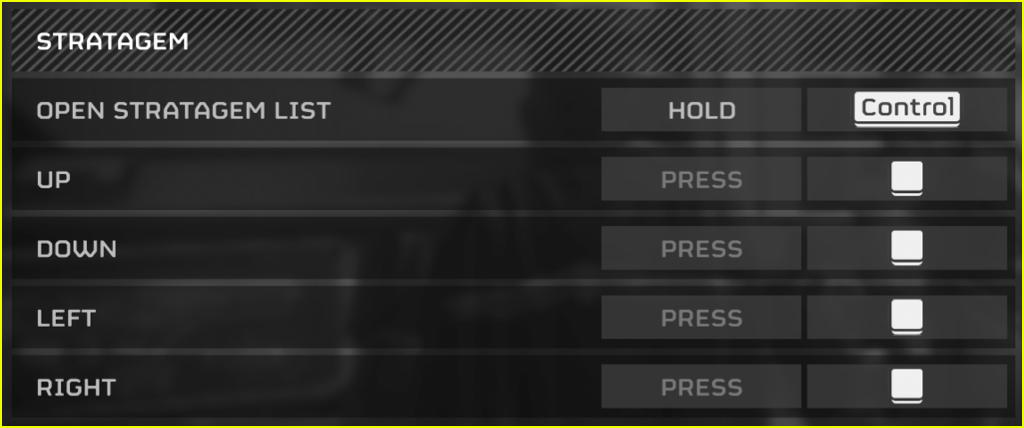
Basically, the idea is it's possible to rebind the keys you use to dial in stratagems. By default these are WASD on a keyboard, but you might find it more useful to swap them to the arrow keys or even 4568 on your numpad.

Now, why would you ever want to do this? Mainly because it gives you the option of moving with WASD, while also inputting the stratagem commands at the same time. You can even go from a sprint with WASD, before letting go of shift to quickly input the stratagem command, then go back to sprinting again all fairly quickly.

This will actually alter some other interactions too, interestingly, so you'll have to press left or right on your new stratagem keys to interact with rotating wheels and such.

The main problem will likely be reforging muscle memory and learning to do stratagems with your alternate hand, but at least for me it wasn't too difficult to swap.
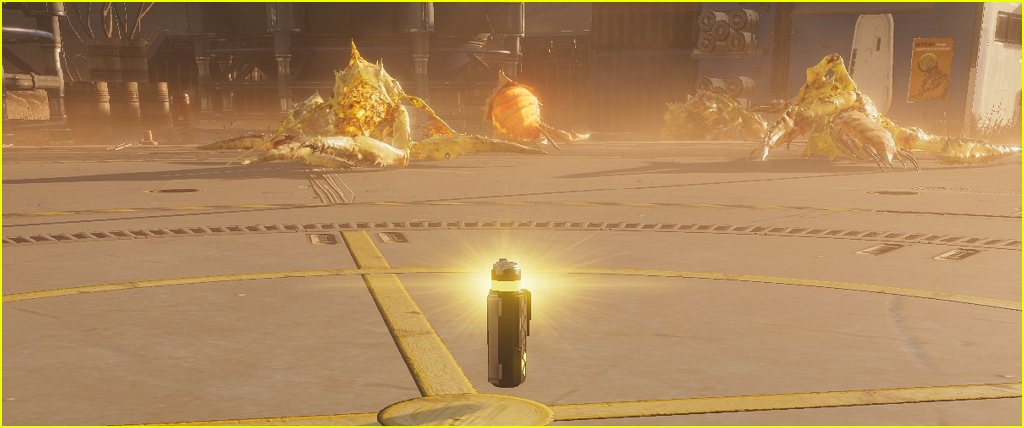
I think the benefits of being able to move while inputting stratagems makes all this worth it. I personally use the numpad but I am sure for some people it might be awkward finding the right keys. You might be tempted to do 2468 instead of 4568, but that might just prove more confusing.

I've heard some people suggest too that "but then I have to take my hand off the mouse and I can't aim" but really that's not a great loss. If you're committing to interacting with an object or tossing a stratagem, aiming is not terribly important.

You could argue that a second or two of standing still while you input the stratagem is not important either! Still, I've found it useful, personally.
01.19) - Become a Traitor


Modern problems require modern solutions.

Now, this is going to sound absurd but bear with me.

So, I don't even know how many people know what happens when you 'leave' the battlefield and I don't know how often you'll really get a chance to pull this off, probably mostly on very cramped Elimination missions and such where you just need to kill a lot of enemies. Might have some use on Blitz too, I don't know. This also probably is best used on bug missions since they rely on enemies to get nice and close, bot missions might just see you getting sniped.

But if you put aside this positively massive wall of caveats...

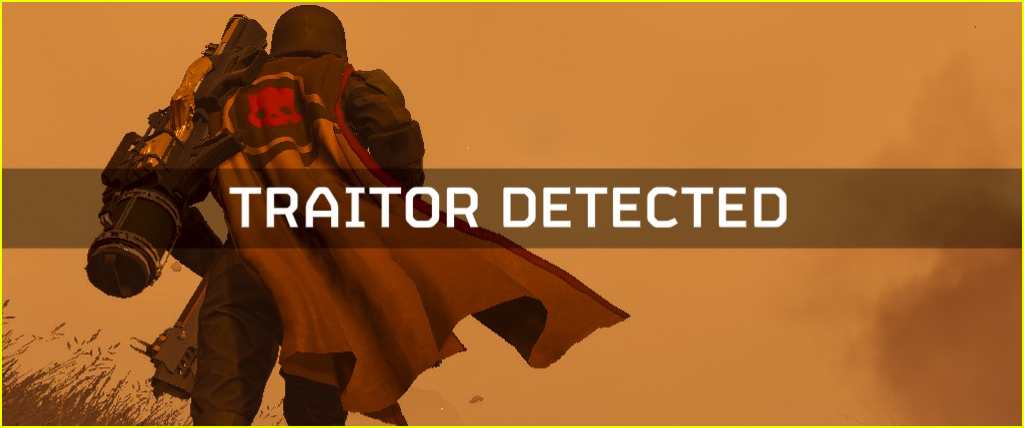
If you step outside the battlefield long enough, you are branded a 'traitor' to Super Earth and, their big idea for how to terminate you and your Helldiver contract, is... just to fire the 380mm HE Barrage at you until you eventually die.
Needless to say, their accuracy is very poor. I am not sure whether or not it actually take into consideration your ship module upgrades (Exploding Shrapnel or More Guns for instance) but either way, you can last a surprising amount of time while walking around with tons of GIGANTIC explosions raining down upon you.

So if in a really desperate situation, or just on a really small cramped map where you can easily step outside the battlefield before finding a very sneaky hiding place somewhere with, ideally, a cliff hanging above you, like some Elimination maps... you may be able to successfully become a traitor, and use the infinite, poorly aimed artillery that comes with that betrayal to destroy the entire map's supply of enemies.

Probably best done either solo or just far enough from allies that they won't get caught in the inevitable blast that annihilates you. So overall a very situational tactic. However, this is a strategy that you might want to keep in your back pocket.

You never know when you'll need to betray all of mankind.
01.20) - Communication


Communication - every little bit helps!

It's not necessary to outline every single little thing you're doing, but let's all try and communicate more effectively by describing what our next plans our, goals for the session, or even moment-to-moment objectives.

Sometimes it's a really great idea to retreat. Instead of kicking someone, maybe ask them to explain themselves, since they might have a great idea and they're just about to try and make it work. That guy calling extract might just be trying to help everyone, so go ahead and let him.

It's not just up to the person explaining themselves either, do not be afraid to ask questions, and in turn don't be afraid to answer questions. The worst possible thing you can do is stay quiet if someone asks you something, because if they're the host, they may just have to kick you.

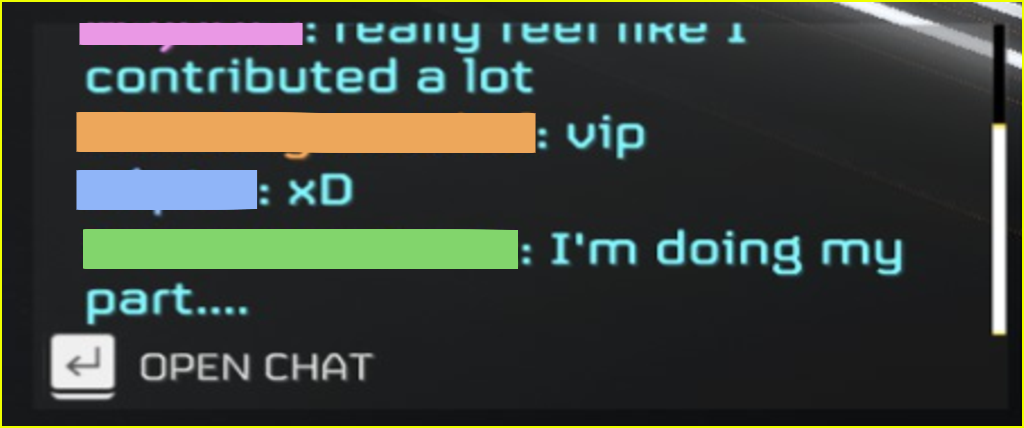
It's as simple as hitting the 'ENTER' key. I am sure most players have voice these days, and I honestly strongly encourage everyone to use voice as well. Helldivers 2 even has a nice in-game voice function. It works okay, so may as well use it.

I am sure part of the apprehension comes from a lack of confidence, when you think you are surrounded by strangers who probably know way more about playing the game than you do and you don't wanna say anything wrong. But really, every single other player also feels that way and is probably also just trying to clear the mission as best they can without anyone else finding out that they themselves have no idea what they are doing.

That's just my interpretation, I am sure there are other people just can't be bothered and only feel the need to speak up if something is irritating them.

But either way my recommendation is the same - talk about it!

If you are a player that actually uses voice when playing Helldivers 2, or really any other game actually, I may take a moment to selfishly suggest you swap to push-to-talk instead of voice activation, if you aren't using it already. I hear all the time from people that 'voice activation works great and never fails'.

Well, guess what: it does fail sometimes. Sometimes a person will forget to push mute, or it just starts picking up all kinds of details in the background, cars, microwaves, whatever. It isn't that it wasn't picked up on the mic, other people are just being polite about not commenting on what they just heard.

I'll refrain from getting into specifics, but pro-tip: set a push-to-talk button. Even if it's 'weird' at first, it's just muscle memory and you will get used to it in no time at all.

If you chose not to use tilde for map as I mentioned earlier in this guide, that could be a useful key, but most easily accessible probably is to have it on a mouse button. Basically any mouse button. Helldivers 2 doesn't make use of 'mouse4' or 'mouse5' really for anything else, and almost every mouse sold these days has these kinds of buttons. Most video games in fact don't use these.

So, consider setting push-to-talk to a mouse button!
01.21) - After Dropping, Look Out!


I struggled with naming this section so I settled on something very direct and to-the-point!

Once you hop out of that Helldiver pod, even if it looked kind of clear as you came down, one should always IMMEDIATELY do a full 360 and look around. Before you even call your first support weapon, have a look around for enemy patrols or even bases, see what's around you. Even if you didn't decide to drop into danger directly, sometimes you'll be surrounded by bugs or bots.

It might even just be that you are 'within range of enemy artillery' (which helpfully repeats every three seconds) and if you choose to call in your Shield Backpack and Quasar, you might be obliterated in the next instant.

So - remember to LOOK OUT! Danger's always right around the corner!

This also goes for if you happen to drop in on top of a small base or something, or hear or see one nearby; instead of calling in all your stuff in a situation where you might just get a bot drop or bug breach right on top of all of your delicious military hardware, maybe wait for it to be all clear first. Fresh out of the pod, you should be able to tackle the first few groups of enemies with nothing but your primary and a few stratagems!

It's better to be proactive yet cautious, because if you have one or two allies in the middle of a fight as soon as you drop in, things can rapidly deteriorate. It's best to take care of these early threats as soon as possible. Otherwise, you might lose a couple Helldivers, and taking deaths very early on is something best avoided.

Also, fun fact, in case you are unaware: your pod when dropping in can destroy automaton factories as well as bug holes. This might be useful if someone drops your reinforce beacon right into the middle of a base, at least making your inevitable death count for something.

Even when you first drop in at the start of a mission, it is possible to start off by taking out a bug hole or the factory of a small base. Though on higher difficulties the danger rises, I've still had some success in doing this - just watch out for Devastators, which can be troublesome, and Chargers, that can be incredibly dangerous when you haven't got your support weapons yet!
01.22) - Super Uranium


This section will be image heavy because there's lots of visual information I need to give you.

It probably verges on being outside scope for this guide, but I don't care I want to tell everyone about Super Uranium.

AKA Super Samples, Purple Samples, Tier 3 Samples, The third sample, the last sample, or what it's actually called... Super Uranium.

I mostly felt obligated to make this section because I myself when I first started playing Helldivers 2 had absolutely no idea about anything to do with Super Uranium, and the game explains NOTHING about it to you, but it's actually VERY important. For a while. Then you research everything that requires it and then you're capped on it and then have nothing to spend it on...

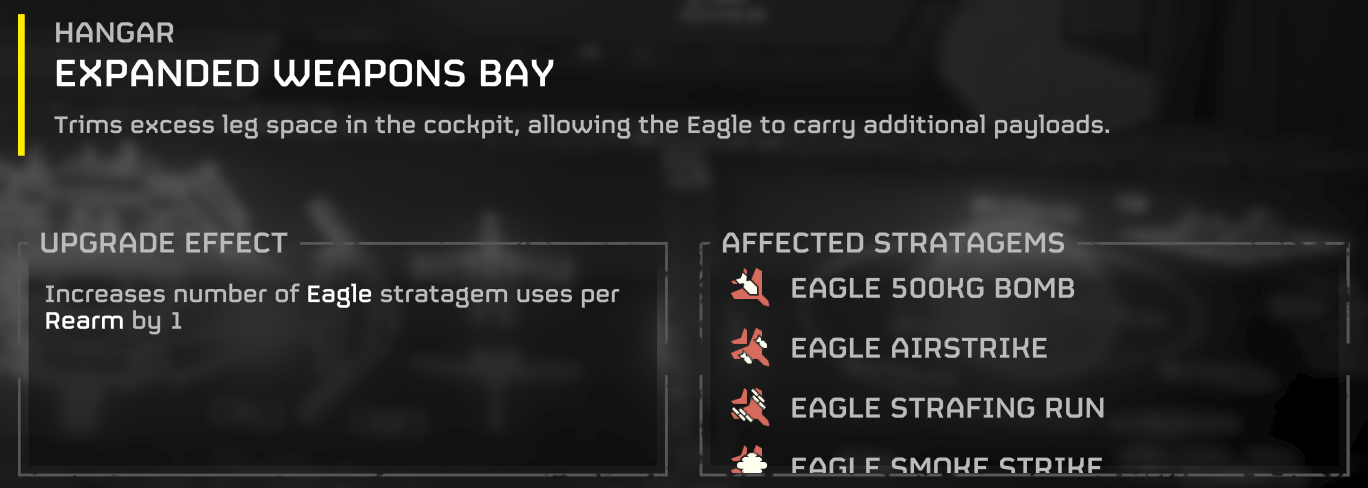
But! Super Uranium is the key to unlocking possibly the most important ship upgrade. I don't think anyone would even disagree. I feel pretty confident in saying that. There's other good upgrades - but Expanded Weapons Bay is unbelievably powerful.


Importantly, you get a little bit extra on all your Eagles, but the fact that it doubles your 500kg bombs just helps so much. I can't imagine spending my first 10 Super Uranium pretty much anywhere else.

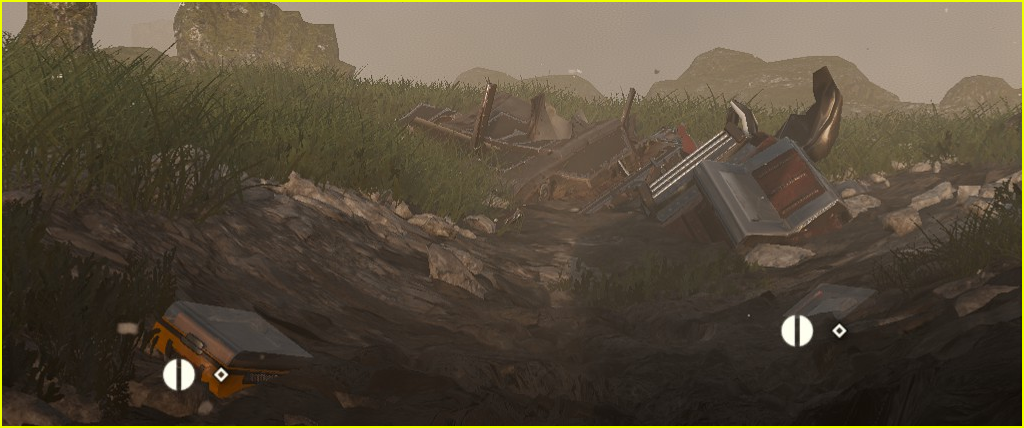
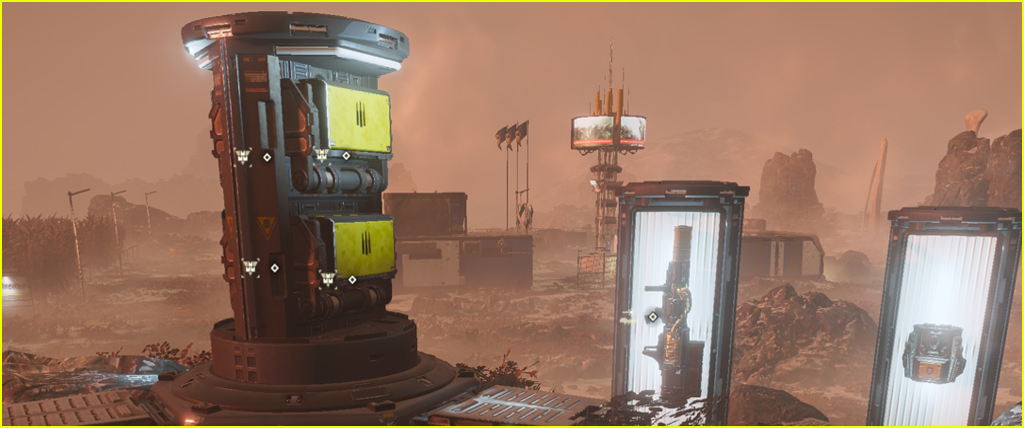
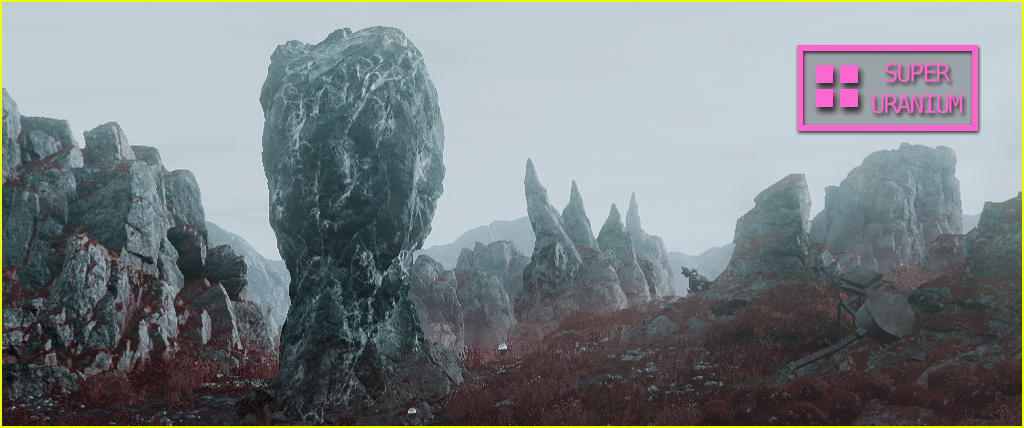
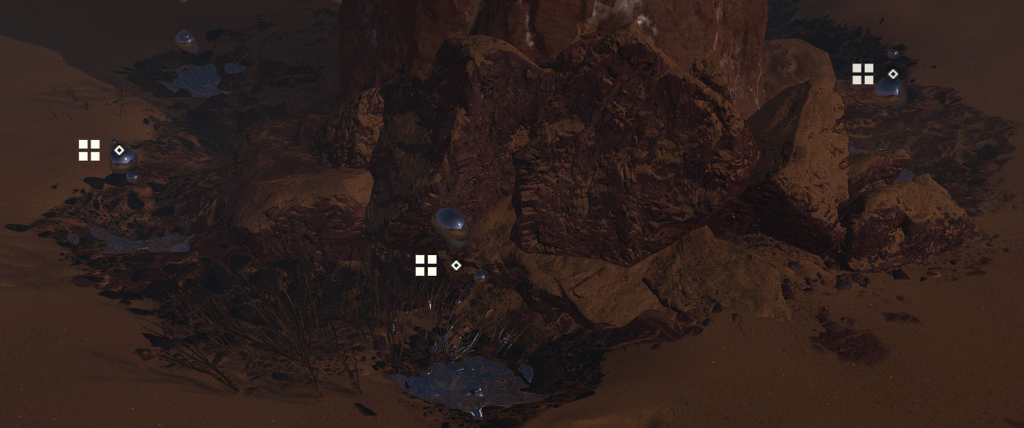
But anyway. You might be wondering why the image for this section is a giant rock that looks like a... fist, or something. It's because for whatever reason, all the Super Uranium in a given mission will spawn around this particular rock, every single mission. It's the Super Uranium rock.

However, there IS a variant of the Super Uranium rock that has a pit next to it with ammo and such that is NOT the Super Uranium rock. So if you do find the correct rock but no samples, it's just the wrong one. In my experience I've seen it on bug missions, mostly.


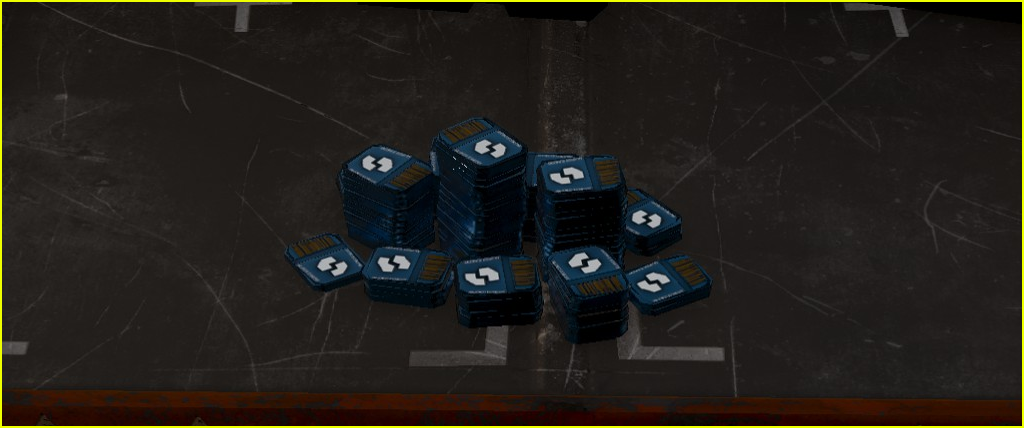
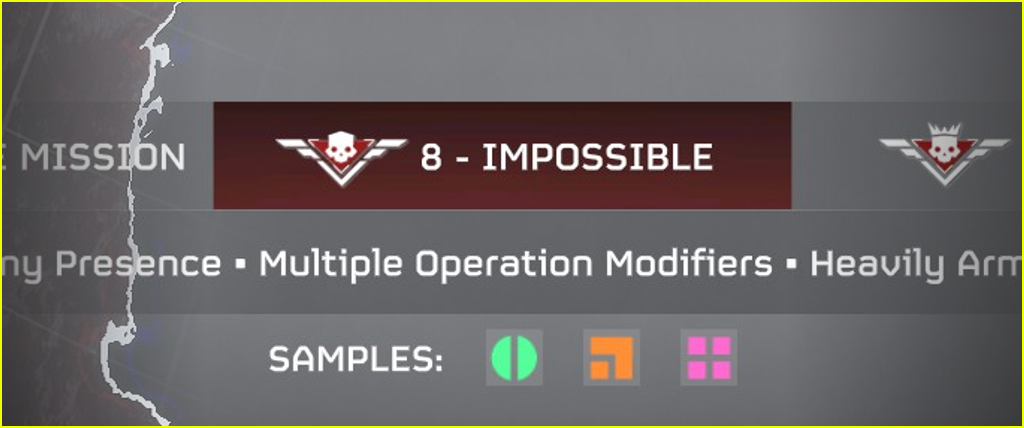
These are the samples. You just pick them up like regular samples. At time of writing they are found on difficulties 7, 8 and 9, in varying amounts - three, five or seven Super Uranium total.

On some maps you can just scan the horizon and you have decent odds of seeing the rock somewhere in the distance, but like most POIs you can see it on the map if you pixel-hunt enough. And it is basically a pixel. Because it sort of shows up as a vibrant white on gray, you might have better success from a fully zoomed out map, but either way it's basically a pixel.


(This is a bit higher resolution than is shown here, so click for the full image if you like.)

Here you can see the mighty pixel that is the Super Uranium rock on the map itself at all three magnifications. Honestly, picking this out is hard even when you know what you're looking for, but it's easier on some maps and harder on others, it varies. In this case I had better luck looking around with my eyes instead of using the map, but maybe this method will be useful to you. If you already looked around most of the map and couldn't find it, this could help.

I'd probably advise just farming on difficulty 7 if you want Super Uranium.

Also, in connection with several other sections of this guide... if you're a level 50 (or higher, now) and you already have farmed all the samples you need, please don't skip grabbing them if you see the rock and you're in a lobby with a couple of low levels. Be nice.

And as mentioned in 1.6, I STRONGLY RECOMMEND if you happen to pass the evacuation zone, you just immediately throw your Super Uranium on the ground there so you can pick it up after the Pelican is called. No one wants to get stuck fighting robots for 5-8 minutes because someone took a random rocket and the Super Uranium is in the middle of a pack of Hulks with Tank support. For most other samples, if necessary, you can cut your losses and forget about 10 commons and 5 rares dropped by a player.

Whatever, right? Better lose those, than lose the mission, and the other 30-40 samples you have totalled between all party members.

But losing the Super Uranium, hurts, especially when for some players it's the ONLY real reason why they are playing difficulties 7, 8 or 9 in the first place.
01.23) - Climbing Difficulties


This section is not about parkour.

Just so we are all on the same page, a Mission is one map, part of an Operation. An Operation is anywhere from 1-3 Missions. It changes based on difficulty, so the amount of Missions in an Operation on Trivial & Easy is only 1, on Medium and Challenging it is 2, and on Hard all the way to Helldive, it is 3.

First up, the requirements: to progress from a given difficulty, you have to complete a full Operation. This might sound like a time-consuming ordeal, and it is, especially in a game where planets change hands constantly, but fortunately your progress on a given Operation will save, so you can always come back to it later if you can't play for like an hour straight or whatever... as long as you're the one hosting it.

If you're one of those players who is stuck trying to progress through all the difficulty tiers so you can host whatever you want whenever you want, my advice to you is this: if you're on PC, set matchmaking to Public, optionally disable Crossplay, and commit to hosting.

If you just try and complete an Operation via joining other people's games, odds are you're not gonna have a good time. You rely then on that host playing through an Operation in its entirety, and in my experience as a joiner most of the time the host will play one Mission and quit.

Even if it's a friend, unless you're both really synced up with schedules, you might play one or two Missions with them and then you might sign off, then they might play another few more, finish the Operation without you. Then you have to start again.

So, host it yourself!

Since release people have reported that the SOS beacon doesn't work or whatever, in my recent experience it has, but I'm certainly not going to discount the possibility that there is some kind of bug with it. Either way, this means you probably don't want to rely on it.

This means you should probably fill your session first before you get started. To do this, pick an Operation on a high population planet if you can help it, pick whichever enemy type (bugs or bots or whatever) you can more reliably deal with. Then, once the Mission is selected, matchmaking will start and you can just chill for a while until three other players fill your Super Destroyer.

Depending on the difficulty, this might take a long while or no time at all, so all I can say is good luck and be patient. Some people too will just leave if you don't get started right away, so be sure and communicate and TELL them you are planning to wait for '2 more' or '1 more'. Otherwise they might think you are AFK. Some people don't have that kind of patience though and will leave right away. That's okay. Don't get mad at them.

However, before you get started with choosing random Missions, look out for these dangers:

  • Press C and check that Effects readout while selecting a Mission to determine just what extra 'fun' the game is sending your way. An example is, on Maia you can get Extreme Cold (which is really not too bad) and Meteor Storms (which can be troublesome if you are unlucky).

  • Emergency Evacuation and other Missions where you have to rescue civilians are best avoided, not only for your own sanity but for the sake of other players that might just straight up leave if they see a Mission type they don't like. You can see every Mission in the Operation when you click on it, so it should never surprise you.

  • Complex Stratagem Plotting is less of a killer than before the patch (+50% call in time down from +100%) but imo it's even more dangerous in some ways than the Automatons AA Guns (-1 Stratagem Slot) because it can throw off your timing wildly. Having to think a few extra seconds ahead can completely ruin some stratagems completely.

Given at each difficulty you can find a few different Operations, you can feel free to shop around a bit. If you don't find any to your liking, (if they all have AA Guns or whatever, some effect you just hate) you can always enter one of them, start the game immediately, drop in, then abandon and it'll reset and reroll all your available Operations, giving you more to choose from!

This leads into another fun trick.

Failing OR Abandoning a Mission fails the entire Operation. So this means once you start the game... if three other players decide to just mess around and waste like 18 of your Reinforces to just stupid things and you're really frustrated and mad because they're screwing up your chance at clearing the Operation - not just for your own selfish needs but for the good of Super Earth, you have no choice but to just accept it, that you're gonna lose.

However. There is an alternative to failure.

Now, this might be considered cheating to some, but... If you 'crash' (or ALT+F4 to force-quit the game) the game will NOT reset or reroll your Operations. So this means, if a Mission is going poorly, bad enough that you are down to 0 Reinforcements, less than 4 players left alive with the Primary Objective not yet completed, and you think you might not get the clear? Just ALT+F4! It'll kick everyone and you'll be able to restart your game and try the Mission again!

It even preserves the exact same map, so if you have a good memory (or took a quick screenshot) you can preserve map knowledge of where stuff is.

I would only advise doing this ONLY if you think you can't even complete the Primary Objective. Do NOT do this just because you are having a hard time at Extract, or for any other reason. It will probably upset three other players needlessly.

One final note. If the planet you are on happens to be 'liberated' and yet you still have one or two Missions left to go, you can still complete the Operation, but it'll probably be much harder, maybe impossible to find other players to join you... the SOS beacon might get some people to quickmatch into your session, I am not sure, but in my opinion you should probably just move on to another planet and abandon the Operation - unless you feel confident playing solo! In which case, good luck.
02.00) - End


Hopefully you found something of value in this guide.

Obviously, I'm not really here to tell you exactly how you should play the game or whatever, I'm just here to give my opinions and you can decide whether or not you wanna listen to me.

I'll probably update this in future with more details and information, stuff I see as the game develops.
02.01) - Additional Resources
Not necessarily all stuff made by me, but further reading you may find useful.


Let's talk about Patrols: An In Depth Analysis of Patrol Spawning Mechanics
This is a Reddit post that has so far been kept up-to-date on all the different spawning mechanics and is the source of a lot of information I used in this guide. Kind of a lot if you're just looking for light reading.

Let's Talk About Patrols: Part 2, An In Depth Analysis of WHERE Patrols Spawn
This is just some more details - as it basically says already - about 'where' spawns patrol relative to the player. Might be useful, but like the first part, it's a lot.
02.02) - Credits
Me - all the text herein
SEC-101 - useful feedback and suggestions
43 Comments
Yulapboy 19 Nov, 2024 @ 10:55pm 
AMAZING guide :D
maxman 4 Jun, 2024 @ 1:24pm 
incredible guide
-=C.D.Z.R=- Dragon™ 15 Apr, 2024 @ 6:35am 
thx
-=C.D.Z.R=- Dragon™ 15 Apr, 2024 @ 6:35am 
i will and i won't be hosting anyway and i like typing more than talking
Majorita  [author] 14 Apr, 2024 @ 4:17pm 
I mean, hey man don't let anyone tell you what to do. If you don't wanna use mic you don't have to, really. I would also never kick anyone for not using mic, but I'd at least appreciate it if you can communicate via in-game chat.
-=C.D.Z.R=- Dragon™ 14 Apr, 2024 @ 8:34am 
what about peopple who dont like using mic bc i am one
Majorita  [author] 13 Apr, 2024 @ 3:36am 
If you think that'd be helpful, you've got my permission I suppose.
Jester 13 Apr, 2024 @ 3:20am 
@Majorita Gm. If you don't mind i take your guide and translate it. All credits to you will be saved :)

Also i think i will add some tactis and builds (like how beat new defense mission etc) and let you know about those updates.
Majorita  [author] 7 Apr, 2024 @ 1:30pm 
@BaygouL I wrote an entire section about climbing difficulties JUST for YOU! It got kind of long, but maybe it'll help.
Majorita  [author] 7 Apr, 2024 @ 12:30pm 
@Tego There's plenty of stuff in this game you will eventually learn just by playing the game, it is true. There's stuff in here that is actually pretty obvious, but... there's plenty of stuff that is not obvious and isn't told to you by the game.

That's why I wrote the guide in the first place. Some players need a little extra help, or some players don't get all the information, and some players are just new. So it's for those people I made this.