Dragon's Dogma 2

Dragon's Dogma 2

276 ratings
The Arisen's Handbook: A Guide to Adventuring in Vermund and Battahl
By ̧҉ ҉Minorou ꧁💀꧂
This guide contains a wealth of information on game mechanics, tactics, and general knowledge to assist you in your adventures. There is also a useful section on how to get your pawn hired!
29
6
9
14
2
2
2
2
   
Award
Favorite
Favorited
Unfavorite
Greetings, Arisen!
"Perhaps we'll find aught of use here."
Welcome to Dragon’s Dogma 2, where everyone speaks a silly dialect and mythical creatures are out to kill you. Like any long RPG, there is a lot to see, a lot to do, a lot to learn, and a lot you can miss. This guide is a collection of information I’ve found in my adventures.

Given the wild success of my guide for the first game, I felt compelled to write another handbook for this absolute gem of a sequel. Take note - since this game is still new, some information may be wrong or speculative until players get further into the game to iron out specifics. Much of this document is based on my guide for the first game, and I’m making some assumptions on what I expect to remain the same.
If you find anything in this guide that is wrong, or if you have new information to add, feel free to leave a comment. I’d be happy to make corrections and add your name to the credits section!

This guide is a work in progress. Many sections are incomplete or missing. I’ll add more information as I find out more.
How does this compare to the first Dragon’s Dogma?
Do I need to play the first Dragon’s Dogma?
No, it's not really necessary. The story is separate from the first game, but the main theme is similar. With maybe one or two minor exceptions, there are no recurring characters.

While Dragon's Dogma 1 was a wonderful, if quirky game, a lot of stuff was left on the cutting room floor. Dragon's Dogma 2 is more like a redo. It improves in some areas, and fails in others. The final verdict is up for players to decide, though.

What are some major differences from the first Dragon’s Dogma?
If you’re familiar with the first game, much of the broad concepts remain similar to the original. While it would be impossible to list everything, here are the most notable differences.

Vocation Changes
  • The Strider and Ranger vocations have been replaced with the Thief (who wields only daggers) and the Archer (who wields only bows).
  • The Mystic Knight has been replaced by the Mystic Spearhand, who wields the Duospear.
  • The Magick Archer no longer wields daggers and staves.
  • The Assassin is removed.
  • Skills and abilities from the removed vocations have been reallocated to other vocations.
  • Two new Arisen-only vocations have been added: the censer-wielding Trickster and the Warfarer, who is proficient in all weapons.
  • You will need to find vocation maisters to unlock some vocations. If you gain their trust, they may teach you extra specialized skills you can’t learn anywhere else.
  • When you change vocations, most stat bonuses from leveling up now change to be appropriate to the new vocation. You don’t have to worry about leveling up as a certain vocation for “optimal” stat growth. There is a minor difference in stats if you focus only on physical or magical vocations, but once you reach level 200 all stat growths converge to be the same anyway.
  • Instead of equipping 6 weapon skills (3 for Warrior), all vocations now have 4 weapon skill slots. They also have class-specific actions that are always available.
Other Changes
  • The map is approximately four times larger than Gransys.
  • Lanterns are no longer a pain to manage. They last longer, don't douse in rain, and it's much faster to turn it on and off with the item shortcut.
  • Basic bow attacks now aim automatically, but manual aiming is still available for more precision attacks.
  • It’s now possible to stand on enemies and use weapon skills as if you were on the ground.
  • Pawns can now have extra specializations, such as translating languages or offering quality-of-life services such as inventory management.
  • Armor has been simplified. Instead of having clothing, gloves, and accessories, defensive equipment now only has five categories: Head, Upper Armor, Lower Armor, Cape, and Rings.
  • Curative items no longer heal back all damage taken. When damaged, a portion of max health will remain diminished until you sleep, whether at an inn or at camp.
  • In the original game, killed NPCs would respawn after a few days. In DD2, dead NPCs will be moved to a city morgue. Players have the opportunity to revive them, but take too long and they will perish forever.
  • Sidequests in original Dragon’s Dogma could expire based on your main story progression. In Dragon’s Dogma 2, timed quests will be marked with an hourglass icon and expire from actual time passed.
Character Creation and Advancement Part 1
Dragon’s Dogma has a very robust character creator, giving you extensive choices for you and your main pawn. While you have plenty of freedom, keep these facts in mind:
  • The larger and heavier you are, the more you can carry. Large characters have larger stamina pools but stamina regenerates slower. Large characters also benefit from longer reach with their melee attacks, and being taller allows you to stand in deeper water without dousing your lantern. Taller characters walk faster than shorter characters.
  • The smaller and lighter you are, the less you are able to carry. Small characters have smaller stamina pools but stamina regenerates quicker. You have a smaller hitbox, so some attacks against you might miss when it could have hit a taller character. If you're playing a small character, consider getting a larger pawn to carry your loot.
  • Run speed is the same regardless of character size.
  • At the beginning of the game, you only have access to "natural" hair and skin colors. You can later change to a more vibrant color by purchasing red, green, blue, yellow, or purple dyes near the Battahl pawn guild, then taking them with you to Mettefere the barber, also in Battahl.
  • As you or your main pawn explore the world, you there is a small chance of obtaining scars. Resting at the hot springs heals them. Scars you put in at character creation will remain unaffected.
  • You start the game with a choice between Fighter, Archer, Thief, and Mage. Some advanced vocations may need to be unlocked via quest before you can access them.
  • There are a total of 10 vocations (classes) in the game. In general, basic vocations have a mix of offense and defense, advanced vocations focus more on dealing damage, and hybrid vocations offer unique abilities and versatility.
  • Pawns cannot be hybrid vocations, nor can they be a Warfarer.
  • You can't change to some vocations right away. You'll need to find the appropriate Maister and learn the vocation from them.
  • Take note that advanced and hybrid vocations aren't necessarily stronger or better than basic vocations. They are more specialized, and give something up (usually defenses) to make up for their abilities. Try everything and play what suits your play style! All vocations are powerful in their own right.
Vocations
Vocation
Type
Weapons
Description
Fighter
Basic
Sword, Mace, Shield
The sword-and-shield fighter has a variety of offensive and defensive options. They can withstand heavy damage with high HP and heavy armor. They can draw attacks away from allies to let them fight without fear of counterattack.
Thief
Basic
Daggers
The thief scraps in melee with dual daggers with rapid successive strikes. They have remarkable acrobatic skills that allow them to take advantage of openings and quickly retreat when their enemy counterattacks.
Archer
Basic
Bow
The ranger focuses on the bow for devastating long-ranged damage. They are able to make quick work of weak points of larger enemies and can focus-fire high-priority threats in large battles.
Mage
Basic
Staff
The mage has a nice selection of basic damage and support spells. They are the backbone of any balanced party. Multiple casters can synchronize the same spell with auxilary incantation for rapid-fire casting.
Warrior
Advanced
Greatsword, Greathammer
The warrior eschews shields in order to go all out with two-handed weapons. Whether they go for quick sustained strikes or slow almighty blows, they hit for devastating damage. With proper timing on button hits, they can unleash a flurry of blows while remaining resistant to staggers and knockdowns.
Sorcerer
Advanced
Archistaff
The sorcerer loses some support capability in exchange for flashy and powerful spells that wrack the battlefield. Multiple casters can synchronize the same spell with auxilary incantation for rapid-fire casting.
========
=======
=============
========== The below vocations are Arisen only ==========
Magick Archer
Hybrid
Magick Bow
The magick archer uses magick through their bow with homing capabilities. They are very mobile and have versatile magick utility, including support abilities. Their special arrow attacks span across all elements.
Mystic Spearhand
Hybrid
Duospear
The mystic spearhand combines melee and magick to spectacular effect. They are able to teleport directly to foes, telekinetically throw objects, and paralyze enemies. Their kit is well-suited to all ranges.
Trickster
Hybrid
Censer
The clever trickster focuses on distraction, deception, and support. Their smoke-based illusions can deceive foes, causing them to fight each other or fall to their death. The censer can also emit helpful buffs to the pawns, pushing them past their normal limits.
Warfarer
Special
All
The warfarer is able to wield all weapons and mix and match skills from all other vocations. This extreme versatility comes with lower base stats, but the ability to adapt to any situation is powerful in its own right. Customize to your missing heart’s content.

How bad are the lower stats on the warfarer?

According to datamined numbers, it actually isn't that bad at all. Remember that these are base stats - bonuses from equipment are large enough to overshadow the difference.

How do I unlock all the vocations?
I recommend just playing the game, as the main story should point you in the direction to unlock nearly all of them. However, I understand if you want to fast-track to a favorite.

The steps are too detailed to fit in this guide, so I recommend this video on how to unlock all vocations.

If you want more, here is a video on how to unlock all Maister skills.
Character Creation and Advancement Part 2
  • Your character level and your vocation level are entirely separate. Your character level is your character's overall level of power, and can go up to level 999. Each of the ten vocations have their own level up to 9, which unlocks more attacks, spells, and augments for that vocation. You increase your character level and your current vocation level at the same time.
  • You obtain Discipline Points whenever you defeat enemies. These are used to unlock additional skills for your vocations. Core skills are always available for you to use once unlocked. Weapon Skills must be “equipped” before they can be used. They are tied specifically to the vocation they’re associated with.
  • Discipline Points can also be used to purchase Augments, which are passive benefits that thematically fit with the vocation that unlocked it. However, you can equip Augments unlocked from other vocations, allowing for extra customization. You can check out my guide on Augments below:
    https://gtm.steamproxy.vip/sharedfiles/filedetails/?id=3197734361
  • Equipped augments are saved per vocation, so you'll need to reassign augments if you switch to a newly-unlocked vocation. However, once that's done, you'll keep your augment loadout in the future when switching between vocations.
  • While every vocation has basic attacks that do not consume stamina, vocations mostly use skills in combat, which are combat maneuvers, special attacks, or spells that require stamina. Vocations can equip up to 4 weapon skills at once.
  • There is no such thing as mana or MP in this game. Instead, spells are balanced by their stamina cost and casting time. If you get interrupted while casting a spell, you'll lose all progress and will have to start casting from the beginning. Thus, the biggest, flashiest spells take a long time to cast and are risky in a chaotic fight.
  • Speaking of big flashy spells, don't worry about harming your pawns; with rare exceptions, there is no friendly fire in this game. However, you can harm friendly NPCs, so be careful if you start attacking near them.

  • Having multiple casters in your party enables a unique ability called auxiliary casting, or spell synching. Whenever a mage or sorcerer incants a spell, another caster nearby can cast the same spell almost instantly. This can be terrifyingly powerful in the right circumstances.
  • The stat gains you get from leveling up are specialized to your current vocation. However, they retroactively adapt to any vocation you change to, so don’t worry about stat growths.
Your Pawns and You

Pawns are the main feature of Dragons Dogma that separates it from other games in the genre. You play the game with a main pawn and two support pawns, making a dynamic party of four.
  • Your main pawn is yours. It sticks with you throughout the entire game and it levels up alongside you. You'll get your main pawn very early in the game, typically within the first hour of gameplay. You create it and can customize it almost as much as your main character.
  • Support pawns are the main pawns of other players of Dragon’s Dogma. Every time a player rests at an inn, their pawn gets uploaded to the game servers. From there, other players of the game can find and choose other player’s pawns to be part of their team for a while. After you get your main pawn, you can hire support pawns from any Rift Stone. You can also sometimes find pawns walking around the game world.
  • If you main pawn dies, you can resummon them at no cost at a rift stone.
  • When you rest at an inn, you have the option to set a pawn quest. This sets a goal for whoever hires your pawn, and you can offer a reward for completion. You, in turn, get a reward for the other player's success.
  • The game has a selection of support pawns available at every level for those who cannot play online.
  • Capcom also offers Official Pawns that are created by well-known content creators. You can see their availability here[www.dragonsdogma.com].
  • It’s a good idea to tailor your party for what you’d expect to face for the next few areas and quests. Try to cover your bases. A good general party will have at least one melee vocation, one ranged vocation, and one magic vocation.
  • Pawns have their own knowledge on quests, monsters, and locations. They’ll gain knowledge as they experience the subject in question. If someone hires your pawn and does a quest you haven’t done yet, your pawn will know how to complete it when you start the quest yourself.
  • The same idea applies for monster weaknesses. If you hired a pawn that’s fought a cyclops before, that pawn can shout out what its weaknesses are and your party can act accordingly.
  • Support pawns are meant to be a temporary pact. They do not level up with you and it’s expected to rotate out pawns every couple of levels.
  • You must pay rift crystals to hire pawns of a higher level than you. Rift crystals are the secondary currency of Dragon’s Dogma, and are used in some shops. You’ll get rift crystals over time through regular gameplay. You’ll also receive rift crystals when other players hire your pawn.
  • Official Pawns can be hired for free up to level 10.
  • You can hire pawns from your friends for free, no matter what level they are.
  • Don't get discouraged if your pawn returns to you with no comment or gift. This usually means your pawn died in the other player's world, usually via a long fall, the brine, petrification, or instant death effects. This leaves the player who hired your pawn unable to give them a proper rating.
  • As you explore the world, your pawns will pick up loot occasionally. Everything they pick up will always be yours, so don't worry about your support pawns' inventories when you dismiss them or if they die; everything in their inventory will automatically go to your storage.
  • On the other hand, if you wish to give items to other players, you can do so by giving gifts to their pawn while dismissing them in the rift.
  • You cannot take items equipped on a support pawn. If you try, it will be unequipped but it won't appear in your inventory. If you put your own equipment on a support pawn, that equipment will be gifted to that pawn's master. You'll get a note on-screen notifying you when you're about to do this, so you can't accidentally lose anything.
  • An exception to the above point is that you are able to take lanterns from support pawns. Useful knowledge if you somehow lost your own.
  • By befriending NPCs with certain skills or traits, you can have them teach your main pawn a specialization. This can give your main pawn a new ability or behavior, and it helps differentiate your pawn from others.
  • You can issue commands to your pawns to better adjust their behavior and take advantage of situations. They are on the D-Pad for controller or I J K L on keyboard by default.
  • The "Go!" command tells pawns to generally move forward and act independently. In combat, they will spread out. If a pawn knows about a quest, this command will instruct them to lead the way toward the objective.
  • The "To Me!" command is to get the pawns to return to your side. This can be useful to keep pawns with you while you retreat or run past enemies. If a pawn gets stuck or can't properly reach you, they can teleport if you issue the command while far enough away. In combat, they will remain close to you.
  • The "Wait!" command has pawns hold position. In combat, pawns will stop attacking and instead support you in non-damaging ways, such as holding small opponents and providing healing and support spells.
  • The "Help!" command tells pawns to prioritize support, healing, and recovery, but without the positioning from the wait command. In combat, pawns will be defensive and try to keep themselves alive. Out of combat, pawns will assist you in some tasks, or a mage or sorcerer pawn will cast one of their weapon buffs.
  • Some commands will be issued automatically when the situation calls for it. For example, you automatically call for help if you are grappled by an enemy.
How to Get Your Pawn Hired!
People can be fickle when choosing support pawns. How do you get your pawn to stand out from the rest? There are a lot of factors that players consider when browsing the rift.

Appearance and Equipment
The first is obvious: aesthetics. Is your pawn appealing? Do they look funny? Do they look competent? People have their preferences, but one thing that can be easily changed is equipment. Pawns that look poorly-equipped are more likely to be glanced over. Keep your pawn's armor and weapons up to date, and if you can afford it, upgraded.

Skills
Another quick pass would be a lack of equipped skills. Are you keeping up with augments and core skills? Does your pawn have useful weapon skills? Do they have the upgraded versions if they're available?

Pawn Quest
A big factor in hiring pawns, new to Dragon's Dogma 2, is the Pawn Quest system. When hiring a pawn, you can see a quest that, if completed, you will obtain the listed reward. At the start of the game, pawns all start with the same quest: journey with this pawn for a day and a night, with a wakestone shard reward. That's an easy quest with a useful reward!

However, once you rest at an inn and receive the tutorial about pawn quests, your pawn no longer offers that wakestone shard. It's now on you to make it worth other player's time. If you don't set a pawn quest, it will be empty, and people will likely skip your pawn in the rift in favor of someone else who will actually give them something. The worst Pawn Quest is no quest at all.

So how do you stand out? Be generous. Make your quest relatively easy to complete, and offer a tempting reward. Money or high-value items like gemstones are almost universally positive, as long as it's not a pittance. You can give out level-appropriate equipment if you aren't interested in the vocations they're locked to. Avoid simple, common items like low level curatives or food.

You can also request an item as a pawn quest. This can be useful if you're in dire need of a specific item, but chances are, players are unlikely to give you the item if it's particularly useful for everyone. Asking for Golden Trove Beetles or Seeker's Tokens is almost never going to work.

It helps to visualize it from your own perspective when hiring pawns. Are you making it worth it to hire your pawn?

Keep in mind that you only give up one instance of the reward. If you set up a quest to kill a cyclops with a 5,000 gold reward, and 10 players complete that quest, you will lose 5,000 gold, but the other players collectively gained 50,000. With that in mind, a mutually-beneficial community can generate a lot of wealth.

You can change your Pawn Quest at any time at a Grand Rift Stone at any major city.

Specializations
It's up in the air whether a particular player cares about your pawn's specialization, but it's still another consideration. I hesitate to hire pawns with Chirurgeon, for example. Because my Arisen is small, I have pawns hold almost everything. I don't want them using more items than usual. I may change my hiring habits late game when curatives are plentiful, though.

As time has gone on, I've also become annoyed with Logisticians. While the potential for reorganizing items is nice, I get frustrated when they keep turning fruits into Salubrious Draughts when I'd much rather turn them into the more powerful (and 20 times lighter) Fruit Roberants.

Other specializations, such as Forager and Woodland Wordsmith, are purely beneficial and do nothing but help you.

Inclination
While inclinations in the first game were a big consideration for hiring pawns, it's not such a big deal in DD2. They're all beneficial in their own way now, and don't have serious detriments that would scare off potential hires.
Inventory and Equipment
  • Feel free to pick up just about everything you come across. If you get too heavy, you can always give excess cargo to your pawns.
  • By carrying too much, you'll become encumbered. You'll move more slowly, recover stamina slower, and consume stamina faster.
  • Items are heavy and plentiful. You have item storage available at every inn. Deposit often! Items put away in one area will be available to pick up everywhere else for convenience.
  • You can store entire stacks of items at a time by marking them for bulk deposit. It's the X button on Xbox controller and Square button on Playstation by default.
  • You can have up to 99 of a single item in storage. If you hit that limit, combine or sell the excess. You'll commonly hit the cap with Greenwarish and Goblin Horns.
  • If you are overburdened but too far from any settlement, you can give everything you want to deposit to a support pawn, then talk to them to dismiss them. All items will be sent to your storage. You'll be down a party member, but you can hire a replacement rather quickly wandering around the roads or at any riftstone in the wilderness.
  • You do not need a pickaxe item in your inventory to mine ore nodes. You'll pull out a pickaxe for the gathering animation, but otherwise they are picked up just like anything else.
  • Hold down the button at gathering spots to continuously gather without interruption.
  • Tired of dashing while picking items up? Go into button mapping in the controls menu and enable "Set to Examine only". You can still run by clicking in the left stick by default.
  • Items in your support pawns’ inventory will be automatically sent to your item storage when they leave, so don’t worry about losing items if they die off or you dismiss them without checking their inventory.
  • You can't access a pawn's inventory if they are too far away. This applies when trying to move or combine items in the inventory menu, putting items in storage, or buying and selling to a vendor.
  • Keep an eye out for Golden Trove Beetles out in the world. They are decently large and glow to get your attention. Once picked up, you can use them in your inventory to permanently increase you and your main pawn's carrying capacity. A single beetle increases both, so you don't have to choose!
  • Always keep a lantern on you. The game is very dark underground and at night. Have some flasks of oil ready to refill it when it starts to flicker and dim. If you get drenched in water, it will go out. You can relight it by putting it away then taking it out again. Pawns can use lanterns as well.
  • Need more of an item? Try making a forgery! Some NPCs offer item copying services. While most item duplicates will be effectively identical to the original, not everything does. Magical properties cannot be copied, and there may be unexpected outcomes if you give a quest NPC a forgery instead of the real thing.
  • Trust your intuition when it comes to using forgeries for quest turn-ins. Maybe you don't trust the questgiver, so you can give them a forgery to foil their plans.
  • You can combine items from your inventory. It can be quite useful if you're in a pinch. The Enlightenment augment gives you a chance at creating extras for free.
  • Some items have expiration dates! Don’t expect that meat you picked up to be good forever. It will eventually become aged meat, then rotten meat. Items deposited into item storage still age, but at an extremely slow rate. This is mostly only noticeable near the end-game, where one month passes and the majority of your storage will rot. Be sure to use or combine your aged food every now and then.
  • You can combine items to turn them into more permanent versions, usually called roberants, draughts, and dried meats.
  • It's a good idea to have roberants on hand, as they weigh much less than the ingredients used to make them, while also being more effective.
  • It's highly recommended to save any Allheal Elixirs you find. They are especially useful for the endgame.
  • If some items in your inventory rot, don’t throw them away. Aged items have their uses too. You can recycle them into lantern oil via combination, for example. Rotten items can also be used as bait for carnivorous enemies, or used for quest objectives.
  • Don’t sell items unless you’re short on cash. Deposit everything you aren’t going to use. Strange, obscure, or seemingly useless items can be quest objectives, ingredients for an item combination, or a required item for an equipment upgrade.
  • If you read the item descriptions of gemstones, they often have a description saying which region it is rarely found in. They should sell for a higher price at vendors there.
  • That said, don't sell all of your gemstones. Keep some on hand; they're also used in some equipment upgrades.
  • During your travels, you may find an item called a Dragon's Gaze. Using it marks wakestone shards on the map. The Dragon's Gaze is infinite use, so feel free to utilize it at any time. Since it's not consumable, there's no need to hold onto more than one.
  • This game doesn't have a hide helmet option, but some pieces of headgear have a "raise visor" option in the equipment menu if you don't want your face hidden.
  • On the other hand, the game also has a cosmetic slot of equipment for glasses, face scarves, eye patches, and masks for additional customization.
  • The first time you or your main pawn change to a newly-unlocked vocation, you get a free set of equipment appropriate to it. Since most armor can be shared between multiple vocations, early on it can be a good idea to temporarily switch to a vocation just for a potential gear upgrade.
Armor and Weapon Upgrades
You can upgrade your weapons and armor at any blacksmith around the world. You might have noticed some brackets next to the images of your equipment. Those are upgrade slots. The first upgrade slot is usually paid for with naught but gold, but further upgrades generally require gold, miscellaneous items, and monster parts. I hope you've been depositing everything you've come across.

Different blacksmiths have different specialties. Upgrading an item in Vermund will lead to different results than in Sacred Arbor, for example.

Blacksmith Style
Weapon Specialty
Armor Specialty
Weight
Vermund
Balanced
Balanced
Decreased
Battahl
Physical Attack
Physical Defense
Increased
Elven
Magick Attack
Magick Defense
Decreased
Dwarven
Knockback Power
Knockback Resistance
Increased

You are free to mix and match these upgrades among the three brown slots, allowing you to go all in on a particular aspect, or cover up weaknesses by balancing stats.

The first upgrade of any piece of equipment is quite worth it, as the gold cost is low. It's usually a good idea to keep your equipment upgraded at least once. For upgrade levels 2 and 3, different smithing methods require different materials.

Pawns with the Forager specialization mark items on the map that are upgrade materials for your current equipment. In the map menu, you can hit Search and look up specific materials to find every location that provides that item. You can filter by smithing style to narrow down results.

The order of upgrades matter. The first upgrade has the least effect, while the third upgrade has the most effect. For example, upgrading a weapon with two Battahl upgrades then a Dwarven one will have more knockback power than a Dwarven upgrade followed by two Battahl upgrades.

Once a piece of equipment has three upgrades, the fourth special red slot can be filled: Dragon Forging. See the spoiler below on how to do so.

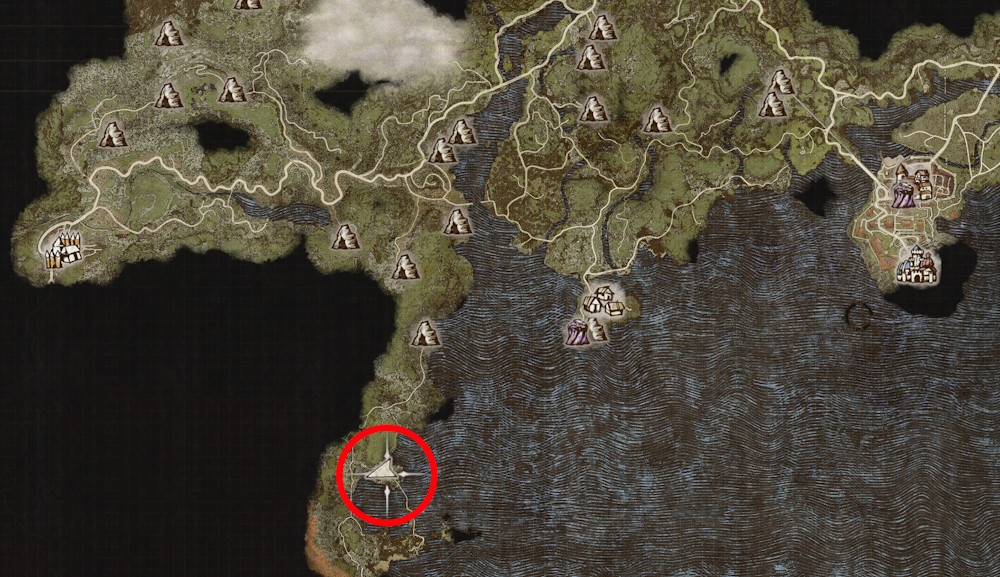
Southeast of the gates to Battahl, on the eastern shore, there is a mysterious figure who is able to dragonforge your equipment in exchange for Wyrmslife Crystals. You can also reach him by heading northeast from Bakbattahl.

Each armor or weapon costs a different amount of crystals.


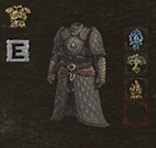
Dragonforged gear has its stats increased, weight halved, and it now has a subtle pale blue swirl visual effect.
Exploration and Combat - Part 1
  • Save often. There’s no worse feeling than trekking halfway across the map only to die because you took a wrong turn and a griffin pounced on you from behind.
  • The game is designed around only having one saved character, but that one save has two save "slots" which serve different purposes. The first is a general save slot that autosaves every few moments. It is also what you save to when you manually save. The second is the checkpoint save, which occurs every time you rest at an inn or sleep in an owned property. If you mess up on a quest or want to retry something but the game has autosaved since, restart from a checkpoint to return to the inn or house.
  • I recommend going into the camera options and maximizing camera distance. This should give you more combat awareness and visibility while exploring.
  • Are you frustrated with the motion controls interfering with your bow or spell aiming? Disable motion sensor function in the camera options.
  • It’s advisable to try many different vocations instead of focusing on just one. This allows you to unlock augments from other vocations that can prove beneficial to whatever vocation ends up being your favorite. That goes for your pawn, too.
  • Early in the game, avoid traveling at night. Visibility is low, exploration is hindered, and very deadly beasts prowl around.
  • The more you carry, the slower you get. Be sure to deposit your loot at every opportunity you can, keeping only what you need for your next venture.
  • Chests don't respawn their contents. There are a few exceptions, usually if the "world state" of the area has changed, such as if a quest changed the area.
  • Defeated enemies will come back eventually. Small enemies take a little over a day to respawn, while large enemies take about a week.
  • When you take damage, you will see your health bar decrease, as well as have a light gray and an empty section. The light gray part of the health bar can be recovered with healing magic and curative items. The empty part of the health bar can only be recovered by sleeping at an inn or camp.

  • If you die in combat, you have a short window of time where you can still enter the menu and use a curative to restore health before needing a wakestone to revive. This doesn't work for fall damage.
  • One cheeky way of avoiding fall damage is to throw a pawn down then jump down after them so they catch you. Magick Archer can fall even further since they can revive pawns at a distance with Recovery Arrow.
  • See a chest just barely out of reach? Maybe a pawn can get to it. Try picking them up and throwing them up there.
  • As you explore, there is a small chance that you or your main pawn obtain scars that weren't applied during character creation. You can remove them by going to a barber and selecting the "markings" option. Since you can only have so many scars, you can prevent any more by applying some yourself in the menu and making them small and invisible.
  • Rest at inns or campfires on a regular basis. Not only does this fully restore health and upload your pawn data, it also sets the game time to dawn, or evening: excellent for doing quests on your own terms.
  • Day lasts 32 minutes; night lasts 16 minutes. Each in-game hour is 2 minutes long, so a full in-game day is 48 minutes long.
  • If you want to pass some time without resting, you can find a bench to sit on. You can recognize a proper seating area by a red cloth with a sun pattern. This will cause 6 hours to pass. Keep pressing the button to continually pass time without having to stand back up.
  • If your at a major settlement, you can also stand at an ox cart sign to skip directly to morning, just before ox carts begin to take passengers for the day. You can interact with the sign repeatedly to skip entire days at a time.
  • It’s a good idea to always have at least one camping set on hand. It’s risky to set out into the wild without one.
  • Camping kits are NOT consumed on use. You get them back when you’re done camping. You can, however, lose camping kits if you are ambushed and the kit is destroyed.
  • You can cook food at a campfire then walk away in order to get the food buff without passing time or regaining health. This carries no risk of being attacked and losing the camping kit.
  • There's a handful of flavorful interactions at camp that have no bearing on gameplay. If other NPCs were around when you started camp, they may join you. You can add fuel to the campfire by interacting it from the opposite side you cook from. If you sit around the campfire long enough, pawns and NPCs can lay down to sleep.
  • Eventually, you may get the opportunity to buy a home. This allows you to rest just like at an inn without having to pay. Check the front door every now and then, as NPCs may leave messages and gifts for you.
  • You have infinite stamina in safe areas such as in town, so you can sprint as long as you like.
Exploration and Combat - Part 2
  • You may encounter a group of four NPCs travelling around while you're exploring the wilderness. These people are mercenaries and bandits pretending to be the Arisen and their pawns. This has no bearing on your story and is just there for flavor, but you can do what you will with the impostors.
  • While you can walk in shallow water, you cannot swim in deep water, which houses the mysterious Brine. The Brine is identified by its "bloody tentacle" appearance when you get too close. An Arisen fallen into the Brine will respawn close by without issue, but any pawn claimed by the Brine will be sent back to the Rift as if killed. Monsters that fall into the Brine will be instantly killed but won't drop loot.
  • Weapon enchantments are a wonderful thing. Try and have at least one person in your party able to buff your weapons. Experiment with different elements to find the best results to suit your playstyle and take advantage of enemy weaknesses. See the Elements and Debilitations section of the guide for more information.
  • If you learn an advanced version of a spell or skill, it will function as a straight upgrade. There is no increased charge time or stamina cost.
  • Pay attention to your stamina! Running out of stamina will cause you to pause to catch your breath, which leaves you vulnerable for several seconds. Pawns can “pick” you up from this state to shorten the animation.
  • You regenerate stamina fastest when not taking any actions. Instead of spamming basic attacks, it may be better to take a moment to reposition while low on stamina.
  • Don't underestimate status effects; they are quite powerful even against boss monsters.
  • If you see small explosive barrels around, you can detonate them by attacking them, or you can pick them up and throw them directly at your enemies. You can also throw rocks and chunks of ice if there are any laying around.
  • You can distract some enemies by discarding meat onto the ground. This is especially useful against wolves.
  • While exploring hidden or out-of-the-way areas, you can often find Seeker’s Tokens, which can be turned in at a guild hall for rewards. If a pawn says that something reflected light nearby, that means you're close to one. The Detection augment from the Trickster vocation will alert you to their location with audio and visual cues.
  • The mage spell Frigor can leave an ice platform that you can stand on. It can be useful for reaching high areas that are just out of reach.
  • Find something you can't reach with your current vocation? An enemy you can't defeat yet? Leave a marker on your map to remember to return later.
  • When a pawn speaks up about knowing about a nearby location for a chest or cave, giving the "Go!" command can sometimes get them to lead you, however, you can also speak to that pawn directly for more details.
  • Keep you wits about you when it comes to positioning. Did a bunch of saurians ambush you in knee-high water? Your footing is slowed down; it may be best to retreat to dry land and fight there. You could also take advantage of the water by hitting them with ice or lightning.
  • Be careful when fighting around wooden bridges. They may collapse.
  • Keep an eye out for destructible rocks or brickwork that looks like you can smash through. You can often find good loot or alternate pathways. There are also a few doors you can push through that are disguised as walls.
  • Placing a stone into a trebuchet will launch it automatically at a (usually) useful location.
  • Disguises work. If you're infiltrating an area, wearing equipment that looks like you belong will make it easier to move around.
  • Talking to NPCs, completing their quests, and giving them gifts may increase their affinity with you. This may unlock extra dialogue, cutscenes, quests, or other benefits. In particular, high affinity with merchants typically gives you a 5% to 10% discount!
  • You can only give a gift to a particular NPC once per day. You can check their profile in the character list menu to see what kind of items they like.
  • NPC opinions of you will also be affected by how you treat their friends, family, and associates.
  • Affinity decays slowly over time, so you may find people liking you less if you haven't paid attention to them for a long while.
  • If an NPC dies, they will be placed in a city morgue or charnel house. You have a few days to revive them, but take too long and they will be gone forever.
  • New Game+ tip: The Dragonforged offers new services in new game plus. He can speed up stat growth of vocations (applies retroactively), halve the stamina cost of weapon skills, and offer useful temporary buffs.
Much Ado About Quests
  • You have no limit to the quests you can have at once.
  • Timed quests will be marked with an hourglass icon. They expire after enough time passes, so it would be prudent to prioritize them.
  • Some quests may be lost if a related NPC dies, or if you progress too far in the main storyline. If you don't want to miss anything, focus more on sidequests than main story.
  • Characters have schedules. You may have to look around to find someone for a quest if they aren't in their usual spot. Some quests and quest objectives are only available at certain time periods.
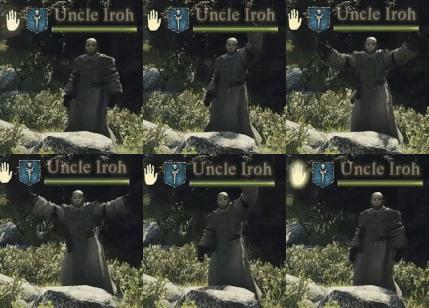
  • If you pick up a quest and a pawn in your party has done the quest before, they will have a hand icon next to their name and will speak up to offer help, often waving their hands to get your attention. If you give them the “Go!” command, they will lead you along the way.
  • You are free to ignore a pawn’s advice if you want to solve a quest yourself. Several quests have multiple solutions that lead to different outcomes.
  • If you are struggling to figure out a quest and none of your pawns know how, you can specifically search for pawns in the rift that know about your current quest priority in the Advanced Search.
  • Still stuck, or don't want to hire a pawn just for a quest? You can visit a diviner or oracle in main cities for guidance. Their advice is generally helpful, but if their answer is vague, that may indicate you have multiple options ahead in terms of completing or failing the quest.
  • Some things are just easier if you pick up and carry someone. Escorting someone that got stuck, or is slow? Carry them along the way. Merchant not selling anything because they're not at their store? Forcefully place them back to their stall. Some NPCs have special reactions or alternate solutions/endings to quests if they are placed in the right location.
  • It will be helpful to remember the location of the first Seeker's Token you ever found and picked up. In New Game+, this hint applies to the first Seeker's Token you pick up in that NG+ cycle instead.
  • In order to complete a Pawn Quest that requests an item, first, have one in your inventory. Enter the Rift and speak to the pawn. Select "Give Item" and choose to deliver it. The item will be removed from your inventory and will eventually be given to the other player who requested it.
  • The quest A New Godsway is a point of no return for the story and world. If you want to experience as much the game has to offer, do everything you want to do before turning in this quest.
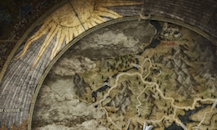
  • You can tell the time by opening the menu. The celestial circle around the map isn't just for decoration; it's an astronomical clock. The sun rises in the east and sets in the west, so it rotates counterclockwise. If the sun is at the top of the screen, it's noon. In this example, with the sun at the top left, it's the afternoon, approaching evening.

Common Quest Questions
Some quests are headscratchers, even if you have a knowledgable pawn and checked with a diviner. Here are some quests with some not-so-clear criteria.

Scaly Invaders - How long do I have to wait for Harve to rebuild? If you've helped with the Saurians twice, the town will not fully rebuild until Readvent of Calamity.
Readvent of Calamity - Where do I find Ulrika? She's gone to Harve, the coastal town. If you've repelled the Saurians twice for Scaly Invaders, she will be there.
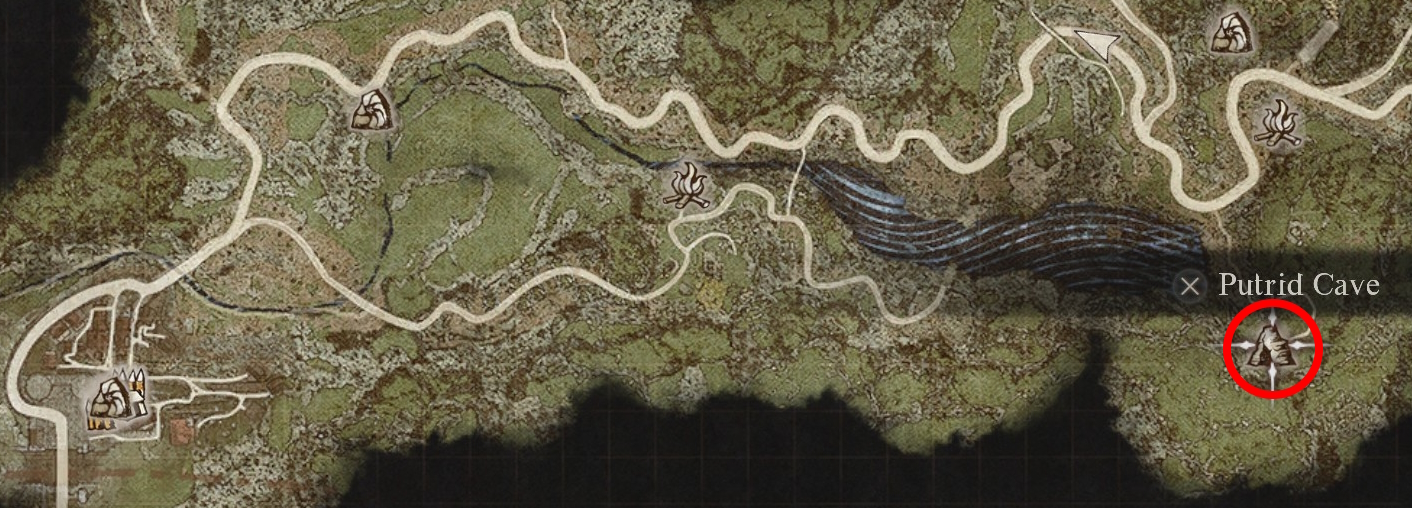
Prey for the Pack - Where is Rodge? There is a trail of blue glowing flower petals that lead to the Putrid Cave. While the flowers themselves glow at night, the petals on the ground are more visible during the day. The cave is a decent trek east of Checkpoint Rest Town.
Spellbound - Why is Trysha taking forever to learn? The quest is currently bugged. Her Gran, Eini, died at some point. Go to Vernworth's morgue and resurrect her with a wakestone. The quest should continue after that.
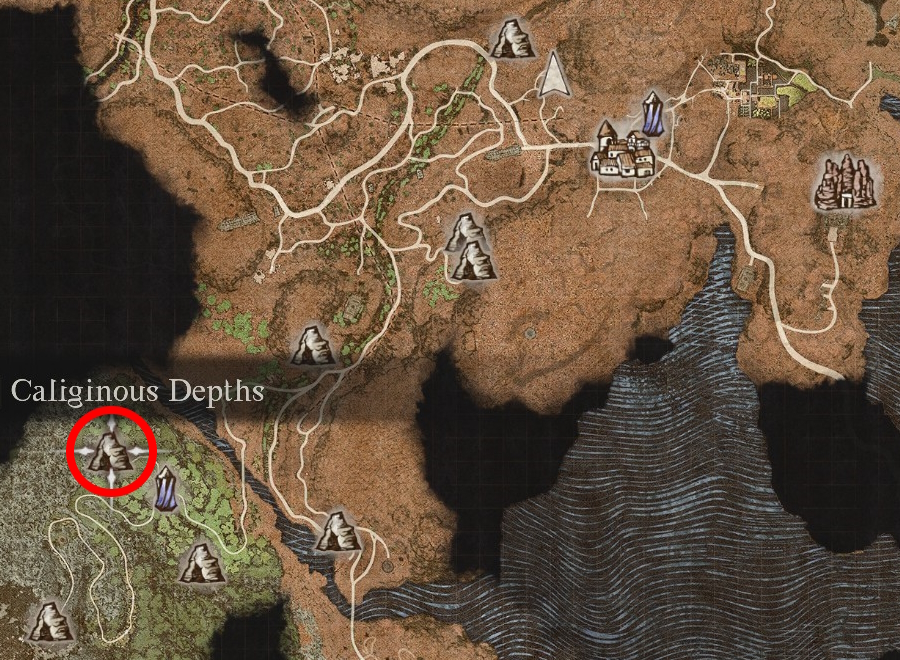
A Case of Sculptor's Block - How do I get a Medusa head, and how do I use it? Head to the Caliginous Depths in southwest Battahl. It's easiest as a physical class with a slashing weapon, especially Thief. Your weapon also needs lightning damage, so bring a mage pawn with Lightning Boon or a weapon innately enchanted with it. As combat begins, command your pawns to "Wait!", as the quality of the head depends on her health at time of decapitation. Climb up to her head and start attacking. Eventually she will be decapitated, killing her instantly. Pick up the head. Its power decays quickly, so move swiftly to meet with Fulvio at the Griffin in northeast Battahl. Set up a portcrystal ahead of time if you want to be safe. To use the medusa head, equip it in your inventory; it temporarily takes up the lantern spot. Activate it just as you would activate a lantern, then aim the beam at your target. Use the shortcut again to put it away.
Fast Travel - Ox Carts, Ferries, and Ports
Dragon’s Dogma 2 is a large game, and it takes a long time to get everywhere on foot. While most games would allow near limitless fast travel to gloss over monotonous travel time, DD2 takes a different approach. To quote the game’s director Hideaki Itsuno,
Originally posted by Hideaki Itsuno:
“Just give it a try. Travel is boring? That's not true. It's only an issue because your game is boring. All you have to do is make travel fun.”
Whether you find overland travel fun or not is up to you, but there are some limited fast travel options.

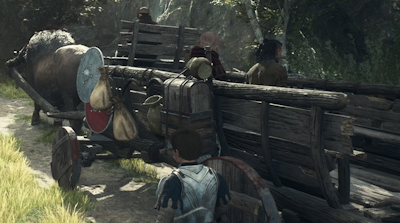
The first and most widely-available mode of fast travel are ox carts, found around major settlements. You can get in and travel between major points of interest. While riding an ox cart, you can watch as the landscape goes by, or close your eyes to effectively skip ahead to your destination. Be aware that it’s possible to be attacked along the way.

If the ox cart is attacked, you'll have to defeat all surrounding enemies before you're able to continue the ride. If the cart takes too much damage and gets destroyed, you will have to walk the rest of the way, or walk back to take another cart. On the bright side, this can also be a good opportunity to explore - one of the common ambush spots is close to the elven lands, for example.

Returning from the first game are portcrystals and ferrystones. They are rare magic items that allow for teleportation. Use a ferrystone to travel to any portcrystal you've seen before. Ferrystones are one-use items, but you can buy or find more.
  • Some locations have permanent portcrystals, like in major cities.
  • Other portcrystals are able to be picked up and placed anywhere you want as a customizable warp destination. Keep an eye out for them!
    • One is received automatically upon completion of the main story quest "Feast of Deception"
    • In a cave on the eastern shore of Battahl, the Dragonforged sells a portcrystal for 20 Wyrmslife Crystals.
    • Solving the Sphinx's Riddle of Madness rewards a portcrystal.
    • If you give the Sphinx a portcrystal as an answer for the Riddle of Conviction, you will obtain another one. This potential portcrystal is missable if you offer a different item instead.
    • Finishing the questline "A Trial of Archery" gives you one as a reward.
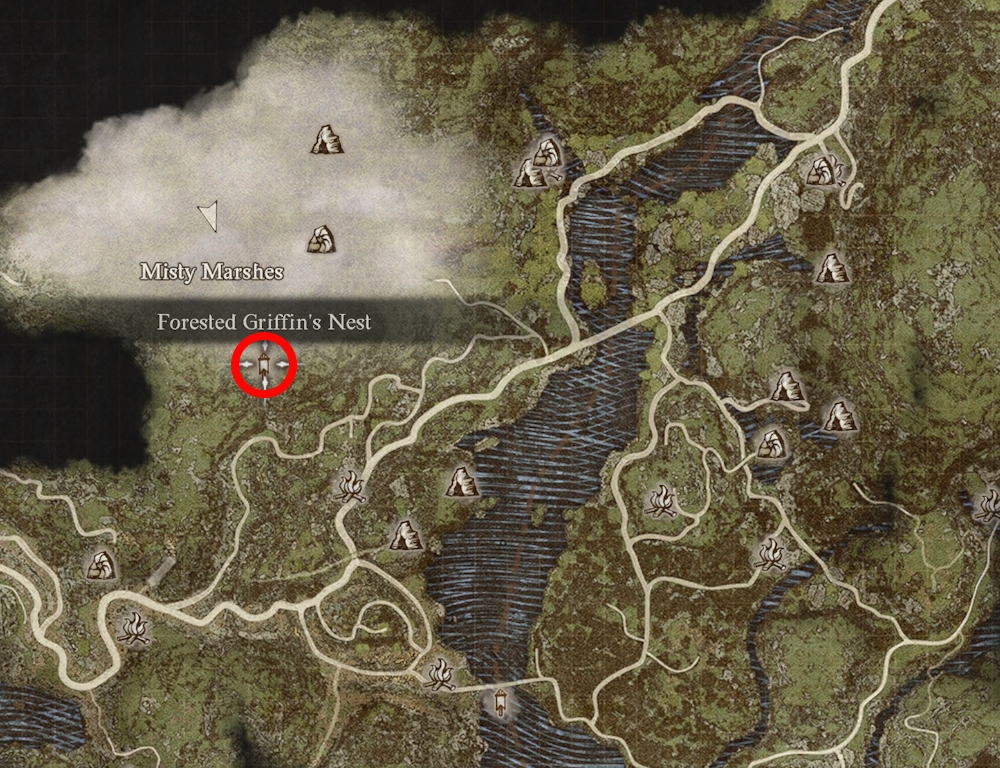
    • In the Forested Griffin's Nest, accessed via the Misty Marshes in West Vermund. You could also hitch a ride on a Griffin back to its nest, but that's unpredictable.
    • While not the most ideal solution, you can purchase a portcrystal for real money as DLC. I wouldn't recommend it, but that's for you to decide.
  • In New Game+, the portable portcrystal locations above will give you forgeries or ferrystones instead.
  • Remember, forgeries do not copy magic properties: forged ferrystones or portcrystals don't work!
Grappling, Climbing, Pushing and Pulling
Dragon's Dogma combat features grappling enemies your size and climbing on those larger than you. While this is a neat addition, it plays a smaller role than you'd think, especially if you're playing a ranged character.

Grappling
  • Grappling means grabbing hold of an enemy such as a goblin or bandit and holding them in place. This reduces the grappled foe's defenses and prevents them from taking any actions. You must hold the button in order to maintain a grapple.
  • While grappling, stamina slowly drains. Larger and heavier characters lose stamina at a slower rate. You'll automatically let go if you run out of stamina.
  • Some enemies must be stunned or knocked down in order to be grappled.
  • When an enemy is grappled or knocked down, heavy attacks against them are especially powerful with unique animations.
  • You can grab a large foe’s leg and push or pull them in an attempt to knock them off balance.
  • Believe it or not, you can grapple a flying Harpy by the legs and somewhat steer the direction you fly. She will eventually knock you off, but it's a neat thing to try nonetheless. You could even use a harpy to fly to hard-to-reach areas if you're clever enough.
  • You can use a harpysnare smoke beacon to lure in a harpy if you suspect there's something within a short flying distance. Check the controls on the bottom right when in flight; you can ascend up to a certain limit or descend safely.
  • If pawns keep killing harpies that you're trying to fly with, use the "Wait!" command so that they stop attacking.

Climbing
The more bombastic variant of grappling that allows melee classes to reach and attack weak points or specific limbs that they normally cannot reach. This functions somewhat similarly to how climbing works in the game Shadow of the Colossus.
  • You can climb on just about any creature larger than you.
  • Like grappling, climbing will slowly drain stamina. A monster can attempt to shake you off, which drains stamina quickly. You will be unable to move or attack while holding on during erratic movement.
  • How fast you climb depends on your vocation. As you might expect, more agile vocations climb faster. In addition, smaller characters also climb faster, in exchange for their smaller stamina pools.
  • You can also "climb" by repeatedly jumping off and grabbing on as you jump higher, though beware that this can be difficult to pull off if the monster is moving erratically.
  • You can target different parts of the body for an advantage. For example, you can attack a cyclops' arms to have them drop something they're holding, attack the legs to make them stumble and fall, or attack the head for extra damage. You can burn a griffin's wings with a fire weapon to prevent it from flying. A notable enemy for this is the Chimera: it has three heads. You can focus attacks on the goat head to stop its ability to cast spells, or chop off the snake head to prevent poisoning, and so on.
  • You can do light and heavy attacks while holding onto the enemy. This can be useful if you’re next to a weak point.
  • You are able to stand on top of enemies. This allows you to use your more powerful abilities as if you were on the ground. Beware - it’s easy to fall off this way!
  • Be wary if you climb onto a flying creature; it could fly high up into the air with you on it, leaving you to a nasty fall if you let go.
Elements, Debilitations, and Status Effects
or, "WTF do these symbols mean on my equipment screen?"
Like most other RPGs, Dragon's Dogma has its fair share elements and status effects.

Elements
Element
Effects
Fire
Fire damage can inflict damage over time with Caught Fire, or even more damage over time with Torched on targets that are Tarred.
Ice
Ice damage can slow down enemies with Frostbite, or lock them down entirely with Ice-Bound on targets that are Drenched.
Lightning
Lightning damage jumps to nearby targets and has a chance to inflict Unconscious. If the target is Drenched, lightning has a larger range.
Holy
Holy damage is rare, but it is quite effective against undead.

Debilitations
Debilitation
Effects
Blighted
Targets takes damage slowly over time. It lasts many in-game hours, and you can't manually save the game while the Arisen is afflicted. Colloquially referred as poison.
Fulminant Poison
Target takes damage quickly over time. A more extreme version of Blighted.
Tarred
Target is covered in tar or oil, making it easier to lose balance. If hit with fire damage, the target will become Torched.
Caught Fire
Target takes fire damage over a short amount of time. Can be removed immediately by immersing in water and becoming Drenched.
Torched
Target takes fire damage quickly over a short amount of time. Inflicted by being hit with fire damage while Tarred, or dealing Tarred to a target that has Caught Fire. Can be removed immediately by immersing in water and becoming Drenched.
Drenched
Target is covered by water, whether by entering bodies of water or standing in rain. Reduces fire damage and prevents Tarred. Cures Caught Fire and Torched. Increases ice and lightning damage received, and target is more likely to become Ice-Bound.
Frostbite
Target slows down as they become covered in frost.
Ice-Bound
Target becomes frozen solid. Inflicted by receiving ice damage while Drenched.
Silence
Target cannot speak. This interrupts and prevents spellcasting.
Sleep
Target falls asleep, vulnerable to attack. Target wakes upon taking damage, being woken by an ally, or a short time passes.
Unconscious
Target is dazed, stunned, or otherwise unaware of their surroundings. Inflicted by lightning or physical strikes dealing blunt damage.
Petrification
Target turns to stone, causing instant death.
Riddle me this, Sphinx - Part 1
The Sphinx offers ten riddles, in two sets of five, with useful rewards. This quest line is rather unforgiving, as you only get one attempt to answer each riddle. Get one wrong, and you forfeit that riddle's reward.

Solving these riddles involves a good amount of time, but with some preparation, a lot of effort and heartache can be avoided. Before you start, I highly recommend doing a checkpoint save by resting at an inn or house, then being careful to not do so again until you've fully completed both sets of riddles. If you're okay with using it, setting up backup saves with the DD2 Save Manager[www.nexusmods.com] should safeguard you from any mistakes.

Ferrystones will make these riddles faster and much, much easier. The more you have, the better. When you have the chance, I highly recommend placing a portcrystal outside her shrine. You'll get one or two as rewards, so don't worry if you don't have any to start with.

Where is the Sphinx's first location?

She is in the Mountain Shrine. The most common way to reach her is to go north from Checkpoint Rest Town. Not far from town is a tower that has a Riftstone of Fellowship. Use it to hire a pawn with the name SphinxMother, SphinxFather, or SphinxParent. Continue on to the Ancient Battleground and go through the large fortress. You should find her eventually through a series of caves. The path is fairly straightforward.

Once you speak with with the Sphinx, she will offer five riddles in any order you choose. I give these riddles not in menu order, but rather the order I recommend for a smoother experience.

Riddle of Wisdom
Place the Sphinx-related pawn onto the pedestal, then speak with the Sphinx. With this riddle complete, you no longer need this pawn and can dismiss them at your convenience.

Reward: 1,200 Rift Crystals

Riddle of Madness
Place your Main Pawn on the pedestal and talk to the Sphinx.

If you want to be fancy with it, you can also bring the Sphinx someone with maximum affinity with you. You can tell if your relationship is at that level if they blush when they talk to you. If you have no one with max affinity, pick someone and give them a gift they like every day (a Bunch of Flowers is a safe bet). Once they're ready, you have four options:
1. If you have a portcrystal at the Sphinx already, pick them up and use a Ferrystone to teleport straight there.
2. Use the Sealing Phial (from the Riddle of Eyes below) to capture them, then use the item once you're at the Sphinx.
3. (Not ideal) Pick them up and carry them the whole way up.
4. (Not ideal) Wait for them to give you an escort quest, then take them to the Sphinx instead of their requested location.

Reward: 1 Portcrystal

Riddle of Conviction
Give the Sphinx an item. I recommend a Portcrystal.

Reward: A duplicate of what you offered. She didn't actually take the original.

Riddle of Eyes
The Sphinx will open a door to a mini-dungeon, asking for the most valuable item inside. Just as you enter, look behind and upward to see a chest that contains a Sealing Phial. You are free to explore the rest of the dungeon, but once you are done, show the Sealing Phial to the Sphinx.

Reward: 1 Wakestone and the Sealing Phial

The Sealing Phial is a one-time use item that can pick up and safely contain an NPC for transport. This can be helpful for future riddles.

Riddle of Rumination
Head to the location of the first Seeker's Token you ever picked up; there will be a Finder's Token there. You have 7 days to retrieve it. If you remember where you picked your first one up, great! If not, don't fret. Some common locations are near the shore just northwest of Melve or on top of the ballista tower in Melve.

If you still can't find it, it's still fine. If the seven days are up, the riddle will still be considered "solved", though you won't get the reward.

The first Seeker's Token picked up resets per new game cycle, so if you're in New Game+, it will be the first location picked up in your current playthrough, not the previous one.

Reward: 3 Ferrystones


Once you complete the first five riddles, she will begin to fly away to her second location. You can find your way there quickly enough, but if you want a shortcut, you can jump on her back and take a ride to the new destination right away. Just be sure to hold on soon after she enters the cave, otherwise you'll fall off.
Riddle me this, Sphinx - Part 2
Where is the Sphinx's second location?

She now resides at the Frontier Shrine. From Checkpoint Rest Town, circle around down to the river and head west. After heading upwards a bit, you'll eventually reach an area with at least two large monsters. Whether you defeat them or not, search along the southern wall until you find some breakable rocks. Smash through and continue south, straight to the shrine.

Riddle of Reunion
By finding the Sphinx, you have already succeeded. Reaching the shrine was the sixth riddle.

Reward: 100,000 gold

Note - the last few riddles are given to you in a random order.

Riddle of Recollection
The Sphinx asks how many riddles you've successfully answered so far. To your left are ten sphinx statuettes. Place the right amount in front of her. They don't have to be exactly on the platform; the general location in front of her will suffice.

Since the order is now random, the answer is different between players, since you can get this at any point. Keep in mind that finding the sphinx at this location also counted as a riddle. If you've failed any riddles, don't count them for your answer.

A good rule of thumb, if you've been successful so far, is count how many unlocked chests are behind the Sphinx right now. Add 5 for the riddles from the first location, and you should have your answer.

Reward: Unmaking Arrow
Only usable by Archers and bow-wielding Warfarers. Keep this on hand; this may be useful, especially if you're lower level.

Riddle of Contest
The Sphinx summons someone for you to fight. She automatically gives you a ring that severely reduces your damage output. Defeat them by picking them up and throwing them off the cliff.

Reward: Ring of Ambition
This ring slightly increases experience gain.

Riddle of Differentiation

You will be shown the image of a person to seek out and bring here. Take a screenshot if you have to - this can be hard to distinguish. It can be one of two characters, and they're twins. Take note of the shape of their hair and the scar on their face.

Dante can be found in Checkpoint Rest Town, often standing by the stairs to the inn. Vergil is found just south of the Checkpoint Rest Town border gate. Bring your target to the Sphinx with any method outlined earlier for the Riddle of Madness.

Reward: Whimsical Daydream
This is a censer, a weapon for the Trickster with 175 Strength and 290 Magick.

Riddle of Futility
Deliver a vase to an NPC that's in Bakbattahl. The vase is fragile and it is a long journey. It's far better to do the reverse: bring the man to the vase at the Frontier Shrine. His name is Maurits, and he hangs out in front of a mural of the Sphinx. Take the stairs near the purchaseable home in the residential district, and go west to the Mural Byway. He will speak to you when you approach. Use your best method to bring him back to the shrine. Place him down next to the vase and a short cutscene will play.

Reward: Eternal Bond
This is a ring that you can gift NPCs to instantly maximize their affinity with you.


It's recommended to make an inn save just in case before solving the tenth riddle.

Once all riddles are solved, the Sphinx will congratulate you and begin to leave. This is your last chance - attack her if you seek the contents of the final, large chest. She will challenge you to a fight. She has Palladium blocking the first few attacks you deal, so attack quickly to break it before using any heavy hitters.

The fight itself can be considered a puzzle. The mural between Worldsend Cavern and Mountain Shrine, the mural in Bakbattahl behind Maurits, and the patterns on the vase from the Riddle of Futility all give hints to the "proper" solution to fighting her: attack only the bestial parts of her body. That is, the lower body, legs, back, and wings are correct targets. She will fight to the death in such a case.

Hitting her chest or face enough times will cause her to declare the fight over and attempt to retreat. If this happens, defeat her now or she'll be gone for the rest of the game. One easy option was foreshadowed earlier: as an Archer or Warfarer, you can equip the Unmaking Arrow and defeat her instantly. Do not use a medusa head, as she will drop no loot if she is petrified.

If you're struggling, people have found success by dismissing all pawns and doing the fight solo.

Reward: The Sphinx drops 10,000 gold and the Key of Sagacity for the final chest. Open it to receive the Eternal Wakestone. It is a one-time use consumable that resurrects everyone in a wide area around you.
Dragonsplague
Given the potentially dire consequences of ignoring dragonsplague, I must keep this information in the guide. Skip this section if you want to keep it a surprise, albeit an unpleasant one.

Dragonsplague is a mysterious ailment that transmits between pawns. You may occasionally hear pawns talk about it while wandering town.

How do I tell if my pawn is infected?
Players have reported several signs that may indicate a pawn in your party has caught dragonsplague, as you can't see it in the status menu.
  • Their eyes have turned glowing red, and pulse every few seconds. This can be easier seen if you speak to them directly. This change reverts once the pawn is no longer infected.
  • Pawn occasionally raises their hand to their head as if in pain.
  • Pawn ignores your direct commands, such as "To me!" and "Wait!"
  • Noted increased aggressiveness in combat, with hostile dialogue you've not heard them say before. Watch for "I will act of my own accord!" or "Don't tell me what to do!" Other pawns may notice this and say something along the lines of, "What are you doing? We are in the middle of battle!"
  • Pawns with aphonite specialization don't speak normally, but they will talk while infected.

    If you receive the in-game tutorial about dragonsplague, one of your pawns is infected. This only happens the first time, however.

    What are the consequences of dragonsplague?
    If you have an infected pawn while resting at an inn, there is a chance that a cutscene will play where the pawn transforms. You'll get a notification that something terrible has happened, and numerous NPCs in the surrounding area will be dead on the ground. However, it seems that characters killed by this event are not permanently gone, and instead respawn after approximately a week.

    What do I do if a pawn in my party is infected?
    Avoid sleeping in town until the dragonsplague is dealt with. You cannot cure it with an item. There are three known methods of dealing with dragonsplague.
    • If the infected is your main pawn, let them die by throwing them into the brine, throw them off a cliff, or otherwise perish in combat. They will be cured once they are resummoned at a riftstone.
    • Your main pawn can be "cured" if another player hires them. This will transfer the infection off of your pawn and onto theirs.
    • If the infected is a support pawn, dismiss them or allow them to perish. This won't cure them, but it will remove the infection from your world, at least for now.

    I missed the signs and now everyone is dead. Now what?
    You can mitigate some of the damage by using wakestones to revive more important NPCs if you need them right away. The Enteral Wakestone from defeating the Sphinx also works as a one-time solution. Otherwise, you could wait around about a week for them to come back, but people aren't sure if that saves all NPCs. Another option is to revert your save. You can't do so normally, but there is a save manager tool[www.nexusmods.com] available. I've personally tested and confirmed that the tool works as intended. Having backup saves is generally a good idea for a major game like this, anyway.
The Endgame
This section will be left intentionally vague for spoiler reasons.

So, you've done it. What now?

You are on a timer. Get moving. You have approximately 12 days. It's fine to rest at an inn or house to make a backup checkpoint save, but I wouldn't recommend doing it more than once. You can go to campsites to make food, but you can no longer sleep at them. You also cannot sit on benches to pass time.

You only have one life. If you die, you'll have to start this endgame portion over. Keep plenty of curatives and wakestones on hand. Remember that healing items can save you from death if you use them quickly enough. Wakestones and Allheal Elixirs can be used to restore your max health back to full. If you need to heal your Main Pawn, toss them off a cliff and respawn them at a rift stone. Regularly dismiss and hire support pawns to keep their max health high.

Ox Carts are no longer in service, but new permanent portcrystals have appeared and ferrystones are now much more common. Use them freely to get to where you need to go - time is precious.

Follow the quests to retrieve your main pawn and investigate the blue pillar of light. This should give you your new main objective.

Now that you've reached the endgame, vendors have updated their wares with more powerful gear. You can also find some of these weapons and armor hidden around the world in newly-exposed areas such as riverbeds. The Dragonforged also offers new equipment in exchange for Wyrmslife Crystals at the Seafloor Shrine.

Your highest priority is to take care of the red pillars of light. Each one is a different encounter.
  • The ones near Sacred Arbor and Vernworth are fights with unique bosses. Approach the Vernworth pillar from the west - the eastern path has a steep slope you can't climb up.
  • The one in Bakbattahl is more of a puzzle/follow the NPC quest.
  • The one near the volcanic excavation site is handled by interacting with the remains of the Gigantus. Be sure to bring your Main Pawn. Sit back and watch the show.
With the pillars out of the way, your time restriction is greatly lifted. You can now focus on completing the rest of the quests. You can do them in any order.
  • Speak to Brant in Vernworth's tavern; you will be directed to Sven in the castle. His mother, Disa, is two rooms over. Take the Ornate Box if it's on the shelf, then carry Disa over to Sven to persuade her. Go out to the western part of town, near the Ox Carts. Depending on what sidequests you've done, you may need to threaten Allard by drawing your weapon. If he's not there, the Ox Carts immediately agree to help. With Disa and the Ox Carts handled, Vernworth (and Harve) are taken care of.
  • Remember to bring a pawn that can translate Elvish. Speak to Taliesin in Sacred Arbor. If you helped his children, bring them along to help convince him. You may need to bring a cutting of the Arborheart to the Seafloor Shrine and plant it there. Report back to Sacred Arbor. If he still refuses, keep insisting by continuing to talk to him until he relents.
  • Speak to Menella just outside the palace. Follow the quest markers around town to solve local unrest. There's several different ways to handle each situation, but as long as they're resolved, Menella will be grateful. Bakbattahl (and Checkpoint Rest Area) are done.
With the above three major settlements, you'll get an achievement. You can optionally help more locations for extra experience and items.
  • Speak to Ernesto near the northern gate of the Volcanic Island Camp. He requests that you escort Gautstafr and Cliodhna to the camp. They can be found at their house, west of the camp. It helps to clear the way of monsters on the way over, then you should have an easy escort back. Tell Ernesto that the elf and dwarf couple are safe to finish the task.
  • Speak to Henrique near the entrance to the Excavation Site. He's a good-natured guard attempting to fight off a golem. Help him defeat his foe, then follow him to hear about the pawn issue. He will hand you a key. Investigate the upper part of the Excavation Site until you find a locked house, and pick up the staff inside. Give the staff to Henrique and the quest will be complete.
With everything major done, you are now free to explore the rest of the world and find whatever you may. With the above quests done, vendors may have moved to the Seafloor Shrine. If you see them wandering around and they're not offering their wares, you can pick them up and place them at an appropriate map marker to access their services. When you're ready to move on, investigate the final red pillar of light at the Seafloor Shrine.
Credit where Credit is Due
While I do my best to confirm all information myself, I cannot claim to have done all the work. I’ve used several sources to speed up research, confirm data or discrepancies, or add to what I already knew.

Official Dragon’s Dogma 2 Website[www.dragonsdogma.com]
Dragon’s Dogma 2 Wiki[dragonsdogma2.wiki.fextralife.com]
Arrekz Gaming Youtube Channel
Ratatoskr Youtube Channel
Valder, who provided information on two portcrystal locations and how to dragonforge equipment.
geistbro, who provided information on another portcrystal location.
Heander, who provided information on yet another portcrystal location.
Ærialvas, who clarified information on a portcrystal location and a detail about ox cart travel.
Tumblyweeds, for a correction on how the inn/checkpoint save system works differently than from the first game.
SekondSpark, for a tip on ox cart travel.
Foefaller, for pointing out that Dragonforged gear gains a visual effect.
bigblackcouch, for data on how equipment upgrade order matters.
UnnamedUser1, for details on the Sphinx fight.
Decaf_GT, for a good compilation of miscellaneous tips and information.
Tumblyweeds, for a lot information including dragonsplague, differences in New Game+, and a potential benefit Dwarven Forging has over Vermundian.

Enjoyed the guide? Keep an eye out for my pawn, Gabe Newell. I'm aiming to 100% the game, so he should be on the more helpful side.

Find something wrong? Have something to add? Leave a comment and you may find yourself added to this credit section!
35 Comments
̧҉ ҉Minorou ꧁💀꧂  [author] 3 Jun @ 3:44pm 
Very true, I hadn't gone through NG+ far enough to notice the differences. I'll take note of these and make adjustments where I can. Thank you!

It'll take some more testing on the part of Dwarven Forging, though, since I don't know if the identical stats is just from the items you happened to test or if it applies across the board.
Tumblyweeds 3 Jun @ 3:10pm 
The quests and locations that give portcrystals on the first playthrough will instead offer ferrystones in NG+. Exception: the Sphinx gives a forgery, instead.

Best guess is that you / others had not yet ventured far enough into NG+ when you wrote this guide to know that? No worries, you know it now. ;-)
Tumblyweeds 3 Jun @ 3:02pm 
Under "much ado about quests," you mention remembering the first seeker token. That's good, though it only applies correctly to the first play through.

Each NG+ the quest that originally called for the first seeker token you ever found will instead call for the first seeker token found in that NG+.

Maybe update that? :)
Tumblyweeds 3 Jun @ 2:48pm 
Minor point: Dwarven forging also does the same upgrades to other stats that Vermund forging does.

I had two copies of an item, so I upgraded one Vermund style, the other Dwarven style. Both had identical stats, except the Dwarven also had the knockback upgrades, and was slightly heavier (largely mitigated by the Dragonforging upgrade that comes with automatically cutting weight in half).

So Dwarven does not only upgrade knocckback. It also adds balanced stats, like Vermund.

I verified this with other items, though please feel free to verify it again if you prefer. :)
madmiscue 7 May @ 9:31am 
Killing NPCs, event the false arisen bands found in the wilderness, can cause the Dragonsplague if done often enough. You can stop progression and even cure the disease by high-fiving after battle and generally being nice (Don't run off without them etc.) The worse the disease is in the pawn, the shorter the window for high-fiving gets. Sometimes though, if you run up to pawns and tap the hail/talk button, they will interact that way anyway.
Tumblyweeds 26 Apr @ 5:34pm 
So, it's possible to get "kill" credit for the Sphinx without using an unmaking arrow. I instructed my pawns to WAIT, though my mage continued healing. Then I only used daggers, basic attack, and only on her hindquarters. When her health bar reached zero, she complimented me on being an interesting challenge, and then dissolved into a lot of bright golden sparkles. She never tried to fly away when her health dropped, so I never needed the unmaking arrow. Yeah, it took me a few tries - she will say something about not being any common beast to be taken down by careless strikes, indicating I'd accidentally hit her where she didn't want to be hit. Reload, try again ... highly recommend resting at a house or inn at the end of Riddle # 9. Anyhow, good news is it's possible. :)
Sengralon 8 Apr @ 8:31am 
Regarding Dragonsplague, there might be a very early warning sign: When reporting back after a rest, my pawn's last line was something like "Curiously, I don't remember much else."

No glowing eyes yet, but she started wiping away spittle a day later.
I'll continue to monitor her.
Tumblyweeds 7 Apr @ 4:06am 
All will speak of being possessed by a greater power, when infected. Maybe during early stages?

Sometimes, usually after sleeping (inn / campsite / house), a different pawn may start saying those things. An eye check shows the pawn newly speaking of power has eyes flashing red, instead of the other's.

At first, the reddish flashing is faint. A slight color change, mostly in the pupil. Over time, it covers both the pupil and the iris. Instead of being faint, it becomes a vivid red glow strong enough to completely hide the eye color.

If transferred, it seems to stay at the same level as the previously infected pawn had.

When I see a vivid glow, I drown the infected pawn. So I haven't seen how it ends.

Also - they can get it from fighting drakes. A slower form of possession, maybe? It doesn't only happen when returning through the rift.

Maybe they always get it from dragonkin? And bring it back, when it happens elsewhere?
Tumblyweeds 7 Apr @ 3:16am 
Ah, thanks for clearing up the confusion about the effect on the clothing, Foefaller. :)

When it turned up on my Arisen's attire, I knew it couldn't be about the plague. Beyond that, I had no idea.
LeonserGT 6 Apr @ 3:25pm 
Can anyone point out the music track name when fighting cancer chicken in unmoored world? 👀