Terraria

Terraria

Not enough ratings
Terraria Boss Ideas 14
By Okami Tomato
(Yep, 2 years after Boss Ideas 13 and spending like 4 in development - TBI 14 is here!)

The named-without-proper-hindsight series continues on for its 8th year now... yes these have been ongoing for nearly a decade.

*Disclaimers, notes and other stuff will be inside 'cause, well, there's quite a bit to talk about


But there's plenty enough to read inside already so no more stalling - let's go!
   
Award
Favorite
Favorited
Unfavorite
[General Prior Notes]
The section where I explain anything unrelated to the page itself. Mostly skippable if you just want to see the bosses but figured it'd still be important.


So, first up, Tomato where have you been!?
Well, in a general context, doing university work and making art mainly. Also got a new Discord server up and running with stuff going on to manage, as well as are commissions, and generally a lot of life stuff to balance.

If you meant 'why did Boss Ideas 14 take nearly half a decade', however, a lot of changes happened. The entire page has been re-written from the ground up 4 or 5 times now, and even the current iteration's roster changes leave it nigh unrecognisable to the most recently-outdated draft. Hopefully, though, this is a refinement process and will show in regards to boss quality.


This doesn't look very vanilla?
A question always brought up on Boss Ideas pages by first-time viewers, and they are correct. These pages are styled based on modded Terraria content, though with the series starting before TModLoader got official support it's written here. Furthermore, this ties in with a continued canon throughout Boss Ideas pages starting from number 4 so there's definitely a little bit of lore built up

I will also answer 'why not make a mod?' here too; attempts have been made. Some stuff has made its way into upcoming mods to some degree (e.g. Malignant, Calamity Community Remix) so you might have to keep an eye out.

Finally, as for 'why not change the name?'... I made the mistake of naming this series something very nondescript early on and kept the name the same for consistency. While I could change it I this is the name most people know it by now.


Hey, those aren't sprites!?
Answer for long-time readers; every single previous page has consisted of sprites for each boss... so why change it up? Simply-put my art skills are probably a little better than my spriting skills generally, and with the larger images I can give a clearer picture on theming and design than a simple sprite could.

Hopefully people like the art here as much as people did for the teasers elsewhere 'v'


With questions aside (for now), onto the actual Terraria stuff!
[Prior Notes - In-Game]
A few small tweaks that would potentially be important for scaling purposes or if this ever, y'know, actually became its own mod. (Feel free to skip if you want want technical stuff, as the bosses themselves await...)

Item Changes:
Yes, blatantly busted items would end up being nerfed.
-Zenith would require more materials for later-game progression - I don't have the heart to nerf the 'vanilla end game weapon' but I do not want people to cheesegrate the first 4 Post-Moon Lord bosses
-Soaring Insignia isn't infinite flight time anymore
-Rod of Harmony - Ahahaha no.
-Post-Moon Lord weapons - Moreso just rebalancing so some aren't blatantly better than others

Boss Buffs:
-Mainly just beefing up some of the hardmode bosses so you can throw more stuff at them without them exploding in 8 seconds
--...mainly Plantera and Golem, but everyone deserves a little something

Misc Changes:
-Lifesteal got nerfed - As someone who plays tank a lot I will just outright say lifesteal is stupidly good. Probably just gonna reduce its effectiveness the more often it's used in a short timespan
-Damage Priority - If you're gonna get hit by multiple sources in the same short span of time the highest damage one is prioritised, so no more making slime/lava AFK boxes to cheese fights
-Boss Armour - Everyone's favourite mechanic, sure, but it wouldn't be anything like Calamity's Malice mode; just a small DR buff if the boss' health is draining too fast for too long


That aside I've been rambling for far, far too long now; so onto the thing everyone's been waiting for; the actual bosses!
Lumifish

Appearance: A primarily green mermaid-like creature. Some of its body appears darker green, some of it seemingly covered in plant matter while the rest seems to be its natural colouration. Its hair, fins and tail all glow a warm yellow colour. It has what appears to be some sort of strange 'stalk' on the back of its head, damaged at the end.

Summon: Fish in either ocean using Luminous Moss as bait. Luminous Moss can be obtained from sharks and all jellyfish types, inside ocean chests, and can rarely generate in the ocean biome. When used elsewhere it acts as normal bait.

Fought: Pre-Hardmode, Pre-Boss
Attributes: Special Win Methods


Stats:
Health:
-1,350 (1,725) (Lumifish)
-1 (1) (Bubble)
Attack:
-15 (25) (Melee) [Inflicts Wet - 100%]
-12 (20) (Bubble, Water Ball) [Inflicts Wet - 100%]
-20 (30) (Light Ring)
-X (40) (Bomb Fish)
Defence:
-4 (Lumifish)
-0 (Bubble)


Attacks:
Phase 1:
The Lumifish is incapable of flight and attacks from the water, being able to jump large distances to reach other, disconnected water pools if needed. If she ends up on land she will flop around releasing homing bubbles, gradually making her way back to the water.
-She may perform a high jump to try and tackle the player, passing through semi-solid platforms as she goes. If she lands back in the water the attack ends as normal, though if she lands on a block she will perform a brief 'faceplant' animation before leaping back to the water.
-She may twirl around, summoning various homing bubbles that chase the player. These can be destroyed by attacks or on contact with the player.
-She may jump upwards out of the water, releasing 3 water ball projectiles in an arc. These are affected by gravity and fall as they travel, limiting their range
Once taken down to half health the Lumifish will enter its 2nd phase, indicated by her glow becoming more apparent.
Phase 2:
Lumifish retains all Phase 1 attacks, though performs them slightly faster.
-She gains one final additional attack where she leaps up out of the water and throws a glowing ring at the player. This ring travels at moderate speed and can ricochet off of tiles

Expert Changes:
-All attacks from Phase 1 are initially slightly faster.
-Phase 2 has more notable changes:
--Her leap attack, upon hitting blocks, has her land on her hands and perform a backward spring instead of faceplanting; removing the additional downtime.
--Both phase 1 projectile attacks gain additional projectiles.
--She gains the ability to aim and throw a Bomb Fish at the player, similar to the ones the player can fish up. It cannot destroy blocks and does significantly less damage however, though the fuse time is significantly reduced and only counts down upon hitting a solid block.
--Throws 2 Light Rings during the Light Ring attack instead of 1.

For The Worthy Changes:
-The water ball projectiles can now ricochet off of 1 block each.
-Lumifish never faceplants during the leap attack.

GetFixedBoi Changes:
-Now carries a Bomb Fish during the leap attack, with it exploding if she hits a block or despawning otherwise. She will, however, always faceplant upon hitting blocks; even in Phase 2.
-Made a little bigger.
-Water ball projectiles replaced with fish that flop around in-place upon contact with a block, eventually disappearing on their own.


Additionally, on all difficulties, catching her with a fishing rod allows the player to pull her out of the water. She will attempt to flop back to the water, but can actually be caught with a Golden Bug Net and stored in your inventory. She does not drop items when caught, but can be 'used' to spawn her wherever you want, restored to full health.


Defeat: Knocked back, creates a large splash of water and disappears. If defeated on-land, however, she falls into the background without the splash.

Lore: A humanoid fish-like creature, cloaked in plant matter. Parts of its body are bioluminescent, creating a warming and alluring glow. It appears to only be part of a greater whole, judging by the broken stalk on its head.

Extra Info:
-The Lumifish does take some inspiration from Calamity's Siren's first designs; mainly in its primarily green colour scheme
--It also, strangely, shares some similarities with the Sea Crawler from Boss Ideas 11 with its primarily green body and yellow bioluminescent lights
-Because you can 'catch' the boss and release it as a consumable like a critter, it is possible to have multiple active at once by releasing many of them from your inventory at once
--It is also possible to trap one in a sealed box, away from the water... but you shouldn't do that because it's mean :(
--When released, there is a brief window where she lacks contact damage and does not attack, preventing cheap hits when summoned this way
-A 'caught' Lumifish can be put in a Terrarium. 10 Terrariums are required in the recipe and the resulting tank is large and open at the top, preventing further things from being stacked upon it.
--Furthermore, certain consumables can be put in the tank that the Lumifish will interact with, such as Beach Balls and Glowsticks. Eventually they will be knocked back out of the tank so they can be retrieved.
[Added: 11/3/24]
Protoplasm

Appearance: A large, green robot. Its central 'body' appears to be operated by a green slime sat atop a base connected to 4 large, solid legs that are themselves over double the height of the body. The two front legs of the robot also house a strange, green insignia of some kind.

Summon: Use the M.I.D. Distress Beacon anywhere in the overworld, crafted using Gel, Iron/Lead Bars and Tissue Samples/Shadow Scales. Upon use a green pillar of light is shot upward that fades, shortly followed by the boss dropping from the sky and opening up to full size before the fight begins.

Fought: Pre-Hardmode, Post-EoW/BoC
Attributes: N/A


Stats:
Health: 6,500 (8,750)
Attack:
-40 (60) (Melee)
-30 (55) (Plasma Ball, Explosion)
-28 (50) (Charged Slimeball)
-N/A (150) (Deathray)
Defence: 10


Attacks:
Protoplasm is a grounded boss that manoeuvres primarily through walking, though can phase through blocks and jump great distances if required to pursue the player. It will typically try to keep away from the player when not attacking, trying to maintain a set distance, though it will remain stationary when attacking.
When it goes to attack a small 'charge up' noise is briefly heard and the Protoplasm will stop walking around as a telegraph. After attacking it will release a jet of steam and stall for a moment before it can begin moving.
-If the player is too close to it, it will perform a very short hop and slam all 4 of its legs down, creating a short-range shockwave all around itself that does melee damage.
-From medium ranges it will launch 3 'charge slimeballs' at random angles. These bounce around the arena, losing momentum with each bounce, and eventually popping harmlessly when nearly all momentum is lost.
-From long ranges it will charge up and fire a large plasma ball. The plasma ball has seeking properties and will chase the player, accelerating the longer it moves in a straight line. After a few seconds it will rapidly slow down before exploding.
As the Protoplasm loses health its charge up sequence is slightly reduced, being roughly 30% faster by the time it reaches its cap at 20% health.

Expert Changes:
-Protoplasm's agility is significantly improved, moving much faster and gaining the ability to 'dash'. The dash allows Protoplasm to rapidly reposition itself, though it will never attempt to dash into the player.
-Protoplasm will never use the same attack more than twice in a row. If in range to use an attack for a third time it will quickly dash to a new position before attacking.
-Protoplasm's wind-up and cooldown telegraphs are reduced, starting at only 75% the duration they were in Normal Mode. The wind-up will continue to reduce down to only 33% of its original duration by 20% health.
-The plasma ball lasts longer and creates miniature explosions as it travels.
-Finally, Protoplasm gains a last-ditch attack once its health is depleted. It will charge up an attack for 3 seconds before unleashing a 3-block tall, horizontal deathray in the player's direction. After firing for roughly 4 seconds Protoplasm will malfunction and display its defeat animation.

For The Worthy Changes:
-Attack cooldown will decreases as it loses health, eventually reducing to only 50% of its initial time.

GetFixedBoi Changes:
-Protoplasm no longer has issue dashing into the player and will attempt to do so whenever it gets the chance.


Defeat: Protoplasm sparks and staggers. Its body will tilt as one of its legs loses power and falls inwards, and finally it will explode into fire and metallic gibs.

Lore: Some sort of strange, prototype device powered by some sort of highly sophisticated slime battery. The slime has some level of control over the robot, but some of its movements suggest someone else is remotely co-piloting it. Why it answered your makeshift beacon is uncertain.

Extra Info:
-Protoplasm, as a concept, has existed since the plans for Boss Ideas 12's initial concept. Originally the mechanical body was small and crown-like while the slime made up most of the boss' body; shifting between forms resembling a human, a squid, and the Eye of Cthulhu's 2nd phase.
-The insignia shown on Protoplasm's legs appears to resemble a slime in and of itself, as well as a question mark.
-The Deathray attack cannot pass through blocks so long as the wall of blocks is as tall as the beam itself. Thus, all you need to block it are 3 blocks stacked atop each other somewhere nearby.
-This boss is especially hard to face for melee players due to its high contact damage and high movements, though an opportunity may arise during its cooldown phases.
--This does not realistically apply to GetFixedBoi, however, where the moment it becomes active again it will lunge at the player and deal damage.
[Added: 12/3/24]
Nightshade

Appearance: A green-haired dryad with pink highlights at the ends of her hair. Most of her body is wrapped in vines, similar to the Dryad NPC. Plant Food, her 'minion', is a tangled mess of vines with three pink plant heads; one based on a pitcher plant, one on a venus flytrap, and one with a resemblance to Mario's Piranha Plants acting as the main head.

Summon: Use the Toxic Bulb in the underground jungle, made using various materials from the jungle. While it can technically be fought at any time, it is intended to be fought Post-Skeletron. It will enrage if taken too far away from the underground jungle or if taken to the surface; significantly increasing the duo's attack and movement speed.

Fought: Pre-Hardmode, Post-Skeletron
Attributes: N/A


Stats:
Health:
-7,000 (10,000) (Nightshade)
-2,000 (3,250) (Plant Food Main Head)
-500 (725) (Plant Food Pitcher Head)
-450 (675) (Plant Food Flytrap Head)
Attack:
-0 (0) (Nightshade Contact)
-30 (55) (Nightshade Leaves, Plant Food Ooze) [Inflicts Poison - 50 (100)%]
-10 (20) (Nightshade Vines) [Bypasses Defence]
-50 (80) (Plant Food Contact)
-40 (65) (Plant Food Seeds, Plant Food Spore Cloud)
Defence:
-5 (Nightshade)
-8 (Plant Food)


Attacks:
At the start of the fight Nightshade will sit atop Plant Food, only moving as Plant Food itself manoeuvres towards the player. Both of them will alternate their attacks, with Plant Food attacking after Nightshade. Only one Plant Food head will attack at a time. If the player is deemed 'unreachable' Plant Food can move through blocks, or if this is still not enough Nightshade can teleport the two of them close to the player.
Nightshade may:
-Fire two arcs of leaves at the player, the first consisting of 3 and the second of 4.
-Fire a volley of 6 leaves directly at the player in rapid succession.
-Summon small, harmless vines from the ground underneath the player and in various random spots nearby. After a short delay larger vines will erupt from the ground. If these make contact they will grab the player and hold them in-place, dealing damage for ~1.8 seconds before releasing the player (in turn, dealing damage 5 times). This attack bypasses defence.
Plant Food, meanwhile:
-The Flytrap head may extend towards the player, dealing contact damage.
-The Flytrap head may spit spore clouds that decelerate as they move, eventually hanging in the air for a few seconds before vanishing.
-The Pitcher head may spit globs of poison that are affected by gravity and leave damaging pools of poison on the ground for a time.
-The Pitcher head may spit a rapid stream of poison directly onto the ground while moving, leaving a lingering, damaging trail.
-The Main head may spit 5 seeds that ricochet off of blocks and are slightly affected by gravity.
-The Main head may spit a rapid stream of gravity-affected seeds. These ones do not bounce like the others.
Destroying either of Plant Food's side-heads (Pitcher or Flytrap) will remove them from the fight, whereas defeating the main head will defeat Plant Food immediately.
If any Plant Food heads are defeated, Nightshade may choose to revive them in exchange for reducing her health. For either side-head this costs 200 health, whereas reviving Plant Food directly via its main head costs 2,500 health. If Plant Food is revived in the latter way all 3 heads are returned to full health. If the revive were to defeat Nightshade then it will instead only take half her remaining health.
When reduced to 50% health Nightshade will hop off Plant Food and will move independently via teleportation. Plant Food will also now 'teleport' by seemingly burrowing into the ground and emerging near the player.
When Nightshade runs out of health Plant Food will immediately be defeated.

Expert Changes:
-Plant Food is generally more aggressive.
-Nightshade's vine snare attack will actually heal her 4x the damage it deals (likely ~400 health).
-When reviving Plant Food, reviving the main body now costs 3,000 health; making it less efficient to target Plant Food directly.
-When teleporting to the player in Phase 2, Plant Food will teleport beneath them and try to 'bite' them with its main head, dealing contact damage.

For The Worthy Changes:
-Nightshade's leaf arc attack now launches 3 volleys; one of 3 leaves, one of 4, and finally one of 5.
-Vine snare heal is stronger, now 5x damage (~500 health)
-Reviving Plant Food only costs 150 health per side-head and 2,500 again for the main head.

GetFixedBoi Changes:
-Reviving Plant Food only costs 2,000 for the main head.
-Nightshade will try to stay further away from the player in Phase 2.


Defeat: Plant Food will explode into gibs. Nightshade falls to their knees and teleports away, leaving their loot as they disappear.

Lore: A dryad who deserted a great battle against an otherworldly enemy for fear of her own destruction, hiding themselves away in the jungle underground. Lack of contact with the outside world for so long seems to have affected them somewhat.

Extra Info:
-Nightshade was originally a boss planned for the Tomato Event in Boss Ideas 10, getting scrapped due to her theming being less clear than other bosses.
-It is most efficient to attack Plant Food's main head to deal damage in Normal Mode and is always better to attack Nightshade directly in For The Worthy or GetFixedBoi seeds. In Expert it generally balances out either way.
-Nightshade is one of few bosses who has direct ways of manipulating their own health; being able to reduce it by reviving parts of Plant Food, or increase it in Expert Mode via the vine snare attack
[Added: 12/3/24]
Dune Duster

Appearance: A large pale brown worm. Its body is similar to a Dune Splicer's, though is generally spikier, while the head is armoured with dinosaur-like bones, giving it a generally more draconic appearance. Remains of some sort of structure or 'armour' is present on its back just beneath the head, containing damage reins, tattered cloth and something vaguely resembling a saddle adorned with a large piece of amber.

Summon: Use a piece of Relic Gold in the desert. Relic Gold is rarely dropped from Dungeon enemies, with the Dungeon Slime having a higher chance to drop it. Enrages outside the desert; massively increasing its speed and stats.

Fought: Pre-Hardmode, Post-Skeletron
Attributes: N/A


Stats:
Health: 12,000 (9,500)
Attack:
-60 (100) (Head Melee)
-45 (80) (Body Melee, Tail Melee, Sandstone Pillar)
-30 (55) (Bone Shard, Fossil Spike)
Defence:
-10 (Head)
-16 (Body, Tail)


Attacks:
Dune Duster will spend its time under the sand when not attacking, leaping out to attack. While under the sand it is invulnerable but becomes vulnerable during its leaps, often hanging in the air slightly to grant the player a fairer window to retaliate:
-It may aim to leap over the player, firing a volley of bone shards from its mouth towards them until it begins to descend.
-It may leap in an attempt to land on the player. As it lands it will launch 4 fossil spikes from where it lands, as well as additional spikes from the ground, spaced out by 6 blocks each. All spikes are affected by gravity.
-It may leap in an attempt to land on the player. Upon landing it begins creating a 30 block tall sandstone pillar, covered in spikes. Only one pillar may be active at a time, with the older one breaking apart if a new one starts being spawned.
As the Dune Duster's health decreases its movement and attack speed increases slightly.

Expert Changes:
-When its health reaches 0 it will have a fake-out death. After 4 seconds its health bar will suddenly refill to full, beginning its second phase.
Phase 2:
Sandstorm visuals will appear, though without the pushing winds. Two 50 block tall sandstone pillars are summoned 50 blocks away from the player in either direction, which will shatter and reform if the player is ever outside of the 'arena' they create.
Dune Duster will lose access to its sandstone pillar attack, but in-turn gains 3 new attacks:
-It may move in a sine wave across the desert surface. Every time its head burrows and resurfaces it releases a scattered cluster of fossil spikes of varying speeds and angles.
-It may burrow and stir up the sand, creating a vortex that drags the player down through blocks. The player has to continue jumping to avoid being pulled under the sand. During this time the sand cannot be mined. At the end of the attack the Dune Duster will lunge up from underneath the player. If the player is buried in the sand during the lunge they are guaranteed to take damage, but will be pushed up and out of the sand.
-It may roar and intensify the sandstorm, reducing the player, the boss and nearby blocks to silhouettes barely visible through the sandstorm. The Dune Duster will lunge at the player 3 times during this, with its eyes glowing intensely through the sandstorm to telegraph each lunge. After the third lunge ends the sandstorm's visibility returns to normal.
Once Dune Duster's health is depleted again it will be defeated properly and will not revive, ending the fight and the sandstorm.

For The Worthy Changes:
Dune Duster generally receives less air time during jumps, effectively increasing its attack speed while also granting less opportunity to damage it.

GetFixedBoi Changes:
-Phase 2's sandstorm retains its wind, messing with the player's movement.


Defeat: Shatters into gibs that sink down through blocks slowly.

Lore: A vengeful fossil linked to an ancient, lost civilisation of desert dwellers. What this creature looked like in life is unknown, as no living specimen remains, though they do seem linked to the large worms that prowl within sandstorms and those deep underneath the sand.

Extra Info:
-Despite its similarities to the other desert worm enemies like Dune Splicers, its lore entry and head shape state otherwise; instead being some sort of ancestor to them.
-The Dune Duster actually has less max health in Expert Mode, however this is due to its fake-out death and subsequent second health bar. In Expert Mode this gives it a total of 19,000 health; comparable to an early Hardmode boss.
-While it is buried in the sand it is completely invulnerable to damage, preventing weapons capable of attacking through blocks from racking up excessive damage during its downtime.
[Added: 12/3/24]
SCAVENGER Unit

Appearance: A multi-segmented robot. Each segment is primarily black with red highlights on the protruding, fin-like blades each possesses, as well as a small red light. Its 'head' segment has a larger light, acting as its eye, as well as a pair of mandible-like blades at the front. Red plasma occasionally arcs off its body.

Summon: Use the Enriched Plasma Core anywhere in the world. As soon as it is used a brief animation plays where the Scavenger rushes past the player, stealing it, before flying upwards. It can then be seen powering up, with its many lights activating, before flying further upward and beginning the fight.

Fought: Hardmode, Post-Plantera
Attributes: N/A


Stats:
Health:
-100,000 (165,750) (Scavenger)
-2,500 (4,000) (Beacons)
Attack:
-100 (200) (Head Melee)
-65 (95) (Body Melee, Beacon Melee, Telegraphed Laser)
-60 (88) (Drone Laser, Missiles)
Defence: 25


Attacks:
Phase 1:
Scavenger is capable of flight and will spend most of the fight trying to deal contact damage to the player whilst firing off other attacks. 5 random segments on Scavenger's body will open up, which Scavenger will attack from, though every 20 seconds these will close and have 5 more segments randomly open in their place. All of Scavenger's body is immune to damage, minus any open segments.
Each segment may reveal one of three things when opened, which dictate which attack that segment can use. Segments will perform their attacks in sequence:
-'Drone' segments, distinguished by 4 large holes beneath the shell, will release 4 drones to attack. These will orbit the player and, after a short delay, will fire lasers before exploding. The laser pattern will either be cardinal (+) or ordinal (x).
-'Missile' segments, which have a 2x4 grid of holes, release a volley of homing missiles. After a few seconds their homing capabilities will decay and they will begin to accelerate in the direction they are heading. They explode on contact with blocks.
-'Laser' segments, shown to have a large glowing 'core', will fire high-speed lasers at the player; each telegraphed by faint red 'tracer' lines before firing.
Once taken down to 60% health, Scavenger will enter its 2nd phase.
Phase 2:
Scavenger gains access to its 'Beacons'; special minions that enhance its abilities:
-The 'Shield Beacon' flies vaguely close to Scavenger and generates a plasma shield, protecting all of its segments from damage until it is destroyed
-The 'Overclock Beacon' increases the attack speed of all open segments until destroyed and is stationed in front of Scavenger's head
-The 'Aggression Beacon' causes Scavenger's movement speed to increase greatly and forces it to 'charge' at the player when close, independent of its other attacks. This beacon hovers a short distance above the player.
These Beacons are summoned at specific health %:
-Initially, at 60% health, a single Shield Beacon is spawned
-At 50% health, an Overclock Beacon is spawned
-At 40% health, an Aggression Beacon is spawned
-At 25% health, both a Shield and Overclock Beacon are spawned
-Finally, at 10% health, both an Overclock and Aggression Beacon are spawned

Expert Changes:
-6 segments will open at a time, though in exchange their base attack speed is slightly increased.
-Gains a new attack upon entering its 2nd phase where its 'cores' glow red. It will then seemingly fire many lasers upwards which will rapidly rain down nearby, indicated via the same 'tracer' telegraphs as the Laser segments' attacks.
-New Beacon spawning patterns:
-60% health summons 3 Shield Beacons
-50% health summons both Shield and Overclock Beacons
-40% health summons both Overclock and Aggression Beacons
-25% health summons 2 Shield Beacons and an Aggression Beacon
-10% health summons Shield, Overclock and Aggression Beacons

For The Worthy Changes:
-Telegraphs are shorter.
-Summons an additional Shield Beacon at 50% and 10% health, as well as an additional Overclock Beacon at 10%. The Overclock effects stack.

GetFixedBoi Changes:
-Summons an additional Shield Beacon at every threshold.


Defeat: An siren begins blaring as sparks fly off the Scavenger. All its segments close and it begins trying to coil up. It gradually begins slowing down before creating a large red explosion. Drops metallic gibs.

Lore: Seemingly some sort of weaponised transportation or reconnaissance drone, judging by how the weapons are situated. The armour is immensely durable and appears to be made of something resembling Adamantite.

Extra Info:
-The Scavenger Unit is actually one of the newer bosses designed, not appearing on any of the original rosters nor being a redesign of an existing boss.
-Any similarities to MoR's Vlitch Gigapora or Calamity's Thanatos weren't intended... just that general refining of the boss' ideas slowly brought about similarities... (What is it with Terraria scientists and having near-invulnerable mechworms that reveal their own weak points?).
-Thankfully, the Beacons are not capable of affecting each other, so the player is free to destroy other active Beacons even if Shield Beacons are present.
-On the highest difficulty setting, the player will need to destroy a total of 21 Beacons; 4 Overclock, 3 Aggression, and a whopping 14 Shield Beacons.
[Added: 12/3/24]
Frostflame

Appearance: A strange sculpture of ice. Its main body on initial inspection appears to simply be a weirdly-shapen chunk of ice, though upon closer inspection it appears almost skull-like, with something resembling an eye hole and a visible upper jaw, sat upon a pile of leaves. A deep crack can be seen at the centre of the ice skull, ranging from eye level to the back of the skull. Something seems to be moving around inside.

Summon: Found within a structure buried within the underground tundra. Initially appears as a large icicle on the ceiling that cannot be interacted with, though after Golem is defeated the icicle appears to melt slightly and can then be interacted with. Attacking the icicle will cause it to break, summon Frostflame, and seal the arena door shut with a wall of ice. The icicle reforms when the player exits its vicinity. Frostflame retreats and despawns outside its arena.

Fought: Hardmode, Post-Golem
Attributes: N/A


Stats:
Health: 56,000 (72,400)
Attack:
-65 (110) (Melee, Ice Chain)
-78 (120) (Frost Beam, Ice Bomb) [Inflicts Frostburn - 50 (100)%]
-60 (100) (Ice Bomb Fragments, Icicles, Droplets)
-100 (200) (Overheat) [Inflicts On Fire! - 100%]
Defence: 24


Attacks:
Phase 1:
Frostflame remains stationary at the top-middle of the arena, where the icicle had been. It will attack with ice-themed attacks as expected:
-It may create sweeping 'deathray' attacks called Frost Beams. The starting position is telegraphed and often not directly targeted at the player, but will sweep towards them as it is fired.
-It may release a pulse of cold energy, launching gravity-affected icicles from its body randomly. Many of them are dropped directly beneath it.
-It may fire a Frost Beam across the ceiling, causing icicles to fall down randomly as it travels.
-It may release 3-4 'Ice Bombs' in the arena. These decelerate as they travel and, upon stopping, explode into a burst of 8 fragments launched in the cardinal and ordinal directions.
When reduced to 75% health it will break free of the main icicle and enter its 2nd phase.
Phase 2:
Frostflame's main attacks remain the same, however it has some level of mobility. It will launch out a telegraphed 'grappling hook' of ice every few seconds, aimed at the player, which will continue until it hits a wall. Once it hits a wall it will pull Frostflame along a few seconds before shattering. After a short cooldown Frostflame will be able to grapple again.
At 50% health it will enter its 3rd phase and will begin melting.
Phase 3:
Attack roster again remains the same, however two extra elements are added to the fight. Frostflame itself will begin releasing damaging water droplets beneath itself, and droplets may also form on the arena's ceiling slowly that can also damage the player on contact.
At 25% health Frostflame's skull-like upper half will shatter, entering its 4th phase.
Phase 4:
The flame within Frostflame will roar to life, increasing its attack speed. All its attacks are now fire-themed and inflict On Fire!, though their function remains mostly the same.
Frostflame will grapple faster as well, being able to have 2 grapples active at a time.
-It gains one new 'overheat' attack where it will charge up energy and release it in a wide blast of flame that engulfs nearly the entire arena. Its grapples will shatter during the charge-up and it stops releasing water droplets, moving and grappling until the attack ends. The only way to avoid the attack is by being directly underneath it, using its icy base as a shield. If Frostflame is too close to the bottom of the arena it will rise up while charging to avoid cheap hits.

Expert Changes:
-Sweeping Frost Beams have a longer sweeping radius
-More icicles produced from icicle attack
-Ice Bomb fragments increased to 10
-Grapples are launched at higher speed
-Ice Bomb fragments no longer released in a uniform pattern starting in Phase 3
-Phase 4 reveals the flame to be a blue flame instead, swapping out On Fire! for Frostburn and simply intensifying their original blue colouration instead of changing it

For The Worthy Changes:
-Ice Bomb attacks now have a chance to release 6 Water Bolt-like projectiles instead of their normal fragments upon exploding, starting in Phase 3
-Flame revealed to be a cursed flame in Phase 4. Inflicts Cursed Inferno instead of On Fire! and makes its attacks green instead

GetFixedBoi Changes:
-Grapples that hit the player will instead launch them towards Frostflame and break instead of pulling Frostflame along
-Flame revealed to be a shadowflame in Phase 4. Inflicts Shadowflame instead of On Fire! and makes its attacks purple instead


Defeat: Frostflame cracks further, begins shuddering, and explodes into a burst of steam, flames and pieces of ice.

Lore: A flame originally worshipped due to its refusal to burn out, eventually blamed for a disaster brought amongst its people. In their desperate attempts to snuff the flame out, they sealed it in a tomb of ice. However, it seems their original efforts were not successful.

Extra Info:
-Upon its initial reveal, Frostflame's name was kept hidden and instead attention was drawn to some sort of secret it possessed. However, given the name, it isn't exactly very 'secret' anymore.
-Frostflame's internal flame, revealed in Phase 4, changes its type in nearly every difficulty minus Master Mode. Its a normal/orange flame in Normal Mode, a frostburn flame in Expert, a cursed flame in For The Worthy and a shadowflame in GetFixedBoi
--It will be a cursed flame in For The Worthy worlds, even if the evil biome generated is a Crimson one
[Added: 12/3/24]
Sharlteron

Appearance: Sharlteron, making his triumphant return after his previous appearance. A skeletal creature with an appearance somewhat reminiscent of Duke Fishron, though with a distinctly different, draconic skull shape and various segments to its wings that Fishron lacks.

Summon: Drop Fishron Bones in the underworld's lava. Fishron Bones are now dropped by Duke Fishron upon its defeat. Once at least 10 of them have been dropped into the lava, it will bubble and Sharlteron will lunge upwards. It will let out a roar-like laugh and begin the fight shortly after. If taken out of the underworld or cavern layer it will enrage, tripling its damage and defence and increasing its aggression.

Fought: Hardmode, Post-Duke Fishron
Attributes: 'Special Boss', Returning Boss


Stats:
Health: 120,000 (155,000)
Attack:
-100 (165) (Melee, Clone Melee)
-115 (180) (Inflamed Melee) [Inflicts On Fire - 100%]
-80 (130) (Magma Flares, Firestorm) [Inflicts On Fire - 100%]
-70 (112) (Flame Breath, Inferno Fireball, Flame Trail) [Inflicts On Fire - 100%]
-60 (100) (Fiery Bones)
Defence: 50


Attacks:
Phase 1:
Sharlteron will dash at the player 5 times. These dashes cover a lot of ground very quickly, forcing the player to dodge rather than outrun them. After the final dash, he will release one of three attacks:
-He may launch 4 arcs of fiery bones at the player. Arcs 1 and 3 have five bones while 2 and 4 contain six.
-He may shoot two streams of flame breath, one either side of the player, trapping them in a cone. He will then release 3 'Inferno Fireballs' that explode into Inferno Fork-esque lingering flames when reaching the player's location. Once the third one has exploded he will stop spewing his flames.
-He may breathe his flame breath downward, summoning a large, fiery pillar called a Firestorm. This will linger in-place until he starts unleashing his next non-dash attack.
When taken down to 75% health he will enter his second phase, letting out a roar of anger.
Phase 2:
Sharlteron will create 2 fiery clones of himself to attack alongside him. He will only dash 3 times between attacks. The clones will both dash after Sharlteron does with a brief delay. He retains his 3 attacks from before, though the clones enhance them.
-During the bone arc attack both clones will spit inferno fireballs at the player for each arc Sharlteron releases.
-During the flame breath attack the clones will dash at the player. The first after the first fireball explodes and the other after the second fireball explodes.
-The firestorm attack has the clones create 2 additional firestorms, both smaller than Sharlteron's. These disappear shortly after Sharlteron begins dashing again.
When reduced to 40% health Sharlteron will become more angry and roar, shattering both clones, and will dive into the lava. He will re-emerge while on fire and enter his third phase.
Phase 3:
Sharlteron will dash twice between attacks, creating lingering flame trails as he does so. His attack pattern is significantly different:
-His bone arc and flame breath attacks from Phase 1 are merged into a single attack; spewing flames, fireballs and arcs of bones all at once
-He may dash down into the lava, causing large fireballs called Magma Flares to erupt from the lava, evenly-spaced apart, over a large distance. A firestorm will erupt above where Sharlteron dashed from, after which 2 clones will dash out of it towards the player and shatter. After the clones Sharlteron himself will dash from within the firestorm.
-Sharlteron may dash through a portal. Portals will begin appearing near the player, with Sharlteron dashing between them.
-Sharlteron may 'roar', releasing large flames cardinally that deal the same damage as his flame trails. A burst of flames is also released that decelerate and disappear after ~2 seconds.

Expert Changes:
-General attack speed buffed.
-Heals back to 50% health when entering Phase 3.
-Upon running out of health, Sharlteron will attempt a desperation attack consisting of 5 of its fiery dashes, his portal dash attack, and his roaring attack, all in rapid succession. A few seconds after the roar attack's flames expire he will play his defeat animation.

For The Worthy Changes:
-Phase 2 heals back to 80% health, while Phase 3 heals back to 60%.
-During Phase 3's dashes, some inferno fireball explosions are created amidst the flame trails. These linger for about a second longer than the trail itself and may persist into Sharlteron's other attacks.

GetFixedBoi Changes:
-Heals back to full health at the beginning of Phase 2 and again at Phase 3.


Defeat: Lets out an uneasy roar as the bones making up its body begin to crack, with an orange glow coming from within. After a few seconds Sharlteron will explode, shattering his entire body minus his head, which gets launched away.

Lore: A draconic creature of ancient power, confined to its mere skull. It has the power to control the bones of other dragons, which it puppets in place of its original body.

Extra Info:
-Sharlteron originally started as an inside joke within a community, though after some time received a proper boss fight and, eventually, this revamped concept.
-Technically, Sharlteron is just the head, as the bones that make up its body primarily belong to Duke Fishron.
-GetFixedBoi's excessive mid-phase healing mechanic technically grants Sharlteron more health than even the Moon Lord, with a total of 185% its health bar. On Expert Mode, the lowest difficulty GetFixedBoi can be attempted on, Sharlteron effectively ends up having 286,750 health; 69,250 more than Expert Moon Lord.
[Added: 12/3/24]
Super Jelly

Appearance: Jelly, returning again from Boss Ideas 10, now wearing some sort of makeshift superhero costume. The costume itself is primarily purple, with a purple cape, though the breastplate is a metallic black. A strange object radiating orange light can be seen in her stomach between the pieces of her costume.

Appearance: During rematches, Jelly sports a much more 'happy' and vibrant colour scheme of red and gold instead. The object formerly embedded in her is also absent.

Summon: Use the Slimespicious-Looking Cape anywhere in the world, crafted using Gel, Silk, and Stardust Fragments. While it can technically be fought Pre-Moon Lord, it's scaled to be an early Post-Moon Lord boss. The player is inflicted with a debuff throughout the fight that greatly limits flight time and reduces flight speed.

Fought: Post-Moon Lord, Post-Moon Lord
Attributes: Special Boss


Stats:
Health:
-400,000 (625,000) (Super Jelly)
-30,000 (50,000) (Superslime)
Attack:
-125 (180) (Melee)
-100 (150) (Superslime Melee, Slimeball, Bouncing Slimeball, Slime Bubble)
-140 (200) (Giga Slimebomb, Gummyhameha)
-200 (300) (Super Hug)
Defence: 40


Attacks:
Phase 1:
Jelly will typically fly in-place when not attacking, typically trying to stay above the player. If she needs to reach a specific position or keep up with a moving player she will fly in a typical 'Superman' pose to do so.
-She may flip around in the air before performing a flying dive towards the player at high speed. If she hits the ground during this attack she will ricochet off of it and release a few gravity-affected slimeballs randomly around herself.
-She may twirl to a position above the player before performing a ground-pound. Upon hitting the floor dozens of evenly-spaced bouncing slimeballs will bounce up from the ground in a wave-like motion either side of Jelly that have to be dodged by remaining between them. They are affected by gravity and will fall straight down again and bounce off the ground one more time before disappearing.
-She will strike a pose, releasing 10 bouncing slimeballs around herself in a burst. These may persist into the beginning of the next attack
-She may pull out a bubble wand a blow a large cluster of 'slime bubbles'; fast-moving homing projectiles that chase the player for a while and accelerate the longer they move in a single direction. After a while they will rapidly decelerate and pop.
At 80% health she will begin summoning Superslimes. Superslimes will continuously fly at the player in a figure-infinite motion though can be stalled/interrupted if attacked. Only one Superslime may be active at a time.
When taken down to 60% health she will seemingly 'power-up', complete with briefly visible aura of energy, before entering her 2nd phase.
Phase 2:
Her movements remain the same but her attack cooldown is slightly reduced. She retains her phase 1 attack but enhances her dash attack.
-Her dash attack now ends with her launching 3 slime bubbles at the player.
-Her first new attack, the Giga Slimebomb, has her raise her hands above her, summon a large ball of slime, and then throw it at the player. The slimebomb will explode on contact with the ground, releasing slimeballs that are unaffected by gravity at random angles and speeds.
-Her other new attack, dubbed the Gummyhameha, has her summon a special in her hand that she then launches at the player. The attack creates a damaging trail as it travels, moves at high speed, and has a mild seeking element that lets it curve towards the player.
Once reduced to 40% health she will also gain one new attack, not signalled by any visible phase change:
-She may open her arms wide and then dash at the player at high speed. If she catches the player they will be caught in a hug, become stuck inside Jelly, and then be launched out of her hair as she performs a spin. She doesn't deal contact damage during this attack, however the player will take a large chunk of damage upon being released from her hair.

Expert Changes:
-During the slam/butt bounce attack the slimeballs launched will be launched with a 5 degree offset, causing them to move horizontally slightly as they bounce. The spacing between them is also smaller.
-More slime bubbles are summoned during both attacks that use them.
-Starting at 40% health Jelly can have 2 Superslimes active at a time.
-Jelly's hug attack will heal her 9,999 health.

For The Worthy Changes:
-Superslimes have increased knockback resistance.
-Jelly has access to the hug attack as soon as Phase 2 begins.

GetFixedBoi Changes:
-Many of Jelly's attack sfx are changed to Super Mario World references (the dash attack using a cape flight noise, the slam attack being a 'thud' sound effect, etc.).
-Jelly gets access to the hug attack from the beginning of the fight.
-The hug attack now heals 99,999 health.


Defeat: Jelly herself gets knocked back and is sent tumbling. She will fall down off-screen in the foreground. In the initial fight, the object inside of her is also released and will be present amidst her drops, named the 'Dull Hyperion Fragment'.

Lore: (Initial fight) A slime taking on a human form. The fragment that got lodged within her is said to contain immeasurable, but unstable, power.
(Rematch) A slime taking on a human form. A familiar, generally friendly face. Cosplaying a superhero after receiving some strange power boost. Hugs are warm but dangerous.

Extra Info:
-Jelly is another recurring Boss Ideas character, though mainly makes her appearances in random art projects rather than showing up as a boss herself most of the time.
-Super Jelly's fight can actually be skipped, making it one of only few optional Post-Moon Lord bosses.
-Jelly's fight consists of many, many references to fictional heroes... well, primarily:
--The outfit is inspired by Wonder Woman and Superman, as is her flying pose during her dash.
--The spin she performs before the dash is a reference to the Noise's attack from Pizza Tower.
--Her power-up, Gummyhameha and Giga Slimebomb are all references to Goku, or Dragon Ball as a whole. The Gummyhameha being the most direct nod while the Slimebomb is a reference to the Spirit Bomb.
---...well this reference has become a little bit more sad as of writing this.
--The hug healing 9,999 health in Expert Mode was a subtle reference to older Final Fantasy games, where the damage cap was 9,999 due to not showing 5-digit numbers.
--The GetFixedBoi Super Mario World sound effect changes are all direct references to Mario, as you may have guessed.
[Added: 12/3/24]
Solstice

Appearance: Solstice is primarily composed of 4 floating, golden rings. Each ring has a spike on its top and bottom, as well as 4 floating spikes disconnected from its body that look vaguely like wings. In the middle of each ring is a core based on each of the lunar fragments. Additionally, a strange white mechanism called the Lunar Telescope floats alongside them that any of the 4 seems to be able to slot into, causing the 'fins' on its side to glow their core's respective colour.

Summon: Use a Lunar Shard, mainly crafted out of Luminite and lunar Fragments. The boss can only be fought at night and will scatter and despawn at daytime.

Fought: Post-Moon Lord, Post-Moon Lord
Attributes: Required for Progression


Stats:
Health: 165,000 (200,000) (per Solstice)
Attack:
-120 (175) (Melee)
-135 (200) ('Enhanced' Melee, Large Projectiles)
-100 (150) (Small Projectiles)
Defence: 50


Attacks:
The 4 Solstice rings will fly near the player, darting around with sudden, rapid movements while staying at a distance. Solstice's main mechanic is that the 4 cores alternate using the Lunar Telescope to enhance their attacks, cycling the user every 3 attacks. The rings take it in turns to attack, with 2 non-enhanced rings attacking before the enhanced ring attacks.
The non-enhanced rings will only attack by performing a dash and then firing projectiles at the player. Each has their own unique projectile qualities:
-The solar ring's projectiles move at high speed and will explode after a few seconds or on contact with the player.
-The nebula ring's projectiles are predictive and are fired based on the player's projected movement path.
-The vortex ring's projectiles move in a zig-zag motion and leave a small damaging trail.
-The stardust ring's projectiles have a powerful homing effect that rapidly degrades after a few seconds.
The enhanced ring will have access to a more broad movepool, again depending on the ring. The latter attack of each ring type will persist into the dashes of the non-enhanced rings before the attack ends:
-The solar ring may try to align itself with the player vertically and launch 4 arcs of 5 spears at the player.
-The solar ring may launch 4 giant fireballs towards the player that explode after a short time, releasing a burst of 8-10 fireballs around itself. These fireballs start slow and gradually accelerate at they travel.
-The nebula ring may fire 3 shotgun-like blasts of crystals at the player. Each shot is predictive, though the random offset that affects most of the projectiles makes them unpredictable.
-The nebula ring may launch a giant Nebula Arcanum-esque energy orb that chases the player. The orb has high speed but has difficulty turning quickly, allowing it to be avoided with careful movement. After a while it will slow down while growing before eventually exploding violently.
-The vortex ring will fire 2 deathray-like lasers 90 degrees either side of the player. They will then sweep inward until each deathray is only 45 degrees away from each other.
-The vortex ring will launch a giant, slow-moving orb. The orb will slowly move after the player, releasing small electrical projectiles in bursts. The bursts consist of 8 shots each, released cardinally and ordinally. After a short while the orb will explode, releasing electrical beams across the cardinal directions.
-The stardust ring may release 3 bursts, each consisting of 12 projectiles. As these projectiles disperse the first and third rings rotate slowly clockwise while the second rotates anticlockwise.
-The stardust ring may fire a deathray toward the player. Shortly after the deathray will sweep 225 degrees around itself, releasing small star projectiles randomly as it sweeps.
When a ring runs out of health it will shatter and will no longer attack the player. When only 1 ring is left it will attack constantly from the Lunar Telescope with an increased attack and projectile speed.

Expert Changes:
-The dashes of the non-enhanced rings are faster
-The solar and nebula rings' giant projectiles move faster and have larger explosions.
-The vortex and stardust rings' deathrays sweep faster, and the latter's now sweeps 300 degrees.
-When a ring is 'destroyed' it will no longer exit the fight; instead simply losing the ability to enhance itself with the Lunar Telescope, skipping its turn using it. The fight still ends when the 4 of them are destroyed as normal.

For The Worthy Changes:
-After a ring detaches from the Lunar Telescope it will receive a temporary buff, doubling its spawned projectiles after dashing. It will also always have priority on the dash over the other rings; ensuring it gets a chance to use the boosts before a new ring attaches to the Telescope.
-The ring using the Telescope receives a 20% damage resistance until it detaches.

GetFixedBoi Changes:
-The order the rings choose to enhance themselves with the Telescope is randomised.


Defeat: Each ring will shatter when they run out of health, gaining visible cracks and letting out a burst of energy based on their core colour. The core will also dim significantly. When all 4 are defeated they will all explode and shatter into gibs, with the Lunar Telescope teleporting away as they do so.

Lore: Otherworldly constructs tasked with tracking rich sources of power. The strange device they have brought with them appears to intensify their abilities, but despite its apparent importance has not yet been noted after previous encounters.

Extra Info:
-Solstice is another returning boss, and much like the others is implied in the lore to have been encountered prior; meaning that previous Boss Ideas appearances for them must have happened in the past as opposed to being retconned or treated as an alternate universe.
-Despite Solstice seemingly having ties to the Moon Lord and the lunar pillars in their appearance and attack theming, the lore does not mention this. Even stranger, they act as a Post-Moon Lord boss which would not make much sense if they were more strongly connected.
-Teasers shown for the boss had the Telescope miscoloured a brownish colour... this was admittedly an accident rather than something clever (whoops)
[Added: 12/3/24]
HUNTER Unit

Appearance: A bulky, robotic canine. Its entire body is covered in red armour plating with black plates interspersed between them and silver joints; the same colours as the Scavenger before it. Its head lacks any notable details outside of a single, glowing eye and fake 'fangs' at the sides. It has a cannon mounted on its back and a blade on its tail that can also lock into the cannon to either enhance it or detach it.

Summon: Use the Wolf Mark on its respective pedestal, located in a special mini-biome/arena found in the caverns. It can be located easier by using an item crafted using Solstice's loot. Upon using the Wolf Mark, a target icon will appear over the player; following their movements. After a few seconds the target will lock in-place and the Hunter will lunge at the target, beginning the fight officially upon landing on the ground and letting out a loud roar.

Fought: Post-Moon Lord, Post-Solstice
Attributes: Required for Progression


Stats:
Health: 320,000 (475,000)
Attack:
-150 (215) (Melee, Blade Tail, Overdrive Pulse)
-125 (180) (Lasers, Bomb Shrapnel, Lingering Flames)
-140 (200) (Bomb, Spiked Mine)
-185 (300) (Eviscerator Ray, Energy Blade Tail)
Defence: 65


Attacks:
Phase 1:
The Hunter will move quickly around its arena, constantly repositioning itself using the floor and various platforms generated within. If the arena has been broken in any way prior to the fight it will be regenerated to a usable state to avoid hindering the Hunter's movements. It will stop to attack:
-It may extend its tail and swing it towards the player multiple times. The blade can reach anywhere in the arena, telegraphing where it will strike with a short-duration red slash.
-It may fire 3 volleys of 5 lasers each towards the player. It may stall the third volley slightly.
-It may fire 4-6 small, round bomb projectiles from its cannon towards the player. These will explode upon reaching the player's position, each sending out 3 evenly-spaced pieces of shrapnel in a burst.
-It may fire spiked 'mine' projectiles to a few random locations around the arena. These can stick to semi-solid platforms. The mines will detonate on contact with the player or after persisting for a long time.
When the Hunter's health reaches 0 it will stagger and crouch down slightly. After a couple of seconds it will suddenly 'flare to life', indicated by a chat message, refill its entire health bar, and enter its 2nd phase.
Phase 2:
The Hunter will be seen visibly sparking in this phase, with plasma arcing off its body. It slowly loses health over time during this phase; 2,000 per second, and can still be attacked by the player.
The Hunter is a lot faster and more dangerous in this phase, including increasing the attack speed of all Phase 1 attacks as well as gaining some new ones:
-It may jump to a location near the player and begin charging energy. After ~2 seconds it will release a large, circular blast of energy around itself, dealing high damage.
-It may stab its tail into the cannon and detach it from its body, in-turn creating a large energy blade at the end of the Hunter's tail. It will then leap at the player 5 times in succession, spinning in the air at high speed as it does so. After the final leap it will re-attach the cannon to its back.
-It may crouch down and charge its cannon. After a few seconds it will fire 3 colossal laser blasts, known as the Eviscerator Rays, towards the player. It will also leave lingering flames on any blocks or platforms it hits.

Expert Changes:
-Less time is spent stalling between attacks.
-Phase 1 Blade Tail attack will now be predictive.
-Phase 2's phase transition will now release an Overdrive Pulse upon 'flaring back to life'.
-Overdrive Pulse is faster; only taking 1.67 seconds to fully charge.
-Eviscerator Rays are larger.

For The Worthy Changes:
-Damage taken from its 2nd phase's DoT is reduced to 1,500.
-Its dashes whilst positioning itself for attacks are noticeably faster.
-Overdrive Pulse is even faster; now only taking 1 second to charge.
-Spiked mines and the Eviscerator Rays' lingering flames last slightly longer.

GetFixedBoi Changes:
-Energy blade tail can deflect projectiles. Damage of deflected projectiles is changed to the same as the energy blade tail's damage.


Defeat: It will spark and stagger around again. On Normal Mode it will simply explode after a couple of seconds. In Expert Mode and higher, however, it will begin lunging at the player continuously, being destroyed the next time the player lands a hit while it is within 20 blocks of the player.

Lore: A heavily-armoured, canine-like robot; given enough tools to potentially take down armies. For some reason, however, all this firepower sits dormant, stationed in a room hidden in the caves. Who would leave such a powerful device in such a remote location?

Extra Info:
-Hunter is the only boss thus far able to intentionally land a posthumous kill on the player in Expert Mode or higher, as the player needs to land one final finishing blow to end the fight.
--Thorns effects can actually trigger Hunter's explosion here, which does mean the player and Hunter can kill each other on the same frame. If this happens, it is still counted as the player's victory.
-Hunter's DoT can actually reduce its health to zero; technically allowing you to beat its entire second phase weaponless in Normal Mode.
--In Expert or higher, however, you will still need to attack at least once to finish the fight.
[Added: 14/3/24]
Starcatcher

Appearance: A Chaotic Entity. Appears to have long, flowing hair that reflects a space-like scene. Wears a primarily silver dress with cyan, grey and pale maroon parts around the ends of the sleeves, around the waist and below the shoulders. A crystal is present around the waist that shines various colours. She also appears to carry some sort of stick that produces a mist featuring the lunar fragment colours.

Summon: Can be found anywhere on the surface at night after Solstice is defeated, becoming more common after the HUNTER Unit is defeated. While she can be fought prior to defeating the Hunter, she will advise against it. She can be spoken to like a town NPC, with a 'Challenge' option that will begin the fight. While she is active as a boss it will be considered nighttime, with the background changing to a starry night.

Fought: Post-Moon Lord, Post-HUNTER*
Attributes: No Direct Summon


Stats:
Starcatcher
Health: 777,777 (1,000,000)
Attack:
-0 (0) (Melee)
-190 (285) (Star Cells, Chaostar Dragon Body, Vortex Spear)
-250 (450) (Giant Gold Star, Chaostar Dragon Head)
-160 (225) (Tiny Gold Stars, Nebula Flare)
Defence: 65


Attacks:
Starcatcher will typically teleport around in-between attacks, though may float towards players if they need to reposition themselves. Instead of proper 'phases' to her fight, she will unlock new attacks and abilities gradually. Any time she unlocks a new attack it will be the first one she uses.
-She may summon a giant Star Cell-like projectile that chases the player. After a few seconds it splits into 3 smaller, faster cells. These will each launch 3 even smaller cells at the player that do not home before exploding into a burst of 5 small cells each.
-She may summon many pink 'Nebula Flare' fireballs around herself randomly that move away from her very slowly at varying speeds and angles. After she finishes summoning them she 'releases' them; massively increasing their velocity.
-She may summon 3 bursts of 8 nebula flare projectiles around herself cardinally and ordinally. Unlike the previous attack these have a powerful homing factor and will chase the player, with their homing effect degrading over time.
-80% health unlocks a new 'Vortex Spear' attack where she will summon an electrified green spear and throw it at the player. Once it passes them it disappears into a portal. Many pairs of portals will then begin opening randomly around the player, launching the spear through them all in rapid succession.
-60% health unlocks Star Rain, an attack that drops many small, golden star projectiles diagonally from the sky. Each star falls at the same angle, but the angle chosen is random every use.
-40% health unlocks a new variant of the vortex spear attack. The spear will leave 2 trails of nebula flares as it moves, but does not go through portals. One of the trails lingers in-place while the second trail has a powerful, degrading homing effect.
-30% health has her summon the Chaostar Dragon; a colossal wyvern-like dragon that will fly near the player, passively at first, but will occasionally dash at them; telegraphed by a glint in its eye. The Chaostar Dragon cannot be attacked and persists throughout the fight.
-20% health unlocks the Superstar Rain; a stronger version of the Star Rain that can also spawn giant golden stars alongside the smaller variant. The giant stars are slower, deal more damage and upon hitting blocks release 5 smaller stars depending on which directions its arms were pointing.

Expert Changes:
-Star Rain is unlocked at 65% health and its star projectiles are faster.
-The first Chaostar Dragon is summoned at 50% health, with a second summoned at 30% health.
-Superstar Rain is unlocked at 25% health and its star projectiles are faster.

For The Worthy Changes:
-Vortex Spear unlocked at 90% health, and its alt form is unlocked at 50% health instead.
-Chaostar Dragons become aggressive more often.
-Superstar Rain's giant gold stars actually create explosions on hitting blocks. Also slightly more likely to replace the smaller stars.

GetFixedBoi Changes:
-Superstar Rain is now unlocked at 65% health instead of Star Rain. Fewer stars are dropped but all of them are giant stars.
-Star Rain is unlocked at 25% health instead and now summons many, many more stars.


Defeat: Gathers energy and creates 4 explosions around herself consisting of the lunar fragment colours. She will then release a 5th, silver explosion to end the fight. She will also immediately turn into a town NPC after the final explosion.

Lore: Something otherworldly taking the characteristics of something else otherworldly - seemingly having taken in some of the excess energy left behind after the cataclysmic battles with the Moon Lord and Solstice. Seems friendly?

Extra Info:
-Despite sharing the lunar fragment colours as Solstice did, the Bestiary entry takes note that the connection between them (and by extension Moon Lord) is minimal; with her having merely absorbed some energy left over from the player's encounters with the two
-There is no way to directly summon the boss; forcing the player to search for them on their initial encounters and then interact with her NPC after defeating her at least once.
-Starcatcher can be fought prior to the Hunter despite being a significantly stronger boss, even though the player is advised not to. Doing so (and winning) grants loot that would make the Hunter far easier and would help with the following boss as well due to the next boss being considered the same tier.
[Added: 14/3/24]
Thalataphobos

Appearance: A hulking sea monster sharing its colours with the Lumifish. Its body is vaguely fish-like in shape but lacks fins at the sides and is covered in strange, root-like growths that sometimes contain luminescent blobs. It has various, scattered glowing eyes and giant glowing teeth lining its mouth. Another root-like growth protrudes from its head, connecting to a twisted, mermaid-like creature with clawed hands and multiple heads and faces growing in a cluster at its front.

Summon: Interact with the sunken pedestal found within a structure beneath the ocean at the jungle's side. The room is intended to be full of water and will refill if emptied before the fight starts. The room will also seal the player within while the boss is active, cutting them off from the surface. The player is inflicted with the Crushing Depths debuff, removing the infinite air effects of things like the merfolk transformation and reducing the effectiveness of things that extend breath time.

Fought: Post-Moon Lord, Post-HUNTER
Attributes: Required for Progression


Stats:
Health:
-800,000 (925,000) (Thalataphobos)
-N/A (225,000) (Lure)
Attack:
-200 (305) (Melee)
-160 (225) (Junk)
-175 (250) (Teeth, Light Rays)
-180 (270) (Broken Lures)
Defence: 75


Attacks:
Phase 1:
Thalataphobos will typically stay on the far sides of the arena, with most of its body obscured by darkness with only a silhouette and its luminous parts visible. Most of its attacks are ranged attacks:
-It may spit a large collection of random junk from its mouth, with each piece having a different effect:
--Bones lack any special properties.
--Toxic Seaweed will curve upwards very slightly as it travels.
--Metal Chunks will curve downwards as they travel.
--Toxic bubbles decelerate and begin moving upwards after a short time.
--Pure bubbles, distinguished by glowing slightly, deal no damage and instead grant the player 5 air bubbles back when touched. Their movement pattern is the same as the toxic bubbles.
-It may spit many small, luminous teeth at the player. Each consists of an arc of 24 teeth, though each has a large gap spaced somewhere in each arc. Every third arc also releases 2-3 pure bubbles.
-It may roar, causing many bubbles to rise from the arena floor. Most of these will be toxic bubbles, though pure bubbles are interspersed with them.
-It may roar, swim back a little, and then charge at the player. At the end of the charge it will remain on the other side of the arena and continue attacking as normal. It creates some pure bubbles behind it as it charges.
When taken down to 50% health it will enter phase 2, signalled by a roar.
Phase 2:
In this phase, Thalataphobos and its lure become fully visible in all their grotesque glory. In this phase Thalataphobos and its lure alternate their attacks; with the former retaining its Phase 1 attacks and the lure using its own, new movepool:
-It may pull pieces of itself off, creating small tadpole-like creatures with faces called 'Broken Lures', and will throw them towards the player. These have a slight seeking effect and will curve as they travel, but will be destroyed on contact with blocks.
-It may hiss, spitting a large, tightly-packed volley of toxic bubbles towards the player.
-It may shriek, causing several faint yellow 'tracers' starting from its head, pointed randomly around the arena. After a short timeframe these will disappear and damaging light rays will be fired from the lure, based on where the tracers pointed.

Expert Changes:
-All pure bubbles only restore 4 air bubbles when touched.
-Enters Phase 2 at 65% health.
-The Lure's light ray attack will prefer to launch light beams to the opposite corner of the arena; reducing the amount of rays aimed back towards Thalataphobos that are unlikely to do damage.
-Gains an extra, third phase at 30% health. The Lure breaks off and fights on the opposite side of the arena to Thalataphobos, also gaining its own health bar. The duos' attack speed also increases.
--When one is defeated, the other will increase its attack speed even further.
---If Thalataphobos is defeated before the Lure, pure bubbles will begin rising from the arena floor randomly, independent of the Lure's actions.
----Additionally, the Lure will inherit Thalataphobos' charge attack, but can charge at varying angles as opposed to just horizontally. The Lure's charge does not spawn bubbles.

For The Worthy Changes:
-Thalataphobos spawns more projectiles in-general and charges faster.
-Pure bubbles only restore 3 air bubbles when touched.
-The Lure can charge in Phase 3, regardless of Thalataphobos being active or not. If one of the two charges, so will the other.

GetFixedBoi Changes:
-'Junk' fishing items added to most of Thalataphobos' attacks, though they are purely visual.
-All bubbles spawned are toxic bubbles. However, their damage is reduced by 25% and touching one will restore 5 air bubbles.


Defeat: Thalataphobos will roar and explode into gibs, toxic bubbles, and cosmetic junk. The Lure shrieks and explodes into gibs.
-Grants access to an underwater ruins subworld accessed beneath the arena. This subworld grants items and materials required for the next stage in progression.

Lore: The monster from which the Lumifish originated. It mindlessly devours all in its path, using its luminescence and lure to attract prey into its depths. If its food is too wary of its deceiving lights, the Lure itself may reach out and drag prey down; whatever it happens to be. Many, many ships have gone missing around where its territory is believed to be.

Extra Info:
-Thalataphobos' name is mainly a combination of 'thalassophobia' (fear of large bodies of/deep water) and 'thanatophobia' (fear of death).
-Thalataphobos appears to be based primarily on the angler fish and its lure on sirens; both fittingly deceptive creatures.
-The Lure's attacks do not produce pure bubbles, meanwhile all of Thalataphobos' attacks do. This is why, in Expert Mode, defeating the Lure second causes bubbles to begin appearing from the arena floor.
-The Lumifish appears to be a lure that has broken away and survived independently, not inheriting the frightening appearance of the main, attached lure.
-The fight forces the player to be wary of the air mechanic, regardless of what accessories were equipped.
--Breath time-extending accessories do still have some effect and thus are still recommended.
--In GetFixedBoi, the changes to the bubbles force the player to take damage throughout the fight to avoid drowning, as the fight is too long to complete without using the bubbles.
[Added: 14/3/24]
Duality

Appearance: A humanoid tomato character in a primarily monochromatic outfit. Duality has long, green hair that appears slightly more yellowed on her left, with the hair covering her left eye also. Her outfit consists of a black full-body bodysuit with a white hood, skirt, boots and gloves; each adorned with a red gemstone. She has two wings; a white one on her left and a black one on her right. She is also seen carrying a green spear with a black handle and two pairs of wings at the top. A strange, vaguely sun-shaped glowing sigil can also be seen near her head.

Summon: Use both the Light Feather and Dark Feather within 10 seconds of each other. While the Light Feather can be crafted as early as Post-Solstice, the Dark Feather can only be crafted after Thalataphobos' defeat. If only one Feather is used the boss will not spawn, though a small visual effect will play and text will indicate the other feather being required.

Fought: Post-Moon Lord, Post-Thalataphobos
Attributes: N/A


Stats:
Health:
-1,205,021 (1,500,051) (Duality)
-300,000 (425,000) (Clones)
Attack:
-0 (0) (Melee)
-175 (250) (Feathers, Split Helix Beam, Cinders, Stars)
-220 (325) (Helix Beam, Monochrome Flames, Lunar Flares, Light Rays)
-300 (450) (Deathray, Clone Melee, Supernova, Light Spear)
Defence: 80

Attacks:
Phase 1:
Will mostly fly over the player in a figure-infinite motion, stopping to attack. All of her attacks consist of black and white projectiles that behave differently:
-She may launch a 5-armed spiral of white feathers that rotate clockwise, as well as a 5-armed spiral of black feathers anticlockwise. The spiral arms gradually rotate, shifting the safe areas.
-She may launch a double helix shaped Helix Beam towards the player. Upon hitting a block it will split into 4 single beams; the first pair 25 degrees either side of the helix, and the second 60 degrees.
-She may launch giant homing Monochromatic Flames towards the player that decelerate. Upon stopping they explode into 5 white Cinders and 5 black Cinders. White cinders accelerate outwards while black cinders spiral outwards.
-She may charge up and fire 6 deathrays around herself, telegraphed by faint grey tracer lines. While the Deathrays are being fired white cinders will also be created by Duality that accelerate and fly out in random directions.
-She may cause it to begin raining down white Lunar Flares from the sky above the player, nearly identical to the weapon of the same name, though with far fewer projectiles. As the flares fall they will also occasionally create stationary black Star projectiles that linger for some time.
When reduced to 40% health Duality will enter her second phase, summoning two large rings of light around herself.
Phase 2:
Duality becomes fully immune to damage and stop attacking the player, but will summon 2 Clones; silhouettes resembling Duality, one white and one black. They will synchronise their attacks and share a health bar that needs to be depleted to continue.
-They may dash towards each other, trying to catch the player in between them. They also create an explosion on contact that deals contact damage.
-They may each launch 3 arcs of feathers at the player. One will do arcs of 6,7,6 while the other does 7,6,7. These feathers do not have any other special movement properties.
-They may both charge up and fire deathrays after a delay. One will always be predictive while the other is aimed directly at the player.
Once this phase is defeated the fight will end in Normal Mode.

Expert Changes:
-Enters Phase 2 at 60% health.
-Gains a third phase when the clones are defeated:
Phase 3:
Duality herself becomes vulnerable again, but now carries 50% damage resistance while not attacking. She gains access to her Phase 1 attacks, with her DR being reduced to 20% while using them. She also gains new attacks that, when used, remove her DR for the duration. While using these attacks the player is also granted infinite flight time:
-She may charge an attack, creating a large ring around herself. When she finishes charging she will release a small black and white star that moves slowly away from her. When it gets outside the ring it will explode in a blast called the 'Supernova'; dealing damage to the player if they were not inside the ring when the star exploded. The explosion lasts for 3 seconds. Duality will move slowly while the star explodes instead of being stationary.
-She may create a Light Spear and throw it downwards. A black deathray is created between her and the spear, with smaller deathrays being created randomly that extend horizontally. White Light Rays also shoot up randomly from the ground for the duration of the attack.
-She may ready her spear and dash at the player 6 times. Every odd-numbered dash creates white cinders behind her that accelerate and have a strong homing effect. Every even-numbered dash creates black cinders either side of her that decelerate and linger in-place for a while.

For The Worthy Changes:
-Attack speed increased.
-All deathray telegraphs are shorter, giving less time to react.
-She moves more during the Supernova attack, and the safe area's ring is much smaller.
-More Light Rays are produced during the Light Spear attack.
-Dashes during her spear attack are faster and more cinders are created.

GetFixedBoi Changes:
-All projectiles are now grey; making it much harder to distinguish what types or projectiles are being used.
-Supernova's safe area's ring is even smaller, effectively forcing you to stay close to Duality throughout.


Defeat: Folds her wings inwards, covering herself with them, then creates a pillar of spiralling black and white light around herself before releasing a pulse of grey energy. After this she will disappear.
-She can also now move in as a town NPC.

Lore: A strange, tomato-like creature that guards a powerful spear, apparently able to harness the powers of light and dark. While she is tasked with fighting anyone that might want to take such an item, she is still remarkably friendly and sociable.

Extra Info:
-Duality will blush a little if the player stays close to her for a long time, most easily noticed during the Supernova attack.
--This also occurs with her NPC.
-Duality is another boss that, like Protoplasm, was planned for the initial draft of Boss Ideas 12. Unlike Protoplasm, however, her design has remained mostly the same.
-According to her NPC's dialogue, her actual name is Alicante.
--And, yes, this is a multi-level pun once again.
[Added: 16/3/24]
Midori

Appearance: A humanoid green slime in a lab coat. Her head appears to have 'hair' formed from the slime, a single eye visible, and a pair of glasses seemingly partially-lodged within her hair. A metal band is seen on her left arm that can be used to display projections, and in her chest is some sort of red energy core, mostly obscured by the coat. She is also carrying a large laser cannon, almost the size of her, and she is accompanied by two round, silvery-white drones.

Summon: Use the M.I.D.O. Challenge Beacon, crafted using Protoplasm's summon and some Post-Thalatophobos items. Her coat will teleport into place, and Midori will form within. She will spear to the player briefly, warning them that their plan to fight her is reckless butadmirable, before teleporting in her laser cannon and beginning the fight. As soon as the fight begins she will summon an invulnerable 'shield generator' that creates a circular arena for the fight to take place in while also granting the player infinite flight. Touching the arena borders will damage the player and push them forcefully back in-bounds.

It is also possible to steal her lab coat by flying into it before she forms and picking it up like a regular item. This will cause her to summon a second, red coat instead and will grant special dialogue and make her attack more aggressively throughout the fight.

Fought: Post-Moon Lord, Post-Thalatophobos
Attributes: Required for Progression


Stats:
Health:
-500,000 (650,000) (Midori)
-625,000 (800,000) (Drones)
Attack:
-150 (220) (Midori Melee)
-250 (375) (Arena Border Contact, Drone Melee, Stalagmite)
-175 (250) (Lasers, Small Rocks)
-215 (320) (Deathray, Plasma Trail, Bombs, Giant Rocks)
Defence:
-50 (Midori)
-120 +10% DR (Drones)


Attacks:
Phase 1:
Midori will fight the player on their own, rapidly flying and dashing around whilst firing lasers from her laser cannon. She will occasionally stop to use one of her cannon's more dangerous attacks:
-She may fire arcs of 7 projectiles; dashing to a new location between each arc fired.
-She may charge up and fire 3 'deathrays' from the cannon. Each one is predictive and will leave a damaging plasma trail once it stops being fired. Once the third deathray subsides all the plasma trails fade.
-She may fire rapidly begin firing bombs from the cannon, each shot a cluster of 3 with one aimed at the player and the other two launched randomly. These do not deal contact damage but will explode a short time after being fired.
-She may align herself with the player along the horizontal axis and begin rapidly firing laser shots horizontally over the course of 5 seconds. Additionally, a wide arc of 4 lasers is fired every second.
When taken down to 60% health she will enter her second phase, signalled by her laser cannon exploding. She will summon a plasma barrier to protect her while calling in her 2 Drones.
Phase 2:
Midori is now immune to damage and her 2 Drones must be attacked instead, with the two sharing a health pool. The drones will dash around and fire lasers as Midori did, attacking in-unison at all times:
-They may both dash at the player up to 5 times in succession. Each dash has a faint tracer line to show the direction of each dash. They will space themselves apart between dashes if they consider themselves too close together.
-They may both align themselves a set distance away from the player and begin firing lasers rapidly. One of them will remain aligned on the horizontal axis, while the other fires horizontally from random positions and attacks faster.
-They may both spin around the player, creating the same bomb-like projectiles as Midori's cannon did, while firing lasers at the player every second.
-They may begin both spinning in a circle at high speed, facing outwards, each firing lasers as they spin. The space inside their circle will begin sparking and will charge up and fire 5 deathrays at the player, each leaving a short-lived plasma trail. This attack is only used when the Drones are below 75% health.
-One Drone may move near the centre of the arena and charge up and fire a deathray. This drone will rotate 720 degrees, firing the sweeping deathray the whole time. The other Drone meanwhile will cycle between firing 3 shots at the player and dashing until the deathray finishes its rotation. This attack is only used when the Drones are below 50% health.
Once the Drones' health is taken to 0 they will both partially explode and shut down, dropping out of the sky whilst smouldering. Midori will shatter her own barrier, visibly frustrated, and enter her third phase.
Phase 3:
Midori now reveals her 'secret weapon', telekinetic abilities, as indicated by her eye and hands glowing pink. She no longer has access to any of her Phase 1 attacks, but will still teleport/move around rapidly between attacks:
-She has the ability to control the two broken Drones and use them to perform all of their Phase 2 attacks. In fact, they will actually attack faster and more aggressively this way.
-She can summon huge chunks of dirt and rock from the ground. They will be launched either horizontally or vertically, evenly spaced apart. Additionally, as they travel, they create smaller rocks behind them that float in-place before being affected by gravity and dropping. This attack can be used 2-4 times in succession.
-She may summon several stalagmites from the ground, leaving only a single safe gap filled with dirt instead, and then suddenly force the player to drop out of the sky. The only way to avoid damage is by hitting the dirt she summons in the safe gap instead of the stalagmites. This attack can be used up to 3 times in succession, with the safe area changing between each use.

Expert Changes:
-Attacks faster.
-When Midori hits 20% health she will begin using the Drones to fire lasers at the player while she isn't using one of her main attacks.

For The Worthy Changes:
-Midori's first phase ends at 70% health instead.
-When Midori hits 33% health she will begin using the Drones to fire lasers at the player while she isn't using one of her main attacks.

GetFixedBoi Changes:
-The regular lab coat is immediately given to the player, forcing them to fight her in her enraged state. Having the Encumbering Stone or a full inventory drops it on the floor as an item and does not bypass her enraged state.


Defeat: Summons stalagmites all over the floor without a safe area to land. Before she drops the player into them, however, she becomes frustrated, looks up, puts her hands over her face, shouts, and teleports away. As she teleports her shield generator and the stalagmites shatter.

Lore: A slime blessed with a highly advanced mind for its species, so strong in-fact that it could develop potent telekinetic abilities. Seemingly the creator of the Protoplasm, but her involvement in the creation of those other, red robots is uncertain.

Extra Info:
-Midori is a recurring character throughout Boss Ideas, appearing in Boss Ideas 5 and then returning again in 10.
-This fight was actually made up of a total of 3 scrapped concepts, merged into a single, more refined fight.
-Midori is one of few bosses to entirely scrap all of her earlier attacks in a later phase; completely losing access to all of her Phase 1 attacks in both later phases.
--While this could purely be due to the laser cannon being broken, she was still able to remotely pilot both Drones after their destruction at the end of Phase 2.
-Midori has different dialogue if you steal her white lab coat when she is summoned. You also get to keep this coat. Her red coat can also be dropped if you defeat her enraged form.
-Both bosses fought Post-Thalataphobos use white, red, black and green in their colour schemes and use oversized weapons to attack, but despite this they are unrelated.
[Added: 16/3/24]
Unbreakable Drake

Appearance: Initially seen as a black wyvern-style dragon with glowing golden eyes. Upon being energised, however, some of his body will gain a golden tint; mainly down its back, on its claws, and on the tips of its wings and tail. The scales on its neck will also protrude outward further, making it appear larger, and the glow from its eyes will intensify.

Summon: Summoned atop the Mountain of Kings using the Thunderous Stone. The subworld containing the mountain can only be accessed after Midori is defeated, with the Thunderous Stone found within a cave the mountain rests upon. Using the Stone will cause a thunderstorm and the Drake to descend from the sky. Once it roars 3 lightning strikes occur; two sealing off the arena borders, and the third hitting the Drake and causing it to energise. Contact/exiting the arena borders deals high damage and will constantly strike the player with lightning until they re-enter the arena.

Fought: Post-Moon Lord, Post-Midori
Attributes: Required for Progression


Stats:
Health: 1,000,000 (1,450,000)
Attack:
-265 (400) (Melee, Plasma Breath, Arena Borders) [Inflicts Plasma Burn - 100%]
-200 (300) (Lightning, Energy Pulse, Lightning Orb) [Inflicts Plasma Burn - 100%]
Defence:
-165 (Normal)
-200 +80% DR (Energised)

[All of the Unbreakable Drake's attacks inflict Plasma Burn - a powerful DoT debuff]


Attacks:
The Unbreakable Drake's fight centres around its 'energise' mechanic. While energised, the Unbreakable Drake will live up to its name and houses boosted defence and enormous damage resistance, though when its energised state expires it loses the DR and some defence, granting a vulnerable window. It will lose its energised state every few attacks and will re-apply it by roaring and being struck by lightning.
-It may charge at the player up to 4 times in succession, with a bolt of lightning striking down at the starting position of each dash.
-It may roar and cause several evenly-spaced lightning strikes to land across the arena. The lightning will strike up to 3 times, with different positioning each time. All lightning strikes are briefly telegraphed.
-It may charge up energy and dash at the player. Once it reaches them it will create a large, explosive energy pulse around itself.
At 80% health it will add 2 more attacks to its movepool, though there is no distinct phase change:
-It may roar and cause lightning to strike the arena randomly over a period of 4 seconds. All strikes are briefly telegraphed.
-It may roar and release various large lightning orbs. 4 are released from each wing that launch diagonally downwards and cause lightning strikes where they land. Others are released upwards from its mouth that curve downwards and aim towards the player, also creating lightning strikes when they land. The wing orbs will strike the ground before the mouth orbs, granting a brief window to safely dodge.
When reduced to 60% health it will enter its 2nd phase, beginning by the Drake energising itself while creating an energy pulse around itself.
Phase 2:
The Unbreakable Drake retains its Phase 1 movepool, minus the energy pulse. Instead, the energy pulse attack is always used as its final attack before it needs to re-energise. It does, however, gain new attacks in this phase:
-It may roar and release energy orbs into the sky from its mouth that slowly rain down around the arena. As they do so, lightning will strike the arena randomly, telegraphed as before. The orbs will also create lightning upon hitting the ground as they did prior.
-It may fly above the player and dash downward, slamming into the ground. Lightning will strike it and will cause a chain of lightning strikes to continue hitting areas further and further away from the Drake for a few seconds. The strikes will stop prematurely if too close to the arena borders if more than 4 strikes have already occurred. This attack is unlocked at 50% health.
When reduced to 30% health, the Drake will enter its 3rd phase and will become angered.
Phase 3:
The Drake's dash attack is no longer used, and instead the Drake will dash 3 times between each of its other attacks. The Drake gains one new attack in this phase:
-It may charge up and fire a large, sweeping, deathray-like electrified beam from its mouth called Plasma Breath. It will fire it at the player 4 times, usually starting from a little ahead of the player's predicted movement path and sweeping back towards the player.

Expert Changes:
-Enters Phase 2 at 70% health and Phase 3 at 40%.
-Starting from Phase 3, lightning will strike the arena randomly independent of the Drake's attacks. This will become more common at 20% health, and more common again at 10% health.

For The Worthy Changes:
-Lightning can randomly strike the arena starting at 100% health. It does, however, become more likely at 70%, more at 40%, and even more likely at 20%.
-The Drake will heal back 10% health at each phase transition.
-The downward dash attack can fake-out the player, with the dragon flying overhead to dash, then repositioning itself above the player a second time before dashing.

GetFixedBoi Changes:
-Attack and energised state colouration is now purple.
-Telegraphs are fainter.
-Has a damaging electrified aura around itself the entire fight, dealing 50% of its contact damage.


Defeat: Lets out an enormous pulse of golden energy. This will disperse the arena borders, settle the storm clouds, and cause the Drake to de-energise. It will land on the arena floor, actually speak to the player about guarding some sort of seal and consequences for it breaking, and fly away slowly.
-The words 'A seal has been broken...' will appear.

Lore: A powerful dragon with mastery over lightning. It resides atop a lost mountain, said to be inaccessible to most, and tasked with guarding a seal that could bring disaster if it were opened again.

Extra Info:
-The Unbreakable Drake was meant to appear in Boss Ideas 9, but due to my own problems with its sprite it got replaced by the Copperplate Drake instead.
-All of the Unbreakable Drake's weapon drops require an additional material to craft, forcing the player to defeat the other on-tier boss to access them. This, in-turn, means you cannot bring the stronger weapons of one boss to face the other.
-Most of the Drake's attacks have decently large windows to avoid them, though this is due to the high damage output of all of his attacks; making every hit he is able to land devastating.
-The Unbreakable Drake is partially inspired by Zekrom from Pokemon, being a black dragon that uses lightning to attack. Its summoning item is also named after the Thunder Stone, used to evolve certain Pokemon.
-The Unbreakable Drake actually has less health than Midori and Duality despite being a tier of progression higher than them. This is because it spends most of the fight energised, which grants a staggering 80% damage resistance while in this state.
-Technically speaking, it is possible for the Unbreakable Drake to have unavoidable attacks in a few circumstances due to the random nature of the passive lightning strikes in Phase 3 (Expert Mode)/throughout the fight (For The Worthy+). However, this only applies in rare cases, and the Rod of Discord could still be used to avoid taking the hit.
[Added: 16/3/24]
Fairy King

Appearance: A large, pink, worm-like creature. It has two arms with clawed fingers about 1/5 of the way down its body and two pairs of pixie-like wings down its back. Its head has a central horn and 3 eyes at either side of it, with a large mouth making up most of the lower half of its head. Its jaws are covered in teeth-like spikes, including near the jaw's hinge, with pink ooze leaking out through the gaps.

Summon: Found in the deepest chambers of the Hallowed Pit, a labyrinthine chamber accessed via a subworld unlocked after beating Midori. The player will be navigated through it by a crystal that acts similar to a phone, with the 'caller' originally being a pixie, followed by the Empress of Light herself. Successfully navigating your way to the chamber reveals a pile of bones belonging to the Fairy King that can be interacted with to start the fight. The Fairy King's ghost will form from the skull and seal the exit to the chamber.

Fought: Post-Moon Lord, Post-Midori
Attributes: Required for Progression


Stats:
Health: 4,895,000 (6,750,000)
Attack:
-275 (400) (Head Melee, Cursed Pixie)
-240 (360) (Body Melee, Soul Blasts, Space Rift)
-200 (315) (Fairy Bullet, Hallowed Flames)
Defence: 80

[Piercing projectiles are capped at 2 pierce vs Fairy King: Any projectiles that hit 3 segments will immediately be destroyed. Has damage resistance vs minions depending on their functionality.]


Attacks:
The Fairy King will typically disappear between attacks to reposition itself, with its new location briefly telegraphed by a faint silhouette of its skull showing. Its only movements aside from this are during its attacks:
-It may spin in a very tight circle somewhere within the arena boundries, summoning a 7-armed clockwise spiral of sparkling 'Fairy Bullet' projectiles. After a few seconds, however, The spirals will suddenly start travelling anticlockwise. Every second he will also release random fairy bullets at varying angles and speeds independent of the spirals.
-He may summon multiple 'walls' of pink fireballs that travel horizontally across the arena. There will be gaps between the fireballs to navigate through. However, the Fairy King will continuously dash at the player throughout the attack, teleporting in-between dashes and re-appearing at varying angles.
-He may appear, partially coiled-up, with something in his mouth. He will then spit a large collection of ghostly projectiles called Soul Blasts at the player that travel quickly and have weak homing properties.
-He may move in a figure-infinite motion at the top of the arena, raining down fairy bullets at varying speeds. He will also release occasional Soul Blasts during the attack.
-He may perform a series of 4 high-speed dashes going from one end of the arena to the other, attempting to hit the player. He will not move in straight lines, however; instead wildly zig-zagging as he dashes.
At 70% health he will enter Phase 2, signalled by a roar. He will noticeably gain the rainbow effect the Prismatic Lacewings have.
Phase 2:
Gains one new passive ability and one new attack. The new passive ability is that he can create fake clones of himself that deal no damage and cannot be attacked, instead existing to block the player's view and to distract them. They will be one of the 6 colours the Fairy King shines in this phase and will appear during each attack.
-The Fairy King's new attack is that it will circle the player from a distance. As he spins 'Space Rift' cracks will form that extend towards the centre of the circle from random points which the player has to avoid. After a while the Fairy King disappears, as do the cracks.
At 50% health the Fairy King will stop briefly before letting out a horrific shriek, opening its mouth so wide that it appears to tear slightly, while the skull he formed from becomes visible within. He will then teleport away and begin its third phase.
Phase 3:
No longer creates clones, but instead can summon ghostly skulls similar to its own that assist it during attacks. These, unlike the clones, actually deal damage. All Phase 1 & 2 attacks are buffed:
-The spiral attack will have skulls appear randomly near the player which lunge at them after a short delay.
-The fireball wall attack has 2 skulls form either side of the Fairy King that dash when he does, also attempting to bite the player.
-The soul blast attack will summon 4 skulls alongside the blasts that dash at the player one at a time in rapid succession.
-The bullet rain attack has a single skull chase the player throughout, lunging at the player when close.
-The dash attack summons 4 skulls with each dash, alternating between cardinal and ordinal positions. They lunge inwards when the Fairy King dashes.
-The rift attack summons skulls, but they will simply laugh at the player. If the player somehow exits the attack prematurely, however, they will rapidly chase them down until it ends.
The Fairy King does gain one new attack in this phase:
-The Fairy King will appear, lying on the floor, with two skulls on either side of the arena about 2/3 up. The two skulls will begin spitting out dark grey pixies that fall to the floor before slowly flying towards the player; gradually filling up the arena with their sheer numbers. Pixies move faster if the player is further away, but the attack typically ends with the pixies disappearing before the arena fills up so long as the player was careful with their movements.

Expert Changes:
-Aggression increased, causing it to attack and move faster.
-Pixie attack lasts a little longer.
-At 10% health it will enter a 4th 'last-ditch' phase:
Phase 4:
-Begins dashing at the player constantly, using its weird zig-zagging movements from its earlier dash attack. As it loses health it gradually gains transparency, with its skull becoming more visible.

For The Worthy Changes:
-All attacks produce more projectiles in-general.
-Phase 4 dash attack will also create the skull minions from Phase 3, spawned randomly around the arena. They simply dash at the player after a delay and disappear.

GetFixedBoi Changes:
-Creates a single cursed pixie at the beginning of phase 3. Unlike all the others, this one persists throughout the entirety of the rest of the fight until it ends, chasing the player slowly throughout.


Defeat: Roars, teleports near the centre of the arena, and fades away. Its skull drops back to the ground at the front of his skeleton; the same position it started in.
-If the player wants to rematch the Fairy King they have to extinguish 7 candles outside its boss arena by interacting with them.
-The words 'A seal has been broken...' will appear again.
--If the Drake has already been defeated, various strange creatures will begin spawning in the overworld dubbed 'Chaotic Entities'. They are extremely powerful, mini-boss style enemies of varying types that all possess different attacks.

Lore: The Fairy King, former tyrannical ruler of the Hallow. Losing his life to a creature that he himself raised, the Fairy King's ghost simply refused to pass to the afterlife. His bones were taken to a cave deep beneath the Hallow to truly be rid of his influence.

Extra Info:
-Being the other boss on-tier with the Unbreakable Drake in progression, both bosses need to be defeated to access their item upgrades. This, in-turn, prevents the player defeating one of them to trivialise the other.
--However, there are still upgrades that can be made after defeating either of them, so beating one of them can still make fighting the other easier.
-The Fairy King's lore and current status are likely due to the Fairy King's Behemoth boss seen in Boss Ideas 10. In fact, the skull the Behemoth wears is nearly identical to the Fairy King's own, based on his design prior to this page.
[Added: 16/3/24]
Lumen

Appearance: A member of the Empress of Light's species, partially mechanised. She has long blue hair and blue eyes. Most of her body is covered in grey and silver armour with a pink core in her chest. Her wings are also now fully mechanical, projecting more natural, butterfly-esque wings in combat. She also carries two swords, similar to the Starlight, with blue and pink energy blades.

Summon: Place and shatter the Hallow Plasma Crystal. When used it will float in the air, doing nothing, though it can be picked up by the player via a bug net or attacked, which will gradually shatter the crystal as you damage it. Once broken, Lumen will appear, give some dialogue, and begin the fight. She will summon a circular arena for the fight to take place inside, granting the player infinite flight within. Touching the arena border, as expected, damages the player and pushes them back inside.

Fought: Post-Moon Lord, Post-Unbreakable Drake/Fairy King
Attributes: Required for Progression


Stats:
Health: 2,655,350) (3,000,000)
Attack:
-280 (412) (Melee, Sword Slash)
-250 (375) (Everlasting Rainbow, Sun Dance)
-225 (340) (Plasmatic Bolt, Energy Slashes, Light Arrows, Light Swords)
Defence: 100 +20% DR


Attacks:
Phase 1:
Lumen's attacks will primarily be based on the Empress of Light's in this phase. She is incredibly fast and attacks nearly constantly, giving little downtime. Her pattern typically consists of 3 dashes, with her teleporting between each one, followed by a ranged attack:
-She may summon 3 bursts of 'Everlasting Rainbow' projectiles in succession, dashing a short distance between each one. Each 'burst' consists of 7 projectiles that, like EoL's, have a damaging trail as they move. Each one will rapidly move outwards before curving back around and returning to Lumen. Both odd-numbered bursts also rotate clockwise while they move while the 2nd rotates anticlockwise.
-She may point her swords upwards and then move them apart, creating a strange 'tear' from which silvery white arrows are shot upwards that are affected by gravity. These then rain down all around the arena over the next few seconds.
-She may perform a long-range, horizontal dash that creates several Plasmatic Bolts as she travels. These rapidly accelerate over time and home in on the player as they do so.
-She may perform EoL's 'sun dance' attack, though each light ray created is noticeably larger. However, they are slightly thinner and have a slightly longer delay between each new set of rays summoned.
-She may release a burst of 12 fast-moving Energy Sword projectiles in a burst, followed by summoning a large number of Plasmatic Bolts, then followed by another burst of 12 energy swords.
When reduced to 75% health she will enter her 2nd phase, with her core flaring to life as she lets out a battle cry.
Phase 2:
Her core can now glow blue, orange or green to indicate which attack she plans to use, based on the souls of might, fright and sight, respectively. She will use a new set of 3 attacks in this phase:
-Might - She will appear overhead and dash downwards, creating numerous light arrows that erupt from the ground randomly. Their density is reduced the further away from Lumen you get.
-Fright - Creates a wall of evenly-spaced energy swords either horizontally or vertically that begin moving after a short delay. Used up to 3 times in succession.
-Sight - She will create a clone of herself that dashes to a random nearly location. The two of them then both slash with both her swords, creating large, X-shaped Energy Slashes that fly rapidly towards the player. They have a mild seeking property.
At 60% health her core will return to glowing pink and let out a pulse of energy. She will let out another battle cry and enter her third phase.
Phase 3:
Her blue/orange/green core mechanic from Phase 2 returns; enhancing all of her previous attacks in one of two ways. The core will telegraph the 'buff' given:
-Everlasting Rainbow Bursts - Might or Sight. Might increases the length of the rainbows' trails. Sight increases the number of everlasting rainbows in each burst to 9.
-Light Arrows - Sight or Fright. Sight causes some arrows to fall directly towards the player. Fright simply increases the number spawned.
-Prismatic Dash - Sight or Fright. Sight summons 2 clones of Lumen that dash at the player before she does, leaving a small number of plasmatic bolts each. Fright creates vertical swords as she travels alongside the usual plasmatic bolts.
-Sun Dance - Might or Fright. Might allows each set of rays to rotate slightly and make them thicker. Fright allows her to additionally release bursts of energy swords with each set of light rays created.
-Swords and Bolts - Might or Fright. Might simply increases the quantity of projectiles created. Fright causes a wall of swords to fall from the sky while the bolts are created.
-Might attack - Might or Sight. Might works as it did in Phase 2. Sight has her dash downwards 3 times, teleporting between each dash, with the third creating the light arrows with a reduced number.
-Fright attack - Fright or Might. Fright works as it did in Phase 2. Might reduces the number of swords, but they are faster and are no longer evenly-spaced.
-Sight attack - Sight or Fright. Sight works as it did in Phase 2. Fright removes the clone, but causes walls of swords to fall quickly from the sky between each energy slash created.

Expert Changes:
-At 0% health she will enter a 'berserk phase', with her core turning purple. She will teleport into the background and begin releasing dozens of projectiles upwards that will rain down for 15 seconds, gradually increasing in intensity:
--Light swords fall at varying angles, but lack special properties.
--Plasmatic bolts retain some level of homing; curving towards the player as they fall. They fall less often than light swords.
--Everlasting rainbow have a damaging trail as they fall and fall slower. They are slightly less common than the prismatic bolts.
--Small, homing projectiles will fall that try to chase the player. When close to the player they will flash red and then explode into a sun dance of 5 light rays. They are the rarest projectile type to fall.
Once the attack ends she will teleport to the foreground, exhausted, and end the fight.

For The Worthy Changes:
-Reduced cooldown time between her dashes and her 'main attacks'.
-Berserk phase lasts for 20 seconds.

GetFixedBoi Changes:
-Arena is smaller.
-Dashes longer distances with each dash.
-Core only changes colour in Phase 3 just as she is about to execute the attack, giving less time to react to the telegraphed colour.


Defeat: Core turns a light blue and she gives some dialogue regarding the player's recent actions, mainly about their defeat of the Fairy King and Unbreakable Drake. She will mention the seals and their importance at keeping something horrible at bay, something sealed away after a climactic battle some time ago. She will then ponder if you're one of the two heroes set to put an end to this trouble and advises you to seek the final seal holder.

Lore: A mechanised member of the Empress of Light's species, having been wounded in a great battle long ago. She is able to harness the power of soul energy, enhancing her already-impressive skills. She seems to have some amount of faith in the player, impressed by their prowess in battle.

Extra Info:
-Lumen is stated to not be a mechanised Empress of Light, but instead a different member of the same species.
--In fact, the Empress of Light is stated to have (somehow) survived their encounter with the player, as evidenced by the Hallowed Pit dialogue when hunting for the Fairy King. Despite the references between the two so close together in progression, not one acknowledges the other.
-Lumen references all 6 vanilla soul types in her encounter.
[Added: 16/3/24]
Storm

Appearance: Storm, returning with a new look. Retains her long, yellow hair but her outfit now consists of a silvery white suit with a sash-like attachment around the neck and a skirt at the bottom. The skirt's rim, her cuffs and the edges of the sash are yellow like her hair. She also wears black leggings and white boots. Her spear is primarily silvery-white, with a yellow ribbon on one side of the spear's head. The spear head is a bident with yellow lines trailing down each side and housing a glowing yellow orb in its centre.

Summon: Found within the Reality Pillar subworld unlocked after Lumen. One of the first rooms is an arena with Storm inside, who the player has to defeat to progress. After talking with her about what lies beyond and her goal, she asks for the player's help, but says she must test their abilities in battle. Selecting the 'challenge' option seals the arena and begins the fight. The player is inflicted with a flight time-reducing debuff while in the Reality Pillar subworld, which would in-turn impact the fight.

Fought: Post-Moon Lord, Post-Lumen
Attributes: Required for Progression


Stats:
Health: 3,250,000 (4,000,000)
Attack:
-275 (400) (Melee, Spear Contact, Lightning, Chain Blade, Plasma Orb Explosion)
-400 (600) (Plasma Storm)
-255 (382) (Spark, Small Lightning, Rocks, Electrified Chains)
Defence: 200


Attacks:
Storm is an extremely agile boss, moving rapidly between her main attacks via teleportation or with rapid dashes either along the ground or through the air. She attacks rapidly with little downtime between attacks. All lightning attacks are telegraphed throughout the fight:
-She may appear near the arena's centre and strike the ground with her spear. Pillars of lightning will erupt from the ground evenly-spaced throughout the arena, lingering for a few seconds, while electrified rocks are also launched around randomly.
-She may dash around the arena walls, spinning her spear around herself when within range of the player. The spin destroys projectiles and bounces minions away from her.
-She may drag her spear through the ground while dashing, then fling it upward. Rocks are launched in random directions from the spear, as are sparks of fast-moving electricity.
At 80% health she will add more attacks to her movepool. There is no visual indicator to the phase transition, however.
Phase 2:
Gains a new set of attacks while retaining her Phase 1 movepool:
-She may summon orbs of plasma around the arena. Some of them will be stationary while others slowly follow the player. After a few seconds, or on contact with the player, these will explode; dealing damage and releasing small lightning bolts along the cardinal directions.
-She may reveal a bladed, grappling hook-esque projectile that she can throw. It will ricochet off of walls, creating a trail of chains behind it. She can then electrify the chains, causing them to deal damage, before retracting them quickly.
-She may charge up the power in her spear before throwing it at the player. After a short delay a huge blast of energy is formed between Storm and the spear called the Plasma Storm. It will additionally release small lightning bolts randomly around the arena.
At 50% health she will enter her second phase, gaining an electrified aura around herself.
Phase 3:
Storm's own contact damage hitbox is increased by the aura, however the main draw of this phase is that Storm can now combo her Phase 1 and 2 attacks together:
-The plasma orbs can be prematurely exploded if struck by lightning strikes or her spinning spear.
-The chain can be electrified prematurely if struck by any electric attacks and the blade can be ricocheted off her spinning spear with increased velocity.
-When using the Plasma Storm attack she will throw a spear made of plasma. The giant blast will be aimed between the spear and wherever Storm was when she threw it.
At 30% health she will enter a 4th phase, shown through her letting out a shout and releasing another pulse of energy.
Phase 4:
Storm attacks even faster and with less downtime. Retains all Phase 3 attacks, including being able to combo them into each other, and gains one new attack:
-Will take herself to the centre of the arena and charge energy. When ready, a vertical Plasma Storm will engulf the centre of the arena with Storm inside it. Lightning will strike out horizontally randomly, plasma orbs will be generated from within every second that move outward at varying angles which explode on contact with lightning or the arena borders, and smaller sparks are released randomly throughout the attack. This attack cannot be combined with another attack and, after use, Storm has to rest for a few seconds.

Expert Changes:
-Storm is even faster.
-Telegraphs exist for less time for all lightning strikes.
-More Plasma Orbs are generated in-general.
-Time before the Plasma Storm is generated is reduced.
-Storm only rests for 2 seconds after her Phase 4 super attack.

For The Worthy Changes:
-Less Plasma Orbs are created, but they now release 8 small lightning bolts; 4 cardinally and 4 ordinally.
-Only needs to rest for 1 second after her Phase 4 super attack.

GetFixedBoi Changes:
-Has even less downtime.
-Does not need to rest after her Phase 4 super attack.


Defeat: Sits down on the arena floor, visibly tired. Tells the player to continue ahead through the Reality Pillar and that she will join them later. The player has access to the rest of the Reality Pillar and must now fight their way through swarms of Chaotic Entities to progress.
-She can be rematched, but only after the next boss is defeated. After that she can be found in her original arena room and spoken with for lore, a nice chat, or a rematch.

Lore: One of two heroes fated to bring an end to a Chaotic force, Storm has spent most of her life training. Mastery over lightning seems to run in her blood; a gift she certainly did not squander.

Extra Info:
-Storm is another recurring Boss Ideas character, and likely the second oldest in the page; first appearing back in Boss Ideas 4.
-Despite many characters having direct ties to Storm, none of them are encountered here.
--She does mention them all in her dialogue in the Post-Game, however.
-Due to the speed of Storm's attacks, even in Normal Mode, it is highly unlikely most players could no-hit the fight. This becomes even more of a daunting task on higher difficulties, as all of them buff her attack speed.
[Added: 16/3/24]
???
(I withheld the name from the title so people don't get so easily spoiled by seeing it on the list.)


Appearance: Chaos Doppelganger, making its last stand. Its body is entirely black, minus a wide white grin across its face that appears partially melted. It has 4 arms, though most of its other features shift or are obscured, making any further descriptors irrelevant.

Summon: Found within the Reality Pillar after encountering Storm. Before it can be fought, the player has to scale the Pillar by traversing its many rooms, often filled with various Chaotic Entities of varying types; some seen in the overworld prior while others are unique to the area. Mini-bosses based on previously encountered entities (e.g. Mimi, seen in Boss Ideas 7) also exist throughout the Pillar, usually housing fights based on prior encounters. Null, another returning boss, gets dealt with by Storm in a fake-out fight.

Once you reach the Doppelganger near the top of the pillar the exits will be sealed, and the fight will begin after a short animation. Losing the fight thankfully lets you skip to the top of the tower instead of forcing you to re-fight your way through it.


Fought: Post-Moon Lord, Post-Storm
Attributes: Final Boss


Stats:
Health:
-10,000,000 (13,850,000) (Doppelganger)
-675,000 (1,000,000) (Hands)
-25,000 (45,000) (Chaos Crawlers)
-150,000 (235,000) (Chaos Wretches)
Attack:
-300 (450) (Melee, Scythe, Moon, Light Blast)
-240 (365) (Large Shadow Orb, Wretch Melee, Chaos Spikes, Crawler Ball, Large Lunar Attack)
-215 (320) (Small Shadow Orb, Crawler Melee, Rocks, Grey Flames, Small Lunar Attack)
-275 (408) (Deathray, Radiant Orb, Pillars)
Defence:
-100 (Doppelganger)
--255 +85% DR (Phase 5 Doppelganger, Active)
-120 (Hands)
--300 +60% DR (Stunned Hands)
-100 (Crawlers, Wretches)


Attacks:
Phase 1:
The Doppelganger's head protrudes from the ceiling and is its only vulnerable part in this phase. It spends most of the time in the centre of the ceiling, but may move left or right during certain attacks:
-It may spit 3-5 large shadow orb projectiles at the player. These will decelerate when they reach the player's position and explode into 8 smaller orbs each launched along the cardinal and ordinal directions.
-It may spit out a cluster of Crawlers: spider-like enemies that chase the player until killed. The sheer number means they will often persist into the next attack.
-It may spit out a large ball of Crawlers that bounces around the arena, releasing Crawlers with each bounce. After a short while one of the Doppelganger's hands will grab it and slam it into the ground; destroying it.
-The Doppelganger's 4 hands may choose random places near the ceiling and, after a brief moment, slam down; creating large jagged pillars of rock; tall ones next to the hands and shorter ones slightly further away.
-It may spit out 2-3 globs that form into Wretches; hunched Chaotic Entities multiple small eyes that will lunge and rush at the player. After a short while, if not dealt with, the Doppelganger's hands will suddenly appear and crush them.
At 85% health the Doppelganger will roar and lash out at the arena itself, breaking parts of it and causing the arena to become unstable. It gains and enhances a few attacks:
-Its hand slam attack now causes rocks to fall from the ceiling when used. The same applies to the hands crushing the Crawler Ball and Wretches.
-It gains an attack where it summons a radiant orb of energy and uses its hands to smack it around the arena. Eventually it will begin glowing, at which point the Doppelganger will grab it and try to slam it into the player; causing it to explode violently. Rocks also fall from the ceiling during the explosion.
-It may grab four massive chunks of debris, slamming two down on the arena floor and the other two into the ceiling corners. Its head then retreats into the ceiling a little before suddenly sliding the two pieces of floor pieces to the outsides of the arena and sliding the ceiling pieces to the centre. It then crushes all 4 pieces of debris, launching gravity-affected rocks randomly from them all.
-It will charge up and fire 2 deathrays near the corners of the arena that sweep toward the centre. After those 2 fade it will fire a third deathray straight downward, also causing rocks to fall from above.
At 65% health the Doppelganger will retreat to a higher point in the Reality Pillar, forcing the player to navigate a small flying segment while countless Crawlers swarm the lower levels of the arena. Once the player reaches the Doppelganger's new height he will grab them in his hands and laugh, teleporting the two of you to another dimension for the next phase.

Phase 2:
The player is teleported to a strange void with an ever-shifting background. They appear to be in constant free-fall, but is granted infinite flight for their wings (or given some if they lack wings). The Doppelganger will appear as a floating head with his 4 floating hands around him. His attack pool will be entirely different:
-He may summon a 'bullet-hell' of hundreds of horizontal and vertical grey flame projectiles. His fists will also try to punch or slash the player throughout.
-He may summon 3 radiant orbs and throw it at the player. They will actually wrap around the screen if they reach corners and will bounce off of each other. Eventually they will glow and explode.
-He may open his mouth wide and try to suck the player in. After a while he fires a colossal deathray that starts aimed at either the top or bottom corner the opposite side of the Doppelganger and sweeps down to the other.
-He may try to slash the player with his hands by teleporting them to random positions near the player and either having them slash toward them directly or move horizontally or vertically to try and cut off the player's movement.
When reduced to 50% health the Doppelganger will force the player out of the subworld and back into the main one. He will try to attack the player as they leave by crushing them, but Storm will jump in and force the hand back with her spear. After this, the Doppelganger roars and Phase 3 begins.
??? (Continued)
Phase 3:
The Doppelganger becomes invulnerable but the hands become vulnerable. The hands will each attack the player using attacks based on the lunar pillars, signalled by a glow around each hand. They attack 2 at a time:
-The 'pink' hand may summon 4 large crystals around itself which it launches one by one at the player. They are predictive.
-The 'pink' hand may create a large volley of small fireballs. They have a weak homing effect.
-The 'orange' hand may create a large fireball, dash towards the player, and then crush it to create an explosion.
-The 'orange' hand may slam down on the ground, creating a wave of small fiery spikes across the arena floor.
-The 'green' hand may slash horizontally across the arena, creating a large trail of lightning as it does.
-The 'green' hand may launch a large cluster of electrified orbs upwards that rain down on the arena after a short delay.
-The 'blue' hand may pose to look like a dragon head and then summon a 'tail' of large segments behind it. It will chase the player for a few seconds, dashing when close.
-The 'blue' hand may create a blue blob of energy and crush it 3 times in its hand. Each time it releases small energy orbs in bursts; the first of 6 projectiles, then of 8, then of 11.
Every 5 attack cycles, one hand will try to charge energy but will be blocked and struck by Storm, leaving it stunned, dealing 100,000 damage and reducing its defences. All hands will stop attacking for 5 seconds, after which the stunned hand will return to normal and the cycle will repeat. The hand chosen is the one with the highest remaining health.
When a hand is defeated it will seemingly be destroyed and removed from the fight. When only one hand is left it will attack much faster.
When all 4 hands are dealt with, the Doppelganger will roar and shatter the room's walls; revealing a storm outside and swarms of countless Chaotic Entities surrounding landscape. The Doppelganger takes on a new, colossal, vaguely-humanoid form that the Doppelganger has taken. The next phase then begins, signalled by a laugh.

Phase 4:
The Doppelganger now resides in the background, with his upper body and head still able to be targeted to deal damage. His attack roster changes again:
-He may summon laughing fire projectiles that come from both sides of the screen and move horizontally. Some move in a straight line whilst others move in a sine wave motion.
-He may fire a deathray from his mouth straight up into the sky, causing dozens of smaller deathrays to rain down on the arena at varying angles. Some of them will also land directly atop the player every second.
-He may summon a radiant orb, teleport to a position closer to the screen, and crush it in his hands to produce a burst of 12 deathrays.
-He may summon a black hole from his chest that pulls the player towards it. Small shadow orb projectiles are also created that are sucked into it from off-screen.
-He may begin to charge energy, indicated by his eyes becoming spirals. Large chunks of debris will slowly rise from around the arena before he releases a giant flash of light. If the player is hidden behind the debris they will avoid damage.
At 35% health he will laugh again, adding new attacks to his attack pool:
-He may launch a tendril backwards and appear to grab the moon out of the sky. He will then fling it overhead, bringing it down diagonally across the arena. Depending on the side he swings it, either the bottom left or bottom right corner will be the only safe place in the arena.
-He may summon a colossal scythe and begin slashing wildly at the player with it, telegraphing each slash briefly.
At 15% health he will appear to begin melting and teleport away, with the background changing to be entirely obscured by swirling dark grey clouds and lightning. The Doppelganger will re-appear as just his head

Phase 5:
The Doppelganger's main gimmick in this phase is that it has extremely high damage resistance throughout most of the phase. Every 4 attacks, however, Storm will land and strike the Doppelganger with her spear, briefly stunning it and removing its DR to grant a brief window to attack it. Its movepool changes one final time:
-It may release a burst of 8 deathrays, released cardinally and ordinally, and then rotate them all 45 degrees.
-It may use its Phase 4 bullet hell attack, though just before the attack ends it will freeze all the projectiles in-place before they vanish.
-It may release a 10-armed spiral of small shadow orb projectiles. After a few seconds he'll reverse the direction the arms rotated.
-It may roar and cause 'chaos spikes' to erupt from the floor of the arena. Then another set will erupt from the ceiling after the ones on the floor fade.
-It may spit out a radiant orb and headbutt it, causing it to release 4 deathrays; 2 horizontal, and 2 45 degrees either side of its head.
Once taken down to 1% health Storm will embed her spear in its head. The Doppelganger, as a last-ditch effort, will try to heal at a decaying heal rate, starting at 65,000 and degrading to 5,000 over about 10 seconds. If not defeated within 20 seconds or if it heals back up to 8% health it will continue Phase 5 as normal until taken down to 1% health again. Each time it gets taken down to 2% its healing is 50% less effective. This continues until it is defeated if needed.

Expert Changes:
-Attack speed increased.
-Phases 4 & 5 are noticeably darker, but are briefly illuminated by lightning strikes.

For The Worthy Changes:
-Attack speed increased.
-Shorter telegraphs.

GetFixedBoi Changes:
-Attack speed increased.


Defeat: Storm will embed the spear further in the Doppelganger's head, causing the glow from his eyes and mouth to intensify. Dozens of hands will begin appearing near the player and Storm, slowly closing in, before a loud blast can be heard, causing the clouds to disperse. The Doppelganger's hands then melt away and it looks upwards, frowning, before letting out a weak roar before melting away.
-With the Doppelganger's defeat the game is (technically) over. The player will be forced out of the Reality Pillar and back to the overworld, with their loot being obtained at the entrance of the Reality Pillar.
-Chaotic Entities stop spawning in the overworld and the sky returns to normal.
-The player will be given the Inter-dimensional Warp Drive upon returning to the overworld

Lore: An otherworldly force that invaded us long ago and source of all the strange creatures that have been showing up to cause havoc. Efforts in the past kept it at bay, but after a long struggle the threat it posed has been truly ended, sent back from whence it came. Thank you!

Extra Info:
-The Doppelganger, like Storm, has been a recurring boss since Boss Ideas 4. It has had the most fight renditions of any returning boss as well, appearing in some form in nearly every Boss Ideas page.
--All the Chaotic Entities encountered are also presumed to have come from it, meaning the Doppelganger has had at least some influence on nearly every Boss Ideas page since 4, aside from 6 and 12.
-The Doppelganger's fight contains references to nearly every other fight present on this page, as well as callbacks to its previous encounters.
-The Doppelganger's fight is easily the longest of the main game bosses, taking a few minutes to deal with each phase on average. Stock up on items before attempting it.
--It could even be advised to take a small break before the Doppelganger on their first attempt, as the player has had to fight through the Reality Pillar shortly before the boss.
-The lore leaves it rather ambiguous as to whether the Doppelganger is killed at the end of the fight. However, it does still suggest that this was the final fight planned for the Doppelganger and that it likely won't appear in future Boss Ideas pages.
[Added: 17/3/24]
Zazabaan

Appearance: A fight consisting of Zazabaan and his many powerful machines.
Zazabaan himself is a mostly mechanised scientist with brown hair and orange eyes. He's seen wearing a lab coat with a metal band around the middle and part of his chest exposed to reveal red metal plating. He also has two wings attached to his back that each hold some sort of strange energy core that sustains the majority of each wing as they are seemingly made of some sort of condensed energy.
Valkyrie is a cyborg harpy, usually seen in a blue combat suit. Her wings and talons are metal, again using a type of hardened 'energy wings'. She has blue hair, a single visible blue eye on the left, and a combat respirator.
The Blacksmith is a large, bulky robot that is primarily grey and modelled after a human upper body. Its head is round, consisting of a single eye, a metal beard and mono-brow. His hands float at his sides instead of being attached to his body directly. Around his waist is a belt that can be rotated: one one side it contains a flat table, presumably for shaping objects against, while the other side contains a small, super-heated forge dubbed Staryolk. Staryolk also has two cannons attached to the front that double as exhaust ports.
The Breaker is a large, red mechanical serpent. Most of its body is rough and angular, with a spherical eye with an x-shaped pupil in each segment. Its front segment has two large mandibles that sparks of plasma occasionally jump across.
The Hydra is a large, red dragon with 3 heads. Its body seems partially incomplete, with exposed cables leading to its core and minimal armour on its legs. Its wings appear to be a mix of fire and plasma erupting from two large metal bars that grant it some level of propulsion.
Atlas is a gargantuan robot; large enough to fill the screen. It spends most of its time dormant in the background with only its eyes, mouth and some lights to illuminate it. Its hands can be seen rather clearly; with 3-fingered claw grips for hands and a metal 'warning' hand on each.


Summon: Found within the final chamber of Zazabaan's lab; a colossal, fairly empty room located at the 'centre' of a subworld dedicated to it. You will be congratulated for making it there and offered the ability to test your abilities. Accepting will begin the fight, spawning either Valkyrie, the Blacksmith, or the Breaker. The one spawned first will depend on what attempt the player is on; cycling through them each attempt.

Fought: Post-Doppelganger
Attributes: Superboss


Attacks:
Due to the sheer scale of this fight, each boss will have its stats displayed during its own respective phase. Depending on the attempt, Valkyrie, Blacksmith and Breaker can switch places.

Valkyrie Phase:

Valkyrie
Stats:
Health: 2,350,000 (2,875,000)
Attack:
-310 (465) (Melee, Vortex Lightning)
-265 (400) (Feathers, Falling Stars)
-335 (500) (Vortex, Plasma Clouds)
Defence: 145

Valkyrie will perform a constant cycle consisting of 3 dashes followed by one of her 'main' attacks. She will align with the player along the horizontal axis for dashes, though the third dash is predictive. After 3 dashes she will use one of the following attacks:
-She will circle the player from far away, summoning plasma feathers in a circle around the player. After a short delay the feathers will dart inward and explode. There will be a small opening amidst the feathers for the player to move through. This attack is used 3 times in succession.
-She will circle the player, spawning plasma feathers continuously; creating a fast-moving spiral that the player has to avoid, again taking a short while for the feathers to begin moving. The stationary feathers not yet active will block the player from escaping the circle.
-She may dash downward from above the player, teleporting every time she passes them to re-appear above them. Throughout the duration of the attack falling star projectiles will rain down from the sky, increasing in density every time she dashes past the player.
-She may spin around an area, creating a powerful vortex that drags the player towards it. Lightning will also be shot from within the vortex randomly until it fades.
-At 65% health she will unlock a new attack. She may cause several glistening spots to appear near the player, one at a time. After a short delay she will dash through them all in a split-second, following the pattern they appeared in. Plasma clouds are also created nearby that linger through the next few attacks.
-At 40% health she will unlock a new, 'super' attack. She will teleport into the background, becoming invulnerable. She will dash back and forth, creating countless plasma feathers that are launched upwards. They will rain down atop the player rapidly over the next few seconds, with only a few small gaps every few seconds. Additionally, near the end of the attack, plasma clouds will appear randomly around the arena. At the end of the attack she returns to the arena and has a brief, 2-second cooldown before she becomes active again.

Blacksmith Phase:

Blacksmith
Stats:
Health: 4,750,000 (6,235,000)
Attack:
-285 (424) (Melee, Hammers, Molten Cannonball)
-255 (390) (Sparks, Molden Metal Blast, Flames)
-400 (600) (Fusion Cannon)
Defence: 200

The Blacksmith will typically stay diagonally above the player, though may reposition depending on the attack. He will often let out a booming laugh before his attacks:
-He may move above the player, grab a blob of liquid metal from Staryolk and hit it with his hammer; creating dozens of large sparks that are affected by gravity.
-He may rotate the Staryolk to be front of him, grab a second hammer, and dip them both in the forge he will throw his hammers over his head, rotate Staryolk back, grab the hammers and dash at the player 3 times, slamming his hammers together each time. Each hammer strike also creates sparks.
-He may rotate the Staryolk and fire 5 shotgun blasts of molten metal at the player. An arc of 5 shots is produced aimed at the player, alongside a cluster of random shots of varying angles and speeds.
-He may dash towards the player, firing up the Staryolk as he does so. He will then spin the Staryolk from his right to his left, spewing out flames from the nozzle.
-At 65% health Blacksmith unlocks a new attack, moving above the player and aiming the Staryolk at them. He will them fire 4 shots at the player, consisting of a few sparks and a large, molten cannonball that explodes after roughly a second. As the cannonballs travel they leave lingering trails of flames in their path.
-AT 40% health Blacksmith unlocks his 'super' attack, moving to the background and charging up Staryolk. Staryolk, when fully charged, creates a star-shaped 'gleam' effect before firing the Fusion Cannon; a colossal blast of flames. He will aim the fusion cannon to chase the player for 7 seconds, with the cannon's movements accelerating if it moves in one direction for too long. It will also create a lingering flame trail as it is fired. After the 7 seconds pass Blacksmith returns to the arena, pats Staryolk, laughs and waits for it to flare back to life after a couple of seconds.
Zazabaan (Continued)
Breaker Phase:

Breaker
Stats:
Health: 5,000,000 (6,955,000)
Attack:
-345 (515) (Head Melee, Giga-Nuke)
-300 (445) (Body Melee, Flame Pillars)
-265 (400) (Missiles, Beams, Lasers)
Defence:
-175 (Head)
-225 +20% DR (Body)

[Piercing projectiles lose a % of their base damage based on how much pierce they have. Minions that deal melee damage are also affected.]

Breaker will pursue the player at high speed between attacks; performing short dashes whenever it gets close. While it uses one of its main attacks it will slow down and stop dashing, but generally keeps up its pursuit:
-The eyes on its body segments may each open up and launch a homing missile. After a few seconds they lose their homing properties and begin accelerating rapidly.
-It may move diagonally downwards, releasing mines from its 3rd, 5th and 8th segments. After a short time these explode and create pillars of fire either cardinally or ordinally, shown via faint orange telegraphs.
-It may release thin beams from all of its even-numbered segments to their immediate left and right. This attack, like the flame pillars, is telegraphed.
-It may fire a laser from each of it segments towards the player, starting from either the tail end or the head end.
-At 65% health it gains a new attack where it releases a giant homing explosive from its mouth. This will follow the player for a while, and after a few seconds will explode violently, creating a deadly shockwave.
-At 40% it unlocks its 'super' attack, flying into the background. It will then barrage the arena with missiles and mines which explode as soon as they enter the arena. Missiles are telegraphed via red targets appearing where they will explode, while mines are telegraphed using the same way they are normally. At the end of the attack it will return to the arena, release a blast of steam from all its segments, and continue attacking after a 2-second delay.

When all 3 of the previous sub-bosses have been defeated, Zazabaan himself will fly down into the arena for the final phase in Normal Mode.

Zazabaan Phase

Zazabaan
Stats:
Health: 5,000,000 (7,000,000)
Attack:
-335 (500) (Melee, Deathray, Vortex, Giga Plasma Sword)
-350 (520) (Railgun Beam)
-285 (420) (Railgun Bolts, Missile Portals, Missiles, Sparks)
-300 (445) (Sword Plasma Trails, Crystal Explosions, Energy Pillars)
Defence: 250 +20% DR

'I'm impressed - you do have quite the astonishing amount of potential.'
'So, here is one final task...'
'Defeat Me.'

Zazabaan's main attack consists of firing horizontal beams of energy from a railgun-like weapon attached to his arm. He will rapidly reposition between each blast, trying to align with the player along the horizontal axis either directly or predictively based on player movement, before firing. With each blast 4 additional 'bolts' are created, launched in a wide arc from the barrel of the railgun alongside the beam.
When using one of his other attacks he will stop firing and retract the railgun attachment on his arm:
-He may create 2 deathrays from his chest, each launched almost vertically initially before they sweep inward, stopping shortly before they collide. Once they fade a third deathray is suddenly fired horizontally, covering the gap left by the 2 previous ones.
-He may draw a large sword and dash at the player multiple times, slashing as he dashes. Each slash creates an uneven 'tear' in the sky filled with plasma that lingers for the remainder of the attack.
-He may open small, red portals in front of himself as he flies alongside the player. Each portal releases a high-velocity missile that has a mild homing effect, exploding on contact with an arena wall or the player.
-He may flap his wings, creating tiny glistening crystals that fly in a wide cone towards the player. Once a second has passed they will begin exploding, though their explosion timers are random and unpredictable.
As Zazabaan loses health he will gradually unlock more attacks:
-80%: He may fly into the background and dash across the screen, launching dozens of the small crystals towards the foreground over a wide area. Each of these crystals explodes upon reaching the foreground, filling the arena with explosions.
-60%: He may release multiple 'mines' from his wings that fly toward the player, stop, and then explode. Upon exploding these release 'pillars' of energy either cardinally or ordinally, depending on the markings on the mines. The pillars linger for roughly a second before dissipating.
-40%: He may fire a strange orb from the railgun toward the player that, after reaching them, explodes and expands into a powerful vortex. This vortex drags the player towards it, as well as several smaller 'spark' projectiles. The 'sparks' are pulled in from off-screen randomly while the vortex is active. Once the attack ends Zazabaan flies into the vortex himself, destroying it.
-25%: He may charge the railgun, causing it to create a giant plasma sword that extends out from between the railgun's rails. He will then dash at the player 3 times, swinging the sword each time. After the third swing the sword explodes into a flower-shaped pattern of plasma sparks.

Expert Changes:
-Attacks unlocked by Valkyrie, Blacksmith and Breaker at 65% and 40% health will be used as soon as they unlock them. Zazabaan will also immediately use any attacks unlocked during his first phase.
-When Valkyrie, Blacksmith or Breaker reach 20% health the next robot in-sequence will enter the fight. They will be invulnerable and will attack very slowly. The final one of the three to appear does not receive this, as both other robots will have already been defeated.
-Zazabaan's dialogue at the start of his phase changes:
--'I'm impressed - you do have quite the astonishing amount of potential.'
--'But there is much more to be done. I see yet more potential in you.'
-Additionally, 3 entire extra phases are added to the fight:
Zazabaan (Continued [2])
Hydra Phase:

Hydra
Stats:
Health: 4,758,500
Attack:
-450 (Melee, Deathrays)
-400 (Fireball)
-420 (Flame Ring, Flame Pillars)
-500 (Giga Fireball)
Defence: 185

The Hydra will dash at the player 4 times between each attack, letting out a roar at the end of the final charge. It may dash to a location a little higher than the player before it attacks:
-It may spew streams of fireballs from its mouths towards the player. The fireballs from the central mouth have seeking properties.
-It may create a large ring of fire and launch it at the player. Once it reaches the player it will explode, releasing 16 fireballs that disperse in a spiral.
-It may move beneath the player and dash upward, creating a pillar of flame that lingers throughout the duration of the attack. It will do this 5 times; the first 4 being predictive while the 5th dashes up directly beneath the player.
-It may roar, causing numerous fireballs to begin rising from the ground at varying speeds.
-At 65% health it will unlock a new attack where it fires 2 deathrays either side of the player with its outer heads and fires fireballs towards them with its central head. There is little room to dodge. At the end of the attack when the outer heads' deathrays fade the central head will fire a deathray down the middle of where they had been.
-At 40% health it gains its 'super' attack where it flies into the background, charges 3 giant fireballs, and launches them towards the player. Each one will create a rapidly expanding explosion upon reaching the arena. Once it launches the 3rd fireball it will return to the arena.

Once the Hydra is defeated, a warning siren with blare and jets of steam will be seen in the background while a large blast door opens. A large, orange eye will flare to life, and slowly Atlas will emerge; shaking the screen as it wakes.

Atlas Phase:

Atlas
Stats:
Health: 7,500,000
Attack:
-600 (Arm Melee)
-450 (Missiles, Fiery Clouds)
-500 (Eye Beam, Deathray)
Defence: 200

Atlas' main body is only partially seen in the darkness, with its head acting as its only weak point. It lets out billows of harmless steam between attacks to signal it's about to attack again:
-It may fire missiles into the air that rain down similar to Valkyrie's 'super' move. Plasma clouds are not created like in Valkyrie's attack, however.
-It may charge up a beam in its large eye that fires at the player similar to Blacksmith's 'super' move. No damaging trail is created like in Blacksmith's attack, however.
-It may launch missiles directly towards the screen, similar to Breaker's 'super' move. No mines are created like Breaker's attack, however.
At 70% health its arms will become active. Its face will now move around to accommodate for the arms' positioning. It stops using its earlier attacks:
-It may swing its huge arms at the player, indicated by large, striped telegraphs.
-It may bring its arms horizontal with the player and try to crush the player between them.
-It may bring its arms to the far edges of the arena and fire horizontal deathrays from the palms of its claws.
-It may bring its arms up from near the bottom of the arena, opening its claws to fire huge barrages of inaccurate missiles from its palms.
At 50% health it will begin using its earlier attacks again and stop using its arms. The attacks receive changes based on Valkyrie/Blacksmith/Breaker's super moves:
-The missile rain now sometimes releases special missiles that leave fiery clouds upon exploding.
-The eye laser now leaves a damaging fiery cloud trail behind it.
-The missile barrage now occasionally releases larger missiles that have a delayed explosion. They release deathrays cardinally upon exploding.
At 40% health it will gain access to its entire moveset: both its enhanced early attacks and its arm-focused attacks.
Zazabaan (Continued [3])
Final Phase:
Zazabaan (& Co.)
Stats:
Health: 5,000,000 (7,000,000)
Attack:
-335 (500) (Melee, Deathray, Vortex)
-350 (520) (Railgun Beam)
-285 (420) (Railgun Bolts, Plasma Sparks, Missiles)
-300 (445) (Plasma pillars, Plasma Clouds)
Defence: 250 +20% DR

'You have one more hurdle to cross.'
'Come, let us end this.'

Zazabaan will appear, restore his health to full, and begin the final phase of the fight. This phase is nearly identical to Zazabaan's earlier phase, minus a few small changes and one large change.
-The small change is that Zazabaan will unlock his attacks much sooner than before. The plasma cloud and plasma ball attacks are unlocked immediately, the plasma orb ring is unlocked at 80%, the vortex attack is unlocked at 65%, and the plasma sword is unlocked at 50%.
-The most significant change in this phase, however, is that all of Zazabaan's robots become involved. All 5 of them will be 'called in' during Zazabaan's attacks to use weaker, slower versions of their own attacks, though they cannot use any of their 'super attacks' and Atlas cannot use any of his enhanced attack variants. The support robots cannot be damaged, so the player has to focus their firepower solely on Zazabaan.


For The Worthy Changes:
-Slightly boosted attack speed and aggression overall.
-'Rest time' between later phases reduced.

GetFixedBoi Changes:
-In the final Zazabaan phase all his robots have access to all of their moves, super moves included.


Defeat: Each phase has a different defeat animation for each robot:
-Valkyrie will flinch, spark a little, and fly upwards.
-Blacksmith will flinch, smoke from his exhaust and from Staryolk, and exit horizontally.
-Breaker will spark across all its segments and dive downward off-screen.
-Zazabaan will recoil from being attacked and fly upward at the end of his first phase.
-Hydra will explode partially, smoldering as it falls off-screen.
-Atlas opens its mouth wide in shock as its sirens blare. It then backs away, creating more rumbling.
-Zazabaan's second defeat has him release a pulse of energy as he recoils. He drops his weapon, his 'energy wings' become smaller, and he dashes to the bottom middle of the arena.
He will congratulate the player for winning, with unique dialogue depending on the difficulty, and says he hopes to fight them again some time.
-Additionally, he will grant use of his forge; allowing the player to access an all-encompassing crafting station that can also be used to craft post-game weapons... when they gather the right materials.

Lore:
Zazabaan:
I see you're trying to find some data on me. To put it bluntly, I'm an engineer with far too much free time on his hands. There is little else to tell, really.
Valkyrie:
Valkyrie? She was someone I rescued some time ago from the clutches of some monstrous scientist who elected to stay by my side. I may not be perfect, but there are still some things I will not stand for.
Blacksmith:
Oh, the Blacksmith? He was an old, rusted robot I found abandoned in a scrapyard. I fixed him up and found he had a knack for creating things, so I gave him Staryolk; his own personal forge.
Breaker:
Breaker is an old robot; one of my oldest, even. It's had many alterations since its original design, which was practically built to explode. Some day I hope to install a proper personality chip into it. I wonder what it'd say if I did that?
Hydra:
Hydra is a prototype, a robot I've yet to finish. I've been working tirelessly to refine it as much as I can, and I'll admit my idea to use it during our battle was probably unwise. Why do I want it finished so soon? It... doesn't matter.
Atlas:
The big guy responsible for helping me excavate and build my new lab. At full power he could probably pick up the entire island of Terraria, just like his namesake, but he's usually asleep and it does take him a little time to get his act together.

Extra Info:
-Zazabaan has been another recurring boss since Boss Ideas 8. While he is incredibly important to the lore, direct fights with him are limited. His robots, however, have appeared infrequently since his introduction.
-Valkyrie has had one appearance back in Boss Ideas 11, though her ties to Zazabaan were limited. Her updated look is similar to the original, though her outfit has changed, as has her movepool.
-Breaker is actually an updated version of his mechworm from his Boss Ideas 8 fight, redesigned almost entirely, with only a few callbacks to the original design.
-Blacksmith, Hydra and Atlas were concepts from a mod I used to work on. They did not see any public appearances until now, with notable updates to all their designs.
-Blacksmith's forge, the Staryolk, is designed based on the Gunyolk boss from Super Mario RPG.
--Blacksmith himself also shares some similarities to Smithy, the final boss of the game, with his large beard, hammer, and ties to 'smithing' in both his name and concept.
-Atlas has two main inspirations, one of which being the giant Drone robots from Crazy Frog which inspired much of its appearance, and the other is the Pokemon Regigigas, as evidenced by its lore entry.
--The term 'get his act together' in the lore is a direct reference to Regigigas' Slow Start ability, which states Regigigas 'got its act together' after being on the field for 5 turns.
-All of Zazabaan's lore entries are written by Zazabaan himself and actually appear to be conversations between him and the player.
-Zazabaan's fight, even with the weapon upgrades from the post-game, is even longer than the Doppelganger's fight in Expert Mode. In Normal Mode you 'only' have 17,100,000 to get through due to it only being the first 4 phases, while in Expert Mode you have to work your way through a whopping 40,823,500 health between all the phases.
-As of 14/3/25, Zazabaan's fight is the only boss to have received any significant changes, as Boss Ideas 14 itself is still the 'active' part and is thus free to be updated. The main changes were to Zazabaan's own phase, making it clearer but also tougher.
[Added: 17/3/24]
[Updated: 14/3/25]
[Final Notes]
And with that, Boss Ideas 14 exists!

I know I've kept people waiting for a long time with this, with all the rewrites and other duties I've had, so I hope it's to your liking.


Now, I will say that there are plans for more stuff for Boss Ideas 14 that I might be able to shape into stuff, especially related to the Post-Game, but I will not make any promises yet until those plans are properly under way. If these bonus pages do get made I'll let you know and update the title of this one to the usual numbering system if needs be and link it below.


I'd strongly advise checking out my other stuff, Boss Ideas or not, 'cause there might be stuff going on that you enjoy elsewhere. If you do want to stick to Boss Ideas though... 10, 11 and 13 are probably the best-written simply due to me refining the craft, but it's really up to you. :P

Or, if you'd like, stop by the new Discord server! The old Boss Ideas one doesn't really see use anymore, so I made a more general server for my stuff that's much more active. Maybe I'll see some of you there? 'v'
[the link doesn't work anymore, darn... gotta get a new one...]


Anyways, I need to stop rambling now; I'm sure you've read enough after the 4-chapter ordeal that was Zazabaan's boss fight...


I hope you enjoyed the bosses and their designs, and I hope to see you next time for whatever it is I end up making!

See you next time 'v'
33 Comments
1481146725 2 Dec, 2024 @ 10:57am 
Sorry for taking so long to reply. When I mentioned last time that you 'no longer create pixel art', there was indeed a problem with my expression. What I really meant to express is that your painting style is no longer 'Terraria' compared to the boss idea from a few years ago. As a Terraria fan, I prefer to appreciate those Terraria style stickers. However, creating something is your freedom, and I have no right to interfere. As your fan, I will continue to support you as always. If future works can return to the Terraria style of a few years ago, that would be even better
Okami Tomato  [author] 18 Oct, 2024 @ 12:59pm 
Thank you so much 'v'

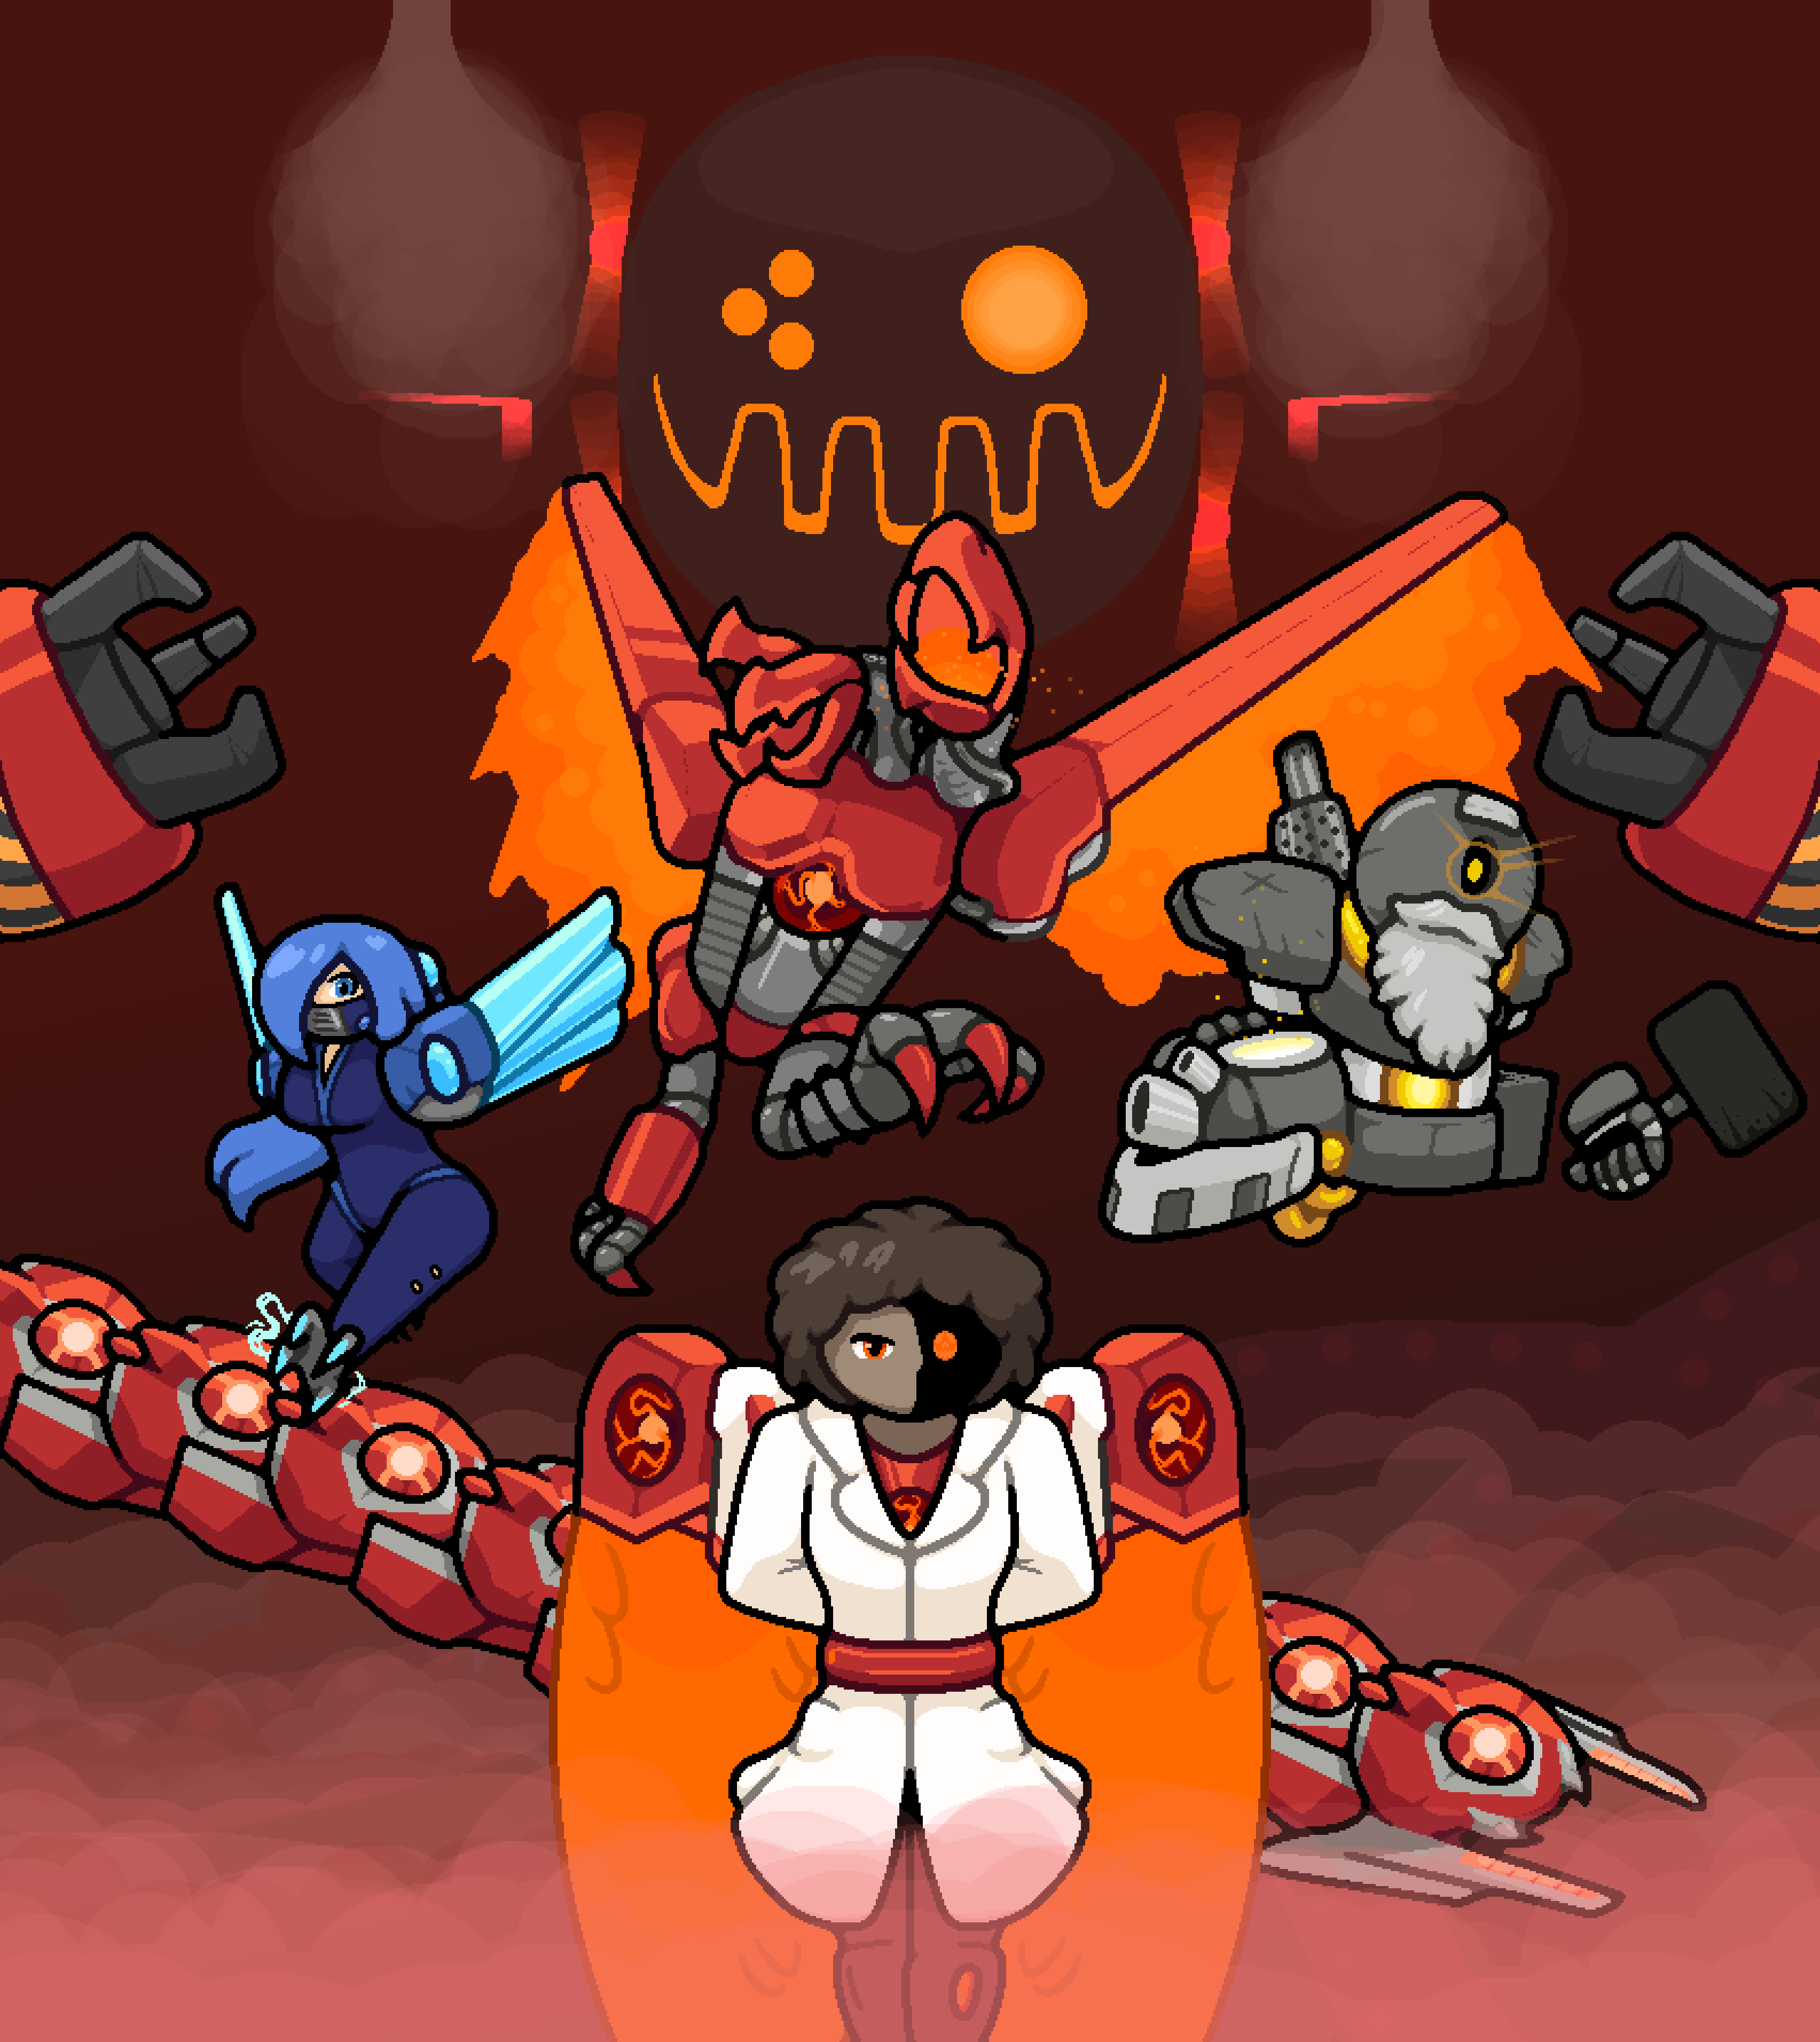
Admittedly I was somewhat disheartened when these pages seemed to have a generally worse reception than most of them in the past, probably in-part due to the several year-long gap between parts 13 and 14, but I'm glad people are still visiting to check them out and are still generally enjoying them


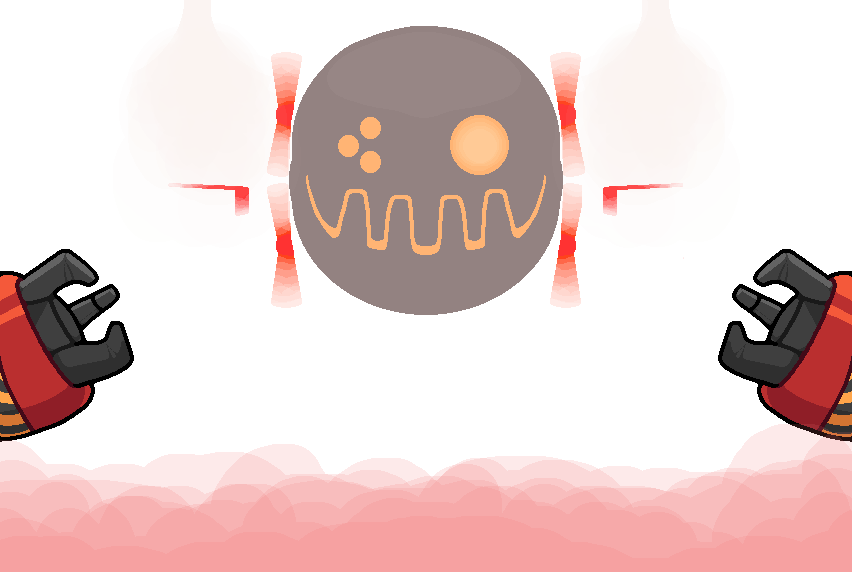
At the moment there are two other pages, the Lab and Tomato Event, related to Boss Ideas 14, with a final page to be worked on at a later date once I finish up some of my university-related work for the year
KIADA DAIE 18 Oct, 2024 @ 9:56am 
Yet again im in awe of your amazing attention to detail and your dedication to this project. I believe i have 2 entries to eagerly read to be up to date. I cant express in words how amazing and talented I think you are. Thank you for feeding my imagination and for the sheer amount of time you put into boss ideas. Genius.
dfullington 14 Oct, 2024 @ 10:59am 
probably same here but i have my own mod idea
cat 3 Sep, 2024 @ 4:47pm 
all u need is items and a dev team as stated in your response
cat 3 Sep, 2024 @ 4:45pm 
ah when i get into coding ill gladly help
Okami Tomato  [author] 2 Sep, 2024 @ 5:45pm 
Trust me, I'd love to and a lot of people seem interested

Only real thing holding me back is that I'd need a proper dev team to make a mod of this scale and that is something I sadly don't have yet

But, y'know, it's not impossible...
cat 2 Sep, 2024 @ 3:19pm 
make a mod i need more amazing mods to explore
Okami Tomato  [author] 23 Jul, 2024 @ 3:20pm 
For the sake of continuing an inside joke I'd like to say they'd arrange a gaming night with MoR's King Slayer

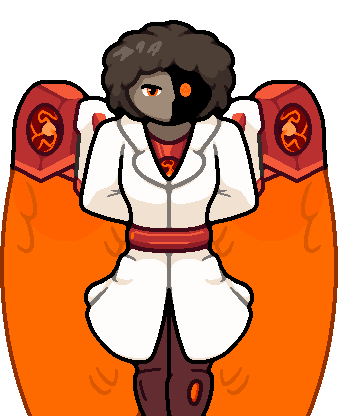
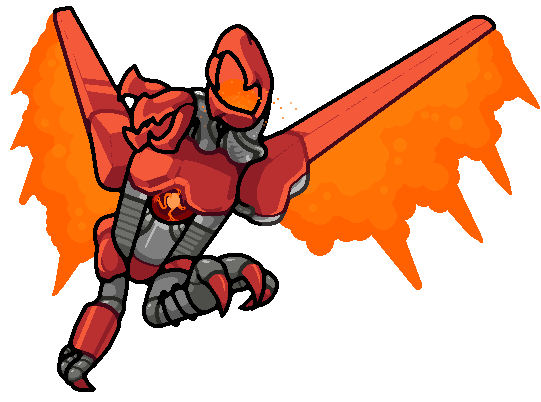
...but if we're talking actual canon they'd probably get along due to their scientific prowess and share ideas for projects or something. Heck, maybe even collab if Draedon would be down for that
dfullington 23 Jul, 2024 @ 10:37am 
if draedon (from the calamity mod) meets zazabaan would they use their machines to fight?