Dragon Marked For Death

Dragon Marked For Death

Not enough ratings
Starter Guide
By Amanuelle
This is a abridge version of the Starter-Guide on our discord.
https://discord.gg/rMHH2BUJRR

(Q): Why is this here?
(A): Because some people don't like using Discord so we share the information here
   
Award
Favorite
Favorited
Unfavorite
About the author
Clearly I enjoyed playing. This doesn't include my 2nd account for speed-run attempts, my time on Ps4, or the time spent boosting my friend's account. The true number is probably around 3000 hrs. Additionally I have solo clear the entire game including the final mission "Ancient Gods" on each character across all platforms.
Except Oracle...I couldn't bring myself to do it again on Steam... I just hate playing her


Onward to the actual guide
The Cast
Playable Characters
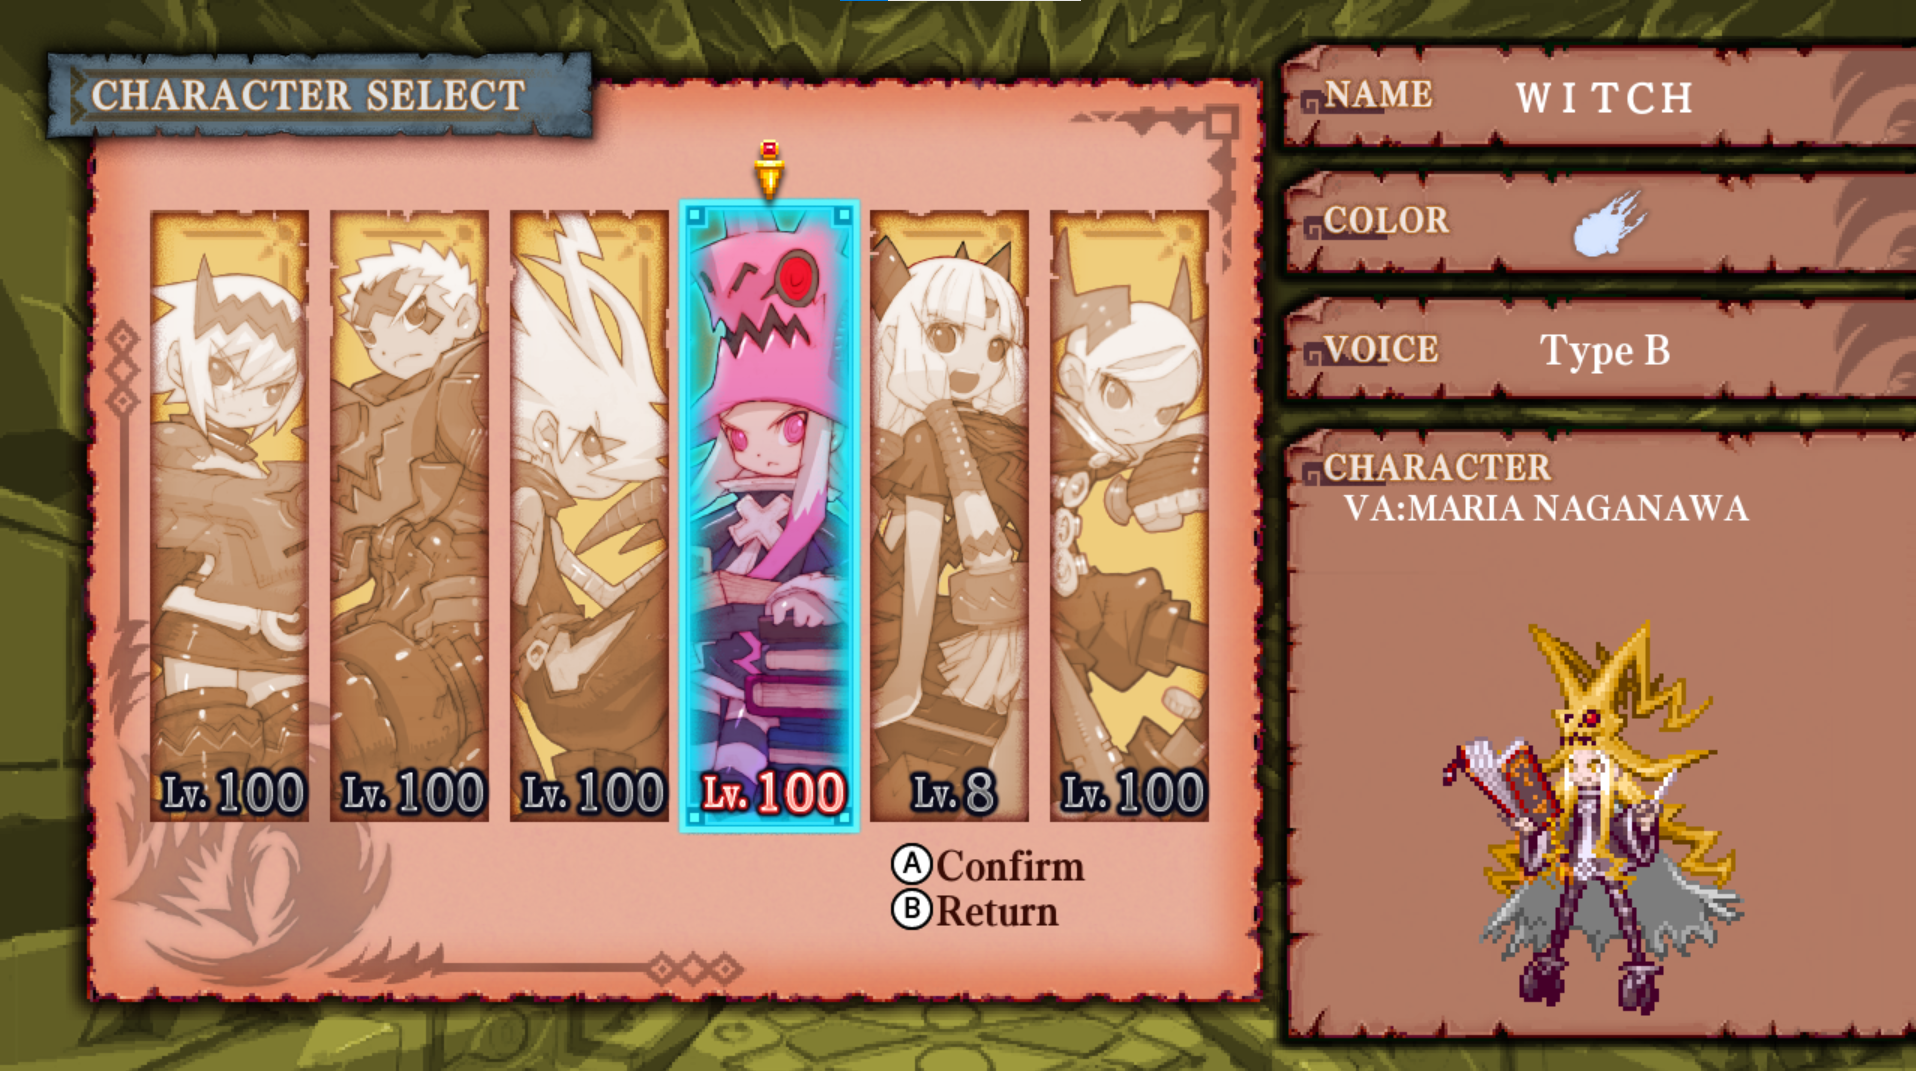
They're six characters (or classes) you can choose in DMFD. Empress, Warrior, Shinobi, and Witch are available from the start. While Oracle and Bandit are tied behind two quest chains. Each character is highly unique and your choice should be dependent on your play-style preference. To provide even more variance in their style, you may also pick an Elemental Contract - Fire, Water, Wind, Thunder, or Poison. Each contract has a different affect on each character, altering various skills, adding powerful effects to existing ones, and even affecting mobility at times.


Unlockable Characters
Oracle and Bandit are some of the best in-game. Both are unlocked following two quest chains, once. Doing so unlocks them permanently even on other save files.
How to Unlock:
Oracle - Complete 'The Astral Dragon'
Bandit - Complete 'The Dragonblood Bandit'

In a Party
Players can coordinate their abilities and tactics to take down powerful enemies and bosses, as well as complete objectives within the game's various missions. Communication and cooperation are the key to successful missions.

Additionally, multiplayer mode introduces dynamic difficulty based on party size, increasing the bosses total hp by 50% per player! Ensuring that encounters remain balanced and engaging regardless of group size.
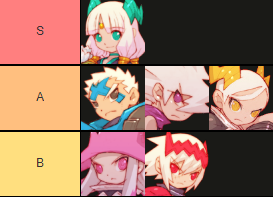
The "meta" for co-op is as follows:
Apply burn to boss > murder > chest opener opens chest > profit

Content can be cleared by any composition but some characters contribute more than others!


Oracle
Damage - High
Durability - Very High
Mobility - High
Utility - Very High
Difficulty - Moderate

Warrior
Damage - High
Durability - High
Mobility - Very Low
Utility - High
Difficulty - Low

Shinobi
Damage - High
Durability - Low
Mobility - Very High
Utility - Moderate
Difficulty - Low

Witch
Damage - Results may vary
Durability - High
Mobility - Low
Utility - High
Difficulty - Very High

Bandit
Damage - Very High
Durability - Very Low
Mobility - Very High
Utility - High
Difficulty - Low

Empress
Damage - High
Durability - Moderate
Mobility - Moderate
Utility - Very Low
Difficulty - Moderate
Solo
Solo play will prove daunting at times, but in this author's opinion, it is the most rewarding. You experience it all—the solace of knowing no one failed you but yourself, the frustration of inadequate LUC for drops, and the joy of finally knocking over that ♥♥♥♥♥♥♥ horse! It is important to note here that ALL content can be cleared in solo play. By every class! If you’re struggling against a particular boss, you are either being stat checked, the attack pattern isn’t obvious yet, or respectfully. Its a skill issue.


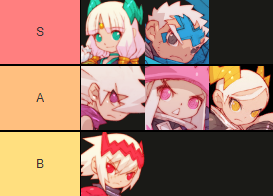
Some of you may be wondering why the tier list differs between party and solo play. There are many factors to consider, including survivability, utility, ease of use, total cost, etc. However, the main reason is damage. In a party, DP (Dragon Points) are so plentiful that classes like the Witch and Warrior have their damage output enormously increased, while others who aren't DP reliant, such as the Shinobi and Bandit, see their damage remain the same. I should mention that neither of these lists reflects well on the Empress. However, she has the second or third best damage throughout most of the game.
Before Adventuring
Status Effects
You should become familiar with the status effects in-game. Negative status effects can be applied by elemental weapons, Dragon Skills, or the incantation spells. Each negative status has a different effect on player characters and enemy monsters.

Poison
Players: Inflicts damage over time based on the player's max HP (4% per tick over 20 ticks).
Monsters: Inflicts damage over time based on the monster's max HP. The potency of Poison varies according to the monster.

Confusion
Players: Reverses directional controls.
Monsters: Removes aggro from the player and enables friendly fire. For bosses, increases the time between attacks.

Burn
Players: Amplifies incoming damage by 100%.
Monsters: Amplifies incoming physical damage by 50%.

Frostbite
Players: Reduces movement speed and jump height.
Monsters: Reduces AGI by 20% (minimum 10, maximum 20).

Paralysis
Players: Disables attacking, dashing and Dragon Skills.
Monsters: Stuns for a short duration.

Dragon Sphere
The Dragon Sphere is a floating orb that appears when certain bosses have 20% HP or below. It will bounce around the screen, and when broken, will deal major damage to the boss and grant you infinite DP for the remainder of the fight. As soon as the Dragon Sphere appears on the screen, all damage dealt by player characters to the boss will be halved. Some weapons amplify damage while the Dragon Sphere is active.

Elemental Weaknesses
The Witch/Oracle spells, Bandit Relics, or weapons with the "Deals magical damage" property have varying effectiveness on enemies, depending on their element. For example, using a Wind spell on an enemy with the Thunder element will result in much higher magic resistance against that spell. Conversely, using a Water spell on an enemy with the Fire element will result in increased damage for that spell. Elemental advantages are as follows:
Wind > Poison > Water > Fire > Thunder > Wind

Resist Instant-death
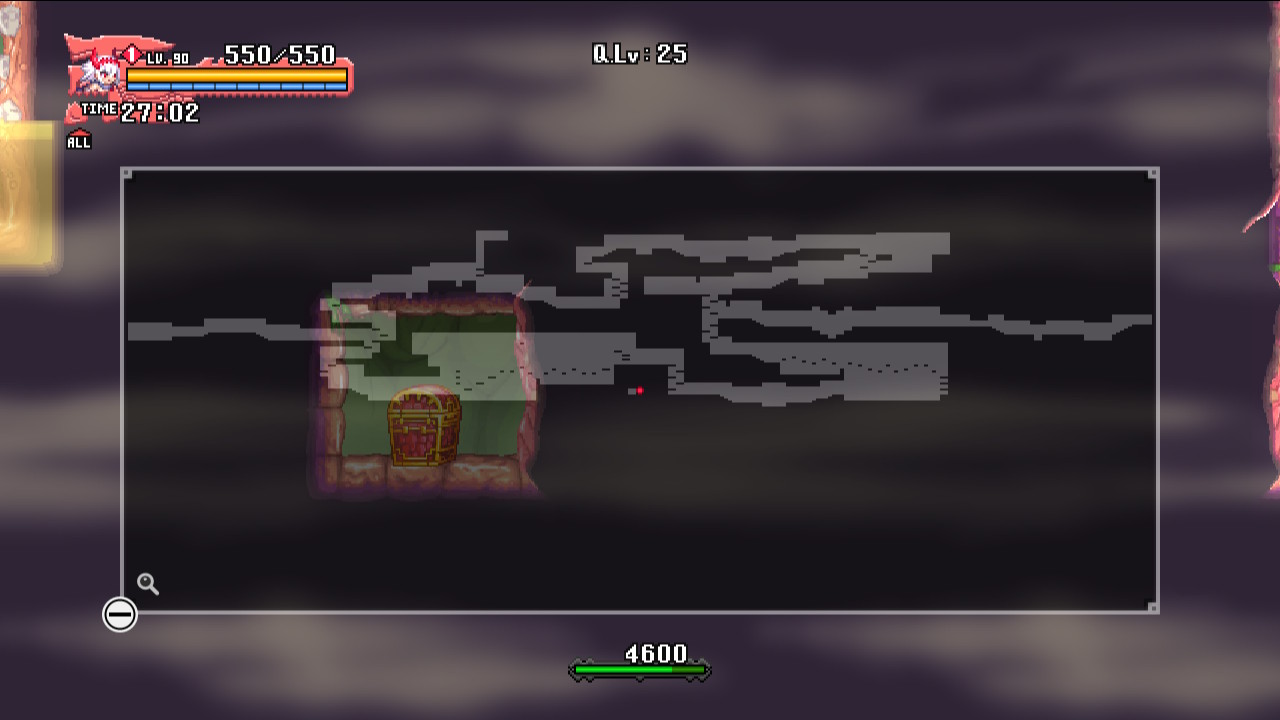
Occasionally, you may have difficulty dodging attacks that kill you in one hit. Getting an accessory with the "Resist instant-death" attribute can be extremely useful in these situations. The easiest source of this is the secret passage chest after the first acid pit in Sea of Tumult (Q.Lv: 15). Several higher level accessories, such as the Dragon King's Crystal and Cavern of Torment class accessories also have Resist instant-death. Seen below:
(Please click or tap to enlarge the media below)


Camera
Triggered by flicking the right analog stick. Although it is usually best to play with the camera fully zoomed out so that you have a wider field of view, there are a few things that can only be done by playing zoomed in. Fully zooming in will allow you to differentiate between Might Mushrooms (restores health, gives a temporary buff to all stats) and Blight Mushrooms (poisons your character), read the walls to determine the correct paths to follow in the Litus Royal Tomb, and even see in dark areas.

Enemy Types
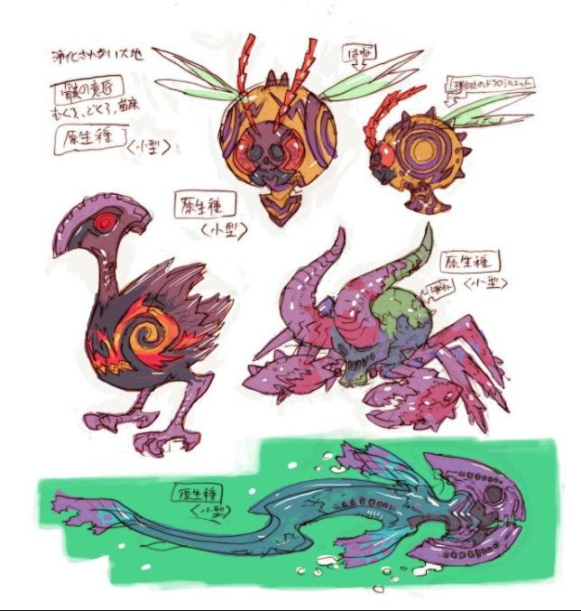
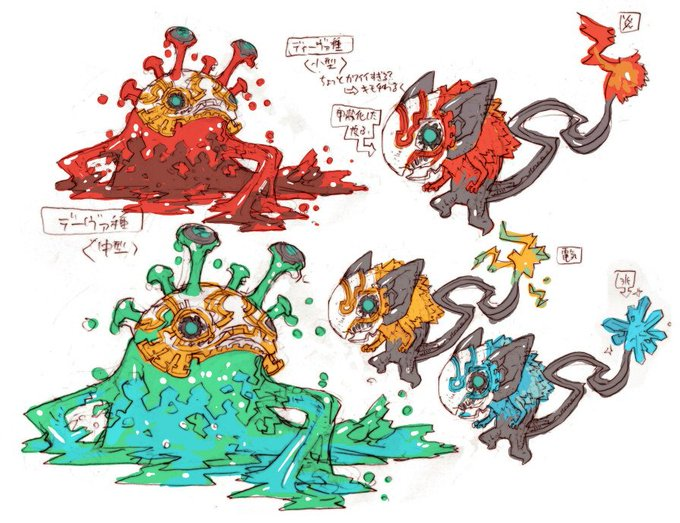
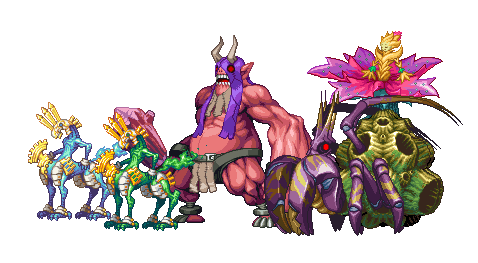
There are three types of enemies in the game - Primal, Asura and Deva. Each type is weak to specific weapons and attacks, and even bosses all belong to one of these three types. The details of each are briefly described below.

[Primal]
Primal enemies are typically monsters you see in the wild, such as in forest maps, though they appear in other maps as well. They generally resemble beasts and are the most common type of enemy. Primal enemies take normal damage from Dragon Skills. Primal enemies hit with dragon skills show as white.

Examples: Demonpillar, Skullbee, Mandrake, Cthulhu


[Deva]
Deva enemies are typically related to the Celestial. Monsters which have "Deva" in their name are also Deva (obviously). Deva enemies take double damage from Dragon Skills. Deva enemies hit with dragon skills show as orange.

Examples: Deva Rat, Deva Slime, Equus, Tonitrus


[Asura]
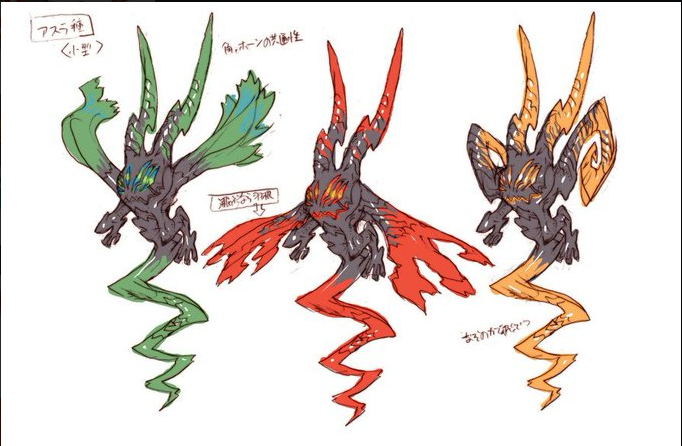
Asura enemies are typically related to Dragons. Monsters which have "Asura" in their name are also Asura (obviously). Asura enemies take 33% less damage from Dragon Skills. Asura enemies hit with dragon skills show as purple.

Examples: Asura Bat, Asura Goblin, Twin Dragon, Atruum


Coins, Cubes and Gems
Familiarize yourself with the below image. If you ever see any of these drop you stop what you're doing an pick it up. Especially the first eight as they're used in crafting some of the better equipment in-game. Those first eight should not be wasted on frivolous purchases and should only be used to purchase specific equipment.
Customization
Quick Commands
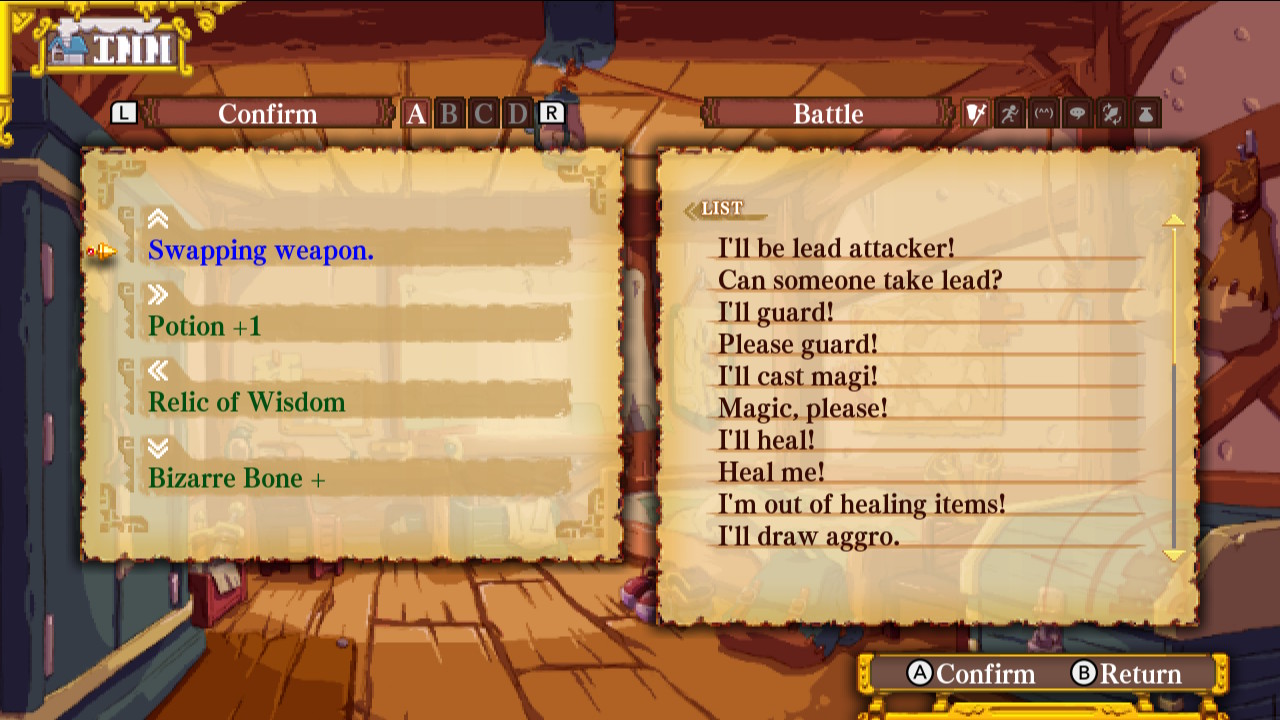
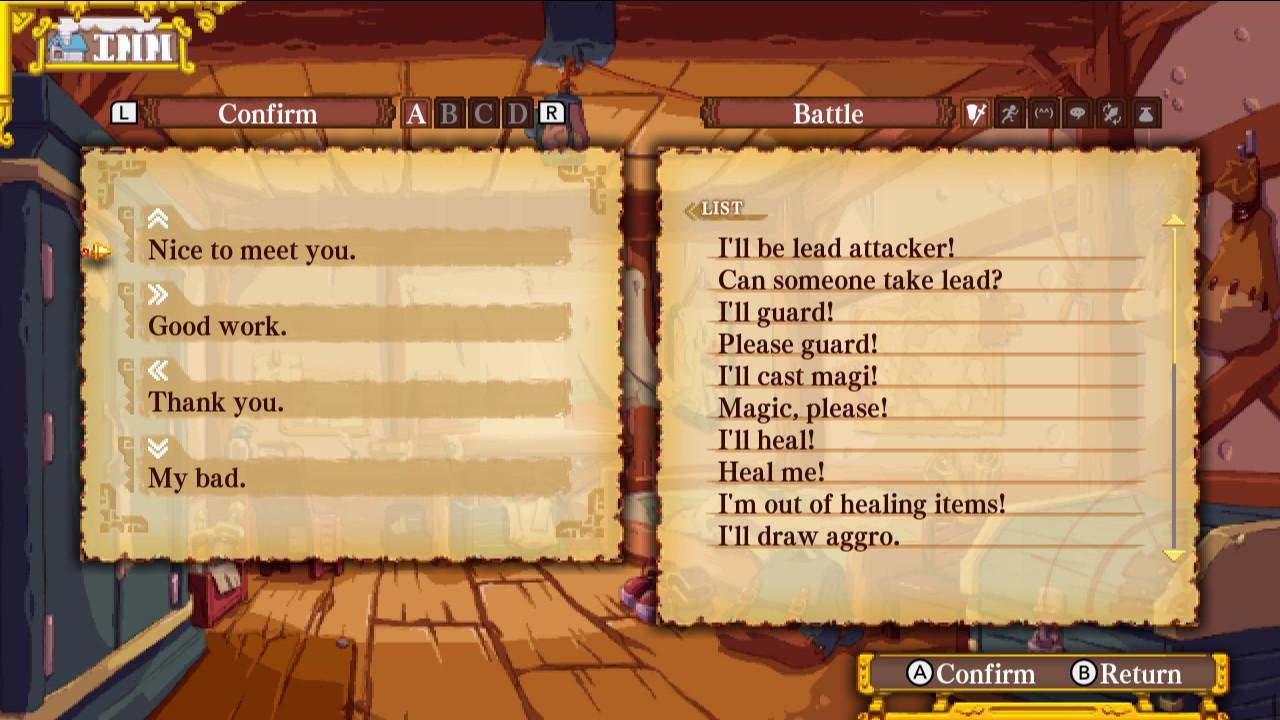
One of the best features in game. An inarguably crucial to performing well in multiplayer! This function lets you preset several pages for communication, quick use items, or weapon swapping. In order to assign quick command shortcuts, head to the Inn in town and select "Assign quick command". There, you can change the options that pop up in the quick menu triggered by using the L2/R2 buttons.


Elemental Contracts
Elemental Contracts alter the playstyle of each character through modifying their Dragon Skills. The status effects inflicted by Dragon Skills also depend on the Elemental Contract you select. In order to change your Elemental Contract, you require Dragonite. The process is the same as that of changing your stat point allocation. For further detail on these contracts please refer to the specific character guide on our Discord.

Stats
There are six main types of stats in DMFD, which increase as you level up. On top of native stat growth, you will be awarded one stat point to allocate to the stat of your choice every time you level up. Weapons and accessories can provide secondary stats that levels alone cannot. Stats make up a third of your character - the other two parts being Elemental Contracts and equipment. Optimal stat allocation are addressed in specific character guides on the Discord.

Primary Stats

Primary stats are stats that can be increased both by leveling up and by getting better equipment. They typically have several properties, often bolstering the effects of multiple secondary stats simultaneously. In order to change your stat point allocation, you require Dragonite, a consumable material found randomly in certain boss chests or through completing specific quests. Dragonite may be used in Atruum's Den, at the extreme left of the slums.

STR
STR provides raw physical power. On its own, it only increases base damage by a fixed amount, meaning that only putting points into STR has diminishing returns. However, it scales together with AGI's multiplicative effect, making them the powerhouses of any physical build.

AGI
AGI adds a multiplier to your damage. For every 10 AGI you have over the target enemy, the multiplier will increase by one tier, also known as increasing the Hit value on your attacks (the default is 1 Hit). The Shinobi and Witch gain a 5 AGI bonus when calculating the Hit value, meaning that they only need 5 AGI over the target to reach 2 Hit, and 15 AGI to reach 3 Hit. In addition to providing a physical damage multiplier, AGI also adds a chance for enemies to fumble their attacks on you, dealing only 1 damage. Conversely, should your AGI be lower than the target, you will also have a chance to fumble your attack, dealing less damage than expected.

INT
INT provides raw magic power. It only affects magic attacks, such as the Witch/Oracle spells, Bandit Relics, or weapons with the "Deals magical damage" property. INT is similar to STR, with the difference being that magic damage does not get multiplied by AGI. If your INT is lower than the target's, your magic attacks will have a higher chance of being resisted, dealing less damage. On top of improving magic damage and accuracy, INT also provides slight resistance against enemy magic attacks.

VIT
VIT increases max HP and reduces the amount of damage you take. Each point of VIT increases max HP by 10. The defensive effects of VIT become more apparent at high amounts of it.

LUC
LUC increases the chances of getting rare items from treasure chests, and marginal increases to hit/crit chance. The character who opens a treasure chest determines the drop based on their LUC, but there is a cap on how much it will improve rates. Each individual treasure chest has its own item pool. 100 LUC is the highest required, and 150 LUC and above has a negative effect on rare drops. In addition, higher LUC increases resistance to status effects as well as the chance of inflicting status effects on enemies. Stage drops are also influenced by LUC - recovery food will drop more frequently with higher LUC, but Litus Pieces are unaffected.

PIE
PIE increases the power of Dragon Skills (Dragon Shot/Cannon, Dragon Smash, Dragon Kick, Homing Shuriken), which are classified as divine damage. Scales linearly like STR and INT, but remains "viable" even in the endgame due to immense PIE bonuses on certain class-specific Accessories. Also improves healing, such as the Warrior's Dragon Guard or the Witch's Heal spells.


Secondary Stats

Secondary stats are stats that are only affected by equipment, and cannot be modified directly using stat points. Their positive effects are much more specific.

ATK
ATK is the base physical damage stat. Weapons with higher ATK typically deal more damage.

M.ATK
M.ATK is the base magic damage stat. Weapons with higher M.ATK typically deal more damage.

DEF
DEF is the base physical defense stat. Equipment with higher DEF typically reduce more incoming physical damage.

M.DEF
M.DEF is the base magic defense stat. Equipment with higher M.DEF typically reduce more incoming magic damage.

ACC
ACC is the base accuracy stat. It reduces the chance of fumbling your physical attacks or enemies resisting them, thus ensuring full damage.

M.ACC
M.ACC is the base magic accuracy stat. It reduces the chance of enemies resisting your magic attacks, thus ensuring full damage.

CRT
CRT is the base critical hit chance stat. It increases the chance of your physical attacks landing a critical hit, improving overall damage output.
Damage in a nutshell
REREAD THE STATS SECTION

Physical Builds
You need enough ATK value so enemies cannot block your damage, and you need enough AGI so your attacks don't fumble. These values are as followed:
- Player STR + ATK > Enemy VIT + Enemy Lv,
(Axe and Greatswords high ATK value is why Warrior and Oracle don't need STR at all)
- Player AGI > Enemy AGI,
(Look at specific guides for individual AGI caps)
For additional damage apply burn to your target! !

AGI requirements
Longsword(Max 5Hit!!)
0, 10, 20, 30, 40

Shortsword(Max 8Hit!!)
0, 5, 10, 15, 20, 25, 30 ,35

Axe(Max 3Hit!!)
0, 20, 40

Greatsword(Max 4Hit!!)
0, 15, 30, 40

Kunai(Max 6Hit!!)
0, 5, 15, 25, 35, 45

Shuriken
Non-applicable

Tomes(Max 6Hit!!)
0, 5, 15, 25, 35, 45

Magic Builds
For bigger numbers get as much M.ATK and INT as possible. Further you need enough INT, M.ACC, and LUC so your spells aren't resisted!
The Magic hit rate formula has SIX layers...
1️⃣: 75 - Enemy INT + Player INT ≤ 100
2️⃣: Enemy Lv (÷) 2
3️⃣: M.ACC + Weapon effect
4️⃣: Element hierarchy +20 | 0 | -20
5️⃣: 1️⃣ - 2️⃣ + 3️⃣ + 4️⃣ ≤ 100
6️⃣: 5️⃣ - 5 + (LUC/20) ≤ 100

Further explanation ! !
INT, M.ACC, and spell/weapon element make up 95% of your hit rating. The other 5% comes from having 100 LUC which is unreasonable to obtain before Lv80 and quite the investment that could otherwise be placed into more damage or survivability.

Simple terms:
Player INT ≥ Mission Lvl + 38 (caps at 152),
MACC + Element hierarchy ≥ Enemy Lv/2,
LUC = 1% hit rating for every 20LUC (caps at 100),

(editor note:) Magic is really Really REALLY strong early game, but it's only reasonably accessible to Witch and Bandit.

Divine Builds
Divine damage based on Dragon skills only. Very Simple
MAX PIE

(editor note:) Divine can be R E A L L Y strong early game, but doesn't scale well into the mid game, an is seen more as "for fun" builds.
The Astral Dragon (Main story + True Ending)
In order to complete the main story, and Unlock the Oracle, a total of eight "flags" must be obtained through completing certain objectives during specific quests. This section will guide you through the best sequence in which to complete the main story.

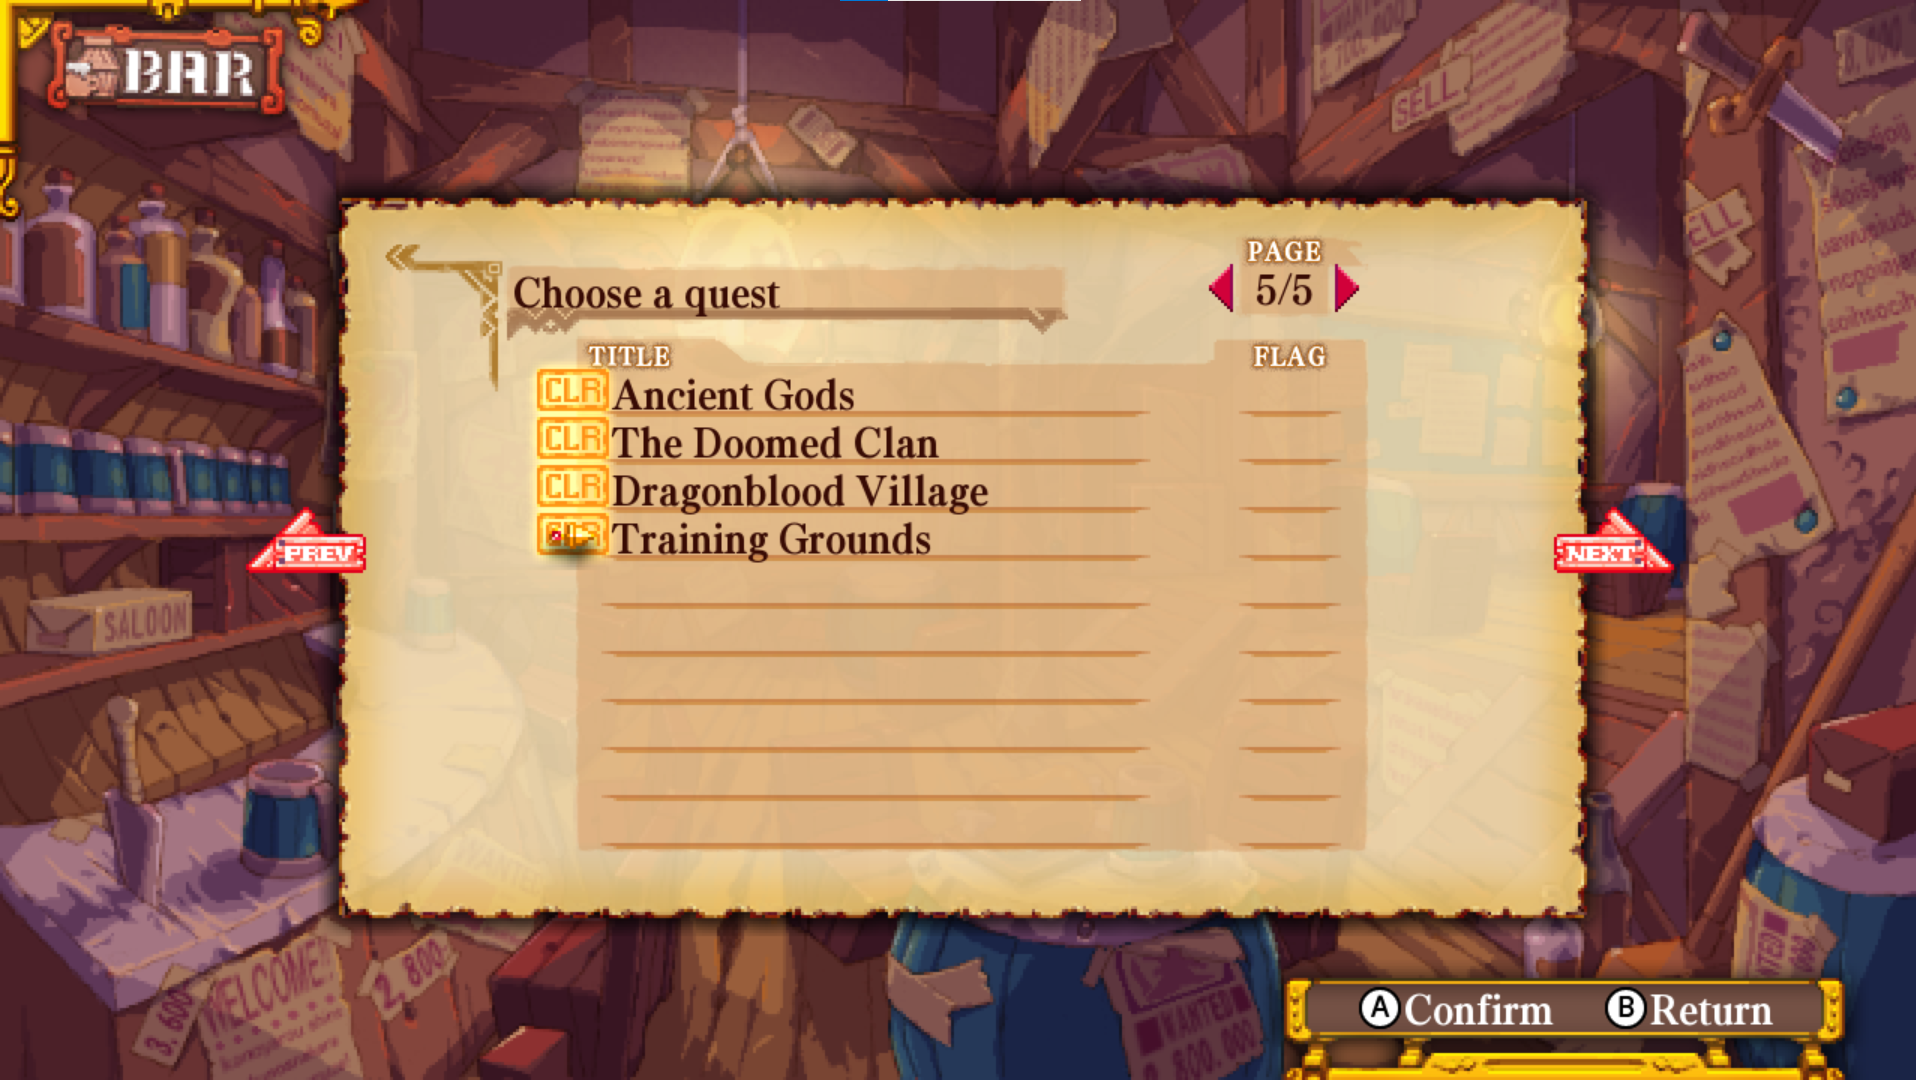
The Doomed Clan
This is the tutorial quest. You will have to complete it every time you create a new character.

The Ogre Fort 🚩
The first quest after the tutorial already has a flag to obtain. Head west, defeat the two Goblins, and return the Pendant to the old lady NPC. Then head east to complete the actual stage.

Dreaming of Treasure
Head west and kill a Tough Chick to get a Door Key from the chest that spawns. Then head east to complete the rest of the stage.

Polluted Water
To unlock this quest, talk to Mitis (Slums, left of the Black Market) after clearing The Ogre Fort.

The Frigid Nest 🚩
Take the top route when the stage splits (beyond the three switches) and defeat Knight.

Sea of Tumult 🚩
Right at the beginning of the stage, head left and immediately go to the bottom left corner of the ship to find a key. Use it to free Bandero (who is at the top right of the ship's internal segment). Defeat the boss. Talk to Bandero again in the next section of the quest. Then, head east and complete the rest of the stage.

Aim for High Heaven
You will have to find the balloon in each section of the tower and attack it to set it free. Continue upwards and repeat till the quest is complete.

Undying Dragon 🚩
This mission requires you to escort an NPC, Eterno, to the left side of the stage. Kill everything in your way and make sure he stays alive. After escorting him to his hut, talk to him twice.

Tomb Rescue
To unlock this quest, talk to Marcus (Slums, left of the Inn) after clearing The Frigid Nest. Head deep into the tomb and rescue as many of the 4 escorts as possible. You do not need to rescue all of them.

Unearthed Royalty 🚩
Head deep into the tomb. When you reach a section with eight similar compartments filled with enemies (four on the left, four on the right), check the area above the top left compartment and zoom in to see which compartment has the correct chest. Open that chest, and continue to the bottom right of the stage. Kill all the enemies and jump on the button that appears. Then, backtrack to the place where you obtained the Door Key, and climb up the platforms on the right to fight Vasith. After defeating Vasith, read the stone tablet in the room, then go back to the warp near the bottom right of the stage and leave the Tomb to fight the boss.

The Castle Burns 🚩
Work your way through the dark underground section to enter the first tower from the bottom. Head up the tower, then cross the bridge to reach the second tower. Make your way downwards. Burn the third, right wooden bridge with the lantern above it and defeat Sumahiko. Cross over to the third tower from the ground floor of the second tower, then head up, making sure to attack the lanterns along the way. Near the top of the tower, you will find Princess Miya. Escort her west to complete the stage.

Pillar Maintenance
Head up the tower, making sure to open chests to get the Power Sources required to operate the elevators to progress upwards. Then, collect the four elements as instructed by the NPC and talk to him again to finish the quest.

Calamity's Portent 🚩
Head east, making sure to enter and clear every gate you come across. The final gate has the boss.

Truth in Heaven 🚩
Head up the tower, making sure to open chests to get the Power Sources required to operate the elevators to progress upwards. Read the wall in the top right corner of the third section of the map (with Power Source C+/C-). There is a boss at the top of the tower.

Soul Vessel
Make your way up the castle. The boss is at the top right of the stage.

Marked for Death
Head right and fight the boss.


[True Ending]
DMFD has several possible endings after completing 'Marked for Death'. We won't spoil what happens so you can get the full experience as some of the visuals are the best in-game. Below is the requirements for each ending.

Bad Ending
-Clear Marked for Death with at least 1 death and 1 Dragon Sphere used.

Neutral Ending
-Clear Marked for Death with at least 1 death and no Dragon Spheres.

Good Ending
-Clear Marked for Death deathless.

True Ending
- Complete "Marked for Death" on Empress, Warrior, Shinobi, Witch
-Talk to Atruum in Atruum's Den before clearing
-Clear 'Marked for Death' without dying or using the Dragon Sphere
-Clear 'Marked for Death' with a weapon dropped from MFD

The Dragonblood Bandit (Side Story)
Completing this quest chain Unlocks the Bandit

Eastern Treasures
To unlock this quest, talk to Lacel (Slums, right of the Bar)
Work your way through the dark underground section to enter the first tower from the bottom. Head up the tower, then cross the bridge to reach the third tower. Descend to the ground floor and cross back over into the second tower an begin scaling. You'll come across a boss door where Sumahiko is waiting. Defeat him, collect the mirror, and take the portal. Another boss door will be on your left. Defeat the Bandit to beat the stage.

Hidden Hell
After clearing Eastern Treasures, talk to Epos (Slums, left of the Black Market)
The first of several maze missions. Defeat the Bandit to beat the stage.

Dragon Struggle
The Bandit just hit a Well's Fargo. You can chase him down for additional gold, or run ahead to the final portal. The Bandit takes nearly 3min to get to the final portal. Defeat the Bandit to beat the stage.

Werewolf Hunting
You have to confront the Lycanthrope several times, beat Vasith, and then the Lycanthrope again to complete the mission. The first several times you just have to damage the levers to close the curtains. Do not get discouraged. This will be one of the harder encounters for new players.
His pattern is:
Hop -> something random -> Screen slash -> Lunge -> Hop -> something random -> throw rocks -> Lunge
Something random being:
- lunge, hops a fair distance and turns to face player
- fake lunge, where he hops up then spins and drops back down vertically
- digging, into the ground throwing rocks in both directions

The Bell Tolls
After clearing Werewolf Hunting, talk to Pavo (Slums, right of the General Store)
It's 'Werewolf Hunting' except now you have to back track constantly to hit a Bell at the top of the castle. Defeat the Lycanthrope to beat the stage.

Haunting Grounds
After clearing Werewolf Hunting, talk to Apis (Slums, left of the Black Market)
Arguable the worse mission in-game. Guide the souls of the Fallen back to their corpses.

Paying the Miser
Kill everything, Loot everything

Infernal Labyrinth
Another maze, yaaaaaaaaaaaaaaaay... Defeat the Asura Goblin to beat the stage.

Resurging Flame
Another maze, yaaaaaaaaaaaaaaaay... Defeat the Asura Goblins to beat the stage.

Invisible Anger
Run around the towers to soak several wall scrolls with your blood. After activating three of them you'll be presented with a teleporter. Defeat the Asura Goblin to beat the stage.

The Dragon Hoard
To unlock this quest, talk to Ciconia (Slums, left of the Bar)
Wipe several gauntlets of Asura Bats, confront the Bandit, then confront him again in his berserk form. Rivalis Berserk is a unique encounter that assimilates to damage taken. You must use a variety of damage sources or this encounter will take forever. Prioritize clearing out the poison. Listen for the scream to dodge fire. An use the trees to your advantage.
Post Game (We Farm)
Unlike typical linear or open-world RPGs, the game predominantly revolves around completing quests that escalate in difficulty. In essence, a significant part of the endgame entails replaying stages repeatedly to obtain rare equipment, reminiscent of the approach in Castlevania HD. This includes collecting numerous valuable materials, clearing "Cavern of Torment", and eventually "Ancient Gods".

As you progress certain materials are needed for Black Market equipment, and Special Upgrade. Some of these are more essential than others depending on the character which will be made clear below.
These materials include:
- Litus Platinum piece
- Animal Pelt
- Beast Fang
- Ogre Eyeball
- Animal Eyeball
- Fork of Good Fortune
- Dragon Horn
- Dragon Scale
- Crystal

Litus Platinum piece
Do not waste these
Kill as many enemies as possible. The majority, if not all... of your platinums will come from exchanging Litus Copper, Silver, and Gold at a 15:1 rate. Or Marlayus Coins (S), (M), (L), and (XL) at a 1:1 rate with Litus Silver, Gold, Platinum, and 10 Platinums.
To really put this in perspective 1 Platinum is equivalent to 3375 Copper. So if you see a silver, a gold, or a marlayus coin you make sure to pick it up! Make sure you stop by the Black Market to prevent these from capping.

Animal Pelt
Drops from: Lost in White 50
Required for Shinobi/Witch
Ignore as Oracle/Bandit
Be careful here as The Trampling Lance resists 99% of magic, piety/dragon attacks (magical weapons can still cause status effects), the roof has frostbite spikes, and the frozen floor causes slip motions thus preventing quick turns.

Beast Fang
Drops from: Tomb Recue 45
Required for Shinobi/Witch
Ignore as Oracle/Bandit
Be careful here as the Demon Puppet resists 99% of physical damage, an takes reduced piety/dragon attacks. Must be overcame with magic damage. Similar to ogre prince he will only do the same attack at most 3 times. Be careful of the poisonous spikes on the ceiling.

Ogre Eyeball
Drops from: Twin Dragon's End 120, The Ogre Fort 110
Required for Shinobi/Witch
Skippable as Empress/Warrior
Ignore as Oracle/Bandit
TDE is more lucrative to farm, but if your solo damage isn't enough to clear just go to OF.

Animal Eyeball
Drops from: Sea of Tumult 110, The Dragon Hoard 110+
Required for Shinobi/Witch
Skippable as Empress/Warrior
Ignore as Oracle/Bandit
SoT is more lucrative to farm, but if your party can't into water spouts! You won't have any fun against the Bandit...

Fork of Good Fortune
Drops from: Infernal Labyrinth 120, Calamity's Portent 120, Hidden Hell 120, and several others
Required for Empress/Warrior/Oracle/Bandit
Skippable as Shinobi/Witch
Everyone can use these, an some of them need 60.

Dragon Horn
Drops from: Marked for Death 120
Required for Everyone
Used to craft your ultimate accessories. Some characters need 5 most need 10. Arguably this is the worse farm due to the shared loot table, lack of EXP, an stat requirements.

Dragon Scale
Drops from: Cavern of Torment 111
Required for Shinobi/Witch
Skippable as Empress/Warrior
Ignore as Oracle/Bandit
Used to craft several penultimate an ultimate weapons out of the Black Market. God Speed solo Witch players on Rivalis Berserk

Crystal
Drops from: Ancient Gods, numerous Lv120 Quests
Required for Everyone
Do not let these cap. These cap at 999 an are used purchasing ore out of the Black Market. 98.9% of your Crystals will come from Ancient Gods. Will go over this more in the Ancient Gods section.
Special Upgrade
Please look at the individual character guides to see what's worth crafting
Available in either store. This is how you craft your Lv95 weapons, Lv99 accessories, and ultimate weapons that aren't tied to the Black Market. You'll see a lot of the previously mentioned materials used here such as; Crystal, Dragon Horn, Forks of Good Fortune etc etc. Along with some new special upgrade only material.
- Mythril Ore
- Adamantite Ore
- Orichalcum Ore
- Tamahagane
- Ether
- Papyrus
- Mulberry Fiber

Unlike other materials these are purchasable from the Black Market at the cost of 1 Litus Platinum, and 50 Crystal each. Yet another reason Platinums are so valuable. But good news everyone! Yet another farmable resource exists!

Platinum Celestial Statue
Is a Black Market material used to purchase Mulberry Fiber, Papyrus etc etc instead of a Litus Platinum. It is exchanged for at the Black Market for several components. One Statue consists of:
1 Celestial Statue - Head
1 Celestial Statue - Body
4 Celestial Statue - Arms
2 Celestial Statue - Legs
1 Celestial Statue - Tail

These individual pieces can all be farmed from Lv120 missions.
Head
Infernal Labyrinth, Dragon's Struggle, The Dragon's Hoard, Truth in Heaven
Body
Sea of Tumult, Undying Dragon, The Castle Burns
Arms
Marked for Death, Eastern Treasures, Resurging Flames
Legs
The Ogre Fort, Unearthed Royalty, Invisible Anger, Hidden Hell
Tail
Soul Vessel, Werewolf Hunting, The Bell Tolls
Cavern of Torment
The most appropriately named mission in any game ever. Available for all characters on the save file after clearing 'The Astral Dragon'. This mission places you in Atruum's den where you follow the cave until you come upon a teleporter. Step on it. Once teleported you must clear out four rooms of enemies before confronting a mid-boss, then another four rooms of enemies an finally another boss. An exit gate will appear every ten floors with two chests to open. The left side chest will be a accessory, the right a weapon or accessory.
Along with a exit gate another teleporter will present itself in the center of the room. Should you chose to progress an not leave. You'll be given additional time to complete the next ten floors an have your retry gauge refilled. However any items used during the previous floors will not be refunded. For this reason please gauge your party's strength before advancing. Just like every other missions failing means losing all drops gathered to that point.

This guide won't give a in-depth play by play of each encounter. You have done these fights numerous times by now hopefully, but we will expound on several of the harder encounter an spell out the new ones.

Floor 1~60
You can begin clearing these at Lv65. Bring your best primal slayer an just brute force your way through the first fifty floors. You need only clear these floors one time as the better equipment is locked behind Floor 81+.
Lv1: Mandrake, Sumahiko
Lv11: Hermit King, Wind Equus
Lv21: Twin Dragon (Left an Right)
Lv31: Ogre Prince, Ice Equus
Lv41: Asura Goblin, Tonitrus
Lv51: Jinryu, Cthulhu

Floor 61~70
The Tempest Steed
The CoT variant of 'The Trampling Lance' from 'Tomb Rescue 45'. Just like it's counterpart it takes reduced magic and divine damage so using physical builds is best.

Vasith
It's the 'Soul Vessel' encounter again. If you've done this fight prior carry on otherwise.
(Yes both these videos are on a prior patch, but it's about show casing the boss abilities)

Floor 71~80
The Horn Breaker
The CoT variant of 'The Demon Puppet' from 'Lost in White 50'. Just like it's counter part it takes reduced damage from physical and divine damage so using magic builds is best. If you have done this fight prior carry on otherwise.

Lycanthrope
You should have plenty of experience by now through 'Werewolf Hunting' and 'The Bell Tolls', but this is probably the first boss you may have to hit up in the training room to get used to. This fight really is more about memorizing an influencing boss patterns than it is a DPS check
(Yes both these videos are on a prior patch, but it's about show casing the boss abilities)

Floor 81~90
Celestial Goliath
Similar to Jinryu in 'The Castle Burns' and 'They come from Hell'. The difference being the goliath is a Deva species that takes reduced divine damage and has a absurd amount of base stats of 128
Tips
In coop play, it is imperative that the targeted player tanks each tackle against the designated wall. If done properly (this isn't hard) the goliath will face the wall for one attack giving player(s) free uptime on boss. This only "fails" if the boss chooses to do 'Homing Thunder'.

Atruum
It's Marked for Death in the Cavern. Carry on

Floor 91~100
Ancient Primal Lord
Confuse the bugs for free damage on boss.
All damage on this encounter is physical. Use platforms to your advantage to dodge the spitfire
The spitfire breaks on contact diagonally, horizontally, diagonally. This is a very difficult encounter until you learn the patterns.

Twin Dragon's Coffin Vasith Blanco...
it starts off in a Deva form(White) and then switches to an Asura form(Black) after 30 seconds have passed; the Deva form is ultra-resistant to physical damage, but SUUUUPER vulnerable to wind magic, so focus on dodging and hold out until the Asura form and only then go hard on dealing damage.

Floor 101-111
Sea Lord's Executioner
Don't even try to fight this boss outright, instead you want to put Confusion status on the tentacles before they use their spray attack and have it hit the crab's face for big damage.

Rivalis
Do not over commit your jumps. Enemy has High AGI(123). Influence his patterns an unload after he starts digging in his pockets. Yes, you can out run the bomb explosion after knocking it out of his hand.
(I'm brand new to Steam formatting an couldn't figure out how to make the video start where I wanted, so have timestamps)
Sea Lord 37:37
Rivalis 22:57

Floor 111-120
Rivalis Berserk
Enemy has High AGI(130). A unique encounter that assimilates to the damage taken. You must use a variety of damage sources or this encounter will take forever. Clear out the poison. Listen for the scream to dodge fire. An use the trees to your advantage.

The False God of the Abyss
Enemy has High AGI(127). There's too much to explain, luckily this guy did a great demonstration video.

Ancient Gods
Unlocked after clearing CoT111
The final farm. A boss rush spaced by five floors.
This is where you farm crystals en masse
You must open the chests to collect crystals

The further you go the more crystals the player(s) are awarded. Be mindful of your limits as failing this missions means losing your time an crystals. Just like CoT you only get 8 items to use, but unlike CoT your retry gauge isn't refilled between floors. You have seen all of these encounters numerous times by now God Speed.

DO NOT LET YOUR CRYSTAL(S) CAP
These cap at 999. Often I purchase whatever material I desire after every 500 crystal(s)

The only unfamiliar boss here is the Ice Equus. His pattern isn't particularly difficult he just has a lot of HP, an heavy resistance to burn. Early on you'll probably need to use a bone here.
Bosses:
Hermit King [Primal]
Mandrake [Primal]
Ice Equus [Deva]
Wind Equus [Deva]
Sumahiko [Asura]

After Sumahiko is felled the player(s) have a chance to leave.
This awards 5 crystals


Remember that you can take advantage of Jinryu's ai by taking the tackle into the wall. Don't feel bad about if you have to use a bone here. Literally everyone except Tar0zX gets hit by thunder dragons.
Bosses:
(Left) Twin Dragon [Asura]
(Right) Twin Dragon [Asura]
Ogre Prince [Primal]
Cthulhu [Primal]
Jinryu [Asura]

After Jinryu is felled the player(s) have a chance to leave.
This awards 15 crystals


The difficulty begins to ramp here. Beyond this point any physical build will have to contest against several enemies with a staggering 127AGI. For reference someone like Shinobi would need 175AGI for max Hit!! Early on you'll probably need to use a bone on Tempest Steed.
Bosses:
Toritrus [Deva] - 127AGI
Asura Goblin [Asura]
Tempest Steed [Deva] - 50% reduced magic damage
Lycanthrope [Primal] - 127AGI
Horn Breaker [Primal] - 75% reduced physical, 50% magic/divine damage

After Horn Breaker is felled the player(s) have a chance to leave.
This awards 30 crystals


Remember that you can take advantage of Goliath's ai by taking the tackle into the wall. Don't feel bad about if you have to use a bone here. Literally everyone except Tar0zX gets hit by thunder dragons. Probably the hardest floor until you get a better weapon. As there's a good reason to use a bone on each one of these bosses.
Bosses:
Rivalis [Asura] - 127AGI
Celestial Goliath [Deva] - 127AGI
Vasith [Primal]
Ancient Primal Lord [Primal]
Atruum [Asura] - 127AGI

After Atruum is felled the player(s) have a chance to leave.
This awards 50 crystals


We don't recommend doing this floor until you have acquired both 99s an a suitable weapon. Either a maxed out fork, BM, or crystal weapon. Bizarre Bones really are the MVP of this run. You don't want to get stuck on Rivalis or False God without a bone.
Bosses:
Sea Lord Executioner [Primal] - 127AGI
Rivalis Berserk [Asura] - 130AGI
Twin Dragons' Coffin [Deva/Asura]
False God of the Abyss [Deva] - 127AGI

After False God is felled the player(s) have completed the mission!
This awards 73 crystals

3 Comments
Syrel 19 Oct, 2024 @ 8:53am 
Thanks!
Amanuelle  [author] 18 Oct, 2024 @ 5:21pm 
I don't know how to reply on steam, so i hope this comment finds you Syrel. I double checked an I forgot the "Clear MFD with original 4" part. I'm sorry, it has been corrected!
Syrel 17 Oct, 2024 @ 10:13pm 
Am I missing something? True End is not occurring despite fulfilling the objectives laid out here

I'm a Shinobi using both Dragon Bane and Dragon Killer, and I'm running MfD 30 without dying or using a Sphere, and I've seen the Atruum scene in the den with Amica's singing