Tunnet
25 arvostelua
Complete Puzzles Guide
Tekijältä Rachel The Great
This is guide is a pack of maps and solutions for the 4 puzzle chambers and HQ.
2
2
   
Palkinto
Lisää suosikkeihin
Lisätty suosikkeihin
Poista suosikeista
Introduction

Chamber 4


Chamber 3


Chamber 2


Chamber 1


Headquarters
Map


Solution
The rooms for 13 and 11 start off locked, they are opened in step one.

Note: I recommend running the wires through rooms (2,1) and (2,3) first and not touching them again as these rooms continually refill themselves so you will not be able to reliably navigate them.


Step 0
Set the rotations for each spliter as shown below. In room (1,1) set the right most spliters rotation as per the red line, for the first.


Step 1
Requires a packet to go from
00 -> 10 -> 12 -> 00
To do this we route 10 through our own wire between room's (3,3) and (1,2). There may be a way to do this with routing existing wires but I felt this was faster.


Step 2
Requires all EP's to communicate sequentially.
00 -> 10 -> 00 -> 11 -> 00 -> 12 -> 00 -> 13 -> 00

Pause the network, disconnect the red line we just placed, Install a spliter in room (1,3), and change the rotation of the rightmost spliter in room (1,1) to the purple line.

19 kommenttia
Rachel The Great  [tekijä] 7.7. klo 6.13 
it is, I just didn't write that solution because it's hacky, it's unavoidable because of game design reasons. The solution listed is the correct one, just skipping it with a single relay is an option, just not 'in the spirit of the game'
el tosico 6.7. klo 16.50 
But for example in chamber 3, why isnt it viable to just connect it with a simple relay ? skiping all the filters ?
Rachel The Great  [tekijä] 5.7. klo 12.40 
They want you to configure the network in the isolated room in such a way that enables Alfred to communicate with the outside world.
el tosico 3.7. klo 19.36 
This puzzles are so weird, I don't understand what they want me to do at any point in the game.
Rachel The Great  [tekijä] 21.7.2024 klo 11.40 
All good points, my room numbers are 0,0 bottom left. And yes I apparently called the orange line red. As you can tell by the completely different style from the rest of the book, this is halfway through a complete redesign, and it's been a long time since I worked on it.
Yaoel 19.7.2024 klo 21.18 
Is it possible to clarify the HQ a bit better? You refer to room numbers a lot, but there isn't an indication of the axis orientation,

3|- - -
2|- - -
1|- X -
_1 2 3

1|- X -
2|- - -
3|- - -
_3 2 1

1|X - -
2|- - -
3|- - -
_1 2 3

for example the above shows three different possibilities for 1,2 with no given key.
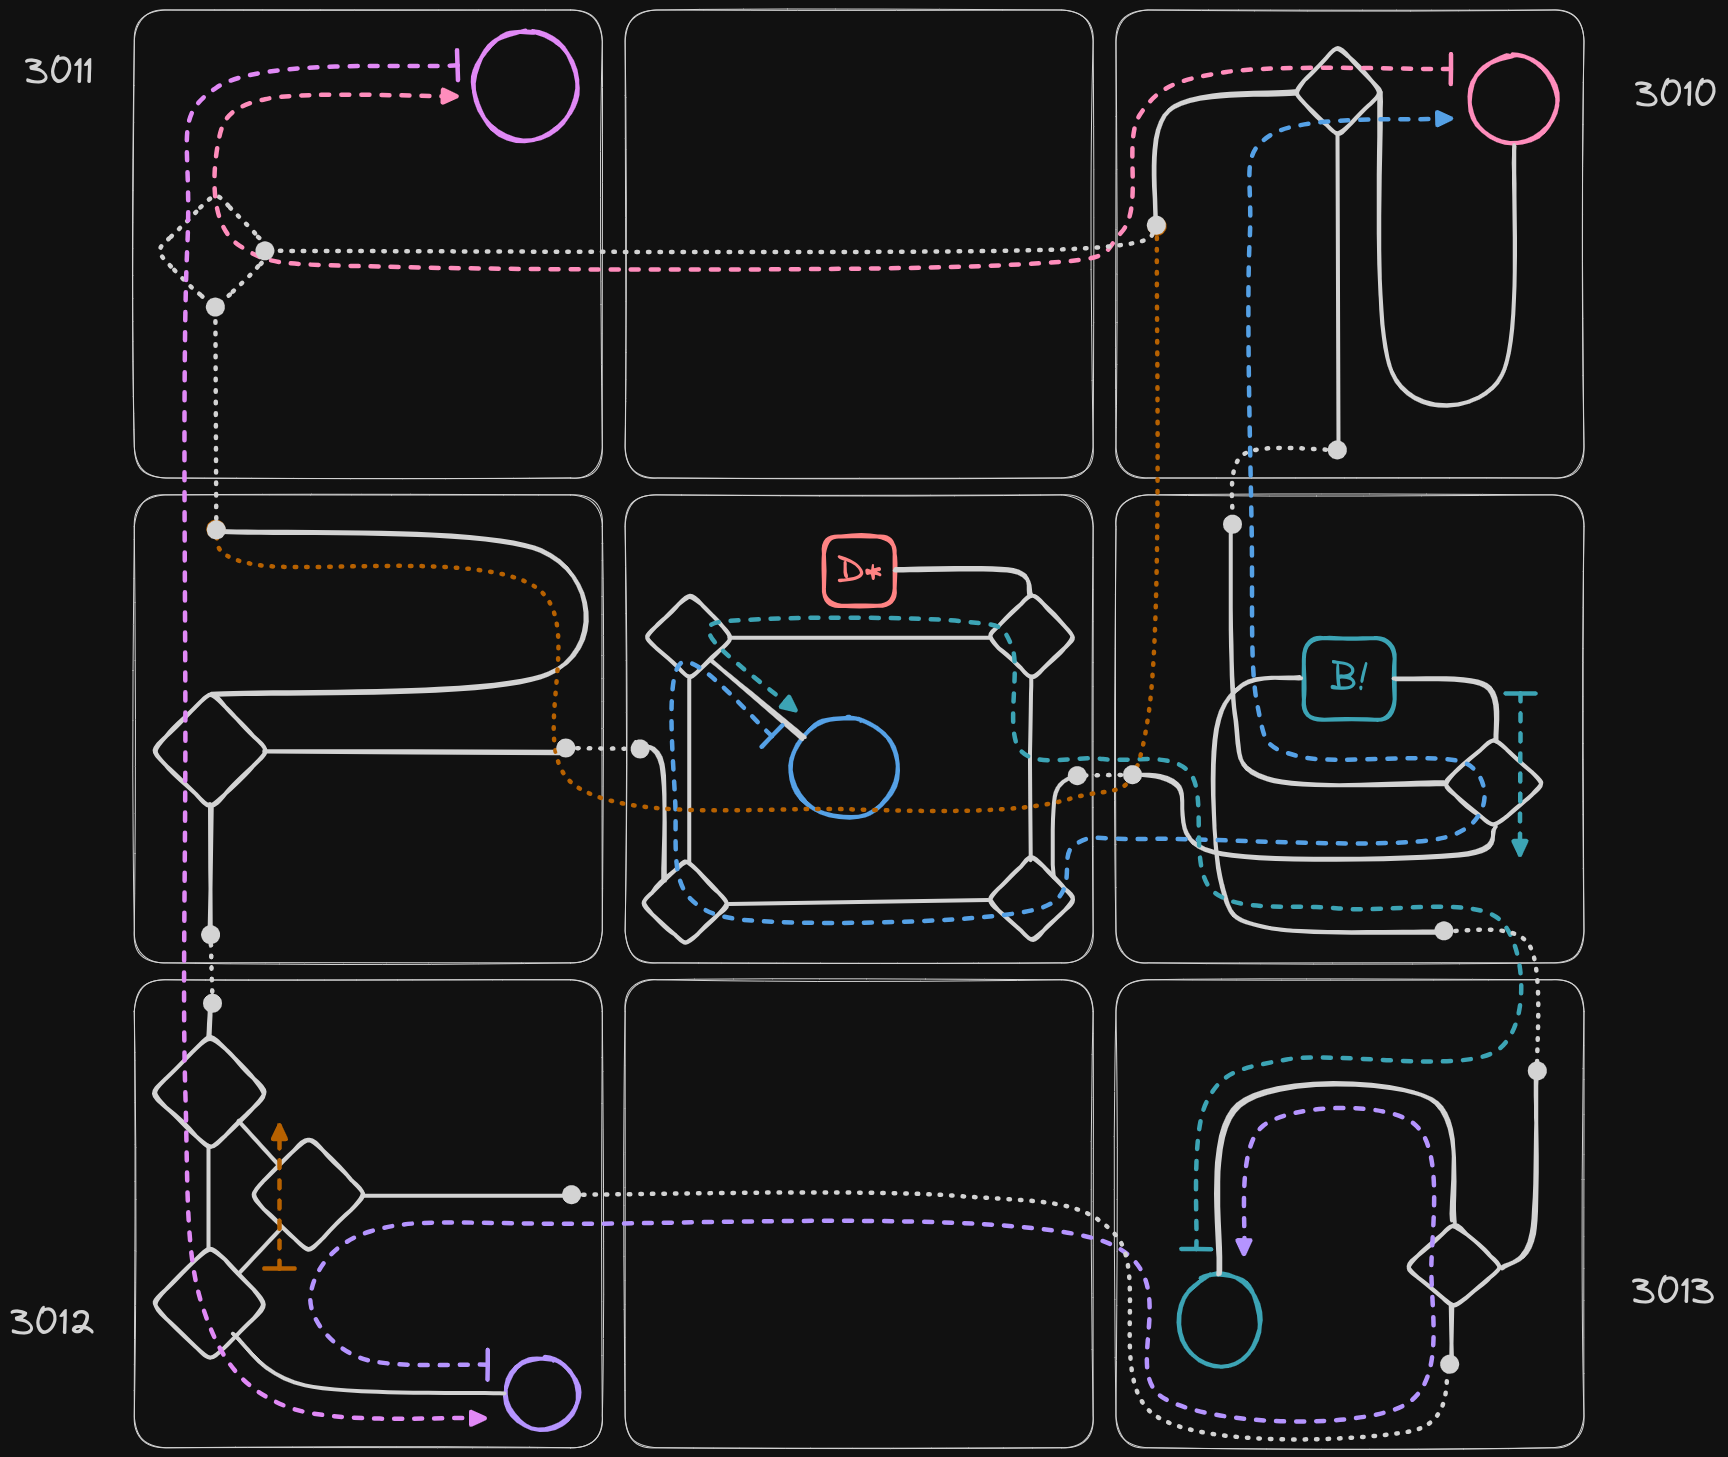
You also refer to deleting a red wire that we placed, but never mentioned a red wire specifically, and your picture doesn't have a red wire in it. I assume orange but I really dont know.
Rachel The Great  [tekijä] 8.6.2024 klo 3.46 
Yes that's how I did it at first too, I excluded it from the guide as it's not in line with the "spirit" of the game. There's also no mechanic to exclude it
deadbeef 28.5.2024 klo 2.22 
Was able to solve Chamber 3 just by doing this, not sure how the dev hasn't put in anything that blocks me from doing this....

https://i.imgur.com/79nDUil.png
zeusrex 27.4.2024 klo 14.19 
LOL!!
That's exactly what it was. I saw the spoilers for the Headquarters, but didn't really look at them very closely as I'd beaten the game already and was just doing a 2nd playthrough to furnish my cabin, streamline my network, 100% the achievements, etc. And that Alfred challenge was kicking my butt :).

Now that you mentioned there are spoilers for those rooms, I see them. As I said before: "I feel silly."
Rachel The Great  [tekijä] 27.4.2024 klo 12.12 
I suspect you're missing the solution pages in the spoiler blocks underneath.
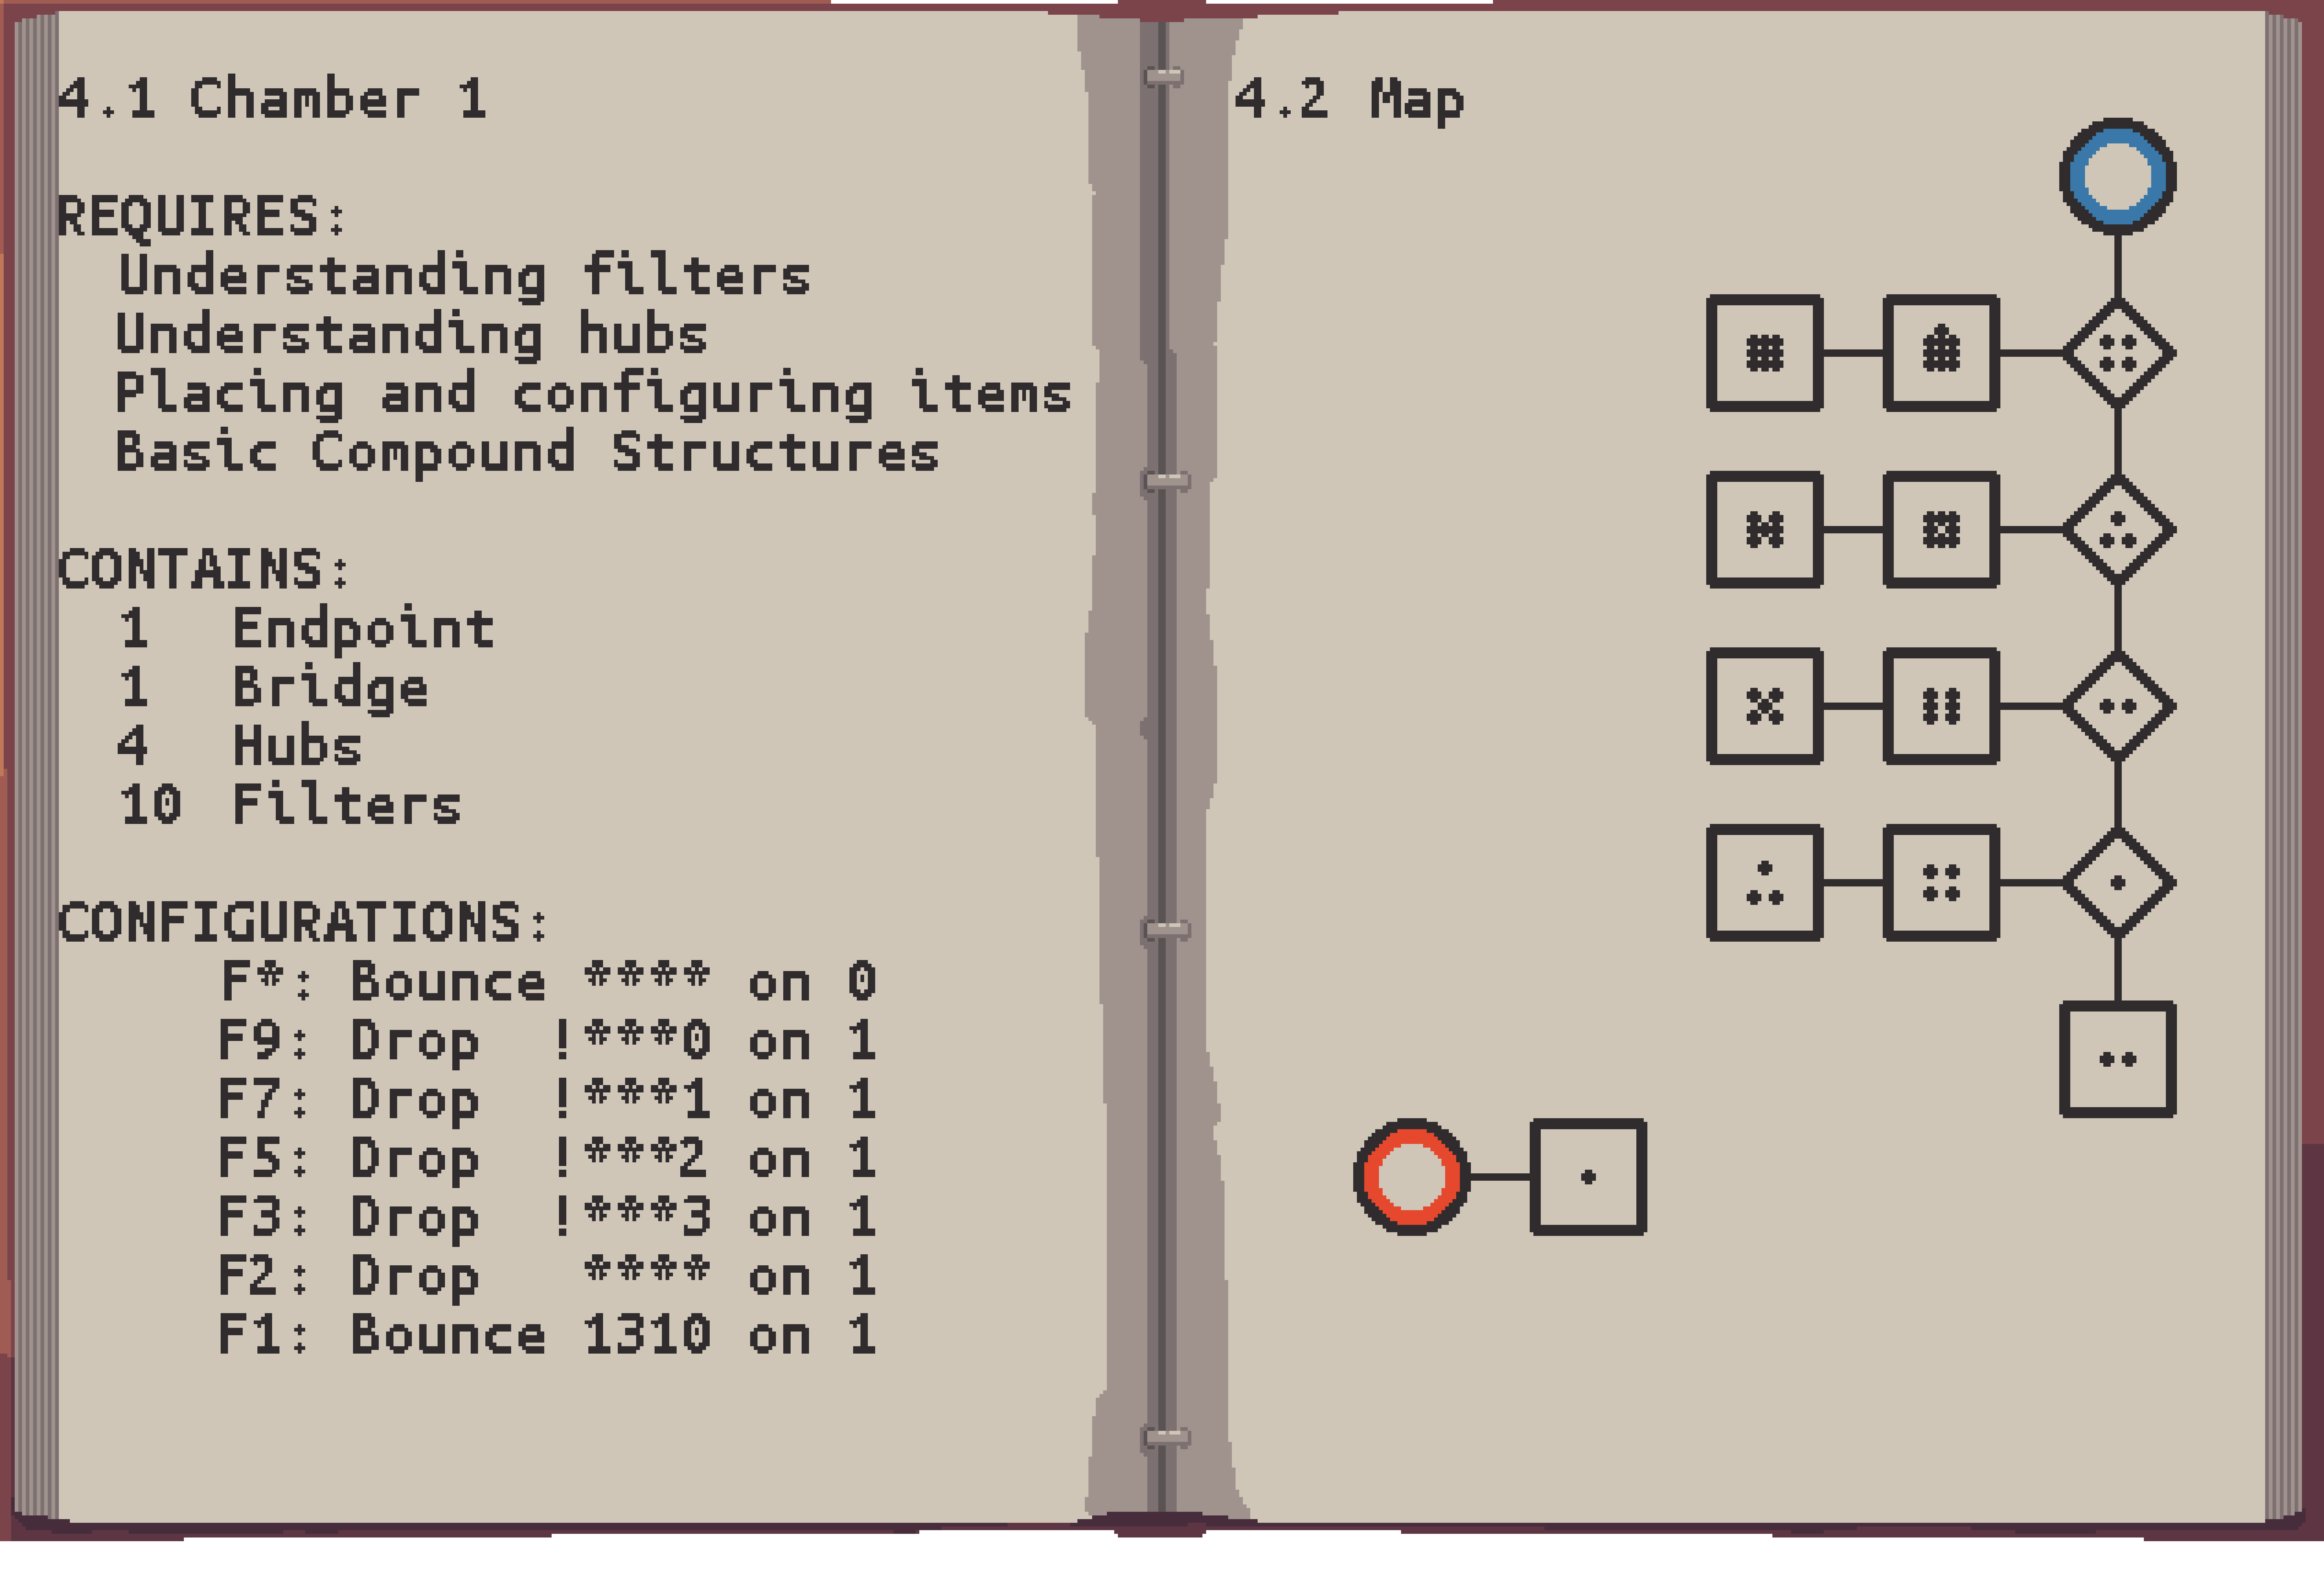
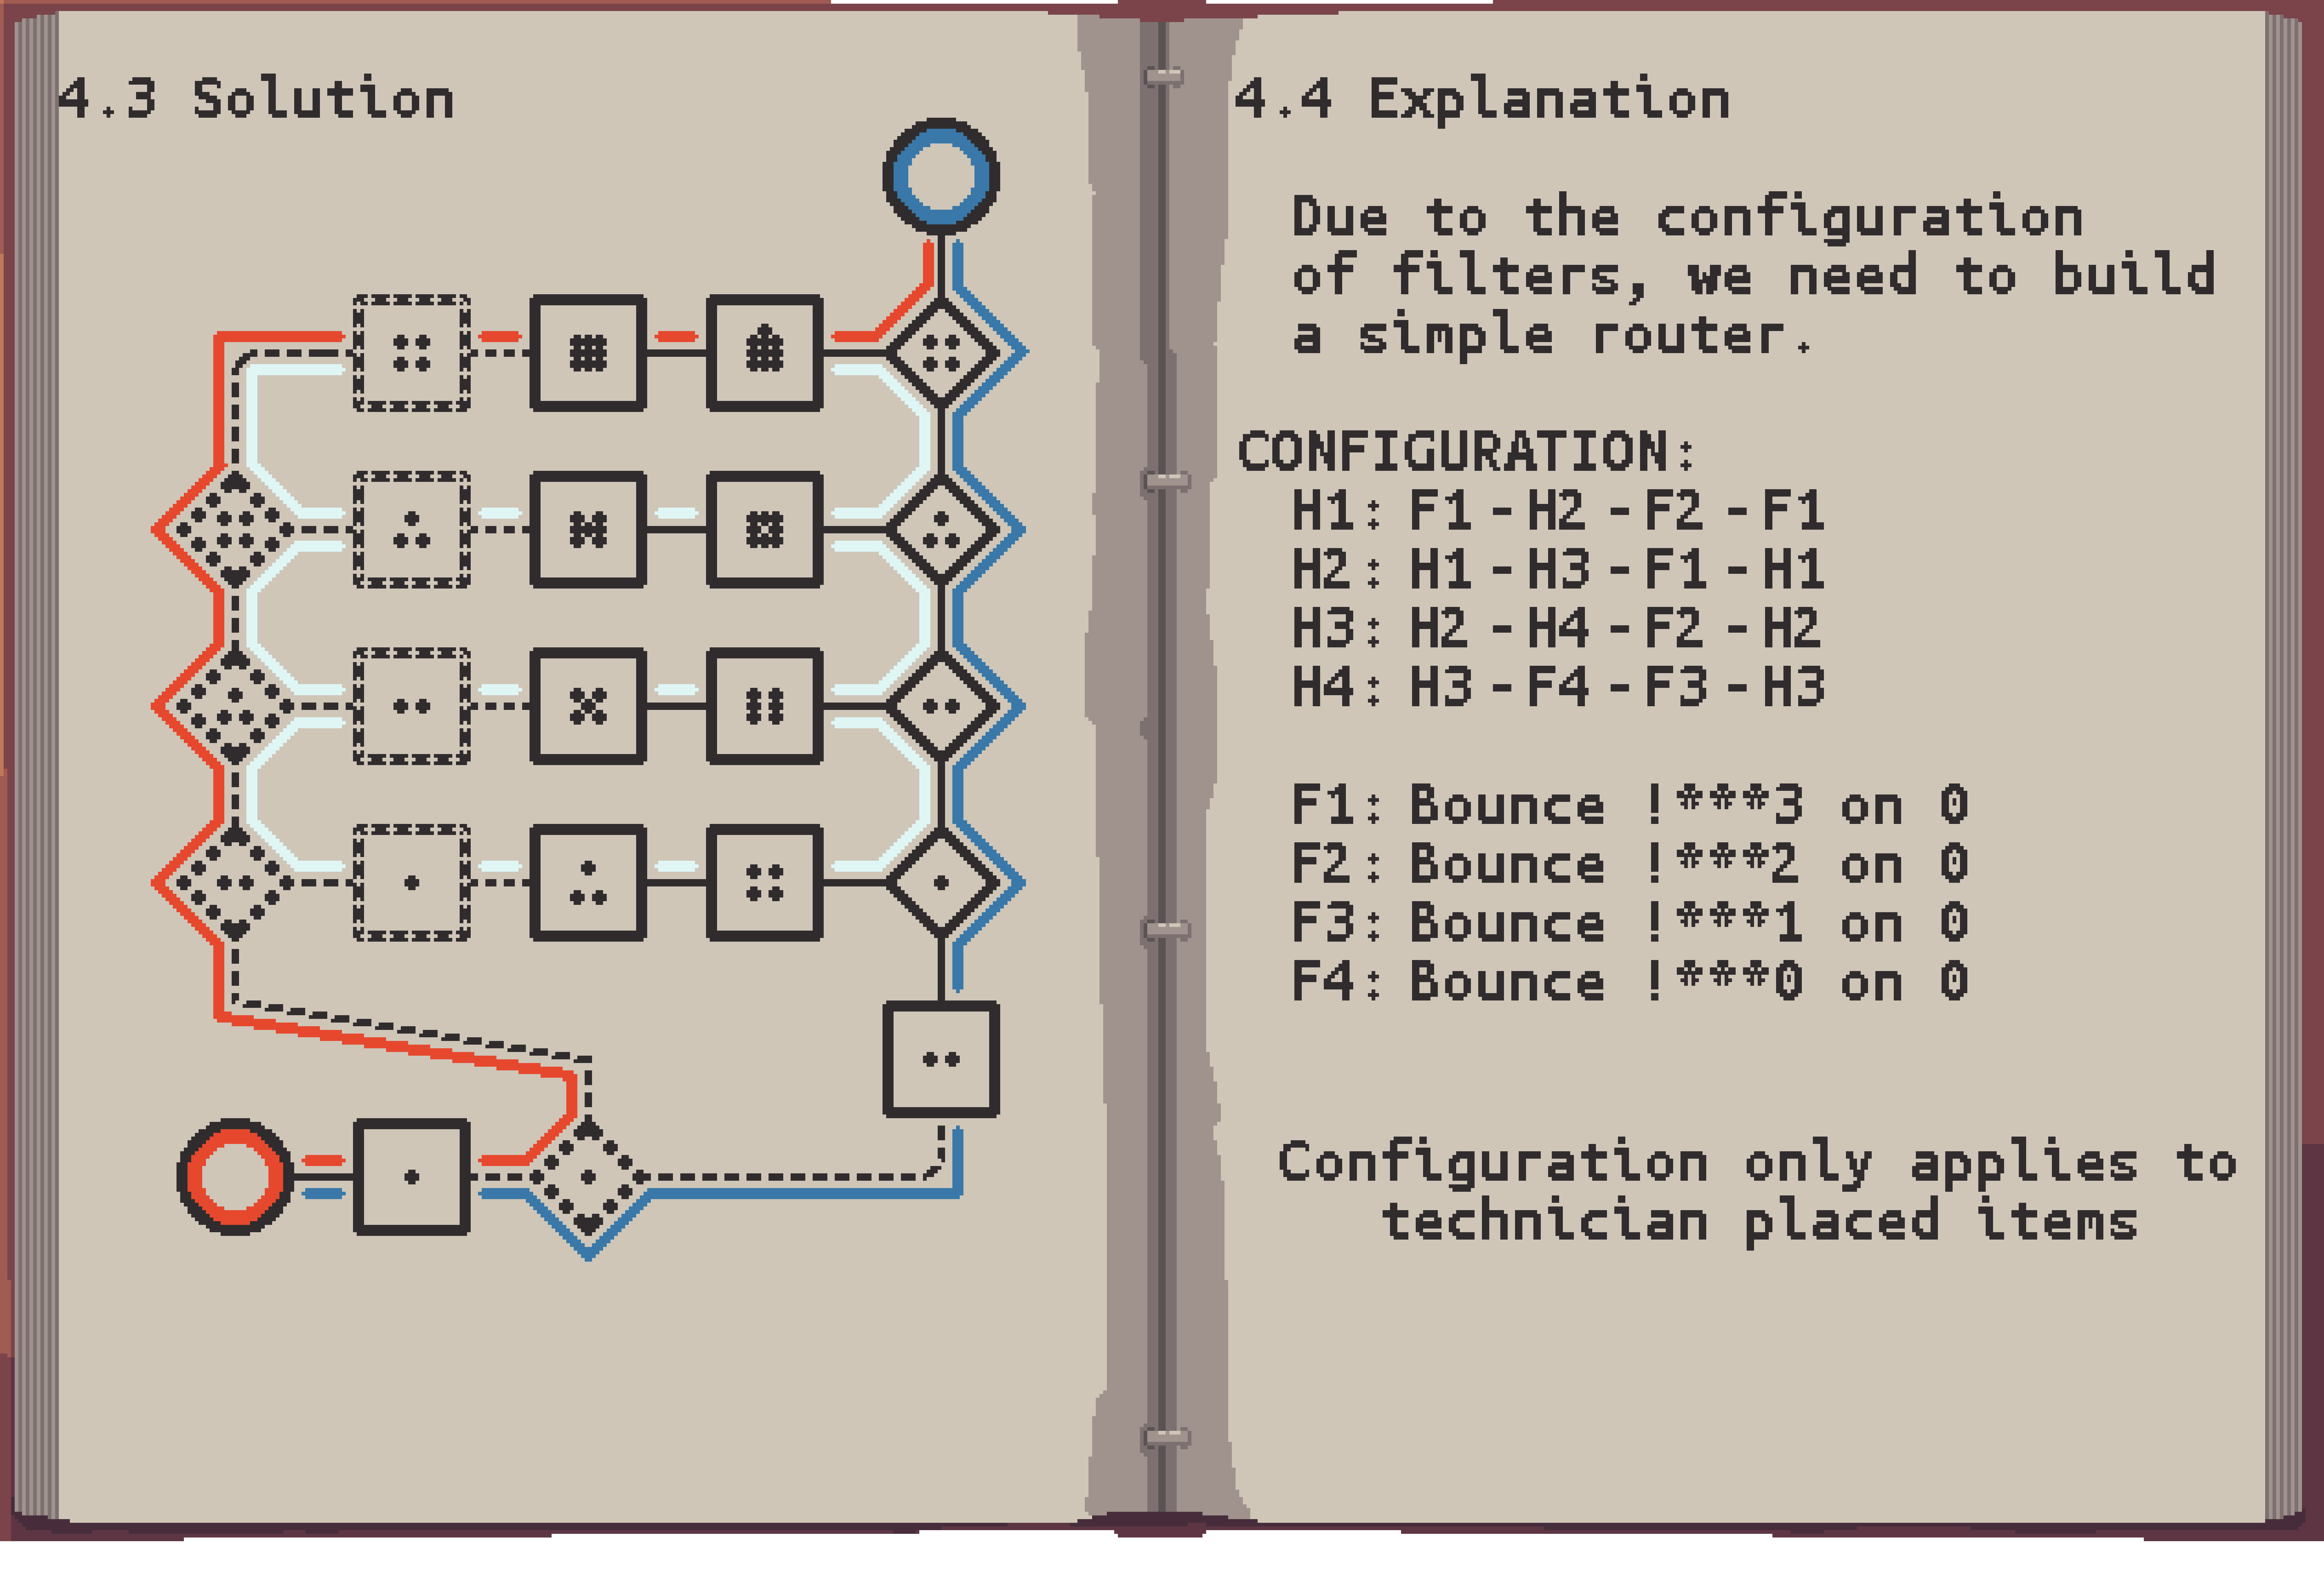
I made this out of my personal notes from getting through the game, and then made it very artsy.

The hints are pretty vague because I'm just not very good at them lol I'm glad you liked it though and I'm sorry it was confusing