Starfield

Starfield

340 ratings
The Ultimate Guide to Starfield & Essential Tips
By Arkane Fang
Your All-In-One Guide to Everything Starfield!


Improvements On Hold for a little while
This game blew up and cooled down very quickly, and after 90 hours in-game with several NG+ runs I'm burned out. As soon as the mod creation tools are release/almost released I'll be back to perfect this guide and get started on modding the game as well.
See you all soon!
27
12
13
5
2
3
3
3
2
   
Award
Favorite
Favorited
Unfavorite
Quick Tips & Need-To-Knows
    Levelling
  1. The best XP is by doing quests of any kind but mainly faction and side missions.
  2. There is no level cap so do not stress every single perk point spent
  3. You cannot respec any skills, once a skill is upgraded, it's upgraded unless you re-load a save
  4. Every solar system has a level, all enemies scale around this level
  5. Enemy health scales with their health, health scales faster than the players damage which means it becomes a sponge situation in the higher levels
  6. Weapons, Spacesuits, Spacepacks and Helmets do not have a level, to get stronger items, go to higher level zones which have better loot tables
  7. Power Levelling - It is quite easy to power level, I have a full section dedicated to it towards the end of the guide

    Skills
  8. Oxygen consumption is affected by gravity, high gravity results in quicker consumption but can be improved via the Fitness skill.

    There is a New Game +
  9. Do not worry about doing everything perfect on your first run, you can infinitely do NG+'s to explore every choice in each faction's questline or companion relationship
  10. Upon a NG+ you lose everything except for your player level and skills and that's about it.
  11. Spoiler - You start a NG+ with a new ship and space suit and can skip the Constellation storyline
  12. Since you lose everything on a NG+, ensure you spend all your resources on performing Research before starting a NG+

    Items & Making Credits
  13. Save your medpacks, try to sleep when in a city to replenish health
  14. An easy credit gainer is to pick up all weapons you find and sell them
  15. Contraband items sell for a high price but require Shielded Cargo holds to get them past planet security
  16. Level up the Security skill early so you can unlock everything and get really good loot from the early game
  17. Learn how to do the Digipicking minigame because it's very annoying during the first couple of times
  18. You can sell Contraband in the early-game by travelling to the TA store in the Wolf system. You can also cheese this by selling items to clear the shops credits and then waiting on a chair/bed for the vendor to restock and then sell again

    Resources
  19. In the early game manually mine some materials, but try to automate them as soon as possible
  20. Invest in Planetary Scanning so you can see resources without even going to the planet
  21. Is is very easy to obtain a lot of resources and crafting materials by going to a general store and then using a bench or chair to wait 24 hours for their inventory to refresh

    Skills to Focus On
  22. Ballistics is a good go-to, or perhaps Lasers for the early-game
  23. Weapon Engineering - Weapon upgrades are brilliant for extra damage
  24. Weight Lifting - Extra storage = More space for valuables to sell
  25. Piloting - Allows you to improve your ships reactor class and access further upgrades
  26. Persuasion - Can skip dialog or even parts of quests and gain nice rewards
  27. Security - Gain the ability to unlock any Digilock which give the best valued items

    Finding Good Planets for Outposts
  28. Look for resources that are next to each other and within the same biome, this way they will all be available from a single outpost location
  29. The Spectral Class stat on a star system is great for telling you how overall good it is, letters further in the alphabet are the best i.e. K, G and H

    Storing lots of items
  30. Build loads of Cargo bays on your spaceship, the loss of mobility is no where near as important as the increased cargo capacity is
  31. Store all resources on the ship, when in an outpost, it will utilise all those resources instead of you having to hold them
  32. You can store resources from about 250m away from your spaceship
  33. When in a shop you can press Q and T to switch between inventories for 1. The shop, 2. Your inventory and 3. Your ship's inventory
  34. Contraband is always an item in the MISC tab with a unique icon on it
  35. Easily move and not lose oxygen when encumbered - The Starborn power Personal Atmosphere provides unlimited oxygen for X seconds, this means that when you are encumbered, you can still run without draining oxygen and losing health.

Bugs To Exploit
  1. To smuggle contraband past security without any skills on Deception or shielded cargo, you can quick fast travel to a custom point on the planet place your contraband in an outpost.

Recommendations
  1. Progress the Constellation storyline first to unlock Powers which grant the player unique abilities, these are no-brainers and provide QOL
  2. Unlock unique Legendary sets of armour and weapons by obtaining the Mantis suit, or doing the Terramorph storyline of the United Colonies faction quests
Ship Combat
Ship Combat, as of release is quite simple. Most of the Starship related fun comes from building yourself a ship as explained in the Starship Customisation section however, there are still mechanics and things to learn to be the best Starship Pilot out there.

The Controls
Starships controls consist of using WASD and the mouse:
  • Acceleration - W
  • Deceleration - S
  • Roll - A and D
  • Pitch - Vertical Mouse
  • Yaw - Horizontal Mouse
  • Fire Weapon 1 - LMB
  • Fire Weapon 2 - RMB
  • Fire Weapon 3 - H

There are two main statistics for ship control:

Speed
Your speed is limited between your minimum speed which is always 0, and your Top Speed which is defined in the Starship Builder menu at the bottom. This value depends on your total engine power versus your total mass.

Mobility
Mobility is your starships ability to Roll, Pitch and Yaw which essentially means turn. This statistic is limited between 0 and 100 and is defined just like Top Speed in that it can only be changed by your engine power to mass ratio.
The higher your engine power and the lower your mass, the closer to 100 Mobility you will be.

You can maximise Mobility by adjusting your speed to be within the Optimal Mobility zone which is about 50%. Here you will turn significantly faster and it is very good to get used to this especially for difficult fights. You can visually see this zone as your speedometer turns white towards the middle 50% mark and fades as you go toward 0% or 100%.

For most of your playthrough I wouldn't stress Top Speed or Mobility and instead focus on weapons, shields and of course Cargo. Try to keep both stats at least around 30/40 because any lower and you'll hate space battles.

Stealth & Evasion
At the start of the game you'll have to do a mission where you're told to turn off most of your power to your ship and 'Stealthily' evade some enemy ships. This is probably the only time you'll use spaceship stealth mechanics, it's truly useless.
To become a Sneaky Little Rat, deallocate power to all sections of your ship and only have 1 point in Engines, this is as complicated as it gets.

Weapons
You can have up to 3 unique weapons on your ship. You can have multiple of each of those unique weapons up until you hit that weapon slots power limit. In the image below, you can see my W0 slot is only half full, this means I can add more of the same weapon 0.
There is no weapon requirement if that's how you wish to play.

Starship Weapon Damage Types

Starship Weapon Types

Disabling & Boarding Enemy Ships

Useful Perks
Ship Customisation
How to customise your starship
To customise your starship you must go to a 'Starship Service Technician' which can be found at any major city. They are typically right next to where your starship ports.


Within this menu select the second option. Once inside you'll see you ship.


Press B to enter the builder. Inside the builder you can drag and drop ship modules. To add a module press G, navigate though the menu and then place the module on your ship using the snapping tool it provides.

Your ship must adhere to a bunch of rules for it to be saved. You can see which rules you are missing by Pressing C for 'Flight Check', this will detail exactly whats wrong with your build. As soon as all red level messages are gone you will be able to save your ship.

If you get the warning that there are ship modules not attached even though they clearly are, double click any module on your ship and it will highlight. Detach and reconnect any bits that aren't highlighted to fix this bug.

Starship Power
Every starship has these 6 power allocation modules
W0, W1, W3 - Weapons
ENG - Engines
SHD - Shields
GRV - Grav Drive (Used for travelling through solar systems)

In the image above, my ship has a reactor power of 14, this means I can allocate up to 14 power between those 6 sections of my ship. The 22 'Equip Power' means that my ship needs 22 power to be completely activated at once. Typically, you only need 1 point in GRV which means you can probably fill up the 5 other slots on your first ship.

Starship Stats
Every starship has the following stats:
LAS = Total damage output with Lasers
BAL = Total damage output with Ballistics
MSL = Total damage output with Missiles
HULL = Health
Shield = Shield
Cargo = Max Capacity of cargo
Max Crew = Number of people you can assign to your ship (Not useful early game)
Jump Range = How far you can travel between solar systems (Not useful early game)
Mobility = How well your ship turns
Top Speed
Mass = The total mass of your ship, as this increases your top speed, mobility and jump range will decrease unless you add more engines or upgrade those modules

When in space, you can hold the Left Alt key and then use WASD to assign power to each menu, it takes a little while to get used to so I would recommend keeping power on weapons and shields with the least on Engines and Grav Drive

Accessing Starship Cargo
Starship cargo can be accessed by going into the menu and then selecting the bottom left option of 'SHIP' and then pressing 'F' to go to the 'Cargo Hold'.
The cargo hold will hold any item up until it's limit. There is no negative implications on having a full cargo hold apart from you can't store any more items. In the early game, make good use of this cargo hold as you won't get proper storage on a base for a little while. Starship cargo can be increased by adding 'Storage' modules to your starship in the 'Starship Builder' menu.
Skills
There are 5 skill categories available, some are far more useful than others. I would personally recommend focusing on the Science and then Tech trees which both focus on improving the players weapons, armour, ship and ability to explore.
For each skill tree I have listed the recommended skills to focus on.


Key Facts
  1. You always earn one skill point per level
  2. Skill points can only be unlocked by levelling up
  3. Once a skill is unlocked, it cannot be respeced, you will need to re-load
  4. There is no level cap, meaning an infinite amount of skill points are available to earn
  5. A lot of content is hidden behind skills e.g. Outposts require Outpost Engineering, Botany etc... and Starships at minimum require Piloting and Starship Design
  6. There are console commands to add skill points or levels, and mods which keep achievement's enabled when console commands are used


Physical
The Physical tree is aimed towards survivability but aren't too useful as they don't impact you much.
Weight Lifting - Increases inventory size which is essential in any Bethesda game


Social
The Social tree focuses on interactions with NPCs.
Persuasion - Allows you to bypass a lot of conversations and get extra rewards
Commerce - Allows you to buy for less and sell for more.

Combat
The Combat tree is focused on dealing damage with specific weapon types.
Ballistics - Very common weapon type in early-game and work well.
Lasers - Common weapon type in early-game.

Science
The Science tree is all about upgrading weapons, armour and building outposts which is essential. The skills to focus on are
Weapon Engineering - Allows you to upgrade your weapons.
Spacesuit Design - Allows you to upgrade your Spacesuit, Helmet and Spacepack.
Outpost Engineering - Unlocks better outpost modules to build.
Scanning as it allows you to identify planets, their resources and biomes without even travelling there. This is great for finding that perfect plane to set up your outposts on.

Tech
The Tech tree is all about your space ship, definitely put some points into Security asap.
Piloting - Upgrade your starships power level to access much better modules
Security - Allows you to lockpick containers and doors (Very good for legendaries)
Starship Design - Allows you to upgrade your spaceship with better modules
Exploring Planets
Every planet has a vast set of statistics that will help you decide whether or not it's good to settle on or gather certain resources.

The stats are:
  • Type - What type of celestial body is this, Rock, Gas Giant etc...
  • Gravity - What is the gravity scale in comparison to Earth being 1G, high means more gravity
  • Temperature - Typically warm planets have local fauna and flora
  • Atmosphere - What's the air made of, does it contain enough oxygen to support life?
  • Magnetosphere - How much magnetic charge there is based on solar radiation
  • Flora - The plant life on a planet (Min is 0, max is 10)
  • Fauna - The animal life on a planet (Min is 0, max is 10)
  • Water - What element is the majority of the planets 'water' made of
  • Resources - What resources this planet offers

Fauna & Flora
Fauna is the presence of animals while Flora is the presence of plants, this value varies between 0 being no fauna/flora all the way up to 10 which is 'abundant'. If you're looking to open an outpost which specialises in organic minerals then you will definitely want to find a planet which has both an abundance of Fauna and Flora.

Fauna can be killed for their resources or harvested via the Zoology skill and building the associated outpost buildings.

Flora can be hand-picked or by automation using the Botany skill line

Resources
Resources has it's own topic within this guide, but just to summarise, there are a tonne of resources in Starfield, each one with it's own specific use cases. Resources can be mined via a Cutter or preferably automated using outposts with the Outpost Engineering skill.

Every planet has a collection of resources which can vary in tier levels. On the planetary view, if you press R to 'Show Resources', you will see a legend of all resources with their colours and their locations on the planet. If you click on a specific location on a planet it will tell you the biome next to the 'Land' button on the right.
If you want to harvest multiple inorganic resources using a single outpost then make sure that you find the resources close together on the planet view and then check that each one of them is within the same biome e.g. 'Sandy Desert'. If the resources are close and all have the same biome then there's a high chance of them all being with the space of a single outpost. This is massively useful in minimising the amount of outposts needed to obtain resources.

Gravity
As far as I know, gravity only impacts your oxygen consumption where low gravity planets will let you use your oxygen far longer than a high gravity planet. Apart from this, it doesn't affect any other elements of the game.
Exploring Starsystems
Every Solar System has a collection of Planets and Moons.
Each Solar System has a spectral rating, the higher the letter in the Alphabet as well as the number indicates a higher amount of planets & moons as well as chance of life.

Every Solar System has the following statistics
  • Spectral Class - This is an indication of the type of solar system and amount of stars it contains
  • Planets - How many planets it has
  • Moons - How many moons it has
  • Outposts - How many outposts you have within this system
  • Catalog Id, Temperature, Mass, Radius, Magnitude aren't very noteworthy
Resources
Categories
Resources fall into the categories:
  • Inorganic - Metals i.e. Aluminium, Titanium, Gold
  • Organic - Harvested from fauna or flora i.e. Hide, Toxins
  • Gases - i.e. Hydrogen-3, Neon, Argon
  • Liquids - i.e. Water
  • Construction - Man-made materials

Rarity
There are 5 rarities:
  1. Common
  2. Uncommon
  3. Rare
  4. Exotic
  5. Unique


You will only be able to scan for rarity 1 resources until you start levelling up the Scanning skill.


The Most Useful Resources To Collect

Weapons Crafting
  1. Tungsten Tu
  2. Iron Fe
  3. Nickel Ni
  4. Sealant

Spacesuit Crafting
  1. Aluminium Al
  2. Beryllium Be
  3. Iron Fe
  4. Chlorosilanes SIH3CL
  5. Adhesive
  6. Sealant

Outpost Building
  1. Aluminium Al
  2. Titanium Ti
  3. Iron Fe
  4. Copper Cu
  5. Nickel Ni
  6. Lead Pb
  7. Beryllium Be
  8. Zero Wire
  9. Sealant
  10. Isocentered Magnets


Scanning for Planetary Resources
On the planet view you can see all resources a planet has. The resources are sorted by rarity where the right-most are the rarest as indicated by the small colour square on the resource icon.

To have a single outpost mine several inorganic resources you need to find resources that are close together and share the same biome.

Example, the Fe which is Iron is located within the Mountain biome, however, the Chlorosilanes is located in the Sandy Desert biome. Although they are literally right next to eachother, you won't be able to find them both at a single outpost since they are different biomes.


Locating Resources on a Planet
To locate resources open up your Scanner by pressing F and then walking around, eventually you will find a highlighted area with a resource name indicated on the right side of your scanner.


When you locate your wanted resources, press R with the Scanner open and it will let you place an Outpost. To the top left of the screen, a list of all available resources within the range of this outpost will show. As you can see in this image, I have access to 3 inorganic resources and 1 liquid. Outpost optimisation is very useful, and this is one of the best ways to improve it and make your life easier.


Automate Mining of Resources
You will want to head to the EXTRACTORS tab and place an Extractor on the highlighted zone for your resource. Extractors come in multiple tiers and gather resources at a higher rate.

Connect this Extractor to a Storage to have an extractor automatically store resources
Building Outposts
What Are Outposts and How to Build Them
Outposts are areas where the player can build a collection of buildings with a purpose. Some purposes could be:
  • A homeworld to customise and store all your items and resources
  • A mining station for inorganic resources i.e. Aluminium, Titanium, Copper etc...
  • A mining gas gathering station for gases i.e. Neon, Hydrogen-3
  • An organic gathering station for fauna (Animals)
  • An organic gathering station for flora (Plants)
  • A factory which takes in resources, turning them into more complex ones

To create an outpost, first go to a planet and go a distance away from any landmarks, open up your scanner F and then press R for the outpost. You will now be able to deploy this outpost, to the top left of your screen the resources available within this area are shown. Once placed, outposts can be moved, however, the build zone will not change, the only way to move the zone is to destroy the outpost and replace it.

Outposts preferably should be placed within a flat zone otherwise hills will restrict the placement of large buildings.

Once an outpost is placed, it's a good idea to place a landing port where your ship will be stationed. When your ship is station you have full access to the cargo hold and so does any crafting or construction in your base. This means you can have all your resources on your ship and be able to use them on your crafting stations at the same outpost, this is very useful when you start the colonising stage of the game. In order to enable this, you must first build a 'Transfer Container'.

Resource Management
Resource management and automation is very simple luckily enough. To automate the movement of resources you need to setup links between buildings.
One example would be, setting up a Titanium Miner and then linking it to an Inorganic Storage Container which would automatically transfer all mined items to that container. You can also daisy chain storage containers to one another to further increase the total capacity you can store.

Creating Complex Resources
Complex resources are those which cannot be mined or gathered from plants or animals and must be crafted. To setup some automated crafting of these materials you will need to link up the associated resources to a Fabricator and then link that to a Resource Storage Container
Skill Researching
Once a skill has been unlocked such as Weapon Engineering, you will then need to research the sciences now available to you such as Scopes, Stocks etc..
To research these sciences you will need to go to a Research Station which can be crafted at an outpost or placed within certain starship modules. You can expend resources to unlock these sciences. You can reduce the resource costs needed by taking certain chems found in the Med tab.

The research project lists break down into the following categories:
  • Pharmacology - Chems and Medicine
  • Food and Drink - ... you know this one
  • Outpost Development - Unlocks modules to build in an outpost
  • Equipment - Unlocks spacesuit upgrading
  • Weaponry - Unlocks weapon upgrading

Sudden Development
Sudden development is when you overflow the spending of a resource and it covers some of the other resource costs, this is very important to utilise. If you have lots of a specific resource then spend that one first just in case it causes a Sudden Development. You can increase the chance of this occurring by levelling up the Research Development skill.
Upgrading Weapons & Spacesuit
Weapon Workbench

Weapon Engineering Skill


Spacesuit Workbench

Spacesuit Design

Companions
Starfield allows the player to have a single active Companion but an unlimited number of Crew. Each companion offers a set of skills which benefit the player, e.g. The companion Sarah offers 3 in Astrodynamics, which means that when she is assigned to the players Starship, you will have an invisible +3 boost to your Astrodynamics skill.

The most notable companions with the best dialog and skills are all from the Constellation storyline. There are a bunch of other companions however, they offer less bonuses to less useful skills and should only be hired after all the main ones are collected.

You can only have 1 active companion, 3 on your ship and 3 per outpost with no perk points allocated to the associated skills. You can increase both the companion ship and companion outpost count via those perks.

All The Companions

Constellation Companions
Sarah
Quite early on into the Constellation storyline she will join you, assign Sarah to your starship for her Astrodynamics - 3 bonus.

Skill Bonuses:
  1. Astrodynamics - 3
  2. Lasers - 3
  3. Leadership - 2
  4. Botany - 1

Barrett
Quite early on into the Constellation storyline he will join you. Assign Barrett to your starship for the Starship Engineering - 3 bonus.

Skill Bonuses:
  1. Starship Engineering - 3
  2. Particle Beam Weapon Systems - 3
  3. Robotics - 2
  4. Gastronomy - 1

Sam Coe
Quite early on into the Constellation storyline he will join you. Assign Sam Coe to your starship for the Piloting - 4 and Payloads - 2 bonus.
NG+ Spoiler On a NG+, you can find him at The Lodge after collecting all Artifacts after defeating the Emissary and/or Hunter

Skill Bonuses:
  1. Piloting - 3
  2. Rifle Certification - 3
  3. Payloads - 2
  4. Geology - 1

Andreja
Quite early on into the Constellation storyline she will join you. Assign Andreja anywhere, but if you like stealth gameplay definitely have her as your Active companion for the huge Stealth - 4 bonus which is brilliant.
NG+ Spoiler On a NG+, you can find her at The Lodge after collecting all Artifacts after defeating the Emissary and/or Hunter

Skill Bonuses:
  1. Stealth - 4
  2. Particle Beams - 3
  3. Energy Weapon Systems - 2
  4. Theft - 1

Vasco
Quite early on into the Constellation storyline he join you. Vasco is always part of your crew, quite low boosts but perhaps keep him on the ship for the shield boost

Skill Bonuses:
  1. Anuetronic Fusion - 1
  2. Shield System - 1
  3. EM Weapon Systems - 1


Companions From The Constellation Storyline
Lin
Quite early on into the Constellation storyline she will join you. Assign Lin to your outpost for that big Outpost Management - 3 boost. She can be found in Vectera, the starting planet.

Skill Bonuses:
  1. Outpost Management - 3
  2. Demolitions - 1

Heller
Quite early on into the Constellation storyline he he join you. Heller definitely belongs on your main outpost from that huge Outpost Engineering - 3. He can be found in Vectera, the starting planet.

Skill Bonuses:
  1. Outpost Engineering - 3
  2. Geology - 1

Faction Specific Companions
Major Hadrian
After completion of the UC storyline head over to the Red Devil base on Mars in the Sol system and find her.

Skill Bonuses:
  1. Energy Weapon Dissapation - 1
  2. Pain Tolerance - 2
  3. Xenosociology

All Other Companions
There are a few other companions, only some of which are notable, the rest are generic and only offer +1 in their respective skill and will cost between 5000 to 20000 credits.
They are all available across major cities typically within bars and you can identify them as when you talk to them, they will have a skill appear in the top right of the screen.
Questlines & Factions
Major Factions
There are 5 Main Factions in Starfield, each one has a collection of quests associated to them. The main game is within the Constellation's storyline which is highly recommended to be the first major faction's quests you complete purely from the vast amount of rewards and companions you get from it. After the Constellation, the order for the other 4 really doesn't matter much.
You can join each of these factions.

Constellation
Location - Alpha Centauri System - Planet Jemison - New Atlantis - The Lodge
Explorers

United Colonies
Location - Alpha Centauri System - Planet Jemison - New Atlantis - United Colonies HQ
Space Police

Freestar Collective
Location - Volli System - Akila City
Space Cowboy Cops

Crimson Fleet
Location - Kryx System - Suvorov - The Key Spacestation
Space Pirates

Ryujin Industries
Location - Vol II System - Neon City
Arms Dealers

Minor Factions - Few/No Quests
There are plenty of minor factions which you cannot join, these are usually enemies and contract-offering factions. They don't have a home planet, city or anything.

Trackers Alliance
They just offer contracts to locate people for a credit reward

Spacers
This is a generic term describing any bad people in the game, this is the majority of enemies you fight. There is no allegiances and everyone is in it for themselves.

Ecliptic Mercenaries
Very similar to Spacers, however, they are slightly more organised as a faction.

Stores & Items
The most useful store types are easily the [i/Mineral Stores[/i] for most resources needed for the outpost and upgrading, General Stores for more minerals and lastly Trade Authorities for selling contraband.

Each major city contains one of each store, including those 3 mentioned. Since there is no proper minimap in Starfield you have to hope you run into them. However, here are their locations for each major city. Screenshots are also a bit pointless so I'll try my best to describe their locations.

Neon - As soon as you enter Neon:
- Straight to the left is both the Trade Authority and Mining League stores
- Straight to the left and further down on the left is Newill's Goods

Akila - As soon as you enter the front gate
- To the immediate left is the General Store
- A bit further in to the left is the Weapon Store
- Even further in to the left is the Mineral Store
- Even further to the right side behind the Galbank is the Trade Authority

Cydonia - As soon as you enter the airlock and go down the ramp
- To the right is the Trade Authority

New Atlantis
- To the left of the landing port is the General Store
Making Credits & Moving Contraband
Obtaining Credits by Taking All Weapons
A nice and easy way to gain credits is by investing in the Weight Lifting skills and looting every weapon you find using their Value/Weight to optimise gains. Weapons become more valuable as enemies level up as their drop tables expand and unlock new items. During the early game you'll find a lot of Grendels, Marauders etc... but later on you'll start getting lots of shiny laser and EM weapons which sell very well.

Looting Chests & Gravpicking
A great way to get legendaries and high-value loot is by levelling up the Security skill and unlocking everything with a lock. If it has a lock, it will have a better drop table, this further increases as the lock level does. E.g. Loot from a Novice chest will most likely be much worse than that of a Master level chest.

Early-Game Smuggling
If you don't have any Shielded Cargo modules on your ship, you can head to the Wolf System and head to a Trade Authority there to sell Contraband. The Wolf system is unique in that it has no cargo scans. You can also cheese this by waiting on a chair/bed for the Trade Authority's inventory to restock with credits to keep selling more.

How to be the best smuggler in the Galaxy
Contraband is an miscellaneous item that is not allowed into major cities, upon grav warping to the airspace of a major city you will be scanned. If contraband is on your player then you will be instantly caught. However, to bypass security and to be sneeky breeky you can install a 'Shielded Cargo' module on your ship. Shielded cargo acts as cargo and will prioritise contraband over normal items.

In order to obtain Shielded Cargo modules you need to first invest in the Starship Design skill and then go to a company-specific staryard. At these specific star yards they will offer these modules.

With contraband and some Shielded Cargo modules installed, head to any of the major cities and locate a 'Trade Authority' store. They will all buy your contraband. It is recommended to level up the Commerce skill which increases the amount of credits you get from selling items.

Obtaining Contraband 1 - Repeatable Looting of the Almagest
The Almagest is a casino that houses 3 locked containers, a science crate and a contraband crate. Once looted, after 7 days it can be re-looted.
The importance of this is the contraband crate, it will contain approximately 60,000 credits worth of items for you to sell at an Authority Post. Bare in mind that you only get a fraction of the actual items worth.

You can find it right next to the starting location within the solar system Olympus' planet Nesoi
Digipicking
Digipicking is Starfields lockpicking. Simply put, it's a puzzle where you have to slot the specific combination of picks at each level.
On the right are your picks you can use to solve the combination on the left.
The lock has more levels, the higher the level it is. When you select an option from the right, if the current level highlights blue then it means it can fit somewhere on this level, however, this does not mean it needs to be used on this level.

Tips & Tricks
These tips are especially useful on higher tier digilocks, usually low-level ones are a brain-dead matching game.
  • When you select a digipick option from the right side, if the lock ring turns blue that means your current selection will fit, however, it does not mean it's 100% supposed to go there, it may be needed later and also fit again.
  • Digipicks stay where you left them, if you are unsure if a digipick is supposed to be used on this level, leave it where you think it may be used, then play around with some other blue options to get a better idea.
New Game Plus
Beware, this entire section is based on the end-game story and will ruin a lot of the great storytelling that goes on.
Major Spoilers
After completing the last mission in the game, you will awake in a fresh new universe where everything is reset except for your:
  • Player Levels
  • Player Powers
  • Player Skills

You will lose literally everything that is materialistic i.e. your spaceship, all items, outposts on planets as well as relationships with companions and progress across any and all storylines.

When you do the first mission it gives, you will get the choice to either: Skip all Constellation storyline or start it afresh.
If you skip the storyline repeat then you will go straight to Vladamir to get the artifacts and powers which you would've had to wait a little while to get back to.

When reborn as a Starborn, you will wake up with a great spacesuit which doesn't require a space pack or a helmet. Additionally, you will have a fancy Starborn spaceship to cruise around with. This ship comes with 150 concealed cargo so you can get a quick-start on a new game via smuggling contraband.

The only noteworthy thing I've noticed on a New Game Plus is that you can skip a bunch of dialogs on quests using the [Starborn] dialog choice. I'm not too sure on how much it skips, but it's a nice-to-have.
Apart from that, I haven't seen any proof that NG+ has any difference to a playthrough.

A good thing to do is spend all remaining resources on the Research[/b[ station as you're going to lose all resources on NG+ anyway.[/spoiler]
Settings
I doubt many care about the settings, but here's an explanation of all of them :)


GAMEPLAY

I would highly recommend turning all 'Save on X' settings to yes and 'Save on Pause' to the minimum of 5 minutes since this game has a tendency to crash.

The difficulty setting should be on Normal for your first playthrough, as with the Bethesda formula, difficulty will make everything harder and will reward more experience. Typically, it's not worth going above Normal because the enemies become horrible bullet sponges but deal tonnes of damage to you.

If you want a more difficult experience, wait for mods to come out that handle the scaling much better and prevent bullet sponging.

DISPLAY

The settings of note here are:
  • Always play in Borderless Fullscreen, it's the go-to on every game
  • If you're struggling with FPS then decreasing your Render Resolution Scale is easily the best option, a value of 100% means you're playing at your monitors resolution.
  • Vsync - As with all games, enable to prevent screen tearing and limit to your monitor's refresh rate
  • Upscaling - If you're struggling with FPS or you get loads of ups and downs then enable this for a more stable framerate

INTERFACE

Self-explanatory

CONTROLS

These settings will probably be fine at default, however, Outpost Item Rotation Speed is set to 5x at default which makes it very hard to place items exactly how you want, turning this value down to 2x or 3x is the best way to go.
Modding
How To Manage & Install Mods
Before you can download any mods, head over to Vortex Mod Manager [www.nexusmods.com] to download and then install it. Open Vortex and log in with your Nexus account. If Starfield hasn't been detected by Vortex then you will need to manually add your game's directory to Vortex. As soon as this is done, you're now ready to download and install mods.

Now you can head on over to Nexus Mods - Starfield [www.nexusmods.com] to browse all the mods. When you've found a mod, click on it, go to the download section and select the Install With Vortex and it will handle the rest, once downloaded on Vortex, just ensure they are enabled and then run the game.

Solving Conflicts
When you try to install a new mod that edits the same file of another installed mod then you will have to deal with this conflict by saying who overwrites who, typically, if a mod is documented well then the guide itself will probably have a warning something like "This mod should go at the top of your load order, or you should let all other mods overwrite it".
Top of the load order means it loads earliest which means the mods lower down on the list will overwrite the ones above them. Some mods will break of wreak havoc if they are incorrectly ordered and a conflict blows up.

What Mods Are Available As of Launch?
As of writing this, it's the 8th of September 2023, just after the launch and although the Nexus already has pages and pages of mods available, a lot of them are very small scripting based mods since we currently don't have access to the modding tools needed for Creation Engine 2 which is the newest Bethesda Game Engine. We do not know when these modding tools will be available however, I'd give it a couple of months and then the flood gates of phenomenal mods will populate the Nexus for years and years to come just like every other beloved Bethesda title.

What Mods Do I Recommend?
This early in to modding, it's not really worth listing them, just go to Nexus and browse by the most popular, endorsed or downloaded to find the best of the best.

Enabling Achievements With Mods & Console Commands
There are plenty of mods on Nexus mods which do the same thing in a different way, this is especially true with Achievement Enabler mods. I'm not going to link any because there are so many and they're easy to find.
They are easy to install but will most likely require SFSE (StarField Script Extended) to actually work.
The User Interface
The Menus
Press Tab to enter the menu
The top left shows the current planet you're on.

The top right shows your most recent progress on a skill

The bottom left shows your starships

The bottom right shows your inventory

The bottom middle shows your missions

The below contain spoilers
The top middle shows your Powers
Improving Game Performance
Good luck, this game isn't optimised very well. Wait until mods come out and fix it.
Power Levelling (Exploit)
Power Levelling is quite easy in Starfield, there are many tutorials on the internet but I would like to share my go-to. This method utilises outposts to gather both Nickel and Cobalt in order to craft them into Isocentered Magnet for 1xp each.
By abusing the wait mechanic you can very quickly get 5000+ of both resources easily and then just drop the produced item after you've gathered all the xp.


Step 1 - Finding the Perfect Planet
You're looking for the Vega system which is just north of all the starting systems you're familiar with and then you're looking for the Vega II-e planet.


Step 2 - Finding the Perfect Outpost Location
In order to find the best spot to start, locate a spot on the planet view right inbetween both Ni and Co as indicated by the colours on the legend, after this is located, land there and finally run around until you find an outpost location which has both of those resources within its range.


Step 3 - Setup the Miners
Setup a bunch of Miners and have them all link to a single storage, this storage will then link to all of your others in a large daisy chain. Repeat this miner setup for both Nickel and Cobalt.

Step 4 - The XP
Now that everything is automated it's time to begin the farming. Repeat these simple steps:

  1. Sleep on a bed, or wait on a seat for 24 hours. Due to this planet's distance from it's solar center, waiting 24 hours is actually 244 universal hours. This is another layer of exploit since miners operate on universal time, and you're skipping 10x faster than usual meaning 10x quicker resources.
  2. Go to your Industrial Workbench and craft 99x Isocentered Magnet
  3. Repeat steps 1-2 until bored
  4. Simply drop your entire stack as a single item


Tip - To quickly select 99 stacks, place the Isocentered Magnet as the top item on your visible list, now spam both LMB and E with your mouse hovered over the place where you can click the 99 quantity. This area will depend on your resolution, but can easily be figured out.

Tip 2 - I would highly recommend avoiding any sort of boosting or power levelling until you've done a majority of in game content, having a limited amount of skills during the game is what makes it unique and interesting but at the end of the day, you do what makes your playthrough more enjoyable.
As soon as you hit about level 50, the levelling starts to become boring and repetitive and IMO that's the time where this method is great.
Conclusion & Credits
Conclusion
I have really enjoyed making this guide and will keep updating it until I run out of useful things to say. I have done my best to add information as soon as it crosses my mind whilst playing, and there are a lot of recommendations which are based on my experience playing Starfield.

Credits To People Who've Helped
  • Moses - Quick Tip for the impact of gravity on oxygen consumption
  • Mr.Blonde - Quick Tip for selling Contraband in the early-game via the Wolf System
  • Blade2k9 - Quick Tips for smuggling contraband and how to keep oxygen levels high
  • Demiwalker - Quick Tips about NG+ researching
  • oOFrostByteOo - Highlighted a piece of incorrect info
  • Kenzi - Digipick tip
  • Hyronsoul - Information about starship controls and the optimal manoeuvring velocity
30 Comments
willderyes 20 Apr @ 11:15am 
Finally got a SSD, so I'm just getting to the game. Thanks for your workup. Really appreciate it. I always look at these things as if the rookie meets an old timer in some space tavern and listens to his/her stories.
Bill70 28 Apr, 2024 @ 9:52am 
Wo0ooowww Amazing work putting all this information together , WELLDONE !!!!
:3dm_seeker::47_thumb_up::flammable::FC5_Cheeseburger::wowscrab::grwdevil:

One point I'd like to let you and anyone else reading this post ,
Referring to your point number 34-

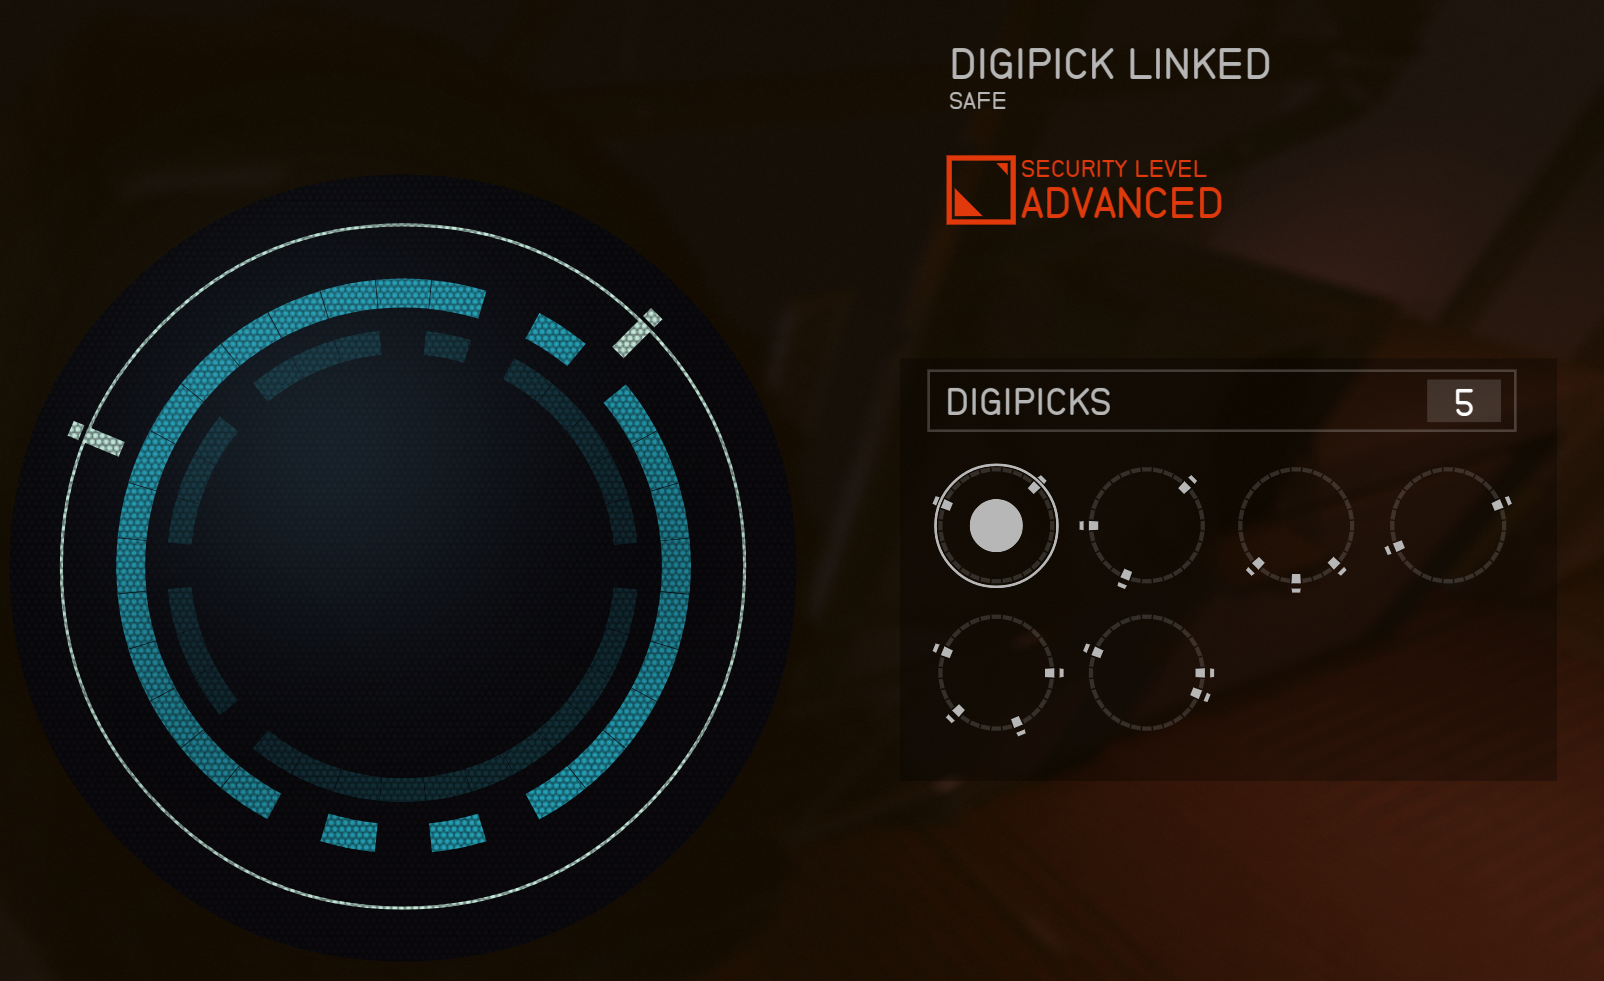
"34 . Contraband is always an item in the MISC tab with a unique icon on it"

Any "Aurora " that you have will be in the AID section , this item is also Contraband !!

I'm still reading the rest of your work so if you wish ,if I see something you might have missed ( which I doubt ,lol ) ,I'll edit my post .... :steamthumbsup::steamthumbsup::summercrab2023::selike::3dm_butler::3dm_butler:
Hedge.V 28 Jan, 2024 @ 10:26am 
Thanks for the work you put in here was good info
Igi_PL 15 Oct, 2023 @ 7:43am 
@Zaeroso You can add Tip to the "Ships Combat" - "The Controls" section. Disabling Auto Ship Acceleration/Auto Throttle in StarfieldCustom.ini

[Spaceship]
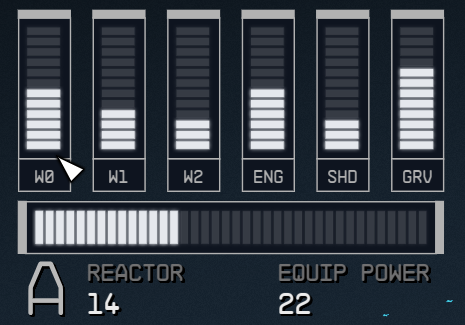
fThrottleAtEngineStart=0


The default value is 0.5
Flat Stanley 24 Sep, 2023 @ 9:39am 
@ glevesque1: You go to her because she is the one that allows you to modify your ship while in the Key. Go through the tabs in the 'build ship' page until you get to the equipment section. The two parts should be at the top at $0 cost. Just take them and place them on your ship. I find that putting your mouse on the ship where you want them to go usually snaps them in place. I placed them on the Frontier beginner ship so they do work.
Santasuit 20 Sep, 2023 @ 2:50pm 
idk if you already heard this but regarding new game plus there are unique universes, like one where cora is a starborn, one where andreja kills everyone in constelation, one where theyre all retired, and a one where you meet yourself and can have yourself as a companion
Arkane Fang  [author] 16 Sep, 2023 @ 7:22pm 
@glevesque1, I haven’t yet completed the crimson fleet missions, I will today and update the guide. There are many things this game doesn’t explain, hence, the need for this guide :VBOY:
glevesque1 16 Sep, 2023 @ 12:37pm 
I need to find out how you are supposed to modify your ship with the items your supposed to install, like the comspike, Armillary, etc. The game hasn't shown anything of how this is supposed to happen. During the Crimson fleet missions your supposed to install the comspike and another device, but it points to Jazz and I can't figure out what I'm supposed to DO !! It's very confusing because the game is very sporadic about giving you tips of how to do things. Messages flash on the top of the screen and it disappears before I even notice it's there!
glevesque1 16 Sep, 2023 @ 12:17pm 
I discovered that when upgrading a jetpack you DON"T want to use the max level possible because it will make it pretty much impossible to land without taking some kind of injury. I found the basic jetpack will allow you to always land safely. The maxxed jetpack will always push you way high up and not let you gently land !
Arkane Fang  [author] 15 Sep, 2023 @ 9:09am 
@Hyronsoul - Appreciate it, I'm glad its useful.
I've now hit the point where the guide has most of the basics so I can finally go back through to refactor and add in all the great details such as the starship steering you mentioned.

@Kenzi - I'll add that thanks.