Wildfrost

Wildfrost

Not enough ratings
Wildfrost Intermediate Guide (as of v1.0.6)
By Altivu
An intermediate guide to Wildfrost, including more involved strategies for success.
2
   
Award
Favorite
Favorited
Unfavorite
Introduction
Disclaimer: This guide will have open spoilers on the endgame content, and will be written under the assumption that you are explicitly attempting for the endgame in every run, so you have been warned. This is an intermediate guide, after all.

If you are just starting out with the game, I would recommend looking at the two beginner guides first:
https://gtm.steamproxy.vip/sharedfiles/filedetails/?id=2962042710
https://gtm.steamproxy.vip/sharedfiles/filedetails/?id=2964992328
While there will be some considerable overlap between those guides and this one, I will put more emphasis into strategies for the final fight.

To summarize the above guides alongside other basic tips (minus the points I don't fully agree with):
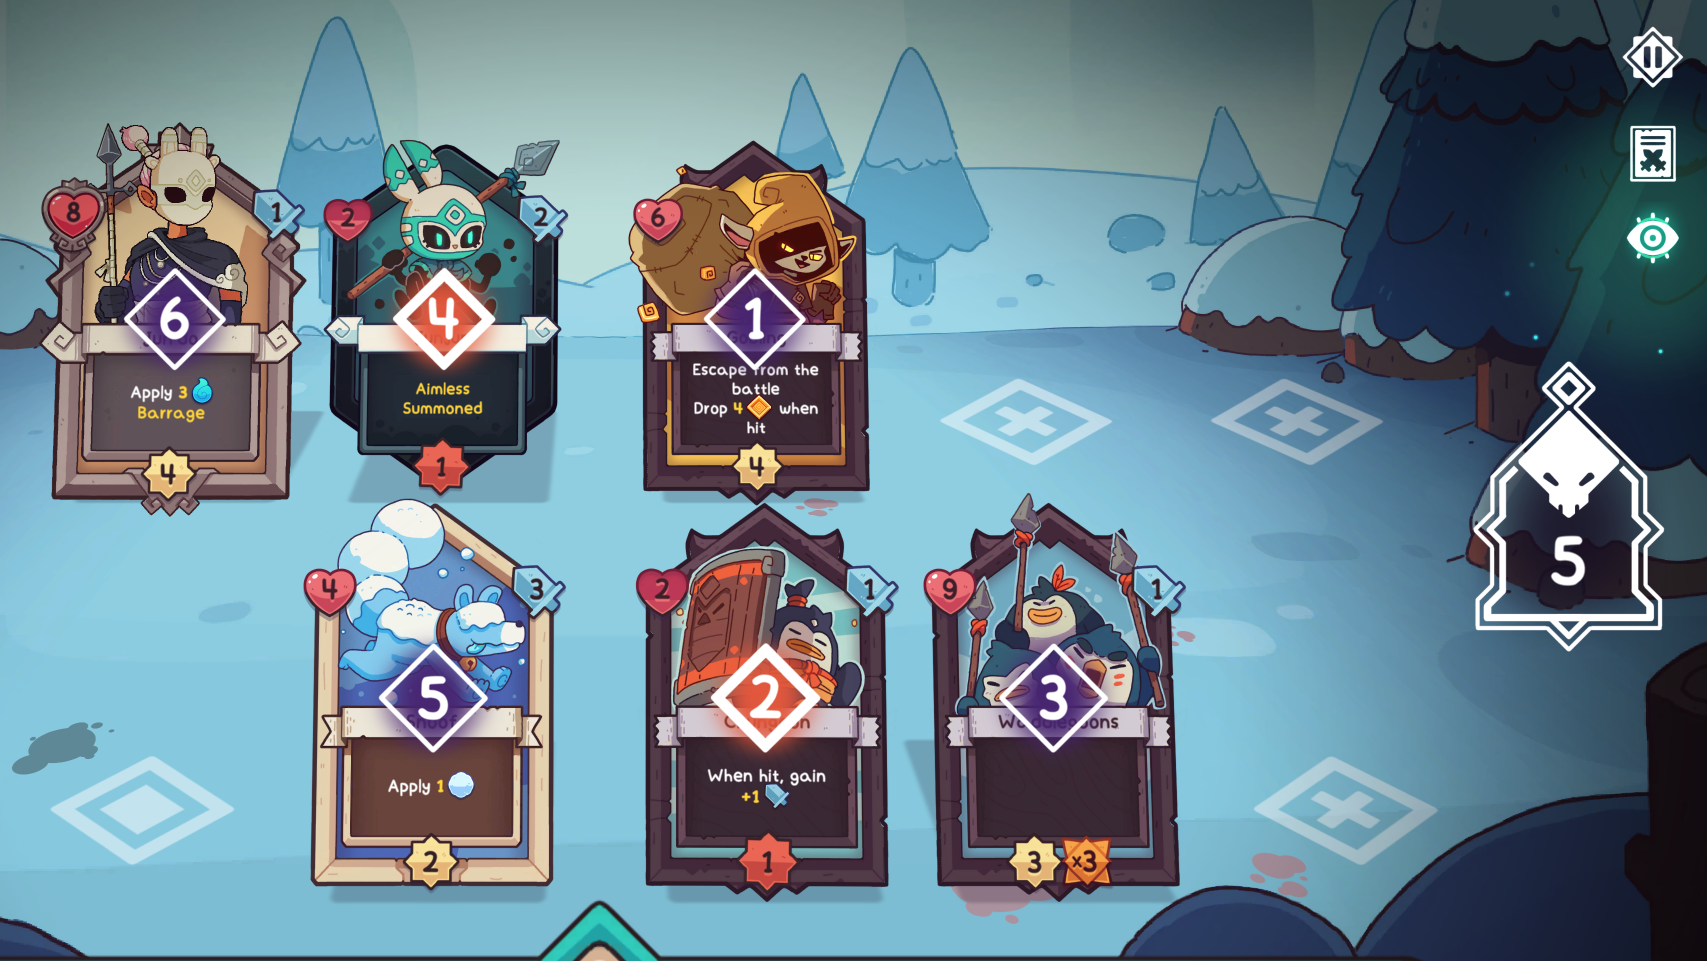
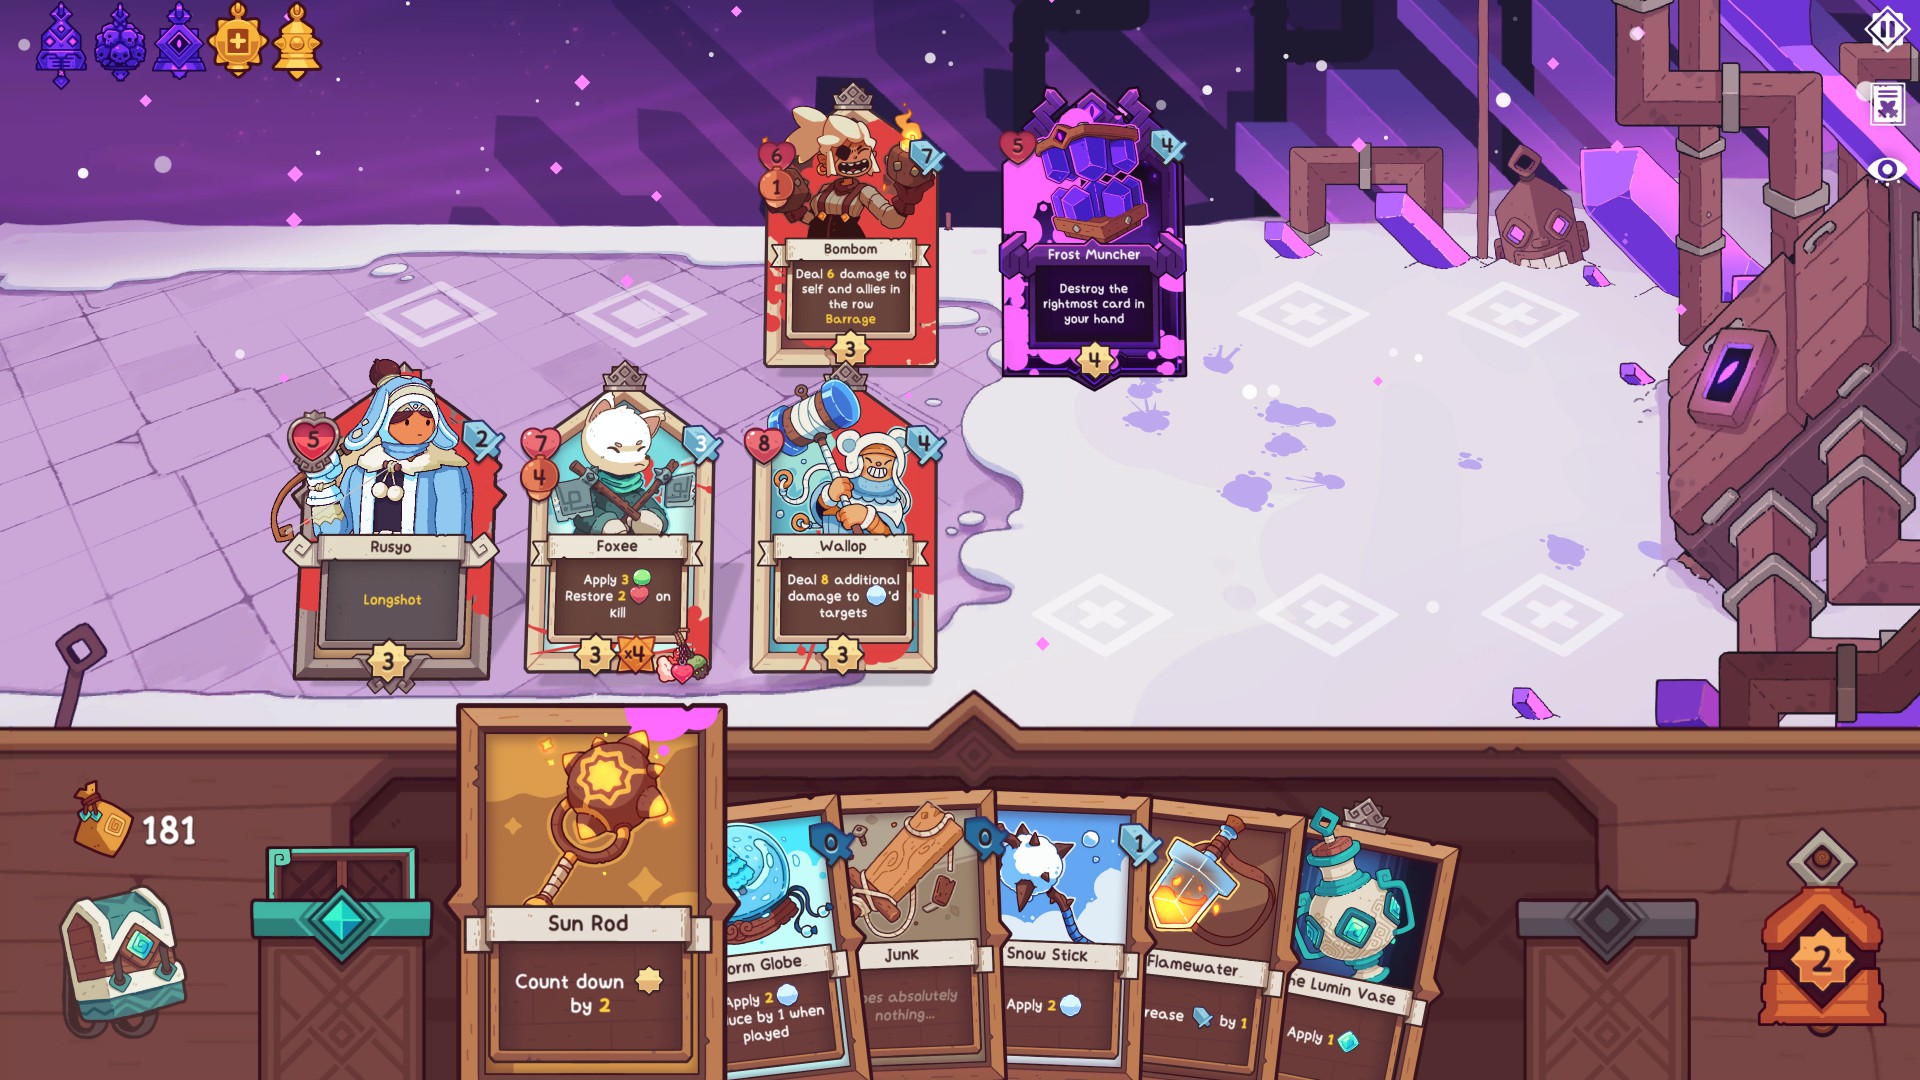
  1. Cards on the field count down in the order of top front -> bottom front -> top middle -> bottom middle -> top back -> bottom back, with the enemies going before you do; v1.0.5 provides a visible turn order as well, in case you have not committed it to memory:
  2. Play companions (units with counters) on the field before items
  3. Health is a resource; spread out damage taken by moving your cards around in-between turns, and don't waste clunkers (wood health) on small hits
  4. Crowns are essential for early momentum
  5. Hit the redraw bell early if your hand is "bad"
  6. Recall your companions to avoid unnecessary deaths or to soak more damage in future turns
  7. 0 attack vs. no attack are two different things
  8. Slow down and think about how each turn will play out before you play a card
    • All the information you need is clearly visible, and I am on the side that believes the game should not outright warn if you are about to make a bad move
    • This goes double when you play with the Dread Bell active, since each wave of (non-boss) enemies will feature an enemy with a random charm, which will usually change how you want to deal with them
  9. Think carefully about charm placement
  10. Always Be Comboing
I have bolded the last two points, as I will be going into more detail on these in the following sections.
Notable changes in v1.0.6
You can see the patch notes here: https://gtm.steamproxy.vip/games/1811990/announcements/detail/3657539010854174090?snr=2_9_100000_
Some more notable changes include:
  • New Leader screen - Instead of being limited to one selection per tribe and three total choices, now you get three selections and nine total choices. This should make it much easier to select something strong and/or of your liking
  • New Sun Vault reward after defeating a boss + New Sun Bells - Instead of selecting from one of three bells, now you get to pick two rewards from a larger assortment of three bells + two charms (+ one crown if it is the first boss)
  • New Enemy wave bell - If you clear a wave early, you have the option to use the remaining turn(s) to setup instead of having enemies immediately spawn in; you can also call the wave early at any time provided there is enough space to fit all the enemies
  • Crowns now have a ramping cost increase (60-100-140-180) as opposed to static (80)
  • Positive effects removed from Frost Bells (this is a temporary change as the next update will include a whole new Frost Bell system)
Miscellaneous Tips
Some more tips that either weren't properly covered in the linked beginner guides, or run contrary to their advice:
  1. For Sun Bell selection, I basically always go Sun Bell of Hands (Card Draw +1) followed by Sun Bell of the Bell (Redraw Bell Counter -1)
    • Sun Bell of Fellowship (Companion Limit +1) consistently feels like the weakest option to me; draw and redraw bell improvements directly contribute to keeping momentum via card manipulation, and the other unit slots are usually better dedicated to clunkers/shades
  2. For particularly difficult fights where it seems inevitable for units to get injured, it's better to sac units with lower stats, since they aren't as affected as much by the 50% stat reduction
  3. When selecting a leader, typically you want to prioritize those that have at least 8 health
    • This is specifically in the context of Heart of the Storm, where under base circumstances, you want your leader to be able to take at least one hit from the Frost Lancer
    • It's not the end of the world if you don't follow this advice, but you will have to plan ahead to make sure your leader can survive via more careful card choices
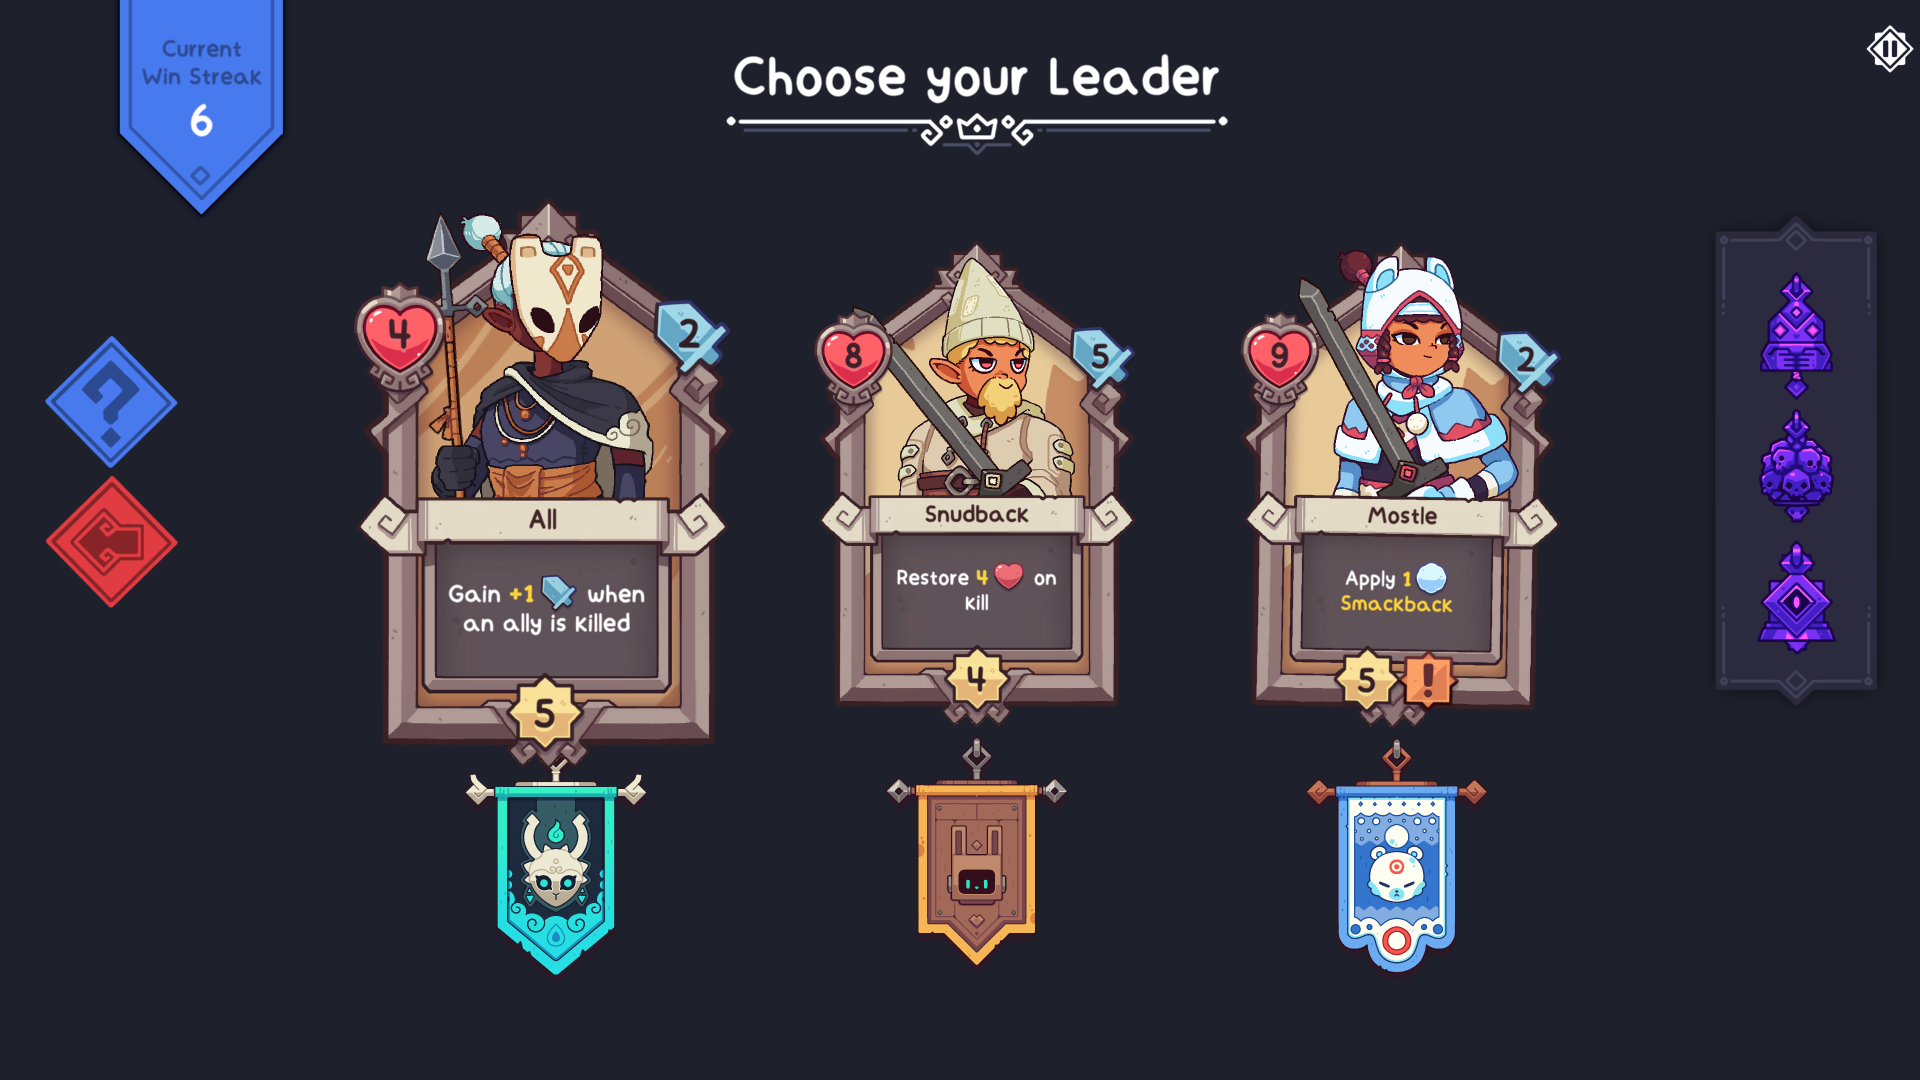
      (One of the worst leaders I've ever seen, at least from the context of Vanquish wins)
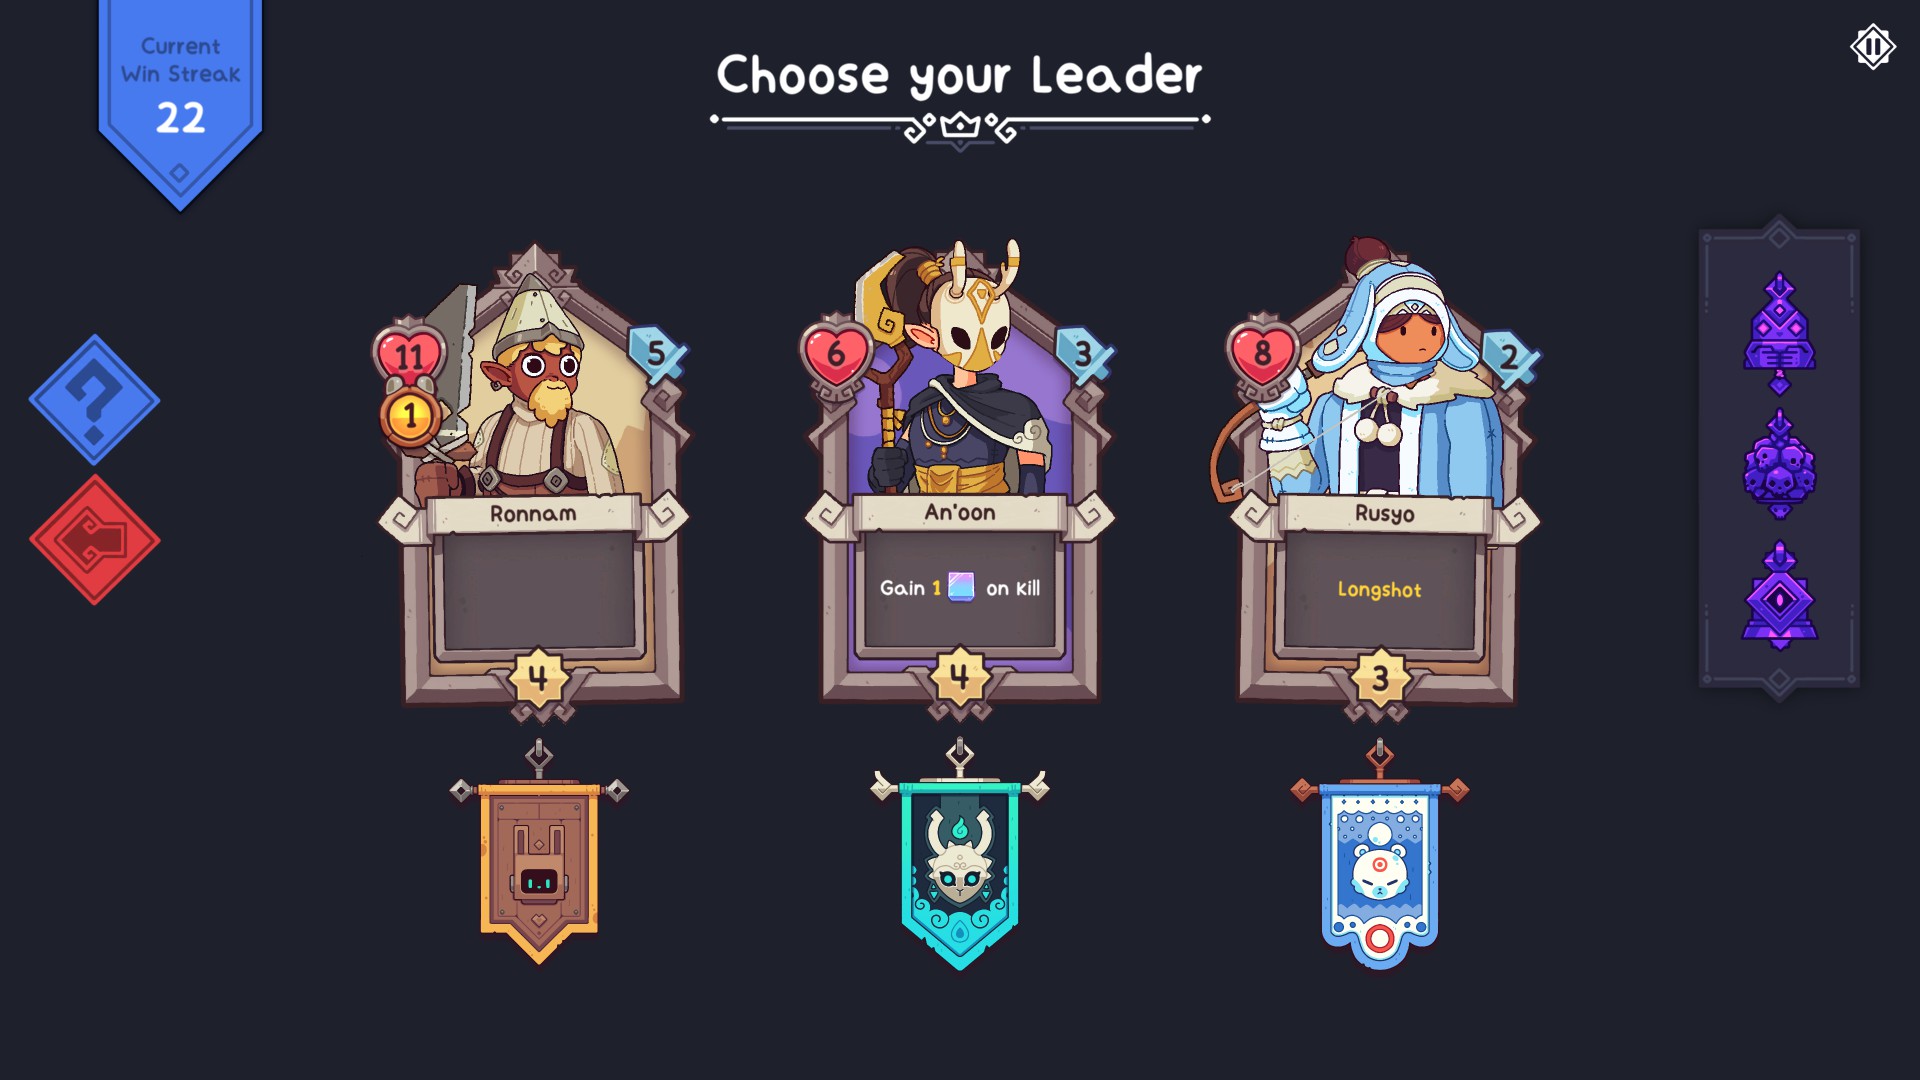
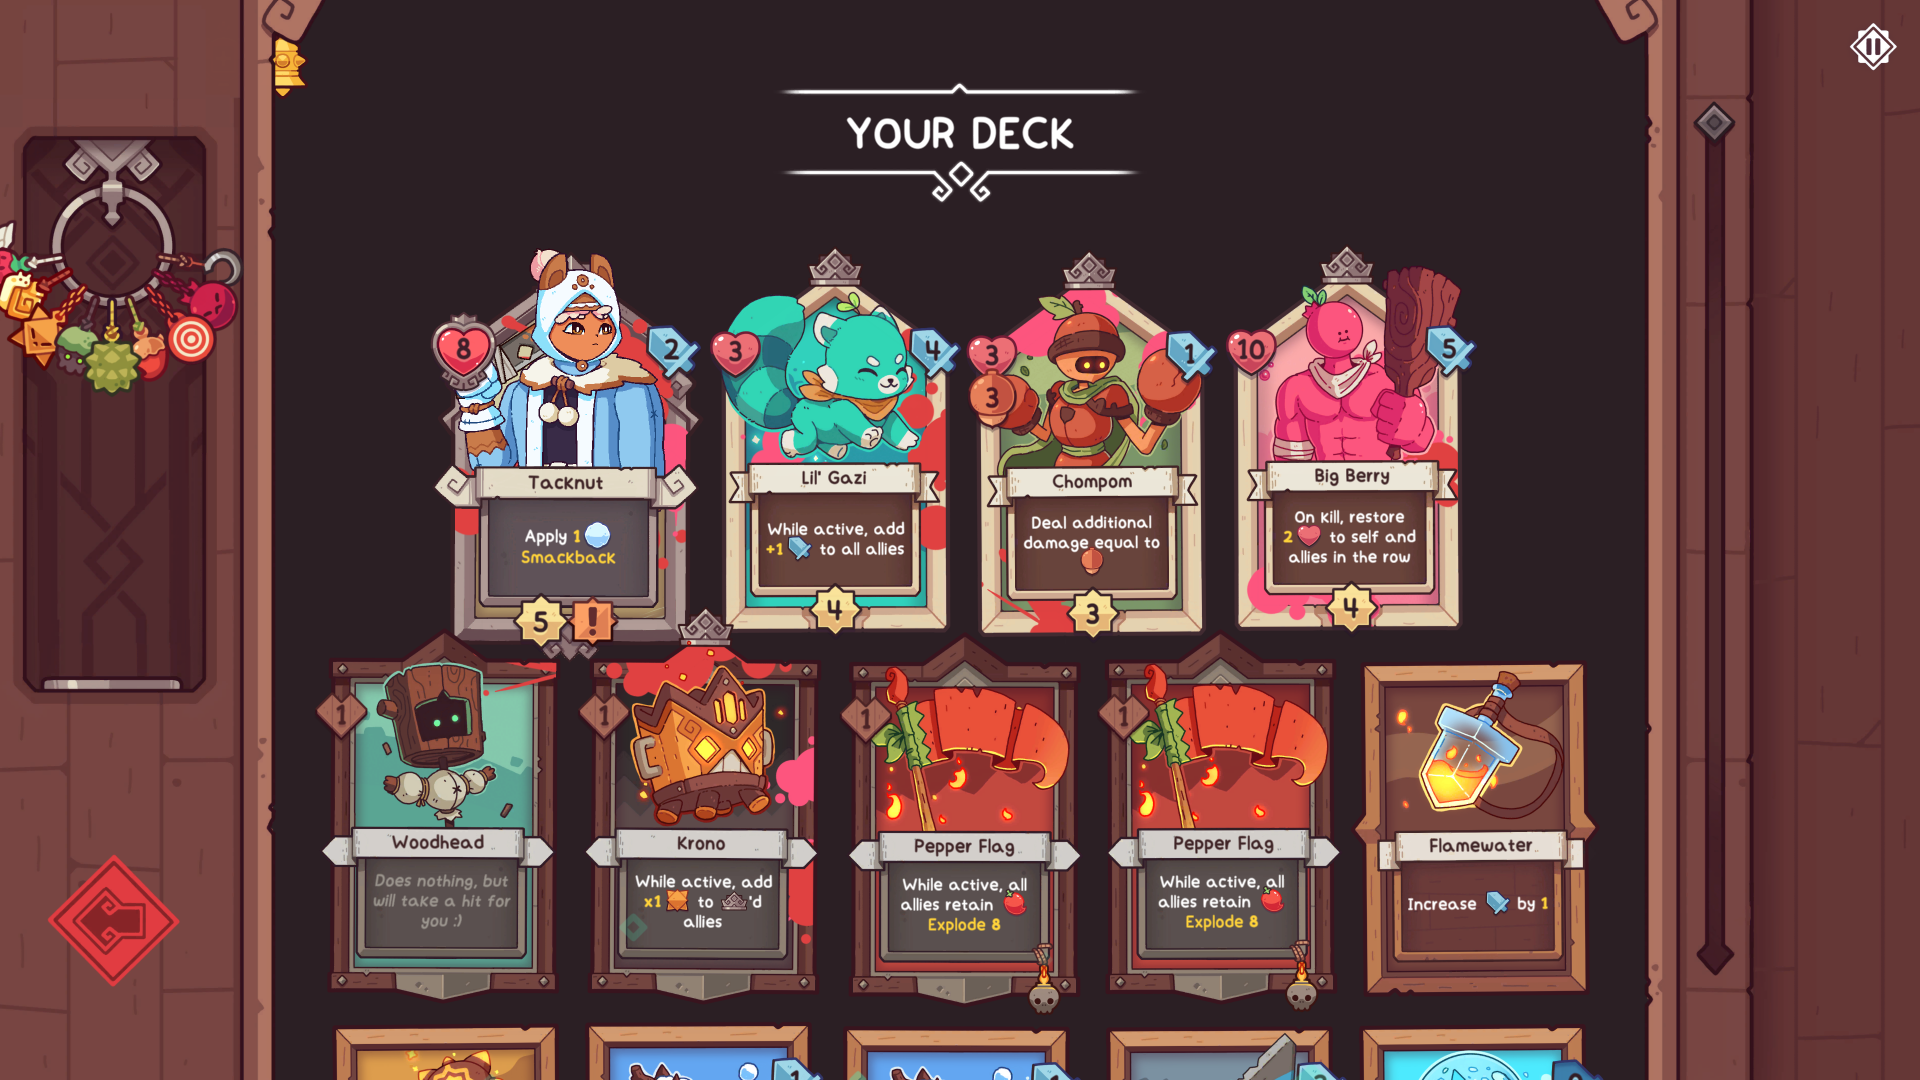
    • As another example, for the run where the Heart of the Storm screenshots came from, this was my leader selection. My rationale for picking Rusyo, even though I generally dislike the longshot leaders for their low damage, is that Ronnam is harder to bring through the mid-game due to Bom, and An'oon does not cross the 8 HP threshold (plus his ability would not be useful in Heart of the Storm)
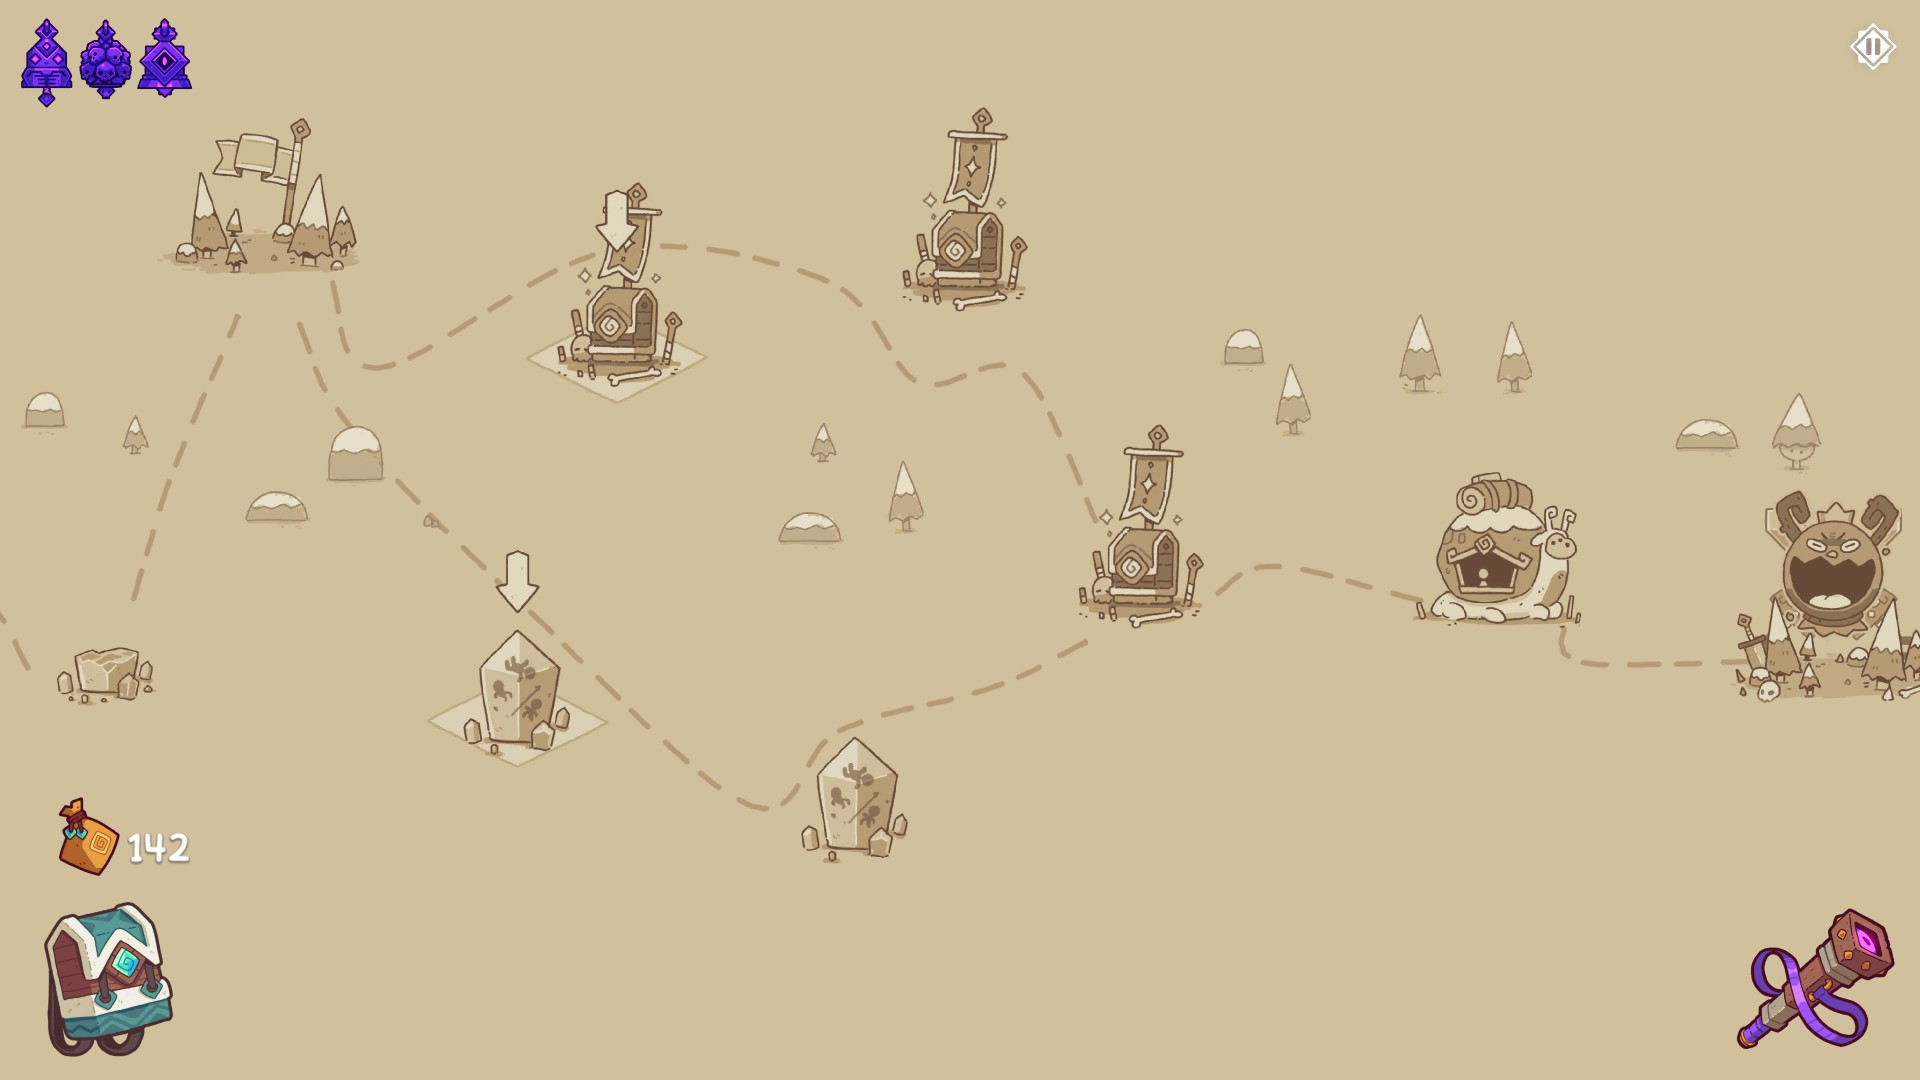
  4. Path Selection:
    • Generally speaking, these are my priorities in order of importance:
      • In the context of Vanquish wins, the paths that hold Broken Vase/Lumin Goop takes precedence over everything else
      • Shop > Muncher > Charm Shop > Gnome Traveller
        • You will usually only want one Muncher (two if playing Shademancers, since there are five Tar Blades) and target the starting Scrappy Swords/Tar Blades/Gearhammers; you should not be adding anything else that would require munching
        • Gnome Traveller is more reasonable if you are playing Clunkmaster, but otherwise you may have trouble with the additional Junk he gives
      • Charm > Treasure
    • You will usually want to get two Frozen Traveller events before the first boss (or more, if you feel like the selection provided was inadequate) and then avoid the rest whenever reasonable; I think v1.0.5 made this a bit easier to achieve with the inclusion of an additional reward node after Battle 1-2 (pretty sure it used to be 3 nodes, but now it's 4?)
  5. A quick note on "save-scumming": Unlike games like Slay the Spire or Monster Train where exiting mid-fight will put you at the start of the battle, Alt+F4ing in Wildfrost will put you at the start of the most recent turn, granted that the turn has not concluded
    • Additionally, even if you exit mid-animation of one of your companions dying, return, and finish the battle without the death, they will still be marked as injured
    • Regardless, you can Alt+F4 during a leader death animation to prevent accidental losses without consequence (leaders can't get injured for obvious reasons), and you can also exit normally during Turn 0 (the crown phase) to reset the fight if you realized you crowned the wrong cards or played things in the wrong order/position
    • Of course, save-scumming is frequently frowned upon, but this is also a single player game where one misplay can immediately end the run, so...play how you want to
Always Be Comboing
(Some of the following screenshots are pre-v1.0.5, but the general strategies still apply)

While this is a basic tip, I would like to emphasize the importance of ensuring multi-kills, as well as keeping (mini)-bosses alive for as long as safely possible to clear out every other enemy (exception being Heart of the Storm obviously, and Eye of the Storm if you aren't utilizing the Greed effect). Although v1.0.6 nerfed the benefit of high combos (you no longer get additional bling bonus past 2x combo and are capped at +5) and made enemies give more base bling amounts, every additional bit can help in the long run.

The main reasons you want to ensure a strong supply of bling are crowns and charms. Crowns cost 60 bling ramping up by 40 for each subsequent purchase, whereas charms (from the charm machine) cost 50-70-90 bling depending on how many times you purchase from the machine. The first shop is guaranteed after the second battle, so ideally you would want to have 110+ bling heading into this to get a crown + charm (alternatively, if you see a key card, then getting a crown + key card instead). From a general perspective, you will want to hit as many shops as possible to pick up the crown at minimum.

Beyond your own ability in manipulating the health of enemies to ensure combos, there is some RNG involved in the encounters, since some battles are better for getting combos than others. Examples include:
  • Battle 1-1 - Big Peng combos more easily than Snow Knight
  • Boss 1 - Bamboozle combos more easily than Infernoko
  • Boss 2 - Truffle combos more easily than Krunker
  • Battle 3-1 - Razor combos more easily than Numskull
Even if you get the less ideal encounters combo-wise, you should still be able to rack up enough bling to, at minimum, get three crowns, although there shouldn't be much problem ending with four-five crowns going into the storm battles.
Key Cards
A lot of this is subjective, but these are my recommendations for top cards to watch for if you are aiming for vanquish wins. Essentially, if you see this card, you should take it from the perspective of consistent wins (unless it is part of a Broken Vase / Lumin Goop selection...). This is not to say that any card not in this list is bad per se, but I consider these cards as great from a strategy-agnostic perspective.

General
  • Any clunker
    • Unless you know you have better options, you can't really go wrong with basic blocker cards, with the big, big caveat that you can properly deal with Frost Junker ramping heavily from this (usually via snow/ink application)
  • Frost Bell
    • Great for survivability and a top choice for charm utilization + Lumin Vase
    • Frostbloom is not nearly as good (3 Frost to single target vs 2 Frost to row), but is still okay if you absolutely need some additional survivability; you will usually be slapping this on Frost Bomber/Frost Lancer
  • Grabber
    • If you aren't in a rush to kill the Frost Jailer, this can be nice to pull Frost Junker to the front and get rid of it as soon as possible
    • Also a decent choice for charms, since it already comes with Noomlin for free play
    • Outside of Heart of the Storm, it's a great card for dealing with wood health
  • Noomlin Biscuit
    • This can be a bit finnicky, as you may not be able to get this and your key card to line up in the same hand in time, but extremely good for momentum otherwise
    • You usually want to put this on a Lumin Vase'd item for maximum effect; if you are concerned about the consistency, you may want to use two crowns on the key item + Lumin Vase to reduce potential bad RNG
  • Pinkberry Juice
    • Unconditional health increase on a key unit is good, especially in the context of getting a unit's health above Frost Lancer's kill threshold
  • Snowcake
    • Shut down a unit for a majority of the fight, granted you have enough DPS through your other cards
    • You will usually be slapping this on Frost Crusher, although it is also good on Frost Junker depending on your circumstances

Snowdwellers
  • Shell Shield
    • For most intents and purposes, this is the same as Pinkberry Juice, although you can use this on clunkers, and it benefits Chompom while not benefitting Big Berry
  • Shellbo
    • One of the best cards in the game; in overly simplified terms, this card gives your team 9 "health" (with the caveat that your row targets need at least 3 health prior)
    • This card goes into ludicrous territory if you can find a Weakness charm (15 "health") or a Moko charm (30 "health"). Also pairs quite nicely with Critical charm and/or Lumin Vase
  • Shroominator
    • High health clunker for the "barrage row"; not that great if you have weak sources of poison

Shademancers
  • Any standard shade card (ex. Beepop Mask/Fallow Mask)
    • Renewable blockers are greatly appreciated for keeping the "barrage row" occupied
    • Blank Mask/Shade Wisp are also excellent cards, but a bit more finnicky with regards to positioning, which is crucial for Heart of the Storm while Unmovable is active; also you can end up bricking Shade Wisp if you apply Overburn to your target
    • Conversely, you will want to avoid shade cards that summon on the enemy's side (ex. Leech Mask/Pom Mask/Sheepopper Mask); since Heart of the Storm starts with a full board of enemies, you may not be able to afford having a dead card for too many turns
  • Soulbound Skulls
      This was changed in v1.0.5 due to the plethora of complaints of it killing their leader, such that you now target an ally and random target an enemy (instead of vice versa; this means you no longer have to spend two crowns to best utilize this). However, there is also an additional caveat that the ally must be killed by your own hand in order for Soulbound to activate. Regardless, so long as you keep a source of item sacrifice/damage handy, this card almost seems like a no-brainer pick now if you want an easy win. Just make sure you can spare the setup turns

Clunkmasters
  • B.I.N.K.
    • Originally one of the best cards in the game, to the point where it got nerfed in v1.0.5 to only apply 2 ink instead of 3. Regardless, still an excellent card for neutering a bunch of effects (including freeing your movement) as well as charm application. Make sure to put your units back in a good spot before the ink runs out on the Frost Jailer though, as not doing so could easily end your run
  • Frostbite Shard
    • Crown this and immediately play it on Frost Junker to heavily reduce its threat level
  • Haze Balloon
    • Arguably blocks two attacks, since the target's second attack will hit something that is not your team
  • I.C.G.M./Tootordion
    • High health clunkers for the "barrage row"
Charm Utilization
From the "Key Cards" section, you can see that I mention "charm utilization" a few times. These are some general tips that I follow when determining how to distribute my charms:
  1. There is a limit of three charms per card (barring getting the Chuckle Charm); it is usually better to focus multiple charms on key cards, rather than spreading yourself thin
  2. Unless you can see a pretty obviously great choice for a charm (ex. Foxee + Battle Charm), it may be better to hold onto a charm until later in the run, until you find a card that is more compatible
    • Of course, this can sometimes end up in situations where you are holding onto a ridiculous amount of charms and still can't think of how to distribute them. If you feel like you need to use charms or risk losing the run, then go ahead with whatever option is best at the time. However, if you were able to survive for a majority of the run while doing this, then that is still good
  3. On the topic of "whatever option is best at the time", here are some random examples:
    • Acorn/Block/Heart/Hog/Raspberry Charm - The most important unit which has less than 7 health, such that they can be brought above Frost Lancer's kill threshold
    • Balance Charm - This is a direct upgrade to the following units (assuming you didn't already give them other stat boosting charms):
      • Chikichi
      • Chompom
      • Foxee
      • Pootie
      • Snobble
      • Tiny Tyko
      • Yuki
      Obviously some of those units use the Balance charm better than others (you don't really get any benefit putting it on Chikichi/Pootie for example), but it is still technically an upgrade. Also very good on Booshu/Fizzle, as well as a potential higher amount of units after having used a Truffle Charm
    • Bom/Frosthand/Greed/Goat/Shroom/Snowball/Squid Charm - Either a frenzy unit or a barrage item (If I have B.I.N.K. or Frost Bell, they are usually top priority)
    • Bread/Molten Egg Charm - Scrappy Sword/Tar Blade/Gearhammer/Junk/Pombomb
    • Cake Charm - Flamewater/Berry Bell (saves you five turns worth of playing this card; great target for a Shade Sculptor too)
    • Chuckle Charm - Whatever card you are focusing a bunch of charms into, obviously
      • This charm is one of the big reasons I end up hoarding charms until late in the game, since keeping open slots in case you get this lets you exponentially increase the power of a card all at once
    • Critical Charm - Whatever card I also want to crown, since you can guarantee the effect at least once without losing redraw bell momentum
    • Durian Charm - Bombom/Plinker (the two most obvious choices)
      • Also extremely powerful on high attack cards that have frenzy, a play restriction, or "negative" effects associated with it (i.e., Pombomb/Proto-Stomper/Slapcrackers/Stormbear Spirit)
      • Otherwise, same targets as Bread/Molten Egg Charms
  4. Given the large pool of charms, you will often get charms that are either low-value, useless, or actively detrimental. This is why it is important to keep a high supply of blings such that you can maximize the amount of charms you can get, and therefore increase the chances of getting something that can greatly boost the power of your deck

Eye of the Storm
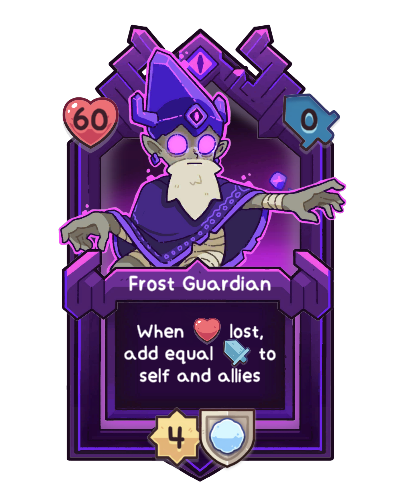
The Eye of the Storm fight can take one of two forms: the standard Frost Guardian orientation that is present for your first run as well as after any Vanquish win, and the "possessed leader" orientation that is present for any loss on Eye of the Storm/Heart of the Storm or Victory win. Both forms of the fight also have a Phase 2 that is the same between the two.

Frost Guardian (Phase 1)

  • Frost Guardian enters the battle with three other enemies, and will have two additional waves of two enemies each afterwards
  • The general strategy typically involves killing every other enemy before attacking into the Frost Guardian, or at least killing them before they can attack with any buffed attack values from the Frost Guardian, since they can easily get to immediately lethal amounts of damage when left unchecked
  • In the situations where you can't get to an enemy that is positioned behind the Frost Guardian via your companions' attacks, you will want to either keep them occupied with snow cards, and/or neutralize using standard attacking items
    • This gets a bit more cumbersome if said enemy is Grizzle, since it has high health AND snow resistance; in this scenario, you may also need to rely on clunkers/shades to deal with the intermittent damage
  • In the same vein as the above sub-point, you may need a clunker/shade or two to deal with Frost Guardian's occasional attack, since there will probably be at least one turn where it will be attacking with a damage value that none of your units can survive normally
  • If you are playing the Clunkmasters clan, inking the Frost Guardian nearly trivializes the entire first phase, as you can keep the Frost Guardian at 0 attack outside of external buffs

"Possessed Leader" (Phase 1)
Copying directly from the official wiki:
Originally posted by Wildfrost Wiki:
Once the Eye of the Storm is defeated without the player meeting the conditions to activate the real final fight, the Emperor Shade will corrupt the player's leader and deck. This will make them the new first phase of the boss fight, and the cards that will fight alongside them will resemble the deck the player had. Instead of items, however, other enemy cards will substitute in [with] similar abilities.

Mechanics
Effects from Charms equipped to a leader or any Companion will remain applied in their corrupt form, with the exceptions of Pinch, Bling, Hog, Spark and Noomlin charms. Items with Charms applied, however, will not carry over to the substitution card. Then, corrupted allies gain:
  • 10-12 Health, rounded up to the nearest even number,
  • +2 to their effects or Attack
On top of Charms and the above bonuses, corrupted leaders then gain:
  • x3 multiplier to total Health
  • Resist Snow,
  • +1 Counter.
Also mentioned in the wiki, certain cards gain additional stats or abilities; I will link to the page at the end of the section if you are curious, although realistically, you don't really need to know the exact stat/effect values. In-game, you can view the possessed leader team via the telescope in town or in the bottom right corner during a run.

Note that v1.0.5 seems to have made this fight a little bit easier via these two points:
  • Final Boss battles have less Teeth
  • Final Boss enemies' stats are boosted less if they have Charms
Regardless, there are basically two (and a half) general tips for this fight as a whole:
  • Similar to the Frost Guardian's phase 1, you will typically leave the leader for last, as they will usually have the highest health and highest counter compared to the other enemies, which can be compounded by other nasty effects like smackback/barrage/teeth depending on how you equipped charms on them previously
  • No possessed units outside of the leader will have snow resistance, so make sure to capitalize on this
    • If you have created a particularly egregious possessed squad, consider forcing at least one run with the Clunkmasters tribe so you can get access to ink, which will usually make this battle a lot more straightforward

Frost Guardian (Phase 2)

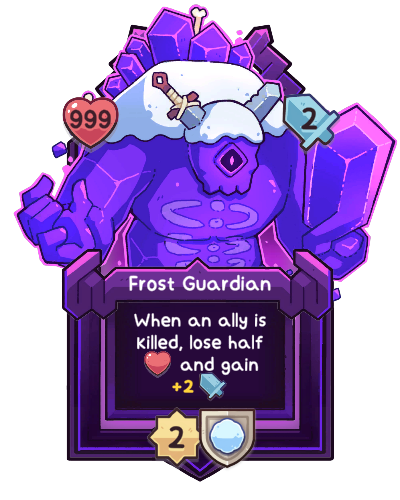
  • Upon starting Phase 2, Frost Guardian will call in five enemies, assuming the field is free. I believe the types of enemies are consistent:
    • Grink (x2)
    • Ooba Bear
    • Porkypine
    • Winter Worm
  • If you activated this phase before all the reinforcements from Phase 1 came in, they will still come in later
  • The general idea of this portion of the fight is to kill all the adds to greatly reduce Frost Guardian's health to a reasonable value, and kill it before its very high attack cuts through your whole team
  • Frost Guardian has ramping offense on a short counter along with frost resistance, so you will have to be careful with your timings
    • A basic example would be as follows:
      • Your leader with 5 health is about to take a 2 damage attack from Frost Guardian
      • You use an item to kill a separate enemy, which increases Frost Guardian's attack to 4 and ends your turn
      • An enemy acting before Frost Guardian attacks into one of your companions who has Teeth with a value high enough to kill it, which increases Frost Guardian's attack to 6
      • The Frost Guardian promptly kills your leader and ends the run within the span of one turn
    • Contrary to Phase 1, if you used ink there, it is usually not a great idea to ink the Frost Guardian in phase 2, as this will result in you having to chip through an extremely high amount health manually, while they are still constantly pelting you with attacks. Depending on your deck, you may have enough attack and/or sustain to deal with this, but it is still quite a slog to get through
      • This means that you may want to avoid playing that B.I.N.K. card for this phase
    ---

    For more information on the fight, including a bunch of possible enemy permutations and substitutions, visit the article about it on the official wiki page[wildfrostwiki.com]. If you want to see wins in action, Retromation's and Skoottie's Wildfrost playlists are good resources (among many others, I'm sure) on how to tackle fights, including Eye of the Storm and Heart of the Storm.
Heart of the Storm
Prerequisites:
  1. All three dread bells activated
  2. Broken Vase and Lumin Goop collected (combines into The Lumin Vase)
    • Do not feed this card to the Muncher...it is fine to attach the Consume effect to it otherwise
  3. Beat the Eye of the Storm
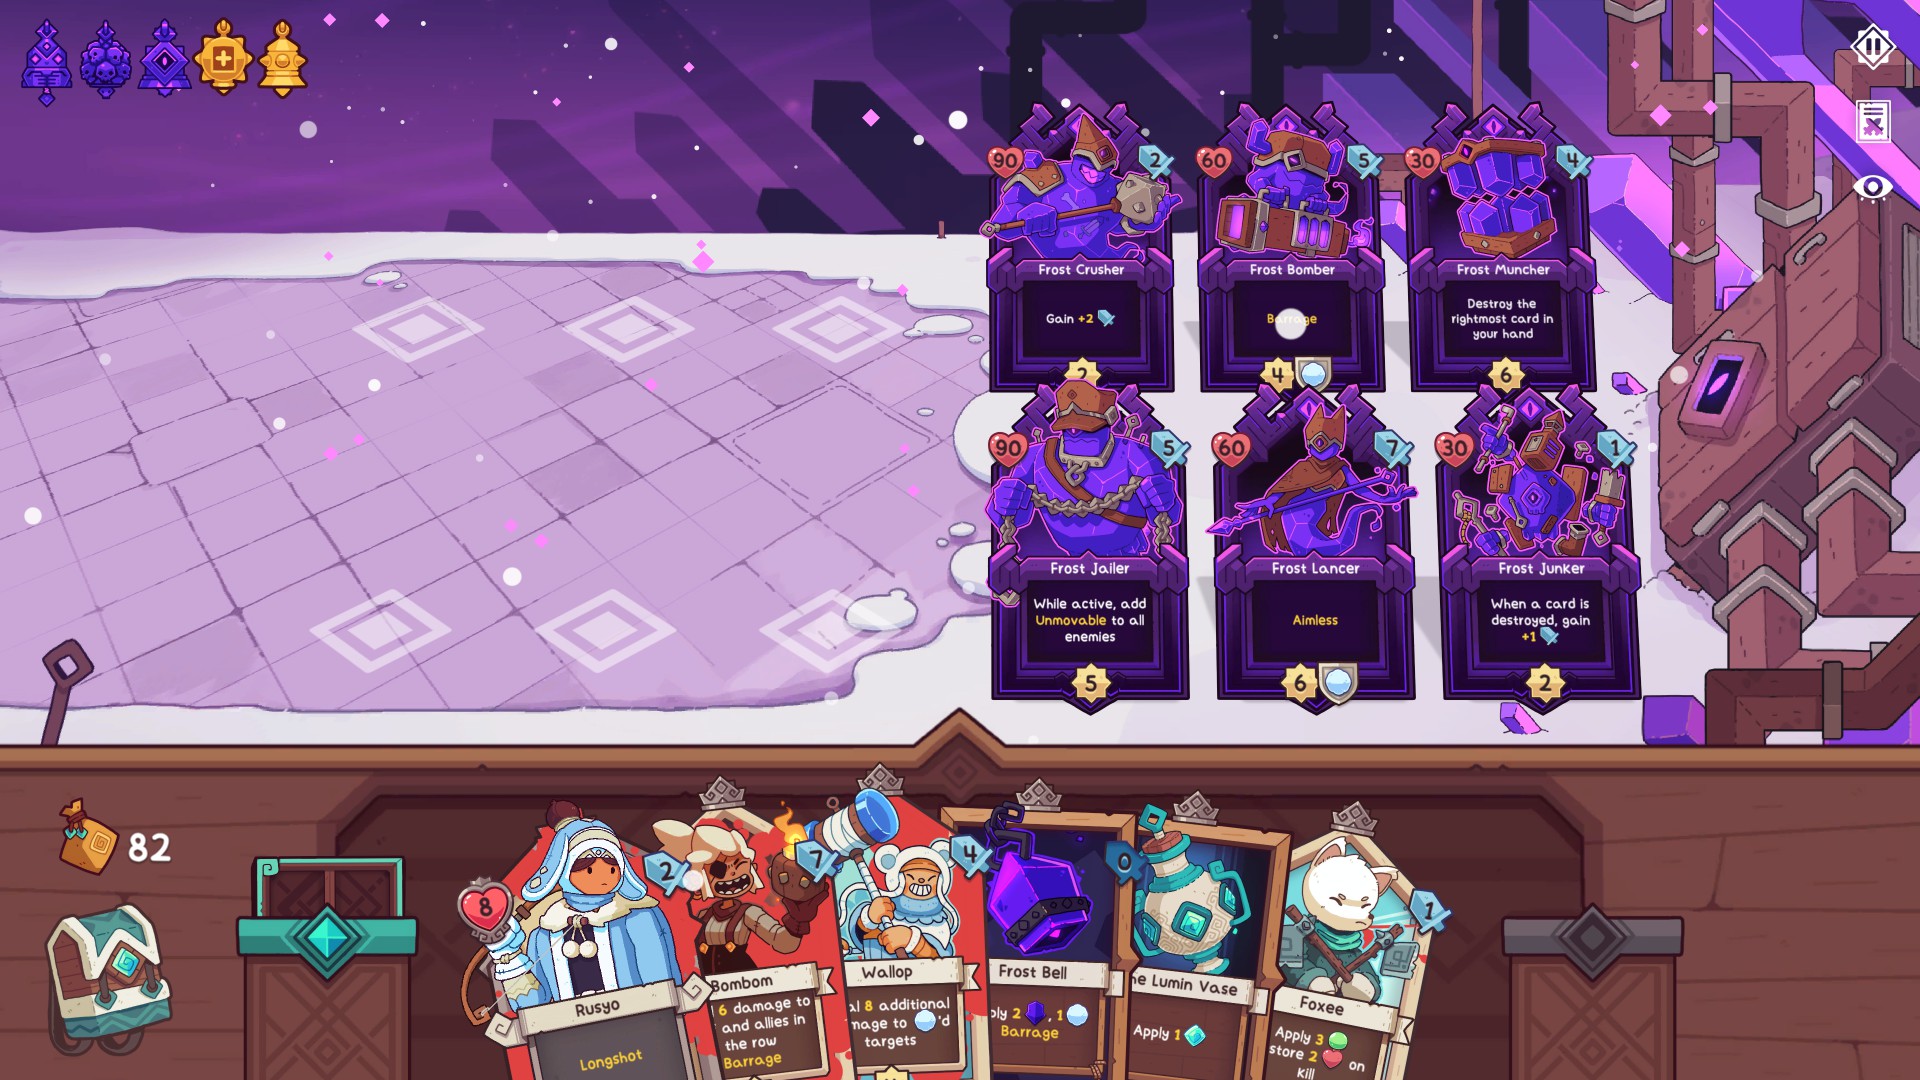
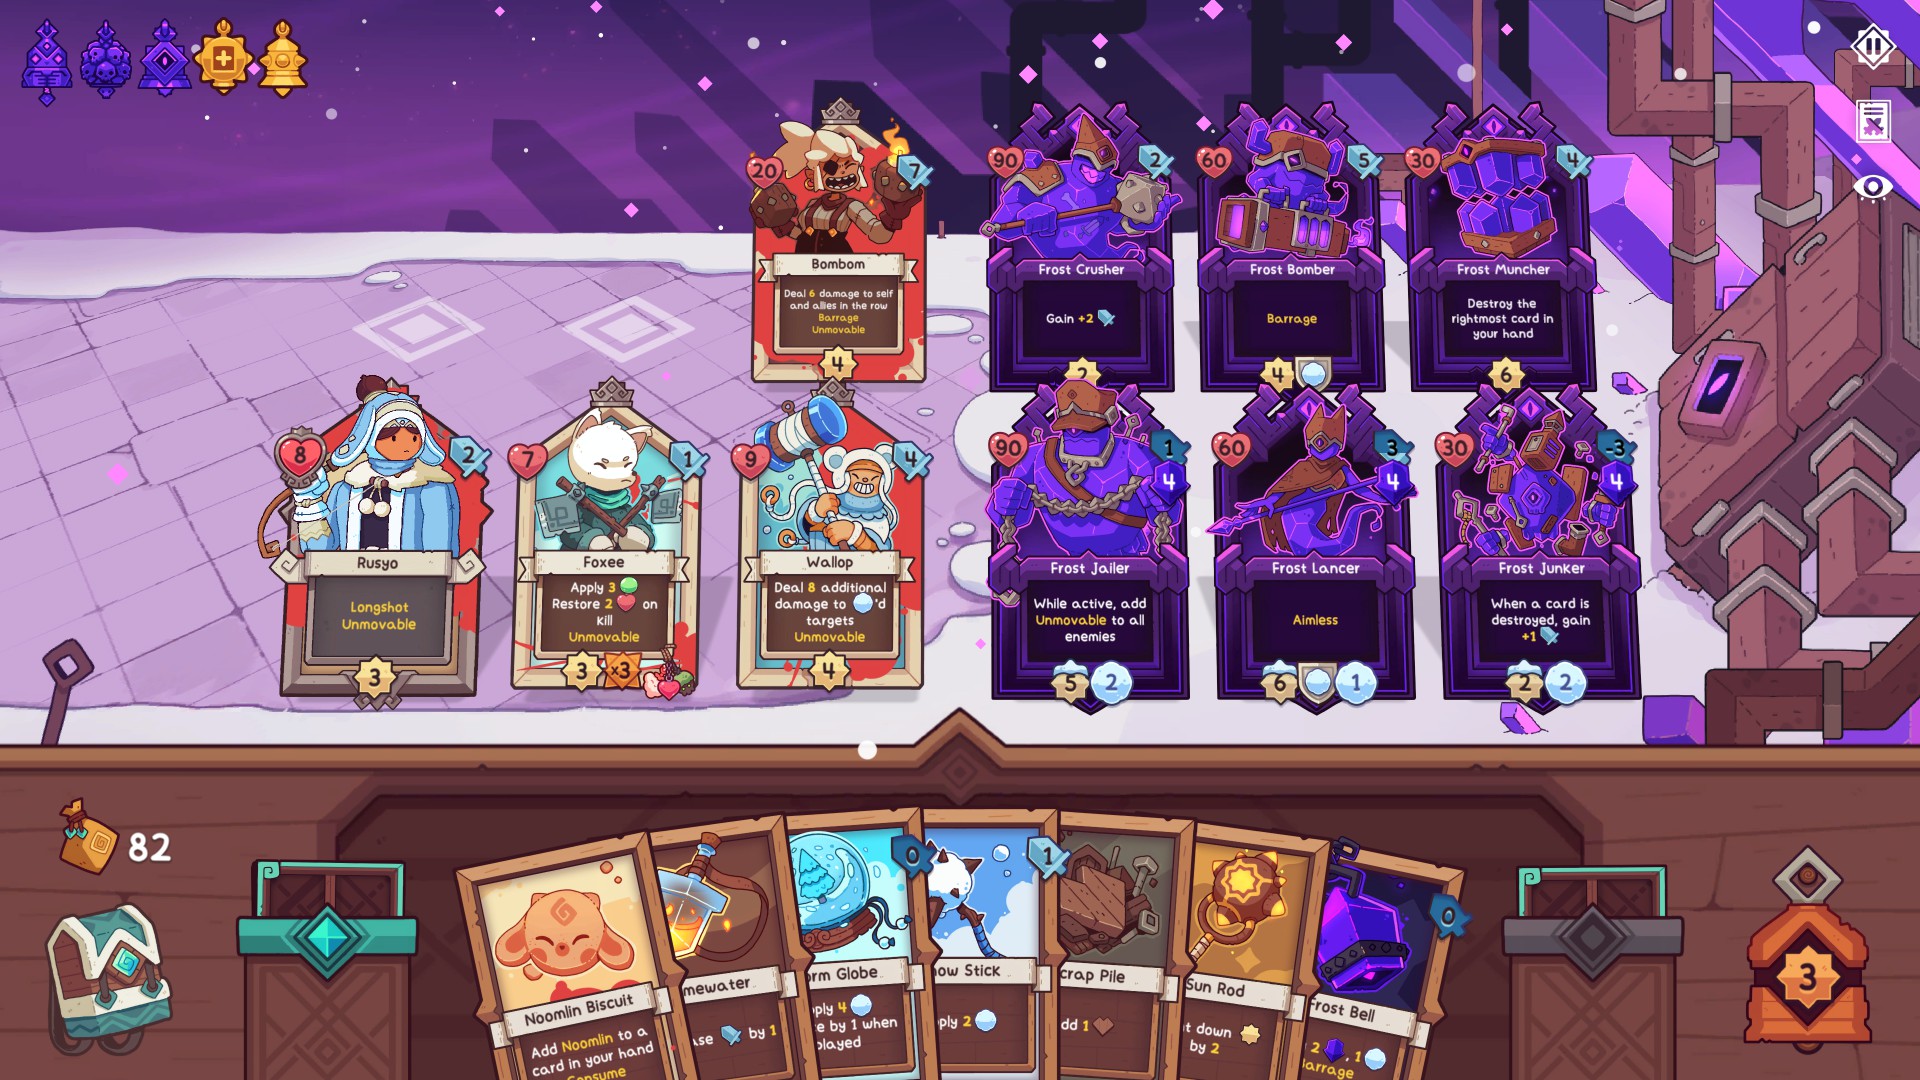
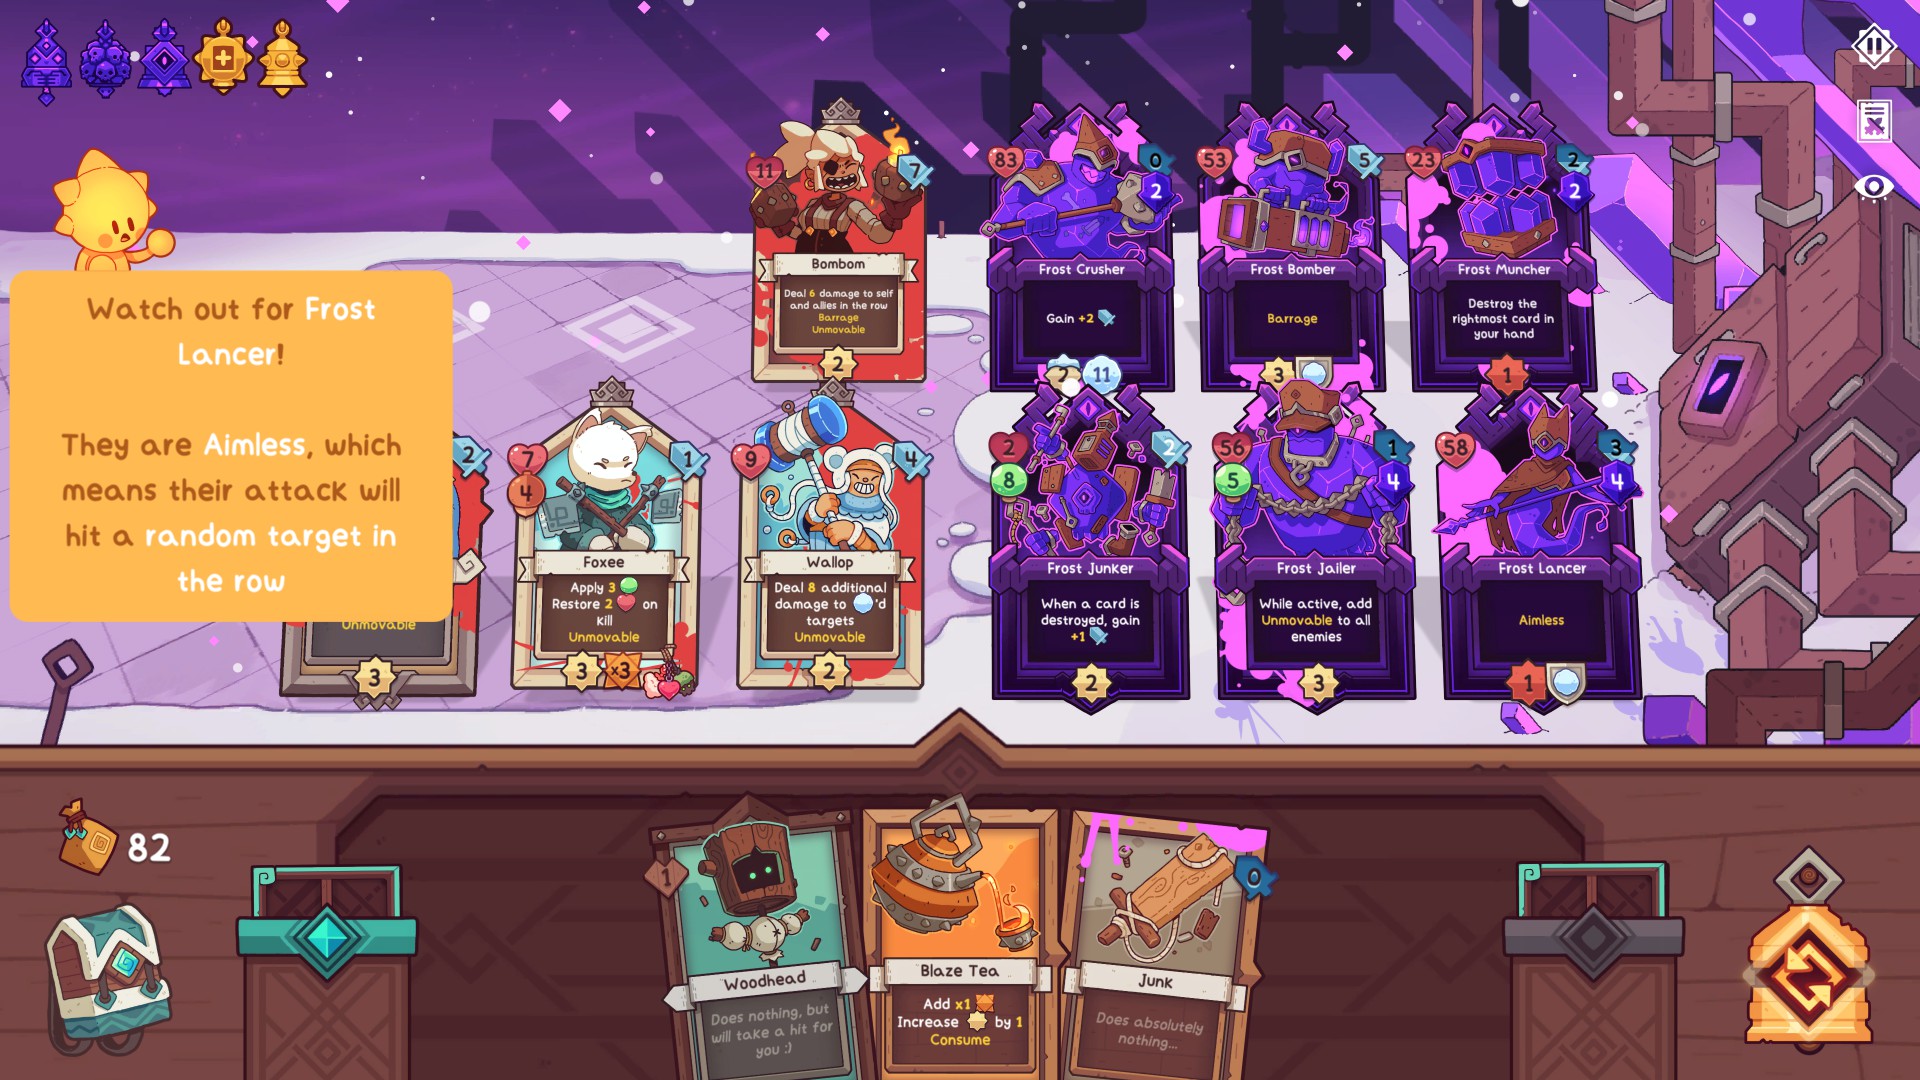
This battle always features the same enemies in the same formation, with the caveat that the rows themselves are interchangeable.
  • The Frost Jailer, Frost Lancer, and Frost Junker constitute one row
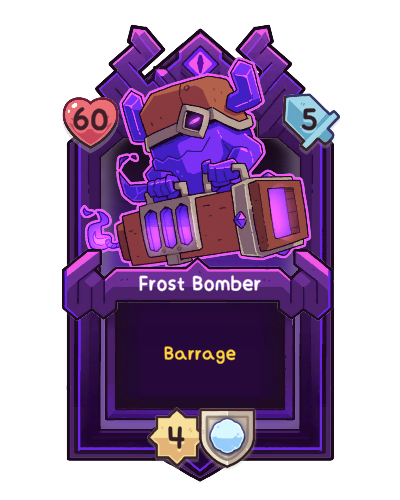
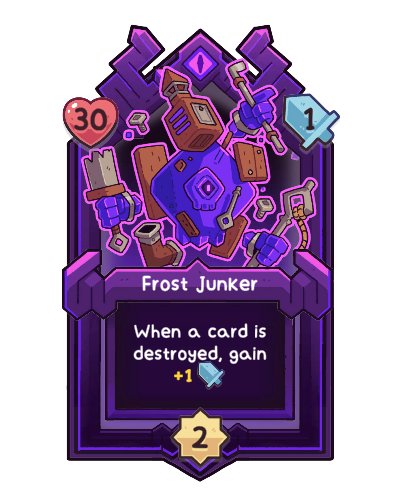
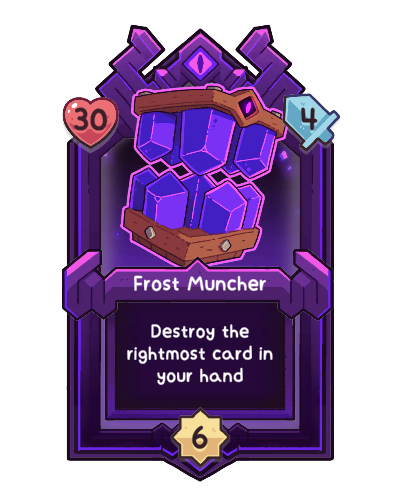
  • The Frost Crusher, Frost Bomber, and Frost Muncher constitute the other row
These are typically named as the "Jailer row" and the "Crusher row" respectively. Make sure you pay attention to how the rows are oriented, as positioning is very important at the start due to the Unmovable effect from the Frost Jailer.

General Tips
  • The generic layout for this battle usually goes as follows:
    • Jailer row: Leader - Damage unit - Tank
    • Crusher row: Tank
  • In this scenario, a tank refers to a unit that has a lot of health. Depending on your card choices, you may not get the option of a traditional high health unit, so you can either supplement this with health increasing cards (ex. Pinkberry Juice/Shell Shield/Shellbo), damage mitigating cards (snow/frost/ink on scalers), or a steady supply of clunkers/shades (with the caveat that you should watch out for Frost Junker's scaling)
  • The Crusher row is also frequently called the "solo row"; the reason this is the generic layout is that the Crusher row holds the Frost Bomber, which is a strong barrage unit (which also has snow resistance). Putting additional units on this row can result in taking a lot of otherwise unnecessary damage, leaving you in a bad position to deal with the other units
  • You may not necessarily want to crown all of your companion/clunker cards to play them on Turn 0; depending on your deck, you might only want two or three units out to start, and have the rest of the crowned cards be items that amplify the power of a singular companion such that they can decimate the battle themselves
Now, I will go over each individual boss and provide some general notes.

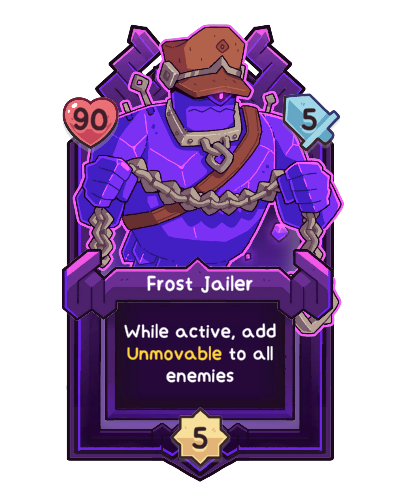
Frost Jailer
  • Does not scale and has average damage compared to the rest of the squad, but has strong presence due to its high health and Umovable effect, locking your team in place
  • Usually ends up being the first enemy that you want to kill so you can start repositioning your units again, and also a great contender for ink so you can temporarily move things around
    • Will naturally be the first enemy to die anyways based on natural positioning of your units, but if you are confident in your formation, you can consider prioritizing other targets instead, since it does not do as much damage as the majority of the other enemies

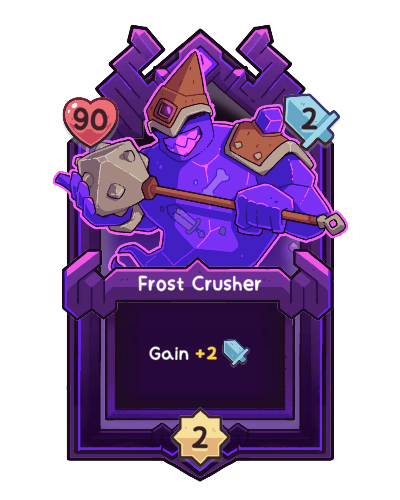
Frost Crusher
  • One of the two offensive scalers, quickly decimating your solo row if left unchecked
  • Since Frost Crusher naturally ramps up its damage every time it gets to move (contrasting Frost Junker, which only scales based on destroyed cards and thus usually scales much more slowly), it is usually the primary target for heavy amounts of snow or ink

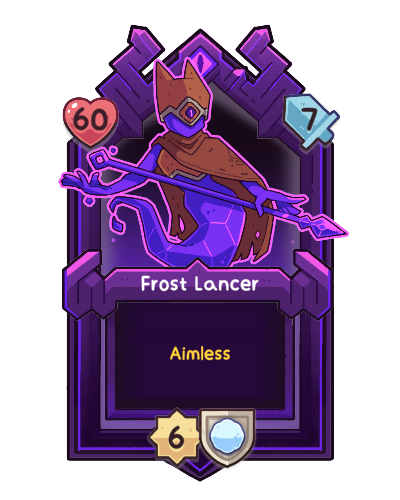
Frost Lancer
  • One of the two snow resistance units, and has a bit of a reputation for unceremoniously ending runs by sniping your leader or key unit with its high damage Aimless attack
    • Barring the influence of Frost Jailer and Frost Junker's attacks, this is the primary reason you want to get your leader's health to 8 or above to survive at least one attack from Frost Lancer, although ideally you would also want to ensure your attacker/key units can also pass this health threshold
  • Naturally, it is usually not a good idea to "waste" snow cards on this enemy unless you absolutely need to delay it a turn above anything else
  • If need be, you can ink it before its attack to ensure it will hit your front unit, but there are usually more important targets if your ink sources are single-target

Frost Bomber
  • One of the two snow resistance units, whose presence somewhat necessitates the concept of a "solo row", unless you have a very hefty supply of units
    • Even if that were the case, it's usually not a good idea to willingly throw away a bunch of units, since this buffs the Frost Junker
    • If you can pair this with timely ink/frost application however, then it is much more reasonable to run a full board of units to kill things faster
  • A good choice for Yank, since you will usually be locking down the Frost Cruncher, and Frost Muncher is largely inconsequential

Frost Junker
  • One of the two offensive scalers, which can quickly get out of control if you don't pay attention to your card plays
    • While a typical strategy for crowns is to place them on Consume cards and get them out on Turn 0 since they won't cycle through your deck, you may want to consider uncrowning them and playing them later in the fight if doing so would cause Frost Junker to scale too heavily
    • Similarly, you will want to be careful about getting too many units killed, since that will result in a snowball effect (figuratively, not like...the actual effect) of the Frost Junker scaling enough to kill units even faster
  • Be careful about how its turn order lines up with other enemies (especially Frost Jailer and Frost Lancer), since they may open up a path to your leader to be quickly obliterated
  • Typically the second best option for heavy amounts of snow or ink, next to Frost Crusher (if you can spare it)
  • If you have access to Yank, this is also one of the better options since it has low health compared to the other enemies, assuming you don't need to urgently kill Frost Jailer first
  • If you happen across a Frostbite Shard card, crown it, and play it before any other consume cards, you can turn Frost Junker into a glorified Baby Snowbo/Pengoon offensive-wise (1 damage attack every 2 turns), so it is always worth keeping an eye out for it

Frost Muncher
  • The lowest damage, lowest health, and most inconsequential effect of the entire squad; you will usually want to leave this enemy for last simply for the fact that you can afford to
  • Even though its effect is the "weakest" of the bunch (and can actually help you in thinning your deck during the fight), you will still want to pay attention to its turn counter, such that you can ensure it doesn't destroy a key card
    • With that in mind, you may want to hit the redraw bell early or delay it to make sure you can keep a weaker card on the right
    • It is fine to let it destroy The Lumin Vase, especially if you don't forsee yourself needing to play it again
  • Needless to say, Frost Muncher synergizes with Frost Junker in boosting its attack with the destroyed card, but since this only occurs every 6 turns, you should be stabilizing the field by the time it gets around to its second attack


6 Comments
dissyllabic 1 Oct, 2024 @ 2:34pm 
Thanks for the awesome guide, this was just what I needed picking up Snowfrost again. I managed to pull of a win after a dozen or so games, then some other really good games came out and I forgot about Wildfrost until now, and I feel that this guide helped me summarize a lot of the stuff I had learned. Thanks!
Altivu  [author] 27 Feb, 2024 @ 4:56pm 
@Austin Body Snatcher

Have a look at this thread discussing it. A bunch of people throw in their own tips:

https://gtm.steamproxy.vip/app/1811990/discussions/0/5440953210422686220/
Austin Body Snatcher 27 Feb, 2024 @ 12:20pm 
Nice guide, thank you.

Got any tips on achieving a 6x kill combo? I'm missing the last companion.
zenflight 17 Dec, 2023 @ 10:52am 
I really like your planning for and and breakdown of Heart of the Storm. It definitely changes how you plan out your runs when you know you'll have to tank a 7 damage aimless hit and also deal 90 damage quickly. Also thanks for linking my guide! :)
BENJA 10 Sep, 2023 @ 5:03am 
Amazing guide!
Bomber ~ SilkSong 6 Sep, 2023 @ 6:24pm 
Thanks for the guide :)