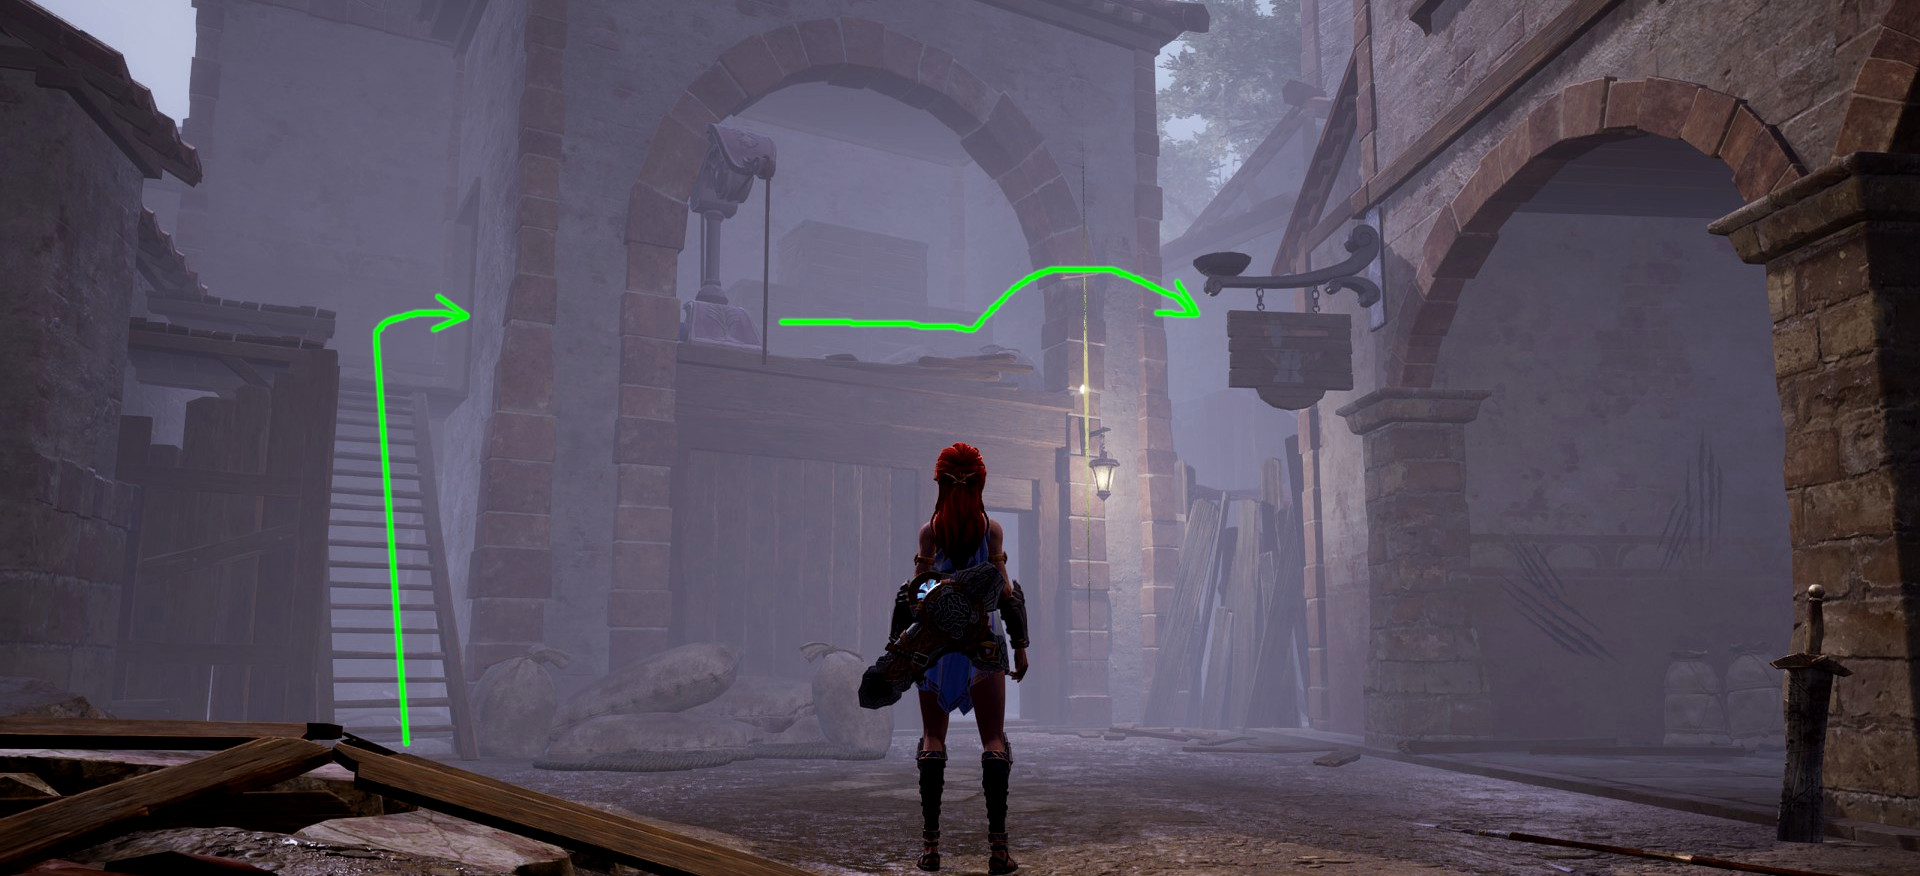
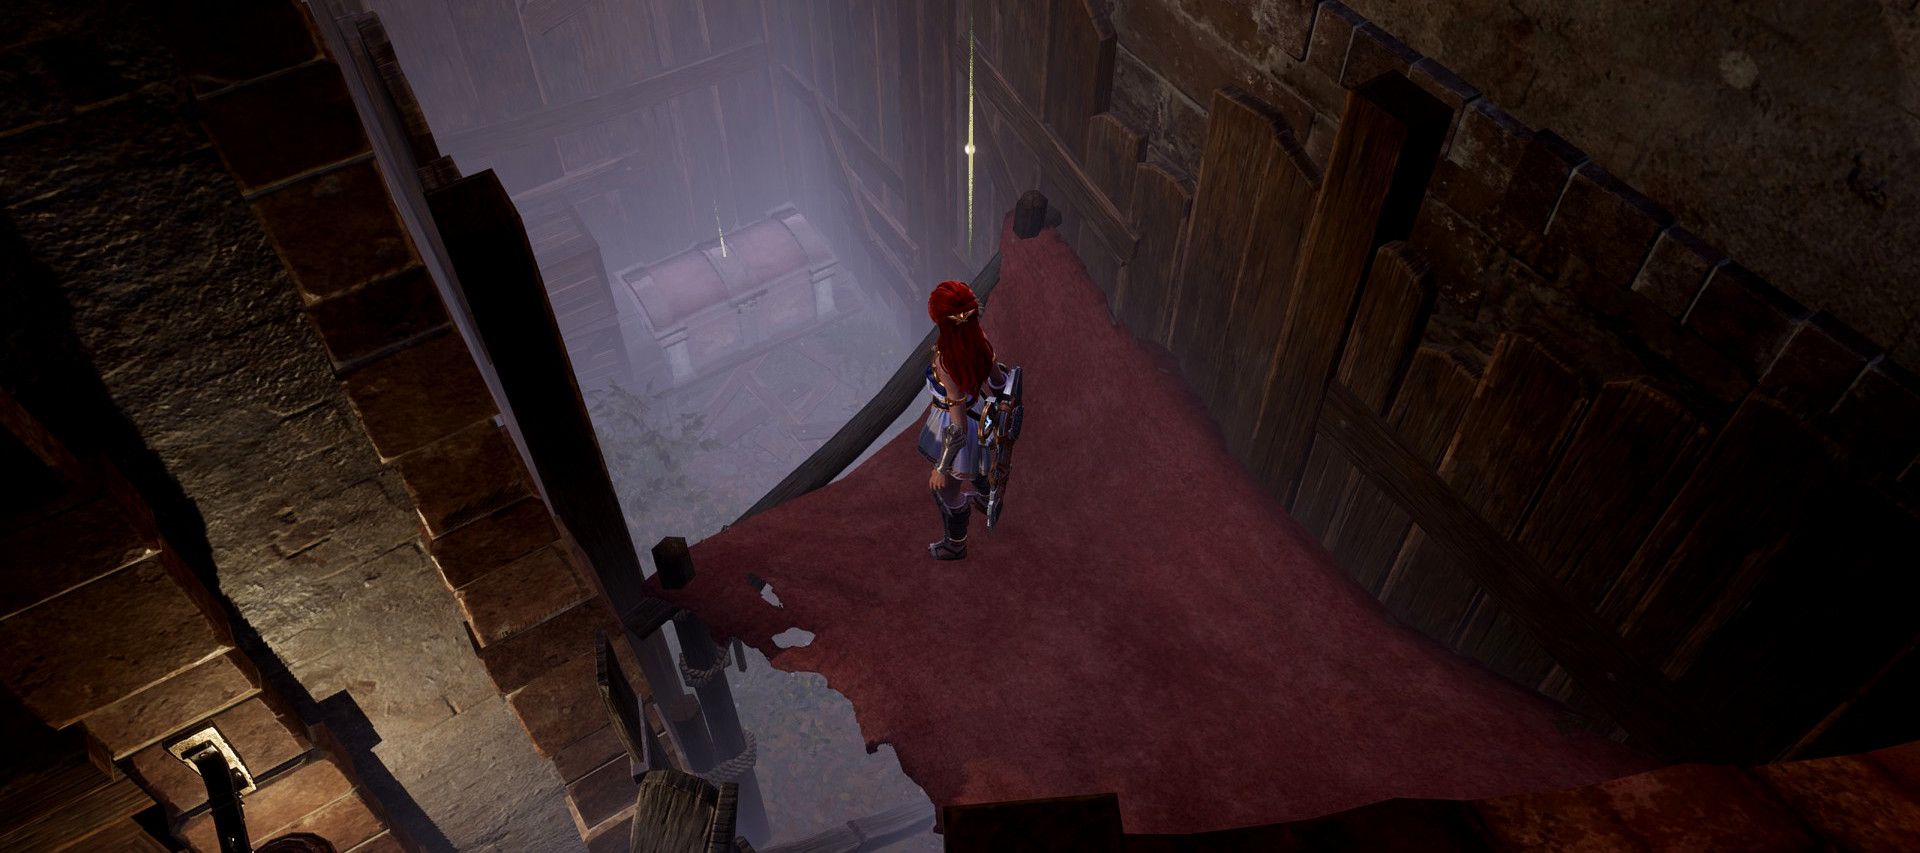
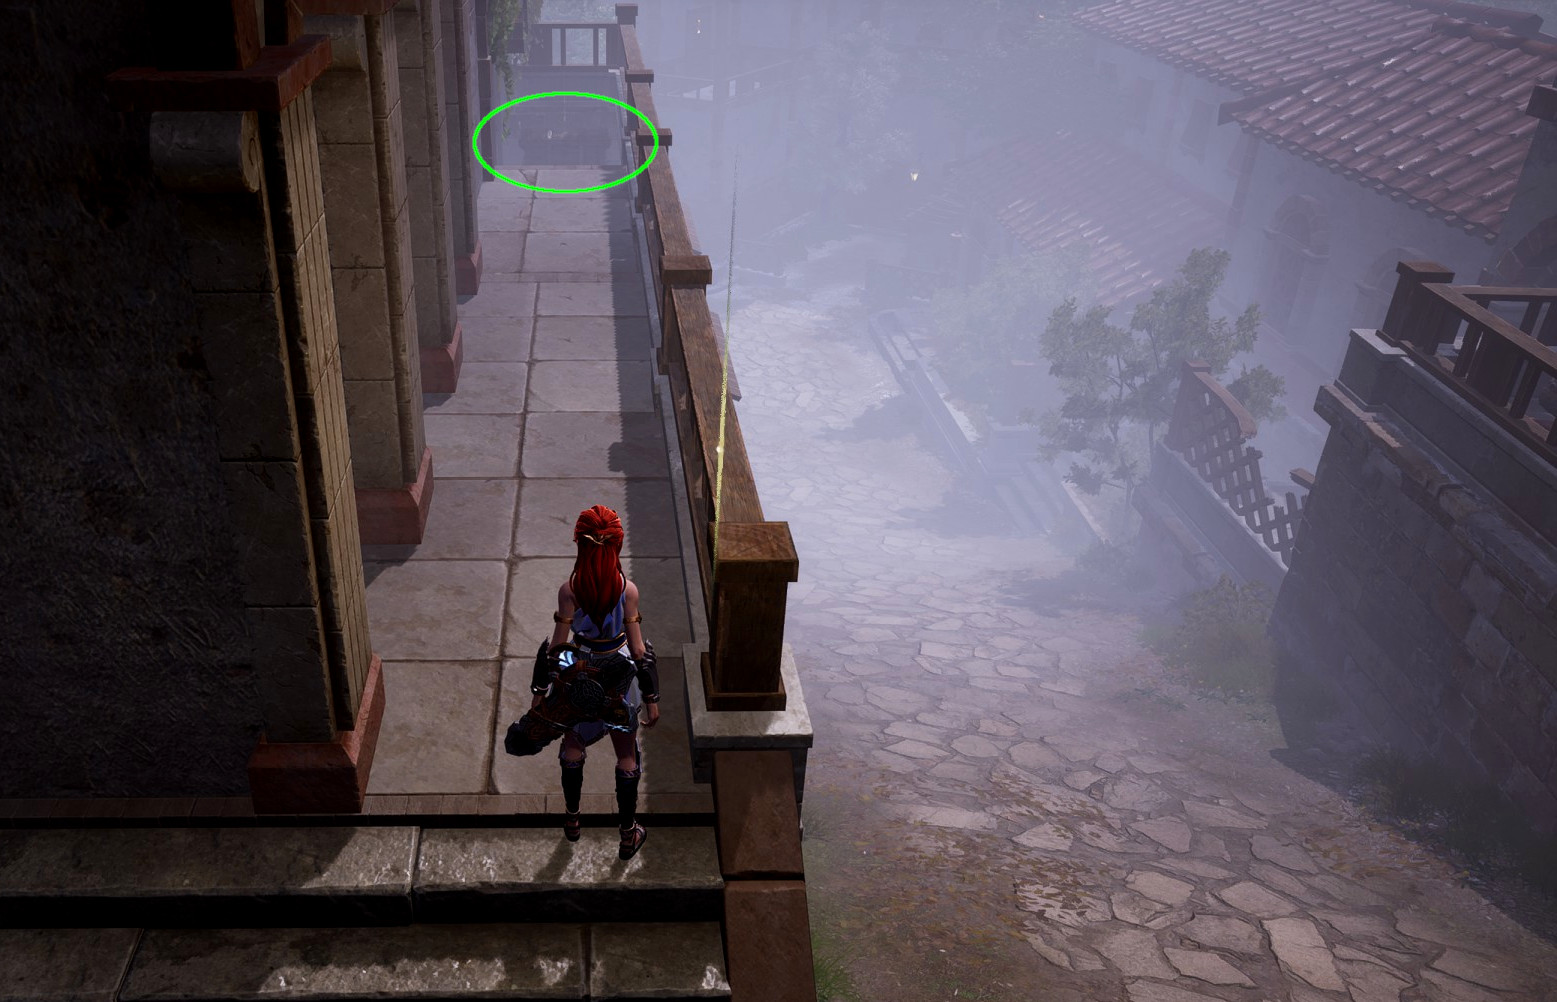
Asterigos: Curse of the Stars

Asterigos: Curse of the Stars

189 ratings
100% Completion Achievement Guide for Asterigos: Curse of the Stars
By SotiCoto
ULTRA DETAILED WITH LOADS OF SCREENSHOTS!
All the information to 100% this game is already out there, but it is disorganised and often poorly conveyed...
... SO I decided for some mad reason to gather everything necessary in one place and explain it all in EXHAUSTIVE DETAIL with more screenshots than necessary.
To be precise, what I've got here should be MORE than enough info for most of the achievements, and if anything I could do with trimming out bits that aren't strictly necessary... but we'll leave that for another time.

If anyone wants a TL;DR version, try asking nicely. I might do it.
19
6
6
10
5
5
4
2
2
   
Award
Favorite
Favorited
Unfavorite
A few things you ought to know first...
I'll try to keep this quick...

It should be possible to get all achievements in this game in one playthrough... but setting it up so you can get both Endings in one playthrough requires very specific micromanagement of certain game events, and trying to do everything else on top of the Limit-breaking achievement is just asking for trouble... I would recommend trying for 2 or 3 playthroughs, depending on whether you want to handle Limit-breaking separately or with others.

The Side-Quest Chains may or may not be missable from one to the next. I didn't miss any of them on my first playthrough, but I did briefly screw one up before reloading an earlier save to correct my mistake. I'll cover that mistake in the side-quests section.
The Achievements for opening all Chests and Mimics may be missable due to the back area of Pegasus Garden being tied to a fiddly side-quest chain that starts in Arges Plaza (not sure if that side-quest is missable or not), but the other collectible cheevos definitely aren't. The game keeps close track of which collectibles you have and which you don't, so it isn't too difficult to go back and find things you missed after the fact.

Another thing worth knowing in advance is that after completing the Laurel Craft event about halfway through the game, you will gain the ability to teleport between conduits. The teleportation screen itself also shows you a very clear count of the collectables you have found in each area, and how many are left for you to find. SO you might want to leave any serious collectable-hunting until at least after getting access to teleportation.
Teleportation ability carries over into NG+ at this point in time, so if you decide to go for NG+ then you'll be able to teleport from the instant you unlock your second conduit.
Also that glimmer-light thing you're given after the prologue... it pings and extends vertically when there is a chest (or mimic) nearby... so you really shouldn't need this guide for chests. I'll include them anyway though, to avoid confusion.


Also an extra warning:
I'm not going to tell you how to play the game beyond what is required (as in game mechanics, combat, etc), nor explain anything not related to Achievements (so I'm not covering the Paragons DLC). That aside though, a lot of achievements are interwoven with the plot. If you're the sort of person who believes in "spoilers" then you might want to find your info elsewhere, as I won't hold back anything that I believe necessary or even helpful to know for achievement-hunting... including the plot.
In fact, I believe in being VERY thorough. Excessively thorough even. Some of the actions I suggest for the Glory Ending, for instance, are probably unnecessary. But better to be overprepared than underprepared

... Also also I use British spelling. In fact I translate some in-game place-names to British spelling. Not sure why I'm mentioning this, but be forewarned that some words may not be spelt the way the game was translated.

Now to the guide...

Story Achievements (Completely Unmissable)
These ones you will get by just playing through the game, so don't expect me to go into too much detail. Everything else I'll explain more carefully, but this is just listing off the achievements you WILL get if you complete the game in any way, shape or form.


You get the Geared Up cheevo when you retrieve your weapons at the start of the game.


The Killer Croc cheevo comes from beating the boss of the Outer Rim.


The Cutthroat cheevo comes from beating the boss of the Black Streets.


The cheevo The Last Bel Canto comes from beating the boss of Arges Bazaar.


The Curiosity Killed The Cat cheevo comes from beating the boss of Stella Mine. You get to Stella mine by sticking to the right at the start of Arges Bazaar, putting out the fire in the tunnel with ice element damage, then heading to the right again at the intersection with the conduit.


You get the Matyr Fell achievement from beating the boss of Phalan Academy. To get there, you go through the flaming tunnel in Arges Bazaar as before, but turn left at the conduit intersection.
Take note: Phalan Academy is probably the most sensitive area in the game to screw-ups, so make sure to make a backup save before you even set foot in there. Things WILL go wrong if you aren't careful.


You get the At The Corner of the Studio cheevo from the Laurel Craft event. No boss fight needed. This is when you unlock teleportation too, remember.


The Kindheart But Twisted cheevo comes from beating the boss of the Sunken Outskirts. You access this area by taking the lift down from the treasury under the granary in the Black Streets, then turning right off the lift at the bottom.


You get the Is that So? achievement from beating the boss of the Glittering Deeps, accessed as a continuation of Stella Mine.


You get the Finally Free cheevo by beating the boss of Styx, which is accessed via either of two passages from the end of Phalanx Academy.


The Difficult Position cheevo is gained by beating the boss of Arges Plaza, which is accessed through the back of Laurel Craft in Arges Bazaar.


The Gaze Upon The Stars cheevo comes from activating the Trinity Night event, which is a point-of-no-return for anything side-quest related, or being able to see clearly in daylight. I would recommend wrapping everything quest-related up before activating this event. Collectables can still be gathered during and after Trinity Night, but the enforced night-time won't make your life any easier.


The achievement The Goldolive Phantom you get for beating the final boss of the game. In case you're wondering, the game doesn't immediately end after that, so you can still go after collectables after beating this one. The game ends for real after placing three items and talking to a certain character... and it does warn you.


Ending Achievements: Dream & Glory - Part 1


This game has two endings. The Dream ending is the "Normal" ending of the game, while the Glory ending is the "Best" ending. Getting the Glory end requires meeting 8+ out of 10 conditions which are tied into side-quests, while having 7 or fewer of these conditions results in the Dream ending. The last of these events is a simple dialogue choice with Eumenedes right before the end of the game... SO if you have EXACTLY 7 conditions met before this point, you can save before the dialogue choice and get both endings in one playthrough.
You know the conditions are met when a very specific jingly tune plays, and a token is added to Minerva's map table. You can see how many conditions you have completed by checking the number of the tokens on the map table:


Anyway, onto the conditions required for the achievement. Besides the first and last there are no particular order to them.

#1. Save the Phalan Academy Smiths
Phalan Academy has quite a few non-hostile smith-type NPCs around. Most of them are downstairs in the Armoury. You absolutely must NOT attack them before completing Phalan Academy if you want this condition met.

In the back section of the Armoury is one smith sitting on the ground called Beta-8. You need to complete his side-quest before the colossi boss fight in order to achieve this condition.

You should also have a chat with Epsilon-14 (the red-eyed smith) in another nearby ground floor room after defeating the nearby Decurion and reluctantly agree to his request too...

You can find the Astral Amplifier they both want in the Barracks building, through the first doorway on the left after entering through the main entrance. It will be stashed in a small metal box near the book-cases.

Once you've opened it, you'll hear a voice and Epsilon-14 will enter the room, demanding you hand over the item. Pick the top response for him in each of the two choices... i.e. "Tell him there's another smith..." and "Ask him about it." to get him to calm down and accept your conditions.

Go back to Beta-8 in the Armoury and give him the Astral Amplifier.

Okay... now you just need to beat the Centurion and Colossi to finish Phalan Academy, get the Iris, and hand the Iris over to Minerva in the Shelter. Once you've done that, speak to Roxane, and she will immediately ask if the Smiths are safe.

Assuming you did everything right, a little tune will play and the first condition token will appear on Minerva's table.

(Bonus: Go back to chat with Beta-8 and Epsilon-14 in Phalan Academy for a rather nice pair of Trinkets. These isn't required for the Glory Ending, but I think you'll want them...)


(Extra Note: AFTER completing Phalan Academy and meeting the conditions, you can go back and kill the smiths without consequence.)

#2. Sunken Outskirts Eumenides Encounter
Simple one, this. But SAVE THE GAME in the Hunters' Camp before going ahead. When you first enter the Ponte's Legacy area (just past Hunter's Camp) in the Sunken Outskirts, you should spot Eumenides and a certain fluffy, glowing doggo chatting with a Decurion. Hilda will move closer to eavesdrop, but she will be spotted.

Dialogue happens, Hilda is allowed to ask one question, and you have to pick Talk about the future of Aphes to meet the Glory condition.

Eumenides will then leave, you will have to fight the electric doggo and its thunderpuppers, and when that is done, you will be prompted to chat with the Decurion, Evangelos.
But after you've been pushed through all that, teleport back to the Shelter to speak to Minerva and tell her about your encounter with Eumenides. Choose to talk to her about the situation in each district, then the Sunken Outskirts, and you should see Talk about Eumenides showing up in gold. Select that.

If you've done this right, Minerva should mention that you just removed the last of her hesitation, then a tune will play and you'll get the second token on the table right beside you.


(NOTE: This condition is particularly quick to get and easy to control. If you're planning on getting BOTH Ending achievements during one playthrough, you will need exactly 7/10 conditions met before the final stage, and this is a good one to deliberately fail by asking Eumenides the wrong question.)

#3. Sunken Outskirts Odysseus Questline
You have to get through the questline of the decurion Odysseus in the Hunter Camp without him dying. It is a little counterintuitive, but let's get to it.
Odysseus is up at the top level of the hunter camp. Go have a chat with him about Selyne and getting his key, and he'll ask you to help. So Accept his condition...

He'll give you 5 Hunter Village Supplies to distribute around the Hunter Camp... so time to go knocking on doors (1 is outside).


Next, Odysseus wants some gross bug eggs.

You could go and fight gross bugs for them...

... but then again, you might find enough of them just stuck to walls about the place.

NEXT, Odysseus wants you to fight a Chimaera. This is a bit different, but no big deal...

Nip on over through the gates to Ponte's Legacy, then through the section with the big central statue to the gates at the back.

Hilda will comment on the noise as she goes through the gates, and the moment she turns the corner, she'll be thrown into an encounter with the Chimaera miniboss.

The Chimaera will shoot lightning attacks and vomit up venom, so I guess you should use some other element besides Lightning on it. Whatever... just kill it, and go back to Odysseus.
Report in Quest Complete... but oh... what is this? Odysseus wants MORE help?

Ask about it, but when given the option, immediately DECLINE his request! Yes, you heard that right. DECLINE or he dies and you mess this up...


...
Ending Achievements: Dream & Glory - Part 2
...

NEXT STEP: We go chat with Bion back in the Shelter. And if you're worried about Odysseus' Dog Tag for Bion's Homecoming cheevo, don't worry as you can get that either way.
Anyway, chat to Bion about the Sunken Outskirts, and you should see the option to talk about Odysseus.

Get through explaining to him that you turned Odysseus down, and you'll get Bion's Token.

So go back to Odysseus and ask about the help he needs again. This time the dialogue will play out differently, and the guy doesn't need help any more since he somehow dealt with whatever it was (that would have got him killed otherwise). Anyway, he promises to help the Adherents, thinks better of Bion, and hands you Odysseus' Dog Tag for Bion's Homecoming cheevo questline.

Also you get the little tune that means you did a Glory Ending condition. FINALLY...


#4. Sunken Outskirts Seryne Questline
After beating Andreas and meeting Seryne, speak to her again. Exhaust all her dialogue, particularly the gold ones, and she should have a couple of requests for you.

The first task is to distribute more supplies, but a little differently to what Odysseus had you do before. If you don't have 3 Quenching Solution spare, then go farm bug enemies in this area to force them to drop some, or open chests in The Hollow area of Stella Mine.
Once you've sorted that, go on over to the Hunters' Camp and head up to the top level. There should be a new NPC there, so have a chat with him. He won't be very responsive the first time, but talk to him a second time and you'll prompt him to say he needs three cans of Quenching Solution.

If you did as suggested then you should already have what he wants, so chat with him again to give them to him. A prompt should come up about Andreas, so tell him that Andreas is dead.

That should be enough with this guy. Head to the Flooded Belt conduit then go back into Darkwater Swamp, the route back towards the Black Street.

You shouldn't have to go too far to spot the wooden shack with the two boats in front and the Waraxe guy, Scultura, out front. Go chat with him, but make sure to say Andreas can't come.

With that you can wrap up the conversation and report this task back to Selyne. Go through all the gold dialogue to complete her first task and you should get a little tune playing.


Now the second request is only available after finishing Minerva's party at Laurel Mansion in Arges Plaza.

Seryne wants you to go back there and talk to everyone there again. So nip on back to Laurel Mansion and start chatting with everyone inside (or at least the 7 I've screengrabbed, including one of the knock-doors):


SO once you've spoken to all of those, you should get confirmation that you've spoken to everyone Seryne wanted you to.

So once you've got that, go back and talk to her, obviously.

You should hear the little tune. Condition Met!

One more thing though. Speak to Seryne AGAIN to receive a necklace. You'll need that for Marrisa.


Brief Mention
One little thing, since I'm moving on to the Arges Plaza part now...
There is a man you can see on a balcony to your right as you first approach the Laurel Mansion conduit, and he taunts Hilda quite rudely. You CAN kill him, but the game plays a doomy sound when you do. I'm not sure if this makes any difference to the Glory outcome, but I wouldn't recommend trying if you intend to try for said ending.

It doesn't make any difference to go back and kill him after completing Arges Plaza for sure, but I'm not sure about during those events...


#5. Arges Plaza Sewer Plot Evidence
Arges Plaza completion requires getting through the sewers and completing a trial with Minerva. BUT to unlock this Glory condition, you also need to find all possible evidence in the sewer section, confront the cultists, and coordinate with Narkis before you take the trial.
So yeah, Narkis is that guy you speak to repeatedly through this area, if you forgot. Make sure to exhaust all his dialogue in every discussion with him.


So... onto the evidence itself. The first piece you'll find right up the stairs behind him.
Two cultists are having a little chat nearby.

Message #1 is right on the floor next to where they were talking, so pick that up.


Message #2 is on a box on the largest platform in the middle of the flooded room. You should have to go right past it to progress through the stage, so it is difficult to miss.


Once you've opened the sluice gate and drained the water from the main Cloaca Kavalla room, go back to said main room and climb down to the bottom. There are four giant enemy crabs wandering around so you might want to kill them. More importantly, there is a large, mossy hill in the room. You want to go up that.

And at the top of that hill, which was an island before, you will be ambushed by a werewolf... but also there is a small, metal box containing the Strange Key.


Head back to the gate switch and go up the left adjacent tunnel now. Be sure to eavesdrop on the conversation behind this door while you have the chance:


Now follow the only route remaining to you, through a few more tunnels, up some stairs, and into a room with a large hole in the middle. Go PAST the hole for now. Just on the other side of it, to your right in an area with candles and feathers, is Message #3.


Continue down the next set of stairs after Message #3 to find another room to fight through.
At the back, in a small box on a glowing floor-marking, is the Kavalla Elevator Room Key, though you likely need that just to progress the story anyway...


...
Ending Achievements: Dream & Glory - Part 3
...

Open the shortcut ahead, then backtrack to the room with the big hole. You've got to land on the narrow beam partway down the pit to avoid dying. So line yourself up very carefully so the plank is directly below you and drop off...

At the bottom, one room seems to have a chest at the far side (it is a Mimic). You need to go in the other direction. At the top of a ladder, you'll find Narkis waiting for you by another door (which the Strange Key unlocks).

Be sure to talk again to Narkis and exhaust his dialogue before opening the door.


Once you're done with Narkis, open the door and go around the corner to get a scene. After the scene, there will be a fight against a Centurion (you will get a Dog Tag for Bion's Homecoming cheevo here) and a bunch of other enemies. You need to clear the entire room of enemies to proceed, including several werewolves in the corner that jump down one after another.
When that is done, you will go back to Narkis, and he'll suggest you look around the room for evidence...

On the central altar, towards the left side, is a rolled up scroll revealed to be the Annotated Strategy Map when you pick it up.


And at the back, pinned on a board, you will find the Back Garden Party Notice.


Once you've taken both of those, Hilda should say Good. This evidence is enough.
But just make sure you go back and talk to Narkis again before leaving. The first time I did this, I just left without talking to Narkis, assuming I had the evidence with me... and it failed the condition. So yeah. More chatty with Narky. When the conversation ends, you'll hear a little tune... but we're not done yet.


Head out through the gate opposite the altar, out to Cloaca Kavalla, turn right and take the lift ("elevator") up to the surface. It is time to meet with Minerva. Hilda should mention the evidence to her in the dialogue.

So all that remains now is the trial itself.
Just fight your way through it as you must until you get the scene with Marble at the top. If you have met the condition properly, Minerva will pull out a scroll (which will promptly vanish) and announce that she uncovered evidence that Acnes has turned to the Ethrus... though Hilda totally did that, but whatever.

When you hear the little tune play, that is when the condition has officially been met.


#6. Arges Bazaar Garden Party
As far as I'm aware, this one requires condition #5 already be met, or at least the progression of Narkis' questline beyond the fight in the sewers.
Once you get back to the Shelter after completing Arges Bazaar, speak to Bion to be informed about goings on back in Arges Bazaar, and what Narkis is up to.


Time to unlock the very last parts of Arges Bazaar. Go on over to the Pegasus Garden conduit. I recommend SAVING THE GAME here, for the same reason as the Sunken Outskirts Eumenides Encounter.
Anyway... the left gate at the back of the room that was closed whenever you came here before is now open, and you can go through it.

Narkis is waiting just inside for you and will nab Hilda's attention on sight. Exhaust his dialogue to get to the meat of the issue. He wants you to talk the people at the party out of supporting the Ethrus.


Now I'm not 100% sure if you have to get all of the answers right to meet the Glory condition, but you probably should. Conversely, if you want to control the number of conditions you meet in order to achieve both endings in one playthrough (i.e. when I recommended you SAVE), then this is another good one to fail because it doesn't impact any other achievements.
So...

To the lady at the top of the left staircase being pampered by harpies, preach the superior fuzzy gloriness of Vulcane. <3


To the man standing by the empty couch on the opposite side, advise him to do it himself.


Move on from him down the side path to find two men, one of which starts trolling Hilda the moment she talks to him. Refrain from rearranging his face into Starite and Try to change the subject.


Keep going to the back and you'll find a man standing before two dancing harpies and two women on couches behind him. Emphasise that his family is not safe here.


And finally for the large man and short-haired woman at the back on the other side...
First Join the conversation...

... then Persuade them not to provide funding.


That should suffice. Hilda will make a remark about achieving what Narkis wanted, so you can go back to him now. He should reward you on a job well done and recommend you go speak to Roxane.

So head back to the Shelter and talk to Roxane however many times you must to dig through her many layers of commentary on everything you've done... then Talk about the situation in Aphes > Arges Plaza > Report what happened in Pegasus Garden.

And when the discussion ends, the music plays and you've completed the condition.

Don't forget that this is a recommended candidate for deliberate failure if you want to control the number of conditions met to get both endings in one playthrough.


#7. Glittering Deeps Freethinker Physikoi / Saving Garrison
This is a long & tricky one and requires completion of both the Glittering Deeps and Styx to achieve. You will also need at least 7 Crystal Nucleus items before the end, and they drop rarely from exploding crystals and some Miners in the first area here, as well as Fanatics (spellcasters) in Styx... AND they're late-stage crafting materials for weapon upgrades.

Anyway... I'll include this is since it is probably missable, but make sure you pick up the sparkling thing on the ground when you first enter Glittering Deeps:


In the small pond area with the ladder (which may or may not be down already, if you followed my instruction in the Homecoming section), just to the right of the ladder is where you get the First Ancient Stele Rubbing, but you need your Glimmer active to get it.


...


Ending Achievements: Dream & Glory - Part 4
...

Once you progress to the Physikoi's Camp, you can find Shaye, Garrison (Old Whitebrow) and a "Bachelor" there. After the initial chat, exhaust all dialogue options with the Bachelor and Shaye. Particularly the golden ones.

This should lead to you getting tasked with finding 6 Titanite.
The Bachelor attunes your glimmer to pick up on Titanite lumps much like it does with chests, but that isn't really important as you can find Titanite quite easily on the ground about the place.


Anyway, leaving the Physikoi's Camp and progressing onward down the platforms with the floating crystals will eventually lead you to a small camp. You'll need to check the notes there to get Tanrius and His Wife's Research Findings.


A little bit further and you reach the Underground Lake.
And from the Underground Lake conduit, the nearest large stone column has Second Ancient Stele Rubbing on the far side, against the floor. Again, you need Glimmer active to get it.


Progress onwards until Hilda sees her father and gets a cutscene where she smashes a rock beast with her hammer... or at least the room where that scene happened. When you regain control, turn left approximately 135 degrees and head into the corner of the room with your glimmer out to get the Third Ancient Stele Rubbing.


Keep pushing onward towards the Rift Observation Deck. Just interact with everything you can in order of proximity, most notably the Retrograde Starite and Iraneus' Journal, both near the conduit.


Getting Tanrius and His Wife's Notes in the next room will force-advance the main quest if you're doing that, and you will have already picked it up if you're back here a second time.

If you are doing the main quest while reading this, you might as well just go to the boss fight from here and get that over with, then go back to the ROD after Hilda wakes up. Either way, starting from the titan's boss-room door, go in the opposite direction through the gap between two walls and veer to the right.

From there, head around the right side of the pond, staying careful of the enemies and floating, exploding crystals, and head up the climbable rockface at the back all the way to the top.

And right in front of you at the top (once you've cleared the enemies) is the Fourth Ancient Stele Rubbing.


If you had back again to the boss-room door and this time follow the path to the left to the open area, at the far end you will find the Gift for Marrisa (used to get her 8th Score for the Inspiration achievement) and Tanrius and His Wife's Final Letter (which may be pertinent for all this nonsense involving research-gathering)...

... Of more pressing interest though is the huge wall to the left and the platforms floating around it.

The top of that wall leads to the Astral Depth conduit, but we have to stop one level down from that and start platforming. Off to one side, there are a few side platforms to jump down.

And right at the end of this is the Fifth Ancient Stele Rubbing. This is the last one.


NOW, assuming you have all the stele rubbings, all the Titanite, all the Crystal Nuclei, and Ireneus back at the Shelter, you should be good to go.

Go to the Physikoi's Camp and get to talking. Exhaust all of the Bachelor's dialogue, then move on to Shaye. Most importantly, Ask about personal matters and then the gold option Ask about helping Old Whitebrow regain consciousness.

Attempts are made, and they don't go so well, but Bachelor hints strongly that Ireneus could help.
SO go back to the Shelter to fetch the tubby boi.

When you get to him, go to Discuss theology and magic then Ask about the voice in the mine...

He will be eager to go and help out, but he needs Minerva's permission first. You might as well go over and get a few things out of the way with Minerva now. Clear out all her gold options EXCEPT any that might trigger Trinity Night.


And with that done, head back to the Physikoi's Camp.

As soon as you get there, go towards the back-room with the cages... and things start to kick off. You have to fight Garrison / Old Whitebeard again to subdue him. Once that is done, he'll finally be cured... and you can talk to him to wake him up and get him to work translating...

... ALL the inscriptions!

Once you're done with him, ask Shaye about the old map too!

AAAAND speak to the Bachelor guy about working with Minerva (and anything else you have left with him)...


Back to Minerva again!
She should have two new gold options under important matters, so ask about both of them!


So finally we need the Crystal Nuclei. Make sure you have 7 of them and take them back to the Bachelor at the Physikoi's Camp...

He reacts immediately upon talking, so no dialogue trees. Just get through his excitement and go straight back to Minerva for the finale...

Once you've asked Minerva ONE LAST TIME about the Freethinker Physikoi, you get the little Glory Ending Condition tune and a new token. FINALLY!


#8. Pit Village Abellone's Cooperation
After all that other hassle this one is easy. After completing the Glittering Deeps and all that Freethinker Physikoi hastle, just go talk to Abellone in the Pit Village.

She'll promise to help Minerva and hand over a Large Chunk of High-Purity Starite Ore.
Then you just have to go talk to Minerva in turn to give her the item...

... and the tune plays. Another condition met.

#9. Arges Bazaar Loser Noble Side-Quest Chain
This has its own section and its own achievement. Just go read the Cockroach achievement section and follow that in its entirety for another condition.


Ending Achievements: Dream & Glory - Final Decision
LAST ONE NOW...

#10. Final Eumenides Encounter before Final Battle
The very last condition happens at Caelum Summit... right after the Astrohenon conduit. So make absolutely sure to make a manual save here...


... though unless you have EXACTLY SEVEN conditions met, it won't make a difference at this point. This last decision is the tiebreaker.


So step forward to where Minerva and Seryne are waiting.
Eumenides will appear and allow Hilda to ask ONE QUESTION.
This is it...
Assuming you have met exactly seven other conditions up to this point, then...
Select Mention Eumenides' ideals to fulfill the condition and get the Glory Ending...
or select Mention Eumides' original intention to get the Dream Ending...


L20 Completion Achievement: Limit-Breaking

There is one other ending-related achievement. Not in terms of story, but in terms of gameplay.
The Limit-breaking cheevo is for completing the game without going over Level 20.

I strongly recommend setting the game difficulty to Story (the easiest setting) for this one.
However, if you're worrying about killing too many enemies and slipping over Level 20, there is a trinket that makes this plausible.
In Cloaca Rhodos / the Shelter, down in the lower corner directly beneath the area where Minerva stands, there is a small metal box. What you need is in that box...


There are two cursed items in the box: The Calamity Ring, which is purely for personal challenge (I wouldn't bother with it), and the Eye of the Abyss Amulet. This second one is the key to this achievement, as when worn it completely prevents you from gaining Experience.


Obviously I wouldn't recommend equipping it right away.
Rather, get as close as you feel comfortable getting to Level 20 without going over (you can reach Level 20 and still get the cheevo, but NOT Level 21)... then equip the Eye of the Abyss Amulet and never take it off until NG+.

The game WILL be difficult if you're attempting to get all the other achievements at the same time as this. I would personally recommend doing this on your first run and making it minimalist for the Dream ending, then going for 100% completion of other achievements and the Glory ending in NG+ once you get there.
Side-Quests: Trust Me Now & The Light!
Okay, these side-quest sections vary wildly from the relatively simple to the complicated.
______________________________________________________________________

I'm mostly including the Trust Me Now? cheevo here because it doesn't really fit anywhere else.
You get it for completing all of Bion's training fights. One you complete the first three, a fourth and final battle will unlock.

It is quite straightforward really, though the last battle is kinda tough. You can get this achievement at any point when Bion is at base camp, right from the first time you step inside.

______________________________________________________________________

The Light! is a simple little cheevo to get, in terms of actual complexity, but is rather well hidden.

First you need to procure all four Charging Module items from the four Ballistas in Phalan Academy.
The First is in Archon's Reach at the top of the building with the growling crate, and is required to progress...

The Second is on the roof of the Armoury, opposite the passage with the bloodstains and the broken spear.

The Third is just past the Guardian Spell door in the Martial Tower, on the right before going down the stairs.

The Fourth is off to one side in front of the main entrance to the Barracks building.


Once you have all four Charging Modules, you will need to use three of them in Styx and one in the Glittering Deep. These can be done in either order.

Styx
As you're making your way through Phylactery's Cradle (the lowest floor), you should notice an open door to the central column of Styx on your right, opposite an open cell with 2 dogs.

Head through the doorway and carefully make your way out to the triangular platform with 3 panels called Void Leap.

All you need to do is insert 3 of the Charging Modules into the panels here to complete this step of the process. No prizes for guessing where the 4th one goes...

Glittering Deeps
From the Underground Lake conduit, go down and across then up onto the sandy raised section of the area.

Veer right then go straight ahead to see a chain of rocks at water level hooking around to the right. Follow that path.

At the end of the path, through a hole in the wall, is a small grove with a circular pattern and a panel to the right.

Insert your last Charging Module into the panel to activate the light-bridge between Styx and Glittering Deeps and get the cheevo.


Side-Quests: Homecoming

The Homecoming achievement is for completing Bion's collection questline for dog-tags, one per major area of the game (besides the last). The quest starts when you first find a dog-tag. After collecting all of them, there are a few extra events around Phalan Academy before the whole thing is cleared up.

Uriah's Dog Tag - Black Streets
Starting from the Granary Outpost conduit (the 4th one in the list, accessed by going up through the granary after defeating Baraad and out along the raised walkway) go up two flights of stairs, fighting off the enemies as you go, and right in the middle of the tunnel leading to the Arges Bazaar shortcut, you will find Uriah's Dogtag sparkling on the ground.

Alternatively, you could go from the lion statue square where feathers were shot at you in Arges Bazaar, make your way through the ruined building to the west and curve back around the streets to open the shortcut back to the Black Streets from the Bazaar's direction, and retrieve the dog tag then.

Aporio's Dog Tag - Arges Bazaar
From the Guardian Square conduit, head outside and go past the miniboss who didn't turn to stardust (as Hilda remarks every time you go past). Instead of going to the lion statue square as you do when following the main mission, turn left to an area in front of some overgrown vines where two Werewolves are discussing how they like to chase the weasel things (they weren't in my screenshot, but these are the guys):

Use Fire Element attacks to burn down the vines and continue through into the next area.
After going under (or over) the small bridge and fighting off a few ambushes, there will be a bunch of the dancing weaselly enemies at the back, and the spellcaster one on the central platform will drop Aporio's Dog Tag when defeated.

NOTE: I've read that you can get additional copies of this dog tag by killing this enemy again... but it doesn't do any good to do so.

Hippos' Dog Tag - Stella Mine
From The Hollow conduit, loop around the central pit clockwise (i.e. backtracking the way you got in). Past the big, square hole in the wooden floor and a couple of tripwire traps, you will see a helmet between the tunnel entrance and the pit. That is the item you're looking for.


Aeson's Dog Tag - Phalan Academy
Dropped by the Centurion you fight before the Colossi boss fight. Unavoidable.


Odysseus' Dog Tag - Sunken Outskirts
Two ways of getting this. Either you finish up Odysseus' questline entirely and he ends up dead, and you pick up the Dog Tag off his corpse... OR you Decline his last request, chat to Bion about it to get Bion's Token, then take that back to Odysseus and ask about the help he needs again to just get given the Dog Tag. See the Glory Ending section for more details, since the latter is a requirement for that.

I've not actually done the version that gets him killed, personally, so I don't know where he ends up dead... so... best just Decline his last request.

Vangelis' Dog Tag - Sunken Outskirts
Dropped by the Decurion, Vangelis, who guards the gates leading to Selyne's temple in the Sunken Outskirts. Unavoidable.


Laurence's Dog Tag - Arges Plaza
Dropped by Centurion Laurence in the Arges Plaza sewers when pursuing Narkis's questline (a requirement for the Glory Ending). Requires the Strange Key from the mossy island in the middle of Cloava Kavalla, and dropping safely down the pit in the room with the square hole. See Parts 2 and 3 of the Glory Ending section for more details.


Hastar's Dog Tag - Glittering Deeps
You might have noticed a shortcut ladder out of reach in the Glittering Deeps before you reach the Physikoi Camp.

The Dog Tag is beside the top of that ladder, and apparently it is a shortcut back from the Underground Lake, but I found a quicker, albeit risky way of reaching it.
Basically you drop onto one of the crystal outcroppings from the top of the cliff, and assuming you survive that, you can drop down to the path below:

It works for me, though I can't guarantee everyone would survive it. Hilda does a falling-over animation when she stands on the crystal that suggests it wasn't ever meant to be stood upon, so this is probably sequence-breaking.
The path beyond has a large blue crystal creature that is quite dangerous, as well as a few crystallised miners, then a climbable wall, before reaching the Dog Tag in the form of a shield and helmet on a spear (next to the ladder).


Aigidios' Dog Tag - Styx
On a railing facing the central pit in the Warden's Cage area of Styx. The same scroll-library type room where you're looking for evidence for the tubby green-robed guy after he KO'd Otto.


Final Wrap-Up
After you hand Bion the last of the Dog Tags and he finishes talking about whichever soldier it was, he will in-initiate dialogue to contemplate his dead ex-comrades.

Bion will expressly forbid Hilda from coming along with him to Phalan Academy, but when the conversation ends, she will state out loud that she should head over to the graveyard there.

So teleport over to the Political Campus conduit, turn around, and go to the stairs heading down towards the temple area...
You will encounter Bion there with an unfamiliar Centurion. Turns out this one is called Phillip. Go over and say hi.

When you speak to Bion, Phillip will interrupt and doesn't seem too pleased...

... so go speak to Phillip directly, and he'll tell Hilda to go clear up escapee monsters on the Pass of Styx.


Teleport over to the Acheron Bank conduit and kill everything up the hill towards Path of Styx until Hilda remarks that it is time to head back.


Back outside the temple, things have gone a bit south.
Phillip attacks you when you get close, and you have to remind him of the pecking order.


Once that is done, talk to Bion. He'll agree that it is best to return to the Shelter.


And finally, back in the Shelter, chat with Bion one more time. No dialogue trees. He just says it straight up...

... and with that, this side-quest is completely finished.

Homecoming Cheevo GET!


Side-Quests: Cockroach - Part 1

The Cockroach achievement comes from completing the Loser Noble collection questline, which starts at the door opposite the Outer Streets conduit in Arges Bazaar and involves collecting a whole bunch of quest items from different areas and delivering them to this door.
NOTE: This questline is ALSO required for one of the conditions for the Glory ending.
So... let's get to it...


From the Outer Streets conduit, simply cross the street and knock on the door to begin an annoying conversation... and if you don't have the Outer Streets conduit unlocked, just head East from the area where the houses stop and the path to the Amphitheatre begins (where you get ambushed by a bunch of harpies from the rooftops)...
The guy will demand Stardust, so give him Stardust...

... After that, he'll request "Star Song's Famous Song, Brilliant Star" and suggest you search the Amphitheatre for it. Time to begin the treasure hunt...

#1. Brilliant Star
Go to the Amphitheatre higher up in Arges Bazaar. You'll have to go here for the area boss battle one way or another. The moment you set foot inside, just head up the stairs to the right, then immediately turn right again (a Harpy will be patrolling here, so just kill her). There are three small bookshelves here, and the item you're looking for, Brilliant Star, is in a small box on the rightmost (3rd) of the bookshelves.


So head on back to the Loser Noble's door and knock again. Hand over Brilliant Star. You get another annoying conversation, and this time he asks you to get him a Phalan Academy uniform. He explicitly states you can find them on the Political Campus.

#2. Phalan Academy Military Ceremony Costume
Go to the Political Campus conduit in Phalan Academy (where you first met Otto), and just before that little alcove is a wide area with griffon statues, some enemies and a shrine building at the end.

Beat the enemies, go inside the shrine building, head downstairs, and in the corner at the back there should be a small, metallic case containing the Phalan Academy Military Ceremony Costume. That is the item you're looking for.


Right, so now you take that back to the Loser Noble at the Outer Streets and hand it over to him, and surprise surprise, he wants another item. This time he asks for Hermes' Bull Statue, and tells you that you'll probably find it in the Pit Village outside Stella Mine.

#3. Delicate Bull Statue
This is roughly halfway between two conduits, so whether you would rather start at the Phalan Trail conduit, take the right path towards the Pit Village and go down the lift there... OR start at the UpperVein conduit for Stella Mine and backtrack up the lift from there... is your choice.
Either way, the place you're headed to is the first area you fight the Goblins before meeting Shaye.
Specifically, the shack at the back of the Goblins shaded dining area, just off the main square.

You'll find the Delicate Bull Statue on the bottom shelf just to the left inside the shack.


Back to the Loser Noble again.
Hand him over the bull statue, get through his bragging about Aphesian culture... and next he'll request his family heirloom, in a box made of marble, painted with a pattern that looks like a mountain... and it was apparently stolen by Baraad (boss of the Black Streets). He suggests you look in that guy's warehouse.

#4. House Rock Land Deed
If you have had this in your possession since you finished the Black Streets then just hand it over... otherwise, head to either the Inner City Rampart or Granary Outpost conduit in the Black Streets and make your way towards the upper level of the granary, above where you fought Baraad (requires the Upper Granary Key from the treasury downstairs) .
The item you seek is the House Rock Land Deed, which is in a glowing box to the right of the climbable net on the upper level.


Okay. Great. Back to the Outer Streets yet again. Hand over the deed. And of course he wants something else. This time it is a few barrels of rose-grape wine, and he tells you that the vineyards should be in what is now called the Sunken Outskirts.
If you haven't yet had the Laurel Craft event, you need to do that first before you can access the Sunken Outskirts for real, but after that, you're free to go delving there.

#5. Rose-Grape Wine
Once you have access to the Sunken Outskirts, go to the Hunters' Camp conduit, run toward the centre of the camp, then turn around. The way is to the right from the conduit, or to the left when facing it.

Follow the path out of the camp, through some nasty bugs, and around a cliff to the right to find a section of wall covered by burnable vines. Time to get your Fire Element damage on.

When you're burning the vines, you'll hear some Waraxe thugs chatting on the other side, so be sure to jump through the wall like the Cool-Aid Man and murderise them.
Once you're done with that, run up the fallen tree-stump to the left to get on the low roof and look down the other side. You should be able to see the amphoras of wine from there.

Nip down and grab the flashy one.

Rose-Grape Wine GET!

Now you know what comes next. Back to the Outer Streets...
... But this time he asks for something a little different. Or so it seems.
He asks you to save his friend Nicolas from Styx.
Truthfully though, this is just going to be another item fetch quest...

#6. Delicate Bracelet
Go around the first floor of Styx until you find the engraving on the wall proclaiming it the "Torture Floor", right next to a corridor with a blue arrow visible through the doorway at the end.

You're looking for a specific cell. The 3rd from the end on the left, just before the owl statue.

The cell has some flashing writing scrawled on the ground. Examine it to get a Delicate Bracelet and Ethrus Emblem. These, presumably, are the remains of Nicolas.

Return them to the Outer Streets door with the rest.
Loser Noble is a bit upset about his friend, but he still wants something he calls Clean 'n' Soften.

...


Side-Quests: Cockroach - Part 2
...

#7. Starite Device and Receipt
This one is in Laurel Mansion in Arges Plaza. You need to complete Minerva's party and open the secret passage in her mansion, and you'll find a small, metal box in the first room downstairs before the sewer tunnels. Since you have to go through here for the main quest, it shouldn't be tough to find...


So now you can take that back to the Outer Streets as usual...
This time he says Get me a pink Starite ore concentrate. Off to the Glittering Deeps then...


#8. Pink Starite Ore Concentrate
You will need to go to the Astral Depth conduit for this one. It is supposed to be the last conduit you activate in the Glittering Deeps, but I was able to sequence-break it by activating a shortcut from long range. It might require a modded staff. Not sure. If you already have it unlocked then just skip ahead a bit.

In the first cave of the Glittering Deeps (with lots of miners), I moved right to the edge of the precipice with the small lantern on it, looked down, and started shooting AoE effects at the corner of a rock I knew could be made to float upwards.

Then in roughly the same place, I repositioned myself so I could see straight down to the breakable crystals that hold the nearer floatable rock in place, and shot near them too to cause AoE damage.

And having freed both of the floaty rocks, I was able to jump across them to reach the Astral Depth conduit and the pink cave beyond.


Anyway, the pink cave near the Astral Depth conduit contains the item we need, as well as a pink crystal glowy monster who drops an item for another side-quest here.

Beat the monster, get its drop, then find the Pink Starite Ore Concentrate on the ground nearby.


Here we go back to the Outer Streets again to give Timmon his Pink Starite...
He doesn't request anything else, but after talking to him, knock on his door again to hear his story about his family.

There is still something else left to give to him...


#9. Letter to Timmon
Go to Minerva in the Shelter and select Talk to her about other important matters, then Ask about Timmon. Note: This is one of the few quest-important dialogue options that is NOT Gold. It is White, but you have to select it anyway.

After that, select the new (and Gold) option Persuade Minerva to reconcile with Timmon.

That will get you the quest item Letter to Timmon.

As you might image, you have to deliver that to his door as well. Back to the Outer Streets.
Deliver Minerva's letter to Timmon. He'll complain a bunch, but hand you Timmon's Reply to give back to Minerva.

I expect you're getting quite tired of playing post-girl by this point, but hang in there...
Deliver Timmon's Reply to Minerva (via the same dialogue tree path as before):

This time Hilda manages to convince Minerva to stop being petty and go clear up her own mess in person. Yeah. Really.

ONE MORE TRIP TO MAKE...
No, not to the Outer Streets. You'll get no further responses there. Teleport to the Laurel Craft conduit and go through the route to Arges Plaza. Upon entering Tertius Boulevard, turn left and head for the archway in the corner.

Knock on the door there, and lo and behold, it is Timmon.


Once the dialogue is over, you will have both the Cockroach achievement AND another of the Glory Ending Conditions.
Great.
Let's never ever do that again...

Side-Quests: Requiem - Part 1

The Requiem achievement comes from completing Otto's questline consisting of two major side-quests, starting when you meet him in Phalan Academy and continuing on through Styx, then finishing up in the Outer Rim.

Firstly, I'm not sure if this part is missable or not, but when you beat the first boss of the game (the crocodile in the Outer Rim) it will drop a knife. I've never tried NOT picking up the knife, but you should probably make sure you've picked that up first, since it belongs to Otto.

You first encounter Otto in Phalan Academy at the Political Campus Conduit.

Make sure to exhaust all his gold dialogue options (and it can't hurt to go through the white ones too), including giving him back his knife. He asks that you meet him in the Armoury.
BUT FIRST you have to deactivate the Ballista in the next area...
So in the Ballista run you turn right and go into Archon's Reach (the room with the growling crate), head up to the top floor and go to the corner guarded by a Decurion to remove the power source from the Ballista and shut it down (ties into The Light! achievement).
When you've deactivated the Ballista, the camera will deliberately pan over the OTHER building you can access from the run where the Ballista was shooting at you before.

I somehow completely missed the relevance of this the first time and figured the Armoury was somewhere through Archon's Reach.
WARNING: If you go through the Barracks building and out the other side without meeting up with Otto in the Armoury, it screws up his questline... so don't do that.

Anyways... head over to the Hall of Prides (the building with the lion cages underground).
There are TWO exits to this building. One on the Ground floor and one up a level. You want to go out through the upper archway. The lower one will just lead you into an open square with a Ballista and nowhere to go (yet).


The next building you enter along the upper pathway should be the Armoury. You'll find another Conduit just inside and Otto waiting to the right. So go over to chat with him.

Make sure to exhaust all his dialogue options, then examine the mark on the wall that he was looking at.


Progress through the Armoury. Don't hurt any of the Smiths downstairs if you have any intention of getting the Glory ending (and cheevo). See the Endings section for more details on that.
Take a moment to open the big doors downstairs since they're valuable shortcuts. This building is full of shortcuts, and you will need to backtrack later, so I'd advise opening any you find.

Take the lift upstairs by Beta-8, loop around the only path available until you go outside. The second Ballista Core is to the right. The path forwards is to the left. Hilda will comment on damage to the surroundings before stopping and gasping at the blood and a broken spearhead. Just to her right as she is talking there is an echo and more bloodstains. You'll want to examine that Echo in particular.


Continue along the path, fight your way back inside and you'll be in the Armourer's Chambers. There are a few interesting things here, including a Conduit, but I'll get to the important thing in due course. Once you've activated the conduit and gone down the other set of stairs leading back down into the Armoury, you'll probably notice some more bloodstains on the floor, and you'll trip an event...

Incidentally, there is another shortcut door in the opposite direction (behind Hilda in the above screenshot).

Anyway, if you carry on, you'll go through another short outdoors area and into another building: The Martial Tower. When you go inside and up the stairs to your left, you'll find Otto in front of a blue glowy Guardian Spell.
Have a chat with him about it but DO NOT select the gold option telling him to go for it. Tell him you want to look around some more.

This might not be necessary if you did the next steps already... but I'll explain this in order.

Turn around and backtrack to the Armourer's Chambers...
Assuming you haven't checked it already, there should be a glowing notice on a notice board in the main room. This is the Transfer Records, and page 2 has record of an outsider being transferred to the lion pens. Hilda will comment on it.


Yes, as guessed, you have to backtrack all the way past the Armoury (use the shortcuts) to the Hall of Prides (the room with the underground lion cages), and drop down the hole in the floor to the underground area. As you approach you should hear dialogue from a Decurion down there.
When you jump down, the Decurion and his lion Mash will attack you.

Kill them both, then examine the bowl that Mash was eating out of to get Emil's Ring. This is the item you need to break the Guardian Spell where Otto is.


Return to Otto in the Martial Tower. Select the gold dialogue option this time to give him Emil's Ring so he can break the Guardian Spell.


Once you've beaten the enemies that show up, you'll have another emotional chat with Otto and tell him to wait at the entrance to Styx.


After the Colossi battle, you will have an auto-event with Otto along the path to Styx.
Before actually going to Styx with him, make sure you've asked if there are any items worth investigating for the tie-in with the Yarn-playing Bigcat achievement (Starlight's questline).


After that you can accompany him to the gates of Styx, though you can't progress any further yet.


That should wrap up the Phalan Academy side of things for this side-quest chain... though you might want to check the wall marking near the exit to the Barracks for good measure.


...
Side-Quests: Requiem - Part 2
...

Once you head to Styx for real, you'll find Otto's questline is tied up with this location much as it was with Phalan Academy. Since your purpose for the achievements is to figure out what happened to all Hilda's Anbari comrades, it is probably worth noting that you pick up Sean's Damaged War Hammer right near the start after heading inside.

Anyway, progress Styx as normal, opening gates along the Torture Floor, going down to Phylactery's Cradle and sniffing out the key in a box at the end, then using that key to get up to Purgatory. Find the fat man and Otto...

Now make sure to talk to Otto about Sean's whereabouts.

... then Ask about your Northwind Legion brothers, and then again, Ask about your missing brothers. Y'know, the Gold dialogue options. The last one won't go away after asking it, but you should ask it all the same (even if it seems like a repetition).

You've got to find out what happened to the three remaining brothers, and the order doesn't particularly matter.

After progressing the stage, going up another level and fighting off a few tough enemies, keep an eye out for an open window on your left leading to the central pit. If you've found the conduit then you've gone too far.

The stone outcropping outside has a trail of blood to check, and then at the end, there is a glowing blue mark on the floor. Check that too.

Hilda will remark that only Berrick could have climbed up. So that is 1/3 remaining brothers accounted for.


Once you reach the Warden's Cage conduit, you should see a mark on the wall behind it.

Examining it reveals it was Organ's mark, so that is 2/3 remaining brothers accounted for.


If you went poking around the Torture Floor all the way to the end earlier then you might have already found the 3rd piece of evidence you need, but without the context to understand it.
Right at the back of the last room of the Torture Floor (the original floor you entered Styx on), there is a spiky chair covered in blood. You need to examine that.

I guess that must have been Lylan. 3/3 remaining brothers accounted for. We'll have to let Otto know the next time he is available.

(Random Weird Note: I defeated the Black Warden boss then backtracked immediately to the Torture Floor rather than going through the open door, and for some reason there was a 2nd Black Warden wandering this floor. Go figure.)

ANYWAY... after you've finished up all the Styx stuff, Irenaeus and Otto should have been moved to the Shelter / Cloaca Rhodos. Otto's new position is right down the stairs from the conduit.

Go have a chat with him. Hilda welcomes him to Skyrim the Shelter...

Now go through all his initial dialogue... which ends up as a subcategory ("Chat") of his full dialogue tree. If you Talk about Aphes with him, there is an option to Ask what else he discovered in Styx, but that isn't strictly necessary for this cheevo. What you want is to Talk about Operation Ashwind and report about Organ and Berrick.

And after you've reported both of those, the option to report on Lylan should come up...

... which leads to one last option to pick. Select Mourn your brothers.


Now you just need to go talk to Bion so he can escort you...

... OH, and make sure you have at least 3 Meeran Herbs for incense. They drop from Ethrus cultists, so I guess if you don't have enough already, the Arges Plaza sewers are probably the best spot (though they might drop in Arges Bazaar too)...


Now head to Horned Owl Overlook in the Outer Rim, and turn towards the Aphes entrance to find Bion and Otto.
You get to have a touching scene with Otto at the grave-site, where he plays his ocarina basically forever and Hilda goes through idle animations. Way to make things awkward, girl...

ANYWAY... listen through his music to the end. After that you can chat to Otto and Bion again before leaving. And if you've done everything right you should have got the Requiem cheevo.


Side-Quests: Yarn-Playing Bigcat

The Yarn-playing Bigcat cheevo comes from completing Starlight's questline. In case you aren't aware, Starlight is the friendly lion to your right after exiting the Barracks in Phalan Academy (be careful not to attack him).


Assuming you're doing Otto's questline (see Requiem achievement section), at some point when chatting with him, you will be able to ask if there are any items worth investigating.

Select that option to be given the Metal Laurel Emblem.

Now go back to Starlight where you left him outside the Barracks.
When you talk to him now, you should have the option to check his Name Tag, so do so.


That in turn should allow the options to Feed him Stardust and Show him the metal emblem engraved with a laurel pattern. You want to do BOTH of these things.


You will need at least 1000 Stardust to feed him.


Okay... so once you've done all that, we need to fetch some more stuff for him from the Barracks nearby. Go into the building and weave your way back through the ground floor rooms, and just before stepping back into the foyer where the statues and stairs are, you should see a small box on the bottom of some wooden shelves. This contains the Scuffed Wooden Ball.

We're not done here yet...

Go upstairs to the top floor.
The middle doorway of the top floorway has a guard loitering outside, so kill him, then enter the room he was guarding.

Inside, on the bed-side table, you should find the item Meteora's Diary.

After picking that up, turn around and check the scroll-rack immediately opposite the bed, beside the door, to find a Commendation.


Now you should have all the items you need, so return to Starlight outside.
Show him all three of the items in any order.

... and once you've done that, select Conclusion.

Hilda will contemplate bringing Starlight back to the Shelter, but decides against it and says she will come back to visit later...

.. BUT if you go back to the Shelter, and head to the right from the conduit, past Quintus and the guarded exit to Arges Bazaar, a familiar face is waiting for you already:

Your lion friend found you... so give him another 1000 stardust. Super important. Feed the kitty!


Now you just have to reload the area. Leave the Shelter far enough to unload it and then return, and go back to see Starlight's new collection of stuff!


Once Hilda gets over her initial surprise, a little tune should play and the Yarn-playing Bigcat cheevo should pop! Now you can trade items with Starlight! Incidentally, I'm pretty sure that tune plays for every cheevo popping. It is different from the Glory condition tune... but anyway...


NOTE 1: You may want to save before trading items to Starlight. His results are rather random, and he also lets you trade away quest items used for small side-quests and the like... which renders those side-quests impossible to complete. Starlight is like a special option for clearing out unwanted quest items in exchange for potentially rare crafting materials.

NOTE 2: There is at least one special item you MUST trade to Starlight for the sake of the Inspiration cheevo. That is the Collection of Aristophanes' Comedies. Trading that to Starlight will get you the Collection of Classical Poems item, which is necessary for getting one of the musical scores for Marrisa.

Side-Quests: Inspiration

The Inspiration achievement is kinda both a side-quest achievement and a collectable achievement. Not just in the same sense some of the other questlines are. There are 8 quest items you get from various unrelated questlines which you can give to your feathered bard back at camp to unlock new music scores. They can be unlocked in any order, you will need to go through other side-quests to get some of them.

#1. Nostalgia
Item: Otto's Sheet Music
You need to complete Otto's entire questline, so go check the sections for the Requiem achievement (Part 1 for Phalan Academy, Part 2 for Styx).
After you've got that achievement from attending the little funeral with Otto at Horned Owl Overlook, come back to the Shelter and chat with Otto here one more time.

He will give you the sheet music, and then you go and hand that over to Marrisa for score #1.

#2. Gold Olive
Item: Seryne's Starite Necklace
You have to do Seryne's Questline, which is covered in Part 2 of the section for the Glory Ending.
The Necklace will be given to you at the end after you meet the Glory condition and speak to Seryne again.

You can then hand that over to Marrisa for score #2.

#3. The Brave Maid
Item: Temple of Mercy Priestess Necklace
Short but well-hidden side-quest. At Ponte's Legacy in the Sunken Outskirts, there is a temple.

Go around the right side of the temple, but not inside. There is a guy lurking at the back for some insane reason. Go chat with him.

The lunatic student will say something about bullies stopping him getting to class. Oookay. Go inside the temple. There are gross bugs in there. Kill them all.

Tell the student you dealt with them, and he'll give you the Temple of Mercy Priestess Necklace.

Go hand that in to Marrisa for score #3.

#4. The Adherents' Wish
Item: Poster for Marrisa's Performance
This item is just in a metal box on the upper level of Laurel Craft in Arges Bazaar, just before the room with the mimic. You probably found it while going through here for the main quest.

Just hand that over to Marrisa for score #4.

#5. Song of the Harpies
Item: Lyre
This one is gained automatically when you defeat Eulalia (boss of the Arges Bazaar), and handed over to Marrisa automatically when you speak to her after said battle (you might need to engage conversation twice or so).


#6. Hymn of Ethrus
Item: Prayer of Ethrus
After defeating the Centurion (before the Colossi) for Phalan Academy, you will get the Martial Tower Key.

After the Colossi fight (and retrieving the Iris), double back and return to the Martial Tower building. Go downstairs to the dungeon beneath the tower and activate the circular panel with the Martial Tower Key to unlock the doors.

In the last (3rd) cell on the left, you will find the item Prayer of Ethrus.

Just hand this over to Marrisa back at the Shelter to unlock score #6.

#7. The City of Stars
Item: Works of a Poet
The process of getting this item is convoluted and takes a while to complete.
It starts in Arges Bazaar, right past Citizen's Square, under the lantern arch and around to the left towards the rest of the stage. Just past the sword on the ground, there is a canal and on the other side, a pair of hooded cultists and, more notably, a door you can knock on.

So kill all the enemies in the immediate vicinity, then go knock on the door and have a chat about comedies. The guy will ask 1000 stardust to put Anbari into a play. Pay him the shinies.

He will try to quiz Hilda about her home, but she doesn't have the time, so long story short he will hand over Collection of Aristophanes' Comedies in return.
Step 1 complete.
For Step 2, you NEED to complete Starlight's questline, so go back and check the Yarn-playing Bigcat section for how to do that (since it gives a separate achievement).
Once you have got Starlight in the Shelter and unlocked item-trading with him, select to trade Quest Items and trade him the Collection of Aristophanes' Comedies in order to receive the Collection of Classical Poems in return.

Once you have that, head over to the Laurel Mansion conduit in Arges Plaza, head up the first set of stairs (to the right from Tertius Boulevard) and look for a man standing on his own in a little dead-end area.

Go over and talk to him. Hilda should hand over the Collection of Classical Poems to him, and in return, she will receive the Works of a Poet item.

Finally, you can hand that item over to Marrisa back at the Shelter for score #7.

#8. Fleeting Days
Item: Gift for Marrisa
Starting from the boss-room door in Glittering Deeps, just follow the left wall into an open area (with quite a few enemies, initially).

Go all the way straight ahead to the end where there are a few items on the ground and a note. Read the note to get the item, as well as Tanrius and His Wife's Final Letter.

Take them both back to Marrisa in the Shelter, get past her grief scene, then hand over the gift for the 8th and final score... and the achievement.

Incidentally... for the grief scene, Bion comes a simpin' ...

... and he isn't subtle about his tastes. Hide your chickens, folks!


Vulcane / Upgrading Achievements
I got a bit carried away in this section, but if you want to skip ahead to the achievements (as if you can't guess what they entail), skip ahead to where I said ACHIEVEMENTS HERE. Otherwise... let us talk about Vulcane...


In case you somehow missed her, Vulcane is the resident weaponsmith for the Adherents in the Shelter... as well as being the most adorable character in the entire cast, absolutely precious, and Hilda's surrogate Fox-Mum.
Vulcane is Fox-Mum.... or "mom" if you're American, I guess. Either way, any claims to the contrary are simply wrong.
She is supportive of Hilda no matter what happens, and Hilda must do everything she can to be supportive right back as Fox-Mum has been through circumstances. This is necessary. No matter how rude or downright murderous Hilda might be to others in the game (Marrisa often deserves it), anyone who would hurt Vulcane is an absolute monster. No exceptions.

There are no less than 5 cheevos revolving around Vulcane's professional services.
... BUT FIRST we need some preparation. You don't need to do all of Vulcane's side-quests to get these achievements (you DO need to do Vulcane's Styx quest for an Echo), so I'll only cover the important stuff... but you really should do the whole quest-chain to its completion for her. It is probably one of the most plot-twisty side-quest chains in the whole game though, so even if I don't believe in spoilers, I won't go into too much detail.

Right... so if you exhaust Vulcane's dialogue about the Smithy after starting the Arges Bazaar mission, she will ask you to do her a favour there.
Her old smithy was along the route towards Phalan Academy and the Pit Village. Starting from Citizen Square, you stick to the right and keep going until just before the tunnel, then look left.

Clear out the werewolf hiding on the upper level, and the one hiding inside the forge, then check in the right corner to find a note to Vulcane. I don't believe she strictly requested the note, but bring it back anyway.

Just outside and to the left from the direction you came in is a small doorway leading into a storage room, and in there you'll find Vulcane's tool-bag. So pick that up for her...

... and hand it back. Her reaction makes everything worthwhile.


ANYWAYS... next stop... Stella Mine!
Starting at the UpperVein conduit head inside and follow the path down to the right and over the bridge, the same way you take with Shaye. Go past the room with the minecarts, and then through the room with the smelters, killing off the Goblins as you go (watch out for the mines).
Just past the last smelter, on the right, you should see a wooden wall covered in greenish slime (I already destroyed it in the screenie, sorry):

To destroy the slime you need to do plenty of Thunder Element damage to it. If you haven't got the Thunder Enchantite yet then a skill that does elemental Thunder damage (e.g. Lightning Torrent for the Staff) will do nicely... but you probably should get that enchantite since it is the only one the game doesn't freely give you (check Chest 7 in the Chests section for Stella Mine).
ANYWAY... behind the slime wall, on a table on the right, you'll find an Orichalcum Tool Set.

As Hilda suggests, you should take this back to Vulcane (the option to hand it over is in the "About smithy" section). She'll be pleased, which is awesome... but equally importantly, the Orichalcum Tool Set will enable her to upgrade your Enhancements.

Now we're all done upgrading Vulcane's tools enough for the cheevos, all that remains is to collect the requisite materials.

ACHIEVEMENTS HERE
______________________________________________________________________


Exactly as the achievement descriptions suggest, you need to upgrade half your weapons to Level 10 to get the Weapon Adept and Weapon Master cheevos. I am NOT going to tell you what you need to make the upgrades, since I don't strictly remember, and I can't go back and check since all my weapons are upgraded to +10 already and they remain that way into NG+.

However, I will note a few things:
#1. Most upgrade materials drop from enemies. Some are picked up off the ground in the little blue bags (they respawn). This is true of both weapons and enhancements to your enchantite. You should have the Treasure Hunter perk equipped at all times.
#2. Some materials can be purchased earlier than usual from Quintus in limited supply, assuming you have retrieved his supplies. His inventory increases as you unlock new areas in any case. But everything he sells will be available in limitless supply later in the game, so it isn't a major issue.
#3. To upgrade weapons to level 10, you will need Disintegrated Star Cores. You can get three of these naturally per run (the last one is right in the very last chest of the game, and the other two are from Marble's chest in Phalan Academy Barracks {needs his key}) and the other from a miniboss near the Astral Depth in the deep), but it is possible to get more by trading with Starlight... if you want to risk a gamble (Starlight's treasures are RNG-based)

______________________________________________________________________


The Magic Adept and Magic Master cheevos, like their weapon counterparts, require upgrading the enchantites to their maximum level, which is level 5 in this case. And like the weapon upgrades, they carry over to NG+ and I've already maxed them all.
Upgrade materials for enhancements drop from enemies and the like too, but unlike the weapons, different element materials are required for upgrading different enchantites.
Upgrading the enhancements above level 3 requires special materials that ONLY drop from the Trinity Night hidden bosses, and upgrading all four of the enchantites to level 5 in a single playthrough requires beating ALL of the Trinity Night hidden bosses... so you should check that section for details.

______________________________________________________________________

I love the icon for this one <3
Anyway... the description is misleading here:
It says to collect at least 20 Craftable Trinkets... but what it fails to tell you is that you need to have at least 20 Craftable Trinkets (i.e. trinkets Vulcane has personally made for you) in your inventory at the same time, and to craft a trinket like that. Crafting them as you go and immediately putting them into storage will not do.
Unique trinkets you get from side-quests and the like DO NOT COUNT towards this achievement either.

Vulcane is able to craft a total of 40 different trinket types per playthrough IF you gather all of the blueprints from defeating Mimics... and they, like all the other upgrades, require materials dropped from enemies (or sometimes gathered from chests). Go see the Chests / Mimics section for details on locations.
If you go into NG+, you get upgraded versions of the trinkets available.
Firefighters - Beating the Hellhounds

You just have to find and beat all the Hellhounds. There are only four of them, and they're not exactly super hard to find, but they CAN be mistaken for... well... camp-fires, or just burning rubble, as they kinda look like just... fire.
Also finding them is rather less of an ordeal than fighting them.

In any case, once you find one, hit it with Ice Element damage a few times to wake it up (and I'd advise continuing to use Ice Element).
I'm just going to point you to them.

Black Streets - Waraxe Encampment
You probably saw this guy off to the right when you entered the Waraxe Encampment the first time on the way to fight Baraad (unless you were too focused on Decimus), but had no means of dealing with it due to lack of the Ice Enchantite at the time. So go back and finish it off.


Phalan Academy - Courtyard before Armoury
I genuinely mistook this guy for a random fire the first few times I went past him, and I didn't get a close look because I had a ballista trying to shoot holes in me. PLUS the stage doesn't strictly necessitate going between the Hall of Pride and the Armoury at ground level (since you enter on the nearby rooftop. But yeah. Hellhound. Kill it with Ice.


Arges Plaza - End of Tunnel from Cloaca Kavalla
One of the tunnels branching from the upper level of Cloaca Kavalla (i.e. the big, flooded sewer room) leads to some glowy tree roots, and behind that a dark room lit exclusively by a large, flaming doggo dossing on the floor. While he is a bit out of the way, it is tough to mistake this one for anything else. If it wants to chill, I recommend Ice.


Styx - Behind Locked Door on Torture Floor
This one needs a little prep-work first...
You need to nip on up to the Warden's Cage area and check the rooms on the right side before the conduit to find the one with the key in a small box on a shelf.


After getting the Lab Key, go back to the Torture Floor and use the panel besides the big cage doors.

Finally, the Hellhound is in this room, along with a bunch of fanatics worshipping it (and a chest covered in slime). You know what to do.


Once you've killed all four of them, the cheevo should pop.
Trinity Night Bosses - Part 1
Once you get to endgame, you can activate the Trinity Night event to unlock the final stage.

It also turns all stages permanently to night and unlocks several other things though. Namely a bunch of special TOUGH bosses, and there are achievements for every one of them. So let's get to it.


Miltos - Outer Rim
Foreshadowing: The Outer Rim fire boar before.
Port to Border Outpost. Forge ahead to the log bridge, drop off it to the right...

... follow the path around to where the two sets of burnable vines were and go past them to where the fire boar used to be. Well now there is an even bigger, badder fire boar (assuming you killed the regular one):

And if you defeat mama pig Miltos, you get Scorching Blood and the Grilled Tasty cheevo!


Kavouras - Black Streets
Foreshadowing: A strange locked gate in Darkwater Wastes...
Port to Inner City Rampart. Head further into the wall and at the room, go left to the stairs down.

Go down the ladder to Darkwater Wastes, past where the mimic was and into the tunnel, then turn left. A gate that used to be locked is now open.

Go through, into the passage beyond, turn the corner and drop into the watery room beyond to face the tankiest giant enemy crab yet...

If you defeat the giantest enemy crab Kavouras, you get Crystallised Black Ice and the Crabby Patty cheevo!


Doron - Arges Bazaar
Foreshadowing: A certain miniboss never turned to stardust...
You can probably guess this one. Port to Guardian Shrine and head outside. He is waiting for a rematch...

And assuming you can beat Doron again, you will earn another Scorching Blood and the Jinx cheevo!


Anagnos - Stella Mine
Foreshadowing: Did you do the Survivor's quest earlier in the game? Did you defeat the eye-hunting assassin? Did you drop by lower Pit Village after beating him only to find someone examining his body? ...
The location isn't intuitive for this one. Port to Pass of Stars, then turn around and step into the last room you fought Garrison in. Someone is waiting for you, or two someones, sort of...

So if you manage to beat this necromancer and his eye-collecting minion, you will get Refined Stardust and the Never Play With A Body cheevo!


Hiems - Phalan Academy
Foreshadowing: Huge, growling crate.
Port over to Archon's Reach and go around the corner towards the Barracks. All seems quiet, until you get close...

Looks like Marble had a lion too... but should you give him the same fate as his master, you will get another Crystallised Black Ice and the Lunacat cheevo!


Trinity Night Bosses - Part 2
...

Soleucus - Sunken Outskirts
Foreshadowing: If you ever looked into the deep water of the swamp, you might have noticed something huge and white swimming around...
Well, port on over to Flooded Belt, go through the gate and turn right towards the Hunters' Camp... but the moment you set foot back in the water, you get your second crocodile boss-fight of the end, and he is much tougher than the last one.

Beating this one will net you yet another Crystallised Black Ice (might want to upgrade your Ice Enchantite) and the Apex Predator cheevo!


Wassily - Arges Plaza
Foreshadowing: During the trial when you were last here, the judge did say Hilda's judgement would be postponed until Trinity Night...
Port over to Prima Boulevard and go to where you met with Minerva when she had her trial. The overseer of the trial will be back, so go have a chat with him.
Quiz him about matters of faith. He tries to convert you.

Tell him you'd rather follow the wind.
... He does NOT take it well.

So as before, do your best to wipe this nuisance off the face of the planet so you can get your Refined Stardust and Miracle cheevo.


Breathless - Glittering Deeps
Foreshadowing: You likely didn't notice it earlier, but there were rock formations in the pink cave that looked rather like monsters we'd fought before, yet they didn't move... then.
As you might expect, our destination this time is the infamous pink cave, so port on over to Astral Depth conduit, turn and go towards the pink. The entrance is glowing, so step in...
And of course when you're a few steps inside, another pink-crystalled abomination will try to kill you, just like last time...

He is small but has some annoying moves, it most of the other Astral wielders do. But as long as you kill him, you can get another Refined Stardust and the Can Rocks Breathe? cheevo.


Astraix - Styx
Foreshadowing: There was a locked cage in the lowest level with a chest inside it, and something else...
Your destination this time is thankfully outside: Acheron Bank. Your new friend will be clearly visible on the bridge leading to Styx itself. And it looks like a very dark version of the chimera we fought for Odysseus. So go over and say hello...

And after you're all done dancing with him and practicing your best FFX dodge-the-lightning, you will not only get your first Thunderbeast Fur and the Crazy Experiment cheevo, but you'll also be able to open that last damned chest in his cage.


Pallas - Caelum Summit
Foreshadowing: You literally fought him before outside the Hunters' Camp.
Palas is the exception here, not only because he is almost certainly canon, but because Caelum Summit is the endgame itself, and you can't just instantly port to him.
The point where he becomes relevant is once the Trail of Astrology conduit has been reached. Rather than pushing forwards, the path to Pallas is through a rocky tunnel with trees either side nearby.

Continue down the path and descend a climbable cliff, and you should find Shaye, Garrison and the Bachelor on your path... assuming you did all their related quests.

A bit further down the road you'll enter an area called Disc of Smite with 3 Pallas Puppers. Do what you must and keep going.

At the bottom of the hill you'll find a bridge to your right, so cross that, and turn left at the end. The path heads back uphill here, past a few more puppers, until eventually a pair of statues mark the entrance to the arena where Pallas waits for real.

How you deal with the fluffy electric doggo is your own business... but if you don't feel bad after killing all those puppers and their parent... well... I dunno.
Anyway... once Pallas is dead, you get a Thunderbeast Fur, the quest item Fang of Pallas, and the Taming Thunders cheevo...


... AAAND if that was your last Trinity Night boss, you will also get the Hardly A Challenge cheevo!


Also on your way back you can hand over the Fang of Pallas to the Bachelor for his research if you like.


Collectibles: Conduits

The Conduits are to this game what Bonfires are to Dark Souls.
I shouldn't have to make a guide for this one, since hopefully you should open every Conduit in the game just by exploring for everything else... but as I learnt by accident moderately early in the game, you have to CLICK every Conduit at least once for it to be active. It isn't enough to just see it pop up. It isn't active until you click it.
AND unlike Dark Souls, merely clicking a conduit won't reset the enemies. Hilda has to actually die or REST at a conduit in order for the enemies to reset... which I love and I really wish FromSoft would do it that way. It means you can Teleport about the map and completely purge it of enemies.

Anyway, I'll give you the list of conduits here, and the screenshots of the Teleport menu should be helpful in finding the locations if you're missing any...

Outer Rim
~ Border Outpost
~ Horned Owl Overlook


Black Streets
~ Deserted Aqueduct
~ Quintus Storage
~ Inner City Rampart
~ Granary Outpost - The only one you might not find, you need to take the Upper Granary Key from Baraad's Treasury, use it to unlock the door upstairs, go on through and keep following the path upward, then outside onto a walkway. The conduit is at the end.


Arges Bazaar
~ Citizen Square
~ Guardian Shrine
~ Market Place - Opposite the road to the Guardian Shrine, there is a path down to a glowing tree surrounded by cultists. If you go in there and take a side-street closer to the canal, you'll find an owl statue and some stairs leading up to this obscure conduit.
~ Outer Streets - If you're charging for the Amphitheatre you might miss this one, but it is necessary for the Loser Nobel quest-chain. From the first steps to the Amphitheatre (before the minotaur and the Marrisa encounter), just go right and follow the street up the hill to the East. It will eventually turn a corner and end at a Conduit and a shortcut door.
~ "Amphitheater" - The American spelling of Amphitheatre. I use British spelling for this guide.
~ Pegasus Garden
~ Laurel Craft


Stella Mine
~ UpperVein - Yes, it is written as one word in CamelCase. I don't know why.
~ The Hollow
~ Pass of Stars


Phalan Academy
~ Phalan Trail - I also regard it as the first conduit for Stella Mine, since it is the nearest to the Pit Village.
~ Political Campus
~ Archon's Reach - Given the proper route through the level is via the Armoury, this one could be construed as out of the way, but it isn't difficult to find, since the growling crate area is a necessary part of progression.
~ "Armory" - I will continue to spell this the proper British way (i.e. Armoury) everywhere else. If you ended up at this section due to searching for "Armory" and got confused, that is why.
~ "Armorers' Chamber" - ... and this.
~ Inner Plaza


Sunken Outskirts
~ Flooded Belt - You probably got this one after beating Baraad, if you like to explore.
~ Hunters' Camp
~ Gate of Aegis
~ Temple of Mercy


Arges Plaza
~ Laurel Mansion
~ Cloaca Kavalla
~ Sluice Kavalla
~ Prima Boulevard
~ Euthenia Plaza


Glittering Deeps
~ Physikoi's Camp - But there are two Physikoi here, and the camp only belongs to one of them?
~ Underground Lake
~ Rift Observation Deck
~ Astral Depth - If you don't explore and don't care for achievements (why are you reading this guide?) then you might not have this one. It involves either a lot of climbing up walls beyond the Titan boss-door, or cheesing floating platforms in the first area as I did.


Styx
~ Acheron Bank
~ Purgatory - I hate this place in particular.
~ Warden's Cage
~ Phylactery's Cradle
~ Aphisbaena Rest


Caelum Summit
~ Acropolis
~ Trail of Astrology
~ Astrohenon
~ The Nexus - The Cheevo should pop after getting this one.


There we go. If you're missing any of these by the end of the game, you probably haven't been following this guide very thoroughly.
Collectibles: Echoes - Outer Rim / Black Streets / Arges Bazaar / Stella Mine / Phalan Academy

Echoes are pretty easy to find, and quite a few are given to Hilda for free as part of the game.
I'll list them all anyway, but don't plan on going into much detail.

Outer Rim
The Chaos of Martial Law - One Thousand Years Ago
This is the first echo you find when you enter Aphes. Unavoidable.


First Contact - More Than Three Months Ago
Given for free as part of the story.

The Long-waited Talk - One Week Ago
Given for free as part of the story.


Black Streets
Resonator Speech - One Thousand Years Ago
Outside the Temple building at Shrine of the Saintess.


Baraad's Fury - One Thousand Years Ago
Along the path between the Granary main and the Granary Outpost in the walls (requires Upper Granary Key from the treasury).


Instigation - One Thousand Years Ago
Visible as soon as you enter the Ghetto the first time.


Secret Deal - Nearly One Hundred Years Ago
In Baraad's treasury below the Granary.


A Crawling Monster - More Than Two Decades Ago
Between the columns on the level below the Quintus Storage building.


Bargaining Chip - Three Months Ago
After beating Decimus, on the way up to the Granary.


Arges Bazaar
The Cause of the Break-Up
In Eulalia's changing room in the Pegasus Garden part of the Amphitheatre.


Good Old Days - More Than One Thousand Years Ago
In the main underground lab room in Laurel Craft.


Resonator Recall - One Thousand Years Ago
At the back of the lion statue plaza full of cage carts where Eulalia bombarded Hilda with feathers.


The Sublimation - More Than Two Hundred Years Ago
On the grass beside the fountain outside the Amphitheatre.


Retreat to the Arges Bazaar - Ten Years Ago
Between the legs of a fallen colossus at the top of the hill before the 2nd canal.


Ethrus Starite Analysis - Two Months Ago
Given for free as part of the story.

Eumenides' Plan - Two Months Ago
Just past the second gate in Laurel Craft, on the route to Arges Plaza.


Stella Mine
The Goldolive Vision - More Than One Thousand Years Ago
Next to the row of huts in The Hollow on the upper level.


Protecting the Mine - More Than One Thousand Years Ago
Near the dead-end middle layer of The Hollow where the green hammer foreman is loitering.


The Goldolive Oath - More Than One Thousand Years Ago
In the lower level of the Pit Village populated by the Goblins, by some huts.


The Amulet Experiment - Nearly One Thousand Years Ago
Just after the second lift down from the Pit Village, before entering the mine itself. The echo is difficult to see in the daylight while approaching the mine.


Uneasiness and Opportunity - One Month Ago
At the end of the Pass of Stars area past the entrance to Glittering Deeps, next to a table and a shortcut lift back to the Hollow.


Shoddy Necklaces - Three Weeks Ago
Beneath a wooden platform with a ladder on the way to a climbing wall descending to the middle level of The Hollow.


Destruction of the Devices - Two Weeks Ago
At the lowest level of The Hollow, near the conduit, between two arbalest turrets and next to a broken magical device.


Phalan Academy
The Templar Plan - More Than One Thousand Years Ago
Beside the statue at the back of the Barracks building, near where Starlight is originally found.


The Price - More Than One Thousand Years Ago
Outside the Temple building in the Political Campus.


The Crimes of Petrius - One Thousand Years Ago
Directly in front of the Barracks building main entrance.


Marble's Decision - One Thousand Years Ago
At the Gate of Glory, where the first ballista is encountered.


A Whim - More Than Eight Hundred Years Ago
Opposite the Archon's Reach conduit (along the route to the Barracks), next to the stairs.


The Ultimate Duel - Two Months Ago
Given for free as part of the story.

Parting Ways - Two Weeks Ago
On the roof of the Armoury past the smashed up corridor, at the end of a trail of blood. Part of Otto's questline.


Collectibles: Echoes - Sunken Outskirts / Arges Plaza / Glittering Deeps / Styx / Caelum Summit
Sunken Outskirts
Friends - More Than One Thousand Years Ago
To the right side of the steps leading up to the Temple building at Ponte's Legacy.


The Path to a Utopia - More Than Two Hundred Years Ago
Near the Ponte Academy Memorial statue, to its left.


The Final Warning - More Than Six Decades Ago
In the water by two boats at the entrance to the Hunters' Camp.


The Tree of Stars - More Than Three Decades Ago
Around the right side of the Temple of Mercy, outside.


A Desperate Predicament - Ten Years Ago
In the back rooms of the Temple of Mercy, at the entrance to the room Seryne was locked in.


A Way to Remove the Curse - More Than Three Months Ago
Inside the Rosemead Winery central building.


Arges Plaza
It Suits Us All - One Thousand Years Ago
On the middle balcony level going up the stairs from the Laurel Mansion conduit on the right side towards Laurel Mansion itself (near the poet).


Ideals and Reality - Nearly One Thousand Years Ago
Along the path between Laurel Craft and Tertius Boulevard (not technically IN Arges Plaza yet).


In the Name of the One - Nearly Eight Hundred Years Ago
In Minerva's study in Laurel Mansion (where Hilda rests after the party).


The Goldolive Phantom - More Than Two Hundred Years Ago
At Euthenia Plaza on the right side of the conduit (from the Marble fight).


Otto's Unease - More Than One Month Ago
Given for free as part of the story.

A Little Knowledge - One Month Ago
From the Sluice Kavalla conduit, it is just down to the left, adjacent to the switch that lowers the water.


Glittering Deeps
Offerings - More Than One Thousand Years Ago
On an isolated bank of the Underground Lake. The Temple is visible from it. It is a bit out of the way from anywhere you have to go for the main story though.


Inspiration - More Than Six Hundred Years Ago
In the Rift Observation Deck, and just about unavoidable.


Research Strategy - One Year Ago
Just behind the Physikoi's Camp, before the descent into the floating crystal pit.


The Couple's Fate - One Week Ago
From the entrance to Titan's boss-room, follow the left wall across a wide area. The echo is visible in the distance quite clearly.


A Discussion - One Day Ago
Right at the entrance to the Glittering Deeps.


The Worried Father - Several Hours Ago
Appears in the Physikoi's Camp after defeating the Titan.


Styx
The Archon's Negotiation
In the main room of Warden's Cage where all the plot happens, just on the other side of the table from where Irenaeus and Otto were.


The Most Glorious Work - Nearly Eight Hundred Years Ago
In Amphisbaena Rest, which is just one room and a main quest one at that, so it shouldn't be hard to find.


The Priest and the Artisan - More Than Six Hundred Years Ago
In a slightly higher-class cage in Phylactery's Cradle near the conduit.


The Result - More Than Five Hundred Years Ago
Just outside the arena where you fight the Black Warden in Phylactery's Cradle.


The Mentor's Gift - More Than Five Hundred Years Ago
This one is VERY different. See, most precious fox-mum Vulcane wants to know what happened to her husband Myron. She brings it up if you talk to her after Styx... and it may or may not require that you've brought all her letters from Arges Bazaar and his room in Phalan Academy Armoury building (not sure, but I did those things).
So you have to go chat to Iranaeus and ask him about Myron...

He will suggest you go to the Warden's Cage and check the prisoners list.
So go there and do as he suggested. It is on the desk that was right next to him earlier when he was in the main Warden's Cage room. If you've already looked at it before, you have to look at it again AFTER speaking to Irenaeus about Myron.

After that, it may or may not be necessary, but go down to Phylactery's Cradle and into the caged area with the table covered in clutter, then into the adjacent cage with beds, then into the cage adjacent to that with the diary pages... and read them both.

ALSO pick up the shiny in the box next to Diary 1.

Now, go back to the Shelter and speak to Iranaeus about Myron again, in exactly the same way as last time. He'll tell you something different.
You now have to go to Amphisbaena Rest, the last area of Styx, and look at a particular memo on the desk there.

Now AGAIN you have to go back to Irenaeus and quiz him about Myron...

... and he'll finally come clean and give you the missing Echo we've been looking for!

Yeah. And once again, Styx has made EVERYTHING harder than it had to be... but at least we're doing this for Vulcane.

The Retreat - Two Weeks Ago
On the Purgatory floor, just beyond the cage door to the left when you enter. Unless you already opened the door, you'll need to circle around the entire floor anti-clockwise to get to it.


The Search - Two Weeks Ago
In the first room beyond the front doors of Styx.

Collectibles: Echoes - Caelum Summit
Have I mentioned I HATE the character limit on these guide sections? Well, Styx ruined any hope I had of keeping it at 2 parts.

Caelum Summit
Ambition - More Than One Thousand Years Ago
In another gazebo-thingie near the top of the Trail of Astrology, or at least close to the conduit. It is the platform closest to the giant stone lady.


Father and Daughter - One Thousand Years Ago
From the lift that ascends into the Trail of Astrology, turn around 180 degrees and look behind you. The echo is near a couch and table.


The Awakening - Nearly Three Hundred Years Ago
Off to the right after The Nexus conduit, near the beam of light leading to Eumenides. This should be the last Echo of the game.


The Legendary Beast - Nearly Two Hundred Years Ago
Under the huge arch near the start of the stage with a red brazier hanging from it.


Harold's Counterattack - Several Hours Ago
Found in the middle of the path after the fight with the man himself as you come through the Astrohenon and the words The Nexus pop up on-screen.


After getting all these, particularly The Awakening, the cheevo should pop.

Collectibles: Chests & Mimics - Outer Rim


The Treasure Hunter and Treasure Raider cheevos are for opening 50 and all Treasure Chests respectively, so getting all the chests will net those.
I'm also grouping these together with the Licky achievement because Mimics look exactly like chests, and if you're already hunting all the chests then you might as well deal with the fake ones too.

Things to note before I begin:
#1. Your Glimmer item isn't just for lighting dark places. If you keep it active all the time, you shouldn't have much difficulty finding most chests / mimics in this game, as it dings audibly and stretches vertically when getting near them (as you'll see in the screenshots). A similar vertical streak of light extends out of the chest itself. Regardless, I will detail all their locations for you.
#2. Some chests look a little different to the others and have a shield effect around them. You need to deal Astral Element damage to break the shield.
#3. Mimics turn the targeting reticle red when you move it over them. Do not engage them at close range. They will kill Hilda quite easily.
#4. Mimics are weak to Thunder Element damage, and it can stun them to stop them chasing Hilda down and killing her.
#5. Mimics drop blueprints for craftable Trinkets that you can hand over to Vulcane so she can craft the Trinkets for you. The Mimics don't respawn after dying, and they don't leave a corpse either.
#6. Once you have unlocked the Teleport feature (after Laurel Craft on first playthrough, then from the second conduit on NG+), it will explicitly tell you how many chests, mimics and Teumes you have collected and still remain in each area, so collecting is pretty easy.
#7. I listed the contents of the chests as best I can, but I'm playing on NG+, and I don't know if that changes the contents of any of the chests. If what you get seems to be a weaker version of what I said, that is probably why.

Anyway... on to the Outer Rim chest locations.

Chest 1/5
Near where you pick up your first two weapons.
Contains: 2x Starite Ore Fragment


Chests 2/5 & 3/5
Both these chests require Fire Element damage to reach, and are ideally meant to be gained after doing Black Streets and returning from the Arges Bazaar shortcut after getting the Ice Enchantite. Chest 2 can technically be gained without Fire Element if you're suicidal enough to just run over the vines, but Chest 3 can't, so you might as well wait.
The way to reach them involves jumping off the first log bridge to the right after the Border Outpost conduit.

Follow the rather linear path until you find a large mass of vines on the floor to your left (there are some to your right also, but fewer). Burn the large patch, then follow the path down to its end.

You should chests 2 and 3 there.

2 Contains: Damaged Silver Trinket
3 Contains: 2x Orichalcum Slab

Chest 4/5
In an alcove to the right after exiting the long sewer pipe.
Contains: 2x Starite Ore Fragment


Chest 5/5
To the right behind some boxes when you first step out of the sewers into Aphes.
Contains: 2x Starite Ore Fragment


There are no Mimics in the Outer Rim.
Collectibles: Chests & Mimics - Black Streets
Chests contain 1 Starite Ore Fragment unless otherwise specified.

Chest 1/13
In the first section of the Deserted Aqueduct to the right past the kneeling statue and behind some vines. Requires Fire Element damage to reach.
Contains: Damaged Silver Trinket.


Chest 2/13
Just before the waterfall bridge in the Ghetto, over a raised platform and down in an alcove.


Chest 3/13
Rather than take the ramp up by the two dogs to Quintus Storage, take the ladder to the right all the way down to the bottom.

At the bottom, exit through the left doorway (the only one available the first time down here) and follow the platforms around anti-clockwise until you reach the end.

The chest is opposite the side-quest guy who wants to give things to the Saintess.


Chest 4/13
Turn left after exiting the ramparts back into the Ghetto.

There is a breakable wall in the small area beyond. Smash that down and the chest is on the left.


Chest 5/13
Drop down the hole to the left before re-entering the Inner City Rampart from the Ghetto.

The chest is round the corner at the back.


Chest 6/13
When you cross the bridge to the Saintess Shrine, immediately turn right, go down the ladder, turn left and check inside the hut there.


Chest 7/13
From facing the Saintess, go between the huts to the right to the end and check the hole in the wall at the back. Beware of ambush!


Chest 8/13 & Mimic 1/1
From the Inner City Rampart conduit, go into the next room and take the subtle path round the wall to the left and down.

Descend the ladder to Darkwater Wastes and you will see two chests at the bottom. The Left Chest is a Mimic.

Mimic Contains
Trinket Design: Rune (Volume 1)
Also, look around the waterways to find Quintus's Supplies.


Chest 9/13
Back at the room after the ICR conduit, this time go all the way up the stairs to the top floor, ignoring the marker, and take the doorway on your right.

Through the doorway you can see some more stairs, so go up those too and the chest is behind you at the back.


Chest 10/13
Downstairs in Baraad's Treasury under the Granary.


Chest 11/13
Up in an alcove accessed by rope mesh in the upper level of the Granary (needs Upper Granary Key from Treasury to access).


Chest 12/13
From the Granary Outpost conduit (through the upper granary and across the walkway) go all the way up the stairs and outside to a plaza full of enemies and the chest on your left.


Chest 13/13
From Baraad's treasury take the lift down to the swamp. Turn left at the bottom and follow the watery path to an area with a few bug enemies and a giant enemy crab.


Kill that, and the chest is behind where it was waiting.

Contains: 2x Starite Ore Chunk

Collectibles: Chests & Mimics - Arges Bazaar
Chests contain Starite Ore Sliver or 2 Starite Ore Fragment or 3 Orichalcum Ore unless otherwise specified.

Chest 1/20
From the Shelter door, the first chest is off to the left just before the tunnel with the first cultist at the end, before ascending the lfit.


Chest 2/20
Along the route from Citizens' Plaza towards Phalan Academy and the Pit Village, you'll find Vulcane's old workshop on the left. The chest is behind a breakable (from the other side) wooden wall you have to jump over by ascending the nearby stairs and jumping off the upper level.


Chest 3/20
After passing the first canal and going up the hill to your right with the fallen colossus at the end, turn around and look up the steps on the balcony path towards a chest at the end.


Chests 4/20 & 5/20
Requires the Key to Quintus Storage Bazaar Branch. Make sure you've agreed to help out Quintus at the Shelter before continuing.
From the area with the statues and the bridge over the canal, head to the left before the 2nd canal and keep going in that direction to reach the Quintus Storage building.

Head inside either of the archways, which meet up in the middle at a locked door. Open that with the Key you got from Quintus.

Inside you'll meet a werewolf called Arsi. Let him go then kill him anyway for best results.

The chests are behind him. Chest 5 requires Astral Element damage to open.
5 Contains: Bone Trinket

Chest 6/20
From the red Market Place tree with the large Ethrus gathering, head towards the Market Place conduit, but turn right at the owl statue instead of left.

The chest is in an alcove facing the 3rd canal.


Chest 7/20
In an upstairs room behind the Market Place conduit.


Chest 8/20
Across Guardian Square from the temple building and over to the left, there is a red canopy (next to a small stairway) you can stand on and a breakable wall behind it. Smash that to find the chest.


Chest 9/20
From Chest 8, go up the small stairway to the right and down the hill to the wooden platform.

Jump off this platform to land on the central island in the middle of the large 2nd canal, then turn left to where the ladder is.

Ascend the ladder and follow the island path all the way to its end to find the chest that was probably triggering your Glimmer when crossing the bridge with the Minotaur earlier.


Chest 10/20
Either taking the left arch out of Guardian Square and then turning left again OR coming up from the canal after Chest 9, you should find yourself in an area with 2 werewolves and a lot of glowy branches. The vines under them can be burnt with Fire Element damage to open a path.

This is the same area you go to in order to get Aporio's Dog Tag for Bion.
This time though, you need to ascend the rubble up to the roof area to drop down onto the 2nd red canopy.

The chest is inside the building in plain view.


Chest 11/20
Just to the left of the weasel cultist gathering in the same area as #10.


Chest 12/20
In the large circular area outside the gates to Laurel Craft, to the right from the stairs (or left from Laurel Craft itself). {I'll get to Laurel Craft near the end, since it is unlocked later than most areas}.


Chest 13/20
On the wooden deck above the Outer Streets conduit across the street from the Loser Noble's house. There is a ladder round the side to get you up.


Chest 14/20
Off to the right of the path to the Amphitheatre, above the prison cart dumping pit.


Chest 15/20
Up the stairs to the right and head to the back just inside the Amphitheatre.


Mimic 1/3
Visible from Chest 15, on the opposite balcony.

It is accessible after the roof bombardment section with Eulalia and dropping down the other side. Just head up the stairs and hit it with ranged attacks!

Contains: Trinket Design: Rune (Volume 2)

Chest 16/20
In the long, dark, curved corridor before the path to the Stage of Feathers, in the far right end.


Chest 17/20
First, get the Exhibition Hall Storeroom Key from the nest area at the back of the Stage of Feathers (where you fought Eulalia, but before Pegasus Garden).

Use this key to unlock the door to the left when you first enter the Amphitheatre.

The chest is just inside to the right, and requires Astral Element damage to open.


Chest 18/20
In a room to the left of the Laurel Craft conduit.


Chest 19/20
In the back storage room downstairs in Laurel Craft. Requires Astral Element damage.
Contains: Scuffed Ceremonial Ornament


Mimic 2/3
On the way out of Laurel Craft, before the last staircase.
Contains: Trinket Design: Electric (Volume 1)


Chest 20/20 & Mimic 3/3
Both are next to each other in the back area of Pegasus Garden, accessible only as part of Narkis' side-quest chain starting in Arges Plaza. See the Dream & Glory - Part 3 section for details on how to get there.
The two are down the second set of stairs opposite the gates used to enter the garden party.

The chest requires Astral Element damage to open.
Chest Contains: 2x Starite Dissolving Agent
Mimic Contains: Trinket Design: Battle Maiden (Volume 2)
Collectibles: Chests & Mimics - Stella Mine
Chests in Stella Mine contain 1 Starite Ore Sliver, except for most in The Hollow, which contain 1 Quenching Solution, unless otherwise specified.

Chest 1/11
From the Pit Village gate, head past towards the edge of the cliff to find a walkway leading down to a cave.

Through the brief tunnel section, there is a ladder leading down to a platform with a bridge that leads to a sewer tunnel.

The sewer tunnel itself contains a backdoor into Cloaca Rhodos (the Shelter) and a Teumes, but before you even enter the sewer tunnel, the chest is on the other side of the water.


Chest 2/11
In the lower section of Pit Village populated by Goblins, in the closed hut on the right, right before the echo.


Chest 3/11
From the smelter room in the UpperVein area, head into the next room with the fence on the left and multiple passages. The 2nd passage leads to an open chamber with a waterfall.

The chest is at the back, and an ambush monster on the ceiling.


Chest 4/11
From where you first enter The Hollow (the big chamber with buildings and broken lift), head straight through and into the tunnel entrance ahead of you.

Fight your way through the mostly linear tunnel, heading to the right at the fork with the wall (a shortcut back to the surface), and just around the corner from there is a blue-lit alcove with a glowing monster on the wall (and a rat looking at it) There is a chest nestled away next to where the monster was.


Most other chests in The Hollow contain Quenching Solution from here otherwise specified.

Chest 5/11
Continue along the same passage from Chest 4, and you'll eventually come back to a higher ledge in the main room.
You need to climb onto the yellow-marked wall and move across and down to reach the chest.


Chest 6/11
In the first of the huts in The Hollow, just to the left inside.


Chest 7/11
While moving through the hut area in The Hollow, the chest is in a building to your left, BUT the door is locked and needs the Foreman's Office Key to open.

So, from the office, head onward, take a left at the T-junction, climb down the ladder, climb across and down the wall, and find the bridge where Shaye did his spiderman thing earlier, which is lower in the main Hollow room. If you look down to your left, you should see a guy with a green glowie, and he has the key.

Make your way around the periphery of the room to the last wall, then climb down to the level immediately below you (don't go to the right, which leads to a lower level). There are mines on the wall, so be careful.

Now you're on a level with the green hammer guy, go beat him up and take his Foreman's Office Key... then backtrack ALL the way back to the office in the Hut section to open the door and claim your prize.
Contains: Thunder Enchantite


Chest 8/11
In the little alcove with The Hollow conduit, just off the lower level of the Hollow main room (where the broken starite device and the half-shack with the table are). The alcove is initially blocked by a slime wall that needs Thunder Element damage to break down.


Chest 9/11
Also in the alcove with The Hollow conduit, behind a breakable rock wall behind the conduit itself. The Chest requires Astral Damage to open.
Contains: Crude Ornament


Chest 10/11
On the other side of a pit you had to platform down when fighting Garrison during the boss-chase sequence. Drop down to the left and jump across the platforms to reach it.


Chest 11/11
From the Pass of Stars conduit, platform across the floating rocks down to the entrance to the Glittering Deeps (or where it will be), then hook around to the right.

Follow the wide passage all the way to the back, where you will find a lift shortcut back to The Hollow, an echo, a table and a chest tucked away in the corner.


There are no Mimics in Stella Mine.


Collectibles: Chests & Mimics - Phalan Academy
Chests contain 1 Starite Ore Sliver unless otherwise specified.

Chest 1/16
In the building off to the right when you first enter the Political Campus.

The chest is up a ladder, across a beam and at the back of the wooden platform.


Mimic 1/2
To the right of the large statue of Hippocrates on a lion, there is an elaborate building with a bunch of paintings, statues and knick-knacks around back (and a Decurion). The mimic is in the dead end path to the right inside.
Contains: Trinket Design: Phalan (Volume 1)


Chest 2/16
Behind the Temple building before the Political Campus conduit.
Contains 3x Orichalcum Ore


Chest 3/16
From the Gate of Glory where you first encounter the ballista, head right toward Archon's Reach, but right before entering, turn right and hook around behind the crates to find the chest.


Chest 4/16
Between covered and uncovered crates in the middle of the top level of Archon's Reach, not far from the ballista control panel.


Chest 5/16
further back from Chest 4 behind some crates on the same level, there is another chest that requires Astral Element damage to open.
Contains: Quenching Solution


Chest 6/16
First, advance through Phalan Academy enough to read the Transfer Records in the Armourer's Chamber. All of this is covered in more detail in the section for Requiem - Part 1.

You can also unlock the same event via one of the documents in the Barracks, though I forget which.
That will make a Decurion and his lion Mash appear in the underground section of the Hall of Prides area.

The chest is in Mash's cage, which was locked before this point.


Chest 7/16
Behind two cranes in the large square in front of the Armoury (the one with a hell-hound and a pair of ballistae). Access it via climbing the crates on the far right side of the area when you enter.


Chests 8/16 & 9/16
If you explore the Armourer's Chamber area, the next-to-last room from left to right behind the Transfer Records board has a small box with a Dirty Armoury Key inside it.

If you backtrack to the first area of the Armoury, just before the first lift, at the other end of the hall is a locked door which needs this key to open.

Inside at the back on the right is Chest 8, which needs Astral Element damage to open...

... and opposite it is Chest 9, hidden behind some crates.

8 Contains; Damaged Legion Trinket

Chest 10/16
On the ground floor of the Armoury, hidden behind some crates, just around the wall from where you first descend the lift.


Chest 11/16 & Mimic 2/2
If you head out of the large back doors to the Armoury (between it and the Martial Tower, leading to the Inner Plaza), you'll enter an outdoor area with a few carriages and two chests... or more precisely, a chest and a mimic. The chest is on the left and the mimic on the right.

Mimic Contains: Trinket Design: Phalan (Volume 2)

Chest 12/16
In the basement of the Martial Tower, right at the bottom of the stairs.


Chest 13/16
In the Barracks building up the stairs to the left...

... and just to the right behind a scroll rack once you enter the room up there.


Chest 14/16
Going up the Barracks stairs to the right side, it is in the room immediately in front of the stairs on the First Floor (middle floor), just behind the door to the left.


Chest 15/16
On the Second Floor (i.e. top floor) of the Barracks building, to the left at the top of the stairs is the route to Marble's quarters.

In the back room, which appears to be Marble's bedroom, is a chest that needs Astral Element damage to open... and also another small box you can open with Marble's Personal Key (from beating Marble in Arges Plaza) to get a Disintegrated Star Core.

Chest Contains: Quenching Solution

Chest 16/16
In the middle of the Inner Plaza in front of two armoured wagons.

Collectibles: Chests & Mimics - Sunken Outskirts
Chest 1/11
Under the walkway leading to the Hunters' Camp from the swamp.

Contains: 3x Starite Ore Chunk

Chest 2/11
From the Hunters' Camp, go up to the top level where Odysseus hangs out (if he is still alive). Just past him, past one of the shacks, there should be a path going down and out of the camp.

At the end of the linear path over rope-bridges and the like, you will find a lone shack with a chest inside on the left.

Contains: Orichalcum Pure Stone

Chest 3/11
Inside Ponte Academy's Temple building, right beside the horned griffin altar. The same room that was originally full of non-respawning gross bugs.
Contains: 2x Orichalcum Slab


Mimic 1/1
Near the Ponte Academy Memorial statue, diagonally to its right, in the water at the back.
Contains: Trinket Design: Electric (Volume 2)


Chest 4/11
From the rocky outcropping where you first see the Chimera (through the large gates from Ponte Academy Memorial), look back and you should spot the chest in a cave. But to reach it you have to shoot down the boulder hanging precariously on the cart rails above it.


You can then hop down onto the boulder to access the chest.
Contains: 2x Orichalcum Pure Stone


Chest 5/11
Drop down from Chest 4 or head round the corner to the right from the Hunters' Camp conduit to get to Rosemead Winery (burn the vines covering the entrance with Fire Element damage if you haven't already):

Take out the Waraxe inside the first area then head up the log on your left onto the low roof.
If you look beside you, there is a ladder leading down into the central building, and right at the bottom of the ladder on the left is the chest.
Contains: 2x Quenching Solution


Chest 6/11
Going left through the gate from the first conduit, you should reach Dragonvine Gorge.
Go past the first scorch mark, through the tunnel with armadillos and out to the area with the central rock (with a Mercy Key on it initially). Loop around, climb up to the ledge and jump across to the central island rock.

From there, look up. There is another shootable section of rail holding up a boulder. Just like with Chest 4, you have to shoot it down to get across, so do that.

Once you have hopped over, you'll find a mass of burnable vines. So do some Fire Element damage to clear them, then switch over to your Ice Enchantite...

The next area looks suspiciously like a miniboss arena... because that is exactly what it is. One of two orange fire-boars in the game lives here (the other is in the Outer Rim, similarly near burnable vites and scorch marks). So kill it with Ice.

Your reward, at the back of the arena area (behind the central rock pillar) is a chest which needs Astral Element damage to open.
Contains: Damaged Valuable Trinket


Chest 7/11
We're not done here yet. From the same red boar arena, burn the other section of vines nearby to reveal a ladder.

At the top of the ladder is another lone wooden shack to your left, and to your right, opposite the shack through some bushes, is another chest.
Contains: Quenching Solution


Chest 8/11
After dropping off the ledge from the previous chest to another area with spine-rat enemies and a breakable tree-bridge shortcut, you can look down off the tree-bridge to see two giant enemy crabs below (and gross bugs behind you). Snipe the nearer crab from up here, then go down to deal with the other...


The chest needs Astral Element damage to open.
Contains: 3x Starite Ore Cluster


Chest 9/11
From the Gate of Aegis conduit, go through the gate itself and proceed to kill your way through the Waraxe invaders, right past the chasm, through an area with an axe buried in a rock, and up to a stone bridge with columns either side:

From the point you step up onto the bridge, turn around and look behind you. There is a narrow ledge that goes back above the area with the axe buried in a rock. That is where the chest is.
Contains: 2x Quenching Solution


Chest 10/11
After the aforementioned pillar bridge, turn right at the top of the stairs. There is a cave with plants over the entrance ahead.

Just inside the cave is another descending climbable wall leading to another giant enemy crab below. You need to get past that.

Go through the cave and you come out at a ledge with a ladder shortcut down to the path between the Chimera area and the Ponte Academy gate, and right there is a chest.
Contains: 3x Starite Ore Chunk


Chest 11/11
Round the left side of the Temple of Mercy. Past where the barrier used to be but before entering the building.
Contains: 2x Orichalcum Slab


Collectibles: Chests & Mimics - Arges Plaza
Chests contain 1 Orichalcum Pure Stone unless otherwise specified.

Chest 1/12
When you first drop down to the lower level in Tertius Boulevard, the chest is behind the covered wagon you likely dropped down onto.
Contains: 2x Starite Ore Cluster


Chest 2/12
After ascending the stairs back to street level and facing another stairway heading up towards the street of the moaning d0uchebag before Laurel Mansion, the chest is beyond an archway to the left. The blue arrow points towards it.


Chest 3/12
In Minerva's wine storage room in Laurel Mansion.

You just have to navigate an easy amphora maze to reach it.
Contains: 3x Quenching Solution


Chest 4/12
In the storage room under Laurel Mansion on the way down to the sewers. In a curtained alcove adjacent to the one with a green rug. It requires Astral Element damage to open.
Contains: Dull Military Trinket


Chest 5/12
In Cloaca Kavalla in an area with candles and drapes before the doorway to the exit lift.
Contains: 3x Orichalcum Slab


Chest 6/12
At the end of the clockwise path leading around the rim of Cloaca Kavalla, against the wall on the cliff edge.


Chest 7/12
When the water has been drained from Cloaca Kavalla, go down to the lower level (full of giant enemy crabs), and go over to the tunnel entrance behind the mossy hill (opposite the Sluice Kavalla side).

Go to the back of that tunnel (beware: two werewolves will drop down to ambush you in the middle) and look behind some roots to the right for the chest.
Contains: 2x Quenching Solution


Chest 8/12
Progress past Sluice Kavalla to the room with weasel enemies and a square pit in the centre. Past the pit on the right is a chest behind some crates.


Chest 9/12
After the room full of enemies where the lift key is found, you can go through a barred arch and left up a short flight of stairs and there is a gate that opens a shortcut up to the start of the sewers. Opposite that, to the left as you come out of the stairs, is a chest that needs Astral Element damage to open.
Contains: 2x Starite Dissolving Agent


Mimic 1/2
From the room with the square pit in the middle, carefully drop down into the pit.

At the bottom, there are two directions: one apparently empty, and the other with a "chest". That is a mimic, so kill it.
Contains: Trinket Design: Ethrus (Volume 1)


Chest 10/12
The next chest is in the Ethrus cult room unlocked by the Strange Key from the mossy hill / island in Cloaca Kavalla. The one involved in Narkis' side-quest and detailed in the Dream & Glory - Part 3 section. Conveniently it is also in the opposite direction from the mimic at the bottom of the square pit.
Once inside the room, the chest is up on a high ledge to the left of the entrance. It is accessible via a climbable wall nearby.


Chest 11/12
To the left of the lift back to the surface from Cloaca Kavalla. In the corner of the room.


Mimic 2/2 & Chest 12/12
When you exit the sewers to Prima Boulevard, turn left and go through the archway.

Follow the relatively straight route through the next area, making a left turn at the charging bull, and into an enclosed area with a Temple building. The chest and mimic are behind the Temple. The mimic is on the left and the chest on the right.
Mimic Contains: Trinket Design: Battle Maiden (Volume 1)
Chest Contains: 3x Starite Ore Cluster


Collectibles: Chests & Mimics - Glittering Deeps
Chests contain 1 Orichalcum Pure Stone unless otherwise specified.

Chest 1/7
In the flooded tunnel behind the Physikois' Camp conduit, on the left.


Chest 2/7
After descending the various ledges and floating platforms from Physikois' Camp and avoiding the floating crystals to arrive at Tanrius' messed up little campsite at the bottom (just before the Underground Lake), the chest is right there in front of you.


Chest 3/7 & Mimic 1/1
From the Underground Lake conduit, head across to the raised sandy level and turn left. Continuing to move left there should enable you to see the Temple in the distance.

Once you get close to the temple, you can see chests either side of the entrance. But the one on the right is a mimic, so exterminate it.
Mimic Contains: Trinket Design: Temple (Volume 1)


Chest 4/7
The blue glade where the light-bridge to Styx is has an Astral Element damage chest on the left side. Check the section on The Light! cheevo for more details, but basically it is the central path of the three from the sandy raised area of Underground Lake.
Contains: Ancient Ornament


Chest 5/7
In the lower area of the Rift Observation Deck. Requires Astral Element damage to open.
Contains: 3x Starite Dissolving Agent


Chest 6/7
From the Astral Depth conduit, just head towards the glowing pink cave, and the chest is up on a rock to your right.


Chest 7/7
The only vaguely complicated chest in this whole place. It is clearly visible from the Astral Depth conduit on a floating rock in the open air.
The only way to reach it is to break the other floating rocks free lower down so they float up to it. Typically one of them is supposed to be broken free from the Underground Lake shortcut path and the other from a cliff near the Astral Depth conduit... but as I explained for the Cockroach cheevo section, this can be done from the start of the level with long-ranged AoE attacks (I use my staff, but bombs would probably work).


Once both of the other rocks are in place it is easy to jump over to the chest.


Collectibles: Chests & Mimics - Styx
Ugh... I hate this place...

Chest 1/11
On the Torture Floor (the original floor), go through the open doorway two doors before the large hole in the wall. It is a pain to distinguish between doors in this place, so try your best...

Through that doorway there should be a pair of statues and a route to a stairwell (or gaping void) on your left, a large painting on your right, and a bunch of blue things on gold shelves in front of you (along with an annoying guardian enemy, so use Ice Element damage against it).
The chest is behind the shelves and is an Astral Element one.
Contains: Twisted Bone Trinket


Chest 2/11
On the way out of Phylactery's Cradle (opposite end to the conduit), there is a rectangular room with large, stone arches, most of which are covered by metal. It stands out because most of this level is just caves. In this room (facing towards the small doorway), you want to go into the area to the right.

In the dark corner on the other side, between four racks (torture equipment), is the chest.
Contains: 2x Orichalcum Pure Stone


Chest 3/11
Upon entering Purgatory and going past the inscription saying as much, look to the left. You should see an open window leading outside to the central chasm.

The chest is immediately to your right as you step outside.
Contains: 2x Starite Ore Cluster


Chests 4/11 & 5/11
In the part of Purgatory where you go into a caged off area, enter one of the cells and find a secret passage to the Warden's Cage for the main quest...

... there are two chests at the back of that caged off area, as well as a nasty, soul-sucking cage-monster which can't be killed. Joy. At least neither of them are mimics.
4 Contains: 2x Orichalcum Slab
5 Contains: Quenching Solution


Chest 6/11
Upon entering the Warden's Cage level from Purgatory, take a left and head out into the hall, then as you approach the large painting, turn right into another room.

In this room on the left is the chest...
Contains: 2x Orichalcum Slab

... and on the other side is a small, metal box containing the Lab Key, which will be useful soon enough.


Chest 7/11
If you read the Requiem - Part 2 section, you might remember the part where we have to go outside onto a ledge before the Warden's Cage conduit. Well, we have to go out there again for a different reason.

Once you're outside, turn to your left about 100 degrees and look down. You've got to jump down to that platform. Note that you can see Chest 3 on the other side.

Now run over to the opposite side of the concrete bridge to find the chest. BEWARE: there is one of the soul-sucking cage monsters right on the other side of the window, and it will attack you when you open the chest.
Contains: 2 Quenching Solution

Now enjoy jumping down to the Torture Floor to get out.

Chest 8/11
Assuming you just jumped down from getting Chest 7 and landed on the Torture Floor again, it should put you outside a huge locked cage with a Hellhound inside. But if you picked up the Lab Key with Chest 6, you should be able to open the doors now.

We're here for the chest to the right just inside (buried behind a load of slime, so zap that first).
Contains: Starite Dissolving Agent


Chest 9/11
In the same area of the Warden's Cage where Ireneus knocked out Otto and asked you to go find information on the Black Warden earlier, and incidentally the same area you find Aigidios' Dog Tag for Bion, there is a chest between two of the scroll racks. It appears to be an Astral Element type chest, but wasn't protected for me.
Contains: 3x Starite Dissolving Agent


Chest 10/11
Just around the corner from the previous area (still in Warden's Cage), tucked away in the darkness, is the next chest.
Contains: 2x Starite Ore Cluster


Mimic 1/1
In case you were wondering where all the mimics got to in this hell-hole, there is one in the next room, just to the left behind the door, before you get to the stair-lift.
Contains: Trinket Design: Ethrus (Volume 2)


Chest 11/11
The last chest is a unique case, as it is trapped in a cage with some sort of beast down in Phylactery's Cradle (towards the back).

This cage only opens once Trinity Night is active, so you're only able to get that chest during Trinity Night by returning back here then.
Assuming you DO come back here for Trinity night, when Astraix is out of his cage, you'll finally be able to open this chest.
Contains: Starite Dissolving Agent


Collectibles: Chests & Mimics - Caelum Summit
Chest 1/6
Before going underneath the huge arch with the red brazier, turn to the left and go between the columns of the building there.

In the dark round the corner of the building, you should find a chest that needs Astral Element damage to open.
Contains: Scuffed Triangular Ornament


Chest 2/6
Past the first conduit and heading up the mountain with lightning striking down around you, the stairs will stop at a huge, circular area. There is a chest on the far side of it.
Contains: 2x Starite Ore Cluster


Chest 3/6
On the way of up the Trail of Astrology, you should come to a gazebo on your left (a circular thingie with pillars and a roof). There is a hidden path down the left side of it.

Spiral down to the bottom and you'll find a chest there.
Contains: Starite Dissolving Agent


Chest 4/6
From the Trail of Astrology conduit, turn around to the left and head into the tunnel with a waterfall inside. This is the path towards Pallas.

Once you emerge from the tunnel, walk to the edge of the cliff and look down on the large, domed building. You should see the chest down there.
Contains: 2x Orichalcum Pure Stone

Technically you could walk further down the path then walk anticlockwise around the rim of the building (the way out), but why do that when you can just drop down?

Mimic 1/1
Further along the path towards Pallas (Disc of Smite), after descending the hill and fighting 3 of its puppies, you'll come to a bridge on your right and a "chest" on your left, which is actually a mimic.
Contains: Trinket Design: Temple (Volume 2)


Chest 5/6
From the bridge on the path to Pallas (Disc of Smite), turn right and go downhill towards the Temple. Don't go into the temple (the final stop for the Paragons DLC), but rather hook around and continue following the path downhill. You should eventually reach another gazebo-thingie with a red lantern and the chest inside.
Contains: Starite Dissolving Agent

After that if you go to the bottom of the hill, you can open those gates you saw at the first conduit and make a shortcut back.

Chest 6/6
The final chest of the game is in The Nexus after the final conduit, located at the back behind the beam of light leading to Eumenides. If you haven't learnt to look behind things by now, this would be a fine reminder. It requires Astral Element damage to open.
Contains: Disintegrated Star Core


And there we go. Done. The Treasure Hunter cheevo should pop after that last chest.
Collectibles: Teumess - Outer Rim / Black Streets / Arges Bazaar / Stella Mine / Phalan Academy

Each stage of the game has a small number of adorable little creatures with an incredibly awkward name in it.

"Teumess". Apparently that is the plural. No idea what a singular one is. A "Teumes"? "Teume"? "Teum"?
And how do you even pronounce it? "Toy-Me's"? "Tumours"? "Teoh-Mess"? No idea.
They're basically silvery ferret-cat-goat things who don't deserve to be violently attacked, but the game insists we should. Vulcane has a pet one. That is proof positive we shouldn't be hurting them.
But... cheevos. Also they drop Morning Star Elixirs when defeated.
Oh well. If any get away, just reload the area.

Outer Rim
1/1
From the Border Outpost, assuming you've knocked down the tree-bridge shortcut, backtrack from the conduit over the small ledges behind you...

... and rush ahead towards the tree. The Teum is to the left of the tree, but will quickly scamper up the cliff and run off if you aren't quick.


Black Streets
1/2
First one is easy. As soon as you step out into the Ghetto, you should hear it nearby. It is to the left of the waterfall, watching the water.

2/2
Second one is horrifyingly well hidden. You have to go to Baraad's Treasury and step onto the lift facing back towards the door. Dark Souls players know what comes next...

You have to step off the lift into a tunnel while it is midway down. Assuming you do it right, you'll find the Teum in the tunnel ahead.


Arges Bazaar
1/2
The first is outside the gates of Laurel Craft, lurking in the shadow to the left (if you're coming out of the gates) or right (if you're approaching from the stairs).

2/2
The second is next to the Amphitheatre conduit, in the opposite direction to the building itself, digging around between some trees.


Stella Mine
1/3
The first is actually right outside the Shelter in the sewer tunnel leading to Pit Village, on the other side of the water.

2/3
The second you probably encountered already when coming through The Hollow the first time, when Shaye spidermans away and leaves you with an impassable bridge, so you have to take the long route around to the right...

... and you turn a corner right into a Teum.

3/3
The third is right down past the Pass of Stars conduit. Just hop down the floating rocks and head towards the Glittering Deeps, and it will appear in front of you on the right side.


Phalan Academy
1/2
The first is just up the path from Phalan Trail. Before you get to the first building, look back to the right.

2/2
And for the second, go to Inner Plaza and head into the Martial Tower. Go downstairs to the basement and head through the door at the back (which opens when you use the key from the boss here).

The stairway eventually leads to a nearly pitch-black tunnel. Just before the exit, there is a Teum in a hidden alcove to your right (which you might miss if you weren't careful).

Collectibles: Teumess - Sunken Outskirts / Arges Plaza / Glittering Deeps / Styx / Caelum Summit
Sunken Outskirts
1/2
From the Flooded Belt conduit, go through the gate, turn left, go past the small section of swamp and up the hill. You should spot the Teum on the ledge above, but it is tough to get it there.

Go into the tunnel, fight past the dillos, go out the other side and scale the ledge at the back before turning around and running along the upper level. The Teum should be waiting for you in the corner.

2/2
The other is right before the Gate of Aegis, on a log to the right as you approach.


Arges Plaza
1/2
First is just up the left stairs from Laurel Mansion conduit, in the upper corner.

2/2
Second is in the room before Sluice Kavalla, but only when the water is down. It is in the corner underneath the bridge on the lower level.


Glittering Deeps
1/4
The first you can just about see from the Underground Lake conduit, in an island in the shallow water nearby.

2/4
Continue as though doing the stage the first time, but in the room where Hilda's father first jumps off the cliff ahead of her, swing a hard right instead and follow that other passage.

At the lantern, jump down to the rock below, then from there to the next lower ledge.

Once you're down there, round the bend ahead and you should see a Teum relaxing in a beam of light from a lantern.

3/4
From Titan's boss-door (I go from here a lot), take the route between two rocks (the 2nd clockwise) and veer to the right on the other side. Same route as to the Fourth Ancient Stele Rubbing.

Head around the pond, avoid the crystals, and climb up the wall to the top.

At the top, turn left, then round the corner to the right and climb ANOTHER wall to run into the Teum at the top.

4/4
Fourth is easy. Port to Astral Depth. Head towards pink cave. Teum is to the left of the entrance.


Styx
1/3
Port to Acheron Bank. Look to your right. Teum 1 is right there by a patch of grass.

2/3
From Teum 1, head UP the hill to Pass of Styx. Watch for where the path splits down to the left and take the left path. Teum 2 is there at the end.

3/3
Port to Phylactery's Cradle. Go down the stairs towards the open cage doorway. The Teum is right on the other side looking back at you. For once Styx does things easy.


Caelum Summit
1/2
From the start of the stage, Hilda goes forward between columns, then up to the left, then back up to the right. Before going up the next set of stairs, check right in the corner of the rocks to the right of it for a Teum.

2/2
On the "Pallas path" from the Trail of Astrology through the tunnel and down the dirt road, you'll eventually beat three Pallas puppies then cross a bridge. Just past the bridge in an alcove on the left past the path, is the 2nd and final Teum.


If this was your last, the cheevo should pop for you here.
Collectibles: Discoveries Documents...


No.
In this case I'm not going to provide an exhaustive guide to all of the Documents in the game. Including DLC, there are 301 of them, and you need 250. The DLC ones count.

I recommend you just try to read every flashy piece of paper or graffiti you find in the game as you go. You can see where you're missing some by checking your Archive / Document section:

This can give you an idea of where to look for them, as the documents are generally listed in the order they're expected to be encountered, so if you have a ??? before another you found, the missing document is probably nearby before the other one.

You can also check the Game Record page to see how many you have in total.


If you want a reference, go check King_Seda's thread here:
https://gtm.steamproxy.vip/app/1731070/discussions/0/6164890302177523851/
Admittedly a lot of the descriptions are vague to the point of uselessness, but it should probably suffice for filling in the gaps that you're missing... and there isn't anything else better out there.

Sorry for not being willing to do this one myself, but you can see how long the other sections are. Doing this properly would probably require at least 2 sections per area for most areas of the game, and take days to put together... as well as the fact that quite a few Documents are missable given certain player choices.

NOTE: Document records, unlike Item records, do NOT carry over to NG+, so if you don't get them all on one playthrough, you will have to start over.

The Final Achievement...
When you've unlocked every other achievement in the game, you'll get the 100% Completion achievement. If your final achievement was one of the Ending achievements, you'll get the 100% Completion after the Credits...

i.e. With The Three


Congratulations on 100% Completing Asterigos: Curse of the Stars.


Sources / Credits / References... and a few final words...
The main source for the Glory Ending requirements was nching's thread on the discussion board here:
https://gtm.steamproxy.vip/app/1731070/discussions/0/6164890302178150716/
It was kinda vague in a few places, so I fleshed out everything I thought necessary (along with a few, like the Stele rubbings in the Glittering Deeps, that probably aren't necessary).

The main source for quest item locations, which helped with remembering where the heck I'd got them from (I strip-mined the world without paying much attention the first time) for the assorted side-quests, was King_Seda's Archive Item Locations thread here:
https://gtm.steamproxy.vip/app/1731070/discussions/0/6164890302177571875/
Again, I also made use of their Document list to some extent... though the helpfulness of that one was variable.
I should note that King_Seda was probably the biggest single contributor of information in all this... though as I may have noted earlier, it wasn't often easy to understand, which is why I made this guide in the first place.

A few things I found via random Reddit threads... but I don't remember where they were, plus I've been permabanned from Reddit since I started this guide... for something posted several months ago on completely fallacious grounds.... so screw that place.

The source for the few of Marrisa's songs I was still missing was another nching thread:
https://gtm.steamproxy.vip/app/1731070/discussions/0/6164890302170790145/
... though I admit I nearly got a migraine trying to figure out what I'd done wrong with a couple of them (e.g. speaking to Seryne twice when finishing her questline).

No source for Chests nor Mimics. I found those by myself thanks to the Glimmer.
Same for Echoes, because they're highly visible.

I only needed the locations of 2 of the Teumes since I figured the rest out myself, but the source for that was rottinduck's video here:
https://www.youtube.com/watch?v=r4qIRA7nbiU

The Trinity Night bosses were kinda obvious since all of them are neatly foreshadowed earlier in the game... but I can get not finding some of them (like the crab). However, I've noticed there are other guides for that if my take on them isn't perfect. Still, I didn't use them at the time, so no credit needed.
The Hellhounds literally glow, so they're obvious too.


Anyway... now I've finally got all this out of the way, I can publish this insanely long ramble.
I hope it helps someone...
This is, incidentally, the longest Steam Guide I've ever written. Yeah. I seriously hope that gets some appreciation... BUT this is one of the VERY FEW GOOD GAMES released in the past few years... so it absolutely warrants more attention.

Oh... and Subscribe to me on Youtube. I don't believe in using videos for guides here, but I DO make videos... of exceedingly questionable quality. I'd appreciate a bit of feedback over there though all the same.

Thanks for your time.
44 Comments
Milkshakes 11 Jul @ 9:45am 
It's so hard to find information on this game. Thank you for putting in so much effort.
wingback18 23 Apr @ 7:26pm 
Breathless - Glittering Deeps
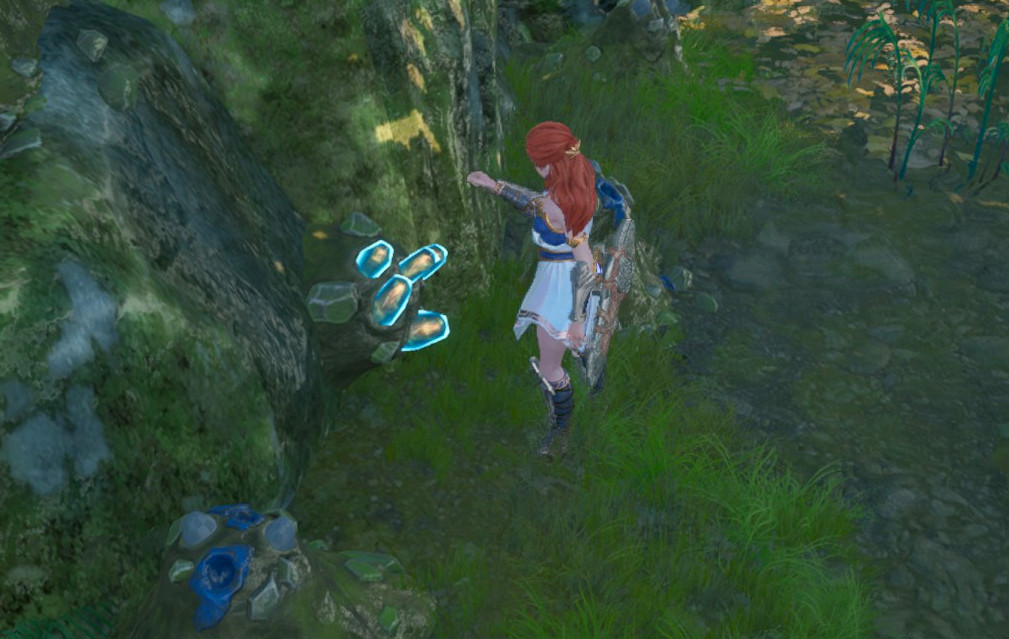
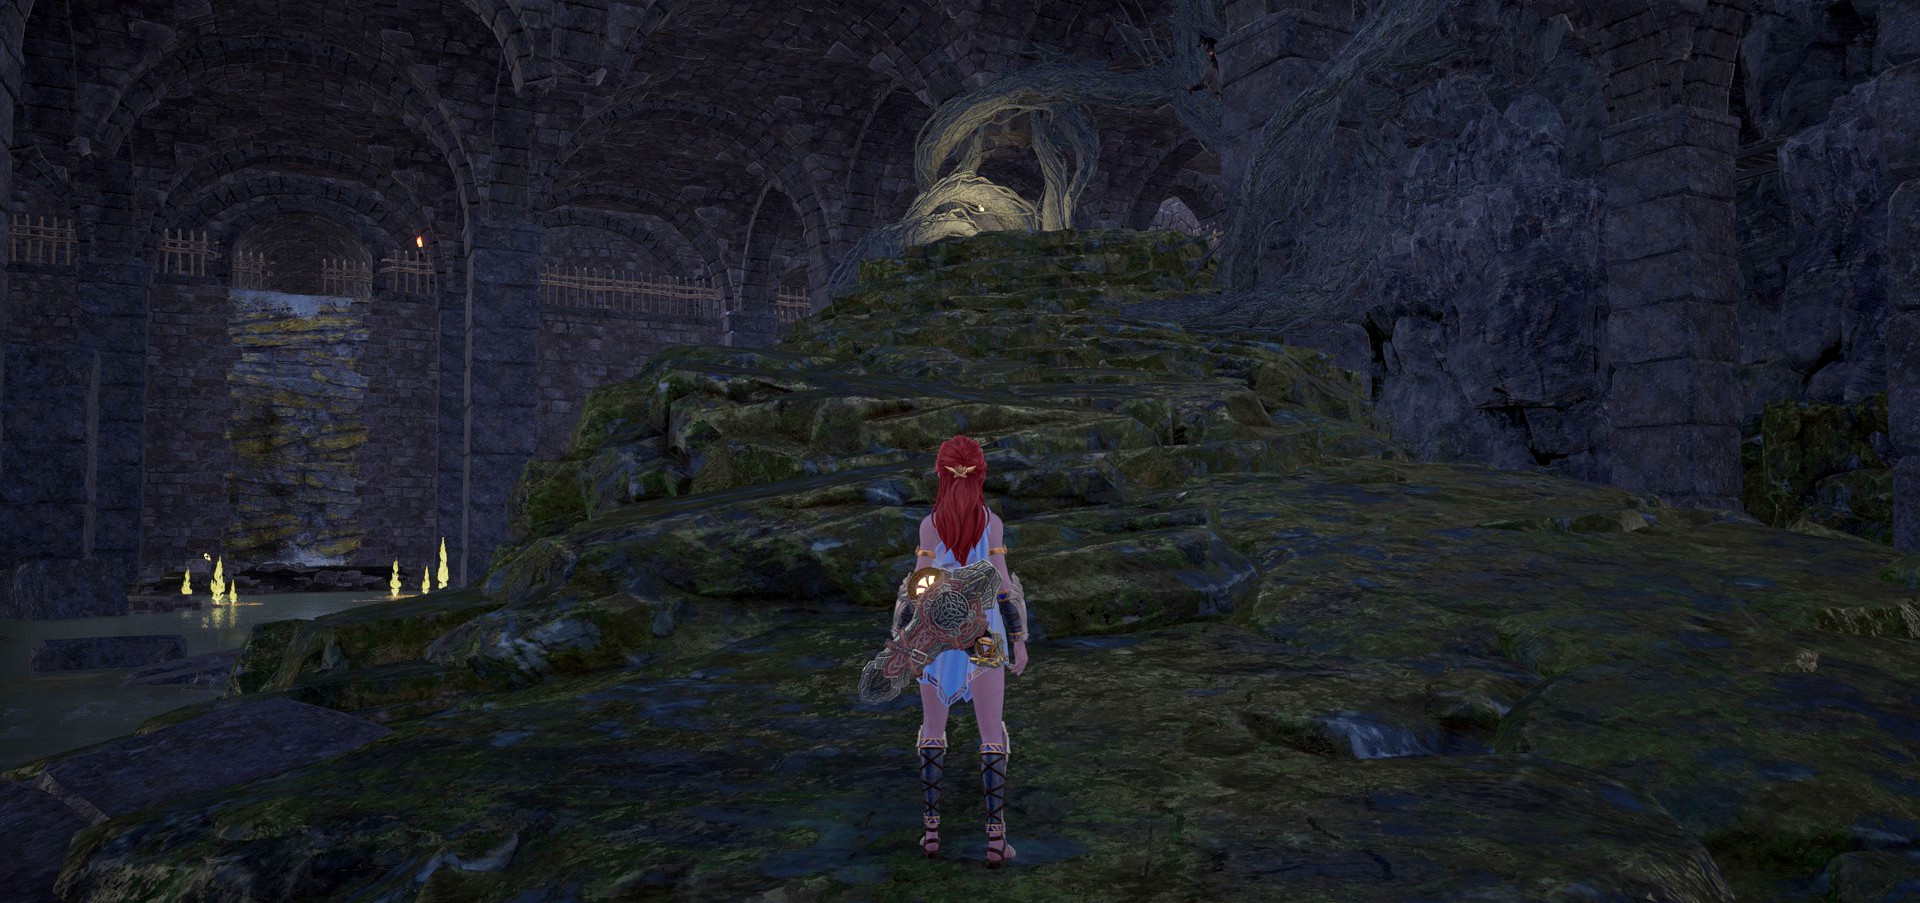
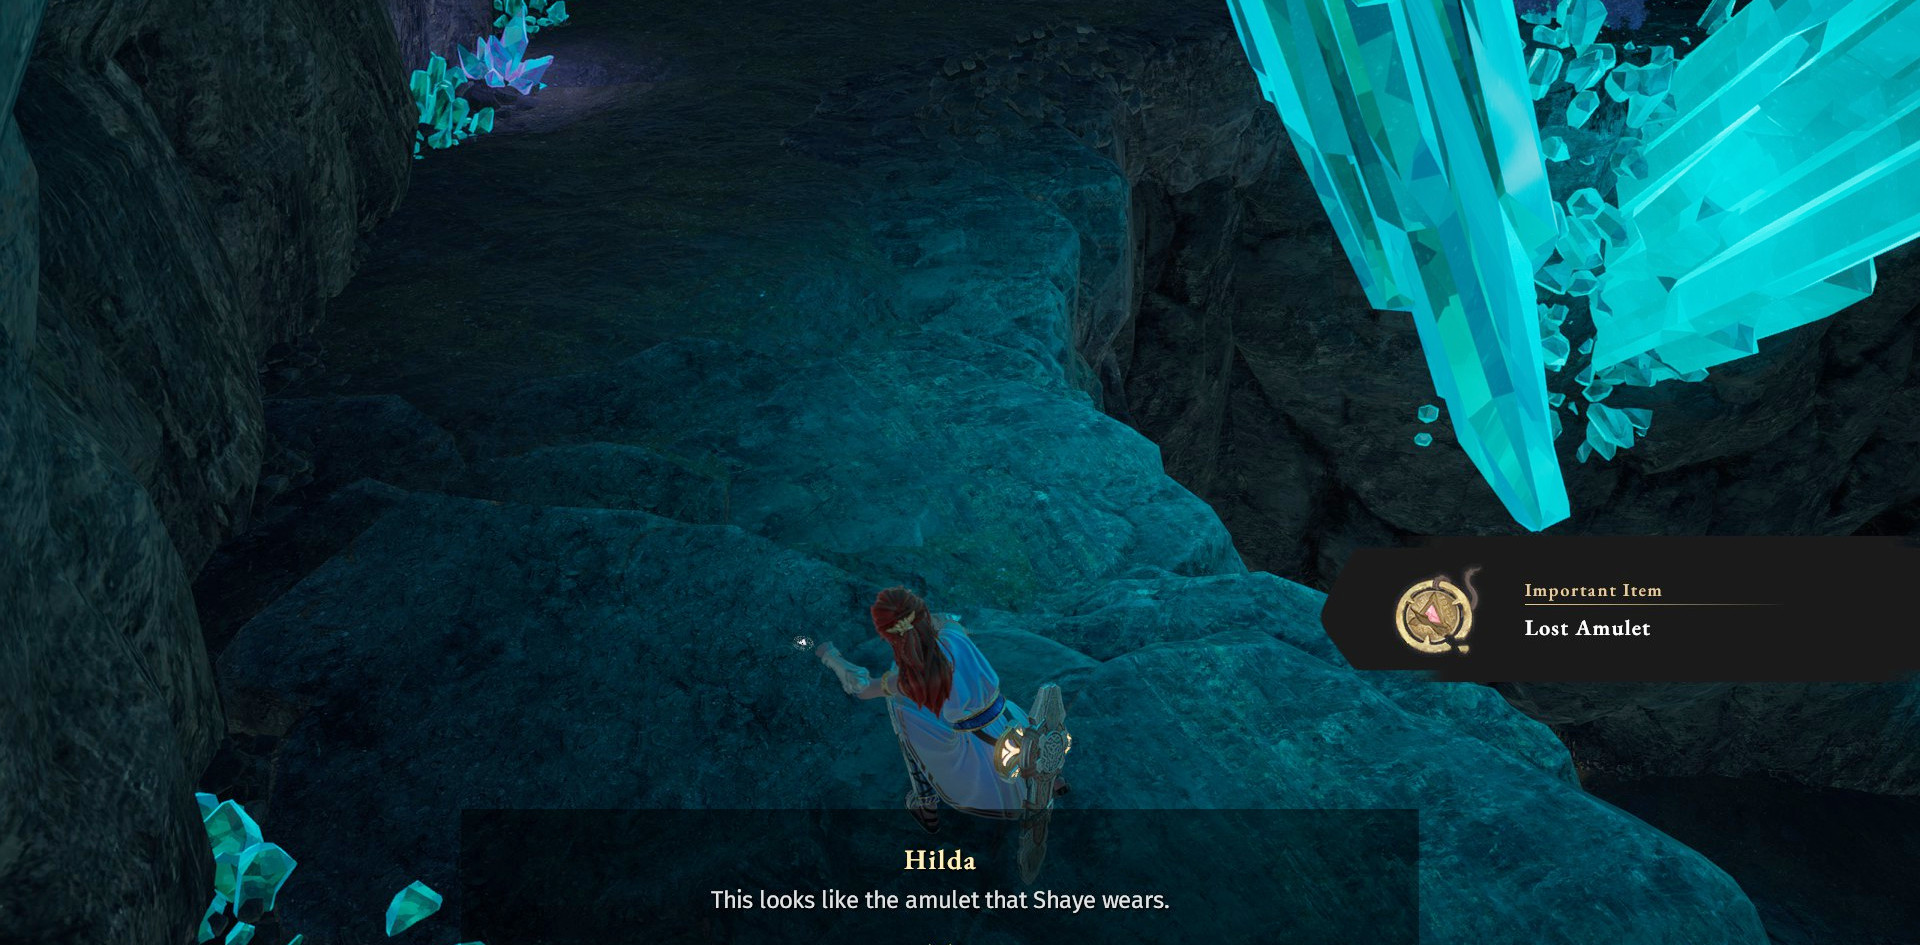
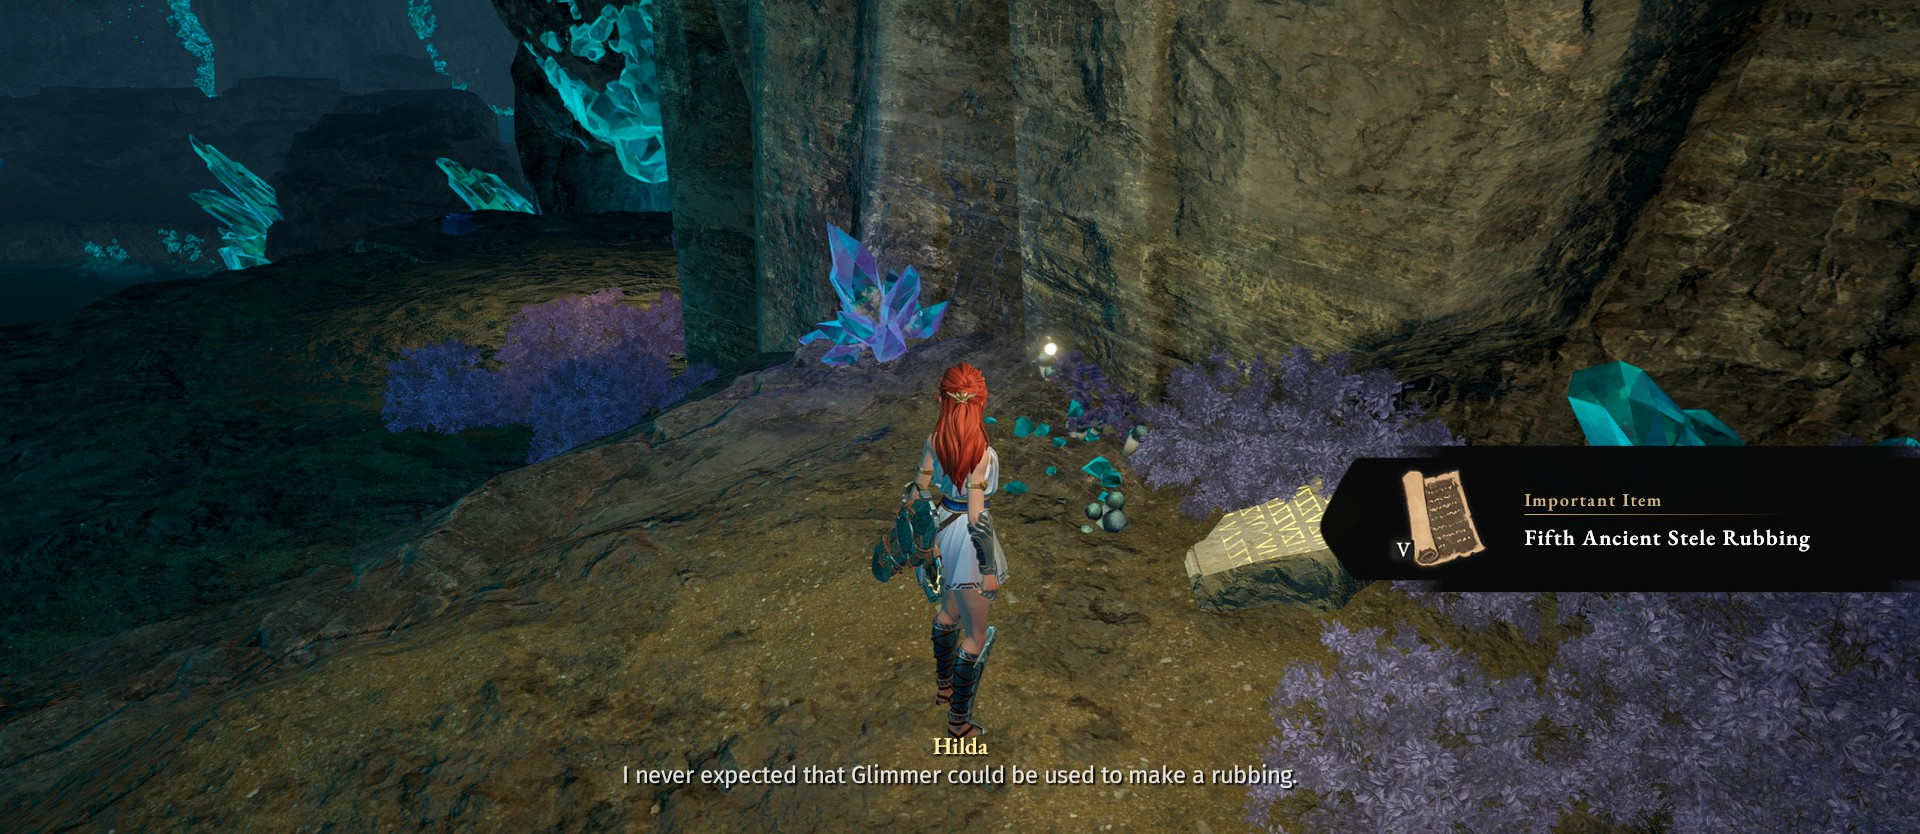
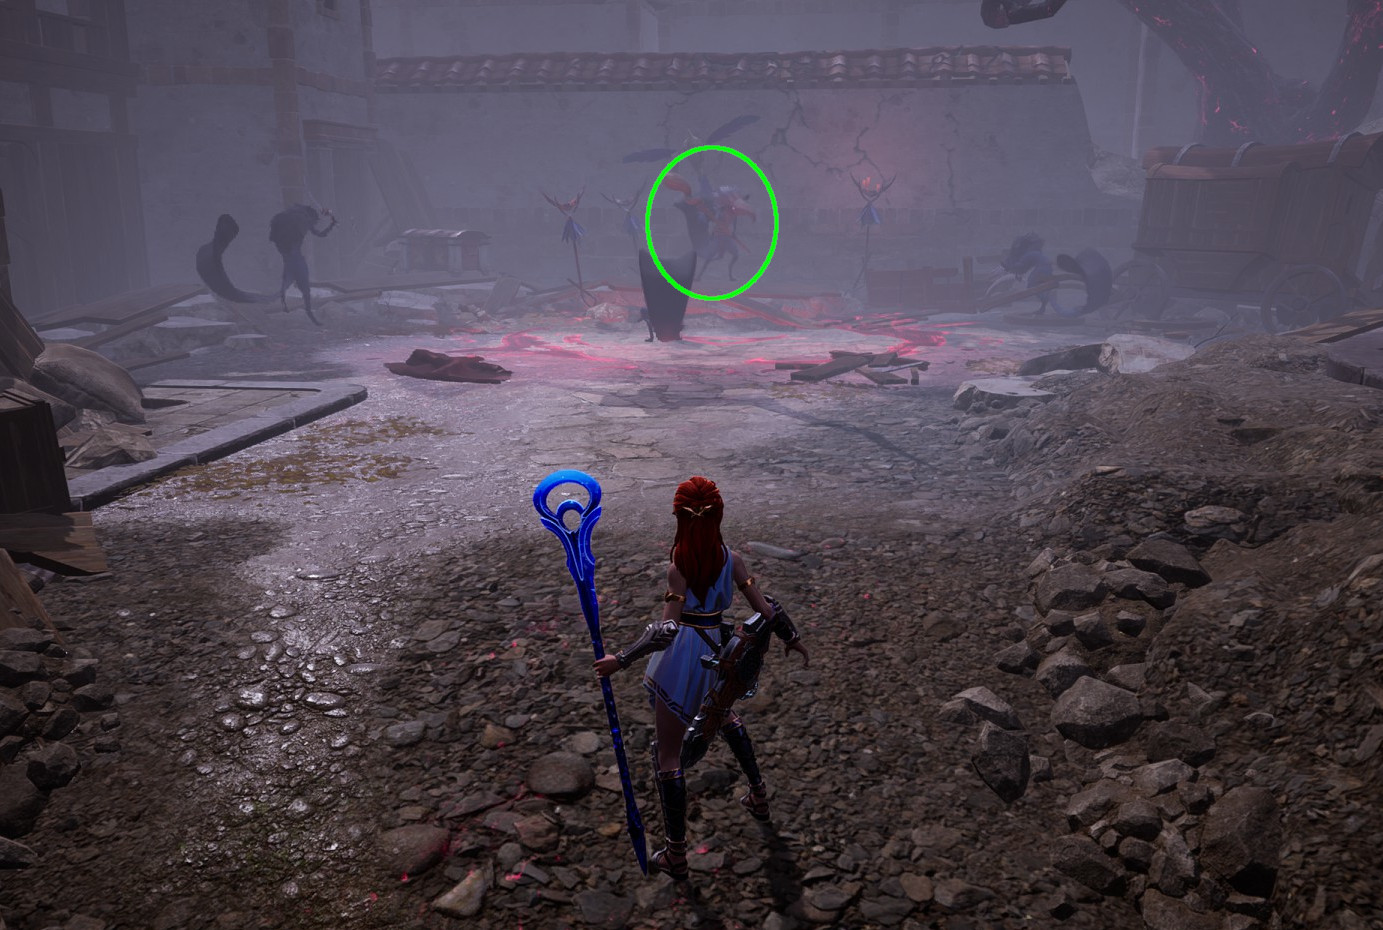
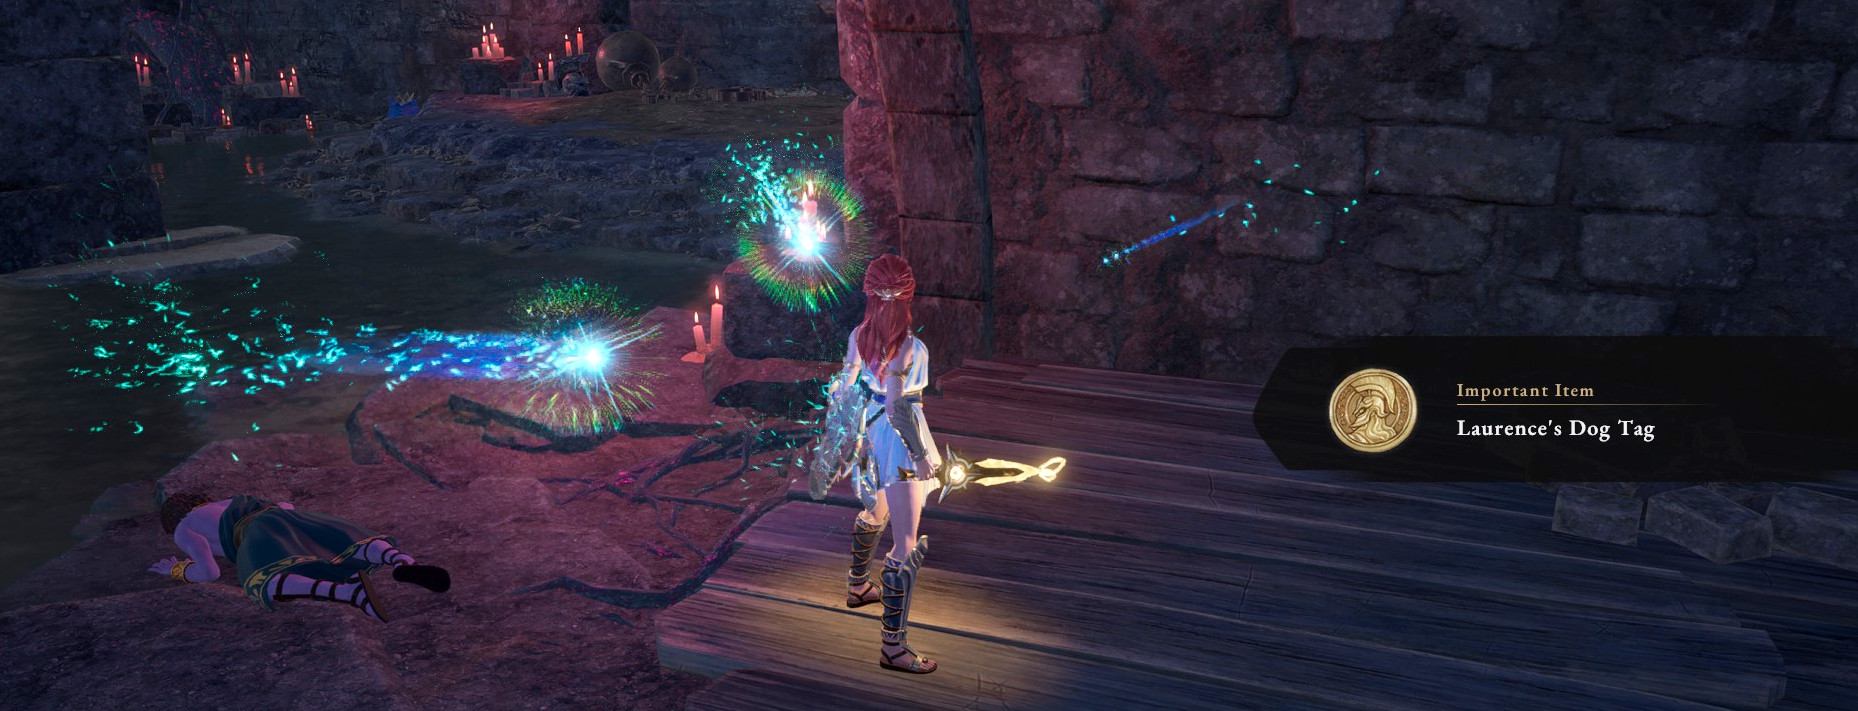
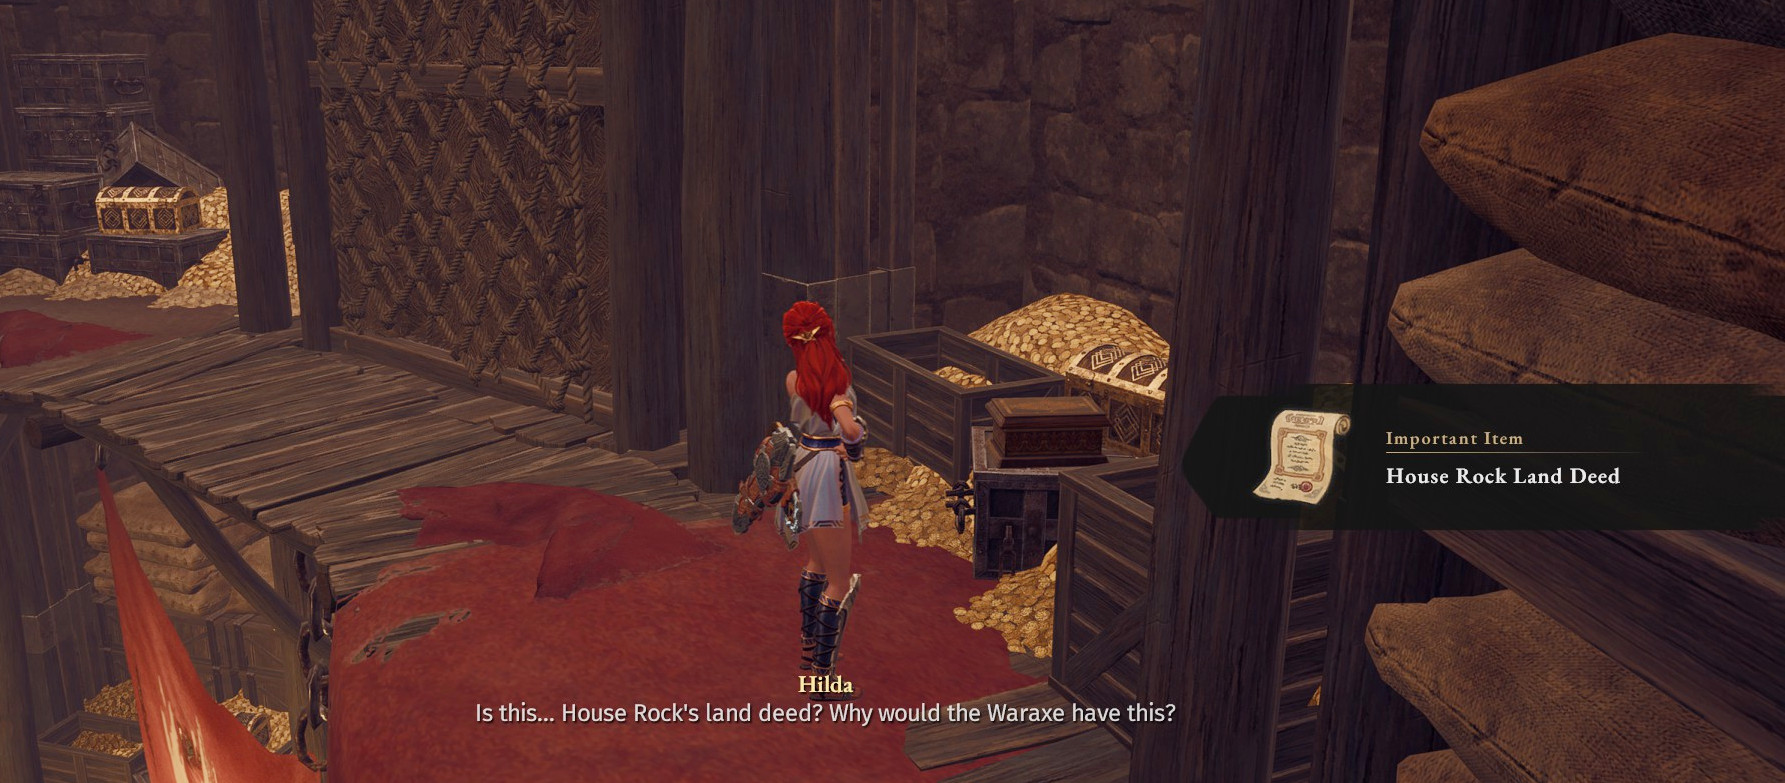
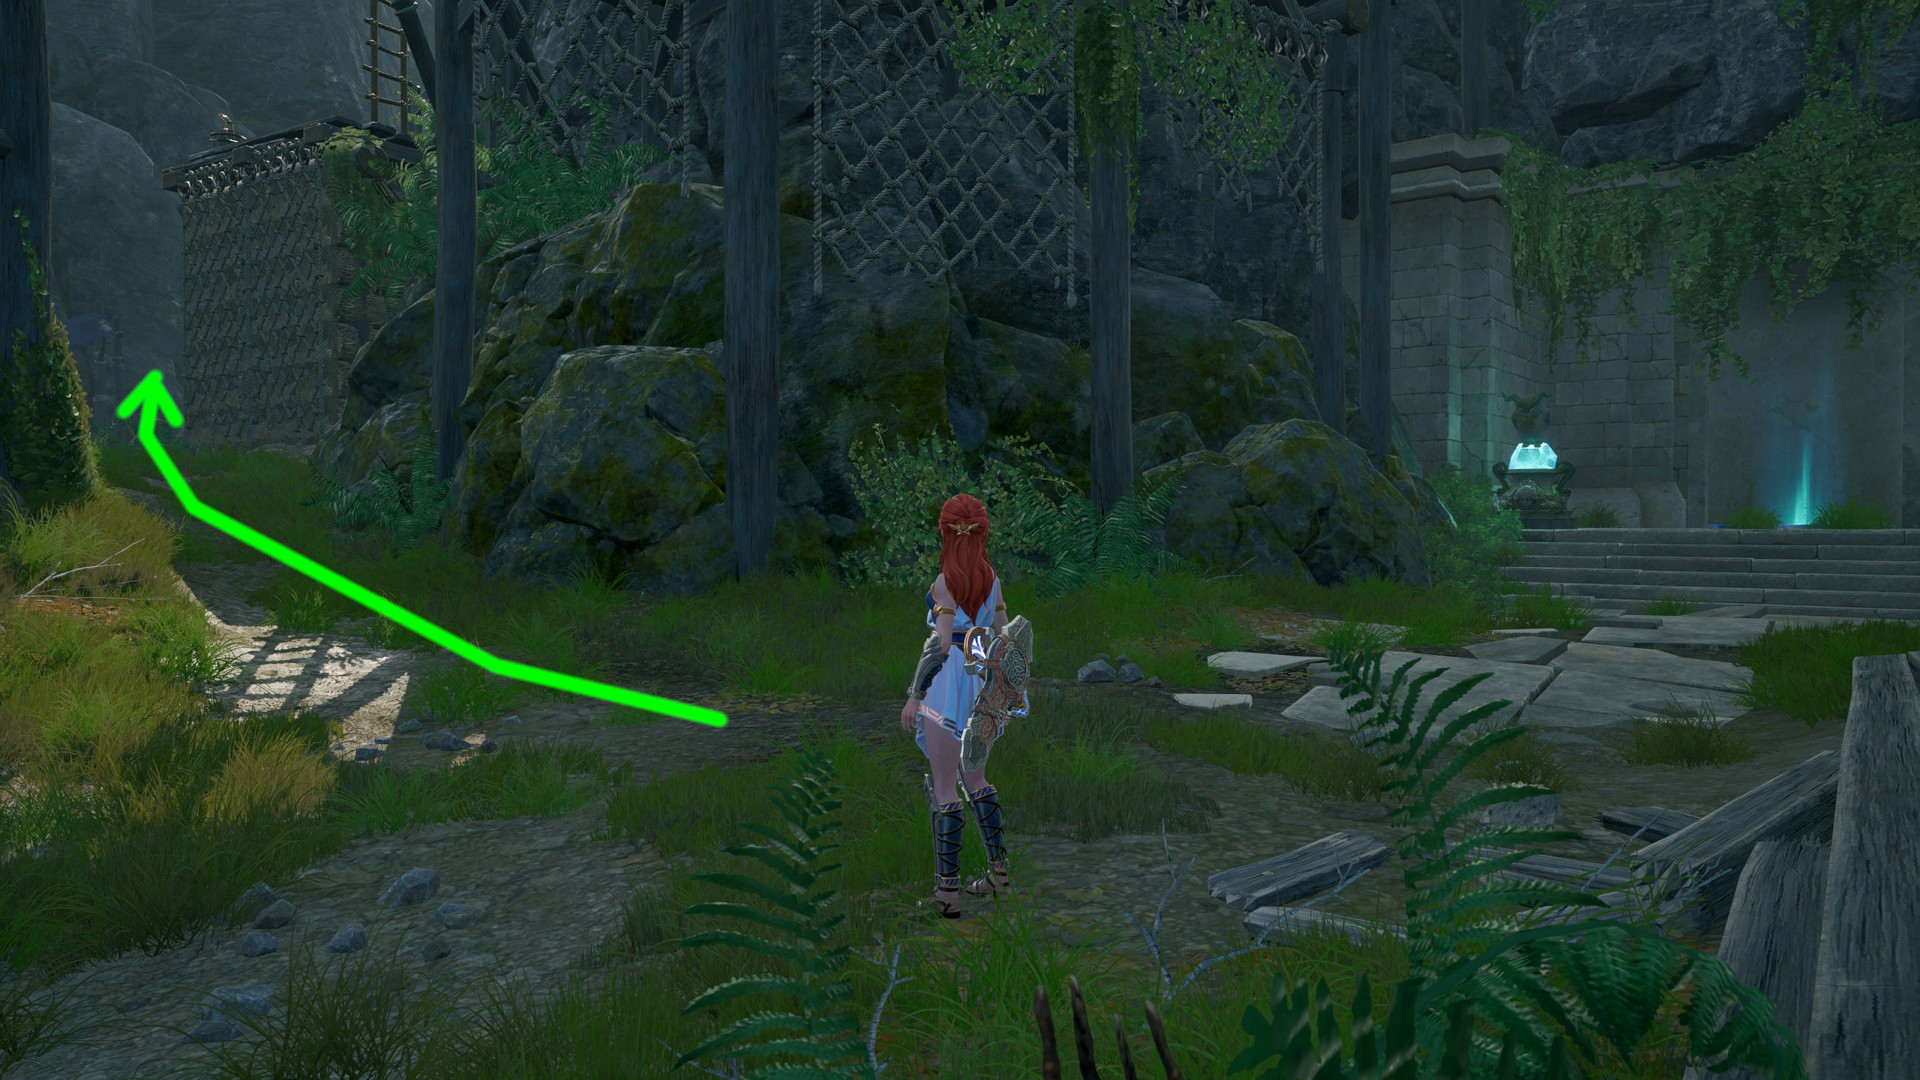
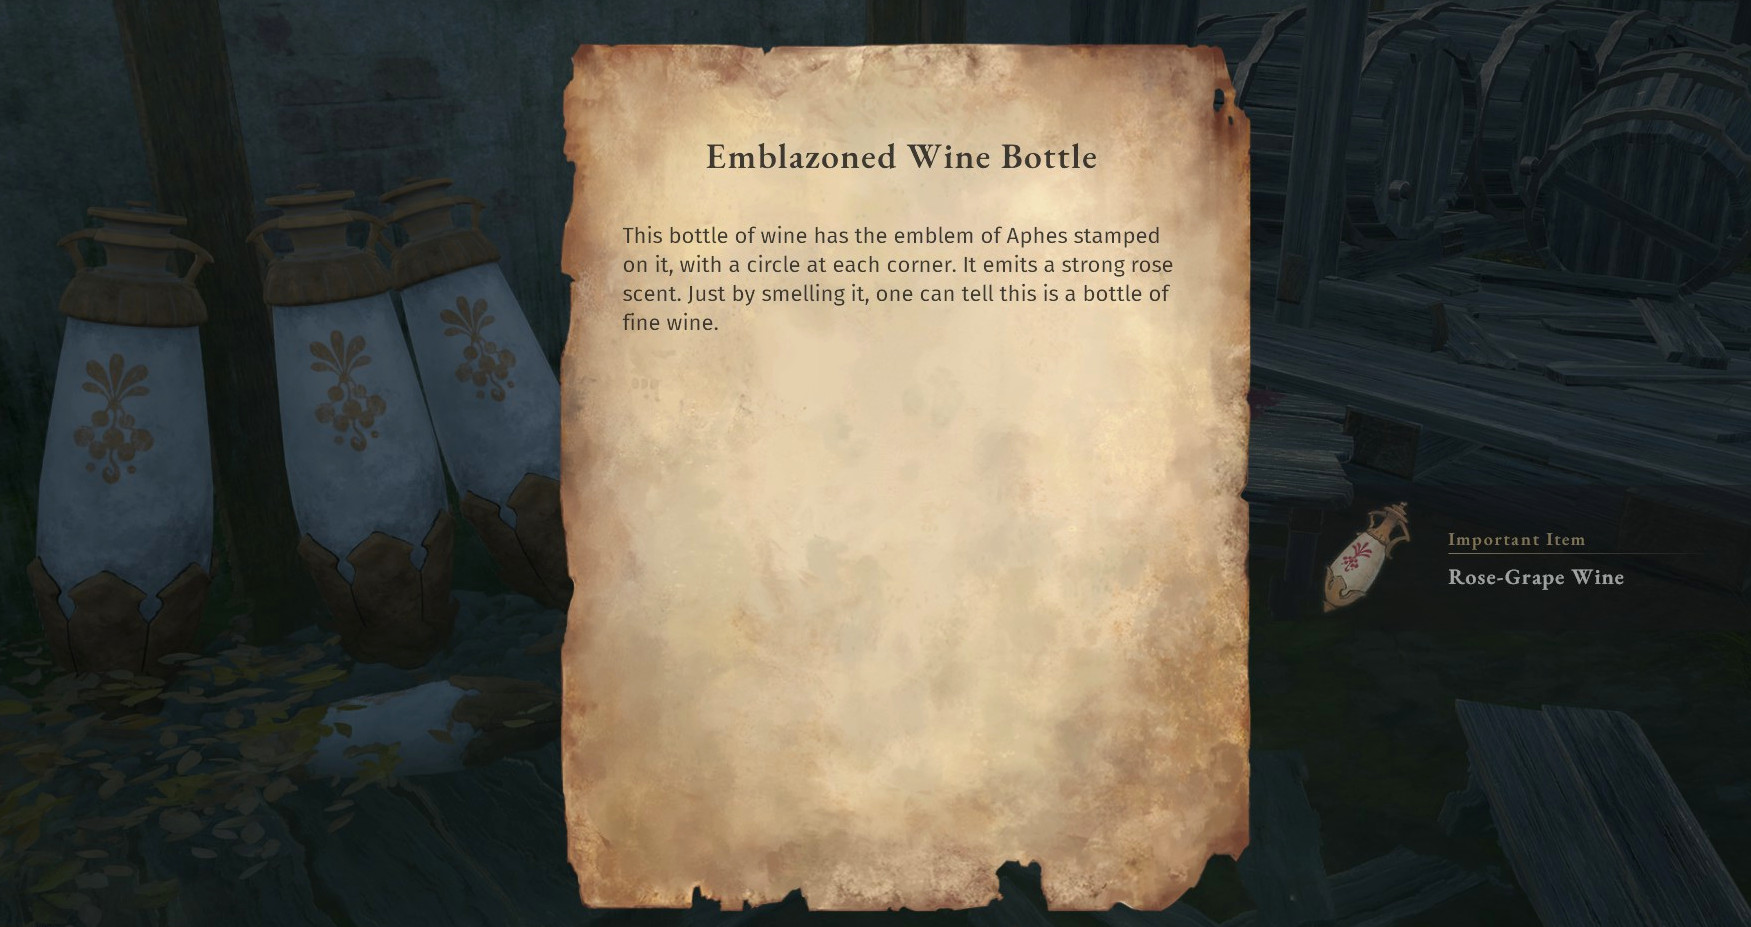
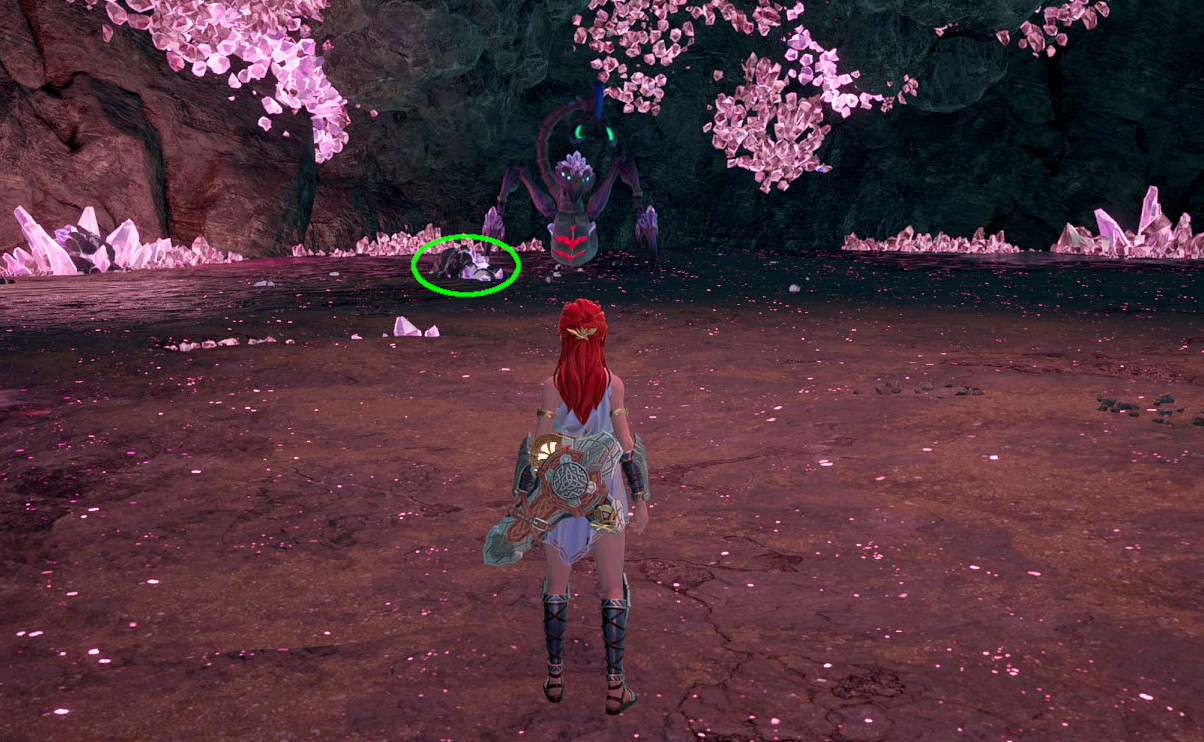
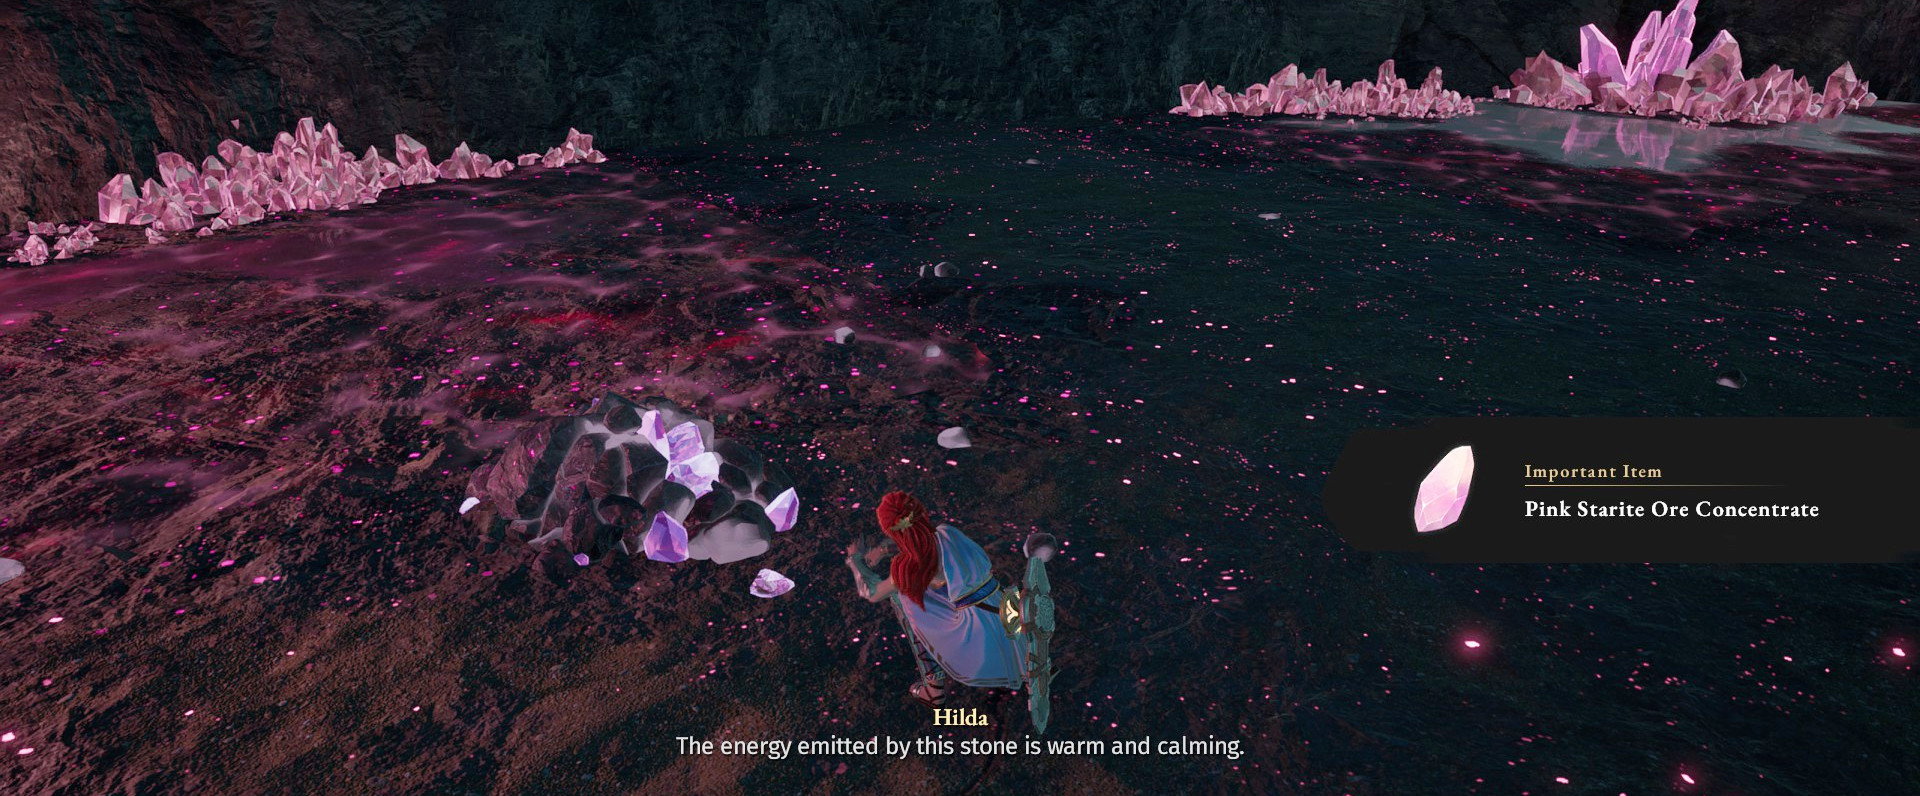
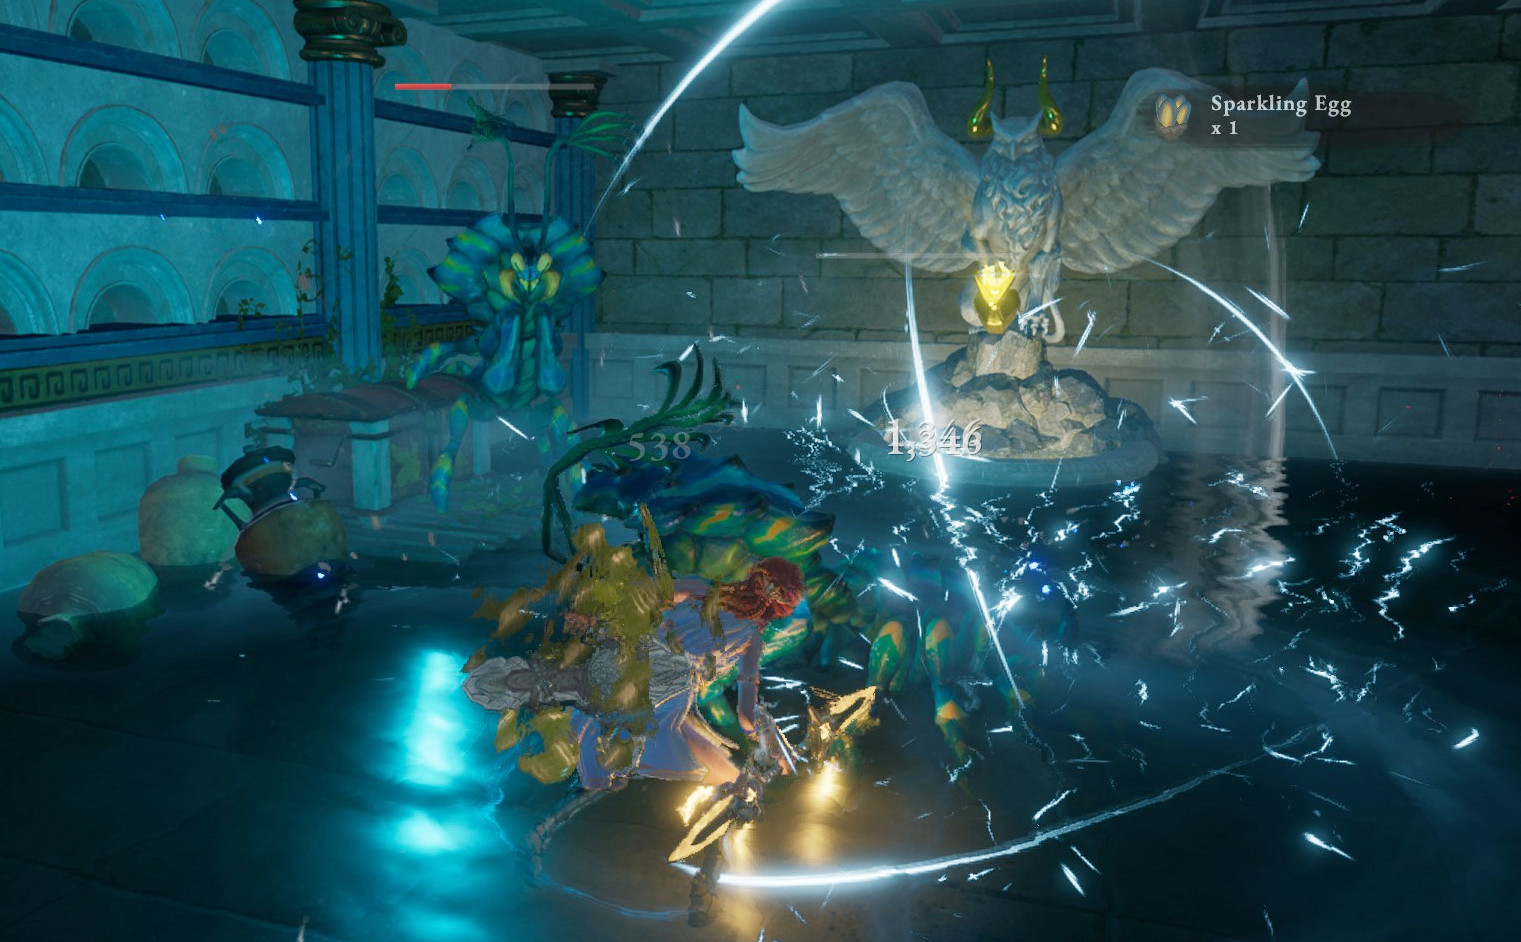
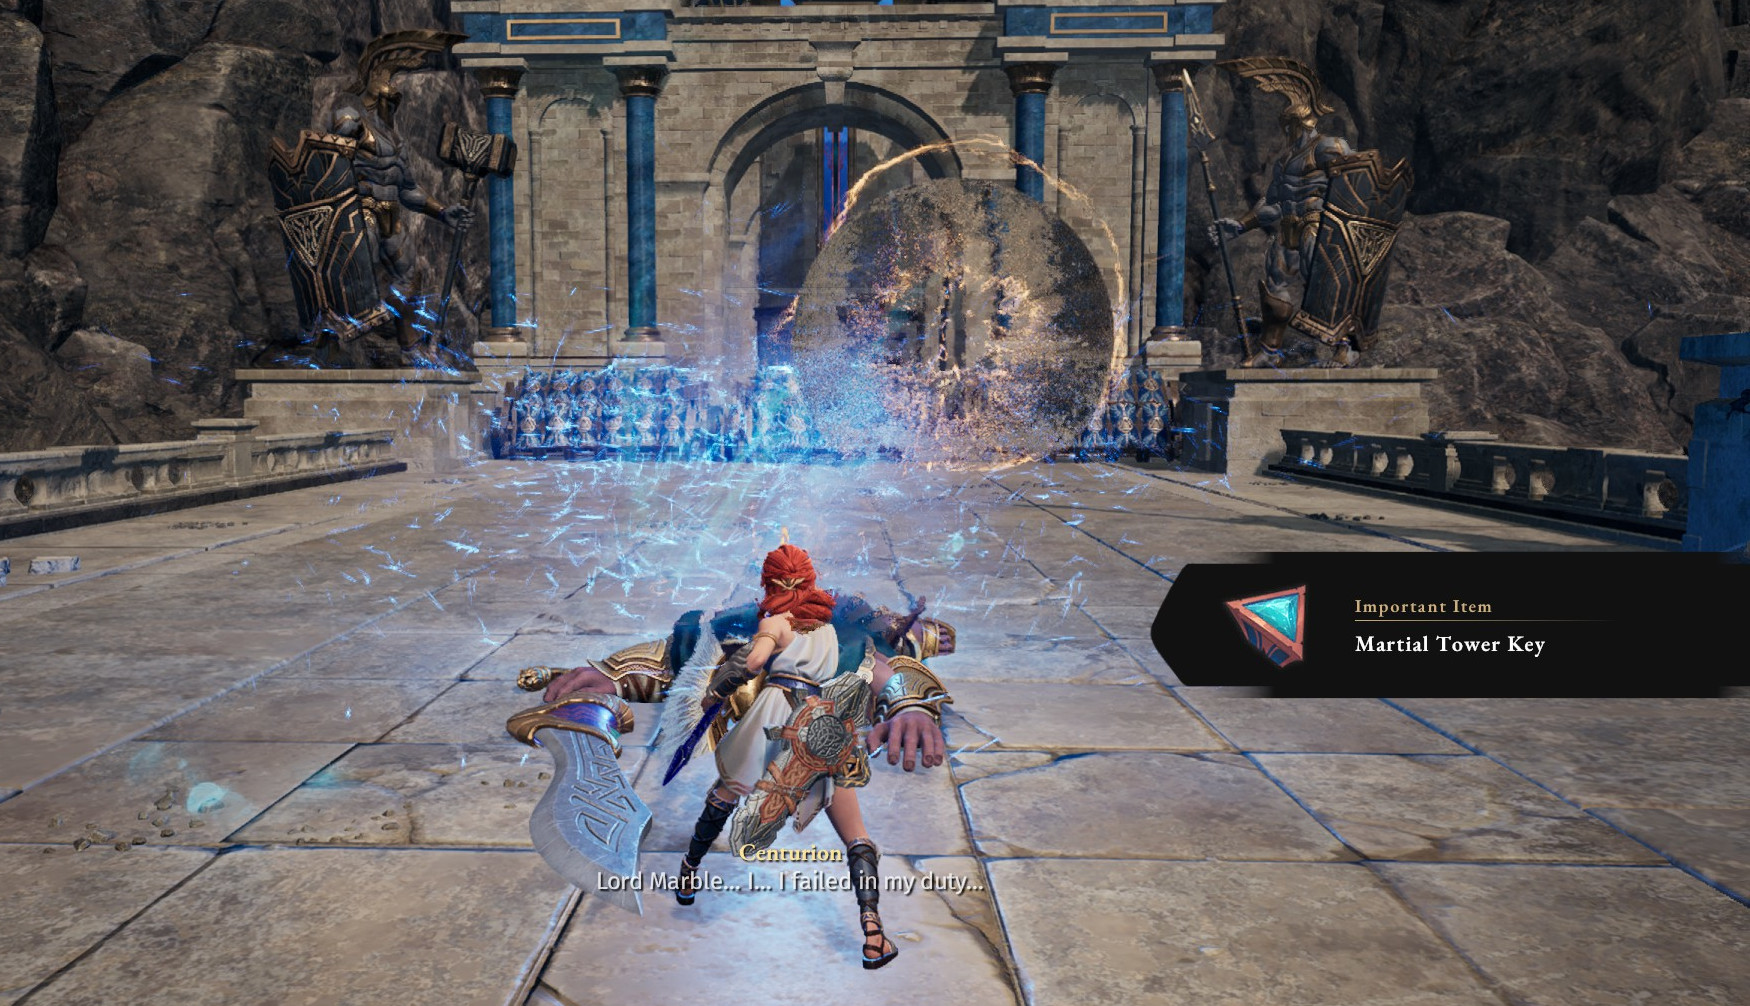
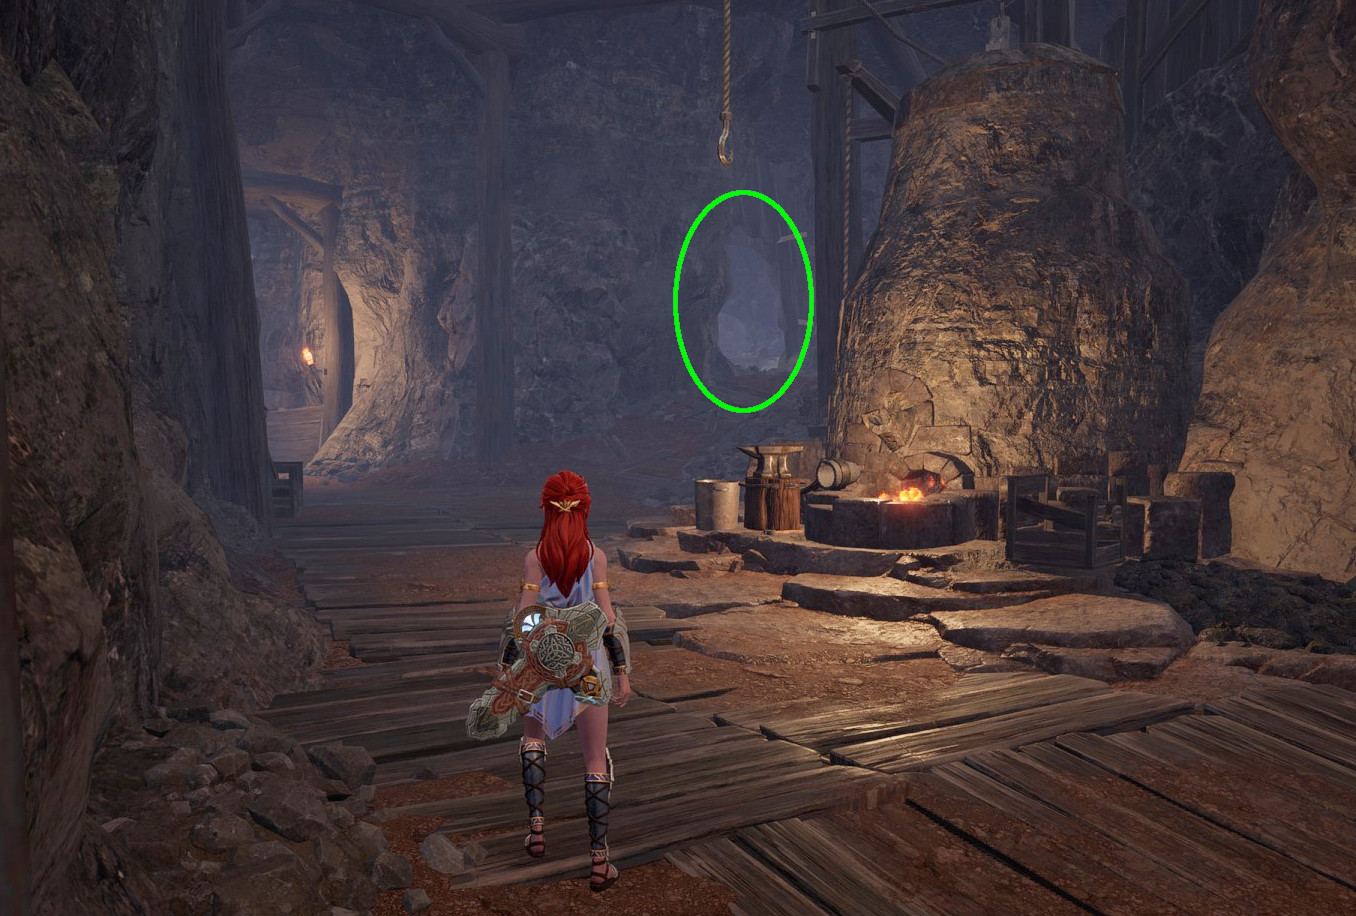
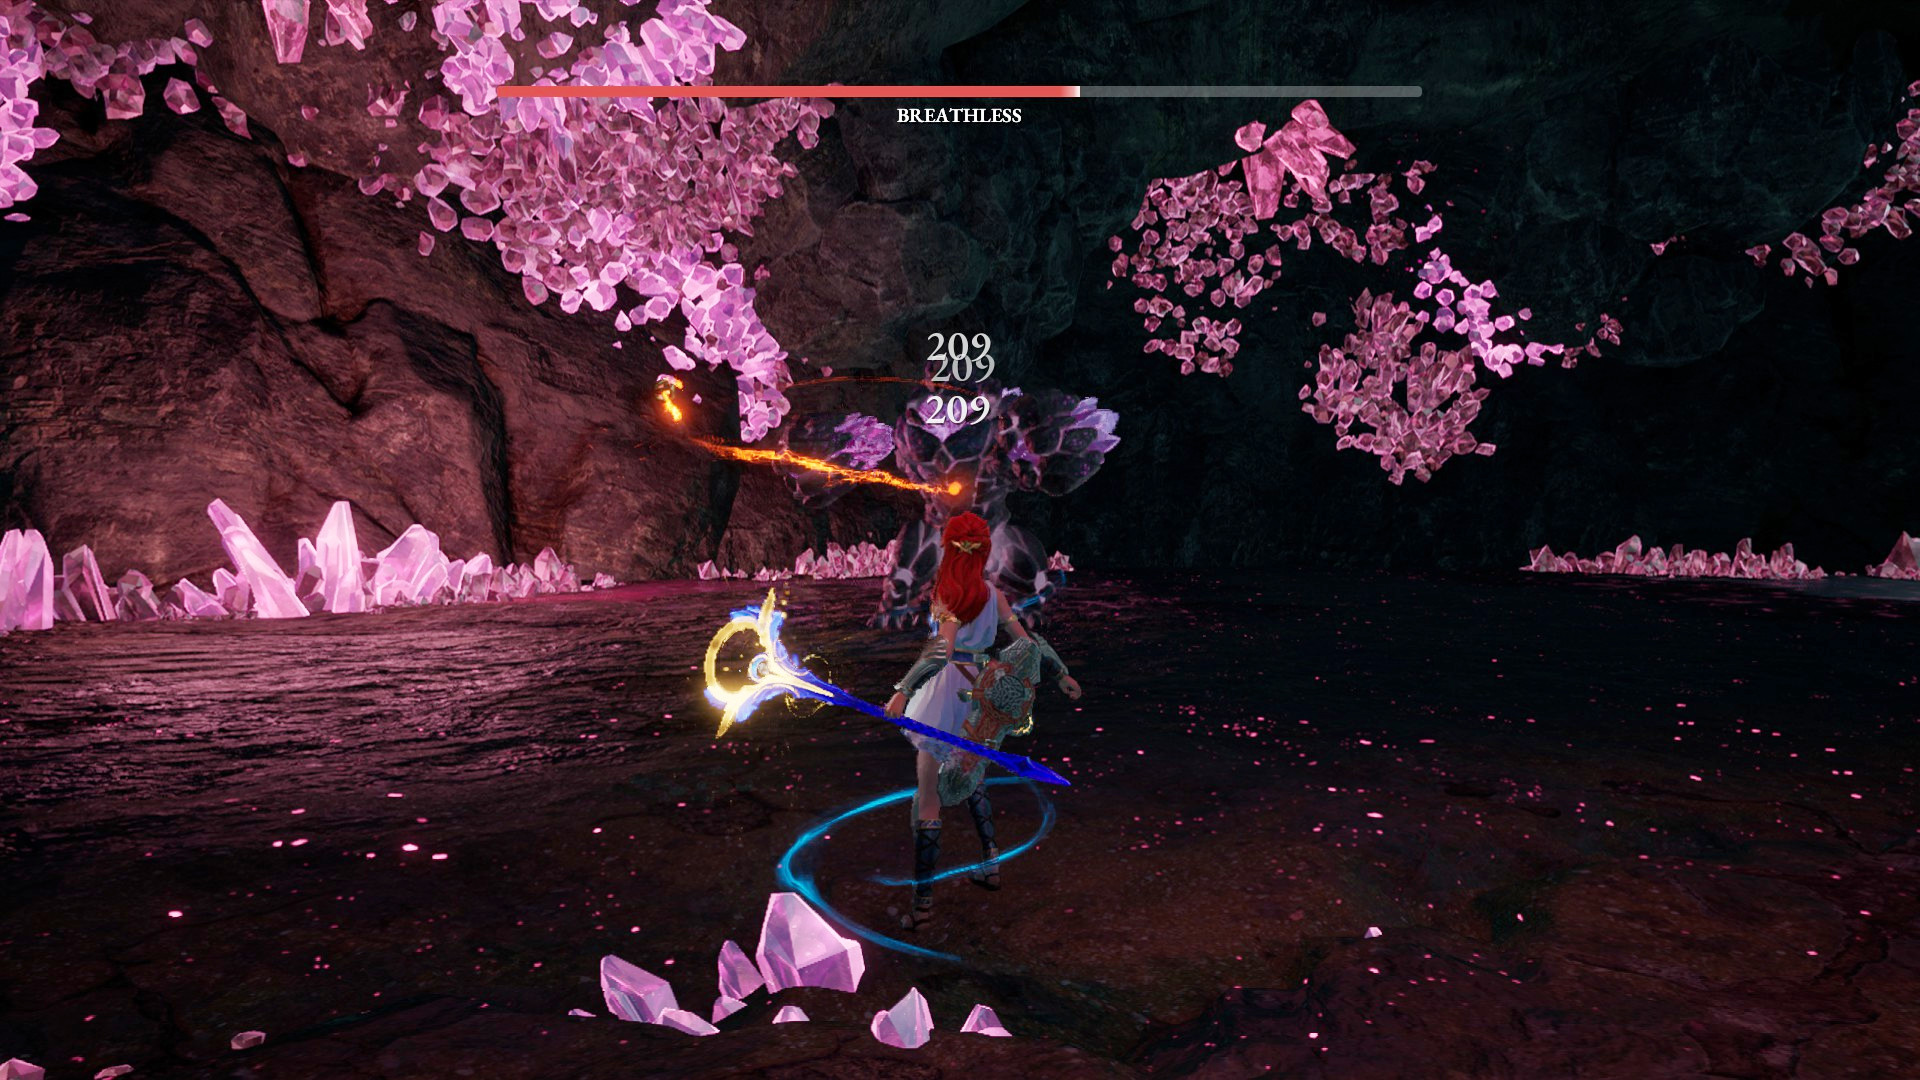
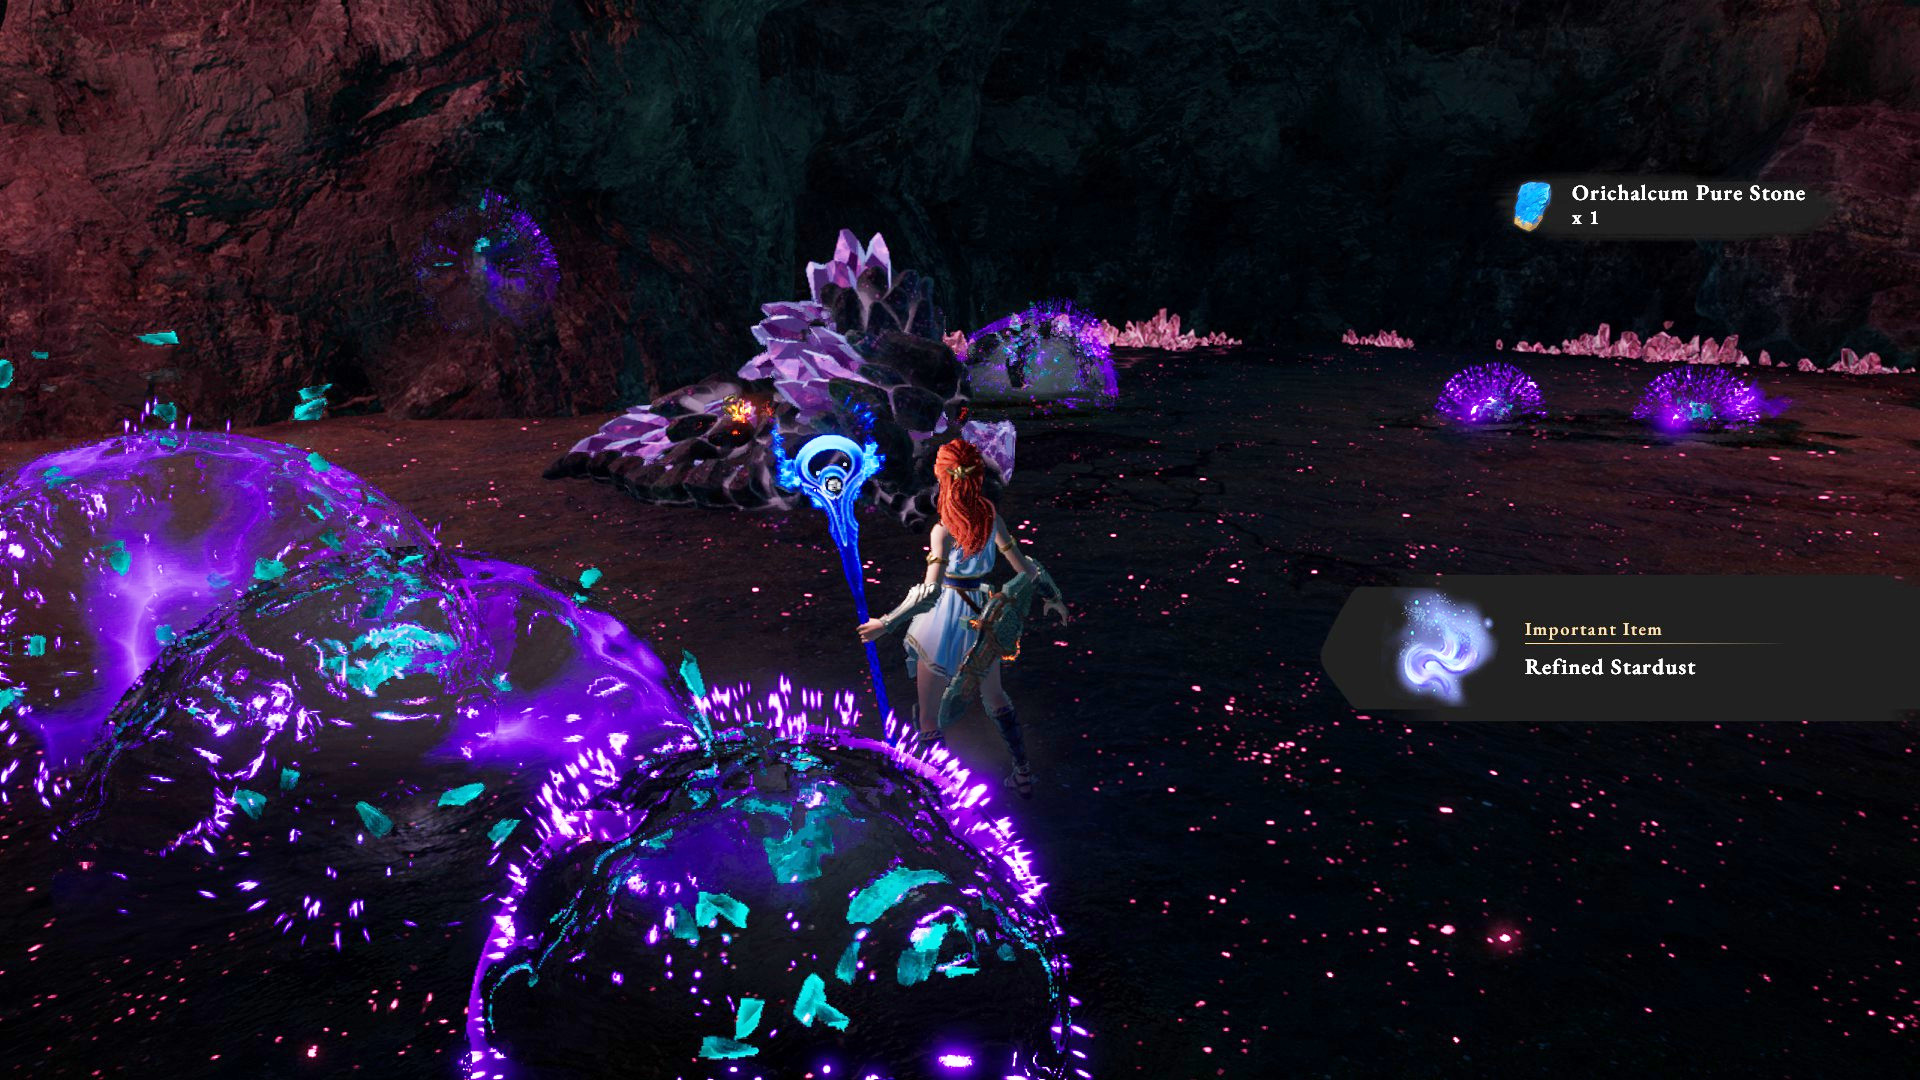
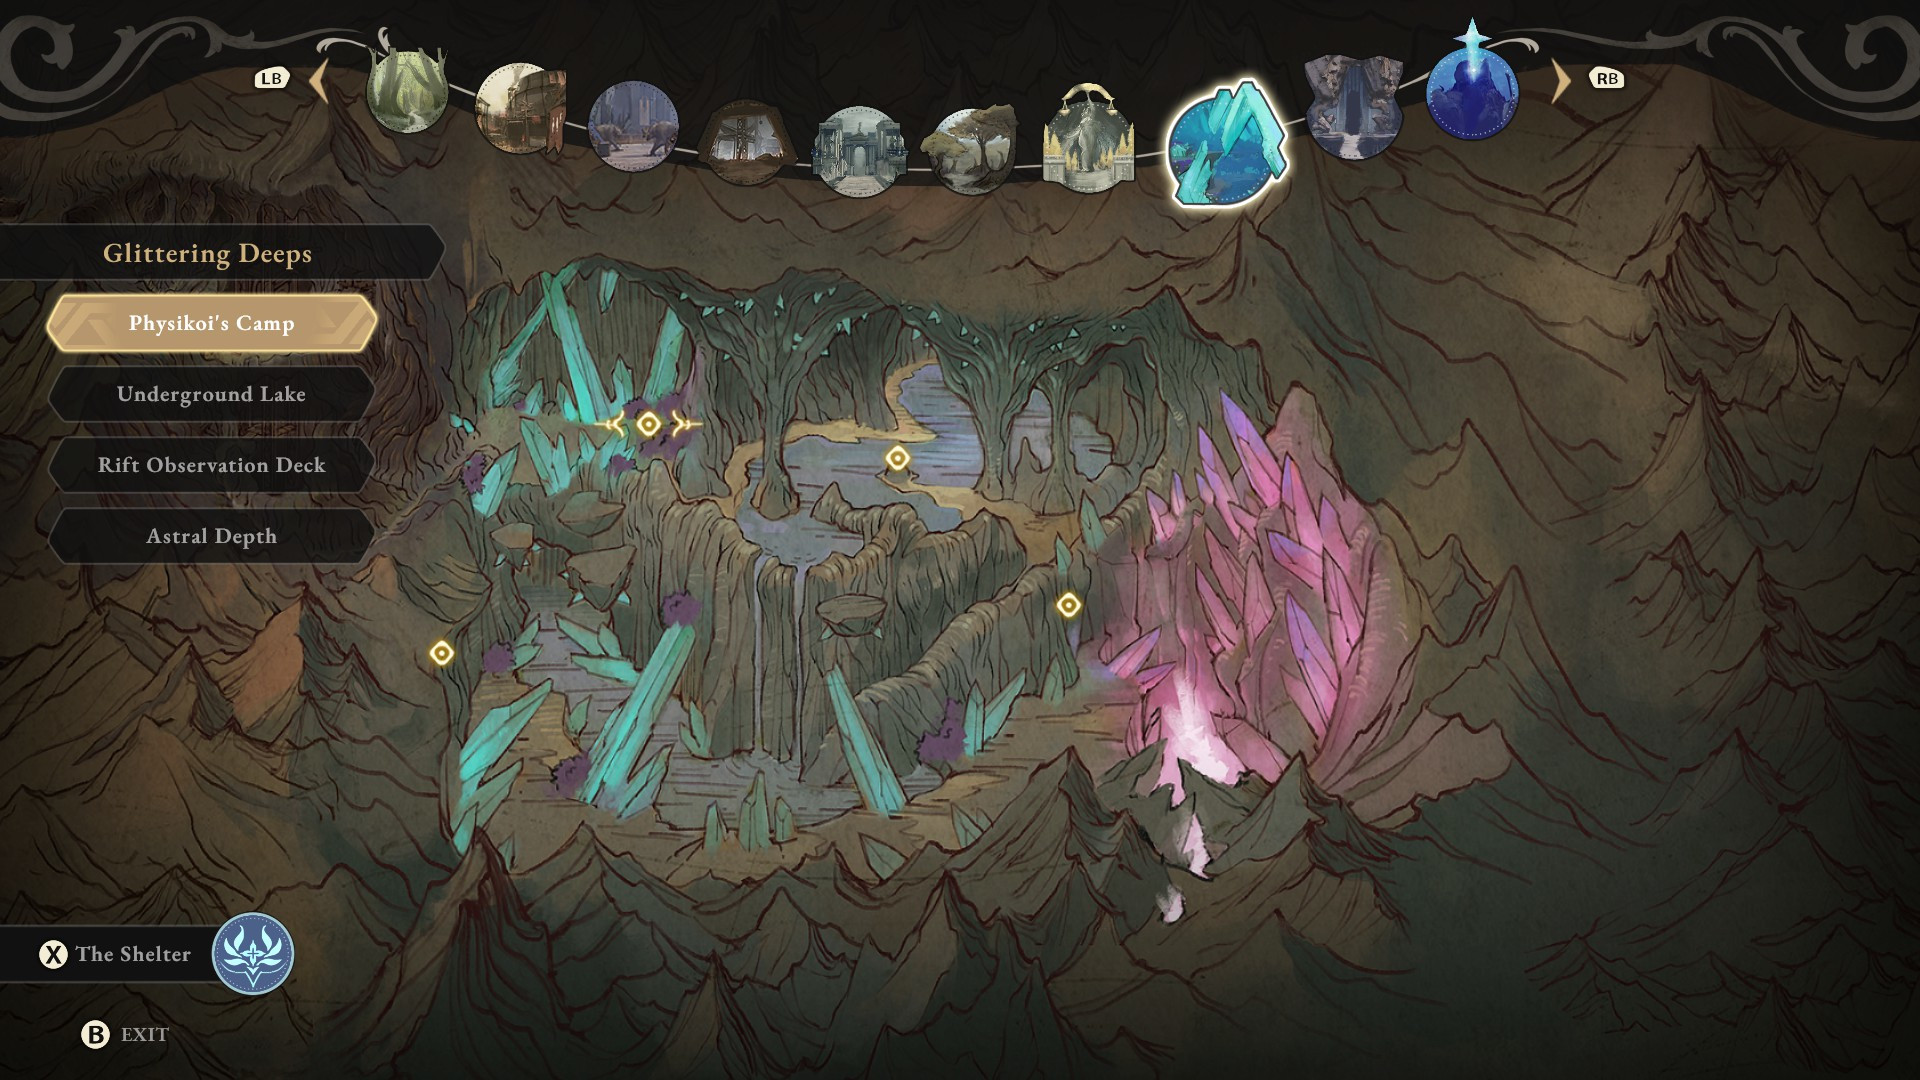
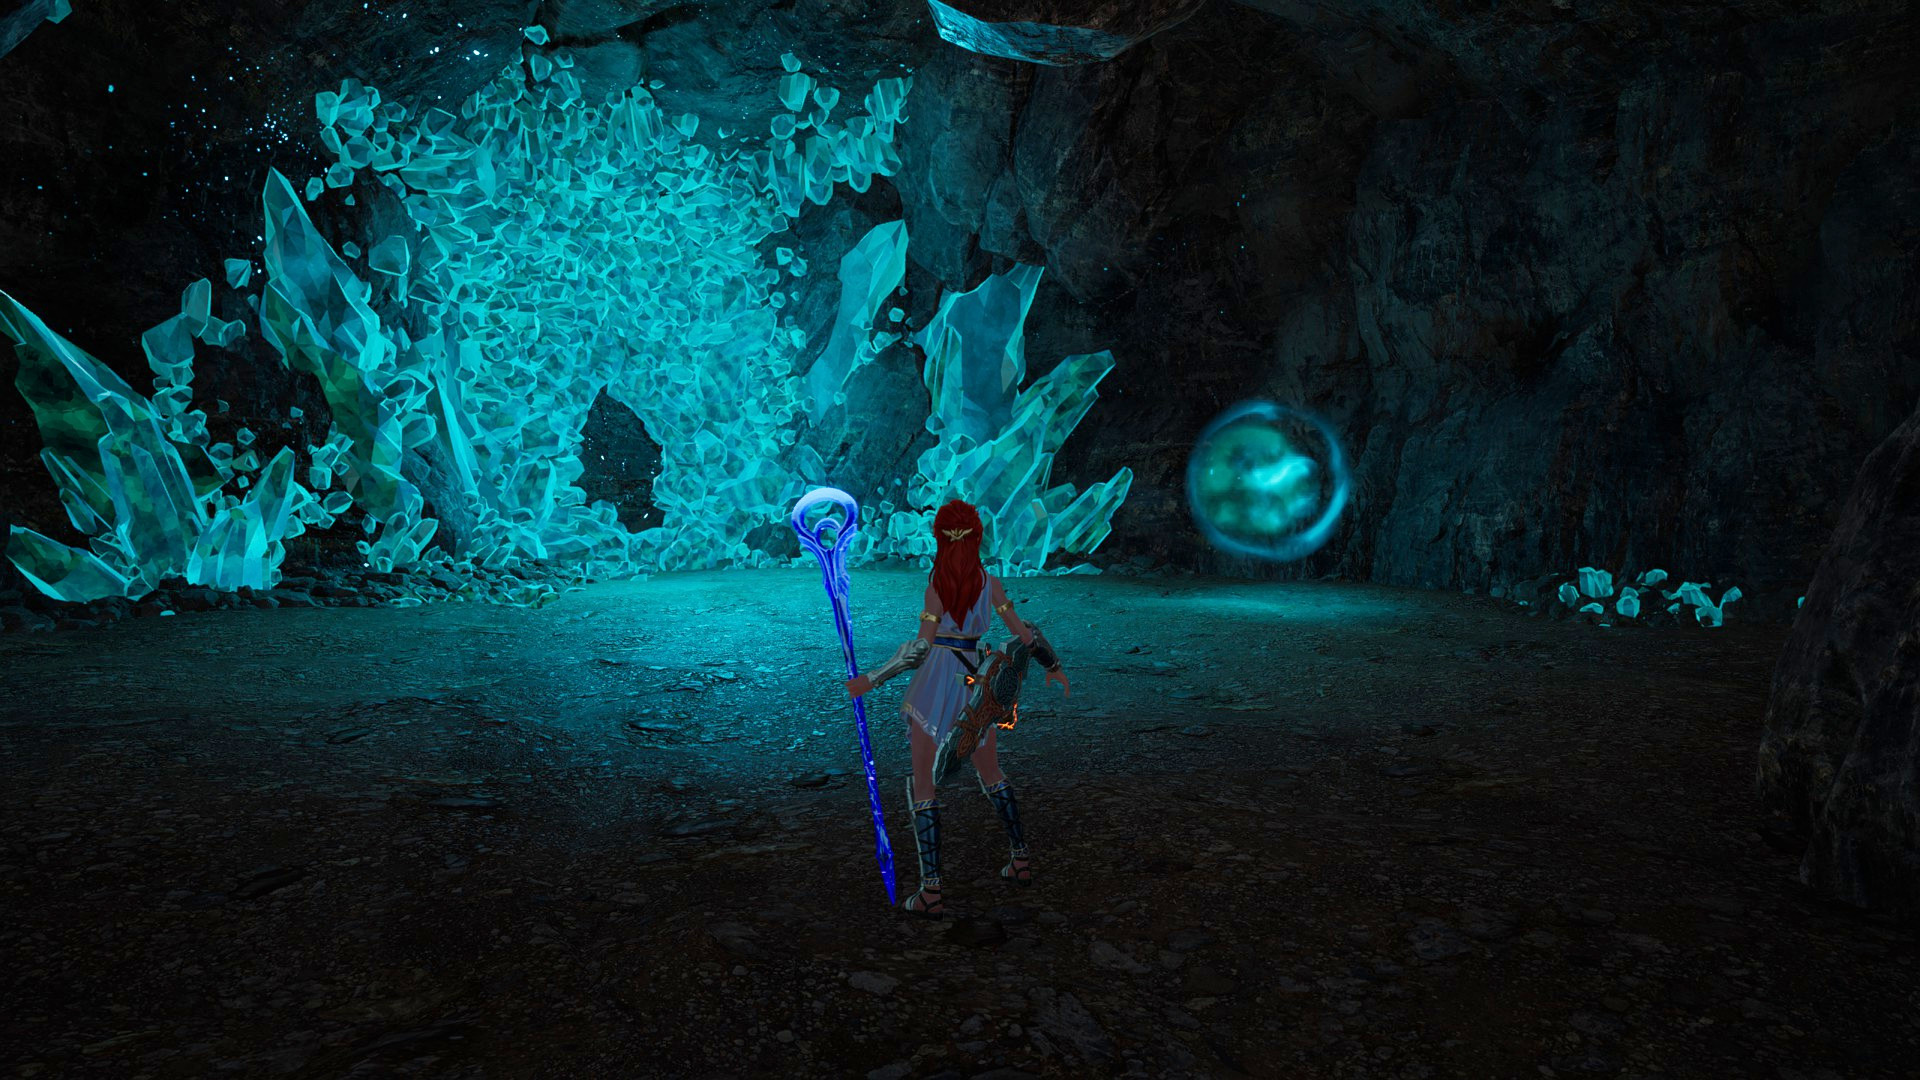
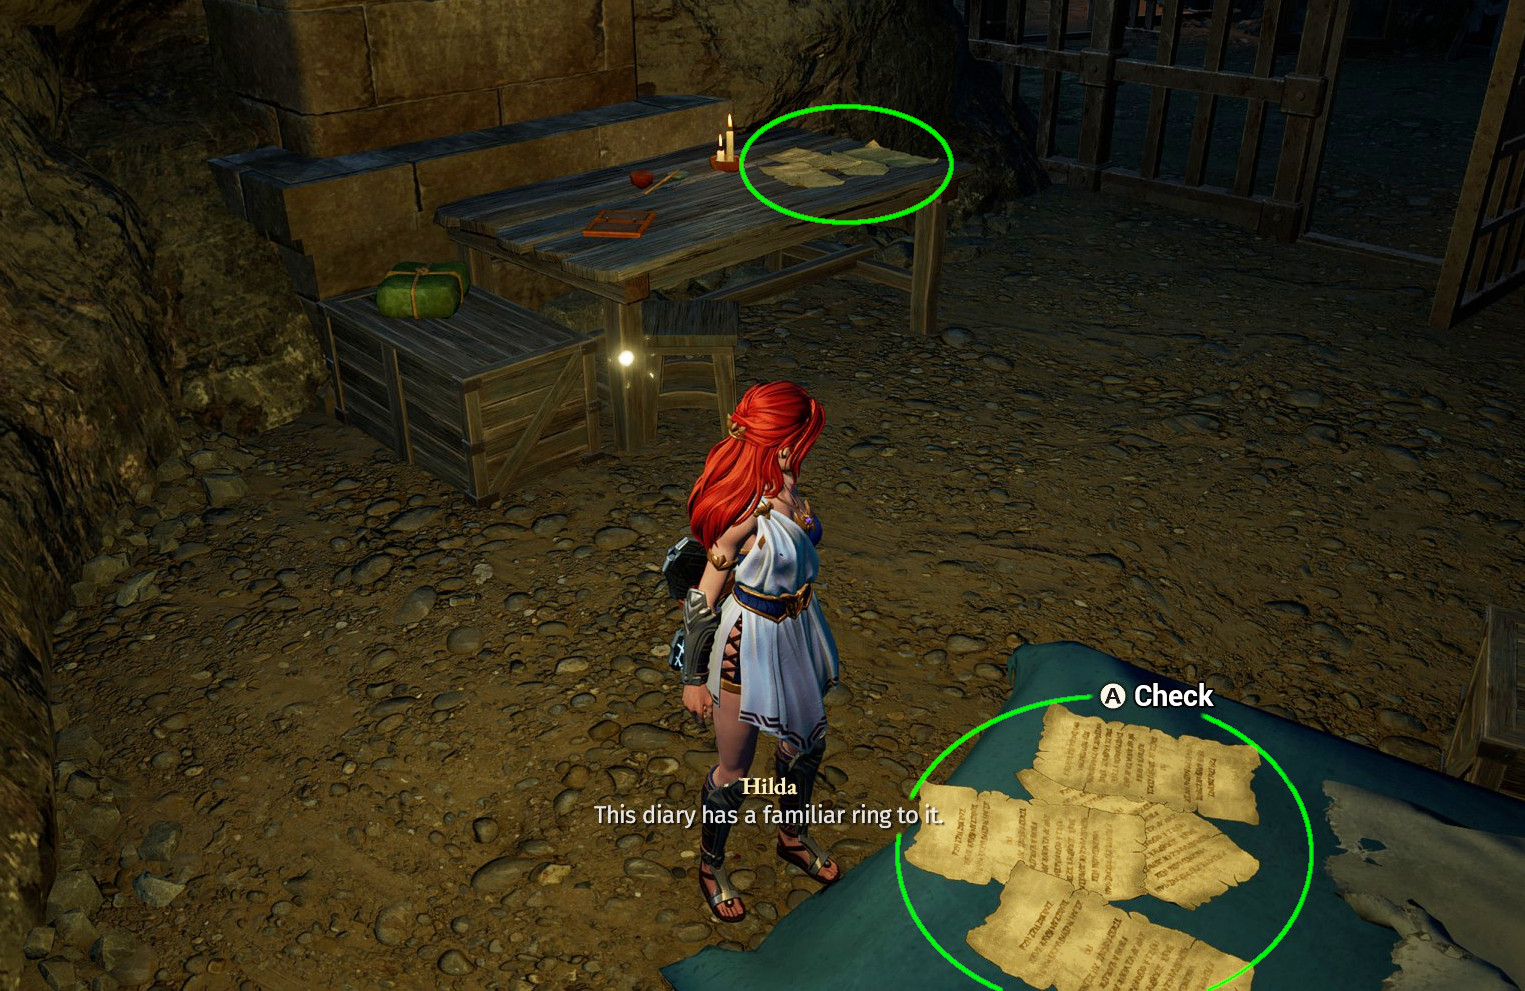
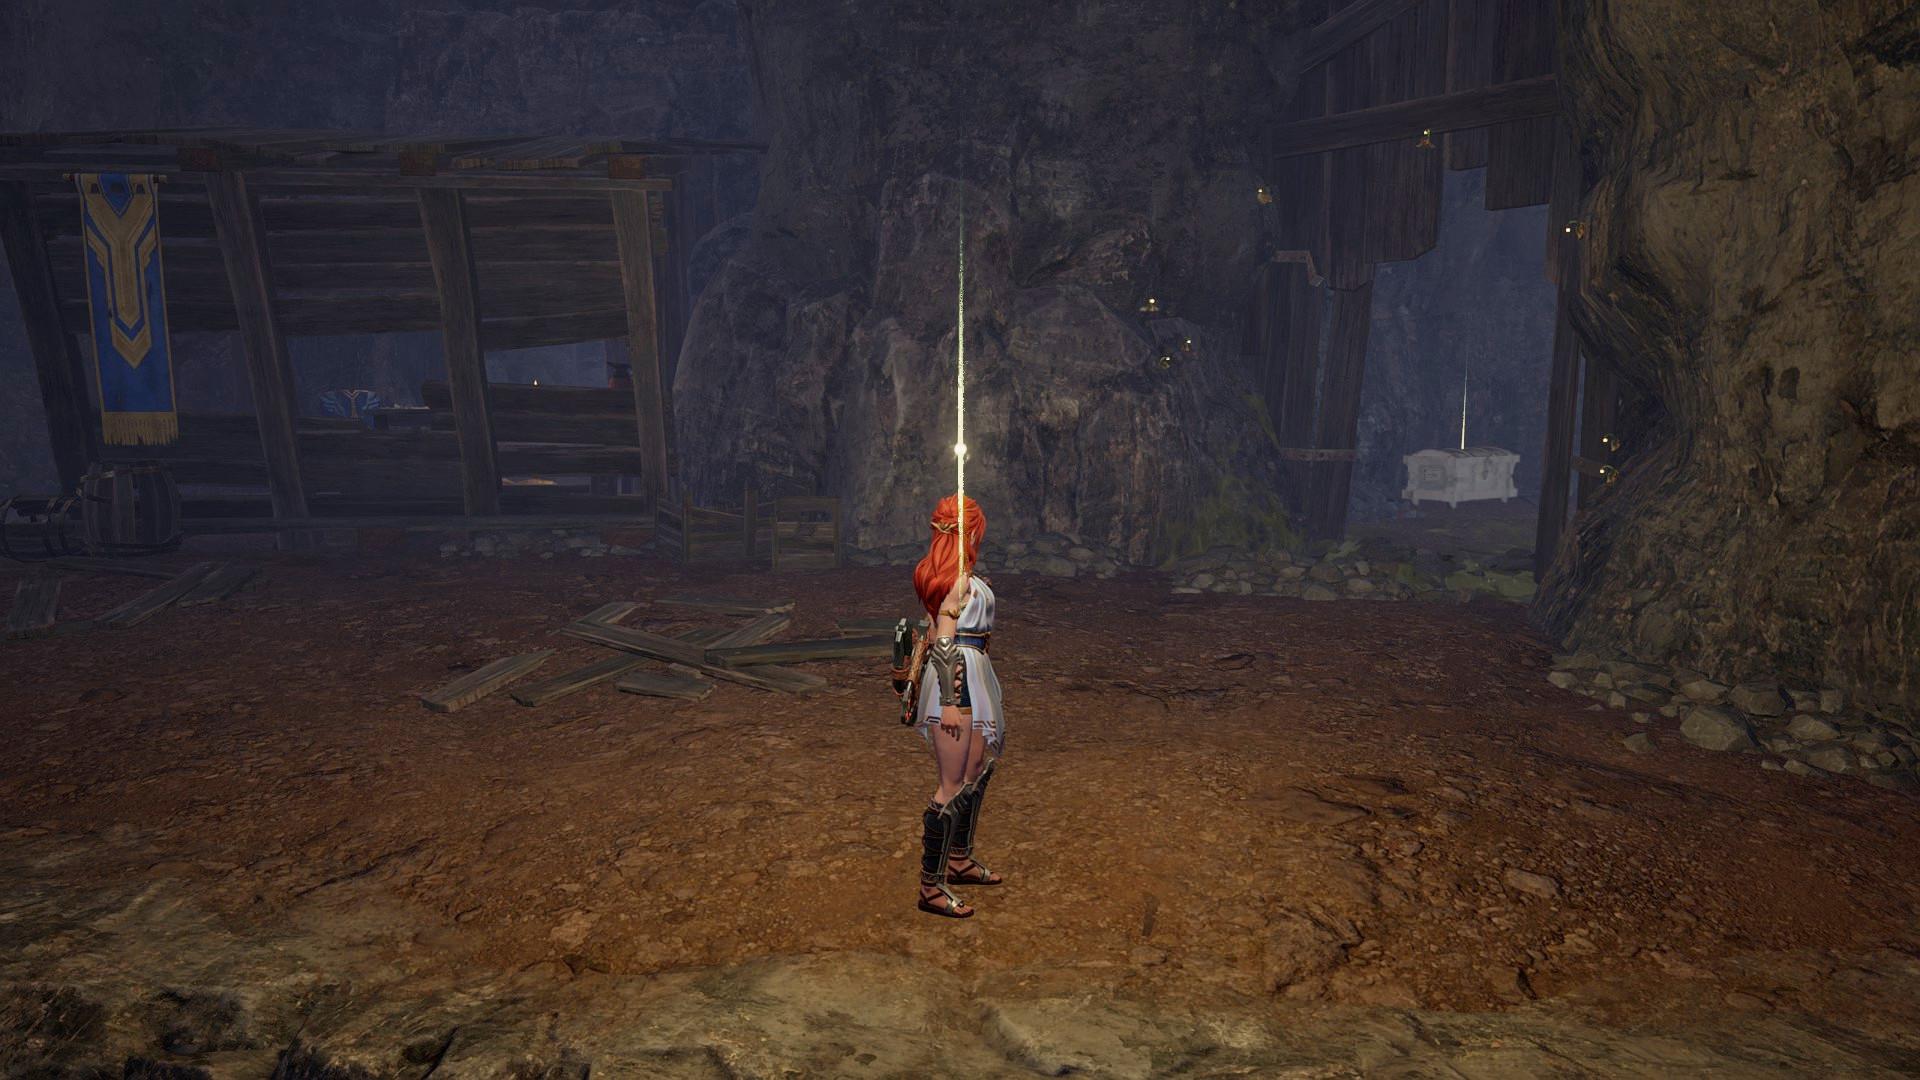
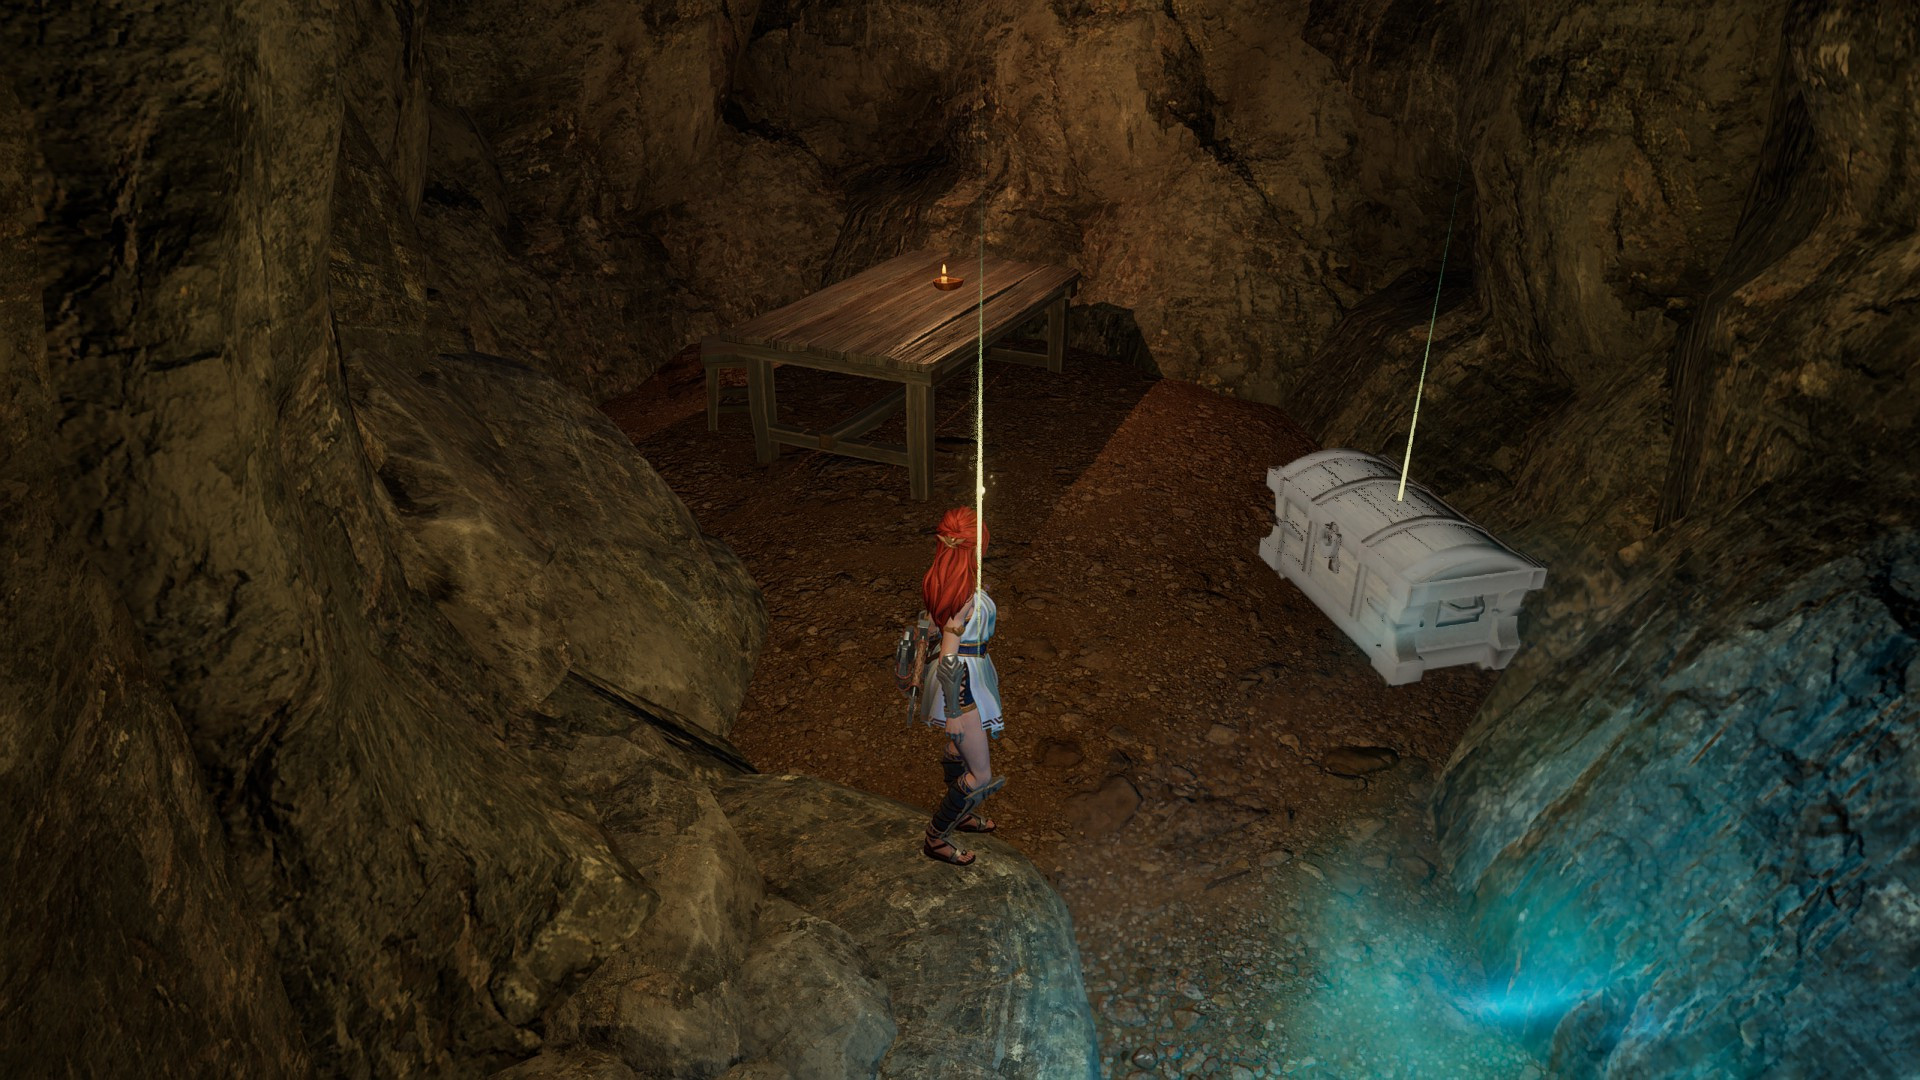
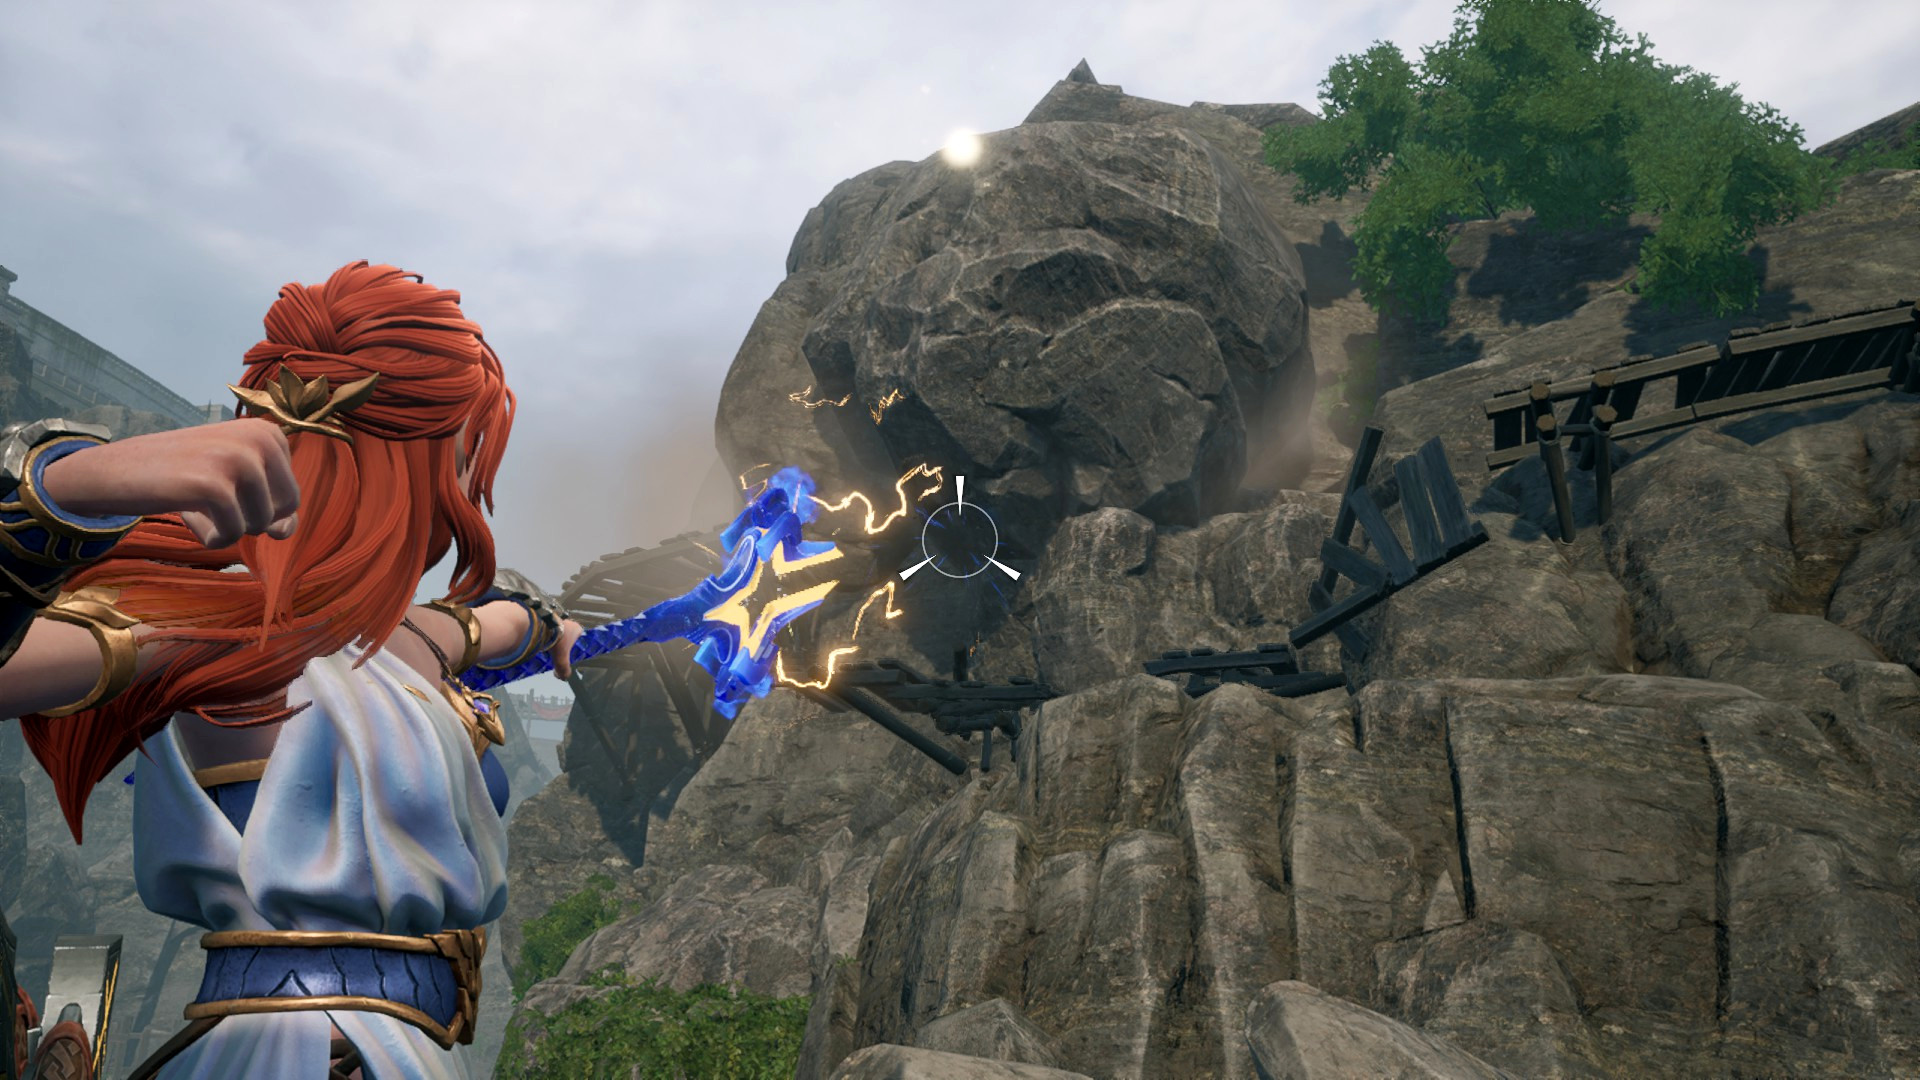
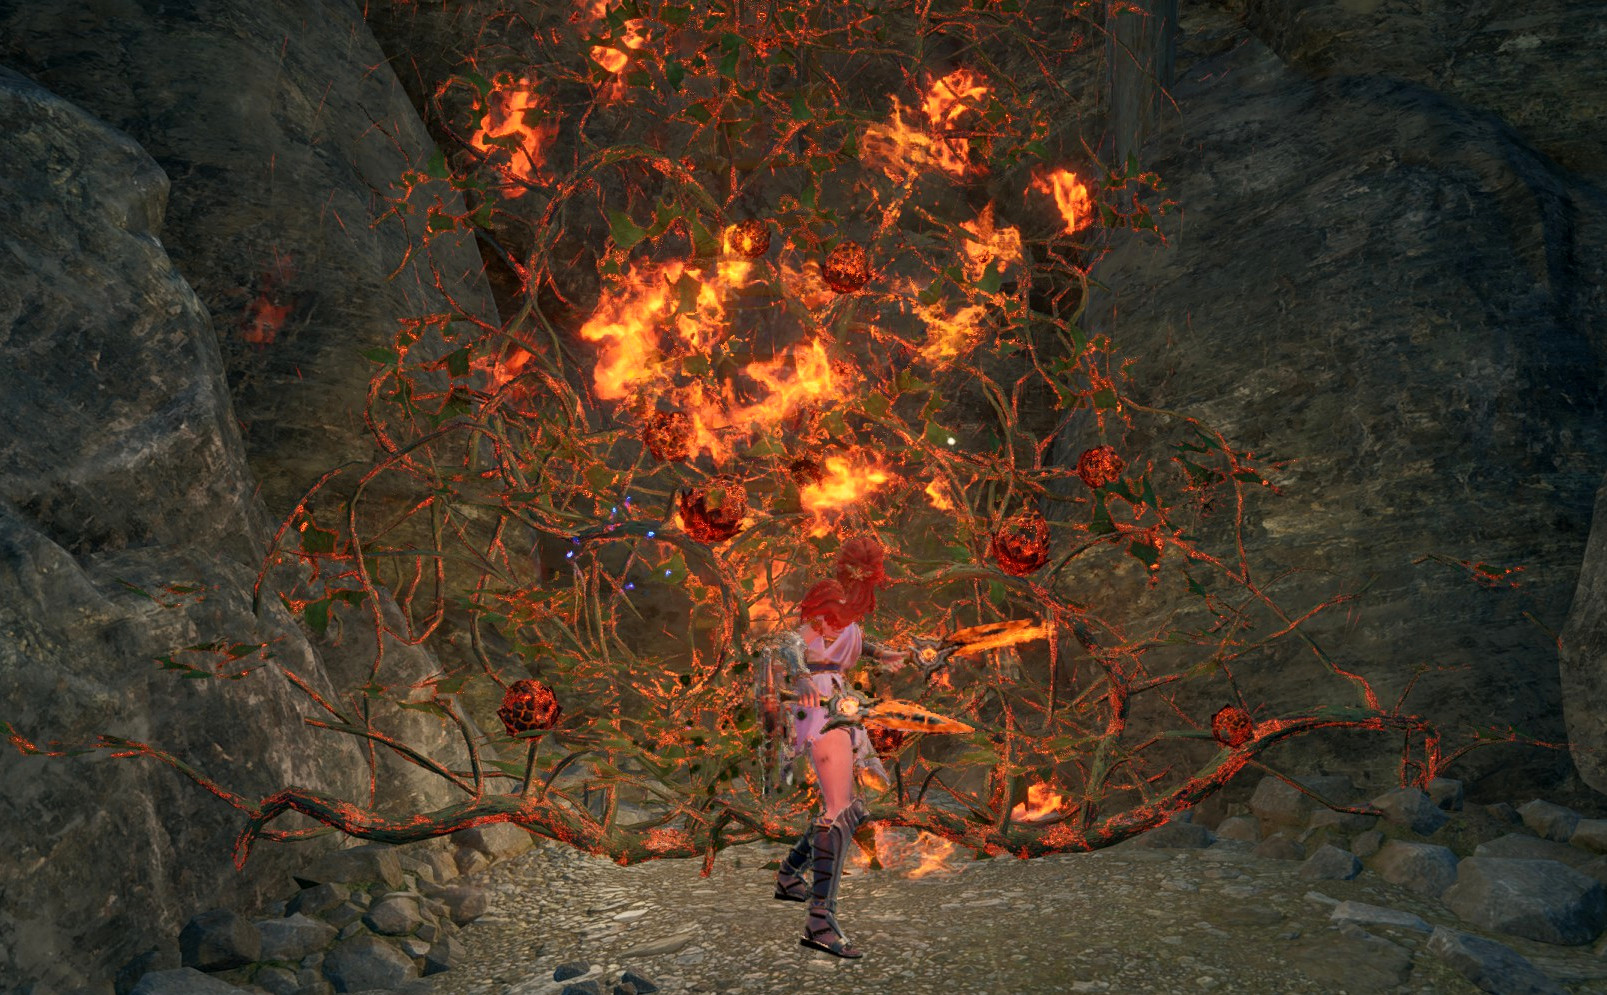
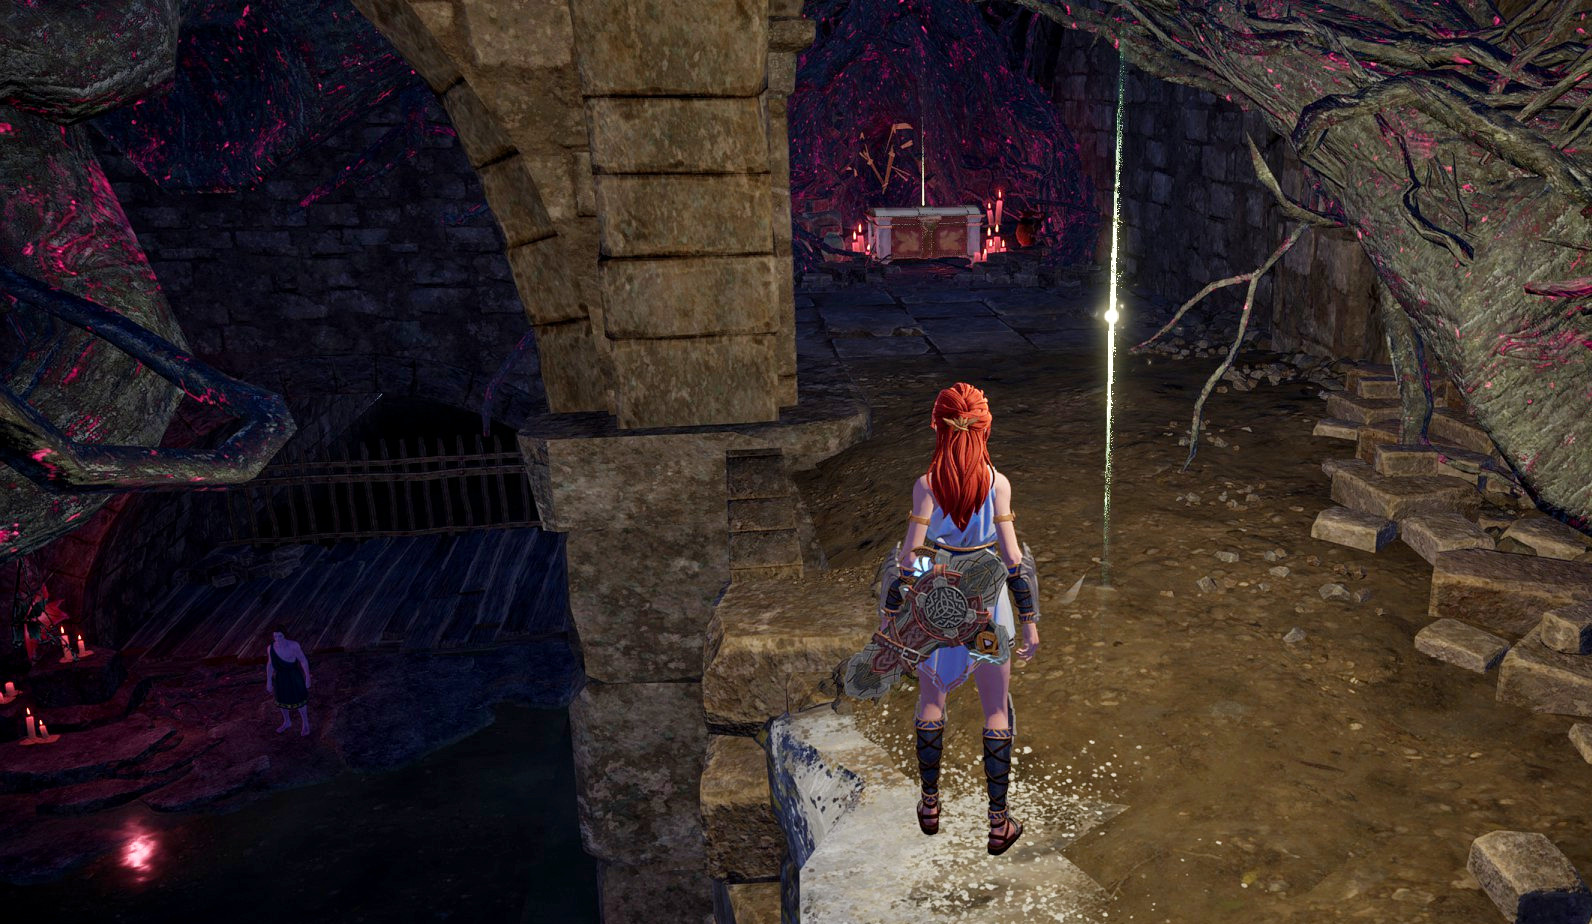
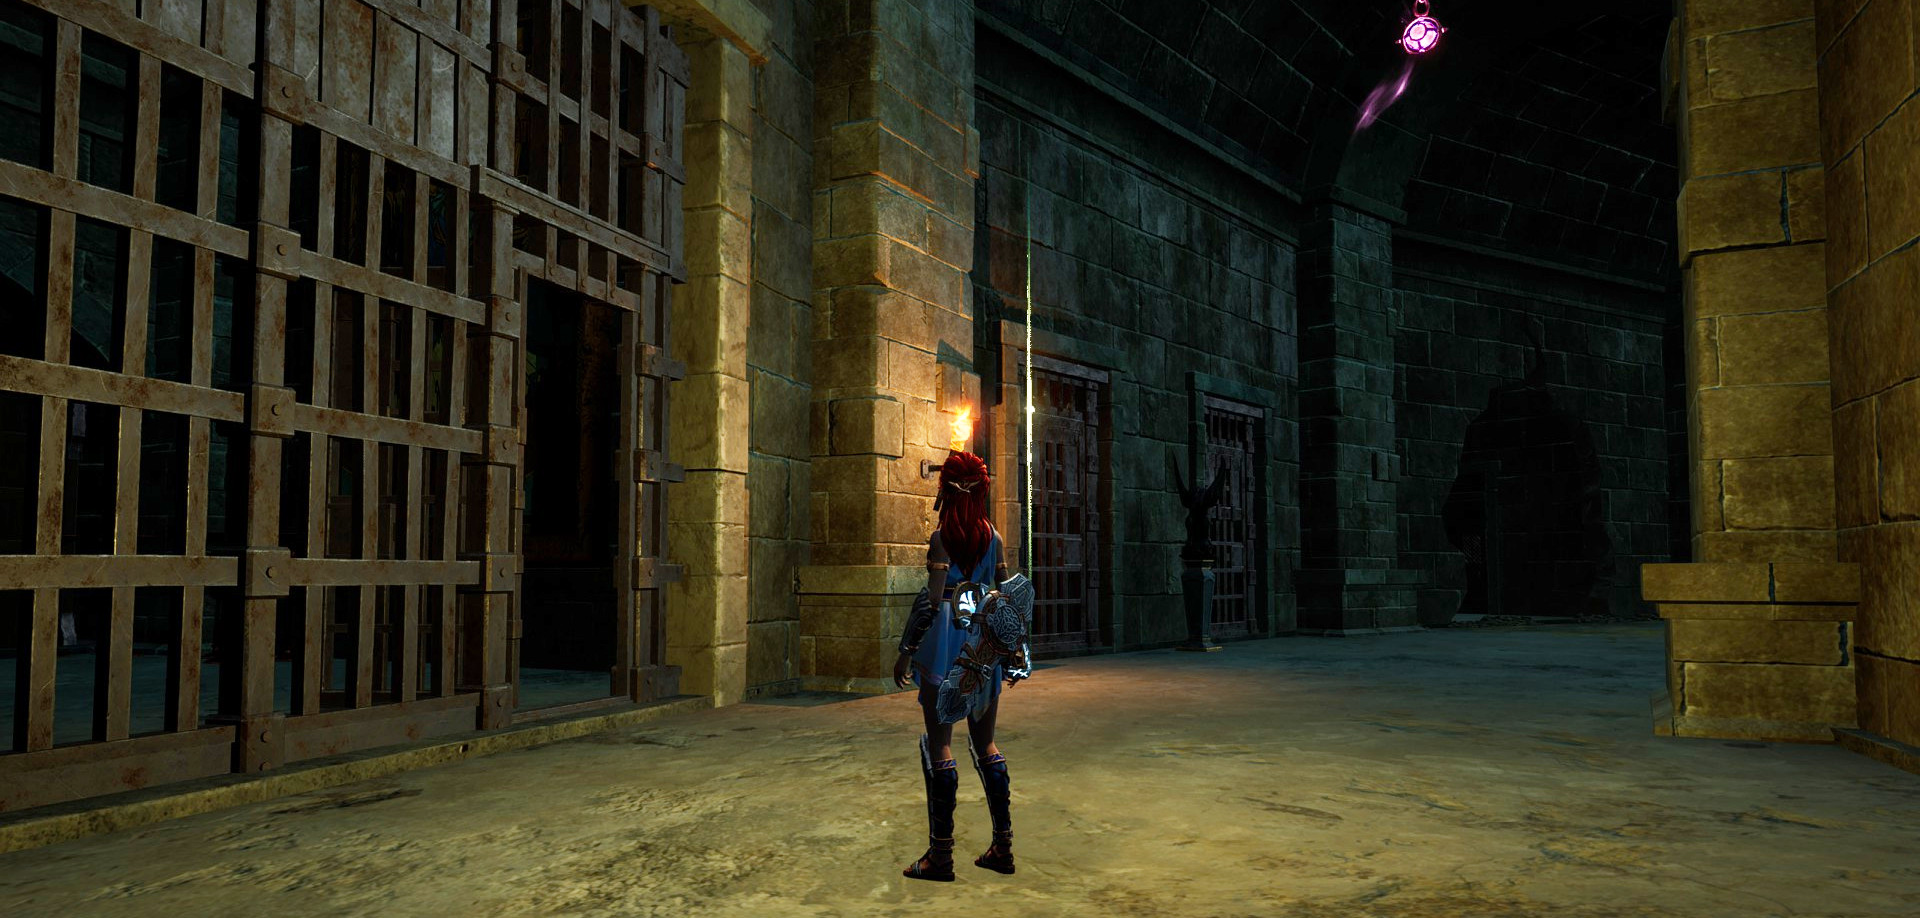
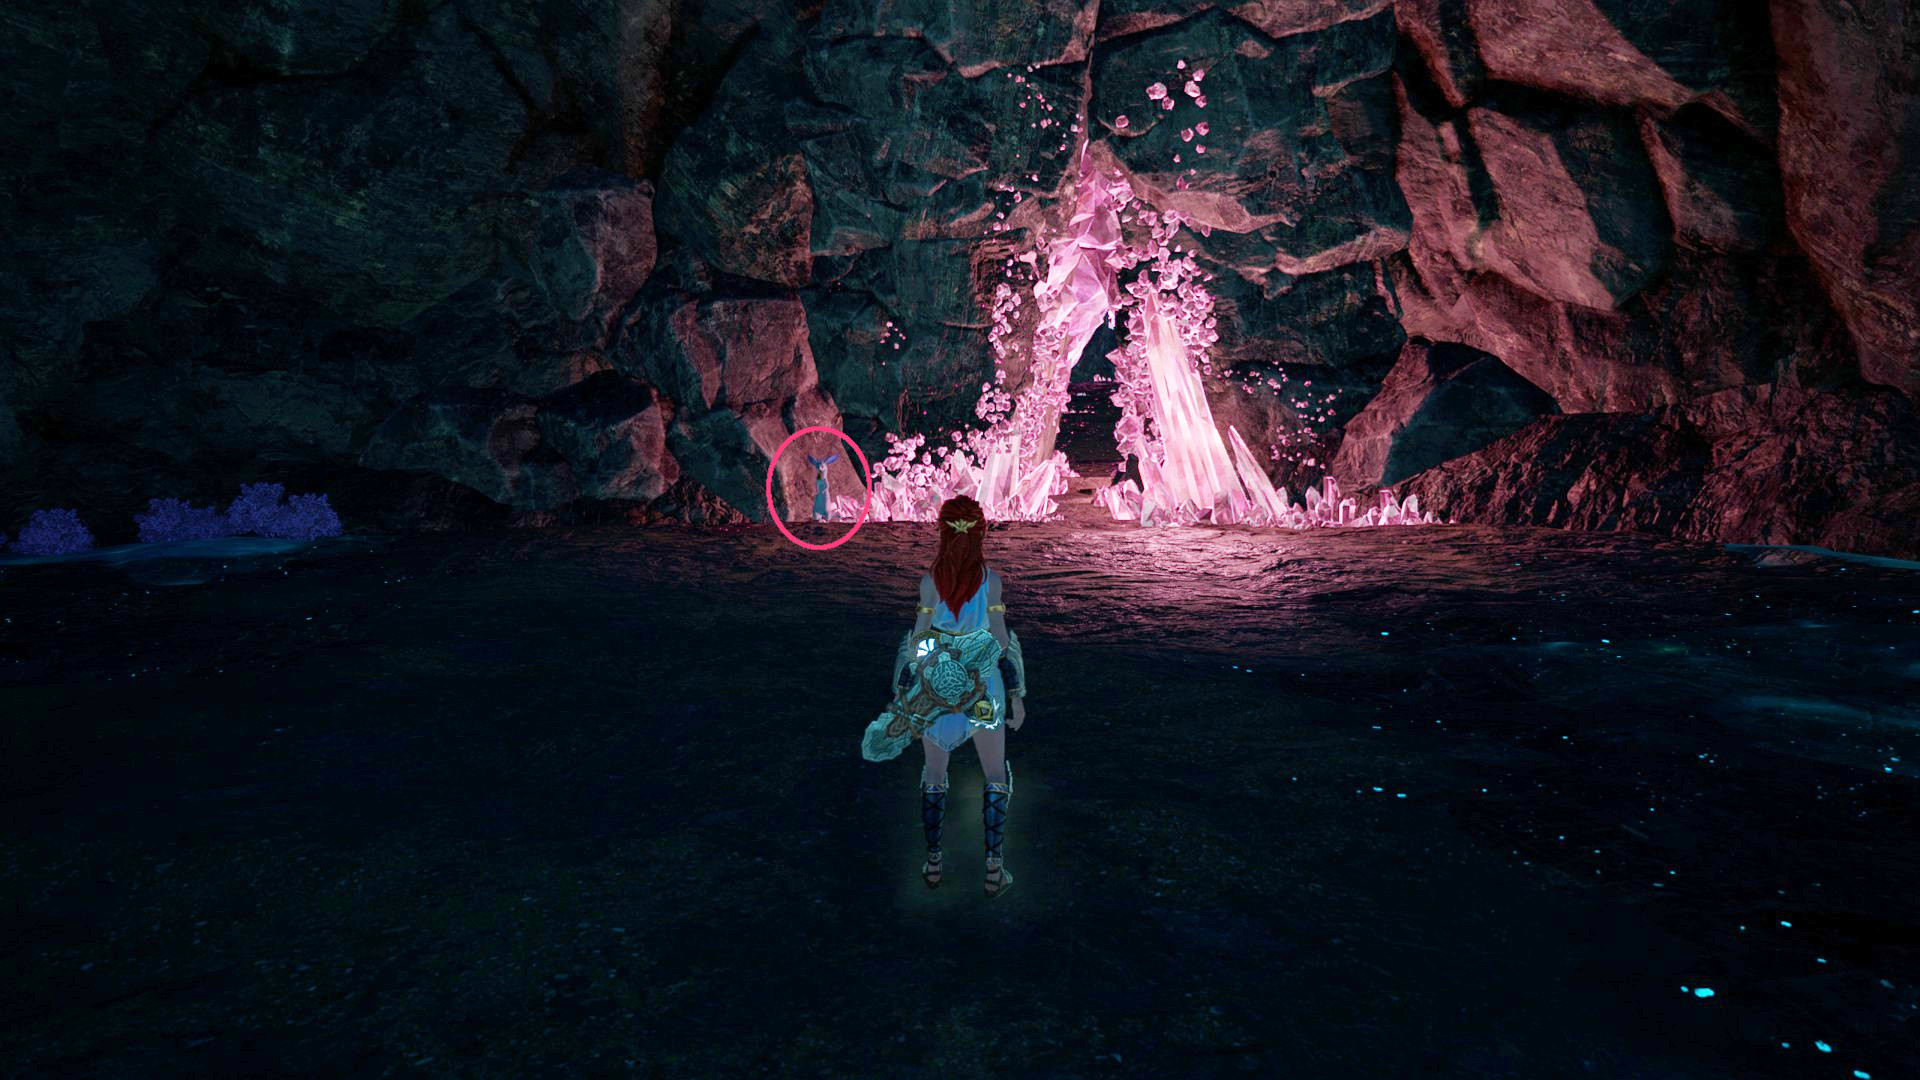
for my playthrough, the rock formation didnt move in the pink cave , i hit it , threw bombs , nothing . probably is a bug
SotiCoto  [author] 11 Feb @ 12:03pm 
@HY417 : Thanks. I fixed a few now.
@Soul : I see, but I'll leave it in all the same for completeness.
Soul 10 Feb @ 9:49am 
For the "Requiem" achievement, you don't need to do everything in Part 1 of this guide.
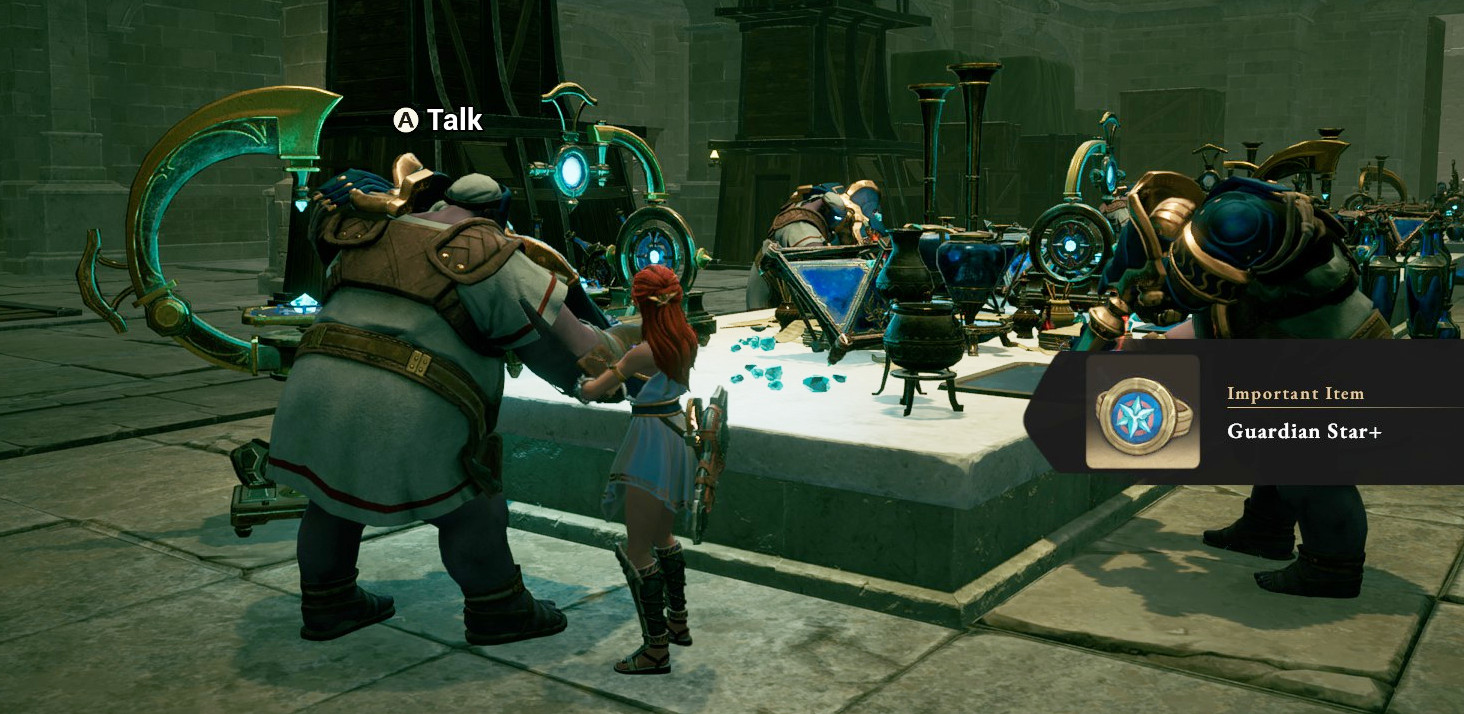
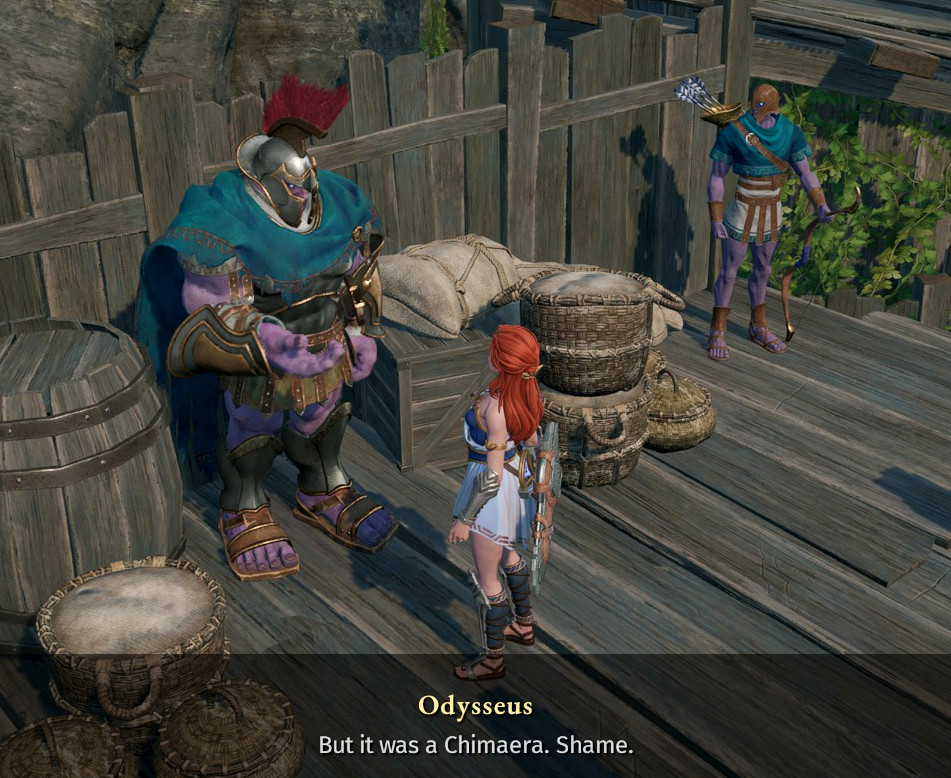
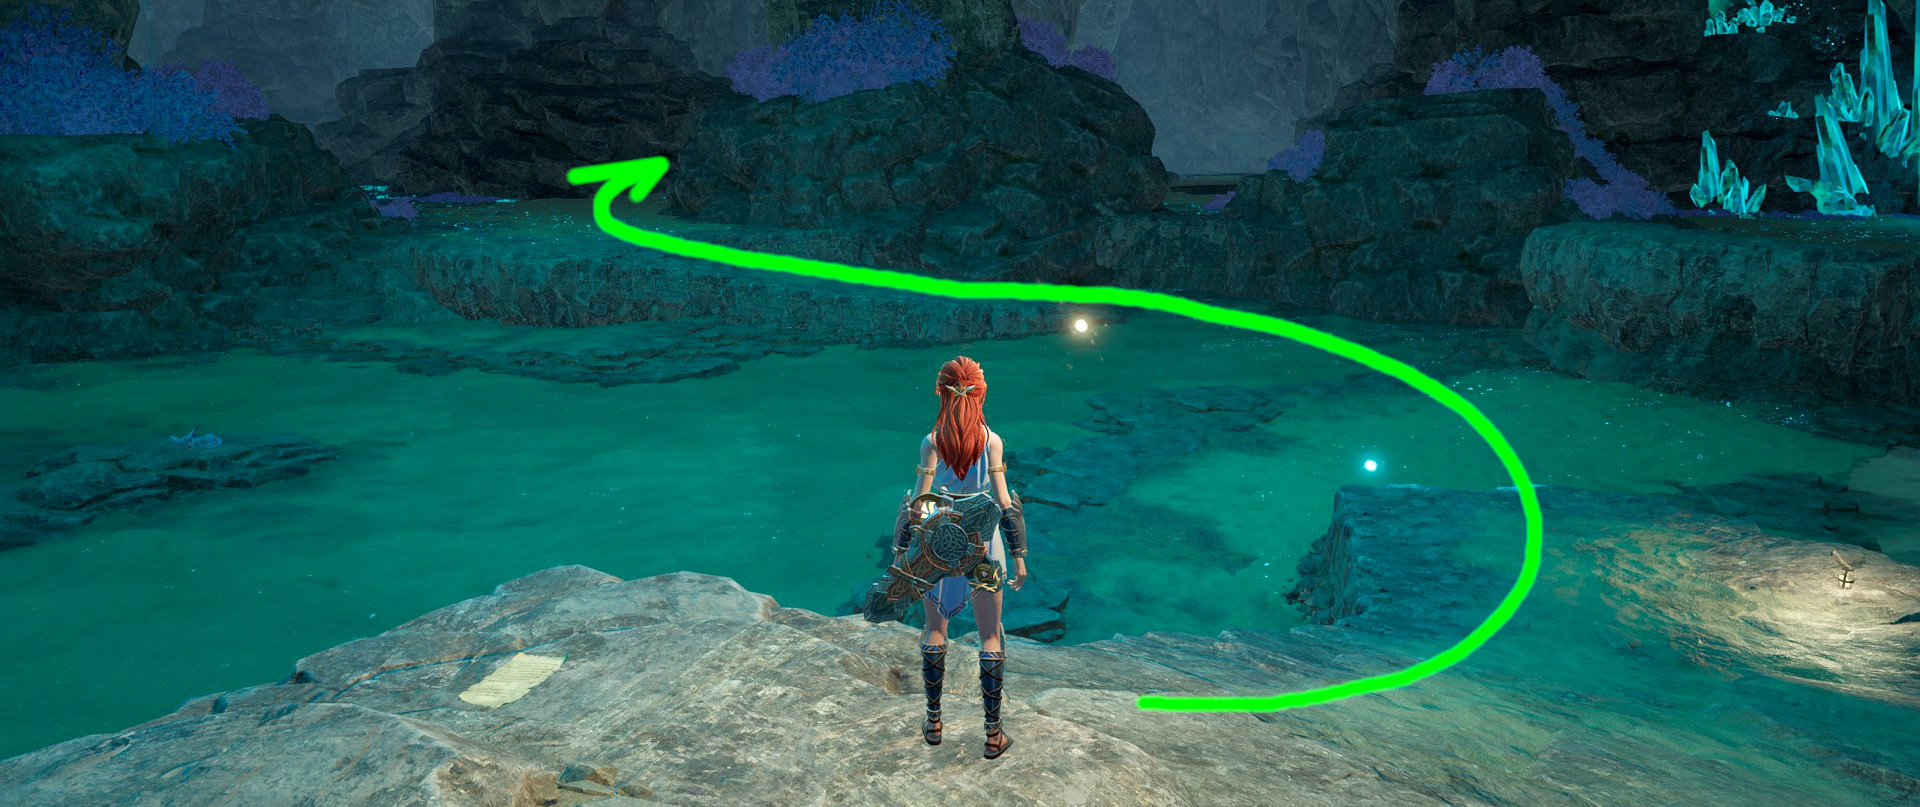
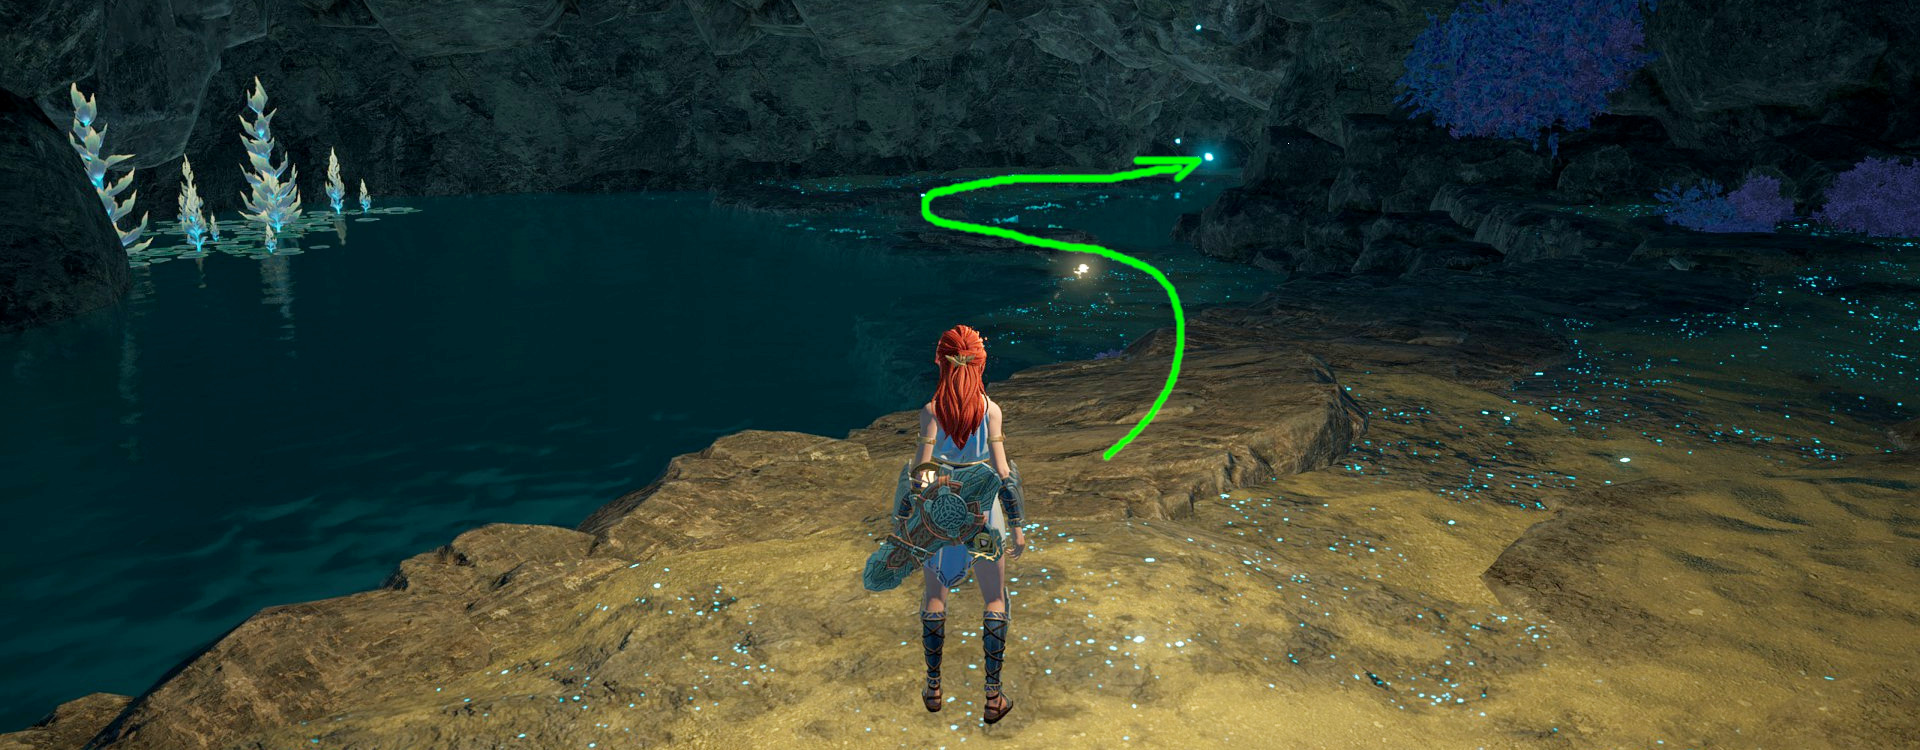
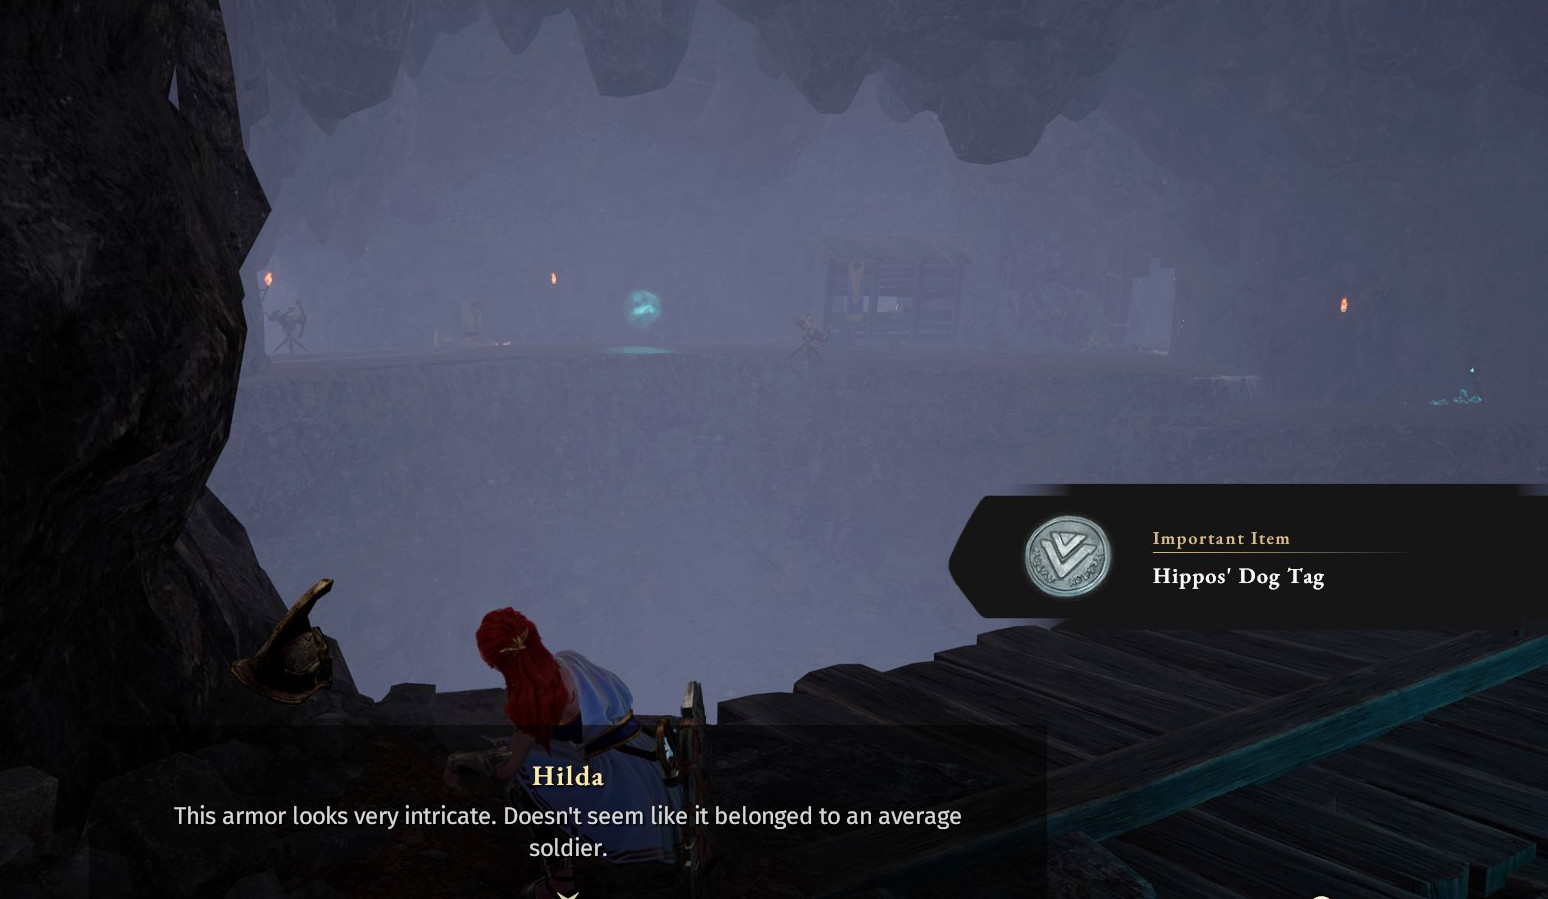
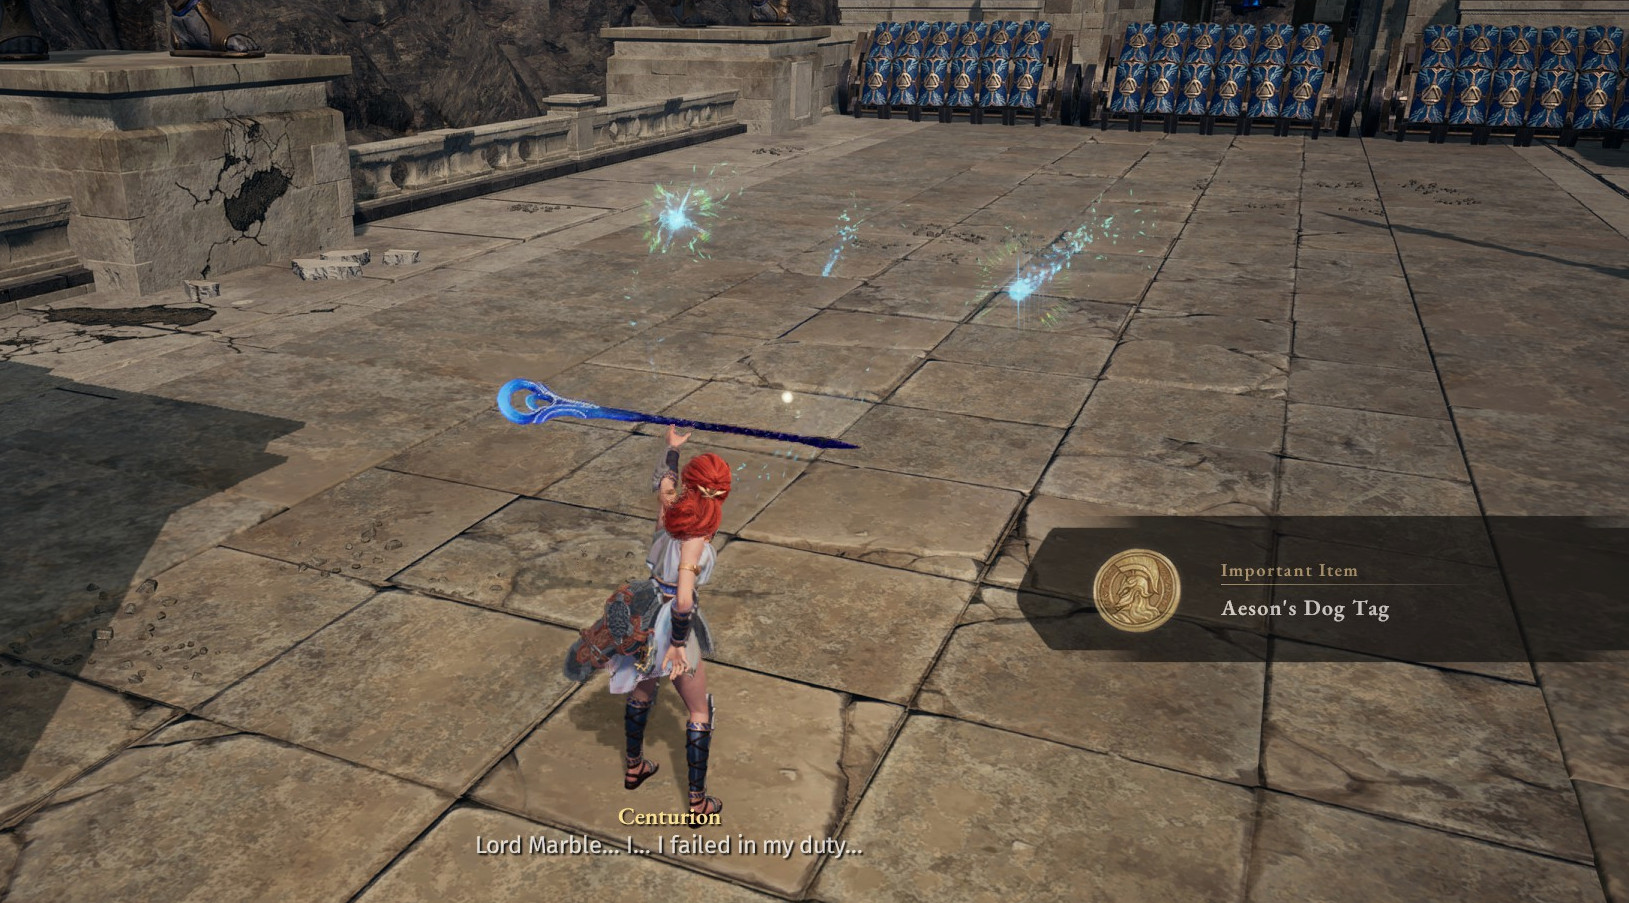
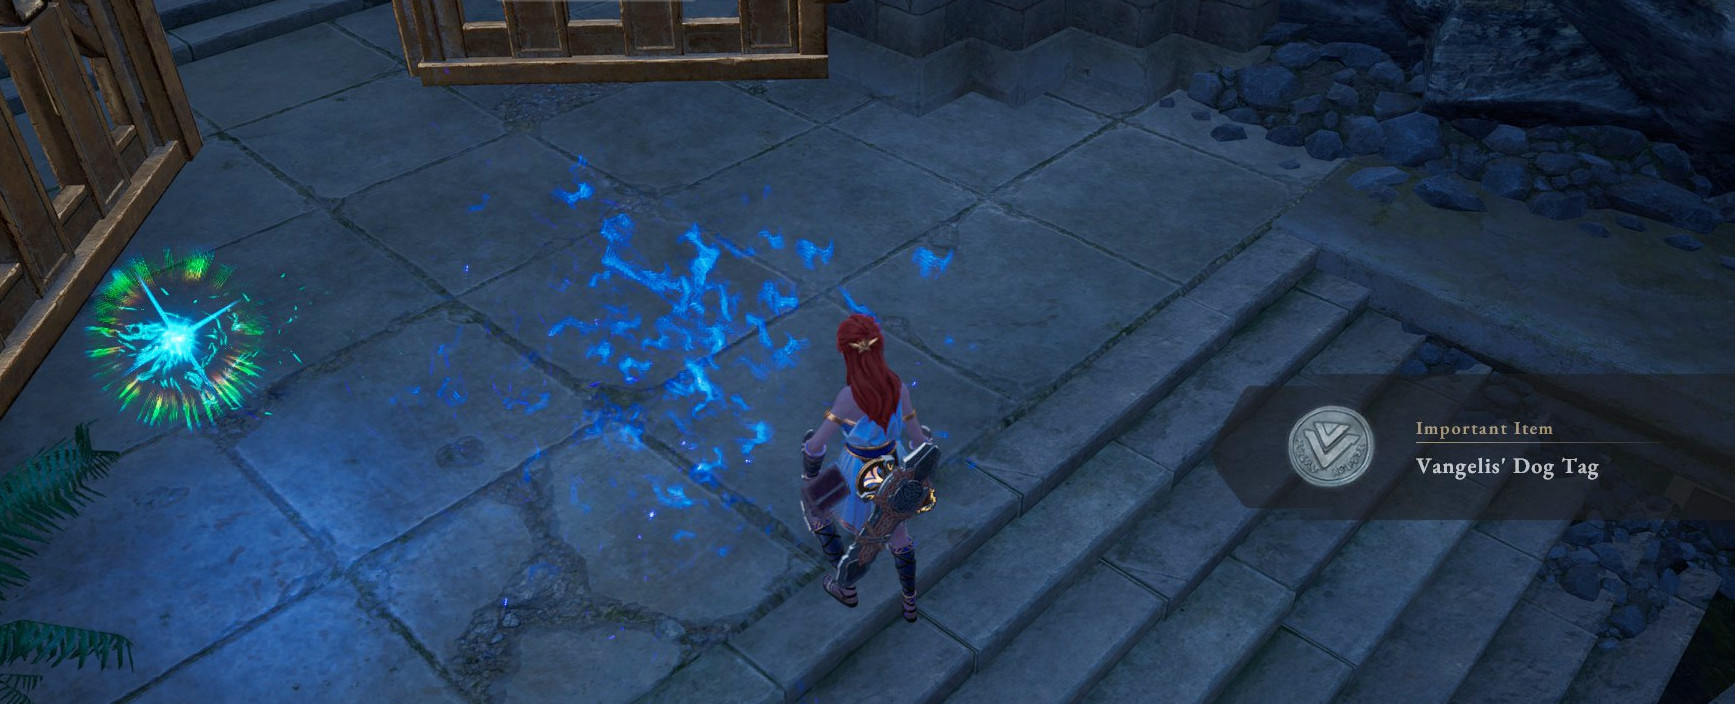
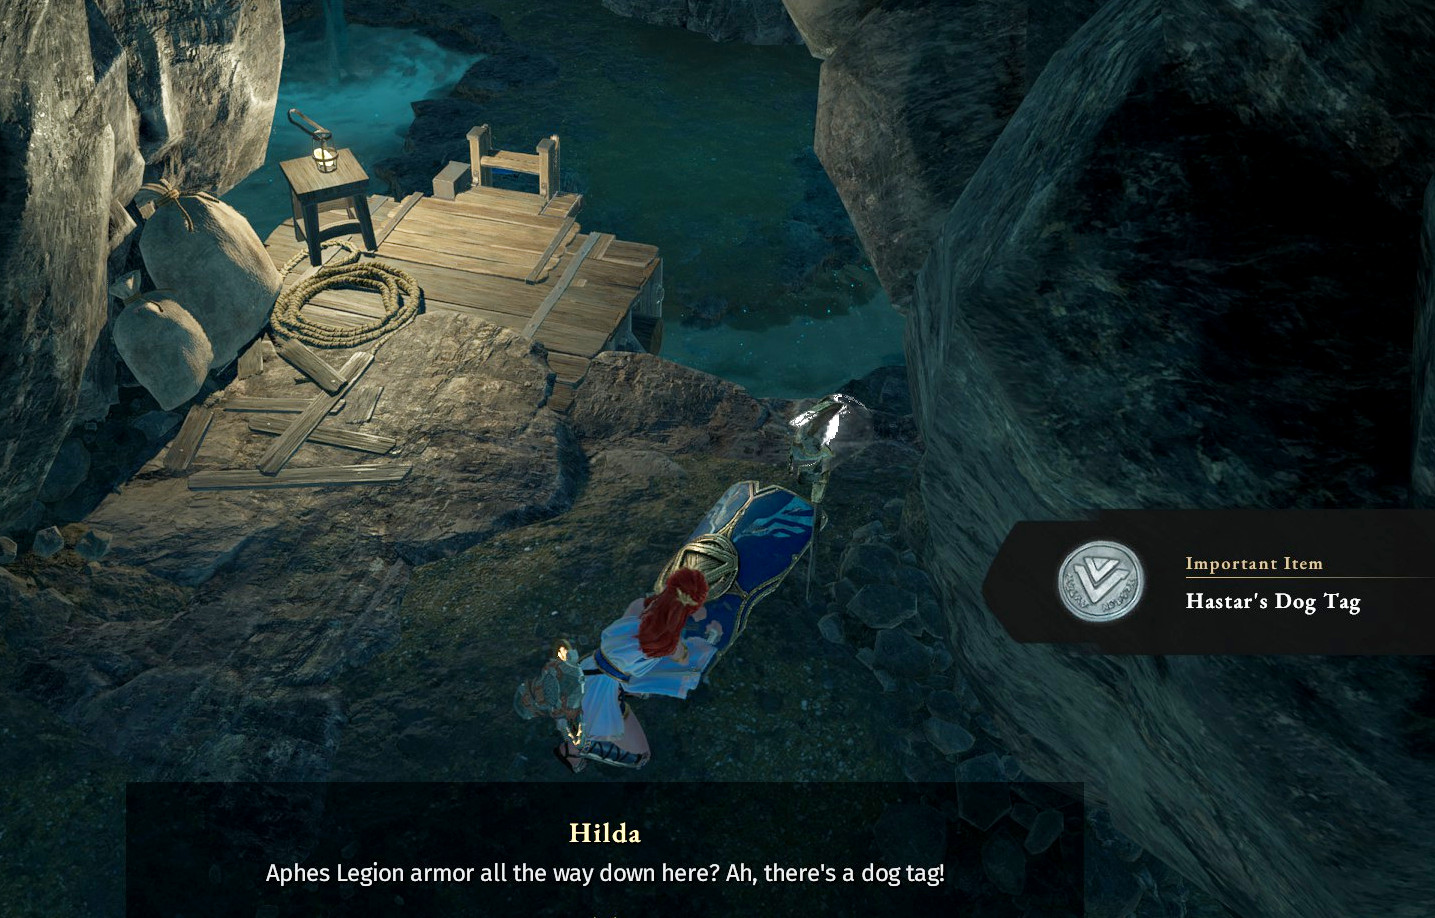
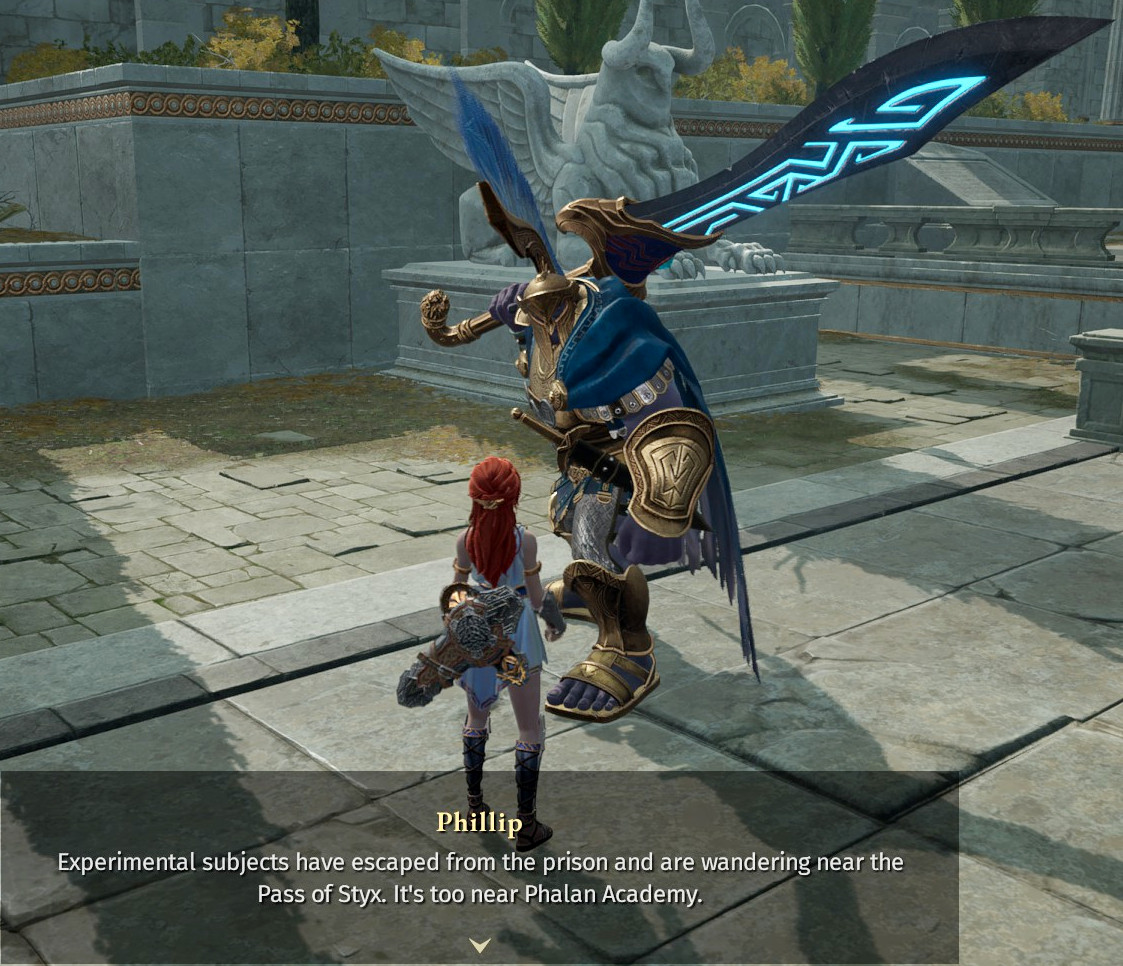
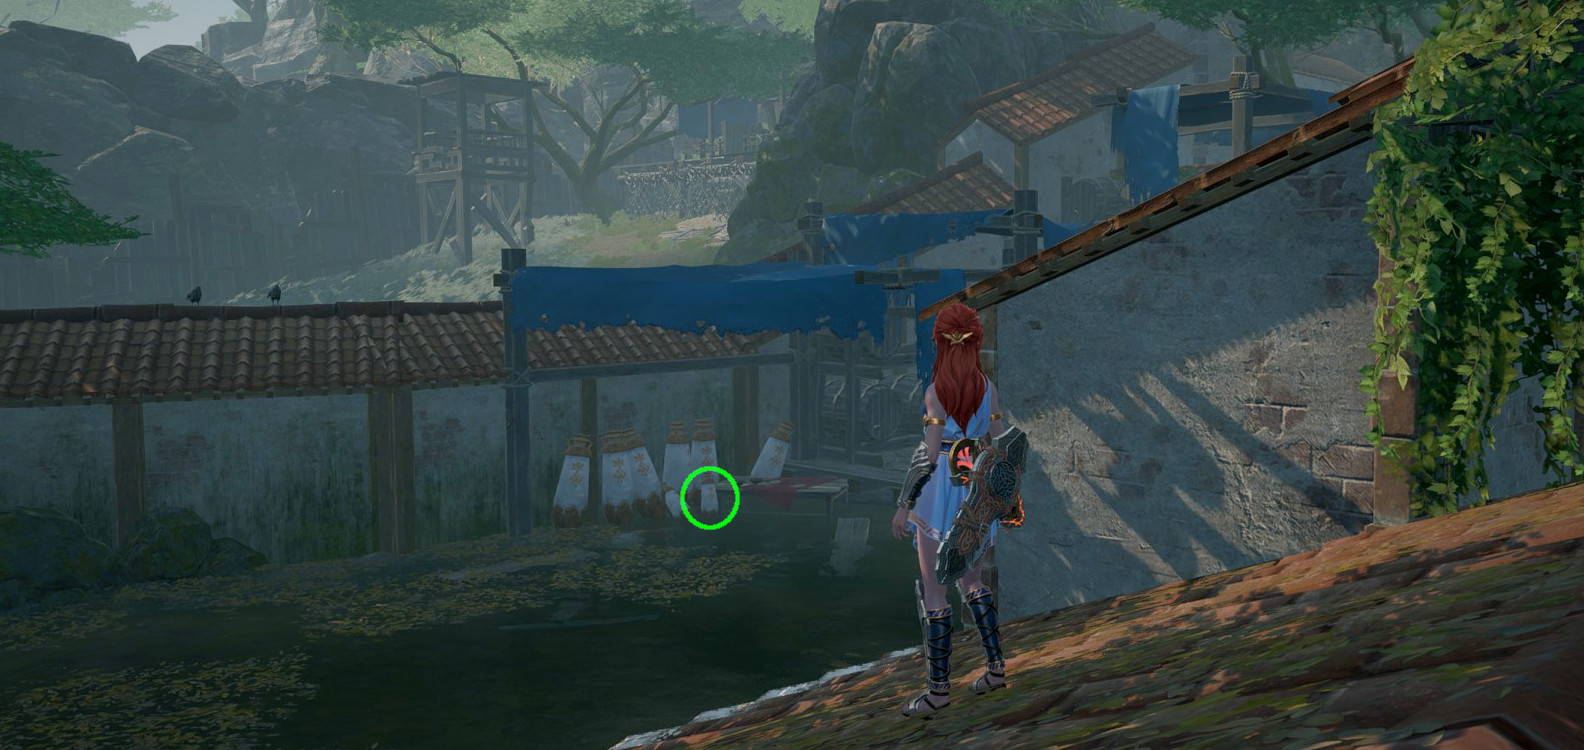
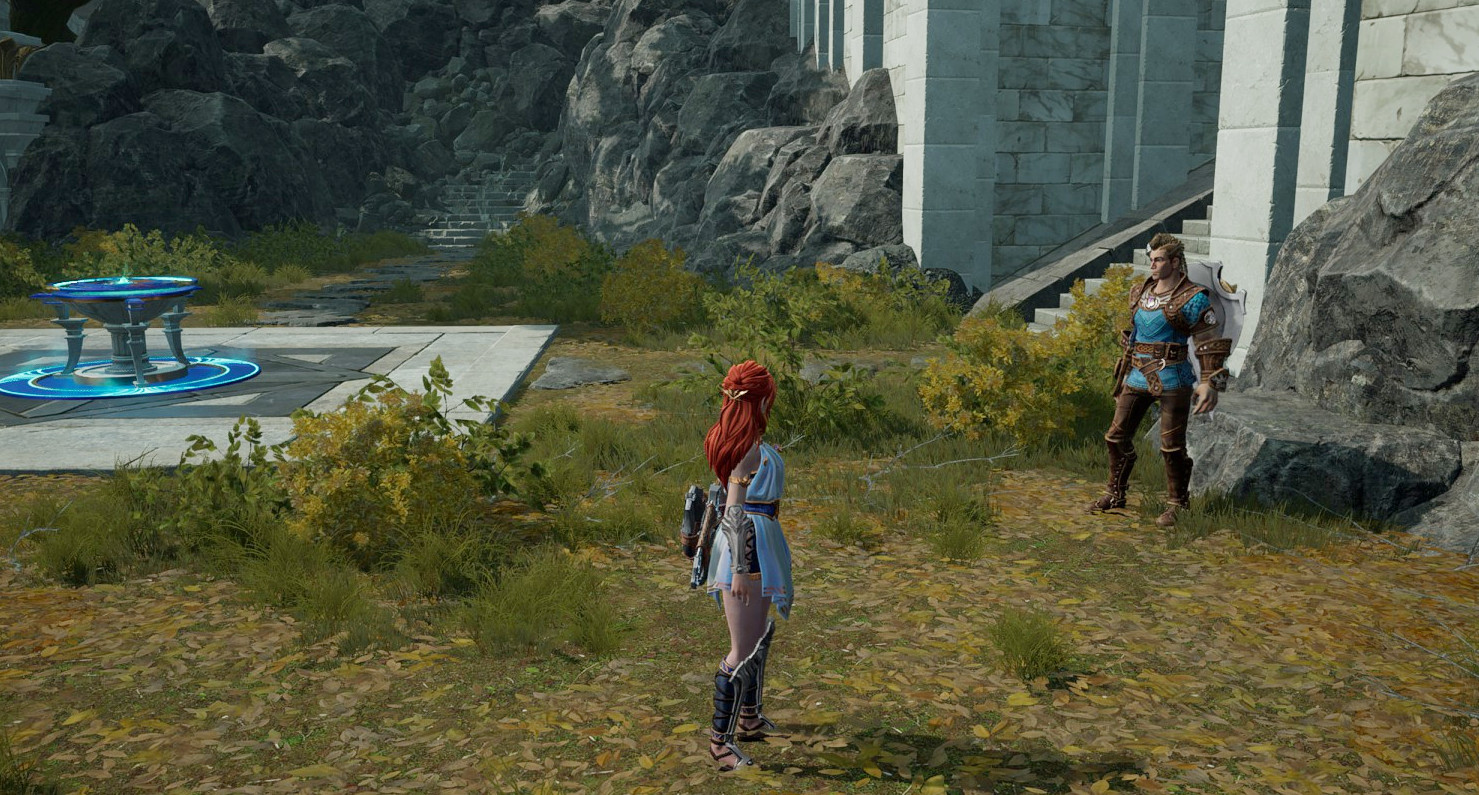
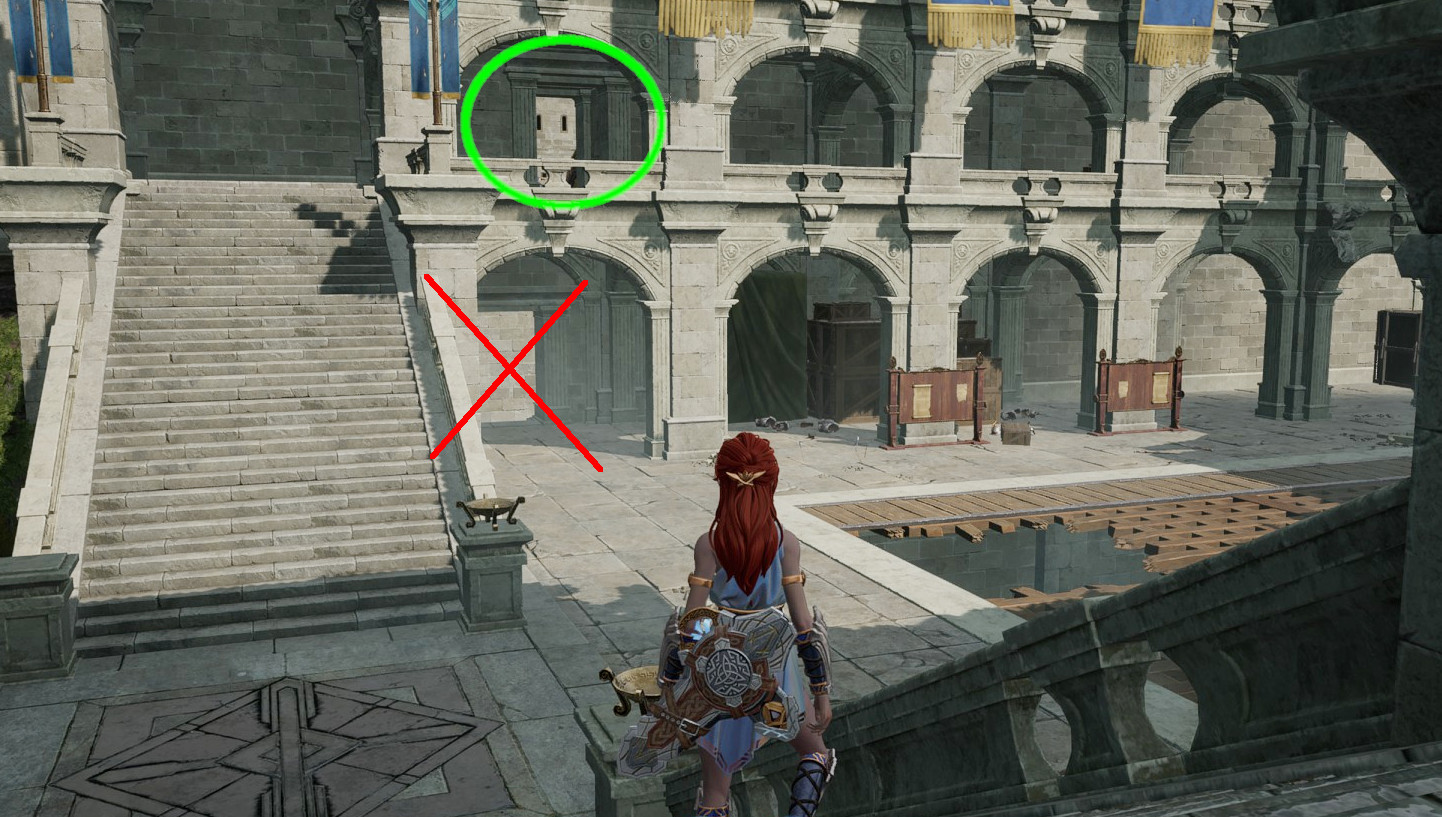
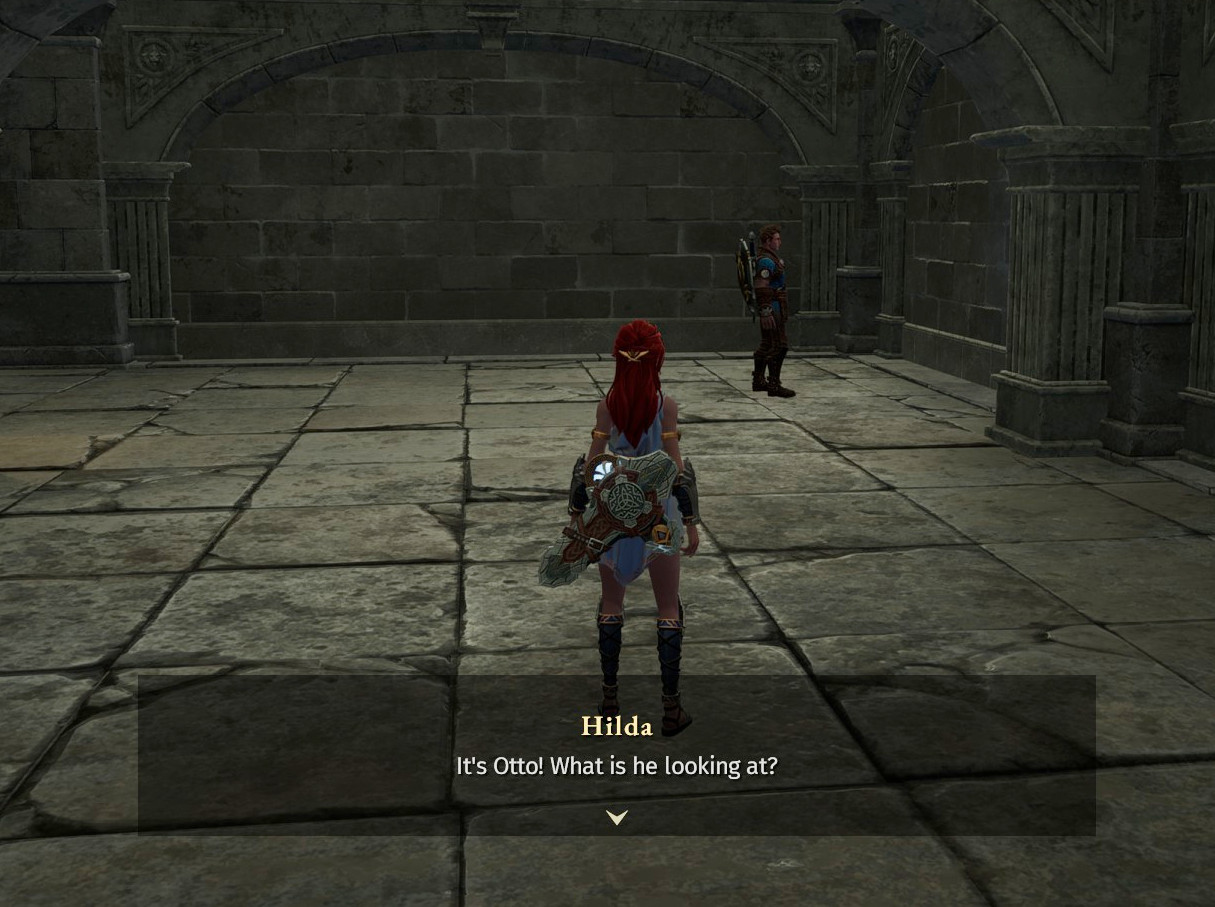
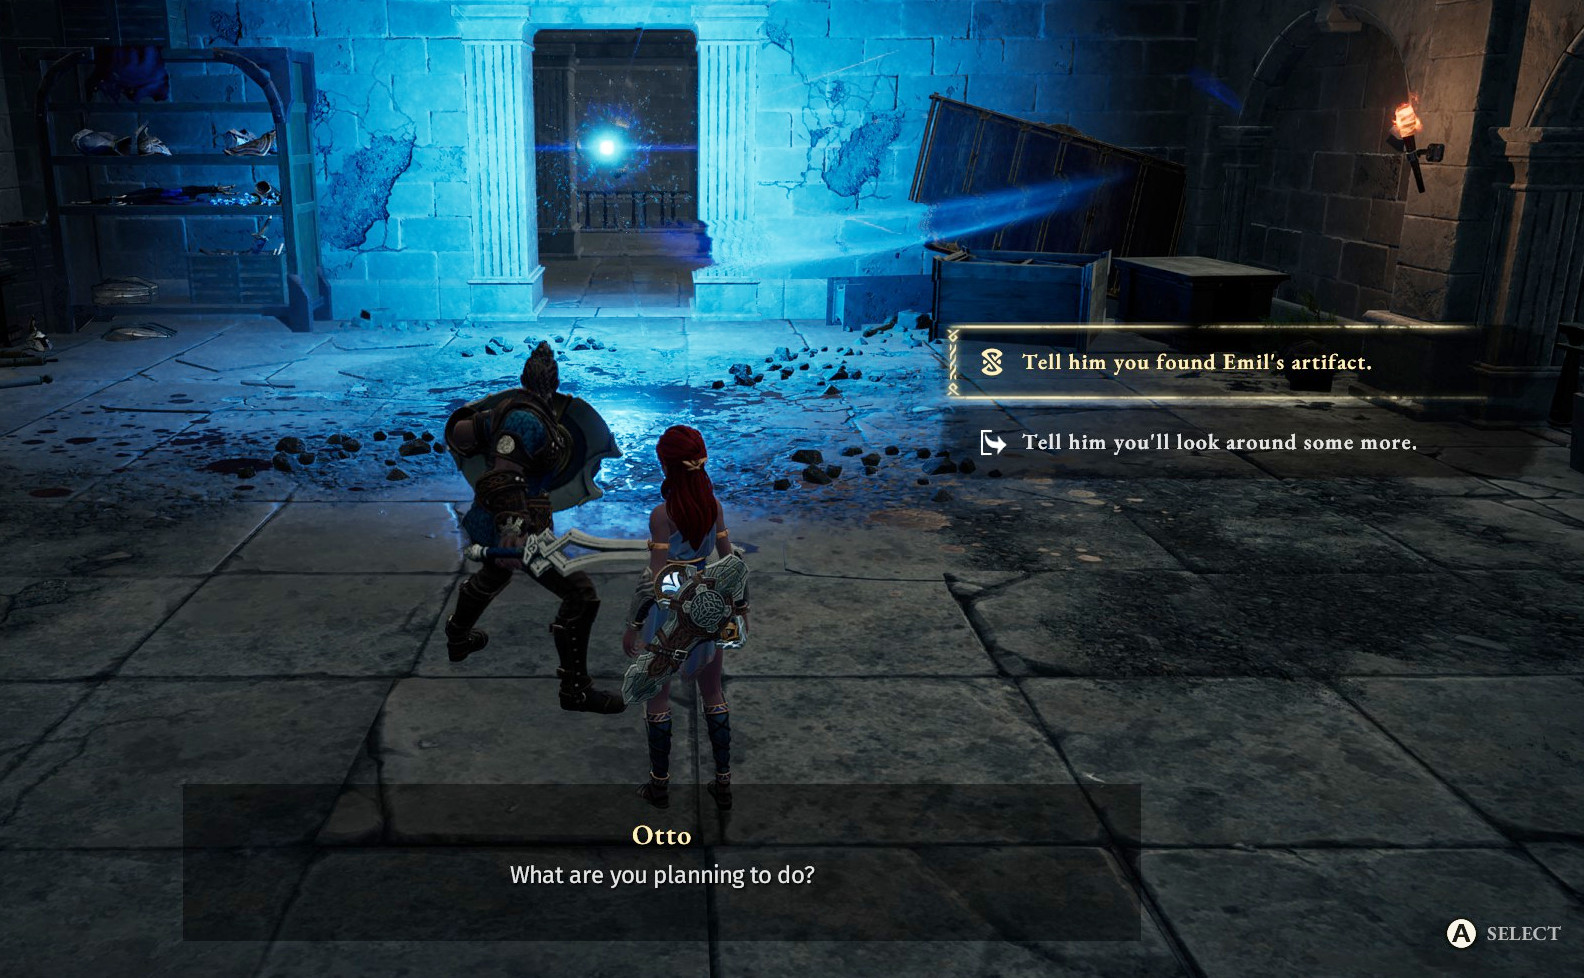
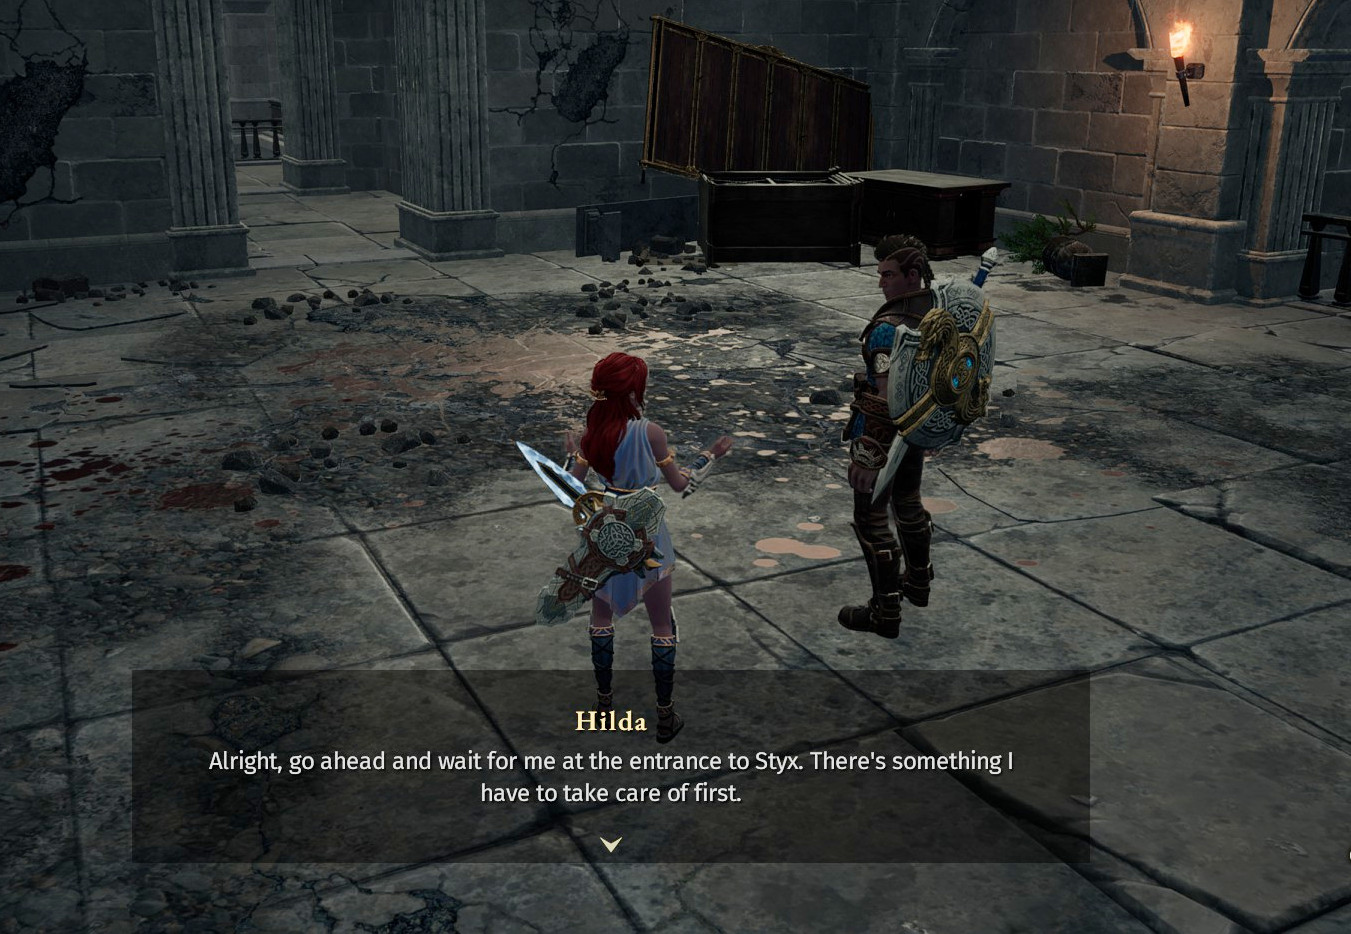
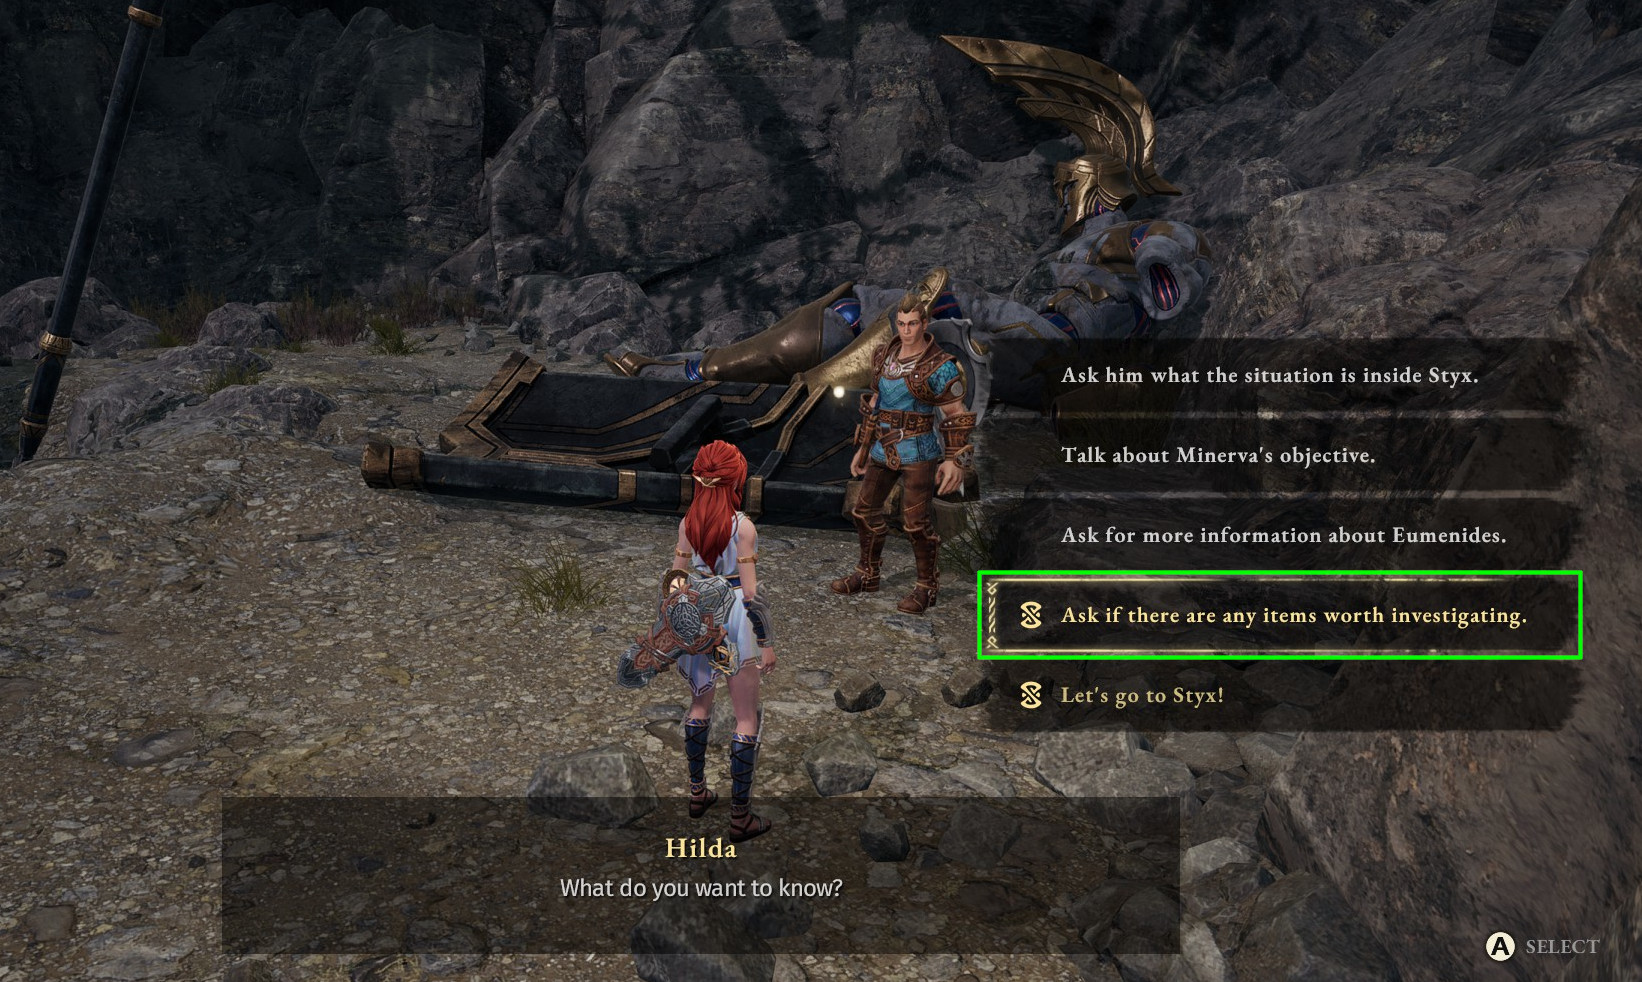
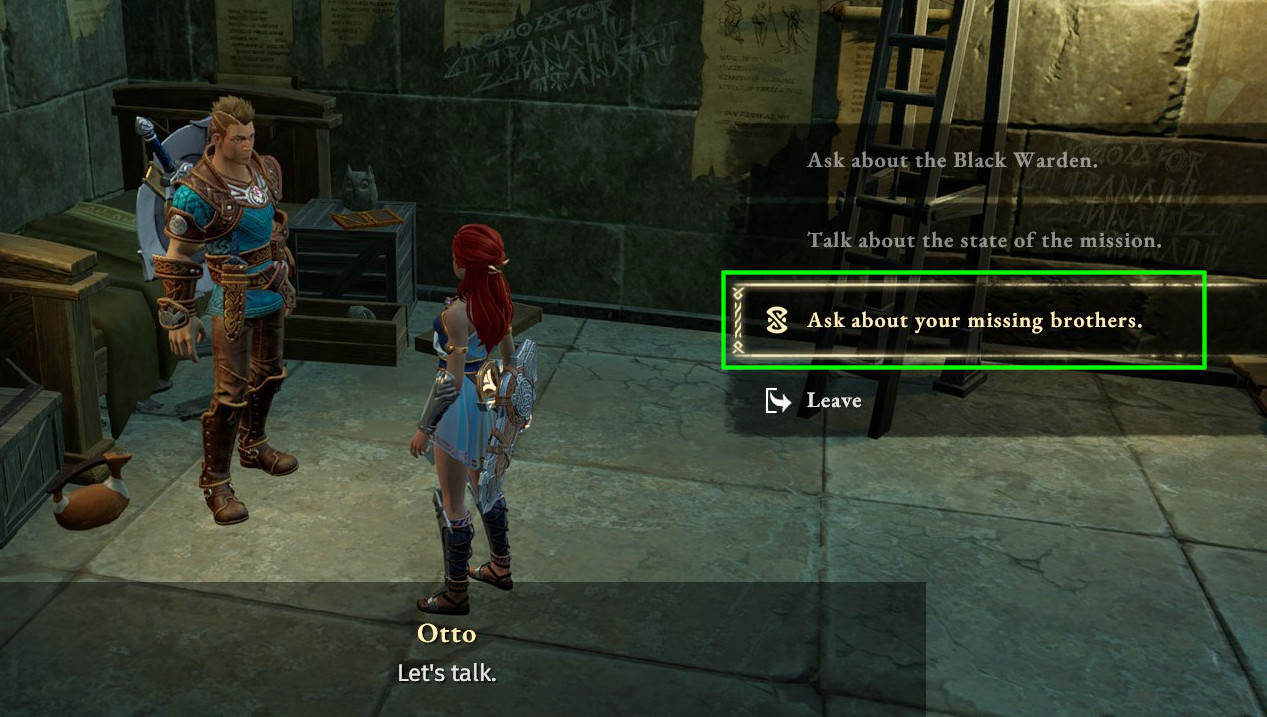
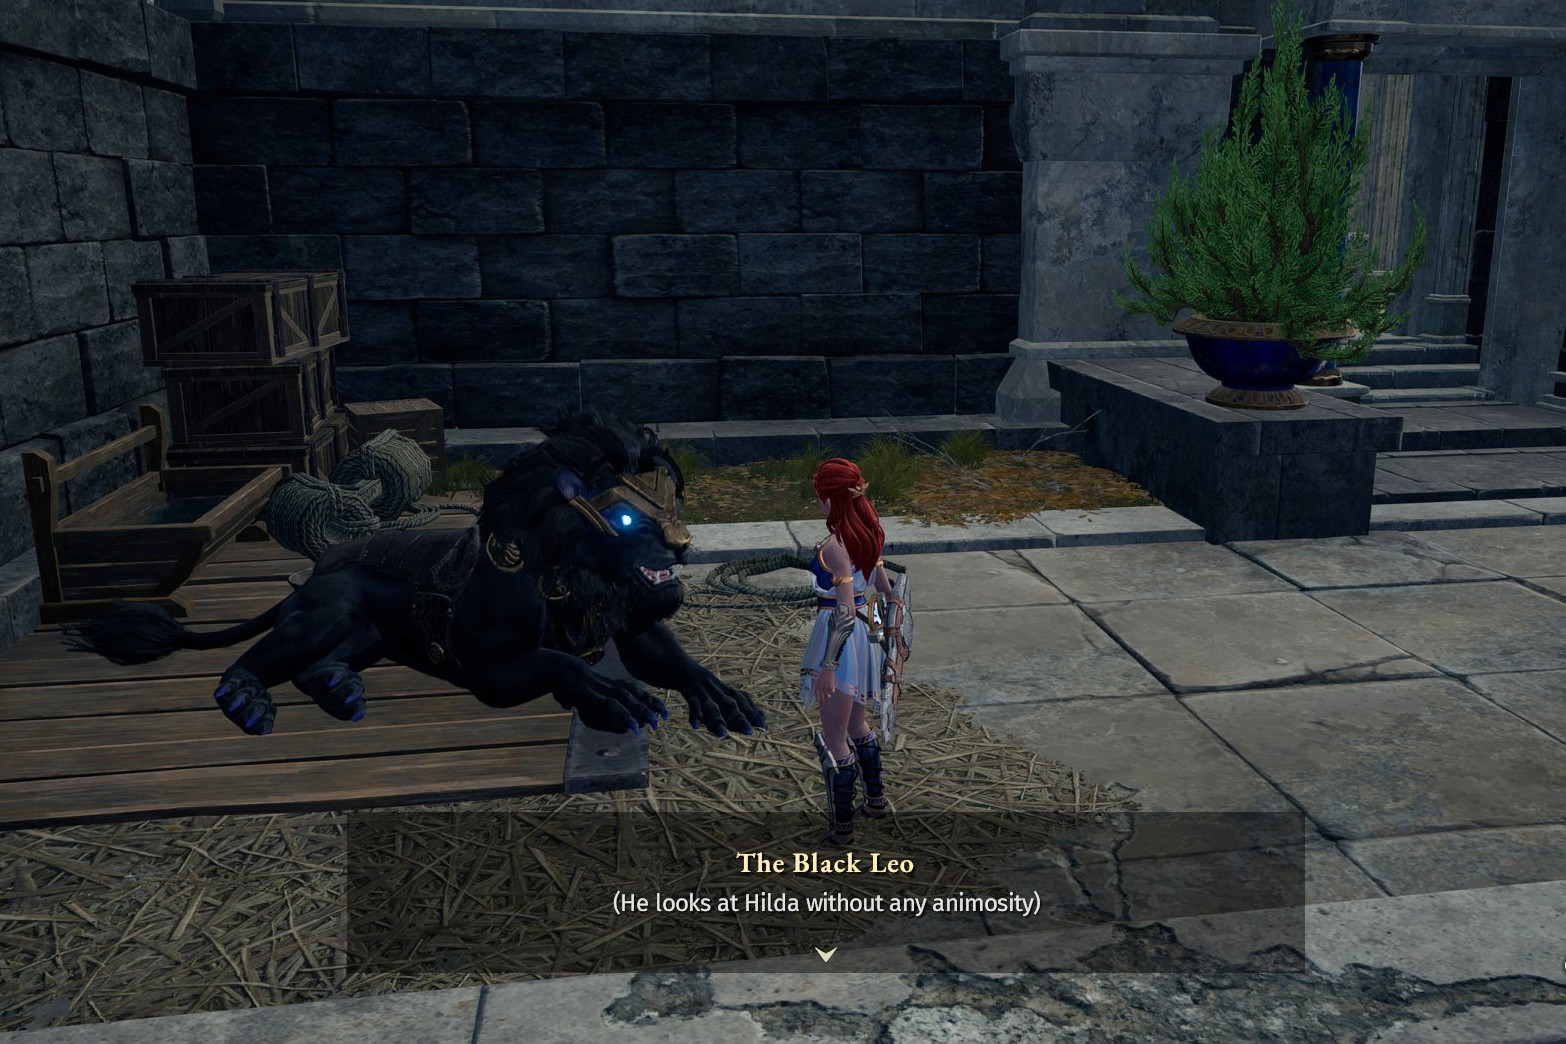
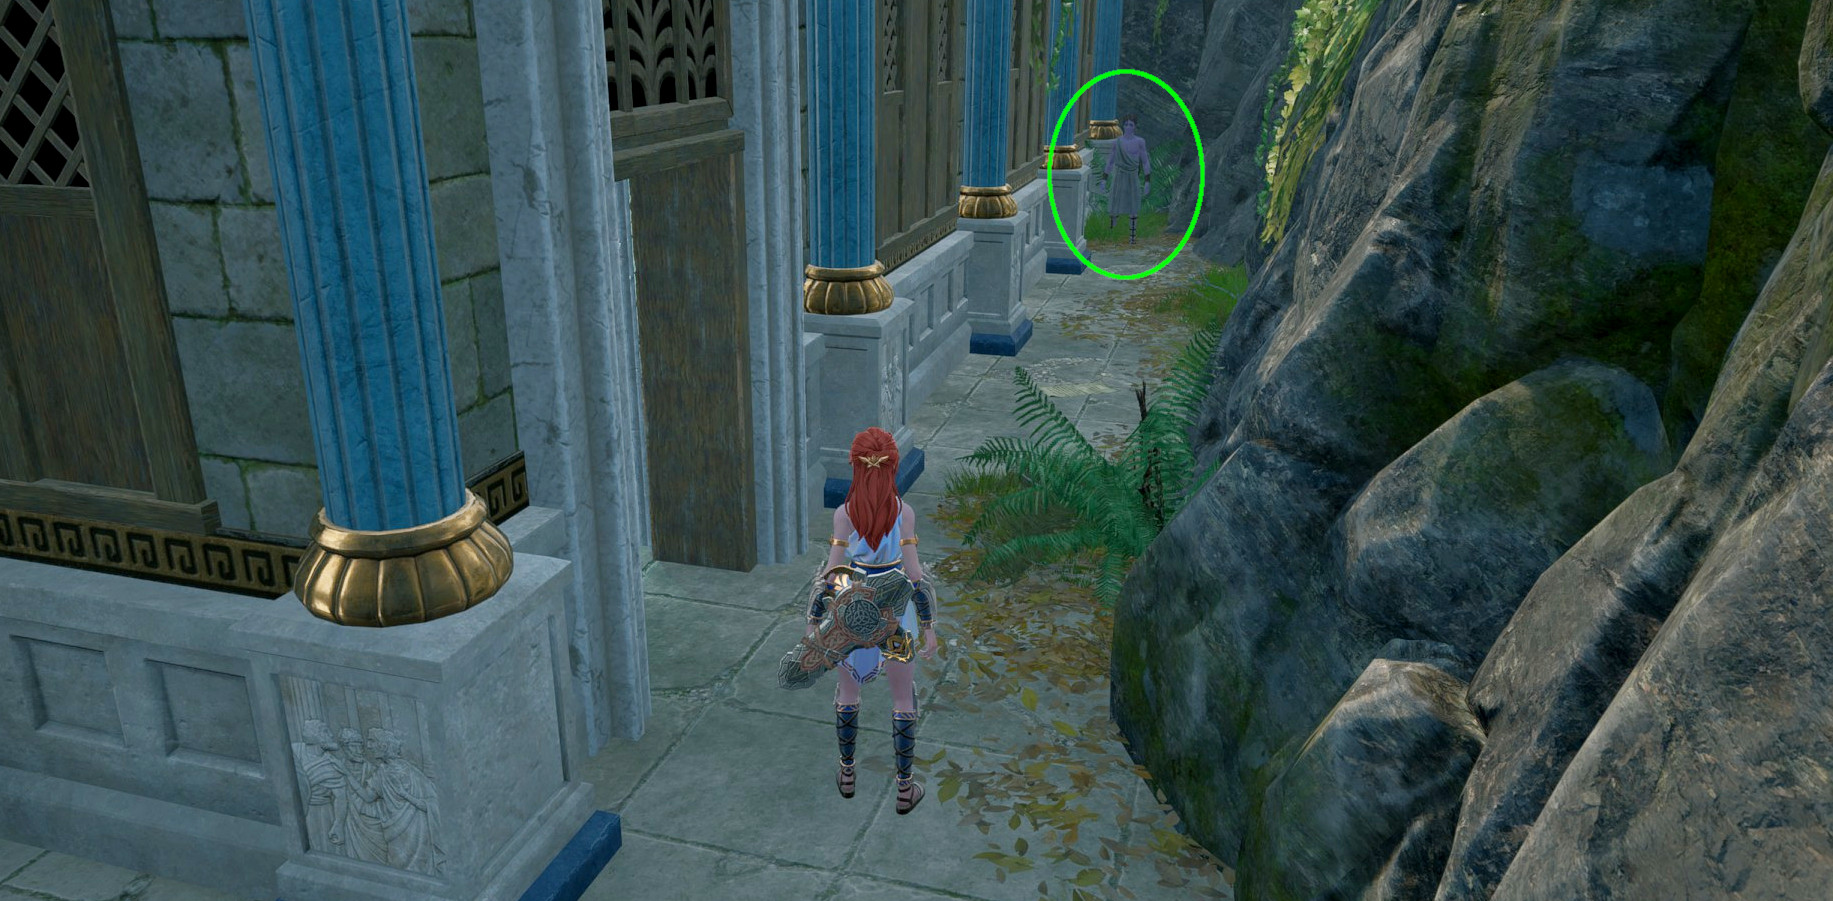
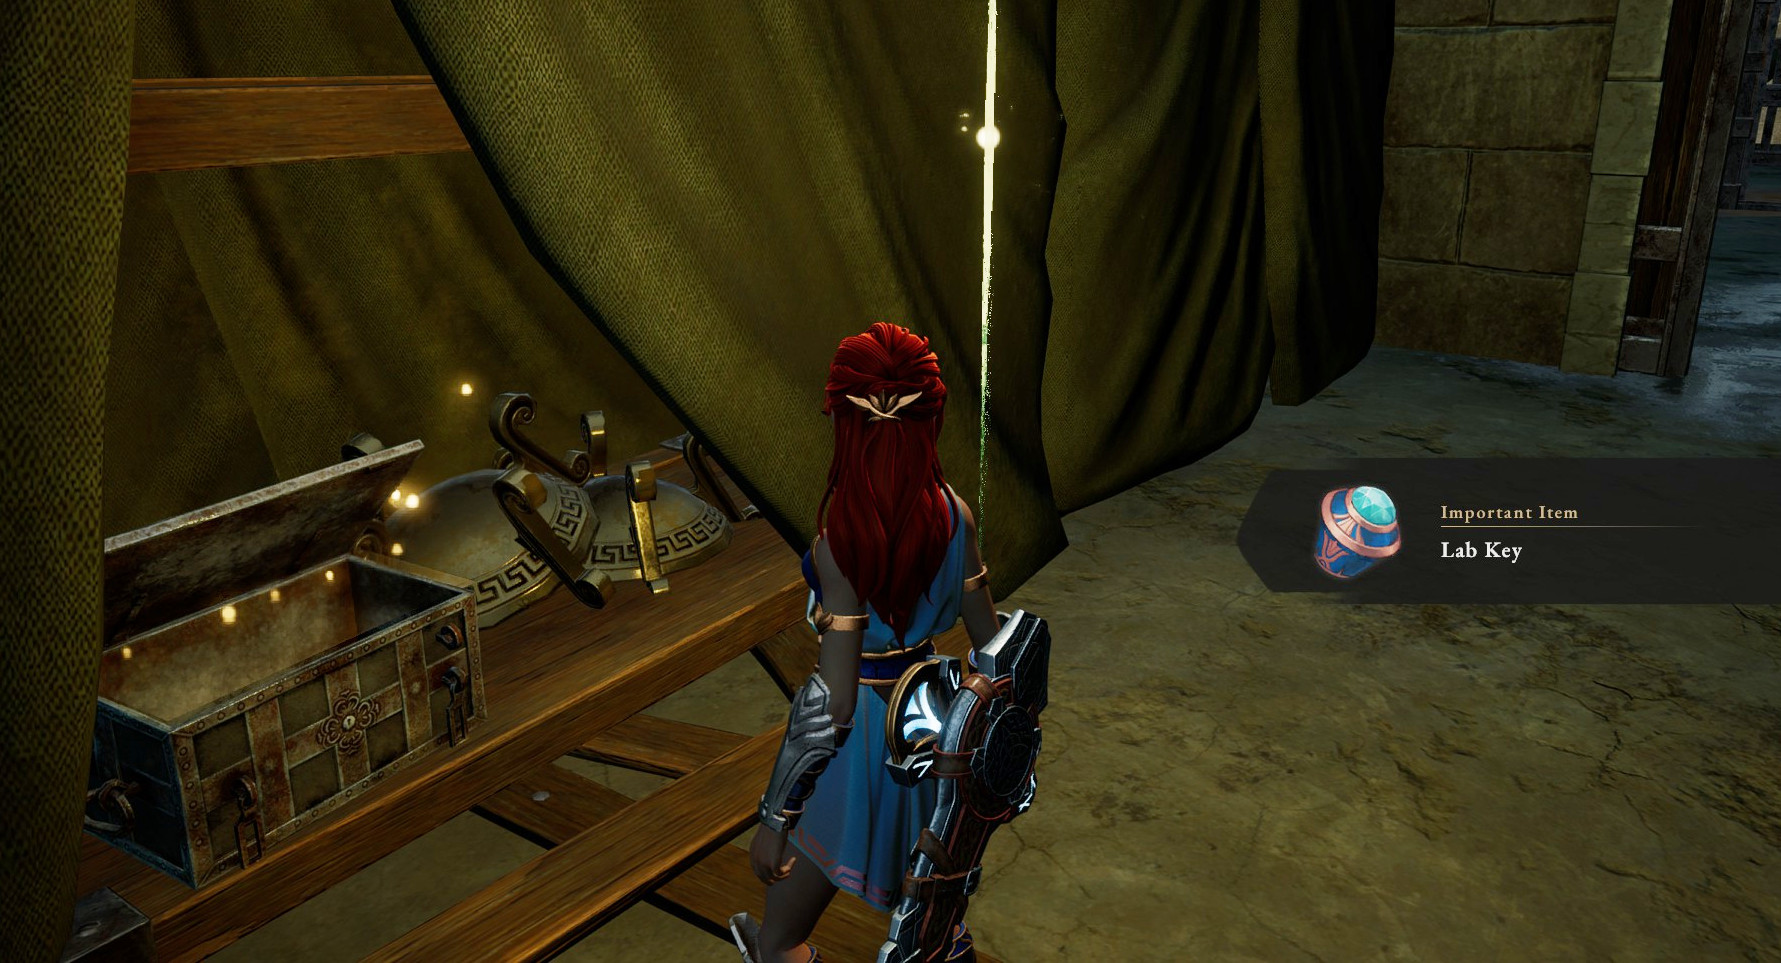
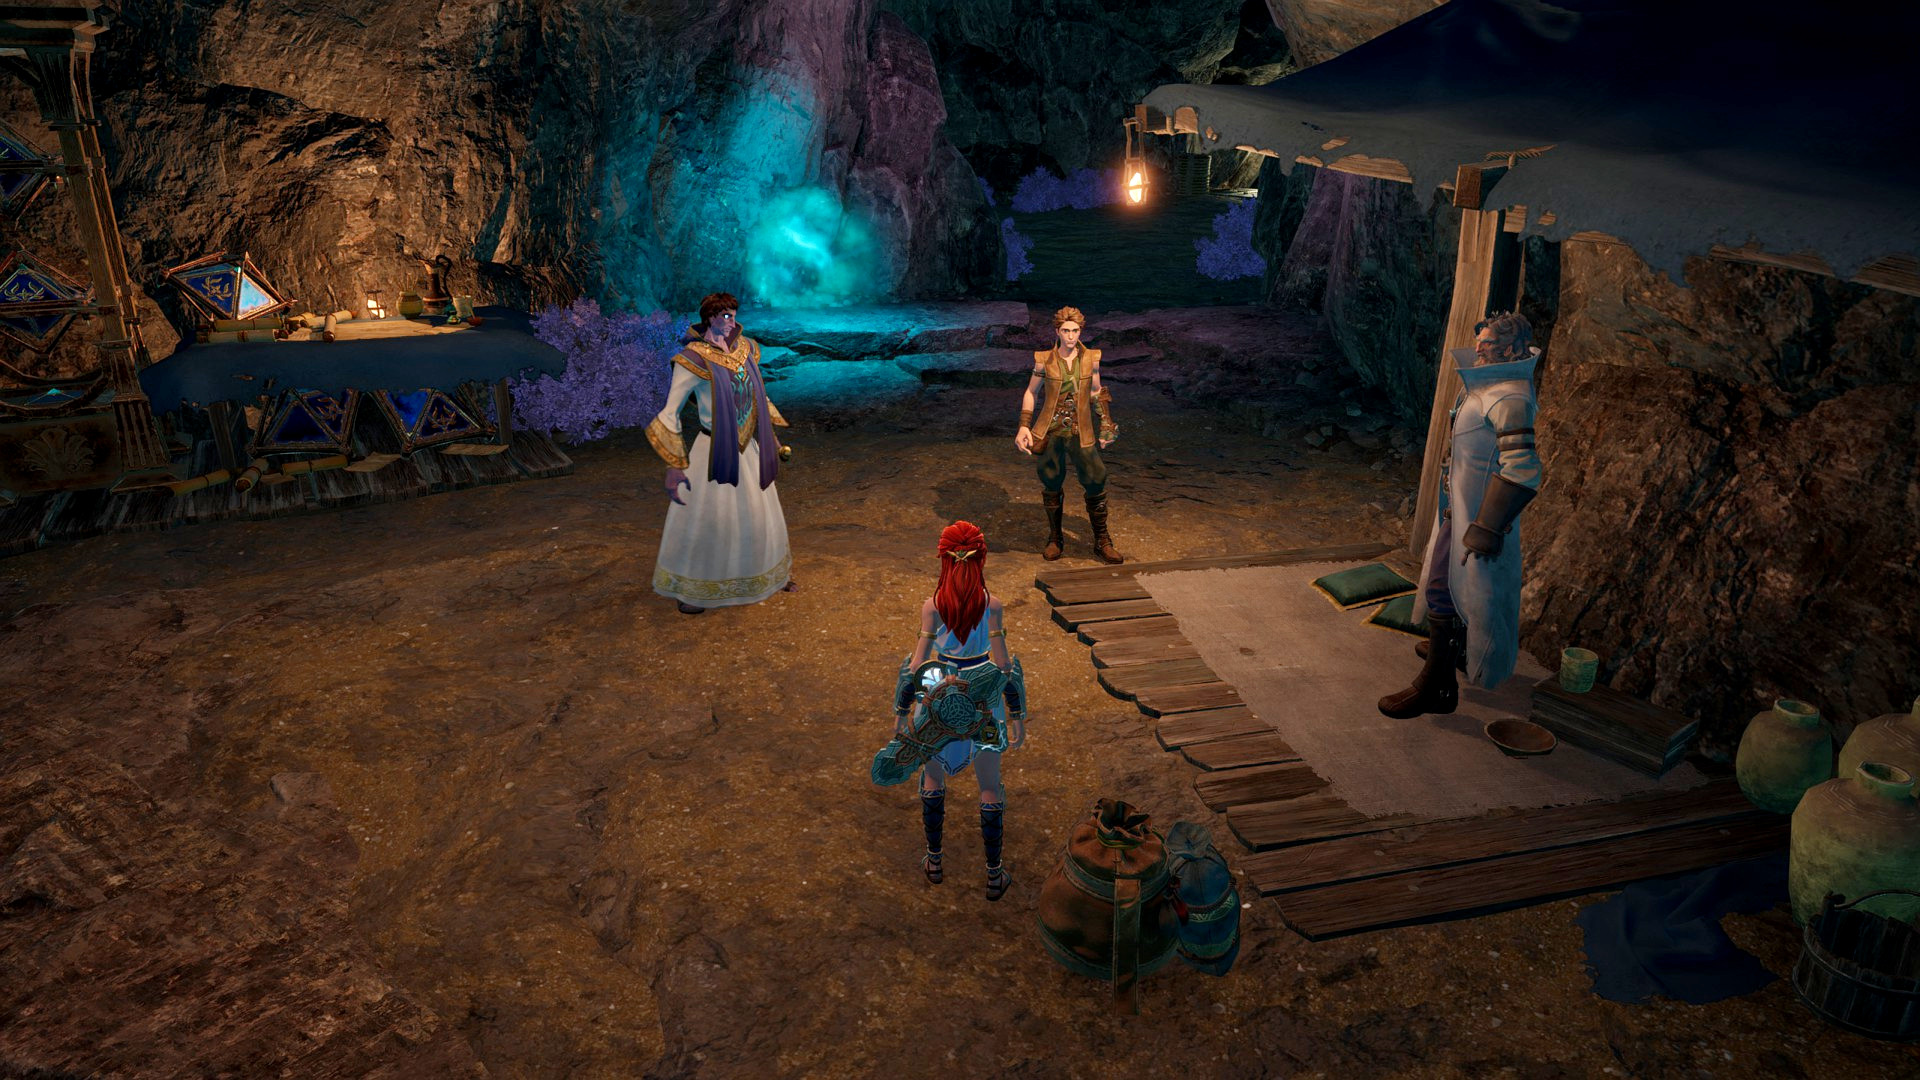
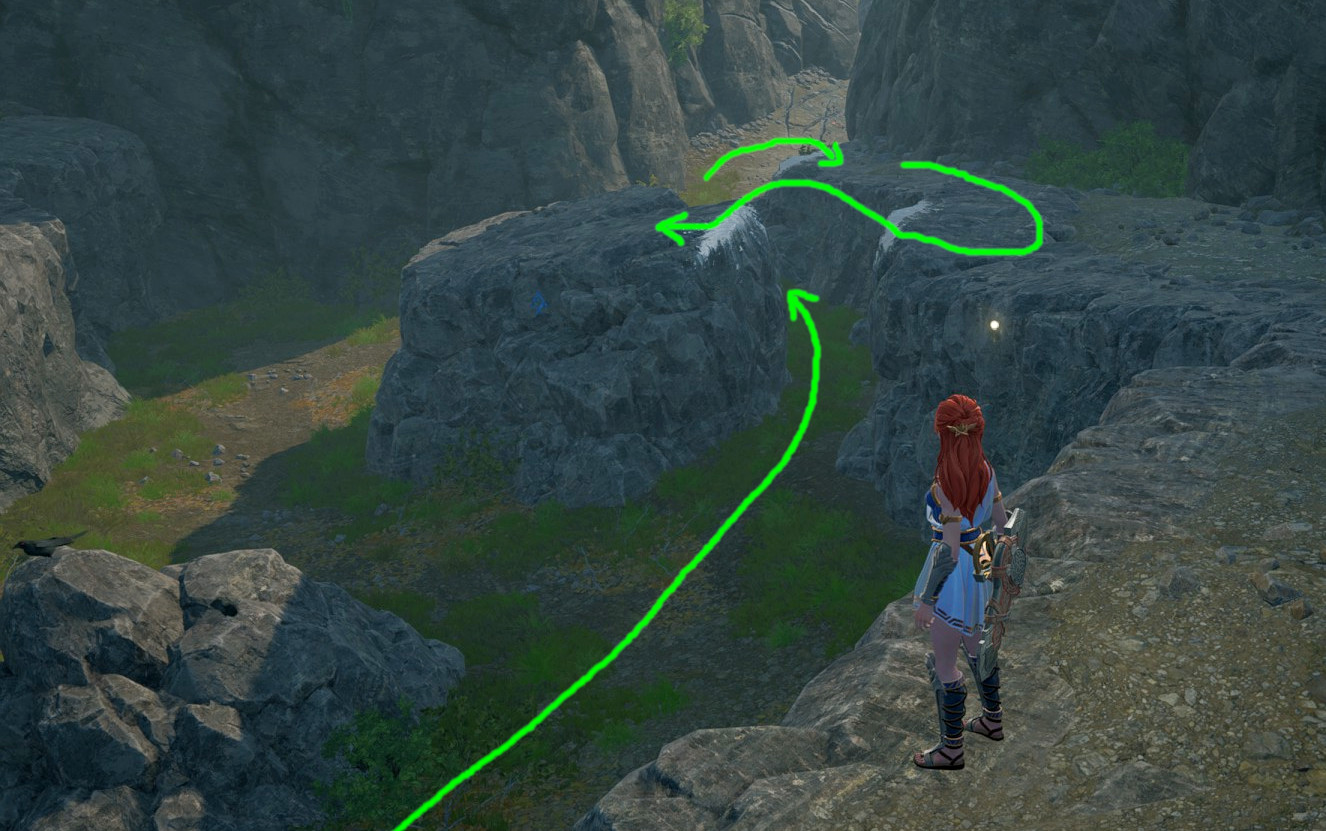
You might have to get Otto to the end area and find him at the entrance of Styx, but you don't need to worry about grabbing the ring in the lion area.
I never knew the ring even existed until I went around the areas for chest cleanup and I still managed to get the achievement. I think the achievement only really cares for the part in Styx.
HY417 / ar558 20 Jan @ 5:12am 
Thanks for this guide!
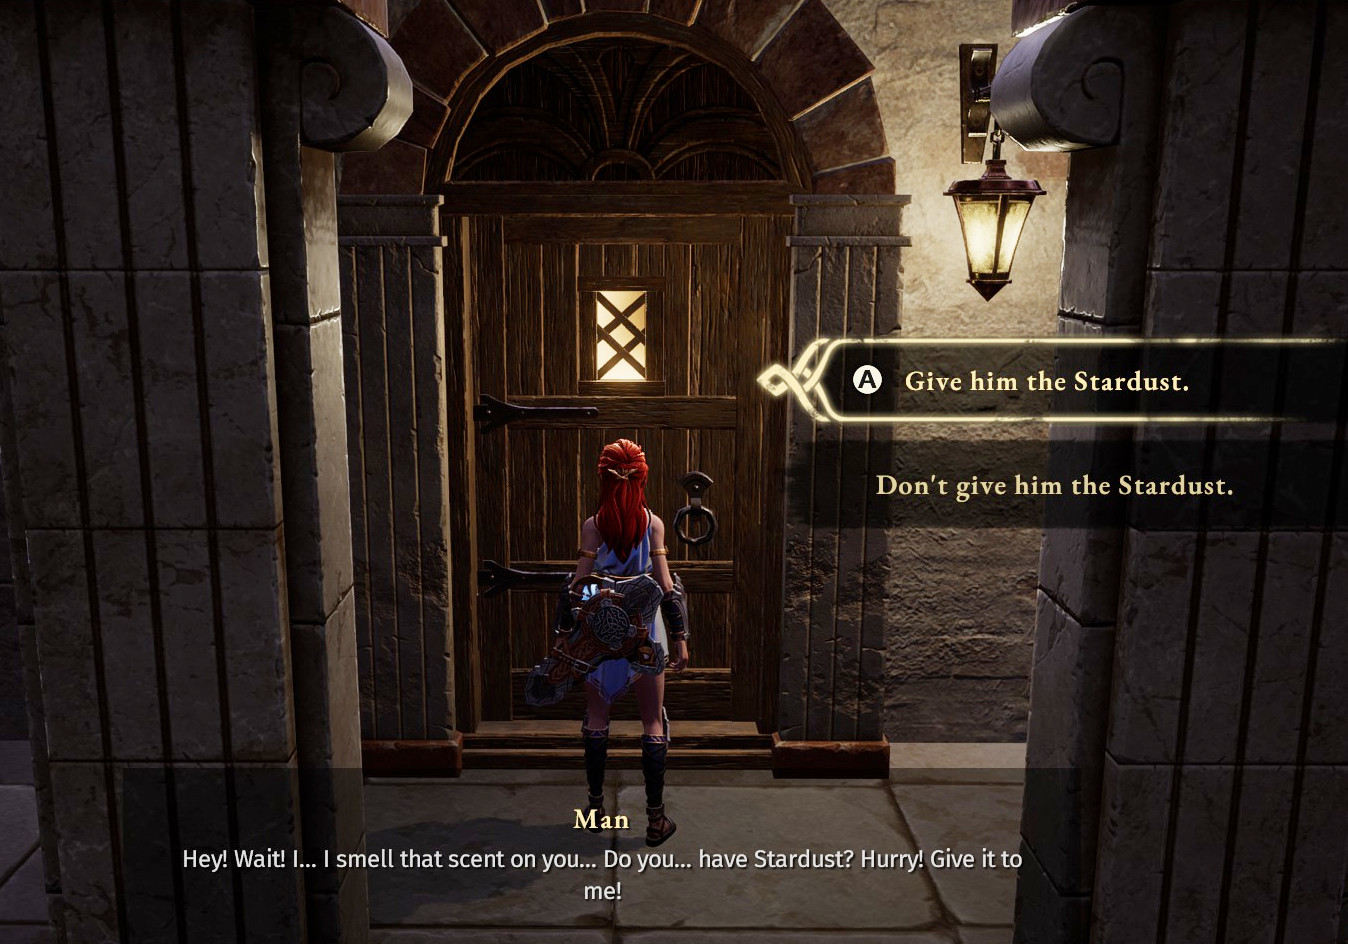
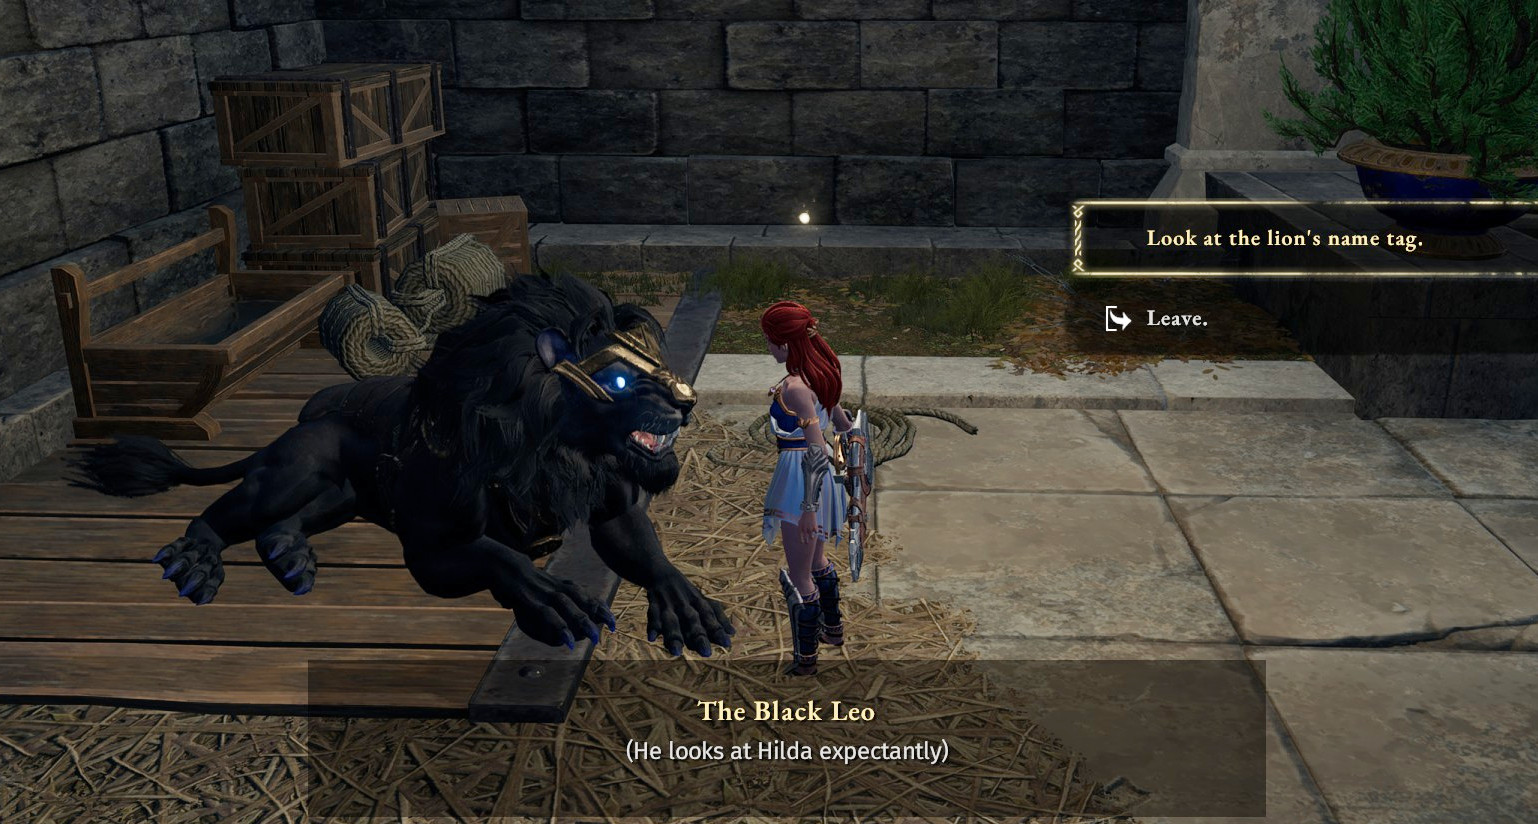
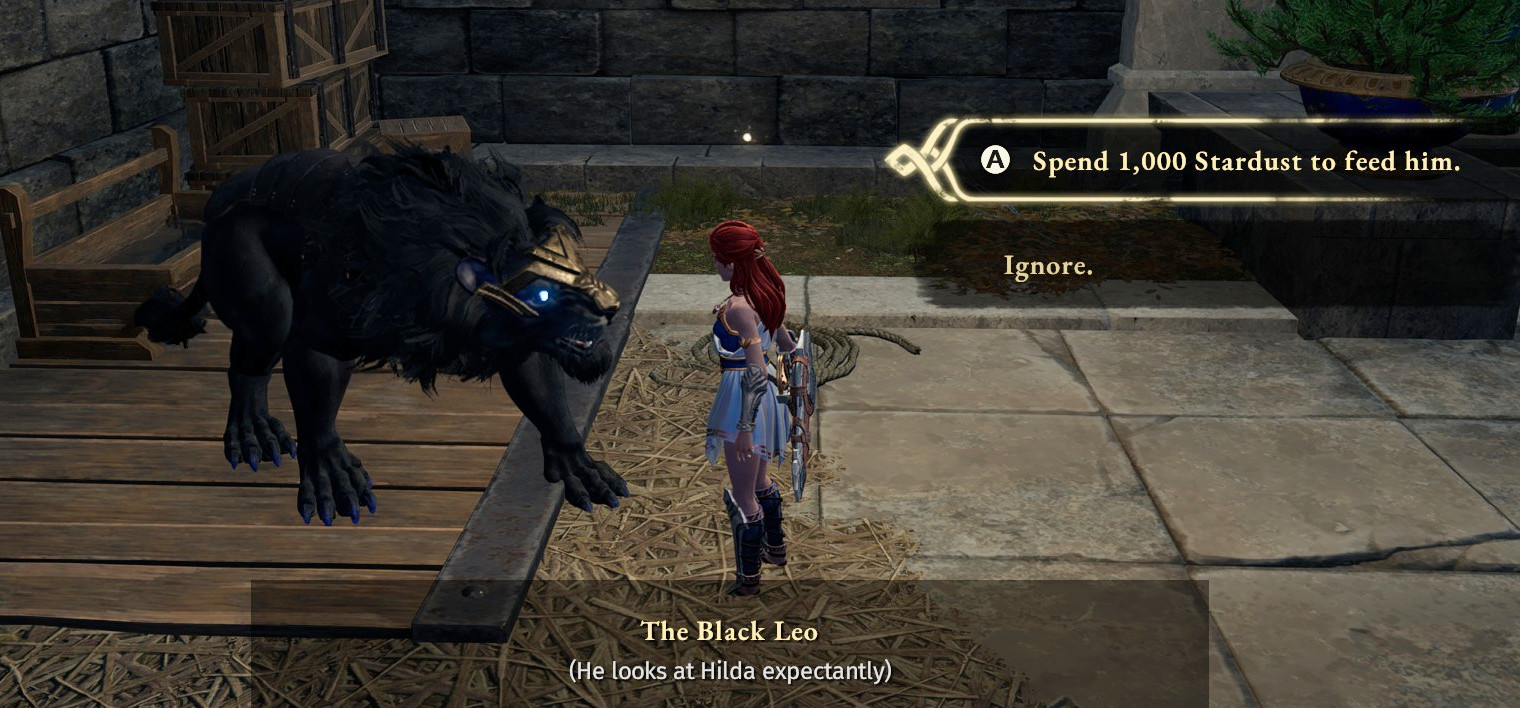
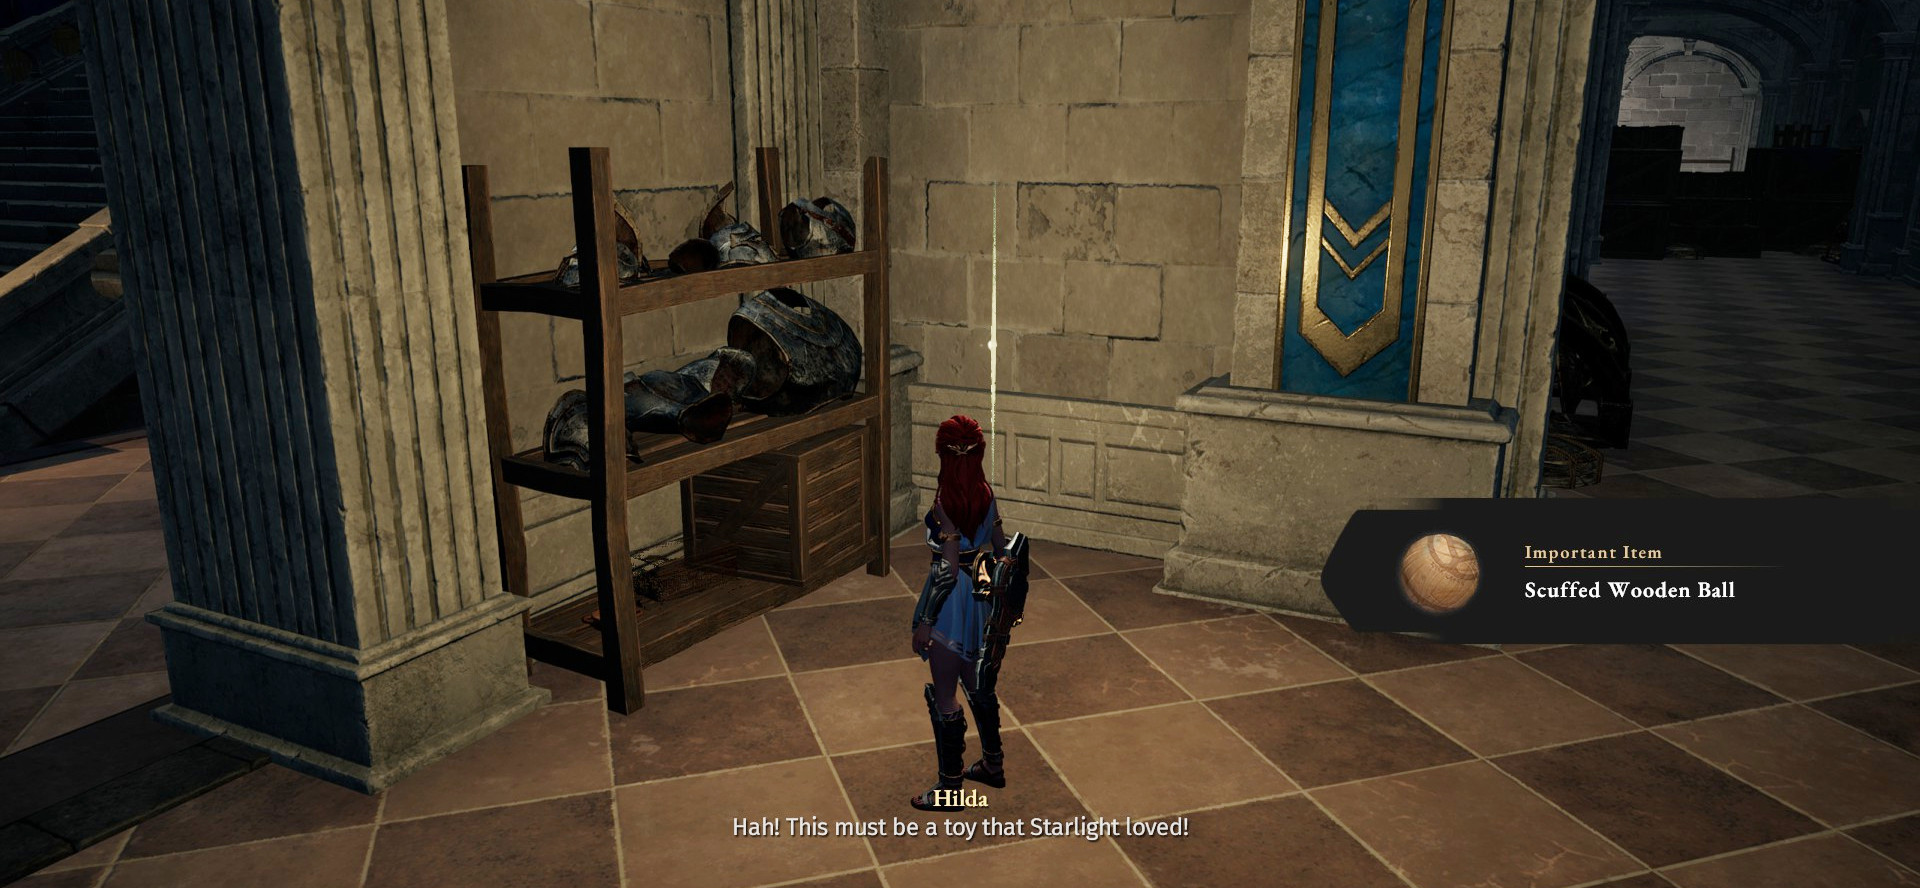
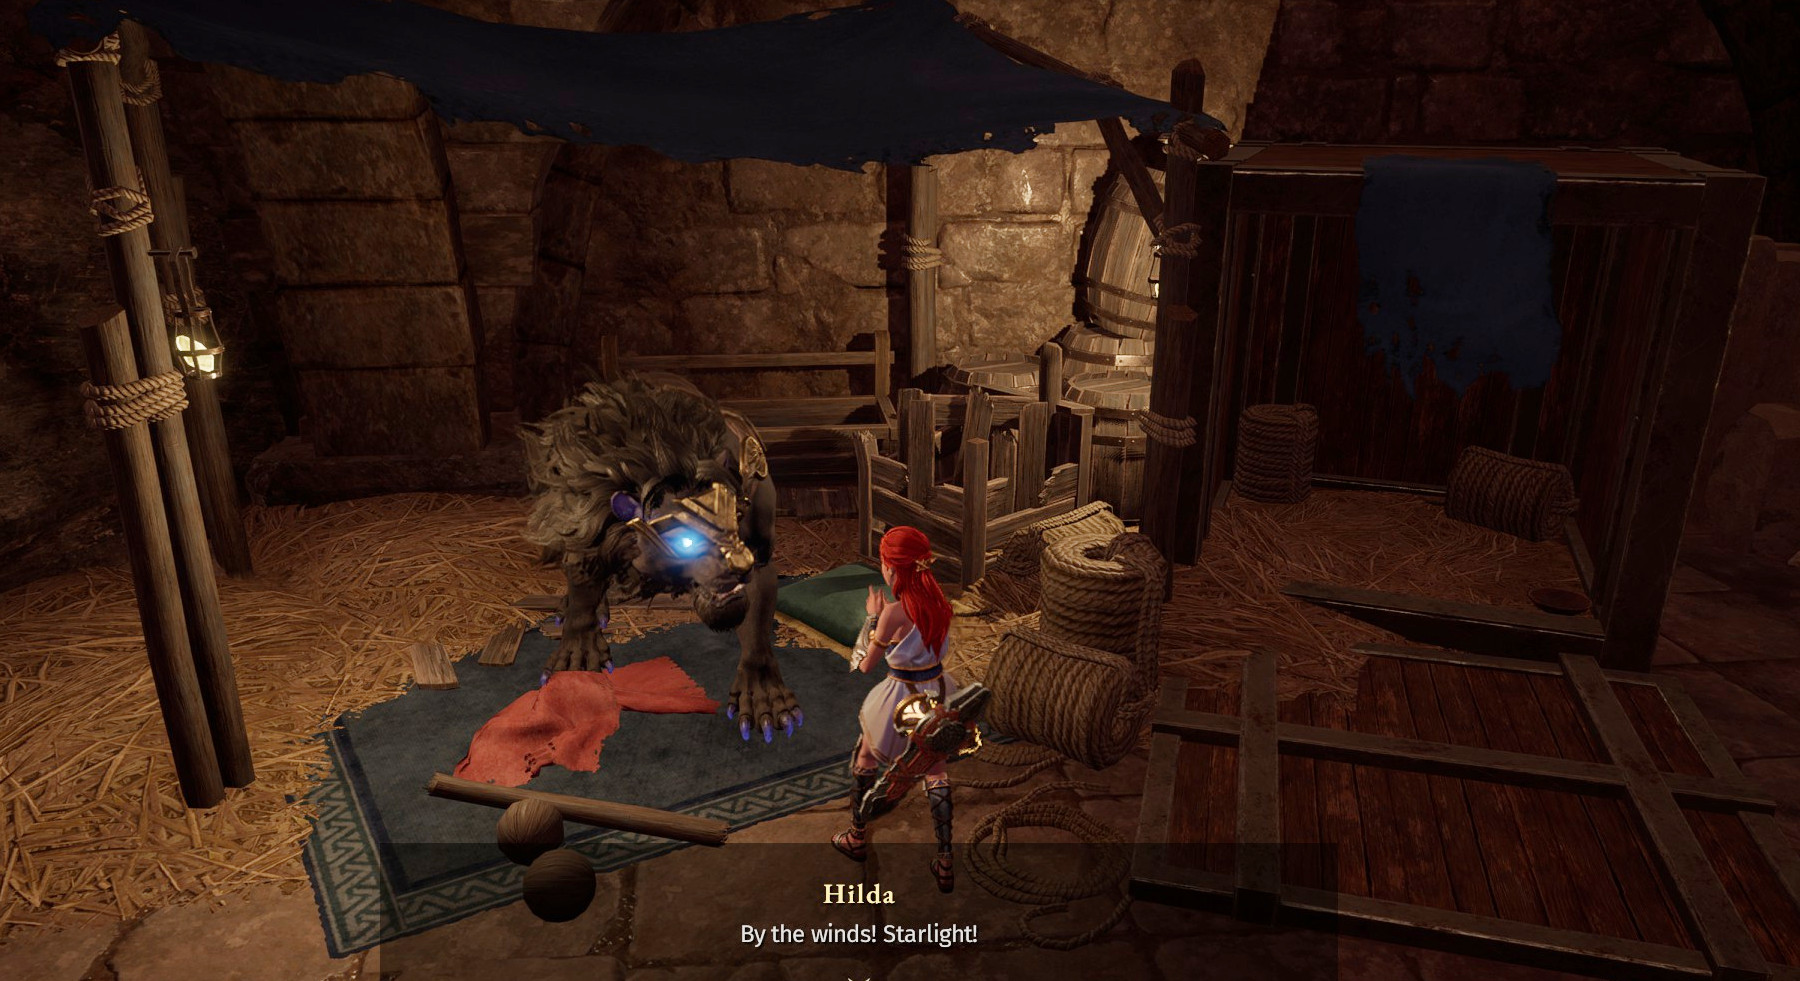
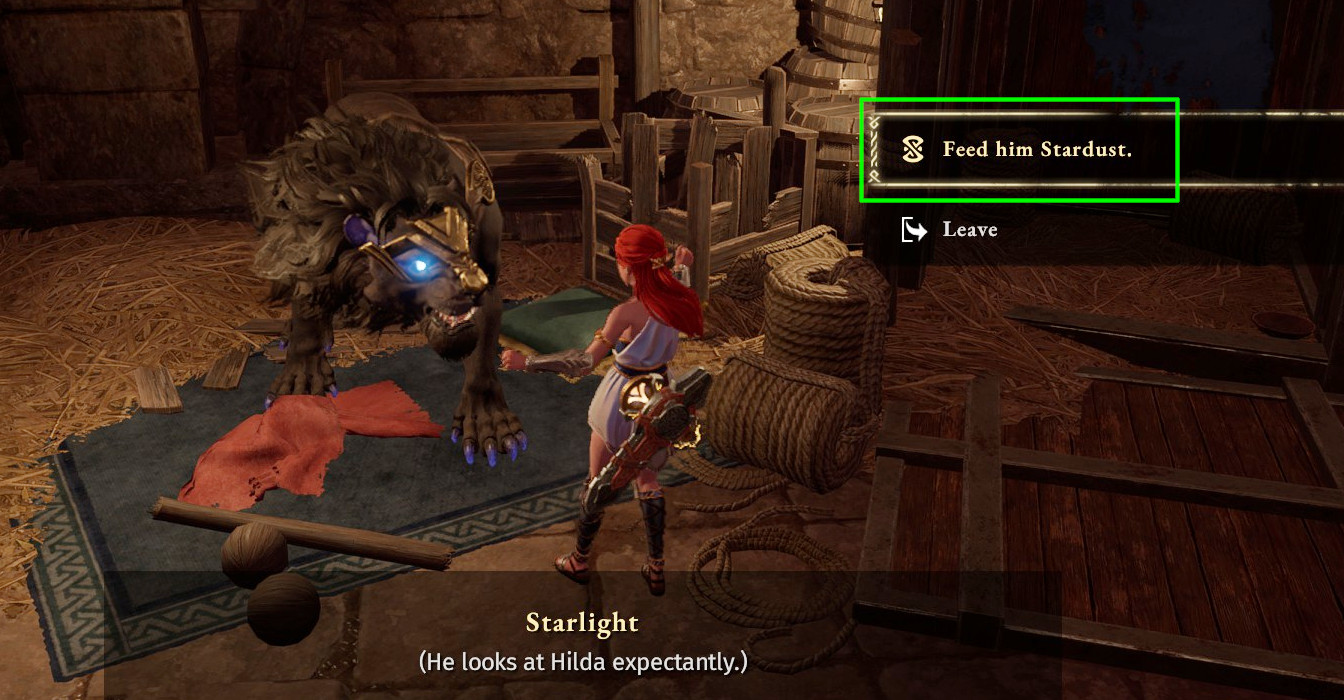
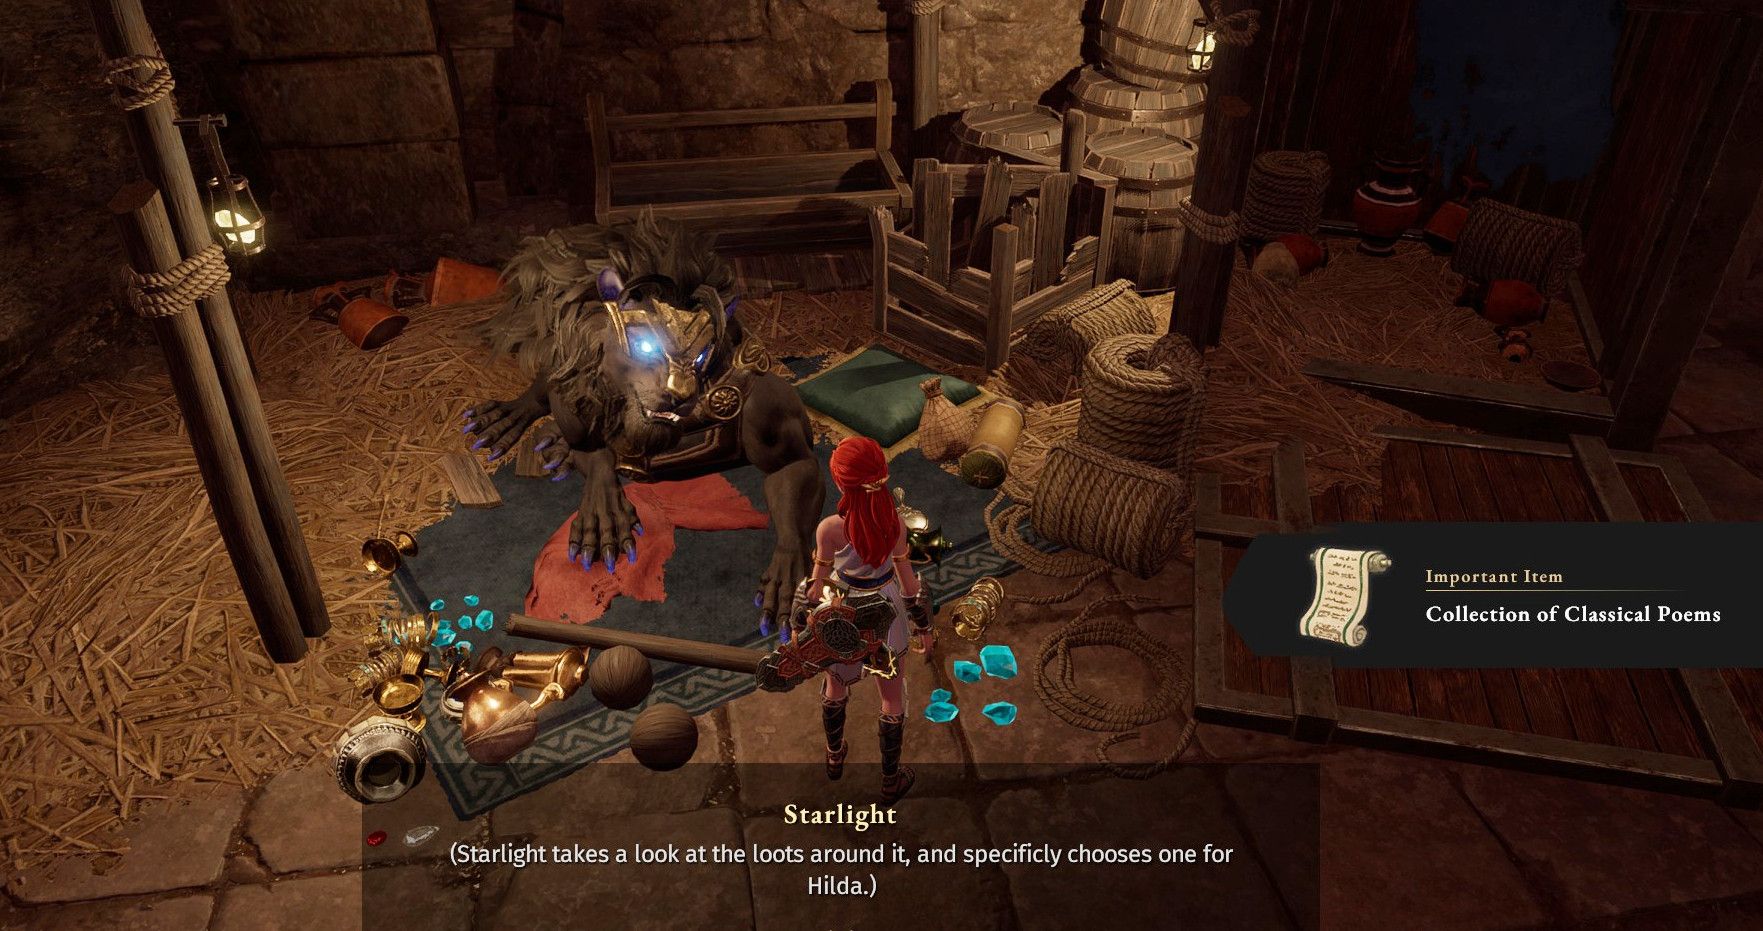
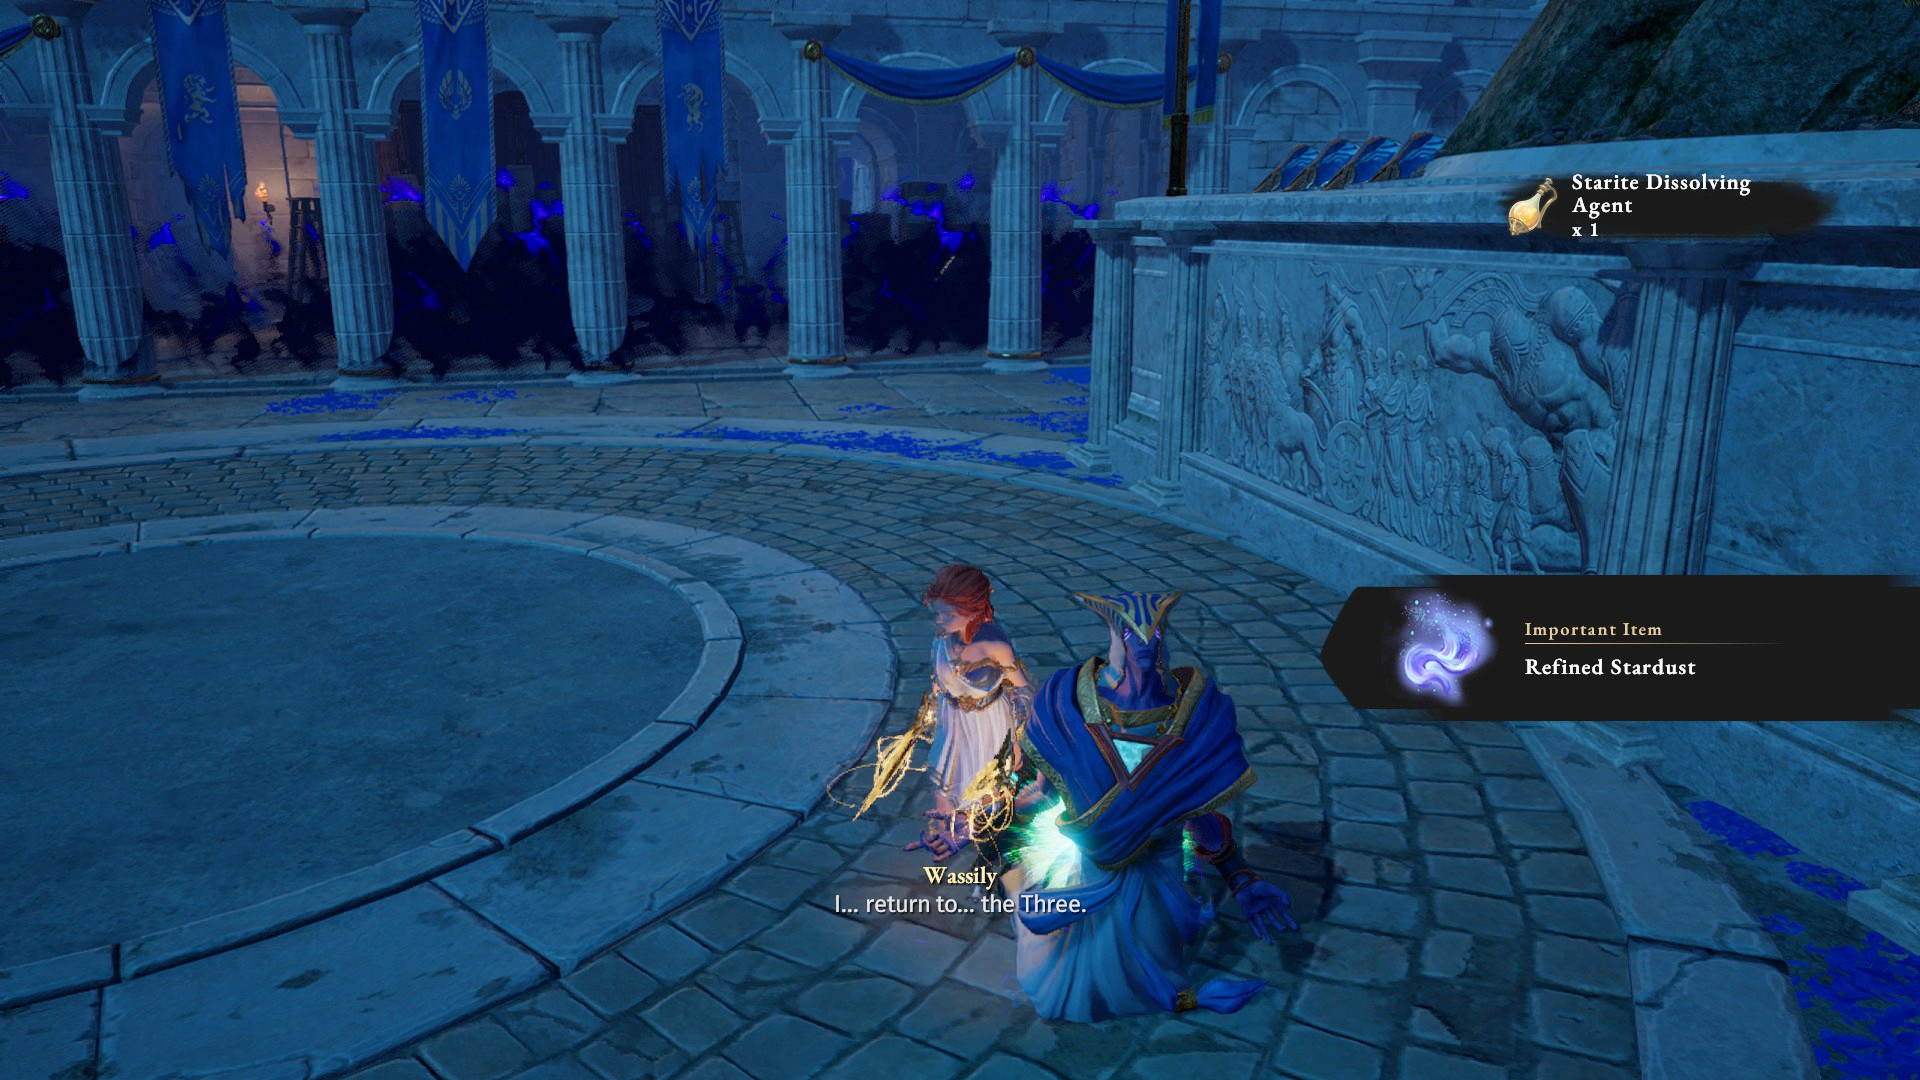
You accidently wrote "Starlight" a few times when you meant "Stardust".
Vilion von Sqrt(-1) 17 Jan @ 3:52pm 
@The Light. No, you don't need dlc to get 100%
The light 26 Dec, 2024 @ 2:52am 
hi all
game need dlc for 100% achievement?
Demonite 17 Nov, 2024 @ 10:36pm 
You do indeed not need to read the diary pages for the "The Mentor's Gift" echo.

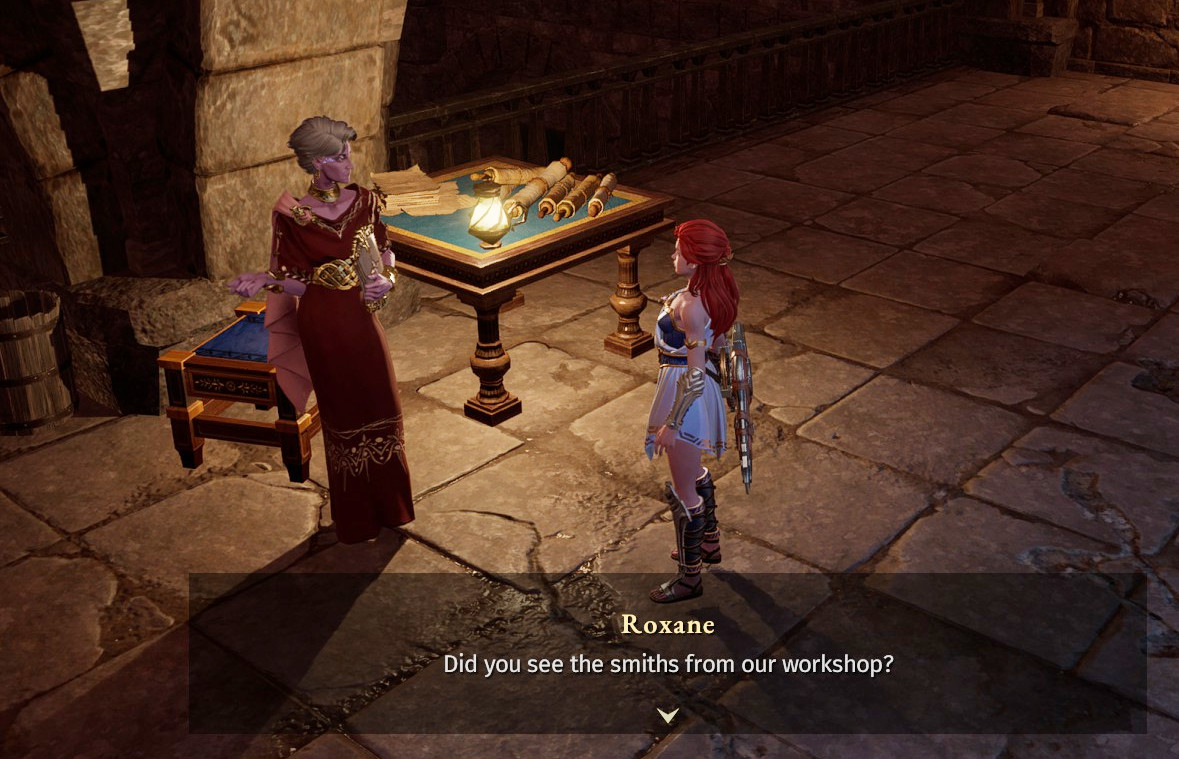
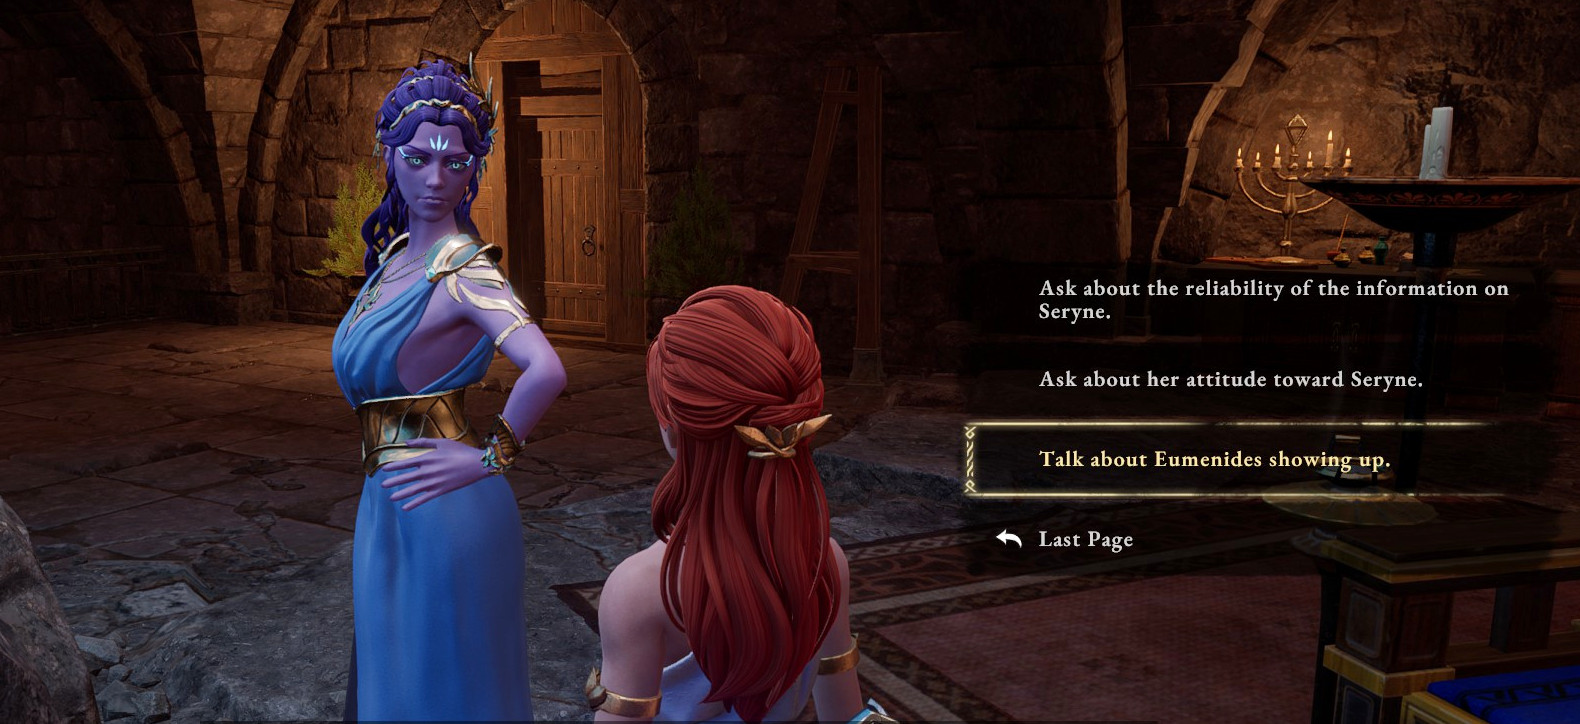
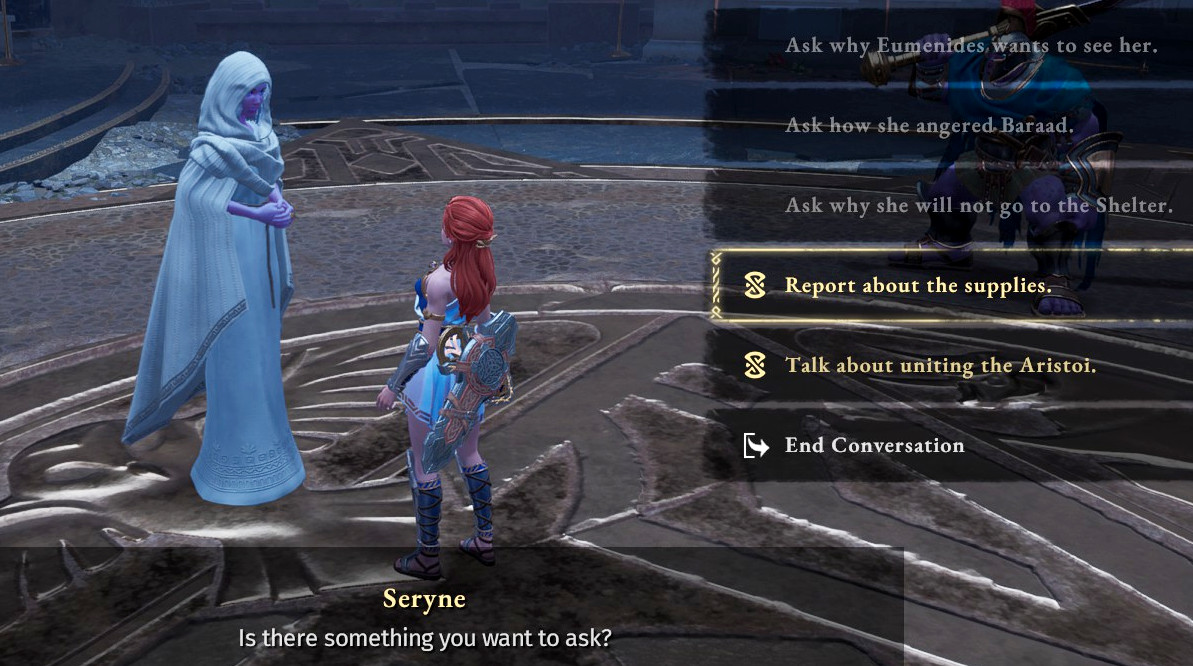
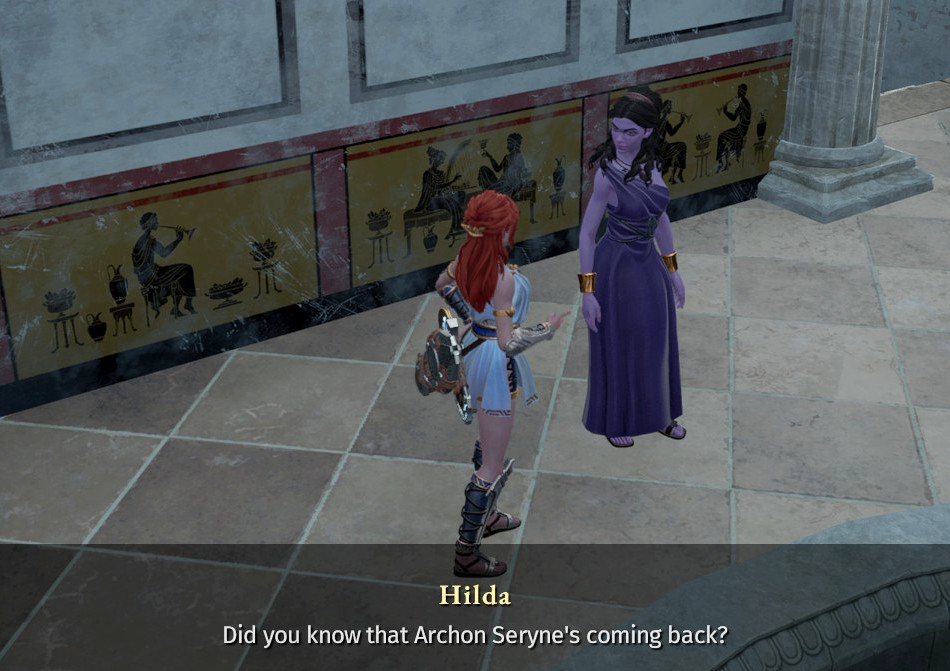
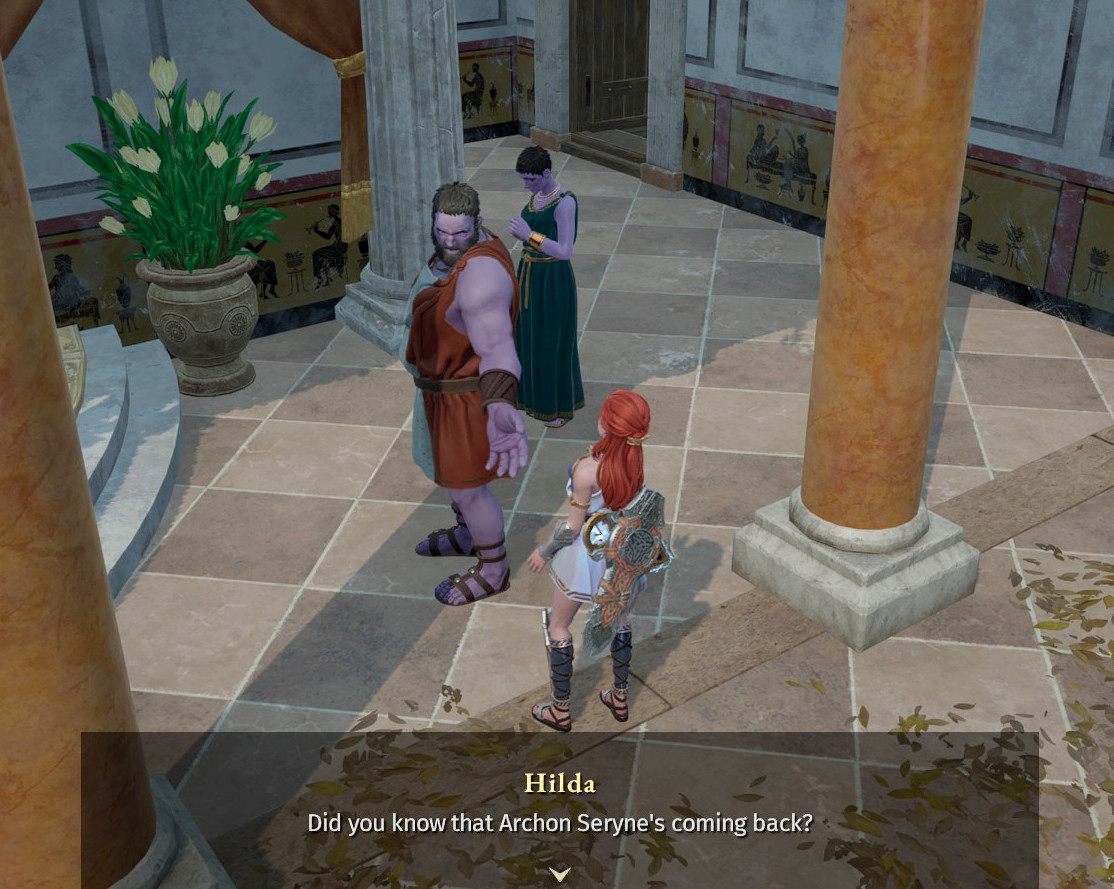
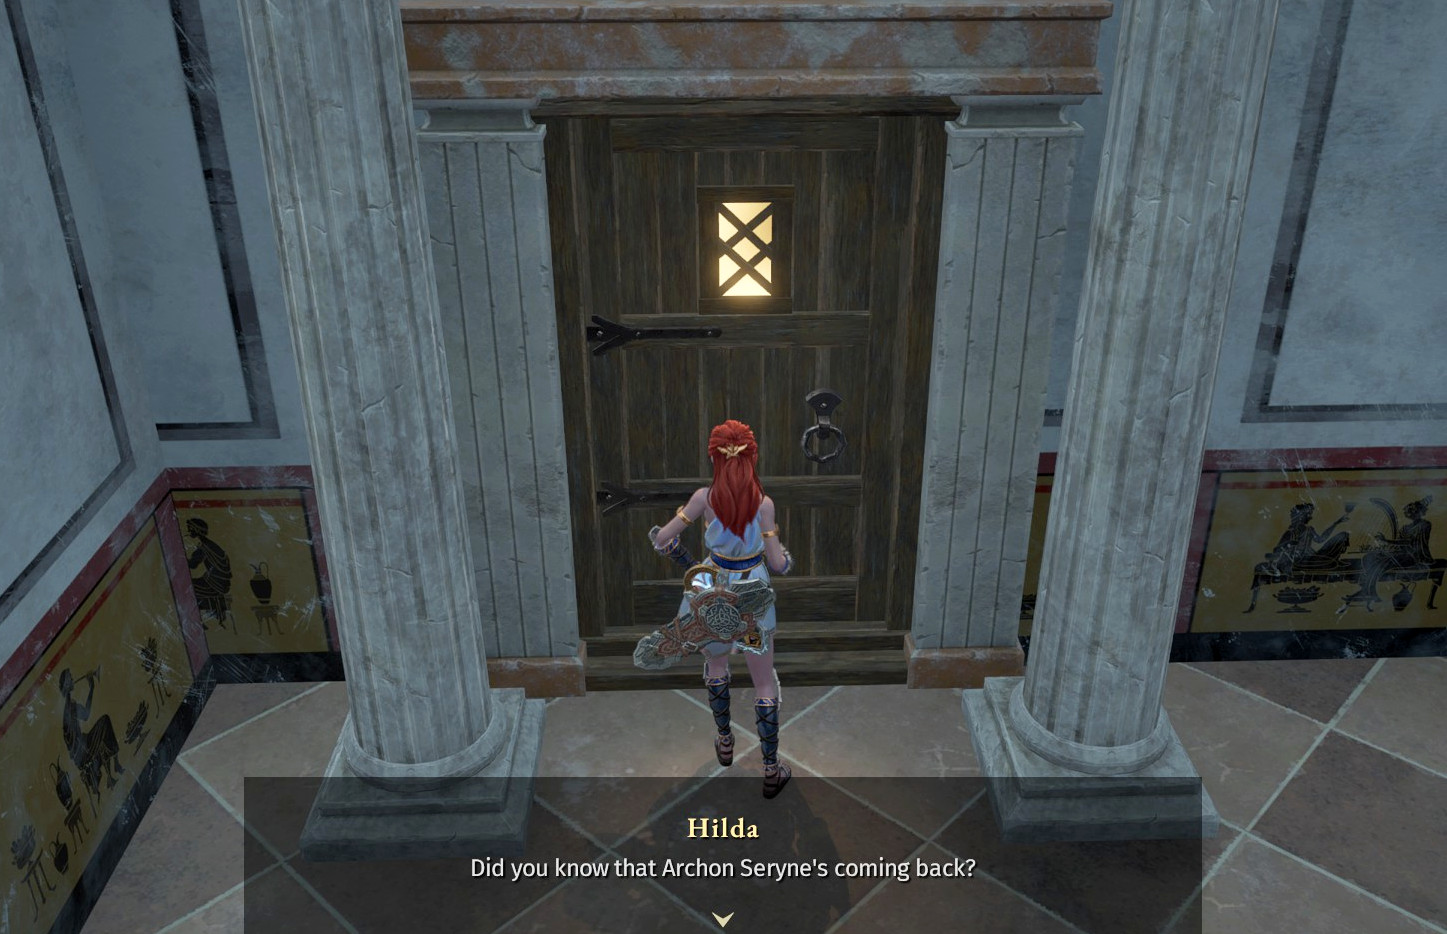
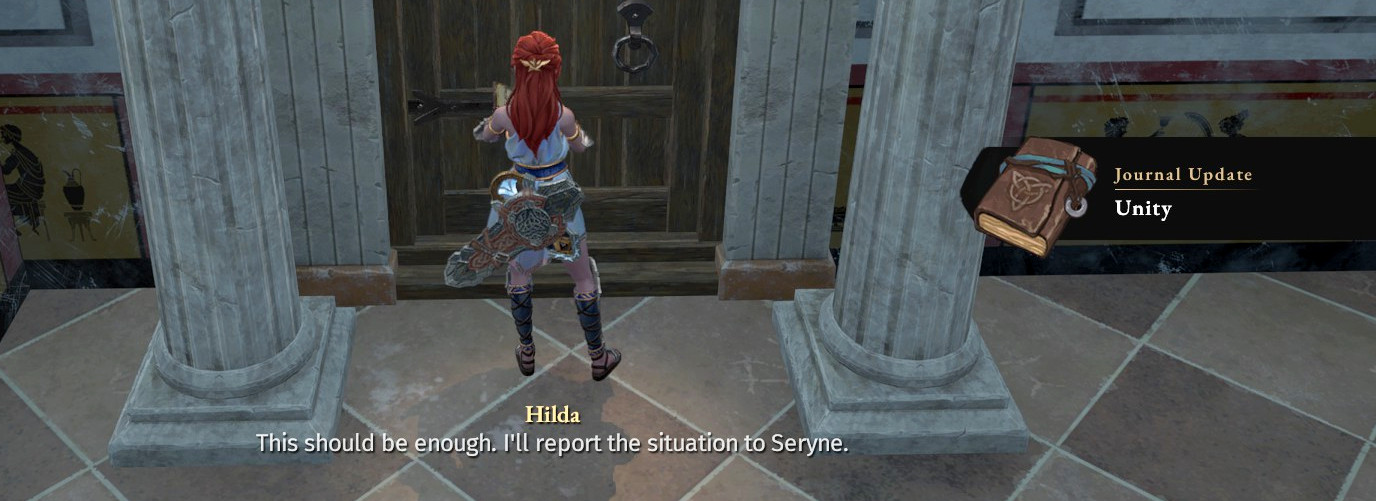
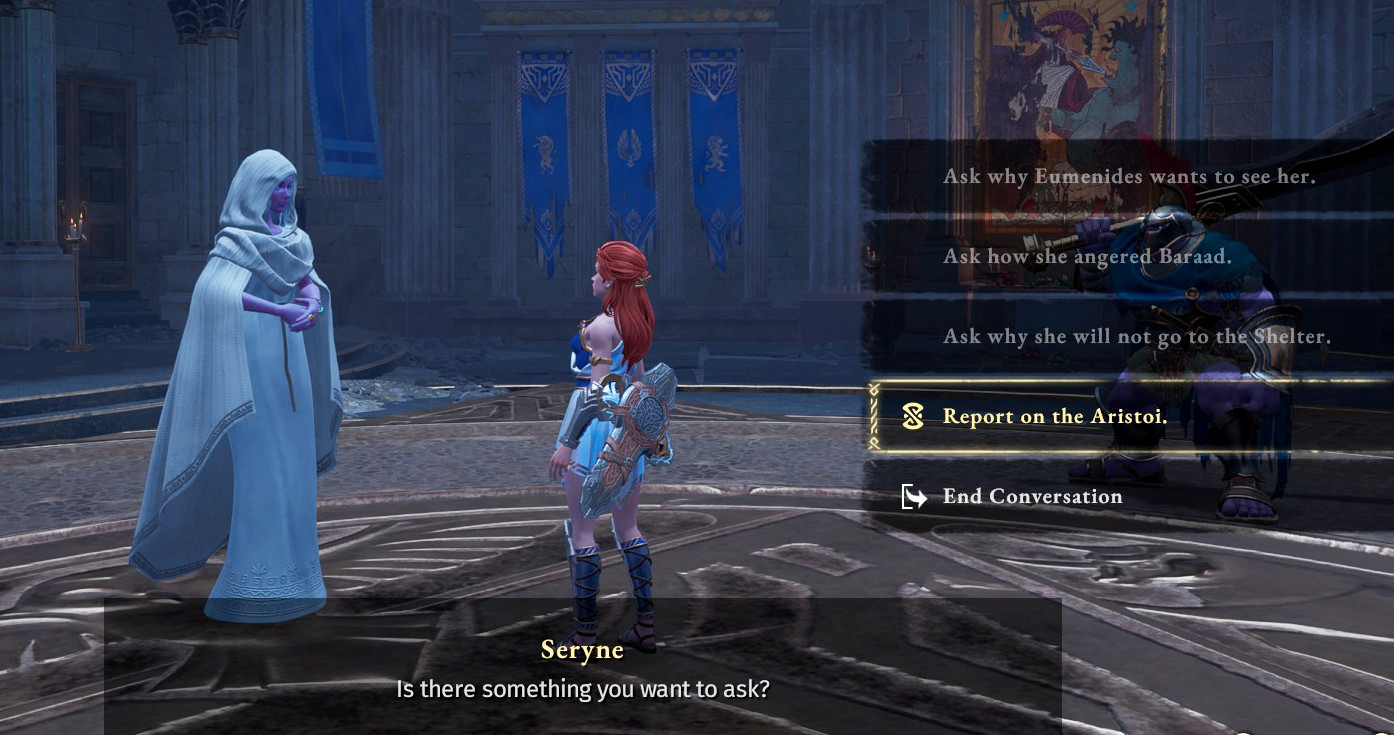
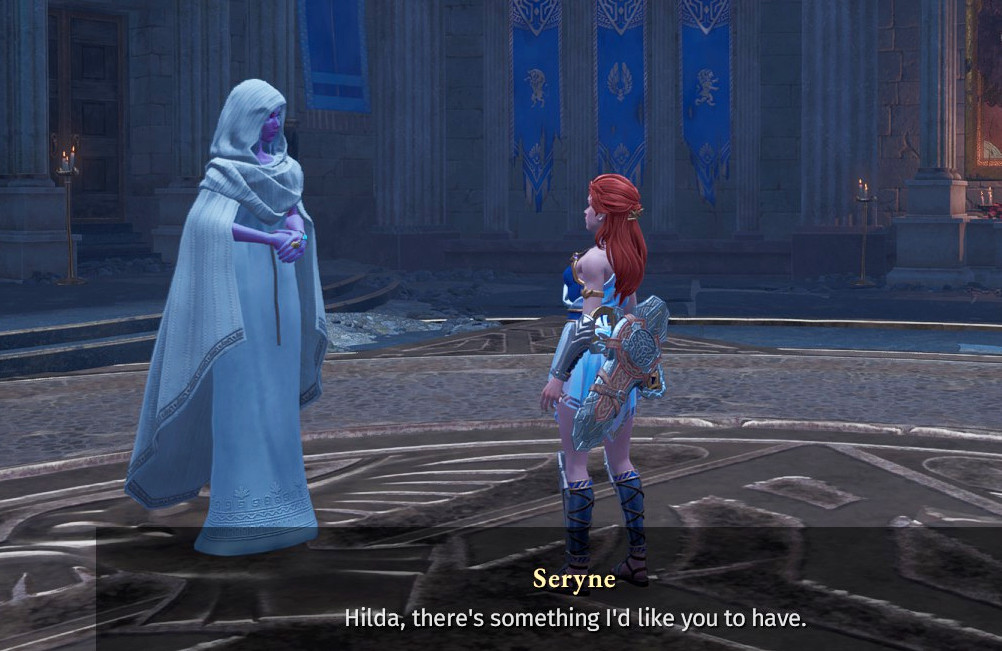
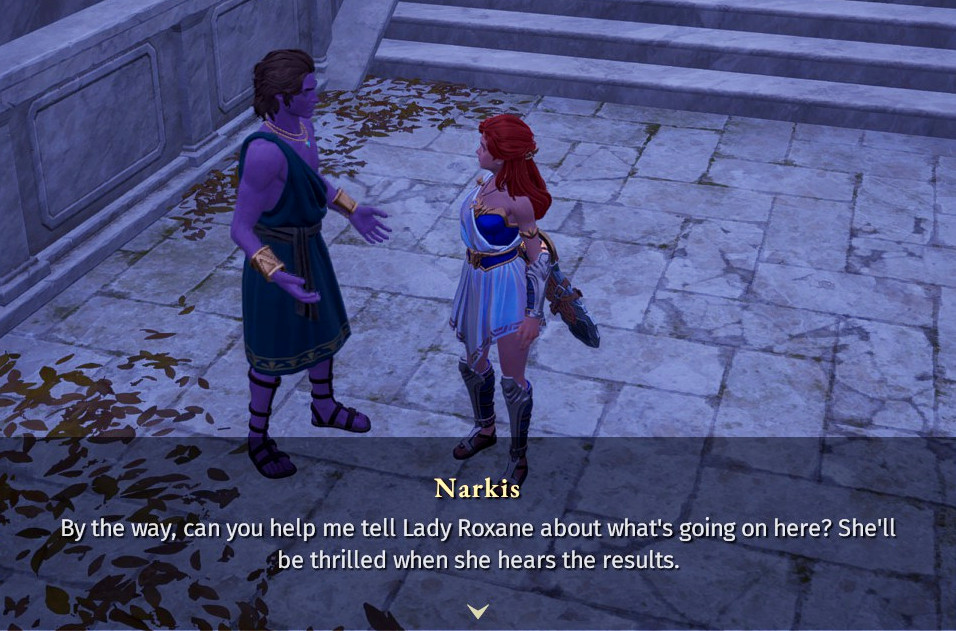
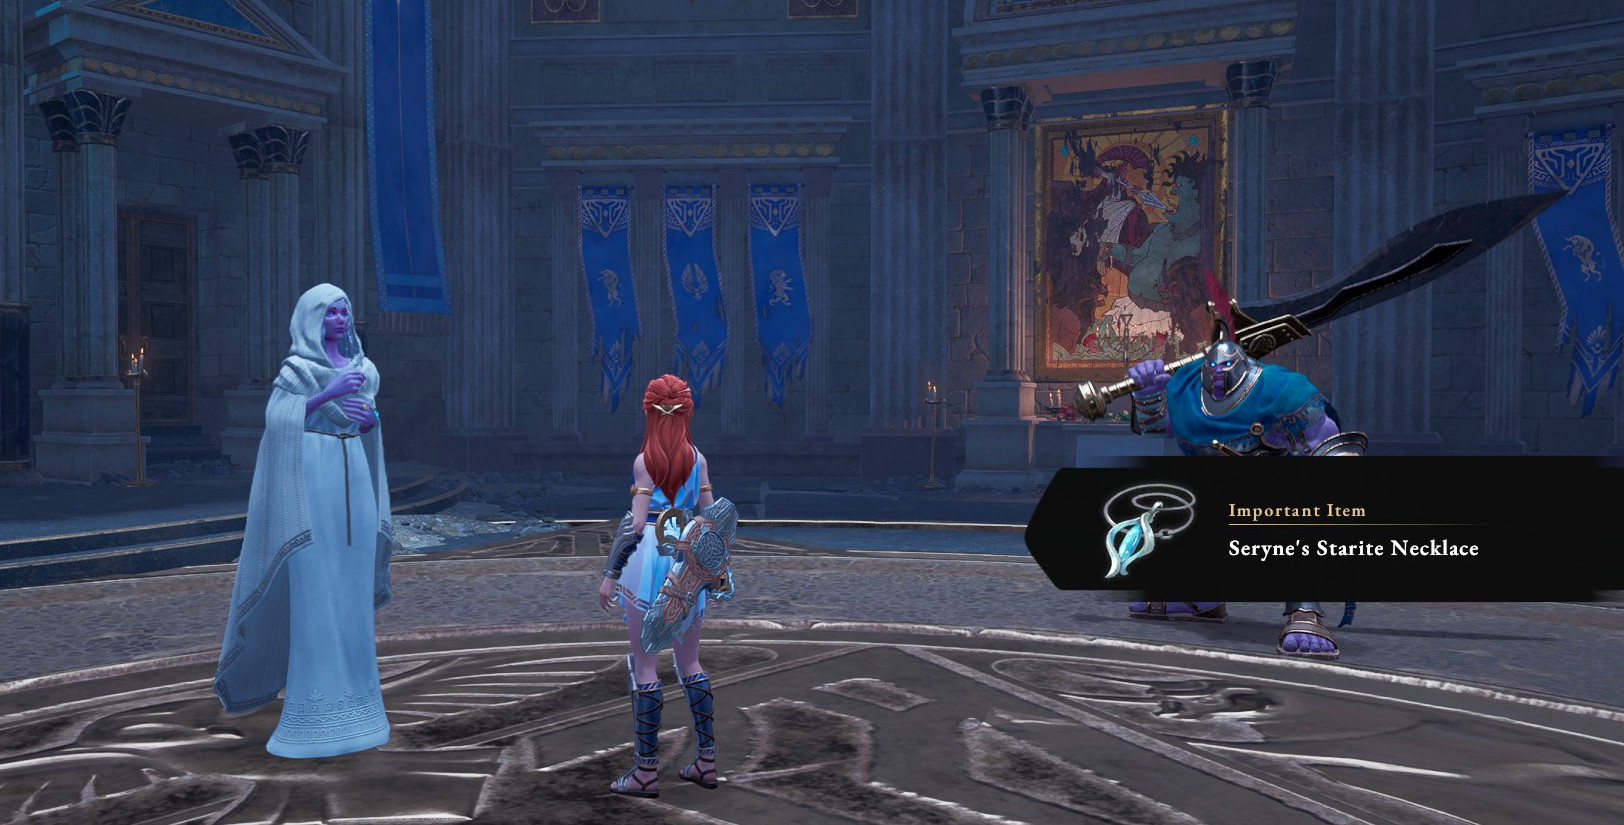
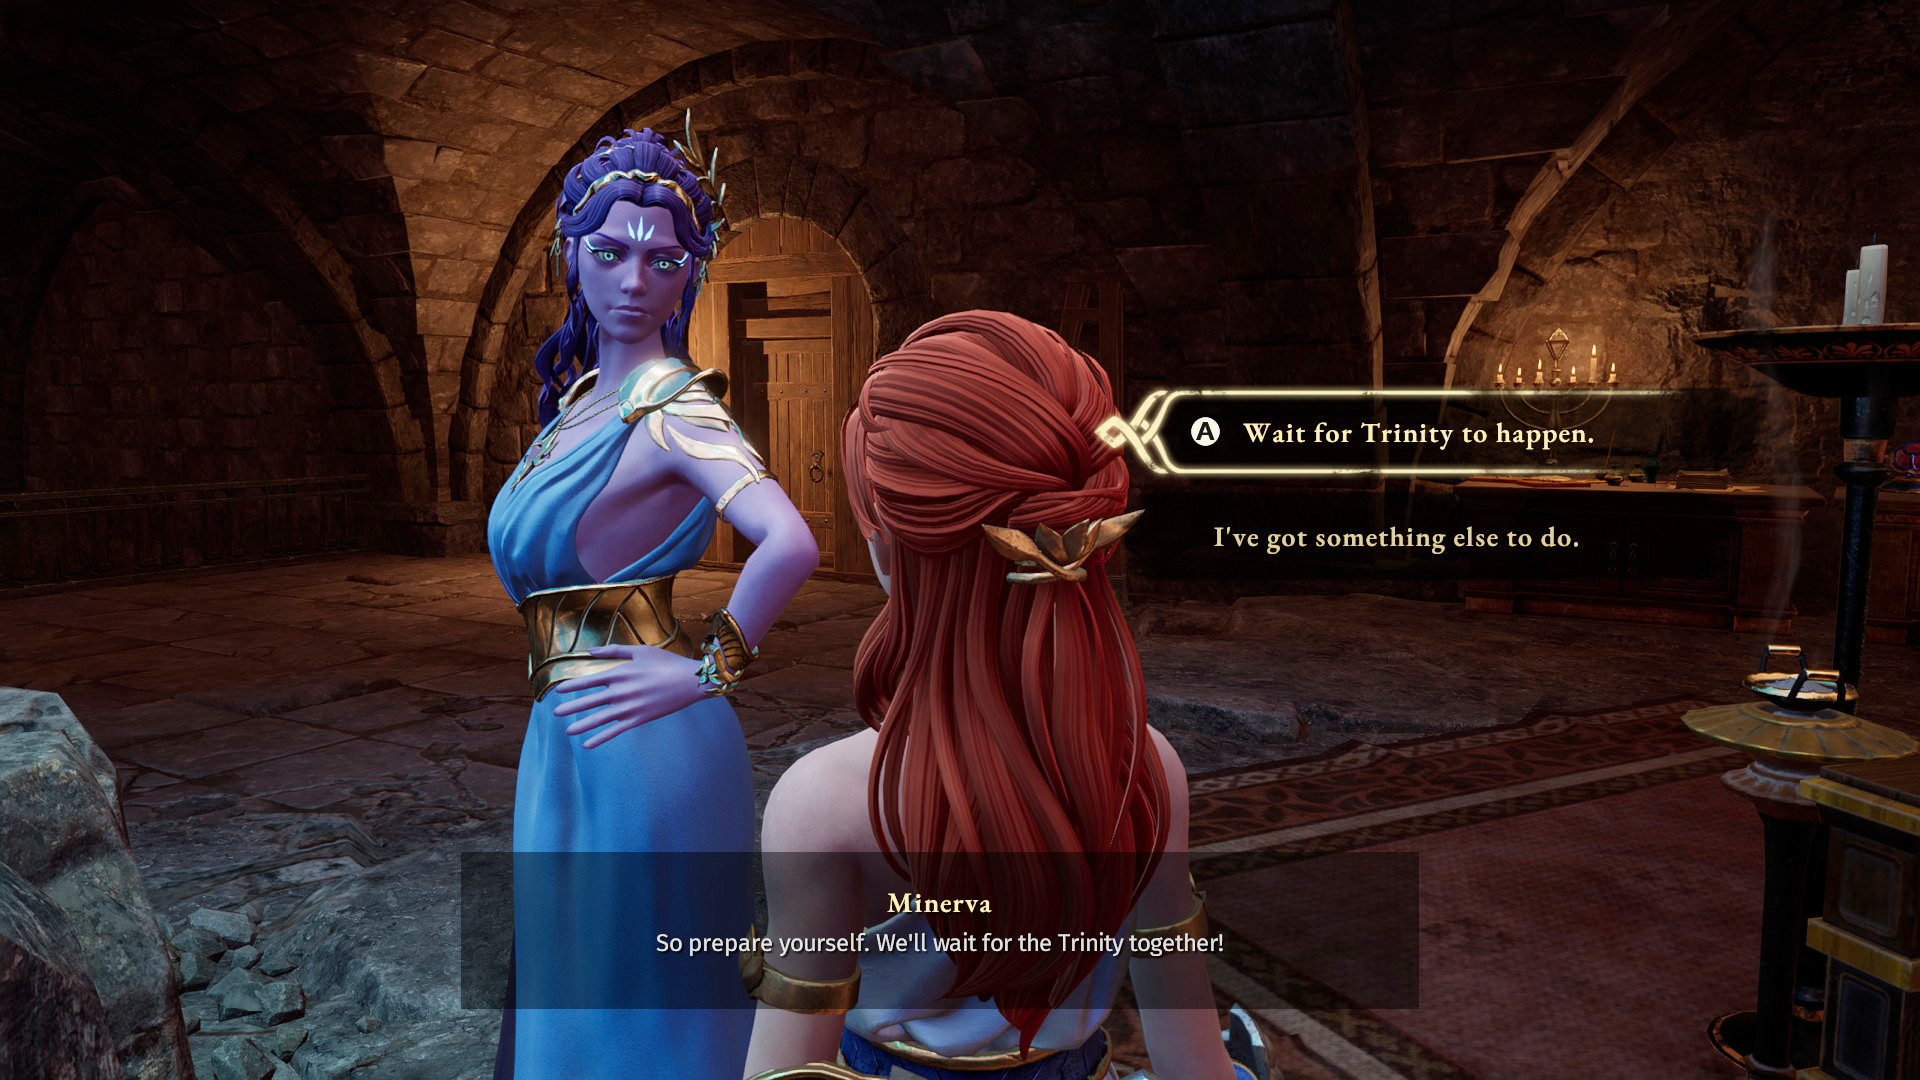
Also, regarding my previous comment: I was missing something for Seryne, so that quest wasn't buggy, I just didn't complete it properly (I guess I mixed up the condition met jingle with the quest complete jingle or something). But Roxane's dialogue never showed up, I'm pretty sure that was a bug.
Demonite 5 Nov, 2024 @ 12:26pm 
Is this game known to be buggy? I can't get two of the tokens to save my life. I completed the Narkis questline all the way up until you're supposed to talk to Roxane to report what happened in the Garden. But there simply is not dialogue option for her there. Narkis and all the Harpies are now gone from the Garden, but still I can't complete the quest and obtain the token. Another one I can't get is the one from Seryne. I completed her quest and got the jingle for it, but no token appeared on the table.
SotiCoto  [author] 27 Jul, 2024 @ 8:48am 
If the content list is blocking the main content then you're probably viewing the guide in a pop-up window. Don't do that. Open it directly from the Guides Section to view it properly.