The Great War: Western Front™

The Great War: Western Front™

Not enough ratings
HOW TO DEFEND
By Spector
Having trouble defending your objectives on the battle map? Let me explain why Machine gun nests and mortars are useless in The Great War: Western Front and a waste of supply points. I will show you two versions of the same battle in which you will see how better you can defend with just units and artillery and don’t need to use supply points on gun emplacements.
   
Award
Favorite
Favorited
Unfavorite
Useless Machine guns
You might think that defence in trench warfare during WW1 in The Great War: Western Front is all about machine gun nests and mowing down enemy infantry as they try to advance but the reality is very different.


For a video version of this guide, follow this link or continue reading here.


This is because due to pinpoint accuracy of enemy artillery the attacker can easily demolish all your stationery defenses like those machine gun nests along with any mortar emplacements you might have.


This will cost them even less supply points than it cost you to set them up, and while they are being bombarded from half the map away, you can’t get them to fire anyway. So when defending in this game, you actually have to take a much different approach to defence than what you might have thought going into this WW1 style strategy gameplay.

Two defence scenarios, tactics
And I will show you here the same battle but in two different scenarios. In the first I will place machine gun nests, along with mortars and barbed wire and of course the infantry companies and four light artillery batteries.


In the second I will use only infantry, artillery and barbed wire, and you will see just what difference this will make and it all boils down to getting the most use out of the limited supply points you get for each of these real time trench warfare battles.

Now if you want to see how to choose where to attack and have a successful offensive I have already made another guide which you can read or watch here:

https://gtm.steamproxy.vip/sharedfiles/filedetails/?id=2954590305

Here I am getting attacked by the Allies in my singleplayer campaign at one of my less defended regions and in total I will have just a bit more than 1400 supply points against 10 enemy battle formations which is A LOT of troops.

Battlefield setup
The two defence scenarios I will show you in this video both start the same way, by me setting up connections between trenches with communication trenches so my units can move between two trenches without coming under fire, but they can’t fire from this type of a trench.


These cost very little but are very useful especially when you want to move units from one trench where they are under artillery fire and suppressed to another where they won’t be. Also, they won’t get shot by any nearby enemy infantry because they are moving through a trench.

The second thing I do in both defence scenarios is to place barbed wire in front of my first line of trenches because it helps slow down enemy units as they try to swarm my own front line trenches and can be hit more by infantry and artillery while they are struggling to get through that barbed wire.


Third thing is to place an observation balloon in a central position to help me keep an eye on all of the no man's land and see where the enemy is attacking from and of course slow him down and suppress with my own artillery fire.

Scenario 1 explanation
Where the two defence scenarios now start to differ is the mentioned use of gun emplacements.


I will now add some machine gun and mortar emplacements to trenches at my Y objective because this is where I am sure the enemy will attack at, as there are fewest trenches here around the objective flag.


I will add one mortar in the middle to cover a lot of the defences and that will cost me 45 supply points. This cost is the crucial thing here, as machine gun nests cost an additional 30 points and they both have limited ranges of fire, with the machine gun having a limited fire arc.


But their worst trait is their stationary nature, making them easy targets for both enemy artillery and bombers. You can at least counter bombers with your own fighters, which costs supply points. But enemy artillery is free to blow up your emplacements as soon as they are spotted.


Scenario 2 explanation
You will see what difference these supply points can make when instead of machine gun emplacements and mortars I used them to have extra infantry reinforcements available in the second scenario of this same battle.


Lastly I add four light artillery batteries around the front line, and behind my own trenches, spaced out of course so they are not all destroyed if one part of the line falls to enemy units or an enemy bomber flies over.


This just leaves placing infantry into trenches around the line and inside all the objectives. My tactic here is to place conscripts, the weakest and cheapest type of units to the front trenches as they are going to be shelled by enemy artillery as they attack the front line and instead of my best troops getting bombarded they will be providing small arms fire support from trenches in the second or third line of defence.


The elite units will remain safe in the back or in the covered command trench where they won’t be detectable or bombarded. And act as fresh troops for counterattacks.

Now lets see how those gun emplacements fair against the enemy attack in the first defensive scenario of this battle.

Outsmarting the enemy AI
As it starts the enemy will first want to take out my observation balloon.


Knowing that I bait them out to send their fighter aircraft and waist points by first raising my balloon at the start of the battle, waiting to see the enemy aircraft in the skies, and then lower it quickly before they can get to it. This cost the enemy about 30 supply points while not doing a damn thing to me.

Sure I lose sight of the battle lines for a while, but I already know what is going to happen so it is no surprise that when I start getting shelled by the enemy artillery at my objective Y.


Now look at the two different defence scenarios. This is the first one where I have gun emplacements and they are the ones getting targeted by enemy artillery. After a few volleys they lose their health pretty fast and are subsequently destroyed. Meaning I just wasted 45 supply points on nothing, while the enemy lost maybe 30 points in total to destroy this mortar emplacement.

But look over here in my second defence scenario, the one with only infantry and artillery.


My conscripts which cost me a single supply point in the preparation phase of the battle are getting shelled and the enemy is using about 10 supply points to damage this unit and its morale while I can simply order these units to move into other trenches where they won’t be hit.


Knowing exactly where the enemy is going to attack, I now just have to move my reserve and my elite units up to that part of the front to cover it and be prepared for their eventual infantry assault. The bomber coming to this part of the front is another dead giveaway that this is the objective the enemy AI has planned to attack. Sending my own planes to intercept it is necessary to prevent it from blowing up my artillery batteries.
Gun emplacements destruction
Now here comes the first way of infantry.


Before we continue watching this scenario with no gun emplacements let's go back to the one where I used those. After that first mortar emplacement was finished off by enemy artillery, the enemy bomber arrived at my Y objective as well. Interception with my fighter air planes is even more crucial here as it can blow up the gun emplacements with even more ease than the artillery batteries.


With the bomber comes the first infantry assault and here I pause the game to give myself enough time to direct my artillery and infantry. With a mass assault like this my own artillery barrages won’t do much but soften these units up for the infantry to finish them off by firing from their trenches.

That is, the units which aren’t suppressed by enemy artillery and which have range. You can also see my machine gun emplacement getting blown up by enemy artillery and that one bomb from the air plane.


That is another 30 supply points I never even got to use for anything. While my conscripts costing just 1 supply point in the deployment phase are tearing apart the slowly advancing enemy units.

The one renaming machine gun nest is simply inadequate to protect the flank of this objective Y against such a swarm of infantry assault units, despite my artillery firing all barrels in support. This is another 30 points which at least got me some defensive value, but not much.


And now you will see how powerful infantry grenades are against such a gun emplacement at the front lines. BAM! Gone with the wind. Ok, so another lesson here, they are probably far more safer in the second line of trenches, but do remember they don’t have much range, and once the enemy is in your trench network your machine guns can’t target them.


This is looking like a big breakthrough for the enemy so let's pause this defensive scenario and go back to the one with no gun emplacements.
Why infantry units are better
Here we stopped just before the first infantry attack and we can see my front line units being targeted yet again by enemy artillery just in a different trench. Again, using the same tactic I move them to the other, now empty trench. I know it looks like a whack a mole game right now but there is a method to this madness.


Using artillery fire is again a must just like in the other scenario, to slow down, demoralise and suppress enemy attackers. If you are moving forces in the second or third line of trenches like I am doing here, keep an eye on those units as they move, because as you can see the enemy AI will target them with artillery as he will now avoid the front trenches his units are swarming over.

Because already damaged units, especially conscripts won’t be able to stand up to enemy assault units in melee trench combat, I will use the SHIFT+W key to withdraw these units as I told you about in my previous guide about attacking.


You have to do this not just because of the tactical situation and to get back supply points you can then reuse on new units, but also because the losses of entire unit companies lower your national will on the campaign map layer. Get that down to 0 and you lose the whole campaign.


Another benefit of using conscripts, and I am not proud of this tactic, is that you don’t have to be particularly squeamish about artillery friendly fire on them. Because as they are getting stormed in their trenches by enemy infantry you can rain down your own artillery barrages on top of all of them.


After units have withdrawn you can replace them with reinforcements and since you are under attack at your objective they will arrive much faster then enemy reinforcements which have to travel all the way from their objectives spawn points on the other side of the map. This is why enemy attacks come in waves.

Again as I explained before, watch the reinforcements and back rows of trenches for enemy artillery when moving your units as they are guaranteed to come under artillery fire.


Now the key things for a successful tactical response in this situation is keeping your units at the front at maximum offensive capability by rotating the new, fresh units from reinforcements for the damaged ones you have ordered to withdraw.

Additionally you have to clear your trenches of enemy units by counter attacking them and making sure to always send two of your units, as that is the trench limit, and under the cover of nearby trenches. Avoid moving them through open terrain above the trenches as they will be shot to pieces.

This is why you have to have elite and veteran units as your second line of defence because once the conscripts and artillery barrages have damaged enemy units you can win trench melee fights 9 out of 10 times. Clearing those trenches of enemy units and making room for your own units to get back into those trenches for the next enemy wave.


I didn’t utilise the time controls much in this battle, as I like the fast paced combat but I would certainly advise all new players to extensively pause the game when moving units, looking over the battlefield, ordering new artillery barrages or withdrawing units before they surrender or are obliterated. It is not an easy game and it takes a while to get the hang of all the moving pieces.

Now you can see that as the enemy attack stalls at my second line of defences my reinforcements can counter attack, remove the remaining enemy units from my trenches at objective Y and this is all happening before the enemy reinforcements have time to arrive.


Losses are of course inevitable and that is exactly why having a lot of supply points available is crucial to being able to protect and hold my objective in this battle where I am the defender.
Guns: Waste of supply points
Now let's jump back into the other scenario where I spent a lot of supply points on ineffective gun emplacements which have already been blown up by enemy artillery and bomber planes. As well as the advancing infantry swarm.


I want you to take a look at my supply points count here at the bottom left, it is somewhat above 400 points. That is what I have for the reminder of this battle, not counting supply points I will recycle by ordering units to withdraw.

But back in that other scenario, with no gun emplacements I actually had above 600 supply points at this same stage of the defensive battle. A 150 points difference is the difference of 7 elite units or 15 veterans or as much as 75 conscripts units. Now I believe you are starting to see the big picture and the difference in these two tactical approaches to defensive battles.


I know many of you have taken to the forums and other places to say that the AI cheats, has infinite supply points, can see through the fog of war without observation balloons, has infinite range on his artillery… and so on.

Now I won’t claim any of this is true or false, as I have no proof either way, but I want you to judge those claims for yourself when you play the game and also by watching what happens at the end of these two battles I am showing you know. Because I think you will be surprised by the results.

Why supply counts
From this point in both of the battles I will be using the same tactics I have explained so far. Artillery barrage on incoming infantry waves, sacrificing conscripts on the front lines, counter attacking with veterans and elites to clear trenches and keep pushing the enemy units out of my objective so they can’t capture it and call in reinforcements from it.

But here is where the difference in supply points between using and not using stationary gun emplacements came in.


Once I got to almost 0 supply points in the battle where I had used them, I started running out of units to fend off new enemy infantry attack waves. One by one I was losing units I could no longer replace and was down to 25 units at this point. While the enemy AI kept sending in new waves of infantry attackers at my objective Y.

I was steadily being pushed back while using cheaper and cheaper units which couldn't fight back. Not only did I lose objective Y, but as my unit count was drooping I was in danger of losing my main command point. The last enemy wave to arrive had a ton of units, while I was down to 15 units, and this was including my artillery batteries which were silent as I had no more supply points for artillery barrages.


One by one my trenches fell to enemy control and I even got attacked by the remaining enemy units from his own defenders from his objectives at my other objective X. This was definitely the final push and the AI was down to pulling every single unit from trenches and throwing them into the attack.


I had a single veteran unit remaining and 3 units of conscripts with enemy units already attacking my main command post. There was a melee fight right inside of it which I barely won, and with conscripts which I had to withdraw.


Now just moments before the enemy AI was to walk into my now empty command post, which he didn’t know was empty, he calls a cease fire. Meaning he would have to take a loss here. Talk about cutting it close!


Why did the enemy AI stop here? Why call a cease fire when you have a clear victory on your hands? Well two reasons: a) he doesn’t have complete map knowledge and information about my units and b) he was out of supply points.


That is what saved my bacon here. You can see the final stats and the fact that I destroyed about 15,000 enemy soldiers. But the enemy scored a lot of points for all the trench close quarter victories, destroying my artillery and capturing that Y objective. Hence the stalemate result.


Better defence Scenario
Now let's look at how the other battle will end, the one where I used only infantry and artillery and didn’t spend points on gun emplacements.


Each new enemy wave was repulsed in the same manner using the same tactics I have explained here, but the crucial difference was the fact that I was able to keep my strength at 30 units much longer.


I had not just 20 units for the last enemy attack wave but also still had my forward trench positions at the Y objective under my control.


As the enemy tried for that last push he ran out of supply points without taking an inch of ground. This forced the AI to finish the battle by calling a ceasefire.


Now check the stats again, with me. 15,000 allied soldiers killed, a few trench and air battle victories for me.


About the same stats, but on the Allied side, about the same points for killing my soldiers but no other points beyond the 14 trench melee victories.


Which is why this battle turns into a victory for my side with a huge negative national will score for the Allies.


If we analyse the supply points spent you can see I was able to recycle a lot of points when withdrawing my infantry by not using up those points in the first place on useless gun emplacements.


Thank you for reading or watching and happy gaming.
14 Comments
car battery 16 Jul @ 3:07pm 
or just blow up their balloons
Henrique Lique 2 Jan, 2024 @ 6:35am 
mg are weak to artillery, but the way you placed made your analysis pretty biased. You need at least 3 artillery salvos to kill an mg.

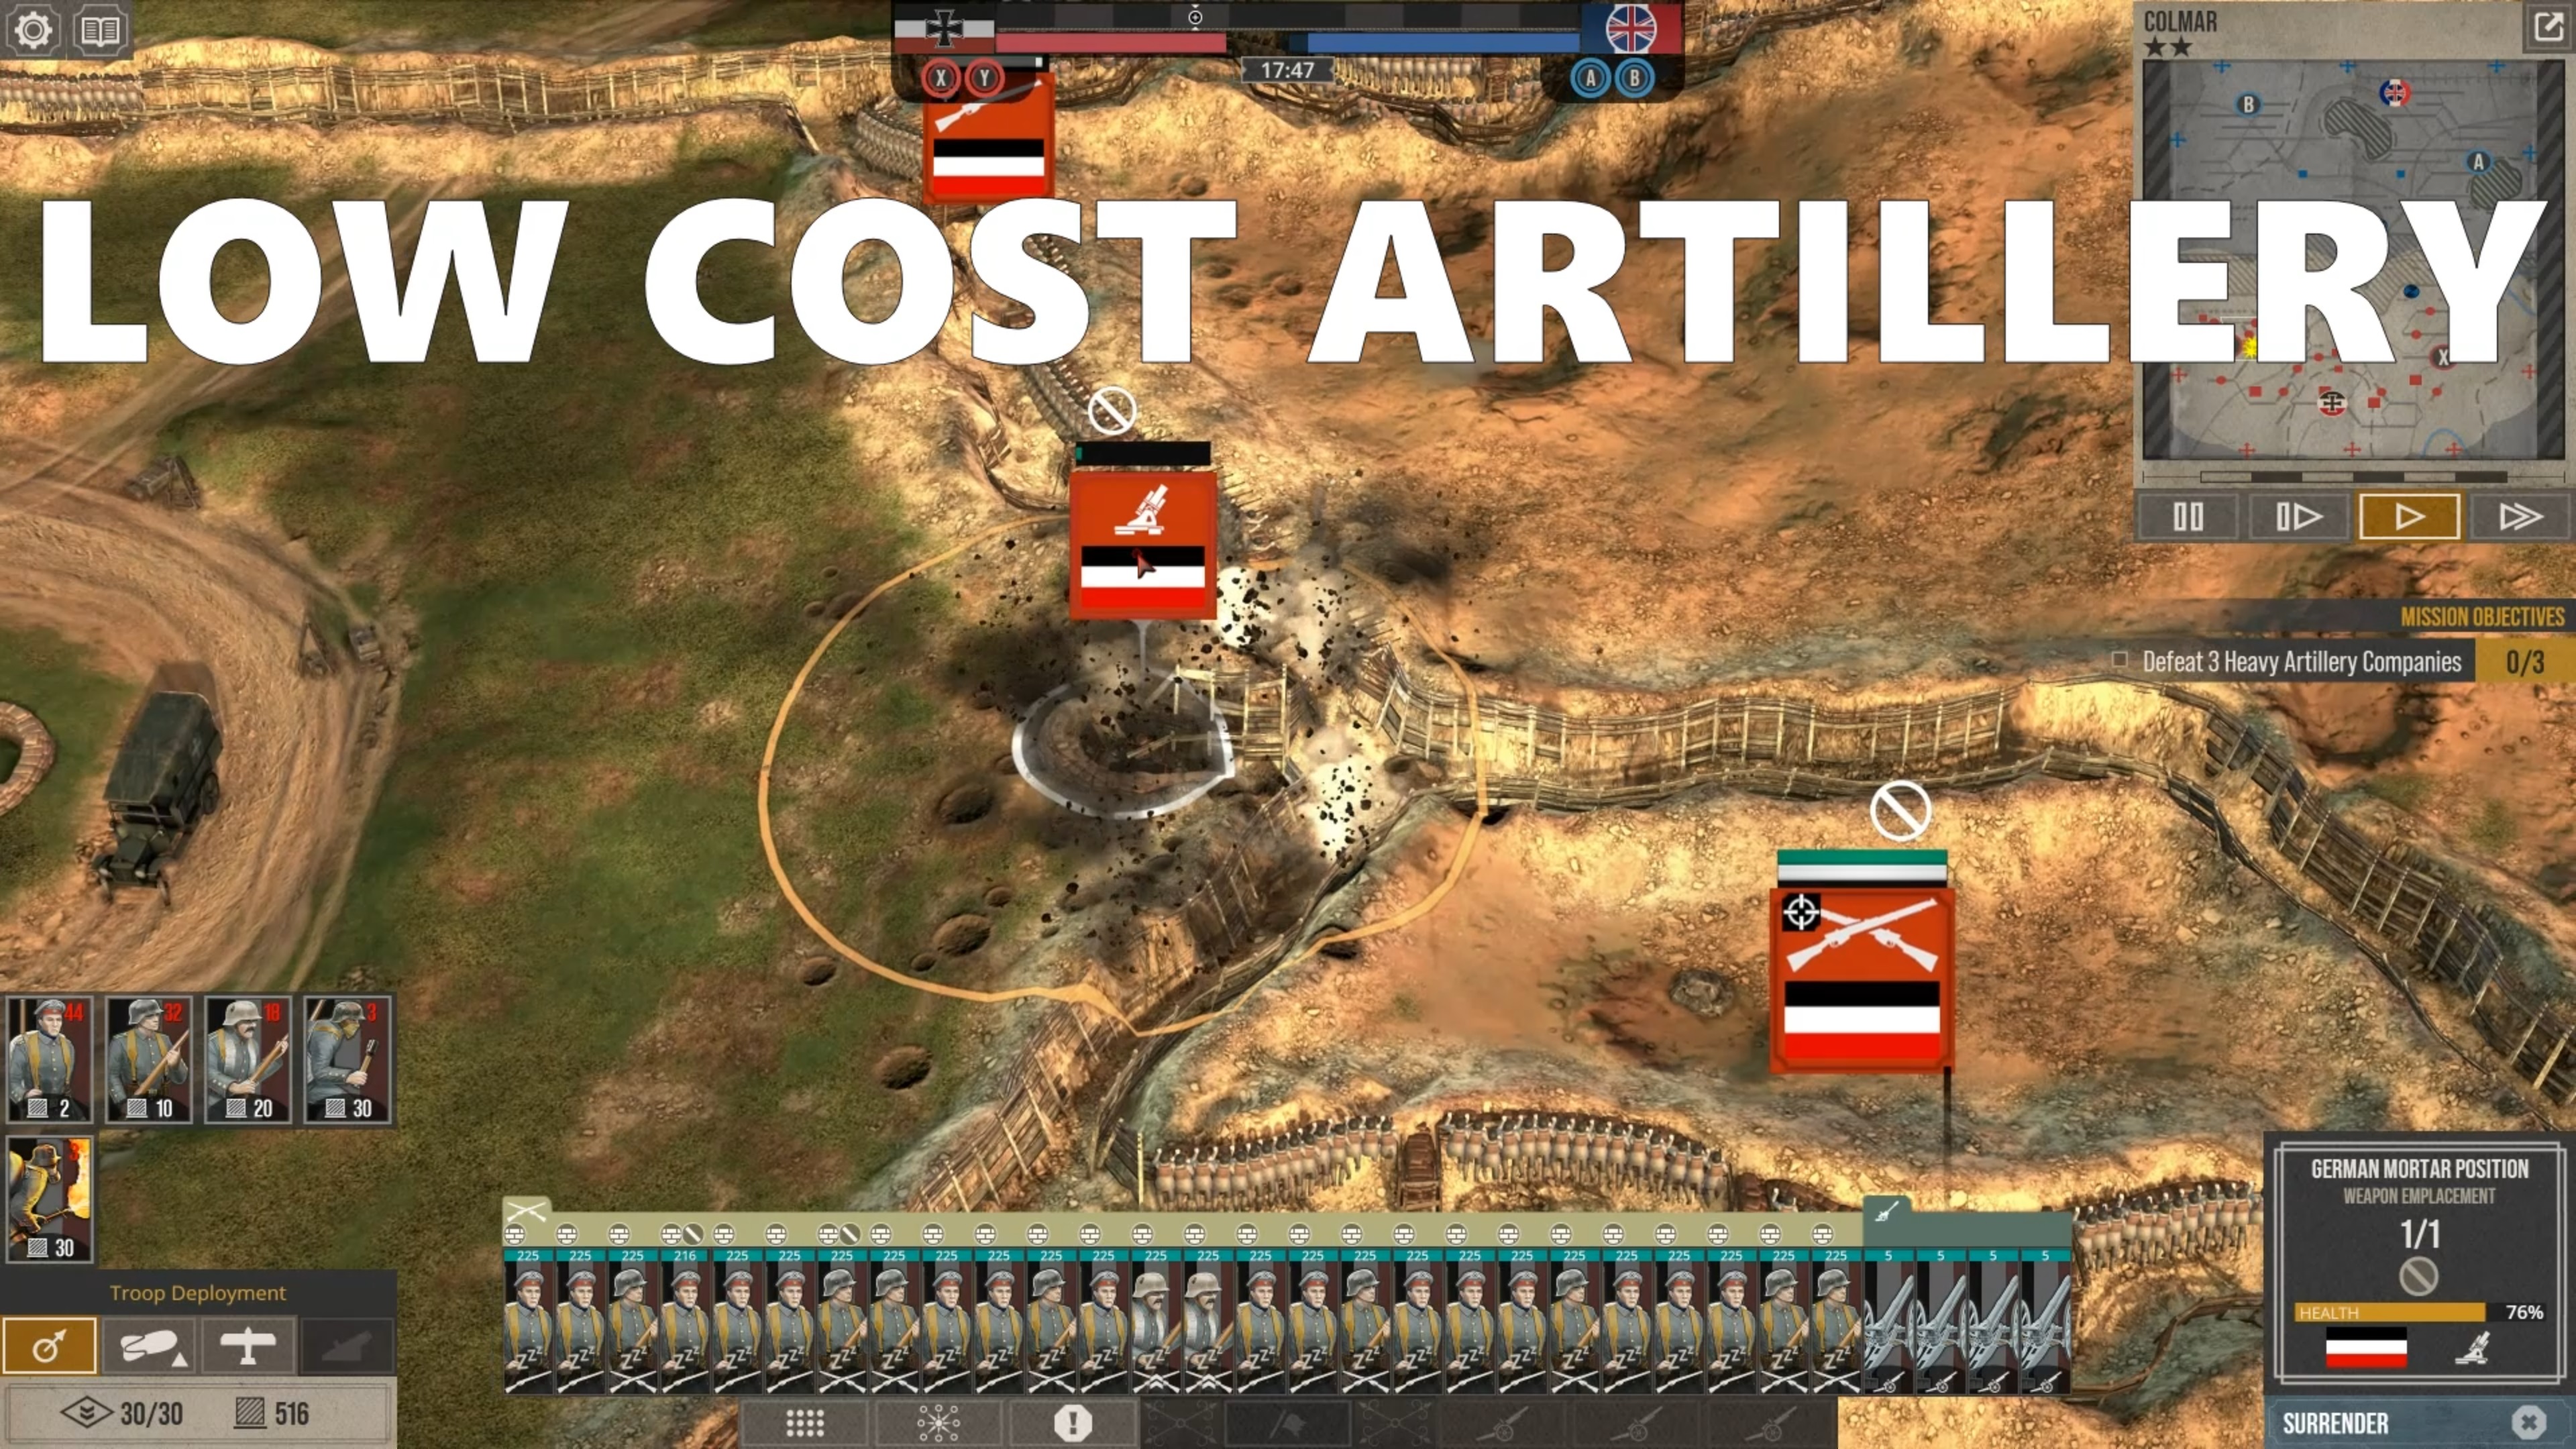
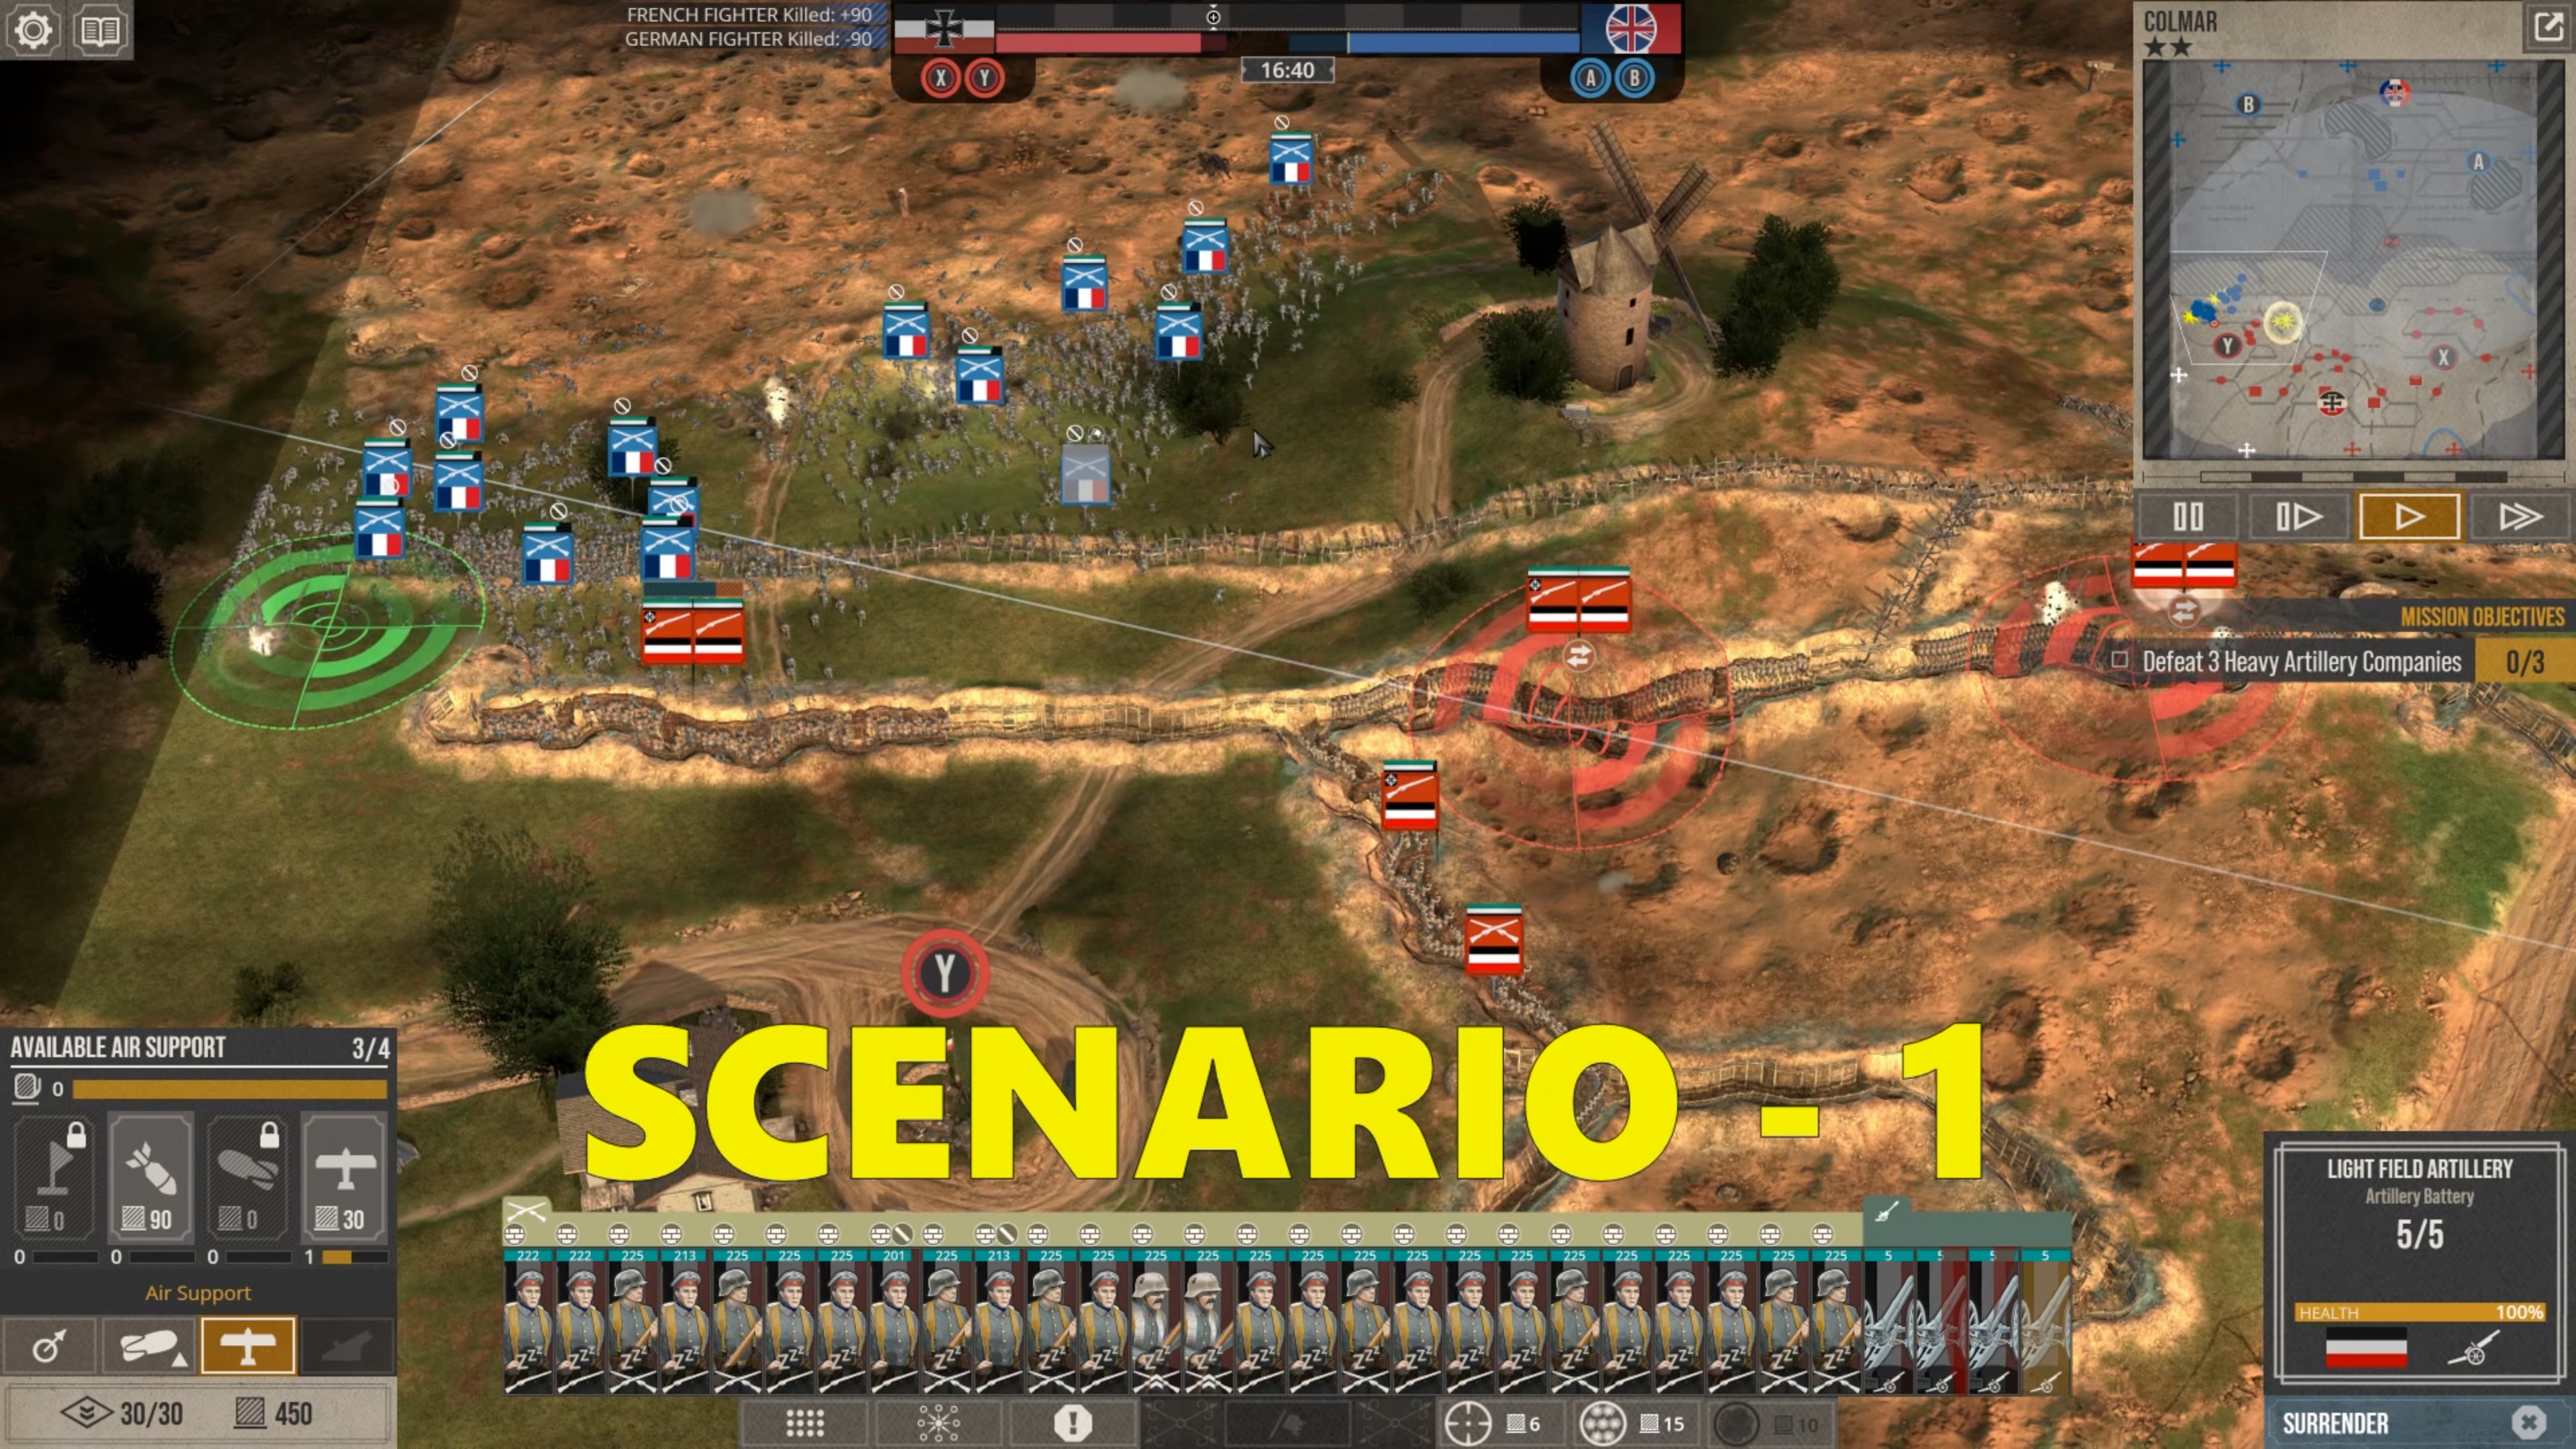
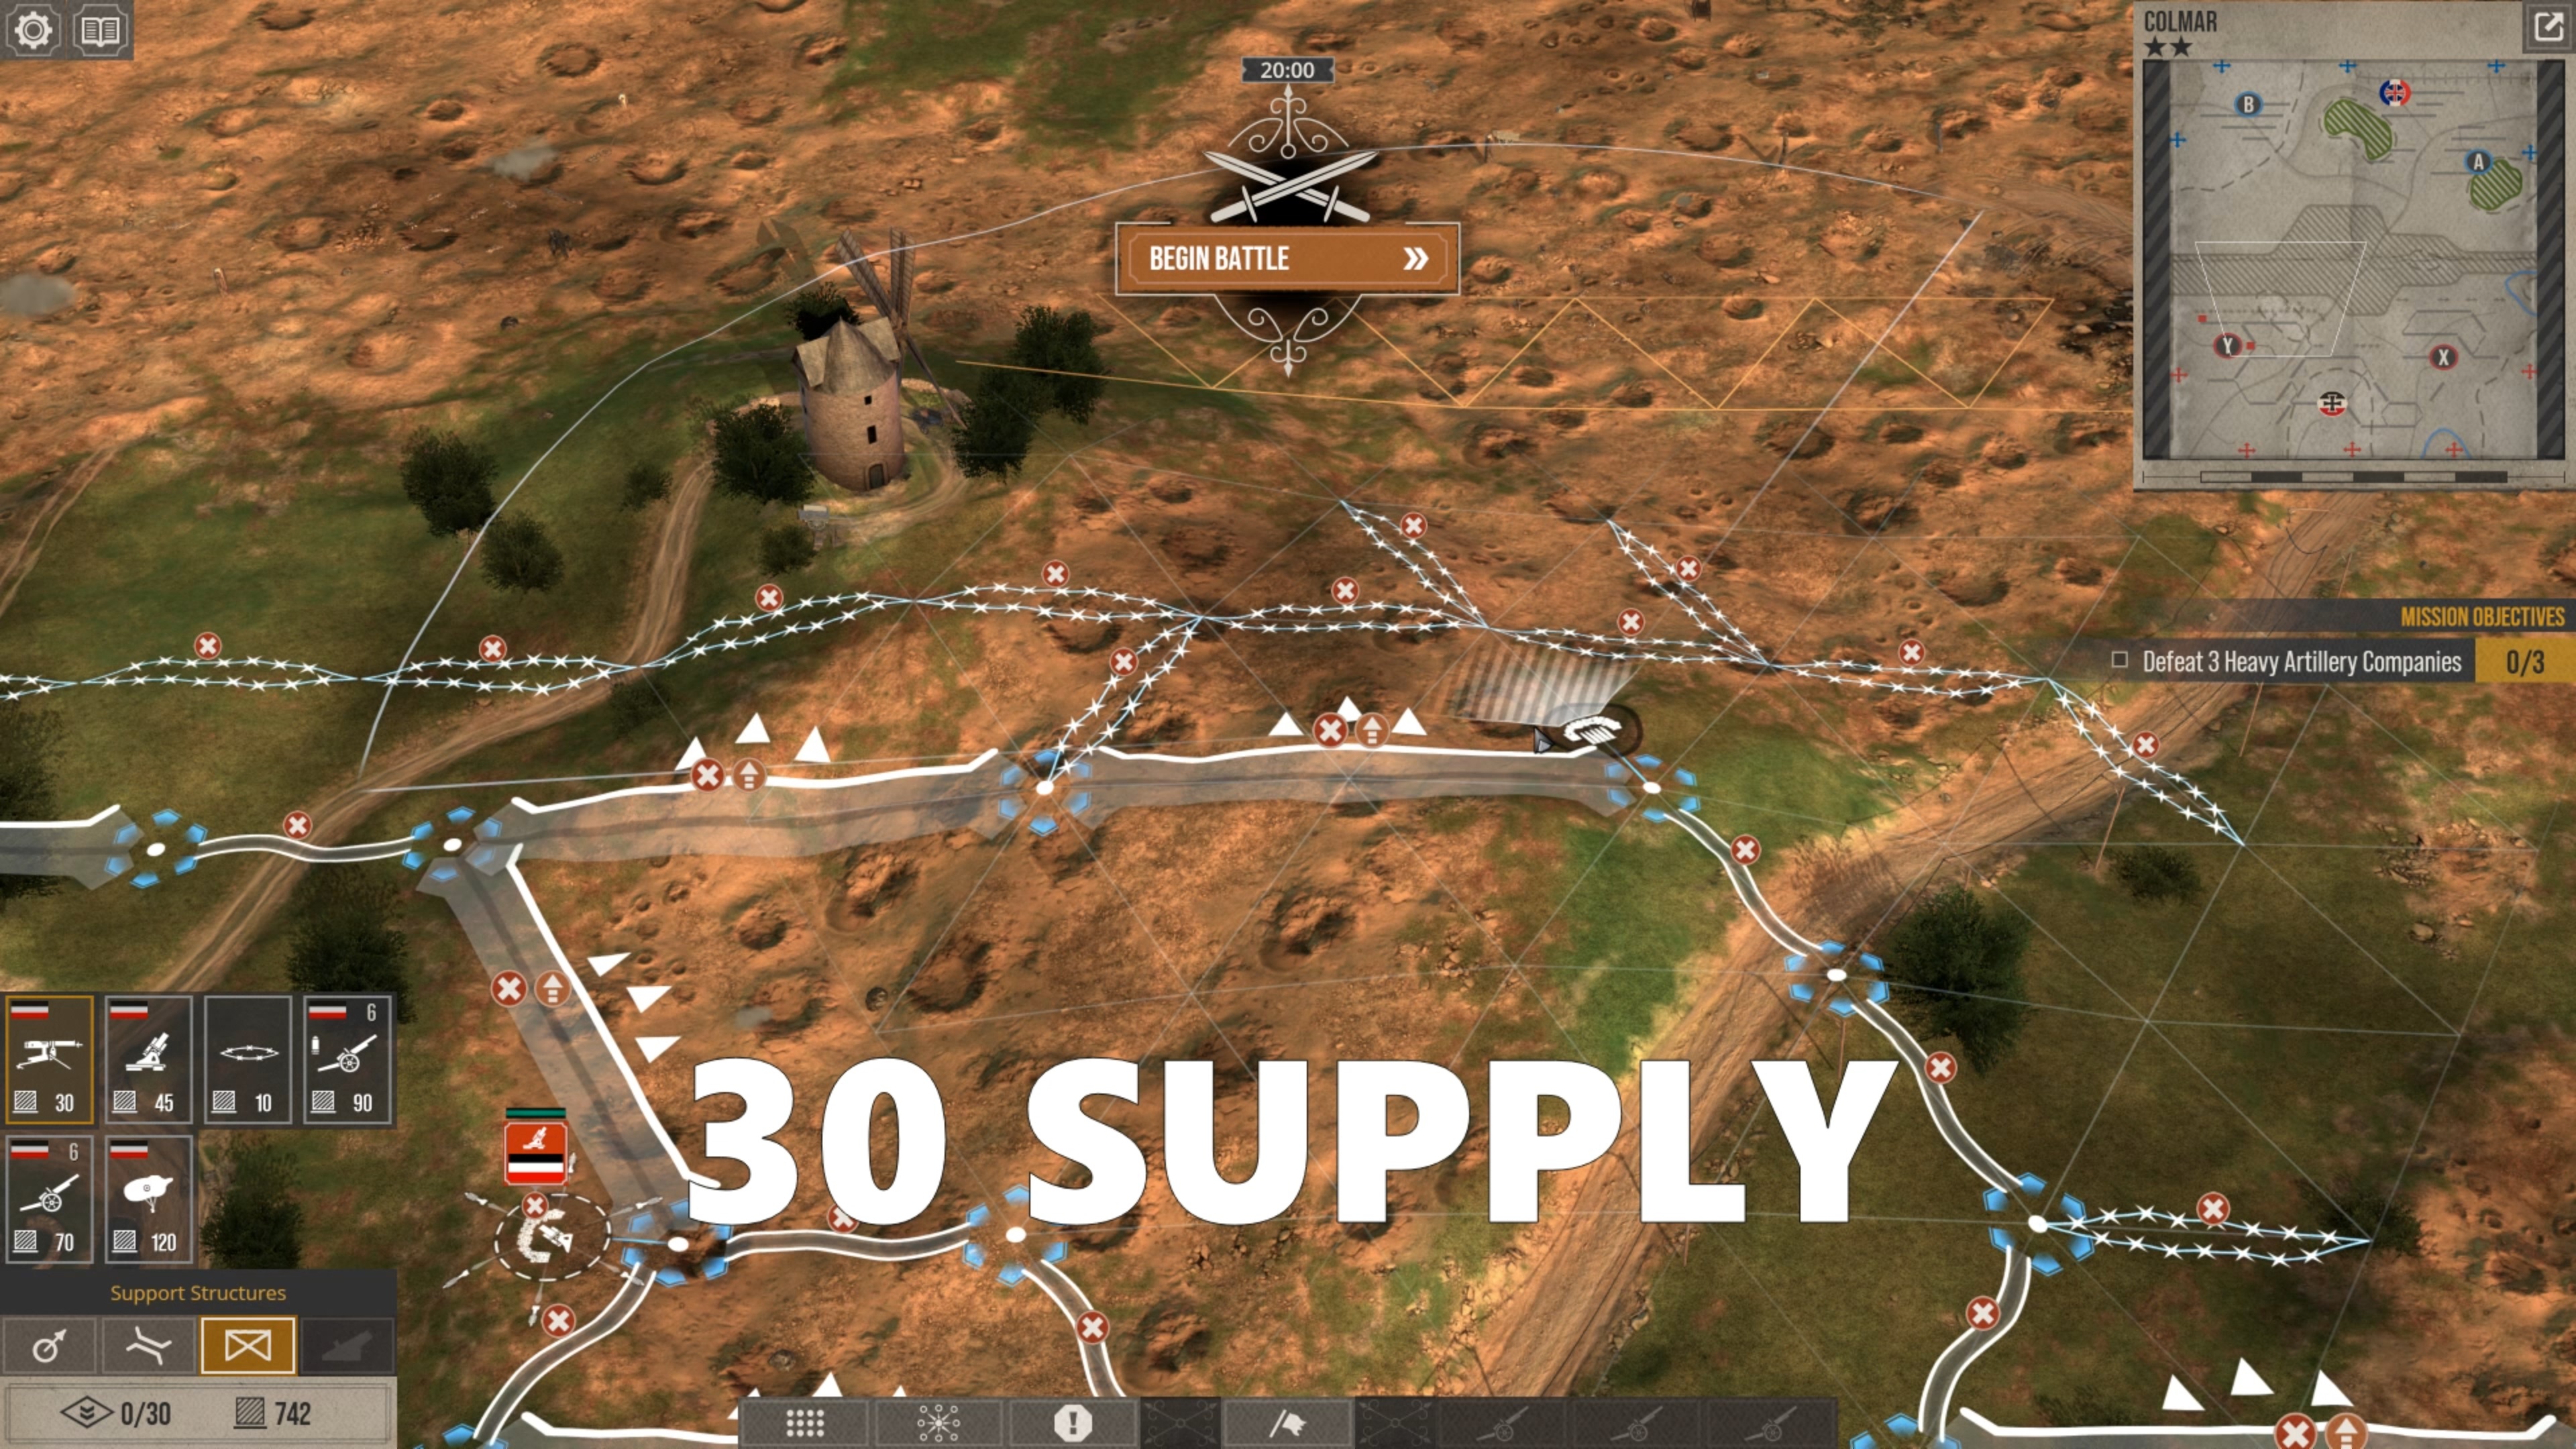
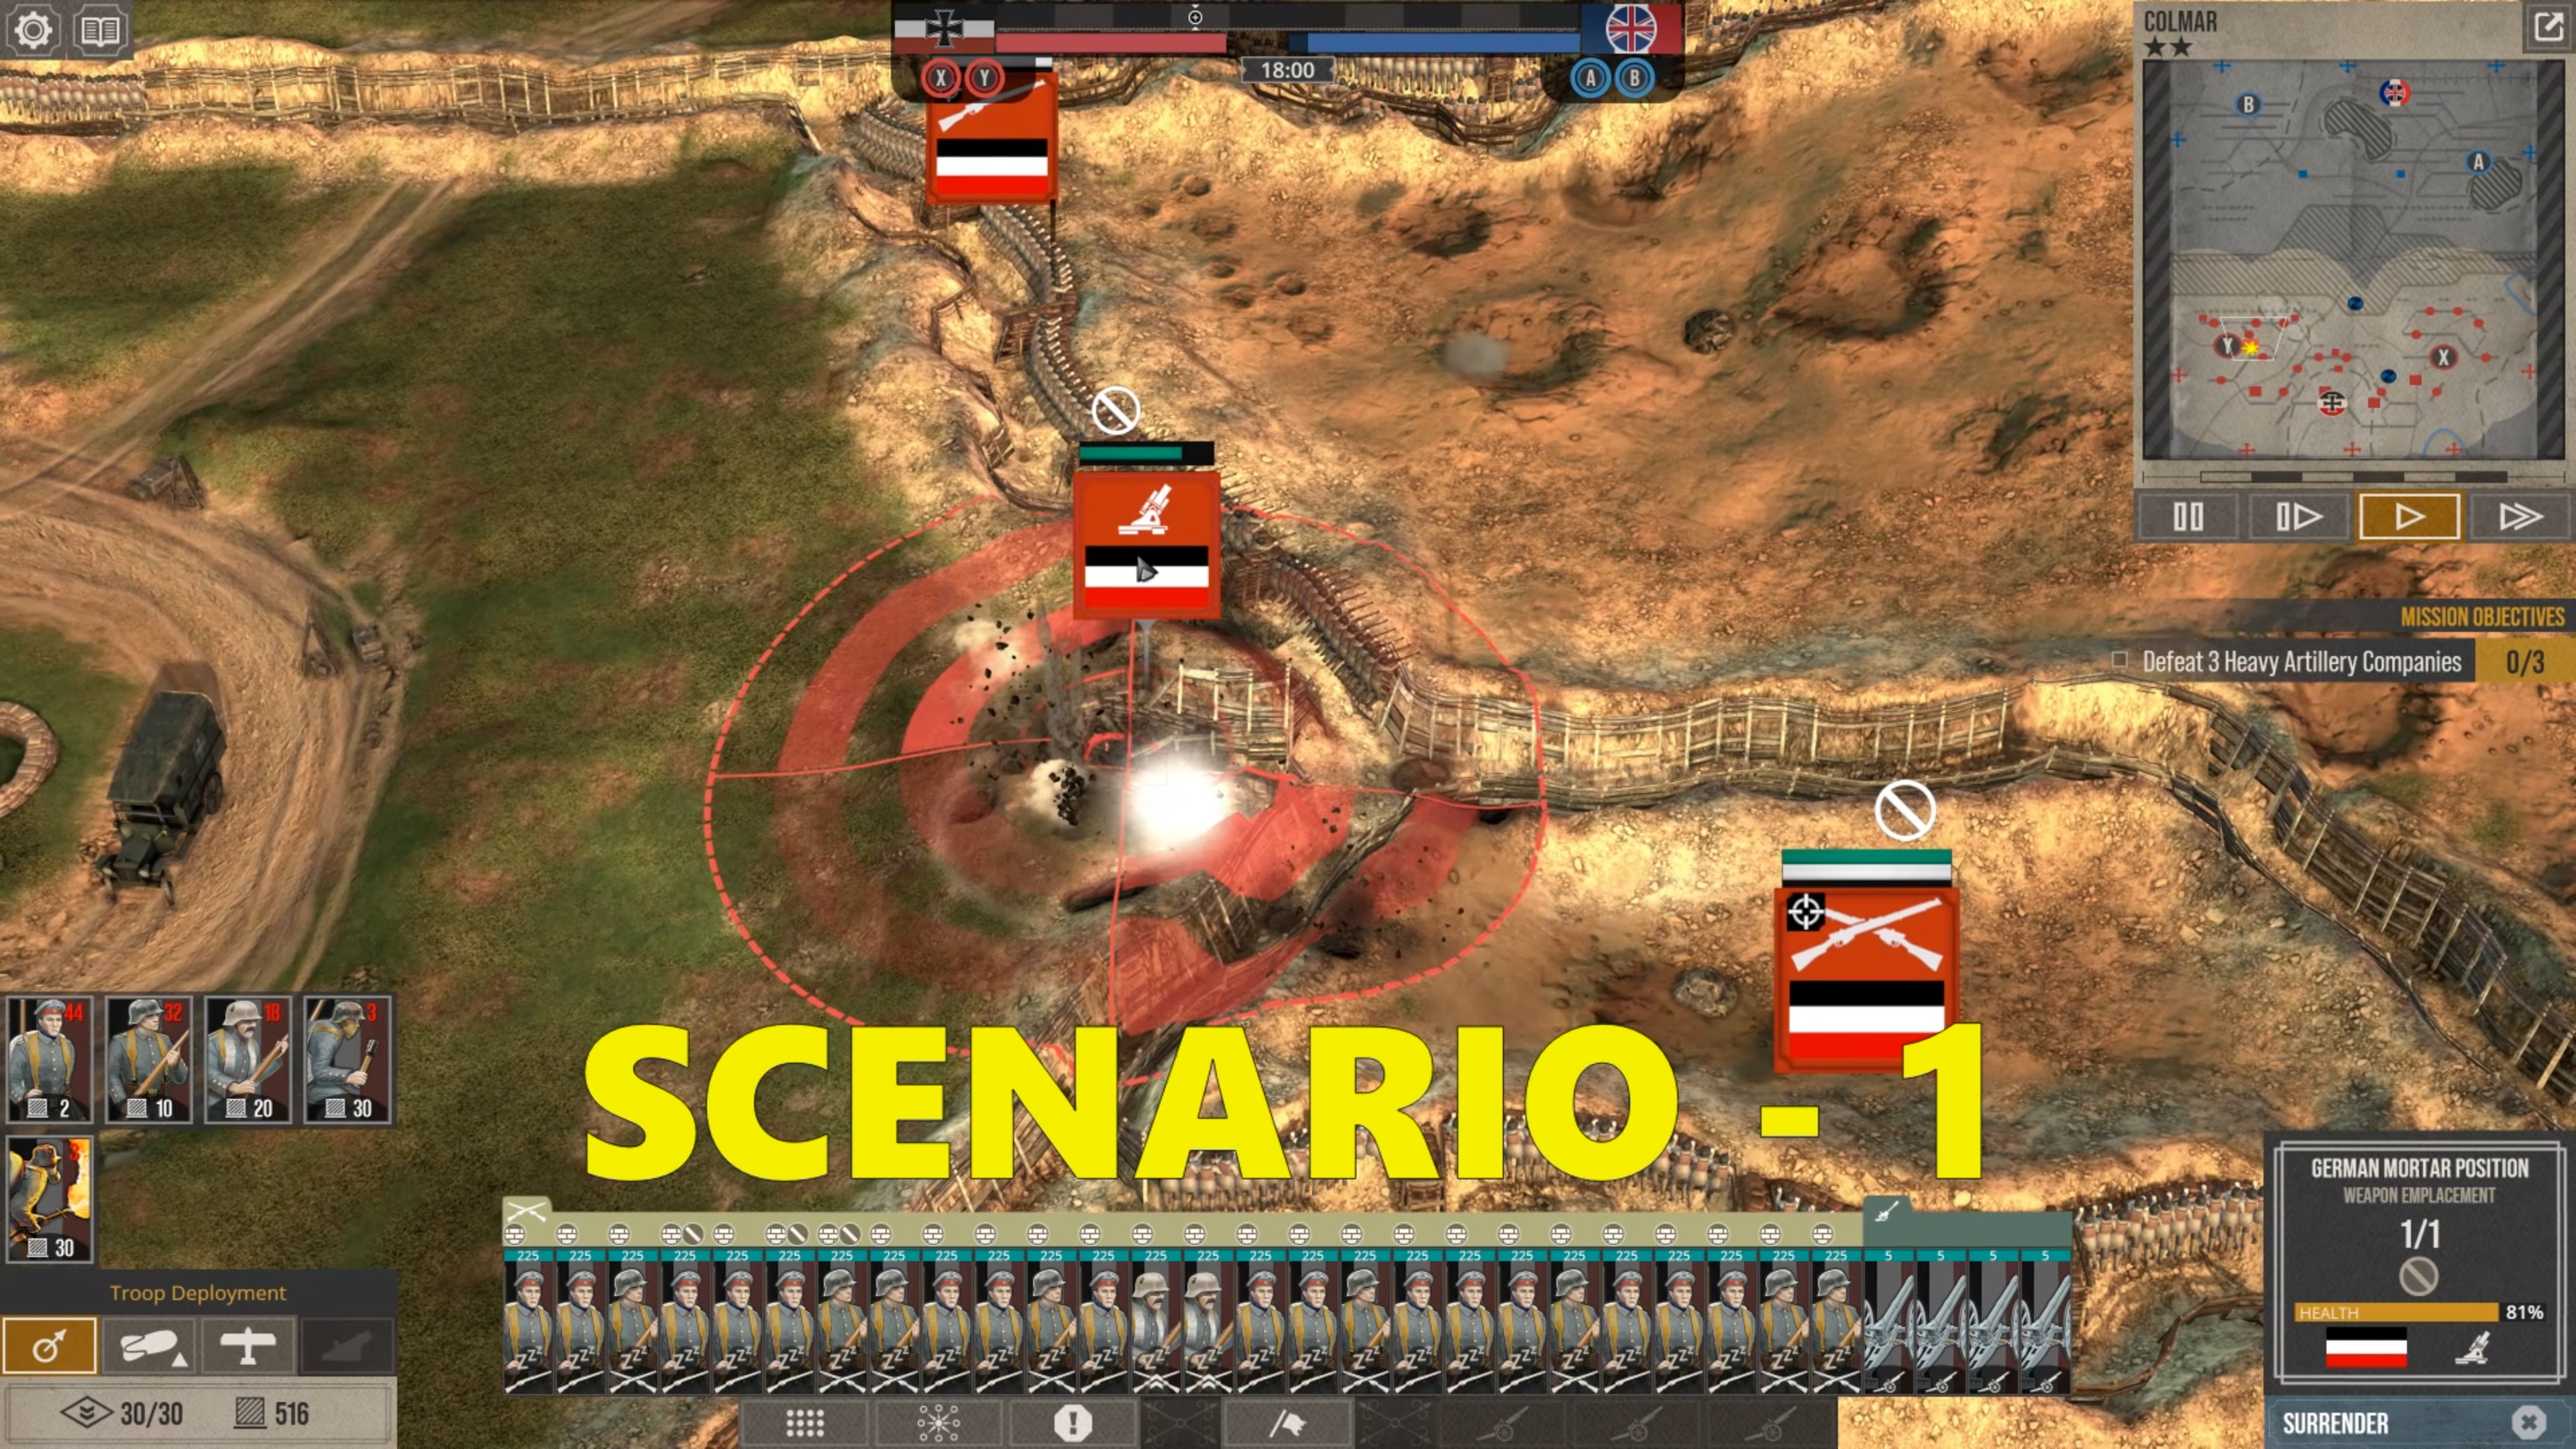
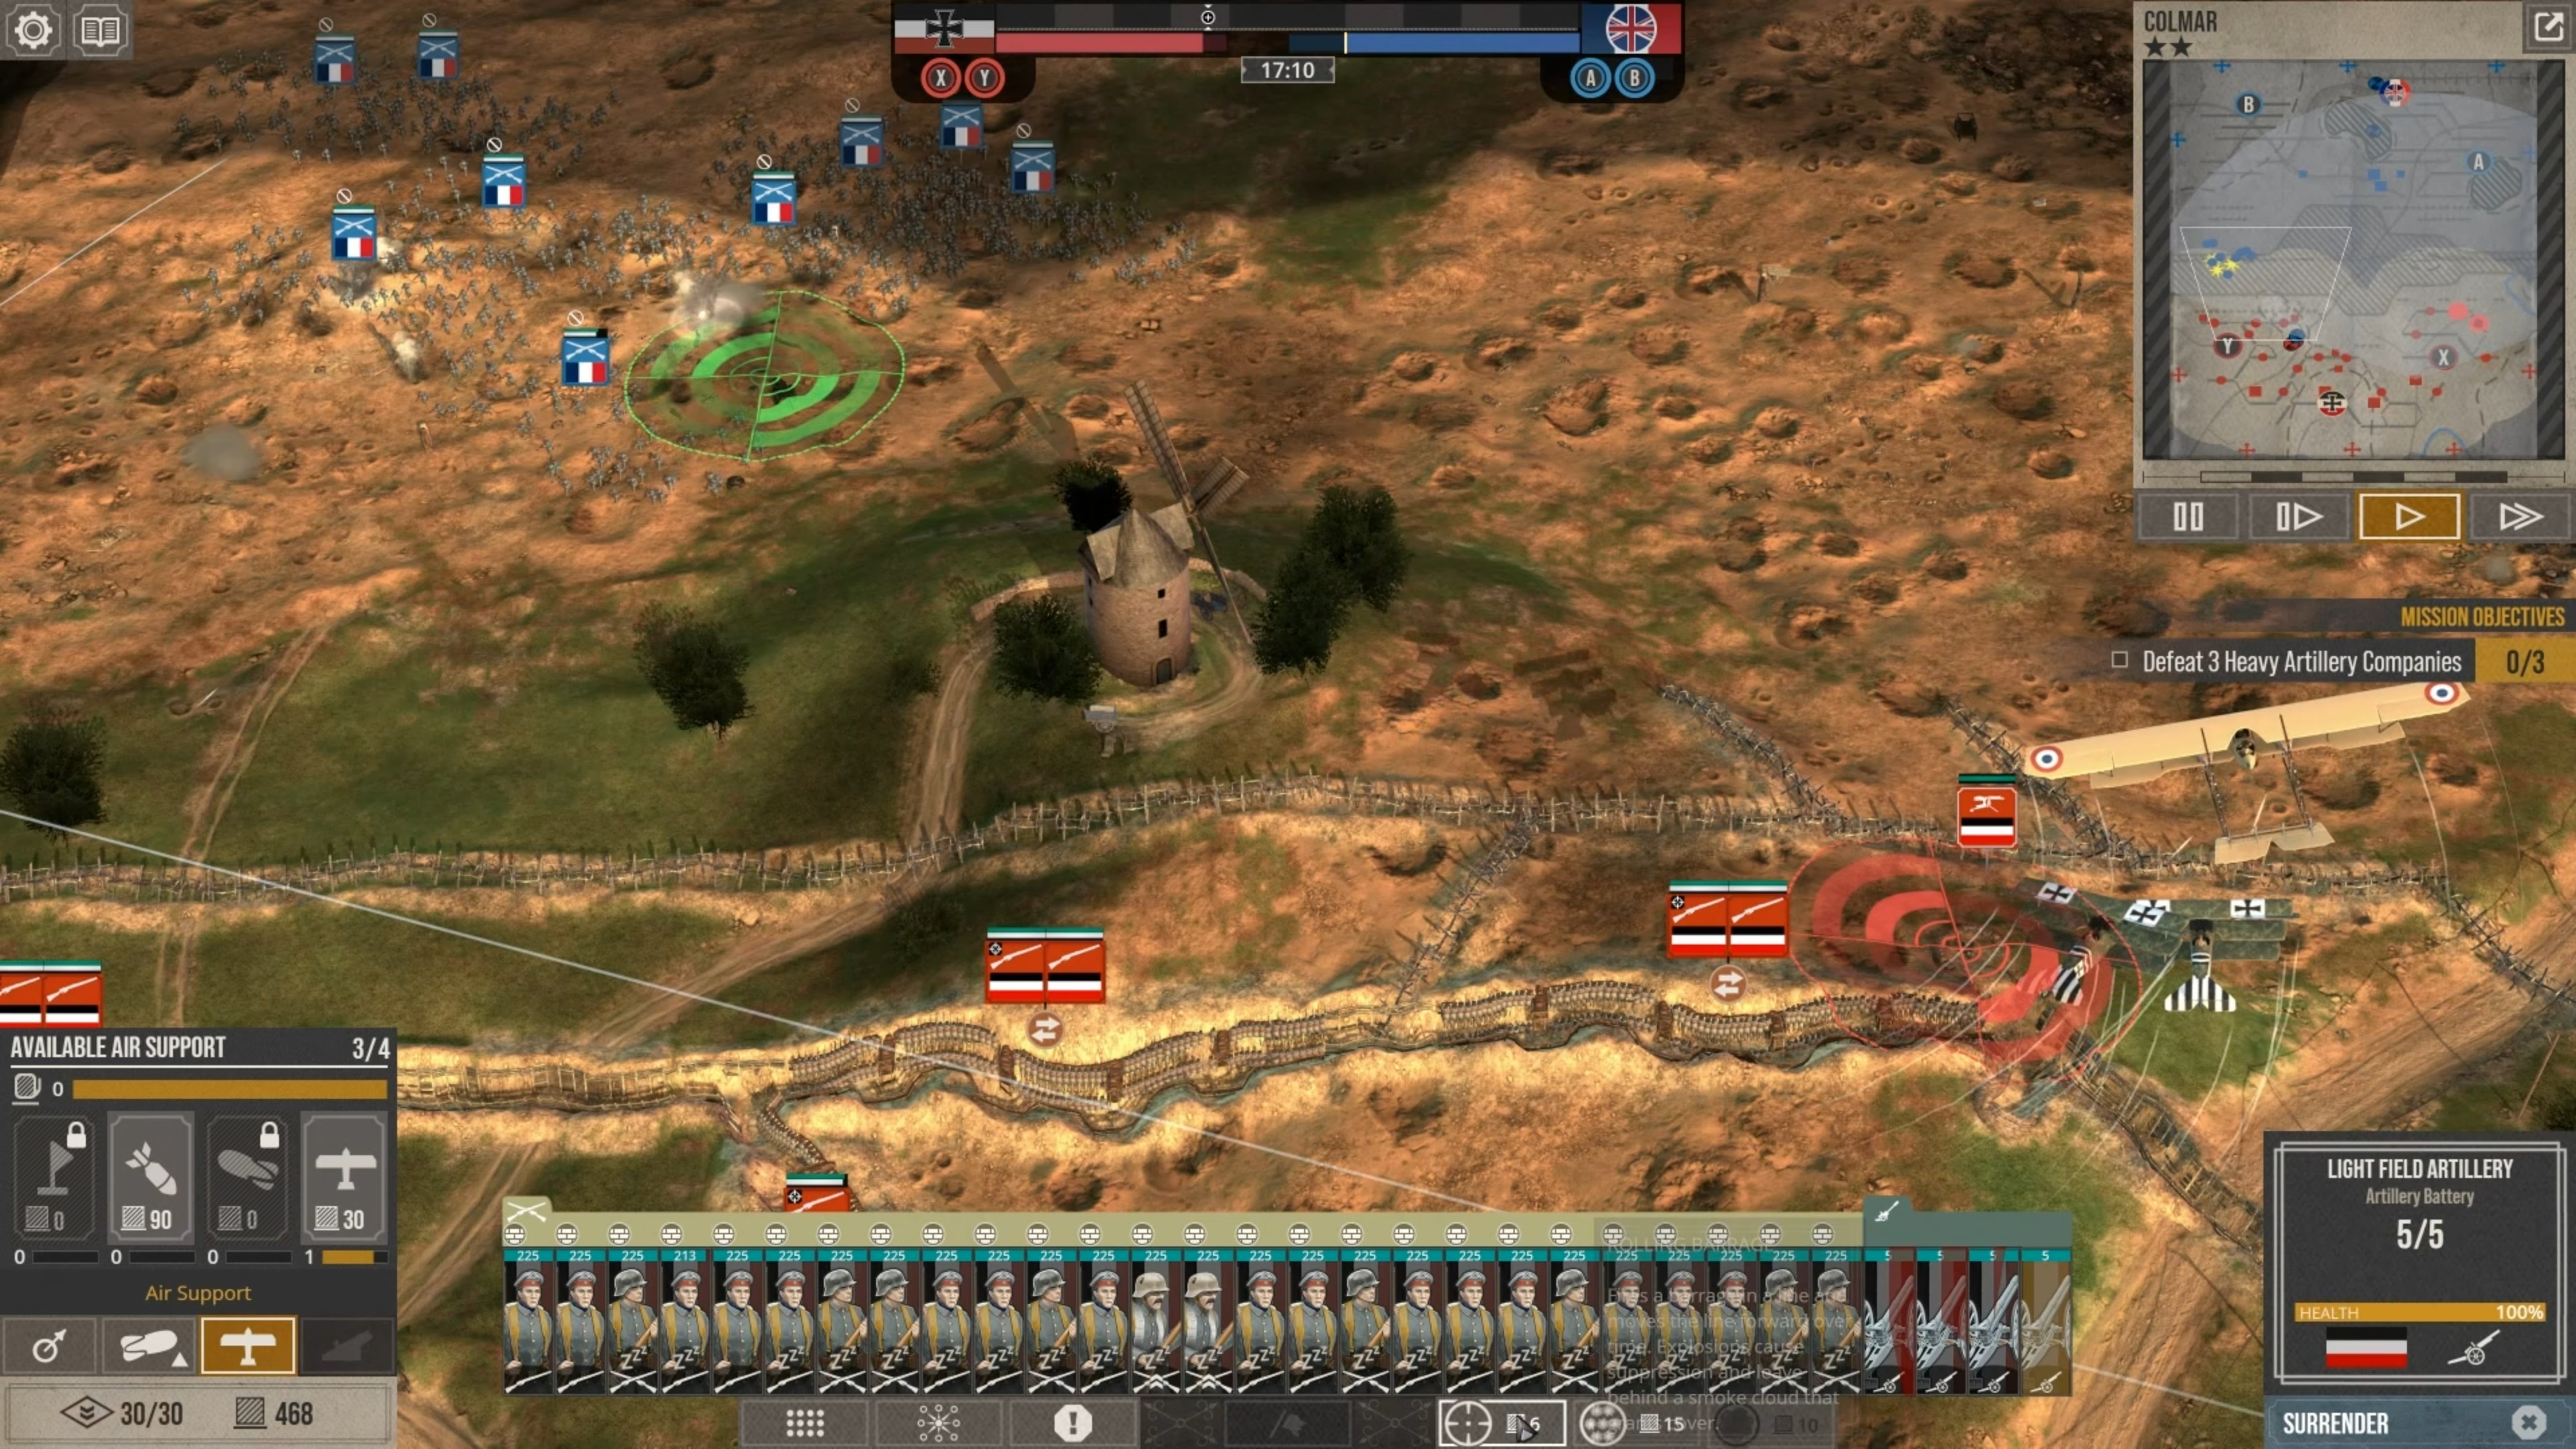
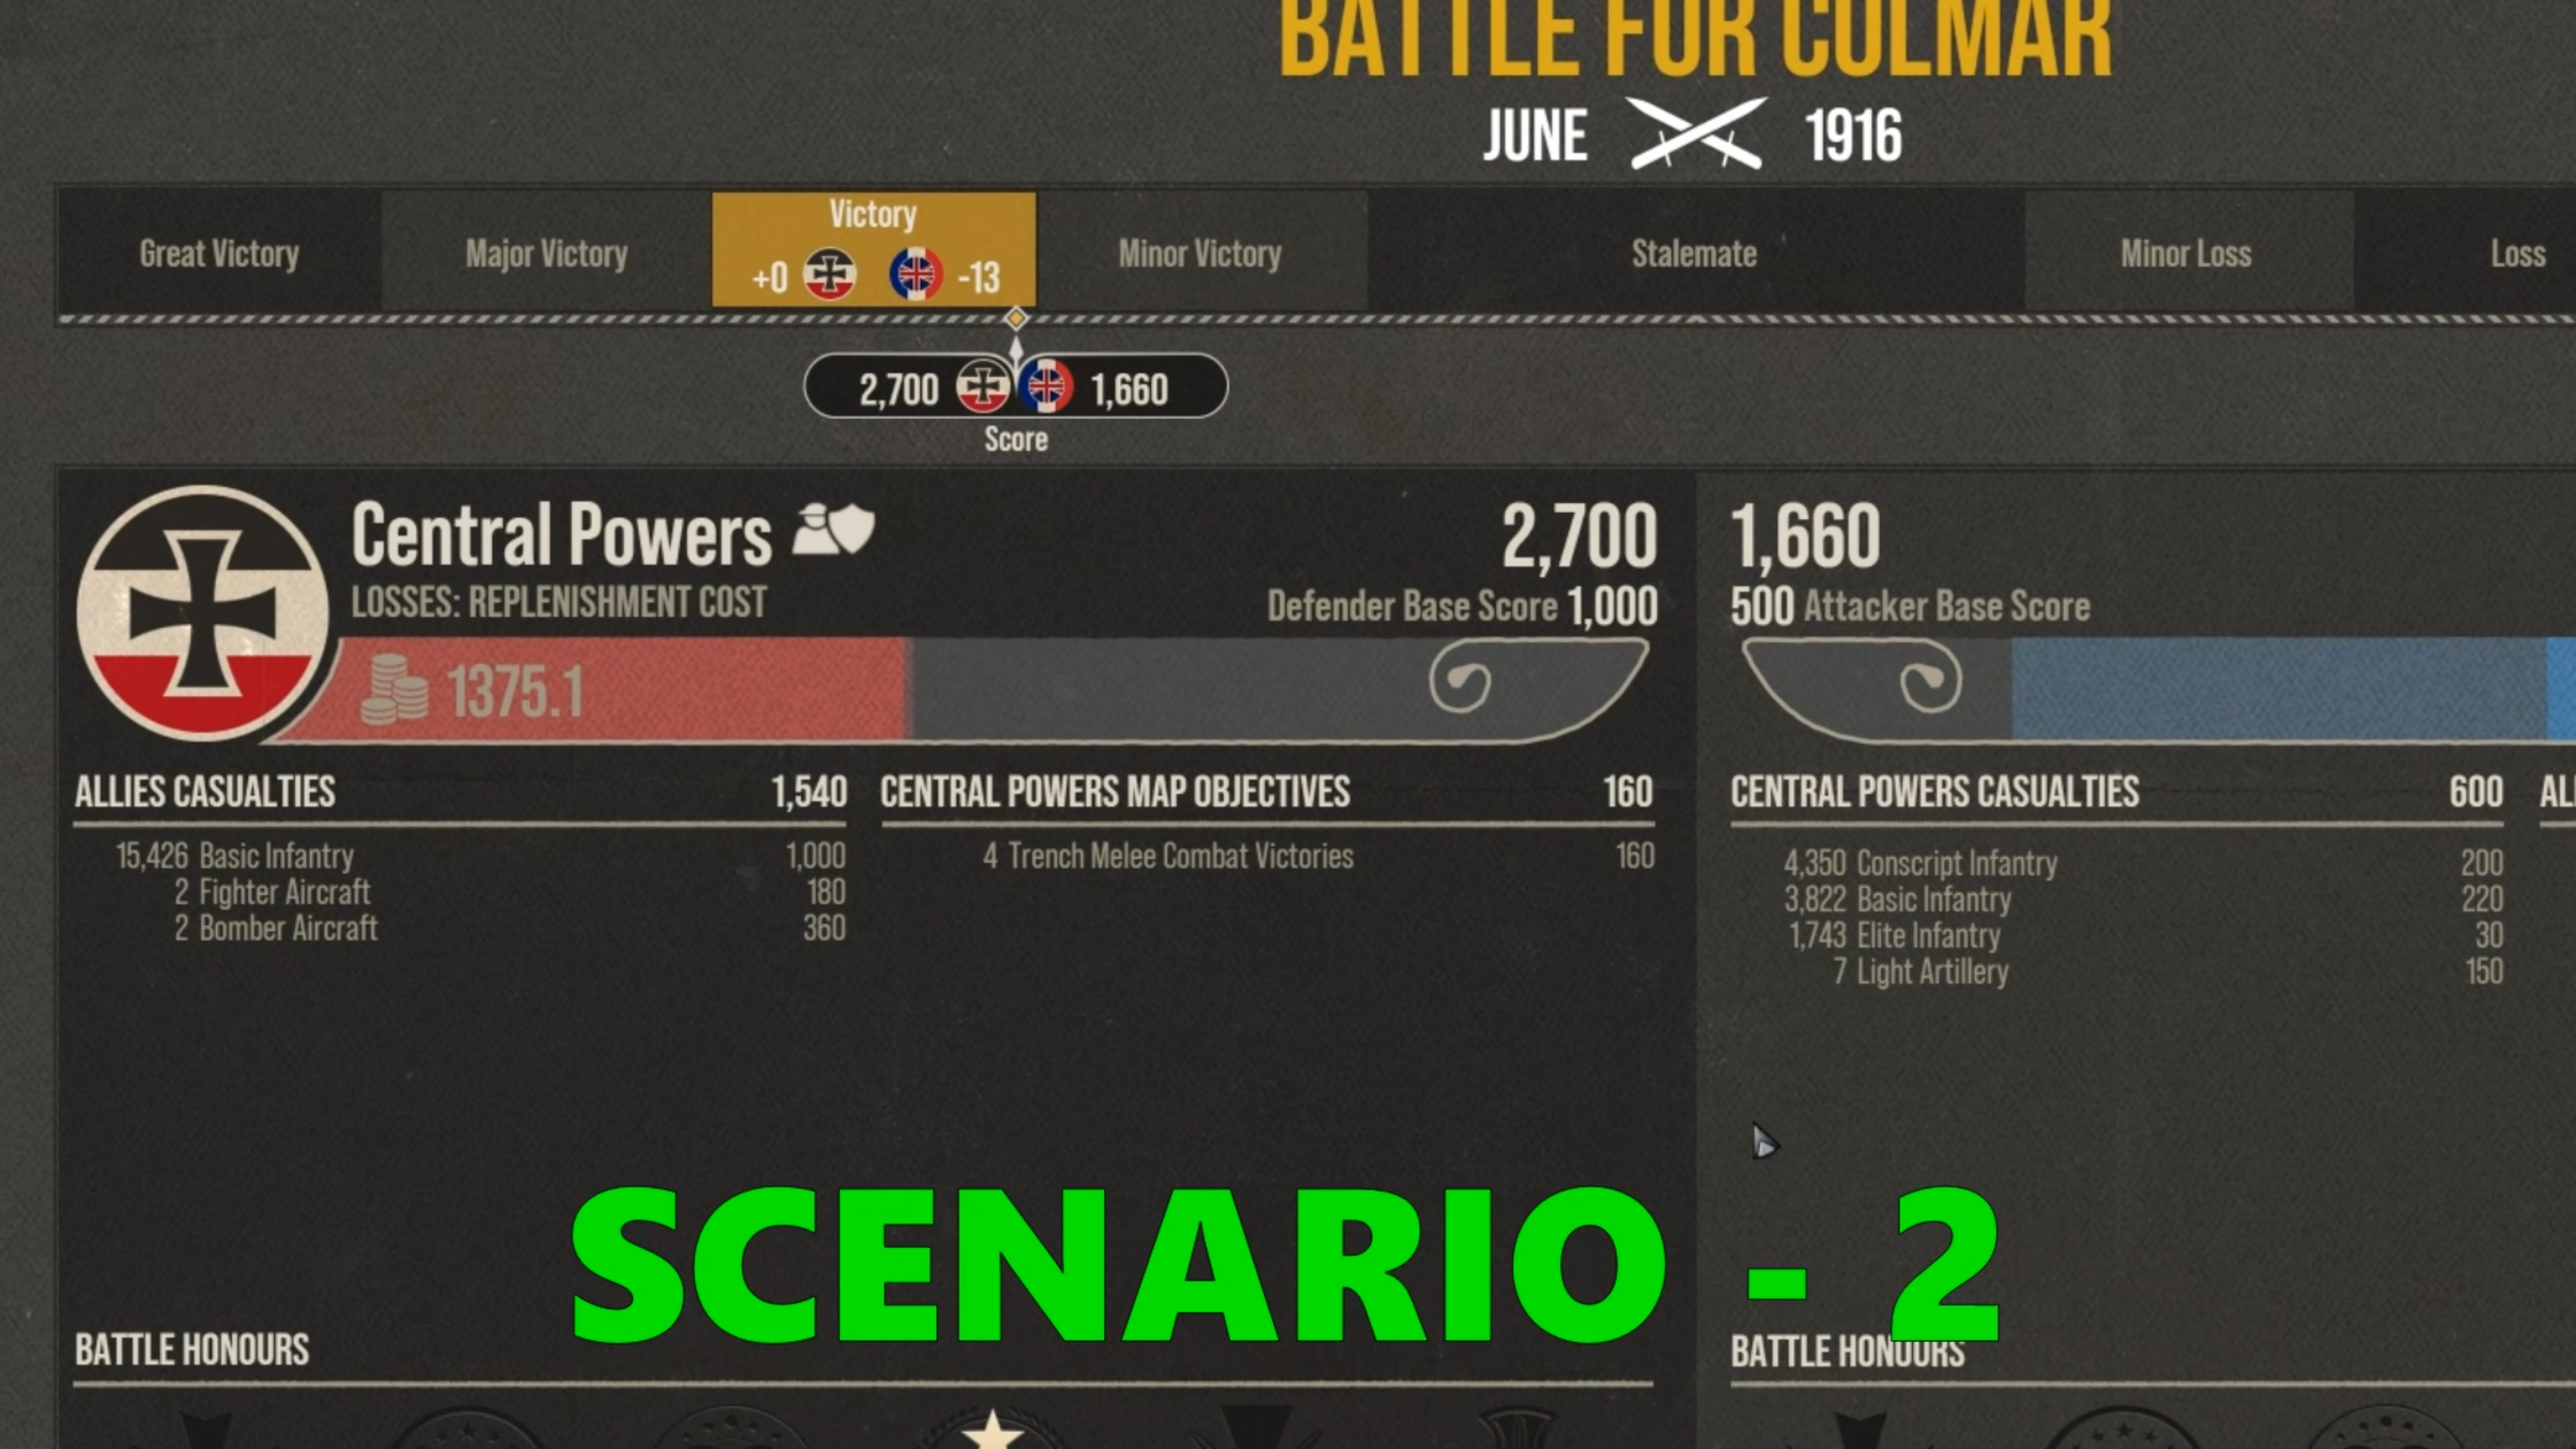
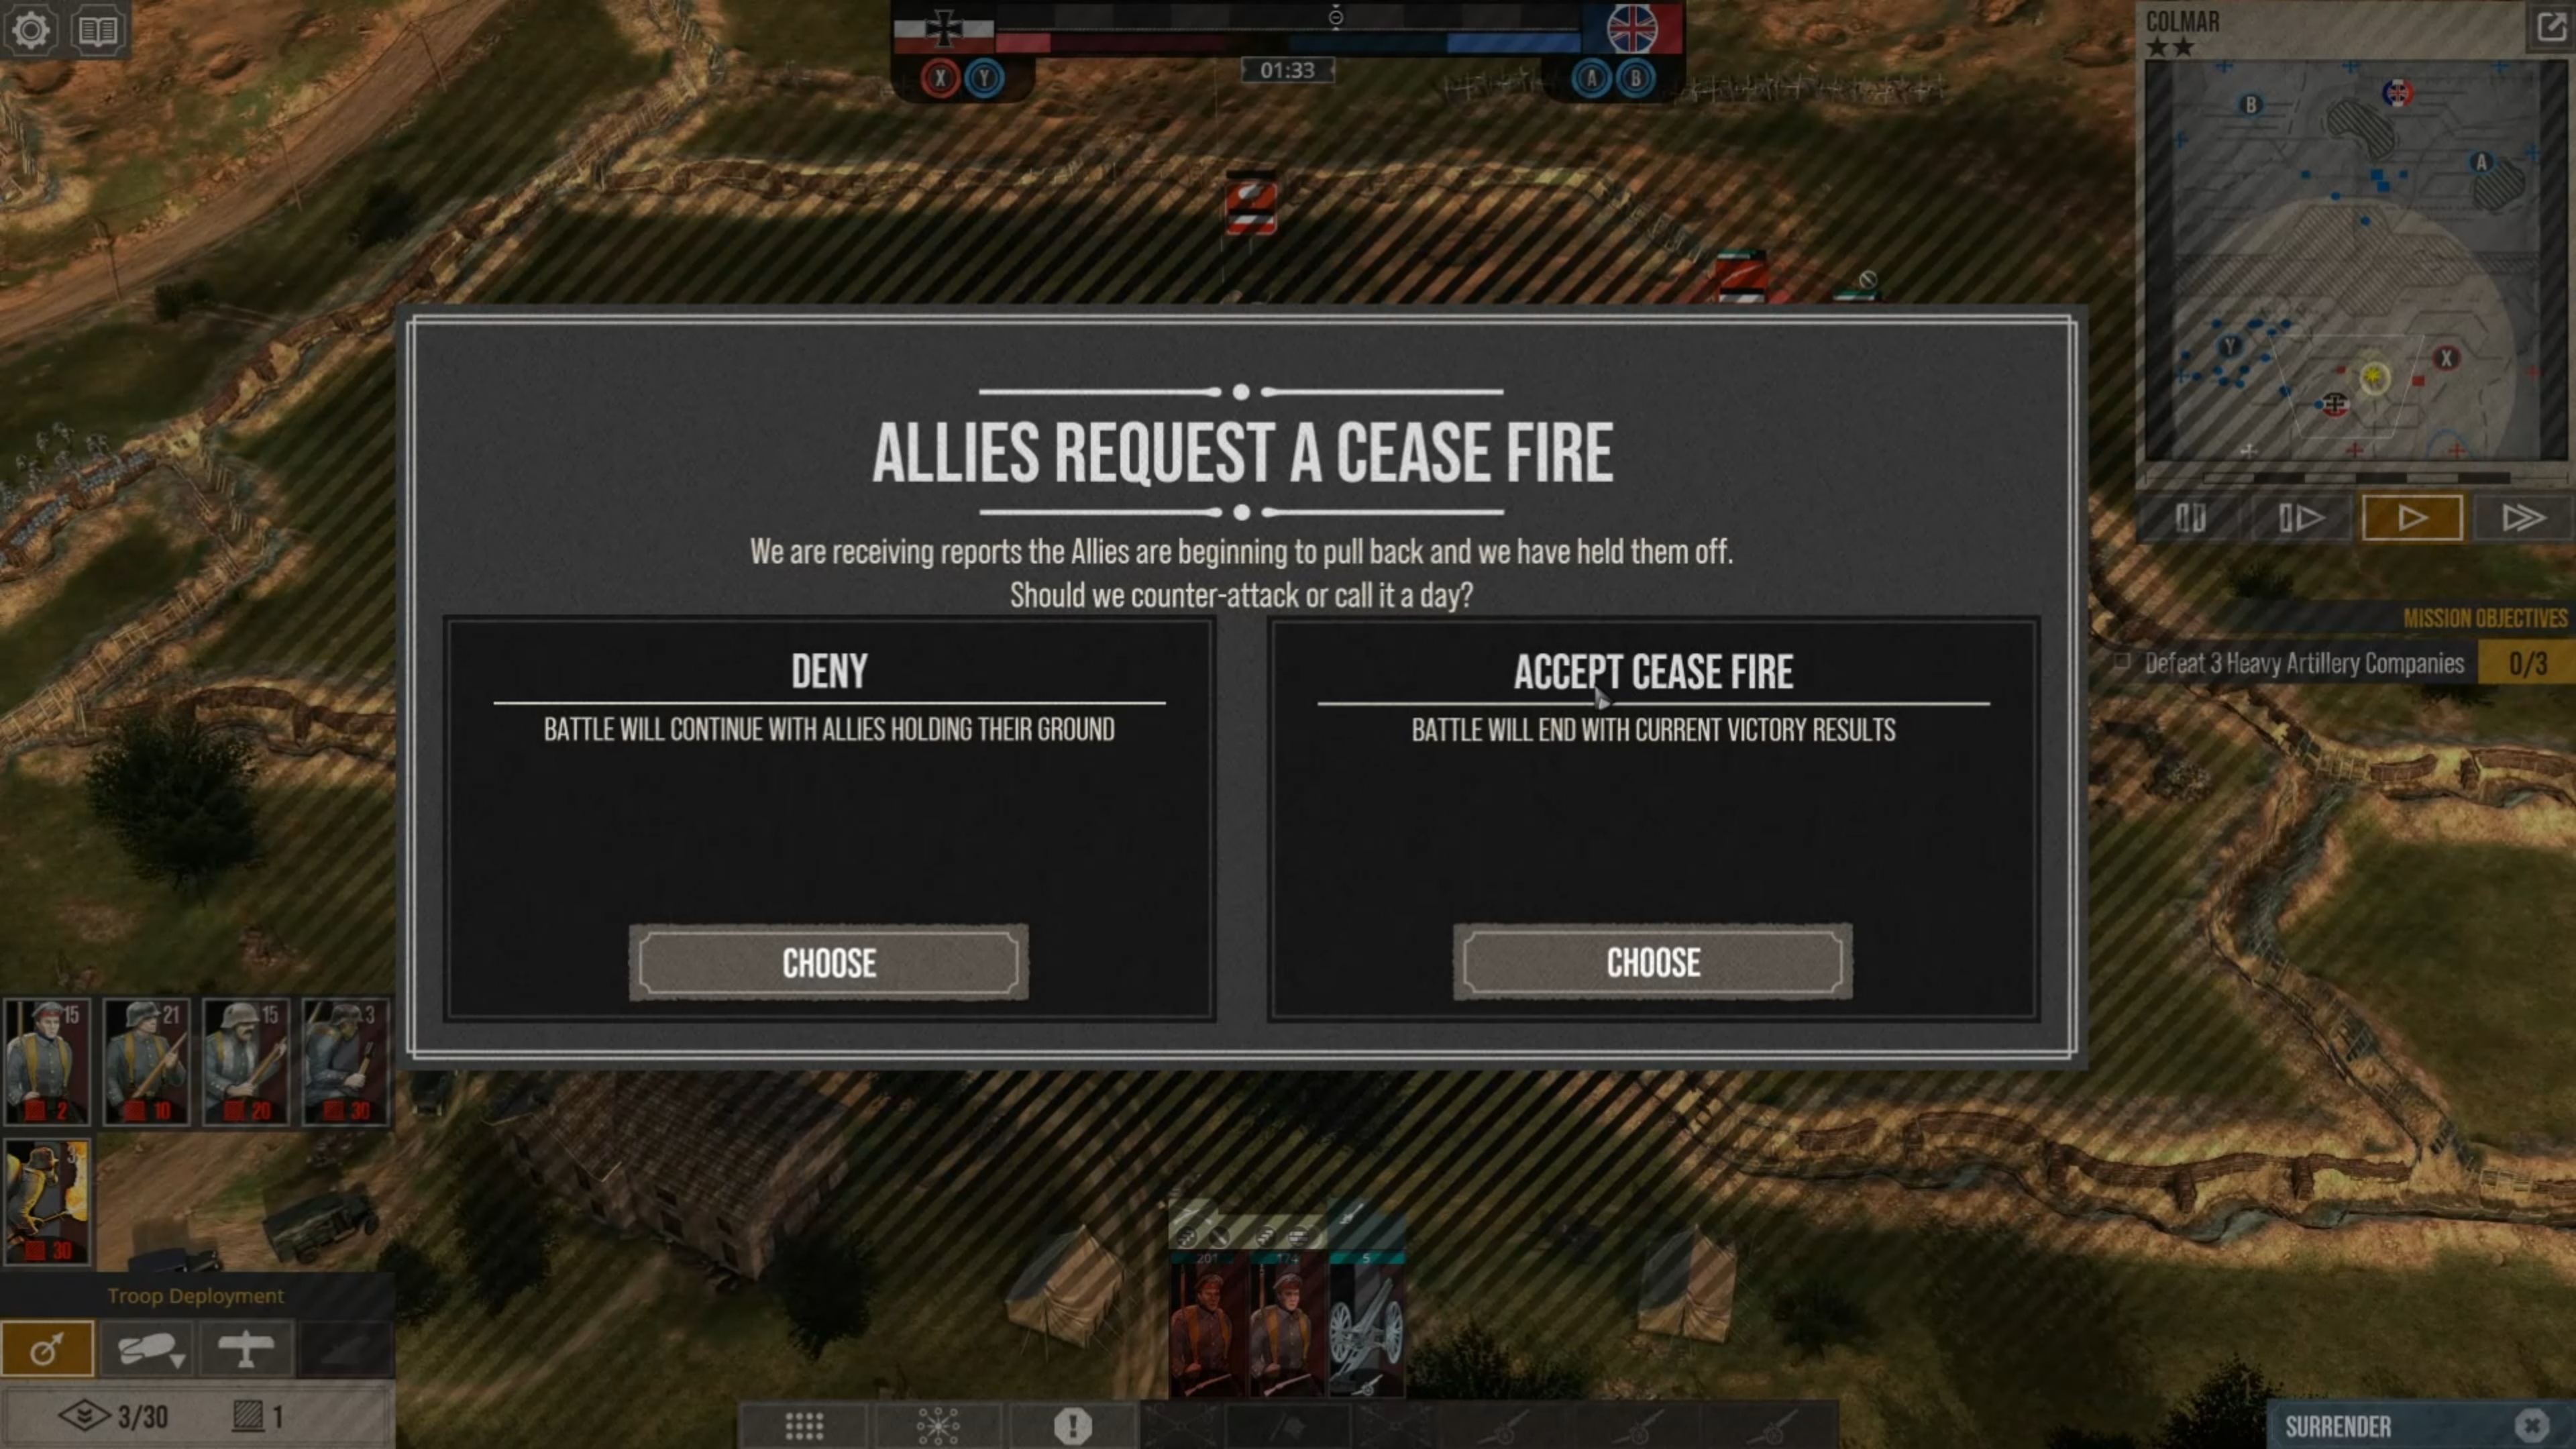
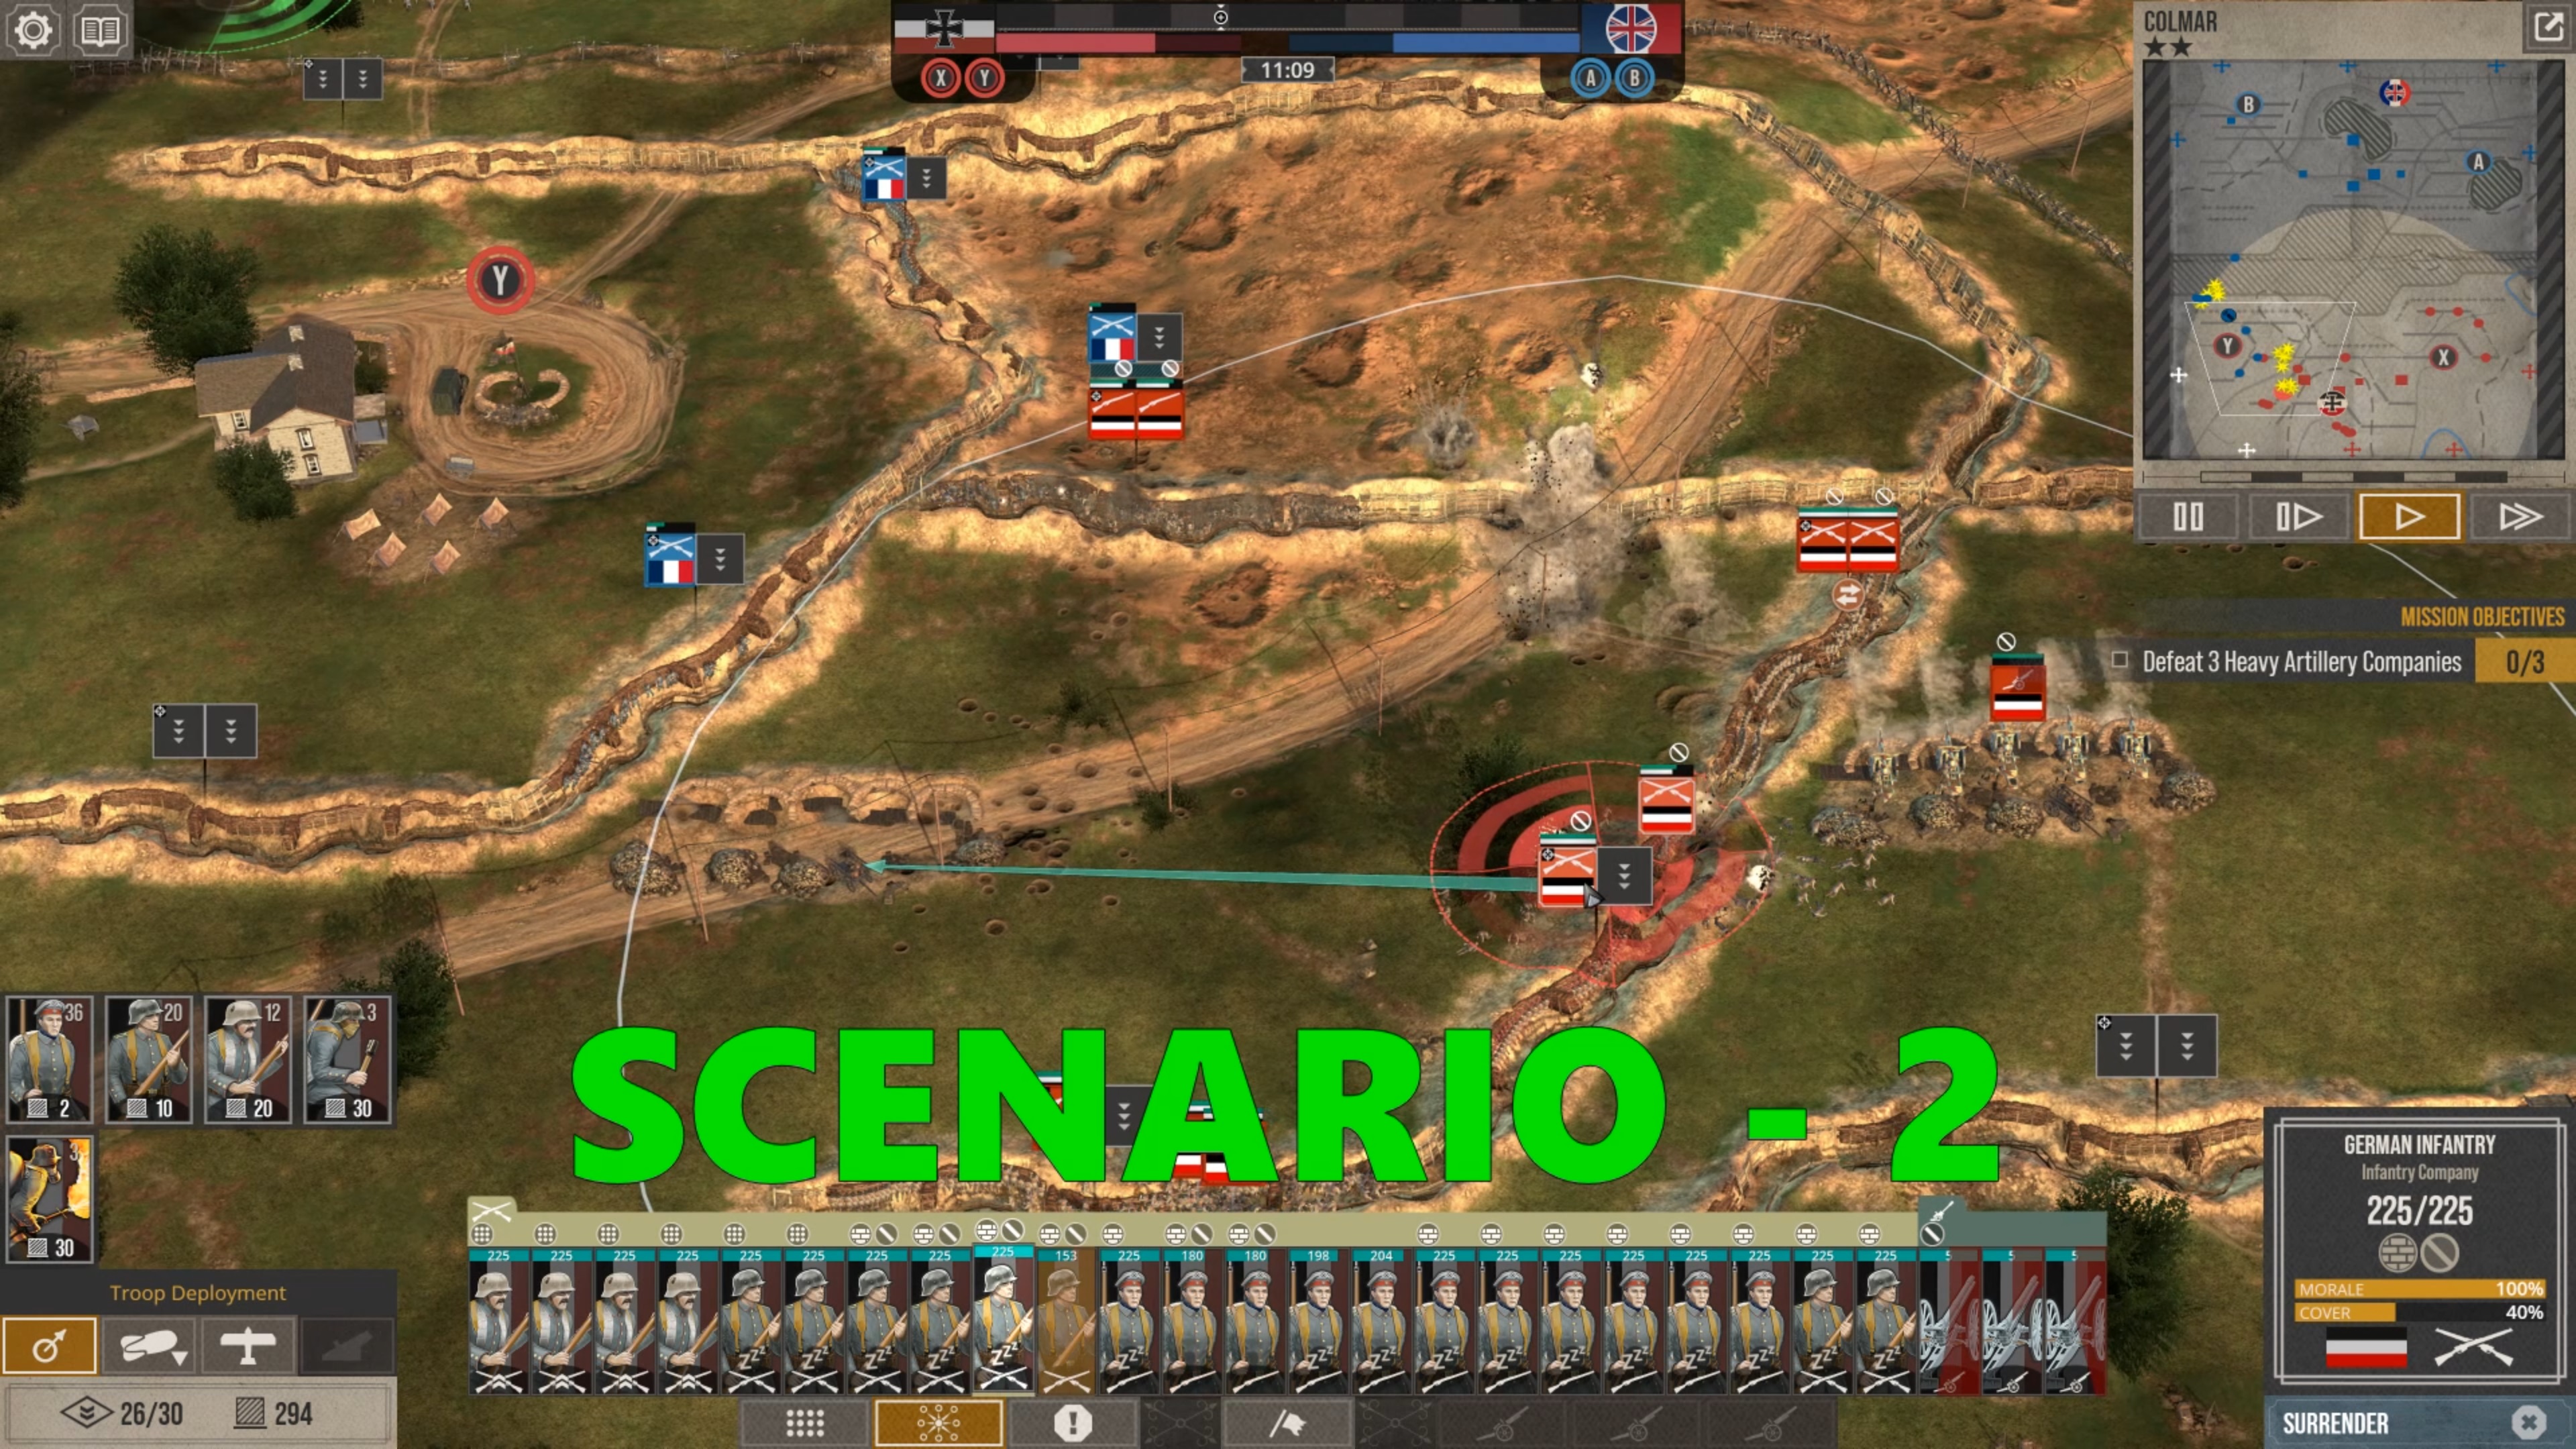
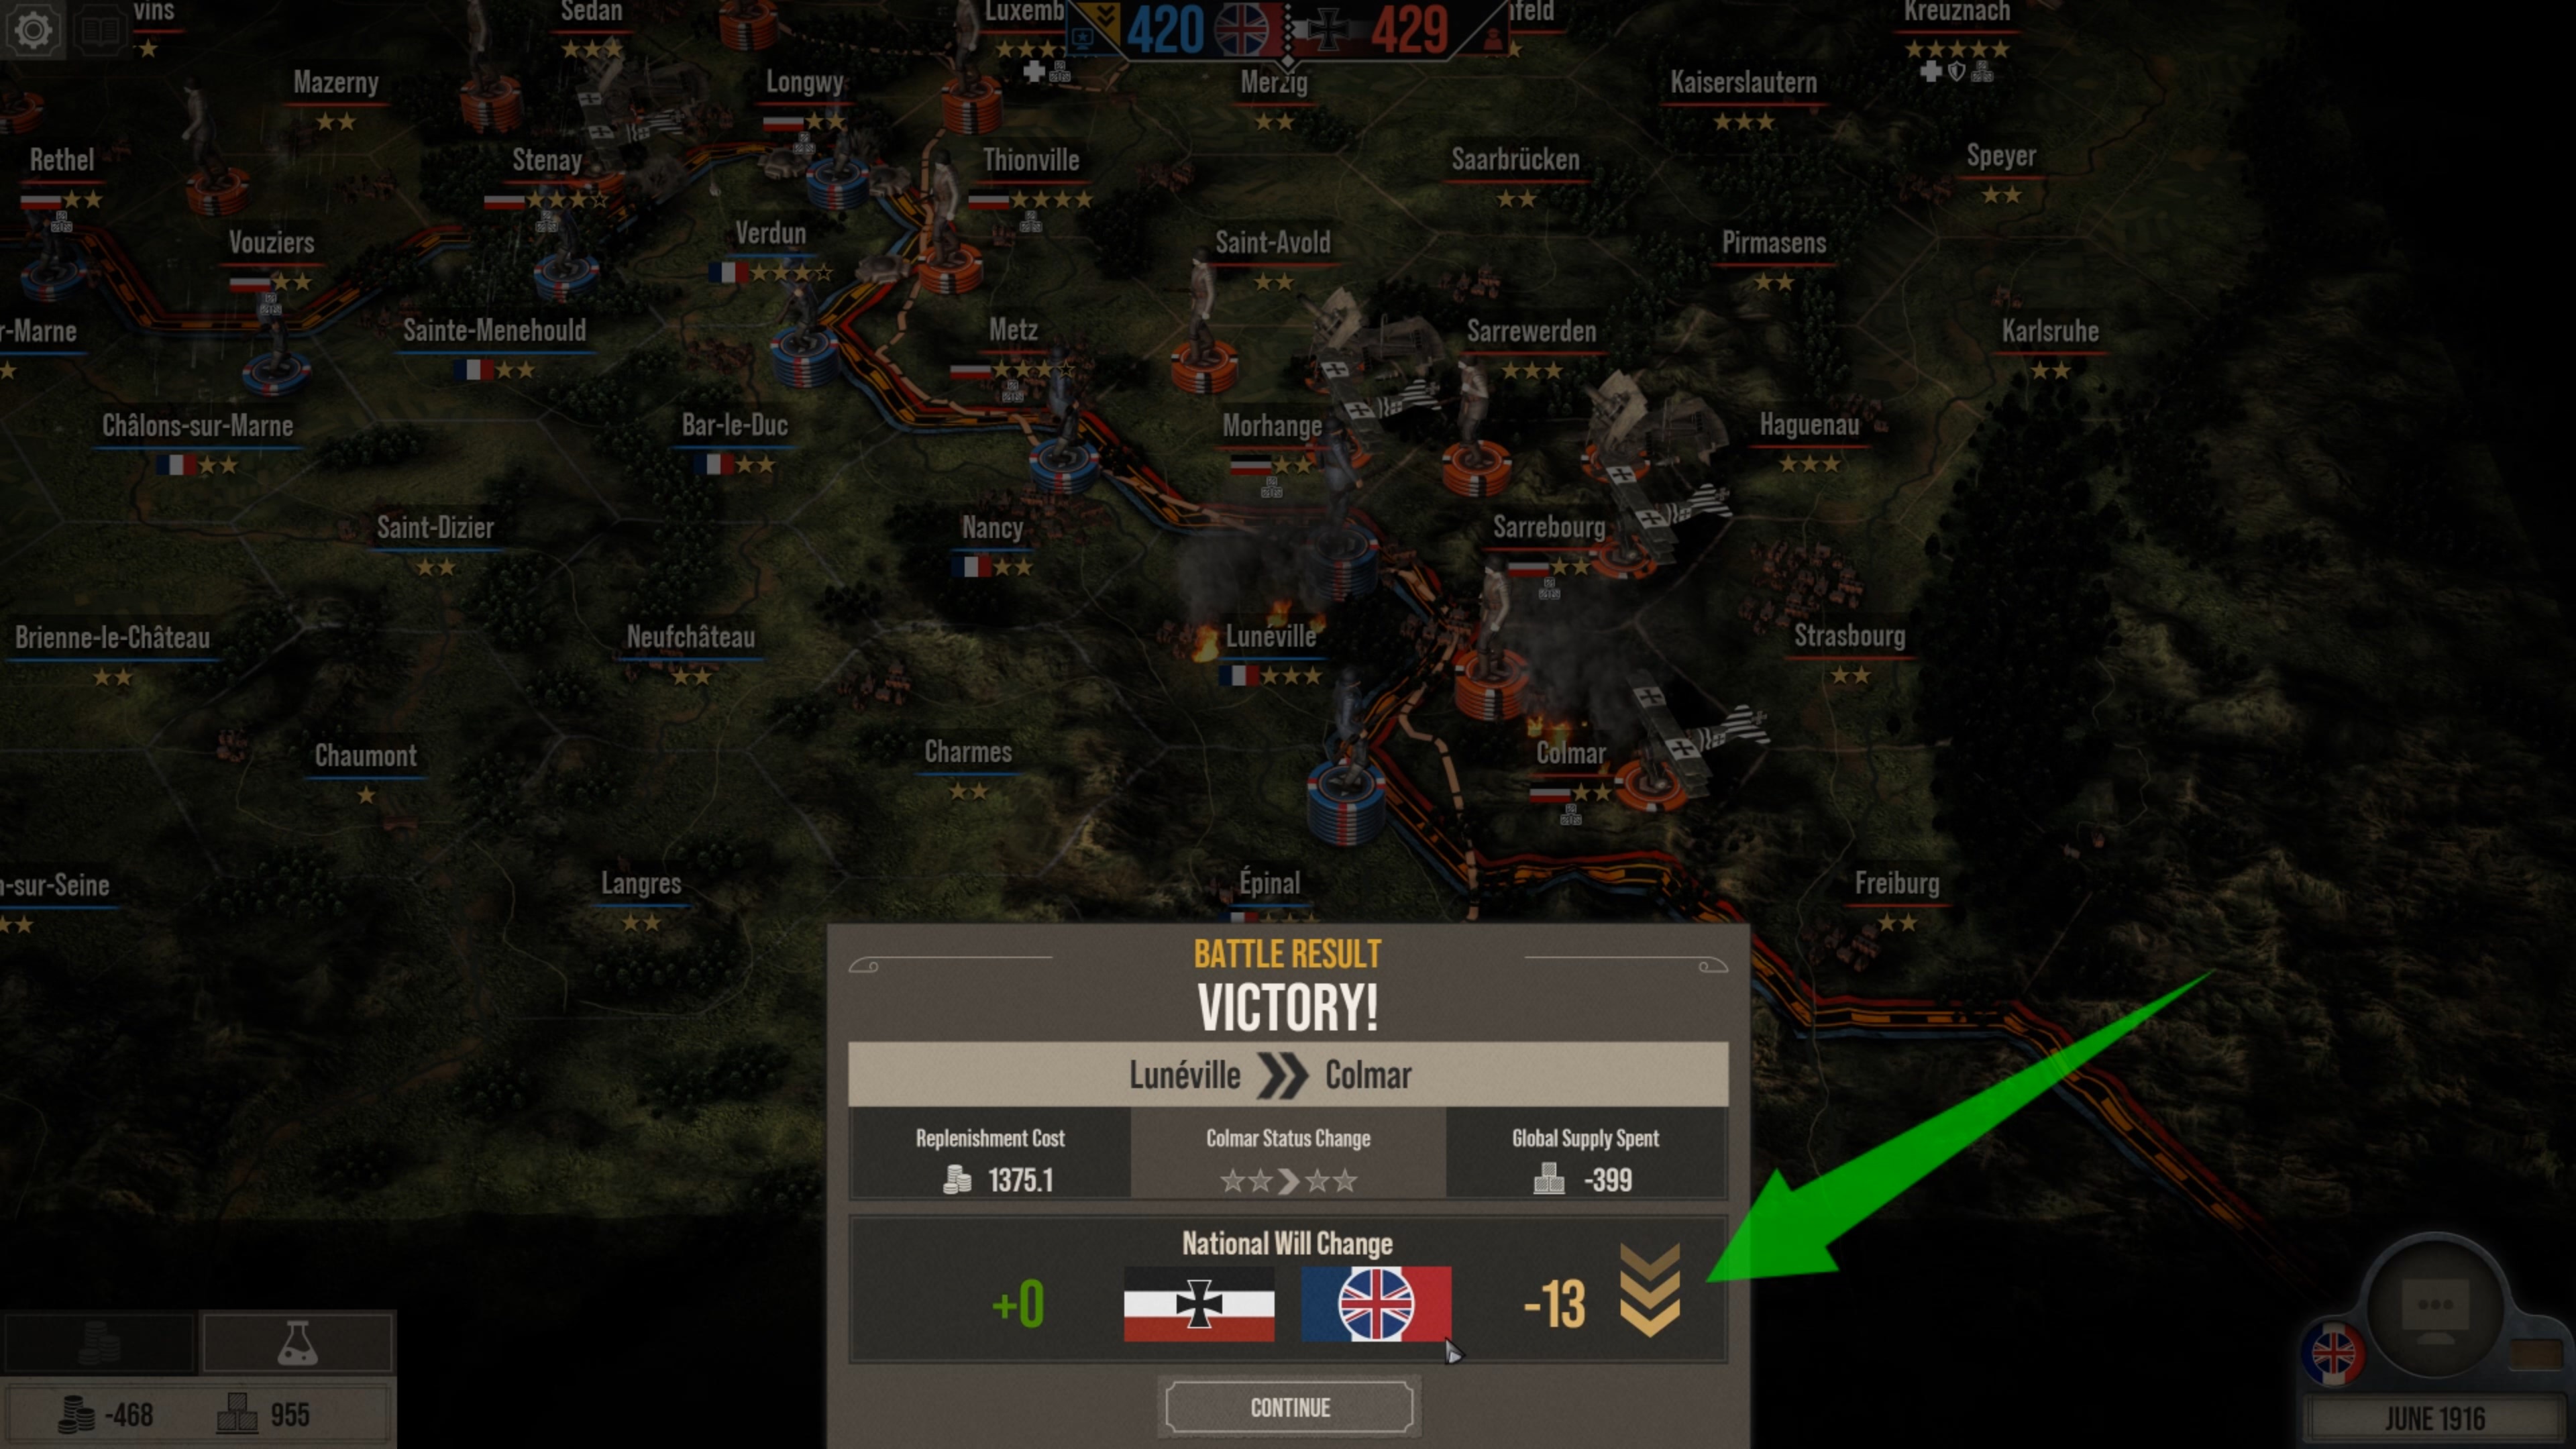
3 shots = 18 supply plus the cooldowns.

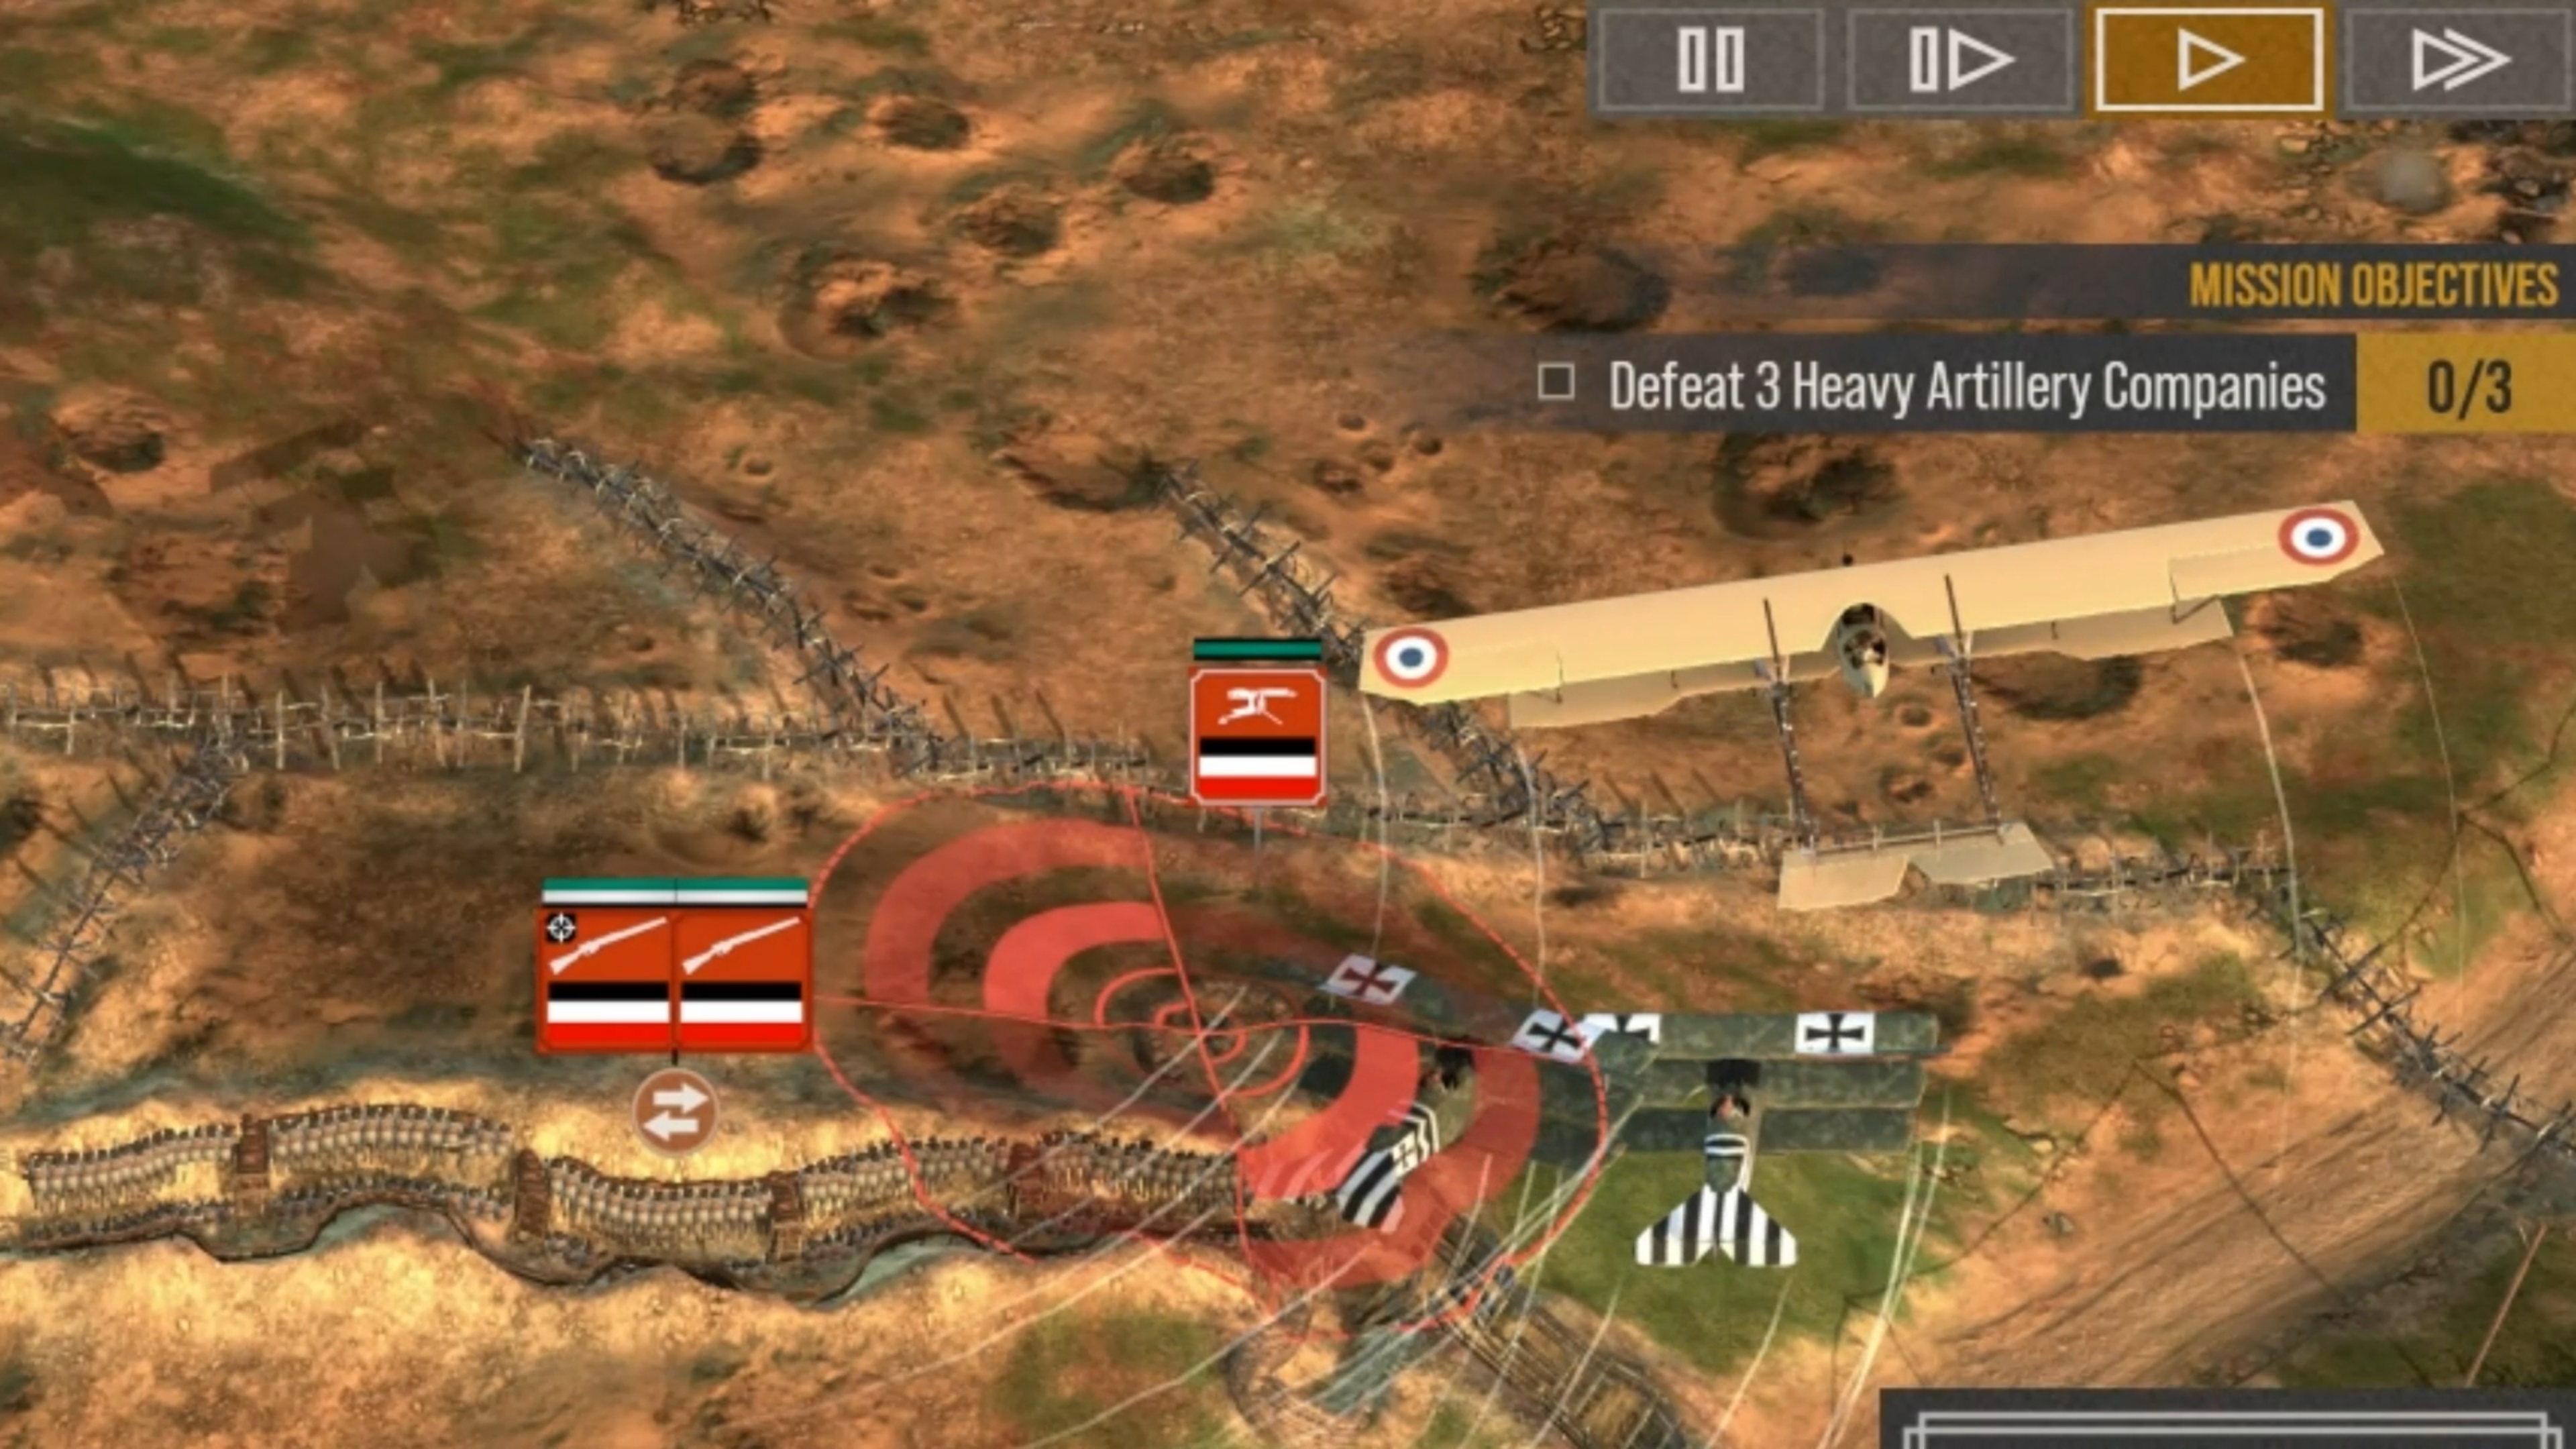
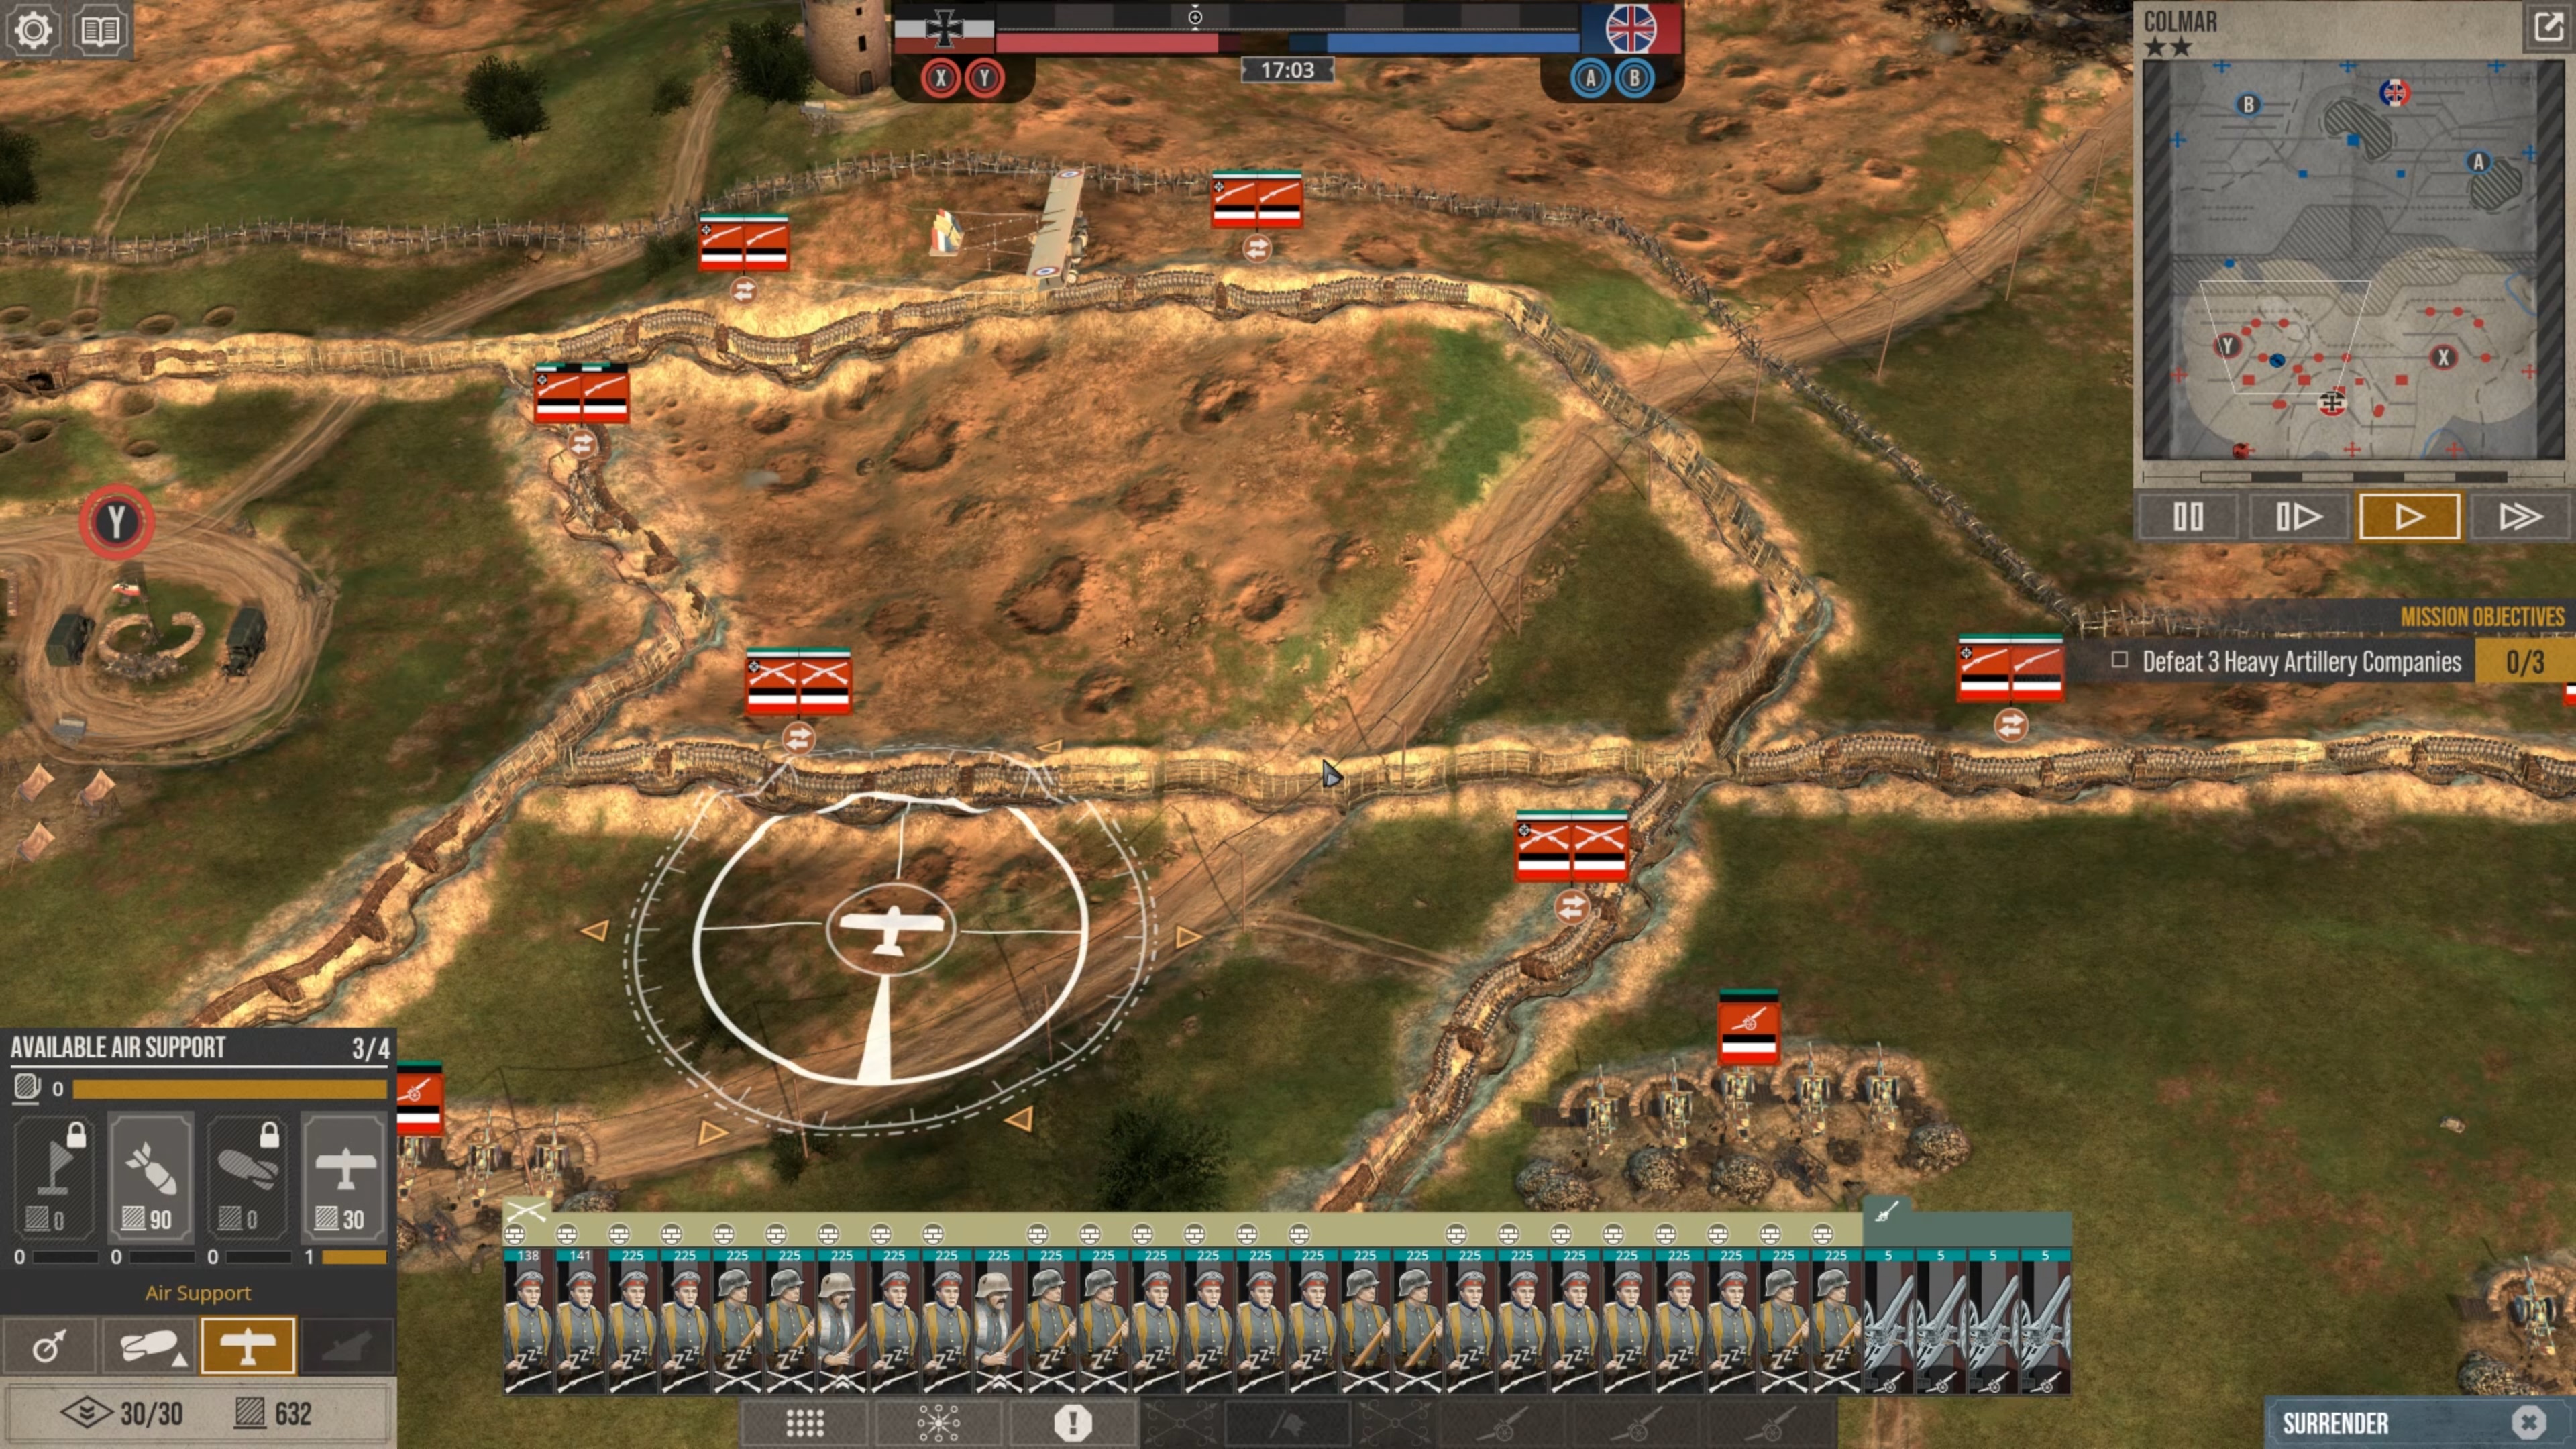
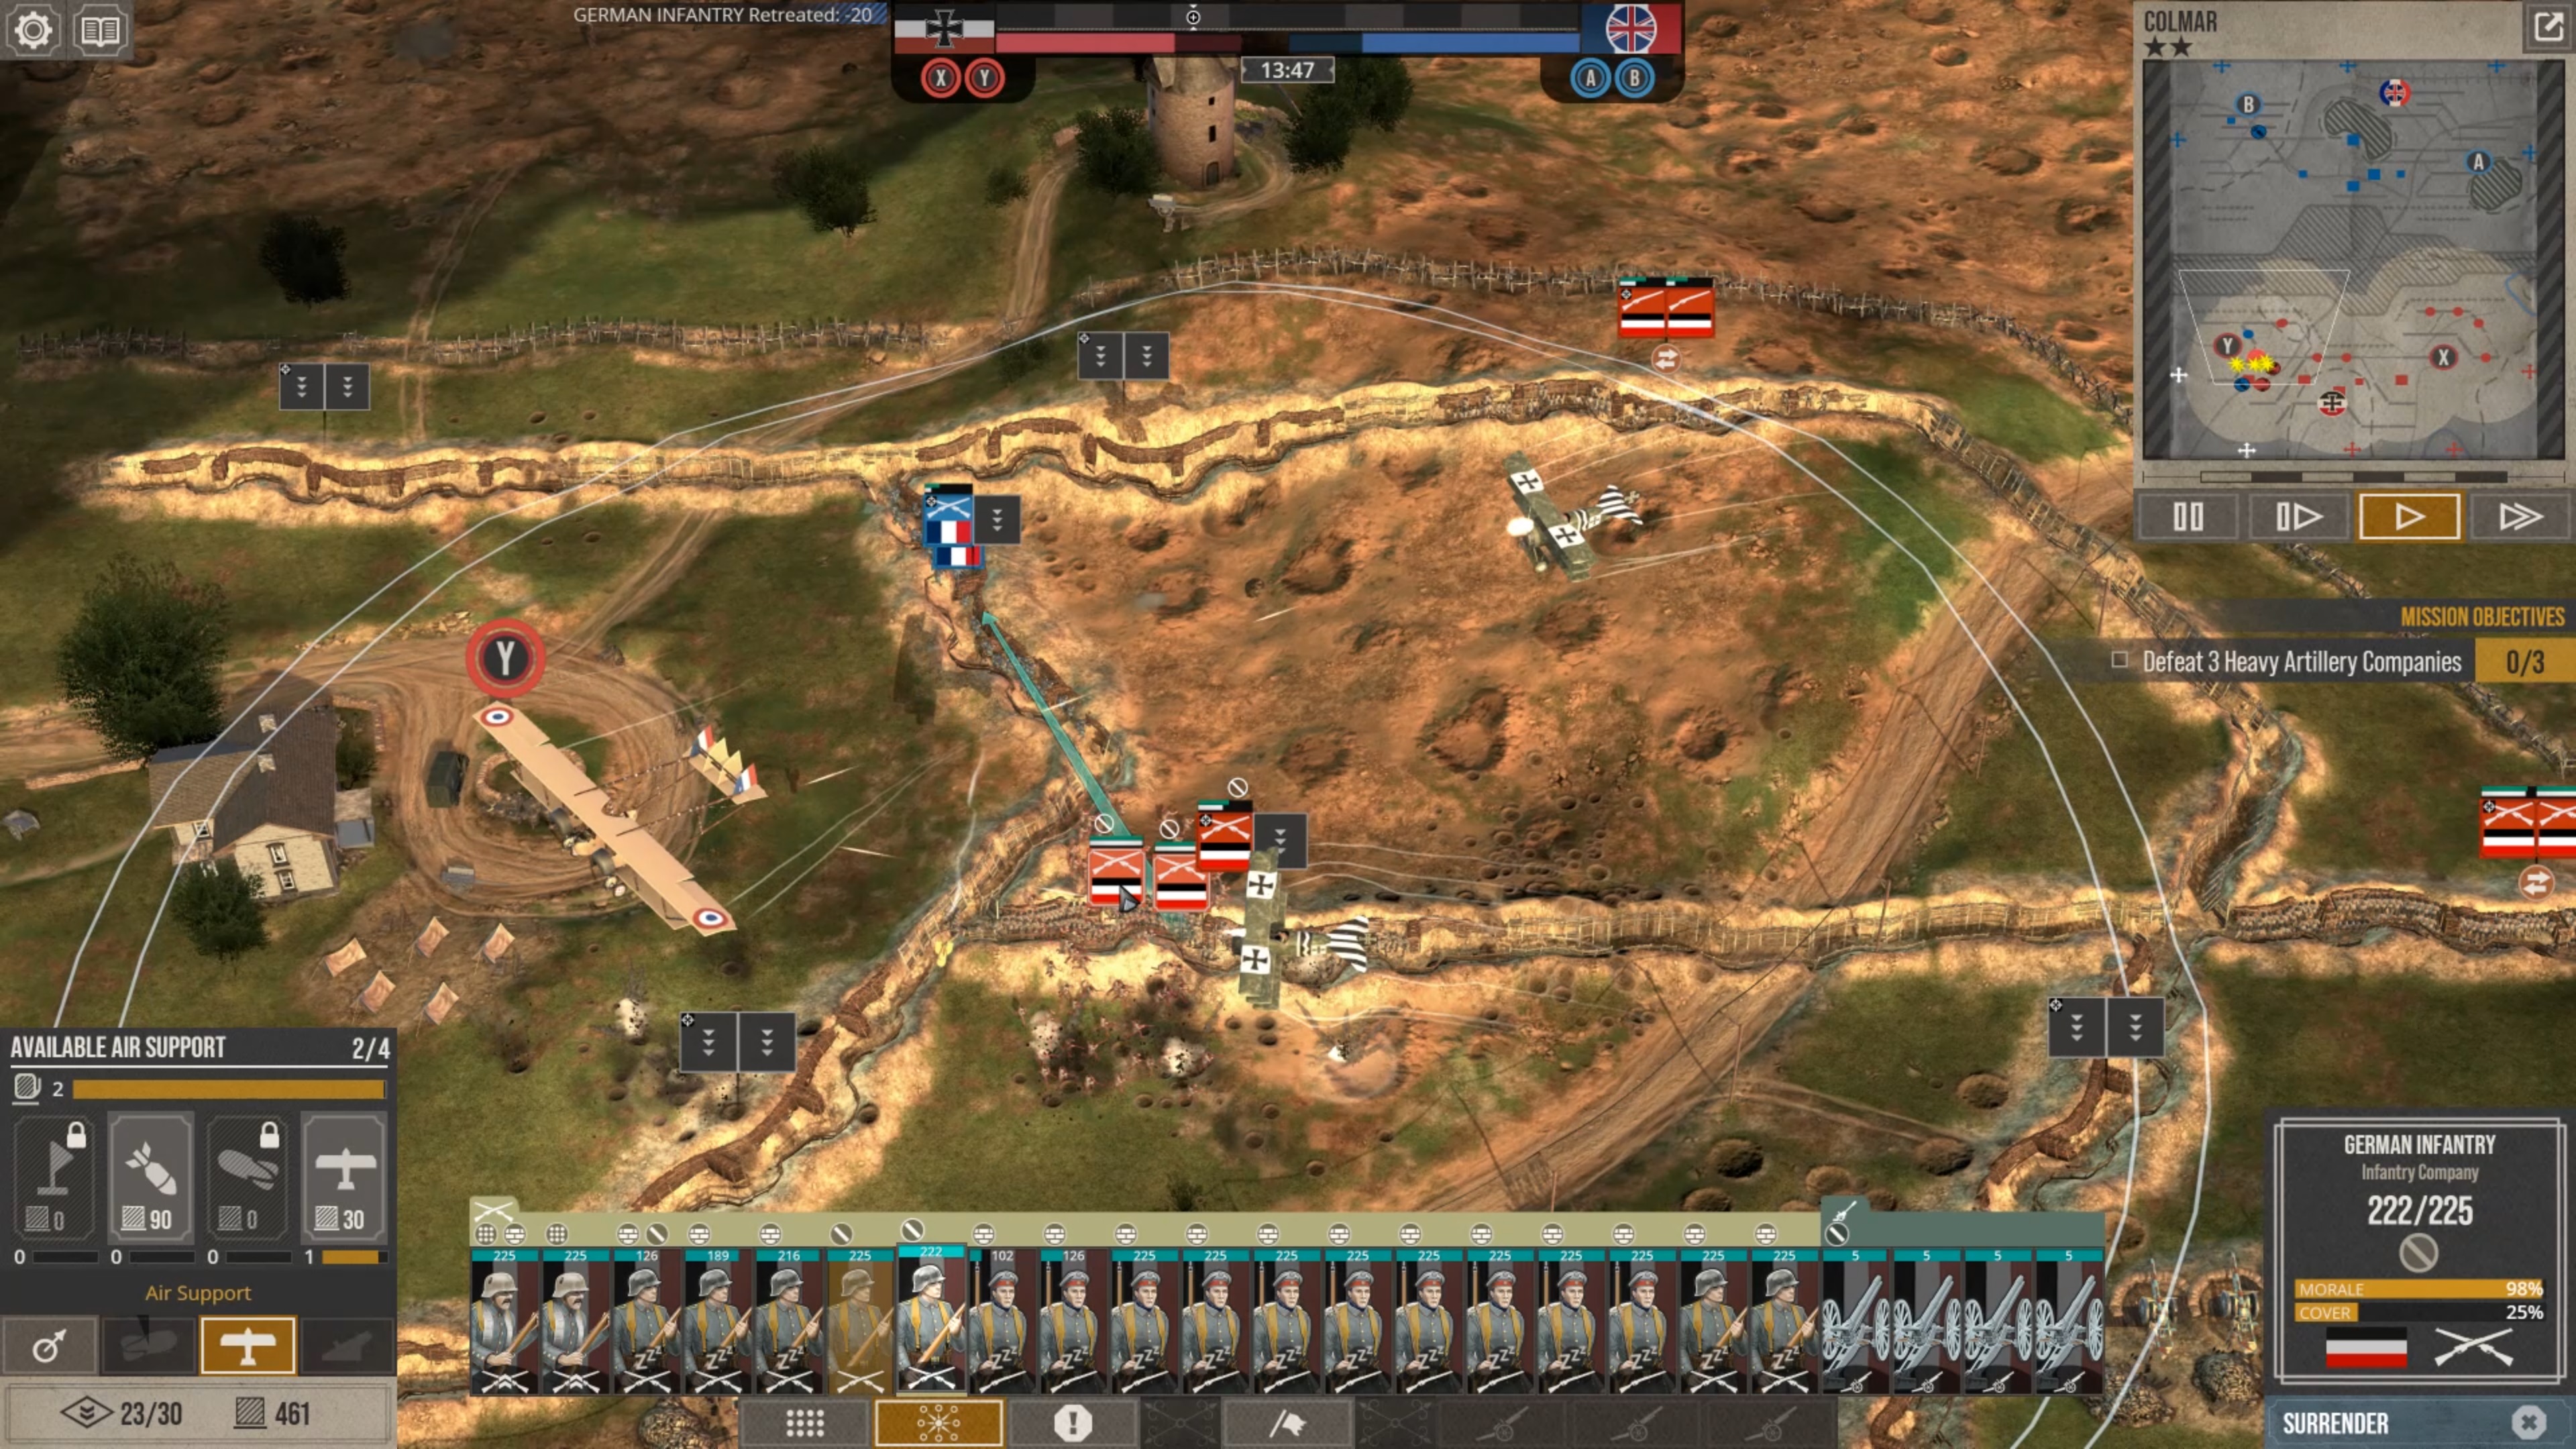
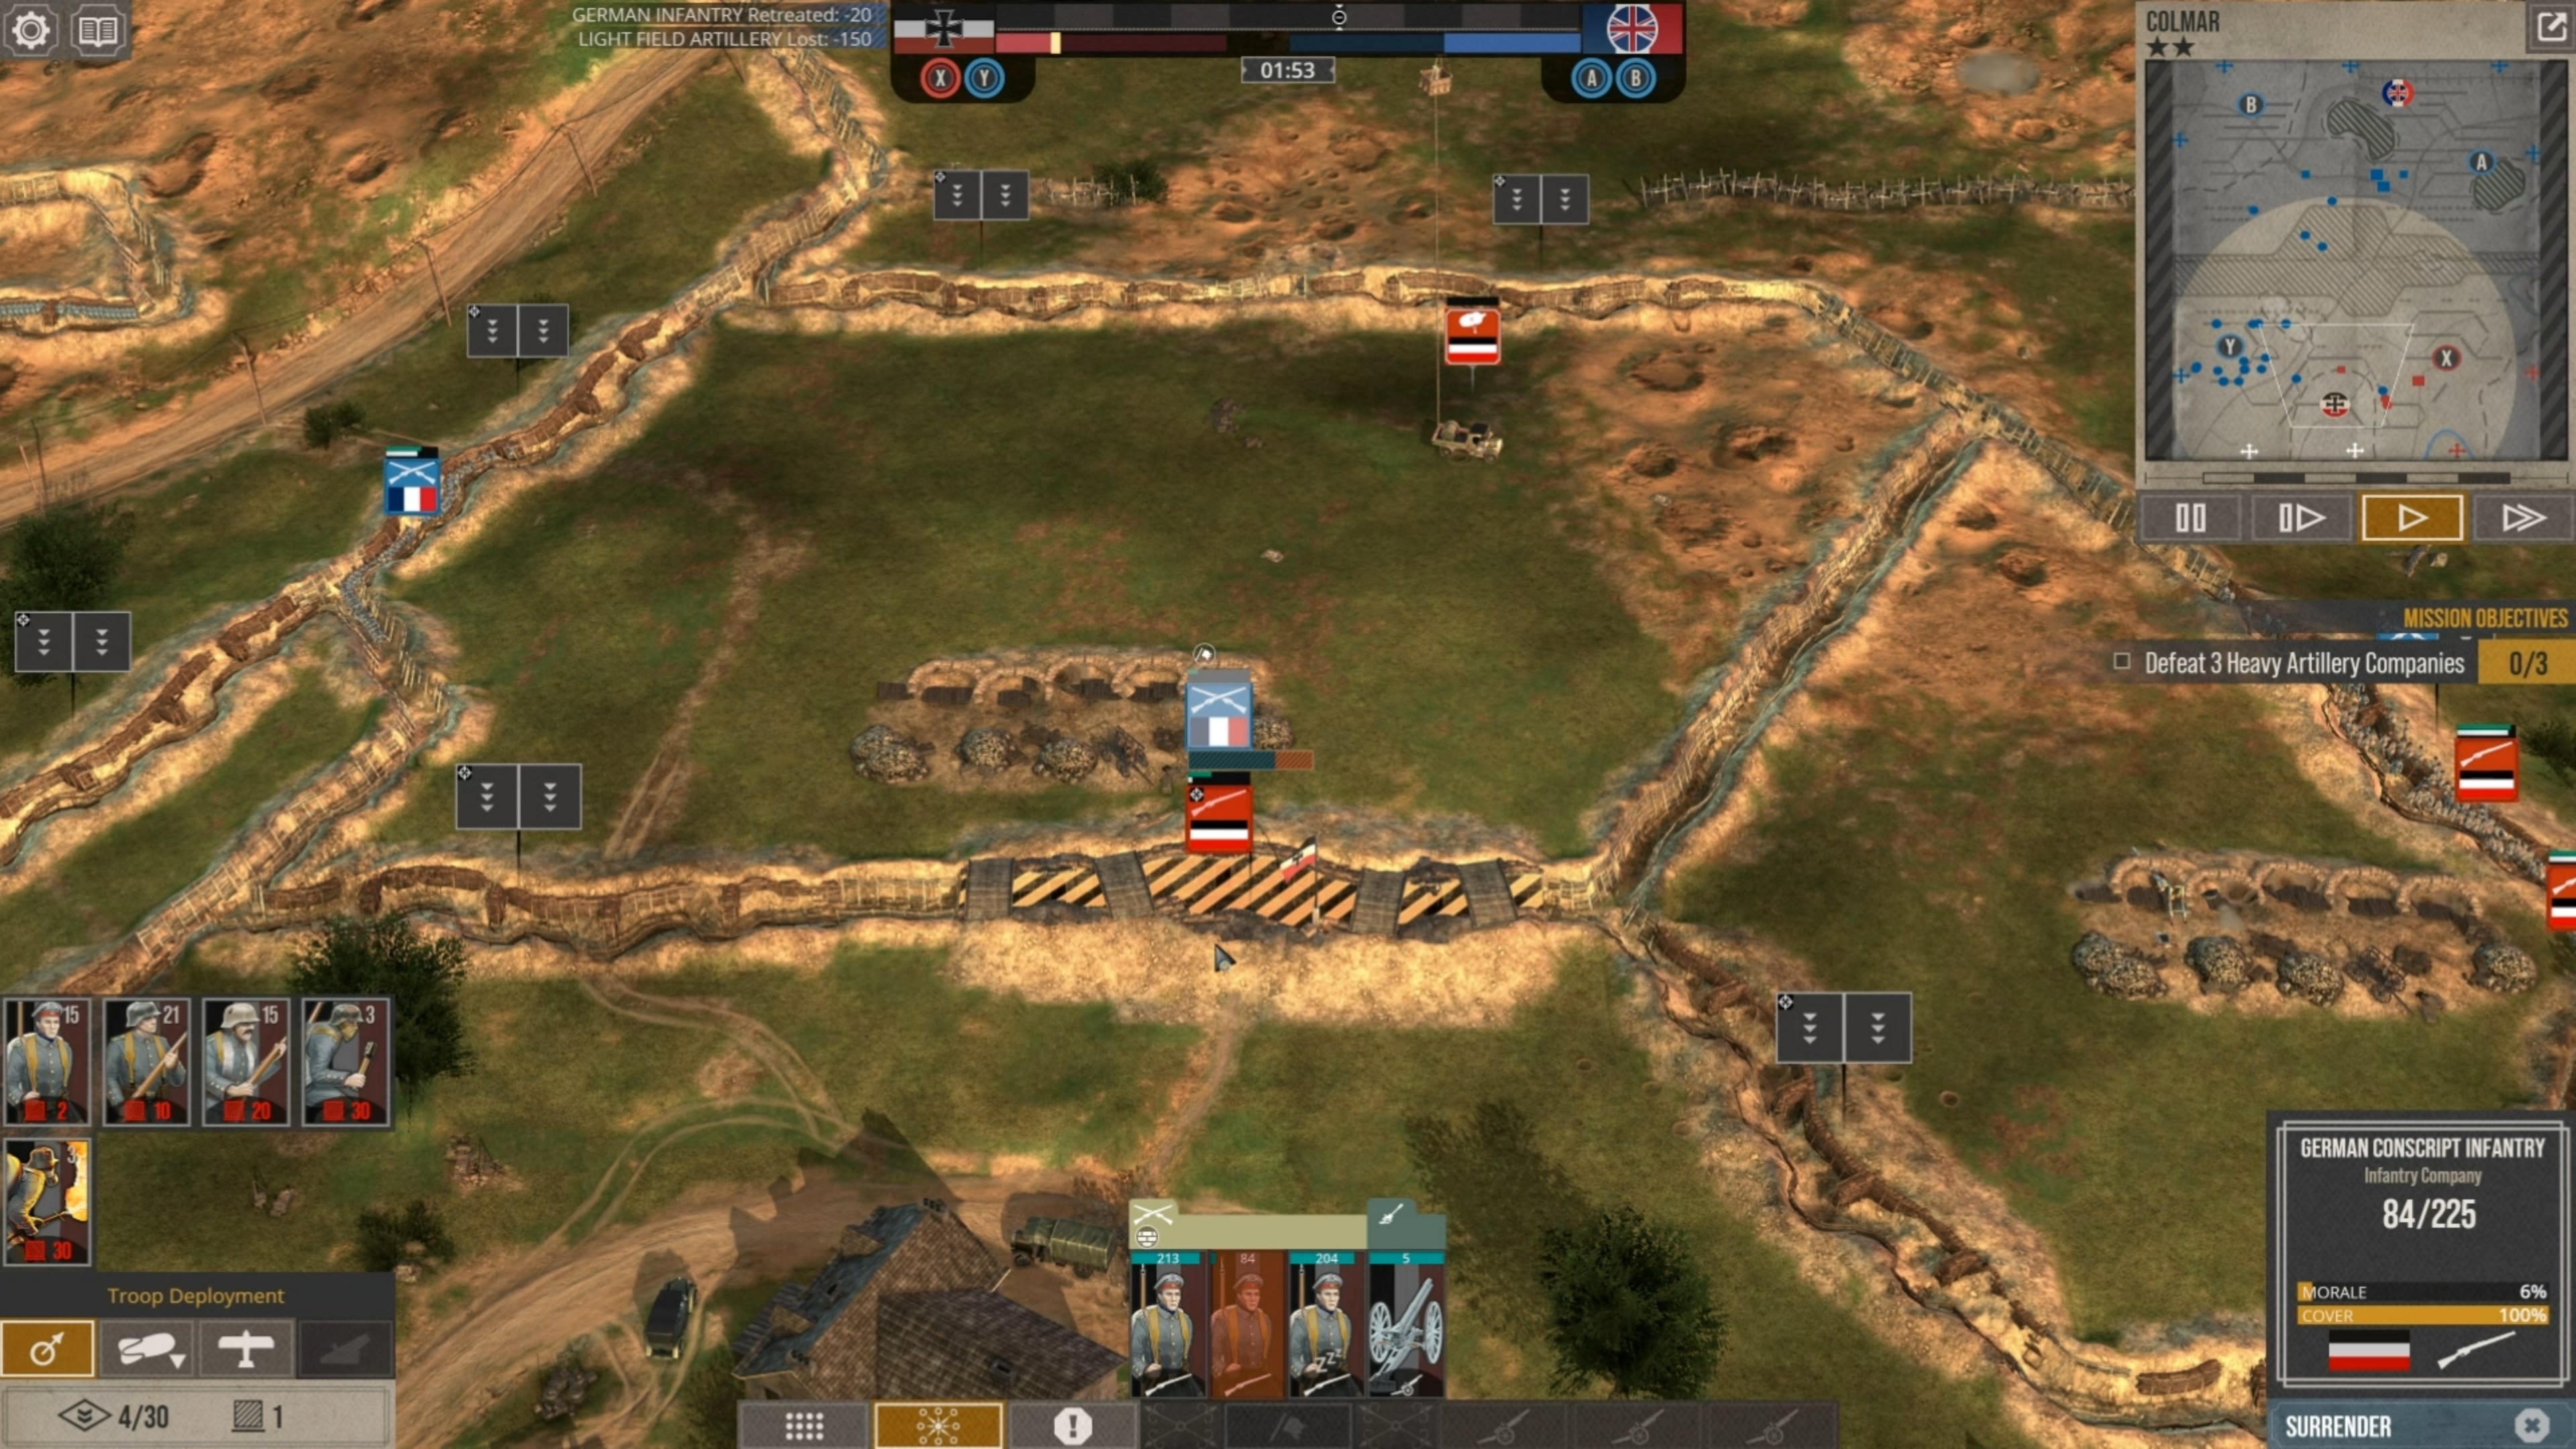
Don't forget to put the mg far enough from the first trench, so enemy cant target while on cover.
Xennial 28 Oct, 2023 @ 6:07pm 
Thanks for the effort putting this together, just got the game!
Fortus Victus 4 Apr, 2023 @ 11:09pm 
Sound advice for Soldier difficulty. Ramp it up to Elite and you need those structures on the attack as you cannot leave back so many companies to man the trenches. The emplacements buy you time to withdraw some 10 or so attackers and redeploy in your rear lines to form a defense.
Shrapp 2 Apr, 2023 @ 3:02am 
Rinse and repeat for 15 minutes until enemy call for a cease-fire granting you a major victory. Enjoy several rewards for killing a larger force, preserving morale, etc. with a bonus +10/-18 national will change.
Shrapp 2 Apr, 2023 @ 3:02am 
When the enemy infantry blob swarms towards line 1, target elite infantry with MG's/heavy arty to kill/whittle them down. When some damaged/weak infantry enters the first line, they will not be able to win hand2hand combat because there are two of your healthy companies in, the rest of the blob cannot enter the trench as long as 2 of their units are fighting (and losing) and can either wait until a slot opens while getting shredded or decide to swarm another trench. And get shredded.

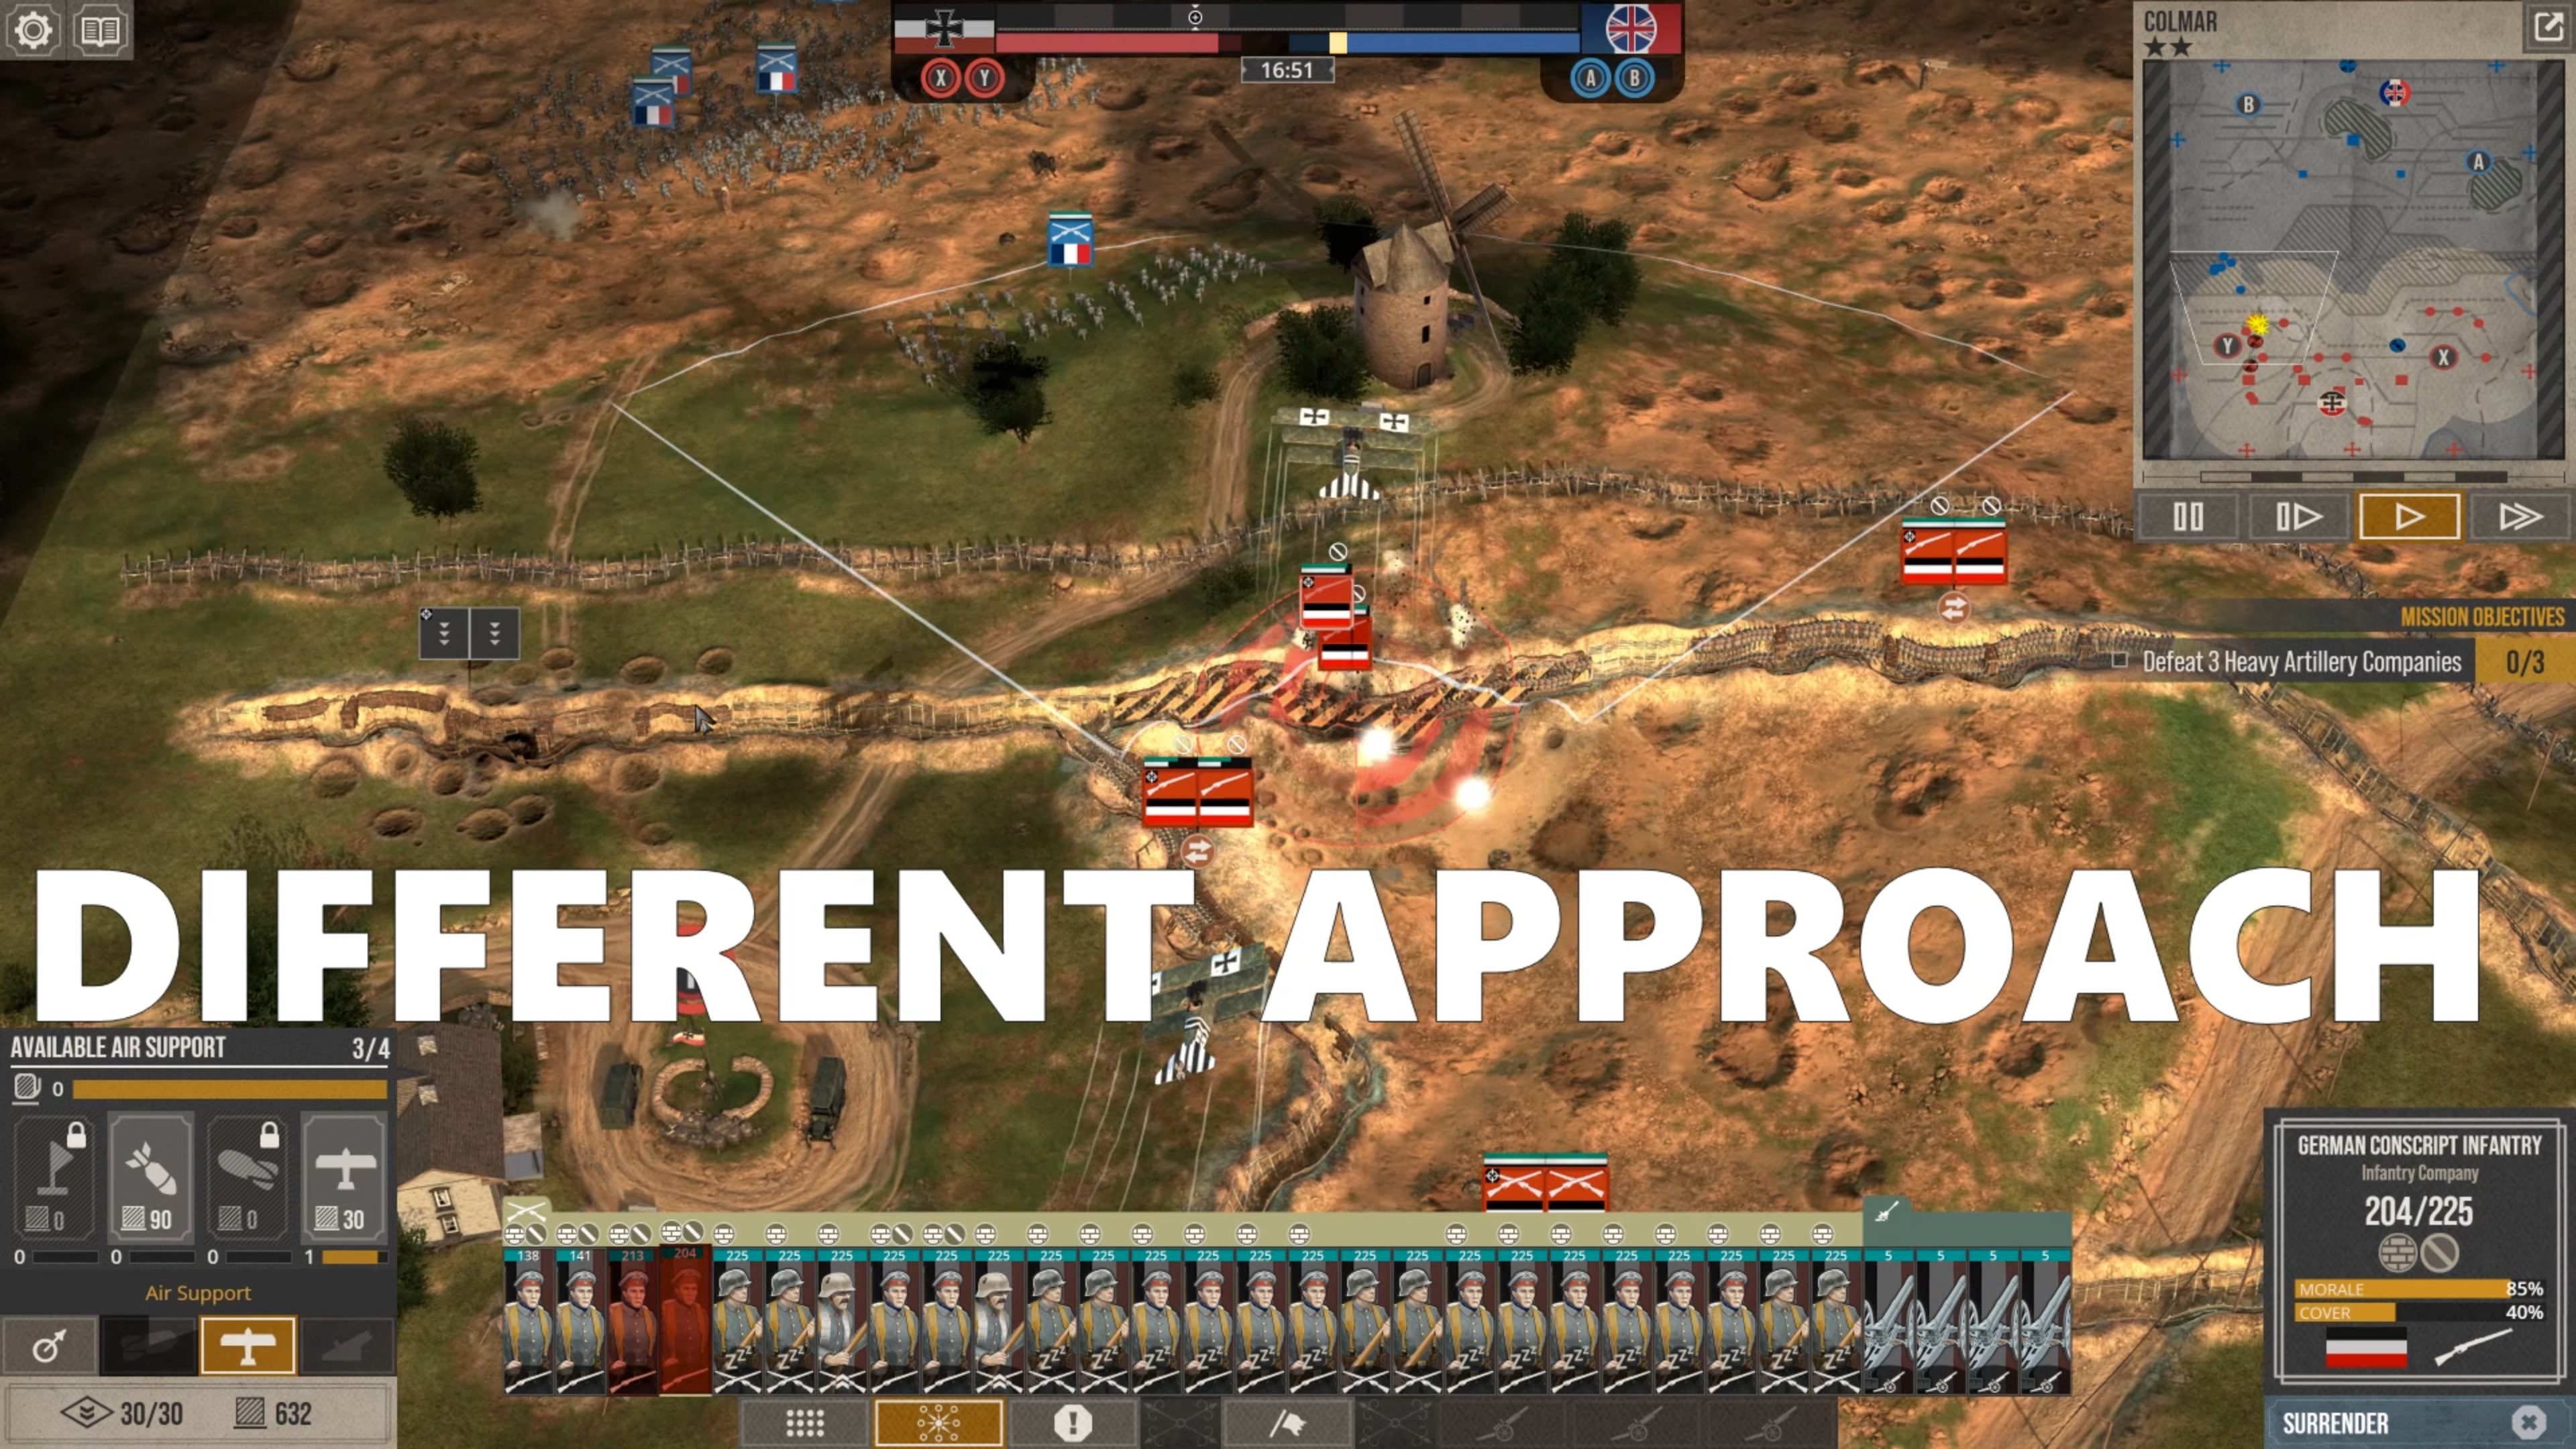
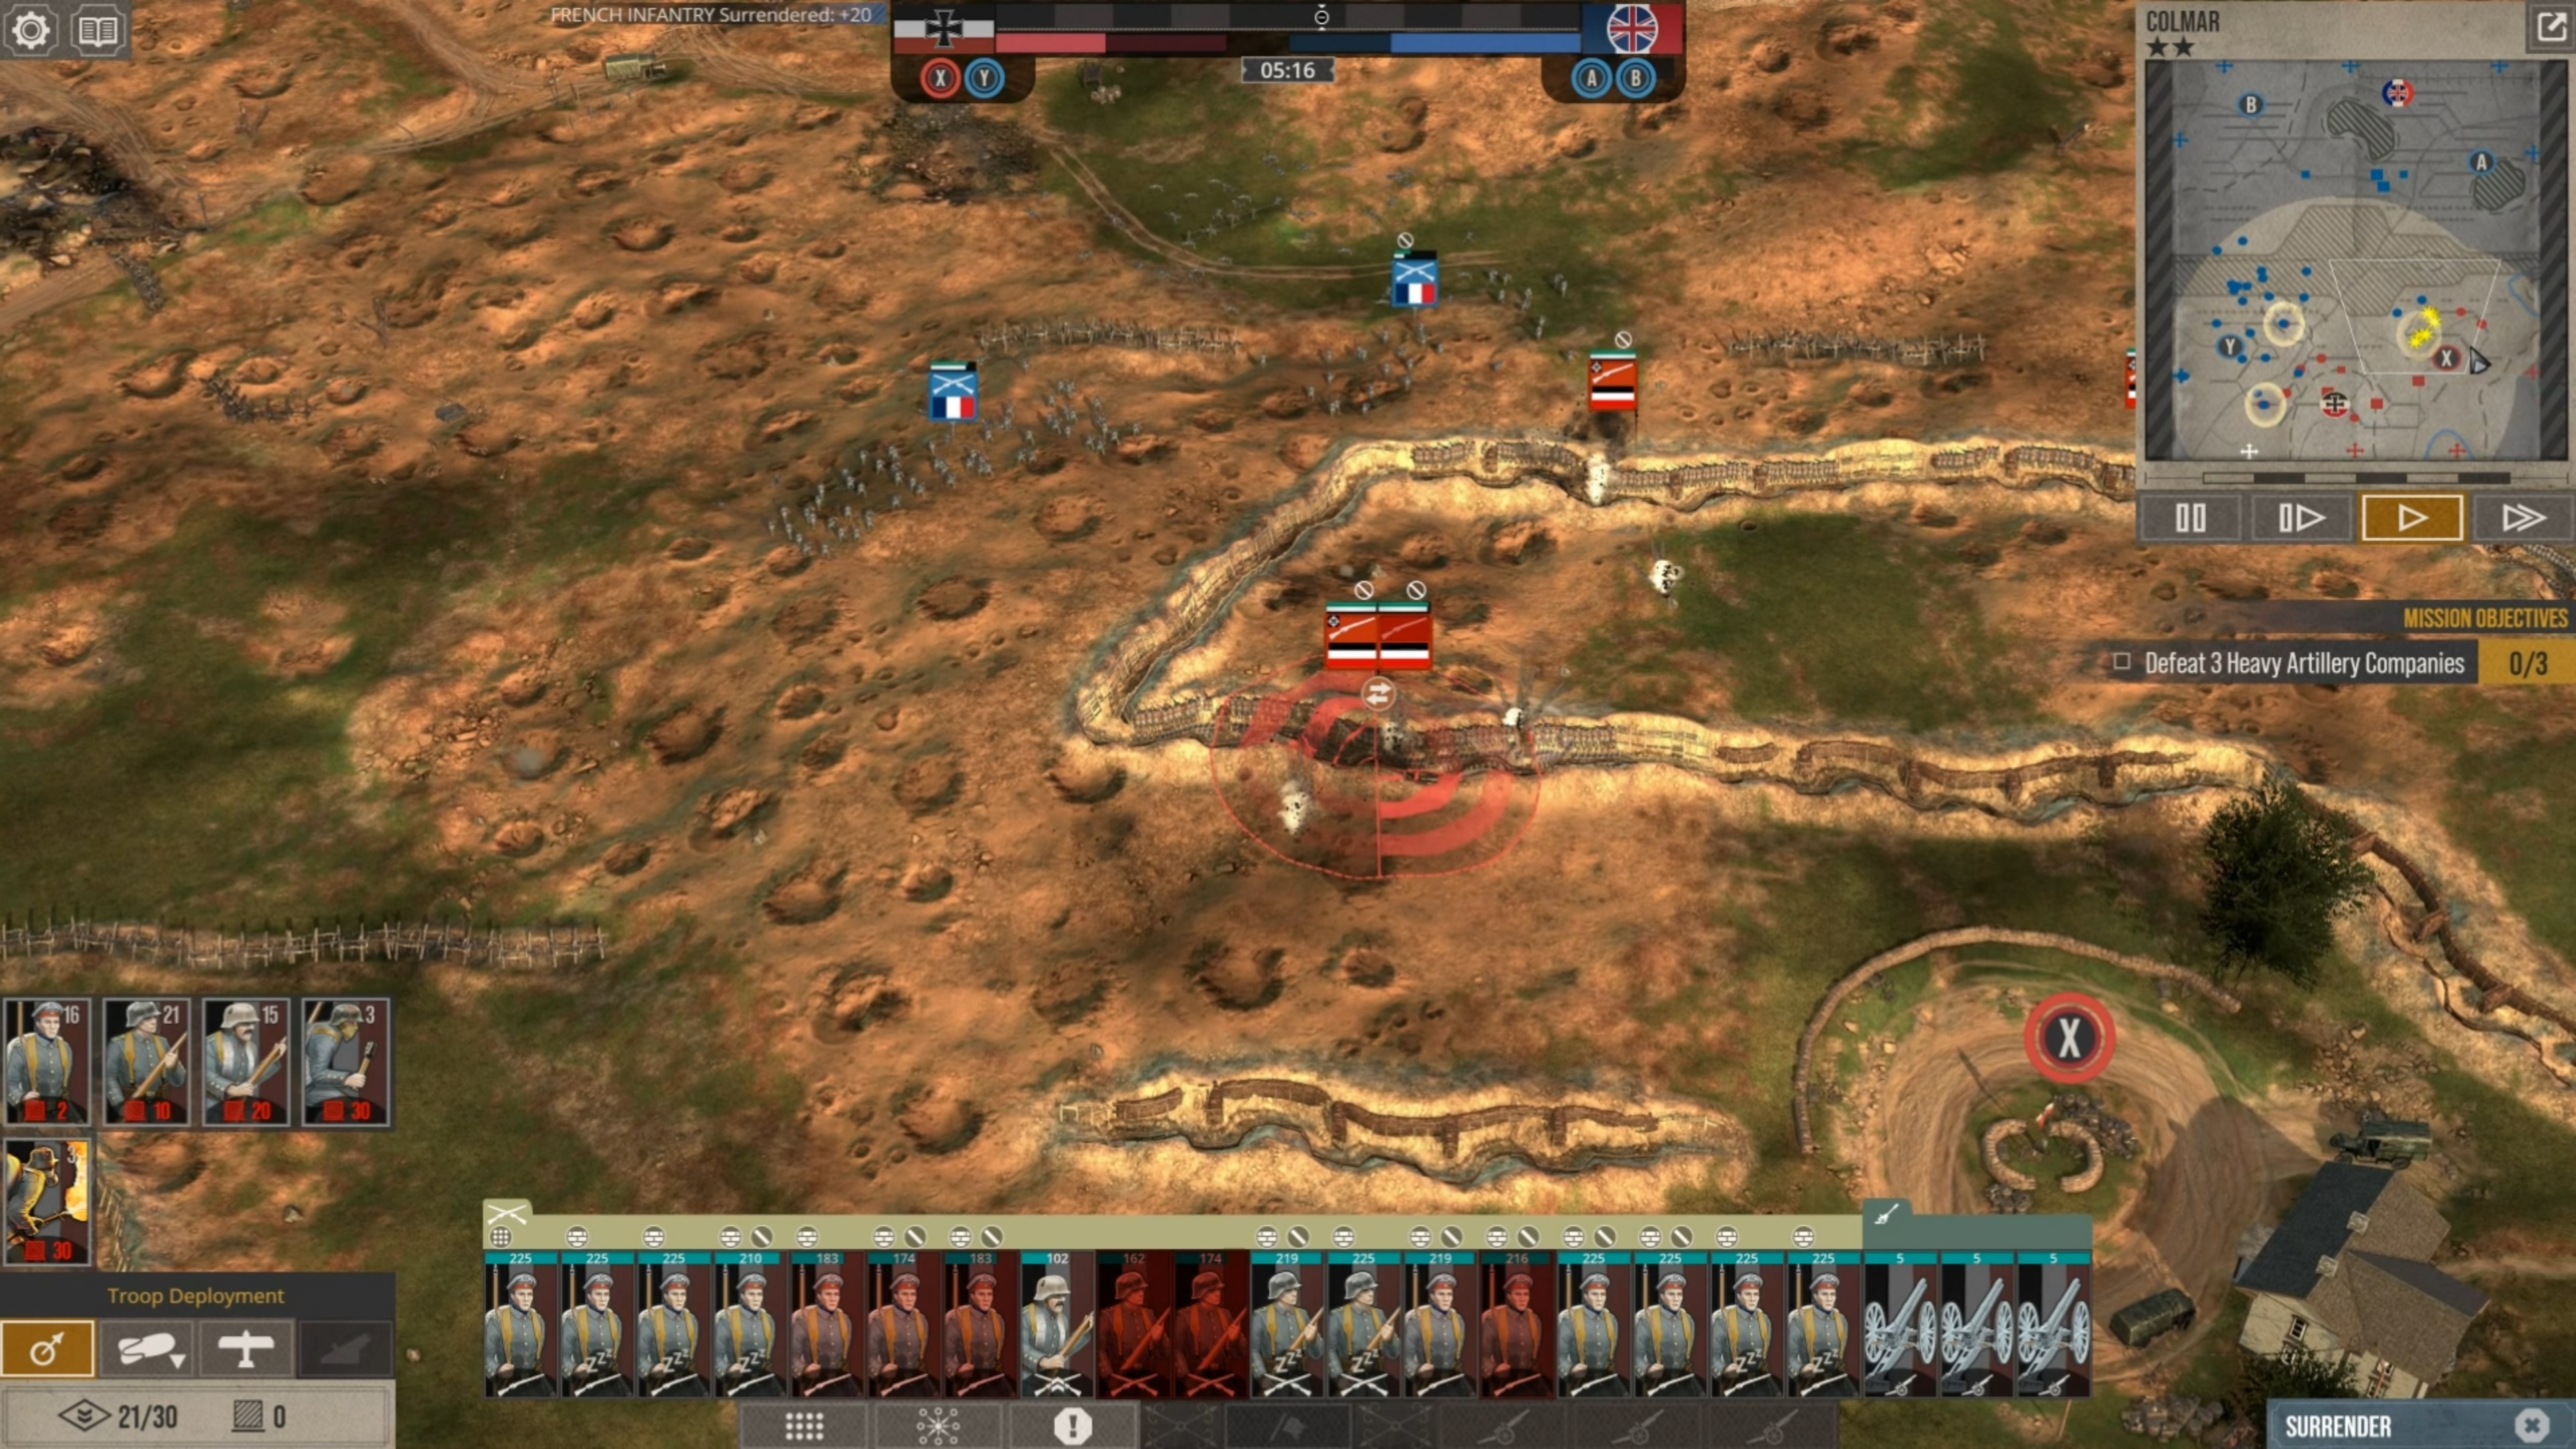
Even if the enemy overwhelms a single trench or two, they are not connected, so their troops will either get out to atttack another one and get slaughtered by MG's/troops/ in line 2-3/hvy arty or will wait, bleeding, for your hvy arty/fresh countercharge from line 2-3 to retake the trench.

Withdraw damaged troops, move up undamaged infantry from the back lines to empty trenches, call in reserves to back trenches. With practice, you are done before another wave.
Shrapp 2 Apr, 2023 @ 3:02am 
HOW TO USE MG'S in defense:

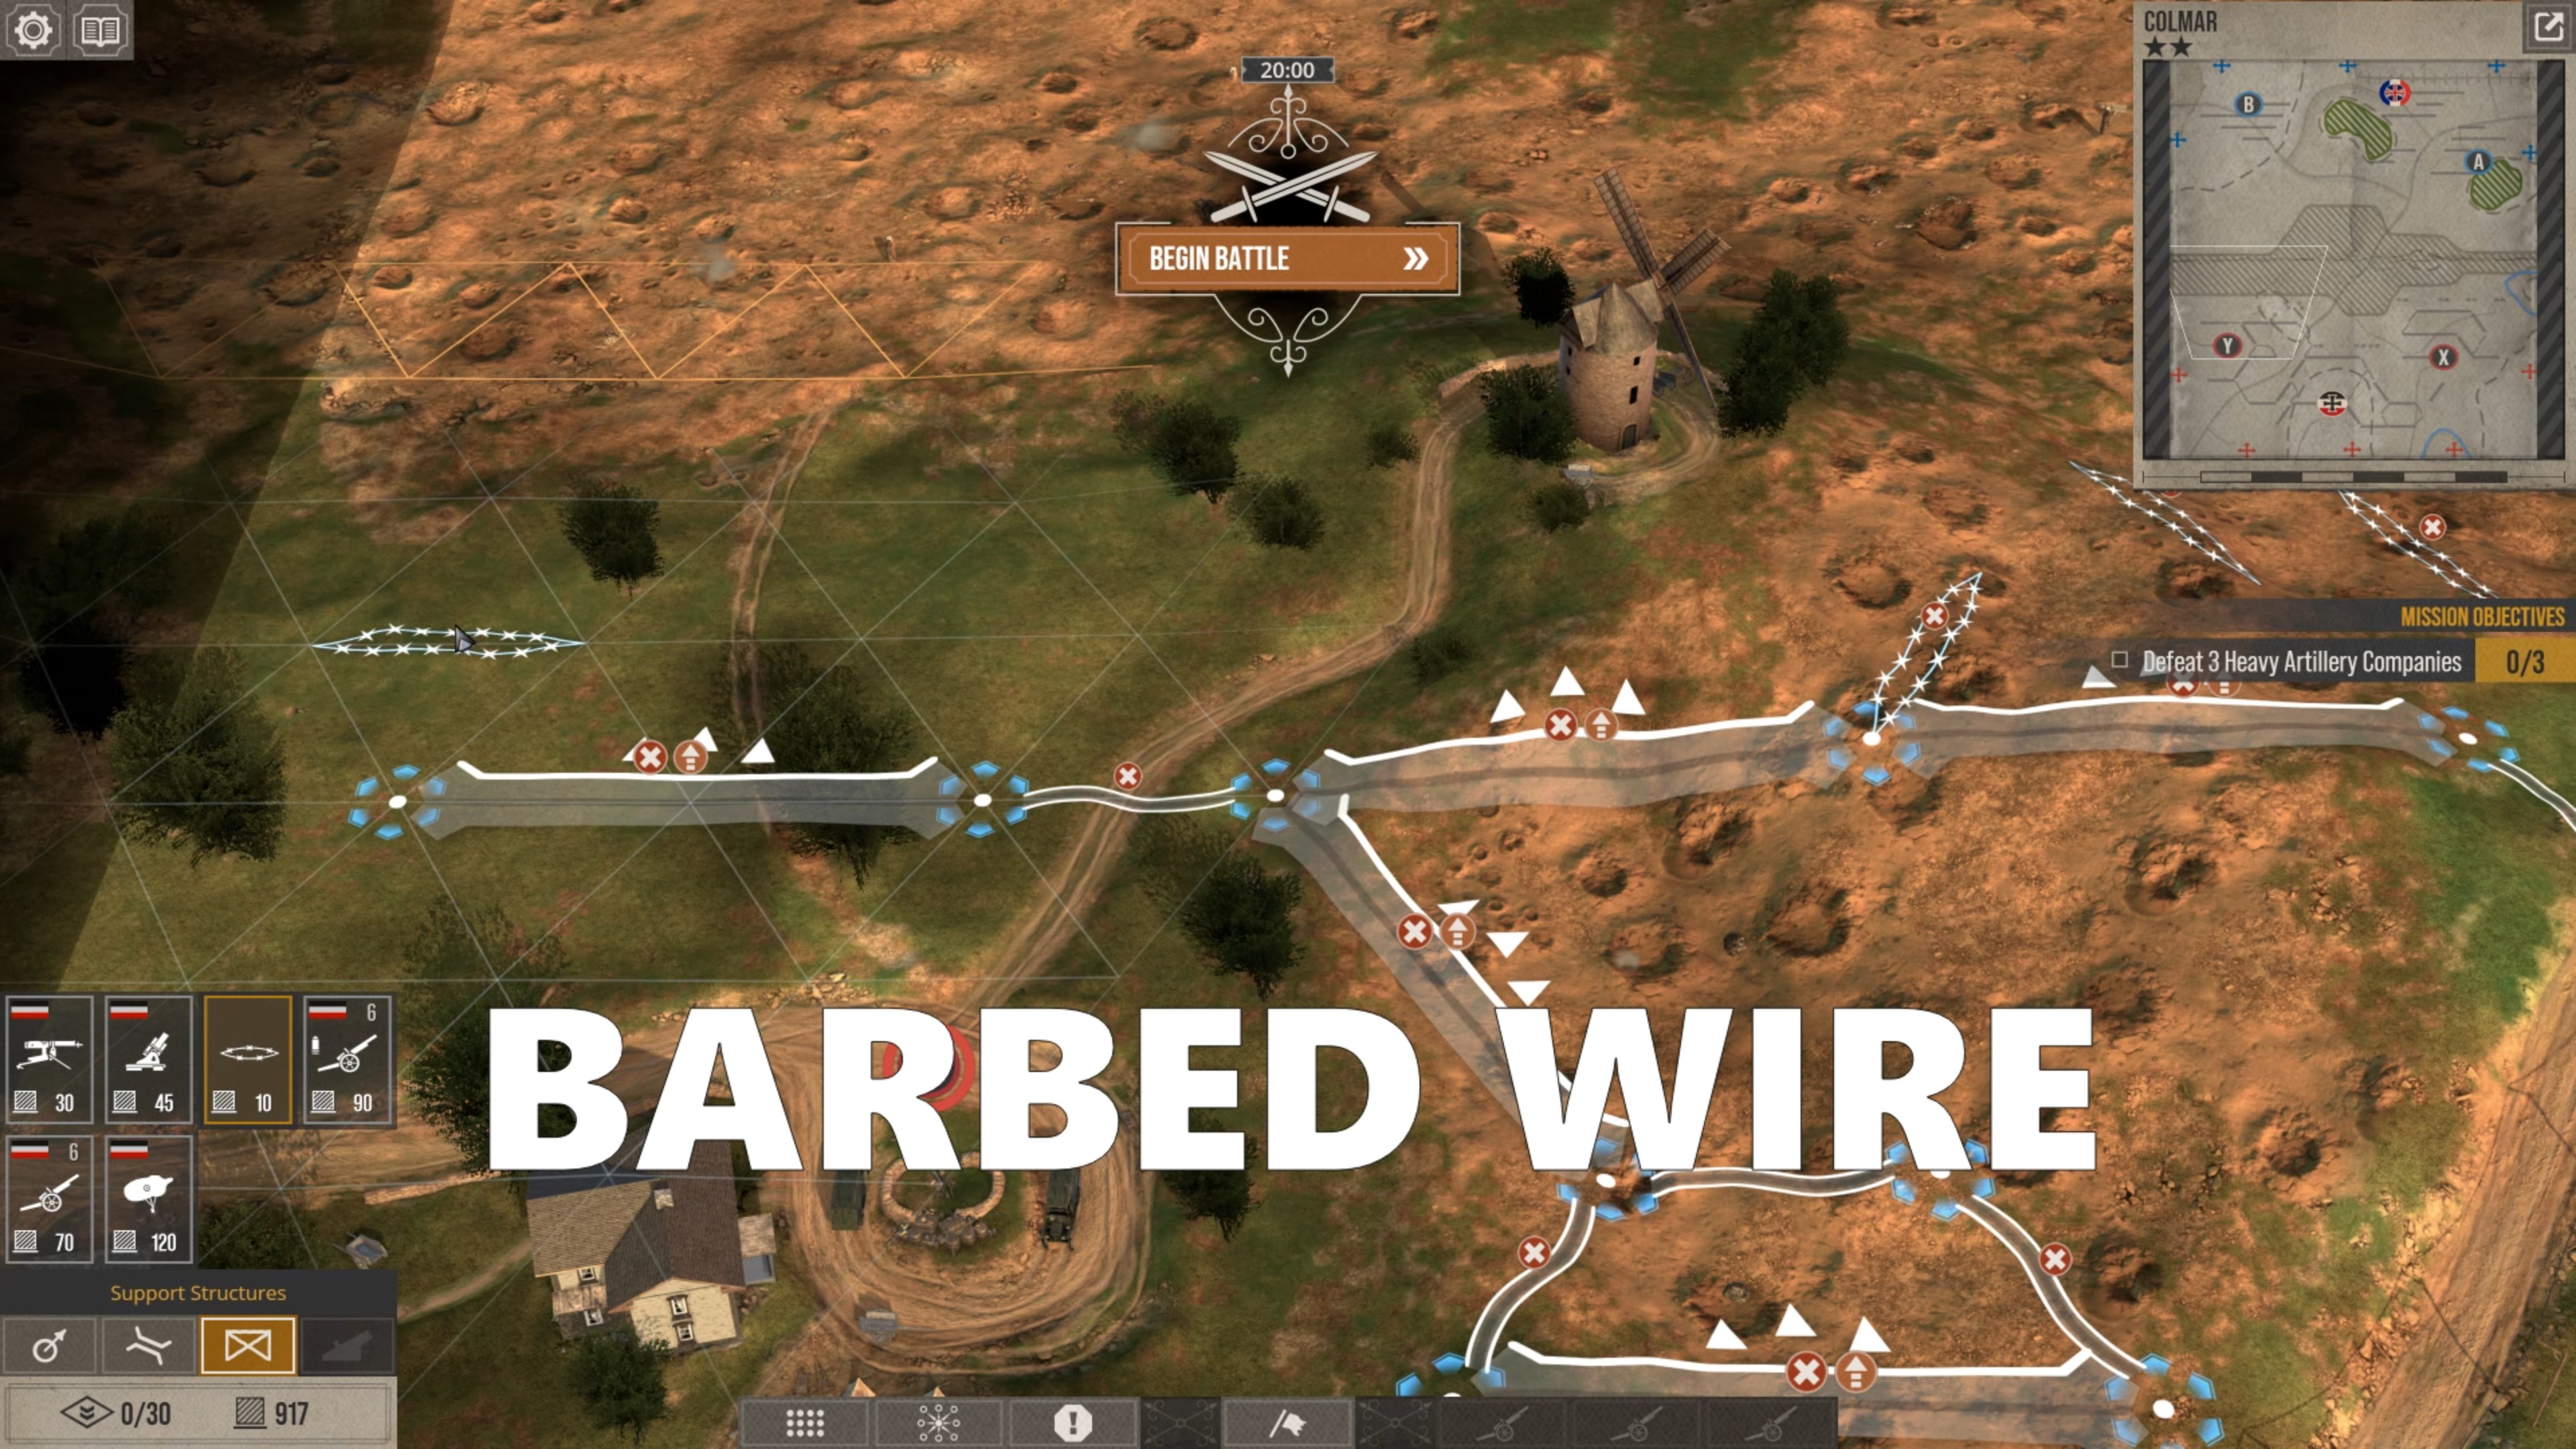
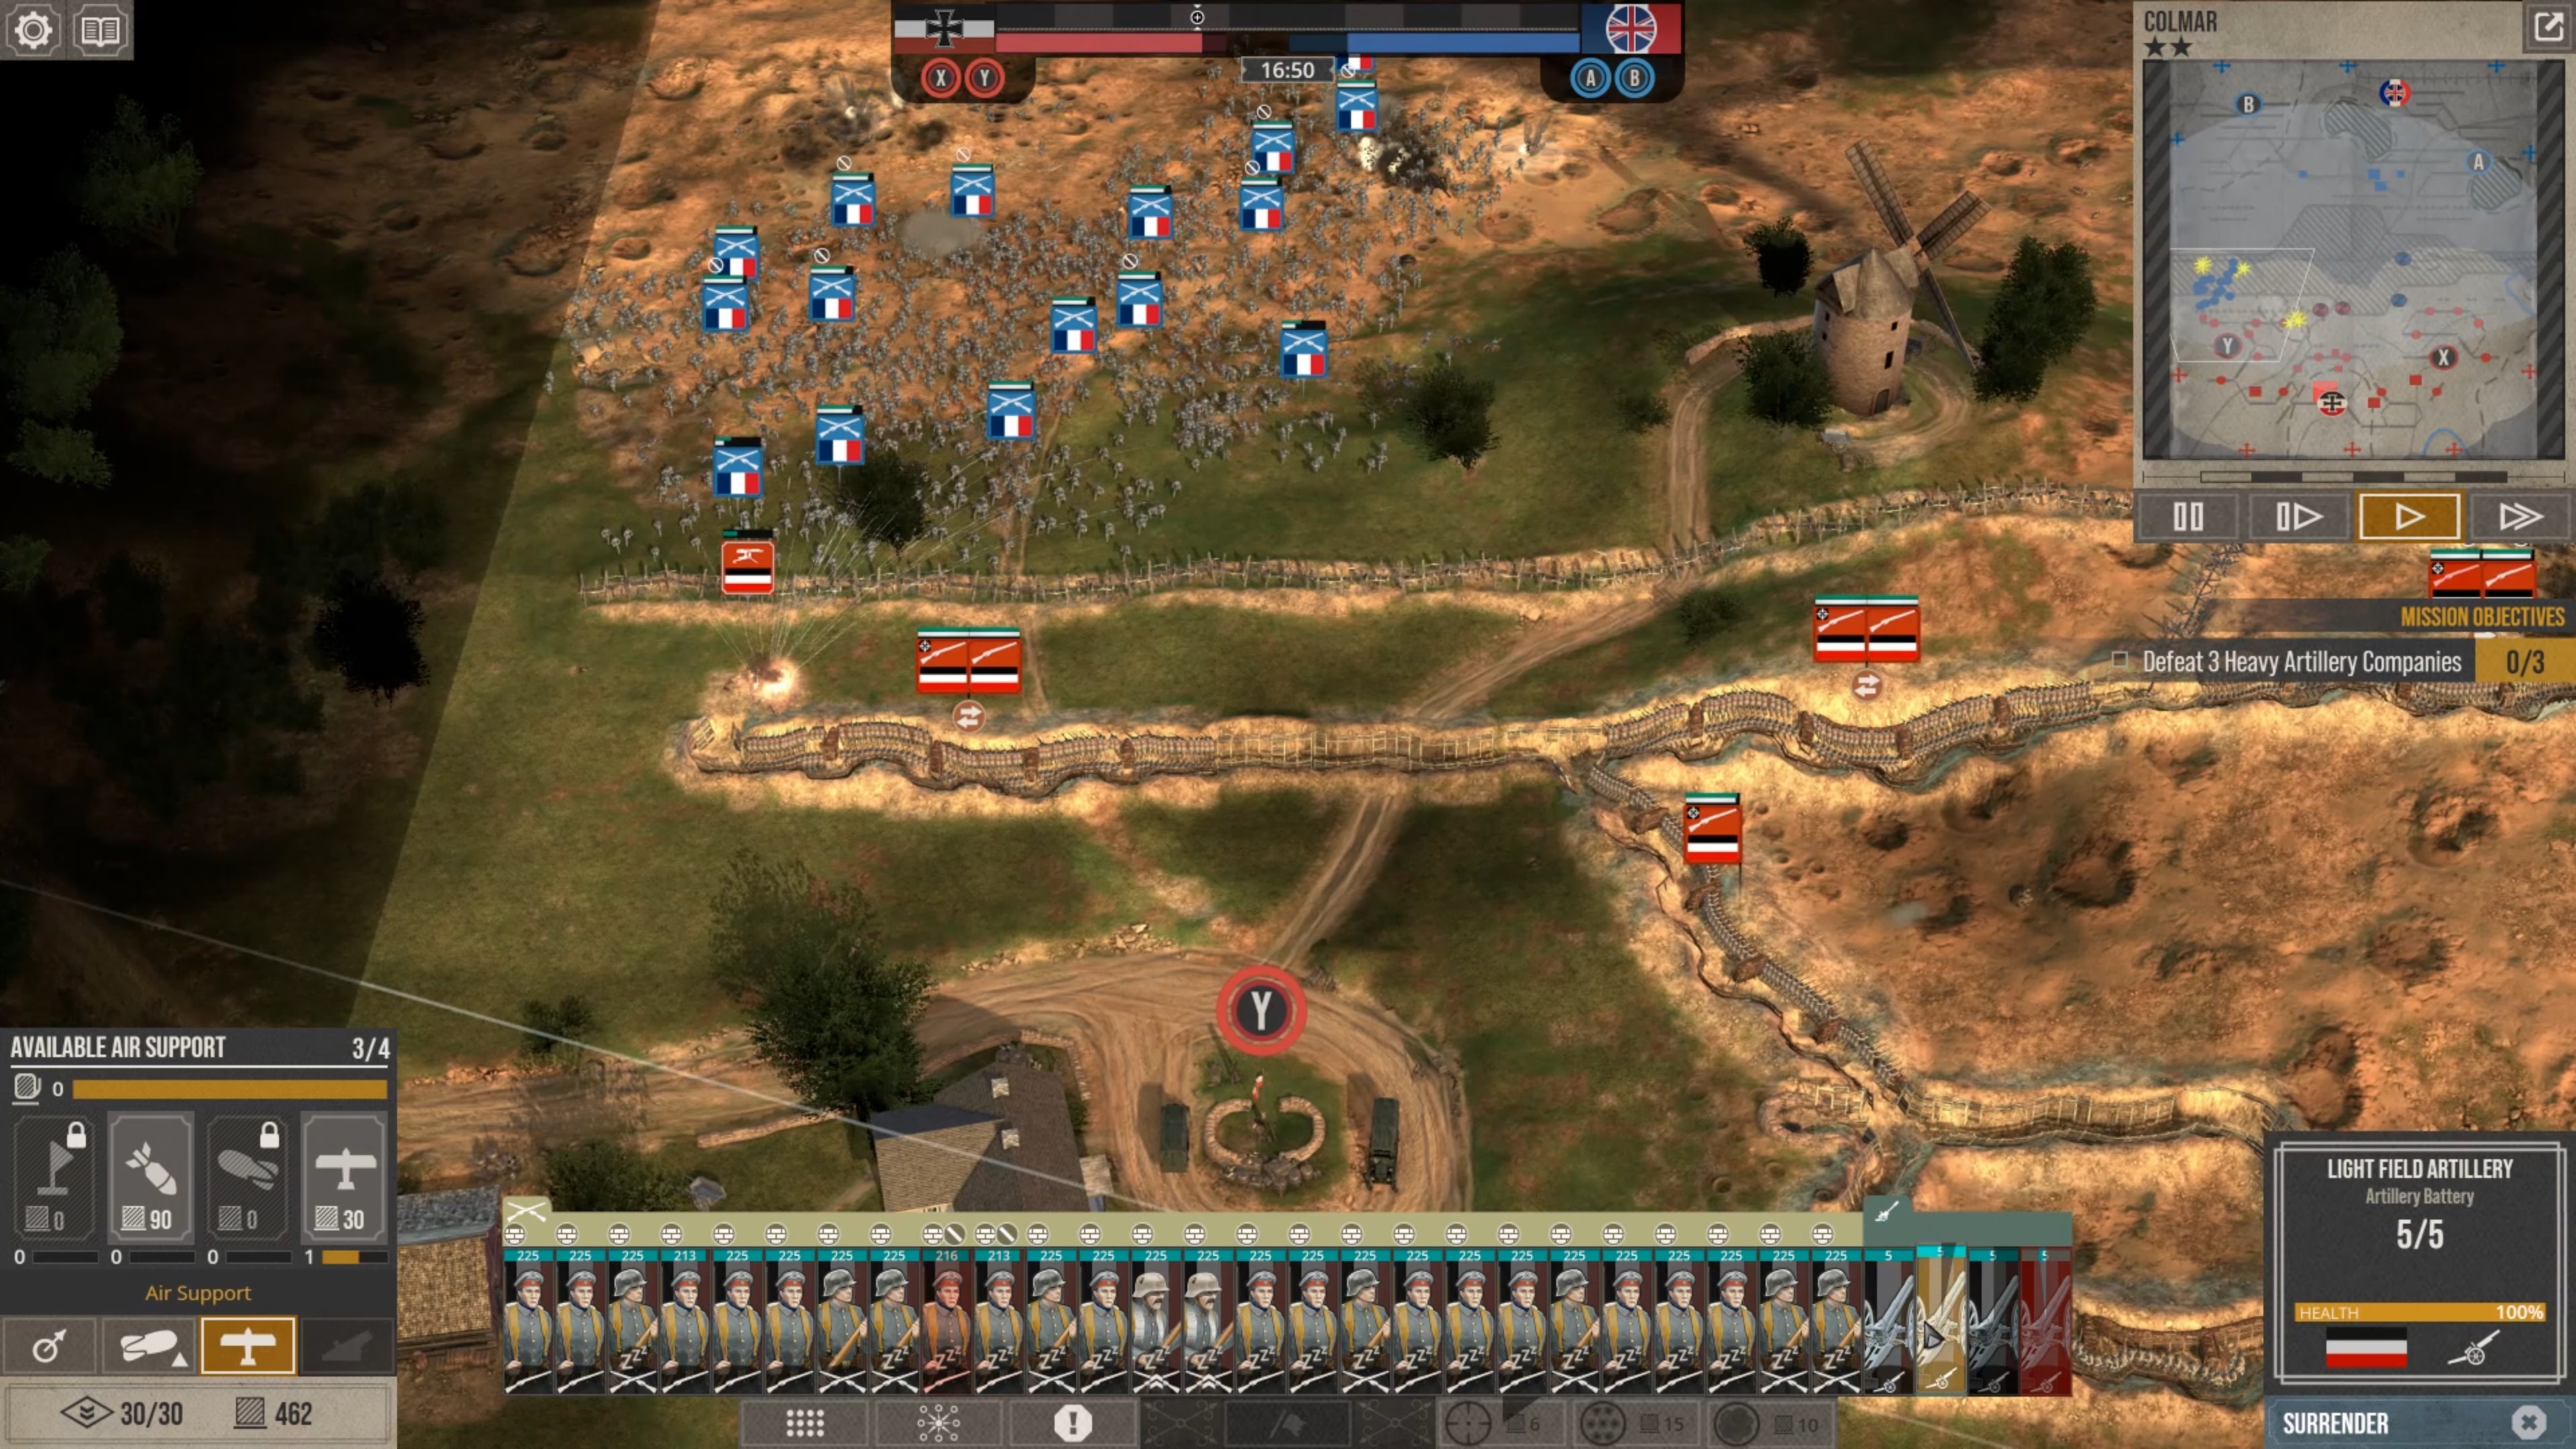
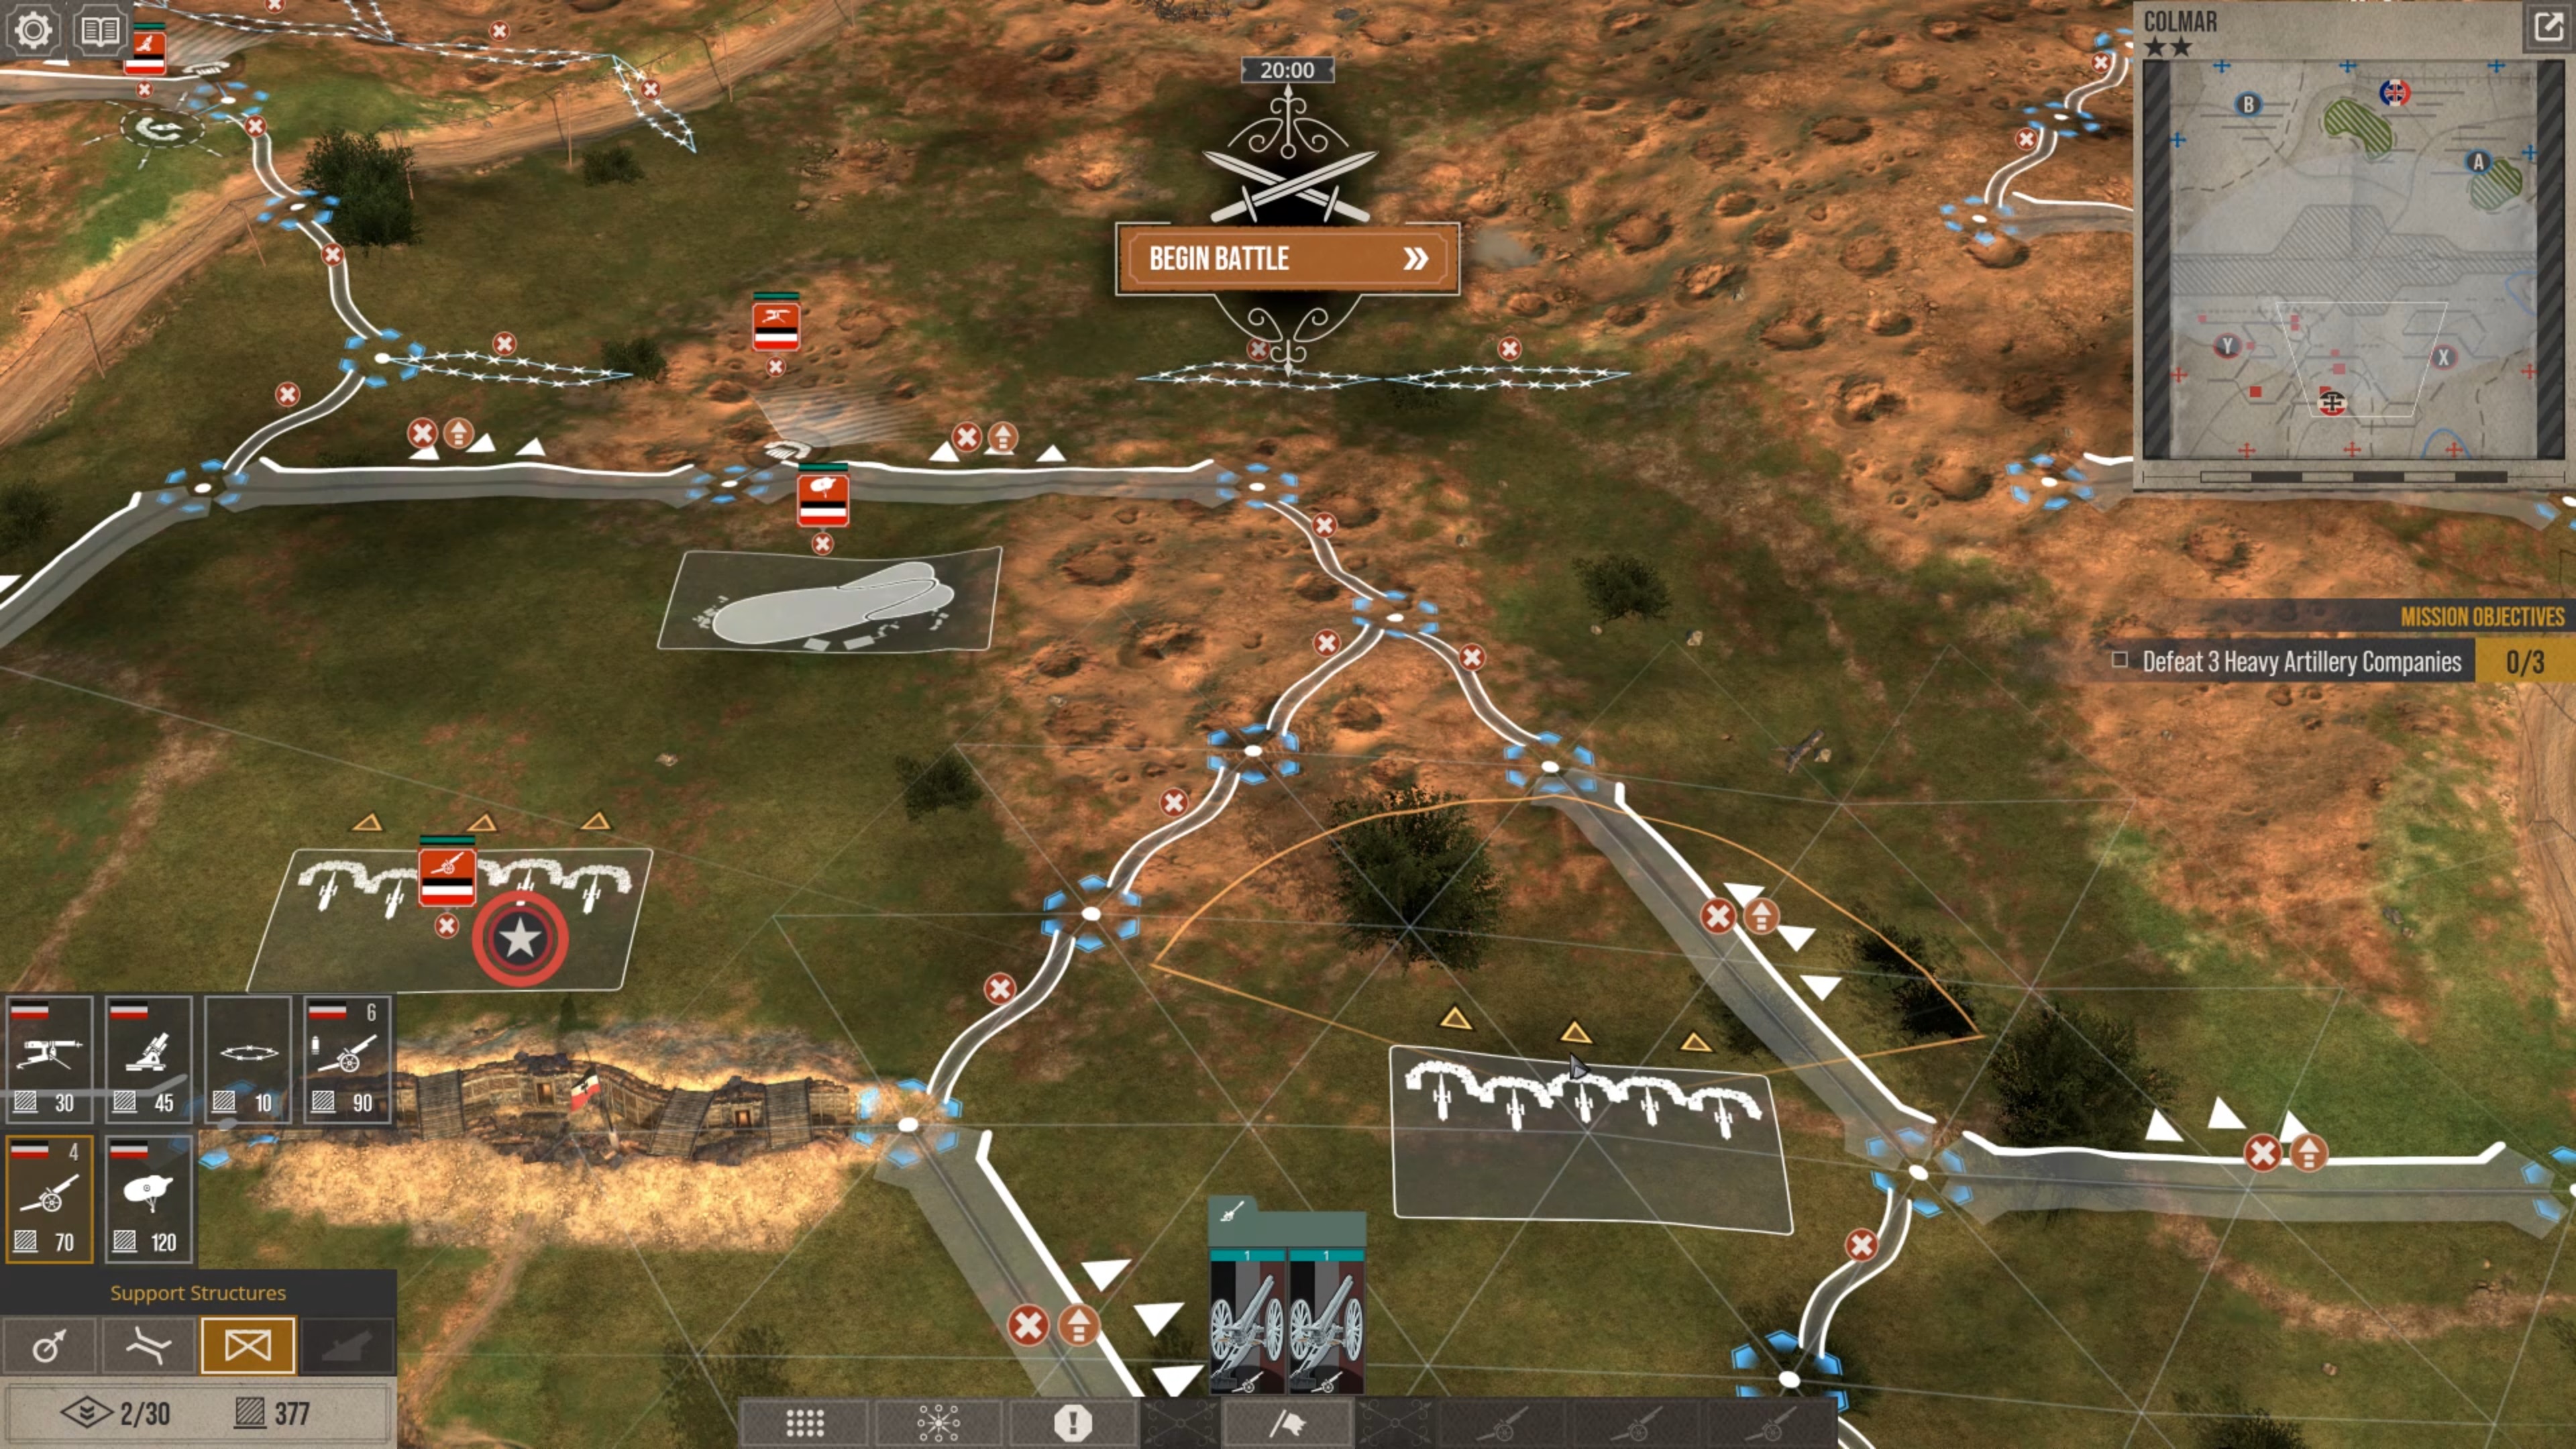
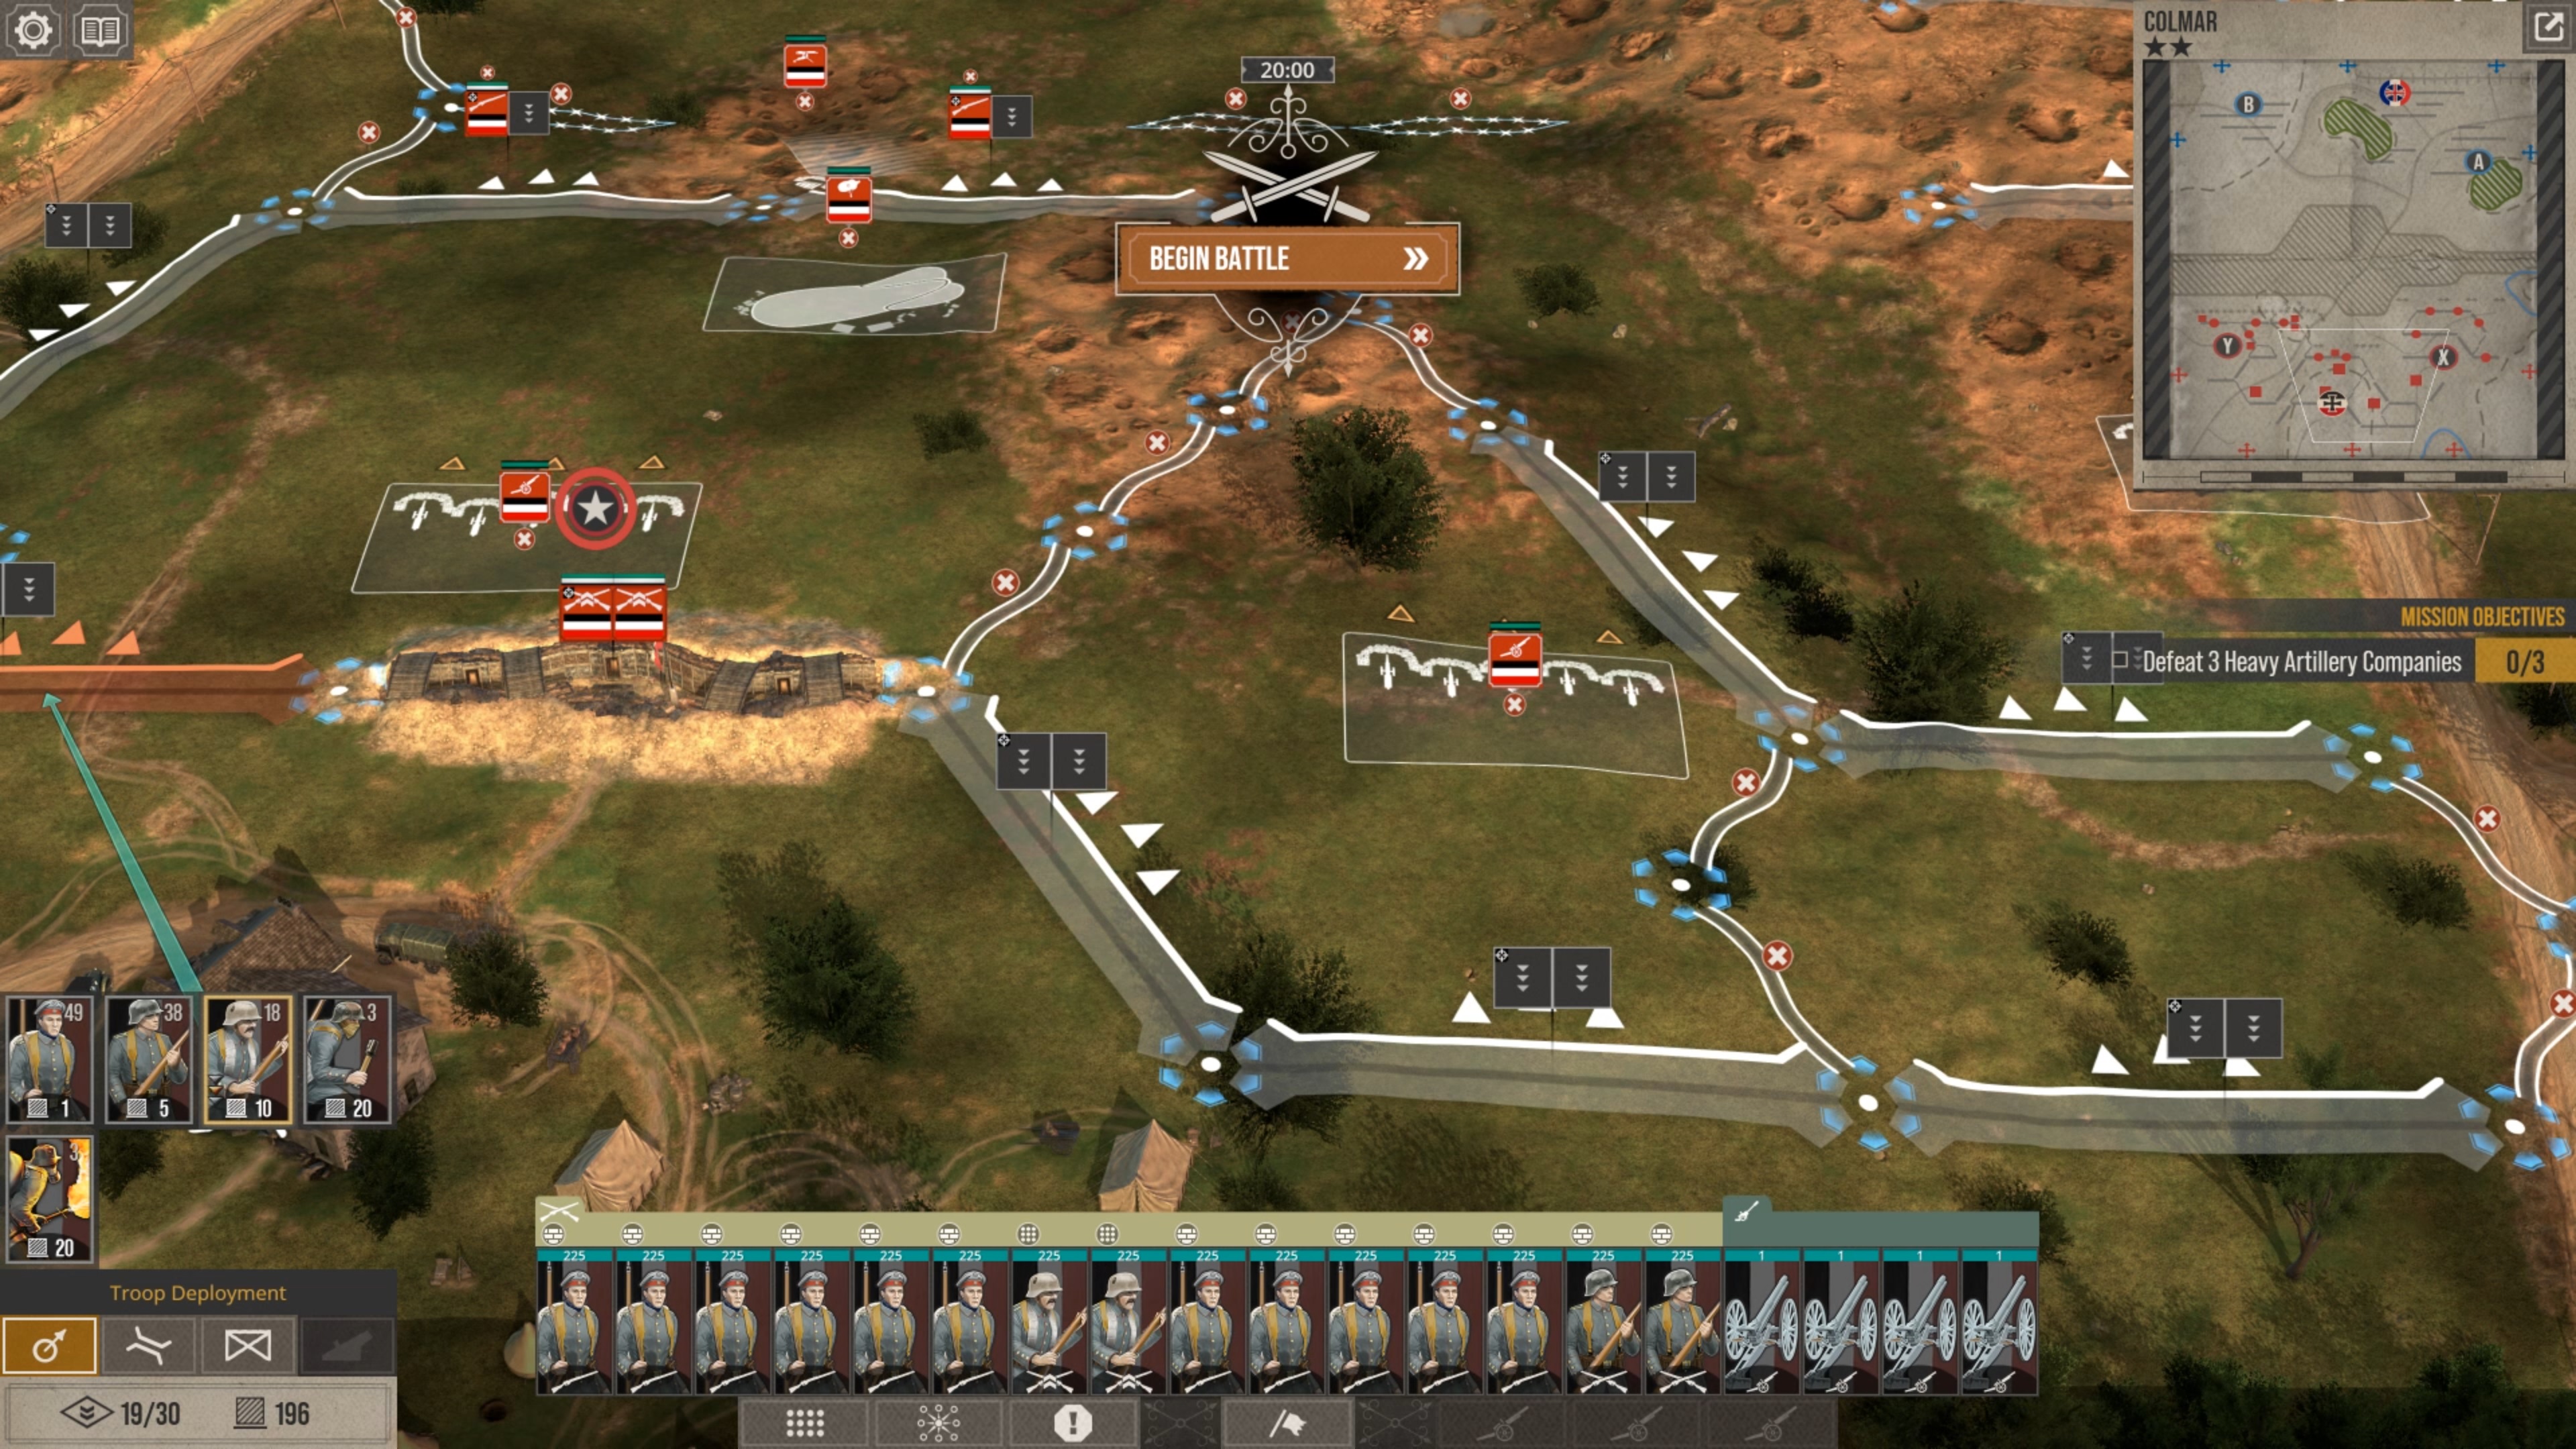
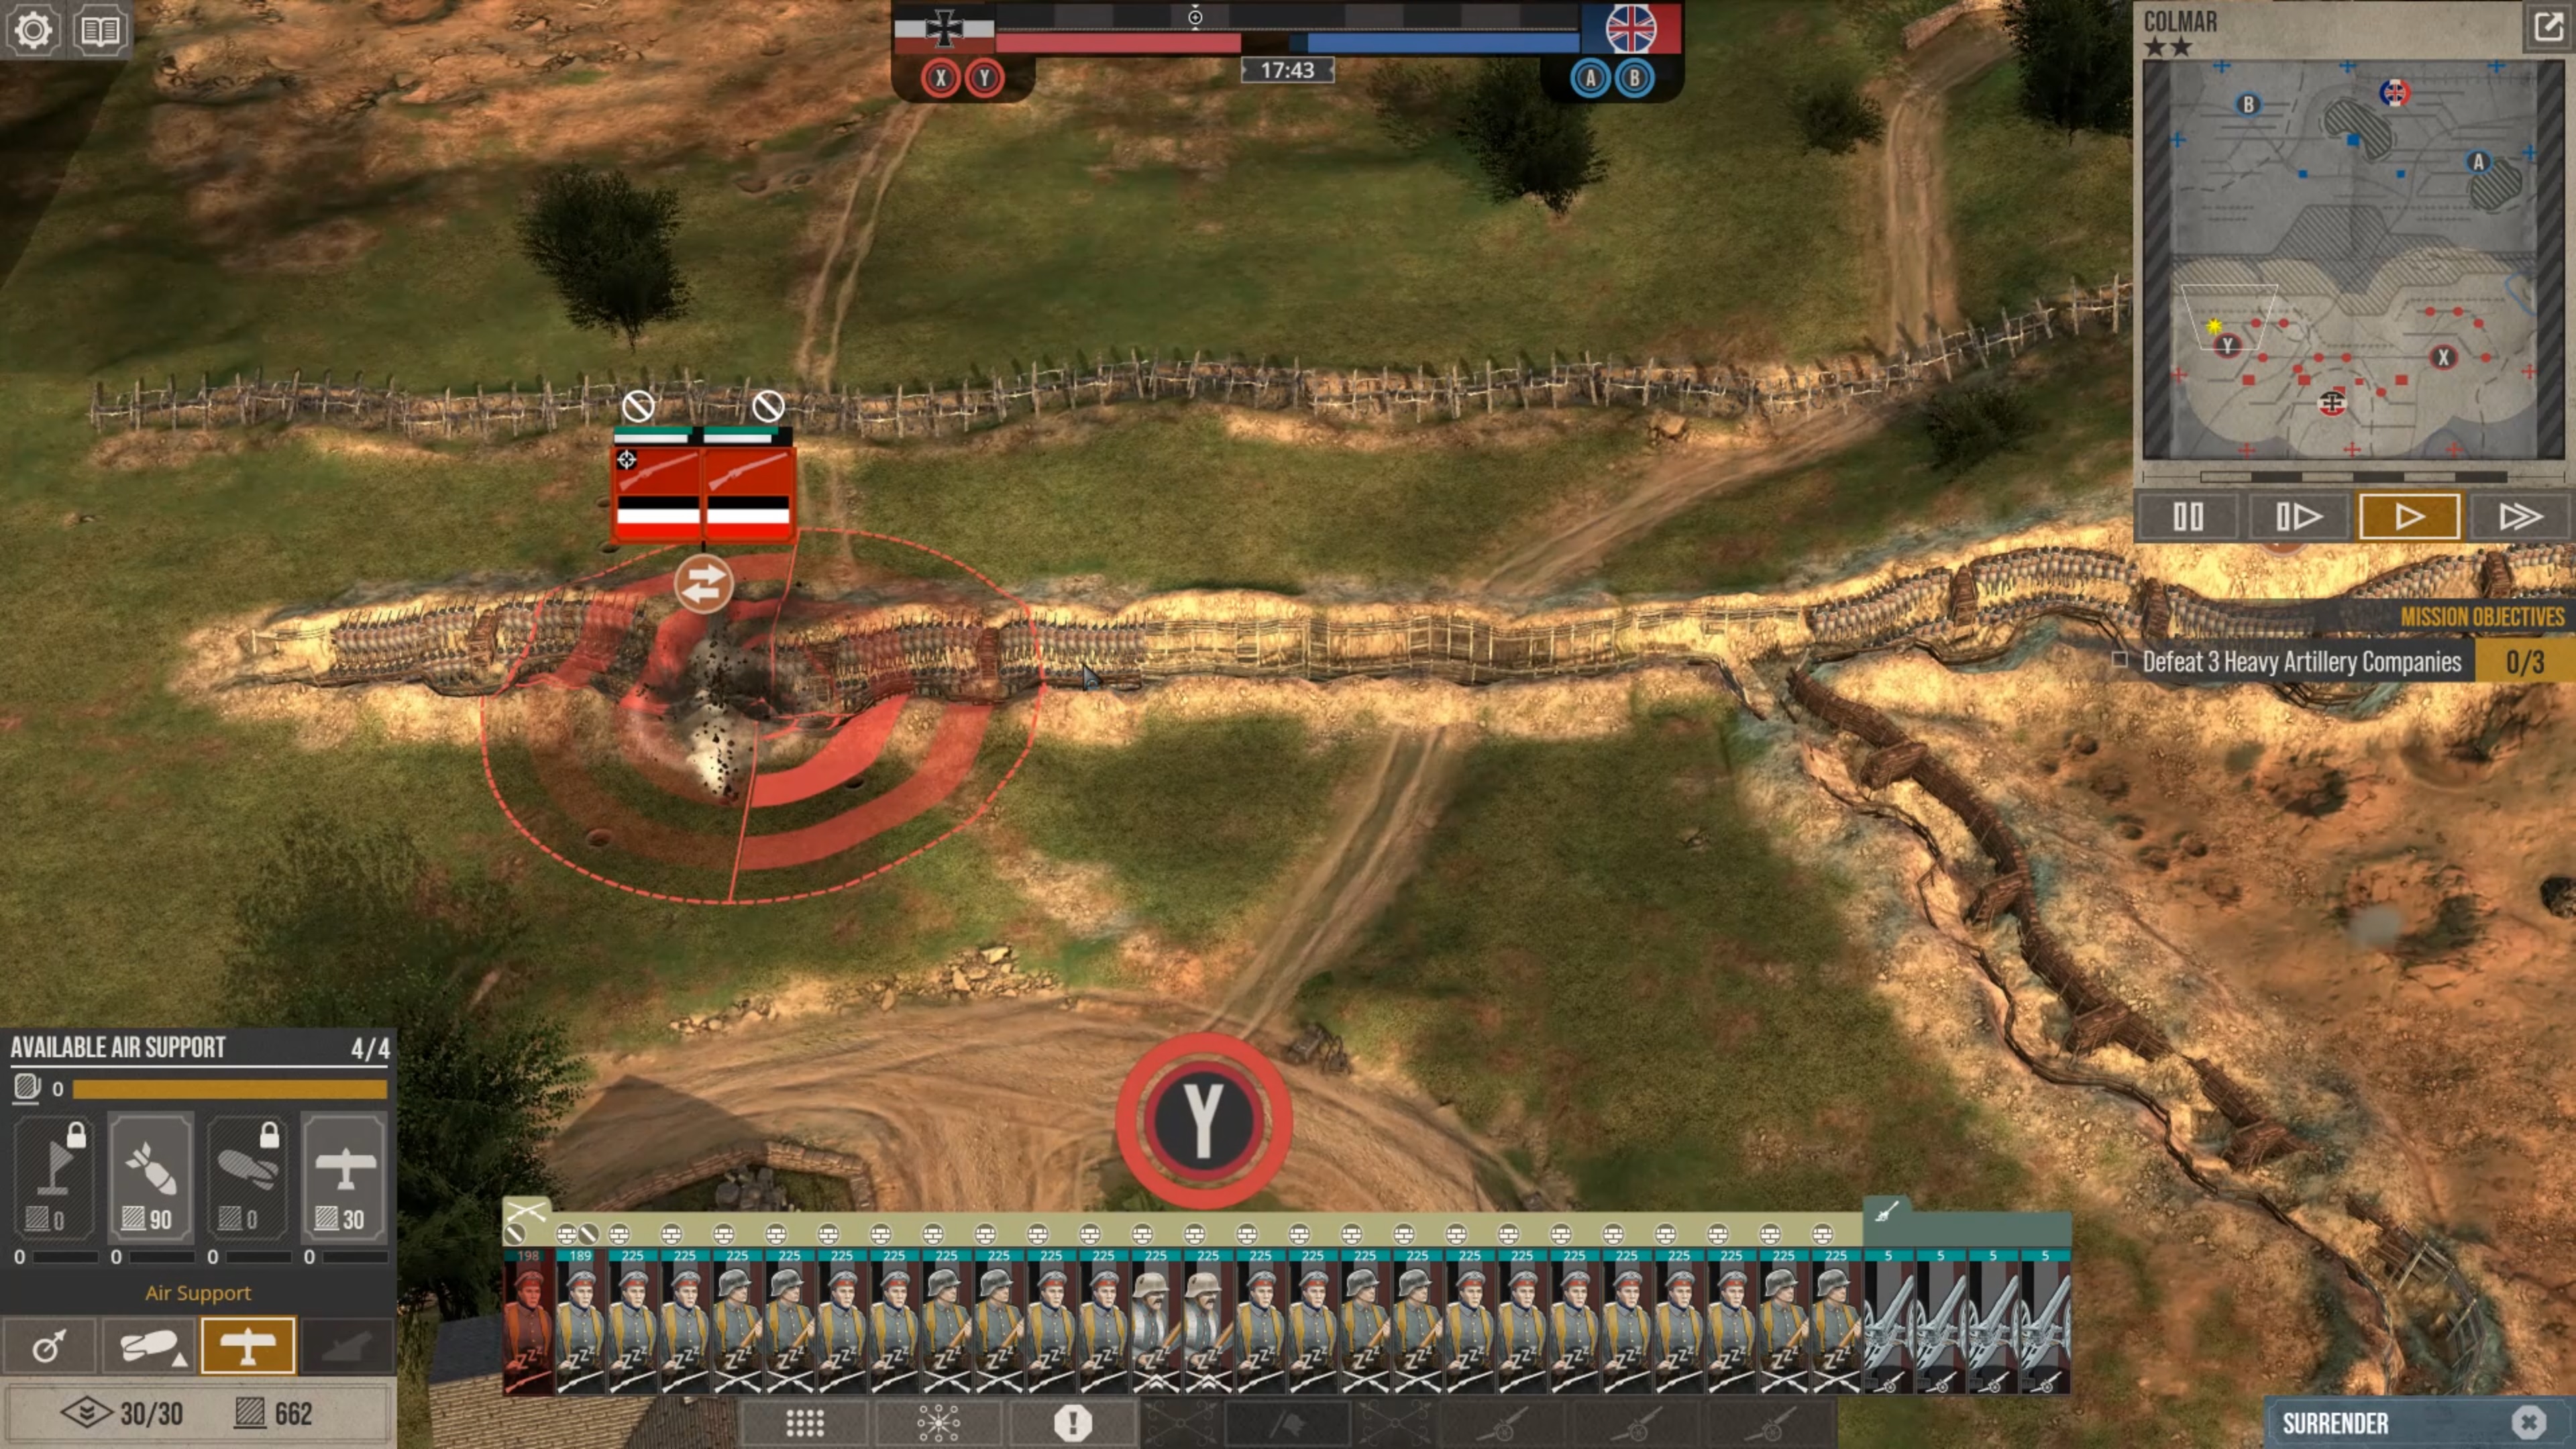
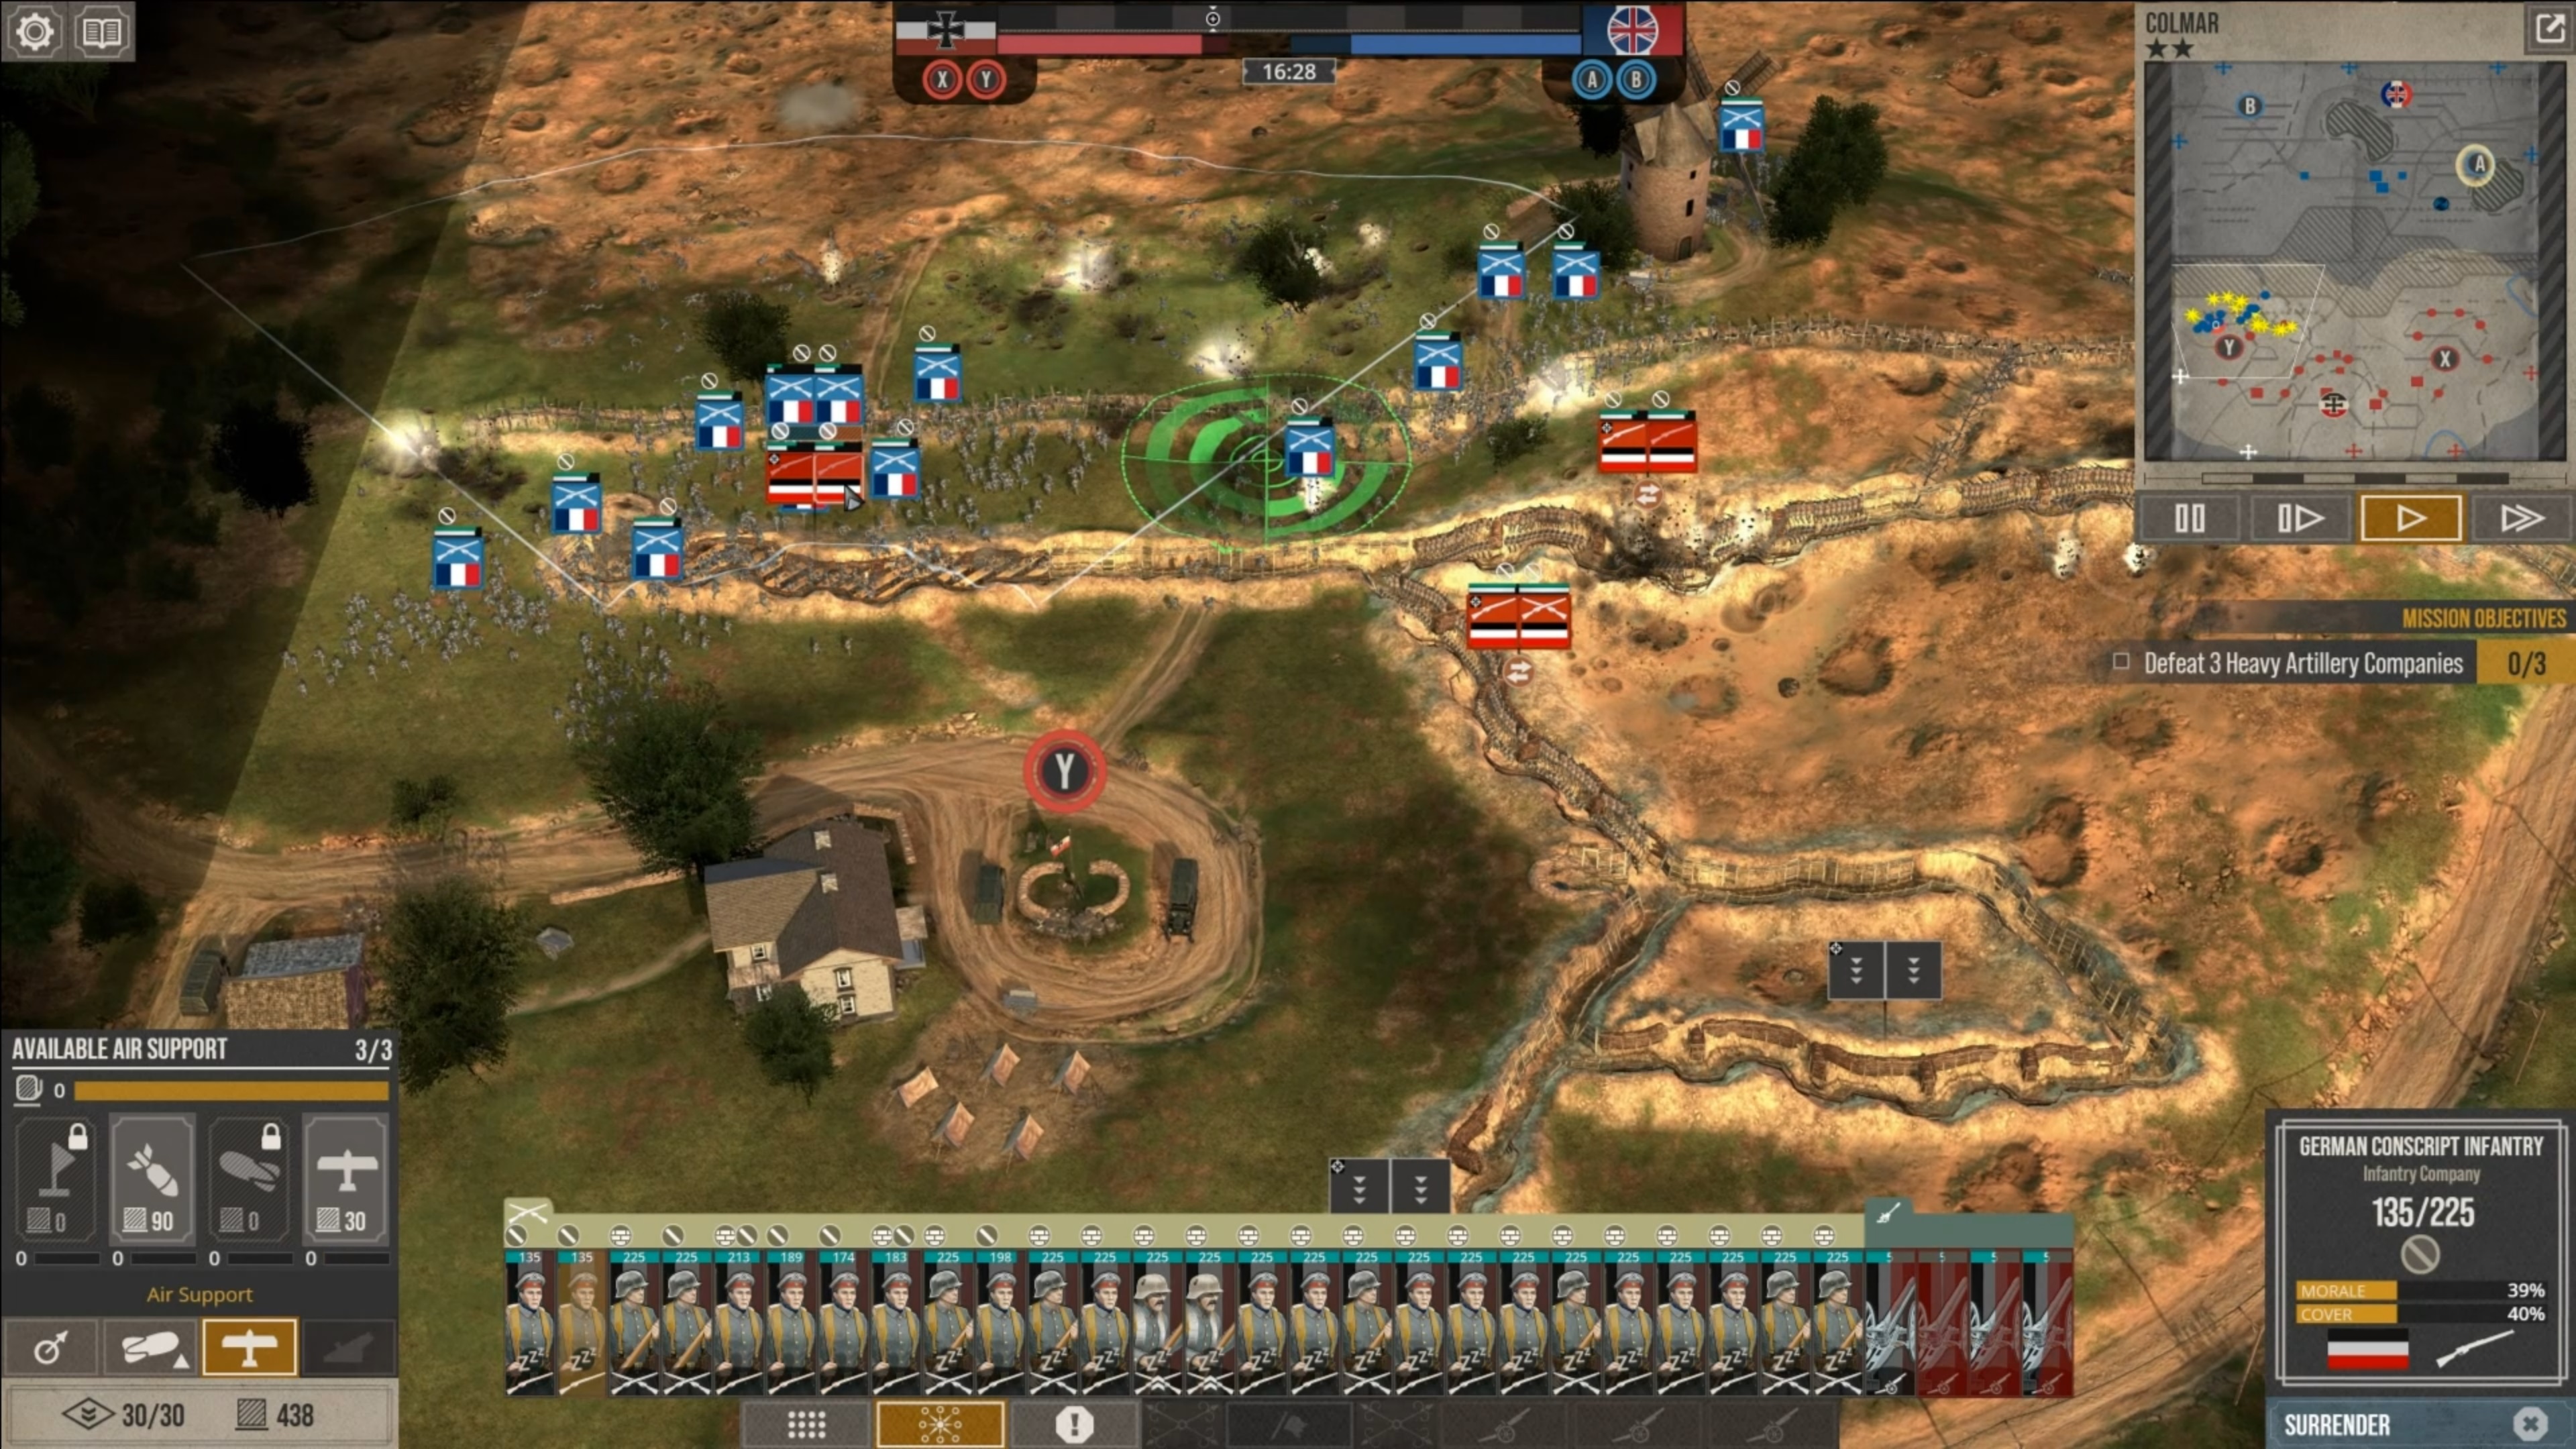
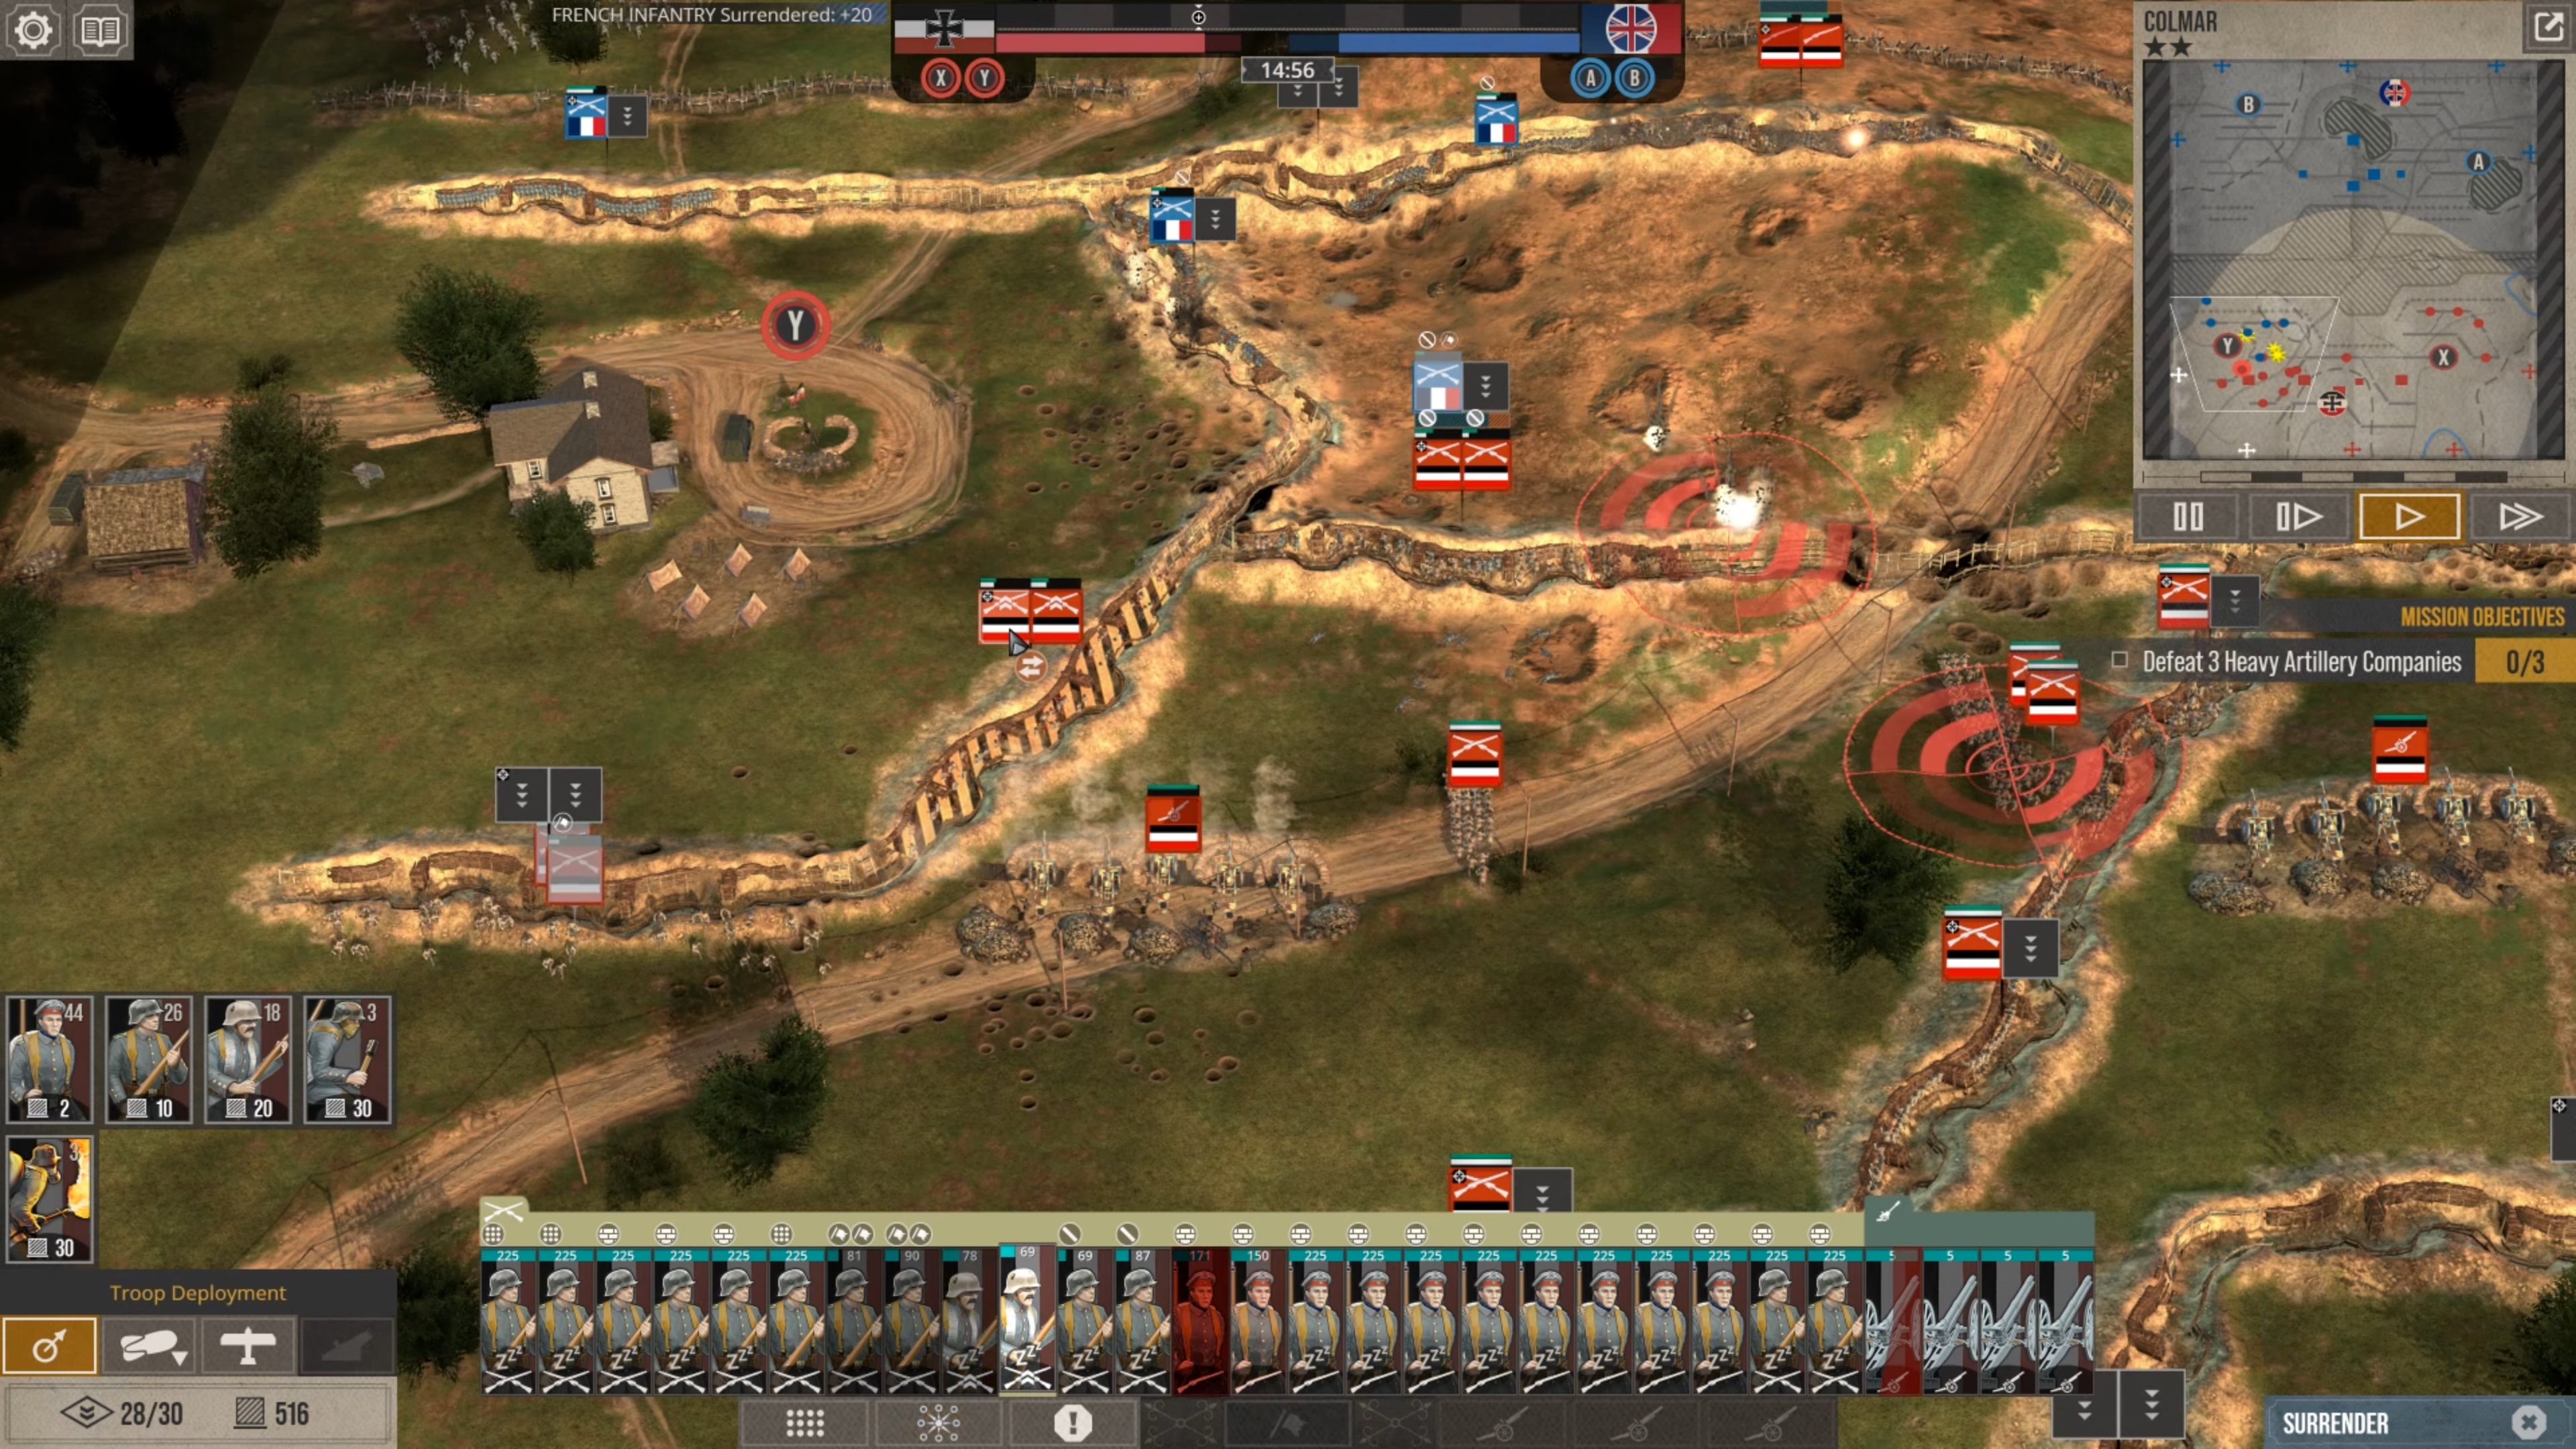
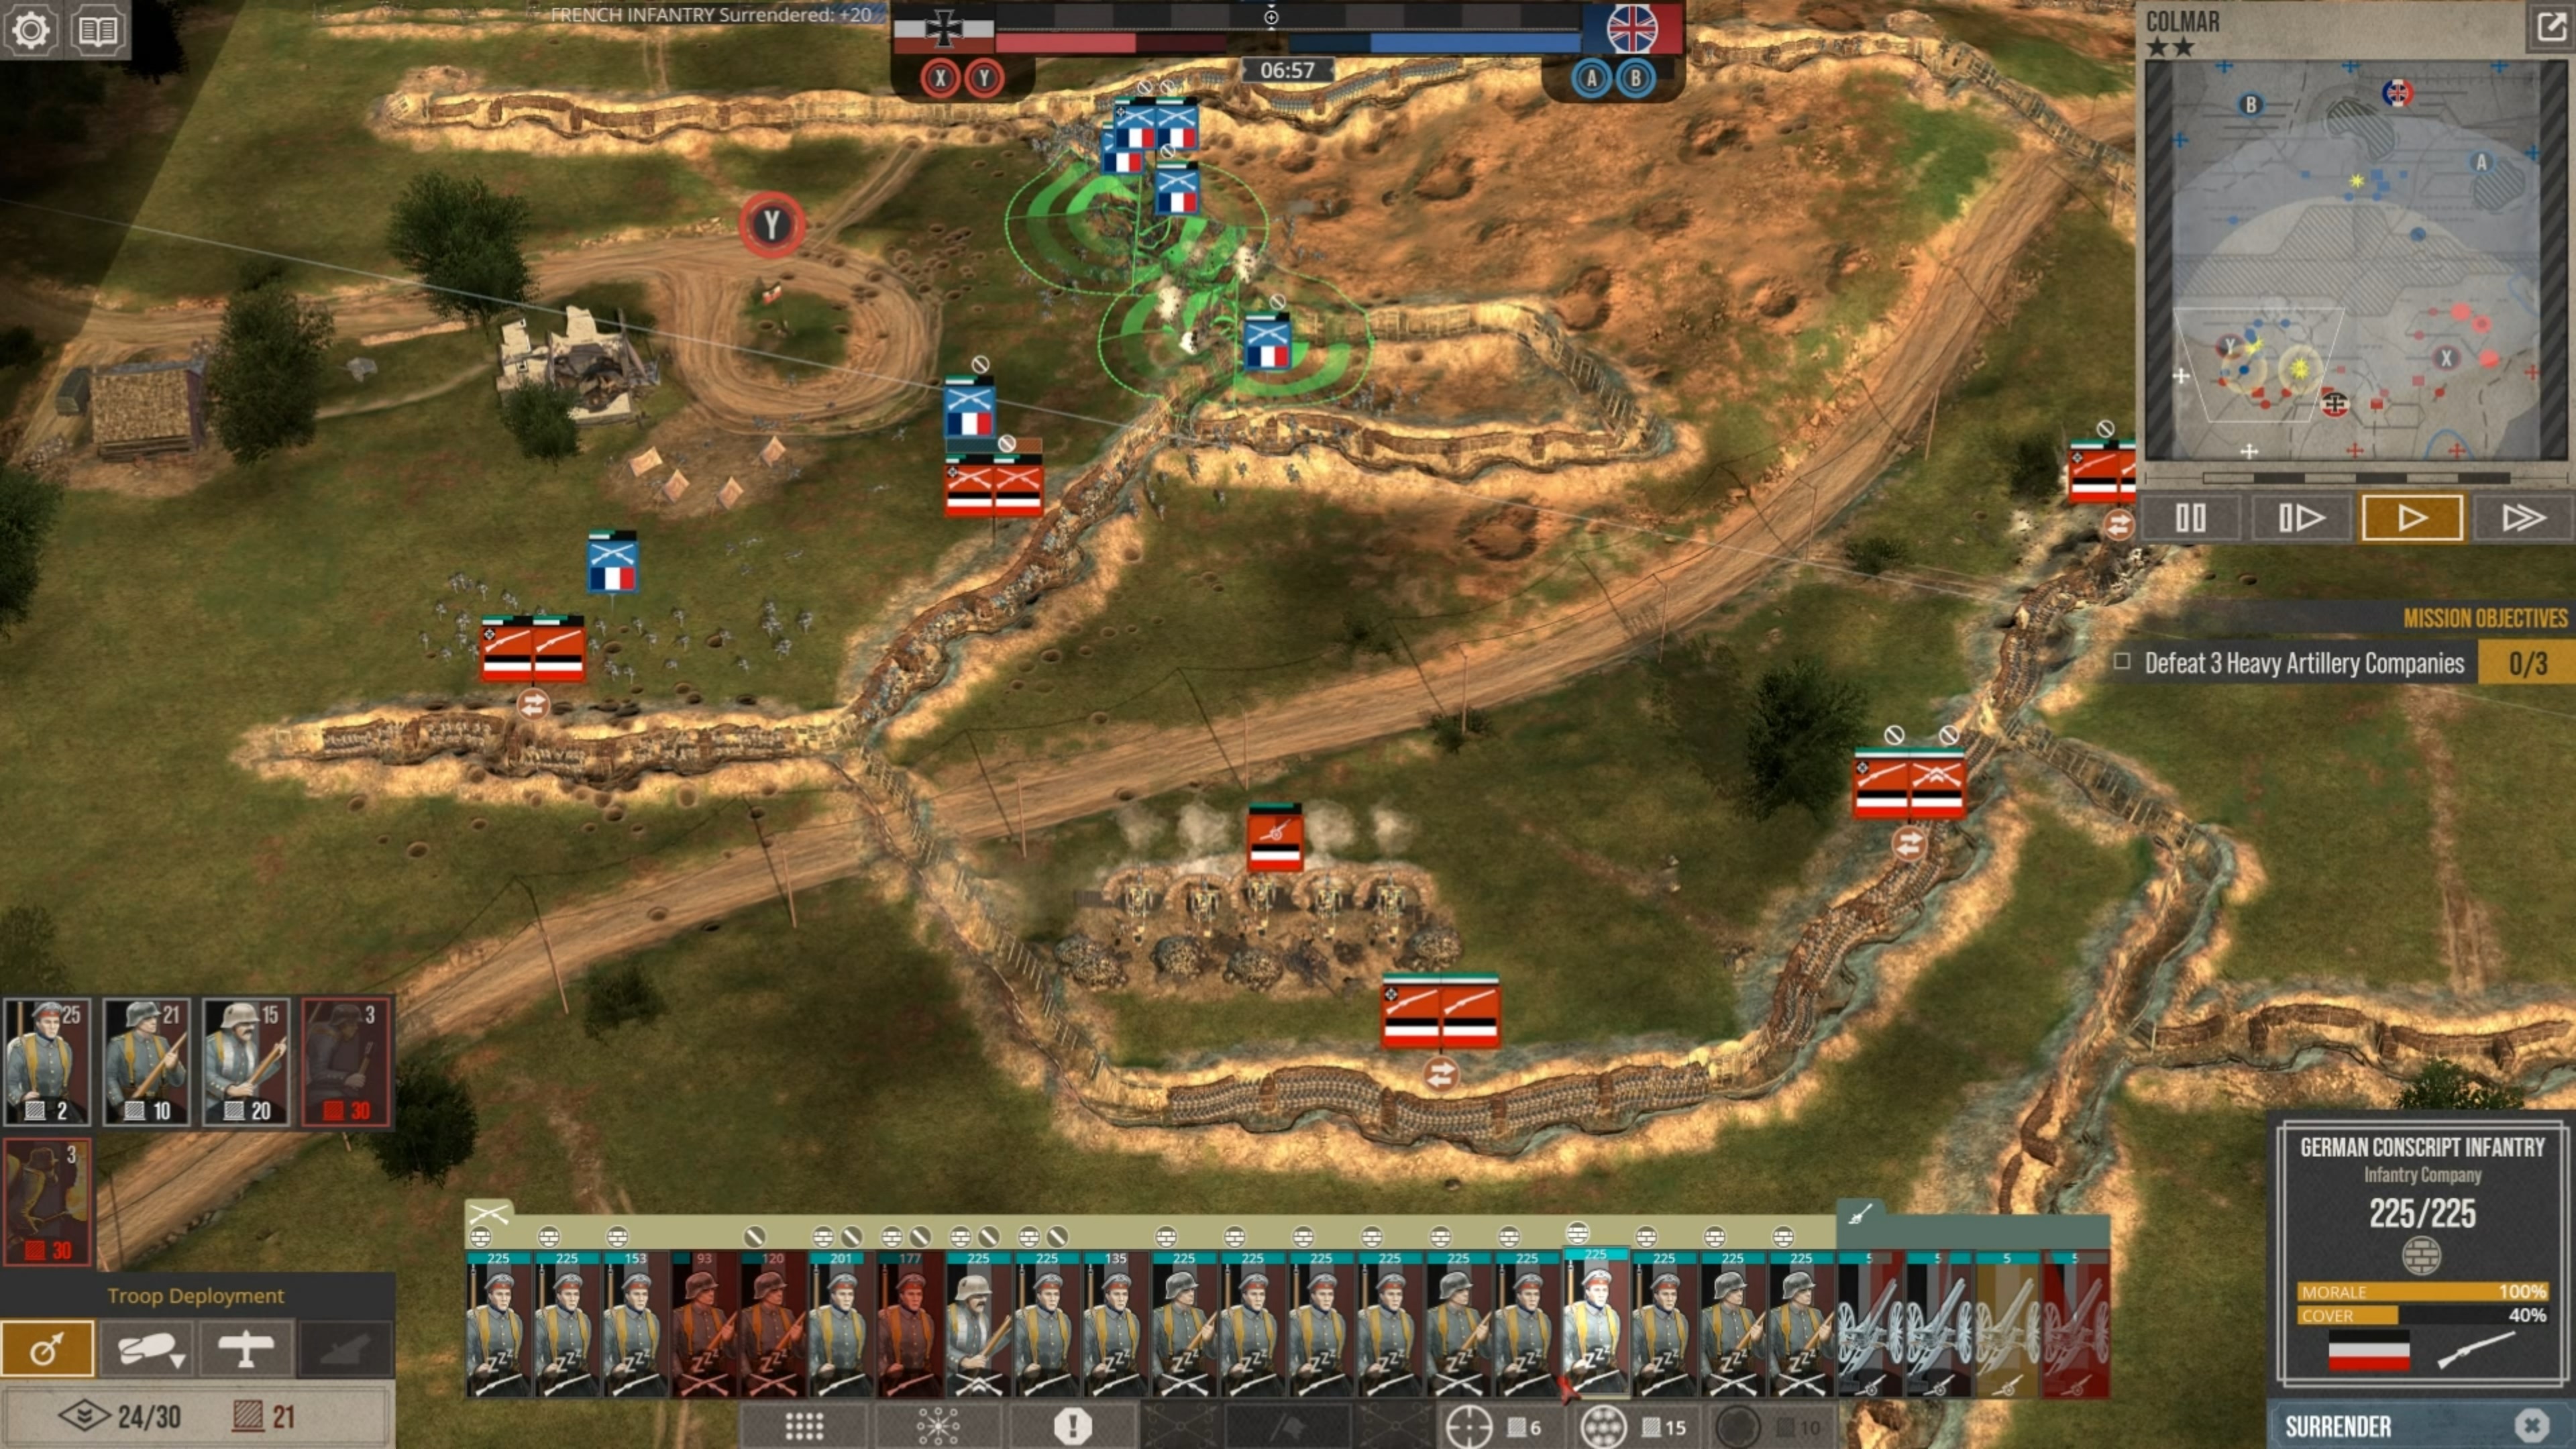
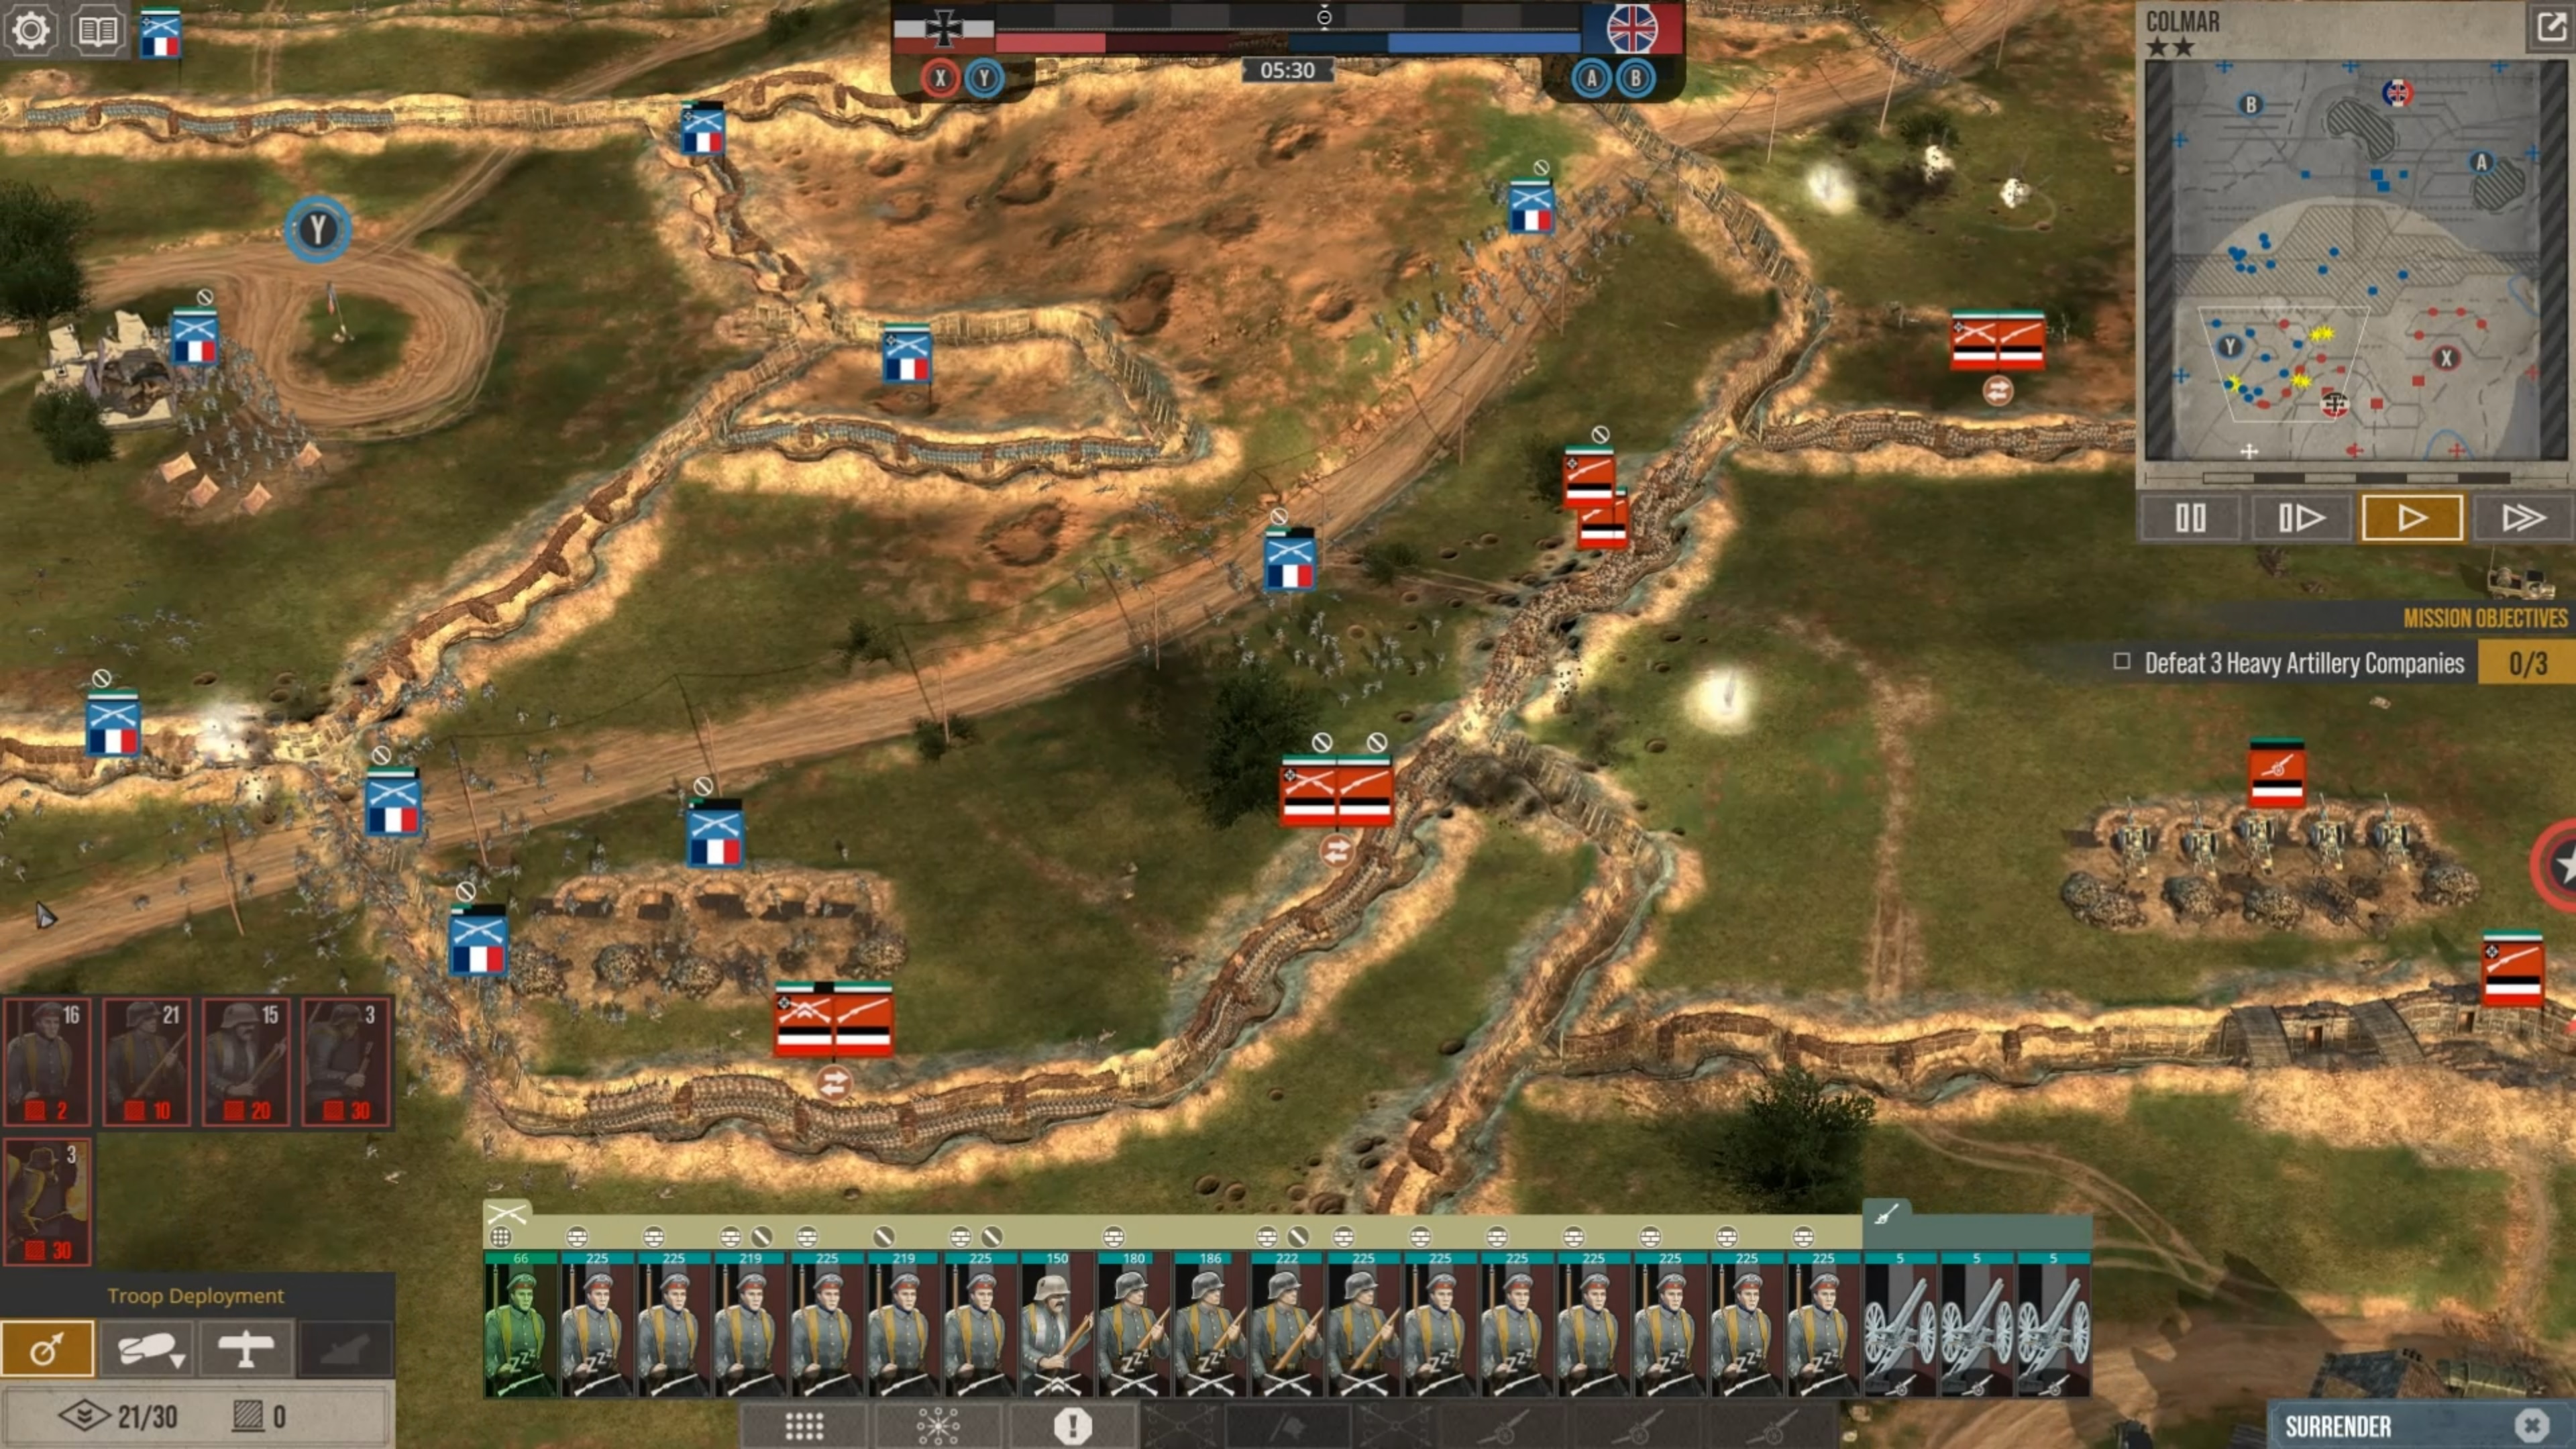
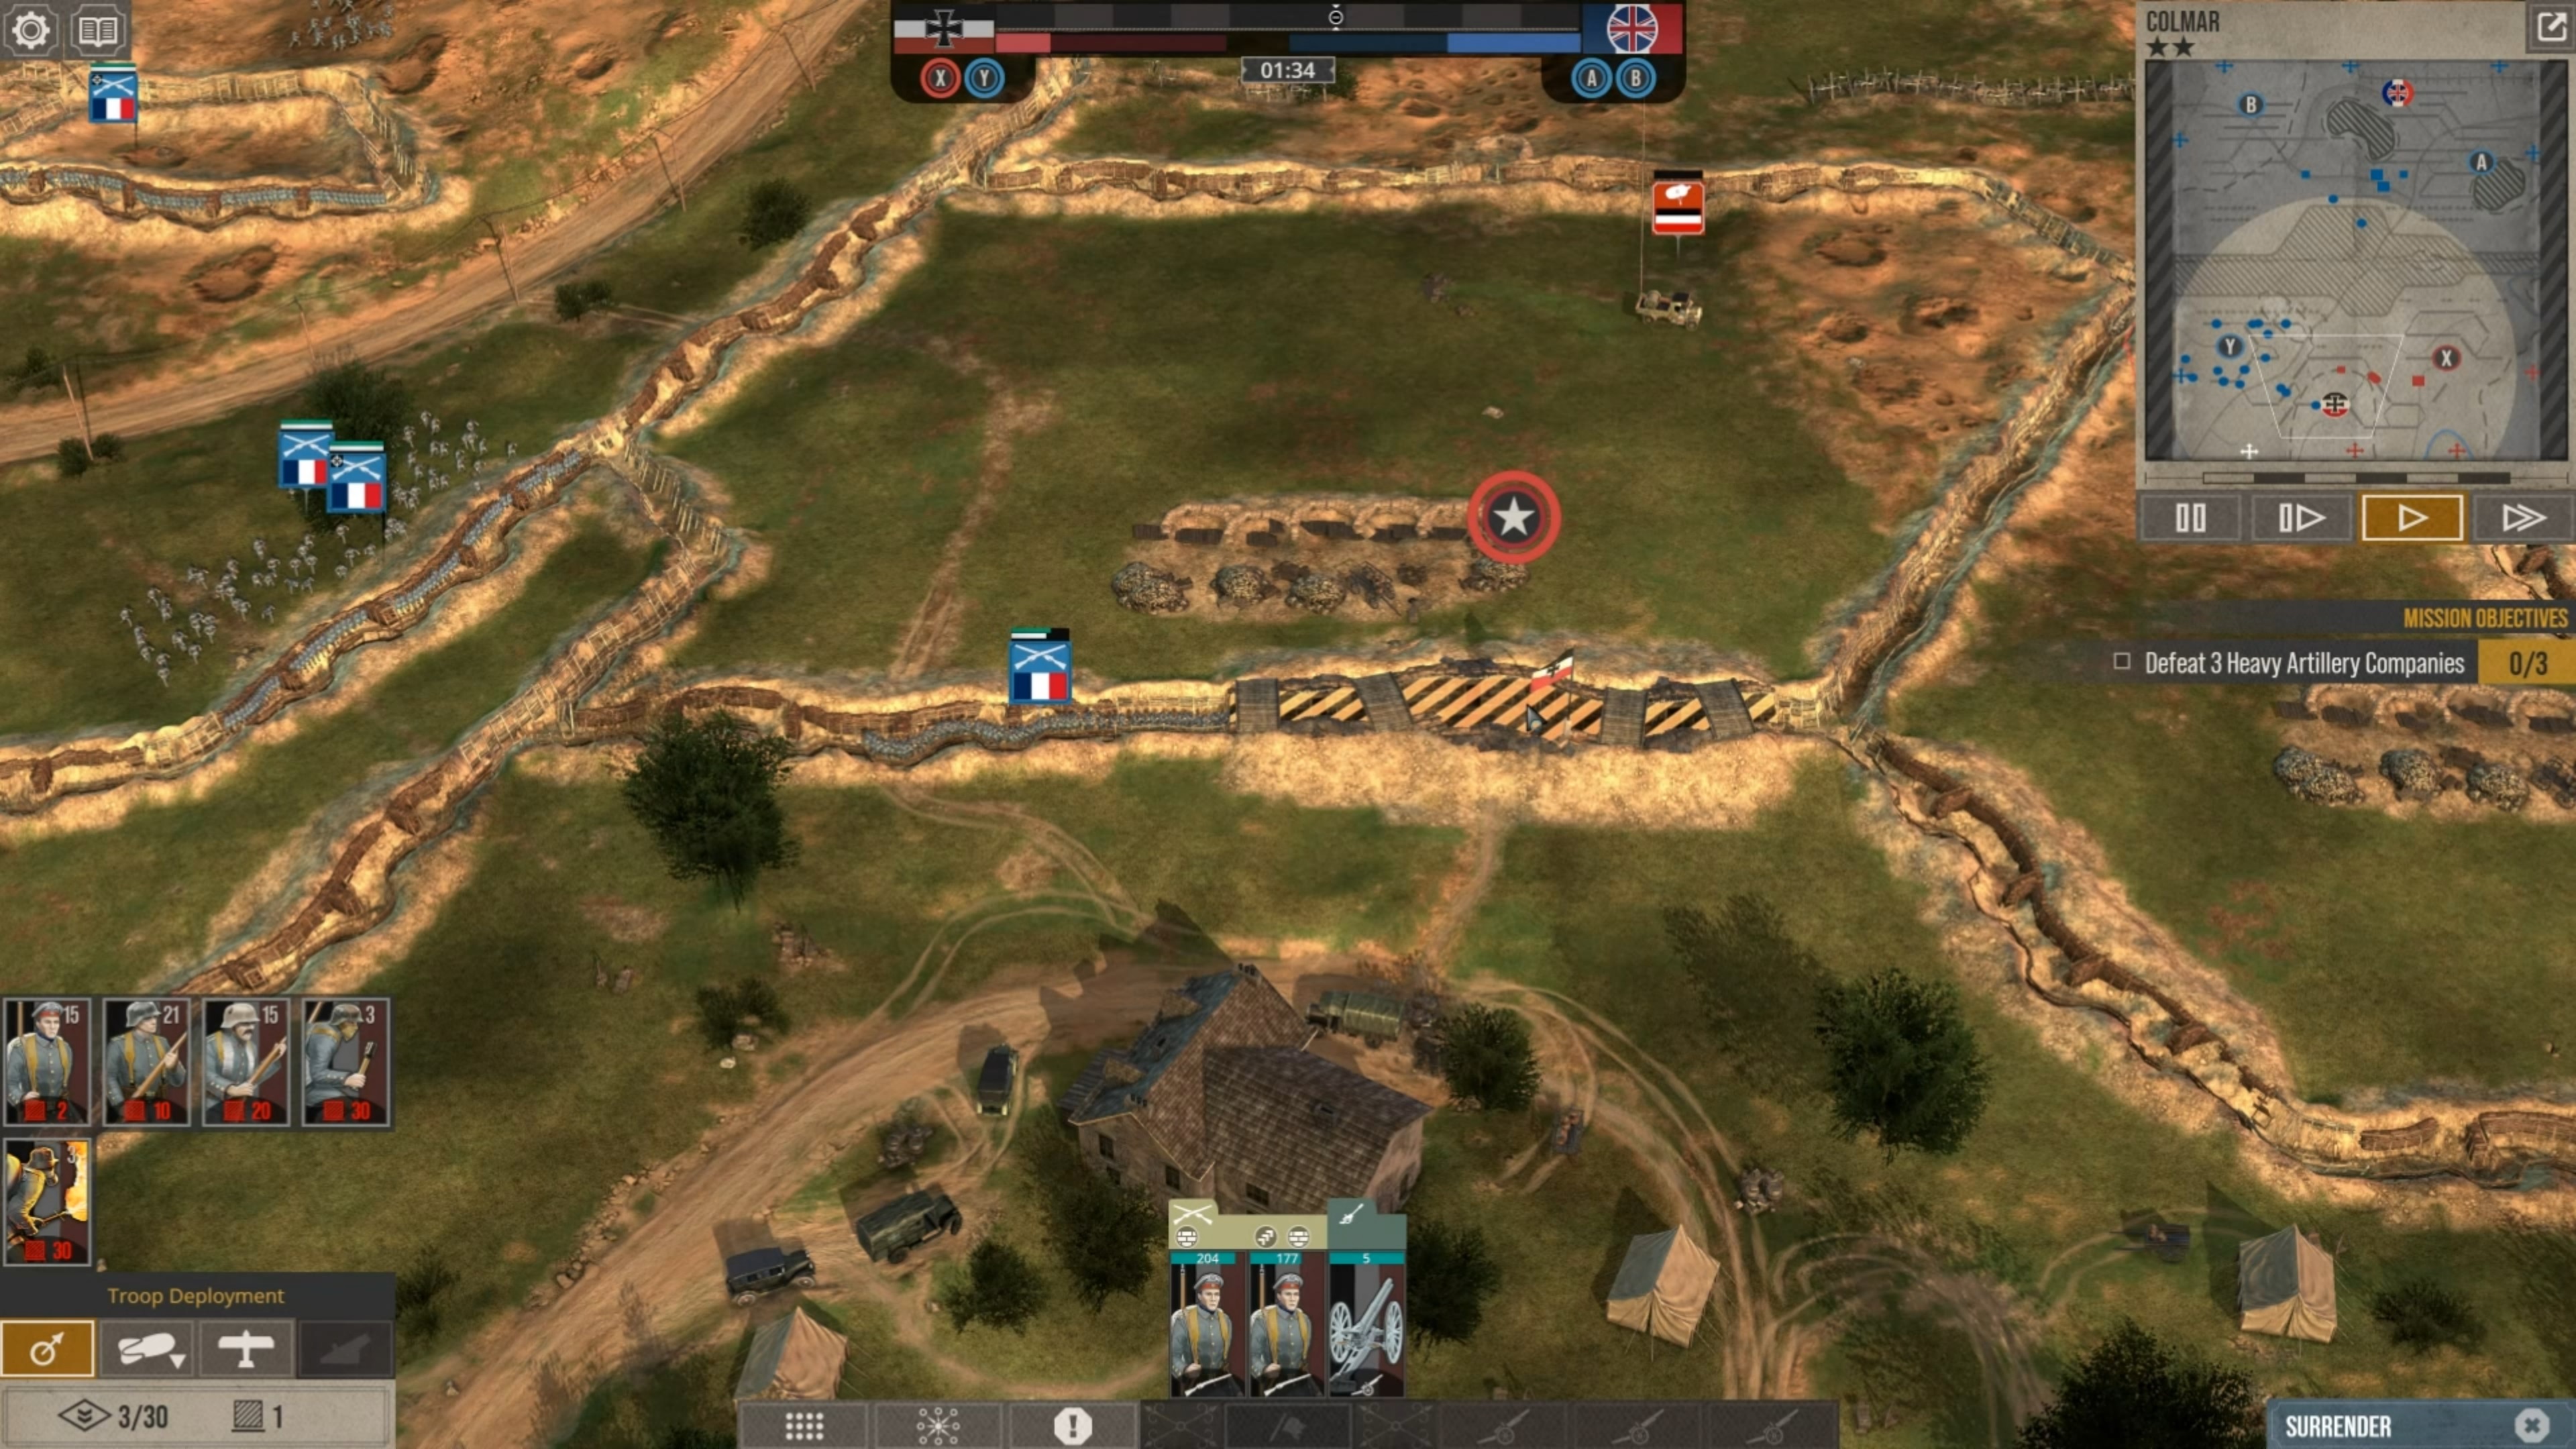
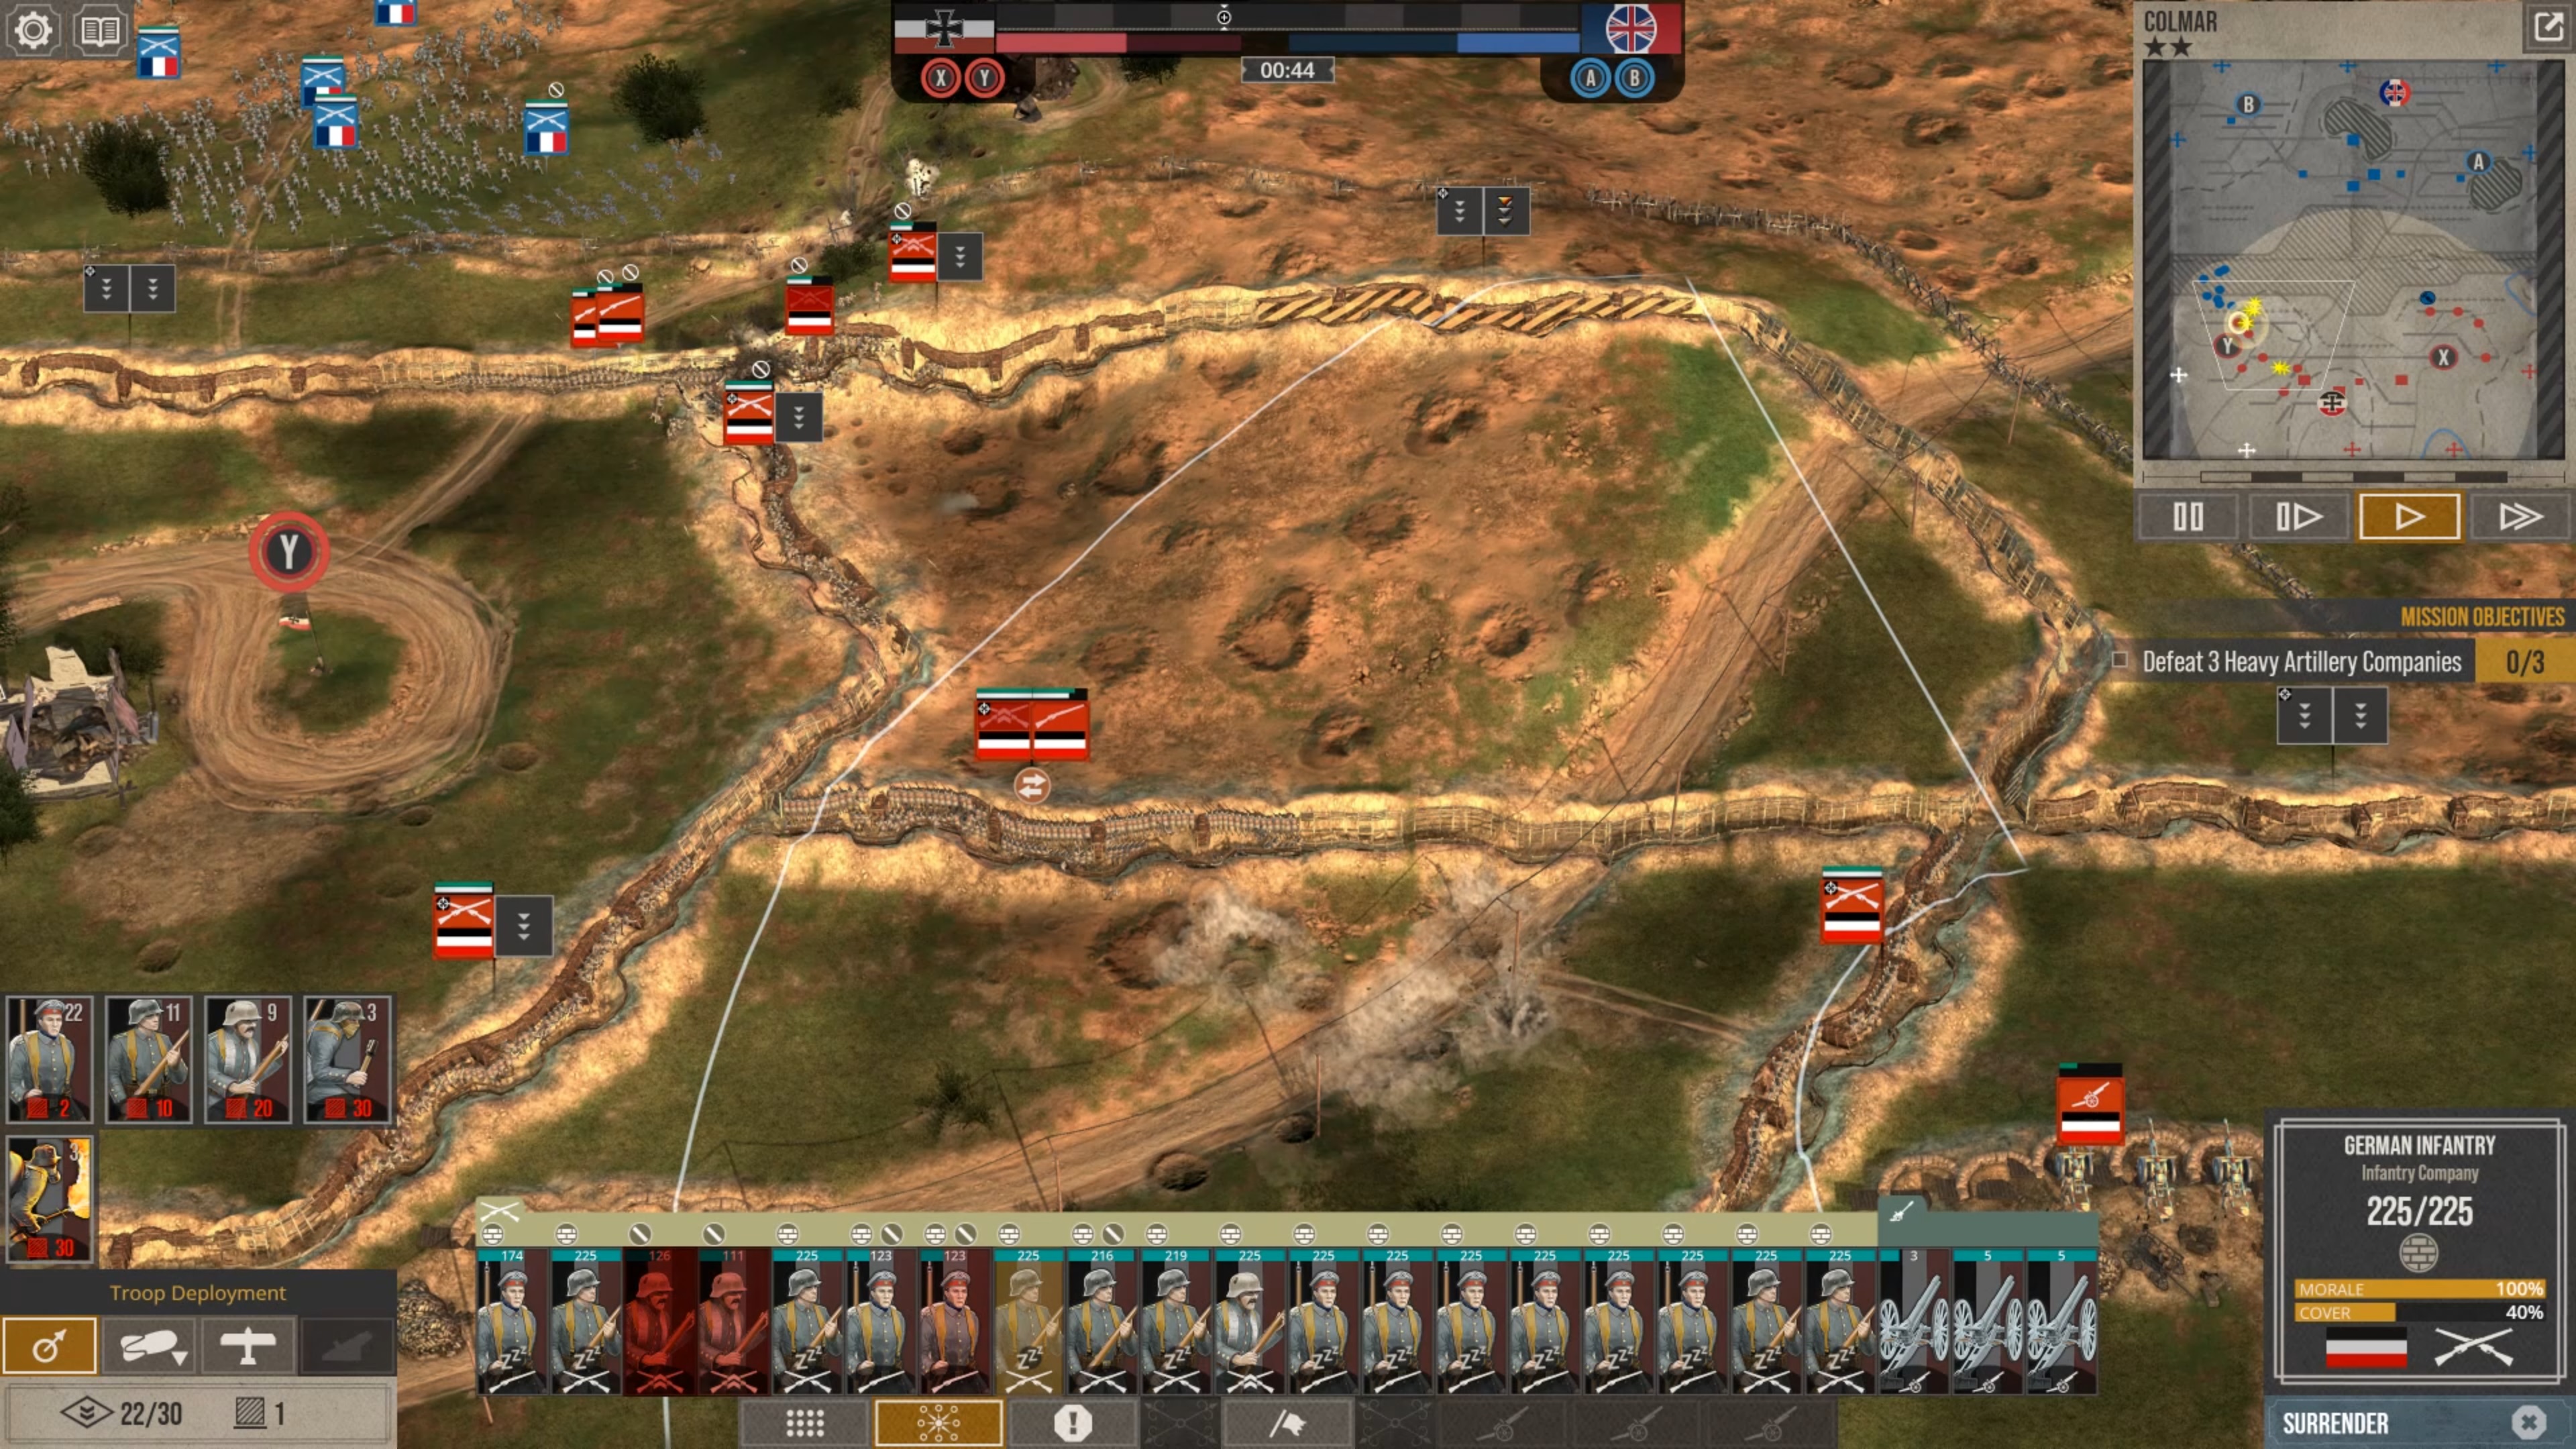
- build your lines just beneath the point (so that enemy cannot take the point without taking the trenches).
- build you defense trenches like a checker board, 3 lines deep.
- DO NOT use communication trenches in line 1 and 2.
- place MG's in the back so that they cover line 1 (so in line 3), if you have excess points you can build them in line 2 as well, so they can shoot well ahead of line 1.
- place double infantry on line 1 of trenches.


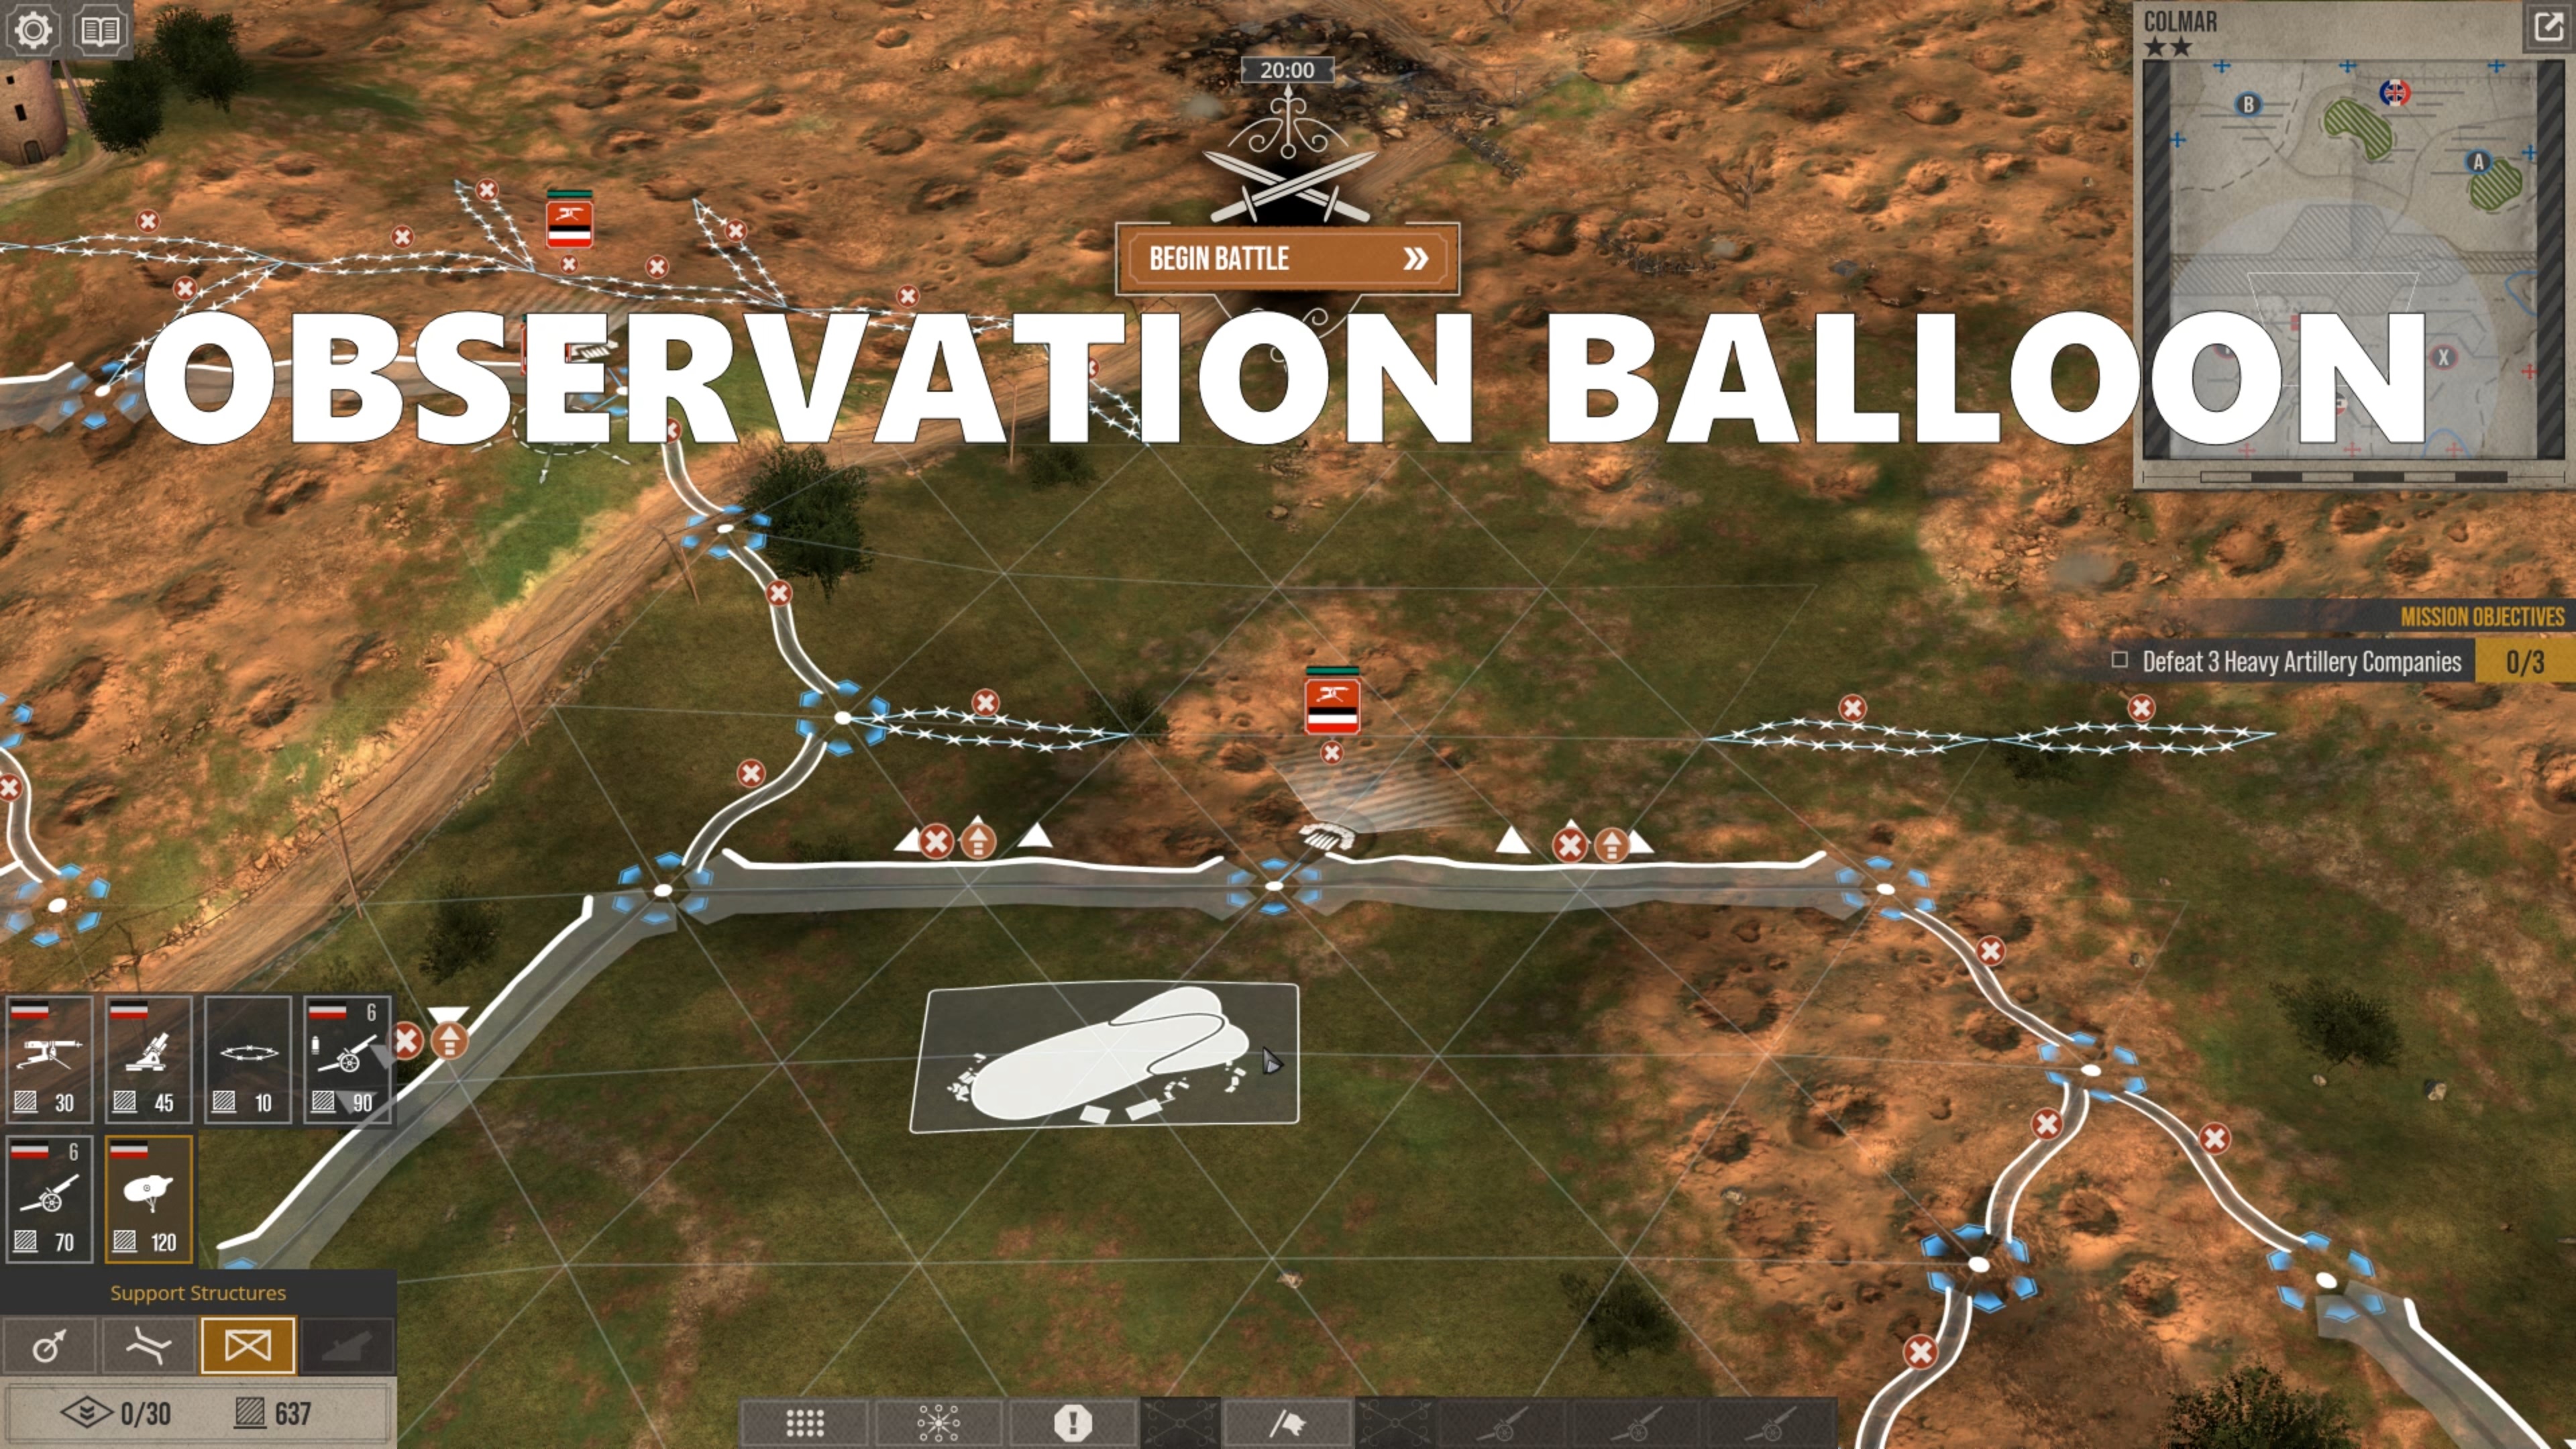
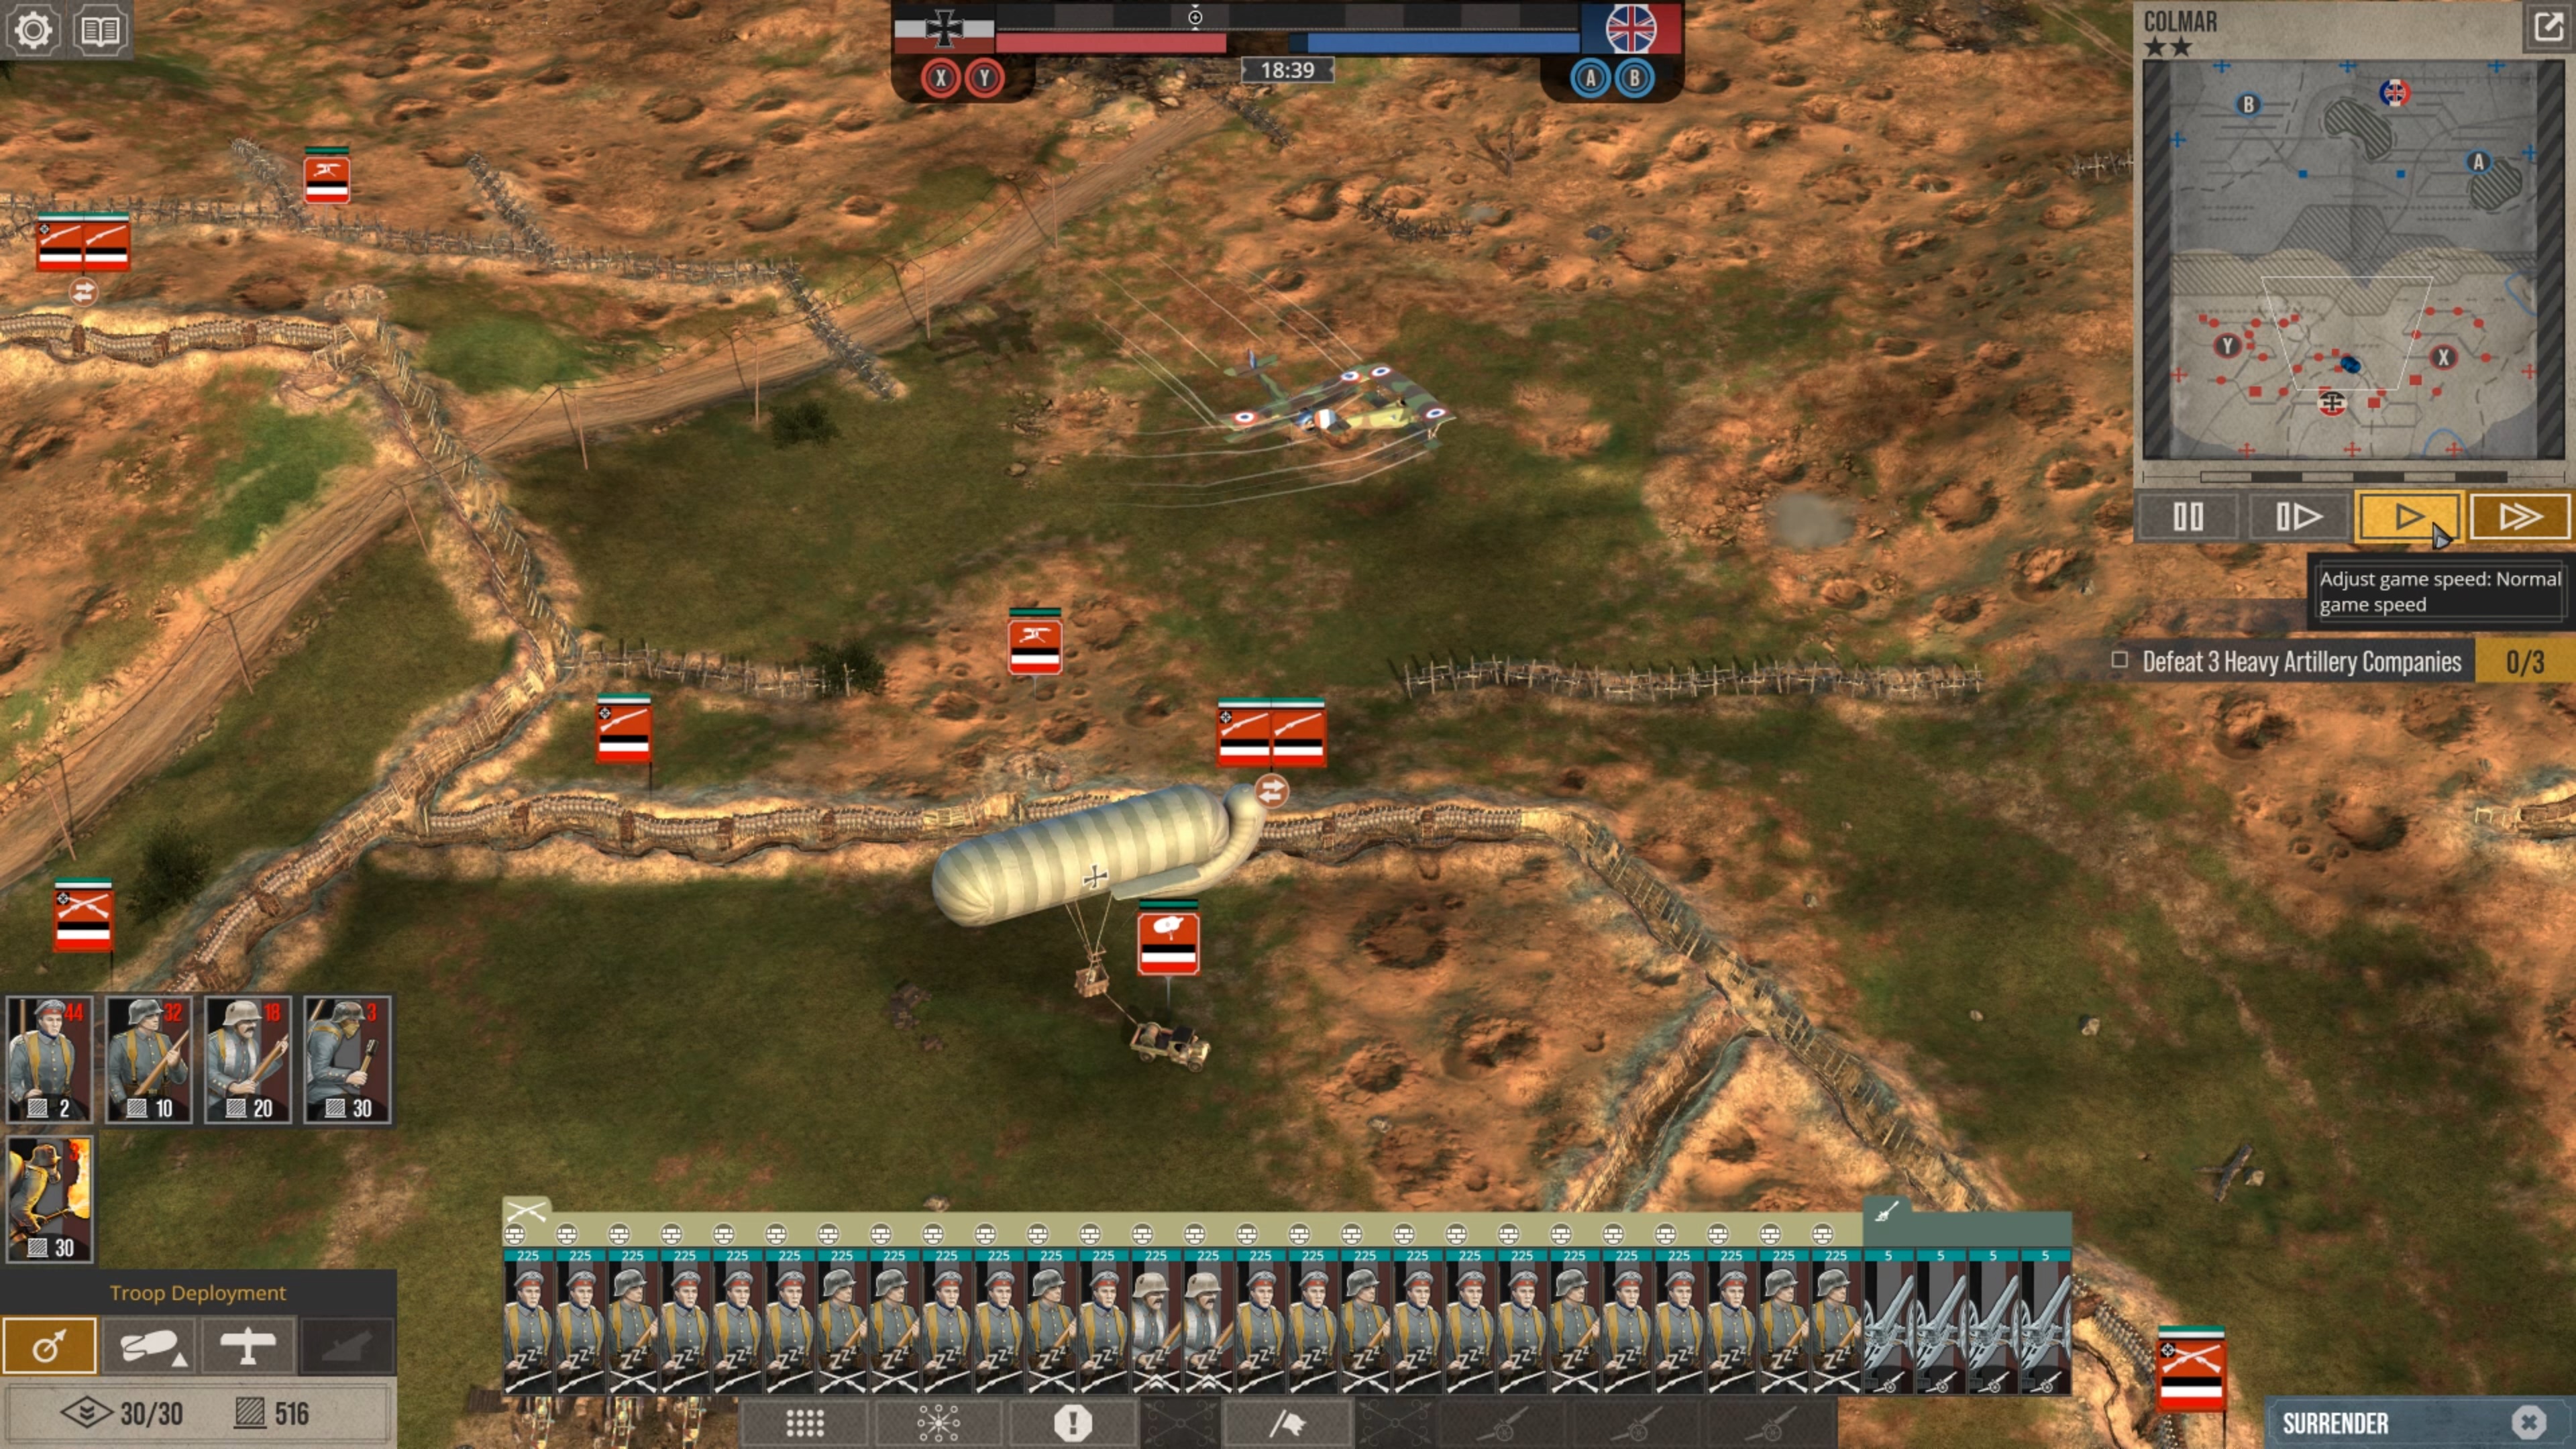
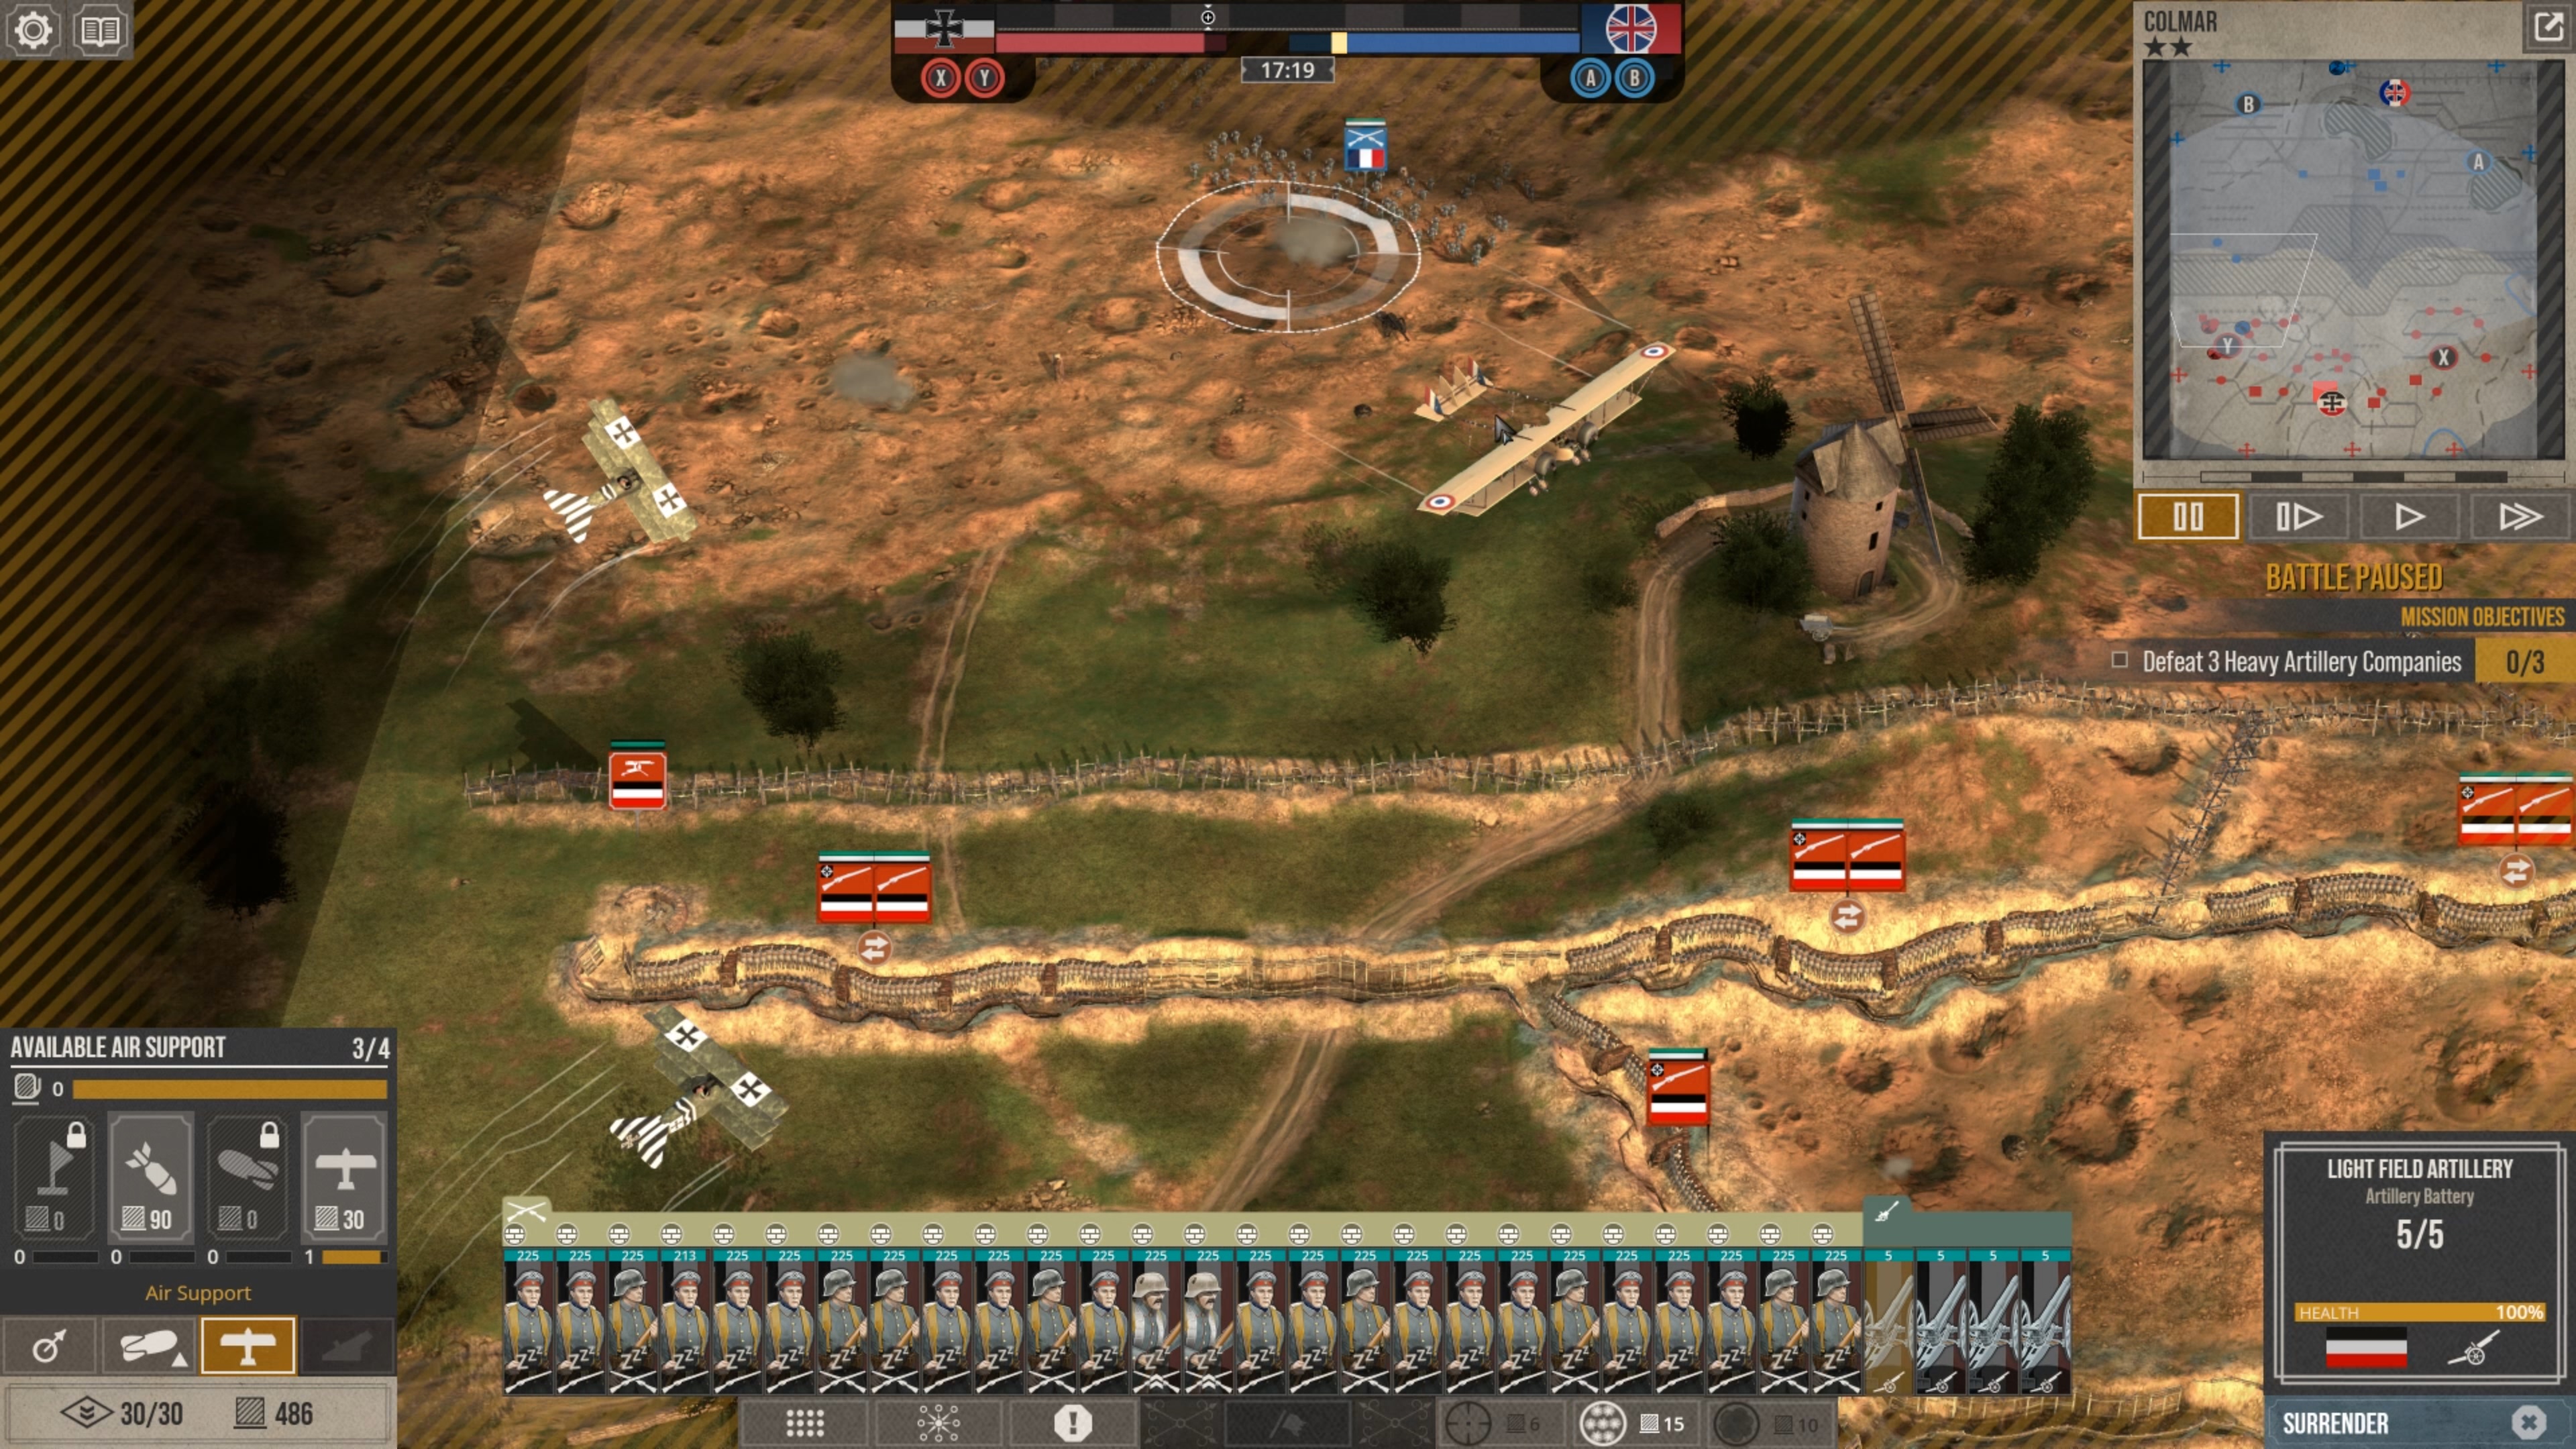
By doing the above: it is likely that your trenches, or at least MG's, cannot be seen by balloons. So no preparatory barrages destroying MG's ahead of main strike.

When the enemy closes in, detects your first lines and calls for arty on them, (some) MG's are likely not suppressed.

When enemy tries to suppress your MG's in the back, some of your trenches will remain unsuppressed and fire.
Shrapp 2 Apr, 2023 @ 3:01am 
MG's purpose is to augment your infantry defense lines, not replace them. They are a marvelous tool for campaign*.

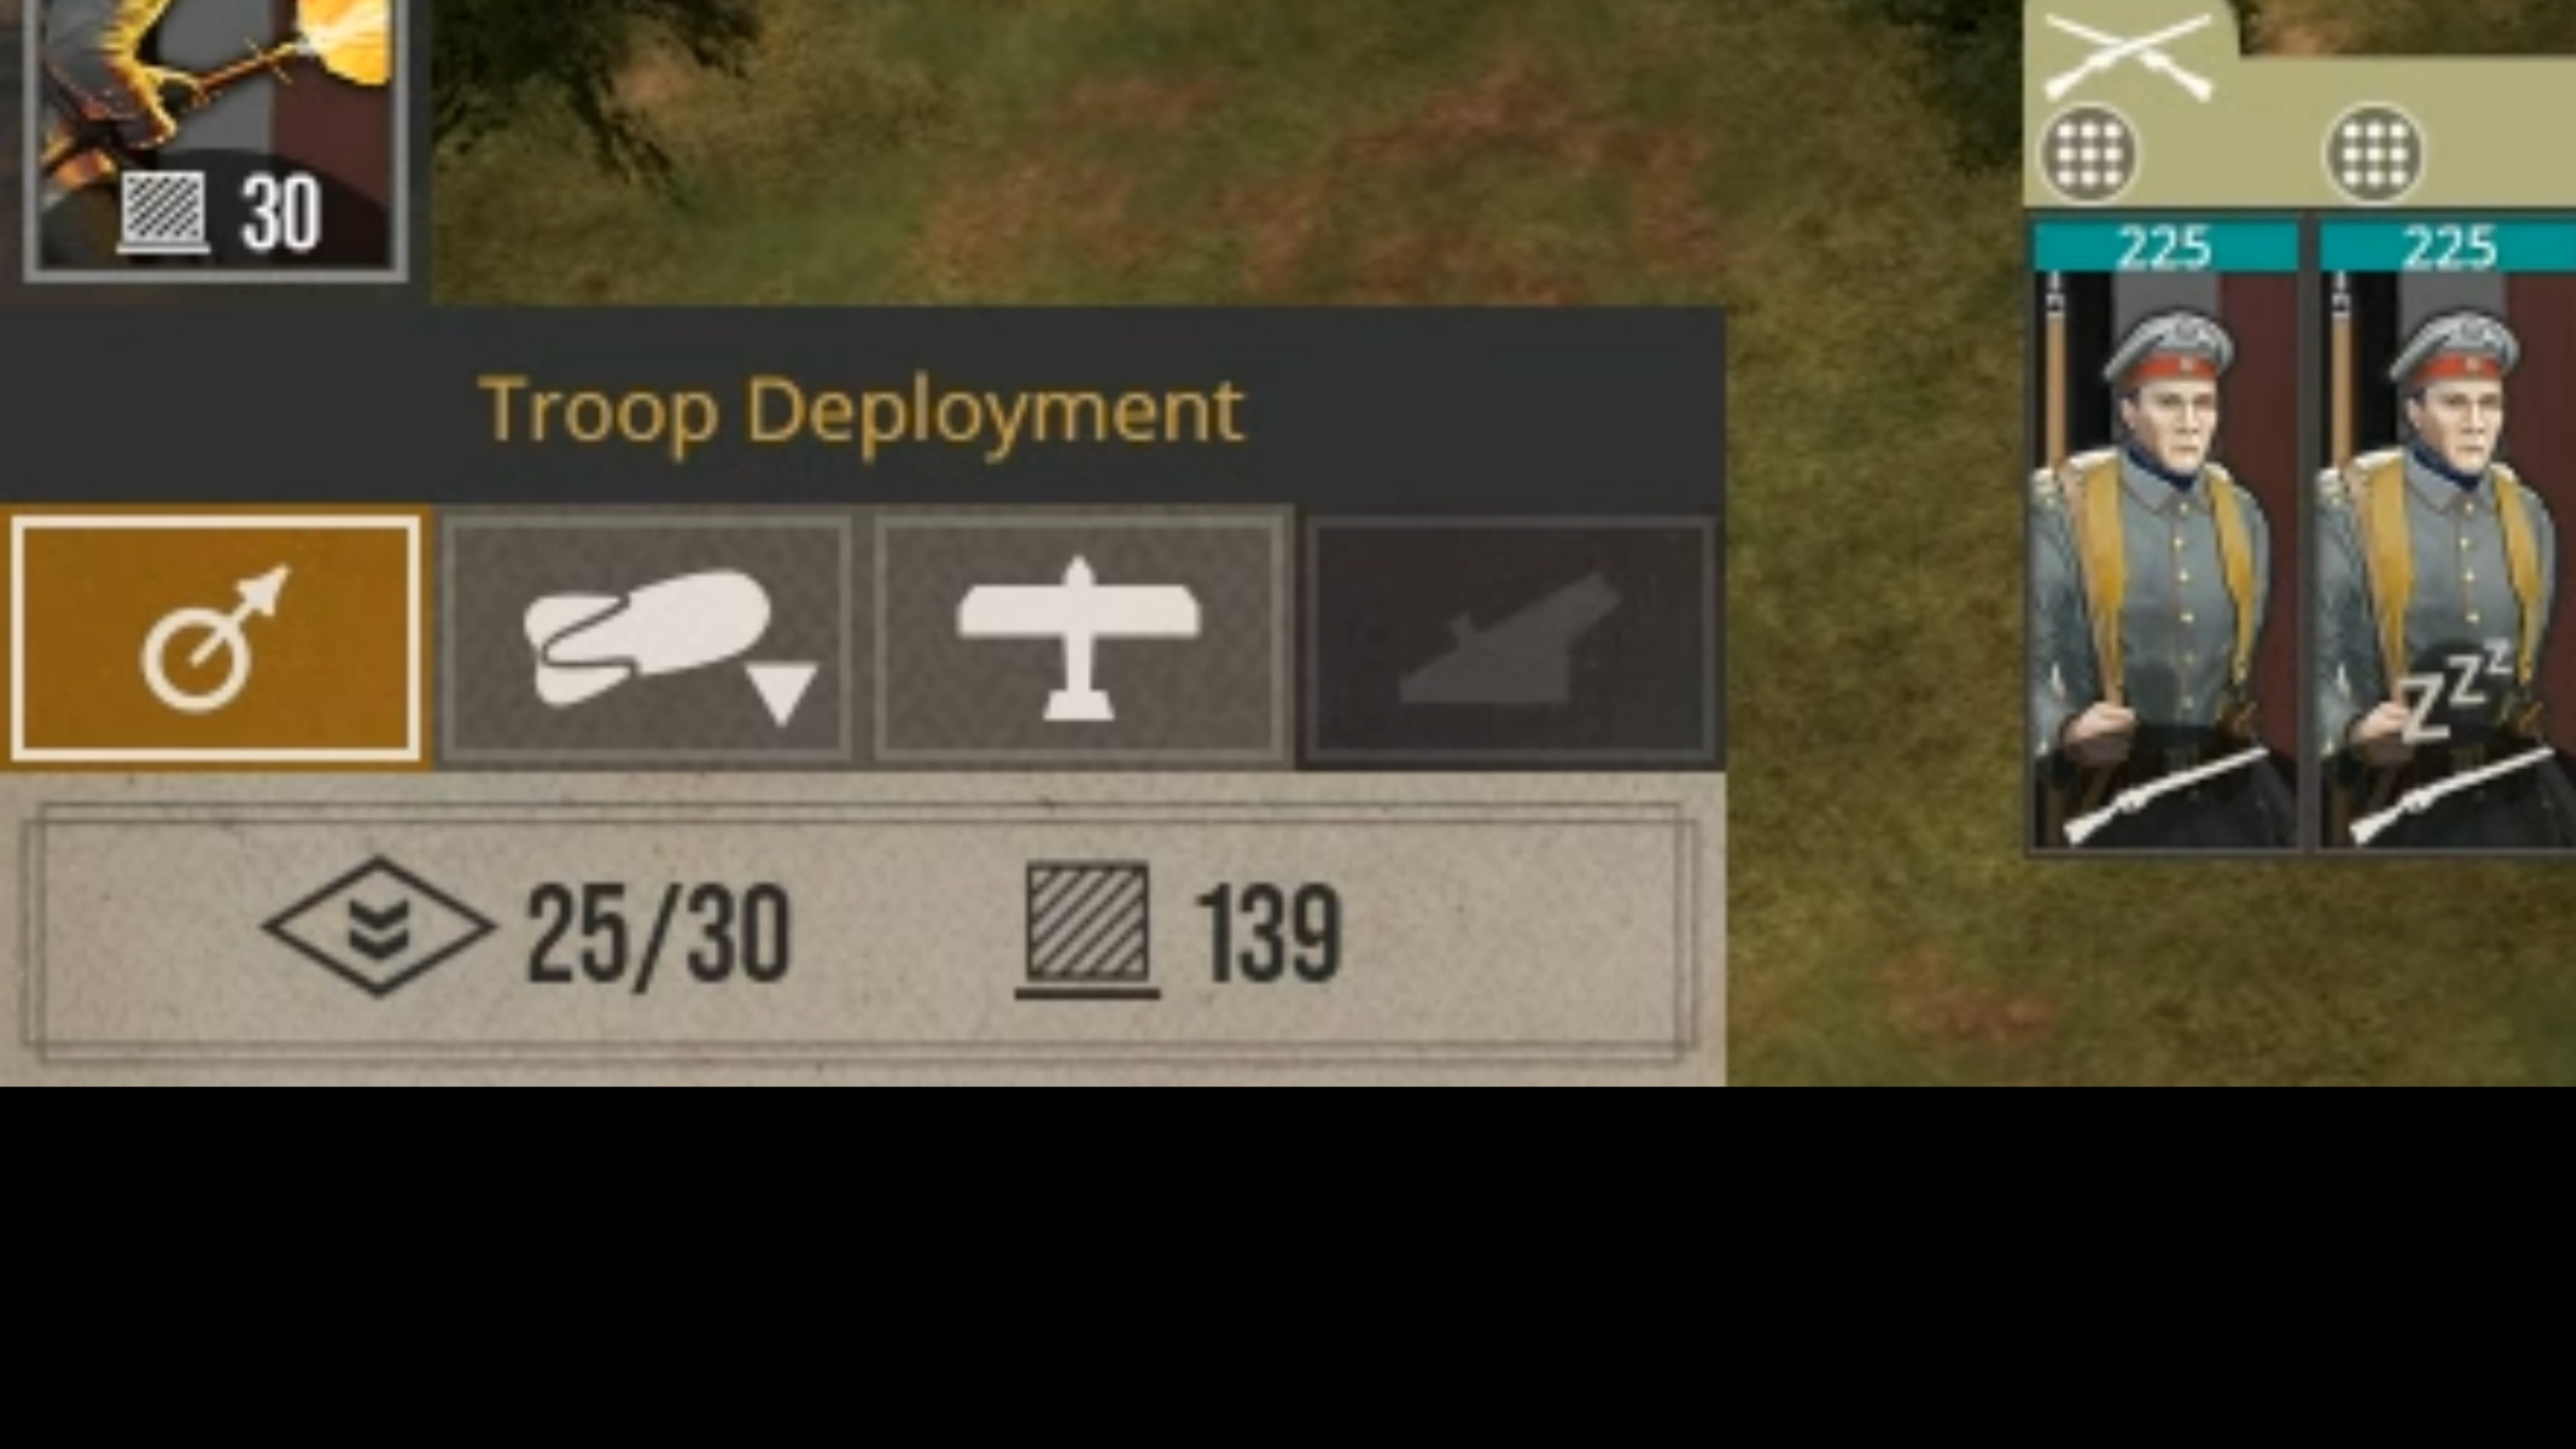
- *researching MG's with +25% dmg takes 2 research points, researching +25% for infantry takes 3.
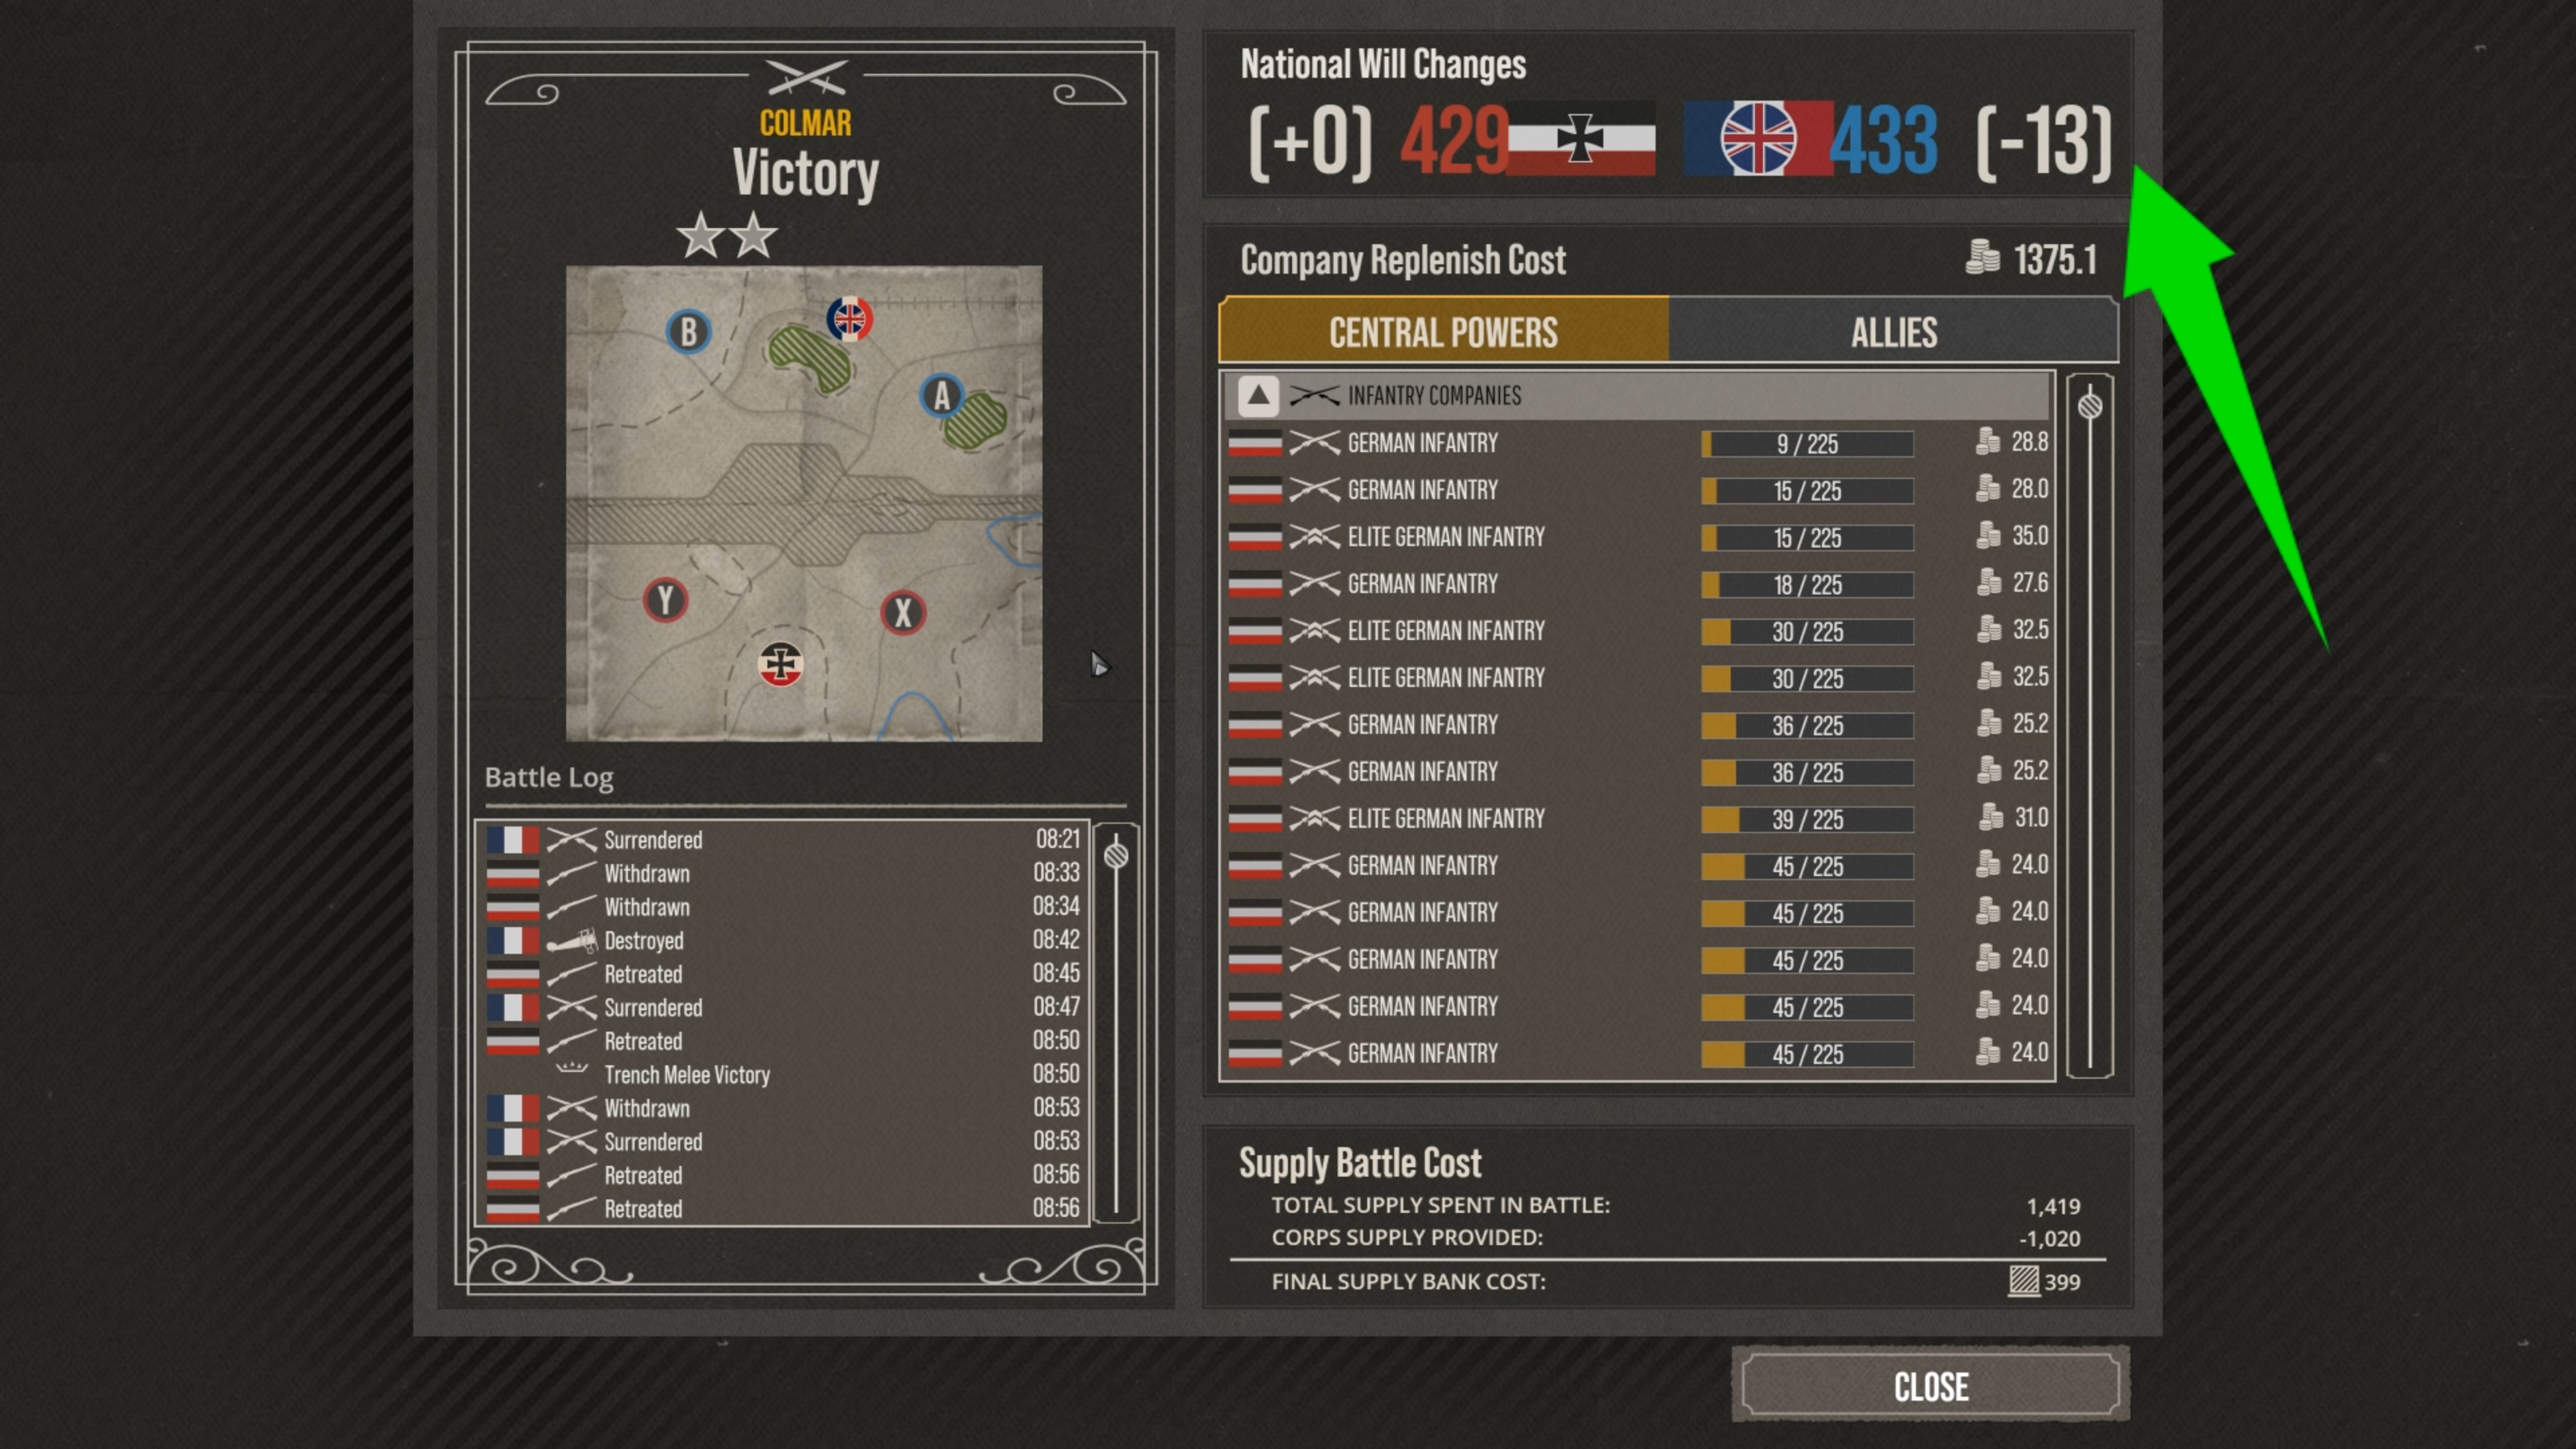
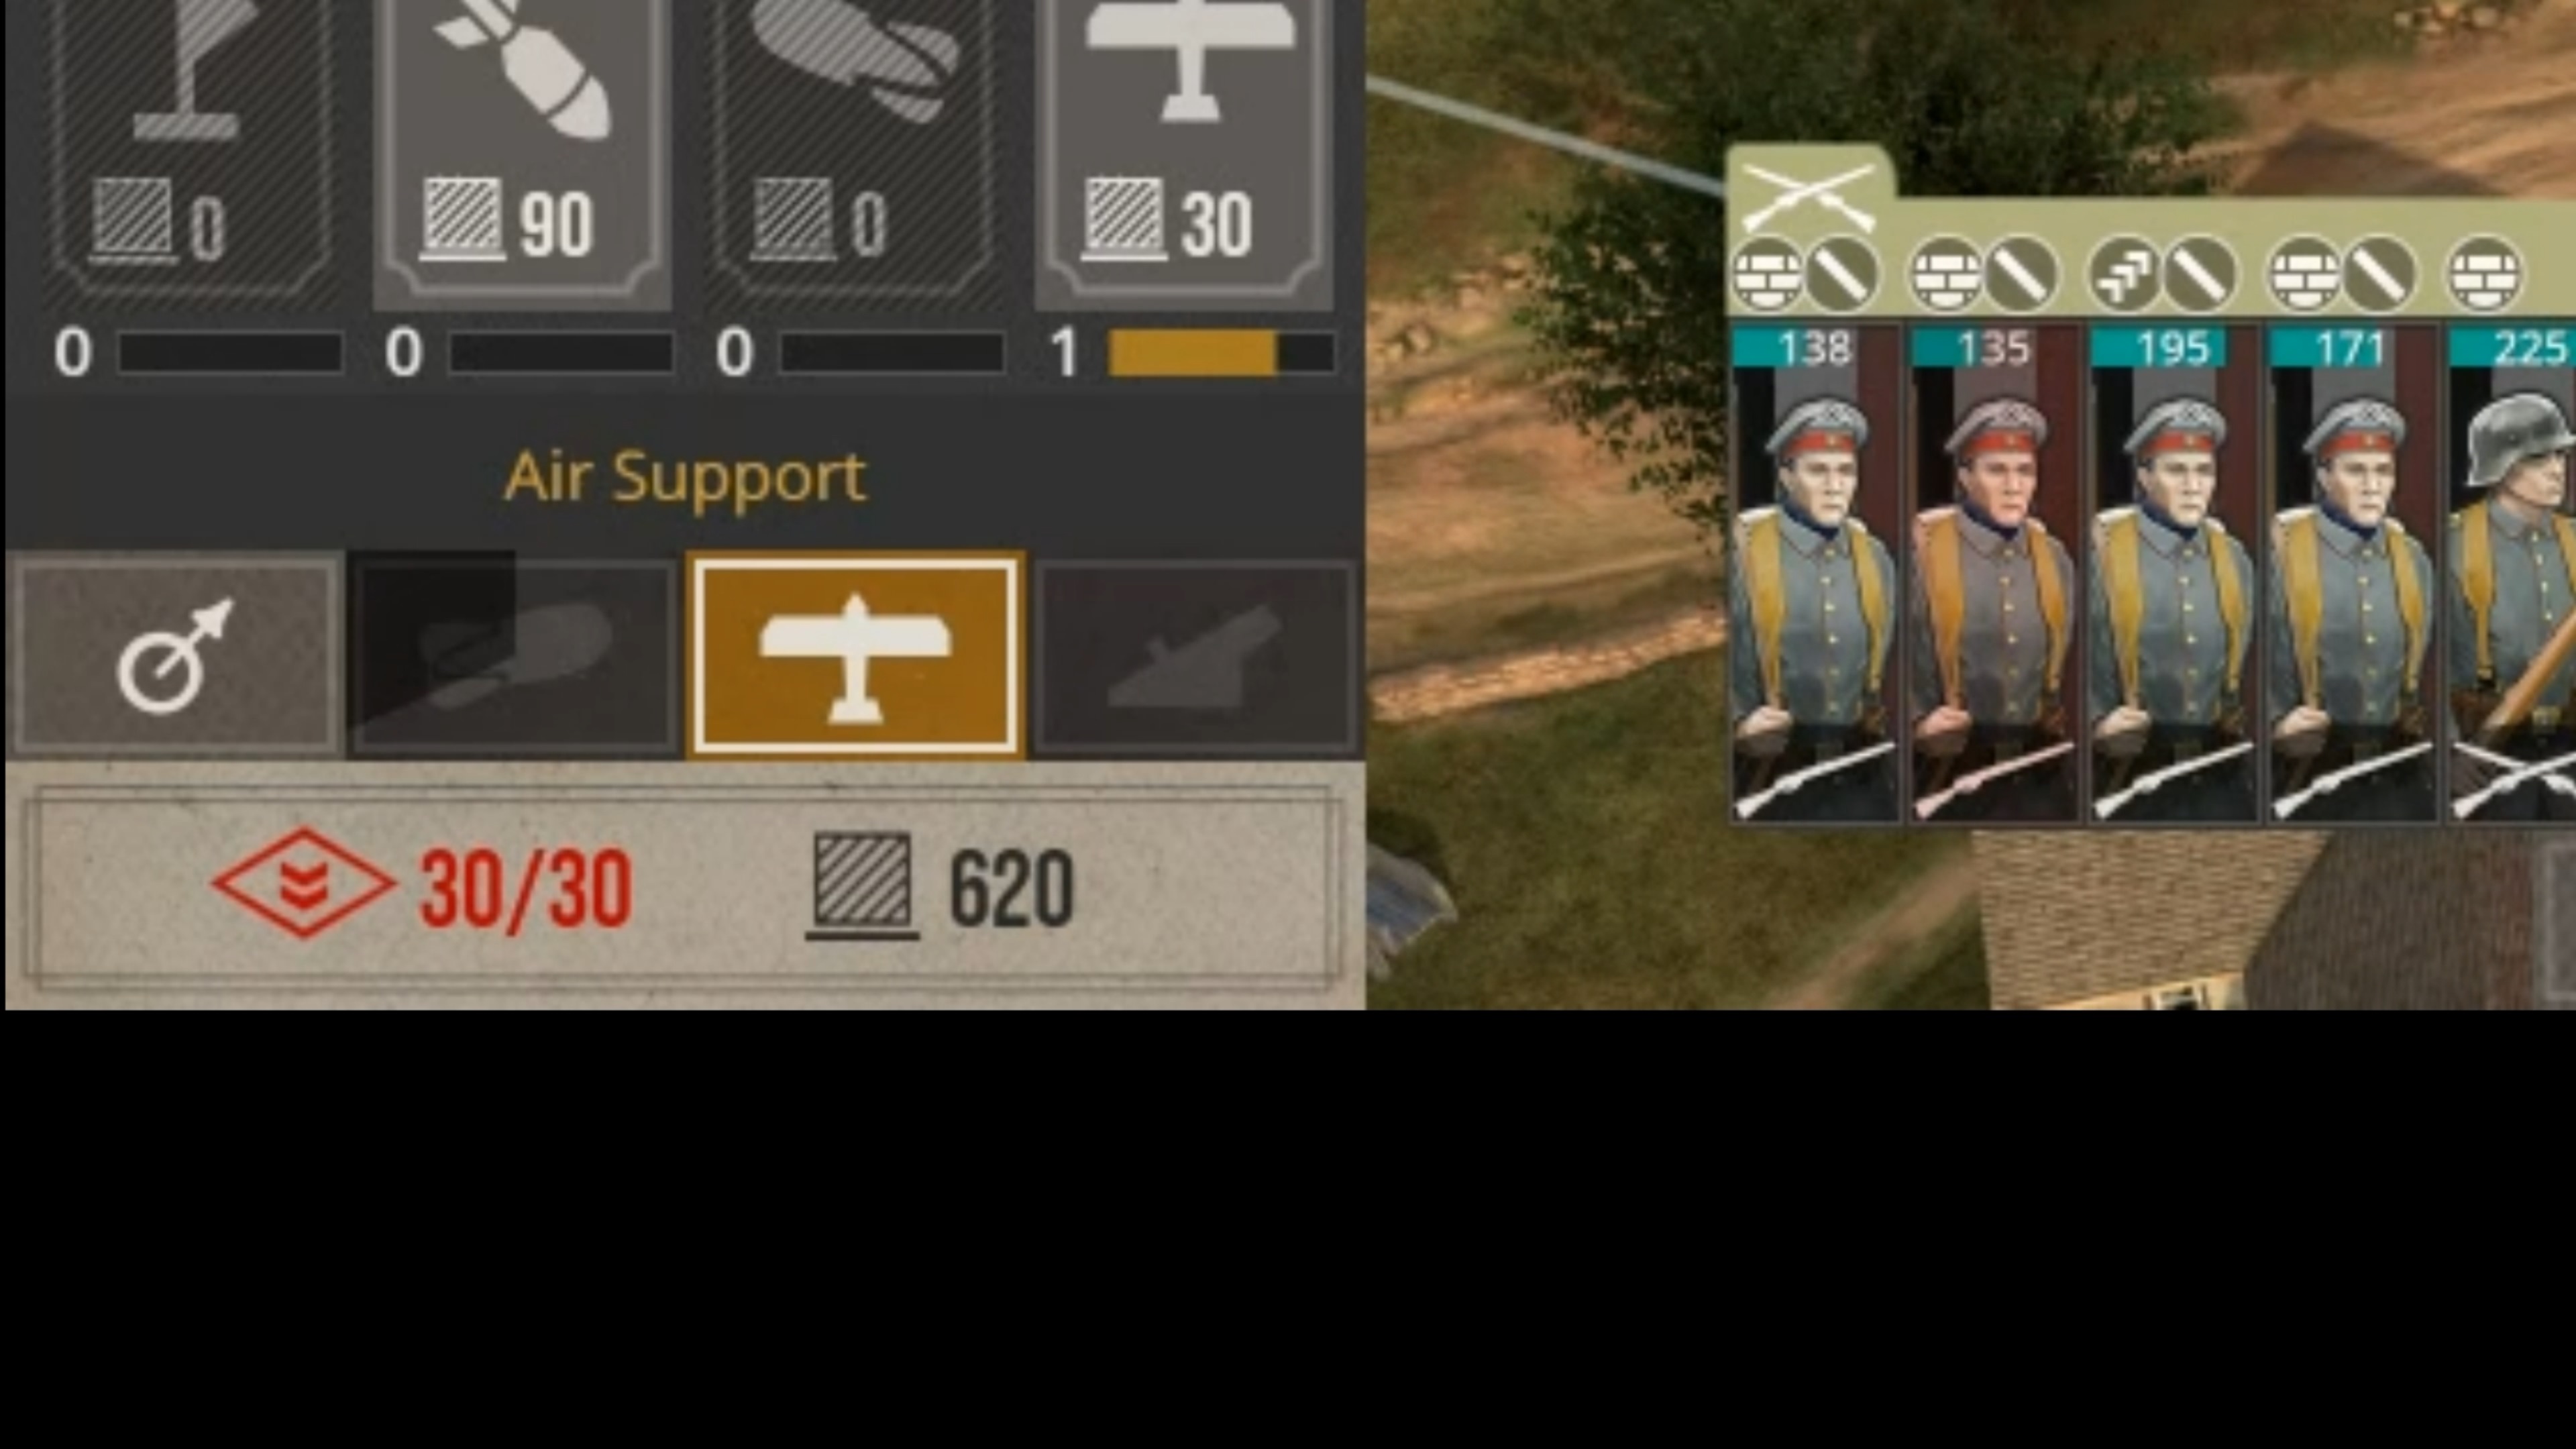
- *MG's cost supply to deploy, but not gold to replenish (unless you exceed fighting force supply).
- you can field up to 30 various units, so if you add artillery you have less infantry. MG's add dakka by exceeding fielded infantry count (helpful in attack also.
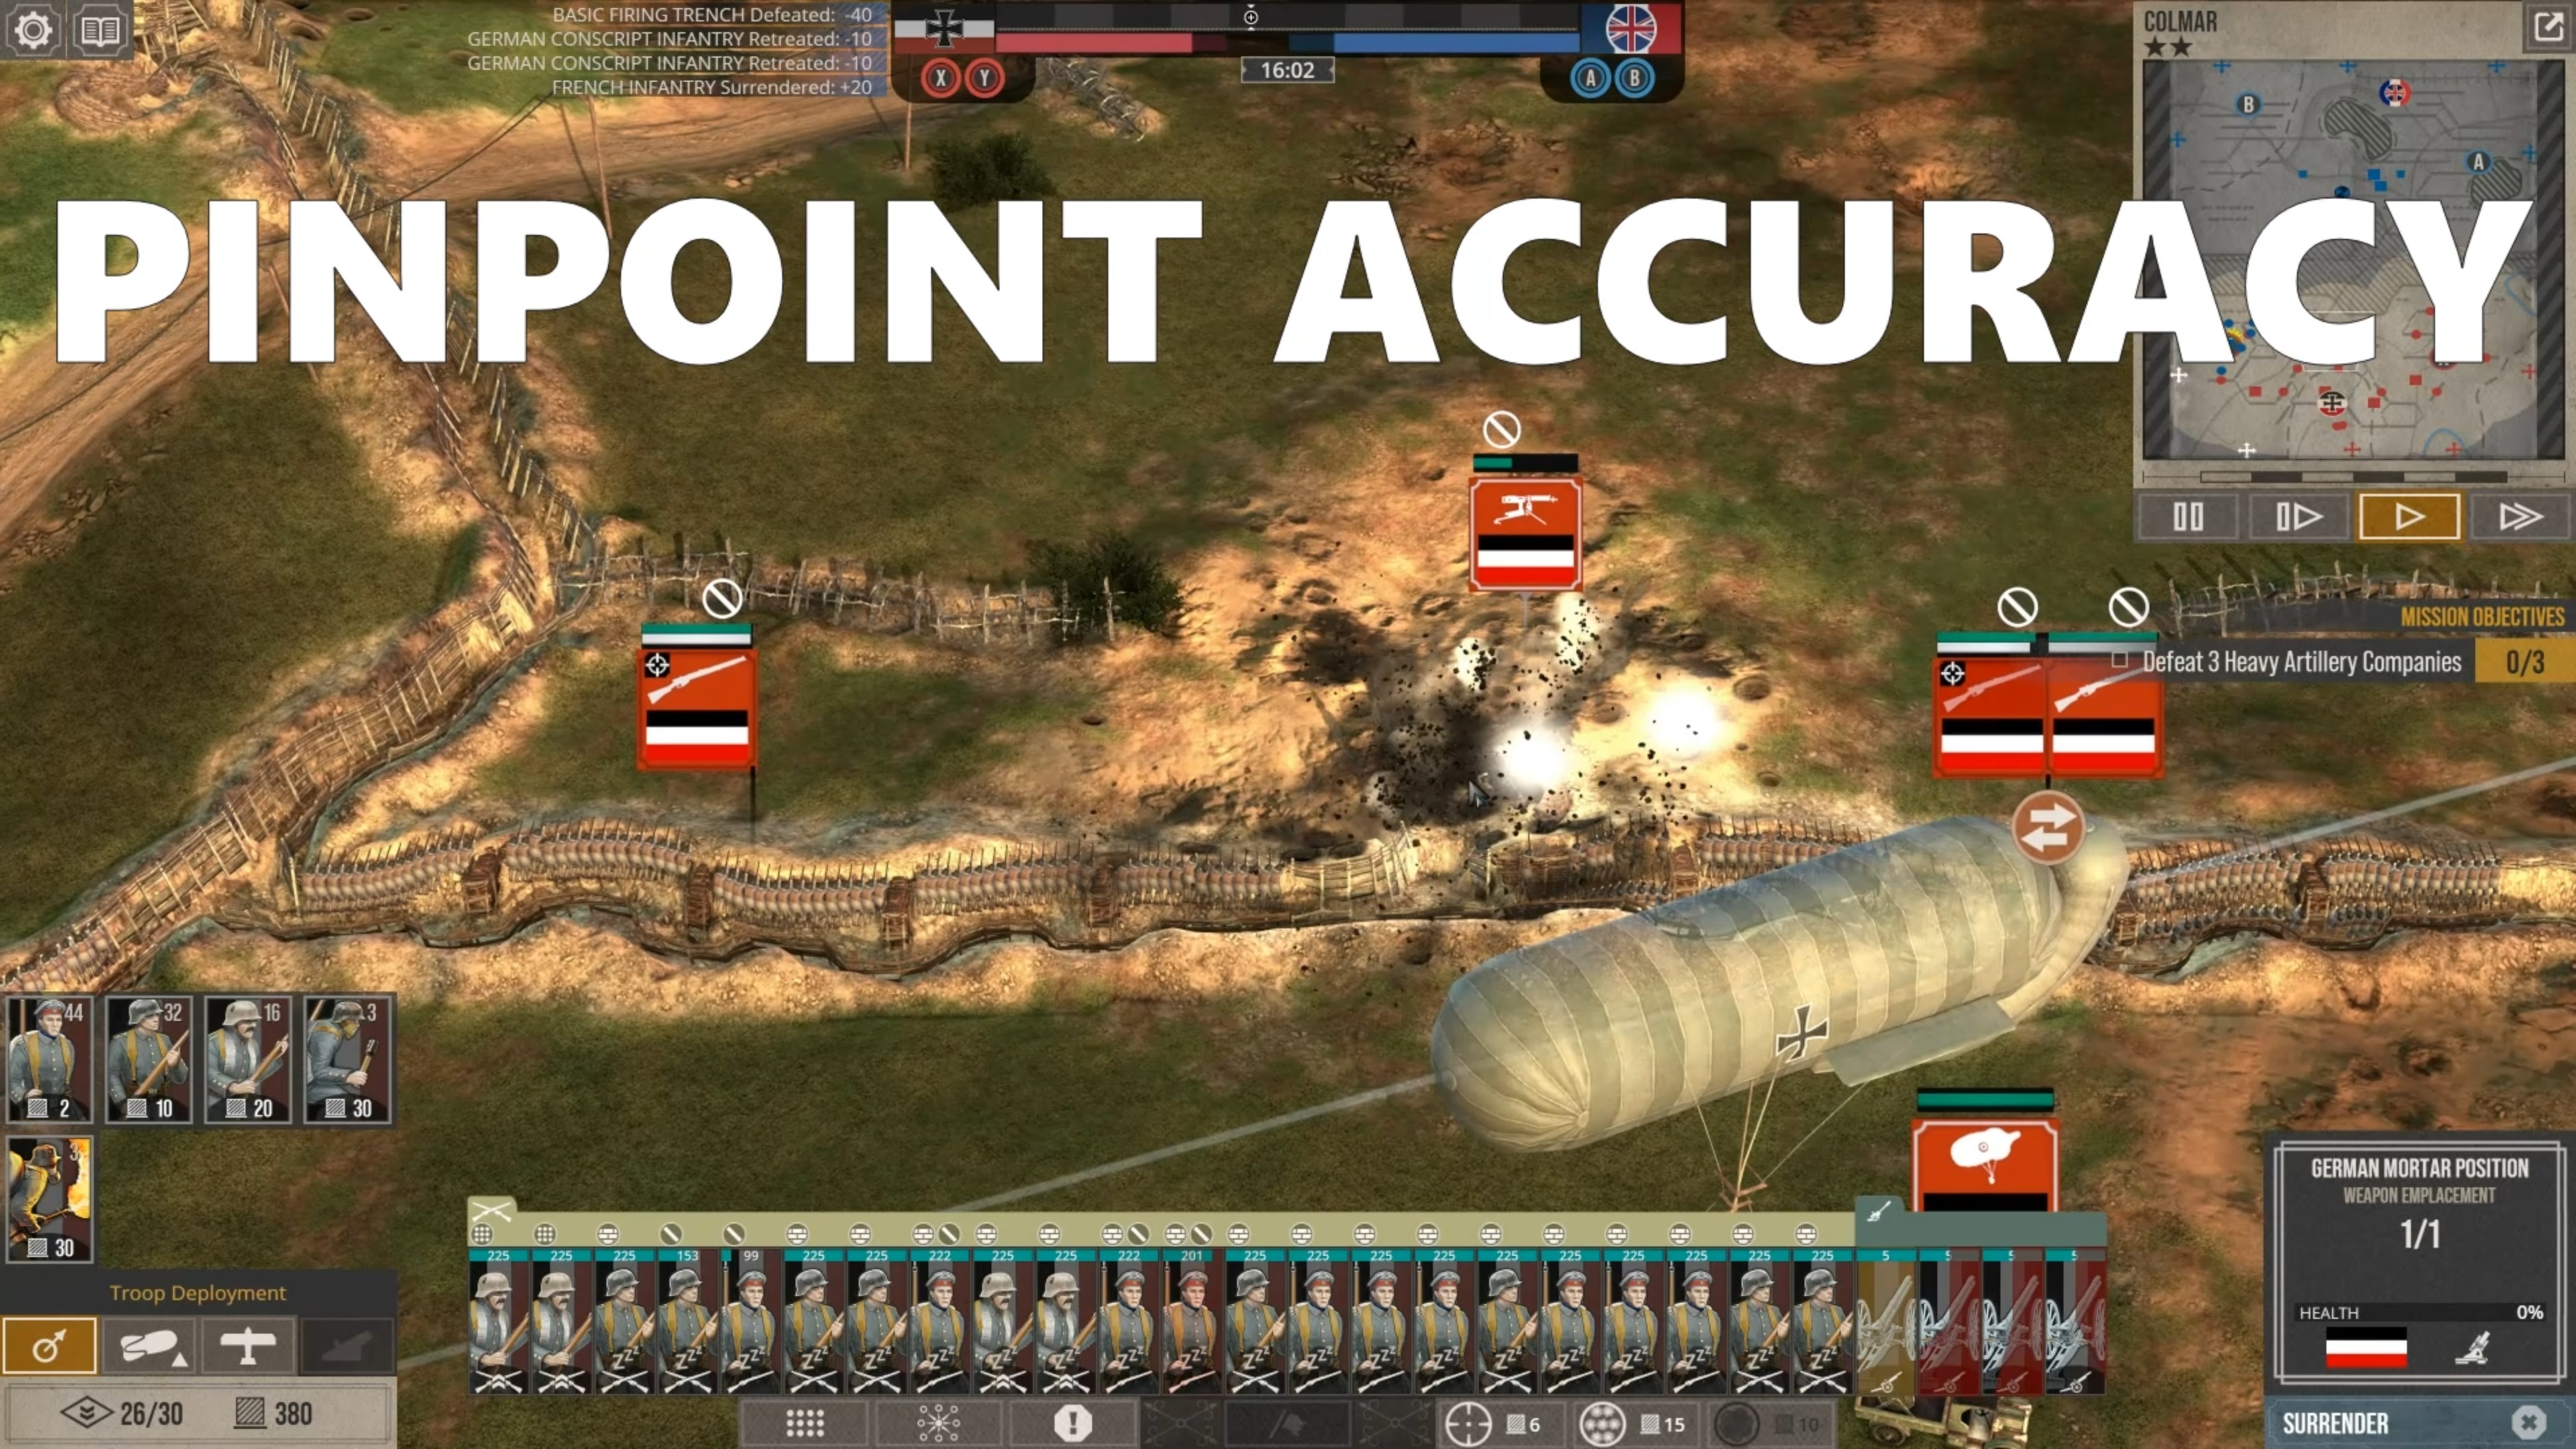
- you can DIRECT fire of MG's (very important).
- you cannot place troops in communication trench, but you can plage MG's on a communication trench.
Spector  [author] 1 Apr, 2023 @ 10:29pm 
@Czibo

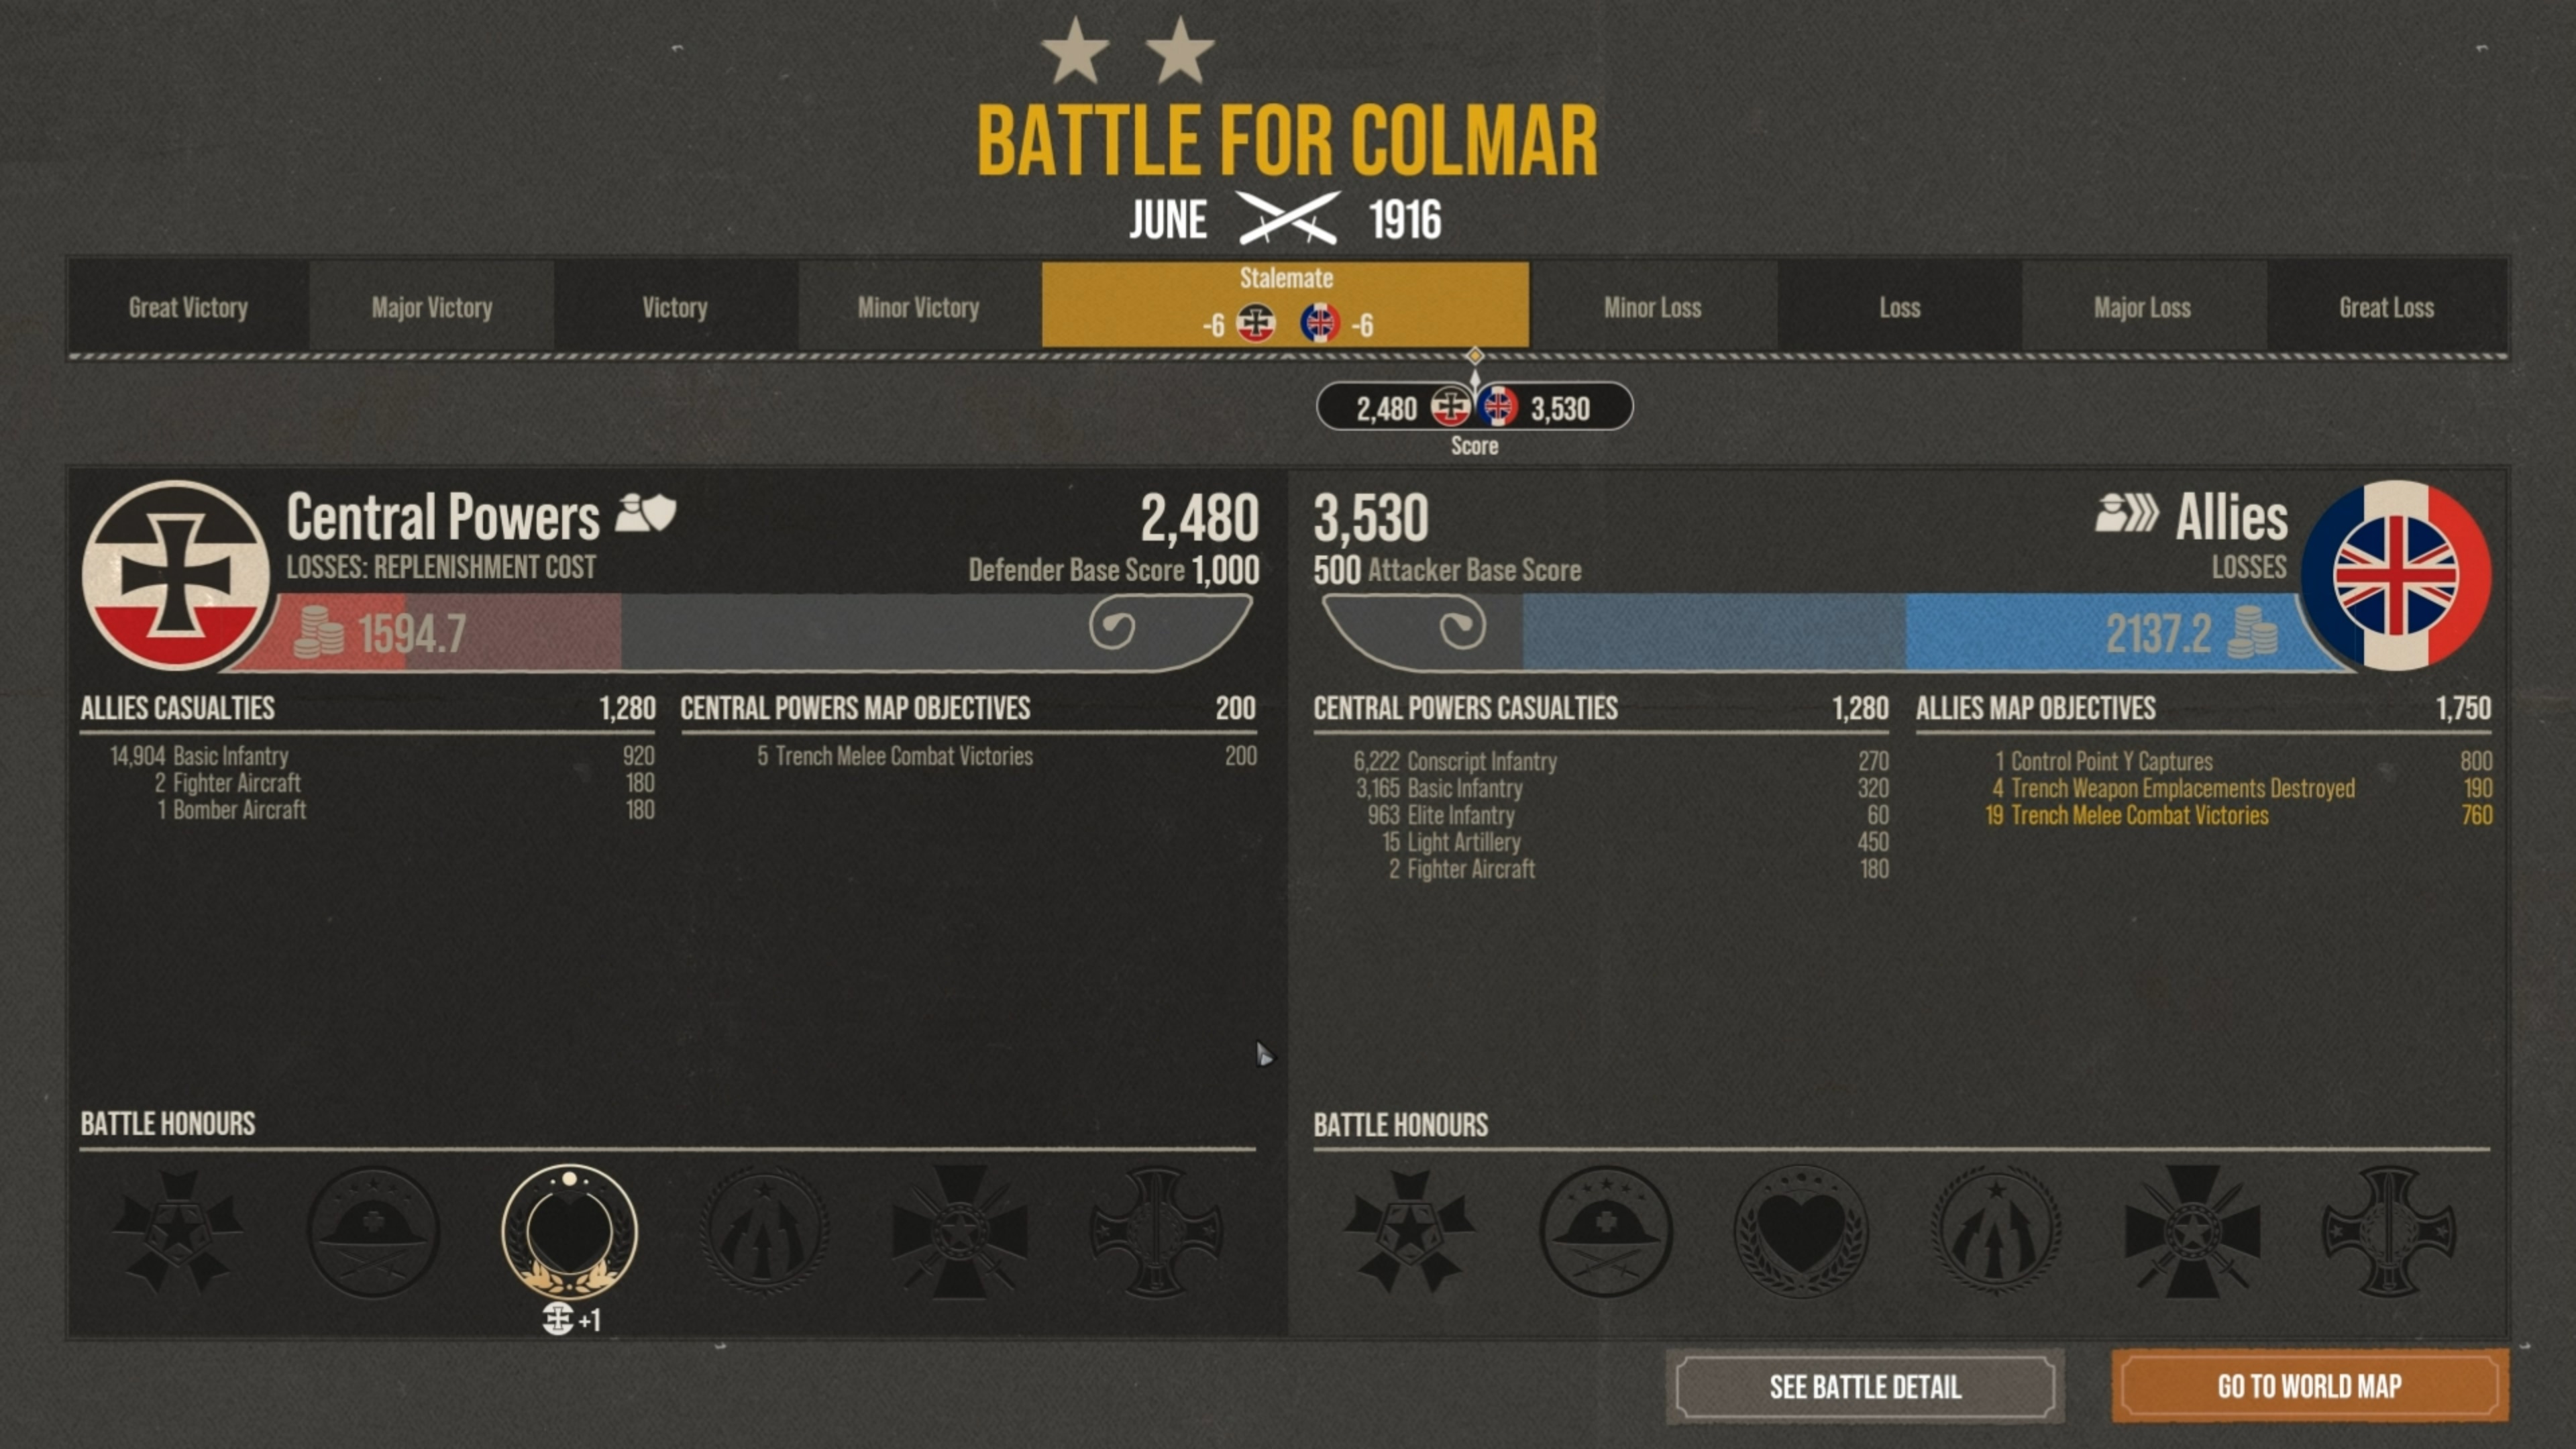
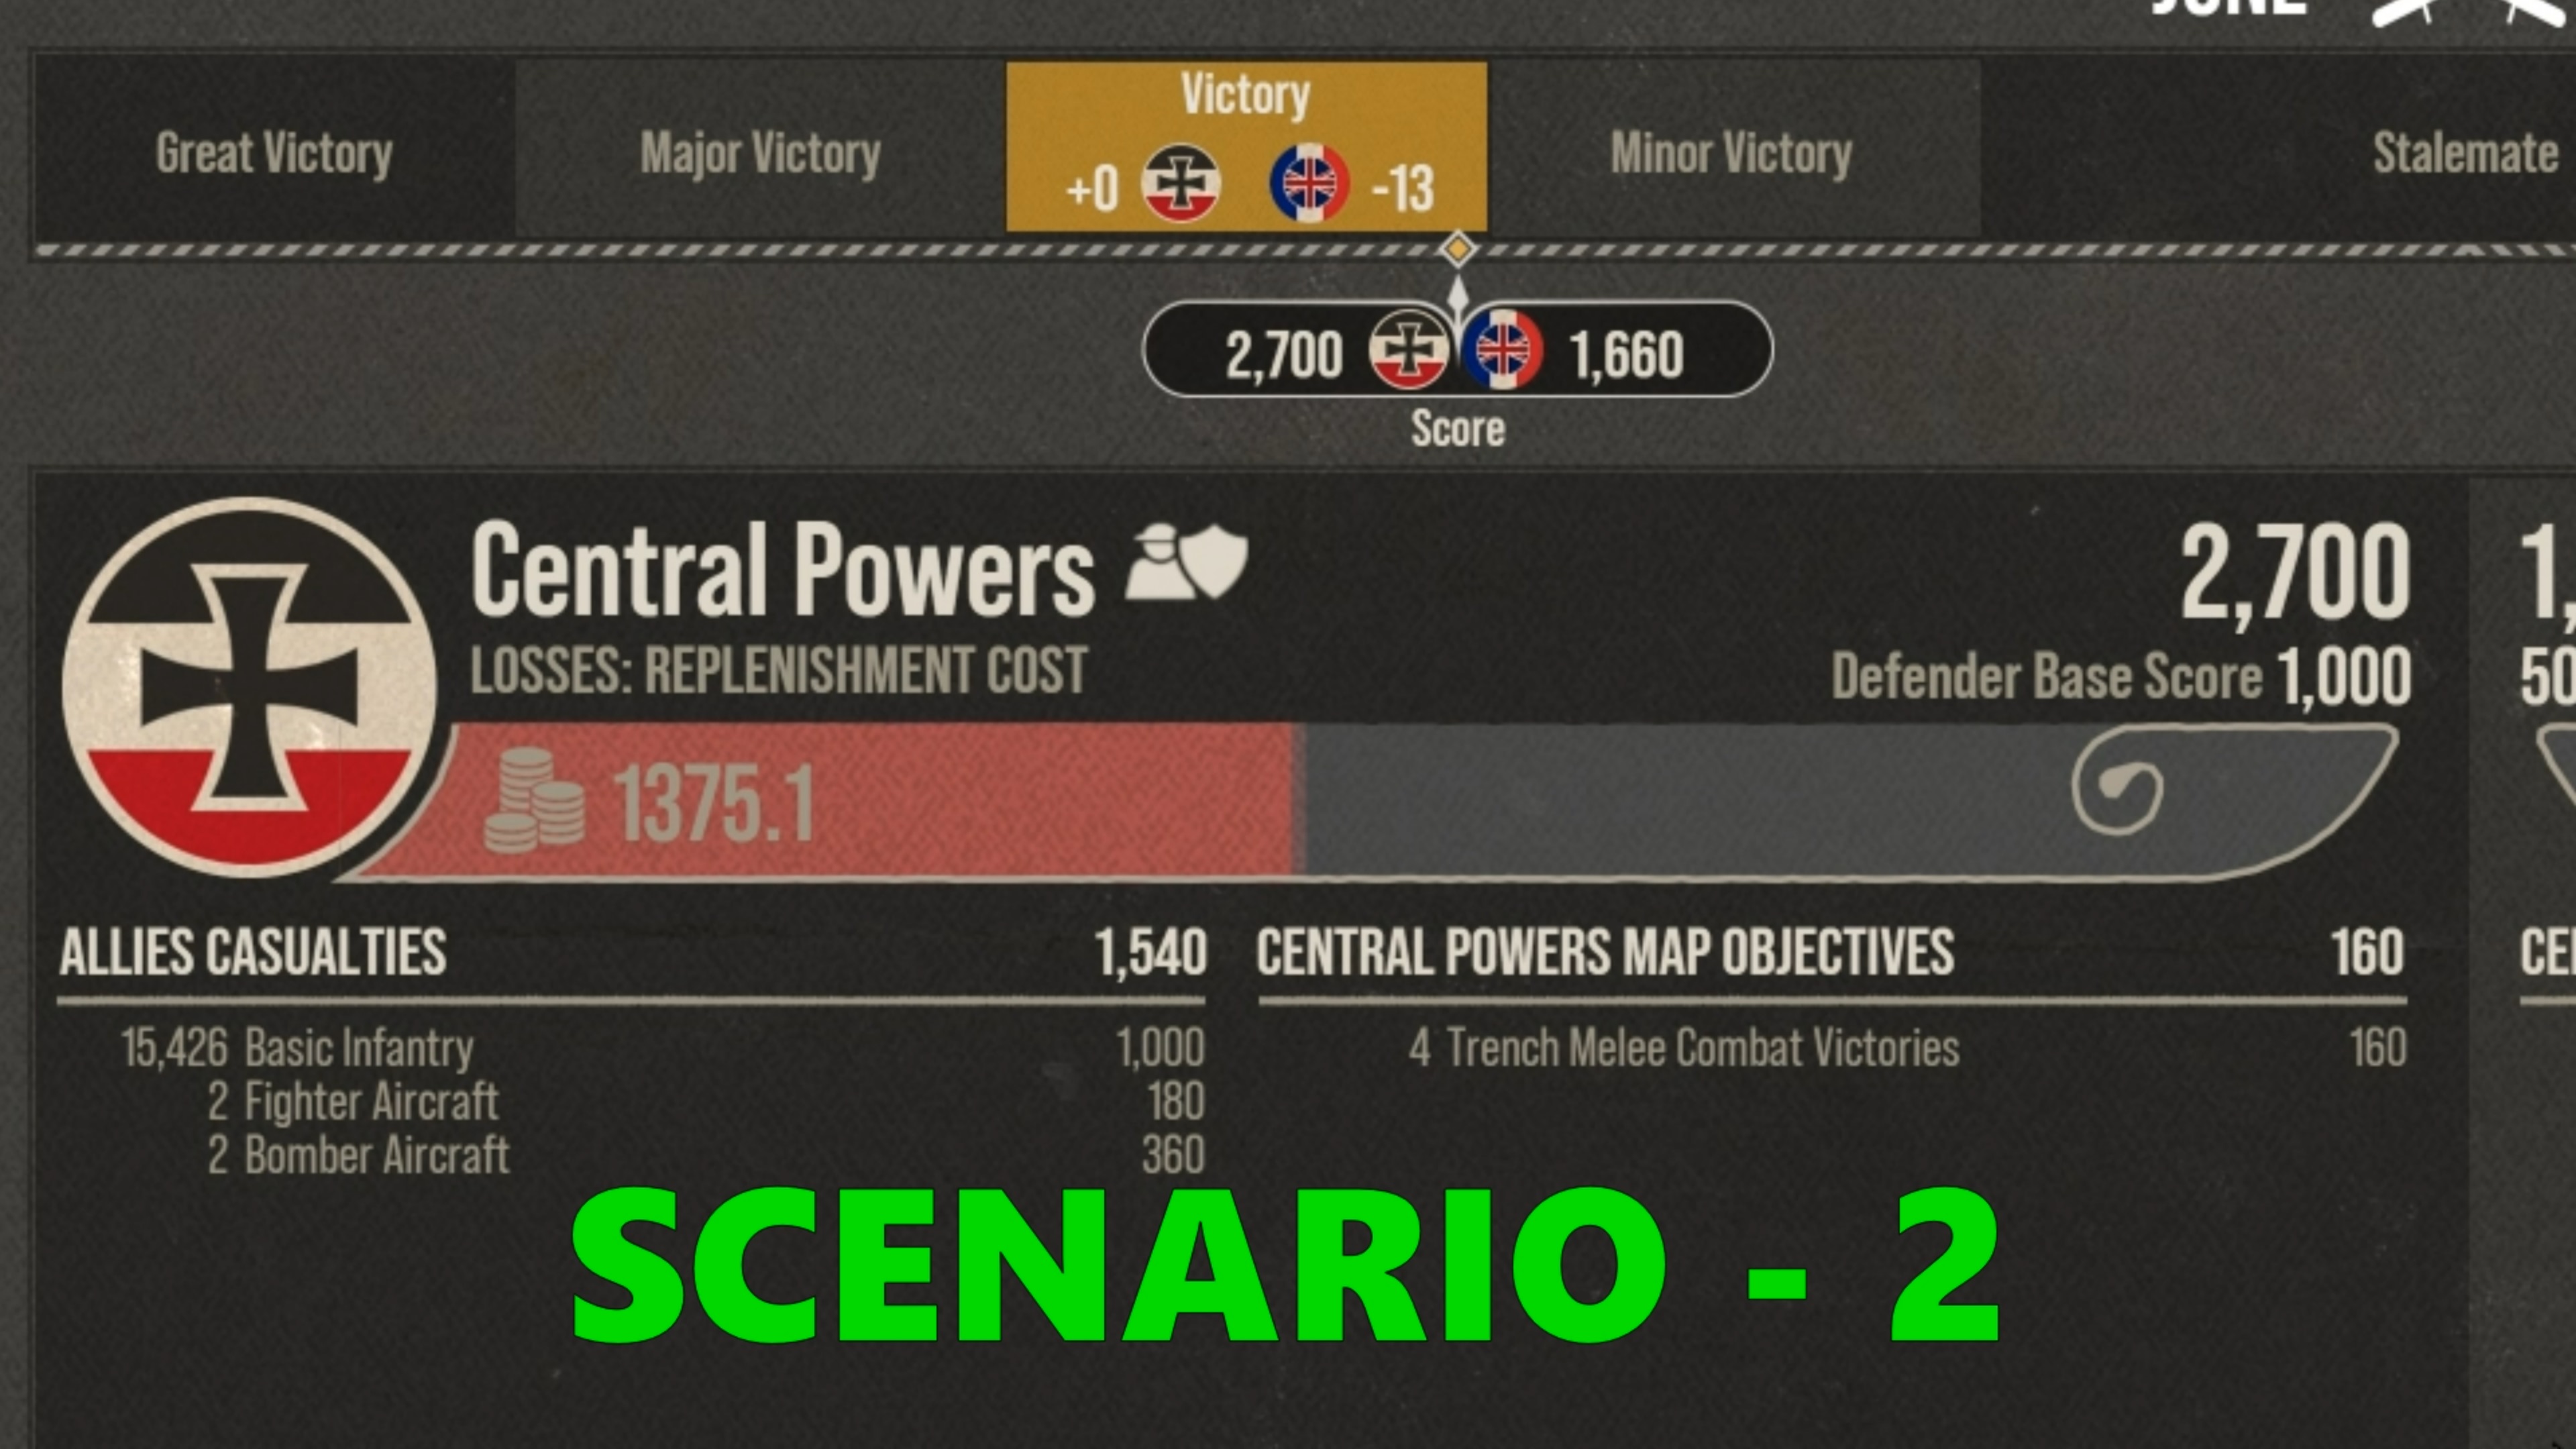
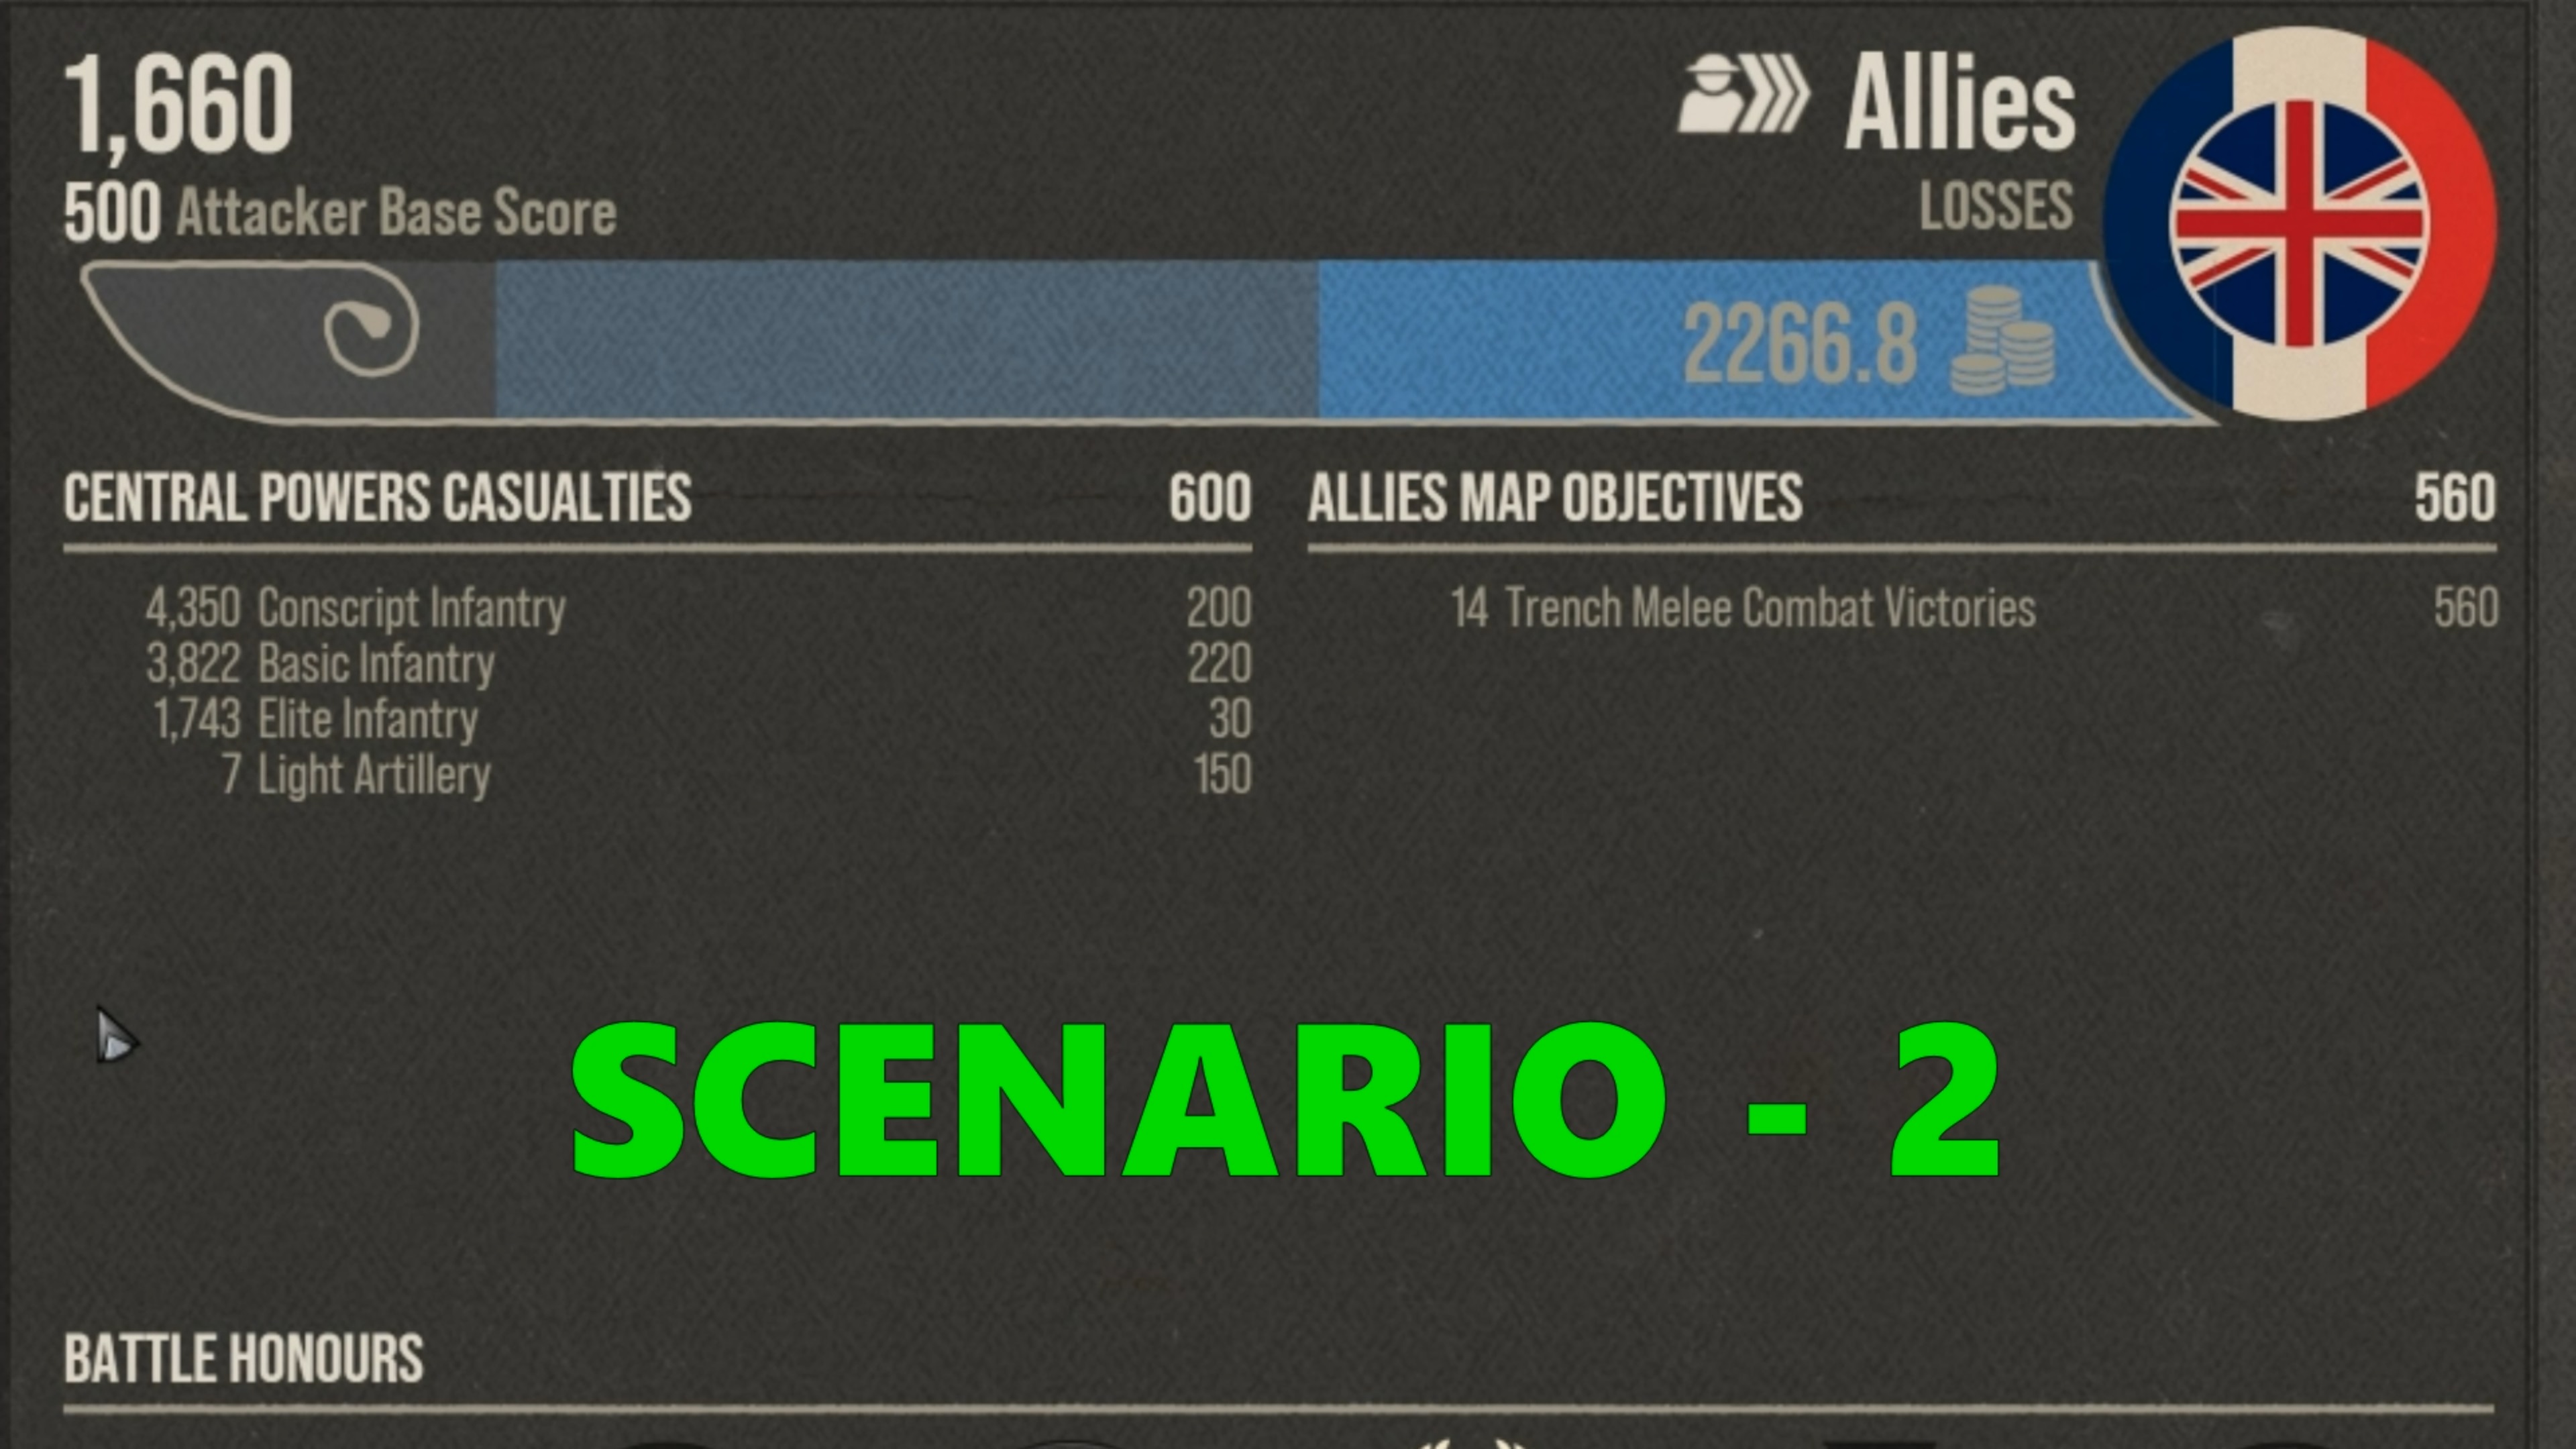
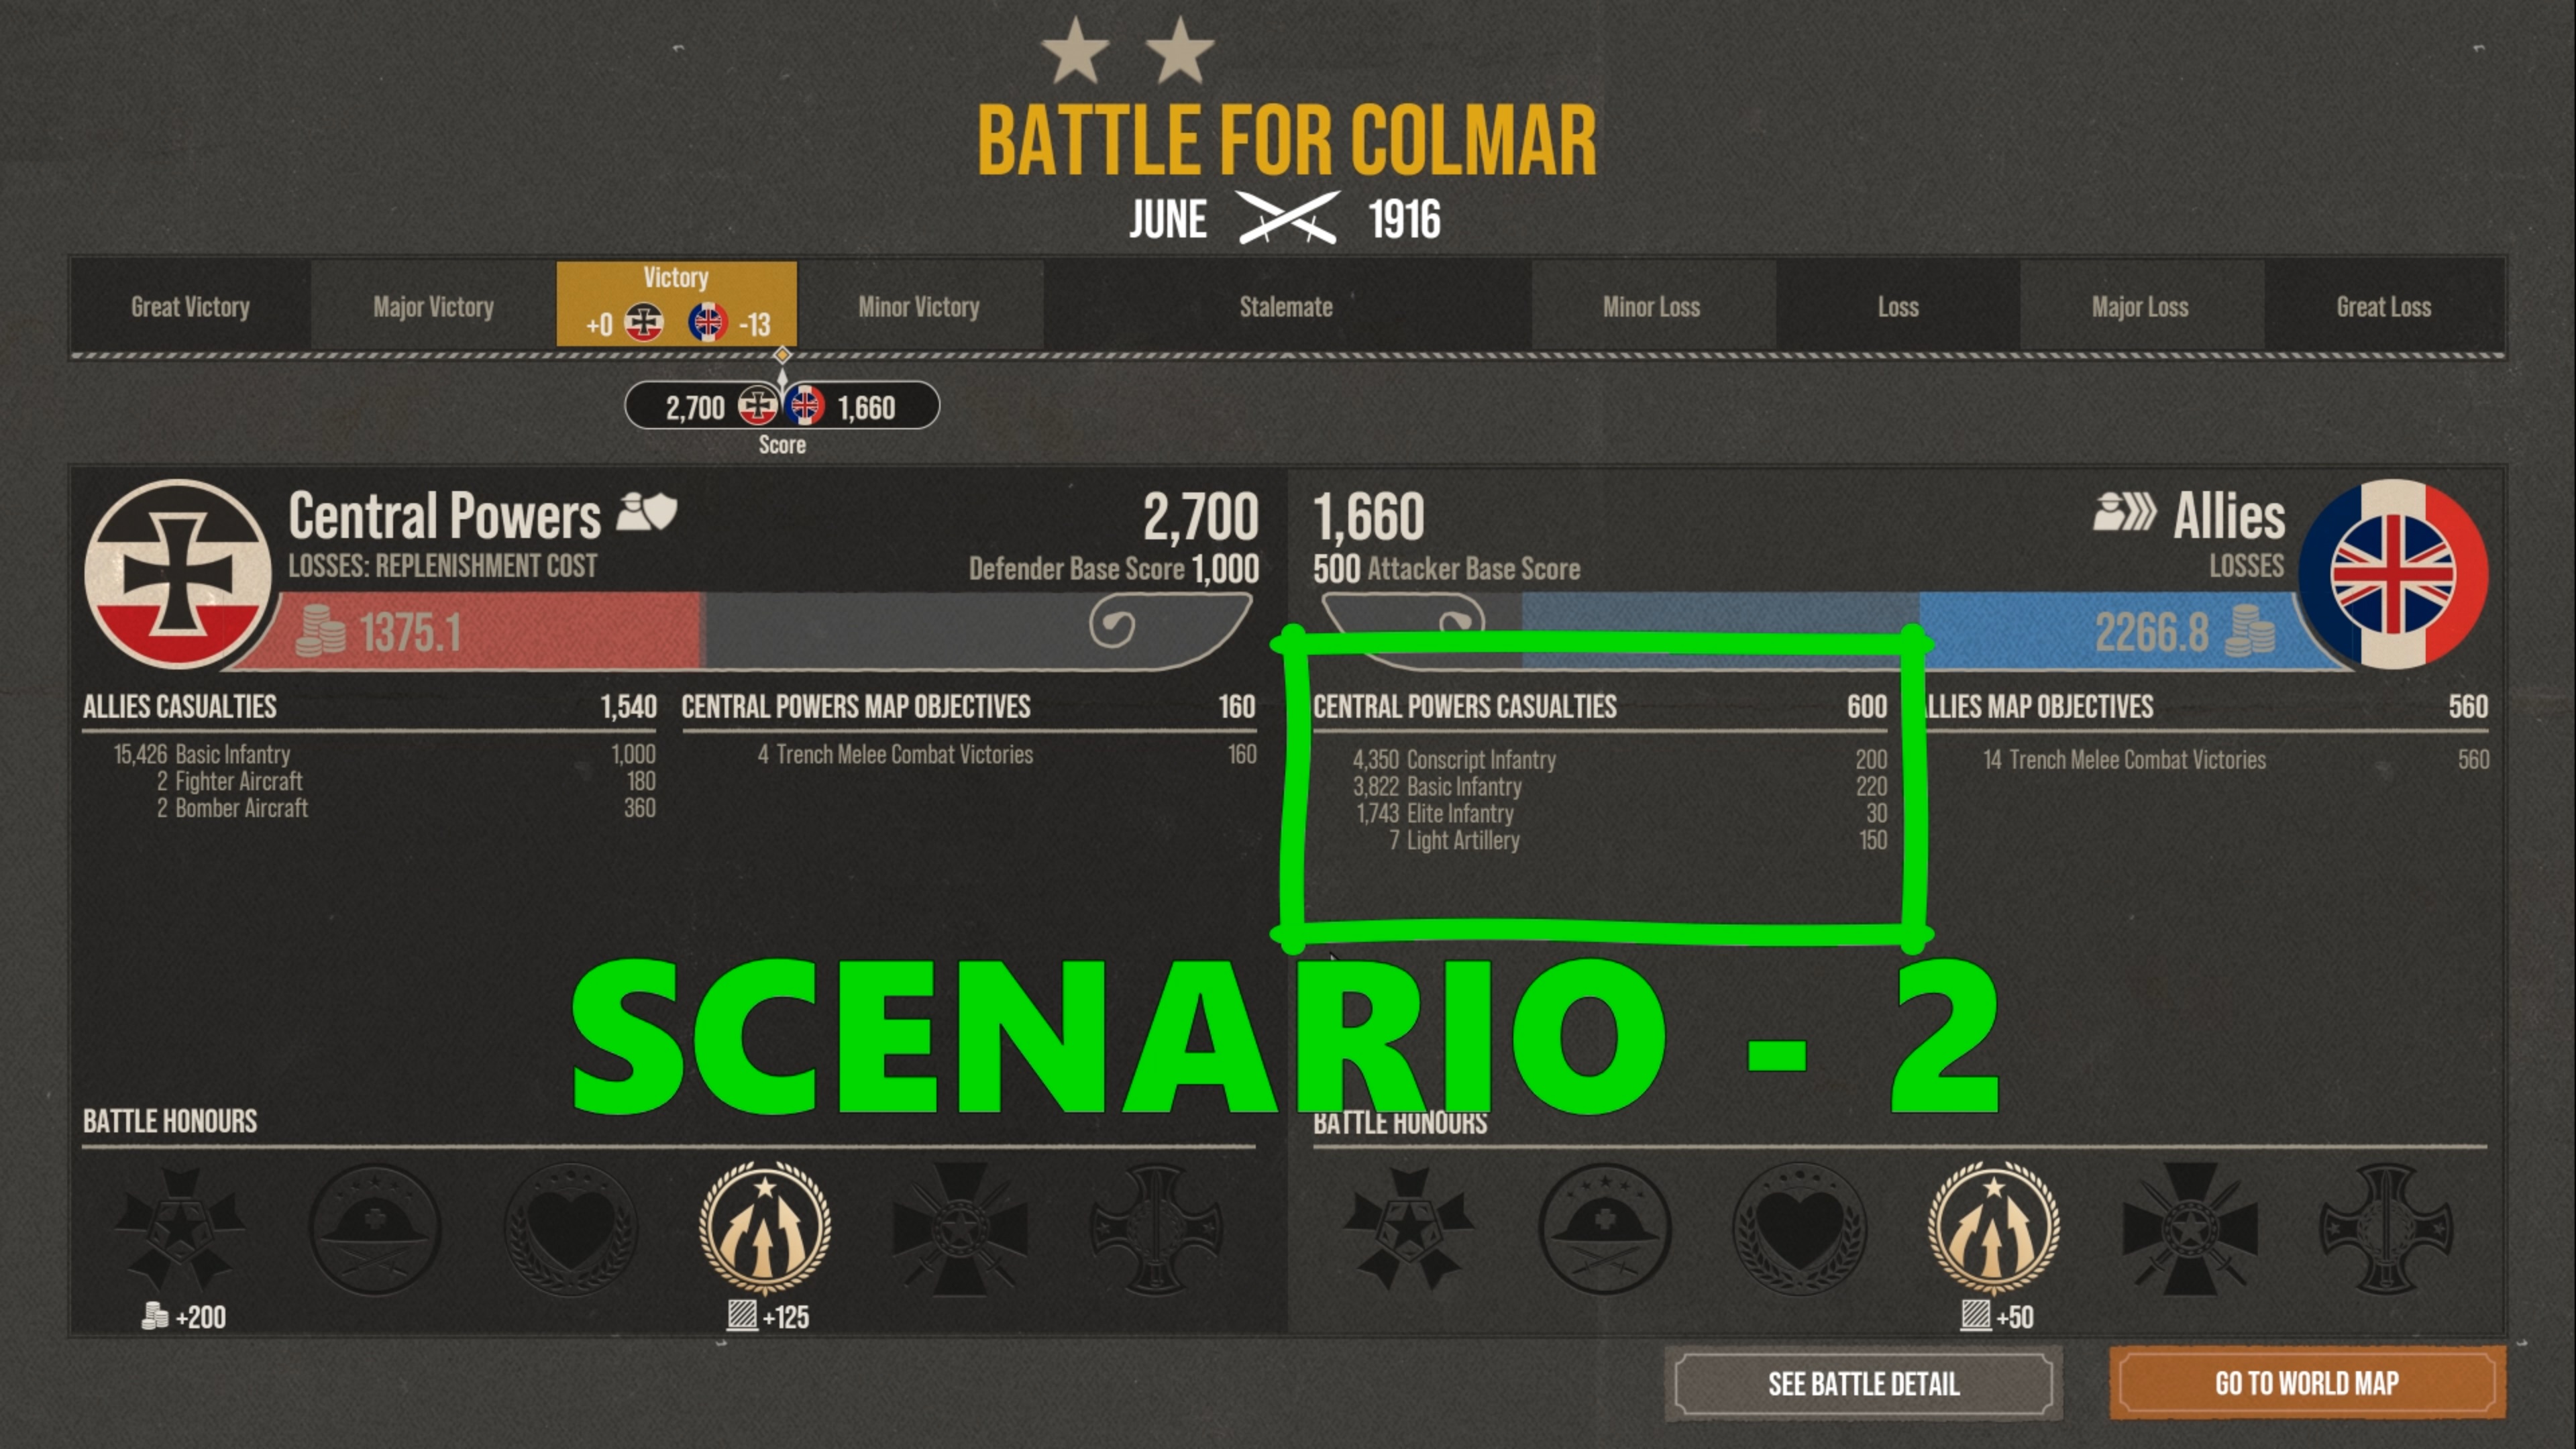
Hi, Yes. Yes. Yes. No, I did use fighter planes, but they take time to kill bombers. Overlapping kills zones on just one objective cost a lot of supply points.

As for adding MGs to back rows of trenches, I have been playing like that for the last few days, but I have had mix results.
1. Enemy will target them even in the back once he attacks from with infantry
2. At the back they have much less range and do much less damage because of it
3. You have 2 objectives, 2 MGs x 2 objectives x 30 supply points is 120 supply points. That is 12 infantry companies that can kill A LOT more enemy than those MGs and they at least can move out of the way of artilery.

So while YES, MGs can do better, don't make it sound like that they can A LOT better.
Shrapp 1 Apr, 2023 @ 3:03pm 
All of your trenches are connected - so once enemy gets in, he can move down the lines without exposing themselves to MG's. But MG's suck.

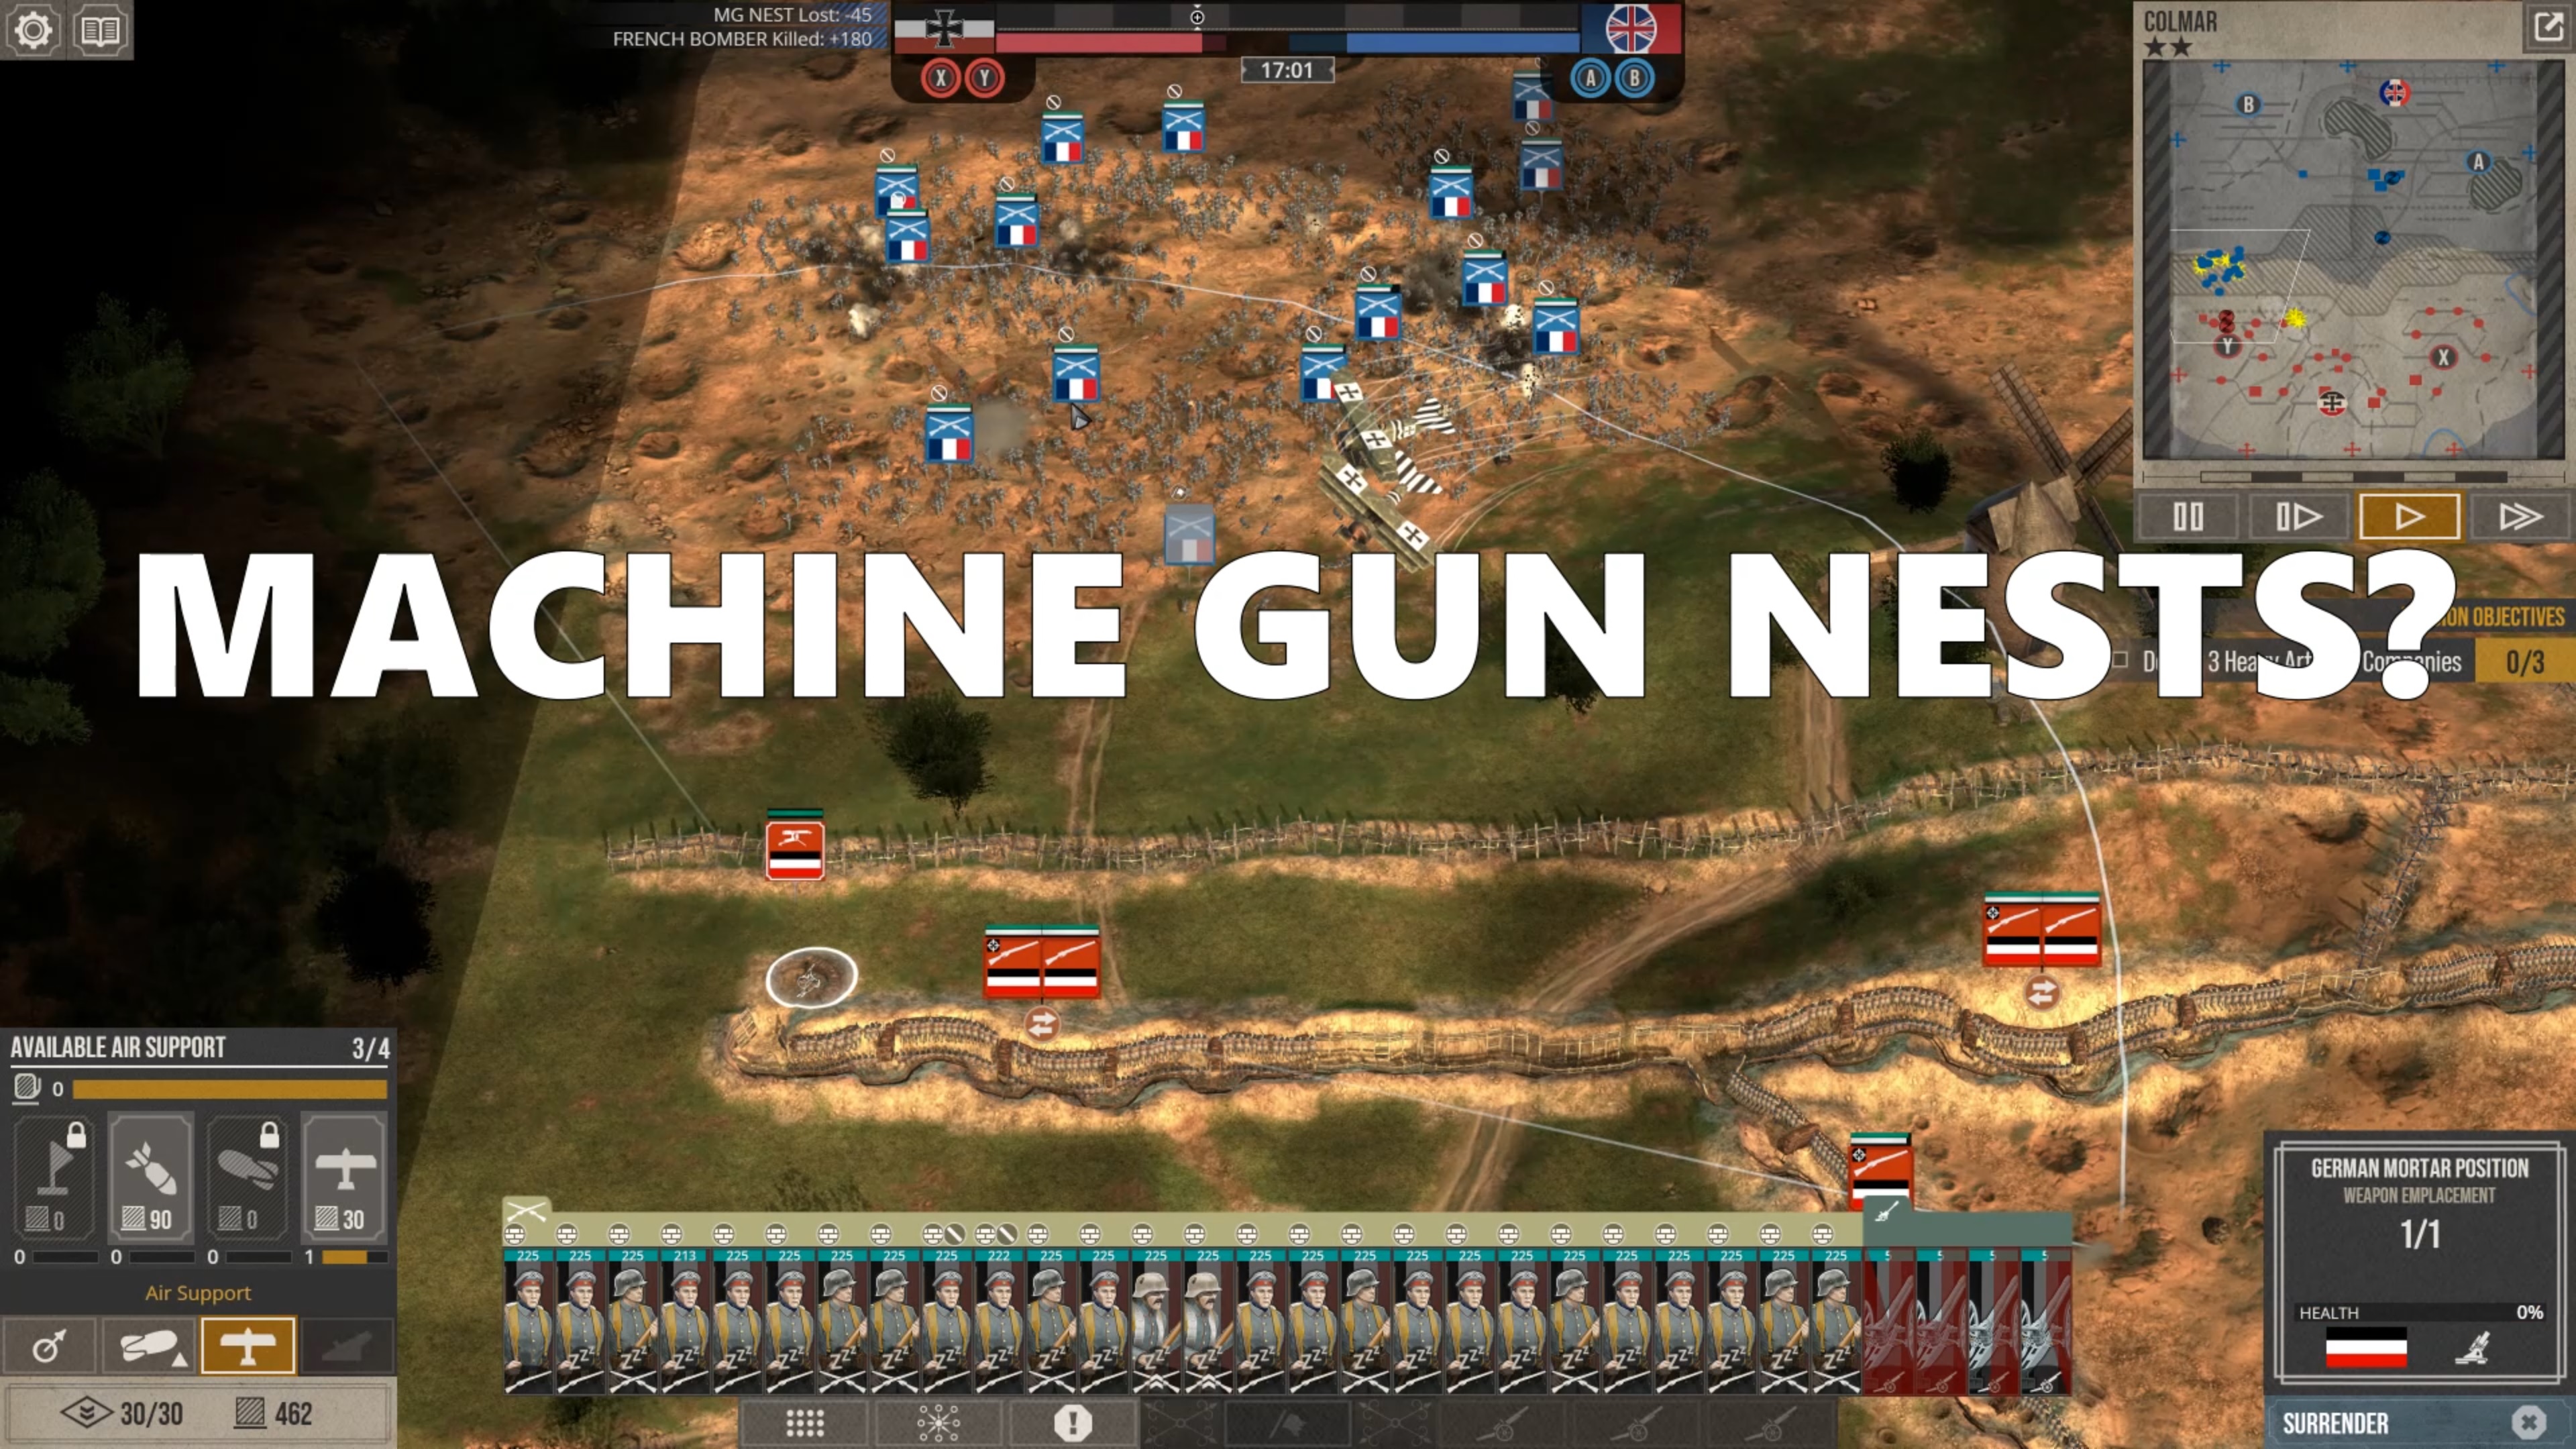
You place MG's on a front line like they are impervious to grenades and arty/forward observers. They aren't. But MG's suck.

You place MG's attached to main lines instead of separated communication trenches behind the main lines. But MG's suck.

You don't bring planes to defend against bombers. But MG's suck.

You don't create overlapping kill zones. But MG's suck.

But wait, what if they don't?!