The Captain

The Captain

Not enough ratings
The Captain - 100% achievements
By John McClane
To some extent, this will also be a walkthrough, 'cause getting an achievement at 100% implies getting all the endings, of which there are quite a lot in this game and they depend on certain actions of the player.

I want to point out that the game does not provide quick saves, so all decisions are final.
The remaining endings can only be obtained through a complete replay of the game.
In this case, you can choose the ending on the planet through open endings, which will save a lot of time.
I want to draw your attention to the fact that you can replay the same ending and finish it with different items received or lost. In subsequent playthroughs, you can choose variants of the same ending.

It is also worth mentioning that you can land on planets only once. The exceptions are the planets Lyme and Pi. They are located in the second sector.

We will start with achievements, for which there is not much to say, and we will finish with a description of achievements for all endings.

attention: I RECOMMEND GOING THROUGH THE GAME FOR THE FIRST TIME ON YOUR OWN WITHOUT USING THIS GUIDE
2
2
   
Award
Favorite
Favorited
Unfavorite
Completed Intro
It's simple - just complete the intro, which will tell you about history of the world and the adventure of our Captain and acquaintance with the ship begins.
Reached Earth
To get this achievement, you need to get to the Earth.
In general, the main goal of our Captain is to reach the Earth with energy cells for weapons that can destroy the enemy heading towards Earth.
Rich
Need to earn 4000 credits.
To perform it , you must:
  • choose options in the dialogs for which you can get credits;
  • sell all the devices of the ship, starting with power panels and ending with weapons;
  • sell energy cells;
  • sell items obtained during tasks on the Planet Lyme;
  • accept and complete the task of eliminating the scientist;
  • do not buy anything in stores (except for a listening device and a fake necklace)
Zen master
To get this achievement, you need to three levels of meditation.

On the planet VL-624 you can save one alien named Umix, who will provide the coordinates of the planet Xerum.
Going to this planet and talking with the local inhabitants in the cave, you need to take a bottle with liquid, drink it and sit on a stone pillar.
After you have completed these actions, a panel will appear.


Stage 1:
  • Press the Air button when you see the same symbol in the cave. It is necessary to wait until it appears;
  • Press the Light button when you see a small flash in the cave;
  • Close your eyes and listen to the sounds - when you hear a melody, then press the Sound button.

If everything is done correctly, then lights will light up from below the pillar after each action, and after three completed actions, the pillar will move to the second stage.

Stage 2:
  • Pay attention to the hanging vine. When it swings, then press the Air button;
  • With the light exactly the same as in the first stage;
  • Close your eyes and listen to the sounds from the drops. When you hear a louder sound of falling drops, creating a kind of melody, press the Sound button.
Stage 3:
  • Here, pay attention to the fact that the fog is changing its direction. Press the Air button after changing the direction of the wind;
  • Flash underwater;
  • Close your eyes and listen to the bass sound.
Blue and Red
After completing the meditation on the planet Xerum, you will be given a choice between a stone figurine, a glass ball and an hourglass.
To get the achievement, you need:
  • To press one of the buttons on the Desert Planet (Blue or Red) and pick up the figurine.
  • In the next playthrough you will need to push the other button and pick up the figurine again

P.S. Thanks to @1410c for the correction! I really forgot about this.
Beat Jannet Pack
It is necessary to destroy Jeannette Pak's spaceship

To complete the achievement, you must visit Burkes' Tradeverse, which is located in the first sector.
Arriving at this location, the pirate ship will get in touch and will allow to visit the station only if you pay him 100 credits.
After talking to the owner of the station, you can get a quest to destroy Jeannette Pak's ship. He will mark Jeannette Pak's coordinates on the map.
After arriving, you need to destroy three pirate ships and the achievement is yours.

Recommendation: before the battle, it is better to conduct a simulation to understand how it is easiest to destroy three enemy ships
All for love
It is necessary to reach the Outpost "Ortis" and resist enemy ships.
You can destroy them with naval weapons or a device that will direct energy beams at enemy ships (which is preferable).

It is necessary to arrive at this Outpost within 80 days.

Time will go after the cut-scene when Captain's wife says that shield is slowly losing power.

P.S. Thanks to @1410c for the correction!
200 days
Here it is necessary to get to earth in 200 days or in less time.

I managed to get there in 153 days.
Acted according to the following scenario:
  • Save an engineer on a Desert Planet and took the power cell
  • Rescue Umix on the Planet VL-624 (I think, this is not necessary, 'cause it does not play any role)
  • Explore the crash site, the coordinates of which were provided by the engineer
  • Took the remaining two power cells on the planets
  • At the Epsilon station chose the ending with a wormhole
  • Jump into the wormhole and then put out the fire by yourself
  • Go to the trading station, where you can sell all your things (weapons, shields, one power cell) to buy two upgrades for the engine
  • Go to the Planet Lyme and accept the task of delivering the bomb to the Expo
  • On the planet Pi go into the central building where located the greenhouse and accept the task of displaying the device at the Expo
  • After the sabotage mission, go to the space gate and pass through the gate
  • Go to the Smuggler Route point
  • Chose the option to give up all your weapons to pass through the cordon
  • Fly to the Earth

Seen it all
To get this achievement, you need to open all available endings on planets, stations and on your ship.

For more convenient navigation, there will be a separate section for each planet, station and ship, which will describe ways to get endings
The Ship
You will get this after passing the intro


During a trip in the first srctor between planets, enemy ship will one day get in touch, the General of which will say that we are transporting a prohibited energy carrier, which is located in Jeff's hull.
To get this ending during the dialogue, we agree to give our robot. After the dialogue, we tell Jeff to wait on the lower deck until he is picked up.


Don't agree to give Jeff away.
While the robot is trying to transfer his mind to the chip, we need to block only one of the three paths for the kidnappers (For example - lock the airlock).
After the kidnappers open the door, don't do anything and wait until they find Jeff and take him away.


Do not agree to give Jeff away and block the way in every possible way:
  • Lock the first airlock on the lower deck;
  • Send a droid to clean the elevators;
  • Go to the laboratory and mix the two components that are in the drawer. Take Spore Acid and Dragon oil Powder. There will be flasks on the table. Take one of them and interact with the flask components in the inventory. After that, place the flask in the heater, which stands to the right of the flasks. The fire alarm will go off.
After Jeff completes the procedure, go to him and press the button on his back.


To get it, you need to save an engineer on the first planet. The rescue process is listed in the Desert Planet section


You need to rescue Umix from the laboratory on the planet VL-624 and offer him a place on your ship.
The rescue process is specified in section VL-624


It is possible to get it after you have agreed to erase your memory in the laboratory on the planet VL-624. The process of erasing memory is specified in section VL-624
After you have erased your memory, you find yourself on your ship. After a short dialogue, go up to the upper deck and sit in the brain scan chair.


Ship breakdown
In order to get to these endings, it is necessary to open a wormhole at the Epsilon station.
Then go through the wormhole. There is a fire that can be extinguished in two ways.
Go down to the lower deck and enter the door on the left. You should get into the spacesuit and open the airlock. When the fire is extinguished, close the airlock and restore the pressure in the room.


Tell the ship to turn on the fire extinguishing system.
Desert Planet
There are two landing zones on this planet:
  • SOS signal
  • Location of the power cell

Landing at the point of SOS signal
You can get it in two ways^
The first way is to open the cryocamera and tell the survivor that about a thousand years have passed. After a small scene, there will be a choice either to give him a cyanide pill, or just leave him on the planet;
The second way is to launch a cryocamera that will turn the survivor into mincemeat.


You need to open the capsule, tell the survivor that several weeks have passed. And while he is warming up, it is necessary to reset all the settings of the cryocamera through the computer so that all the messages that came to his email are deleted.


Oopen the cryocamera, say that several weeks have passed, but don't delete messages from the computer. After that, the survivor will check his email and, realizing that he was deceived, will shove you into a cryocam. After a while, the survivor will return and after a short fight scene, he will be in the cryocamber, and you will be free.


Landing at the location of the power cell
Take the energy cell and fly away from the planet


Take energy cell. Pay attention to the pit after picking up the cell and interact with it. Next you will see a hatch that can be opened. Jump down. There will be a blue and red buttons on the left and right. Press the blue button.


Everything is the same, but just push the red button
VL-624 Planet
After landing on the planet and entering the laboratory, it is necessary to activate the elevators using the panel at the entrance.
Then go down by elevator. On the floor you will find the second elevator and you should go down to another floor.
On this floor, in room No. 12, you will see a silhouette in the window. Go to the panel and turn on the intercom. During the conversation, the scientist will give you a code to unlock the doors. Go back to the floor above and go to Dr. Cake's room.
In the room you will see a small vault with which you can interact. After opening it, pick up the items and go to the leftmost door on the floor. Apply the key on it and go inside. There is a panel in the room through which you need to unlock the doors in the laboratory.
Then take the elevator back down to the scientist. Approaching room No. 12, you will find that the silhouette has disappeared. Go into the room, examine the body and pick up the key card next to the body.
Go up to the floor above and go to Dr. Drum's room.
During the dialogue, the doctor will say that he can't just let go you and offer to erase the memory and pay compensation.
Agree to this procedure, go into the cubicle and interact with the chain that hangs over the cabin.


Do the same things until the moment of meeting with the scientist in Dr. Drum's room.
Refuse the scientist's offer and take the hairbrush that lies down on the table.
Then go to Dr. Cake's room, take the coins that are on the table.
After that, go down to the floor below. Go to room No. 15 and apply the coins on the vending machine. Spend three coins to get the container that is hidden there.
With this container, go into room No. 14 and apply it on the device on the left.
On the right side there will be cages with animals. You need to open a cage with a two-eyed lizard. Take this lizard and shove it into the large compartment of the device that stands on the left. It is necessary to put a hairbrush in the small compartment.
Power up the device. It will create a creature that will help open the door to the cryogenic chamber. The cryogenic chamber is located in the corridor on the left.
After taking the elevator down, interact with the panel to open access to the capsules.
Interact with the remote control and wait for the capsules.
Next, open the two central capsules and rescue people from there.
After a dialogue and a short cut scene, the survivors will give you the key. Go up to the floor above and apply the key to a small compartment in the corridor and take the device from there.
Next, go to the Drama's room and agree to erase the memory.
When you find yourself in the cubicle, apply the device found on the lamp from above and turn it in the other direction so that the beam does not hit you. Pull the chain.
After the device works, a scientist will run in and be surprised that you didn't pass out, but will conduct a small test. She will tell you which square to get up on - get up on the square and do not move until the next one indicates. When you stand on the leftmost square, which is in front of the panel, quickly interact with the note that hangs there.
After that, repeat the procedure through the cubicle. But first you need to open the door of the cubicle using the received code and interact with the panel in which you can set the beam delay for 10 seconds.
After that, return to the cubicle and use the tool to turn the lamp 45 degrees down to the left and then pull the chain. A scientist will run in and after a few seconds the beam will shoot at her, thereby neutralizing him.
After a short cut scene, talk to Umix and offer him a place on your ship.


Take the elevators down to the lowest level and go to room No. 12. Talk to the scientist and take the elevator to the floor above.
Go into Dr. Cake's room and take everything that is in the safe
Next, go down to the lower level again and go to Zone 52 using the key (left door).
Once in the room, turn on the light. After meeting the alien, you will fall down and find yourself in a hangar with cryogenic chambers.
Get Prod and Umix out of the cells and get out. Take the elevators to the exit.
The exit will be closed. Interact with the loader and wreckage.
Next, you need to find the oil and power supply.
Go down to the middle floor and go to the security doors on the left side of the floor. Go into the security room and unlock the doors using the console.
Go down to the lower level again. Approaching room No. 12, you will see that the alien has made its way into room No. 13.
Go into room No. 12 and make your way to the lever. Get out of the room. After a short dialogue, it is necessary to choose who will go to the lever (in this ending it is impossible to save Prod and Umix. Only one person).
After the cut scene, go to room No. 14 and take the power supply.
Go back to the room where you met the monster for the first time. Take the oil container out of there.
Go back to the main exit and insert the battery and pour oil into the loader.
Get into the loader, remove the crates and go to your shuttle.
Bulkidus Crash Site
In the location, the coordinates of which were provided by the engineer, it is necessary to rotate the mirror on the ground so that the laser hits the laser turret.
Then climb on the wreckage of the ship and interact with two laser turrets so that they are in an active state. Jump off the wreckage and go to the console, which hangs down on the left in the passage. Use it to turn on the lasers (two right buttons) and bring the lasers into combat position (left button). One of the laser beams hits the turret, causing it to break. Then climb onto the wreckage, pick up the turret and leave the location.


The principle of operations is the same, only in this case it is necessary to rotate two mirrors - which lies down on the ground and the uppermost mirror, which hangs to the right on the skeleton of the ship. Both beams should fall on laser turrets.
Soma Planet
To get this ending, you need to fly off the planet, taking the power cell with you.
To do this, go down from the landing pad and go to the rightmost part of the location. There you will find a broken droid, after searching it, you will find a pass to a Rover that stuck in the sand. Open the door of the Rover, connect the power to the droid, pick up the multitool that fell out of his hand. Next, you need to repair the ventilation control panel and get the battery in the area where the broken droid was lying down. Take the battery to the Rover for recharging and put it back where it was found. After all the manipulations, the droid in the Rover will give you his chip. Take this chip to the ventilation control panel and turn on the ventilation. Working ventilation will clear access to the power cell. Take it and leave the planet.


All the same actions before receiving the chip from the droid. Need to take the chip to the ship. The energy cell remains on the planet.


After receiving the chip, it is necessary to insert it into the radio tower that stands to the left of the Rover.
Creon Crystal Planet
It is necessary to break a large crystal with a stone, in which the energy cell is sharpened. It will take about 14 days


Pick up the bushes that grow on the location. Next, you should pick up a stone and start hitting a small crystal with it. A small piece will break off from it. Put the collected branches in front of a large crystal and set them on fire with a shard. Melting the crystal will take about 7 days


To get this ending, you need to perform the following actions:
  • Rescue an engineer from a Desert Planet;
  • Visit the location, the coordinates of which will be given by the rescued engineer;
  • Find and take out two laser turrets at the location;
  • Craft the Ice Melting System on the ship;
  • Land on the planet and use the Ice Melting System on a large crystal;
  • Take the power cell and fly off the planet.
Epsilon Space Station
To get the ending , you need:
  • Find the energy cell
  • Do not give the energy cell for modification to scientists
  • Find a container with Dromium
  • Disable robots using a robot that you can switch to
  • While the General is going to figure out the reason for disabling the droids, go down to the wormhole control point, turn on the protective dome, insert the power cell and the container with dromium
After these actions, a General will come to the control point. After a short dialogue, he will put explosives on the airlock of our ship. Switch to the robot and go to the control room, stand next to the General. switch back to the Captain and tell him that he won't be able to count. At this moment, the General gets his pad and starts poking at it. Switch to the robot and interact with its tab.
When you find out the code, go up to the top floor, go through the door and remove the bomb from the airlock. Since the bomb is magnetized to the robot, go down to the lower floor and go to the General's ship. Switch to the Captain.
Bring the General through dialogue so that he activates the bomb.


To get the ending, you need to find the energy cell and give it to scientists to modify it.
The actions to launch the wormhole are the same as those described above.
The wormhole is open. The military will arrive through it. The general will escape.


It's enough to be caught by the General. He will lock you in the garbage bay.
  • Switch to the robot and go to the General's ship, where you disable the droids;
  • Go down to the control room and wait for the General to return;
  • Upon the General's return, watch a small cut-scene;
  • After the cut scene, you find yourself in the garbage bay, in which there is a container;
  • Interact with it until the container becomes empty;
  • Switch between the captain and the robot to reset the timer before the garbage bay airlock opens;
  • As a captain, you climb into the container and wait for the compartment to open
Xerum Planet
First you need to save Umix, which will later give the coordinates of the planet Xerum.
After landing on the planet, you need to talk to the locals and go through meditation. The process of passing is specified in the Zen Master section
After passing the meditation, you will be given a choice of three subjects. You can only choose one.


It is necessary to choose an hourglass


It is necessary to choose a stone figurine


It is necessary to choose a glass ball
Nugget Node Planet
Nugget Node is a planet where providing a drilling competition.
And the endings on this planet are just connected with the place that you will take.

At the time of taking part in the competition, you can see the current table of participants with their results:
1st place-449 minerals (to win, do not go, dial a large number of eyes)
2nd place-339 minerals (do not pass from 340 to 448 minerals)
3rd place-219 minerals (do not pass from 220 to 338 minerals)

It is possible to take part in competition by sending a request through the computers, which is standing by the building on the left.
To get the first place, need to upgarde the engine of our ship, so that the time for flights between the satellites of the planet is minimal.
You can arrange your installments ahead of time after reaching the required amount of minerals

There are three satellites. Each satellite has four dig points.
The amount of extracting minerals does not change after the starting new game.

Grey Moon
First point - 128 minerals
Second point - 32 minerals
Third point - 8 minerals
Fourth point - 36 minerals

Green Moon
First point - 0 minerals
Second point - 135 minerals
3 wheels - 7 minerals
4 wheels - 50 minerals

Red Moon
First point - 25 minerals
Second point - 16 minerals
Third point - 99 minerals
Fourth point - 63 minerals
Celic Planet
Here it is enough to land on the planet and visit the artifact demonstration (or go to sleep) and fly to the ship.
  • Land on the planet;
  • Wait for another ship to land;
  • Turn the pointer;
  • Overhear a conversation;
  • Go to the reception and register under a false name;
  • Go to Bungalow No. 4 and go to bed before the show starts or until the next morning;
  • Returning to the ship


After you have registered under a false name, a girl will knock you down. After a short dialogue, in the reception room, go upstairs and talk to the employee and take the fireworks from him.
Then go to your bungalow and change clothes.
Go outside and walk towards the bartender. There will be Kim (the girl who bumped into you) standing on the balcony. During the dialogue, an alien will get in, who demands that the girl give back what belongs to him, and later will leave in the direction of your bungalow.
You go back to your place, watch a small cut scene.
Go back to the bartender. There is a bell next to it. Interact with him and immediately go to Bungalow no.2. In this bungalow, hide behind the bed and wait for the alien to hide the card in the safe.
After he leaves, open the safe and take the map.
Then go to your room and fall to sleep until the show.
After you wake up, go to the right side where the artifact demonstration is going on. Behind the stand in the ground there is a holder for fireworks. Take it away and put it in the holder to the left of the audience and start the fireworks on it. While everyone is distracted, take away the replica of the artifact that is being shown to the audience. Go back to Kim.
Once on the island, go to the entrance. Do not pay attention to the old guard who will try to block the road.
Go into the cave and take the artifact.
An alien runs in and demands that the artifact be given to him. There are several ways to do this:
  • Give a replica of the artifact to an alien, and give the real one to Kim
  • Give a cyanide pill to an alien and give a replica of the artifact to Kim
  • Give a replica to an alien and tell Kim to give chase after him


The actions are all the same as described above, before descending into the cave.
To get this ending, you need to leave the artifact in its rightful place
  • Give a replica of the artifact to an alien, talk to Kim. And when she comes out of the cave, put the real artifact back.
  • Give a cyanide pill to an alien and give a replica of the artifact to Kim, and return the real artifact to its place
  • Give the replica to an alien and tell Kim to chase after him, put the artifact in its place


Attention: if you tell Kim to to chase after the alien, then the endings on the Taleron Plant will be unavailable for you
Taleron Planet
At the end of your adventure on the Planet Celic, Kim will ask you to give her a lift home. You need to agree to do this.
After landing on the planet, go into the house. Kim will ask you to turn on the music and pour the wine. After the dialogue about the paintings and trophies in Kim's room, three possible answers will appear, on which the ending will depend.
You need to tell Kim that you do not understand what you are doing here. And anyway, your wife is waiting for you. Hearing this answer, Kim will get angry and ask to leave her house.


Here you need to choose the option where you say you can stay overnight. Kim will happily agree to this option.


Need to offer her to join your crew. Tell her that you agree to pay her 300 credit, after which Kim will accept your offer.
Fenton Perth Planet
After landing on the planet, need to interact with the panel of the fallen satellite. Open the four latches and remove the lid.
Set the toggle switches as follows: red - black - red - red - black - red
Press the button. The capsule compartment will open. Take it away, insert the capsule into the analyzer and press the button to receive the self-destruct code. Enter this code on the satellite panel.
The captain notices that the capsule from the analyzer was stolen by a mysterious man, and runs after him. Check a wooden building, After this the captain gets something heavy on the head and loses consciousness.
After a while, the Captain comes to his senses.


The fastest ending on this planet.
After talking to Samoa and having breakfast, go for a walk around the city. Then go out to the city center and talk to Samoa. You will enter the building for an appointment with the Governor. At the end of a small dialogue, Samoa will go home, leaving you alone with the Governor and his assistant.
During the conversation, the Governor will offer you 6 units of gold to get you out of the city. Need to accept the offer. Take your stuff, gold and fly off the planet.


The actions are all the same as before, but in this case you reject the offer and leave the Governor's office.
On the way, stop at a grocery store for groceries for Samoa. Go back home and give her the groceries. During dinner, Samoa will say that they have nothing growing, and this pushes her to think to agree to the Governor's proposal. Offer her your help. Go to bed.
The next morning, pick up a piece of land from the garden.
Go out into the city and go back to the territory of the house. You will see that Samoa is already on the street. You can safely enter the house and turn right towards Lasha's room. Go into the room, take the key with which you can open the cabinet in the kitchen. From there take the wooden trap.
Go to the fallen satellite. Collect blue flowers and fruits on the tree along the way. Also set a trap between the minks of gophers so that they get into it while they run from one mink to another.
When you reach the satellite crash site, put the selected earth in the analyzer to find out the reason why nothing grows on it.
Having understood the essence of the problem, go back to the city. Go to the store where you previously received products. Before entering the store, collect the fruits growing on the tree, and also use the fruit to lure the parrot that is sitting there.
In the store, return the parrot in a cage.
Talk to the seller and check him on the availability of the necessary chemicals. He will say that he has them in stock. But since you don't have the money to pay for them, the seller will offer to bring him some items: flowers, fruits and meat (two gophers).
After receiving the necessary ingredients, return home. In the courtyard of the house on the right, pick all the blue flowers, as well as the yellow flower that was hiding behind them.
Go up to your room in the house and put the ingredients on the table.
Apply the resulting item behind the garden.
The next morning, the Governor will come with a document stating that Samoa must leave the house by tomorrow morning.
Agree to help her.
To begin with, take a large yellow flower that grew in the garden. Then go to the governor's building and go to the judge's right door. We show him Governor's document. But the judge won't help us, because he lost an apple.
Go out to the city square and complete the quest chain:
  • Go to the fruit seller and tell him that we need the apple. Since there is nothing to pay with, the seller will offer to bring a bag of flour;
  • Go to the baker and ask him for flour. The baker doesn't have a flour bag;
  • Go to the tailor and ask him to tie the bag. The tailor doesn't have a needle. Say that we can get it;
  • Go to the blacksmith and ask him to make a needle for us. He will make an igloo for us if we bring him something that he will give to his wife. Give him the flower. Then we get the needle;
  • Give the needle to the tailor, we get a bag;
  • Give the bag to the baker, we get flour;
  • Give the flour to the fruit seller, we get an apple.
Return to the judge and give the apple. He will send us with the document to the librarian.
Go to the library, shows the document. Since the librarian is busy, he cannot make edits to the document, but she will ask you to help.
To the left of the librarian's desk is a cart with books. We take a stack of books from there and take them to the shelves.
The captain says it's too long, but notices a library employee rolling an empty cart. Talk to this employee. During the dialogue, it turns out that he burns books with the word "night" in the book's titles.
Go in the door behind him and approach a large stack of books. Take books until we find one with the right word. Take the book to our cart, tell the employee that there is a job for him there. He will notice the right book and take the cart away. Roll an empty cart to the librarian.
After seeing that the work is done, the librarian makes edits to the documents. With the document go to Samoa.
Next comes the cut scene in court. You can agree to marry Samoa when she offers, or refuse her. The ending will not change from this.
Fenton Perth Planet. part 2
To achieve this ending, you do not need to solve the problem with the earth.
After talking to Samoa over dinner, we find out that her husband kept some kind of diary.
To get the diary, you still need to go into Lasha's room, take the key and open the locker in the kitchen. Ttake the diary from the locker. In the diary we will find a ticket from the library. Take it.
While the librarian is looking for the necessary things for us, go to the seller from whom you bought products for Samoa.
There's a statue in his shop that we need.
To begin with, take the products for Samoa. Next, open the faucet so that the water flows to the floor. While the seller is wiping the floor, remove the bell above the front door. Exit the store.
Wait until the seller goes outside and go back to the store. Pull down the lever to open the roof window. Exit the store.
Go to the library. Upon entering the building, the librarian will say that all the necessary things are in the archive. Take the key from the librarian of the building (to the left of the table).
Go home, give the products to Samoa.
Before going to bed, set an alarm clock that will stand on the windowsill. The alarm must be set for midnight.
When you wake up, go to the seller who has a statue. Climb the stairs, open the window and climb inside. Lower the hook to the statue. Open the hatch and go down. Attach the lid of the statue to the hook, lift the bell over the door and go outside.
Climb the ladder again and lift the hook.
You go down to the store again and pick up the statue.
Then your way lies to the library. Open it with a key and go to the archive.
There will be a board there. Interact the statue with this board. Read all the notes.
After reading, it is necessary to open the lattice, which is located on the right between the books. There will be another statue behind the lattice.
With both statues, go outside and go to the wooden chicken coop that stands to the left of the library.
Interact with statues with each other. A button will appear on the wall. Press it.
The elevator will take you to the underground laboratory. On one of the panels that controls the weather, take the keys.
At this point, you will be caught by the governor's assistant. After a dialogue with him, he will give you the key to the elevator.
Don't rush out. Pay attention to the large white panel on the right. Open it with the keys you took before. There was a power-off button hidden under it. Press it and exit the lab


The whole way and all the actions are exactly the same as in the previous ShutDown ending, but you don't need to press the button. Just get out of the lab.
Lyme Planet
In general, according to the plot, you arrive on this planet for getting a pass to fly through the space gate.
Getting the pass will be possible only through completing a quest chain that starts with a Rouge sitting in the King K. Bar.
After talking to the bartender, he will say that the Rouge is sitting in the far corner of the bar. Approach him and accept tasks from him in order to talk to his boss.


The First Task
Need to deliver the package to the customer in Tower 65


After receiving the package from the Rouge, open the inventory and unpack the package.
Next, go to Tower 65 and interact with sugar boxes that stand next to the kitchen. You will get a packet of sugar. In the inventory, interact with the sugar wrapper from the packaging and give the package to the customer.


The Second Task

In the second task, you need to get acquainted with three characters and figure out which of them is an undercover cop.
Recommendation: when you communicate with a merchant on the street, buy a listening device and a fake necklace. You'll need them.


Undercover Cop (Corbant) stands not far from the alley, to the left of the main entrance to Tower 65.
Go into the alley and put a listening device. Talk to Corbant, tell him that about robbery . After this information, he will go to the alley. Follow him. In the alley you will see that he is talking on the phone, but when he notices you, he will stop the conversation and leave. Pick up the device and go to the Rouge with the information.


Do all the same, but after recording his conversation in the alley, talk to Corbant and tell him that you know that he is an undercover cop and he needs to go away, because in any case you will tell the Rouge about him.


The Third Task

In the third task, need to steal a device from a scientist who will stop at Tower 65.
You will also be given a spy device that will help in the future.

Enter Tower 65 and watch the cut-scene in which the scientist is standing with luggage at the entrance and waiting for bellboy to take his things to the room. And since Bellboy is not at the hotel, it's time to get a job.
Approach the receptionist and say that you want to work as a bellboy. You will get a uniform for. After that, interact with the luggage.
In a small cut scene, you will see how the scientist takes the device out of the bag and puts it on the bedside table. After a short dialogue, he will give you some credits and you will leave his room.
Go into the central room and interact with the bed. Under the bed you will find a connector to which you can connect a spy device.
Use it to shine through the left and right rooms. In the right room you will see an old lady who sat down to take a nap. In the left room you will see our scientist sitting in front of the TV. Remember the number above his door.
Leave the room and go into the old lady's room. There will be a casket next to it, in which the necklace is located. Take it.
Next, go up to the fourth floor. Here you will see a cleaner being scanned by a flying droid. The cleaner's inventory also falls under the scan.
Remember telling you to buy a fake necklace on the street? So, interact with the cleaner's inventory with a fake necklace and open the red door. A droid will arrive, spot the stolen necklace, and the cleaner will be fired.
After that, it will be possible to change bellboy's job to a cleaner's job. Go up to the fourth floor, open the closet with a key and take the sleeping pills.
After that, go down to the reception and retrain from a cleaner to a cook.
Then go into the kitchen and do only what the chef says (cut the onion twice, cut the potatoes twice). When you get to the pan with chocolate, mix a sleeping pill in there and you can go out.
Choose Bellboy's job again, go up to the third floor and enter the central room.
Order food through the intercom and ask for chocolate fondue to be brought. Specify the number of the scientist's room. The flying droid will deliver the food, and as soon as the scientist passes out, you can go into his room. Take a small key from him.


Take the device from the bedside table and give it to the Rouge.


Take the device from the bedside table, open the bags with a key and take out the model of the device from there. You need to give exactly the model to the Rouge.


Leave the device on the bedside table in place. Just take the model from the bag and give it to the Rouge.


Boss's Apartment
After completing three Rouge's tasks, he will give you a pass to the floor where the Boss is located. Agree to get a bomb and detonate it at an Expo on Pi Planet.


After accepting the offer, the Boss's man will go to the elevator, who will say that he is a member of the resistance. He needs to find the coordinates of one person who can reprogram the bomb to explode the Space Gate.
To do this, lift back to the floor, disassemble the bomb in the inventory, interact with the panel twice to the left of the elevator and use the battery. This will turn off the light in the Boss's office, which will allow you to go in there and pick up the notebook from the table. Go out into the lobby of the elevator, read a notebook to find out the combination of the safe. Go back to the office and go to the safe. Open it with the combination and take everything that was in the safe. Leave the office and go down to the first floor.


On the first floor of the hotel, tell a member of the resistance that you have the coordinates (you can get them from the safe). Go by rail, which is from below, to the third location. After the cut scene and dialogues, you will get a modified bomb.


It is necessary to complete a quest to kill a Yuppinheimer, which can be taken on the Pi Planet
Follow the instructions that will be sent on your tab. The quest is quite simple.

Pay attention to the fact that the train wagons that travel on Golden Rail have numbering


Selling devices
Need to sell the real necklace that you stole from the old lady. The NPC who will buy is sitting at the railway below.


It is necessary to sell the powder that you substituted for sugar in the first task from the Rouge


Need to sell a listening device
Prison
This location is easy enough to miss.
It is located in the second sector just above the planets Pi and Lyme.
Flying into this area, you will fall under a beam that turns off all electronics on the ship. There's nothing you can do about it.
Then you will be sent to prison for a period of 25 days.


It is necessary to serve the entire term in full. It is enough to lie down on the bed and choose the option "until the end of the term".


On the first day, go to the gym and communicate with the prisoner who is standing near the blue balls. Talk to him and agree to play Floatball.
He will agree to play if we bet with cigarettes.
Go back and go to bed.
Wake up the next day, call a food delivery droid. Ask him for cigarettes. He will agree to give them to us if we can surprise him. Agree to the offer, take the food from him.
Do not eat the issued substance!
Call a medical droid and ask him to tell us the number. But since the algorithms don't allow him to do it right now, he gives a hint that he can do it if we get sick.
To do this, go to bed for two days. During this time, the food will already be spoiled.
Eat it and call a medical droid. While we are being treated, we will find out the required number.
Call the delivery droid, tell him the number, get cigarettes.
Then we go to the gym and agree to the game. It is necessary to score a goal three times.
Having won, you will get a homemade tool. Return to the camera and unscrew the screw from the panel using a tool.
After this action, you will see a small cut scene where one prisoner is being moved.
Now it is necessary to feed the prisoner from cell No. 4 to the prisoner in cell No. 3.
There are switches for this in our camera.
Now you need to move the chip from camera control to ventilation control.
Next, communicate with the prisoner and ask him for a battery.
Go to bed.
The next day we go back to the gym and play Floatball again. This time, as a prize, there will be a bracelet in which you can insert a chip. Return to the cell.
Insert the chip into the bracelet and get out of the camera.
Now you need to fly past the turret and hide behind the generator, which will become unusable after several hits.
Take your things and get out of prison.


All actions are almost the same as in the previous ending, until the moment when you get the battery.
This battery must be inserted into a special connector on the camera control panel.
After that, the prisoner's cell will return, and you will release from prison.
Pi Planet
You will get to this planet on a task from the Boss.
It is necessary to get to the Expo and destroy the device that is going to be demonstrated.
After landing on the planet, go to the central building. There will be a small greenhouse in the building. Agree to the tour, and during the conversation accept the offer to commit sabotage at the Expo. When you are already going out, you will be given an item that will need to be attached to the demonstration device.


Expo
After entering the Expo building, first disassemble the bomb and put the battery in the boxes that are on the right on the wall.
Go through the detector.
When you find yourself in the exhibition center, you need to find a battery. To do this, approach the contestant with teddy bears. There is a panel nearby in which you need to enter the number of balls in the glass tube. The correct answer is 295.
Get a bear and take the battery out of it. Make a bomb.
To the right of all the contestants, you will see a bunch of boxes and an employee who takes these boxes to the backstage. Take one of them and stuff a bomb into it. Give the box to the employee, wait until he takes it and click on the detonator.


If you accepted the task in the greenhouse in the central building, then you need to act as follows:
  • Take pills from the demonstration table from the first contestant
  • The third contestant should be asked to demonstrate how his device works. After the demonstration, you will see that this cube appeared at the fourth demonstrator.
  • Approach the fourth demonstrator. During the dialogue, offer him to change the name of the stand and the logo. After that, the jury will approach him and move his device behind the scenes
  • Go back to the third demonstrator and ask him to personally test his invention. Being In the device take the pills that you took earlier
  • You will find yourself on the stage. Break the device.
  • Come out from behind the scenes, go up to the VIP-room, watch the demonstration.


Here it is enough just to go up to the VIP-room and watch the demonstration. It is not necessary to spoil the device.


If you talked in the greenhouse in the central building, you will get the coordinates of the headquarters, which is located on the planet.
It is necessary to land at these coordinates, talk to the leader and accept the task of eliminating the scientist on the planet Lyme
Space Gate
After completing the task of disabling the device at the Expo (by blowing it up with a bomb or damaging it with a device obtained in the greenhouse), while in orbit of the planet, you will receive a message that you now have a pass to fly through the space gate.
Go to the space gate, check in and fly through the Gate


To obtain this ending, it is necessary to modify the bomb.
Arrive at the space gate and check in.
Next, you need to go to the baggage area. From the registration point, you need to go to the left end of the location. Apply the key card on the door and go to the baggage area.
You can see two scanners here. The first scanner works to check the compliance of the baggage weight and the barcode. You need to stop the tape when baggage 7 kg weights passes through the first scanner. After that, you tear off the barcode and paste it on the modified bomb. Lower it into the compartment and start the tape. After our parcel has approached the second scanner, turn off the tape and turn it on again. This will allow to pass through the second scanner, since it does not turn on immediately.
Watch the cut scene.
Earth
Need to land on the Earth with an energy cell to complete your mission and defeat the General.
Conclusion
If you want to make a remark or additions, noticed any errors, then let me know in the comments.

Me apologize for broken english.

That's all! Thank you!

17 Comments
SlavaDog 5 Dec, 2022 @ 5:47am 
@CrazyRushin 5765 или 7565
SlavaDog 5 Dec, 2022 @ 5:46am 
how to mine first point on the grey moon?
CrazyRushn 20 Sep, 2022 @ 1:52am 
Ребят,подскажите пароль от первой каюты корабля
я нашел 3 из 4 клочка бумаги с цифрами,подозреваю,пароль состоит из этих цифр:lunar2020ratinablanket:
John McClane  [author] 18 Sep, 2022 @ 10:46am 
@Shadow, check the endings "Got headquater location" and "Sabotage"
Shadow 17 Sep, 2022 @ 9:50pm 
so how do i get the device in the greenhouse to damage the pi project so i can go to through the space gate without using the bomb because the bomb gets rid of all the progress towards the good guy achievment?
Puddleglum 22 Jul, 2022 @ 1:21pm 
Nevermind, it was something missing from the guide but it wasn't too tough to figure out. You have to enter No. 15 and pull the lever to lure the alien over there first. I should have thought of that sooner :)
Puddleglum 22 Jul, 2022 @ 1:06pm 
On VL-624 no matter what I do when I go to the lever in lab 12 the alien gets me. If I exit the lab immediately, the dialogue to choose Umix or Prod to go to the lever does not activate. Is this a bug, a mistake in the guide, or something I am completely overlooking?
John McClane  [author] 18 Jun, 2022 @ 10:11am 
@Corot Dev, Umix and Engineer are on different planets
Umix & Prod - VL-624
Engineer - Desert Planet
fýrine 18 Jun, 2022 @ 8:09am 
I think you made an error on the 200 days achievement, because you say
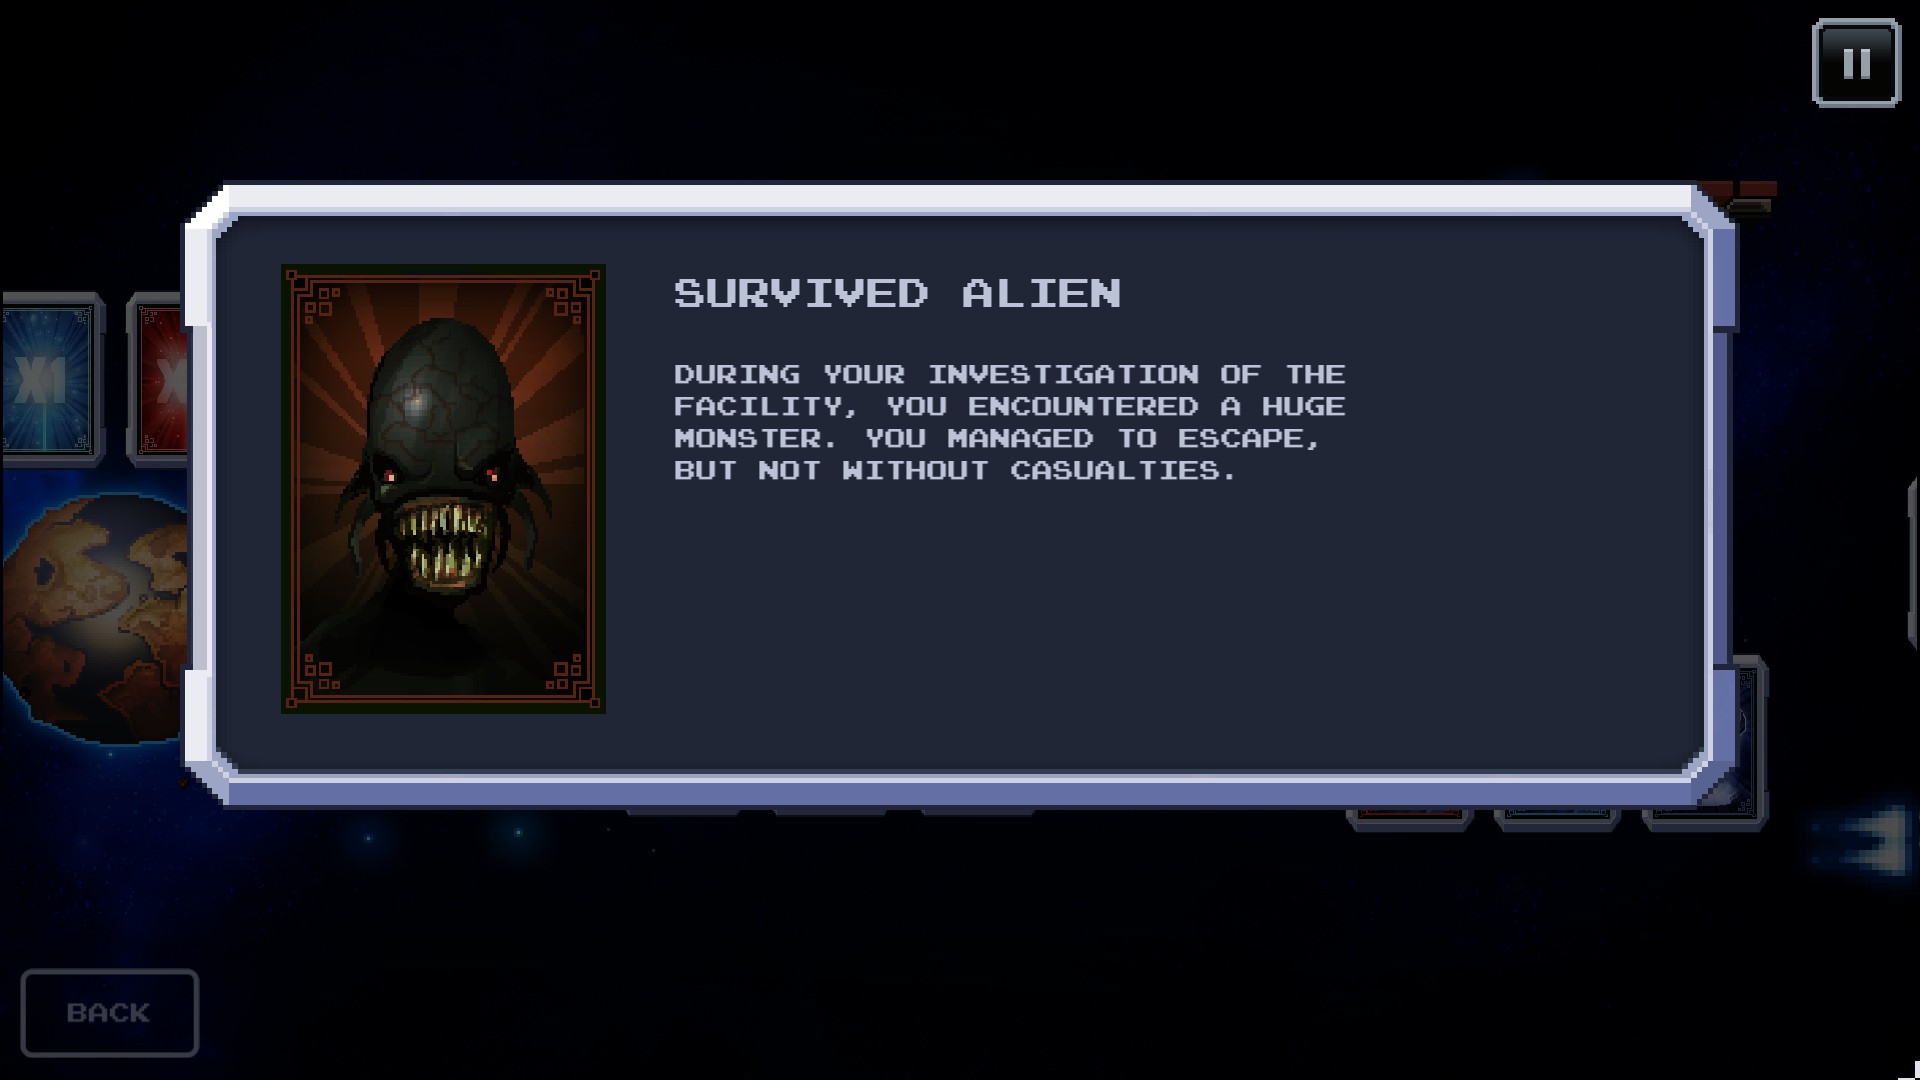
"Rescue Umix on the Planet VL-624 (I think, this is not necessary, 'cause it does not play any role)
Explore the crash site, the coordinates of which were provided by the engineer"
BUT IF YOU CHOOSE UMIX then you are locked out of choosing the engineer and so you can either get umix or the engineer, and ONLY if you choose the engineer are you provided with the bulkidius' coordinates
John McClane  [author] 15 Apr, 2022 @ 5:57am 
@1410c, capisce!