Carrier Command 2

Carrier Command 2

113 ratings
Update 1.3 - Starter Guide (PvE) [Up to date]
By Max and 1 collaborators
All-inclusive starter guide on how the game works, including gameplay recommendations on an unmodded campaign.
9
4
2
4
2
   
Award
Favorite
Favorited
Unfavorite
Starting Out
Beginning your journey shouldn't be too difficult. First-time players should select the Campaign mode for a little help getting started, but things covered in the tutorial will also be talked about a bit later in the guide.

The game fully supports gamepad controllers as well as the standard MKB setup; I've played 100% with an Xbox gamepad and all functions are available.

In order to host a multiplayer game, you will need to decide whether to load an existing save or create a new one. Note that PvP games can only be started NEW under the multiplayer menu, and not generated out of an existing single-player game, campaign or custom.

Selecting loadout options will provide you with some additional chassis and armaments, but for the full experience your first time, I recommend using the default settings. More experienced players might want to increase the base security of islands to 2 or 3, and use the "complete" starting loadout.


There's now a companion video series on YouTube, just in case that would be easier for you to follow than this written guide.
One is more of an organic explanation, while the other is a long read-through of every item in the game as it currently is (1.3.x, at the time of recording in early June, 2022).
Inventory Management (Operation, Co-op)
More detailed inventory recommendations will be near the end of the guide. This section will teach you how to make sure you manage your inventory correctly.
This section assumes you are playing solo or with friends against the AI.

You will start at a warehouse island. It is mostly advisable to empty this island out before you leave for faraway lands on your conquest, as the warehouse cannot be restocked.

To do this, you will make use of your first barge. Barges are very durable and quick (they can match the carrier's top speed of 90 knots) and have infinite fuel. For this section, you'll be using this console:


You want the big screens on the left and right for now.

There are three menus: stock, map, and barges.
The stock menu shows you all available equipment, from ammo to fuel, and how much is where. Each column is for something different. From left to right: the amount of something stored on islands (for now, this is just your warehouse), the amount you want brought to you (this can exceed what's in storage, and it probably should in many cases), the amount "in-transit" that is loaded on a barge, and the amount you have on your carrier right now.
The map menu is where you'll check islands you haven't captured to see what they produce or what blueprints they unlock (if you hover over them), where your barges are, and where you'll select islands to give them production orders. You'll also select barges from here to tell them where to go to pick up resources before returning to you.
Finally, the barges menu is an overview of all barges you have, their status between idle or working, and their distance from your carrier.

Select your only barge, then hit "Waypoints." The barge should blink white, but nothing's happened yet. Click and drag (hold A an Xbox gamepad and use the thumbstick) to connect the barge to the warehouse island. You can then click and drag from the WAREHOUSE to your carrier, and then from the carrier BACK to the warehouse. This will show a repeating icon on the route, so you can see that the barge will now repeat this action until you tell it to stop.

PLEASE NOTE: Any barge will not load items from an island you have not ordered. Make sure you place orders for things first in the stock menu, even if you order more than you have available. This will ensure that barges actually load up the things you want and bring them to you.

Finally, to have an island produce something, you select the island itself and choose from the available blueprints. For now, with just your warehouse, you can only produce Needlefish; naval units like these are very expensive, and they'll be explained in detail later... But they give us a good example! Needlefish cost thousands of credits and take 180 seconds (3 minutes) to produce at your warehouse. You'll see costs and production times like these on other islands you capture later.

Island types are:
Warehouses, which have the home symbol. They produce naval units as of version 1.2
Fuel islands, which have a gas pump symbol. They only make fuel, but they are VITAL
Barge islands, with a double-sized arrow symbol to make more barges for easier transport
Small munitions, which produce things like 20mm to 160mm ammo
Large munitions, for things like torpedoes, cruise missiles, rockets
Turret islands, which create guns for your aerial and surface units of varying types
Auxiliary islands, where you can make things like spare fuel tanks or radar units and cameras
and finally Aerial and Surface chassis islands to produce your units.
Power and Helm (Operation)


Your next two stations, I'll cover together, since the first one isn't so complex.
To even get started, you needed to flip the main breaker and launch the carrier. Hopefully you got that far without me, but just in case, every time you start a game you'll need to visit the front-left console and press the button with the flashing red light for the main breaker. After that, visit the helm (where the wheel is) and select a screen to hit the "launch carrier" button.

The power seat is one you hopefully won't sit in very often. From here you will prioritize what sections of the ship to repair and repairs take quite a bit of power. If you don't visit this console to order repairs, they'll happen passively but VERY slowly.
You can monitor the power more closely without sitting in the chair from here:

As long as a bar is green, good, it's got enough power. Trying to move the carrier with all the weapons on will hamstring your speed (all weapons armed, radar on, full throttle is about 45 knots, but just the radar and engine will give you twice that speed).

If you're in transit to a new island and you're sure you're safe, feel free to flip the weapons button on the breaker to crank up the engine to maximum.


Next, the helm. There's a lot more going on here than you might initially think. I'll go over each screen from top left to bottom right.
The first screen you'll see shows your speed and what propulsion you're currently powering with the engine. If you're not moving and haven't set anything yet, you may not see much. This screen will also show you what's going on with your flight deck; it will beep when units change from a holding pattern (queued), landing, on taxi, etc. This is important to note, as if you try to launch or land fixed wing aircraft on rough seas, they're likely to crash! Try to take note of your movement and help out your aerial units so they safely take off or land.

The second screen shows how your carrier is sitting in the water, such as pitch or roll, as well as your heading in degrees. Dead north is 360/0, east is 90, south is 180, west is 270, and of course everything in between. You have buttons next to the wheel to set the carrier to "maintain heading" so it can sort of drive itself in the direction you want it to go while you, say, go manage your inventory or give orders to units while the carrier is on the move.

The third screen you may have noticed while it was all red and beeping angrily at you. It's your depth indicator, and it will warn you if you're about to beach your carrier. The carrier can and will become irreversibly stuck on land if you beach it, so listen for that thing and be careful.

The final three screens are all maps. If you select one and click (or hit A) you can mess with the display a bit. I recommend turning on island names and team colors. From there, I personally have the left screen show wind, the middle show depth, and the right show current. Wind informs the captain about the conditions some air units might need to fight with, depth with max zoom will help the captain avoid sand-bars and position the carrier, and the current will help you find what side of an island you want to sit on so the carrier stays nice and still for accurate fire and safe landings.

You can use the reverse or side thruster buttons to switch your movement mode to counteract the current too, but that should take some practice.
Weapons (Operation)
On to weapons:


For starters, you may want to just turn everything on (pull all the red switches) to see the full display. Once you're more familiar with the game, you might end up turning off certain stations instead of hitting the weapon breaker, but that's a preference thing.

From left to right, you will arm:
Two anti-air missile pods. They reload slowly and lock on automatically. If you ever hear them beep, it's a good idea to fire at least one BEFORE you check what it's locking on to. They display lock percentage (the likelihood the missile will hit the target) and ammo.
Four CIWS gun turrets. These are anti-air and anti-missile chainguns that use your 20mm ammo stores to lock onto and eliminate missiles and air units that get too close (about 850m). Keep in mind that they WON'T be able to shoot down fast moving ROCKETS which can be very deadly to your carrier as a result. Try and use those AA missiles to splash your enemy before they fire anything at you.
A flare gun to help you light up dark islands at night. This can help you spot units like turrets that have no headlights at night, for example. It can also help a little with cutting through heavy fog or rainfall, although those are too uncommon in an unmodded game.
The carrier main gun and cruise missile launcher. These are long-range, highly powerful weapons that require something to spot for them; you can't use them manually. The main gun uses 160mm shells and ALWAYS fires 5 in a burst (assuming it has at least 5 loaded, of course). The carrier cruise missiles are laser guided and can travel almost 20km! If you can safely fly a scout aircraft to an adjacent island, try and call in a carrier cruise missile on their hanger (I'll explain how this works in a bit).
Finally, your torpedoes (bottom right) and your countermeasures (top right, overhead). The torpedoes will have a lengthy explanation later, but for now just know that they're your sniper-cannon-esque weapon against ships you pick up on radar, and countermeasures can be launched to thwart enemy torpedoes as a last resort, since those torpedo pods of yours can also fire "noisemakers" as decoys.

This console also displays your radar screen, which defaults to 5000m, but can be changed to 2000m or 10000m as well. The green line is the direction your carrier is facing, and the red line is the bearing of your torpedo pods (more on this later). Green icons are friendly, red ones are the enemy. A red triangle is a detected aerial unit, and a dot is a naval unit.

Finally, from here you can access the scope (under the radar screen), which you can use to scan for targets from the top of the carrier's observation tower. You may not use this too often, but don't forget it's there!
Units (Operation)
Our final console is this one on the back right:

You'll be spending a lot of time here, and there's a lot to explain about the controls, so let's get started.

First off, on the left, both above and below, you've got controls for some lights. It's mostly cosmetic while in co-op, but you can activate them if you like.

Next, across the top, we have the log, air traffic report, CCTV, and elevator indicator.
The log shows things like enemies destroyed, allied units down, islands captured or lost, players joined, and information related to those things. It will display the team of these items as well, such as "0" for neutral units, and typically "2" for the enemy carrier's units, while "1" is most often your team number unless you're in PvP.
The air traffic report shows all units queued to return to the carrier and their status such as fuel and relative location. The big ring is for fixed wing craft, and the line off the back of the carrier is for rotary craft. Land units don't have such a queue, since they move in and out of your well dock at the bottom of the ship and out into the water as amphibious craft.
The CCTV is a bit of a novelty. It shows a pixelated display of what's going on in your hanger bay, both the aerial section and surface section. You can watch the crane move from here and watch units pull in or leave - or you can hop on the lift just outside your observation room and go see for yourself, perhaps.
The elevator indicator is just a display of whether the elevator is moving, if there's something on it, etc.

Now, the big one. Along the bottom we have a few things, from left to right.
First, a vehicle control screen. You have three of those, but this first one on the left next to the lights might be the one you use most often if you're solo or the captain of the ship.
The eight green lights you see in the picture are your surface bays. For you, all the lights may not be on, as all the bays might not be loaded.
Then we have another vehicle control screen.
Then the aerial unit lights.
Another control screen.
And the crane indicator.

You can launch units without issuing a particular order to them by pressing the corresponding bay button - but there's a better way... And here we go.

The vehicle control screen, any of the three, is where you'll issue orders to your units - set waypoints, connect waypoints for repeating patrol routes, adjust the desired altitude of an air unit as it moves between these points, tell units to attack enemies for you, set units to follow one another or interact, and see their status.
It is also where you can hop directly into their camera... And even take direct control of each one. There are some limitations, but I'll go over all of this later in greater detail along with my recommendations.

The operating of this station with finesse will be the difference between an island capture taking over an hour, or less than ten minutes.
Units and Inventory Management (Operation)
We're going to return to the first set of screens again:


You've used the two large ones on the sides, but now we want to focus on the two in between.

These are your 16 unit bays, to be filled with either a surface or air chassis (you can have 8 surface and 8 air in total maximum). If you select a bay, you can fill it with a chassis, then you can select the hard-points on said chassis to give it a loadout.

Be aware that as of 1.2, units recently taken out of storage and placed in a bay have 1 HP, no fuel, and no ammo. If you want them to be ready for the next mission, be sure to manage what you want on deck in advance.

Now back to the screen on the far right:


You could hit the big green buttons to launch your prepared units with no orders.
But instead of that, try and select your carrier. You'll be able to see your prepared units, their loadout, and if you select one you can now issue it an order before it even launches. For more detailed instructions on issuing orders, see the later section.
Holomap
One last station to mention:


The holomap is useful to track unit movement and see some details about, say, the depth of the water near an island you're attacking. The picture shows the default cartographic mode, but I almost always have this set to display depth.

The holomap can display the path a unit has taken, which can be useful to make sure a target is or is not moving (firing artillery or torpedoes at a moving target reduces your chance to hit, of course).

The map can also display things like torpedoes in travel - and bullets being fired, if you're zoomed in enough. If you get surprised by an AA unit on an island and you're quick, you might be able to look at the holomap to see where the shots came from. Monitoring the overall situation from the holomap can give one an excellent idea of the full picture - but the holomap can't control anything on its own. If you have a full crew, perhaps have the captain man this console while the ship is stationary and the other members of the crew are issuing orders to units.
Inventory (Recommendations)
Here's where things get a bit more on the side of preference. I'm going to list each piece of equipment, provide a brief description, and give you a "target value" you'll want to carry as a result. Those values are BACK-UP values, and do not take into account what I have equipped, but I'll list that at the end, too.

At the end of these sections, I'll also post a strip of code you can input to a save file to alter the inventory to these values.

Lastly, keep in mind that this game has some exploits with the weight system. It is possible to have your carrier near 100%, then take some of your units out of their ready bays to push it over 100%. After that point, all weight checks stop and you have infinite inventory size. I say this so you can either avoid the exploit, or use it to your advantage depending on your preference. Personally, I avoid that kind of thing.
Inventory (Small Munitions)
  • Flares
    Recommended amount: 200
    Range: Unknown
    These are used for two things: IR Countermeasure flare launchers, and the carrier flare launcher. IRCs will help throw off IR and AA missiles targeting a unit of yours, and can be automatically deployed by the AI. Flares from the carrier light up dark or low-visibility islands, such as during the night or a bad storm.
  • 20mm
    Recommended amount: 40,000
    Range: 850m (CIWS)
    This ammo is used by a lot of things. CIWS on the carrier and surface units, and aircraft chainguns. You burn through it QUICKLY too, if you use these armaments often like I do. Each bullet is 1kg, so 40000kg out of your 1,000,000 might seem substantial, but I just like to be able to fire away without worry, so I recommend carrying a lot of it.
  • 100mm
    Recommended amount: 500
    Range: 800m? (Battle), 1250m (Heavy)
    These shells will be fired by Bears equipped with either the Battle Cannon or Heavy Cannon. More on those later, but having a healthy stock of these is a good idea.
  • 120mm
    Recommended amount: 500
    Range: 5000m
    Exclusively used by the Artillery Cannon on a Bear, these are a good replacement for the carrier main gun in that they can be fired one at a time from a different location.
  • 160mm
    Recommended amount: 500
    Range: 5000m
    Your most powerful direct weapon, these are fired from the carrier main gun. Unlike the artillery cannon and its 120mm shells, the main gun will only arch its shots exactly as necessary to hit a target. The 120mm shells come straight down. You fire these in bursts of 5, unless not fully loaded.
  • Sonic
    Recommended amount: 50
    Range: 200m?
    This ammo is only used by a sonic pulse generator aux unit, and it can't be used by the AI. They're strong for what their purpose is, but not usually necessary. Only one shot is carried per generator.
  • Smoke
    Recommended amount: 100
    Range: Unknown
    As of 1.1.4, two shots of these could hide a unit from the AI's lock on. An aux unit for smoke can carry 16 uses, so 200 units will give you plenty of wiggle room for their use. An explosive launcher carries 16 shots, while the stream launcher carries only 4 (if I remember right).
  • 40mm
    Recommended amount: 6000
    Range: Don't remember, need to review and post
    Again, a lightweight ammo, like they all are. These are better than 30mm in every way. As soon as possible, switch over. Only used on Seals and Walrus 40mm cannons, carrying 150 rounds.
  • 30mm
    Recommended amount: 0
    Range: Don't remember, need to review and post
    See above. Only useful at the very beginning of the game.
Inventory (Large Munitions)
  • Light bomb (L-UGB)
    Recommended amount: 20
    Range: Varies by speed and altitude
    Small, unguided bombs with a small blast radius. These do more damage than a torpedo on a direct hit, and wipe out an NDL with a single strike. Turrets and SWDs survive. CIWS no longer shoot down incoming bombs (confirmed test as of 5/18/2022).
  • Medium bomb (M-UGB)
    Recommended amount: 10
    Range: Varies
    A bit bigger, more damage, bigger boom. Turrets and SWDs are destroyed in a single hit. CIWS no longer shoot down incoming bombs (confirmed test as of 5/18/2022).
  • Heavy bomb (H-UGB)
    Recommended amount: 0
    Range: Varies
    As big as they get. Overkill on anything but a carrier, equal in power and weight to a CRRM! CIWS no longer shoot down incoming bombs (confirmed test as of 5/18/2022).
  • IR Missile (IRM)Recommended amount: 20
    Range: 5000m
    These are used in surface IR turrets and in aerial unit payloads. The surface version is completely unreliable and regularly ignores your locked target to fire at something else. The aerial payload is more reliable, but still sometimes has this behavior. Mostly useful in an emergency or with 4 on a Manta you fly out and bomb a Swordfish with. You don't need many of these on hand.
  • Laser-guided Missile (LGM)
    Recommended amount: 40
    Range: 5000m
    Best loaded on an Albatross for whoever's manning the gimbal to use to pick off isolated targets. More on their use later, but they do the same damage as an IR missile, so they have their uses.
  • Anti-Air Missile (AAM)
    Recommended amount: 100
    Range: 5000)
    Your carrier fires these for defense, and you can load them on an aerial unit as well. The sheer number of them is, like with 20mm ammo, so you can use them without reserve and never worry you'll run out.
  • Carrier Cruise Missile (CRRM)
    Recommended amount: 32
    Range: ~20000m
    These are fired exclusively from the carrier on demand from the main scope or another unit's camera. They are slow moving, laser guided, and EXTREMELY long range by comparison to any other weapon. They're a bit heavy, but the enormous boom is worth it. Keep these on hand to blast enemy hangers or harass a carrier at a distance. They won't make it through even a single CIWS turret, but if the enemy has no AA, they're helpless before a CRRM.
  • Rocket (RKT)
    Recommended amount: 500
    Range: Varies
    Recently nerfed in this update, rockets are no longer pin-point accurate, especially at long rage. If you can get up close, they fire quickly, and you can carry 19 per RKL pod you equip to an air unit. They're significantly lighter than missiles (IRMs are 1000kg, RKTs 50kg; you can carry 20 RKTs for a single IRM), and they do just as much damage. If you're good at flying aircraft manually, or if you've got some rotaries like Razorbills or Petrels, these can clean house. Very useful, carry lots.
  • Torpedo
    Recommended amount: 32
    Range: 40m/s, max timer is 990sec, expire after 10mins. Total range is about 63600m
    You always want to stay on top of your stock of torpedoes. They are your main weapon against enemy ships, and you often want to fire them from as far away as possible (10km is ideal) so the enemy doesn't detect you or your units first. More on their use later.
  • TV-guided Missile (TVM)
    Recommended amount: 0
    Range: 5000m
    These weigh twice as much as an IRM or LGM, do the same damage, and pretty much kidnap you while you pilot it as they can't be fired by the AI. I avoid using them, since there's always a better option, and you can't fly them under a CIWS curtain like I was hoping.
  • Noisemakers
    Recommended amount: 12
    Range: Varies by timer, higher is better
    Keep a few of these handy, just in case. They're decoys for enemy torpedoes. Post 1.2, and now also 1.3, these are much more handy than they used to be, since the enemy navy now uses torpedoes more often.
  • Countermeasures
    Recommended amount: 12
    Range: 200m?
    Same as above. Instead of acting as a decoy, however, these turn off lock on for torpedoes completely if they're in range. You still need to move your carrier out of the way to dodge, so they're a last resort. Drop one, hit full throttle, and pray.
Inventory (Turrets)
  • 30mm Cannon (0) - As stated above, best to switch these to 40mm ASAP
  • Chaingun (8) - These can be very strong in the right hands, and rotaries with them equipped can make strong passes at enemy units even while automated. Keep them handy.
  • Rocket Pod (RKL) (6) - Inaccurate at long range, but carries a lot of ammo and reloads extremely fast. Close range, oppressive firepower at its finest.
  • CIWS (3) - These are placed on a Walrus or Seal. You only need a few in reserve, and you should take care to make sure they're well escorted in the field, since they can't defend themselves against other surface units.
  • IR Turret (3) - Powerful indirect fire, but they tend to shoot whatever they feel like, even when manually controlled. Still, in a pinch, they can be useful, so keep a few replacements handy.
  • Flare Launcher (20) - These are very useful to have on hand and equipped on units you don't want to lose to random missile fire. The AI will use them if threatened, too, so you don't need to worry about whether they'll fire off or not. Make sure you have some units with these on, and keep some in inventory too.
  • Battle Cannon (2) - These turrets are heavy, but they are very strong. They carry 100mm ammo, 40 shells, and reload more quickly than the Heavy Cannon. You may want to zoom in, and mind your range-finder on the bottom of the screen, but they can be strong in the right hands. The AI, however, has a tendency to blow themselves and even their allies up with it due to the firing arc, so take care when employing them autonomously.
  • Artillery Cannon (2) - Unable to be controlled directly by the player (people were using them as direct fire weapons and they are WAY too strong for that) these fire 120mm shells with a very high arc to the shot. Once you call it in, prepare to wait ten seconds for it to come back down. Best used on enemy turret emplacements, since those don't move... But if you're creative with a Petrel's lift equipment, maybe you'll find a use versus naval units, too, if you can sneak into range.
  • 40mm Cannon (3) - These fire faster and hit harder than the 30mm gun. Carry these over the 30mm whenever possible.
  • Heavy Cannon (2) - While they don't reload as fast as the Battle Cannon does, these fire straighter and can OHK a Seal or Walrus on a direct hit. The AI are better at using them than the Battle Cannon, too, with reduced risk of self-termination or friendly fire... However, the AI will also try to use them to fire over hills at targets just out of sight. While this is possible, and funny when it works, it also means they waste ammo fairly often. Same with the Battle Cannon, just be careful about leaving these in the hands of the AI.
Inventory (Aux and Fuel)
  • Observation Camera (0) - These are a MAIN armament on a surface chassis that can serve the same purpose as a gimbal camera. Almost completely useless. Avoid.
  • Gimbal Camera (8) - These are a unique armament on Petrel, Albatross, and Manta chassis. With my setup, I have 8 equipped, so I hold 8 in reserve. They are the keystone of the entire game; scout aircraft will be how you spot enemy units of all kinds, scan to see what their main weapon is, mark targets on the map, and call in support from your carrier or fleet. A critical item.
  • Actuated Camera (0) - These fill the aux slot on surface chassis, and are unable to call for support or scan targets. Only useful in PvP for multiple players to see the same thing. Avoid.
  • AWACS (2) - A special aux piece that only the Manta can use. This thing functions exactly like the carrier's own radar; it detects and marks all naval and aerial units in range. It cannot SCAN these units, so you may want someone watching the console while the AWACS scouts for targets at extreme long range. Careful not to let your Manta fly too close to an enemy island or naval unit!
  • Fuel Tank (4) - The wiki is incorrect about this, but their function has yet to be fully tested. Some people say these are just 100L of fuel. If you look at the wiki, that means 4 of them would give an Albatross a 50% boost in up-time... Which is abysmal for their weight. Others say it doubles the fuel of a unit, which would be incredibly useful and worth sacrificing a payload slot for. I keep some on hand just in case, but I haven't sat down to confirm their effectiveness yet.
  • Radar (0) - Ground version of AWACS and carrier radar. Completely useless.
  • Sonic Pulse Gen (10) - These units CANNOT be activated autonomously; they REQUIRE player activation. That might sound like it makes them useless, but their effect is powerful: all explosives that enter about a 200m range during the few seconds the sonic pulse is active will detonate early. It is an incredibly useful last resort for surface units, and if you can't fly air units well it can save them too. Each one can only hold a single charge, so make them count!
  • Smoke Launchers (4) - Take your pick on these, it's mostly preference. Apparently, two clouds of smoke is enough to hide units from the AI, but I haven't gotten the chance to test just yet. I tested a single cloud, got no result, and assumed they were useless against the AI. I might update the guide on my findings later.
  • Virus Modules (10) - These are how you capture islands. Need I say more? You have the blueprint by default, so once you capture any aux island, be sure to get a small stockpile. You should never have a virus bot in danger, so you shouldn't need spares. Try to only perform your landing ops after you've confirmed the area is clear.

Fuel (1000) - Yes, I carry a ton of fuel. No, I don't regret it. Yes, it has become more useful after the update since it needs to feed the carrier, 16 units, and a fleet of Needlefish too.
Inventory (Active Armaments)
Below is my active PvE loadout for S1-S8 and A1-A8. This loudout is best manned with two or three players. With this, you'll see why I recommend the above back-up values. I also make sure to keep back-ups of all chassis in bays, which means I carry 4 Bears, 2 Walrus, and 2 Seals as reserve surface chassis. I also carry 4 Petrel, 2 Albatross, and 2 Manta chassis, and if I can spare the weight I also have 2 Razorbills in reserve for emergencies (twin 20mm makes them surprisingly good anti-air units).
Note that this are just the standing loadouts, and they can be edited with what you have on hand. UGBs of any weight are a viable option now, especially for clearing an island of CIWS units and turrets, so be sure to swap out to fit your needs.

  • S1 - Bear, Artillery Cannon, IR countermeasure, Sonic Pulse Gen
  • S2 - Bear, Heavy Cannon, IRC
  • S3 - Bear, Battle Cannon
  • S4 - Bear, Battle Cannon
  • S5 - Walrus, 40mm
  • S6 - Walrus, IR turret, IRC
  • S7 - Seal, CIWS, SPG, Explosive Smoke Launcher
  • S8 - Seal, Virus Bots, IRC, ESL

  • A1 - Petrel, Gimbal, 1 20mm, 1 RKL, 1 AAM, 1 IRM
  • A2 - Petrel, Gimbal, 1 20mm, 1 RKL, 1 AAM, 1 IRM
  • A3 - Petrel, Gimbal, 1 20mm, 1 RKL, 2 IRM/LGMs
  • A4 - Petrel, Gimbal, 1 20mm, 1 RKL, 2 IRM/LGMs
  • A5 - Albatross, Gimbal, 4 LGMs
  • A6 - Albatross, Gimbal, 4 LGMs
  • A7 - Manta, Gimbal, AWACS, 1 20mm, 1 AAM, 2 RKLs
  • A8 - Manta, Gimbal, AWACS, 1 20mm, 1 RKL, 2 AAMs


S1 is powerful against turrets and naval units if A3/A4 carries it to about 5500m, drops it in calm water, and it swims into the 5000m range. It can be in danger from surface-to-surface IRMs, so it has some countermeasures in place.
S2 has low ammo, but very high firepower vs surface and naval units. In a panic, it can be launched into open water to fire on enemy SWD or NDL, or even the enemy carrier.
S3 and S4 are the main escort units. They are the two most often at risk, so they don't have any aux equipment, but they usually don't need it if S7 is with them like it should be.
S5 is a personal choice. I like the 40mm turret more than the explosive cannons, and I can usually kill off five or six units before S5 is at risk and needs to pull back.
S6 is just for spare IRMs, honestly. We hardly launch the poor thing.
S7 follows other units for cover from surprise IRMs, but is otherwise pretty useless.
S8 is our lander. Usually waits in the water, safe near the carrier, for a Petrel to pick it up and drop it near the target.

A1/A2 are my main go-to units. I typically take direct control of these to start clearing away AA surface units, and before the RKL nerf I could also take on 1 and 2 shield islands alone with just A1.
A3/A4 are scouts with emergency firepower in IRMs or LGMs, depending on what we're dealing with. These are usually our air-lift units, though A1 and A2 can also redirect to such a role if we've used a ground op out of boredom.
A5/A6 are my captain's choice. He uses them at an altitude of about 1100m on a looped patrol over the island we're currently attacking since they're more stable for gimbal use. This also keeps LGMs on station for isolated targets.
A7 is our long range anti-ship Manta. It usually launches if we've somehow got a Swordfish on approach we didn't see on radar ahead of time.
A8 is our anti-air Manta, though it can double as anti-ship in my hands. A8 has pulled us out of the fire on more than one occasion, as AI Manta often carry RKLs that can kill the carrier in one pass. If we somehow didn't kill everything in the enemy hanger before we got close, and one takes off, A8 is our hero. I've had plenty of Ace Combat flashbacks piloting it so far.
Power and Helm (Recommendations)
This one's fairly straightforward:

You should keep all the breakers on at all times, except weapons. You can either do as I do and flip the weapon breaker to quickly divert power to your engine, or you can toggle individual weapon groups at the weapon console instead if you want more control. NEVER turn off your radar, TRUST me.

For the helm, as I mentioned in the previous category discussing it, I keep wind, depth, and current on the three screens respectively so I can make informed decisions quickly. I keep the central screen, set to depth, zoomed way in too so I can get my carrier dangerously close to islands in case I'm bored and want to launch a ground operation.
Weapons (Recommendations)
Considering the fact that most things on this console are automatic... This section is basically just about how to use torpedoes. The next section will cover details on calling in support from the carrier's automated weapon systems.

As a brief note about AA missiles, make sure to fire at least one when they go off BEFORE you check what you're dealing with. The single missile can disrupt your enemy's flight path enough that it has to come around again and fails to land a hit on you, which can give you time to prepare. Otherwise, try to fire while they're on a direct approach or fleeing directly away to give your missiles the best chance to hit.

Torpedoes


You have a few controls over your torpedo tubes. First, NEVER load your torpedoes before you intend to fire them. This console should be mostly used from long range (10km+), so you're in no rush here unless you're wildly shooting at an incoming enemy naval vessel you somehow ignored until it got that close. Try not to let that happen.

Each tube has two black buttons next to it's fire control; one for a torpedo, and one for a noisemaker. These function differently, as I'll explain. The console also has an activation delay and bearing control. The ONLY time your activation delay should be less than 30 is if you are firing torpedoes in a panic off your left or right side at a vessel that is dangerously close.

Offensive torpedoes can be a little confusing to learn to control, but I did the work for you. Follow these steps:
Find out where your target is relative to where your carrier is facing. You can check the radar screen and look for the green line that shows where the carrier is facing, and a red dot to indicate the enemy target. The red line is your torpedo's current bearing setting. Change that to overlap with the red dot - unless you feel you need to account for current instead of setting a longer activation timer.
Once you have your bearing and you know which side of the carrier to fire from, load the torpedoes on that side. It's usually a good idea to load and fire two if you don't know what type of ship you're shooting at. Swordfish require two hits, but a Needlefish only needs one. If you waste a torpedo, at least you still got a kill.
Before you fire, make sure the torpedoes have a clear path to the target from that side of the carrier. If you're too close to an island, or you're trying to fire at a target that happens to be hiding behind a sandbar, you'll just waste torpedoes. Always check the depth near the target and make sure you have a clear lane to fire on.
Make sure your activation timer is correct - at least at 30 seconds - before you fire. The activation timer is important for a few reasons:
  • Torpedoes will ONLY correct to your set bearing for them during this duration.
  • If an allied naval unit is nearby, torpedoes can lock those too! Let them pass safely by your allies by setting a slightly longer timer before the torpedo activates.
  • Torpedoes have a locking angle of about 25 degrees in front of their path. You don't need to be pinpoint accurate - unless you're trying to shoot around an island, which is possible to do with enough practice using the delay and locking angle.
NOW you can fire.

Practice this, and you'll get it down faster and faster until it's second nature, no worries.
Units (Recommendations)
If you saw the above section on my Active Armaments, you should have a decent idea of what I use and why, but not HOW to use them. This section will cover some details on the units. The next one is more about using the consoles for more dexterous operation.

Surface

Surface units, as of 1.1.4 and seemingly also 1.2 (at least so far), are very nearly useless when compared to air units for a LONG list of reasons. Truthfully, you need one Virus Bot Seal, so you can capture islands. That's all. Anything else is for fun... And fun is why I'm here, so here we go.

Seals (SEL) are pretty quick compared to the other two when controlled by the AI. You generally want to load them with CIWS and Virus Bots as long as you have access to Walruses, though, since WLR have more health and armor. WLR are slower in the water, quite noticeably, but when they make landfall with a 40mm gun, they can do some good work on a 1 or 2 shield island, even solo.

Bears are where things get a bit odd and complex. As before in the guide, BERs loaded with a Battle or Heavy Cannon can kill themselves and their allies due to the blast radius of their 100mm shells. This ALSO means they can kill whole groups of enemy surface units in just a few shots, though. If you have a CIWS SEL to send in with them, a squad of BERs is tough to take down as long as they don't take THEMSELVES down.

Aerial

Aerial units are king. The Manta and Albatross can fly great distances before needing to return and refuel (I've had missions that took them almost 100km away), they both hold the gimbal camera that can scan enemy targets and call for support remotely, and their armaments are extremely powerful. All aerial units are, however, quite fragile and easy to destroy, so take care with their use if you don't want to fountain credits into the water behind your ship.

Albatross (ALB) are steady, slow to accelerate and turn, and basically made of cardboard. Launch them on a path away from the ship to an altitude of at least 1050m before bringing them in to scout on a repeating patrol. This should keep them out of range of enemy ground units with CIWS, although we had a SINGLE instance of a Heavy Cannon Bear getting a lucky shot. My captain insists that the 1050-1200 range is best for this strategy, as it allows higher zoom and more accuracy on artillery, carrier gun, and missile strikes.

Razorbills (RZR) are light, agile, and they can carry countermeasures to make safer attack runs on naval vessels when deployed autonomously, but in early game they're only really good for loading up with your huge stock of IR missiles and wiping out a group of Seals. They also can't use a gimbal camera. I've been able to dodge 5 AA missiles in one by rolling left and right at top speed, though, so being so small and swift has its advantages.

Mantas (MNT?) are heavier, faster, and can carry AWACS to scan for aerial and naval targets to a range of 10km in a radius around the craft. They can outrun AA missiles, and if you're a good pilot on manual mode you can also dodge a CIWS turret (just don't push it, the AI has godlike aim; this IS NOT Ace Combat's CIWS AI). These things are perfect for aggressive action under manual control, and even setting them to auto can produce decent results. They can hit double the speed of an ALB too... Just be careful you know what you're doing, or you can crash them pretty easy. Fun fact: the way physics works in the game, you can use the yaw (LB/RB on an Xbox gamepad) to drift with them in midair!

Petrels (PTL?) are much bigger than RZRs, but they have quite a few other capabilities. Unlike RZRs, PTL can't carry countermeasures. Instead, like the Albatross, it has 4 weapon slots and a gimbal camera. Where they really shine, though, is top speed and the ability to air-lift ground units. When flown manually, they can hit 140 knots - but I only ever dodge AA missiles in them if I'm high enough to roll them into a spinning dive at just the right time. Their air-lift function is a bit wonky, too, and you may need to help them straighten out if they get stuck in a loop (they can get stuck endlessly spinning around a unit with the rear of the craft facing the target. How, I'll never know, but getting them unstuck isn't too hard. Confirmed in 1.2 as well).
Issuing Advanced Orders
We once again return to your unit control screens:


While you've got units on the map, try clicking on an empty spot with no unit.


The above screen should appear. What you're seeing are the same map options for the helm, and I'll also recommend turning on team colors and island names at the bottom, but you also see some "Go Codes" too.

Now try clicking a unit and dragging out a waypoint. For best effect, use an air unit like a Razorbill. Make sure the waypoint is a few thousand meters away (check the bottom left to see things like distance and bearing of the waypoint you're about to set) and then click it. You should see the screen below.


This is the Petrel's waypoint screen, but it serves our purpose. You can set the waypoint to be a waiting point on a Go Code, A-D, and your units will hang tight there until you issue the code. Useful for coordinating operations between your units, right?


Ok, so here's ONE example of a complex combination operation. With this as a reference, I hope you'll find your own creative ways. Here we go, step by step:

  • Completely clear an island of all enemies
  • Launch a Seal carrying Virus Bots into calm waters near the island
  • Launch a Petrel to a waypoint a few hundred meters from the Seal
  • FROM THE WAYPOINT drag to the Seal, so the Petrel picks it up instead of following it
  • Wait for the Petrel to start going in for the pickup (the line between it and the Seal will turn cyan)
  • While the Petrel is going for the pick-up, drag from the same waypoint to a spot near the capture point on the island
  • Edit this waypoint to tell the Petrel to "Deploy"
  • Drag from this waypoint to a spot nearby and give it a Go Code (Alpha, for example)
  • From this holding point, drag to the Seal before it gets picked up
  • Wait for the Seal to land, then drag a waypoint from it to a safe spot next to the capture building
  • Edit this waypoint for the Seal to deploy the Virus Bots
  • Drag from this waypoint back to a safe and open place for the Petrel to pick it up again
  • Wait for the Seal to complete its mission and reach this final point
  • Click an empty spot on the map and issue Go Code: Alpha

The Petrel will start to pick up the Seal. From there, once the Seal is attached, you can call the Petrel home and it will deliver the Seal to you as well!

You can do lots of overly complex things like this with the waypoint system.
1.2's Focus - Needlefish
The warehouse can now craft Needlefish with one of four weapons. Although AI Needlefish can carry two armaments, ours can only hold one.

Now hold on
You may think, "But that's lame," or "They're too weak."
Hang tight, because I'm not finished.

Needlefish spawn after 3 minutes of construction near your warehouse island. They can travel up to an hour before they need to refuel with the carrier. Make sure you're in range to pick them up once they start moving. They're also very expensive, and almost impossible to construct early into a new game. All of this is for very good reason: Even a small fleet carries enough firepower to down 2-shield islands at the same time as the main carrier engages another nearby island.

As of 1.2, Needlefish make their own ammo while in range to refuel from the carrier... EXCEPT the Torpedo unit! This is being further tested; for now, torpedoes and CRRMs DO NOT regenerate, and there may be a bug with the inventory count on the other two!
21/3/2022: A more recent update has addressed this as an issue with the inventory screen not updating ammunition count when the NDLs pull from it. NDLs rely on your stores of ammunition like any other vehicle.

An AA NDL is 6000c, a 160mm NDL is 8000c, a torpedo NDL is 10000c, and a CRRM NDL is 12000c.
These ships refuel when near the carrier. If you select one, it will highlight the area around the carrier that is in range, and you can even order them into a refueling distance while the carrier holds still so they navigate around one another automatically.
They reload ammo near the carrier as well.
Finally, they heal themselves, but very, very slowly, regardless of carrier proximity. Mind their HP as you send them on missions.

These NDLs also have formation mechanics.

The formation AI behaves as follows:
Any NDL ordered to follow another naval unit (they can follow the carrier or each other) will attempt to follow at the back left. From there, the next unit would follow at the back right. The third unit would be behind and to the left of the first, #4 is to the back right of #2, etc. They switch left and right in order until a formation is achieved.
But
As you can see in the above image, this can be used to construct your own formations. For example, as above:

AA NDL is given an order to go somewhere. It arrives and waits.
CRRM NDL is told to follow AA NDL, which it does at the back left.
160mm NDL is told to follow AA NDL, which it does at the back right.
Torpedo NDL is told to follow 160mm NDL, which it does to the 160mm NDL's back left - which places it behind the AA NDL, creating a diamond formation.

I think now you can see how useful these simple follow-rules can be.

Furthermore, since these units reload independent of the carrier's weaponry while refueling, they can be incredibly strong while near the carrier by effectively doubling the time before a reload is required (20 shots of 160mm in the carrier, 20 in a nearby NDL). Three units can follow the carrier in refueling range if you use the above rules (#1 and #2 follow carrier, #3 follows #2), and be given effectively infinite ammo while in motion. The 160mm reloads very slowly, as does the CRRM... But the AA and Torpedoes reload much faster. An NDL can fire torpedoes faster than the carrier, as long as it is in range to refuel, for example. Take care; firing too many torpedoes with this method can lag or even crash the game. I usually get 120fps, even in combat - but 40 torpedoes in the water dropped me to 30fps and below.

With the right fleet configuration, and a single scout aircraft, NDLs can attack adjacent islands to the carrier and clean them out on a single pass, clearing the way for a landing operation to capture simultaneous to another island assault. Though this is most likely to work with more than one allied player, an RTS nut could absolutely pull off both at once.


Feb. 23
With further testing, my recommendation for an independent fleet would be:
4 AA, 4 160mm, and 1 or 2 CRRM, escorted by a Manta with 2 20mm on the inner slots and 2 RKLs on the outer for multi-role scouting and defense.
For a fleet to follow the carrier, instead consider only producing 2 160mm and 4 AA. Cruise missiles won't do you much good in close range defense, and the carrier has plenty to defend itself, but extra CIWS after the update can increase your defensive curtain, and the 2 160mm NDLs can reposition to attack the island from different angles to keep your shells from hitting tall cliffs and missing.
Latest Update: 1.3.1 - Various Topics
This section will contain some up to date information on the game as long as I remain active in it.

We'll start with the recent state, 1.2.6, and I'll make new mini-sections from there.


Early April, 2022
Some of the most recent patches have touched on naval combat several times. In 1.2 proper, enemy naval units changed their detection methods and behavior. Previously, as long as no unit closed within 5000m of either the ship (NDL/SWD) or the island they were defending, those naval units would remain still and even ignore incoming torpedoes. In 1.2, this updated to - seemingly - radar range of 10000m, which means that naval units would then dodge and outrun torpedoes at full speed while also perfectly using noisemakers to redirect them. A lot of this has been slightly mitigated, combining into viable naval combat again, but things are more difficult now than before 1.2.

Another change made recently is to the accuracy of RKLs. Previously, you could fire rockets with perfect accuracy - but they could clip through the ground if you fired too close to the ground. Both have changed, so now rockets have a deviation in their initial path you cannot control or predict, but they also properly explode on contact.

AA missiles and torpedoes now also track based on bearing instead of heading, attempting to lead their target and making them hit more reliably unless countered in some way.

Finally, after much testing with allied NDLs, a few things to note.
  • Allied torpedo NDLs cannot use noisemakers like the AI can. All allied NDLs rely on the carrier for anti-torpedo defense, but dodging torpedoes is technically possible if you coordinate with another player on when to turn. Torpedoes will miss if the NDL is traveling at full speed (40kt) straight, and then turns roughly 165 degrees in either direction to juke. This is aided by the torpedo change to attempt to lead the target.
  • A fleet of ships should number 3, 4, 6, 7, 9, 10, and so on. Using the following rules they adhere to can allow for formations of ships with full CIWS coverage and plenty of ammo for remote operations. After the patch to their fuel economy, NDLs can easily capture two islands of 2-shield security or lower while the main carrier captures a 3 or 4-shield island. Torpedo NDLs are useless, and you want enough CIWS NDLs to fully cover the fleet against IR missiles and other aerial threats, but you generally want 2x160mm for every 1 CRRM NDL, using the 160mm for groups, the CRRMs for lone targets - or use your aerial scout (Manta, Albatross, Petrel) to mop up and begin the landing op.
  • When conducting remote operations, a Manta is recommended to use as a scout for the islands the fleet is traveling to. Using AWACS to expose naval threats and air units on taxi, as well as excellent fuel economy makes them perfect at calling in a CRRM on the enemy hanger, then scanning all enemy ground units. After that, the Manta can return to the carrier (careful to avoid the island the carrier is engaged with and any CIWS that might be present there), and a Petrel can launch carrying the Virus Bot unit of your choice.
  • If you have a player in your game that is a skilled enough pilot, a Petrel armed with 4x20mm chainguns is a fantastic mobile turret. Hovering steady 200m or less above the carrier keeps it safe from AAMs thanks to the carrier CIWS while allowing them to mulch any enemy naval unit that's gotten to close. HOWEVER, take care that the enemy CIWS can also fire on the Petrel with impunity, and save your carrier 160mm to finish off enemies that get that close.
  • This one might sound obvious, but just in case: keep in mind that fleet NDLs ALWAYS have their weapons active. You can disable carrier weapons entirely and use your fleet's armaments in their place to give your carrier maximum mobility while retaining your firepower if engaged off the coast of an island. This means you can dodge enemy fire, launch noisemakers and countermeasures as necessary to defend the fleet, and still bombard enemy naval units with 160mm fire. It's even possible, when engaged with an enemy carrier, to take out their fore and aft CIWS with well-placed shots, then use the NDLs' CRRMs to take down a carrier in a naval-only offensive!


Late April, 2022
More about 1.2.6, we've done some bomb testing and here are the results so far:
Light bombs are half the weight of an IRM, but deal more damage on a direct hit. To be specific, it appears that they do MORE damage than a torpedo. When a Swordfish was hit directly with a Light Bomb (hereafter, an L-UGB (Light Un-Guided Bomb)), it was reduced to 25% HP, compared to a torpedo hit that leaves it at about 50%. Needlefish are killed outright. Ground units do not survive direct hits, aside from turrets.
A Meduim Bomb (M-UGB) kills a Swordfish outright on a direct hit. These weigh the same as an IRM at 1000kg, but their greatly increased power means that if you are capable of manual flight, you're better off completely replacing all your IRMs with L-UGBs and M-UGBs.
Heavy Bombs (H-UGB) then, is complete overkill on any singular unit aside from an enemy carrier. We are currently in a game with four enemy AI teams, and we intend to test all these bombs against an enemy carrier as soon as possible. H-UGBs weigh 2000kg, the same as a CRRM, and they also appear to have the same blast radius based on what my crewmates saw (I was the one doing the bombing run, so I can't very well look back while flying a Manta over CIWS turrets).

In short, if you can fly any air chassis manually, I suggest practicing with L- and M-UGBs. I'll update the inventory suggestions at a later date, after the H-UGB tests vs enemy carriers.


Mid May, 2022
Thanks to some recent tests, and the last campaign I did with my fellow crewmates, I have some updates that should be reflected in the guide in above sections.
Bombs are absolutely a more effective strategy than when I started before 1.2, and have even seen some buffs that have gone unnoticed - at least by my crew - until now.
For notation purposes, here're the details I'll be using to update the guide above (some repeat as the late April notes):
  • L-UGBs are half the weight of an IRM/AAM/torpedo, but deal more damage than they do. A single one can kill anything but a SWD or ground turret, and of course the enemy carrier.
  • M-UGBs weigh the same as IRMs, but deal far more damage, especially on direct hits.
  • H-UGBs weigh as much as a CRRM, and seem to equal them in blast radius and damage, but it's hard to test specifics on an enemy carrier during a direct fight. A PvP test-bed has been created to look into this further.
  • CIWS no longer targets UGBs of any kind, but carrier radar still warns that they are incoming, similar to a torpedo warning on the radar. Use on islands for high-altitude bombing runs is now fully recommended to destroy CIWS units!
Special thanks to Steam user "crazy10101" for that last one. We did a quick PvP test and, sure enough, my carrier was struck with two H-UGBs despite CIWS being on, the enemy Manta being on my radar, and on high seas. If the CIWS did acquire a lock, they never got the chance to fire. I also believe this was without a bombing run for the increased speed and travel time of the bombs, since they inherit velocity like RKTs do.
Save Editing (Cheating)
Before you do any of this, make sure you have a back-up copy of your save in case something breaks by accident! This section is NOT up to date with new inventory recommendations as of 5/18/2022!

You will need:

Notepad or Notepad++

Your CTRL+F function


Money

To give yourself more money after starting a game, search your save.xml in the correct slot under \Users\[your username]\AppData\Roaming\Carrier Command 2\saved_games

Once you find the .xml, open it with Notepad/++
CTRL+F and paste in the following: is_destroyed="false" currency=
Find the one that isn't equal to 0. If you pay attention, you'll see the team numbers. For a PvE game, you want the one labeled for team #1. This value should only be equal to 0 if you do this the INSTANT after starting a new game.
Replace the value inside the " with the money you want - just be careful not to go too high. I recommend something like 9 million. Don't add any commas ,


Inventory

I'm just going to paste in the inventory I usually use on the fly. Please see other guides or the wiki on strategywiki.org to learn how to edit the values to your preference.

Search for: <inventory total_weight=
Find the value that isn't equal to 0, and this should be your carrier's inventory
Replace the text below it with the following. Make sure you replace ONLY what is given below, or you can break your save. Be careful!

<q value="0"/>
<q value="4"/>
<q value="4"/>
<q value="8"/>
<q value="4"/>
<q value="4"/>
<q value="0"/>
<q value="8"/>
<q value="0"/>
<q value="0"/>
<q value="8"/>
<q value="8"/>
<q value="3"/>
<q value="3"/>
<q value="0"/>
<q value="0"/>
<q value="0"/>
<q value="40"/>
<q value="40"/>
<q value="100"/>
<q value="0"/>
<q value="0"/>
<q value="8"/>
<q value="0"/>
<q value="4"/>
<q value="4"/>
<q value="20"/>
<q value="4"/>
<q value="3"/>
<q value="32"/>
<q value="500"/>
<q value="200"/>
<q value="40000"/>
<q value="500"/>
<q value="500"/>
<q value="500"/>
<q value="1000"/>
<q value="32"/>
<q value="0"/>
<q value="12"/>
<q value="12"/>
<q value="0"/>
<q value="10"/>
<q value="0"/>
<q value="10"/>
<q value="20"/>
<q value="20"/>
<q value="4"/>
<q value="6000"/>
<q value="3"/>
<q value="10"/>
<q value="0"/>
<q value="0"/>
<q value="0"/>
<q value="0"/>

21 Comments
Pancakes 3 Sep, 2024 @ 9:00am 
This is really helpful. Thank you for making this.
Avi8 26 Oct, 2022 @ 12:35am 
The AI doesn't know how to aim bombs in the slightest. Only use them manually.
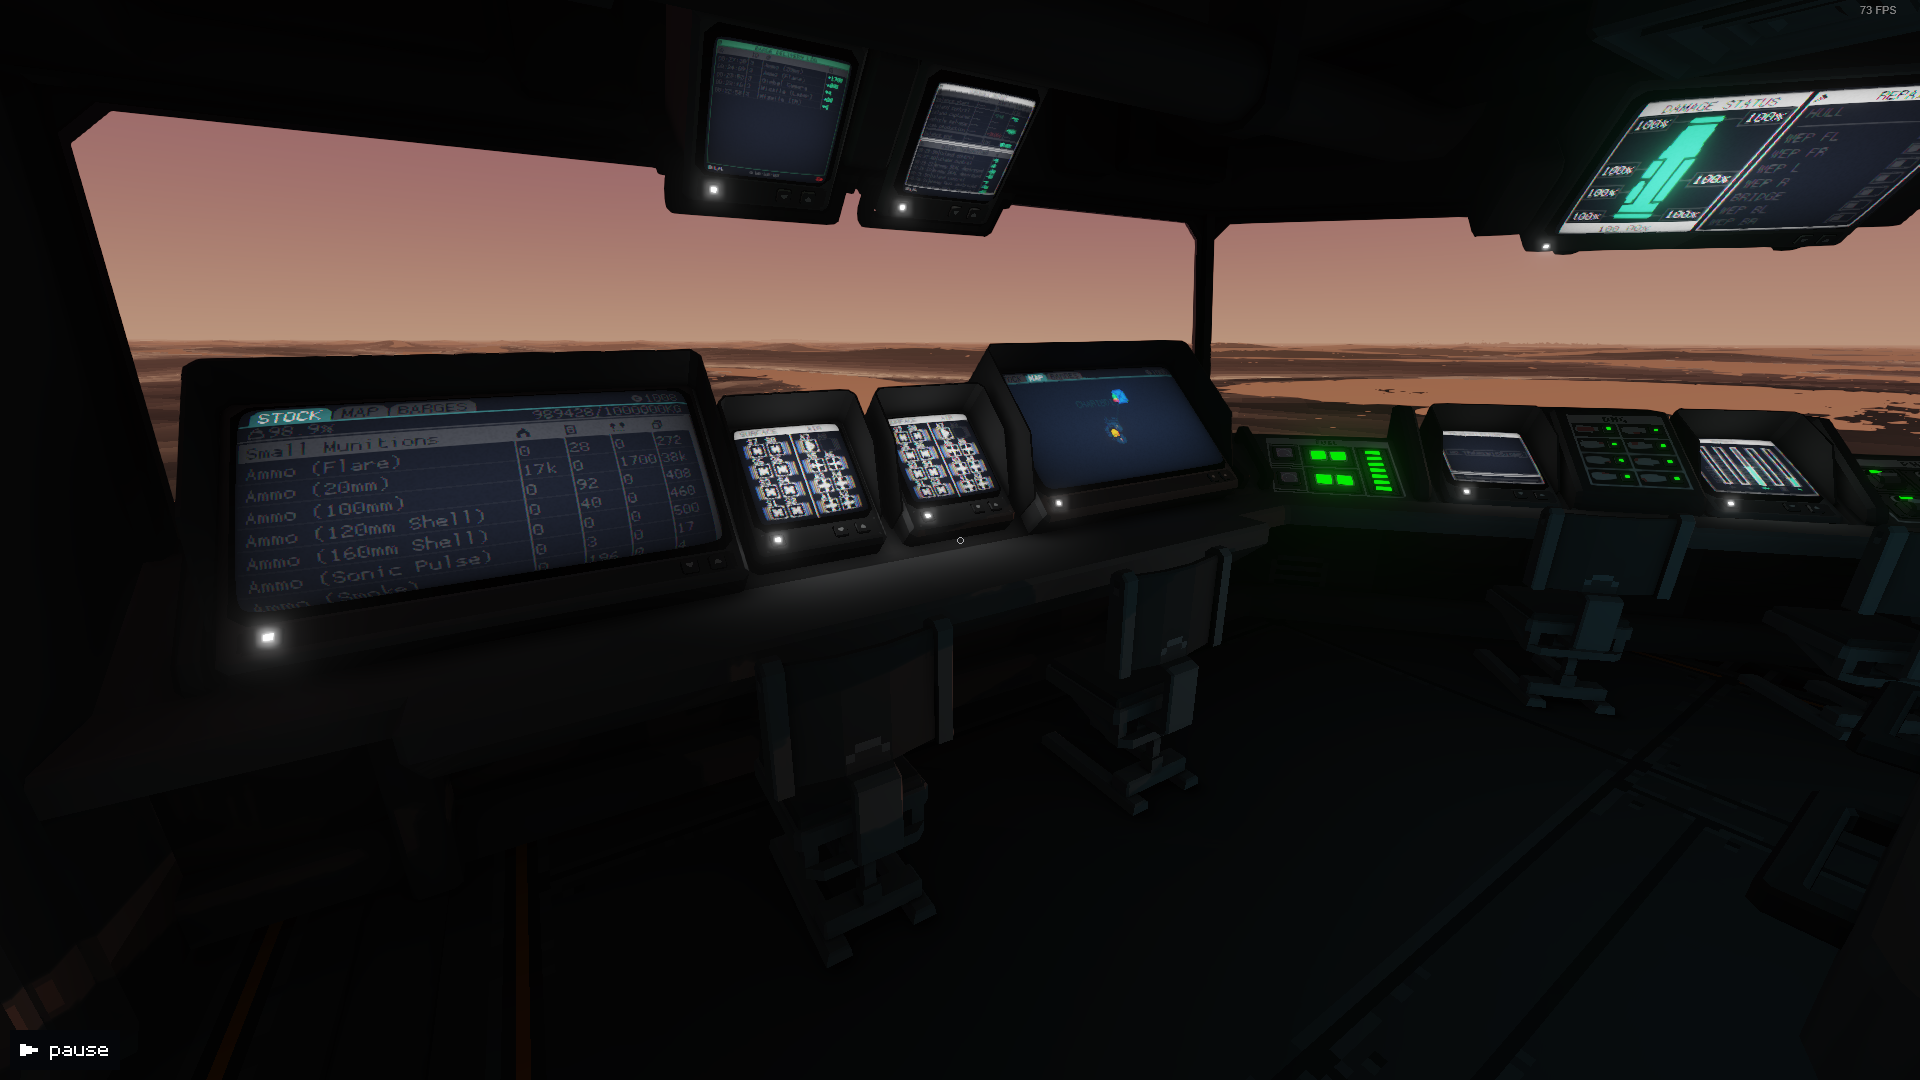
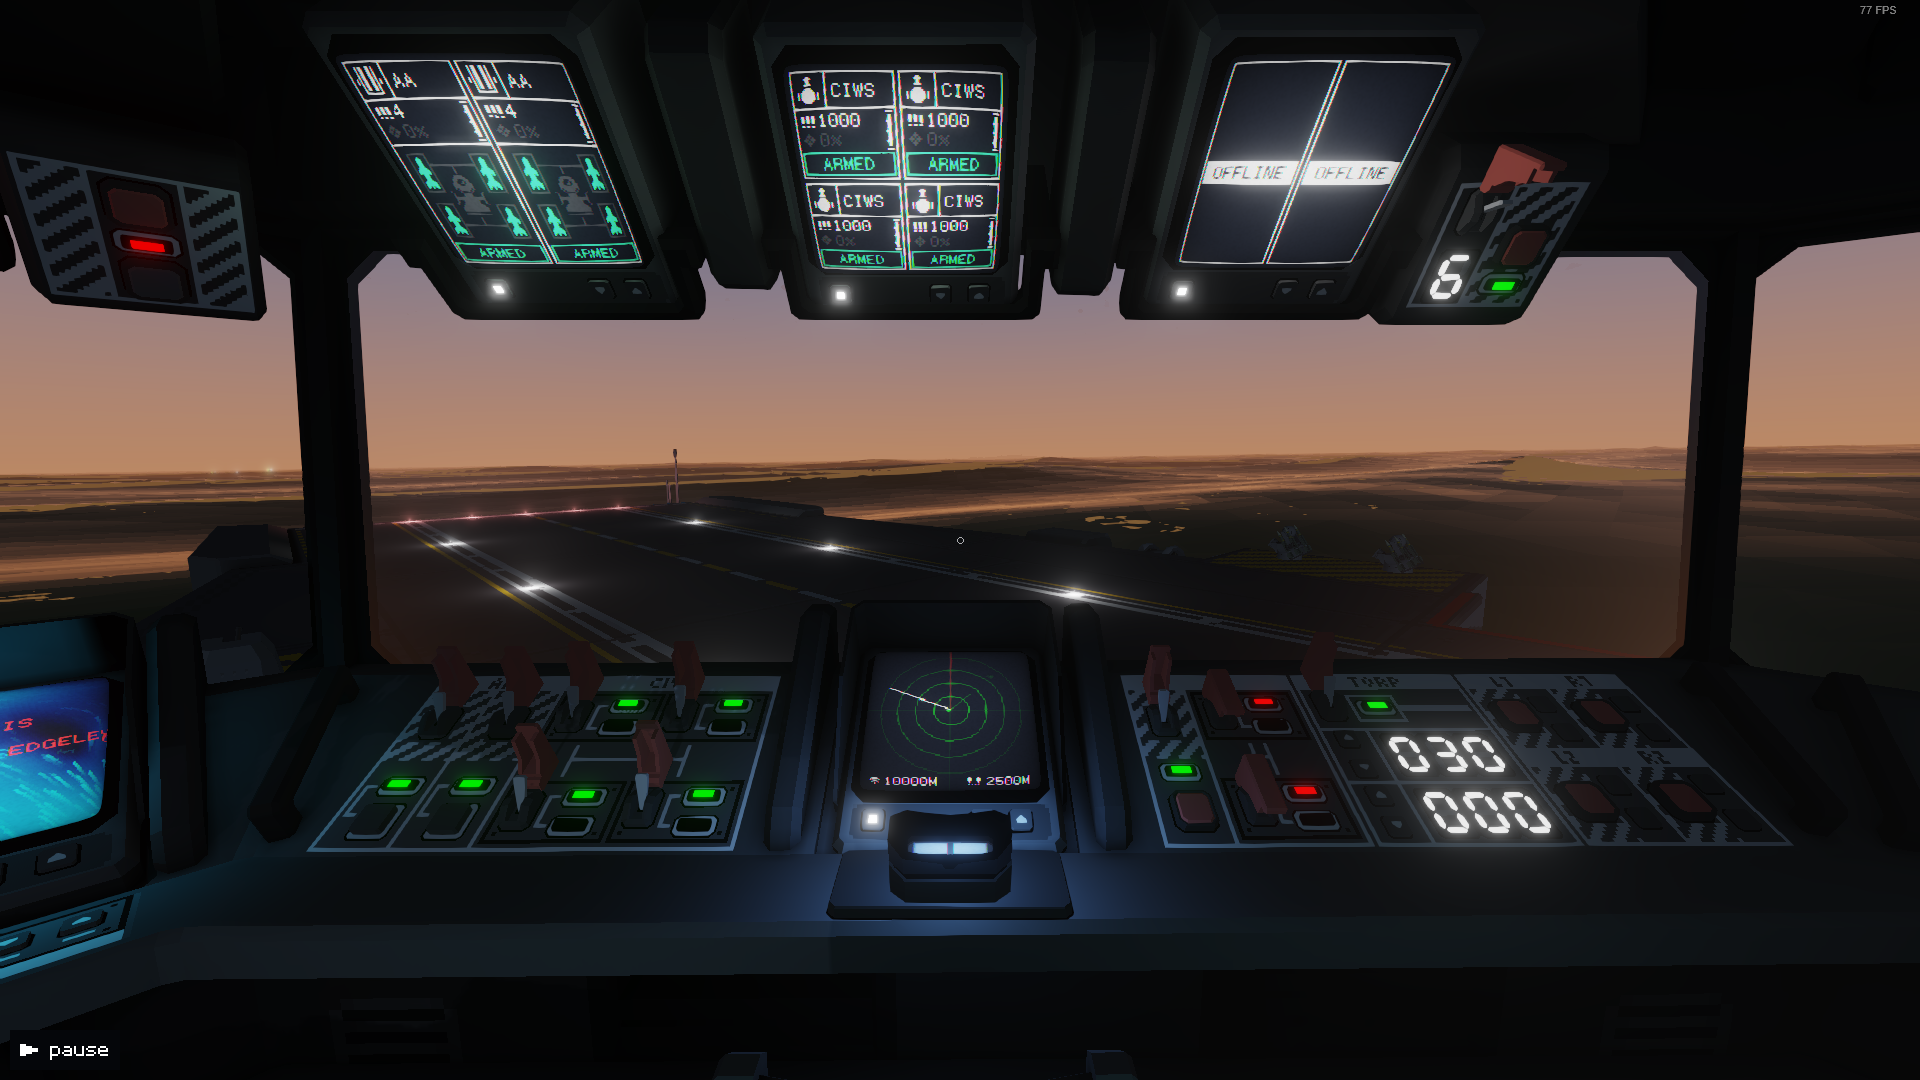
Although CIWS can be manually aimed at ground targets, and also consume 20mm ammo which is devastating on the 20mm autocannon, they are completely useless against those ground targets.
The 100mm cannons can devastate carriers, if one of its Bears doesn't swim up next to you.
Rockets are also devastating against carriers.
IR missiles can be used against aircraft in an emergency, although they won't track as well. I've shot down a Manta while piloting an Albatross with them before.
Iron Dice 19 Jun, 2022 @ 9:56am 
This guide is pure gold. Many thanks for all your hard work on this! Fantastic job, and is really helping me get my head around this odd/cool game.
Max  [author] 2 Jun, 2022 @ 2:41am 
That's what it's there for, @ArchangelBelly , glad it helped. I keep on top of it, there's just been no new developments just yet. Latest major update didn't affect the gameplay at all.
Archangel 2 Jun, 2022 @ 1:19am 
Just wanted to say as a new player this was really helpful at getting me started thank you
Colonel Sanders Lite 22 May, 2022 @ 1:10am 
"but you need to hit just outside the hanger door, front or back. I think there was an unlisted or unintentional nerf to landing a CRRM on the roof of the hanger."

Ah, that could be it! Here I was thinking cruise missiles got nerfed so hard that they just kinda suck now. Maybe we can say that it's not that cruise missiles got nerfed, but those hangers got seriously reinforced! Definitely give this crucial little piece of info a mention.

While it's true that it's not a huge deal that the medium bombs can't take out turrets, it's still important to give valid advice to new players. A guy might not have access to 120 or 160 mm and is needing to blast a super annoying cheeze whiz turret. In my own testing, I found heavy bombs to be *really* nice for the job. Sometimes, a well placed heavy can nail 3 turrets in one shot.
Max  [author] 21 May, 2022 @ 9:56pm 
About H-UGBs: I could swear we killed turrets with one M., but if not, no big deal. Better to use 120mm on them anyway, but I'll run more tests to be sure.
About CRRMs: TVMs are pretty awful in my experience, provided you can manually pilot aerial units. CRRMs can and will destroy everything in a hanger - my crew does this habitually - but you need to hit just outside the hanger door, front or back. I think there was an unlisted or unintentional nerf to landing a CRRM on the roof of the hanger.
About the AI: You're right, AI can't aim bombs for anything. Bombs are pretty much exclusively useful for pilots capable of manual flight.
Colonel Sanders Lite 21 May, 2022 @ 12:30pm 
Oh, one more note -
I was trying to see how accurate the AI is with bombs. As far as I can tell, the AI just can't aim them correctly at all. It's so bad that they're almost lucky to even hit the island, much less hit their target. If they manage to hit something with them, it's pure unadulterated dumb luck.
Colonel Sanders Lite 21 May, 2022 @ 11:09am 
1/2
After a lot of tries and several direct hits (I think), I don't think single medium bombs can one-shot a turret. Heavy bombs definitely do though.

I also want to say that I'm seeing a lot of buzz about using cruise missiles to paste enemy hangers around the net, including in this guide. I suspect that this is dated info and their blast radius got nerfed. With several tries, I'm finding that I can only get one, *maybe* two, aircraft in the hanger with a cruise missile strike. Perhaps I'm mistaken and I'm just doing something wrong though.
Colonel Sanders Lite 21 May, 2022 @ 11:09am 
2/2
Regardless, I'm finding TV missiles to do a great job at pasting hangers. Just set up your aircraft to stand off from the hanger at about 4,000 yards, fire a tv missile, and fly it right in through the door to the middle of their hanger. BOOM! In my experience, it reliably takes out all the aircraft in there. Just like cruise missiles, it's vulnerable to enemy cheeze whiz though. On the plus side, you can often direct the missile around such defenses in a manner that's impracticable with cruise missiles. There's also a big benefit to be had in that it's *way* faster than a long range cruise missile shot.