Neverwinter

Neverwinter

150 ratings
Neverwinter | Guide For A New Level 20 (Mod 23 "Dragonslayer")
By Frost
Have you reached level 20 and don't know what to do next? This guide has you covered! This guide covers the early to mid-game of Neverwinter.
7
5
2
4
2
7
3
2
   
Award
Favorite
Favorited
Unfavorite
Introduction
Hiya adventurers! I am Luna Winter, Devout Cleric proudly part of The Neverwinter Nine guild and the Gutbusters Brigade alliance. I picked Neverwinter up in 2020 and have been playing since. As of writing this guide, my main is 67k (as of Mod 22) and I have completed all of the games content but Crown of Keldegonn, Tower of the Mad Mage, and Zariel's Challenge (Master). All three of which I am geared for.

One of Neverwinter's biggest problems is that the Mod 22 introduction and levelling experience leave you feeling overwhelmed with content. So my goal is to hopefully help give you the guidance on your next steps while trying to remain unbiased where I can. If you like or dislike this guide, please give me a rating at the top of this page! Every vote helps.

For this guide, I played through a Paladin named "Star in the Night" for the screenshots. These images are compressed by Steam, so can be a little hard to read.

Using This Guide
Every system in Neverwinter is connected in some way, so structuring this guide in Steam's linear format is difficult. I've chosen to focus on the order I feel makes sense for a new player to follow. Feel free to pick and choose what you read.

Neverwinter's a complicated game and no one is expecting you to understand it all immediately. Work at your own pace! Learn things as you go and enjoy your time playing. That's the most important thing. If something is incorrect or you feel you need more information about it, feel free to leave a comment. I'll read it and I can update the guide.

I'm A Returning Player, What Do I Do?
Everyone is different. There are returning players from Mod 18 who were maxed out then that will have an easy time of adjusting. Others, especially from before Mod 16 (Undermountain) will have a lot more to work out. Regardless of your position, I would still follow this guide as if you were a new player and tackle the game again. A few things to note:
  • Max level is now 20. You no longer gain experience but gain levels through quests. All characters made before Mod 21 are now max rank. Still run through these adventures to gain valuable items.
  • Enchantments have had a big rework. Any enchantments you had equipped will be sent to your mail. Retrieve them and go to the Antiquities Scholar at the top of Protector's Enclave to turn them in for new enchantments. Go to the Sage Shop near the bank to buy rank 1 enchantments.
  • Statistics and hard/soft caps have been completely reworked. Certain pieces of old gear are still valuable, especially anything that gives a % boost to a stat. Keep what you can until you get your bearings again.
  • The game is in a period of reworking old systems. Lots of guides will be out of date. Make sure you check recent ones (Mod 19+ or 2021+, and Mod 22 for enchantment guides) when looking at builds and the like.

Mod 23 Update When?
I'll be updating this guide soon. I have a solid grasp of the Dragon Hunt system, but there's lots of details I'm still working out. Important update details to note:
  • No major systems have been changed.
  • With the quality of the Seal of the North/Wild Gear, you can probably get away with skipping grinding Master Expeditions fairly easily.
  • Similarly, if you have a group who can support you, the Dragon Hunts wouldn't be out of reach for even a mid-tier player. You could reasonably avoid some NVOS ring grinding depending on your desired build.
  • Loot drop rate is noticeably better!
Overview, Item Level, and Unlocking Content
First up, I want to give an overview on how Neverwinter's content works for those of you who are a little lost. Item level is a rough gauge of how well geared a character is. The higher the item level, the better a player is. Or that's how it's meant to work. Instead there are a few quirks with how item level and stats are calculated that add a bit of nuance here. I'll discuss the specifics of statistics and item level in the "Gearing Your Character" section.

⠀⠀⠀⠀⠀⠀⠀⠀⠀⠀    Above: Star in the Night's Character Sheet

The journey to level 20 and the Undermountain campaign will give you enough item level to unlock 75% of the game. You need the following item level to unlock each campaign/random queue. Some content unlocked relatively early (like the dragon hunts) wont be achievable until you reach a higher item level.

Private queuing dungeons and trials reduce the required item level by up to 5,000. Most groups will private queue all but the Random Queues, which can't be queued this way.

Item Level
Content
18,000:
Young Dragon Hunt
20,000:
Random Skirmish Queue, All Skirmishes, Undermountain (Adventure), Adult Dragon Hunt
21,000:
Dread Ring (Campaign), Storm King's Thunder (Campaign), Icewind Dale (Campaign)
22,000:
The Cloaked Ascendancy (Campaign), Ancient Dragon Hunt
23,000:
Jungles of Chult (Campaign)
24,000:
Elemental Evil (Adventure), Ravenloft (Campaign)
25,000:
Random Dungeon Queue, All Normal Dungeons
26,000:
The Dwarven King (Adventure), Descent Into Avernus (Campaign)
28,000:
The Maze Engine (Adventure)
30,000:
Random Trial Queue*, Acquisitions Incorporated (Adventure), Path of the Fallen (Campaign), The Infernal Citadel (Dungeon)****, Zariel's Challenge (Trial)
35,000:
Random Advanced Dungeon Queue*, Tyranny of Dragons (Adventure)
40,000:
Sharandar (Campaign), Demogorgon (Trial)***
45,000:
Scaleblight Summit (Adventure), Dragonbone Vale (Campaign), Vault of Stars (Dungeon), Tower of the Mad Mage (Trial)
50,000:
Reaper's Challenge**, Zariel's Challenge Master (Trial)
65,000:
Crown of Keldegonn Master (Trial)
70,000:
Rise of Tiamat Master (Trial)

*All dungeons/trials associated with the RTQ and RADQ are available alongside these queues, though most require an unlock through a campaign or adventure.
**Reaper's Challenge varies in item level every day, but 50,000 is the usual (and highest) requirement.
***As of writing this, the queue for Demogorgon has been disabled
****The Infernal Citadel is locked to private queue
Currency: Astral Diamonds, Zen, Seals, and Trade Bars
Most of this was covered in the levelling experience, but I feel it is always good to cover the basics again. There are heaps of currency in Neverwinter, but only two really matter: Astral Diamonds and Zen. Astral diamonds is the currency you use to buy items from other players through the Auction House (AH). Astral diamonds comes in two forms: rough (known as RAD) and refined astral diamonds (known as AD). You can turn 100,000 RAD into AD every day, which can be done in the Riches tab. I will talk about earning rough astral diamonds later.

Zen is the premium currency of Neverwinter. You can acquire it only two ways: through the Zen-Astral Diamond Exchange (ZAX) or by spending real world money. The ZAX currently has a backlog so it can take the better part of a year to get Zen this way. So for all intents and purposes, you can only get Zen through paying for it. Luckily, you don't 'need' Zen for anything outside VIP.

Seals of the North and Seals of the Wild are two useful early game currency that can be used to boost your item level. You can buy useful shirts/pants and solid entry level gear at Seal Vendors found in every major player hub, such as Protector's Enclave or the Yawning Portal. Seals of the North can be obtained through the Random Trial Queue (RTQ) and the Random Advanced Dungeon Queue (RADQ). Seals of the Wild can be obtained through heroic encounters in Avernus, Vallenhas, and Dragonbone Vale, as well as most high level content.


⠀⠀⠀⠀⠀⠀⠀⠀⠀⠀⠀⠀⠀⠀⠀⠀⠀  Above: Seal Vendor at the Market in Protector's Enclave

Trade bars are the last major currency to become familiar with. Trade bars can be spent at the trade bar vendor for mount and companion upgrade tokens, enchantments, scrolls of life, and many other useful items. You acquire these through dungeon chests or by opening lockboxes.


⠀⠀⠀⠀⠀⠀⠀⠀⠀⠀⠀⠀⠀⠀⠀⠀⠀⠀⠀⠀     Above: Trade Bar Store in Protector's Enclave
First Steps
You have just reached level 20, what do you do? Your first objective should be reaching 35,000 item level. This will unlock almost every campaign for you to work through.

Join an active guild if you can. Ask any questions in the guild or alliance chat. Everyone in this game was in your position at some point, so we're usually happy to help! When you join a high level and established guild, you will get access to three boons, each giving you 1,000 item level. Be sure to equip them in your Boons > Guild Stronghold page!

While it's definitely possible to start your own guild (with minimum 4 others), I'd advise against it. It's a massive time and resource sink that will take you years to finish. Joining another's guild allows you to become part of a community who can help you in your journey.


⠀⠀⠀⠀⠀⠀⠀⠀⠀⠀⠀⠀⠀⠀⠀⠀⠀⠀⠀⠀⠀⠀⠀⠀⠀⠀⠀⠀⠀    Above: Guild Boons

You should run the Vault of the Nine quest available from Lord Neverember if you haven't already. You get an artifact that can be claimed on all your characters. Bard, Cleric, Fighter, and Paladin all have useful artifacts depending on your class, but each artifact is still worth using if you don't have four artifacts slotted already.


⠀⠀⠀⠀⠀⠀⠀⠀⠀⠀⠀⠀⠀⠀⠀⠀⠀       Above: Vault of the Nine Quest from Lord Neverember

Make sure you are running the Random Skirmish Queue and the Random Dungeon Queue at least once per day for the bonus rough astral diamonds as these will be super useful later. You can access the queue through the 'K' key by default, or otherwise clicking on the second circle from the left on the top bar.

See "Earning Astral Diamonds" for more ways to earn them.


⠀⠀⠀⠀⠀⠀⠀⠀⠀⠀⠀⠀⠀⠀⠀⠀⠀⠀⠀⠀⠀⠀⠀⠀⠀⠀⠀⠀⠀  Above: Queue Menu

If you are under 35,000 item level, consider running through the Undermountain adventure. If you are above 35,000, you can instead jump to Avernus, though running through Undermountain will still be helpful to your character.
Undermountain
One you have finished the first few adventures and reached level 20, you should start the Undermountain Adventure. It will run through a series of linear areas, giving you better gear and some nice boons.

You can start this at the table behind Sergeant Knox. The quest is called "An Important Invitation".


⠀⠀⠀⠀⠀⠀⠀⠀⠀⠀⠀⠀⠀⠀⠀⠀⠀⠀⠀⠀   Above: Where to Find "An Important Invitation"

Master Expeditions
After working your way through the Undermountain adventure and spoken to Runemaster Sinyé, you will have access to a quest from Obaya Uday, called "Master Expedition (Three Daily)". As the name suggests, you will be able to run three Master Expeditions daily, giving you various runic etchings that can be handed to Zok, the questionable merchant under the stairs.

In order to get this etching, you need to use a rune, which can be made using resonance acquired from the runic corruption encounters in the various Undermountain regions. 10 resonance will get you one rune. Always run a Master Expedition with at least one rune. Only one player in your party needs to use the rune (they must be party leader), so share the burden with some friends or party up with others.

In Mod 23, the Undermountain and Master Expeditions are less of a factor in the early game than they used to be. Most of the gear here isn't that valuable, but a few pieces like the Trobriand's set and the Arcturia's Music Box artifact do still see use or niche utility in some dungeons and builds. The best part of the Master Expeditions currently is the guaranteed rough astral diamonds, which will definitely help when improving your character.


⠀⠀⠀⠀⠀⠀Above: Runic Heroic Encounters

Items from Master Expeditions
Below are some items to keep an eye out for and can help when building your character.
  • 1,010 Item Level Companion Gear
  • Arcturia's Music Box (Artifact)
  • Ebony Stained Shirt (Shirt)
  • Jhesiyra's Tattered Mantle (Neck)
  • Mugger of the Maze's Braces (Arms)
  • Staff of Flowers (Artifact)
  • Stealer of the Star's Braces (Arms)
  • Stealer of the Star's Hides (Chest)
  • Stealer of the Star's Hood (Head)
  • Trapper of the Twilight Braces (Arms)
  • Trobriand's Condution Cable (Waist)
Continuing the Adventure

⠀⠀⠀⠀⠀⠀⠀⠀⠀⠀⠀⠀⠀⠀⠀⠀⠀⠀⠀⠀⠀⠀⠀⠀  Above: Adventures and Campaigns

Now that you've finished Undermountain, you can continue with the four linear storylines known as adventures. These are Elemental Evil, The Dwarven King, The Maze Engine, and Acquisitons Incorporated. Each should be an hour or two long depending on your gear and reward you with Boons, Armour, Weapons, and some rough astral diamonds.

The gear you get from these adventures are generally not that useful (except the Gallant items from Acquisitons Incorporated, which can be nice). The astral diamonds and the boons are a solid reason to run these adventures however, totalling to 400,000 over these four adventures. More than enough to get started in Neverwinter.

At 35,000 item level, you will be able to undertake the Tyranny of Dragons epic adventure. This rewards a bunch of consumables that are useful when fighting dragons, a boon point, 100,000 rough astral diamonds, and a unique set of cosmetic gear.

The last major adventure is the Scaleblight Summit, a short adventure that rewards 4 boon points, 100,000 rough astral diamonds, and most notably awards a piece of 1400 item level companion gear. This is the highest item level companion gear you can get as of Mod 23, but they have odd stat combinations that make them difficult to fully incorporate in a build.
Early Game (25,000 - 40,000 item level)
So, you've finished Undermountain and the other adventures. You've got your Class Artifact and you've joined a guild with guild boons. What next?

The goal for now is to boost your item level as much as possible. The easiest ways to do this are through Mounts and Companions, Artifacts, and better gear in general. This is what I will focus on for the early game.

Use the Astral Diamonds you earned through the adventures to purchase Epic (purple) or Legendary (orange) mounts/companions. After that, you should focus on earning Astral Diamonds and use these to buy anything that you need.

Early Game consists of the following chapters:
  • Companions and Mounts
  • Artifacts
  • Artifact Gear and Sets (Legacy)
  • Legacy Campaigns
  • Dread Ring
  • Avernus
  • Earning Rough Astral Diamonds
  • Random Dungeons/Trials/Skirmishes
  • Group Content Etiquette
Companions and Mounts
If you ask a player how to improve their item level after getting some entry level gear, most players will tell you to get some mounts and companions. There's a few reasons for this. There are two systems known as your companion bolster and mount bolster that boost your item level significantly. Mounts and companions also give fantastic bonuses that really help in building your character.

Companions
There are three major systems present with companions exclusively: your summoned companion, your companion powers, and your companion gear. Your summoned companion is the one you have in the world, joining you on your adventure. There are two types of summoned companions: augments and combat companions. Augments have no combat capabilities and instead give you bonuses to up to three statistics. They are useful for balancing your stats but offer no combat incentive beyond this. Great for healers and tanks especially. Combat companions are ones that attack, heal, or are engaged in combat in other ways. These are fantastic in battle, but you will need to find other ways to improve your stats. An augment companion will only have the enhancement power, while combat companion will have multiple listings.

⠀⠀⠀⠀⠀⠀⠀⠀⠀⠀       Above: Polar Bear Cub is an Augment, Batiri Runt is a Combat Companion

Each companion comes with an Enhancement Power and an Equip Power. Both of these powers can be equipped without having the companion that gives the bonus summoned. Enhancement powers rely on the rarity of your summoned companion. When your summoned companion is Mythic, they are always have a 7.5% chance on hit to apply a 7.5% debuff to the enemy or 7.5% buff to yourself and your summoned companion. The purple power in the top right of the six powers is your enhancement.

Equip powers, the other five powers you can use, are a little more involved. Each companion gives a power, usually with one or more of the following three types: Offensive, Defensive, and Utility. Three of your five slots must be used on one of each of these types while the other two are universal. Each power gives one or more % bonus, a bonus under certain conditions, or another similar effect. The power is improved as you upgrade the companion that gives that power. Of note is that an equip power will give 750 item level at mythic with 750 combined rating, so they're fantastic on any build. Lot's of good options for companion equip powers and there is a degree of balancing because of the required three types.

⠀⠀⠀⠀⠀⠀⠀⠀⠀⠀⠀⠀⠀⠀⠀⠀⠀⠀⠀⠀⠀⠀⠀⠀⠀⠀⠀⠀⠀Above: Equip Powers

The final major system is the Companion Gear. You can have three slotted at a time. You can get solid companion gear from both Sharandar and the Master Expeditions in Undermountain. These usually offer a big boost in rating to one or two statistics. Use these to balance your stats.

Mounts
There's a lot going on in mounts with the insignias, so I'll cover the stable and the insignias in another section. Instead I want to focus on the Mount Combat Power and the Mount Equip Power. Every mount comes with these two powers and they increase with your mount rarity and your mount bolster (covered later).

You can pick one mount to use the mount power from. This mount doesn't have to be the one in your appearance or the one you use the equip bonus from. Each power has a 1 minute cooldown and gives the team a buff, the enemies a debuff, or deals damage. Upgrading a mount will upgrade its combat power. Notably, a mythic mount power with 100% bolster will give you 3,000 item level (no combined rating). These, like artifacts, are essential in high level content and stacking different powers can really help make dungeons a breeze.

⠀⠀⠀⠀⠀⠀⠀⠀⠀⠀⠀⠀⠀⠀⠀⠀⠀⠀⠀⠀⠀⠀⠀⠀⠀       Above: Mount Combat Powers

Your Mount Equip Power, like your combat power, improves as you upgrade the mount that gives the power and your mount bolster increases. Like companion gear, the equip power is useful mainly for balancing stats. At mythic and 100% bolster, the equip power gives you 3,000 item level (2,700 Combined Rating).

⠀⠀⠀⠀⠀⠀⠀⠀⠀⠀⠀⠀⠀⠀⠀⠀⠀⠀⠀⠀⠀⠀⠀⠀⠀⠀     Above: Mount Equip Powers

Companion and Mount Bolster
The reason is that there are two systems known as your companion bolster and mount bolster. Each system works the same, giving 3,000 item level at 100% companion bolster and 6,000 item level at 100% mount bolster, for a total of 9,000 bonus item level (and the same Combined Rating so its always a gain). Your top 10 mounts and companions count towards your bolster. These mounts/companions aren't necessarily the mounts in your stable or the companions you are using the powers from and just take into account the highest you have on your character.


⠀⠀⠀⠀⠀⠀⠀⠀⠀⠀⠀⠀⠀⠀⠀⠀⠀⠀⠀⠀  Above: Mount and Companion Bolster Location

The amount of bolster you gain from a companion or mount is dependent on the rarity of the companion or mount.
Rarity
Bolster
Common
0.5%
Uncommon
1%
Rare
2%
Epic
3%
Legendary
5%
Mythic
10%

You don't need a high bolster at first (30% is a good start) and it can take a while to get the last 20-30%. The easiest way to get a decent bolster to start with is to use Astral Diamonds to buy epic companions and mounts to take your total to 10. You can only have one of each companion/mount, so you will need 10 unique companions/mounts (I made this mistake early on).

Upgrading Companions and Mounts
Upgrading your mounts and companions is vital for not only your bolster, but the bonuses and powers they provide. It's a long grind and one you will probably focus on in the mid-game (40,000 -> 50,000 item level). To upgrade your companions, you need either Astral Diamonds or Companion Upgrade Tokens. Mounts can only be upgraded through Mount Upgrade Tokens. You need the following amount:
Rarity
Companion (AD)
Companion (Token)
Mount
Common -> Uncommon
50,000
30
10
Uncommon -> Rare
250,000
60
50
Rare -> Epic
500,000
90
100
Epic -> Legendary
1,000,000
120
150
Legendary -> Mythic
1,500,000
150
200

You can get Mount and Companion Upgrade Tokens the following ways:
  • Dungeon and Skirmish Chests
  • Juma Bags (Companion)
  • Limited Time Events
  • Progress Rewards
  • Rage of Bel (Companion)
  • Reaper's Challenge Store
  • Sybella Artis, Legacy Campaign Vendor (Companion)
  • Tarmalune Trade Bar Store
  • Zen Market
Artifacts
Artifacts are a powerful, class-independent ability that you will have access to. There are dozens of artifacts from recent releases to ones that have existed since the early modules. The levelling experience will give you the selection of three artifacts and the Vault of the Nine quest will allow you to obtain a second. You can have four artifacts equipped at a time, one of which is an active artifact you can use. The three you have equipped as secondary artifacts give you their item level and their statistics, but you can't use them in combat like your active one.

Use your artifact often! They can be enough to turn the tide of a battle, especially in solo play. When in a group try and use your artifacts together, especially when they give a bonus such as lowering the targets resistances or increasing your damage dealt against the target.

Upgrading Your Artifacts
Almost all artifacts begin at uncommon rarity and can be improved all the way to mythic. Improving an artifact not only increases its item level and its statistics, but it also reduces the cooldown between uses. Your active artifact should (almost) always be the highest rarity one you have, allowing you to use it more often in combat. Upgrading a passive artifact isn't a priority, but I would recommend upgrading your active up as much as you can.

You can improve an artifact's rarity by right-clicking the item and selecting "Upgrade". See "Upgrading Enchantments" for more information on upgrading, as the system is the same for artifacts.

⠀⠀⠀⠀⠀⠀⠀⠀⠀⠀⠀⠀⠀⠀⠀⠀⠀⠀⠀⠀⠀⠀⠀ Above: Refining an Uncommon Artifact

Artifacts come in two item levels: 600 and 1,200. An artifact with 600 item level is usually one from before Module 21. An artifact with 1,200 item level is usually one released from Module 21 onwards. The item level has no impact on the quality of the artifact and only refers to how much item level and statistics you get by equipping it. Pick your primary artifacts for the effect they have and your secondary artifacts for the statistics they have.

⠀⠀⠀⠀⠀⠀⠀⠀⠀⠀⠀⠀⠀⠀⠀⠀⠀⠀⠀⠀      Above: 600 and 1,200 item level artifacts

Notable Artifacts
Here is a small list of artifacts to look out for. A lot of these can be purchased on the Auction House for Astral Diamonds.

Name
Item Level
Where to Get
Arcturia's Music Box
600
Trade Bar Store or Master Expeditions. See "Undermountain".
Book of Vile Darkness
600
The Infernal Citadel Final Chest.
Charm of the Serpent
600
Tomb of the Nine Gods Final Chest.
Decanter of Atropol Essence
600
Cradle of the Death God Final Chest.
Demogorgon's Reach
1,200
Demogorgon Final Chest.
Erratic Drift Globe
600
Trade Bar Store.
Forgehammer of Gond
600
Wonders of Gond event.
Halaster's Blast Scepter
600
Tower of the Mad Mage Final Chest.
Heart of the [Colour] Dragon
600
Red from Dragonborn Legend Pack, rest are from the Nine Hells Lockbox.
Horn of Valhalla
600
Assault on Svardborg Final Chest*.
Mythallar Fragment
1,200
Dragonbone Vale Campaign.
Refulgent Diamond Pin
600
Shattered Diamonds. See "Vault of Stars (40,000+)".
Sigil of the [Class]
600
Vault of the Nine Quest. See "First Steps".
Soul Sight Crystal
600
Lockbox of the Lost
Sparkling Fey Emblem
600
Vault of Stars Final Chest. See "Vault of Stars (40,000+)".
Staff of Flowers
600
Trade Bar Store.
Sword of Zariel
600
Master Zariel's Challenge Final Chest.
Trobriand's Ring
600
Lair of the Mad Mage Final Chest.
Wyvern-Venom Coated Knives
600
Trade Bar Store.

Tales of Old: Storyteller Journals
If you inspect any late game damage dealer, you will find that they are likely using three of the four Storyteller Journals: Darkened, Envenomed, Flayed, and Frozen. These are powerful artifacts for two reasons: their set bonus and their pages.

Unlike most artifacts, the Storyteller Journals can be improved through pages as well as refining. These pages are small upgrades that give the artifact an additional effect, such as summoning a minion, boosting your damage, increasing your resistances, adding a stacking elemental effect, and many other bonuses. These bonuses mean that a single artifact can activate a multitude of effects.

The pages and the journals are available in the Tales of Old event, which is a rare occurrence. They come back occasionally in the Zen Market, with pages available in the Wondrous Bazaar. These are incredibly expensive, but worth it for late game players. Don't concern yourself with them as a new player. Normal 600 and 1,200 item level artifacts are likely better for you anyway until you hit end game.
Artifact Gear and Sets (Legacy)
Certain items can be improved through refining, like artifacts. These are known as artifact gear and can include weapons, neck, and waist pieces. Most of these items start at uncommon (green) and can be improved up to legendary (orange). Recently, Neverwinter has revisited how artifact gear will work from now on. Legendary/Mythic neck and waist pieces will be the new standard and no new artifact weapons will be released, instead replaced with high item level regular weapons with a set bonus.

Plenty of the old artifact sets still exist and are acquirable through gameplay. Some, like the Apprentice' Spoils set, are still considered great options. Artifact weapons especially will remain powerful for the forseeable future.

Right clicking an artifact neck/waist or weapon will allow you to "upgrade" them, increasing their rarity and item level.

⠀⠀⠀⠀⠀⠀⠀⠀⠀⠀⠀⠀⠀⠀⠀⠀⠀⠀⠀⠀⠀⠀⠀⠀⠀⠀   Above: Upgrading Artifact Gear

Artifact weapons have additional benefits. Main hand and off hand artifacts have a bonus known as an "artifact modification" that you can adjust to suit your playstyle and build. The main hand has one modification boosting an at-will power and the offhand has two modifications, giving a small increase to one stat and a random increase to another stat.

An artifact weapons modifications are random when you acquire them, but you can adjust them using Cubes of Augmentation. These drop in lockboxes or can be purchased through the Wondrous Bazaar and Auction House. It costs four cubes to roll for a new stat, or one cube to reroll the random stats value. Rerolling the random stat will only improve the stat if the new number is higher than your current value. You can use a small amount of astral diamonds to change to any modification you have unlocked on that weapon.

You can modify an artifact weapon's modifications by right clicking the weapon and selecting "manage artifact modifications".

⠀⠀⠀⠀⠀⠀⠀⠀⠀⠀⠀⠀⠀⠀⠀⠀⠀⠀⠀⠀⠀⠀⠀⠀⠀⠀      Above: Artifact Modifications

Set Bonuses
Some gear have a set bonus that grants increased benefits when combining items in a set. You will need two or three items to complete a set and gain these bonuses. If you equip two pieces from a three piece set, you wont gain additional bonuses. Some sets, like the Storyteller Journal Artifacts, gain benefits with two pieces as well as additional benefits with three pieces. Set bonuses are typically on artifact gear but can appear on other regular items such as the Band of Air and Ring of Darkness.

Some of these bonuses are very useful depending on your class and build. For example, the "Watcher" set grants you a 1% bonus to Power, Critical Severity, Critical Strike, and Defense when you enter combat, and an additional 1% bonus for every 5 seconds in combat, up to 5%.

⠀⠀⠀⠀⠀⠀⠀⠀⠀⠀⠀⠀⠀⠀⠀⠀⠀⠀⠀⠀⠀⠀⠀     Above: Red is where the set bonus is

Notable Artifact Sets
Here is a small list of artifact weapons and sets to look out for. Weapon names are dependent on your class:
  • Apocalypse (Apocalypse Choker, Apocalypse Bindings, Apocalypse Dagger)
  • Apprentice' Spoils (Arcturia's Music Box, Jhesiyra's Tattered Mantle, Trobriand's Conduction Cable)
  • Call of Evil (Book of Vile Darkness, The Engine Master's Mantle, Whip of the Erinyes)
  • Celestial (Weapons)
  • Demogorgon's Wrath (Demogorgon's Reach, Heart's Twine, Sinuous Cord)
  • Diamond (Iridescent Diamond Pendant, Refulgent Diamond Pin, Scintillating Diamond Buckle)
  • Legion's Guard (Weapons)
  • Lionheart (Weapons)
  • Masterwork (Weapons)
  • Mirage (Weapons)
  • Storyteller's Journal (Any two/three: Darkened Storyteller Journal, Envenomed Storyteller Journal, Flayed Storyteller's Journal, Frozen Storyteller's Journal)
  • Tales Set (Scarf of Embellishments, Sash of Embellishments, Any Storyteller's Journal)
  • Trickster's Gift (Sparkling Fey Emblem, Starshard Choker, Twinkle of the Stars)
  • Tiamat (Amulet of Tiamat's Demise, Tiamat's Orb of Majesty, Tiamat Sash)
  • Valhalla's Rebuke (Belt of Valhalla, Cloak of Valhalla, Horn of Valhalla)
  • Watcher (Weapons)

Avernus: Legion's Guard Weapons
Certain mobs drop treasure maps in the Avernus wastes. These maps show a location somewhere in the wastes where you can go and dig up a chest. The chest has a chance to drop a really good entry level weapon set, known as the Legion's Guard. If you haven't got a weapon set yet, I highly recommend you farm these.

Rainer has a fantastic guide on farming this weapon set.

The Cloaked Ascendancy: Mirage Weapons
One of the best sets for any damage dealer is the mirage weapons. You can find these in the Cloaked Ascendancy campaign store and you will need heaps of campaign currency, arcanic focus, and arcane magical writings to refine the relic to completion. The mirage weapons are one of the aforementioned low item level weapon sets that are fantastic and worth farming.

Cloak Alliance has a great guide on farming this weapon set[cloakalliance.wordpress.com]

Master Expeditions: Watcher Runs
One of the best weapon sets in the game, the Watcher set, can be found in Master Expeditions. These can be difficult, so bring a good team.

Nenaraz's fantastic guide to Watcher Runs can be found here[www.notion.so]

Professions: Masterwork Weapons
Professions is a system of crafting in Neverwinter. Through it, you can create powerful potions and gear. The Masterwork weapon set is among one of the best weapon sets in the game, but it requires a huge resource sink to acquire. The Sharandar Masterwork weapons (Feywood) are the highest item level versions available as of Mod 23.

Obikin has a good guide on professions[neverwinter.obikin89.com]
Legacy Campaigns
Under campaigns, you should see a list of Legacy Campaigns. These are storylines which require daily or weekly missions to be completed. These are a big time investment, but all can be completed by yourself so work through them at your own pace. The quickest way to complete the campaigns is running them during 2x events, which can be viewed in the calendar.

Every week, Sybella Artis, will offer three missions which reward a special currency known as Heroes Medallions. These medallions can be spent at her shop for useful rewards, such as companion upgrade tokens and various refinement items.

You can find Sybella at the back of Protector's Enclave, near Lord Neverember and the Guild Register.


⠀⠀⠀⠀⠀⠀⠀⠀⠀⠀⠀⠀⠀⠀⠀⠀⠀⠀⠀⠀⠀⠀⠀    Above: Sybella in Protector's Enclave

Boons
Each adventure and campaign will reward boons. These are tiny stat increases that you can choose to assign in the boons menu. As of Module 23, 90 exist and can be collected by working through each campaign and adventure. This is a slow grind for minor benefits, but it does give you something to work on by yourself as every campaign can be completed solo.

You can select up to two tier 5 boons, requiring 4 boons to upgrade to max, and one master boon, requiring 3 boons to complete. Every tier 4 boon and below can be improved up to 5 times.

⠀⠀⠀⠀⠀⠀⠀⠀⠀⠀⠀⠀⠀⠀⠀⠀⠀⠀⠀⠀⠀⠀⠀⠀⠀⠀⠀⠀⠀⠀⠀    Above: Boons

Genies Gifts
Dungeons and lockboxes have a chance to award an item known as a Genies Gift. These items can be traded in at most legacy campaigns for a special bag that rewards campaign currency. Every legacy campaign except Descent Into Avernus have a campaign store with this bag of treasures. Super useful for longer campaigns like Jungles of Chult and Storm King's Thunder.
Dread Ring
In my opinion, the most overlooked campaign by new players is the Dread Ring campaign. Dread Ring can be completed by running daily quests. One quest in particular, the quest given by Sergeant Knox known as the lair quest, can give you some useful refinement items, notably Enchanting Stones. The specific lair and the chance of getting an Enchanting Stone depends on the day, but it's worth running every day if you can.

The days certain rewards are available. Will vary depending on your time zone:
Day
Lair
Reward
Monday
Random
Bonus Vanguard Scrip
Tuesday
Dread Spire
Enchanting Stone
Wednesday
Death Forge
Enchanting Stone
Thursday
Phantasmal Fortress
Enchanting Stone
Friday
Random
Bonus Vanguard Scrip
Saturday
Your Choice
Enchanting Stone
Sunday
Your Choice
Enchanting Stone

You can start this campaign by going to the campaigns tab and clicking begin story.

⠀⠀⠀⠀⠀⠀⠀⠀⠀⠀⠀⠀⠀⠀⠀⠀⠀⠀⠀⠀⠀⠀⠀⠀⠀⠀⠀⠀Above: Dread Ring Start
Avernus
If you're to ask any player in Neverwinter where to go to improve your item level, Vallenhas and/or Avernus will be the answer. There are two campaigns here: Descent Into Avernus, which involves the region of Vallenhas, and the Path of the Fallen campaign, which involves the connected regions of the Avernus Wastes, the Wandering Emporium, and the Bleeding Citadel. The two campaigns are very similar and often get confused by players.

Descent Into Avernus
I'll start with Descent Into Avernus first. This campaign is one of the most important in the game, especially when you're starting out. It unlocks a campaign currency known as chaotic writings, which are earned through the quests and heroic encounters. Chaotic writings can be spent at Juma, a little demon in a cage to the side of the stronghold (towards the north of the map). He has Suprise Bags affectionately known by players as "juma bags" that can be purchased with 100 chaotic writings. Juma bags contain heaps of great rewards, such as mounts, companions, companion upgrade tokens, rough astral diamonds, wards, legendary dragon keys (usable in any dungeon), and gear with an item level of 1225.

⠀⠀⠀⠀⠀⠀⠀⠀⠀⠀⠀⠀⠀⠀⠀⠀⠀⠀⠀⠀⠀⠀⠀⠀⠀⠀⠀⠀ Above: Juma's Location

The easiest way to get chaotic writings is through the Demonic Summoning heroic encounter, colloquially known as Ape. During 2x: Descent Into Avernus weeks, the Siege heroic encounter is a good option to farm too, but it is difficult to get people to farm it normally. At certain times of the day, a demonic insurgency will happen. This is a chain of heroic encounters that give 100 chaotic writings each encounter. You can see how long until the next insurgency is in the top right of the map, and you can join by using the red portal near the fireplace in the Vallenhas stronghold.

You can start the campaign by speaking to Sergeant Knox in Protector's Enclave. The quest is called "A House in Need".
⠀⠀⠀⠀⠀⠀⠀⠀⠀⠀⠀⠀⠀⠀⠀⠀⠀⠀⠀⠀⠀⠀⠀⠀⠀⠀⠀⠀     Above: House in Need

Items From Juma Bags
Below are gear to keep an eye out for.
  • Bone Harvester Hood (Head)
  • Fancy Duelist Mask of Cormyr (Head)
  • Poisoned Leathers of Rage (Chest)
  • Safety Harness of Protection (Chest)
  • Shielded Defender Vambrace (Arms)
  • Spiked Defender Vambrace (Arms)
  • Rusted Iron Leggings (Feet)

Bel and the Forger's Box
As you progress through the campaign, you will be handed a Dormant Forger's Box. This is a permanent consumable that can be used every 10 minutes and gives you a boost in power and another stat. It's a very useful device for healers and damage dealers in particular. To upgrade it, you need to gather certain components. You get them from here:

Item
Location
Reinforced Metal Rod
Heroic Encounters in Vallenhas
Broken Metal Rod
Any skill node on any map
Balanced Metal Rod
Alyssa's shop at Marshal rank
Battle Worn Metal Rod
From a boss in the Insurgency Heroic Encounter
Infused Metal Rod
Random drop when you defeat Bel
Dented Metal Rod
Found in the Ornate Box at Seneschal rank

I'm not too familiar with Bel to be comfortable giving anymore information on it. A great guide by u/Zephriael can be found here.

Path of the Fallen
Path of the Fallen takes place in the Avernus wastes, following on from the Descent Into Avernus questline. Here, you will have four distinct areas to quest in: the Wastes, the Scab, the Stygian Docks, and Haruman's Hill. There's a few features on this map you likely wont have seen before. The first is the vehicle. One of the first quests will allow you to use a car to travel across the wastes. This makes traveling through the map a lot easier, but it can be difficult to control at first.

In Avernus, there's a battle between the devils and demons. As you defeat one of the factions in the instance, the other will gain power. Eventually when enough mobs have been defeated, a special boss, Garyx the Unforgivable if the devils are winning or Siegebreaker Mog'dorath if the demons are winning, spawns in the Scab or the Stygian Docks respectively. Each boss has the same loot table and can drop valuable legendary rings.

Avernus has a bounty system, similar to Chult. Certain mobs, tagged with a special symbol next to their name, can drop special items that can be traded for lures. Those lures can then be used to spawn a boss that can drop some gear. Some of the gear that drops, such as Bone Devil's Ribcage, Goristro's Horns, and the Wisps of the Shadow Demon are among the best in the game. However, they can be a grind to get, especially the ribcage. You can trade for the lures at the Bleeding Citadel, which is unlocked by finishing the Path of the Fallen campaign.

With the introduction of Dragon Hunts and the subsequent gear in Module 23, the hunt items are far less valuable, but some like the Goristro's Horns are still easily accessible and worth getting while you're working on other parts of your build.


⠀⠀⠀⠀⠀⠀⠀⠀⠀⠀⠀⠀⠀⠀⠀⠀⠀⠀⠀⠀⠀⠀⠀⠀⠀⠀Above: Hunt Marks in Avernus

You can start the campaign by continuing through the Vallenhas story.
Earning Astral Diamonds
Earning astral diamonds is vital to improving and getting better equipment. The easiest way to get refined AD outside making some yourself is to sell items on the AH. This is more for mid-late game players as they will usually be able to farm for equipment and gear that people will buy. To start with, you should worry about making RAD and refining your 100,000 a day. The following are some of the ways I earn mine:

Random Queues. You earn about 12,000 RAD from the skirmish, 30,000 RAD from the Dungeon, 25,000 RAD from the RTQ, and about 40,000 from the RADQ. You will get more from the chest at the end and there is an additional bonus if you are playing the role in demand (usually tank or healer).

Dungeon Chests. Most dungeons and skirmishes drop a varying amount of astral diamonds. An easily repeatable way to earn more astral diamonds and can be paired with the random queues.

Master Expeditions. The amount you can get varies if you use a rune to increase the amount you get from a Master Expedition, but you generally get between 15,000 and 20,000 RAD a day.

Juma Bags. One of the common drops in Juma's Surprise Bags is 2,500 RAD. You can farm astral diamonds this way while aiming for better drops.

Rage of Bel. This is event in Vallenhas which lasts for an hour and runs every few hours. You can defeat the boss as much as you like (typically 6 times), which can be done during one of those hours. Each run earns you a small amount of RAD and gives you seals.

Dragon Hunts. One of the rewards in the final chest is rough astral diamonds. The amount varies, but it's typically a few thousand. Modifiers can increase the amount you get, as each modifier has a chance to drop a small amount of astral diamonds in addition to the amount you get from the chest. The best part about getting astral diamonds this way is that there is no limit to how much you can get a day, nor does it scale you back.
Random Dungeons/Trials/Skirmishes
I have spoken a little about this before, but the random queues are a great way to get your 100,000 daily rough astral diamonds. You can attempt the Dungeon Queue with any item level, but you need 20,000 item level for the Skirmish Queue, 30,000 for the Advanced Dungeon Queue (RADQ), and 40,000 for the Trial Queue (RTQ).

I would recommend running the RADQ or the RTQ with your guild/alliance. They can be a bit involved and mechanic heavy (especially the Spellplague Caverns and Rise of Tiamat). Be sure to watch a video or read a guide on the mechanics of the dungeon you're doing! Some players are happy to teach mechanics in the dungeon, but don't rely on that.

I'd recommend reading Obikin's guide[neverwinter.obikin89.com] for the RADQ, and his guide[neverwinter.obikin89.com] for the RTQ.

Note: I might make a guide for the RADQ/RTQ as I've done a ton of them and I think I can do a solid job of a text explanation. I will update if I do.
Group Content Etiquette
Once you get to this stage, it's important to understand how the community talks to one another, forms groups, and the group's expectations. Some of this is going to be pretty obvious, other parts wont be. I have distilled the list to a few key points.

Be Respectful
Above all, always be respectful to your group. Treat everyone with kindness and don't complain about another player in the dungeon, whether they're doing good or bad. Thank the other players when you finish a dungeon, praise a good performance where you feel it's needed, and congratulate those who complete a dungeon for the first time! Be mindful of what you say to people and refrain from comments and topics of conversation that might be uncomfortable or upsetting to people.

Communicate With Your Group
If you haven't done a dungeon before, tell your group. If you want clarification on mechanics, ask. If you need a minute for cooldowns, let your team know. Communication is key to a smooth experience. Don't be afraid to ask questions and tell your group if you have any problems.

Don't Be Hasty to Kick!
In the past, Neverwinter has had a really bad kicking problem. To avoid this culture again, I ask you to be patient with others. If a boss is holding up the group, try at least three times before giving up. If a player has disconnected from the dungeon, give them a few minutes to reconnect. If a player is struggling, assist them if you can. Kicking should be a last resort.

Commit to the Dungeon
When accepting a queue, be prepared for the dungeon to take up to an hour, sometimes longer. It's a waste of you and your team's time to start a dungeon only for you to leave after the first boss. Obviously real life can come up and can be unavoidable, and this is an exception. Don't be that guy that accepts the queue and goes away from keyboard right at the start, holding up your team.

Use Scrolls of Life
Dying is inevitable in a lot of content. The healer can only do so much and sometimes you just get unlucky. If you die, don't spam the "Help" option, only use it once. Carry at least a dozen scrolls of life into every dungeon so that you can use them if your team can't get to you. Don't let your team suffer for your death!

Ignore the Leaderboards
The leaderboards are pointless. While they can be fun, they don't consider someone sitting at a campfire to swap loadouts while the rest of the party pushes ahead. It doesn't consider someone hard rushing every single group leaving the others behind. It's not always representative of someones performance in a dungeon, so don't treat it as one.

Joining Group Content
Protector's Enclave is the heart of Neverwinter and where most players recruit for various dungeons. Typically the chat will look something like this:

⠀⠀⠀⠀⠀⠀⠀⠀⠀⠀⠀⠀⠀⠀⠀⠀⠀⠀⠀⠀⠀⠀⠀⠀⠀    Above: Looking For Group Chat

Most people use the following ways to request players or to ask for a game in the following ways:
  • "LF[X]M [Content] [Role]", where [X] is the number of players needed, content refers to the dungeon/trial/queue being run, and role refers to the needed role.
  • "+[Content]", "+[Role]", or "+[Content] [Role]", means that player is groupless and is looking for a game as the role they are. Sometimes players add their item level, usually to flex or to show they understand the content.
  • "LFG [Content]" or "[Role] lfg [Content]", means that player is looking for a game as the role they are.

If you wish to be added to a group, you can private message (or tell) the player who sent a message looking for players a "+", or a "+[Role]". If you don't receive an invite or a response, assume the group is full. Sometimes people get hit with way too many messages to reply to them all.

The Glossary covers common terminology that players use when using group chat.
Mid Game (40,000 - 60,000)
You've collected a good selection of mounts and companions, your bolster is slowly increasing as you get more. You have finished a couple of campaigns and you have a solid artifact. What next?

The goal for now is less so about boosting your item level and more about leaning how to build your character properly. This is a process that heaps of new (and old) players still struggle with. When you're running the RADQ and you get paired with a player who tops the damage charts by over three times second places numbers, it's not their item level making the difference. It's their knowledge of their class and the quality of their build. Our goal is to understand how they got there and slowly build up to that point.

Mid Game consists of the following chapters:
  • Gearing Your Character
  • Sharandar
  • Dragonbone Vale
  • Enchantments
  • Upgrading Enchantments
  • Insignias and Mount Collars
  • Vault of Stars
Gearing Your Character
Neverwinter is a complicated game. If you ask 20 players what items to run, they will give you 20 different answers. And that's part of the fun of the game! There's no one right answer on what is the best gear and equipment to run. Everybody's playstyle is going to be slightly different so what might work fantastic for one player might be terrible for another.

It also should be noted that gear is only half the battle. Your individual skill plays a massive part of how well you play. I personally have seen players with the best gear and capped stats that have struggled. I've also successfully run a buttery smooth dungeon with weaker groups. Positioning and mechanical knowledge matter a lot more than newer players realise.

With all that being said, the process of improving your gear is the same for all players. I'll break it down.

Statistics and Item Level Caps
You have 15 Main Stats with varying levels of importance. You can read what each stat does by hovering over each one in the Character Sheet. Each statistic has two values, a rating (sometimes called the raw stat) and the percentage (%). Your % score is the one that matters. This refers to your effectiveness in that skill and it is the one used in the games calculations.

The game calculates your % from your rating and additional bonuses from companions, gear, powers, racial bonuses, and many other sources. Capping your rating will give you a maximum of 50% in your %. Your rating cap is equal to your item level and the maximum your % can be is 90%. You can reach 90% in a stat without capping your rating if you are gaining over 40% from other sources.

The game turns a stat green when it is capped. When you have more than your item level in a certain rating, it becomes overcapped and shows as orange. This means you have more in that stat than you need. A stat is considered overcapped if you have more than 1000 over your item level in it. Orange is generally bad, green is good, white means you are still under the maximum.

⠀⠀Above: Power % is capped, Critical Severity rating is capped, Outgoing Healing is overcapped.

So what does all that actually mean?
I said lots of words and they probably don't mean much to you. And that's ok, you don't need to consider this until you're over 40,000 item level. But the earlier you can start recognising how gear works and how it all interacts, the easier time you will have assessing what is good for you and what isn't.

The key takeaways are:
  • Gear will give you rating or % when certain conditions are met, such as high stamina, after dealing big hits, or standing still.
  • Your goal is to have 90% (or as close to) in the stats that matter to you while in combat.
  • The higher your item level, the further away your cap on ALL stats becomes, so the harder your job is to keep everything high/capped.
What Stats Should I Focus On?
Below is a short table on the most important stats for each role. A primary stat should be your focus. Secondary are the ones you should focus on after reaching the cap in your primary stats. Your tertiary are nice to have, but you shouldn't prioritise them over the primary and secondary ones. This is not a comprehensive list and your needs might differ depending on your playstyle. Instead it's a general guide to get you started.

Role
Primary Stats
Secondary Stats
Tertiary Stats
Damage Dealer
Power, Combat Advantage
Critical Strike, Critical Severity
Accuracy, Forte, Defense, Awareness
Tank
Defense, Awareness
Critical Avoidance, Deflection
Deflect Severity, Forte*, Power, Combat Advantage, Incoming Healing
Healer
Power, Outgoing Healing
Critical Strike, Critical Severity, Forte
Defense, Awareness

*Secondary for the Paladin class because of their reliance on Divinity.

Combined Rating
If you look at any piece of gear, you will see that there is a stat known as Combined Rating listed. Combined Rating is a bonus to all 15 main stats of the amount listed (Individually, not divided among them). This is in addition to the other bonuses on the item. For example, the Raindrop Raiment grants 1,372 Defense through Combined Rating, and an additional 1,144 through the item itself. Almost everything in the game that gives item level will give some amount of Combined Rating.

However, it is important to note that equipping an item that doesn't give you as much Combined Rating as Item Level will reduce all of your main stats by the difference. In the aforementioned Raindrop Raiment example, you would gain 1,525 Item Level but only 1,372 Combined Rating, meaning you are 153 short in all 15 of your main stats through the increase alone. Some sources, such as Companion equip bonuses, give an equal amount of Item Level as Combined Rating, avoiding any decrease. Others, like combat enchantments, don't have any Combined Rating and can reduce your stats significantly if not considered properly.

⠀⠀⠀⠀⠀⠀⠀⠀⠀⠀⠀⠀⠀⠀⠀⠀⠀⠀⠀      Above: Two pieces of gear with their stats shown

Base Damage, Hit Points, and Role Bonus
After reading this, you might have a question. If increasing your item level makes the statistic harder to cap, why would you do it? The answer is in your base damage and hit points. Neverwinter calculates your base damage modifier as 10% of your item level and your hit points as 10 times your item level. Boosting your item level will increase your survivability and your damage if you manage your stats properly.

Depending on your role, your hit points and damage get a bonus. Damage dealers gain 20% increased damage. Healers gain 10% increased damage and hit points. Tanks gain 20% increased hit points.

Scaled Content
While above is correct, there is something in Neverwinter known as scaling. When you enter certain areas or dungeons, your item level will be fixed to a certain amount so you are not too strong or too weak for the content. For lower level players, this can be a boon, allowing you to better survive the content. For higher level players, this can be detrimental. Certain sacrifices you have made to increase your item level without much benefit will be a handicap.

On the positive side, most players will be able to complete the content they queue for. On the negative side, the system can punish you for your decisions. Scaling is only a thing in lower to mid game. Vault of Stars, Tower of the Mad Mage, and Zariel's Challenge (Master) are not scaled.

You can tell a dungeon or area is scaled on your character sheet. If your total item level is blue, you are scaled. Hovering over it will tell you to what item level you are scaled to.

⠀⠀⠀⠀⠀⠀⠀⠀⠀⠀⠀⠀⠀⠀⠀⠀⠀⠀⠀⠀⠀    Above: Scaling in the Cloak Tower dungeon

Balancing Your Stats
There are a few tools to help balance your stats. They include:
  • Gear
  • Companion Enhancement and Equip Bonuses
  • Enchantments
  • Insignias
  • Artifacts
  • Armour Reinforcement Kits
  • Boons
Sharandar
The second hardest campaign as of Mod 23 is Sharandar. If you played Neverwinter at any point over the last few years, you might remember it. The old Sharandar was replaced with a reworked zone and campaign, turning it into a much more difficult zone.

Sharandar is split into three acts: the Iron Tooth, the Soul Keeper, and the Odious Court. Each chapter represents a different area from the main New Sharandar hub.

Sharandar is home to a bounty system with special mobs like Avernus, but these mobs don't drop anything. Instead, defeating the mobs will grant you a percentage bonus to the Bounty quests. You can pick up a bounty quest for each of the three areas from the bounty board. Aragon made a great image guide to the locations of these mobs, which can be found here[nwo-tredecim.com] and here[nwo-tredecim.com]. Handing in the bounty quests has a chance of giving you 1300 or 1350 item level companion gear. Dragonbone Vale has companion gear that are higher item level (1400) but they aren't as versatile as the gear here and come with difficult to integrate stat combinations.

⠀⠀⠀⠀⠀⠀⠀⠀⠀⠀⠀⠀⠀⠀⠀⠀⠀⠀⠀⠀⠀⠀⠀⠀⠀  Above: Sharandar Bounty Target

You can start the campaign by speaking to Illiyasha Guildstar in Protector's Enclave. The quest is called "The Return to Sharandar". You need 40,000 item level to accept the quest.

⠀⠀⠀⠀⠀⠀⠀⠀⠀⠀⠀⠀⠀⠀⠀⠀⠀⠀⠀⠀⠀⠀⠀⠀⠀  Above: Where to Find "Return to Sharandar"
Dragonbone Vale
The highest level place in the game as of Mod 23 is Dragonbone Vale. It's a large, expansive map with three distinct areas. Like Sharandar and Avernus, Dragonbone Vale is home to a weekly cap which will mean it'll take you four weeks to complete at the fastest. Completing the campaign will give you the Mythallar set, which is fantastic for magical damage dealers like the Cleric, Warlock, and Wizard.

Early in the Dragonbone Vale questline, you will need to choose one of three factions to support: the Emerald Enclave, the Lord's Alliance, or the Order of the Gauntlet. The choice just gives you a bonus to reputation for the one you pick, you can still gain the rewards from the other two (albeit at a slower pace). Regardless of your choice, you will also be working with the Harpers and have access to their store.

Dragonbone Vale has a mini-boss system, like Avernus and Sharandar. Unlike those two, the targets don't have a glow and look just like regular enemies (with a unique model, however). Defeating these mini-bosses can reward you various currency for the campaign and unique shirts/pants which are some of the best available. Aragon made a good map for the mini-bosses[drive.google.com].

In addition to the mini-bosses, there's a similar system to the treasure maps in Avernus. Interacting with one of the Dragonsight artifacts around the map (the large dragon skull) will illuminate a pillar of light where you can dig for treasure. From these, you can get the high item level main/offhand Vale set for any class of your choice, and some campaign currency you can use in the various faction stores. Aragon also made a good map for the Dragonsight treasures[drive.google.com].

You can start the campaign by speaking to Sergeant Knox in Protector's Enclave. The quest is called "Forging the Shield". You need 45,000 item level to accept the quest.

⠀⠀⠀⠀⠀⠀⠀⠀⠀⠀⠀⠀⠀⠀⠀⠀⠀⠀⠀⠀⠀       Above: Where to Find "Forging the Shield"

Adventure: Scaleblight Summit
Scaleblight Summit is a short adventure that concludes the storyline of Echoes of Prophecy and Dragonbone Vale. It rewards one piece of account bound 1400 item level companion gear of your choice, 100,000 rough Astral Diamonds, and 4 boon points. The companion gear can be pretty nice, especially for a tank. However, the options are fairly odd combinations of statistics compared to the 1300 item level Sharandar items.
Enchantments
When you open your character sheet, you will see another tab called "Enchantments". Here, you can equip various different rating boosting items as well as your Artifacts. You can have a total of 14 enchantments equipped at a time: 4 offense, 4 defense, 1 utility, 2 overload, 1 combat, 1 bonus, and 1 companion enchantment (shown in the Companions section). I will walk through what each enchantment does.

⠀⠀⠀⠀⠀⠀⠀⠀⠀⠀⠀⠀⠀⠀⠀⠀⠀⠀     Above: Luna's Enchantments (Pls send Coal Motes)

Offense, Defense, and Utility Enchantments
These three enchantment types make up most of the enchantments you have to be concerned with. Five types exist: Amethyst, Citrine, Cobalt, Garnet, and Jade. Each of these enchantments can be placed in any of those three slots, giving different statistics depending on which slot you place it in.
Enchantment Type
Offense Slot
Defense Slot
Utility Slot
Amethyst
Combat Advantage
Awareness
Control Bonus
Citrine
Accuracy
Deflection
Control Resistance
Cobalt
Critical Severity
Deflect Severity
Incoming Healing
Garnet
Power
Defense
Forte
Jade
Critical Strike
Critical Avoidance
Outgoing Healing

Each enchantment offers the same numerical boost to any of those statistics, item level, and combined rating when compared at the same ranks. Each enchantment has five ranks corresponding to five rarities (Uncommon through Mythic). Below is a small table of the statistics, combined rating, and item level of the enchantments at each level.
Uncommon
Rare
Epic
Legendary
Mythic
Rating Bonus
450
900
1350
1800
2250
Item Level
300
600
900
1200
1500
Combined Rating
270
540
810
1080
1350

There is no "best" enchantment as it relies on your role, your class, and your overall build. Use these to balance your statistics and to help cap the stats you need.

You can purchase Uncommon enchantments from Bradda the Sage, in the Sage Shop in Protector's Enclave. Be sure to check the Auction House first (under Miscellaneous tab) as they may be cheaper there.

⠀⠀⠀⠀⠀⠀⠀⠀⠀⠀⠀⠀⠀⠀⠀⠀⠀⠀⠀⠀⠀⠀⠀⠀⠀⠀      Above: Sage Shop Location

Overload Enchantments
Overload enchantments are temporary boosts that expire after a few hours. These aren't necessary, especially at earlier levels, but they can help give you a boost in harder fights. The easiest overloads to acquire are the Dragon overloads from skirmishes and dungeons, or the Marks from the Gemmonger in the Stronghold.

Other notable overloads include:
  • Bulwark of Brimstone (+5% Maximum Hit Points)
  • Corrupt Black Ice (For 8 seconds, +800 Power and 1.25% AP each second)
  • Corrupt Lethal (For 8 seconds, +800 Critical Strike and 1.25% AP each second)
  • Corrupt Piercing (For 8 seconds, +800 Critical Severity and 1.25% AP each second)
  • Demonic Empowerment (+5% Action Points)
  • Devil's Precision (+5% Critical Chance, +5% Accuracy)
  • Frosted Protection (For 20 seconds, +1.5% Awareness and +1% Defense)
  • Frosted Tempered (For 20 seconds, +1.5% Awareness and +1% Deflect)
  • Rage of Flames (+5% Damage Bonus)
  • Resiliency of the Depths (+5% Physical Damage Reduction)

Combat Enchantment
Combat Enchantments are a powerful way to increase your damage or your survivability. Six Combat Enchantments exist: Battle Tempered, Cursed Burn, Flash Freeze, Fortified Nature, Poisoned Thorn, and Soul Shield. Each with unique effects that shape your character.

However, Combat Enchantments have a few problems that make them difficult to understand as a new player. Each option gives 1,000 Item Level for each of its five ranks, up to a maximum of 5,000 item level at Mythic. However, you don't gain any Combined Rating (See "Gearing Your Character"). This isn't a problem for those in the late game as you can gain back the loss of stats with a smart build and good stat balance. However, it can really mess with your percentages if you focus on the Combat Enchantment first. This is especially so in scaled content where equipping a Mythic Combat Enchantment is a reduction of 5% in all your statistics if you haven't capped your stat accordingly.

What this ultimately means is that you should be super careful with how you upgrade your Combat Enchantment. It can be worthwhile to not use one at all and instead focus on your ratings. Especially so for Healers who don't benefit from an increased item level as much as Tanks and Damage Dealers.

For Tanks, I recommend either Fortified Nature or Flash Freeze.

For Damage Dealers, I recommend Poisoned Thorn or Cursed Burn.

For Healers, I would recommend Flash Freeze, Soul Shield (uncommon), or none.

You can purchase Uncommon Combat Enchantments from the Sage Shop in Protector's Enclave.

Bonus Enchantment
The bonus enchantment, as its name suggests, is an additional benefit that offers no item level or combined rating boost. Each bonus enchantment is to one of the boosts, the other statistics not part of the 15 main stats. This includes Action Point Gain, Recharge Speed, Stamina Gain, and Movement Speed. Not a priority, but a nice to have.

You can purchase Uncommon Bonus Enchantments from the Sage Shop in Protector's Enclave.

Companion Enchantment
In addition to those in the "Enchantment" tab, you have an additional companion enchantment located in your "Companions" section. Only one enchantment type fits this slot: the Companion Enchantment. This enchantment boosts the damage your companion deals if it is an active one, and boosts the statistics you gain from it if it is an augment.

Below is the damage bonus and stat bonus you get for each rarity of the companion enchantment.
Uncommon
Rare
Epic
Legendary
Mythic
Item Level
300
600
900
1200
1500
Damage Boost
30%
60%
90%
120%
150%
Augment Stat Boost
1500
3000
4500
6000
7500

Mythic Account-Wide
When you upgrade an enchantment to mythic, you can trade it in at the Reward Reclaims Vendor in Protector's Enclave for a bound, account-wide enchantment. This is hugely beneficial if you play multiple characters. The downside is that once you convert an enchantment this way, the enchantment becomes bound and you wont be able to trade it again.

⠀⠀⠀⠀⠀⠀⠀⠀⠀⠀⠀⠀⠀⠀⠀⠀⠀⠀⠀⠀Above: Reclaiming Account-wide Enchantments
Upgrading Enchantments
You can upgrade an enchantment to increase its rarity, item level, and its effect. The way you improve enchantments is identical to the system used in Artifacts and Artifact Gear. Right clicking the item and selecting upgrade will show you a screen like this:

⠀⠀⠀⠀⠀⠀⠀⠀⠀⠀⠀⠀⠀⠀⠀⠀⠀⠀⠀⠀⠀⠀⠀⠀   Above: Upgrading a Garnet Rank 2

On the right, you will see the percentage chance to upgrade the item as well as what the item upgrades into. On the left, you will see the required materials to upgrade. In the middle, you will see a slot for a mote. A mote is an item which increases the chance of success for the upgrade. There are five motes, representing five rarities from Uncommon to Mythic. You can find motes in Dungeon chests. Primitive motes can be purchased at the Sage Shop. Coalescent motes can also be acquired from certain events, through the invoking chest, or purchased from the Zen Market.
Rarity
Uncommon
Rare
Epic
Legendary
Mythic
Name
Primitive
Standard
Improved
Enhanced
Coalescent
Chance
1%
2%
5%
10%
100%

By default, an enchantment has a 0% chance of success and will always need a mote. Some items, like Insignias and Artifacts will have a starting chance that can be improved with motes.

If you try and upgrade an enchantment and fail, you will lose one random reagent used in the upgrade process. You can protect a component by placing a Preservation Ward on the right. Every upgrade attempt will use every ward you place, so you will need a lot especially for a low chance. You can acquire Preservation Wards through Dungeon chests, the invoking chest, Reaper's Challenge vendor, certain events, or the Zen Market.

How to Get The Reagents
You will need various items to upgrade your enchantments, artifacts, and artifact gear. Typically this is in the form of refinement points, gold, enchanting stones, and glyphs of potency. Some items, such as the Beacon of Simril and the Illusionist's Mask artifacts will need additional event specific items to improve.

For refinement points, the Wanderer's Fortune insignia bonus will help you gain plenty of refinement items. Otherwise converting old equipment is a solid way to gain more refinement points.

The easiest way to acquire gold is through Professions. If, like me, you find Professions boring or confusing, you can gain more than enough gold by selling equipment you pick up in dungeons. You can get some items, like mount collars and a Picaroon's Tricorne, which boost the amount of gold you can find.

You can find Enchanting Stones up to rank 5 in the Dread Ring lairs (See "Dread Ring") and rank 6's from Dungeon chests. You can get Glyph of Potency from the Wondrous Bazaar or Sybella Artis (See "Legacy Campaigns).
Insignias and Mount Collars
Under mounts, you will see another tab called "Stable". Here you can equip 5 mounts of your choice, attaching 3 insignias and a mount collar to each of them. The stable is something you can slowly work on as you will pick up many of the items you need while playing and accomplishing other goals. I will break down each system at work here.

⠀⠀⠀⠀⠀⠀⠀⠀⠀⠀⠀⠀⠀⠀⠀⠀⠀⠀⠀⠀⠀⠀⠀⠀⠀⠀⠀⠀⠀ Above: Luna's Stable

Stable
The five mounts you place in your stable don't really matter. They can be any that you own, they don't necessarily have to be the ones you are using the powers from. Only two things need to be considered with your mount choices: the mounts rarity and its insignia slots.

Each mount will have specific insignia types it can slot. Generally, the higher the rarity of the mount, the more universal slots it supports. Upgrading a mount doesn't change the insignia types it's locked to.

Your mounts rarity is the limit of the collar rarity it can support. You need to make sure the mount in your stable is of an equal to or higher rarity than the collar equipped to it. For example, the epic Dawn Unicorn can support an uncommon, rare, or epic collar, but not a legendary or mythic.

⠀  Above: Locked Collar (Because the Dawn Unicorn is only epic) and the locked insignia types

Insignias
Throughout your adventure, you will have found some uncommon, rare, and sometimes epic insignias to equip in the stable. Each mount can have three insignias attached to them, for a total of 15. When you place an insignia in a mount, it'll stay with that mount until you remove it. If you ever swap what mounts you have in your stable, be sure to take the insignias out first!

Your insignia choice is dependent on the gear you run, your enchantments, and many other aspects of your build. Use ones that work on the primary and secondary stats you need (See "Improving Your Character") until you can understand what you need to work on. You can get by most of the game using Rare or Epic insignias, so upgrading these isn't a huge priority.

There are five different types of insignia slots: Barbed, Crescent, Enlightened, Illuminated, and Regal. Depending on the combination you place on your mount, you can unlock an additional benefit known as your Insignia Bonus. These are generally small bonuses, but they can be really helpful in your build. Each bonus can stack up to three times, but the second one gives half the benefit and the third gives a quarter of the benefit.

You can see the Insignia Bonuses for your mounts by clicking on the "Insignia Bonus List" in your stable.

⠀⠀⠀⠀⠀⠀⠀⠀⠀⠀⠀⠀⠀⠀⠀⠀⠀⠀⠀⠀⠀⠀⠀⠀⠀⠀⠀  Above: Insignia Bonus List

Mount Collars
Each of your stable mounts can be equipped with a mount collar. You can use five at a time, but like insignias, they each have a type. The five types are Practical, Sturdy, Supportive, Unified, and Wayfaring. You can only equip one of each category, and there are three in each type: Barbed, Crescent, and Regal.

Choice wise, each collar has advantages and disadvantages. They only give half their item level as combined rating, so equipping them can reduce your stats if you don't balance well. Choose whichever sound valuable to you and your playstyle, they all have uses.

Upgrading mount collars is an absurd grind for not much gain, especially the legendary and mythic upgrades. You can run every dungeon with just epic collars, so don't stress too much about upgrading them.
Vault of Stars
Once you have completed all the unique quests in chapter 1 of the Sharandar campaign and faced off with Granny, you will unlock the Vault of Stars dungeon. In Module 22, the Vault of Stars dungeon offers some of the best gear available, at 1500 and 1525 item level depending on the item. You must be 40,000 item level to private queue or 45,000 item level to normally queue it. Almost everyone chooses to form a group through the in game channels rather than queue normally for it. Looking For Group in Protector's Enclave and your Guild/Alliance channel are good places to find groups.

There are a few different ways players choose to run Vault of Stars. Normal Vault of Stars, or 'nvos', is a normal run of the dungeon. Nothing special here. Most players run nvos for the 1500 item level rings at the end of the dungeon, the boss drops which can be traded for pieces in the Sharandar Campaign Store, and in the past, the Star set (neck/waist/artifact). There's plenty of guides that explain the mechanics a hundred times better than I ever could. Aragon's guide is a good place to start.

⠀⠀⠀⠀⠀⠀⠀⠀⠀⠀⠀⠀⠀⠀⠀⠀⠀⠀⠀⠀⠀⠀⠀⠀   Above: Sharandar Campaign Store

The other ways people run the dungeon is by setting it to hardcore mode, which will end the instance the second someone dies. This is known as 'hcvos' or 'hardcore vos'. All dungeons can be queued this way, though Vault of Stars is the only dungeon with unique 'mini-bosses' when in hardcore mode.

Hardcore: Band of Air and the Ring of Darkness
There are three mini-bosses located throughout the dungeon. First mini is located under the waterfall before the first boss (the Royal Gardener). Second mini is located through a portal right next to the campfire right before second boss (the Prince of Frost). Third mini is located in the maze, after the second arena when you are split again. Second and Third mini can be difficult for groups to reach and will require lots of practice. First mini is considerably easier.

Players grind these mini-bosses for reagents which can be used to craft the Band of Air or the Ring of Darkness, two exceptionally strong rings. Each mini-bosses drops a reagent and the final boss drops the fourth reagent for a total of four components. In Module 22, farming these rings is a late-game objective.

⠀⠀⠀⠀⠀⠀⠀⠀⠀⠀⠀⠀⠀⠀⠀ Above: Luna's Band of Air (what's the point if you can't flex it?)

First Mini-Boss
Now that I've covered the basics of Vault of Stars and Hardcore, it's time to talk about what I recommend new players to run: first mini. As previously mentioned, the first mini-boss is significantly easier than the other bosses and I also believe it's easier than 'nvos' for most players. If you can reliably run all the dungeons in the RADQ without dying and you have 40,000 item level, you are able to complete first mini.

Clear the enemies until you have to group up to progress. You will be teleported to a small arena, where a mage will create a path into the gloaming court. You have to clear the enemies here as fast as possible. Stay out the red, avoid the archers, and try and stay within range of your healer. It's the hardest part of the whole experience. After clearing out the waves of enemies, a portal will appear and you can progress. Follow the path to the second bridge. To the left of the bridge, there is a waterfall. The tank should go under the waterfall, attack the boss, and lead him outside to the area around the bridge. Defeat the boss and you're finished!

⠀⠀⠀⠀⠀⠀⠀⠀⠀⠀⠀⠀⠀⠀⠀⠀⠀⠀⠀⠀⠀⠀⠀⠀⠀⠀⠀    Above: First Mini Location

Gear drops roughly 20% of the time. It's tradition to link any gear you do find in chat or type 0 if the boss dropped nothing. Once everyone has checked for loot, someone can defeat themselves using the 'Help and Support' option or by running into the next set of enemies. Rinse and repeat!

You can find the list of gear you get from this boss in the Sharandar Collections Log, under "Antiquities of Sharandar". This gear also drops from second and third mini.

⠀⠀⠀⠀⠀⠀⠀⠀⠀⠀⠀⠀⠀⠀⠀⠀⠀⠀⠀⠀⠀⠀⠀⠀     Above: Gear From First Mini-Boss

When you are queuing for hardcore Vault of Stars or any mini-boss run, make sure you enable hardcore mode. You can do so through the Match Options in the bottom left.


⠀⠀⠀⠀⠀⠀⠀⠀⠀⠀⠀⠀⠀⠀⠀⠀⠀  Above: Queuing in Private Mode with Hardcore Enabled

Shattered Diamonds
When you defeat the mini-bosses or complete the bounty targets in Sharandar, you will gain an item called Shattered Diamonds. You can open these when you get 100 to gain a small amount of rough astral diamonds and a diamond's blessing, a consumable which gives you a 5% increase in damage for 15 minutes when used. Rarely, you can acquire transmutes, the diamond set (neck/waist/artifact), or companion gear.

You can either open the shard when you get 100 of them or sell the shards on the Auction House.

⠀⠀⠀⠀⠀⠀⠀⠀⠀⠀⠀⠀⠀⠀⠀⠀⠀⠀⠀⠀⠀⠀⠀⠀    Above: Shattered Diamond Shards
Late Game (60,000+)
You've completed most of the legacy campaigns, you've gotten a grasp on how to build your character, and you have conquered Vault of Stars. What next?

At this point, you have a few options. Most players will look into running Tower of the Mad Mage and Zariel's Challenge to farm the Celestial and Lionheart weapons. Others will choose to write a guide instead (heh). Really, at this point the game is about building your toon up. Farm for Astral Diamonds to buy upgrades to your character. Sell items you don't need to earn more Astral Diamonds. Farm the events that come up every now and then.

Really, most players will go for one of the following:
  • Defeat Ancient Dragons for the mythic dragon hunter gear.
  • Grind Hardcore Vault of Stars for a Band of Air and/or Ring of Darkness.
  • Run Crown of Keldegonn Master for the Durgarn Thord weapons.
  • Go for Rise of Tiamat Master in the hopes of getting an Arcane Globe.

In Module 23, players have access to a reworked Rise of Tiamat. The Master Tiamat, Crown of Keldegonn, Tower of the Mad Mage, and Zariel's Challenge are outside my realm of expertise as I am yet to run them.
Events and the Calendar
If you plan on playing for a while, it's a good idea to keep up with the calendar and the upcoming events. You can access the calendar through the "L" key by default, or by clicking the calendar icon next to the map in the top right.

⠀⠀⠀⠀⠀⠀⠀⠀⠀⠀⠀⠀⠀⠀⠀⠀⠀⠀⠀⠀⠀⠀⠀⠀⠀⠀⠀⠀⠀⠀     Above: Calendar

Some events to look out for:
  • 2x Refining Stones
  • 2x Currency (Any campaign)
  • Dungeon Delvers Delights
  • Feast of Lanterns
  • Harvester of Nightmares
  • Siege of Neverwinter
  • Summer Festival/Winter Festival
  • Wondrous Bazaar Discounted
  • Trade Bar Store Discounted
  • Astral Lockbox
Useful Resources
Below are some great resources to help you on your journey:
- Aragon, a youtuber with great breakdowns on Neverwinter and whats happening in the game.
- Rainer, a youtuber with great breakdowns on some of the RNG in the game.
- Galactic Underwear, a youtuber with everything Neverwinter.
- Northside, a youtuber to keep up to date on Neverwinter.
- Neverwinter Subreddit, a great resource for asking questions.
- NW-Hub[www.nw-hub.com], contains a link to the Neverwinter Character Builder, an invaluable tool to designing your character (Thanks for making it Rainer).
- Obikin's Requiem for Neverwinter[neverwinter.obikin89.com], a great guide that goes way more in depth than I do.
- Rainer's Mod 20 Pocket Wiki[docs.google.com], a great resource for finding information on mounts/companions/artifacts and much more.
- JanneNW's Website[jannenw.info], contains heaps of information on the behind the scenes formulas in NW.
- MMOMinds[nw.mmominds.com], a source for builds.
- Casual_Notgamer's VIP Keybinds, a short post on binding the main VIP functions to hotkeys.
Bonus Pro Tips
Here's a short list of bonus tips that don't really fit elsewhere in the guide:

Loadouts
You can have two entirely different builds on the same character through the loadout system. To set up a loadout, click the manage loadouts at the top of the character sheet. Loadouts cost Astral Diamonds to purchase, but having multiple is super useful in a dungeon environment to swap between different builds for certain bosses/enemies.

Rebinding Change Instance
Each area is made up of multiple 'instances' of that map. Normally, you can change instances by accessing the world map or pressing the blue diamond near the mini map. Typing "/bind F1 ChangeInstance" into chat without the quotes will allow you to press F1 to open the change instance menu.

Teleportation Hubs
Certain areas have a green teleportation crystals that you can interact with. When you interact with them, you will set that crystal as your hub. Pressing the green symbol next to your map will instantly teleport you to your hub. You can use this once per hour, or pay 5,000 Astral Diamonds to do it again immediately. Very useful if you don't have VIP rank 4.

⠀⠀⠀⠀⠀⠀⠀⠀⠀⠀⠀⠀⠀⠀⠀⠀⠀⠀⠀⠀⠀⠀⠀⠀    Above: Protector's Enclave Crystal
Glossary
Here are some common terms in Neverwinter and what they mean.

Term
Definition
Explanation
AD
Astral Diamonds
The primary currency in Neverwinter. See "Currency: Astral Diamonds, Zen, Seals, and Trade Bars".
AOE
Area of Effect
Refers to attacks that hit a wide area or lots of small/weak enemies.
BBZ
Zariel's Challenge (Normal)
A mid-tier trial, the baby version of Zariel's Challenge (Master).
BHE
Big Heroic Encounter
A heroic encounter, typically needing 5+ players.
CN
Castle Never
A low/mid-tier dungeon found in the Random Dungeon Queue
CODG
Cradle of the Death God
A mid-tier trial found in the Random Trial Queue
♥♥♥
Crown of Keldegonn
A high-tier trial with a normal mode found in the Random Trial Queue
CR
Castle Ravenloft
A high-tier dungeon found in the Random Advanced Dungeon Queue
DC
Cleric, Devout Cleric
Refers to the old name for the Cleric, the Devoted Cleric. Some people still use DC to refer to the Devout Cleric, the healing paragon
Demo
Demogorgon
An endgame trial
DR
Dragon
Refers to a Dragon Hunt or a Well of Dragons Heroic Encounter
ECC
Cragmire Crypts
A low-tier dungeon found in the Random Dungeon Queue
ELOL
Lair of Lostmauth
A mid-tier dungeon found in the Random Dungeon Queue
EOP
Echoes of Prophecy
A limited time campaign that started in October 2021 and went until December 2021
ES4, ES5
Enchanting Stone
An enchanting stone of the rank following the "ES".
ESOT
Shores of Tuern
A skirmish found in the Random Skirmish Queue
FBI
Fangbreaker Island
A mid-tier dungeon found in the Random Dungeon Queue
GWD
Gray Wolf Den
A low-tier dungeon found in the Random Dungeon Queue
GWF
Barbarian
Refers to the old name for the Barbarian, the Great Weapon Fighter.
HDPS
High Damage Per Second
A damage dealer who is (usually) very strong, typically with maxed gear. The term has lost its meaning recently, so take it with a grain of salt.
HR
Ranger
Refers to the old name for the Ranger, the Hunter Ranger.
KOS
King of Spines
A big heroic encounter in Soshenstar River.
LF[x]M
Looking For [x] More
Player's are trying to find others for the content they are running. [x] is the number of spaces available. Sometimes players leave the number out.
LFG
Looking For Game
The player is looking for a game, usually the one they mention in the message.
LH
Lionheart
Generally refers to the Lionheart weapons. See "Artifact Gear and Sets".
LOMM
Lair of the Mad Mage
A high-tier dungeon found in the Random Advanced Dungeon Queue
ME
Master Expeditions
A small randomised dungeon where you can collect relics and gain runic etchings. See "Undermountain".
MHE
Minor Heroic Encounter
A small heroic encounter, typically needing <5 players.
MSPC/SPC
Spellplague Caverns
A mid-tier dungeon found in the Random Advanced Dungeon Queue.
MZC, ZCM
Zariel's Challenge (Master)
An endgame trial that grants the Celestial weapons
OP
Paladin, Oathkeeper Paladin
Refers to the old name for the Paladin, the Oathbound Paladin.
PE
Protector's Enclave
The area of Protector's Enclave, the main hub for players
PF
Phantasmal Fortress
A lair in Dread Ring. See "Dread Ring".
RAD
Rough Astral Diamonds
A currency in Neverwinter. See "Currency: Astral Diamonds, Zen, Seals, and Trade Bars".
RADQ
Random Advanced Dungeon Queue
A randomised queue for advanced dungeons. See "Random Dungeons/Trials/Skirmishes".
RC
Reaper's Challenge
A specialised dungeon queue which scales up the dungeons and adds random modifiers to increase the difficulty. Changes daily.
RTQ
Random Trial Queue
A randomised queue for trials. See "Random Dungeons/Trials/Skirmishes".
SKT
Storm King's Thunder
The Storm King's Thunder Campaign
ST
Single Target
Refers to attacks that hit a single enemy, usually against a boss.
TCA
The Cloaked Ascendancy
The Cloaked Ascendancy Campaign
TIC
The Infernal Citadel
A high-tier dungeon
ToMM
Tower of the Mad Mage
An endgame trial that grants the Lionheart Weapons
TONG
Tomb of the Nine Gods
A high-tier dungeon found in the Random Advanced Dungeon Queue
TR
Rogue
Refers to the old name for the Rogue, the Trickster Rogue.
VOS, NVOS, HCVOS
Vault of Stars
The Vault of Stars dungeon and its many variants. See "Vault of Stars".
VT
Valindra's Tower
A low-tier dungeon found in the Random Dungeon Queue.
WTB, WTT, WTS
Want to Trade/Sell
The player wants to buy, trade, or sell the item they linked. Usually this involves Astral Diamonds, Mark of Potency, or a trade of equal valued items.
Changelog
  • 2021/12/04: Release
  • 2021/12/05: Added Artifact Gear and Sets section, couple of corrections, wording and formatting adjustments
  • 2021/12/11: Added Module 22
  • 2021/12/16: Added Mod 22 note in the Dread Ring section
  • 2021/12/20: Added some Mod 22 notes and added the Vault of Stars section
  • 2021/12/21: Reworked the guide's layout, added some extra information to the Vault of Stars section, and added the Glossary section.
  • 2022/01/04: Added a note in the Overview and First Steps section, and added a Still to Include below this. Fixed the Artifact Gear and Sets section to better explain set bonuses. Added the Artifacts section.
  • 2022/01/05: Added a short section addressing returning players.
  • 2022/01/06: Added the Improving Your Character section.
  • 2022/01/07: Fixed some information, added some new references, and added the Bonus Pro Tips section.
  • 2022/01/11: Fixed some information, revised the Companions and Mounts section to explain all the systems, not just bolster.
  • 2022/01/12: Updated most of the guide to Mod 22. Expanded on the Legacy Campaigns section to cover Boons and Genies Gifts.
  • 2022/01/15: Added Dragonbone Vale, removed some references to Mod 21, and expanded the Bonus Pro Tips section.
  • 2022/01/21: Added Enchantments, added Upgrading Enchantments, moved information in the Artifacts section into Upgrading Enchantments to keep a better flow.
  • 2022/01/22: Added Insignias and Mount Collars, changed all references from Very Rare to Epic.
  • 2022/02/12: Revised the guide's format to be easier for new players to understand. Updated a couple of references.
  • 2022/06/19: Fixed the broken images (thanks Steam), added an updated Mod 23 note in the Intro, and updated the Glossary.
  • 2022/06/22: Updated the first few sections of the guide, revised the early game sections to better reflect the current game state.
  • 2022/07/26: Updated the guide to match Mod 23, added Group Content Etiquette section
10 Comments
Amiine 29 Dec, 2023 @ 11:18am 
.
Dravlae 2 Oct, 2023 @ 9:24am 
Thank you for this guide. You (team) did an awesome job. I have played Neverwinter on and off for years but got back into it since the squish. I will say this guide is so helpful cause everything ranges from a little different to a lot different. Also, finally can understand the whole companion paradox. LoL.
Jarthone 16 Jun, 2023 @ 12:24am 
Thank You!! Trying to get game going from playing initially with the decades old PC version (which I still have) and plenty reading of Salvatore's novels.
NeN 16 Apr, 2023 @ 5:39pm 
Thanks for adding my guide. Appreciate your gargantuan effort to consolidate so much information. It must've taken you several weeks for research, and a week to outline, and format it all. Amazing.

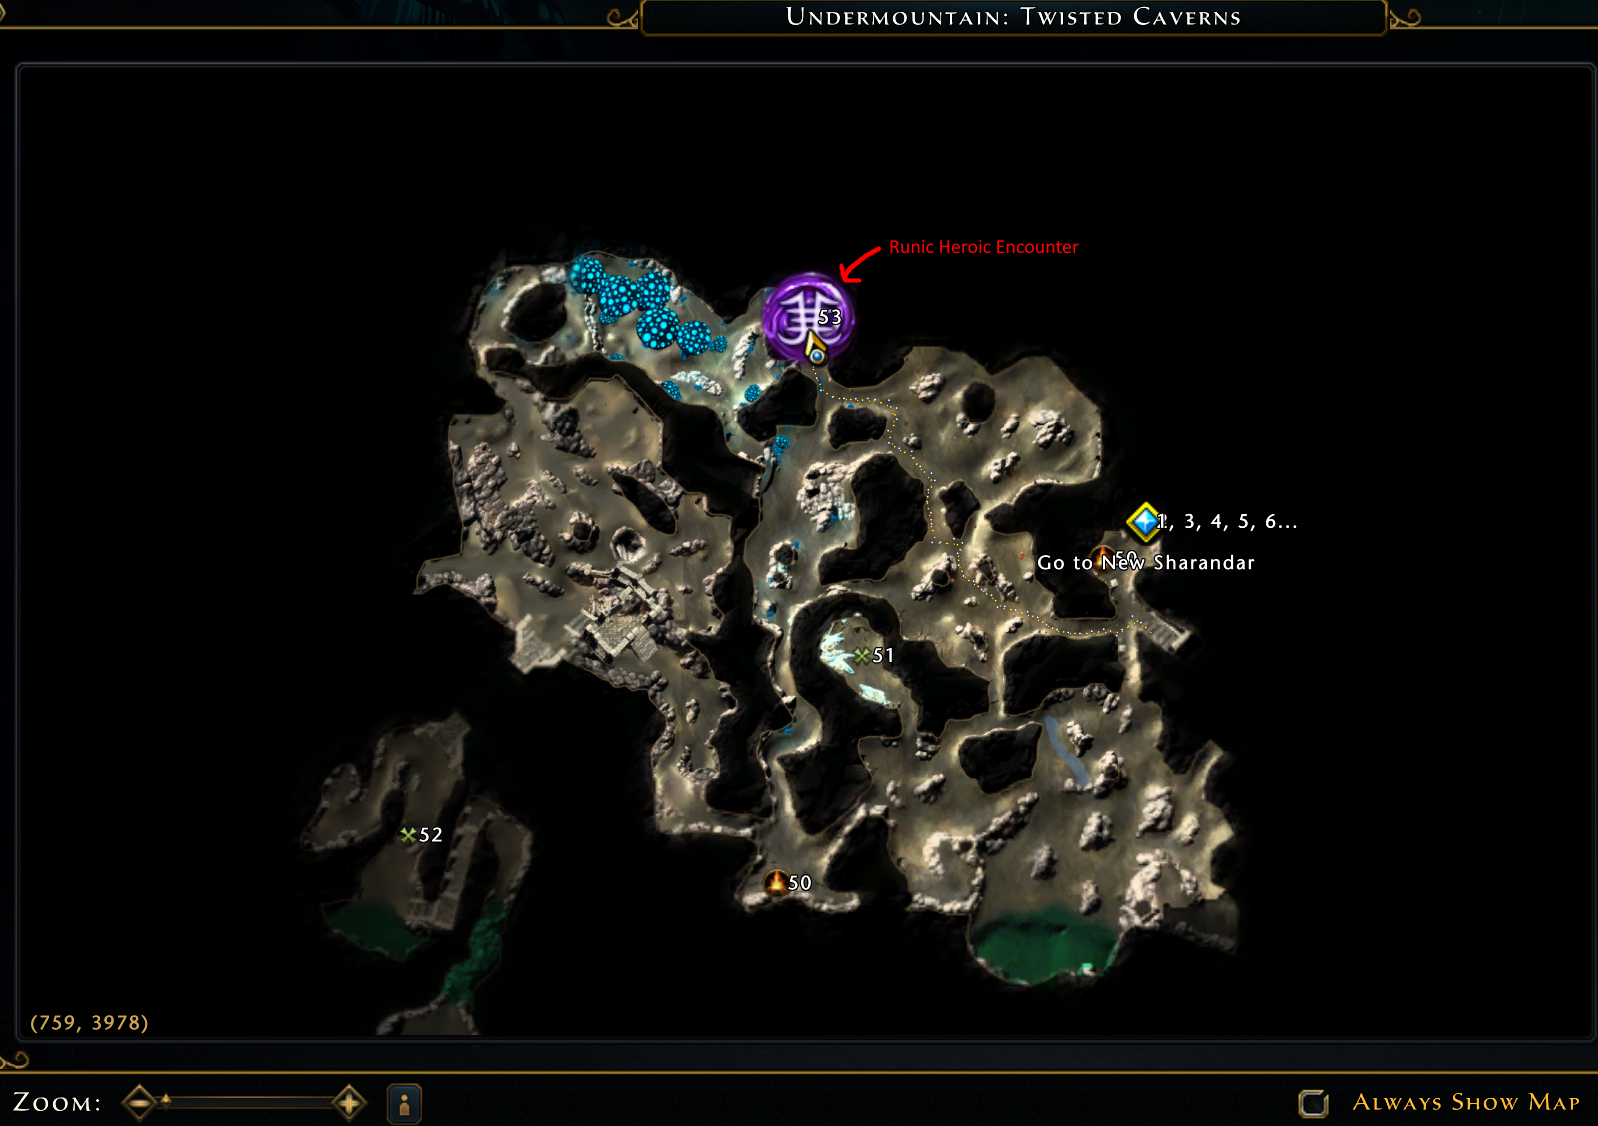
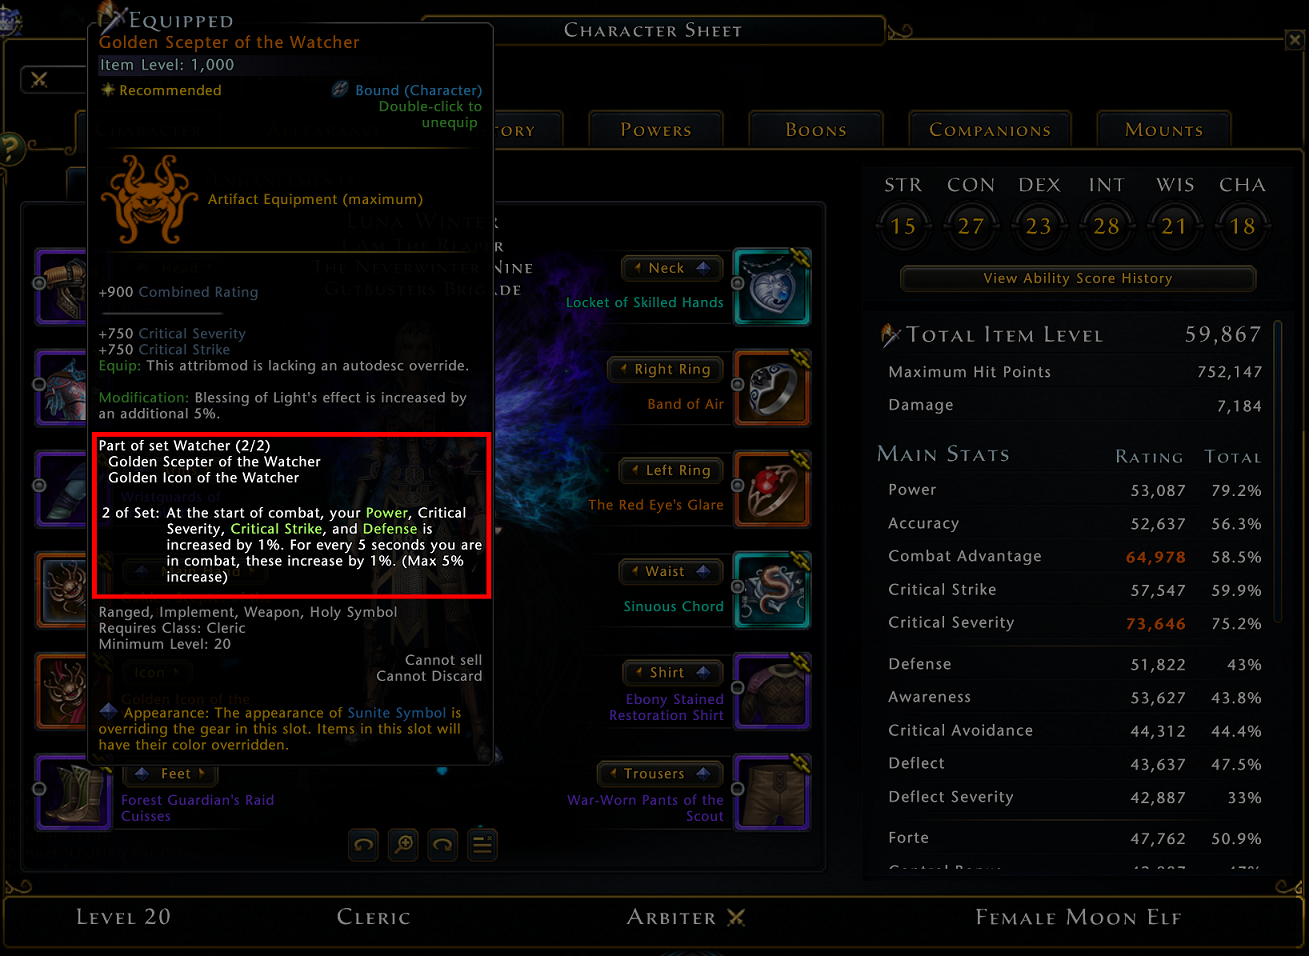
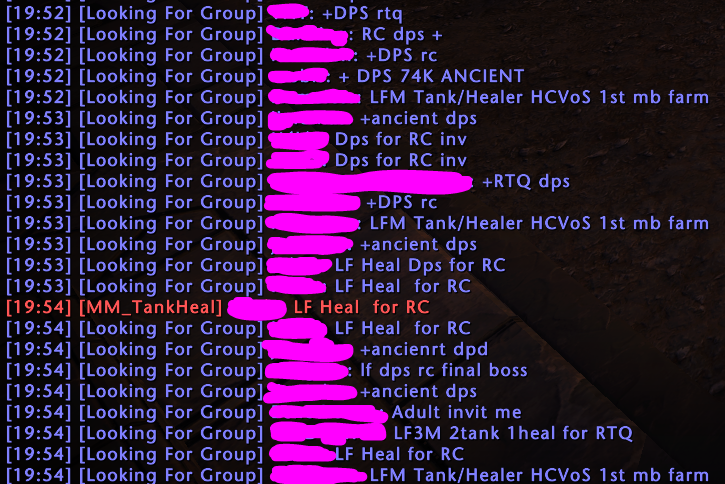
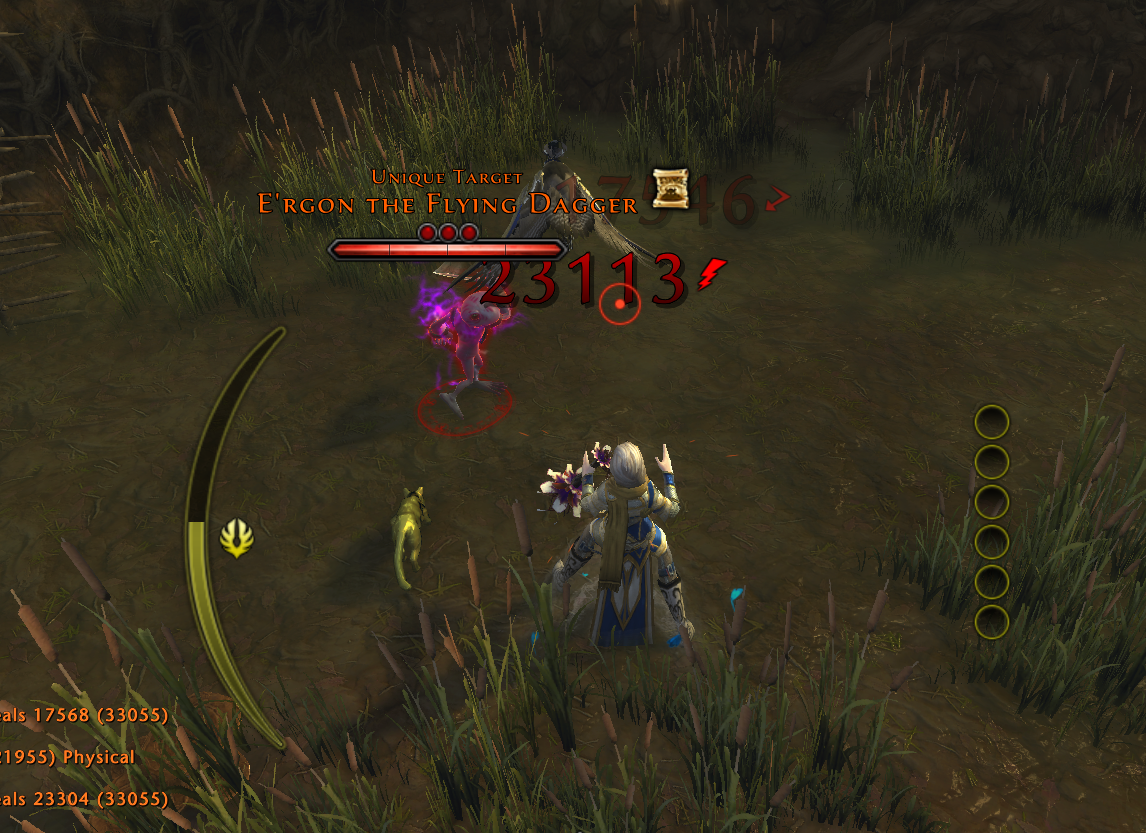
The Watcher Runs are a dear memory of mine. Met amazing people in NWO from around the world.
Shoutout to them. If they ever read this, they know who they are :bor_energetic::shipenergy::cybercup:
Gorwe 16 Nov, 2022 @ 1:34am 
Imo, everything above 45k is late game. I could argue even above 40k. Because once the story etc content dries up, a LOT of non-hardcore players is going to give up. And that's perfectly fine, perfectly natural. That's how I play. I don't care about the min-max part. Once that starts, I'm out. Or, rather, there are other classes.

With that said, thank you for the hard work and putting this guide together.
Cat on Linux 20 Feb, 2022 @ 9:29am 
omg, this is a treasure! thank you!
tungt88 30 Jan, 2022 @ 12:20pm 
Thanks for all the hard work you put into this: wonderful guide for both newbies and returning players alike :steamthumbsup:
Teloc 26 Jan, 2022 @ 11:14pm 
Legit glad I found this. Most of the guides don't give a good explanation on what is going on. Thx
Frost  [author] 7 Dec, 2021 @ 2:21pm 
Thank you!
T-Bone 7 Dec, 2021 @ 10:03am 
Great guide! It's very difficult to find one that isn't written by a long time player who is jaded over the changes! 10/10 would recommend.