EVERSPACE™ 2

EVERSPACE™ 2

40 ratings
Everspace 2 - How to Wreck Havoc with Bomber Class
By Kelrycor and 1 collaborators
Want to end a fight even before it actually began? Then the bomber class is what you are looking for. Insane area of effect damage capabilities and toughness making it one of the most imba classes.
   
Award
Favorite
Favorited
Unfavorite
Preamble
Greetings, pilots.

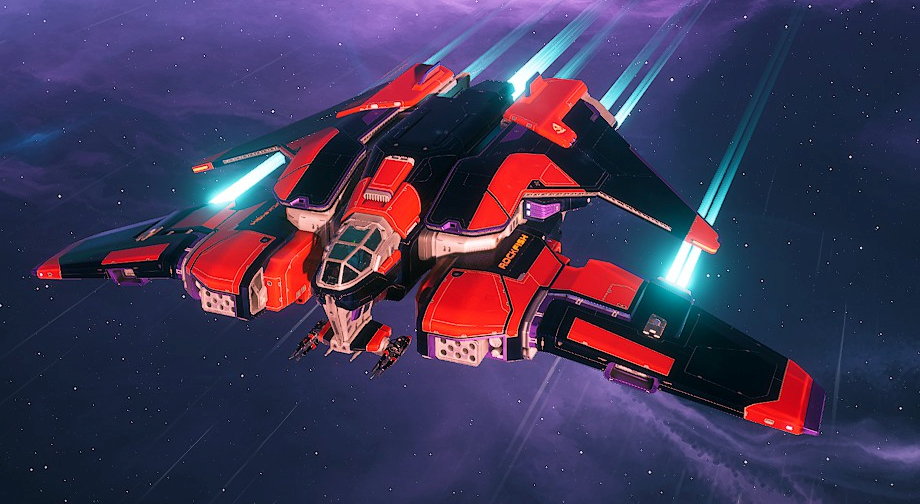
The bomber class is one of the highest and toughest DPS ships in Everspace 2. In fact it does tear down swarms of enemies in high-risk areas and even high-lunacy rifts with ease.

Kelrycor (KR):
In my opinion RFG will most likely going to nerf this ship a little sooner or later. This ship is big fun to play right now - as long as you like slow and ponderous ships.

My other favourite ship is the ultra-swift Scout class with the weapon range increase. So changing from scout to bomber was a tough switch indeed. But I was highly impressed how good this ship performed so I decided to make this little guide.

Want to know how to end fights before they really began? Of course, else you wouldn't be here :)

NerArth (NA):
Although the Bomber has been the main ship class for me since I started playing, in a single-player game like ES2 I really hope that they never nerf any class, because they all have their strengths and fun elements.

The Bomber's ultimate is awesome but it's the secondary weapons that make it great. Like other classes, it's very flexible though and lends itself well to many personal styles of play.


Feel free to leave comments about what you think of the Bomber class, any suggestion and ideas. This guide was originally created by Kelrycor and NerArth has started updating it in 2024.
Basic Tactics
Basics

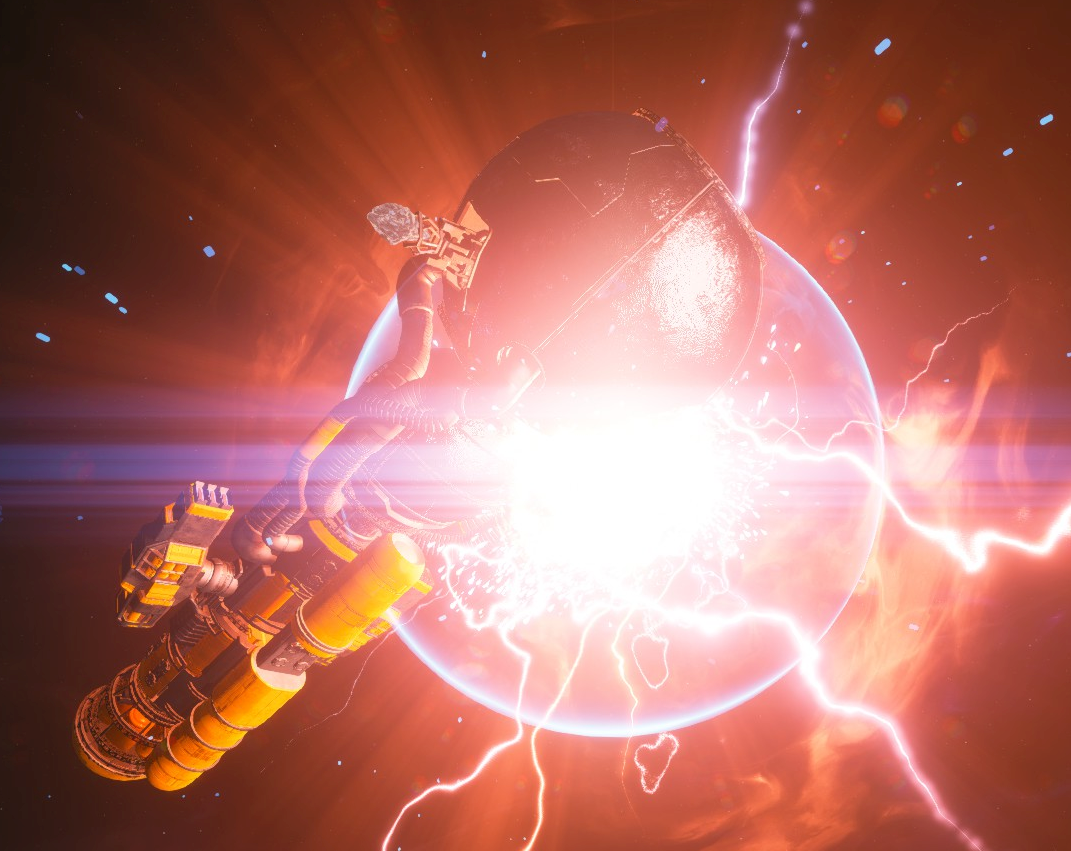
The main concept for handling the bomber efficiently is to max out its DPS and use area of effect weaponry against smaller targets, by using weapons like Flak, Mines and the ARC-9000, the bomber's ULT, basically a nuke heavily inspired by the BFG from the game DOOM.

The most uniquely defining trait is the unlimited secondary weapon charges, which only need energy instead of limited ammo. Bombers can inflict a lot of damage to groups of fighters but are also literally capable of nuking larger targets like Destroyers very, very easily.

With the bomber's lifesteal expertise, you almost literally cannot die since your damage converts into hull points.

Simply put, attacking relentlessly is the best defence for this ship class.


Cyclops-A1 II+

Single Figther Wings

Either use cruise mode and engine kill (this will eventually be demonstrated in a video) or boost/teleport towards them and strafe spit 2-3 corrosive mines.

(KR): The strafing is needed to lower the chances the mines get killed early by the enemy fire. (NA): This rarely feels like an issue but a strafe run is good because it ensures good damage distribution.

Drones will instantly die to any mine, fighters might need a second mine. But a well-spread barrage usually means sudden death for the entire wing.

Multiple Fighter Wings

Try to aggro and draw the multiple wings together while boosting or teleporting. Soften them by occasionally dropping a corrosive mines into the centre of swarms while you try to line up all swarms.

Then there are two options:

  • Gain distance and turn around to unleash the ARC-9000 when ready, aiming towards a predicted centre of enemy concentration while trying not to directly aim at anything too close. Remember that the ULT will also deal damage with tendrils before detonating.

  • In some situations like certain High-Risk Areas or Rifts, there may be a mutator that makes it harder to shake off enemy ships. In this situation, it may be easier to make sure you can fire the ULT even at almost point-blank range and then simply teleport, dash, or hook away with a couple of saved up charges and detonate the ULT manually after a second or two.

    Using 2 charges of the maxed out forward teleport device is almost always enough distance, about 1.6km. This variation of the tactic does involve more risk but is easier to pull off in some scenarios.

Remember: Chances are high the ULT will prematurely explode and damage your heavily. Finish off the survivors with some corrosive mines or your primary weaponry. In Rifts especially, you shouldn't save up your ULT for too long, even against the weaker targets.

Destroyers, Carriers and Cruisers

Close in with cruise speed, teleporter, hook or whatever device you use for closing distance. It's a good idea to weaken bigger targets with destabilizer missiles while munching on their hull with a strong kinetic weapon and mines.

Having good keys for quickly swapping between secondary weapons is very useful versus this ship size class, because you can rotate quickly between mines and any missiles even if you don't have a lock-speed bonus for the missiles.

Missiles will generally be able to hit these targets at close range without a lock, affected by your positioning of course, since they don't move quickly. The bomber is sturdy enough to take some beating without much of a perk buff, the passive lifesteal effect will keep you alive against any bigger target easily as it usually leeches more than enough.

If your target is a Destroyer, you can use the anti-missile device to make things even more chill if you're concerned about the missile barrages they fire.

The ULT is not necessary to do this job, but can be fun as well. A direct hit with the ULT is good for an effective damage output. Boost near the target to make sure you'll hit it, ideally positioning yourself in front or behind the target. Fire the ULT and gain distance with 2-3 teleport jumps or another speed-related device, otherwise the blast can severely damage your own ship if your ship didn't roll with ULT self-damage reduction.

Wardens (Ancients)

(KR): Wardens are shields-only. Corrosive mines won't do anything. This is why I love to have a good primary and secondary weapon at hands that will make up for it. Shieldbreaker missiles, normal missiles, normal mines, EMP generator, destabilizer missiles, whatever. Wardens will do very little damage to your ship as long as you keep strafing (using boost), so there is no haste in killing them.

(NA): In my experience Wardens avoid guided weapons like missiles by teleporting when they're about to receive the hit. Primary weapons are still somewhat important against wardens but secondary weapons like guided missiles can indeed still hit from time to time.
Loadout: Ship
Bomber: Basics


Okay, so the bomber is a no-brainer choice if you want to play the bomber ship class.


As mentioned before, the main unique features about the bomber are:
  • Huge radius AOE ultimate, the ARC-9000
  • Unlimited ammo for secondaries with the trade-off that they have recharging energy instead
  • Expertise: Hull Lifesteal

As you progress in the game, you are able to unlock better quality versions of the Bomber. III+ is a realistic goal to set if you want to do the end-game content and will usually cost around 400k credits with a little bit of variation.

As you unlock more and more perks, you'll also be able to choose from two sets of passive rolls whenever you're looking at buying a ship, so that helps in reducing the RNG stink of not getting the ideal combo for you.

Depending on your playstyle and how much you like trading, getting to a quality IV may even not take too long. They cost about twice as much as the III+, about 800k.

What might take a little longer than getting to a IV, is getting the combination of passive rolls best suited for your playstyle. Each passive has different advantages, which we'll next focus on in no particular order, as the order is the same as the order listed in the ES2 wiki.


Bomber: Passives
Target lock-on duration reduced by 50%
This bonus is very useful to have if you like to use any of the guided missiles since it effectively halves the time to lock onto a target. Very importantly, this effect stacks with the bonus that can roll directly on secondary weapons:


Having both of these bonuses together makes most guided missiles lock on almost as good as instantly. Cruise missiles will lock on in under half a second or so with both bonuses, making it ideal if you like to make use of quick secondary weapon swaps.

20% reduced damage from enemy explosives

Very straightforward. This is arguably one of the worst bonuses you can have but it is a free survival bonus in some contexts anyway.

Convert mines instead of triggering them when flying close without boosting

This bonus is semi-useful, especially if you're actually fighting/grinding Bloodstar, but realistically it's another one of the worst passives to have, since in most scenarios you need to make adequate use of boosting to minimise damage taken and in some cases to even gain bonuses, making it difficult to make good use of this passive.

Take 50% reduced damage from ARC-9000 explosion

This is self-explanatory and is very useful if you want to be extra aggressive with your ULT and firing/detonating while you remain in close proximity to enemies, or if you just like watching awesome explosions right in front of you.

The dangers to yourself of premature ULT detonation are considerable and this does mitigate those dangers greatly. Premature detonations can be costly to you in High-Risk Areas and in Rifts especially.

ARC-9000 damage increases by 2% every second after being fired

A very useful passive in most scenarios. This gets the best use by having a good feel of how to group enemies together in such a way that you maximise the distance::damage ratio both from this passive itself and from the ULT tendrils while the projectile flies past enemies.

Target lock-on is maintained off-screen

If you want to make use of guided weapons, this is one of the key passives to have. While the reduced lock-on times can make this unnecessary, this passive allows for a lot of freedom in targeting enemies with all of the guided missiles, cruise missiles especially if you don't yet have any lock-on time reduction bonuses.

20% reduced energy consumption for all secondary weapons

This is definitely one of the top passives to have. This passive is arguably less useful if you already rotate between all your secondary weapons a lot but it's greatly useful with both guided missiles and mines. Rockets probably benefit the least from this passive, followed by any secondary weapon that rolled with the chance to refund the cost of firing it.

Activating ARC-9000 fully restores secondary weapon energy

A good passive to have, especially if you want to do High-Risk Areas and Rifts, where, depending on your secondary choices, you're likely to use them all up quickly and make mistakes in managing their energy. This benefits cruise missiles the least and benefits rockets and mines the most, guided missiles getting a good benefit from it too.

When ARC-9000 is manually detonated, gain 40% increased ARC-9000 shockwave damage

How good this passive is really is up to your use of the ULT. If you're particularly aggressive with manual detonation and timing, it's probably one of the top choices. Otherwise, the thing to consider about this passive is that it's of great benefit when dealing with smaller targets anyway, since this helps deal with any ships that would often survive an ULT detonation if they weren't slightly worn down first.
Loadout: Equipment (Being updated)
These are only suggestions. Any player has their own favourites and this is fine. As the bomber is a beast, you can change a lot of things and still be deadly as hell.

General Loadout Advice

Primary weapons are usually a more important choice for other ship classes. Thanks to the unlimited secondary ammo, bombers can even be played without firing a single shot from the primary weapons.

So, while having decent DPS primary weapons is still good for a bomber, a highly optimised bomber will actually make better use of primary weapons oriented for buff/debuff roles.

Many weapons and modules have named/set variants. Some of these are considerably more worthwhile than the basic version of the same equipment.


Primary Weaponry

Synchro Pulse

This weapon often performs better than the regular Pulse Laser. Compared to the Autocannon it's not much less effective against armour or hull so it makes a better general purpose weapon. Very versatile weapon with decent range. It is generally better against shielded fighters, Wardens or Redeemer cruisers.

(KR): I do like my Synchro Pulse with the corrsive chance effect on it, as well as the higher crit chance. Makes it even deadlier on higher-HP targets.

Autocannon

(KR): One of my favourite weapons. Though a little bit low range it is most effective to damage enemies without shields such as many Outlaw types and some Redeemer. Temporarily switch to it if the Synchro Pulse is drained or you have a hull/armoured tank target.

(KR): I usually love my Autocannons with the attribute/catalyst to build up extra damage for any second you keep firing on it. This will double the damage on longer barrages. Also if you get the hand on a "Powerful" or "Swift" sub version it will beef up things.


Secondary Weaponry

(Corrosive) Mines

This is one of the key secondaries and vital in my opinion to deal really massive damage. Mines detonate by proximity and will deal AoE damage (about 200m), whiping out groups of enemies easily. Although normal proximity mines work too and look more awesome, I suggest using corrosive mines instead. They do not damage yourself, so you can literally unleash them directly inmidst an enemy wing, and they also more act like heavy dumbfire rockets which will not stop moving after some time like normal mines do. They will deal no shield damage but do a lot more damage directly on the hull and armor instead, killing enemies with full shields. Who needs to damage shields if the target dies anyway?

(Shieldbreaker) Missiles

I prefer normal missiles (Starforged version if available) to do pinpoint hunting when NPC fighters are surrounding my targets to prevent making them aggro. Mines are not suitable for this type of encounters. If you want a more Warden focused secondary, equip the shieldbreaker missile instead.

Destabilizer Missiles

A superior destabilizer missile lets you deal nearly twice the damage than normal (84% more damage to be exact). This is particular a huge advantage against Wardens, carriers, destroyers and cruisers.

Use it first when engaging bigger target, then switch to another DPS dealing secondary.


Modules

Every module should at least push the firepower or precision attribute. Expertise, utility, handling and resistance are nice to have, but not necessary at all.

Modules can have certain rolls that are very useful for any ship class wanting to maximise damage, such as increased critical chance %, increased primary/secondary damage %, as well as ship speed or handling bonuses which while not directly responsible for DPS, do contribute to both damage-dealing and survival.

Since every module can have bonuses like these, you can optimise their rolls towards general damage boosts.

Shields

Shield modules are actually not massively important for a bomber if you're dealing damage adequately or are able to have enough manoeuvrability. The legendary shield module is very acceptable for a bomber.

(KR): I prefer having the 500m ranged EMP effect when the shield is breaking on the shield module. This really helps a lot, especially in combination with the Defensive Massacre perk you can get multiple EMP blasts in short period.


Cargo

This module can occasionally have a ship speed bonus on it, which I really like for this particular class. This makes up a little for the slow and slugginess behavior.


Catalysts

Catalyst choices depend heavily on the specific piece of equipment and what native bonuses it rolled with. In some cases, weapons already come with Rapid or Powerful, in which case trying to use a catalyst that adds one of these prefix will replace the existing one.
Loadout: Devices
Again, a lot about this is personal preference. Adapt the choices to your personal liking. (More suggested device use coming soon)

Basic Advice for Devices

By the time you're into the mid-game or late-game, paying for device resets shouldn't feel too expensive. That said, you will probably develop certain preferences as you find and use new devices you discover.

(NA): My personal recommendation is that you have at least 2 devices that let you gain distance away from or towards targets. With the bomber my personal preference is actually to maximise movement with the use of devices, since it's hard to get movement boosts anywhere else. I use Teleporter, Energised Boost, Annihilator Virus and Fusion Hook and would only ever swap out the virus for some other offence device.

Warfare Devices

EMP Generator


This device really helps if you are surrounded by a lot of enemies. It will give you some breathing and you can take down some enemies while the effect lasts. It can also lower the effectiveness of shielded enemies significantly.

(KR): I personally use the Hard Reset mode on it, to make the effect last longer for every kill done during this phase. With my chosen perks I will get a nice +20% weapon energy as well.

(NA): Note that in High-Risk Areas and Rifts, there's a mutator that can make enemies immune to EMP effects. In Rifts you cannot change anything about your loadout once you start, so beware of what mutators you pick as you progress if you're using this or other EMP effects.

Annihilator Virus
You may prefer to use something such as Missile Defense System over this if you want a prolonged defence device.

(KR): With my character perks you will get an extra of 20% weapon energy with it and it does a lot of group damage as well, maxing out your overall DPS capabilities even more. But it takes a long time to deal the damage. Most likely you will destroy a lot of infected ships with your mines by the time it triggers.

(NA): This device is actually best used as a utility device in my opinion, using either Symptomatic or Comorbidity. Symptomatic debuffs enemies to deal 50% less damage and since you can only use this device at very close range, this is usually a useful debuff if you're being swarmed and at risk. Alternatively, this can really shine with Comorbidity since debuffs such as corrosive and webbing from respective mines usually stack.

Support Devices

Teleporter
This is a favourite for both of us. It can have up to 4 charges which will teleport you up to 800m in the direction you are facing at the moment of use, regardless of what direction your ship is moving (relevant when using engine kill).

So you can use the right amount of little jumps (600m to 1800m with a triple-jump) to get close to targets (sniper drones or bigger targets) or get away of an enemy group quickly. This device also gives the bomber a little bit more freedom of movement while exploring areas, countering the nautral slowness a little bit.

(KR): I love to have the Parting Gift mode activated. This will leave a free proximity mine at your old position which will deal area damage to the enemies close to it or trying to follow you. Good thing if you escape-jumped out of a bigger swarm of enemies.

(NA): Parting Gift is indeed a good choice here but at end-game content you may find it less useful than the other two modes. Face Off turns you around after teleporting and is useful for quick tactical use of the ULT and certain weapons, like Cruise Missiles, especially if you have the passive to keep target locks when off-screen. Scurry is probably on par for general usefulness when compared to Parting Gift because at end-game content it may feel more important to close/gain distance.

Missile Defense System

This is not a mandatory device at all. But without other movement modifiers or a good thruster piece, the bomber can be a sitting duck if your movement device charges are used up and your thruster has a low boost recovery.

Note about this device that the cooldown ONLY starts after its duration is all used up.

Activating this device will at least handle all incoming missiles, lessening the damage taken significantly in many contexts, especially against certain elite enemies. Less time spent dodging means more time dealing damage.

(KR): I prefer the Sustenance mode on it. This will cause the effect last longer for every missile eaten. This is especially good against destroyers or enemy bombers.

(NA): Sustenance is arguably the best one to use in almost any scenario. Because your mines can blow up enemy mines and not many enemies actually make use of mines, Minesweeper's ability to remove mines is never extremely useful.

A good alternative may be the Annihilation Virus device.
Loadout: Perks (Pending guide update)
While in the Early Access state, we are capped at LVL 20 right now with 4 character perks unlocked.
Here are my suggestions:

Lvl 5 perk: Defensive Massacre

Will start recharge of shield as soon as an enemy dies. Can cause multiple EMP detonations in a short period with a shield that generates an EMP blast if running out. A very nice combination.

Lvl 10 perk: Downtime Warrior

One of my favourites. The more devices are recovering the less weapon energy your weapons will use. -30% for each, which is a lot. As I use my devices regularly I can reduce the energy consumption up to 90%. For the Teleporter device it is just needed to have used just one charge to count, so you still have the other charges whenever you need them.

Lvl 15 perk: Relentless

Gives you 20% for any warfare module installed. As I always have the EMP Generator installed, and on many other classes I play with the Annihilation Virus additionally, you will profit from it. But the perk "Crit Happens" is also a good thing to use instead.

Lvl 20 perk: Unyielding Assault

Activating your ult (aka ARC-9000) will instantly repair 50% armor and void all debuffs on your ship. This can be a life saver, especially when the ARC detonates too early and you already had little to none armor left.
Loadout: Consumables (Pending guide update)
Consumables Basics

There's not a lot to say about consumables. For most of the gameplay, you're very free to craft and swap them at any time, but in Rifts, whatever loadout you have is locked in as soon as you enter.

This makes consumable choices slightly more important in that context, especially if you want to do higher lunacy levels and are still somewhat under-equipped.

(Consumable specifics will be added here)
Video Demonstrations
Kelrycor's Demonstrations

I made a brief video to show what this ship is capable of while raiding superior high-risk areas on LVL 20, the current level cap at the time of recording. Not my best encounters, but it should give you the basic idea on how to play the bomber.

In the first part I will show all the used equipment, the augmentations, devices and perks. If you want to dive directly into the action, feel free to skip this part directly to minute 2:41.

External Youtube Link

https://gtm.steamproxy.vip/sharedfiles/filedetails/?id=2732672130

The first 3 high risk areas are normally fitted, the forth and last one against Redeemers I'll show you that even if you use bad gear (commons) and no perks and augmentations at all, you will still win.

Though I must admit the distraction Elek, your companion who occasionally shows up and helps you, was causing at some point was very welcomed. Though it also lessened the chances for my corrosive mines to deal group damage as he spread out the enemies too much away from each other.

Thanks for reading and watching. And good hunting, fellow pilots.

NerArth's Demonstrations

I played the game all the way through only Normal difficulty up until I finished the story and I used the bomber for almost all of it, even for doing side missions and exploration, which was annoying at times because of ship size.

Since finishing the story and reaching the level cap, I have only played the game on Nightmare and the bomber is my most played ship class which I learned to play by myself before I even saw Kelrycor's original guide.

In my video below, I showcase what the bomber can really do, clearing a lunacy 1000 rift in under 8 minutes, if you don't take into account the loading screens and entering/exiting. The loadout used in the video is very similar to what I still use now but I have used many other loadout choices, which I hope to show off in different videos at some point.

This video also shows the strength of the bomber in using secondary weapons with the rest of the equipment oriented towards self-buffing and debuffing enemies.

Rift Run 5 - Lunacy 1000 - Bomber (III+) Class - EVERSPACE 2 (External YT Link)

Attribution/Acknowledgments
NerArth (NA):
I'd like to thank Kelrycor, the original author of this guide, for creating it. I personally want to maintain the structure of the guide close to the original, because it is fairly straightforward. That said, since Kelrycor is currently unable to take time to add to the guide, I'll be adding to the guide myself wherever I think there's a benefit to the guide/community.

I'd also like to thank the contributors of the ES2 wiki for providing fairly accurate and consistent wiki content about the game.
7 Comments
Kelrycor  [author] 15 Jan, 2024 @ 6:48am 
You are very welcomed, NerArth. I don't have the time anytime soon to overwork it and everyone will profit from a more up to date guide :cupup:
NerArth  [author] 14 Jan, 2024 @ 9:17am 
Maybe you don't have time to update this old guide anymore but if you'd like I could help you update it by co-authoring, it still seems fairly valid even now.

I had been thinking about making a bomber guide myself having recently started playing and always gravitating towards classes like this. Just seems silly for me to create a second guide for the same class when yours already exists. I can also put something up to give a more updated demonstration of what can be done with similar principles to what you're showcasing here.
Sorcerer of Sauce 18 Dec, 2022 @ 2:19pm 
What's your highest lunacy with bomber
Kelrycor  [author] 26 Nov, 2022 @ 8:12pm 
I definitely have to try them. Thanks for the heads-up. Have to update the guide a little bit soon also.
Kitsune Raven 26 Nov, 2022 @ 7:43pm 
The new Cruise Missiles with the Conversion type Bombers are soooo fun. Unlimited high power VERY long range attacks.
TheValidPerson 19 Nov, 2022 @ 7:48pm 
Great guide! Personally I prefer rockets to shield-breaker missiles since they can absolutely erase big bosses in the high-risk areas. A fun little ting I like to do is run Annihilator Virus with R-Naught and Nano Transmitters with Carefree Package for a full replenish from a big, juicy swarm. I also have a note to toss on here from personal observations.

-"High capacity" secondaries are able to fire more in a full salvo before needing to recharge energy.
propheticjester 31 Dec, 2021 @ 9:27pm 
Nice guide, thank you!