LEGO® MARVEL Super Heroes

LEGO® MARVEL Super Heroes

169 ratings
BLVGH - LEGO Marvel Super Heroes
By legogamesguy
This is my new and improved guide for LEGO Marvel Super Heroes! In an effort to make my guides more helpful and engaging, I have decided to rework them! I would appreciate any feedback you guys have about this new format, so be sure to leave a comment or shoot me a direct message!

In this guide you will find:
-A rundown of Gameplay Basics
-A tour of the S.H.I.E.L.D. Helicarrier
-How to beat each level in Story Mode, as well as how to get to the next Story level in Manhattan
-The locations of all 10 Canisters and Stan Lee in Peril in each level in Free Play Mode
-How to complete the 12 Bonus levels, including how to unlock them
-The locations of each Character Token, Deadpool Red Brick, and Stan Lee in Peril in the Bonus levels
-A complete guide to exploring Manhattan and the S.H.I.E.L.D. Helicarrier, including the locations of every Character Token, Gold Brick, JJJ Photo Mission, Quest, Race, Stan Lee in Peril and Vehicle Token
-Full lists of Achievements, Characters, Extras and Vehicles
-A full list of Cheat Codes

These guides have always been and will always be free. However, working on these guides takes considerable time and effort. If you like the guide, feel free to show your appreciation with a Steam Award! I appreciate all the points and support you guys have given me!
7
2
2
7
3
2
2
   
Award
Favorite
Favorited
Unfavorite
------------Gameplay Basics------------
Game Modes
This game has plenty of levels for you to play, with 15 story levels and 11 bonus levels. There are several different game modes you can play, which I'll describe here. I also describe how I structure the walkthroughs for each game mode.

The first time you play a level, you will be playing Story Mode. You will only have access to the characters that the game gives you. Generally, your exploration is limited due to the characters you have, meaning you'll have to come back in Free Play Mode to unlock the collectibles you couldn't collect in Story Mode. After completing a level in Story Mode, you can select the Replay Story option to replay the level in Story Mode.

At the top of my Story Mode walkthroughs, I list the enemies you'll encounter and any bosses you will fight. I also list both your starting characters and any characters that are added as you progress. Finally, I list the True Believer total for that level. Each level is split up into parts, which I sometimes call areas. Each part is a distinct area of the level, separated from other areas by a screen wipe (it will be very obvious when you enter a new area). Below each part, I explain what to do in that part to progress in the level. I do not include the locations of any collectibles, even if you can collect them in the story. At the end of the walkthrough, I list any characters you unlocked. If you need to purchase these characters, I have also included their cost in studs.

After completing a level in Story Mode, you will be able to play it in Free Play Mode. In Free Play Mode, you can select any character from all the ones you've unlocked to take into the level. The game will then give you a selection of other characters to cover all of the abilities you have unlocked. In Free Play Mode, your goal is to find all of the collectibles. At any point in Free Play Mode, you can save and exit to return to Manhattan without having to complete the level.

My Free Play Mode walkthroughs are also divided into parts, as I believe this makes them easier to navigate. At the top of the walkthrough will be a list of the abilities you'll need to collect all of the collectibles in that level. Free Play Mode walkthroughs contain the locations of all 10 Canisters and the Stan Lee in Peril (if you're playing a Story level) or the Character Token, Stan Lee in Peril and Deadpool Red Brick (if you're playing a bonus level), even if they can be collected in Story Mode. Screenshots are also included to add clarity to the walkthrough.
Collectibles
To get 100%, you gotta collect everything. There are lots of things to collect, so it's important to know what you are looking for! You can check your overall collectible progress from the pause menu.

Studs
These are the most important things you can collect. Studs act as the game's currency, so you'll want to be picking up as many as you can find. The silver studs are worth 10, the gold studs 100, the blue studs 1,000, and the purple studs 10,000. You'll use studs to purchase things in Manhattan, so you'll want to be collecting as many as you can.

True Believer
Collecting studs is essential if you want to reach True Believer status. Collecting studs in a level will reveal a stud bar in the top center of the screen. As you collect studs, the stud bar will gradually turn yellow. Once you fill the stud bar, you will achieve True Believer status. Once you achieve True Believer in a level, you cannot lose it. Even if you lose all the studs in a level after achieving True Believer , you will not lose it.

Gold Bricks
Gold Bricks are exactly what they sound like, and they can be found in many different ways. They can be earned by completing certain tasks, and they can also be found as collectibles in Manhattan. There are 250 Gold Bricks in total, and the amount of Gold Bricks you have is a good way to estimate your overall percentage in the game.


Canisters
Canisters are blue-and-grey cylinders, and can be found in Story levels. There are 10 in each Story level for you to collect.


Stan Lee in Peril
You'll find Stan Lee in various dangerous situations in levels and in Manhattan. Help him out of his predicament to rescue him. Rescue all Stan Lees in Peril to unlock him as a playable character.


Races
Appearing on the map as checkered flags, races require you to maneuver through a series of rings within a time limit. Press the "special" button while in the starting ring to begin the race. Complete the race to receive a Gold Brick.


Character/Vehicle Tokens
These collectibles are circular white tokens that have an image of a character or vehicle on them. Collecting a token will allow you to purchase a certain character or vehicle. While you can find some Character Tokens in the Manhattan bonus levels, the vast majority of the Character and Vehicle Tokens are found in Manhattan itself.


Deadpool Red Bricks
Small red bricks featuring Deadpool's logo, these Red Bricks allow you to purchase the game's Extras. Deadpool Red Bricks can be found in the Manhattan bonus levels. After collecting a Deadpool Red Brick, you can purchase the corresponding Extra in Deadpool's Room in the Helicarrier. Collect all Deadpool Red Bricks to unlock the merc with a mouth himself.


Quests
Appearing on the map as a white "?" surrounded by a yellow circle, quests involve talking to characters and completing tasks for them. Walk up to the person and press the "special" button to talk to them. Complete the quest to receive a Gold Brick. Please note that while some character and vehicle tokens are earned by completing "quests", I consider Quests to be only those tasks that are marked by a "?" icon.

JJJ Photos
You'll find a photo icon near the Daily Bugle.


Head to an alley by the Daily Bugle and you'll find J. Jonah Jameson. Talk to him and he'll tell you about a photo he needs for the Daily Bugle.


Follow the marker on your screen and you'll find the place to take the photo. Hold the "tag" button as Spider-Man to turn into Peter Parker, then press the "special" button to take the photo. Return to JJJ and give him the photo to receive a Gold Brick.
Character Abilities
As you play through the levels, you will notice many things that you can do. However, not all characters will be able to do them! This is because each character has certain abilities, and in order to collect all the collectibles, you'll need to make use of their abilities to unlock new areas of the levels to explore.

Here is a quick rundown of all the abilities characters can have. For detailed information on who has these abilities, see the "Characters" sections towards the bottom of this guide.

Agility
Characters with this ability can use their physical abilities to swing on poles. Hop onto a pole to start swinging, then press the "jump" button to swing to the next pole.


Characters with this ability can also hop up special blue-and-white walls. Hop onto the wall to grab on, then keep hopping up to scale the wall.


Arrow
Characters with this ability can shoot arrows into red sockets on walls. Press and hold the "attack" button to aim, then release to fire an arrow into the socket. Characters with the Agility ability can then swing on the arrows to reach new areas.


Beam Deflection
Characters with this ability can use beam deflection panels, which are circular white panels on the ground. Stand on the panel and press the "special" button to start reflecting the beam. You can then move the beam around to destroy objects or charge up a dish or generator.


Claw
Characters with this ability can use claw switches, which are small yellow levers. Stand in front of a claw switch and press the "special" button to use it.


Characters with this ability can also destroy cracked blocks. Press the "attack" button in front of a cracked block to destroy it. While some cracked blocks have three lines going through them, characters with this ability can destroy any cracked blocks.


Climbing
Some characters can use their heightened senses to reveal walls that can be climbed. These walls are marked by colored squares and circles. Once a wall has been revealed, simply hop on to start climbing.


Dig
Characters with this ability can dig up dirt patches with paw print icons above them. Stand near the dirt and hold the "special" button to dig it up.


Electric
Characters with this ability can charge generators. Press and hold the "special" button to fire an electric beam, or press and hold the "attack" button if you're standing close to the generator.


Some characters, such as Thor, will need to charge up before they can power a generator. Hold the "special" button to charge yourself up.


Explosive
Characters with this ability can destroy silver LEGO objects.


Extinguisher
Characters with this ability can put out or walk through LEGO fires. Some characters can put out fires with air or ice attacks, which will clear the fires permanently. Walking over fire with a shield will not put out the flames permanently, but will allow you to pass through them unharmed. Some characters with this ability can simply walk through fire without taking damage.


Flight
Characters with this ability can fly, and can therefore reach new ledges and areas that other characters can't reach. Double jump to start flying, and hold the "jump" button to gain altitude. Hold the "special" button to lower your altitude, or double tap it to drop to the ground.


Freeze
Characters with this ability can freeze puddles of water. Not all water can be frozen (water that can be frozen will have LEGO studs bouncing around inside). Hold down the "special" button to activate a freeze beam, then hold it on the water to freeze it. Characters with this ability can also put out fires.


Glide
Characters with this ability can glide across gaps that are too large to jump across. Jump up in the air, then press and hold the "jump" button again to glide. While you can glide anywhere you want, blue ledges with white arrows on them indicate that you will need to glide to reach the opposite ledge.


Grate Travel
Characters with this ability can travel through blue grates, either by contorting their body or by teleporting. Stand on top of the grate and press the "special" button to travel through it.


Heightened Senses
Characters with this ability can use their heightened senses to reveal hidden objects. Stand in an area marked by colored dots and press the "special" button to reveal the hidden object.
Character Abilities cont.
Laser
Characters with this ability can destroy gold objects. Press and hold the "special" button to activate your laser. You'll have to hold the laser on an object for several seconds to destroy it.


Characters with this ability can also cut through gold panels. Press and hold the "special" button to activate the laser, then target the wall to begin cutting through it. Use the d-pad to follow the shape in the panel, cutting it out.


This ability also allows characters to melt ice. Hold your heat beam on blocks of ice to melt it.


Magnet
Characters with this ability can manipulate blue metal objects. Stand near the object and hold the "special" button to manipulate it.


Mind Control
Characters with this ability can take control of people who have "?" icons above their heads. Get close to the person and press the "special" button to take control of them.


Power Cosmic
Characters with this ability can use the Power Cosmic to build black cosmic LEGO pieces. Hold the "special" button to build the cosmic LEGO pieces.


Pull
Characters with this ability can latch onto pull handles with some kind of rope or web. Press the "special" button to latch on, then repeatedly tap the "special" button to pull on it. This will often knock something down in the environment.


Sometimes you will find two pull handles, and only some characters with this ability can latch onto two pull handles at once.


Very rarely, you will find a pull handle attached to a ledge. Latch onto it to leave a rope behind, allowing other characters to climb up.


Sand
Characters with this ability can use sandboxes to turn into something new, allowing them to interact with the environment in different ways. Stand in the sandbox and press the "special" button to activate this ability.


Characters with this ability can also travel through sand to reach new areas. Stand on top of the sand and press the "special" button to travel through it.


Sharp Shoot
Characters with this ability can hit far off targets, either by shooting something or throwing a weapon. Hold the "attack" button to aim, then release it to fire. If not close to another object or enemy, pressing the "attack" button will often perform a long-range attack.


Shield
Characters with this ability can throw a shield into shield switches. Hold the "attack" button and target the shield switch, then release to throw your shield into the socket. This will often activate/deactivate something in the environment.


Shrink
Characters with this ability can shrink down to fit into small tunnels. Hold the "special" button to shrink down, then hold the "special" button to return to normal size.


Stealth
Characters with this ability can sneak past security cameras. Security cameras will be emitting a green laser if they do not detect anyone. If they detect someone nearby, the laser will turn red and the camera will activate, usually closing a door or activating a barrier. Press the "special" button to activate stealth.


Stretch
Characters with this ability can use circular Fantastic 4 panels to stretch their body into useful shapes. Stand on the panel and press the "special" button to transform into an object and interact with the environment.


Super Strength
Characters with this ability can do several things. First, they can pull on super strength handles, which are green handles found on objects. Walk up to the handle and press the "special" button to grab on, then repeatedly press the "special" button to pull on the handle. This will often destroy the object. You can also pick up some large objects by grabbing onto the super strength handle on them.


Characters with super strength can also smash cracked blocks. Simply stand in front of the cracked block and press the "attack" button to smash it.


Some cracked blocks are off of the ground, and will need to be destroyed by throwing something at it. Some characters (such as Thor) can throw their weapon at these cracked blocks to smash them. Other characters can grab rocks out of the ground. Hold the "special" button to grab a rock from the ground, then press the "attack" button to toss it.
Character Abilities cont.
Symbiote
Characters with this ability can travel through black patches of symbiote goo. Stand in the goo and press the "special" button to travel through it.


Technology
Characters with this ability can activate and use technology panels, which are blue panels found on walls. Stand in front of the technology panel and press the "special" button to activate it. You will then have to mash a button to use the panel. Sometimes, you will have to complete a simple puzzle to activate the panel instead.


Telekinesis
Characters with this ability can manipulate purple objects using their mind. Hold the "special" button to manipulate the object.


Some purple objects can be moved freely. While holding the "special" button, use the d-pad to move the object around.


Toxic Immunity
Characters with this ability can walk through toxic waste or gas unharmed.


Web Swing
This ability is very similar to flight, and allows a character to swing around on webs. Double jump to start swinging, and hold the "jump" button to gain altitude. Hold the "special" button to lower your altitude, or double tap it to drop to the ground. Characters with this ability can reach new ledges and areas that other characters can't. However, this ability cannot be used when you are very high up (like when you are on the S.H.I.E.L.D. Helicarrier).
Tour of the S.H.I.E.L.D. Helicarrier
The S.H.I.E.L.D. Helicarrier, while not the size of Manhattan, still has tons for you to do. The interior of the Helicarrier contains several rooms that you can explore, most of which will allow you to do cool things. Let's take a tour!

This section does not cover the locations of the collectibles on the S.H.I.E.L.D. Helicarrier. See the "Exploring the S.H.I.E.L.D. Helicarrier" sections for that info.

When you enter the game, you'll almost always start on the S.H.I.E.L.D. Helicarrier. Pull the nearby lever to activate the lift, allowing you to head inside the Helicarrier.


Entering the Helicarrier will place you in the Control Room. Head to the console in the center of the room and you'll be able to replay any of the Story or Bonus levels that you've beaten.


Head down the stairs to the right to reach the Hangar. While you can't do anything special in here, you'll have to come here while exploring to grab some collectibles.


After completing Exploratory Laboratory, you'll be able to head up the stairs and through the door on the left.


Head down the hallway and you'll find a door on the left. This leads to the Laboratory. Much like the Hangar, you can't do anything special inside.


Head back down the hallway and you'll find a door with a welcome mat in front of it. This leads to Deadpool's Room.


There are several things you can do in Deadpool's Room. You can use the console on the left to enter Cheat Codes.


Activate the central console and you'll be able to purchase any Deadpool Red Bricks that you've found.


You can use the console on the right to view your completed comic book pages.


Head back down the hallway and you'll find another door on the right.


Head inside to reach the Detention Center. Use the consoles in the center of the area to create your own custom Big Figs.


Head through the opening at the end of the hallway to reach the Intelligence Center.


Head through the door on the right to reach the Medical Bay.


You can use the consoles on the right to create your own custom characters.
---------------Story Levels---------------
Sand Central Station - Story Mode
One of New York's most iconic locations, Grand Central Terminal has served as one of the world's busiest transport hubs since it opened in 1913.

Enemies: Sandman Goon
Boss: Abomination, Sandman
Starting Characters: Hulk, Iron Man (Mark 6)
Added Characters: Spider-Man
True Believer: 70,000

Part 1 - Station Approach

Head down the path towards Grand Central Station, smashing the cars and barriers in your way. Eventually, you'll reach a bus blocking the road. Destroy the silver clasps on the nearby fire hydrants to soak the sand in water, creating a cracked block. Smash it to reveal a super strength handle, then pull on it to clear the path.

Continue down the road and you'll find a Roxxon tanker truck in the way. Destroy the silver part of the truck to reveal LEGO pieces, then build them into a super strength handle. Pull on it to clear the path, then continue on to reach Abomination. Press the "attack" button to start the fight, then follow the button prompts to toss him into the station.

Part 2 - Grand Central Station

Now that Abomination has been taken care of, we need to get to Sandman. He'll create two giant hands out of sand that will block the path. To get rid of them, we need to toss things at them. Use the super strength handle on the left to pick up the object, then toss it at one of the hands to destroy it. Head to the right and destroy the silver barricades to reveal another super strength handle, then pull on it to rip out part of the wall. Toss it at the other hand to destroy it, clearing the path.

Continue towards Sandman and a train will appear, dropping off Sandman Goons. Defeat 25 of them and the train will disappear, allowing you to continue up the path. A large wall will then appear. Destroy the silver clock on top of the information booth to reveal LEGO pieces, then build them into a water cannon. Fire it at the wall until a cracked block appears, then smash it to destroy the wall.

Continue down the path and Sandman will create a sandcastle. He will also be launching balls of sand at you, preventing you from reaching the cracked block in the center. Destroy the silver scaffolding on the right to reveal LEGO pieces, then build them into an anvil. Use the super strength handle on it to pick it up, then toss it at the cracked block on the sandcastle.

Part 3 - Rooftop Showdown

Spider-Man has joined the group, and we need to make our way past the electricity to reach Sandman. Head to the left and destroy the silver barrier to clear the way to the generator. Walk up to the generator and use Spider-Man's heightened senses to reveal a pull handle. Latch onto it and pull to destroy the generator, shutting off part of the electricity.

Head to the right and use Spidey-sense to reveal a wall to climb. Climb up to reach the ledge, then latch onto the pull handle and pull to knock down the tower, revealing LEGO pieces. Build them into a super strength handle, then pull on it to destroy the second generator.

With the electricity shut off, head over to the "A" in the center of the area and use Spidey-sense to reveal two pull handles. Latch onto them and pull to lower the "A", allowing you to climb up onto the roof.

Once on the roof, Sandman will knock down a barrier on a ledge on the right. Head to the right and use the pull handle to create a rope, then switch to Hulk. Hold the "tag" button to turn into Bruce Banner, then climb up the rope to reach the ledge. Turn back into Hulk, then pull on the super strength handle to destroy the water tower, revealing LEGO pieces. Build them into a water cannon, then hop in and fire it at Sandman until a cracked block appears. Smash it to damage Sandman.

He will then reappear, revealing a large air vent on the left side of the roof. Smash the cracked block on top of it to reveal LEGO pieces. Build them into a cement mixer, then use the super strength handle on it to pick it up. Toss it at Sandman to reveal another cracked block, then smash it to damage him again.

He will then reappear, and to defeat him, we need to fill up that water tank in the center. Pull on the pull handle in the back left corner to reveal a lever, then pull it to partially fill up the tank. Destroy the silver object in the back right corner to reveal another lever, then pull it to fill up the rest of the tank.

Once the tank is full, use Spidey-sense to reveal a pull handle, then latch onto it and pull to launch the water at Sandman, revealing another cracked block. Smash it to defeat Sandman, ending the level.

Unlocked Characters: Iron Man (Mark 6), Hulk, Spider-Man, Roxxon Guard (150,000), Sandman (175,000)
Sand Central Station - Free Play Mode
Required Abilities: Claw, Dig, Electric, Flight, Freeze, Heightened Senses, Laser, Mind Control, Pull, Sand, Super Strength, Telekinesis

Part 1 – Station Approach

Canister 1
There are 3 blue mailboxes you need to destroy. The first can be found by hopping onto the street to the left of your starting point.


After clearing the bus out of the path, you’ll be able to continue down the lower streets. The second mailbox is in the back left corner of the area.


The third mailbox is in the back right corner of the area. Destroy all 3 to reveal this Canister.


Canister 2
Grab a rock from the ground and toss it at the cracked billboard on the left side of the path to reveal this Canister.


You’ll need to fly up to it to reach it.


Canister 3
Hop onto the road on the right and you'll find a pizza scooter buried in the sand.


Dig it up and a stud trail will appear. After clearing the bus from the main path leading to the station, hop on the pizza scooter and follow the stud trail to park it in front of the pizza shop, revealing this Canister.


Canister 4
Charge the generator on the road to the right of the main path to open the garage doors, revealing this Canister inside the shop.


Use heightened senses to reveal two pull handles.


Latch onto them and pull to open the door, allowing you to head inside and collect this Canister.


Part 2 – Grand Central Station

Stan Lee in Peril
Fly onto the ledge to the left of your starting point and you’ll find Stan trapped underneath a newsstand. Destroy it to rescue him.


Canister 5
After rescuing Stan Lee, you'll find this Canister trapped in a gold cage above you. Destroy the gold weight on the right to send the cage crashing to the ground, allowing you to collect this Canister.


Canister 6
Use heightened senses to the right of the info booth to reveal a gold valve.


Destroy it to open up the pipe, spilling water onto the sand.


This will reveal a sandbox. Use it to turn into an excavator, revealing this Canister.


Canister 7
Cut the shape out of the gold panel on the left to reveal a claw switch.


Use it to open the garage door, revealing this Canister.


Use mind control to take control of the citizen inside, allowing you to collect it.


Part 3 – Rooftop Showdown

Canister 8
Use telekinesis on the clock in the foreground to give the clock hands to the statue in the center. He will then conduct the other statues, revealing this Canister.


Canister 9
There are 5 gold objects you need to destroy. The first is to the left of your starting point.


The second is up on the ledge by the generator on the right.


The third can be found in the near left corner of the rooftop where you fight Sandman.


The fourth is in the back left corner of the rooftop where you fight Sandman.


The fifth is in the back right corner of the rooftop where you fight Sandman. Destroy all 5 objects to reveal this Canister.


Canister 10
After destroying the water tower on the right, you'll leave a puddle of water behind.


Freeze it to create an ice slide, then hop on to slide down it and collect this Canister.
Interlude - Baxter Building Break-in
Characters: Mr. Fantastic, Captain America

We need to get down to the Baxter Building so we can do some research on the cosmic bricks. Follow the stud trail to reach a diving platform, then jump off to skydive off the helicarrier! You can hold the "jump" button to speed up or hold the "special" button to slow down if you wish. Once you get close to the ground, you'll automatically deploy a parachute.

You'll find yourself in a park across the street from the Baxter Building. The gate leading to the street is locked, so we'll need to find a way to open it. Destroy the glowing streetlight to the left of the gate to reveal LEGO pieces, then build them into a grate. Use Mr. Fantastic to travel through it, popping out on the street. Destroy the nearby glowing satellite dish to reveal LEGO pieces, then build them into a Fantastic 4 panel. Use it to turn Mr. Fantastic into a pair of pliers, destroying the lock on the gate and allowing Captain America to join you.

Head to the right side of the Baxter Building and toss Cap's shield into the shield socket. This will lower a ladder, allowing you to climb up onto the ledge. Head to the left and glide across the gap, then use the technology panel to open the doors. This will instead activate lasers. Drop off the ledge and use the beam deflection panel to deflect the lasers into the wires above the door, shutting them off and opening the door. Head inside to start the next level.

Unlocked Characters: Captain America, Mr. Fantastic
Times Square Off - Story Mode
The top five floors of the Baxter Building are home to the Fantastic Four. Up-to-date plans are unavailable, as Reed Richards is continuously reconfiguring the layout of his labs.

Enemies: Octobot
Boss: Doctor Octopus
Starting Characters: Captain America, Mr. Fantastic
Added Characters: Spider-Man
True Believer: 170,000

Part 1 - Laboratory

Doc Ock is getting away with the cosmic brick, and we need to stop him! Defeat the Octobots that attack you and more will burst out of the wall on the right, leaving LEGO pieces behind. Build them into a Fantastic 4 panel, then use it to turn Mr. Fantastic into a screwdriver. He will reveal a shield panel on the wall, so toss Cap's shield into it to raise up a lift.

Ride it onto the ledge and Doc Ock will flee, leaving LEGO pieces behind. Drop down and build them into a grate, allowing Mr. Fantastic to reach the area on the left. Head back onto the ledge and head to the left. Use Cap's shield to walk through the flames, allowing you to join Mr. Fantastic on the left.

Latch onto the pull handle and pull to reveal LEGO pieces, then build them into a shield switch. Toss Cap's shield into it to reveal a plug. Climb the ladder in the back to reach the ledge, then use the technology panel to place the plug into the socket, revealing a button.

Step on it to activate a laser, revealing LEGO pieces. Build them into a beam deflection panel, then use it to deflect the beam into the glowing discs. Once both discs are powered up, a large lift will appear. Hop on to reach the roof.

Part 2 - Rooftop Chase

Head to the right and you'll find H.E.R.B.I.E., who will tell you that you'll need to glide across the gap to reach Doctor Octopus. Do as he says, (if you want, you can destroy the nearby antenna to reveal LEGO pieces for a tightrope, allowing Cap to join you). Latch onto the pull handle and pull to reveal LEGO pieces. Build them into a ladder, then climb up to reach the room above you.

Destroy the boxes inside to reveal LEGO pieces, then build them into a rotary handle. Turn it to rotate the big satellite dish above you, revealing a pole. Switch back to Cap and swing across the poles to reach the roof on the right. Continue along the path and head down the stairs, then toss Cap's shield into the shield switch. This will shut off the fans below, allowing Mr. Fantastic to use the grate and join you.

Head back up the stairs and destroy the blue pipes and AC unit to reveal LEGO pieces. Build them into a Fantastic 4 panel, then use it to turn Mr. Fantastic into a water pump. This will destroy the nearby water tower, revealing LEGO pieces. Head back up the stairs and hop onto the platform, then build the LEGO pieces into a tightrope. Slide down it to reach another rooftop.

You'll be immediately grabbed by Doc Ock. Switch to your partner and smack him, causing him to run away again. Continue to the right and hop up the ruined ledge. Doc Ock will then climb on top of a "HOTEL" sign. Toss Cap's shield at the glowing support on the bottom right corner of the sign, revealing the support on the left. Toss Cap's shield at that support to knock down the sign, allowing you to continue to the right.

Head up the sign and continue to the right, then use Cap's shield to destroy the object underneath the ladder, lowering it. Climb up and head inside the building, then have Mr. Fantastic use the pull handle to reach the ledge. Unfortunately, the elevator is not working. We need to get Cap on the roof so he can fix it.

Have Cap walk through the flames on the right, then hop up the wall to reach the roof. Destroy the nearby blue AC unit to reveal LEGO pieces, then build them into a shield switch. Toss Cap's shield into it to turn the elevator on. Switch back to Mr. Fantastic, then head inside the elevator and step on the button to reach the roof. Continue to the right and glide across the gap, then build the LEGO pieces that appear into a tightrope, allowing Cap to join you.

Continue to the right and you'll find Doc Ock hanging out on the Daily Bugle sign. Head to the right and travel through the grate to reach the upper ledge. Hold the "attack" button and target Doc Ock to knock him off the sign. He will then start swinging on the side of the building. Latch onto the pull handle above you, then pull to knock down the sign, revealing LEGO pieces. Drop down and build them into a Fantastic 4 panel, then use it to turn Mr. Fantastic into a crane.

Part 3 - The Chase Continues

Spider-Man has once again decided to join us, and we're still chasing after Doc Ock on the rooftops. Latch onto the pull handle across the gap and pull to knock down the tower, allowing you to cross. Use Spidey-sense to reveal a wall, then climb up to reach the ledge above you. Use Spidey-sense again to reveal two pull handles, then latch onto them and pull to power up the generator. This will turn on some fans, allowing your partners to join you.

Continue to the right and smash the boxes in the back right corner to reveal LEGO pieces. Build them into a technology panel, then use it to open the gate. Continue to the right and use the Fantastic 4 panel to turn into a rocket, crashing into the billboard and revealing two pull handles.

Latch onto them and pull to pull down the billboard, allowing you to continue to the right. Head up the billboard and climb the ladder onto the ledge, then continue to the right. Doc Ock will then show up, crashing a helicopter into the building. Follow him to the right.

Part 4 - Times Square

Time to finally face Doc Ock. Avoid his attacks until one of his arms gets stuck in the ground. When he gets stuck, stand in the circle by his arm and press the "attack" button to cut it off. Repeat this process until he's down to one heart. He will then run around Times Square. Catch up to him and smack him one more time to complete the level.

Unlocked Characters: Doctor Octopus, H.E.R.B.I.E. (200,000)
Times Square Off - Free Play Mode
Required Abilities: Dig, Electric, Explosive, Extinguisher, Flight, Laser, Magnet, Power Cosmic, Stretch, Super Strength, Symbiote, Telekinesis

Part 1 – Laboratory

Canister 1
Manipulate the metal valve to open the safe, revealing this Canister.


Canister 2
Destroy the silver object on the right side of the area to reveal a generator.


Charge it to reveal an opening, allowing you to head inside and grab this Canister.


Part 2 – Rooftop Chase

Canister 3
Head down and to the left from your starting point to find some rubble on the ground.


Destroy it to reveal a dig site. Dig it up to reveal cosmic LEGO pieces.


Use Power Cosmic to build them into a rocket, revealing this Canister.


Canister 4
There are 5 greenhouses you need to smack. The first can be found after gliding across the first gap.


The second is to the right of the first shield switch.


The third greenhouse can be found on the ledge just before the “HOTEL” sign.


The fourth is on the far left side of the roof of the building with the broken elevator.


The fifth is on the right side of the roof of the building with the broken elevator. Smack all 5 greenhouses to reveal this Canister.


Canister 5
After sliding down the tightrope and scaring off Doc Ock, destroy the silver vent on the wall to reveal some symbiote goo.


Travel through it to reach the greenhouse above you, where you'll find this Canister.


Part 3 – The Chase Continues

Stan Lee in Peril
Fly onto the roof of the building to the left of the large lawn, then destroy the silver objects to reveal LEGO pieces.


Build them into a pipe, then use telekinesis on the valve to destroy the water tower, revealing Stan Lee.


Canister 6
Destroy the silver objects in the lawn to reveal LEGO pieces, then build them into a pump.


Hop on it a bunch of times to reveal a Fantastic 4 panel.


Use it to turn into a lawnmower, mowing the grass and revealing this Canister.


Canister 7
Destroy the gold fuel tank in the back right corner of the lawn to destroy the grill, revealing this Canister.


Put out the fires, allowing you to collect it.


Part 4 – Times Square

Canister 8
There are 5 fire hydrants with gold tops you need to destroy. The first is in the back left corner.


The second is on the left side of the area.


The third is in the near right corner.


The fourth is on the right side of the area.


The fifth is in the back right corner. Destroy all 5 to receive this Canister.


Canister 9
Pull on the super strength handle on the police van in the near left corner to destroy it, revealing this Canister.


Canister 10
Destroy the silver car in the back right corner to reveal a cracked block, then smash it to reveal this Canister.
Interlude - Oscorp Infiltration
Characters: Hawkeye, Black Widow

Green Goblin has taken the cosmic brick to Oscorp, and we need to chase after him! Times Square is in ruins after our battle with Doc Ock, so we'll need to use some fancy acrobatics to make our way around. Before heading down the stairs, use Hawkeye to destroy the silver billboard in the background, revealing slots on the wall. Shoot arrows into them, then head down the stairs.

Walk across the beam, then head over to the arrows. Jump on and swing across the gap, then continue to the left. Follow the guide studs and you'll find your path blocked by downed power lines. Head back to the right to find a wall, then hop up it to reach the ledge above you. Use the technology panel, then select each of the arrow icons to shut off the electricity.

Drop back down and follow the guide studs into the alley, then latch onto the rope point and pull to open the gate. Continue to Oscorp, where you'll find a booth guarded by a security camera. Use Black Widow's stealth to sneak past the camera, then pull the lever to open the door. Head inside to start the next level.

Unlocked Characters: Hawkeye, Black Widow
Exploratory Laboratory - Story Mode
Within the Oscorp building's high-security perimeter, Norman Osborn's labs undertake secretive research into radical new chemical and genetic technologies.

Enemies: Oscorp Scientist, Symbiote Scientist, Symbiote Scientist (Hazmat)
Boss: Green Goblin, Venom
Starting Characters: Spider-Man, Black Widow, Hawkeye
True Believer: 100,000

Part 1 - Main Labs

Green Goblin is flying around, and we need to catch up to him! Head to the right and use the technology panel to enter the code (match the colors that flash), opening the door. Continue to the right and you'll enter a small lab. Latch onto the pull handles on the vents on the ceiling, then pull to open them, revealing LEGO pieces. Destroy the silver boxes on the right to reveal more LEGO pieces, then build them into a technology panel. Use it to enter the correct code, opening the door.

Continue to the right and Green Goblin will appear, triggering the security system. A barrier will then lower on the right. Use Spidey-sense near it to reveal two pull handles, then latch onto them and pull to tear down the barrier. Continue to the right, then hit Green Goblin with a ranged attack. He will then crash into the elevator shaft, destroying the glass and allowing you to head inside.

Walk across the beam, then use Spidey-sense to reveal a wall to climb. Climb up, then destroy the glowing panel to reveal a lever. Pull it to reveal a ladder, allowing your partners to join you. Destroy the silver AC unit above you to reveal a pull handle. Latch onto it to create a rope, then climb up. Latch onto the pull handle on the left, then pull to lower the beam.

Walk across it to the left, then head down the hallway. Use Spidey-sense at the end to reveal two pull handles. Latch onto them and pull to reveal a silver panel. Destroy it to destroy the door, allowing you to continue down the hallway. Use stealth to sneak past the cameras, then grab the bar at the end of the path to shut off the lasers. Latch onto the pull handle on the left and pull to open the door. Head inside.

Part 2 - Trash Compactor

We need to get out of the crusher! Destroy the silver support above you to knock down the container, revealing LEGO pieces. Destroy the engine to reveal more LEGO pieces, then build them into a ladder. Climb up to reach the ledge, then head to the right.

Head down the path and destroy the silver objects on the ledge above you to knock down the sign. Use Spidey-sense to reveal two pull handles, then latch onto them. Pull to knock down a large box. Hop on top of it, then hop onto the ladder.

Climb up to the top ledge, then use the technology panel on the left to reveal sockets on the wall. Shoot arrows into them, then swing up as Black Widow to reach the ledge. Use stealth to sneak past the camera, then pull the lever to reveal another ladder. Climb up.

Part 3 - Symbiote Labs

Head to the right and you'll find a door. We need to find a power generator to restore the power to it. Continue to the right and you'll find your path blocked by some boxes. Smash through them, then continue to the right.

You'll find two pull handles. Latch onto them and pull to power up the generator, revealing LEGO pieces. Build them into a socket on the wall, then shoot an arrow into it. Hop onto the arrow and swing up onto the ledge on the right, then use the technology panel to connect the wires. This will restore the power.

Head back to the left and Venom will retreat into the hallway, closing the door behind him. Head into one of the small rooms and step on the button to partially power the door. Switch to your partner and step on the button in the other room to open the door.

Head into the hallway, then destroy the large box to reveal LEGO pieces. Destroy the objects on the walls to reveal the rest of the LEGO pieces, then build them into a speaker. Latch onto the pull handle and pull to turn it on, clearing the path ahead of you. Continue down the hall.

Part 4 - Genetics Labs

Head down the hallway and Venom will do his best to scare you. After his jump scare, continue down the hallway. Destroy the two silver consoles to reveal pull handles, then latch onto them and pull to clear the path.

Head into the next room and Venom will appear. Defeat some enemies and Venom will crash into a container on the left, revealing LEGO pieces. Build them into a radio, knocking Venom down. Smack him to take off a heart.

Venom will then jump away, destroying the radio. A symbiote scientist will crash through the glass in the back, revealing a lever. Pull it to reveal a flamethrower. Hop in and aim it at Venom to knock him down, then smack him to take out another heart.

He will then hop onto the crane on the right. Use Spidey-sense to reveal two pull handles. Latch onto them and pull to reveal LEGO pieces, then build them into a bell. Shoot the target under it to ring it, knocking down Venom. Smack him to take out his last heart, ending the level.

Unlocked Characters: Venom, Symbiote Scientist (Hazmat) (150,000)
Exploratory Laboratory - Free Play Mode
Required Abilities: Claw, Dig, Electric, Flight, Freeze, Grate Travel, Laser, Magnet, Mind Control, Power Cosmic, Shield, Super Strength, Symbiote, Technology, Telekinesis

Part 1 – Main Labs

Canister 1
There are 4 gold Oscorp posters you need to destroy. The first is to the left of your starting point.


The second can be found in the second hallway.


The third is to the right of the elevator shaft.


The fourth can be found in the same room as Canister 4 (see below). Destroy all 4 to receive this Canister.


Canister 2
Head into the alcove on the right side of the room with the desks you destroy, then manipulate the metal batteries to place them in the slots on the wall. This will open the door on the left.


Head inside, then use the technology panel to match the DNA model on the left with the image on the right. This will open the container on the left, allowing you to collect this Canister.


Canister 3
Pull on the super strength handle on the left side of the room with the elevator shaft to reveal a shield switch.


Toss your shield inside to make the nearby hologram dance, revealing this Canister.


Canister 4
While heading down the hallway towards the exit, use mind control to take control of a person in the room on the right.


Pull the lever to remove the covering on a grate.


Switch back to your character, then travel through the grate to reach the room on the left.


Charge the two generators inside to reveal a claw switch.


Use it to teleport this Canister in front of you, allowing you to collect it.


Part 2 – Trash Compactor

Canister 5
Head to the right side of the area and you'll find a ladder leading to a trash compactor.


Drop down, then dig up the dirt to reveal this.


Canister 6
There are 3 colored spiders you need to build. While climbing up the ladder, hop onto the first ledge on the left. You'll find a large container of vats.


Destroy it to reveal some symbiote goo.


Travel through it to reach the room below you, then destroy the containers to reveal LEGO pieces. Build them into a green spider.


To build the second spider, smash the cracked block on the right side of the upper ledge to reveal LEGO pieces. Build them into a red spider.


To build the third spider, head to the far right side of the upper ledge. Use telekinesis on the valve to reveal some LEGO pieces below you.


Drop down and build them into a purple spider. Build all 3 spiders to receive this Canister.


Part 3 – Symbiote Labs

Canister 7
After overloading the generator, you'll be attacked by symbiote scientists as you move back to the left. In the center room is a puddle of water.


Freeze it to reveal this Canister, then melt the ice block so you can collect it.


Canister 8
Destroy the gold vent in the room to the left of the exit, revealing this Canister.
Exploratory Laboratory - Free Play Mode cont.
Part 4 – Genetics Labs

Stan Lee in Peril
Manipulate the metal container by your starting point to reveal a claw switch.


Use it to open the hibernation pods, rescuing Stan Lee.


Canister 9
After rescuing Stan Lee, you'll be able to collect this Canister in an open hibernation pod on the right.


Canister 10
While fighting Venom, fly up to the ledge in the back and destroy the boxes to reveal cosmic LEGO pieces.


Use Power Cosmic to build them into a handle, opening the vault and allowing you to collect this Canister.
Interlude - To the Raft
Characters: Iron Man (Mark 6), Hulk

Sounds like there is trouble at the Raft! We now have the ability to explore all of Manhattan, so fly around if you want to reveal more parts of the map. Unfortunately, we can't fly to the Raft just yet (defense lasers will take you out), so follow the guide studs to reach a harbor. Unfortunately, the ferry that will take us to the Raft is partially sunken in the water. Destroy the silver shipping container to raise the ferry back up, revealing the ferry captain.

Talk to him and he will tell you that you need a ticket to travel to Ryker's Island. Follow the guide studs back up the stairs and head into the open garage. Build the LEGO pieces into a ticket machine, then pick up the ticket it spits out. Give it to the ferry captain, then hop on the boat to ride over to the Raft. Head over to the gate and pull on the super strength handle to tear off the panel. Destroy the silver clasp to open the gate, then head inside to start the next level.
Rock up at the Lock up - Story Mode
Located off Manhattan's east coast, the highest-security area of Ryker's Island Maximum Security Penitentiary is known as the Raft. Looking for the worst of the worst in super-villainy? You'll find them here.

Enemies: Inmate
Boss: Leader, Sabretooth, Abomination
Starting Characters: Iron Man (Mark 6), Hulk, Wolverine
True Believer: 150,000

Part 1 - Raft Exterior

We need to get inside the Raft to reach Sabretooth. Head down the path and through the gap in the fence to the right. When you get close to the bridge, a large wave will knock it down. Fly across the gap and build the LEGO pieces into a rotary handle, then turn it to raise up the bridge, allowing your partners to join you.

Continue to the right, then dig up the dirt to reveal LEGO pieces. Build them into a super strength handle, then pull on it to tear a hole in the wall. This will allow Hulk to reach the lift inside, but we need to find a way to power it up. Use Wolverine's heightened senses to reveal a wall, then climb up. Destroy the vats in the back right corner to reveal a claw switch, then use it to activate the lift.

Switch to Hulk and step on the button on the lift to activate it, allowing you to reach the upper ledge. This will also activate the security system, revealing four silver turrets. Fly around and destroy the turrets to shut off the lasers. Continue to the left and a gate will close. Pull on the super strength handle to destroy the gate, then continue to the left.

Use Wolverine's senses to reveal a wall, then climb up. Grab the bar above you to lower a ladder, then climb up. Head to the right and slice through the cracked block to reveal a technology panel. Use it to release the four large clasps holding the door closed, opening the door. Head inside, then continue down the hallway. Smash through the debris at the end to reveal a cracked wall, then smash it to reveal an opening. Head inside.

Part 2 - Cell Blocks

Whiplash will charge up a generator, preventing you from reaching Sabretooth. Head up the stairs and Leader will appear. He will create an energy shield, preventing you from damaging him. Destroy the silver objects he's moving around to destroy the energy shield. He will then use mind control to stun your character. Switch to your partner and smack Leader to scare him off.

Continue down the path to the right, then slice through the cracked block to create an opening. Head inside, then use Wolverine's senses to reveal a wall. Climb up, then use the claw switch to lower the bars on the right. Head back down and continue to the right.

Whiplash will charge up another generator, electrifying the area around Abomination's cell. Destroy the glowing containers in the back right corner to reveal LEGO pieces, then build them into a technology panel. Use it to send the charge back through the wire, damaging Whiplash.

Abomination will then wake up and start pounding on the walls of his cell. Use Wolverine's senses to reveal a super strength handle, then pull on it to pull the floor out from underneath Abomination. Hop on top of the platform and climb up the chain to reach the ledge on the left, then use Wolverine's senses to reveal a wall.

Climb up to reach the ledge, then destroy the silver locks to open the door. Head inside, then destroy the silver lock to open the next door. Head inside and to the left, then destroy the silver tanks to reveal LEGO pieces. Build them into a claw switch, then use it to open the main door.

Hop out of the hole in the wall, then drop down and head up the path through the main door. Use the technology panel to select each of the "?" icons, locating Sabretooth. JARVIS will then open the elevator, allowing you to head inside.

Part 3 - Going Up?

Iron Man has been decommissioned by Magneto, so it's up to Wolverine and Hulk to take out Sabretooth. Defeat the inmates that attack you and eventually Magneto will levitate a platform. Sabretooth will hop on, and the only way to knock him down is to throw something at him. Build the LEGO pieces into a bathtub, then pick it up using the super strength handle. Toss it at Sabretooth to knock him down, damaging him.

Continue to defeat inmates until Magneto levitates another platform. Build the LEGO pieces that appear into a couch, then pick it up using the super strength handle and toss it at Sabretooth to damage him again.

Defeat the last wave of inmates and Magneto will levitate two platforms. Rebuild the bathtub and couch, then use the super strength handles to toss them at Sabretooth, defeating him.

Part 4 - Landing Pad

Looks like Abomination wants a rematch. In order to distract him, we need to shine a searchlight at him. Head to the right and dig up the dirt to reveal LEGO pieces. Build them into a ladder, then climb up to reach the ledge. Use Wolverine's senses to reveal a wall. Climb up, then hop onto the searchlight. Shine it at Abomination until the bar fills up, then follow the button prompts as Hulk to damage him.

Sabretooth will then destroy the searchlight, forcing you to find another one. Head to the far right and use Wolverine's senses to reveal a cracked block. Grab a rock from the ground (or a large S.H.I.E.L.D. shipping crate) and toss it at the cracked block to destroy it, revealing LEGO pieces. Build them into a trampoline, then use it to bounce up onto the ledge. Hop up the wall, then use the claw switch to reveal another searchlight. Hop on, then shine it at Abomination until the bar fills up. Follow the button prompts as Hulk to take another heart off Abomination.

Sabretooth will then destroy the searchlight. An elevator will then activate on the left. Head back to the left and climb the ladder, then head inside the elevator to reach the ledge above you. Grab onto the pole, then swing up to reach another ledge. Destroy the boxes to reveal LEGO pieces, then build them into a claw switch. Use it to reveal another searchlight. Hop on and shine it at Abomination until the bar fills up, then follow the button prompts as Hulk to defeat him, ending the level.

Unlocked Characters: Tony Stark (Underwear), Wolverine, Abomination (250,000), Sabretooth (250,000)
Rock up at the Lock up - Free Play Mode
Required Abilities: Dig, Electric, Explosive, Flight, Freeze, Grate Travel, Heightened Senses, Laser, Magnet, Pull, Sand, Technology

Part 1 – Raft Exterior

Canister 1
There are 5 red life preserver stands you need to destroy. The first is by your starting point, in the near right corner.


The second can be found by the bridge that gets destroyed.


The third is to the right of the large lift.


The fourth can be found to the left of the lift controls.


The fifth can be found on the left side of the upper ledge. Destroy all 5 to receive this Canister.


Canister 2
You'll find this Canister behind some metal bars near your starting point. Manipulate the metal bars and they'll fall away, allowing you to fly up to this Canister.


Canister 3
You'll find a drain pipe across from the lift. Latch onto the pull handle on it and pull to reveal a puddle of water.


Freeze it to create a fishing rod, which will reel in this Canister.


Canister 4
Fly out over the water and head to the right. You’ll find a boat with a silver object inside. Destroy it to reveal some boxes of food. A shark will then eat the boat, giving you this Canister.


Stan Lee in Peril
You'll find a grate to the left of the exit. Travel through it to reach the room with Stan Lee.


Use heightened senses to reveal two pull handles.


Latch onto them and pull to rescue Stan Lee.


Part 2 – Cell Blocks

Canister 5
Manipulate the metal bars on the cell to the left of Abomination to destroy them, allowing you to head inside.


Destroy the bunk inside to reveal LEGO pieces, then build them into a grate.


Travel through it to reach the cell on the left, where you'll find this Canister.


Canister 6
Manipulate the metal dumpster to the right of Abomination's cell to reveal a small metal trashcan.


Manipulate it to reveal a metal pail.


Manipulate the pail to reveal this Canister.


Canister 7
Latch onto the pull handles above Abomination's cell, then pull to reveal a gold panel.


Fly up to it and cut the shape out of it to reveal LEGO pieces. Build them into this Canister.


Canister 8
After using the technology panel to find Sabretooth, wait for the lift to appear. Once the lift appears, use heightened senses on the left to reveal a generator.


Charge it to reactivate the technology panel.


Use it and you'll pull up another maze.


Select the Canister icon and a static screen will appear. You should get the Canister a few seconds later. You may need to move the cursor around behind the static to collect the Canister.
Rock up at the Lock up - Free Play Mode cont.
Part 4 – Landing Pad

Canister 9
There are 3 drones you need to reveal. To find the first, destroy the silver objects on the left side of the area to reveal some dirt.


Dig it up to reveal LEGO pieces.


Build them into a box, then pull the nearby lever to open it, releasing the drone.


To find the second drone, destroy the gold box on the right side of the area. This will reveal a sandbox.


Use it to turn into a cannon, firing out this drone.


The third drone can be found on the ledge with the third searchlight. Pull the lever to open the box, releasing the drone. Release all 3 drones to receive this Canister.


Canister 10
After opening the door to the lift on the left, head inside and fly straight up to reach this Canister.
Interlude - Change of Clothes
Characters: Tony Stark (Underwear), Captain America

After getting the Mark 6 dismantled by Magneto, Tony needs to head back to Stark Tower to get a new suit. Hop on the ferry to get a ride back to Manhattan, then follow the guide studs to reach the base of Stark Tower. Unfortunately, Tony forgot his keys, so you'll need to find another way inside.

Toss Cap's shield at the "A" in the Stark logo to reveal a shield switch, then toss his shield inside to open the garage. Use the technology panel inside to send power through the wires, revealing the entrance to Stark Tower. Head inside to start the next level.
Rebooted, Resuited - Story Mode
Stark Tower dominates the Manhattan skyline as either a highly advanced technological research facility or a giant monument to its owner's ego. Depends who you ask.

Enemies: Extremis Soldier
Boss: Aldrich Killian, Mandarin
Starting Characters: Captain America, Tony Stark
Added Characters: Iron Man (Mark 1), Iron Man (Mark 42)
True Believer: 145,000

Part 1 - Suiting Up

First thing we need to do it get past those laser gates. Look up on the wall in the back of the area and you'll see a shield switch. Toss Cap's shield at the cage around it to clear it up, then toss his shield into the shield switch. This will raise the barrier, allowing you to access the room behind it.

Destroy the objects inside to reveal LEGO pieces, then build them into a technology panel. Use it, then select each of the laser gates to shut them off. Unfortunately, they will not be shut off permanently. Continue to the right, timing your movements past the laser gates.

Once you get past the gates, a large laser will appear. Use the nearby beam deflection panel to reflect the laser back at itself, destroying the cannon and revealing LEGO pieces. Build them into another technology panel, then use it to take control of a drone.

Fly it up and to the right, then through the gap above the window. Continue flying it to the right and land it on the marked point to open up the case containing the Mark 1 armor. Head over to it as Tony, then press the "special" button in the white circle to put the armor on.

Aldrich Killian will then appear with some soldiers and start wrecking the place. Head back to the left and destroy the silver cage above the laser barrier to reveal a shield switch. Toss Cap's shield into it to raise up the barrier. Head inside the room, then step on the buttons in the elevator to head up.

Part 2 - New Toys

Head to the right and you'll notice a fork in the path. The bottom path is blocked by some lasers, so take the upper path to reach a lever. Pull it to reveal a large wheeled platform. Head over to the technology panel that appears and use it to move the platform over to Cap. He will then hop on the platform, so switch to him and ride it back to the right. Hop onto the ledge, then walk through the fires. Smash the console at the end of the path to shut off the lasers, allowing Iron Man to join you.

Continue to the right and Killian will continue to flee. Destroy the silver clasps to open the door to the balcony, then head outside. Hop onto the pole, then swing up to reach the ledge. Continue to the right, then head back inside. Grab the bar on the left to activate a fan, allowing Iron Man to join you.

Continue to the right on the ledge and you'll find another fan. This fan is stopping you from continuing. To shut it off, destroy the large silver panel on the wall to send it crashing to the ground. Once the fan is shut down, drop down and continue to the right.

Destroy the box in front of the laser gate to reveal a beam deflection panel. We'll be using this later. Continue to the right and destroy the silver clasps on the door to destroy it. Hop up the walls as Cap to reach the ledge above you, then head to the left. Turn the rotary handle to reveal a silver bundle of wires below you.

Destroy it to activate two lasers. Head back to the left and use the beam deflection panel to deflect the lasers into the blue panels on either side of the door, charging them up. Once both panels are charged, the door will open.

Continue down the hall and you'll be ambushed by a laser. Use the beam deflection panel to redirect the laser back at itself, destroying the cannon. Continue down the hall and build the LEGO pieces into bars. Grab one, then switch to your partner and grab the other one. This will open the door to JARVIS.

Head inside and destroy the box in front of you to reveal another beam deflection panel. Head to the back of the room and toss Cap's shield into the shield switch on the left, activating a laser. Head back to the beam deflection panel and use it to redirect the beam into the panel on the right, charging it up. Toss your shield into the shield switch on the right to charge up the other panel, rebooting JARVIS.

With JARVIS rebooted, have Iron Man stand in the white circle in the center of the room and press the "special" button to equip the Mark 42. The Mark 42 comes with a laser, so use it to cut through the gold panel in the back of the room. Head inside.

Part 3 - Landing Pad Showdown

Time to face both Mandarin and Killian. Mandarin will teleport away for a bit, so you're left to deal with Killian and his Extremis goons. Defeat enough goons and Mandarin will reappear and mind control you. Switch to your partner and smack Mandarin to damage him. Killian will then come running after you, so smack him to take off one of his hearts as well. Repeat this process two more times and Killian will be down.

Mandarin will then take over the Hulkbuster armor and start shooting at you from the air. Defeat 40 Extremis soldiers and the Hulkbuster will become vulnerable to attack. Blast it with Iron Man's lasers or Cap's shield and JARVIS will activate House Party Protocol, calling a whole bunch of Iron Man suits to your aid.

Unfortunately, the Hulkbuster will destroy all of them, leaving LEGO pieces behind. Build them into an ARC reactor, then toss Cap's shield in the shield switch to activate it, shutting down the Hulkbuster. Destroy the gold panel on its back to complete the level.

Unlocked Characters: Iron Man (Mark 1), Iron Man (Mark 42), Tony Stark, Aldrich Killian (150,000), Mandarin (100,000)
Rebooted, Resuited - Free Play Mode
Required Abilities: Agility, Electric, Flight, Freeze, Laser, Magnet, Mind Control, Pull, Sand, Super Strength, Telekinesis

Part 1 – Suiting Up

Canister 1
You'll find an Extremis soldier in a room on the right side of the area.


Use mind control to take control of him, then pull the lever to open the garage on the left.


Head inside and use telekinesis to place both wheels on the hot rod.


Once both wheels are in place, manipulate the metal engine to place it in the car.


Once the hot rod is ready, hop in and follow the stud trail to reach this Canister.


Canister 2
Use telekinesis to destroy the cabinets with purple drawers on the right, leaving LEGO pieces behind.


Latch onto the pull handles and pull to destroy the other cabinets, revealing more LEGO pieces.


Build them into a generator, then charge it to reveal this Canister.


Part 2 – New Toys

Stan Lee in Peril
You'll find Stan hanging from a bar in the near left corner of the area, near your starting point. Use the nearby sandbox to turn into a trampoline, allowing him to hop down.


Canister 3
There are 5 gold holoprojectors that you need to destroy. The first can be found by heading to the right of the fan you ride up.


The second can be found in the same room as Canister 5 (see below).


The third is in a small room to the right of the hallway leading to JARVIS.


The fourth is on the right side of the hallway leading to JARVIS.


The fifth is on the right side of the room with JARVIS. Destroy all 5 to receive this Canister.


Canister 4
Before heading back inside from the balcony, fly up to reach this Canister floating above the doorway.


Canister 5
While hopping up the wall on the right, keep hopping to reach the top of the wall, where you'll find the entrance to a small room.


Hop inside, then use telekinesis to destroy the cabinets with purple drawers, revealing LEGO pieces.


Latch onto the pull handles and pull to destroy the other cabinet, revealing more LEGO pieces.


Build them into a jukebox, revealing this Canister.


Canister 6
Pull on the super strength handle on the ledge on the right to tear off the glass barrier, revealing this Canister.


Part 3 – Landing Pad Showdown

Canister 7
This Canister can be found sitting out in the open near the back left corner of the area.


Canister 8
Head to the back part of the lower level and you'll find this Canister behind a door. Use telekinesis to ring the bell, opening the door and allowing you to collect this Canister.


Canister 9
Head to the right side of the lower level and you'll find a puddle of water. Freeze it to create a chest, revealing this Canister.


Canister 10
Once Mandarin hops into the Hulkbuster, you'll be able to fly to the upper ledge. Manipulate the 3 metal spotlights to destroy them, revealing this Canister.
Interlude - Hunt for Hydra
Characters: Hawkeye, Black Widow

We need to figure out where Loki is taking the ARC reactors! Follow the guide studs and skydive off the helicarrier to reach Manhattan. Once on the streets, follow the guide studs as Nick Fury works to locate the signal. You'll be led to a pier. Use stealth to sneak past the security camera, then pull the lever to open the garage. Unfortunately, it seems the coordinates are off!

Fury will then send you some updated coordinates, so follow the guide studs to reach a small seafood store. Latch onto the pull handle on the sign, then pull to reveal the Hydra logo. Shoot an arrow into the socket on the logo, then build the LEGO pieces into a trampoline. Bounce on it and grab the arrow, rotating the logo and revealing an opening. Head inside to start the next level.
Red Head Detention - Story Mode
Standing over 1400 feet tall and weighing 365,000 tons, the Empire State Building was opened in 1931, and has remained one of New York City's most recognizable landmarks ever since.

Enemies: Hydra Goon
Boss: Red Skull
Starting Characters: Black Widow, Hawkeye
Added Characters: Human Torch, Captain America
True Believer: 95,000

Part 1 - Base Infiltration

Time to infiltrate a Hydra base! Head to the right and use stealth to sneak past the security cameras, revealing a lift. Head inside and step on the button to reach the ledge above you, then head to the left. Hop up the walls, then destroy the generator to shut off the cameras, allowing Hawkeye to join you.

This will also reveal LEGO pieces, so drop back down and build them into a bar. Grab onto it to reveal a large silver structure to the right. Switch to Hawkeye and destroy it to stop the gear, allowing you to continue to the right.

Continue to the right and you'll find a large circular door. Destroy the boxes to the right of it to reveal LEGO pieces. Build them into a technology panel, then use it to rotate the wires on the screen, sending power to the right. This will open the door, allowing you to head inside.

Part 2 - Generator Room

Human Torch has arrived to help out! Head down the path, then take a right and head down the stairs. You'll find a gold wall. Cut the shape out of it to reveal a computer screen. Use the technology panel that appears to take control of some mirrors. You need to manipulate the mirrors so the light matches the pattern that flashes on the screen. Match three patterns and the cart will make its way over to you, creating a bridge.

Head back up the stairs, then cross the bridge and continue to the right. Grab the bar on the right to clear up the button on the lift, then step on it to reach the ledge. Continue along the path and Loki will flee, along with Red Skull and Arnim Zola. Continue to the right and use stealth to sneak past the camera, allowing you to head inside the room. Destroy the generator inside to shut off the camera, as well as open the door on the right.

Continue to the right and shoot an arrow at the pull handle to create a rope, then grab on and hop on the ledge to the right. Continue to the right and you'll find a rope. Grab onto it as Hawkeye, then switch to Black Widow and use the technology panel to move him to the right. Switch back to Hawkeye and latch onto the pull handle, then pull to reveal a bar. Grab onto it to reveal a gold object. Destroy it to reveal a socket, then shoot an arrow into it, allowing Black Widow to join you.

Continue to the right and you'll be shot at by a large cannon. Use stealth to sneak past it, then continue to the right. Ride one of the gear platforms to the right, then continue to the right and use stealth to sneak past the camera. Pull the lever to shut off the camera and cannon, allowing your partners to join you. Continue to the right and latch onto the pull handle, then pull to open the door. Head inside.

Part 3 - Armory

Loki and his Hydra friends are still running, and we need to catch up to them! Head to the right and cut the shape out of the gold wall to reveal a ladder. Climb up, then head to the right. Destroy the silver engine to reveal LEGO pieces, then build them into walls. Hop up them to reach the ledge above you, then head down the path.

Two more cannons will then activate, so use stealth to sneak past them and head to the left. Use the technology panel to destroy the cannons, revealing an opening. Use Human Torch to defeat the gold-armored Hydra goons, then head inside.

Part 4 - Star-Spangled Man

Captain America has joined the team, just in time to take down the Red Skull. Get close to Red Skull and he will shoot at you, pushing you back. Switch to Captain America and press the "special" button to lower your shield, allowing you to deflect Red Skull's shots. Walk up to him and attack him as Cap to take off one of his hearts.

Arnim Zola will then pull a lever, revealing LEGO pieces on the left and a lever on the right. Head to the left and build the LEGO pieces into a shield switch, then toss your shield inside to reveal a gold panel. Cut the shape out of it to reveal some power cells, then destroy them to destroy the cannon above you.

Head to the near right corner and pull the lever to reveal another gold panel. Cut the shape out of it to reveal more power cells, then destroy them to shut off the cannon above you. Once both power cells have been destroyed, attack Red Skull as Cap again.

Zola will then pull another lever, revealing LEGO pieces on the right and a lever on the left. Build the LEGO pieces on the right into a shield switch, then toss your shield inside to reveal a gold panel. Cut the shape out of it to reveal power cells, then destroy them to shut off the cannon above you.

Head to the near left corner and pull the lever to reveal a gold panel. Cut the shape out of it, then destroy the power cells that appear to shut off the cannon above you. With all power cells destroyed, Red Skull will hop back down. Attack him as Cap to take out his last heart, ending the level.

Unlocked Characters: Human Torch, Arnim Zola (200,000), Red Skull (200,000)
Red Head Detention - Free Play Mode
Required Abilities: Claw, Electric, Extinguisher, Flight, Freeze, Grate Travel, Laser, Magnet, Pull, Sharp Shoot

Part 1 – Base Infiltration

Canister 1
There are 3 spiders you need to destroy. If you get too close to them, they will retreat, so you’ll need to hit them from a distance. The first is to the left of the first security cameras you encounter.


The second can be found to the left after riding up the lift.


The third appears to the right of the exit, towards the ceiling. Destroy all 3 spiders to reveal this Canister.


Canister 2
After hopping up the wall, manipulate the metal fan to destroy it, revealing this Canister.


Canister 3
You'll find a puddle of water to the left of the exit. Freeze it to create a box with this Canister inside.


Melt it and you'll be able to collect the Canister.


Part 2 – Generator Room

Canister 4
There are 5 gold pillars with Hydra logos on them that you need to destroy. The first is in the back left corner of the area.


The second is up on a ledge on the left side of the area. Fly up to it to reach it.


The third can be found by heading down the stairs by your starting point and continuing to the right.


The fourth is in the back right corner of the area.


The fifth is on a ledge to the left of the large rotating gear. Fly up to it to reach it. Destroy all 5 to reveal this Canister.


Stan Lee in Peril
Fly up to a ledge in the back left part of the area and you’ll find Stan Lee trapped behind some electricity. Destroy the generators on either side of him to free him.


Canister 5
Head to the right side of the area with the tracks and you'll find a generator.


Charge it to start rotating the gear, revealing this Canister. If you miss it, don't worry, as it will come around again.


Canister 6
You’ll notice this Canister surrounded by flames in an alcove to the left of the large gear. Fly down to it, then put out the fires (or walk through them) to reach this Canister.


Part 3 – Armory

Canister 7
Continue to the right past the silver engine and you'll find this Canister inside a rocket. Latch onto the pull handles and pull to tear off the panel, allowing you to collect it.


Canister 8
Fly up onto the ledge above the exit to find a claw switch. Use it to turn on the speaker and receive this Canister.


Part 4 – Star-Spangled Man

Canister 9
There are 4 blue flags you need to destroy. The first is in the near left corner of the area, up on the ledge.


The second is in the back left corner of the area, up on the ledge.


The third is in the back right corner, up on the ledge.


The fourth is in the near right corner, up on the ledge. Destroy all 4 flags to reveal this Canister.


Canister 10
Head to the right side of the upper ledge and you'll find a grate. Travel through it to reach the room behind Arnim Zola, where you'll find this Canister.
Interlude - A God Among Men
Characters: Captain America, Human Torch

Wolverine needs to pick up some more hair gel, so he'll run off. Thor has arrived, so follow the guide studs to meet up with him. Once you get close to him, you'll start the next level.
Bifrosty Reception - Story Mode
Most of what S.H.I.E.L.D. knows about Thor and his people remains highly classified. What little information we've obtained about his home Asgard comes from, well, this one children's book found by Dr. Erik Selvig in New Mexico. Seems pretty accurate so far...

Enemies: Frost Giant
Boss: Loki
Starting Characters: Captain America, Human Torch, Thor, Wolverine
True Believer: 95,000

Part 1 - The Bifrost

As you travel along the Bifrost, move around to collect studs and avoid obstacles. Once you reach the end, you'll arrive in Asgard.

Part 2 - Observatory

It looks like Loki has already been here, as parts of the observatory are frozen. Thankfully, you have Human Torch with you. Head to the center of the area and melt the ice around the sword to reveal LEGO pieces. Build them into a generator, then charge it up to open the door on the right. Head outside.

Part 3 - The Bifrost Bridge

Head down the Bifrost, defeating 20 Frost Giants as you go. Once you reach the end, Loki will appear. At first, he will be protected by a barrier. Once you defeat the 20 Frost Giants, the barrier will disappear. Once you get close to him, he will mind control you. Switch to your partner and smack him to scare him off. Melt the large block of ice in front of the gate, revealing a cracked block. Toss Mjolnir (Thor's hammer) at it to smash the gate open. Continue down the bridge.

Part 4 - Asgard

Loki is now standing on a ledge, and if you try to walk up the stairs to reach him, you'll slide back down. Fly up to him and he will mind control you, so switch to the other flying character and smack Loki to scare him off. He will knock over some pillars before he leaves. Destroy the remains of the pillars to reveal LEGO pieces. Build them into a ramp, allowing your partners to join you.

Head to the right and use Wolverine's senses to reveal a place to climb. Climb up, then use the claw switch to create an opening on the right. Head inside, then charge the generator to shut off the barrier completely, allowing you to continue to the right.

Continue to the right and destroy the gold statue to reveal LEGO pieces. Build them into a shield switch, then toss your shield inside to reveal a rotary handle. Turn it to create stairs, then head up them. Continue to the right and you'll run into Loki again. He will mind control you, so switch to your partner and smack him to scare him away.

Use Wolverine's senses on the left to reveal a dig site. Dig it up to reveal LEGO pieces, then build them into a claw switch. Use it to move the generator to your right up and out of the shield. Fly up and charge it to open the door below you, revealing a lift.

Now that Cap and Wolverine can join you, continue to the right and use Wolverine's senses to reveal a cracked block on the statue in the back. Toss Mjolnir at it to knock it down, then destroy the gold panel on the back of the statue's head to reveal LEGO pieces. Build them onto the fountain, which will grow some flowers to the right.

Hop up the flowers, then head into the dining room. Loki will then make several copies of himself appear. Use Wolverine's senses to reveal the real Loki, then walk up to him. He'll mind control you, so switch to your partner and smack him to scare him off. He will retreat again, revealing LEGO pieces. Build them into a shield switch, then toss your shield into it to open the door. Head inside.

Part 5 - The Destroyer

Loki has taken control of the Destroyer, and we need to stop him! Avoid the Destroyer's attacks for awhile and LEGO pieces will start to appear. After enough time has passed, you'll be able to build them into a beam deflection panel. Use it to deflect the Destroyer's beam at Loki, damaging him. This will leave the Destroyer vulnerable, so walk up to it as Thor and press the "attack" button to damage it.

Avoid the Destroyer's attacks some more and a large ice block will eventually appear on the right. Melt it to reveal LEGO pieces, then build them into a beam deflection panel. Use it to reflect the Destroyer's beam back at Loki, damaging him. Approach the Destroyer as Thor and press the "attack" button to damage it again.

Avoid the Destroyer's attacks some more and another ice block will appear on the left. Melt it to reveal LEGO pieces, then build them into a beam deflection panel. Use it to reflect the Destroyer's beam back at Loki, damaging him. Approach the Destroyer as Thor and press the "attack" button to incapacitate it.

Loki will then hop down from the throne, revealing more copies of himself. Use Wolverine's senses to reveal the true Loki, who will then mind control you. Switch to your partner and smack him to take out his last heart, completing the level.

Unlocked Characters: Thor, Destroyer (MiniFig) (250,000), Frost Giant (250,000)
Bifrosty Reception - Free Play Mode
Required Abilities: Dig, Electric, Explosive, Flight, Laser, Magnet, Pull, Super Strength, Telekinesis

Part 1 – The Bifrost

Canister 1
This appears in the bottom left corner of the Bifrost. You’ll run into it just before reaching Asgard.


Part 2 – Observatory

Canister 2
Head behind the sword in the center of the area to find this hidden Canister.


Stan Lee in Peril
You'll find Stan trapped under a silver wheel in the back of the area. Destroy it to rescue him.


Canister 3
Latch onto the pull handle on the right and pull to reveal a gold eye.


Destroy it to reveal this Canister.


Part 3 – The Bifrost Bridge

Canister 4
Destroy the silver armor on the statue to the left of the exit to reveal a pull handle.


Latch onto it and pull to reveal this Canister.


Canister 5
Manipulate the metal armor on the statue to the right of the exit, destroying it and revealing this Canister.


Part 4 – Asgard

Canister 6
There are 3 flowers hidden in ice blocks that you need to reveal. The first is on the left side of the ledge where Loki first appears.


The second is on the left side of the small lift.


The third is to the right of the small lift. Reveal all 3 flowers to reveal this Canister.


Canister 7
Fly up to the ledge to the left of where Loki first appears to find a silver panel.


Destroy it to reveal a generator.


Charge it up to open up the area below you. Drop down and use telekinesis to move the ice block out of the water.


Melt the ice block, allowing you to collect this Canister.


Canister 8
After charging a generator to lower a barrier, continue to the right and head down the stairs. Fly to the right and you'll notice that the path continues on.


Continue to the right and destroy the silver box to reveal LEGO pieces.


Build them into a rotary handle, then turn it to move the statue into position.


Destroy the brown box on the right to reveal more LEGO pieces.


Build them into a statue, opening the gate in the back and revealing more LEGO pieces. Build them into a super strength handle, then pull on it to tear off the gate, revealing more LEGO pieces.


Build them into the Infinity Gauntlet, then use telekinesis on it to reveal this Canister.


Canister 9
Destroy the plants in the center of the small courtyard across from the lift to reveal a dig spot.


Dig it up to reveal LEGO pieces, then build them into this Canister.


Part 5 – The Destroyer

Canister 10
There are 3 gold statues that you need to destroy. The first is on the left side of the stairs.


The second is on the left side of the throne, partially hidden behind it.


The third is on the right side of the stairs. Destroy all 3 to reveal this Canister.
Interlude - X-Mansion Attack
Characters: Jean Grey, Cyclops

The Brotherhood of Mutants is attacking the X-Mansion, and we need to head inside to stop them! Follow the guide studs and head up the steps. You'll find Stan Lee trapped behind some fires. Use Jean Grey's mind control to take control of Stan Lee, then build the LEGO pieces into a valve. Use telekinesis to turn it, activating the sprinklers and putting out the fires. Continue to the right and use telekinesis to place the broken piece of the statue back in its place, revealing an opening. Head inside to start the next level.

Unlocked Characters: Jean Grey, Cyclops
Juggernauts and Crosses - Story Mode
Officially, Professor Charles Xavier's Institute for Higher Learning is an ordinary boarding school, but the truth is it also serves as a home and shelter for young mutants with extraordinary powers, collectively known as the X-Men.

Enemies: Magneto Acolyte
Boss: Juggernaut
Starting Characters: Jean Grey, Cyclops
Added Characters: Storm, Iceman, Beast
True Believer: 105,000

Part 1 - Entrance Lobby

We need to open up two escape tunnels to help out the students.

Female Student - Head to the left and destroy the gold statue to reveal a bookshelf. Use telekinesis on it to lower it into the ground, revealing a lever. Pull it to reveal the first escape tunnel.

Male Student - Head to the right and destroy the wooden rubble by the stairs to reveal LEGO pieces, then build them onto the stairs. Walk up and continue to the right, then use telekinesis on the image of Jean Grey to reveal a gold wall. Cut the shape out of it to reveal LEGO pieces, then build them into a lever. Pull it to reveal the second escape tunnel.

With both groups of students rescued, Juggernaut will crash through the area, destroying the door on the right. Follow him inside.

Part 2 - Dining Room

Head to the right and Juggernaut will crash through the wall, blocking the path. Use mind control to take control of the maintenance worker, then head into the restroom. Build the LEGO pieces into a water tank, putting out the fires.

Switch back to Jean, then use telekinesis to destroy the door. Head inside and continue to the right. You'll find the entrance to the dining room blocked off by debris. Destroy the gold object, then use telekinesis to clear the rubble.

Head inside the dining room and you'll find Storm trapped in Toad's tongue. Switch to her and spam the "attack" button to charge up her electricity, freeing her and adding her to your party. You now need to reveal another escape tunnel to rescue the trapped students.

Destroy the piano in the back left corner to reveal LEGO pieces, then build them into a chair. Put out the fires in the back right corner, then use telekinesis to move the chair to the table. Once all three chairs are at the table (one chair is already in place), use telekinesis to attach each chair's arms to the table. This will reveal a generator. Charge it up to reveal the escape tunnel.

The security door will then be activated, preventing you from heading outside. Cut out the shape in the gold panel on the right, revealing a power cable. Use telekinesis to attach it to the nearby suit of armor, revealing another generator. Charge it up to open the door. Head outside.

Part 3 - Garden Terrace

Head to the right and you'll find Iceman battling Pyro. Switch characters to switch to Iceman, then spam the "special" button to freeze Pyro, adding Iceman to your team. Juggernaut will then break through the nearby window, destroying the fountain. Freeze the water left behind to create stairs, then climb up to reach the roof.

Head to the right and destroy the gold object to clear the rubble, revealing a pool of water. Freeze it to create a bridge, then cross it and continue to the right. Use telekinesis to remove the plants, revealing a gold wall. Cut the shape out of it to create an opening, then head inside.

Part 4 - Rec Room

We need to find another escape tunnel. Use telekinesis on the bookshelf on the left to reveal a room behind the wall. Use mind control on the construction worker inside, then pull the lever to reveal some buttons on the floor. Switch back to Jean, then step on the buttons that correspond to the lit-up portions on the screen. This will reveal the last escape tunnel.

Magneto will then taunt you, and his acolytes will clear the rubble on the stairs on the right. Build the LEGO pieces that appear into a platform. Cyclops will automatically hop on, so use telekinesis to raise him up to the ledge. Once he hops onto the ledge, switch to him and head to the left.

Destroy the gold pendulum on the grandfather clock to destroy it, revealing LEGO pieces. Build them into a ladder, allowing your partners to join you. Put out the fires across the gap in the back of the ledge, then use telekinesis to create a bridge. Destroy the gold hinges to destroy the door, then head into the opening.

Part 1 - Entrance Lobby

We're back in the lobby now. Drop down and head to the right and Juggernaut will run across the upper balcony, chasing Gambit. Head up the stairs on the right and put out the fires, then smash through the rubble to clear the way to the balcony.

Put out the fires in the center of the balcony to reveal LEGO pieces, then build them into suits of armor. Use telekinesis to place each suit of armor on the pedestal that matches its color. This will reveal a generator. Charge it up to reveal a lift behind the fireplace. Head inside.

Part 5 - Hangar Battle

Beast has joined us, just in time to take on the Juggernaut. Juggernaut will start throwing large boxes at you. Use telekinesis to send one back at him, damaging him. He'll then drop down and destroy a chemical tank, leaving some fires behind.

Put them out to reveal LEGO pieces, then build them into a bar. Hop onto it, then switch to your partner and grab the bar on the other side of the garage door to open it. Destroy the box that falls out to reveal LEGO pieces, then build them into a boombox. Use telekinesis on it to lure Juggernaut into crashing into the pipes. Freeze the water that appears, then use telekinesis on the ice block to damage Juggernaut.

He'll then start throwing more boxes at you. Use telekinesis to send one back at him, damaging him. He'll fall down into another chemical tank, revealing some fires. Put them out to reveal LEGO pieces, then build them into a technology panel.

Use it to open the garage door, then destroy the objects that fall out to reveal LEGO pieces. Build them into an alarm clock, luring Juggernaut into charging into the pipes. Freeze the water on the ground, then use telekinesis on the ice block to damage Juggernaut.

He will then toss an engine into the ceiling, knocking down some LEGO pieces. Build them into a technology panel, then use it to move the claw down the path to Juggernaut, knocking off his helmet. Follow the button prompts to take control of Juggernaut, then pull on the super strength handle in the back to reveal some water. Freeze it, then use telekinesis on the ice block to damage Juggernaut, completing the level.

Unlocked Characters: Storm, Beast, Iceman, Juggernaut (250,000), Pyro (150,000)
Juggernauts and Crosses - Free Play Mode
Required Abilities: Dig, Explosive, Extinguisher, Grate Travel, Laser, Magnet, Pull, Sand, Sharp Shoot, Shield, Super Strength, Telekinesis

Part 1 – Entrance Lobby

Canister 1
Manipulate the metal record player on the ledge on the left to reveal this Canister.


Canister 2
Destroy the gold lock on the bookshelf by the exit to reveal LEGO pieces.


Build them into an “X” pattern, revealing this Canister.


Part 2 – Dining Room

Canister 3
Latch onto the pull handle near your starting point and pull to open the door.


Destroy the box inside the room to reveal this Canister.


Canister 4
Destroy the silver stall in the bathroom to reveal a toilet plunger.


Use telekinesis on it to reveal this Canister.


Canister 5
Manipulate the metal statue to the left of the exit to raise it up.


Manipulate the metal bars to destroy them, allowing you to collect this Canister.


Part 3 – Garden Terrace

Canister 6
There are 5 stone gargoyles you need to destroy. The first can be found up on the ledge above your starting point.


The second can be found to the right of your starting point, surrounded by two fires.


The third can be found to the left of the broken staircase.


The fourth can be found by heading down the stairs by the exit.


The fifth can be found to the right of the exit. Destroy all 5 gargoyles to receive this Canister.


Stan Lee in Peril
Put out the fire on top of the shed to the left of the fountain to reveal LEGO pieces.


Build them into a super strength handle, then pull on it to reveal LEGO pieces.


Build them into a trampoline, allowing Stan to hop down.


Canister 7
Destroy the silver rubble to the right of the fountain to reveal a dig site.


Dig it up to reveal LEGO pieces.


Build them into a sandbox, then use it to radio in a helicopter. The helicopter will drop a box, revealing this Canister.


Canister 8
Destroy the objects to the left of the exit to reveal a dig site, then dig it up to reveal LEGO pieces.


Build them into a chainsaw, then use telekinesis on it to cut the bush into an "X", revealing this Canister.


Part 4 – Rec Room

Canister 9
Manipulate the metal object on the right to destroy it, revealing LEGO pieces.


Build them into a shield switch, then toss Cap's shield into it to open up the room on the left.


Head inside, then travel through the grate to receive this Canister.


Part 5 – Hangar Battle

Canister 10
There are 4 small yellow screens that you need to use telekinesis on. The first is in the near left corner.


The second is in the back left corner.


The third is in the back right corner.


The fourth is in the near right corner. Destroy all 4 screens to reveal this Canister.
Interlude - Operation Latveria
Characters: Mr. Fantastic, Invisible Woman

Thing will run off after Human Torch, leaving you with Mr. Fantastic and Invisible Woman. Follow the guide studs to reach Central Park. The Fantasti-car is hidden underneath a fountain, and we'll need to uncover it so we can use it to reach Latveria. Use telekinesis on the hot dog stand to reveal LEGO pieces, then build them into a Fantastic 4 panel. Use it to turn into a wheel, rotating the fountain and revealing the Fantasti-car. Hop inside to start the next level.

Unlocked Characters: Invisible Woman
Doctor in the House - Story Mode
Deep in central Europe lies a small nation known as Latveria, ruled by Victor von Doom. Don't let the rustic look of Dr. Doom's castle fool you; it has incredibly advanced weaponry hidden behind its stone walls, even really good Internet.

Enemies: Doombot
Boss: Green Goblin
Starting Characters: Mister Fantastic, Invisible Woman, Thing
Added Characters: Human Torch, Nick Fury
True Believer: 100,000

Part 1 - Skydive

As you approach Doom's castle from above, move around to collect as many studs as you can.

Part 2 - Castle Walls

We've been knocked off course and need to reunite with Human Torch and Nick Fury. Latch onto the pull handle and pull to reveal purple platforms. Use telekinesis to stack them on the purple panel, allowing you to hop up to the ledge above you. Before heading up, use the super strength handle on the left to pick up the box, then toss it at the cracked block above you to destroy it, revealing a ledge.

Hop up the platforms to reach the ledge, then head to the left. Latch onto the pull handle to reach the next ledge, then head to the right. Pull the lever to reveal a ladder, allowing Invisible Woman to join you. Use the beam deflection panel to deflect the laser into the blue dish, powering up a bridge. Drop back down, then cross the bridge and continue to the right.

You'll find a large satellite dish, and you'll need to disable it to shut off the interference. Grab onto the super strength handle underneath the dish and pull to reveal some LEGO pieces. Build them into a Fantastic 4 panel, then use it to turn into a drill and reveal a technology panel. Use it to select the red "X" icon, shutting off the dish.

This will extend another bridge, so cross it and continue to the right. Smash the cracked block to reveal platforms, then use telekinesis to place them on the purple slots. Hop up to reach the ledge, then head to the right.

Use stealth to sneak past the security camera, then stand on the button. Use telekinesis on the object to reveal LEGO pieces on the ledge above you. Latch onto the pull handle to reach the ledge, then build the LEGO pieces into a rotary handle. Turn it to shut off the lasers and camera below you.

Drop back down and continue to the right, then smash the cracked block to clear the path. Continue up the stairs, then use telekinesis on the object to reveal a grate. Travel through it, then glide across the gap to the right to reach a ledge. Latch onto the pull handle, then pull to reveal LEGO pieces. Build them into a Fantastic 4 panel, then use it to turn into a fuse box, powering up a bridge. Drop down, then cross the bridge and continue to the right.

Part 3 - Team Rendezvous

Human Torch is busy fighting Doombots, and we need to meet up with him. Head down the stairs and to the right, then smash the cracked block to clear the path. A Doombot will then shut off the bridge, activating a security camera.

Use stealth to sneak past the camera, then head inside the alcove. Head to the right and use telekinesis on the plug to shut off the camera. Use the technology panel to power the bridge, then continue to the right. Latch onto the pull handle and pull to lower a ladder, then climb up.

Grab onto the super strength handle on the right to pick up the box, then toss it at the cracked block to reveal a laser. The laser will destroy a statue, revealing LEGO pieces. Build them into a beam deflection panel, then use it to deflect the laser into the blue dish on the left. This will power up a bridge.

Cross it to reach Human Torch, then switch to him, adding him to your party. Head up the stairs to the left, then pull on the super strength handle to reveal a ladder. Climb up to reach Nick Fury, hen switch to him, adding him to your party.

We now need to call down a lift. Use telekinesis on the cannon to move it into position, then destroy the gold panel to reveal a lever. Pull it to destroy the door on the right. Continue to the right and head inside, then latch onto the pull handle and pull to activate the alarm. This will lower the lift. Head back down and cut the shape out of the gold wall, revealing the lift. Have Thing step on the button inside to head up.

Part 4 - Throne Room

Green Goblin took out Human Torch, so it's up to the rest of your party to take him down. Green Goblin will fly around, crashing through some windows. Eventually, he'll crash through a window on the left, revealing LEGO pieces. Build them into a box, then use the super strength handle on it to pick it up. Toss it at Green Goblin to knock him off his glider. He will then run up to you. Smack him around to take off three of his hearts.

He'll then hop back on his glider and fly around some more. Eventually, he'll crash through a window on the right, revealing LEGO pieces. Build them into a net, then use telekinesis on it to knock Green Goblin off his glider. He'll then run after you again, so smack him to take out three more hearts.

He'll get back on his glider and start flying around again. Eventually, he'll crash through a window in the back, revealing LEGO pieces. Build them into a Fantastic 4 panel, then use it to turn into a control tower. This will cause Green Goblin to fall off his glider, so smack him one more time to complete the level.

Unlocked Characters: Thing, Nick Fury, Doombot (250,000), Green Goblin
Doctor in the House - Free Play Mode
Required Abilities: Dig, Electric, Explosive, Flight, Heightened Senses, Laser, Magnet, Mind Control, Pull

Part 1 – Skydive

Canister 1
This appears in a ring of studs towards the center of the screen.


Part 2 – Castle Walls

Canister 2
There are 5 gold statues you need to destroy. The first is to the left of your starting point.


The second is on the top of the first ledge, to the left of the lever you pull to create a ladder.


The third is across from the large satellite dish.


The fourth is to the left of the security camera.


The fifth is to the left of the bridge leading to the exit. Destroy all 5 to receive this Canister.


Canister 3
After shutting off the large satellite dish, fly up to it to reach a large container. Manipulate the metal on it to open the container, revealing this Canister.


Canister 4
While on the ledge above the security camera, melt the ice to allow you a better view inside the room.


Use mind control to take control of the Doom Bot, allowing you to collect this.


Part 3 – Team Rendezvous

Canister 5
There are 3 banners you need to reveal by destroying silver objects. The first can be found above your starting point. Fly up to it.


The second and third can be found high up on the castle, above the courtyard where you find Human Torch. Reveal all 3 banners to receive this Canister.


Canister 6
There are 5 blocks of ice you need to melt to reveal LEGO pieces, which you can then build into wall panels. The first can be found right by your starting point.


The second is on the left side of the ledge behind where you find Human Torch.


The third is on the far left side of the area where you find Human Torch.


The fourth is on the right side of the area where you find Human Torch.


The fifth can be found by flying onto the ledge on the right side of the area where you find Human Torch. Build all 5 panels to reveal this Canister.


Stan Lee in Peril
After climbing up the ladder across from Human Torch, head to the right and you'll find Stan Lee inside a cannon.


Use heightened senses to reveal a pull handle, then latch onto it and pull to reveal a gold panel.


Destroy it to fire the cannon, rescuing Stan Lee.


Canister 7
Dig up the snow on the ledge to the left of the courtyard where you find Human Torch to reveal LEGO pieces.


Build them into a trampoline, allowing you to bounce up to this Canister.


Canister 8
Destroy the gold statue on the right side of the area where you find Human Torch to reveal this Canister.


Canister 9
Fly up to the ledge to the right of the courtyard where you find Human Torch, then use heightened senses to reveal two pull handles.


Latch on and pull to tear off the door, allowing you to head inside.


Destroy the silver wall to reveal a gold box.


Destroy it to receive this Canister.


Canister 10
After collecting Canister 9, head to the right on the ledge and destroy the silver panel to reveal a generator.


Charge it to reveal this Canister.
Interlude - Out to Sea
Characters: Iron Man (Mark 42), Thor

We're heading for a S.H.I.E.L.D. research submarine, located way out in the water south of Manhattan. Follow the guide studs and skydive off the Helicarrier to reach Manhattan, then follow the guide studs to reach a pier. Fly over to the submarine to start the next level.
That Sinking Feeling - Story Mode
S.H.I.E.L.D. research submarines are extremely useful for taking the fight to bad guys while underwater. These subs feature advanced tracking equipment, ideal for locating enemies or items of interest.

Enemies: A.I.M. Agent, Doombot
Boss: M.O.D.O.K.
Starting Characters: Iron Man (Mark 42), Spider-Man, Thor
True Believer: 90,000

Part 1 - A.I.M. Submarine

Time to infiltrate the A.I.M. submarine! Destroy the debris in the back left corner to reveal LEGO pieces. Build them into a technology panel, then use it to connect the wires. This will activate a sprinkler, putting out the fires on the right. Cut the shape out of the gold wall to reveal an opening, then head inside.

Use Spidey-sense to reveal a place to climb, then climb up to reach the ledge. Use Spidey-sense again to reveal two pull handles, then latch onto them and pull to connect the water pipes. Drop back down and continue to the right, then use Spidey-sense to reveal two more pull handles. Latch onto them and pull to put out the fires around the debris. Destroy the debris to reveal LEGO pieces, then build them into a generator. Charge it up to open the door, then continue to the right.

You'll find Doctor Doom in the next room, who will flee and block your path forward. Head down the stairs to the right and you'll find a large boat. Fly up to the top level, then destroy the silver boxes to reveal a generator. Charge it up to activate a robotic arm, which will drop a box off.

Use Spidey-sense to reveal two pull handles, then latch onto them and pull to reveal LEGO pieces. Build them into a technology panel, then use it to take control of a submarine in the water. Hold the "special" button to sink down, then run into the two red buttons to activate a bridge.

Cross the bridge, then destroy the gold panel on the box to reveal LEGO pieces. Build them into a generator, then charge it to destroy the large generator. This will shut off the lasers above you, as well as open the security door.

Head back across the bridge, then head left and continue up the path. Head down the hallway and you'll run into M.O.D.O.K. Defeat the A.I.M. agents that attack you and M.O.D.O.K. will activate his laser. While he's using his laser, M.O.D.O.K. will eventually lower his shield, allowing you to hit him with a ranged attack. Do so to knock him down, then smack him to take off one of his hearts. Repeat this process two more times to defeat him.

Part 2 - Underwater

Doom has stolen the S.H.I.E.L.D. submarine, but he's crashed. We're now roaming around underwater looking for him. While Jean Grey is with you, you cannot control her, as she is busy creating an air bubble for you.

Head to the left and destroy the large pieces of debris to reveal a cracked block. Smash it to reveal some LEGO pieces. Build them into a starfish, then use Spidey-sense to reveal two pull handles. Latch onto them and pull to tear down the panel, allowing you to continue.

Continue to the right and you'll reach a temple blocking your path. Use Spidey-sense to reveal two pull handles, then latch onto them and pull to reveal a cracked block. Smash it to destroy the temple, clearing the path.

Continue to the right and you'll find a large silver panel. Destroy it to reveal a cracked block, then smash it to clear the path. Continue down the path, then destroy the four gold panels on the tentacles to scare them off. Use Spidey-sense to reveal two pull handles, then latch onto them and pull to topple the pillar.

Cross the pillar and continue to the right to reach the S.H.I.E.L.D. research sub. Smash the cracked block on it to complete the level.

Unlocked Characters: A.I.M. Agent (250,000), M.O.D.O.K. (250,000)
That Sinking Feeling - Free Play Mode
Required Abilities: Claw, Dig, Electric, Flight, Laser, Magnet, Sand, Shield, Technology, Telekinesis

Part 1 – A.I.M. Submarine

Canister 1
After using the technology panel on the left, you'll notice you can use it again.


Select the left arrow to move the bucket above you to the left, then select the grey icon to dump water on the fire, putting it out and revealing this Canister.


Canister 2
Use the claw switch to the right of the gold wall to reveal an image of M.O.D.O.K., revealing this Canister.


Stan Lee in Peril
You'll find Stan Lee to the right of the water pipes, trapped underneath a metal object. Manipulate it to rescue him.


Canister 3
There are 3 holographs of Doctor Doom you need to destroy. The first is at the base of the stairs to the right of your starting point.


The second can be found to the left of the large boat.


The third can be found to the left of the hallway leading to M.O.D.O.K. Destroy all 3 to reveal this Canister.


Canister 4
Toss your shield into the shield switch in the hallway, causing this Canister to drop from the ceiling.


Canister 5
After building the technology panel that controls the submarine, recharge the generator on the boat to reveal a box.


Destroy the gold panel on it to reveal this Canister.


Canister 6
You’ll find this Canister underwater between the two large red buttons. You can grab it while controlling the submarine.


Part 2 – Underwater

Canister 7
There are 3 chests that you need to dig up. The first can be found to the right of your starting point.


The second is across from the silver panel.


The third can be found by the S.H.I.E.L.D. research submarine. Dig up all 3 chests to receive this Canister.


Canister 8
After destroying the temple, destroy the pillar on the left to reveal some sand.


Travel through it to reach this Canister.


Canister 9
After heading past the temple, you'll see a purple worm above you. Use telekinesis on it to lure in a fish, revealing this Canister.


Canister 10
After destroying the temple, continue to the right and head down the slope. You’ll find this Canister hidden behind a sandcastle.
Interlude - Give Me Liberty
Characters: Mister Fantastic, Hulk

Follow the guide studs and skydive off the helicarrier to reach Manhattan. Once in the city, follow the guide studs to reach a Quinjet. Hop in to start the next level.
Taking Liberties - Story Mode
Roxxon undisputably leads the world in energy production. Its power plant, located a short distance from New York, is rumored to contain some kind of experimental reactor core.

Enemies: Magneto Acolyte
Boss: Mastermind
Starting Characters: Hulk, Wolverine, Mister Fantastic
True Believer: 95,000

Part 1 - Waste Processing

You'll start off trapped in the Quinjet, so spam the "special" button to break yourself out. Head to the right and Lady Liberty will appear, knocking the Quinjet out of the wall. Continue to the right and head into the toxic waste as Hulk, then smash the cracked block to reveal platforms, allowing your partners to cross the toxic waste.

Continue to the right and Lady Liberty will block your path. Climb the nearby ladder to reach the ledge, then head to the left. Slice through the cracked block to reveal a claw switch, then use it to activate the conveyor belt below you. Destroy the blue box that appears to reveal LEGO pieces, then build them into a Fantastic 4 panel. Use it to turn into a mousetrap, clearing your path.

Continue to the right, then head down the stairs and into the toxic waste. Pull on the super strength handle to destroy the support structure. Head back up the stairs, then use Wolverine's senses to reveal a place to climb, allowing him to cross to the right. Latch onto the pull handle above you, then glide across the gap to join Wolverine. Slice through the cracked block to reveal a technology panel, then use it to raise up Hulk in a lift.

With your party back together, continue to the right and Lady Liberty will get her hand stuck between two platforms. Use the super strength handle to pick up the chemical vat, then toss it at the cracked block on the tower to burn Lady Liberty's hand.

Continue to the right and you'll reach a large pool of toxic waste. Use the technology panel to rotate a pillar towards you. Once Wolverine hops on, exit the technology panel to move the platform back, allowing Wolverine to reach the other side. Hulk can reach the other side by walking through the toxic waste, so head to the right as Mr. Fantastic and travel through the grate to reach the other side. Once everyone is on the other side of the toxic waste, step on the three buttons to reveal a lift. Head inside.

Part 2 - Nuclear Reactor

Pull on the super strength handle on the right to start moving the energy cell. Time your movements past it to the right, then use the claw switch to start moving the second set of energy cells. Continue past them to the right, then walk across the bridge.

You'll reach a nuclear core with moving rods. We'll need to shut it off to get past it. Pull on the super strength handle to reveal an opening, then head inside and use Wolverine's sense to reveal a place to climb. Climb up, then head to the right and use Wolverine's sense again to reveal another place to climb. Climb to the right, then drop down onto the ledge. Use the claw switch to slow down the reactor, allowing your partners to join you. Continue to the right, then latch onto the pull handle and pull to open the door. Head inside.

Part 3 - Lady Liberty

We are now inside the statue, and we need to make our way to the top. Head towards the back wall and use Wolverine's senses to reveal a place to climb. Climb up, then use the claw switch to start a lift to the right, allowing your partners to join you.

Head to the left and travel through the grate, then destroy the glowing object to reveal LEGO pieces. Build them into a pull handle, then latch onto it and pull to extend a platform, allowing your partners to join you. Continue to the left and pull on the super strength handle to clear the path.

Continue up the stairs to the right and you'll reach some fires. Destroy the objects in the background to reveal a grate, then travel through it. Destroy the wooden box on the left to reveal LEGO pieces, then build them into a Fantastic 4 panel. Use it to turn into a crane, extending a bridge (and putting out the fires) so your partners can join you.

Smash the cracked block on the right to clear the stairs, then head up. Continue towards the center of the area, then travel through the grate. Continue to the left across the beam, then latch onto the pull handles and pull to lower a bridge, allowing your partners to join you. Pull on the super strength handle to reveal a ladder, then climb up.

A Quinjet will then crash on the right. Before heading over there, latch onto the pull handle on the left and pull to start a lift moving, allowing Hulk to join you. Head to the right and destroy the wooden box to reveal LEGO pieces. Build them into a beam, then walk across it and continue to the right.

Slice through the cracked block to reveal LEGO pieces, then build them into a Fantastic 4 panel. Use it to turn into a firetruck, putting out the fires. Pull on the super strength handle on the Quinjet to clear the path, then continue up the stairs. Use the claw switch to reveal a spiral staircase and a bridge. Cross the bridge and climb up the stairs.

Part 4 - The Mind's Master

Time to face the Mastermind. He will first take control of Wolverine, so smack him until his hearts are depleted. Once his hearts are depleted, switch to Wolverine and spam the "special" button to resist Mastermind's mind control.

He will then take control of Mister Fantastic. Smack Mister Fantastic to take out his hearts. He will occasionally wrap himself around you. When he does this, switch to your partner and smack Mister Fantastic to knock him loose. When his hearts are depleted, switch to Mister Fantastic and spam the "special" button to resist Mastermind's influence.

Mastermind will then take control of Hulk. Since Hulk is a big fig, you cannot damage him normally. Lure Hulk into charging, then move out of the way so he runs into the wall. This will cause him to turn back into Bruce Banner. Smack him to take out a heart. Repeat this process one more time. When Hulk is down to one heart, lure him into charging into the wall again. He will then knock himself out, freeing him from Mastermind's influence.

Mastermind will then drop down, revealing copies of himself. Use Wolverine's senses to reveal the real Mastermind, then smack him to complete the level.

Unlocked Characters: Liberty (250,000), Mastermind (250,000)
Taking Liberties - Free Play Mode
Required Abilities: Explosive, Flight, Freeze, Grate Travel, Laser, Magnet, Power Cosmic, Pull, Super Strength, Telekinesis, Toxic Immunity

Part 1 – Waste Processing

Canister 1
There are 3 purple containers you need to use telekinesis on, destroying them. The first is to the left of Canister 3 (see below).


The second is on the ledge to the left of the glide point.


The third is on the far right side of the area, by the large pool of toxic waste. Destroy all 3 to reveal this Canister.


Canister 2
Fly to the left of your starting point to find a ledge, then head to the bottom of the stairs. Destroy the silver container to reveal this Canister.


Canister 3
After collecting Canister 2, head to the left to find a grate.


Travel through it to reach the inside of the elevator shaft, then fly up to reach this Canister.


Canister 4
After smashing the first cracked block in the toxic waste, head inside the alcove and go to the left to reach this hidden Canister.


Part 2 – Nuclear Reactor

Canister 5
Fly over to the ledge behind your starting point to reach this Canister.


Stan Lee in Peril
You’ll find a tightrope between the two rotating energy cells. Hop on and walk across it to reach a platform with Stan Lee.


Destroy the chemical vat on top of him to rescue him.


Canister 6
After rescuing Stan Lee, latch onto the nearby pull handle and pull to reveal cosmic LEGO pieces.


Use Power Cosmic to build them into a model of the Statue of Liberty, revealing this Canister.


Canister 7
After pulling on the super strength handle to the left of the nuclear core, head inside the alcove and continue to the left (past the location where you can use heightened senses) to reach this Canister.


Part 3 – Lady Liberty

Canister 8
There are 5 blue octagonal signs (they look like blue stop signs) that you need to destroy. The first is up the stairs to the right of your starting point.


The second can be found to the right of the first claw switch.


The third can be found on some stairs on the right side of the statue.


The fourth can be found after climbing up the tall ladder, to the left of the Quinjet crash.


The fifth is to the right of the exit. Destroy all 5 signs to reveal this Canister.


Canister 9
Manipulate the metal lid on the bin to the right of your starting point to open it, revealing this Canister.


Canister 10
You'll find a puddle of water to the right of the stairs leading to the exit.


Freeze it to create a box, then melt it to reveal this Canister.
Interlude - Clobberin' Time
Characters: Captain America, Thing

Magneto is off to Asteroid M, and we need to get there before he does! Follow the guide studs and skydive off the helicarrier to reach Manhattan. Once in the city, follow the guide studs to reach a Quinjet. Hop in to start the next level.
Rapturous Rise - Story Mode
Unfortunately, little intelligence exists concerning this mysterious island. For some reason, it doesn't appear on our maps, and we have very good maps! Lots of vegetation and some evidence of military structures, but that's about all.

Enemies: Magneto Acolyte, Velociraptor
Boss: Rhino, Magneto
Starting Characters: Captain America, Thing
Added Characters: Storm
True Believer: 85,000

Part 1 - Beach

Looks like Thing has gotten himself stuck in the sand. Toss Cap's shield at the glowing plants along the back wall to reveal LEGO pieces. Build them into an air pump, then hop on it a few times to free Thing. Continue to the right and destroy the plants to reveal a cracked block. Smash through it to clear the path, then continue to the right.

Once you get close to the turret, it will start shooting at you. Switch to Cap and press the "special" button to lower your shield. This will deflect the turret's shots back at it, destroying it. Have Thing pick up the rock and toss it at the cracked block to destroy it, revealing a shield switch. Toss your shield in it to overload the generator, shutting off the electricity.

Continue up the path and head to the right. Smash the plants to the left of the waterfall to reveal a super strength handle, then pull on it to reveal some LEGO pieces. Build them into a rotary handle, then turn it to raise up a bridge.

Cross it and continue to the right and you'll find your path blocked by more electricity. Head down the slope, then grab onto the pole and swing across the gap. Destroy the plants to reveal a shield switch, then toss your shield inside to overload the generator, shutting off the electricity above you.

Grab the rope to your right and climb up to reach the ledge, then toss your shield at the glowing crane support to knock it down. Walk up the crane's arm to reach the boat, then pull on the super strength handle to clear the path. Continue into the jungle.

Part 2 - Jungle

Head to the right and destroy the plants on the log to reveal a super strength handle. Pull on it to clear the path, then continue to the right. Pull on the super strength handle on the plane cockpit to knock down the tree, revealing poles. Head back up the path and hop onto the poles, then swing across the gap. Walk through the flames, then pull the lever that appears to create a ramp, allowing Thing to join you.

Continue to the right and destroy the wooden boxes to reveal LEGO pieces, then build them into a super strength handle. Pull on it to create an opening, then continue to the right. Destroy the wooden boxes in the clearing to reveal LEGO pieces, then build them into a jet engine. Hop on to crash through the stone wall, clearing the path.

Continue up the path, then grab onto the bar underneath the bridge. Shimmy across to the right, then drop down once you reach the other side. Head up the path, then head back left on the bridge. Pull the lever to open the gate, allowing Thing to join you. Head back to the right and pull on the super strength handle to clear the path.

Continue up the stairs, then have Thing pick up the rock on the right. Toss it at the cracked block on the wall to destroy it, revealing LEGO pieces. Climb up the ladder and build them into a shield switch, then toss your shield inside to shut off the electricity. Continue up the path.

Part 3 - Magneto's Pets

Storm has decided to join us as we hurry to stop Magneto. Destroy the plants in the back left corner to reveal a cracked wall, then smash it to reveal LEGO pieces. Build them into a generator, then charge it up to lower the gate.

Continue into the next courtyard, then destroy the plants in the center of the area to reveal a beam deflection panel. Use it to deflect the lasers that appear back at the cannons, destroying them. Build the LEGO pieces left behind into a generator, then charge it to lower the gate.

Continue into the next clearing and Rhino will appear. Rhino will run around, randomly charging across the clearing. Destroy all of the orange plants in the center of the area to reveal LEGO pieces, then build them into a large pumpkin. Lure Rhino into charging into the pumpkin and he will stun himself. Switch to Thing and attack Rhino, then follow the button prompts to scare him off.

Magneto will then appear to attack you himself. Avoid the anvil he summons until it is destroyed, then build the LEGO pieces to repair it. Use the super strength handle on it to pick it up, then toss it at Magneto to knock him down. Smack him to take out one heart.

Magneto will then send an alarm clock after you. Avoid it until it is destroyed, then build the LEGO pieces to repair it. Use the super strength handle on it to pick it up, then toss it at Magneto to knock him down. Smack him to take out another heart.

Magneto will then try to smack you with a paddle. Avoid it until it is destroyed, then build the LEGO pieces to rebuild it. Use the super strength handle on it to pick it up, then toss it at Magneto to knock him down. Smack him one more time to complete the level.

Unlocked Characters: Mystique, Rhino (250,000)
Rapturous Rise - Free Play Mode
Required Abilities: Claw, Dig, Explosive, Extinguisher, Grate Travel, Heightened Senses, Laser, Magnet, Pull, Sand, Sharp Shoot, Telekinesis

Part 1 – Beach

Canister 1
Dig up the three dirt piles on the left side of the beach to reveal LEGO pieces.


Build them into a crab, revealing this Canister.


Canister 2
Destroy the gold totem pole on the left side of the beach to reveal a cracked block.


Slice through it to reveal LEGO pieces.


Build them into a sandbox, then use it to turn into a palm tree, revealing this Canister.


Canister 3
After passing the first electric barrier, use heightened senses on the left to reveal a pull handle.


Latch onto it and pull to pull down the 4x4, revealing this Canister.


Canister 4
Cut out the shape in the gold panel inside the wrecked boat to reveal this Canister.


Part 2 – Jungle

Canister 5
There are 5 gold eggs you need to destroy. The first can be found to the left of your starting point.


The second can be found on the ledge above a lever inside a plane.


The third is on the right side of the clearing with the crashed plane.


The fourth is to the right of the bridge.


The fifth is to the left of the exit. Destroy all 5 to reveal this Canister.


Canister 6
There are 4 red suitcases you need to attack. The first is to the right of the large log you destroy.


The second is up on a ledge on the left side of the clearing with the crashed plane.


The third is on the right side of the clearing with the crashed plane.


The fourth is to the left of the shield switch near the exit. Attack all 4 suitcases to reveal this Canister.


Stan Lee in Peril
You'll find Stan trapped behind some fires in the clearing with the crashed plane. Put out the fires to rescue him.


Canister 7
Destroy the silver panel on the right side of the clearing with the crashed plane to reveal this Canister.


Canister 8
Use telekinesis on the plants to the left of the exit to destroy them, revealing LEGO pieces.


Build them into a grate, then travel through it to reach this Canister.


Part 3 – Magneto’s Pets

Canister 9
There are 5 pumpkins you need to dig up and destroy. The first can be found in the near left corner of the first clearing.


The second can be found in the back right corner of the first clearing.


The third is on the right side of the second clearing.


The fourth is in the back left corner of the final clearing.


The fifth is in the near right corner of the final clearing. Dig up and destroy all 5 to reveal this Canister.


Canister 10
You'll find a totem pole up on the ledge in the back left corner of the first clearing. Manipulate the metal on it to knock it down, revealing this Canister.
Interlude - The Stark Jet
Characters: Iron Man (Mark 42), Spider-Man

The Stark Jet is located in Central Park, so follow the guide studs to reach a pier by the lake. Use Spidey-sense to reveal a technology panel, then use it to rotate the colored discs. Rotate the discs so that the colors on the outer discs match up with the colors on the inner disc (you can't rotate the inner disc). This will reveal the Stark Jet out in the lake. Head over to it and hop inside to start the next level.
Magnetic Personality - Story Mode
That's Magneto's space station: Asteroid M. We don't know much about it, but it is sure to be swarming with bad guys and booby traps. Any S.H.I.E.L.D. agent attempting to gain entry should proceed with extreme caution.

Enemies: Magneto Acolyte, Doombot
Boss: Magneto
Starting Characters: Iron Man (Mark 42), Spider-Man, Thor
True Believer: 100,000

Part 1 - Airlock

Magneto has sealed the door, so we'll need to find a way to get it open. Head to the back left corner and you'll find a silver panel. Destroy it to reveal a generator, then charge it to reveal some LEGO pieces.

Head to the back right corner and use Spidey-sense to reveal two pull handles. Latch onto them and pull to reveal a silver panel, then destroy it to reveal another generator. Charge it to reveal more LEGO pieces. After revealing both sets of LEGO pieces, build them into a rotary handle. Turn it to open the airlock, destroying the door. Head down the hallway.

Part 2 - Asteroid M

Head to the right after Magneto, then fly or web swing across the gap. Fly up to the next ledge and Magneto will raise up some metal pillars, preventing you from following him. Use Spidey-sense to reveal a cracked block, then smash it to break the glass. Latch onto the pull handle and pull to reveal some LEGO pieces.

Build them into a generator, then charge it to power up the magnet, destroying the poles and clearing the path. Continue to the right, then use Spidey-sense to reveal a place to climb. Climb up to reach the ledge above you (your partners will fly up to join you).

Magneto will then close the door, preventing you from following him. You'll notice a grey panel to the left of the door. Stand on it and you'll be raised up to a bar above you. We need to reveal another bar on the right.

Head to the right and destroy the silver structure near the grey panel to reveal LEGO pieces. Build them into another bar, then stand on the panel to be raised up to it. Grab onto both bars to reveal two pull handles. Latch onto them and pull to destroy the door.

Continue down the hallway and Magneto will flee through the door on the right. Latch onto the two pull handles and pull to reveal a technology panel. Use it to rotate the hallway so it lines up with the door. Head inside.

Part 3 - Metal Head

Time to take on Magneto, for real this time! He will throw some objects at you, leaving LEGO pieces behind. Avoid his attacks until you can build the LEGO pieces, then build them into an iron. Stand in the white circle as Iron Man and press the "attack" button to hit Magneto with the iron, knocking him to the ground. Smack him to take three more hearts off him.

He will then start shooting at you with a large gun. Once he gets tired of that, he will start to throw more objects at you, leaving LEGO pieces behind. Avoid these attacks until you can build the LEGO pieces, then build them into a pumpkin. Stand in the white circle as Thor and press the "attack" button to knock the pumpkin into Magneto, knocking him down. Smack him to take three more hearts off him.

Magneto will then sweep the area with a large chainsaw. When he gets tired of that, he will start throwing more objects at you, leaving LEGO pieces behind. Avoid his attacks until you can build the LEGO pieces, then build them into a large box. Charge the generator on the box, then stand in the white circle as Spider-Man and press the "attack" button to hit Magneto with it, ending the level.

Unlocked Characters: Magneto (150,000), Magneto Acolyte (15,000)
Magnetic Personality - Free Play Mode
Required Abilities: Claw, Climbing, Dig, Electric, Explosive, Extinguisher, Flight, Freeze, Grate Travel, Heightened Senses, Magnet, Mind Control, Power Cosmic, Super Strength, Telekinesis

Part 1 – Airlock

Canister 1
Manipulate the metal box in the near left corner to open it, revealing cosmic LEGO pieces.


Build them into a carnival ride, then hop on.


Use the d-pad to move around. After a few seconds on the ride, this Canister will appear.


Canister 2
There are 3 groups of green vats you need to destroy. The first can be found to the right of the airlock.


The second can be found in the back right corner.


The third can be found in the back left corner. Destroy all 3 to reveal this Canister.


Canister 3
Destroy the large green box on the right to reveal wires.


Use telekinesis to place them on the purple panels on the wall, revealing this Canister above you. Fly up to reach it.


Canister 4
Pull on the super strength handle to the right of the exit to reveal an opening.


Put out the fires, then head inside and fly up to reach this Canister.


Part 2 – Asteroid M

Canister 5
Fly onto the ledge by your starting point, then use the claw switch to drop the rock to the ground, revealing a dig site.


Dig it up to reveal this Canister.


Canister 6
After passing the bridge, manipulate the metal wall to reveal a generator.


Charge it to open the door on the left.


Use heightened senses to reveal a place to climb, allowing you to reach this Canister.


Canister 7
After collecting Canister 6, drop back down and freeze the puddle of water to create a plunger, revealing this Canister.


Canister 8
After reaching the final ledge, look above you and to the left to see a Magneto Acolyte inside a pipe. Use mind control to take control of him, allowing you to collect this Canister.


Canister 9
Travel through the grate on the right side of the final ledge to reach this Canister.


Stan Lee in Peril
You’ll notice a silver panel above you just before the exit. Destroy it to reveal Stan Lee, rescuing him.


Part 3 – Metal Head

Canister 10
There are 3 metal boxes you need to manipulate. The first is on a ledge on the left.


The second is in the foreground directly across from Magneto.


The third is on a ledge on the right. Manipulate all 3 boxes to reveal this Canister.
Interlude - S.H.I.E.L.D. Rendezvous
Characters: Invisible Woman, Mister Fantastic

Agent Coulson needs us up on the S.H.I.E.L.D. Helicarrier! Follow the guide studs to reach a nearby Call-In Point, then stand in the white circle and press the "special" button to activate it. Select the "Return to Helicarrier" option to transport yourself onto the Helicarrier's deck. Pull the nearby lever to lower the lift.

Once inside the Helicarrier, walk up to Nick Fury and talk to him to start the next level.
A Doom With a View - Story Mode
We've collated all of our data from every S.H.I.E.L.D. agent and Avenger throughout the world, and we've managed to ascertain that Doctor Doom is definitely up to something bad. I know that's not much to go on, but it is a start, right?

Enemies: Magneto Acolyte, Doombot
Boss: Doombot (V-Series), Doctor Doom
Starting Characters: Captain America, Thing, Storm, Spider-Man
True Believer: 85,000

Part 1 - Asteroid M

Head up the stairs and to the right, then use Spidey-sense to reveal a pull handle. Latch onto it and pull to create a platform, then head back to the left. Hop up the walls to reach the ledge above you, then continue to the right.

Hop on the platform and cross the gap, then destroy the glowing console to reveal LEGO pieces. Build them into a shield switch, then throw your shield into it to reveal a power coil. Charge the generator that appears to lower a platform. Hop on the platform, then continue to the right.

Pull on the super strength handle to reveal a shield switch, then toss your shield inside to reveal a pull handle. Latch onto it and pull to activate the laser, revealing LEGO pieces. Build them into a beam deflection panel, then use it to reflect the laser into the large circular panel on the right. This will reveal a platform, allowing you to continue to the right.

Continue to the right, then smash the cracked block to reveal a generator. Charge it to activate a lift. Ride it to reach the ledge above you, then pull on the super strength handle to reveal two pull handles. Latch onto them and pull to create an opening. Head inside.

Part 2 - Space Walk

Head to the right and you'll find that the floor is moving to the left. If you try to walk up the ramp, you won't be able to make it. However, Spider-Man can swing up and Storm can hover up. Head up the slope, then charge the generator to reverse the direction of the floor, allowing your partners to join you.

Continue to the right and use Spidey-sense to reveal a pull handle. Latch onto it and pull to reveal LEGO pieces, then build them into a shield switch. Toss your shield into it to open the door. Continue up the slope (hovering or web swinging to reach the top), then destroy the box to reveal LEGO pieces. Build them into a generator, then charge it to reverse the direction of the floor, allowing your partners to join you.

Continue to the right and use Spidey-sense to reveal a cracked block. Smash it to create an opening, then head inside the room. We need to undo the safety locks on this door so we can open it.

Head to the left and use Spidey-sense to reveal a place to climb. Climb up, then destroy the console on the ledge to reveal LEGO pieces. Build them into a rotary handle, then turn it to open some of the locks. Drop back down and head to the right, then pull on the super strength handle to create an opening. Head inside, then hop up the walls to reach a ledge. Turn the rotary handle to open the rest of the locks.

This will reveal a generator in the center of the door. Charge it up to rotate the door, then pull on the super strength handle to open it. This will suck you out into space! Move around and collect studs as you move back towards the station.

Part 3 - It's Clobberin' Time!

Time to take on Doctor Doom. First, you'll be attacked by a wave of Doombots. Once you defeat 20 of them, a V-Series Doombot will appear and charge at you. Move out of the way to trip it up, then attack it as Thing to take off a heart. Attack it as Thing again, then follow the button prompts to tear off its face, revealing a pull handle. Latch onto it and pull to destroy it.

Doctor Doom will then lower his shield and hop on a laser, revealing LEGO pieces in the center of the room. Build them into a beam deflection panel, then use it to reflect the laser into the gold coils above him. When all three coils are destroyed, Doom will hop to the center of the area and electrocute you. Switch to your partner and smack him to take off one heart. Repeat this process one more time to take out another heart.

When Doom is down to one heart, he will send another V-Series Doombot after you. Destroy it like you did the others. Doom will then hop to the center of the room. Walk up to him and he will electrocute you. Switch to your partner and smack him to end the level.

Unlocked Characters: Doctor Doom, Doombot (V-Series) (175,000)
A Doom With a View - Free Play Mode
Required Abilities: Claw, Climbing, Dig, Explosive, Extinguisher, Flight, Laser, Magnet, Power Cosmic, Sharp Shoot, Super Strength, Technology

Part 1 – Asteroid M

Canister 1
Head to the left of your starting point and you'll find a gold box.


Destroy it to reveal a technology panel, then use it to collect this Canister.


Canister 2
There are 5 holograms of Magneto that you need to destroy. The first can be found at the top of the stairs to the right of your starting point.


The second can be found way high up to your left after hopping up the walls.


The third can be found to the right of the shield switch you build.


The fourth is up on the wall on the far right side of the area.


The fifth is on the wall to the left of the exit. Destroy all 5 to receive this Canister.


Canister 3
After charging up the generator, a box on the ledge above it will be destroyed, revealing this Canister surrounded by flames. Walk through the flames or put them out to collect it.


Canister 4
After revealing a bridge, a silver wall will appear. Destroy it to reveal this Canister, allowing you to fly over to it.


Canister 5
Manipulate the metal hatch to the left of the exit to open it, revealing this Canister.


Part 2 – Space Walk

Canister 6
Head to the left side of the room at the end of the tunnel and you’ll find a super strength handle. Pull on it to tear the console out of the wall, revealing this Canister.


Canister 7
While climbing up on the left side of the room at the end of the tunnel, continue up past the ledge to reach this rather obvious Canister.


Canister 8
Cut out the shape on the gold panel to the left of the exit to reveal LEGO pieces.


Build them into a gold statue, then destroy it to reveal this Canister.


Canister 9
Dig up the dirt pile in the near right corner to reveal this Canister.


Part 3 – It’s Clobberin’ Time!

Canister 10
Destroy the silver hatch on the left side of the area to reveal cosmic LEGO pieces.


Build them into an oven, revealing this Canister.


Stan Lee in Peril
Use the claw switch on the right side of the area to reveal LEGO pieces.


Build them into a technology panel, then use it to rescue Stan Lee.
Interlude - An Unlikely Alliance
Characters: Iron Man (Mark 42), Thor

We need to pick up Magneto and Abomination. Pull the nearby lever to activate the lift, bringing you to the deck. Follow the guide studs, then skydive off the Helicarrier to reach Manhattan.

Once in the city, follow the guide studs to reach your rendezvous.


After the cutscene, you'll be in control of Magneto and Abomination. Follow the guide studs to reach Doctor Doom. Unfortunately, his Doom Jet is being held to the ground by a metal clamp. Use Magneto to destroy it, then hop in to start the final Story level.
The Good, the Bad and the Hungry - Story Mode
Galactus, devourer of worlds. If our own intelligence is to be believed (we got it off an Internet site), he is as old as the universe itself. His hunger is unrelenting and will consume any planet unfortunate enough to cross his path. That can't be good.

Starting Characters: Thing, Spider-Man, Mystique, Green Goblin
Added Characters: Abomination, Venom, Human Torch, Iron Man (Mark 42); Nick Fury, Mister Fantastic, Captain America, Doctor Octopus; Magneto, Storm, Doctor Doom, Cyclops
True Believer: 75,000

Part 1 - West Engine

First order of business is to clear out the debris in the turbine. Have Green Goblin toss pumpkin bombs at the silver objects, then head to the near left corner. Have Thing use the super strength handle to pick up the object, then toss it at the cracked block in the turbine to destroy it.

A Quinjet will then crash on the right. Head over to it, then pull on the super strength handle to reveal LEGO pieces. Build them into a pull handle, then latch on and pull to reveal a technology panel. Have Mystique or Green Goblin use it to raise up the turbine.

Head to the left and use Spidey-sense to reveal two pull handles. Latch onto them and pull to lift up the turbine, forcing Galactus away.

Part 2 - East Engine

We are now on the east engine, and we need to lift up this turbine as well. Destroy the gold panel on the left to reveal a technology panel, then use it to raise up the turbine. Press the "special" button as Abomination to thunderclap, putting out the fires on the right.

Head to the right and use Venom's heightened senses to reveal two pull handles. Latch onto them and pull to lift up the turbine. Iron Man will then hop in to boost the turbine. Follow the button prompts to speed it up.

Part 3 - Upper Deck

Now that both turbines are aimed at Galactus, we need to get to work on constructing a portal. Latch onto the pull handles by the helicopter and pull, revealing a Fantastic 4 panel. Use it to turn into a hammer, opening the nearby box and revealing LEGO pieces. Build them into a technology panel, then use it to match up the colored dots with the wires.

This will activate the portal device. Unfortunately, it will swing to the left, destroying a box. Build the LEGO pieces left behind into a beam deflection panel, then use it to deflect the beam into the portal to the right of Galactus.

Part 4 - Lower Deck

With the portal ready, we now need to knock Galactus into the portal. Use Magneto to unhook the metal clasp, revealing a generator. Charge it to reveal some LEGO pieces. Build them into part of a model of Earth. Some debris from the deck will then be blown away.

Destroy the gold objects on the left to reveal LEGO pieces, then build them onto the model Earth. Undo the metal clasps on the left to reveal more LEGO pieces, then build them onto the model Earth. Put out the fires on the right, then destroy the debris to reveal more LEGO pieces. Build them onto the model Earth. Complete the model to end the level.

Unlocked Characters: Galactus, Loki
The Good, the Bad and the Hungry - Free Play Mode
Required Abilities: Claw, Dig, Electric, Extinguisher, Freeze, Laser, Magnet, Sand, Super Strength, Technology

Part 1 – West Engine

Canister 1
Head to the foreground and you'll find this Canister surrounded by flames. Put them out or walk through them to collect it.


Canister 2
There are 3 metal weapons racks you need to manipulate. The first is on the right side of the area.


Canister 3
Use the claw switch on the left side of the area to reveal this Canister.


Part 2 – East Engine

Canister 2 cont.
The second weapons rack is on the left side of the area.


The third is on the right side of the area. Manipulate all 3 to reveal this Canister.


Canister 4
Manipulate the metal panel on the right side of the area to reveal this Canister.


Part 3 – Upper Deck

Canister 5
Dig up the dirt pile in the foreground to reveal LEGO pieces, then build them into this Canister.


Canister 6
Smash the cracked block on the left side of the area to reveal this Canister.


Canister 7
Charge the generator in the back left corner to reveal this Canister.


Canister 8
Destroy the gold box in the back part of the area to reveal this Canister. Galactus will often do this for you with his laser.


Part 4 – Lower Deck

Stan Lee in Peril
Use the sandbox in the back left corner to turn into a boot, rescuing Stan.


Canister 9
Freeze the puddle in the back right corner to open the box, revealing this Canister.


Canister 10
Use the technology panel in the near right corner to take control of a street sweeper.


Clean up the 5 puddles of oil to receive this Canister.
------------Manhattan Levels------------
A Shock Withdrawal - Story Mode
Head over to the bank in the Financial District and use the technology panel to match the symbols, opening the garage door.


Once you have 5 Gold Bricks, you can build the door to this level.


Enemies: Inmate
Boss: Electro, Shocker
Starting Characters: Captain America, Iron Man (Mark 6), Spider-Man
True Believer: 35,000

Part 1 - Bank Robbery

Electro and Shocker are causing mayhem at the bank, but first, we need to help three hapless citizens.

First Citizen - This citizen is trapped behind a barrier in the back right corner. To free him, hop across the platforms on the right, then toss your shield into the shield switch to open the door. Head inside the alcove, then destroy the objects inside to reveal LEGO pieces. Build them into a trampoline, rescuing this citizen.

Second Citizen - This citizen is trapped underneath a chandelier on the ledge in the back. Swing over to her, then use Spidey-sense to reveal a pull handle. Latch onto it and pull to free her.

Third Citizen - This citizen is trapped on the desks on the left. Destroy the silver objects to reveal LEGO pieces, then build them into a beam for him to cross. Destroy the "$" sign to reveal more LEGO pieces, then build them into another beam, allowing the citizen to escape the electrified water.

With all of the citizens rescued, Electro will stop electrifying the water. Walk up to him and he will electrocute you. Switch to your partner and smack him to knock him into the safe, defeating him.

Destroy the silver object on the vault to destroy it, revealing Shocker. Smack him to take out his hearts. When he's down to one heart, he will hop on top of the nearby van. Fly up to him and smack him to take out his last heart, ending the level.

Unlocked Characters: Electro (150,000), Shocker (150,000)
A Shock Withdrawal - Free Play Mode
Required Abilities: Laser, Magnet, Mind Control

Part 1 - Bank Robbery

Character Token (Moon Knight)
Use Mind Control to take control of the man in the room on the left side of the area.


Pull the lever inside to lower the bars around the nearby ATM.


Destroy it to reveal this Character Token.


Deadpool Red Brick (Collect Ghost Studs)
Destroy the gold bars to the right of the safe to reveal this.


Stan Lee in Peril
You'll find Stan Lee trapped inside a metal cage in the safe. Destroy it to rescue him.
Feeling Fisky - Story Mode
After collecting 50 Gold Bricks, build the LEGO pieces by Fisk Tower into a door. Head inside to start this level.


Enemies: Kingpin Henchman
Boss: Elektra, Bullseye, Kingpin
Starting Characters: Spider-Man, Captain America
Added Characters: Daredevil
True Believer: 50,000

Part 1 - Penthouse Suite

The first thing we need to do is rescue this poor business man. Destroy the glowing objects on the right side of the area to reveal two sets of LEGO pieces. Build them into a pool table and a beam deflection panel, then use it to reflect the beam into the glowing object on the wall. This will shut off the laser. Use Spidey-sense to reveal two pull handles, then latch on and pull to free the businessman.

Daredevil will then join your party, just in time for Kingpin to reveal himself. Elektra will also appear on the left. She will stand on one of the trapdoors on the floor. If you get close to her, she'll hop away. Throw Cap's shield or Daredevil's baton at her to damage her.

Once she's defeated, Bullseye will appear. Smack him to take out a heart. He will then retreat onto a turret. Switch to Cap, then press the "special" button to lower your shield. This will deflect the turret's shots back at it. After destroying the turret on the left, Bullseye will hop onto another turret on the right. Destroy this turret as well to defeat him.

With Bullseye taken care of, build the LEGO pieces left behind into pull handles. Latch onto them and pull to break the glass, forcing Kingpin to come out and fight. He will dance for a bit, then move to the left, revealing LEGO pieces. Build them into a rotary handle, then turn it to drop the chandelier on Kingpin, damaging him.

He will then hop to the right, revealing a broken wire above the chandelier. Destroy it to drop the chandelier on Kingpin, damaging him. He will then hop to the center of the area. Use heightened senses to reveal two pull handles, then latch on and pull to drop the chandelier onto Kingpin, defeating him and ending the level.

Unlocked Characters: Daredevil, Kingpin (150,000)
Feeling Fisky - Free Play Mode
Required Abilities: Electric, Extinguisher, Laser, Telekinesis

Part 1 - Penthouse Suite

Character Token (Kingpin Henchman)
Charge the generator on the left to turn on the jukebox, revealing this Character Token.


Deadpool Red Brick (Studs x6)
Use telekinesis on the portrait of Kingpin on the right to reveal a safe.


Destroy the gold door to open it, revealing this Red Brick.


Stan Lee in Peril
Put out the fires in the fireplace on the right to reveal Stan Lee.
The Thrill of the Chess - Story Mode
Once you have 175 Gold Bricks, fly over to the Raft and you'll find a silver and gold lock.


Destroy both locks, then manipulate the metal switches to open the garage door, revealing LEGO pieces.


Build them into a door, then head inside to start this level.


Enemies: Inmate
Boss: Mysterio
Starting Characters: Mystique, Magneto
True Believer: 35,000

Part 1 - The Raft

Looks like Magneto wants his chess board back. Head to the right and manipulate the metal to open the gate, then manipulate the metal on the door to open it. Head inside and you'll find Mysterio, who will teleport to the upper ledge.

Head to the back left corner and use Mystique to sneak past the camera (hold the "special" button to disguise yourself as a Raft Guard), then step on the button inside the elevator to reach the upper ledge. Destroy the nearby fuse box to shut off the camera, allowing Magneto to join you.

Continue to the right and destroy the objects in front of the cell to reveal a metal lock. Manipulate it to open the cell, then smack Mysterio to take off one heart.

He will then teleport into a cell below you. Destroy the TV in the cell he just left to reveal LEGO pieces, then build them into a lever. Pull it to reveal a target above Mysterio's cell. Drop down and shoot the target to open the cell, then smack Mysterio to take off another heart.

He will then teleport into another cell. Manipulate the metal valve in the cell he just left to open the cell above you, revealing LEGO pieces. Head back to the upper ledge and build the LEGO pieces into a bar, then double jump onto it, opening the cell. Smack Mysterio to take out his last heart, ending the level.

Unlocked Characters: Mysterio (150,000), Polaris (150,000)
The Thrill of the Chess - Free Play Mode
Required Abilities: Claw, Electric, Symbiote

Part 1 - The Raft

Stan Lee in Peril
Charge the generator on the left to open the cell, rescuing Stan Lee.


Character Token (Green Goblin (Ultimate))
Use the claw switch to open the cell door, allowing you to collect this Character Token.


Deadpool Red Brick (Character Token Detector)
Destroy the locker on the right side of the area to reveal some symbiote goo.


Travel through it to reach the room with this Red Brick.
Put up your Dukes - Story Mode
Once you have 75 Gold Bricks, head over to Fogwell's Gym and build the LEGO pieces into a door. Head inside to start this level.


Starting Characters: Wolverine, Jean Grey
True Believer: 25,000

Part 1 - Boxing Gym

Looks like Blob doesn't want to play nice. We need to give him three food items to convince him.

Vegetables - Head to the right and you'll see Blob on a treadmill. Use telekinesis several times on the smaller treadmill to the left to destroy it, revealing LEGO pieces. Build them into an oven, which will pop out a tray of vegetables. Use telekinesis to place it in the boxing ring.

Water - Destroy the glowing water coolers on the left to reveal LEGO pieces, then build them into a cup. Use Wolverine's heightened senses to reveal a place to climb, then climb up to reach the ledge above you. Destroy the vending machines to reveal more LEGO pieces. Drop down and build them into a water cannon. Hop in the water cannon and spray the cup to fill it up, then use telekinesis to place it in front of Blob.

Fruit Platter - Use telekinesis on the purple locker in the back of the area to reveal part of a fruit platter. Attack the colored lockers on the left to reveal the rest of the fruit platter, then use telekinesis to stack the pieces. Once the fruit platter is complete, use telekinesis to place it in front of Blob.

After you move the first food item into the ring, Blob will hop off the treadmill to eat/drink it, allowing you to feed him the rest of the items. Feed Blob all three items to complete the level.

Unlocked Characters: Phoenix (200,000), Blob (250,000)
Put up your Dukes - Free Play Mode
Required Abilities: Grate Travel, Magnet, Technology

Part 1 - Boxing Gym

Deadpool Red Brick (Minikit Detector)
Use the technology panel by Captain America to lower a punching bag shaped like Red Skull. Cap will destroy it, revealing this Red Brick on the left.


Character Token (Wolverine (Cowl))
Travel through the grate in the back left corner to reach the room with this Character Token.


Stan Lee in Peril
Stan Lee is trapped under a metal weight on the right. Manipulate the metal to raise the bar off him, rescuing him.
Tabloid Tidy Up - Story Mode
Once you have 10 Gold Bricks, you can build the LEGO pieces in front of the Daily Bugle to create a door. Head inside to start this level.


Starting Characters: Agent Coulson, Doctor Octopus
True Believer: 30,000

Part 1 - Daily Bugle Office

During a cutscene in "Times Square Off", Doctor Octopus smashed through a floor of the Daily Bugle building, completely wrecking the place. Now, S.H.I.E.L.D. has brought him back to help clean the place up. There are five small tasks we need to complete to repair the place.

Repair the Window - There is a massive hole in the wall on the left side of the office. Destroy the objects on the left side of the area to reveal several sets of LEGO pieces, then build them into a nice window.

Clear JJJ's Office Door - Destroy the silver rubble in front of the door to reveal LEGO pieces, then build them into the door to repair it.

Repair the Photocopier - Destroy the silver and normal objects in to the near left corner to reveal LEGO pieces, then build them into the photocopier.

Put Out the Fires - You'll find a silver valve above the door to the fire escape. Destroy it to reveal some LEGO pieces, then build them into a fire extinguisher. Hop on the yellow valve a few times to put out the fires.

Vacuum the Floor - Use Doc Ock's heightened senses to the right of JJJ's office to reveal two pull handles. Latch onto them and pull to open the closet, revealing LEGO pieces. Build them into a vacuum cleaner, then use the technology panel in the closet to control it. Steer the vacuum over the three piles of debris (destroy the objects in the center of the office to help clear the path) to clean them up.

Once you complete all five tasks, the level will be complete.

Unlocked Characters: Agent Coulson, J. Jonah Jameson (150,000)
Tabloid Tidy Up - Free Play Mode
Required Abilities: Dig, Explosive, Laser, Telekinesis

Part 1 – Daily Bugle Office

Character Token (Doctor Octopus (Ultimate))
There are 3 posters you need to build. The first can be found by destroying the silver box in the back left corner. Build the LEGO pieces that appear into the first poster.


The second can be found by destroying the printer inside JJJ’s office.


The third can be found by destroying the gold box in the back right corner. Build all 3 posters to reveal this Character Token near JJJ's office.


Deadpool Red Brick (Studs x4)
There are 3 trophies in JJJ's office. Use telekinesis to place them on the correct colored pedestals. Place all three trophies to reveal this.


Stan Lee in Peril
You'll find Stan Lee trapped in some dirt on the right. Dig him out to rescue him.
Stunt Show Surprise - Story Mode
Once you collect 100 Gold Bricks, head to the circus in Central Park and build the LEGO pieces in front of the tent to create a door. Head inside to start this level.


Enemies: Skeleton
Boss: Nightmare
Starting Characters: Hawkeye, Black Widow, Iceman
True Believer: 25,000

Part 1 - Circus

Time to knock Nightmare down to size. Destroy the silver lock on the container to the right of the pool to reveal Nightmare. Smack him to take out his heart, causing him to flee. Put out the fires he leaves behind to reveal LEGO pieces, then build them into a fishing pole. This will destroy the container, leaving behind a puddle of water. Freeze it to create a ramp for Ghost Rider, allowing him to drive into Nightmare.

Nightmare will then retreat into a container on the ledge on the left. Head to the left and destroy the orange boxes to reveal LEGO pieces. Build them into a hammer, which will reveal more LEGO pieces. Build them into a trampoline, then bounce on it to reach the ledge.

Destroy the large container to reveal Nightmare, then smack him to take out a heart. The container will then explode, revealing some fires. Put them out to reveal LEGO pieces, then build them into a ramp, allowing Ghost Rider to drive into Nightmare again.

Nightmare will then appear on the box in the near left corner. When you get near him, he will disappear, leaving some fires behind. Put them out to reveal LEGO pieces, then build them into a pull handle. Latch onto it and pull to reveal Nightmare in a car. Destroy the car and Nightmare will crash into the wall, leaving LEGO pieces behind. Build them into a cannon, then shoot the target on it to reveal some arrow sockets in the back right corner.

Shoot arrows into them, then swing up them to reach the ledge in the back. Latch onto the pull handle to create a rope, then climb up. Destroy the silver teeth to reveal a valve, then step on it to raise up a ramp. Ghost Rider will then drive into Nightmare, knocking him down to the ground. Walk up to him and smack him to complete the level.

Unlocked Characters: Ghost Rider (150,000), Nightmare (250,000)
Stunt Show Surprise - Free Play Mode
Required Abilities: Flight, Heightened Senses, Laser, Magnet, Pull, Telekinesis

Part 1 - Circus

Deadpool Red Brick (Attract Studs)
This Red Brick can be found trapped in a metal cage in the back left corner. Manipulate the metal to open the cage, allowing you to collect the Red Brick.


Stan Lee in Peril
Use heightened senses on the right to reveal two pull handles.


Latch onto them and pull to reveal a gold panel.


Cut the shape out of it to reveal LEGO pieces.


Build them into a top hat, then use telekinesis on it to reveal Stan Lee.


Character Token (Mandarin (Film))
You can find this Character Token up on a ledge on the right side of the area. Fly up to it to reach it.
Reptilian Ruckus - Story Mode
Once you have 125 Gold Bricks, head to the northeast corner of Central Park to find the reptile house. Build the LEGO pieces into a door, then head inside to start this level.


Boss: Lizard
Starting Characters: Spider-Man, Thing
True Believer: 45,000

Part 1 - Reptile House

Head down the stairs and Connors will turn into Lizard. He will then hop into the water, and we need to scare him out. Head down to the water and destroy the cage on the right to reveal LEGO pieces. Build them into a ladder, allowing Thing to return to the upper ledge. Continue to the right and use Spidey-sense to reveal a pull handle. Latch onto it and pull to reveal LEGO pieces, then smash the cracked block to reveal more LEGO pieces. Build them into a pump, draining the water and revealing Lizard. Smack him as Thing to take out a heart.

He will then jump through the glass in the back of the area. Use Spidey-sense by the glass to reveal two pull handles. Latch onto them and pull to reveal LEGO pieces, then build them into a super strength handle. Pull on it to destroy the glass, causing Lizard to hop back out. Smack him again to take off another heart, causing him to retreat to the left.

Head inside the room on the left, then use Spidey-sense to reveal two pull handles. Latch onto them and pull to tear off the barrier, revealing Lizard. Smack him one more time to defeat him.

Unlocked Characters: Curt Connors (200,000), Symbiote Scientist (150,000)
Reptilian Ruckus - Free Play Mode
Required Abilities: Dig, Electric, Explosive, Magnet, Laser, Stretch, Telekinesis

Part 1 - Reptile House

Character Token (Thing F.F.)
There are 3 frogs you need to reveal by destroying circular windows. The first is a silver window in the back left corner of the area.


The second is a gold window in the back right corner of the area.


The third can be found after draining the water. Use telekinesis to open the window on the left, revealing the third frog. Reveal all 3 frogs to reveal this Character Token.


Deadpool Red Brick (Studs x8)
Charge the generator by the water to turn on the sprinklers, revealing a large metal plant.


Manipulate it to open it, allowing you to collect this Red Brick.


Stan Lee in Peril
You'll find Stan Lee in the room on the left, trapped by a plant. Dig up the dirt to reveal LEGO pieces, then build them into a Fantastic 4 panel.


Use it to turn into a pair of hands, rescuing Stan Lee.
Bro-tunheim - Story Mode
Once you have 200 Gold Bricks, head over to the Bifrost marker in the Industrial District and build the LEGO pieces onto it. Step on the pad to start this level.


Enemies: Frost Giant
Boss: Malekith
Starting Characters: Thor, Loki
True Believer: 25,000

Part 1 - Jotunheim

We need to take care of Malekith and Laufey to we can free Heimdall.

Malekith - Destroy the large rock by your starting point to reveal a pool of water, then freeze it to create a catapult. Use telekinesis on it to create a ramp, then walk up it to reach Malekith. He'll teleport away, leaving LEGO pieces behind. Build them into a fireplace and a generator, then charge it to turn on the fireplace, melting the ice. Put out the fires left behind to reveal a cracked block, then smash it to reveal a purple block. Use telekinesis on it to raise it up, allowing you to hop up onto the ledge. Hop onto the ledge and follow Malekith to the right, then use telekinesis on the chain to partially open the gate.

Laufey - Head to the right, then fly up onto the ledge. Smash the cracked block to reveal a rotary handle below you. Drop down and turn it to open the gate, allowing Loki to join you on the ledge. You'll notice a black pillar by Laufey. Fly on top of it as Thor to raise up another pillar. Have Loki hop up the pillars to reach the ledge, then follow Laufey to the left. Use telekinesis on the chain to partially open the gate.

Once you open the gate, Malekith will reappear, hopping on top of a floating platform. Use Mjolnir or blasts from Loki's scepter to destroy the platform, knocking Malekith to the ground. He will then run up to fight you, so smack him to take off a heart. He will then hop on top of another platform, so repeat this process two more times to defeat him, ending the level.

Unlocked Characters: Laufey (250,000), Malekith (250,000)
Bro-tunheim - Free Play Mode
Required Abilities: Dig, Explosive, Laser, Magnet

Part 1 - Jotunheim

Deadpool Red Brick (Mini Characters)
Melt the large ice wall on the left side of the courtyard to open the mouth on the statue, revealing this Red Brick.


Stan Lee in Peril
You'll find Stan Lee trapped inside the mouth of a statue on the right side of the courtyard. Manipulate the metal on the statue to open the mouth, allowing Stan to escape.


Character Token (Thor (Classic))
Destroy the silver rubble on the right side of the area to reveal a dig spot.


Dig it up to reveal this Character Token.
Nuff Said - Story Mode
Once you have 20 Gold Bricks, you can head over to Marvel Comics H.Q. and build the LEGO pieces into a door. Head inside to start this level.


Enemies: Inmate
Boss: Vulture
Starting Characters: Spider-Man, Mister Fantastic
True Believer: 40,000

Part 1 - Comics H.Q.

Looks like Vulture and Howard the Duck have attacked Marvel Comics H.Q. Before we can take them out, we need to get past the security gates. Destroy the desk by the gates to reveal LEGO pieces, then build them into a technology panel. Use it to connect the wires, opening the gates.

Head into the office area and Howard the Duck will take himself out, destroying some silver objects in the process. Build the LEGO pieces left behind into a birdhouse. Vulture will land on it, electrocuting himself and taking off one heart.

This will reveal more LEGO pieces on the right. Build them into a grate, then travel through it to reach the ledge on the right. Head to the left and grab onto the bar, then switch to Spider-Man. Web swing up to the ledge on the left, then grab the bar to open the curtains.

Use Spidey-sense to reveal two pull handles, then latch onto them and pull to knock down the picture, revealing LEGO pieces. Drop down and build them into a cutout of Iron Man. Vulture will then crash into it, damaging himself and taking off another heart.

Vulture will also destroy the desks on the right, revealing LEGO pieces. Build them into a holograph projector, then use the technology panel to activate it, revealing a hologram of Captain America. Vulture will crash into it, damaging himself and taking off another heart. He will also crash into the desks in the center, revealing LEGO pieces.

Build them into an air pump, then hop on the orange button a few times to inflate a Thor balloon. Vulture will crash through it, damaging himself and taking off another heart. He will also crash through the desks on the left, revealing LEGO pieces. Build them into a Fantastic 4 panel, then use it to turn into a nest, ending the level.

Unlocked Characters: Howard the Duck (25,000), Vulture (150,000)
Nuff Said - Free Play Mode
Required Abilities: Laser, Magnet, Telekinesis

Part 1 - Comics H.Q.

Character Token (Ms. Marvel)
Destroy the gold Hulk statue in the near right corner to reveal this.


Stan Lee in Peril
Manipulate the metal bar on the door in the back to open it, rescuing a trapped Stan Lee.


Deadpool Red Brick (Gold Brick Detector)
Use telekinesis to complete the image of Deadpool on the right, revealing this Red Brick.
House Party Protocol - Story Mode
After completing the Story, you'll have access to this level. You can find the entrance on the side of Stark Tower by the helipad.


Starting Characters: Iron Man (Mark 42), War Machine
True Believer: 90,000

Part 1 - House Party

Looks like Tony's party is pretty lame. We'll need to do three things to liven up the party.

DJ Booth - Head over to Nick Fury, who needs some repairs for the DJ booth. Destroy the nearby boxes to reveal LEGO pieces, then build them onto the DJ booth to repair it.

Disco Ball - Destroy the silver panel in the back to open the door, then use the technology panel to copy the pattern, revealing the disco ball.

Speakers - Head to the right and you'll find a "STARK" sign up on the wall. Destroy it to reveal a gold panel, then cut the shape out of it to reveal LEGO pieces. Build them onto the elevator, opening it and revealing a large box. Destroy it to reveal LEGO pieces, then build them onto the speakers to repair them.

With the party improved, the Iron Patriot armor will appear for a dance battle. Match the three patterns that appear on the dance floor to complete the level.

Unlocked Characters: Iron Man (Mark 7) (150,000), War Machine
House Party Protocol - Free Play Mode
Required Abilities: Laser, Telekinesis

Part 1 – House Party

Character Token (Iron Man (Heartbreaker))
There are 3 sets of balloons that you need to destroy. The first is on the left side of the area.


The second is to the left of the dance floor.


The third can be found by the elevator on the right. Destroy all 3 to reveal this Character Token.


Deadpool Red Brick (Studs x10)
Destroy the gold panel near the stairs to reveal a baton.


Use telekinesis on it to destroy the pinata, revealing this Red Brick.


Stan Lee in Peril
Stan Lee can be found trapped behind some gold bars to the right of the elevator. Destroy the bars to rescue him.
Stranger Danger - Story Mode
Once you have 150 Gold Bricks, head to the Sanctum Sanctorum and build the LEGO pieces into a door. Head inside to start this level.


Enemies: Skeleton
Boss: Dormammu
Starting Characters: Invisible Woman, Human Torch
Added Characters: Doctor Strange
True Believer: 46,000

Part 1 - Sanctum Sanctorum

Dormammu has trapped Doctor Strange, and we need to chase after him! Head to the left and use telekinesis on the clock twice to destroy it, revealing LEGO pieces. Build them onto the door, opening it and allowing you to head inside.

Head into the bathroom, then use telekinesis on the shower curtain to reveal Dormammu. He will toss some objects out at you. Destroy them to reveal LEGO pieces, then build them onto the toilet. Use telekinesis on the chain to flush the toilet, revealing a hammer. Use telekinesis on it, then move it to the purple points on the boards, bashing them down. Destroy the gold water heater to knock Dormammu out of the shower, causing him to retreat into the room on the right.

Continue to the right to reach the study, then destroy the gold object on the right to reveal LEGO pieces. Build them onto the piano, revealing a lever. Pull it to knock Dormammu out of the mirror. He will then reveal stairs leading to the attic.

Follow him up the stairs and into the attic, then head to the left. Use telekinesis on the skeleton to reveal Doctor Strange, who will tell you that Dormammu is using three gold orbs to keep him trapped. We'll need to destroy the orbs to free him.

First Orb - Approach the chest on the far right wall to reveal this orb.

Second Orb - Approach the cabinet in the back to reveal this orb.

Third Orb - Approach the blue vase in the near left corner to reveal this orb.

Once all three orbs are destroyed, Doctor Strange will be added to your party. Dormammu will reappear in the living room, and if you get too close to him, he will kill you with his laser. Use stealth to sneak up on him, then smack him to take off one heart. He will then disappear and send skeletons after you. Defeat the skeletons and Dormammu will reappear, allowing you to smack him again. Repeat this process to defeat him, ending the level.

Unlocked Characters: Doctor Strange (150,000), Dormammu (250,000)
Stranger Danger - Free Play Mode
Required Abilities: Explosive, Flight, Heightened Senses, Pull, Sand, Telekinesis

Part 1 - Sanctum Sanctorum

Character Token (Invisible Woman (F.F.))
Destroy the silver lock on the display case in the living room, opening it and allowing you to collect this Character Token.


Stan Lee in Peril
After clearing Dormammu from the bathroom, use heightened senses to reveal two pull handles on the light above you.


Latch on and pull to create a hole in the ceiling.


Fly up to reach a new room, then destroy the silver lock on the sarcophagus to rescue Stan Lee.


Deadpool Red Brick (Fast Build)
Travel through the sand on the right side of the attic to reach a new room.


Use telekinesis on the chest to reveal some LEGO pieces, then destroy the drawers on the right to reveal more LEGO pieces.


Build them into a christmas tree, revealing a present. Latch onto the pull handle and pull to reveal this Red Brick.
The Brick Apple?
After completing the Story, head into the opening by the base of the Statue of Liberty to start this level.


Starting Characters: Galactus, Doctor Doom

Your goal in this level is to collect 1 million studs. Once you reach this total, the level will end. A lot of this is done by destroying everything in sight, but I'll list some of the other things you can do for studs below.

Create a model Empire State Building
Destroy the orange dumpster by your starting point to reveal LEGO pieces.


Build them into a rotary handle, then turn it to reveal some LEGO blocks. Use telekinesis to stack them on the purple panel, creating a model of the Empire State Building.


Destroy the Statue of Liberty
Fly to the far left to reach Liberty Island, where you'll find more stuff to smash.


Enter the shop
Use telekinesis to destroy the rotating door to the shop on the left, allowing you to head inside.


You can also fly up to the roof of the shop and build the LEGO pieces onto the billboard. Use telekinesis on the present on the billboard to turn it blue, then destroy it for more studs.


Build and power a lift
Destroy an orange dumpster in the back left corner to reveal LEGO pieces.


Build them into a lift, then charge the nearby generator to power it up.


Ride it up to reach some studs, then grab the nearby bar. Shimmy to the right to reach even more studs.


Continue shimmying to the right to reach a ledge with more items to destroy. Make sure to destroy the images on the billboards to get even more studs.


Spell "LEGO"
Build the LEGO pieces in front of a building to spell "LEGO".


Go for a joyride
Hop in the S.H.I.E.L.D. 4x4, then drive around Central Park to collect the LEGO studs that appeared.


Build a rocket
Use Power Cosmic in the near right corner to build the cosmic LEGO pieces into a rocket.


Spell "LEGO" again
After building the rocket above, it will crash back to the ground, revealing LEGO pieces.


Build them into an "L", then use telekinesis to place the letters on the purple panels. Spell "LEGO" to receive a large amount of studs.


Reach a rooftop
Destroy the gold statues on the right, then destroy the pedestals underneath them to reveal purple panels.


Use telekinesis on them to raise them up.


Hop up them, then grab onto the bar on the side of the building. Hop up to reach the roof.


Open a garage
Use the technology panel to take control of the nearby robot. Move it to the right, then press the "attack" button to shatter the glass.


Hop inside and pull the lever.


This will open the garage below you, allowing you to hop on the motorcycle inside.


Clean up some puddles
Head to the island on the far right side of the area and destroy the house. You'll have to use telekinesis on a few items to completely destroy the house.


Once the house is destroyed, some LEGO pieces will be left behind.


Build them into a cleaner, then use the nearby technology panel to take control of it, cleaning up the puddles.


Explore a cave
After cleaning up the puddles, the cleaner will crash into the ground, revealing an opening. Head inside to enter a cave.


Use telekinesis on the objects inside, allowing you to destroy the structure.


Unlocked Characters: Captain America (Classic) (150,000), Union Jack (150,000)
-----------Exploring the Hubs-----------
After completing the final Story level, you'll have access to Manhattan Free Play. This means that you'll be able to explore the city with whatever characters you currently have unlocked. Hold the "tag" button and you'll pull up the character menu, allowing you to select whichever characters you want.


With your entire character roster now open to you, you'll be able to unlock a lot more of the collectibles hidden throughout Manhattan. I have decided to split the hub into two sections: the S.H.I.E.L.D. Helicarrier and the island itself. At the beginning of each section of the walkthrough, I have included various maps of that area. Each map contains the locations of a certain type of collectible. There is one map showing Character Tokens, one map showing Quests, one map showing Stan Lees in Peril, etc. I did this because it allows me to more clearly label the map.

There are many Gold Bricks in the game, and they're listed as Gold Brick 1, Gold Brick 2, etc. in the walkthrough (this also applies to other collectibles). As such, having a map showing nothing but images of Gold Bricks really doesn't tell you much. If you know which Gold Brick you are having trouble with, how are you supposed to know which Gold Brick it is in the guide? To help solve this problem, I have labelled the dots on the map with the same numbers that correspond to the collectibles in the sections below. For example, the image labelled #1 corresponds to Gold Brick 1 in the walkthrough. I have tried to make the numbers flow in a logical way (you won't find Gold Bricks 1 and 2 on opposite sides of the city).

I know Manhattan is a large hub, and unfortunately there isn't an easy way to divide up the city. I have done my best to organize each section from north to south, but there are some exceptions (either because I missed an item or I had to collect something else before it appeared). Because of this, I strongly suggest that you look at my maps to determine how I label a specific collectible before hunting for it in the guide. Here is how each section is ordered:
  • Gold Bricks, Quests and Races are listed as they appear on the map
  • Character and Vehicle Tokens are listed alphabetically, regardless of where they appear on the map
  • Stan Lees in Peril and JJJ Photos are listed chronologically, as only one of each appears at a time
Keep in mind that I will not be super specific about precise locations. For example, I won't say "starting at Stark Tower, take a right until you reach the...". The maps are there for a reason, and the labels should be enough to tell you where you need to go. If you are having trouble finding something specific, feel free to let me know and I'll clarify in the guide.
---------------Manhattan---------------
Character Tokens


Gold Bricks


JJJ Photos


Quests


Races


Stan Lee in Peril


Vehicle Tokens
Character Tokens
Required Abilities: Agility, Beam Deflection, Claw, Dig, Electric, Explosive, Flight, Freeze, Grate Travel, Heightened Senses, Laser, Magnet, Mind Control, Pull, Sharp Shoot, Shield, Shrink, Super Strength, Technology, Telekinesis

Absorbing Man
Destroy a manhole cover in a construction site in the Upper West Side to reveal a water spout. Ride it up to reach this Character Token.


Ant-Man
You’ll find a car on top of a scrap pile in the Industrial District.


Destroy it to reveal a dig spot, then dig it up to receive this Character Token.


Archangel
You’ll find a series of piping on the side of the Avenger’s Mansion. Quickly destroy all 21 sections of it to reveal this Character Token. It’s easiest to do this with a laser, as you only have about 2 seconds to destroy another section before you fail.


Aunt May
“It’s my third quest, so you know what that means: the designers have probably run out of ideas! Let’s beat up a set number of bad guys! Extra points if you see them spawn in!”

After collecting the Deadpool’s Helicopter Vehicle Token, talk to Deadpool in West Harlem and he’ll ask you to help him beat up some bad guys.


Defeat the nearby group of A.I.M. Agents to receive this Character Token.


Beetle
You’ll find a bunch of cobweb trampolines in an alley in Yorkville.


Bounce on the trampolines, collecting all of the studs that appear, to reveal this Character Token.


Black Bolt
“Been doin’ card tricks so long, Gambit figures it’s time he tried his hand at something new - magic tricks! See if you can keep track of the ball, mon ami - lift de right cup, win yourself a fabulous prize!”

Talk to Gambit in the sandbox in Central Park and he’ll ask you to keep track of a ball as he moves around some trashcans.


Watch as the ball moves around, then use telekinesis to lift the right trash can. Find the ball three times to receive this Character Token.


Black Cat
You’ll find pull handles above the door to a building in Soho. Latch onto them and pull to open the door, then head inside.


Use heightened senses in the corner to reveal a lever, then pull it to open the nearby box, revealing this Character Token.


Black Panther
“My fearless partner and I were pursuing some crooks through the alleyways, but we got separated and he hasn’t come back. Could you find him for me? He’s short, dark… and answers to Mr. Tiddles...”

After collecting the Rescue Character Token, talk to Black Panther in the East Village and he will ask you to find Mr. Tiddles.


Follow the guide studs to reach a nearby alley, where you’ll find Mr. Tiddles. Defeat the Extremis soldiers that attack you, then chase after Mr. Tiddles.


Follow Mr. Tiddles into another alley, then defeat the Extremis soldiers that appear. Once they’re defeated, fly up to the nearby roof, where you’ll find more Extremis soldiers.


Defeat the Extremis soldiers and Mr. Tiddles will jump down to the ground. Drop down after him, then press the “special” button to get him to follow you. Lead him back to Black Panther to receive this Character Token.


Blade
“I chased a gang of those sinister-looking goons here, but they escaped in a bunch of funny-lookin’ cars before I could catch ‘em. Ram those suckers off the road!”

After collecting the Iron Fist Character Token, talk to Blade on the roof of a building in East Harlem and he’ll ask you to destroy some cars.


Destroy the three golf carts driving around to receive this Character Token.


Bullseye
There are 4 basketball hoops with cracked blackboards in the Industrial District that you need to smash. After smashing one, you will have 10 seconds to destroy the next one. The first is on the southeast corner of the building.


The second is on the side of a building to the west of the Character Token.


The third is down by an alley on the northwest side of the building.


The fourth is on the side of a building north of the Character Token. Quickly destroy all 4 basketball hoops to reveal this Character Token.
Character Tokens cont.
Captain Britain
“I told Captain America that I’d duff up a few of those Hydra rotters causing trouble in the area, as a favour -- that’s F-A-V-O-*U*-R -- to a fellow captain. If you’re up for a scrap, I’d appreciate an extra pair of fists!”

After collecting the Psylocke Character Token, talk to Captain Britain in the Lower East Side and he’ll ask you to help him defeat some Hydra soldiers.


Follow him into the train station, then defeat the attacking Hydra soldiers to receive this Character Token.


Carnage
There are several grates on top of a building in Yorkville. We need to freeze the water over several of them so we can reach this Character Token inside the tower.


The first grate can be found on the west side of the roof.


The second grate can be found in the center part of the roof.


The third grate can be found on the east side of the roof.


Once all three grates have been frozen-over, travel through the grate in the center of the roof to reach the inside of the tower.


Hop up the walls to reach this Character Token.


Colossus
You’ll find a circle of light outside the X-Mansion.


Step inside it and a Sentinel will appear. Destroy the silver panel on its chest to reveal a gold panel.


Destroy the gold panel to reveal a cracked block.


Destroy the cracked block to destroy the Sentinel and receive this Character Token.


Cyclops (Astonishing)
“I’m gonna be late! Drive!”

After completing Quest 3 in Manhattan, talk to a man in the Financial District and he’ll ask you to drive him somewhere. Hop in a taxi and drive the man to Marvel Comics H.Q. to receive this Character Token.


Drax
“Do you know what would really jazz up my ‘Draxophonist’ gigs? A LION! I know it’s a bit unusual, but such is the way of jazz… The one by the circus looks like it could use a bit of music in its life!”

After collecting the Gwen Stacy Character Token, talk to Drax on top of Marvel Comics H.Q. and he will ask you to bring him a lion.


Head over to the sandbox in Central Park to find a lion.


Hop on and ride it back to the Vehicle Call-In Point by Marvel Comics H.Q., where you’ll find a ramp.


Ride the lion up the ramps to reach Drax, who will give you this Character Token.


Electro (Ultimate)
“Thanks for stopping - now drive!”

After collecting the Cyclops (Astonishing) Character Token, talk to a woman by Oscorp and she will ask you to drive her somewhere. Hop in a taxi and drive her to Empire State University to receive this Character Token.


Elektra
Head to the top of a building in West Harlem and you’ll find an AC unit.


Destroy it to reveal a claw switch.


Use it to open the door below you, revealing a cracked wall. Smash it to reveal this Character Token.


Emma Frost
“I have another student here struggling to use their abilities… I’ve X-plained it enough times, but sometimes it’s better to show than tell. I’ll let you take it from here!”

After collecting the Magneto-mobile Vehicle Token, talk to Professor X and he will ask you to guide one of his students through the maze.


Use mind control to take control of her, then lead her to the other end of the maze to receive this Character Token.


Gambit
“Gambit got on Storm’s bad side earlier…. Things got a li’l… shall we say, ‘windy’... and my cards blew everywhere! One o’ them is still missing - maybe stuck in a tree, eh? Could you help me find it, chere?”

After collecting the Mandarin’s Helicopter Vehicle Token, talk to Gambit in Central Park and he will ask you to help him find one of his missing cards.


Follow the guide studs and you’ll find Gambit’s card stuck in a small tree. Pick it up and return it to him to receive this Character Token.
Character Tokens cont.
Gamora
“You know what there isn’t enough of? Superhero musicians. And no, Dazzler’s bubblegum pop does NOT count! Anyway… I used to play the saxophone, but I’ve not had the chance in a long time. If you find one for me, I think it’s time for 'The Draxophonist' to make a comeback!”

Talk to Drax in Times Square and he will ask you to find him a saxophone.


Follow the guide studs to reach a music store. Unfortunately, the door is closed.


Fly up onto the ledge above the store and you’ll find a technology panel.


Use it to extend some platforms to the left, allowing you to reach a lever.


Pull it to open the music shop, allowing you to grab the saxophone inside. Pick it up and give it to Drax to receive this Character Token.


Groot
“I AM GROOT!”

After collecting the Mandarin’s Boat Vehicle Token, talk to Groot in Inwood and he will task you with smacking more moles.


These moles will appear on the side of a nearby cliff. Shoot 15 moles within 40 seconds to receive this Character Token. The moles will stick around for a while before retreating back into the holes, but if you’re having trouble, you can always use a laser to hit them faster.


Gwen Stacy
“I’ve been playing my heart out on the ol’ sax since you found it. But it seems not everyone in my audience here appreciates jazz. These guys look like trouble; help me out will ya?”

After collecting the Gamora Character Token, talk to Drax in Times Square and he will ask you to help him take care of some enemies.


Defeat the attacking A.I.M. Agents to receive this Character Token.


Havok
You’ll find this Character Token inside a cafe in West Harlem.


To reach it, head up to the roof, where you’ll find some lasers. Use the beam deflection panel to deflect the laser into the gold fan, destroying it and revealing a shield switch.


Toss your shield into it to open the cafe, allowing you to collect this Character Token.


Heimdall
“I came to visit a friend from Asgard. I’m sure he said to meet him at THIS tailor shop, but it’s possible he’s waiting at another, similar venue. Would you mind finding him and escorting him here?”

After collecting the Chitauri Chariot Vehicle Token, talk to Heimdall outside a pizza shop and he’ll ask you to find his friend.


Follow the guide studs to reach Heimdall’s friend. Press the “special” button to get him to follow you, then lead him back to Heimdall to receive this Character Token.


Hydra Agent
You’ll find a cracked block on top of a building in Washington Heights. Destroy the dumpster in front of it, then smash the cracked block to reveal this Character Token.


Iron Fist
“I’ve noticed some shifty looking creatures skulking around here… They may dress like people, but they ain’t foolin’ me… Let’s take ‘em out before they cause any trouble!”

After collecting the Pizza Bike Vehicle Token, talk to Blade on the roof of a building in the East Village and he will ask you to help him defeat some bad guys.


Defeat the attacking Frost Giants to receive this Character Token.


Iron Man (Heroic Age)
“I’m not saying it was you, but SOMEONE left the Bifrost open and allowed an army of angry Frost Giants to invade this world! Help me defeat them, before they wreak their frosty mayhem all over the city!”

Talk to Heimdall in the Industrial District and he will ask you to help him defeat some Frost Giants.


Defeat the nearby enemies to receive this Character Token.


Iron Man (Hulkbuster)
There are 8 vents on the helipad on Stark Tower. Quickly destroy all 8 of them (each requires 3 hits to destroy) to reveal this Character Token.


Iron Patriot
Fly up to the top of the Empire State Building and you’ll find three American flags. We’ll need to raise each of them. Use the claw switch by one of the flags to raise it up.


Latch onto the pull handle by another flag and pull to raise it up.


To raise up the flag in the center, fly up to the ledge above the flags, then use heightened senses to reveal a lever. Pull it to raise up the final flag, receiving this Character Token.
Character Tokens cont.
Kraven the Hunter
Shoot the five targets outside the Reptile House in Central Park to receive this Character Token.


Kurse
You’ll find a circle of light in the road near the Roxxon power plant. Step inside it and Kurse will appear.


Use a big fig to defeat him and receive this Character Token.


Leader
You’ll find this Character Token floating above a circle near Fisk Tower. Hop up the walls to reach it.


Mary Jane Watson
You’ll find a box on a ledge between two buildings in Yorkville. Use heightened senses to reveal a pull handle.


Latch on and pull to open the box, revealing this Character Token.


Mini Sentinel
You’ll find a circle of light in Columbus Circle.


Step inside it and a Sentinel will appear. Destroy the silver panel on its chest to reveal a gold panel.


Destroy the gold panel to reveal a cracked block.


Destroy the cracked block to destroy the Sentinel and receive this Character Token.


Mister Fantastic (F.F.)
“You again! I challenge you to a rematch race! Prepare to feel the blazing sting of defeat!”

After collecting the Spider-Man (F.F.) Character Token, talk to Ghost Rider in Washington Heights and he will challenge you to another race.


Defeat him in the race to receive this Character Token.


Nova
Complete a footrace that begins on the roof of a building in Yorkville to receive this Character Token. Make sure to use a character with the Agility ability, as you’ll need to hop up some walls during the race.


Pepper Potts
“Some thugs stole my milk… I tracked their scent to this location, but…. Why would they steal MILK, which one can easily buy in stores…? This smells like a trap to me… Help me take these villains down!”

Talk to Black Panther in a parking lot in the Industrial District and he will ask you to help him defeat some enemies.


Defeat the nearby enemies to receive this Character Token.


Power Man
Head into an alley in Yorkville and you’ll be attacked by some escaped inmates. Defeat 20 inmates within 30 seconds to receive this Character Token.


Professor X
“One might question my X-pertise at teaching, but I just cannot get through to this student. You seem to have the X-factor when it comes to these things - can I ask you to help me out once more?”

After collecting the Emma Frost Character Token, talk to Professor X and he will ask you to help out another student.


Use telekinesis to repair the X logo and receive this Character Token.


Psylocke
“Now that I’ve been reunited with my trusty automobile, how about a quick race? It’ll give me a chance to tour the city, as well, so two birds with one stone!”

After collecting The Britmobile Vehicle Token, talk to Captain Britain in the Financial District and he will challenge you to a race.


Beat him in the race to receive this Character Token.


Punisher
“This time those truckers have gone too far… Driving around the suburbs in the middle of the night, HONKING THEIR HORNS! This calls for the ultimate punishment… leave no truck un-smashed!”

After collecting the Punisher’s Car Vehicle Token, talk to Punisher by Fogwell’s Gym and he will ask you to smash even more trucks.


Destroy the four trucks driving around to receive this Character Token.


Red Hulk
You’ll find a circle of light by the water in the Industrial District.


Step into it and Red Hulk will appear. Use a big fig to defeat him, revealing this Character Token in the street.
Character Tokens cont.
Rescue
“The Roxxon Corporation plans to use this device to mine a Wakandan island for its precious vibranium! We cannot allow these scoundrels to ravage my home this way… Help me disable this contraption!”

After collecting the Pepper Potts Character Token, talk to Black Panther in the Industrial District and he will ask you to help him shut down the Roxxon contraption.


Head to the top of the nearby structure and manipulate the two metal objects to destroy them, revealing a shield switch.


Toss your shield into it to shut off one of the contraptions.


You’ll find another shield switch floating above the water by another cylindrical structure.


Toss your shield into it to extend a platform, allowing you to reach the technology panel. Use it to match the symbols, shutting off the other contraption. Shut off both contraptions to receive this Character Token.


Rocket Raccoon
“I keep telling Wal Russ that giraffes CAN’T climb tall buildings, but the silly plonker is determined they can. He must think I was born yesterday! Without PHOTOGRAPHIC EVIDENCE I ain’t believin’ nothin’...”

After collecting the Star-Lord Character Token, talk to Rocket Raccoon by the water in the Lower East Side and he’ll ask you to get photographic evidence that giraffes can climb tall buildings.


Follow the arrow on your screen to reach the top of Fisk Tower, where you’ll find a spot to take a picture of a giraffe. Take the picture and give it to Rocket to receive this Character Token.


Ronan the Accuser
On the side of an obelisk in Central Park, you’ll find a bunch of plants.


Destroy them to reveal a staircase, then head down them to reach a secret room.


Destroy the silver panel on the left to reveal a generator.


Charge it up to turn on one of the lights by the container.


You’ll find another generator on the ceiling. Charge it up to turn on another light.


Destroy the gold panel on the right to reveal the final generator.


Charge all three generators to open the container in the center of the room, revealing this Character Token.


Sandman Goon
You’ll find a cracked block on the side of the road under Yorkville. Smash it to receive this Character Token.


She-Hulk
There are 7 cracked blocks in the Scrapyard that you have to destroy. Once you destroy one, you’ll have 15 seconds to destroy the next one. The first is on top of a building in the northwest corner of the Scrapyard.


The second is underneath a car in the northeast corner of the Scrapyard.


The third is at ground level in the center of the Scrapyard.


The fourth is on the wall, behind a car on the east side of the Scrapyard.


The fifth is on the wall on the south side of the Scrapyard.


The sixth is on a ledge in the southwest corner of the Scrapyard.


The seventh is on the roof of the building in the center of the Scrapyard. Quickly destroy all 7 cracked blocks to reveal this Character Token.


Silver Samurai
Use heightened senses a couple times on the roof of a building in the Industrial District to clear up the maze.


Once the maze is complete, use telekinesis to move the object to the other side.


This will open a nearby container, revealing this Character Token.
Character Tokens cont.
Silver Surfer
“It seems I am growing increasingly careless with my board… Another piece of it broke off, and was stolen before I could reattach it. May I burden you once more to return it to me?”

After completing Quest 40, talk to Silver Surfer in East Harlem and he will ask you to recover a piece of his board.


Follow the guide studs to reach the thief, then defeat him.


He’ll drop the cosmic brick, so pick it up and return it to Silver Surfer to receive this Character Token.


Spider-Man (F.F.)
“YOU! Look into my eyes! Do you see my burning desire… TO RIDE? You look like the type who could give me a challenge… Let’s race!”

Talk to Ghost Rider at the Dockyard and he will challenge you to a race.


Beat him in the race to receive this Character Token.


Spider-Woman
You’ll find a building near the water in the Financial District covered in cobwebs.


Destroy the cobwebs and head inside, then destroy the rest of the cobwebs to reveal a lever.


Pull it to open the container on the roof, revealing this Character Token.


Squirrel Girl
You’ll find a bunch of dig spots by the Dockyard.


Dig up the one in the center and you’ll find a button.


Step on it to open the doors on the nearby hut, revealing a metal hatch. Manipulate it to open the container above you, revealing this Character Token.


Star-Lord
“Which d’you fink’s tougher - squirrels or raccoons? Me and Squirrel Girl was ‘avin’ a pretty heated debate about it. I fink the only way to settle this is to give ‘er a demonstration… let’s knock some criminal heads together!”

After collecting the Garbage Truck Vehicle Token, talk to Rocket Raccoon in the Upper West Side and he will ask you to help him defeat some criminals.


Defeat the nearby Frost Giants to receive this Character Token.


Superior Spider-Man
Fly up to the top of the Empire State Building and you’ll find a platform you can jump off of.


As you’re falling, you’ll find this Character Token surrounded by blue studs in the shape of a star.


Super-Skrull
You’ll find this Character Token frozen in ice underneath a water tower on top of a building on the Upper East Side. Melt the ice and you’ll be able to collect this Character Token.


Taskmaster
You’ll find a platform floating high above the water south of Manhattan. Fly up to it and destroy the silver lock on the box to open it, revealing this Character Token.


Toad
“I’ve watched you bounce, and I’ve gotta hand it to you - you’re pretty good. But you’re no TOAD! Only when you have conquered my final bouncing challenge will I accept you as the Ultimate Bouncer!”

After collecting the Wolverine’s Motorcycle Vehicle Token, talk to Toad on Liberty Island and he will ask you to bounce on even more lily pads.


Bounce on the lily pads and complete the race to receive this Character Token.


Viper
You’ll find a chest hidden behind some plants in Central Park.


Destroy the plants to reveal the chest, then destroy the gold lock to open it, revealing this Character Token.
Character Tokens cont.
Wasp
Fly to the top of Ant-Man’s Lab and you’ll find a series of small tunnels.


Shrink down and head inside, then follow the tunnel to reach a button. Step on it to shut off the electricity, allowing you to continue through the tunnel.


Continue through the tunnel, stepping on buttons to shut off the electricity, and you’ll reach this Character Token at the end.


Whiplash
Use mind control to take control of a man inside a building in Yorkville, then pull the lever on the left to open the nearby box, revealing this Character Token.


Wizard
Fly up onto a ledge on the side of the Baxter Building, then manipulate the metal switch. This will open the nearby container, revealing this Character Token.
Gold Bricks
Required Abilities: Agility, Claw, Dig, Electric, Explosive, Extinguisher, Flight, Grate Travel, Heightened Senses, Laser, Magnet, Pull, Sand, Sharp Shoot, Shield, Shrink, Stealth, Super Strength, Symbiote, Technology, Telekinesis

Gold Brick 1
You'll find this Gold Brick in a greenhouse north of the X-Mansion.


To reach it, destroy a plant on the nearby beach to reveal some sand. Travel through it to reach this Gold Brick.


Gold Brick 2
Destroy the objects to the right of the entrance to the X-Mansion to reveal a metal switch.


Manipulate it to open the container, revealing this Gold Brick.


Gold Brick 3
Destroy the silver Wolverine statue outside the X-Mansion to reveal this Gold Brick.


Gold Brick 4
Use the technology panel on the back of a billboard in Inwood to connect the wires, sending power to the right.


This will turn the lights on, revealing this Gold Brick.


Gold Brick 5
There are 4 people we need to save from fires in Washington Heights. Put out the fires outside the building to rescue the first citizen.


Latch onto the pull handle on the right to create a rope, then climb up to reach a ledge.


Put out the fire to rescue the second citizen.


Drop back down and head to the left to find a grate in the alley.


Travel through it to reach the roof of a nearby building, then follow the stud trail and hop onto the platform.


Put out the fires to rescue the third citizen.


Fly up to the roof to find the last citizen. Put out the fires to rescue her.


Once you rescue all 4 citizens, this Gold Brick will appear on the ground.


Gold Brick 6
There are two large basketballs on the basketball courts in West Harlem. Use a big fig to pick them up, then toss them at the cracked backboards to smash them.


Smash both backboards to reveal this Gold Brick in the center of the court.


Gold Brick 7
We need to charge some generators to turn on lights outside a building in West Harlem. The first generator can be found on the roof. Fly up to it and charge it.


Drop down towards the water and you'll see some platforms and awnings.


Drop down onto them and head to the left to reach the second generator.


The third generator can be found on the north side of the building. Destroy the plants to reveal it, then charge it up.


Charge up all three generators to reveal this Gold Brick by the "nose" of the smiley face.


Gold Brick 8
You'll find this Gold Brick in a container underneath the train tracks in East Harlem.


To open the container, head into the alcove on the right to find a large button. Have a big fig stand on it to turn the lights green.


Quickly run back to the container and grab this Gold Brick before the lights turn red again. If you're having trouble getting back in time, you can always leave your partner behind at the container and then switch to them once you activate the button.


Gold Brick 9
You'll find this Gold Brick hidden in a concrete tube at a construction site in the Industrial District.


To reach it, head into the pit in the middle of the construction site to find some dirt.


Dig it up to reveal some sand, then travel through it to reach this Gold Brick.
Gold Bricks cont.
Gold Brick 10
Walk around the barriers on the side of a road in the Industrial District to reach a grate.


Travel through it to reach a lever, then pull it to shut off the lasers.


This will allow you to head into the alcove on the right, where you'll find this Gold Brick.


Gold Brick 11
Destroy a gold panel on the side of a building near the Scrapyard to reveal an alcove.


Destroy the boxes inside to reveal a claw switch, then use it to reveal this Gold Brick above the chimney.


Gold Brick 12
Bounce on an umbrella to reach a ledge on the side of a building in East Harlem, then head to the right.


Climb the ladder to reach an awning, then bounce on it to reach the wall on the left.


Hop up the wall to reach another awning, then bounce on it to reach the bars above you.


Hop up the bars, then head to the right. Use stealth to sneak past the security cameras, then pull the lever to open the shop below you.


Drop down, then head to the back right corner to find this Gold Brick.


Gold Brick 13
There are 7 red cars in a parking lot that you need to destroy in East Harlem. The first 2 are on the ramp leading up to the parking lot.


The other 5 can be found in the parking lot itself.


Quickly destroy all 7 red cars to reveal this Gold Brick.


Gold Brick 14
Head to the top level of a parking garage in East Harlem, then toss your shield into the shield switch. This will shut off some lasers at the bottom level of the parking garage.


Head to the bottom level and into the alcove previously blocked by lasers, then destroy the yellow dumpster to reveal this Gold Brick.


Gold Brick 15
Head into an alley by the train station in Yorkville and you'll find your path blocked by a silver fan.


Destroy it, then head into the alley. Look to the left and you'll find another silver fan. Destroy it and you'll be able to collect this Gold Brick.


Gold Brick 16
Pull the lever in a parking lot in the Industrial District to open the container above you, revealing this Gold Brick. To reach it, you'll need to complete a small obstacle course. If one of the security cameras sees you, the container will close and you'll have to pull the lever again to open it.


Activate stealth and head to the right, then hop onto the wall to reach the pole.


Swing up the poles to reach a platform, then continue to the left. Swing across the next set of poles to reach this Gold Brick.


Gold Brick 17
You'll find this Gold Brick in a greenhouse on the Upper West Side.


To reach it, head to the nearby pond to find an ice block.


Melt it to reveal a grate, then travel through it to reach this Gold Brick.


Gold Brick 18
Destroy the S.H.I.E.L.D. shipping containers at the Dockyard to clear the area.


Use heightened senses to reveal a small box, which will open to reveal this Gold Brick.
Gold Bricks cont.
Gold Brick 19
There is a small underground path that will take you underneath Horizon Labs.


Head inside and you'll find a super strength handle. Pull on it to reveal an opening, then head down the stairs.


When you near the bottom, you'll be attacked by OctoBots. Defeat 20 OctoBots within 30 seconds to reveal this Gold Brick.


Gold Brick 20
There are 10 fires in a skate park underneath the train tracks that you need to put out. The first 2 are on top of a dumpster, and the third is on a small trash can.


Two more can be found on a hot dog stand, two more are on a bench, and the last three are in front of some vending machines.


Put out all 10 fires to reveal this Gold Brick.


Gold Brick 21
You'll find a place to use heightened senses near a pedestal in the northwest corner of Central Park.


Use heightened senses to reveal a dirt pile, then dig it up to reveal a stud trail.


Follow it to find another dirt pile, then dig it up to reveal another stud trail.


Continue digging up dirt piles and following stud trails. You'll eventually reach the dirt pile with this Gold Brick buried underneath.


Gold Brick 22
You'll find 4 plants around a fountain near the Reptile House. Quickly destroy all 4 (they each take 3 hits to destroy) to reveal this Gold Brick.


Gold Brick 23
You'll find some control stations on a dock by the lake in Central Park. Stand in front of one and press the "special" button to take control of a boat.


Destroy the yellow submarines that attack you to reveal this Gold Brick.


Gold Brick 24
You'll find a button on a ledge on the overpass at the center of Central Park. Step on it to reveal targets.


Destroy all of them to receive this Gold Brick.


Gold Brick 25
You'll find 4 statues (2 gold, 2 silver) around a pedestal in Central Park. Destroy all 4 to reveal this Gold Brick.


Gold Brick 26
Shrink down and head into the tunnel in Central Park.


Step on each of the buttons, shutting off the electricity and allowing you to collect this Gold Brick.


Gold Brick 27
Fly to the top of a building near Central Park and you'll find a lever.


Pull it to turn on four lights on the side of the building. Copy the pattern by stepping on the buttons, opening the container with this Gold Brick inside.


Gold Brick 28
You'll find this Gold Brick inside of a building in Yorkville.


To reach it, head to the other side of the building to find a recycling bin.


Destroy it to reveal a grate, then travel through it to enter the building. Head to the left to reach this Gold Brick.


Gold Brick 29
There are two cracked blocks on the side of a building in Yorkville.


Smash them both to reveal wires, then fly up to reach a generator.


Charge it up to open the garage below you, revealing this Gold Brick.


Gold Brick 30
Fly onto the side of a building on the Upper East Side and you'll find a sponge. Use telekinesis on it to clean up the 5 ink stains on the window, revealing this Gold Brick.
Gold Bricks cont.
Gold Brick 31
On the side of a building on the Upper East Side, you'll find a plant.


Destroy it to reveal a dig spot, then dig it up to reveal a trail of silver studs leading to the right.


Follow the stud trail and you'll reach a picnic area. Use heightened senses to reveal a dig spot, then dig it up to reveal another stud trail.


Follow the stud trail and you'll reach a circular grassy area. Use heightened senses to reveal a dig spot, then dig it up to reveal another stud trail.


Follow the stud trail to reach a grassy median, then use heightened senses to reveal a dig spot. Dig it up to reveal another stud trail.


Follow it to reach a small alleyway, where you'll find a yellow dumpster.


Destroy the dumpster, then use heightened senses to reveal a dig spot. Dig it up to receive this Gold Brick.


Gold Brick 32
You'll find a tunnel on top of a building on the Upper East Side.


Head through the tunnel and step on the third button to open a nearby crate, revealing this Gold Brick.


Gold Brick 33
You'll find some consoles on the side of the basketball court underneath the Queensboro Bridge. Stand in front of one and press the "special" button to take control of a car.


Drive around and smash all of the red cars to reveal this Gold Brick.


Gold Brick 34
There are 4 citizens trapped on the Queensboro Bridge that you need to help. The first citizen can be found on the right. Latch onto the pull handles and pull to rescue her.


The second citizen can be found trapped on a burning car. Put out the fires to rescue him.


The third can be found on the left, trapped underneath a car. Put out the fire and destroy the car to rescue her.


The fourth citizen can be found up on top of the bridge. Fly up and put out the fires on the car to rescue him.


Rescue all 4 citizens to reveal this Gold Brick.


Gold Brick 35
You'll find two generators outside a coffee shop near the train tracks.


Charge both of them to open the garage, revealing this Gold Brick inside.


Gold Brick 36
You'll find a gold lock on a garage door on the side of a building. Destroy it to open the garage, revealing this Gold Brick inside.


Gold Brick 37
Pull a lever on Liberty Island to shut off the electricity in front of one of the tunnels above you.


Shrink down and head inside, then step on the button at the end to shut off the electricity in front of another tunnel.


Shrink down and head inside, then step on the button to activate another lever.


Pull it to shut off the electricity in front of the final tunnel.


Shrink down and head inside, then head to the end to reach this Gold Brick.


Gold Brick 38
Fly onto the roof of a building in Soho and you'll find a lever inside a greenhouse.


Use stealth to sneak inside, then pull the lever to activate a nearby sign, revealing this Gold Brick.


You'll find the Gold Brick on the south side of the building. Fly up to reach it.


Gold Brick 39
Destroy the gold statue of Stan Lee in Times Square to reveal this Gold Brick.
Gold Bricks cont.
Gold Brick 40
There are 10 statues you need to destroy around the MARVEL Comics H.Q. The first 2 are silver statues on the north side of the building.


You'll find a grate on the northwest corner of the building.


Travel through it to reach 3 gold statues.


The next 4 statues are on the south side of the building.


The last statue can be found by the street by the southeast corner of the building.


Destroy all 10 statues to reveal this Gold Brick on the north side of the building.


Gold Brick 41
You'll find two purple objects in a maze on top of the Kronos Corporation. Use telekinesis to move them into the purple slots, opening a nearby crate and revealing this Gold Brick.


Gold Brick 42
You'll find a gold wall on the roof of a building in the Financial District.


Cut the shape out of it to reveal some symbiote goo.


Travel through it to reach this Gold Brick.


Gold Brick 43
You'll find a circle of light in the courtyard in the Financial District.


Step inside it and a Sentinel will appear. Destroy the silver panel on its chest to reveal a gold panel.


Destroy the gold panel to reveal a cracked block.


Destroy the cracked block to destroy the Sentinel and receive this Gold Brick.


Gold Brick 44
Charge a generator outside a store in the East Village to open the garage door, allowing you to head inside.


Manipulate the metal switch to turn on the neon sign, revealing this Gold Brick.


Gold Brick 45
This Gold Brick can be earned by completing a footrace that begins on top of a building in the East Village. I recommend using a character like Black Widow, as she has a very fast sprint speed. Complete the race to receive this Gold Brick.


Gold Brick 46
There are 6 large buttons on top of a building near Grand Central Station that you need to step on with a big fig. The first 3 are in plain sight on the roof.


The fourth can be found by climbing the nearby ladder.


The fifth can be found by smashing the cracked block.


The sixth can be found by pulling on the super strength handle.


Step on all 6 buttons within 30 seconds to reveal this Gold Brick.


Gold Brick 47
There are three technology panel puzzles you need to solve on top of a building in the Financial District. The first is towards the southwest corner.


The second is on a ledge towards the center of the roof.


The third is hidden away in the northeast corner of the roof.


Complete all three puzzles to open the container on top of the roof with this Gold Brick inside.
Gold Bricks cont.
Gold Brick 48
You'll find some consoles on the side of the road underneath the Financial District.


Stand in front of one and press the "special" button to take control of a car. Use the hammer to smash all of the red cars driving around, revealing this Gold Brick.


Gold Brick 49
There are two fans on top of a building near Oscorp.


Destroy the silver and gold blades to reveal buttons inside the fans.


Step on them, then walk across the bridge to find two more fans.


Destroy the fan blades to reveal buttons, then step on them to reveal this Gold Brick.


Gold Brick 50
After completing Quest 23, fly up to the top of the Roxxon power plant and use the technology panel to shut off the wires, opening the nearby crate and revealing this Gold Brick.


Gold Brick 51
After completing Quest 27, you'll find a ladder on the side of a building.


Climb up it to reach the roof, then pull the lever to open the crate containing this Gold Brick. You'll need to head through the obstacle course to reach the Gold Brick.


Activate stealth (if a camera sees you, you'll have to start over), then walk across the bridge. Hop up the walls, then continue to the right.


Swing up the poles to reach another ledge, then climb up the ladder.


Shoot the targets to extend a bridge, then walk across it and climb up the ladder.


Cross the roof, then shoot the two targets to extend a bridge.


Walk across it and hop up the walls to reach the roof with this Gold Brick.
JJJ Photos
Required Abilities: Flight

Photo 1
JJJ wants a photo of Grand Central Station. Head to the roof of a building in Soho to find the perfect spot to take the photo.


Photo 2
JJJ wants a photo of the Raft with the city in the background. You'll find a platform floating above the water northeast of the Raft. Fly up to the platform and you'll be able to take the photo.


Photo 3
JJJ wants a photo of Stark Tower with the "STARK" sign visible. You'll find the perfect spot to take the photo on top of a building in the Financial District.


Photo 4
JJJ wants a photo of the Empire State Building. Head up to the top of the Baxter Building to find the spot to take the photo.


Photo 5
JJJ wants a photo of the Bifrost marker. Head to the top of the nearby building to take the photo.


Photo 6
JJJ wants a photo of the X-Mansion with some mutants in it. Head to the top of a building in Washington Heights to take the photo.


Photo 7
JJJ wants a photo of a skate park. You can find one in Yorkville.


Photo 8
JJJ wants a photo of the Statue of Liberty. You can take the photo from the waterfront in the Financial District.


Photo 9
JJJ wants a photo of the city of Manhattan. You'll find a platform floating above the water west of the X-Mansion. Fly up to it and you'll be able to take the photo.


Photo 10
JJJ wants a photo of the Empire State Building overlooking Central Park. Head to the roof of a building in West Harlem to find the spot to take the photo.
Quests
Required Abilities: Claw, Dig, Electric, Explosive, Extinguisher, Flight, Heightened Senses, Mind Control, Pull, Sharp Shoot, Shield, Stealth, Technology, Telekinesis

Quest 1
"Here's a little tip you can take to the bank - everything is more fun if you're bouncing! Embrace your inner amphibian and bounce on these lily pads!"

Talk to Toad and he will ask you to bounce on some lily pads.


Head over to the lily pads, then hop on the first one to start a race. Complete the race to complete this quest.


Quest 2
"My dog buried his squeaky toy somewhere in the woods, but he's refusing to go dig it up, and he won't come from here without it. Would you mind helping me search? You look like you've got a 'sense' for this sort of thing..."

Talk to a woman in Inwood and she will ask you to find her dog's squeaky toy.


Use heightened senses nearby to reveal a dig spot, then dig it up to reveal a stud trail.


Follow the stud trail, then use heightened senses to reveal another dig spot. Dig it up to reveal another stud trail.


Continue revealing dig spots and following stud trails until you find the dog's toy. Pick it up and return it to the woman to complete this quest.


Quest 3
"Taxi? TAXI! What am I, the Invisible Woman? I'm meant to be at Grand Central station, like... 10 minutes ago!"

Talk to a woman by the Avenger's Mansion and she'll ask you to drive her to Grand Central Station.


Hop in a taxi and drive her to Grand Central Station to complete this quest.


Quest 4
"We got a chopper due to land any moment, and some wise-guy has messed up the H on the landing pad! Don't they KNOW that helicopters EXPLODE if they land on a misshapen H?! Help me fix it, quick!"

Talk to a man on top of the Raft and he'll ask you to fix the helipad.


Use telekinesis to rotate the panels and fix the "H", completing this quest.


Quest 5
"There was some trouble over at The Raft recently, and now we got a gang of escaped inmates running rampant! Take care of those punks before someone gets hurt!"

Talk to a police officer in a park in West Harlem and he will ask you to help him take care of some escaped inmates.


Defeat the attacking inmates to complete this quest.


Quest 6
"Could you help a poor, old lady find her cat? He's black with white paws... I'd look for him myself, but these rough streets are no place for a frail, old lady like me..."

Talk to an old woman and she will ask you to help her find her missing cat.


Follow the guide studs to an alley in East Harlem, where you'll find the cat. Press the "special" button near it and it'll follow you. Bring the cat back to the old lady to complete this quest.


Quest 7
"Behold! Y'all in the presence of the greatest collection of second-hand tires know to -- OH DARN IT, THEY'RE ON FIRE AGAIN! Please, save mah poor babies from their fiery fate!"

Talk to a man in East Harlem and he'll ask you to put out the fires on his tire pile.


Follow Pyro around the tires and put out the fires he starts. Once all of the fires are put out, smack Pyro until he is defeated, completing this quest.


Quest 8
"There was a mass break-out at the prison, and what's the first thing those convicts do? Steal my boats and go joyriding, that's what! Blow those seafaring scumbags outta the water for me, would ya?"

Talk to the ferry captain on top of the Raft Ferry building and he'll ask you to destroy some boats.


Destroy the four boats in the water to complete this quest.
Quests cont.
Quest 9
"Greetings! I have journeyed from Asgard in search of a new home. Thus far have struggled to blend in. I wouldst garb myself in what I believe your people call 'fashionable threads'. Might I request your assistance in this task?"

Talk to an Asgardian on the roof of a building in the Industrial District and he will ask you to grab him some new clothes.


Follow the guide studs to reach a clothing store near Columbus Circle. To open it, we need to charge two generators. The first can be found on the left.


Fly up onto the ledge above the store to find the other generator.


Once both generators are charged, the store will open. Head inside and smash the mannequin with the feathered cap to knock it off. Pick up the cap and bring it to the Asgardian to complete this quest.


Quest 10
"I'm sure what you super-guys and gals do is important an' all, but me? I'm of the mind that it's the little things that count. A gang of thugs has been terrorizing the neighborhood; how's about you quit zipping around for a second and beat some sense into those crooks?"

Talk to a police officer in West Harlem and he'll ask you to help him smack some sense into some crooks.


Follow him into a nearby alley, then defeat the attacking henchman to complete this quest.


Quest 11
"I need to take this priceless antique egg over to Empire State University for study, but the streets are simply OVERRUN with thieves! If you're up to the task, I'd feel much safer with a bodyguard. Don't let them near me! First sign of trouble and I'm making a run for it...!"

Talk to a man in Yorkville and he'll ask you to guard him as he brings an egg to Empire State University.


Guide him to Empire State University while fending off the symbiote scientists that attack you. Reach the university to complete this quest.


Quest 12
"I ran away to join the circus as a tightrope walker. Not my best plan, since I'm terrified of heights! I suppose I could conquer my fear by crossing over a few of these rooftops, if I had a suitable beam or something to walk on..."

Talk to a woman on top of a building on the Upper West Side and she'll ask you to help her overcome her fear of heights.


Use telekinesis on the nearby debris to create a beam, allowing the woman to cross. Hold the "special" button to keep the beam in place while she crosses. Follow her across the rooftops, creating three more beams, to complete this quest.


Quest 13
"Yo! We ordered pizzas from a joint in Chinatown, like, an HOUR AGO, and there's been no sign of 'em! These overtime workers get grouchy when they're hungry... Could ya be a pal and go round up that pizza van?"

Talk to a man outside Horizon Labs and he'll ask you to track down a pizza van and drive it over to him.


Follow the guide studs to find the pizza van parked in Little Italy. Hop in and drive it back to the man to complete this quest.


Quest 14
"Behold, my latest invention... the Duck-Delighting Bread Cannon! Help me charge it up, dearie, and I'll let you launch the bread to those hungry ducks!"

Talk to an old woman by the lake in Central Park and she'll ask you to charge up her bread cannon.


Charge the nearby generator to power up the cannon, then hop inside.


Shoot bread into the mouths of each of the ducks to complete this quest.
Quests cont.
Quest 15
"Doo-doo-doodle-doodle doo-doo-do-doo... is what I USED to say, before my monkey ran away. If you find him, perhaps you could bring him back to me? Until then I say to you, dooooo do-do-dooooo do-do-doo do-doooo do-doooo..."

Talk to a man in front of the circus tent and he'll ask you to find his missing monkey.


Follow the guide studs to reach the northwest corner of Central Park, where you'll find the monkey in a tree. Shoot the branch to knock the monkey down, then press the "special" button to get it to follow you. Bring the monkey back to the man to complete this quest.


Quest 16
"All my animals have run away! Bring them back to me and save the day! Lion, gorilla and elephant, hey! I think they're all around Chinatown way!"

After completing Quest 15, talk to the man in the sandbox and he'll ask you to bring him his three missing animals.


Head over to Soho to find the gorilla. Hop on and ride it back to the man in the sandbox.


Head over to a fire escape on the side of a building in Soho to find the lion. Hop on and ride it back to the man in the sandbox.


You'll find the elephant in an alley in Soho. Hop on and ride it back to the man in the sandbox. Bring all three animals back to the sandbox to complete this quest.


Quest 17
"My kid went to play in the sandpit, but the sandpit started... PLAYING BACK! And playing rough at that! Someone's gotta take that sand down a peg before someone else's kid gets SANDBLASTED...!"

Talk to a woman in Central Park and she'll ask you to fight the sandbox.


Head inside and defeat the attacking Sandman Goons to complete this quest.


Quest 18
"I managed to lock myself out of the building, and I'm pretty sure I left the iron on. Figured I'd go in through the window, but I'm on the top floor and these fire escapes were designed by some kind of madman. Could you help me out?"

Talk to a woman in Yorkville and she'll ask you to help her get to the top of the building.


Before taking control of her, we'll need to make sure she has a clear route to the top. Head to the right and use the claw switch to raise up the ladder.


Climb up and head to the right, then latch onto the pull handle and pull to lower another ladder.


Climb up and head to the left, then use heightened senses to reveal a ladder.


Climb up and head to the left to find a claw switch. Use it to lower another ladder.


Climb up and head to the right, then latch onto the pull handle and pull to extend a platform.


Continue climbing up the building, then fly up onto the ledge to find a lever. Pull it to extend a bridge.


With the path completed, drop back down and use mind control to lead the girl to the roof, completing this quest.


Quest 19
"Ohh, where is she? If she's cutting class to ogle those gross reptiles again, Professor Kissick's gonna flunk her faster than you can say 'gluconeogenesis'! If you see her, can you get her over here?"

Talk to the woman in front of Empire State University and she'll ask you to find her friend.


Head over to the reptile house in Central Park to find her. Press the "special" button near her and she'll start following you. Lead the girl's friend back to her to complete this quest.


Quest 20
"Hey, whaddya think of this for a superhero catchphrase: 'With great ability comes the need to be accountable for one's actions'? Snappy, huh? Let's go fight some bad guys so I can try it out!"

Talk to a man in front of Empire State University and he will ask you to help him fight some bad guys.


Follow him to the nearby circle and defeat the A.I.M. Agents that appear to complete this quest.


Quest 21
"Oh, thank goodness! Some young good-fer-nothing HOODLUM stole my handbag and ran into that alley! Please, get it back for me!"

Talk to an old lady in Yorkville and she will ask you to retrieve her stolen purse.


Follow the guide studs to the alley and you'll find the thief!


Chase him down and defeat him and he'll drop the purse. Pick it up and return it to the old lady to complete this quest.
Quests cont.
Quest 22
"I'm supposed to keep this spotlight aimed at the dancer, but I'm just too darn excited to keep a steady hand! Can you do me a solid and help me out? Remember to keep her lit for the whole performance!"

Talk to a woman on a ledge by a stage and she'll ask you to aim the spotlight at the dancer.


Hop in the spotlight and follow the dancer around to complete this quest.


Quest 23
"We had to evacuate the plant quick-sharp when all that mess hit the fan earlier, but some of the workers didn't make it out past that toxic waste! How 'bout it, bub - can you get those guys outta there?"

Talk to a woman outside the Roxxon power plant and she will ask you to help evacuate some employees.


Head towards the plant and take a left, where you'll find some silver debris. Destroy it to clear the path, then continue along it.


You'll find some fires. Put them out, then continue along the path.


You'll find the first Roxxon employee trapped behind some fires. Put them out, then press the "special" button to get her to follow you.


Continue around the back of the power plant and you'll find a large laser.


Use stealth to sneak past it, then climb up the ladder to reach the ledge above you.


Hop up the platforms, then use the technology panel to shut off the lasers.


Drop back down and you'll find another employee. Press the "special" button and she'll start following you.


Continue around the power plant and you'll find another employee trapped by flames. Put them out, then press the "special" button in front of him to get him to follow you.


Continue along the path, putting out the fire to clear the way. Continue along the path and destroy the silver object to clear the path back to the front of the power plant.


You'll find the final employee trapped behind some dumpsters. Latch onto the pull handle and pull to free him, then press the "special" button in front of him to get him to follow you.


Return all four employees to the woman to complete this quest.


Quest 24
"Can you help me cross the street, dearie? Those cars whizz by so darn fast, I'll be paste before I get to the other side! If you can 'divert the traffic', I'll make a break for it... Ready, hon?"

After completing Quest 23, talk to an old woman outside the Roxxon power plant and she'll ask you to help her cross the street.


Simply follow her across the street, destroying any cars that get close, to complete this quest.


Quest 25
"I tell ya, I ain't cut out for the big city. My new boss wants some fancy coffee they only sell at this coffee shop on the other side of town... these buildings all look the same to a country boy like me! Could you help a fella out?"

Talk to a man in the Financial District and he will ask you to get him some fancy coffee.


Follow the guide studs to reach a coffee shop in the Industrial District, then head up onto a ledge on the side. Use heightened senses to reveal a shield socket.


Toss your shield into it to open up the coffee shop.


Head inside and destroy the brown vending machine on the right to reveal a cup of coffee. Pick it up and bring it back to the man to complete this quest.
Quests cont.
Quest 26
"Some no-good villains have cleaned out the vault! That's four van's worth of my precious... I mean, the PEOPLE's precious money making a getaway! Ram those punks off the road!"

Talk to a man in the Financial District and he will ask you to stop some bank robbers.


Chase the three vans around and destroy them to complete this quest.


Quest 27
"Ah, bully - a local! I'm visiting the Big Apple with the missus, don'tcherknow? But the old dear went sightseeing without me and has yet to return, what-what! Said something about taking pictures of a 'square clock', as I recall. You wouldn't have a gander for her would you, old bean?"

Talk to a man by the water and he'll ask you to find his missing wife.


Follow the guide studs to find her in Times Square. Stand next to her and press the "special" button to get her to follow you. Lead her back to her husband to complete this quest.


Quest 28
"That darn Magneto thought it'd be funny to mess with some boats. Now we got folks stranded out there! Help me throw these life preservers out to them."

Talk to a man on a pier and he'll ask you to rescue the people in the water.


Use telekinesis to toss a life preserver over each person, completing this quest.


Quest 29
"I'm testing this new S.H.I.E.L.D. technology that uses money to track things. Wanna try it out? Just follow the arrows of cash to pinpoint the 'treasure'! Oh, watch out for the screwy silver ones though... there's a glitch that makes them point in the opposite direction."

Talk to a S.H.I.E.L.D. Agent in the Financial District and he will ask you to help test out his new technology.


Follow the stud arrows to find the buried treasure. The gold arrows point in the right direction, but the silver arrows point in the opposite direction that you need to go. Find the treasure to complete this quest.


Quest 30
"Have you seen my boy? I took my eye off him for one second and he disappeared! He was talking earlier about going to find a vegetable that would give him some kinda superhero night-vision powers or something... Kids, honestly!"

Talk to a woman in Soho and she'll ask you to find her missing son.


Follow the guide studs to a grocery store in the Upper East Side, where you'll find the boy. Press the "special" button to get him to follow you, then return him to his mother to complete this quest.


Quest 31
"We was fixing the roads up after that hooplah with Doc Ock, and while I was in the pit some gooey-lookin' fella snatched my good shovel and made off into the tunnels. I'll bet he's still underground somewhere... if you find him, rescue my poor shovel would ya?"

Talk to a construction worker in Times Square and he'll ask you to find his missing shovel.


Follow the guide studs into a tunnel underneath the city, where you'll find the shovel hidden behind a cobweb. Destroy the cobweb and pick up the shovel, then return it to the construction worker to complete this quest.


Quest 32
"That darn cat of mine has wandered off again! I bet the greedy little scamp caught a whiff of fish and went to grab himself a second breakfast! Be a dear and keep an eye out for him, won't you?"

After completing Quest 6, talk to an old woman in Soho and she'll ask you to once again find her cat.


Follow the guide studs to find her cat in an alley in the East Village. Press the "special" button to get the cat to follow you. Return the cat to the old woman to complete this quest.
Quests cont.
Quest 33
"I told my boyfriend to meet me up here so we could have a romantic 'movie moment', but clearly that FOOL thought I meant some OTHER giant pointy building in Manhattan! If he doesn't get here soon, we're watching back-to-back rom-coms for a week!"

Talk to a woman on top of the Empire State Building and she'll ask you to help her boyfriend reach her.


To reach her boyfriend, drop down onto the ledge below you and slide down the zipline.


Use mind control to take control of the boyfriend, then walk across the beams and platforms to reach the Empire State Building.


Hop up the platforms and climb the ladders to reach the top.


Eventually, he'll get far away from you, and you'll have to catch up to him to be able to take control of him again. Once you reach the top, you'll complete this quest.


Quest 34
"I gotta apologize to my old lady fa' ruinin' her big romantic night, but my masculine pride keeps getting in tha way! If only someone could just... TAKE CONTROL of my brain and MAKE me do it...!"

After completing Quest 33, talk to a man by Horizon Labs and he'll ask you to help him apologize to his girlfriend.


Use mind control to take control of him, then hop up the platforms and climb the ladders to reach her.


He'll eventually get too far away from you. Catch up to him and you'll be able to take control of him again. Continue climbing to reach the top, completing this quest.


Quest 35
"I don't even WANT to know where it came from, but this giant head came flying in and blew my shop sign to kingdom come! Ya think you could help fix my sign up, Mac?"

Talk to a man in the Financial District and he will ask you to fix his sign.


Use telekinesis to repair the sign. Spell "LEGO" to complete this quest.


Quest 36
"Times like this I wish I worked in England. They know how to wait in lines -- or should I say queue? -- over there! I keep telling these people, SINGLE FILE BETWEEN THE LINES! I'd move 'em myself, but they don't let me do that anymore..."

Talk to a man outside Grand Central Station and he will ask you to get the people in a single file line.


Use mind control to move the people to the other side of the barrier, completing this quest.


Quest 37
"The train drivers are all spooked, say there's some kinda 'monsters' lurking in the underground stations. Sounds like nonsense to me, but could you check it out? I'm not scared, I'm just... busy, that's all."

Talk to a man outside Grand Central Station and he will ask you to take care of some monsters in the underground train station.


Follow the guide studs to a train station, then defeat the symbiote scientists that appear to complete this quest.


Quest 38
"I promised to whip up some carrot soup for the shelter today, but I'm one carrot short... and only a monster would feed the homeless UNDER-CARROTED soup! What do you say? Could you get me one?"

Talk to a man in front of the F.E.A.S.T. building and he will ask you to find him a carrot.


Follow the guide studs to reach Soho, where you'll see a man in a green shirt holding a carrot.


Chase him down and defeat him, causing him to drop the carrot. Bring it back to the man to complete this quest.


Quest 39
"I'm having trouble drumming up hype for my restaurant. If that food critic came by -- maybe due to a little persuasion, wink wink -- his write-up could give me the exposure I need! You can't miss him; the guy carries a baguette wherever he goes."

Talk to a man in Little Italy and he will ask you to bring a food critic to his restaurant.


Follow the guide studs to reach Times Square, where you'll find the food critic holding a baguette. Press the "special" button in front of him to get him to follow you, then lead him back to the restaurant to complete this quest.


Quest 40
"They say every cloud has a silver lining, and in this case I believe my time feeding Galactus has opened my eyes to the wonders of food. I would like to partake in some Italian food, if you know of a good place..."

After completing Quest 1 on the S.H.I.E.L.D. Helicarrier and Quest 39 in Manhattan, talk to Silver Surfer and he will ask you to lead him to an Italian restaurant.


Follow the guide studs to reach the pizzeria in Little Italy. Along the way, you will be attacked by various enemies, so defeat them to protect Silver Surfer. Reach the pizzeria to complete this quest.
Races
Required Abilities: Agility, Flight

Race 1
This is a flying race that begins on top of the X-Mansion.


Race 2
This is a ground race that begins on a hill in Inwood.


Race 3
This is a ground race that begins by the tracks in West Harlem. Quickly hop up the wall to complete the race.


Race 4
This is a flying race that begins on top of a gas station in West Harlem.


Race 5
This is a ground race that begins on a street near East Harlem.


Race 6
This is a ground race that begins in a grassy circle northwest of Central Park.


Race 7
This is a flying race that can be started by flying up to a platform floating high above the water.


Race 8
This is a flying race that can be started on top of a building at the Dockyard.


Race 9
You'll find some consoles next to the lake in Central Park.


Stand in front of one and press the "special" button to take control of a submarine. Use it to complete the race.


Race 10
This is a ground race that begins in the southwest corner of Central Park.


Race 11
This is a ground race that begins in a parking lot in Yorkville.


Race 12
This is a ground race that begins in the Upper East Side.


Race 13
This is an air race that begins between two buildings north of Oscorp.


Race 14
This is a ground race that begins in the Financial District.


Race 15
This is also a ground race that begins in the Financial District.


Race 16
After collecting the Golf Cart Vehicle Token on Liberty Island, hop in and use it to complete the nearby ground race.


Race 17
This is a ground race that begins in Times Square.


Race 18
This is a ground race that begins outside a pizza shop.


Race 19
You'll find a pair of consoles on the roof of a building on the Lower East Side. Stand in front of one and press the "special" button to take control of a car. Use it to complete the nearby race.


Race 20
This is a ground race that begins in the Financial District.
Stan Lee in Peril
Required Abilities: Claw, Dig, Extinguisher, Flight, Heightened Senses, Laser, Magnet, Mind Control, Pull, Sharp Shoot, Super Strength, Telekinesis

Stan Lee in Peril 1
You'll find Stan Lee trapped behind some fires at the X-Mansion. Use mind control to take control of him, then build the LEGO pieces into a valve.


Use telekinesis to turn it, turning on the sprinkler and putting out the fires. You'll have to rescue him during "Interlude - X-Mansion Attack".


Stan Lee in Peril 2
After rescuing the previous Stan Lee, you'll find him outside Marvel Comics H.Q. The security guard won't let him in!


Use mind control to take control of the guard, then pull the lever on the left to open the door.


Stan Lee in Peril 3
After rescuing the previous Stan Lee, you can find him trapped underneath some chess pieces in Central Park. Use heightened senses to reveal a pull handle, then latch onto it and pull to rescue him.


Stan Lee in Peril 4
After rescuing the previous Stan Lee, you can find him in the Industrial District. He will take a sip of a funny-tasting drink, turning him into Stan Hulk! Switch to a big fig and smack him a few times to turn him back to normal.


Stan Lee in Peril 5
After rescuing the previous Stan Lee, you can find him by the water in Washington Heights. He's stuck on a hose connected to a fire hydrant. Melt the nearby ice to reveal a claw switch.


Use it to shut off the fire hydrant, rescuing Stan.


Stan Lee in Peril 6
After rescuing the previous Stan Lee, you'll find him on a rooftop in Yorkville. He's standing right underneath some heavy equipment being hauled by the crane!


Climb up the ladders on the side of the crane to reach the control room, then use the claw switch to move the equipment away from Stan.


Stan Lee in Peril 7
After rescuing the previous Stan Lee, you'll find him being held by a gorilla on top of the Empire State Building. Fly up and defeat the gorilla to rescue Stan.


Stan Lee in Peril 8
After rescuing Stan Lee in Peril 1 on the S.H.I.E.L.D. Helicarrier, you'll find him buried in the sandbox in Central Park. Dig him up to rescue him.


Stan Lee in Peril 9
After rescuing the previous Stan Lee, you'll find him stuck at the top of the chimney in the Industrial District.


Smash the cracked block at the base of the chimney to rescue him.


Stan Lee in Peril 10
After rescuing the previous Stan Lee, you'll find him in the lake in Central Park. Manipulate the metal life preserver to toss it out to Stan, rescuing him.


Stan Lee in Peril 11
After rescuing the previous Stan Lee, you'll find him in the Financial District. He's trapped in a taxi, which he somehow managed to get stuck up in a tree. Destroy the taxi to rescue him.


Stan Lee in Peril 12
After rescuing the previous Stan Lee, you'll find him trapped under a giant dumbbell outside Fogwell's Gym. Use the super strength handle on it to lift it up, rescuing Stan.


Stan Lee in Peril 13
After rescuing the previous Stan Lee, you'll find him trapped on the train tracks. Manipulate the metal clasp to rescue him.


Stan Lee in Peril 14
After rescuing the previous Stan Lee, you'll find him in a boat surrounded by sharks. Defeat the sharks to rescue Stan.


Stan Lee in Peril 15
After rescuing the previous Stan Lee, you'll find him on the Raft. Smash the cracked block on the left to release him.
Stan Lee in Peril cont.
Stan Lee in Peril 16
After rescuing the previous Stan Lee, you'll find him trapped in a BBQ fire near the X-Mansion. Put out the fires to rescue him.


Stan Lee in Peril 17
After rescuing the previous Stan Lee, you'll find him once again in the sandbox in Central Park. Latch onto the pull handle and pull to destroy the clown car, rescuing Stan.


Stan Lee in Peril 18
After rescuing the previous Stan Lee, you'll find him with his head stuck in a mailbox in the Financial District. Destroy the mailbox to rescue him.


Stan Lee in Peril 19
After rescuing the previous Stan Lee, you can find him at the top of Lady Liberty's torch. Fly up and put out the fires to rescue him.


Stan Lee in Peril 20
After rescuing the previous Stan Lee, you can find him in a small construction site in the Upper West Side. Defeat the three Sandman Goons harassing him to rescue him.


Stan Lee in Peril 21
After rescuing the previous Stan Lee, you'll find him at the Roxxon plant getting zapped with electricity. Fly up to the ledge above him and pull the lever to shut off the electricity.


Stan Lee in Peril 22
After rescuing the previous Stan Lee, you'll find him floating above the circus tent in Central Park. Destroy the balloon he's holding on to to rescue him.
Vehicle Tokens
Required Abilities: Agility, Claw, Dig, Electric, Explosive, Flight, Grate Travel, Heightened Senses, Laser, Magnet, Mind Control, Pull, Sharp Shoot, Shield, Stealth, Super Strength, Symbiote, Technology

Captain America’s Bike
“Quick! Follow that convenient trail!”

After collecting the Electro (Ultimate) Character Token, talk to a man in the Industrial District and he’ll ask you to drive him somewhere. Hop in a taxi and drive him to the Empire State Building to receive this Vehicle Token.


Chitauri Chariot
“That treacherous Loki froze anyone who crossed his path during his rampage through the city… Follow this sorry trail of frozen innocents, and release them from captivity!”

After collecting the Iron Man (Heroic Age) Character Token, talk to Heimdall on top of a building in Soho and he will ask you to unfreeze 4 trapped civilians.


The first citizen can be found on a ledge on the building across from you. Drop down and melt the ice around her to free her.


The second citizen can be found in the center of Times Square. Melt the ice to rescue him.


The third citizen can be found on the side of a building just to the north of Times Square. Melt the ice to rescue her.


The fourth citizen is on the same building as Heimdall, on a lower ledge. Unfreeze all 4 civilians to receive this Vehicle Token.


Deadpool’s Helicopter
“Wah, wah… I lost my favorite FLAMINGO BLADE and I can’t be bothered to go look for it myself! Man, these fetch quest guys tick me off. I still want you to go find that sword, though. Chop chop!”

After collecting the Deadpool’s Scooter Vehicle Token, talk to Deadpool and he will ask you to find his missing flamingo blade.


]Follow the guide studs to a building in West Harlem, then destroy the pink dumpster behind it to reveal the flamingo blade.


Pick it up and return it to Deadpool to receive this Vehicle Token.


Deadpool’s Scooter
“Hey hey! Hope you guys aren’t sick of races yet, because you ain’t 100%-ing this game without finishing mine! Hop in your favorite wheels and show me what you’re made of, punk!”

After unlocking Deadpool, talk to him on the Brooklyn Bridge and he will challenge you to a race.


Beat him in the race to receive this Vehicle Token.


Doom Jet
This is floating above an intersection in the Financial District.


Fantasticar
You’ll find this on top of a fountain in Central Park.


Flower Car
“I AM GROOT!”

Talk to Groot in Central Park and some moles will appear.


Smack 7 within 25 seconds to receive this Vehicle Token.


Garbage Truck
“Seems I dropped me energy knife in one of the dumpsters round here. AND NO, IT’S NOT BECAUSE I WAS RUMMAGING THROUGH THEM FOR FOOD! Give us a hand finding it, would ya guv?”

Talk to Rocket Raccoon near the Scrapyard and he will ask you to find his energy knife.


Follow the guide studs to Yorkville, then hop into an alley to find a brown dumpster.


Destroy it to reveal Rocket’s energy knife. Return it to him to receive this Vehicle Token.


Ghost Rider’s Motorcycle
“Back for more? Alright, this race is for the win! Cower before the flames of the Ghost Rider’s wounded pride! LET’S RACE!”

After collecting the Mister Fantastic (F.F.) Character Token, talk to Ghost Rider and he will challenge you to another race.


Defeat him in the race to receive this Vehicle Token.


Golf Cart
You’ll find a golf cart on Liberty Island. Manipulate the metal clamp holding it in place to collect this Vehicle Token.


Hydra Tank
Fly onto a ledge on the Empire State Building to find a metal switch. Manipulate it to open the garage door below you.


Drop down and head inside the room, then charge the two generators to reveal this Vehicle Token.
Vehicle Tokens cont.
Magneto-mobile
“I know I shouldn’t say this, but my latest batch of X-students is… well, pretty X-asperating. They have potential, but lack confidence… Take this one here, for X-ample. Care to X-cite them as you demonstrate how it’s done?”

Talk to Professor X outside the X-Mansion and he will ask you to help one of his students learn how to use their powers.


Cut the shape out of the gold panel to receive this Vehicle Token.


Mandarin’s Boat
“I AM GROOT!”

After collecting the Flower Car Vehicle Token, talk to Groot in the Financial District to reveal some more moles.


]Smack 9 moles within 30 seconds to receive this Vehicle Token.


Mandarin’s Buggy
You’ll find a woman inside a guard shack in the Industrial District. Use mind control to take control of her, then pull the lever to open the container above you, revealing this.


Mandarin’s Helicopter
“Looks like our ‘friends’ in de Brotherhood decided to pay the X-Mansion another visit, eh? Let’s throw those guys a welcoming party… And a few punches while we’re at it, no? Time to roll out the red carpet!”

After collecting the Black Bolt Character Token, talk to Gambit by the X-Mansion and he will ask you to help him defeat some attacking members of the Brotherhood.


Defeat the nearby Magneto Acolytes to receive this Vehicle Token.


News Helicopter
You’ll find a cracked block in the courtyard across from the Baxter Building.


Destroy the plants in front of it, then smash it to reveal a technology panel.


Use it to open the container above the train tracks, revealing this Vehicle Token.


Pizza Bike
“They may call me the Daywalker, but I much prefer day-RIDING! And I challenge you to a race!”

Talk to Blade in the tunnel beneath the Financial District and he’ll challenge you to a race.


Beat him in the race to receive this Vehicle Token.


Pizza Van
Climb up the ladders on the side of the pizza shop in Little Italy to reach a claw switch. Use it to turn on one of the lights above the door.


Climb the ladder to reach the next ledge, then latch onto the pull handle and pull to reveal another claw switch. Use it to turn on another light above the door.


Use heightened senses to reveal a ladder, then climb up to reach the roof.


You’ll find another claw switch. Melt the ice around it, then use it to turn on the final light above the door.


Once all three lights have been turned on, the door will open, allowing you to head inside and collect this Vehicle Token.


Police Helicopter
Head onto the roof of a building on the Upper West Side and you’ll find a target.


Shoot it and another target will appear. Head over to the roof of the building to the north to find it.


]Shoot it and another target will appear. It’s floating above a chimney near Fisk Tower in the Industrial District.


]Shoot it to reveal another target. You’ll find this one floating by a building just to the west of the Vehicle Token’s location.


]Shoot it to open the box on the roof, revealing this Vehicle Token.


Police Motorcycle
You’ll find this Vehicle Token behind a barrier in Yorkville.


]To reach it, smash a nearby cracked block to reveal a grate.


]Travel through it to reach this Vehicle Token.


Police Truck
Hop up a wall underneath the train tracks to reach this Vehicle Token.
Vehicle Tokens cont.
Pumpkin Chopper
Destroy the silver wall on the helipad on top of Oscorp to reveal some symbiote goo.


Travel through it to reach this Vehicle Token.


Punisher’s Car
“Those truck-driving crooks we took down before are back… Seems they didn’t get the memo that the Punisher is still in town, dishing out his own brand of speeding ticket… A ticket straight to the SCRAPYARD! Smash ‘em up!”

After collecting the Punisher’s Truck Vehicle Token, talk to Punisher and he will ask you to smash some more trucks.


Destroy the three green Roxxon vans (marked on your map by yellow triangles) to receive this Vehicle Token.


Punisher’s Truck
“See this face? It’s not a happy face… And it’s all because of joyriding crooks, tearing up and polluting the streets in their TRUCKS… Take my environmentally friendly truck and PUNISH those smoke-spewing death machines!”

Talk to Punisher and he will ask you to destroy some polluting trucks.


Hop in his truck and ram the three green Roxxon vans (marked on your map by yellow triangles) to receive this Vehicle Token.


Raft Helicopter
Pull on the super strength handle on top of the Raft to tear away the wall, revealing this.


Raft Truck
You’ll find a dig spot on the northwest corner of the Raft. Dig it up to reveal this.


Raid Truck
Smash a cracked block near the Raft Ferry to reveal some moles.


Smack 15 of them within 40 seconds to reveal this Vehicle Token.


S.H.I.E.L.D. 4x4
Hop up some platforms in a construction site to reach a cracked block.


Smash it to reveal an opening, then drop down inside. Dig up the dirt to receive this.


S.H.I.E.L.D. APC
Toss Cap’s shield into the shield switch on the side of the Raft Ferry building to open a container.


Head up to it to reach this Vehicle Token.


S.H.I.E.L.D. Staff Car
You’ll find a security camera on the roof of a building in Little Italy. Use stealth to sneak by it, revealing a technology panel.


Use it to open the nearby container, revealing this Vehicle Token.


Spider-copter
You’ll find some cobwebs in front of a cracked block on the roof of a building by Ant-Man’s lab. Destroy the cobwebs, then destroy the cracked block to reveal this.


Spider-Cycle
You’ll find a silver statue of Spider-Man on top of a building by Oscorp. Destroy it to reveal this Vehicle Token.


Spider-Trike
You’ll find a generator hidden behind a plant on the side of a building on the Upper East Side.


Destroy the plant, then charge the generator to open the greenhouse on the roof. Head inside to reach this Vehicle Token.


Stark Jet
This is floating out in the lake in Central Park.


The Britmobile
“It’s nice to have reminders of dear old England… If only I hadn’t misplaced my quintessentially British car, somewhere in the north end of the city… If you happen to come across it, I’d be jolly glad to see the old girl again!”

Talk to Captain Britain and he’ll ask you to find his missing car.


Follow the guide studs to the parking garage in East Harlem to find it, then drive it back to Captain Britain to receive this Vehicle Token.


Wolverine’s Motorcycle
“My toad-senses are tingling… I’m nearly POSITIVE that bouncing on all these lily pads will lead to something incredibly cool.”

After completing Quest 1 in Manhattan, talk to Toad in the Industrial District and he will ask you to bounce on some more lily pads.


Head down to the lily pads and hop on to start a race. Complete the race to receive this Vehicle Token.
Vehicle Tokens cont.
X-Jet
Head to the runway underneath the X-Mansion and you’ll find a blue container. We need to charge three generators to open it.


The first generator can be found to the left of the container. Use heightened senses to reveal it, then charge it up.


The second generator can be found up on the ceiling. Destroy the cobweb in front of it, then charge it up.


The third generator can be found on a pillar towards the end of the runway. Destroy the silver panel to reveal the generator, then charge it up.


Charge all three generators to open the container, revealing this Vehicle Token.
----------S.H.I.E.L.D. Helicarrier----------
Character Tokens


Gold Bricks


Quests


Races


Stan Lee in Peril


Vehicle Tokens
Character Tokens
Damage Control
You'll find a bunch of fires on the south part of the deck.


Hop in the nearby water cannon and put out the fires to reveal this Character Token.


Maria Hill
"Time for the final round of the S.H.I.E.L.D. Helicarrier Grand Prix! This course is a little trickier, but just drive like you're getting chased by an angry Hulk and you'll be fine."

After collecting the S.H.I.E.L.D. Minicarrier Vehicle Token, you'll find a large ladder on the deck. Climb up to reach Maria Hill. Talk to her and she'll challenge you to another race.


Hop in a Go-kart and beat her in the race to receive this Character Token.


S.H.I.E.L.D. Agent
Head to the bottom part of the Helicarrier and you'll find a turret. Pull the nearby lever, then hop in.


Shoot all of the targets that appear to receive this Character Token.
Gold Bricks
Required Abilities: Electric, Laser

Gold Brick 1
You'll find some turrets on the west side of the Helicarrier deck.


Hop in and shoot all the drones flying around to receive this Gold Brick.


Gold Brick 2
You'll find some missile turrets on the east side of the Helicarrier deck.


Hop in and shoot all the drones flying around to receive this Gold Brick.


Gold Brick 3
Head over to the southwest turbine and you'll find it clogged with debris. Destroy the objects inside, as well as the gold statues, to clear the turbine.


Once the turbine is clear, a generator will appear. Charge it to start up the turbine and receive this Gold Brick.
Quests
Required Abilities: Flight, Heightened Senses, Telekinesis

Quest 1
"Greetings... Now that my board has been rebuilt, and - more importantly - the world is no longer facing impending doom, perhaps you would indulge me in a little race?"

Talk to Silver Surfer on the Helicarrier deck and he will ask you to compete with him in a race.


Beat Silver Surfer in the air race to complete this quest.


Quest 2
"Who, what, where, me? I'm not doing anything. I definitely wasn't about to shred some sensitive documents in these turbines. And I certainly wouldn't be asking you to find the one VERY sensitive document I lost somewhere on the Helicarrier deck. You can't prove anything!"

Talk to a S.H.I.E.L.D. agent on the Helicarrier deck and he will ask you to find a secret document that he lost.


Head to the southern part of the Helicarrier and drop down the ledges to find the document stuck in a vent.


Destroy the plants, then use telekinesis to set the document down on the ground.


Pick it up and return it to the S.H.I.E.L.D. agent to complete this quest.


Quest 3
"A bunch of us agents thought it'd be a good idea to play hide and seek, try to lighten the mood, y'know? But that was about 3 hours ago and one of the guys is a little TOO good at hiding. We kinda have work to do, so... can you help us find him?"

Talk to a S.H.I.E.L.D. agent on the Helicarrier deck and he will ask you help him find a missing S.H.I.E.L.D. agent.


Head over to the northwest turbine and use heightened senses to find the agent. Press the "special" button near him and he'll start following you. Return to the S.H.I.E.L.D. agent to complete this quest.


Quest 4
"Ah, hello... Agent Robinson here was sparring with Black Widow. He needs a cast for his leg, but we've quickly run out of them since the Hulk entered our wrestling league. Maybe if you find one, you can bring it back here?"

Talk to a S.H.I.E.L.D. agent in the Medical Bay and he will ask you to find a cast for Agent Robinson.


Head over to the southeast corner of the Hangar and you'll find a box.


Destroy it to reveal a cast. Pick it up and give it to the S.H.I.E.L.D. agent to complete this quest.


Quest 5
"Where is it?! WHERE IS IT?! No, no NO! I was on my way to trade my limited edition Captain America card for Coulson's mint Captain Britain card, but I must've dropped it somewhere! Without that card I have nothing to offer! Can you help me find it?!"

Talk to a S.H.I.E.L.D. agent in the hallway and he'll ask you to find his Captain America trading card.


Head to the right side of the Detention Center to find the trading card. Pick it up and give it to the S.H.I.E.L.D. agent to complete this quest.


Quest 6
"You couldn't give me a hand, could you? This window's so big, by the time I'm finished cleaning it, it's dirty again and I have to start over! I really need to hit the bathroom, but I can't leave 'til this is done!"

Talk to the S.H.I.E.L.D. agent in the Laboratory and he'll ask you to help him clean the window.


Use telekinesis to move the sponge over the five images of Deadpool, completing the quest.


Quest 7
"Snakes... why'd it have to be snakes?! I hate them! How'd they even get on board? Director Fury told me specifically to get these snakes off this gosh-darned Helicarrier! I may be paraphrasing slightly. Anyways, can you help me out?"

Talk to a S.H.I.E.L.D. agent in the Hangar and he will ask you to help him get rid of some snakes.


Defeat the snakes that attack you to complete this quest.


Quest 8
"Just ONCE could they bring a jet back in one piece!? I'll never get this fixed in time without my trusty wrench, and I can't remember where I put it! Can you find it for me? Otherwise Director Fury is going to be Director FURIOUS at me!"

Talk to a S.H.I.E.L.D. agent in the Hangar and he will ask you to find his wrench.


Head to the near right corner of the Hangar to find the wrench on top of a tarp. Pick it up and give it to the S.H.I.E.L.D. agent to complete this quest.
Races
Required Abilities: Flight

Race 1
This race can be started in the air south of the Helicarrier.
Stan Lee in Peril
Required Abilities: Sharp Shoot

Stan Lee in Peril 1
After rescuing Stan Lee in Peril 7 in Manhattan, you'll find Stan being held hostage by a drone. Destroy the drone to rescue him.


Stan Lee in Peril 2
After rescuing Stan Lee in Peril 22 in Manhattan, you'll find Stan in Deadpool's Room. Destroy the box he's trapped under to rescue him.
Vehicle Tokens
Required Abilities: Grate Travel, Pull

Go-kart
"I've been working on an alternative use for the force-field projectors... PROJECTED RACE TRACKS! Wanna help me test them out with a race? I've sorted all the power fluctuations, so we shouldn't get any more raining go-karts situations..."

You'll find a large ladder by the northwest turbine. Climb up to reach Maria Hill. Talk to her and she'll ask you to help her test out the new projected race tracks.


Hop in a go-kart and beat her in the race to receive this Vehicle Token.


S.H.I.E.L.D. Jetfighter
Latch onto the pull handle on some boxes, then pull to move them out of the way.


Travel through the grate to reach this Vehicle Token.


S.H.I.E.L.D. Minicarrier
"No time for racing today - A.I.M. soldiers are attacking the helicarrier! We need to keep them from getting inside - help us sweep the deck clean of those bucket-heads!"

After collecting the Go-kart Vehicle Token, talk to Maria Hill on the deck of the Helicarrier. She will ask you to help her fend off some attacking A.I.M. Agents.


Defeat all of the A.I.M. Agents to receive this Vehicle Token.
--------------Miscellaneous--------------
Characters
There are a grand total of 153 characters (not including the 26 custom characters) that you can play as in this game. I have listed them all below in the order that they appear on the character selection screen. Next to each character I list their weapon and abilities. I also list how to unlock them and any other interesting things about them.


Iron Man (Mark 1)

Weapon: Energy Blasts, Melee, Missiles, Unibeam
Abilities: Explosive, Sharp Shoot, Technology
How To Unlock: Complete Rebooted, Resuited


Iron Man (Mark 6)

Weapon: Energy Blasts, Melee, Missiles, Unibeam
Abilities: Explosive, Flight, Sharp Shoot, Technology
How To Unlock: Complete Sand Central Station


Iron Man (Mark 7)

Weapon: Energy Blasts, Melee, Missiles, Unibeam
Abilities: Explosive, Flight, Sharp Shoot, Technology
How To Unlock: Complete House Party Protocol, then purchase in the character menu


Iron Man (Mark 42)

Weapon: Energy Blasts, Melee, Missiles
Abilities: Explosives, Flight, Laser, Sharp Shoot, Technology
How To Unlock: Complete Rebooted, Resuited


Tony Stark

Weapon: Melee
Abilities: Technology
How To Unlock: Complete Rebooted, Resuited


Tony Stark (Underwear)

Weapon: Melee
Abilities: Technology
How To Unlock: Complete Rock up at the Lock Up


Iron Man (Heroic Age)

Weapon: Energy Blasts, Melee, Unibeam
Abilities: Flight, Sharp Shoot, Technology
How To Unlock: Collect his Character Token in Manhattan, then purchase in the character menu


Iron Man (Heartbreaker)

Weapon: Energy Blasts, Melee, Missiles
Abilities: Explosive, Flight, Laser, Sharp Shoot, Technology
How To Unlock: Collect his Character Token in House Party Protocol, then purchase in the character menu


Hulk

Weapon: Melee, Thunderclap
Abilities: Extinguisher, Super Strength, Technology (as Bruce Banner), Toxic Immunity
How To Unlock: Complete Sand Central Station


Hold the "tag" button to transform into Bruce Banner.


Spider-Man

Weapon: Melee, Web Blasts
Abilities: Agility, Climbing, Heightened Senses, Pull, Sharp Shoot, Web Swing
How To Unlock: Complete Sand Central Station


Hold the "tag" button to transform into Peter Parker.


Spider-Man (F.F.)

Weapon: Melee, Web Blasts
Abilities: Agility, Climbing, Heightened Senses, Pull, Sharp Shoot, Web Swing
How To Unlock: Collect his Character Token in Manhattan, then purchase in the character menu

Just like Spider-Man, hold the "tag" button to transform into Peter Parker.


Captain America

Weapon: Melee, Shield
Abilities: Agility, Beam Deflection, Sharp Shoot, Shield
How To Unlock: Begin Interlude - Baxter Building Break-In


Captain America (Classic)

Weapon: Melee, Shield
Abilities: Agility, Beam Deflection, Sharp Shoot, Shield
How To Unlock: Complete The Brick Apple?, then purchase in the character menu


Mister Fantastic

Weapon: Melee
Abilities: Glide, Grate Travel, Pull, Sharp Shoot, Stretch, Technology
How To Unlock: Begin Interlude - Baxter Building Break-In


Mister Fantastic (F.F.)

Weapon: Melee
Abilities: Glide, Grate Travel, Pull, Sharp Shoot, Stretch, Technology
How To Unlock: Collect his Character Token in Manhattan, then purchase in the character menu


Hawkeye

Weapon: Bow and Arrow, Melee
Abilities: Agility, Arrow, Explosive, Pull (single handles only), Sharp Shoot
How To Unlock: Begin Interlude - Oscorp Infiltration


Black Widow

Weapon: Melee, Pistols
Abilities: Agility, Sharp Shoot, Stealth, Technology
How To Unlock: Begin Interlude- Oscorp Infiltration


Wolverine

Weapon: Claws
Abilities: Agility, Claw, Climbing, Dig, Heightened Senses
How To Unlock: Complete Rock up at the Lock Up


Wolverine (Cowl)

Weapon: Claws
Abilities: Agility, Claw, Climbing, Dig, Heightened Senses
How To Unlock: Collect his Character Token in Put up your Dukes, then purchase in the character menu


Human Torch

Weapon: Fire Blasts
Abilities: Flight, Laser, Sharp Shoot
How To Unlock: Complete Red Head Detention


Press the "special" button to flame on! You can also do this by flying or using any of Human Torch's fire-based abilities.
Characters cont.
Thor

Weapon: Electric Blasts (if charged), Mjolnir
Abilities: Electric, Flight, Sharp Shoot, Super Strength (cracked blocks only)
How To Unlock: Complete Bifrosty Reception


Thor (Classic)

Weapon: Electric Blasts (if charged), Mjolnir
Abilities: Electric, Flight, Sharp Shoot, Super Strength (cracked blocks only)
How To Unlock: Collect his Character Token in Bro-tunheim, then purchase in the character menu


Cyclops

Weapon: Energy Blasts, Melee
Abilities: Laser, Sharp Shoot
How To Unlock: Begin Interlude - X-Mansion Attack


Cyclops (Astonishing)

Weapon: Energy Blasts, Melee
Abilities: Laser, Sharp Shoot
How To Unlock: Collect his Character Token in Manhattan, then purchase in the character menu


Jean Grey

Weapon: Energy Blasts, Melee
Abilities: Beam Deflection, Glide, Mind Control, Sharp Shoot, Telekinesis
How To Unlock: Begin Interlude - X-Mansion Attack


Phoenix

Weapon: Fire Blasts, Melee
Abilities: Beam Deflection, Flight, Laser, Mind Control, Sharp Shoot, Telekinesis
How To Unlock: Complete Put up your Dukes, then purchase in the character menu


Storm

Weapon: Melee, Wind Blasts
Abilities: Electric, Extinguisher, Glide, Sharp Shoot
How To Unlock: Complete Juggernauts and Crosses


Beast

Weapon: Melee
Abilities: Agility, Claw, Climbing, Dig, Heightened Senses, Technology
How To Unlock: Complete Juggernauts and Crosses


Iceman

Weapon: Ice Blasts, Melee
Abilities: Extinguisher, Freeze, Glide, Sharp Shoot
How To Unlock: Complete Juggernauts and Crosses


Invisible Woman

Weapon: Energy Blasts, Melee
Abilities: Beam Deflection, Sharp Shoot, Stealth, Telekinesis
How To Unlock: Begin Interlude - Operation Latveria


Invisible Woman (F.F.)

Weapon: Energy Blasts, Melee
Abilities: Beam Deflection, Sharp Shoot, Stealth, Telekinesis
How To Unlock: Collect her Character Token in Stranger Danger, then purchase in the character menu


Thing

Weapon: Melee
Abilities: Super Strength, Toxic Immunity
How To Unlock: Complete Doctor in the House


Thing (F.F.)

Weapon: Melee
Abilities: Super Strength, Toxic Immunity
How To Unlock: Collect his Character Token in Reptilian Ruckus, then purchase in the character menu


Nick Fury

Weapon: Melee, Pistols
Abilities: Sharp Shoot, Stealth, Technology
How To Unlock: Complete Doctor in the House


Maria Hill

Weapon: Melee, Pistol
Abilities: Agility, Sharp Shoot, Stealth, Technology
How To Unlock: Collect her Character Token on the S.H.I.E.L.D. Helicarrier, then purchase in the character menu


Agent Coulson

Weapon: Destroyer Gun, Melee
Abilities: Explosive, Sharp Shoot, Technology
How To Unlock: Complete Tabloid Tidy Up


Abomination

Weapon: Melee, Thunderclap
Abilities: Extinguisher, Super Strength, Toxic Immunity
How To Unlock: Complete Rock up at the Lock up, then purchase in the character menu


Absorbing Man

Weapon: Mace
Abilities: None
How To Unlock: Collect his Character Token in Manhattan, then purchase in the character menu


A.I.M. Agent

Weapon: Melee, Rifle
Abilities: Sharp Shoot
How To Unlock: Complete That Sinking Feeling, then purchase in the character menu


Aldrich Killian

Weapon: Fire Blasts, Melee
Abilities: Explosive, Laser, Sharp Shoot
How To Unlock: Complete Rebooted, Resuited, then purchase in the character menu


Ant-Man

Weapon: Melee
Abilities: Grate Travel, Shrink, Technology
How To Unlock: Collect his Character Token in Manhattan, then purchase in the character menu


Archangel

Weapon: Feathers, Melee
Abilities: Flight, Sharp Shoot
How To Unlock: Collect his Character Token in Manhattan, then purchase in the character menu


Arnim Zola

Weapon: Melee
Abilities: Electric, Mind Control, Technology
How To Unlock: Complete Red Head Detention, then purchase in the character menu


Aunt May

Weapon: Handbag
Abilities: None
How To Unlock: Collect her Character Token in Manhattan, then purchase in the character menu


Beetle

Weapon: Energy Blasts, Melee, Missiles
Abilities: Explosive, Flight, Laser, Sharp Shoot, Technology
How To Unlock: Collect his Character Token in Manhattan, then purchase in the character menu
Characters cont.
Black Bolt

Weapon: Energy Blasts, Melee, Voice Blast
Abilities: Flight, Sharp Shoot, Telekinesis
How To Unlock: Collect his Character Token in Manhattan, then purchase in the character menu


Black Cat

Weapon: Melee
Abilities: Agility, Claw (claw switches only), Climbing, Heightened Senses, Pull (single handles only)
How To Unlock: Collect her Character Token in Manhattan, then purchase in the character menu


Black Panther

Weapon: Claws
Abilities: Agility, Claw, Climbing, Dig, Heightened Senses
How To Unlock: Collect his Character Token in Manhattan, then purchase in the character menu


Blade

Weapon: Sword
Abilities: Agility, Sharp Shoot
How To Unlock: Collect his Character Token in Manhattan, then purchase in the character menu


Blob

Weapon: Melee, Thunderclap
Abilities: Extinguisher, Super Strength, Toxic Immunity
How To Unlock: Complete Put up your Dukes, then purchase in the character menu


Bullseye

Weapon: Melee, Playing Card
Abilities: Agility, Sharp Shoot
How To Unlock: Collect his Character Token in Manhattan, then purchase in the character menu


Captain Britain

Weapon: Energy Blasts, Melee
Abilities: Climbing, Flight, Heightened Senses, Sharp Shoot, Technology, Telekinesis
How To Unlock: Collect his Character Token in Manhattan, then purchase in the character menu


Carnage

Weapon: Melee, Web Blasts
Abilities: Climbing, Heightened Senses, Pull, Sharp Shoot, Symbiote, Web Swing
How To Unlock: Collect his Character Token in Manhattan, then purchase in the character menu


Colossus

Weapon: Melee
Abilities: Super Strength, Toxic Immunity
How To Unlock: Collect his Character Token in Manhattan, then purchase in the character menu


Curt Connors

Weapon: Lizard, Melee, Thunderclap (as Lizard)
Abilities: Extinguisher (as Lizard), Sharp Shoot, Super Strength (as Lizard), Technology, Toxic Immunity (as Lizard)
How To Unlock: Complete Reptilian Ruckus, then purchase in the character menu


Hold the "tag" button to transform into Lizard.


Damage Control

Weapon: Melee
Abilities: None
How To Unlock: Collect his Character Token on the S.H.I.E.L.D. Helicarrier, then purchase in the character menu


Daredevil

Weapon: Staff
Abilities: Agility, Climbing, Heightened Senses, Sharp Shoot, Shield
How To Unlock: Complete Feeling Fisky


Deadpool

Weapon: Pistols, Swords
Abilities: Agility, Sharp Shoot
How To Unlock: Collect and purchase all Deadpool Red Bricks


Destroyer (MiniFig)

Weapon: Fire Blasts, Melee
Abilities: Explosive, Laser, Sharp Shoot
How To Unlock: Complete Bifrosty Reception, then purchase in the character menu


Doctor Doom

Weapon: Electric Blasts, Melee
Abilities: Electric, Sharp Shoot, Technology
How To Unlock: Complete A Doom With a View


Doctor Octopus

Weapon: Melee
Abilities: Climbing, Heightened Senses, Pull, Sharp Shoot, Technology
How To Unlock: Complete Times Square Off


Doctor Octopus (Ultimate)

Weapon: Melee
Abilities: Climbing, Heightened Senses, Pull, Sharp Shoot, Technology
How To Unlock: Collect his Character Token in Tabloid Tidy Up, then purchase in the character menu


Doctor Strange

Weapon: Magic Blasts, Melee
Abilities: Flight, Grate Travel, Mind Control, Sand (travel only), Sharp Shoot, Stealth, Symbiote, Technology, Telekinesis
How To Unlock: Complete Stranger Danger, then purchase in the character menu


Doombot

Weapon: Melee, Pistol
Abilities: Sharp Shoot
How To Unlock: Complete Doctor in the House, then purchase in the character menu


Doombot (V-Series)

Weapon: Melee
Abilities: Super Strength, Toxic Immunity
How To Unlock: Complete A Doom With a View, then purchase in the character menu


Dormammu

Weapon: Flaming Skulls, Melee
Abilities: Laser, Mind Control, Sharp Shoot, Super Strength (cracked blocks only), Telekinesis
How To Unlock: Complete Stranger Danger, then purchase in the character menu


Drax

Weapon: Knives
Abilities: Agility, Power Cosmic, Sharp Shoot
How To Unlock: Collect his Character Token in Manhattan, then purchase in the character menu


Electro

Weapon: Electric Blasts, Melee
Abilities: Electric, Flight, Sharp Shoot
How To Unlock: Complete A Shock Withdrawal, then purchase in the character menu
Characters cont.
Electro (Ultimate)

Weapon: Electric Blasts, Melee
Abilities: Electric, Flight, Sharp Shoot
How To Unlock: Collect his Character Token in Manhattan, then purchase in the character menu


Elektra

Weapon: Knives
Abilities: Agility, Sharp Shoot
How To Unlock: Collect her Character Token in Manhattan, then purchase in the character menu


Emma Frost

Weapon: Melee
Abilities: Beam Deflection (Diamond Form only), Mind Control, Toxic Immunity (Diamond Form only)
How To Unlock: Collect her Character Token in Manhattan, then purchase in the character menu


Press the "special" button to turn into Emma Frost's Diamond Form.


Frost Giant

Weapon: Ice Axe, Ice Blasts
Abilities: Sharp Shoot
How To Unlock: Complete Bifrosty Reception, then purchase in the character menu


Galactus

Weapon: Energy Blasts, Melee
Abilities: Flight, Laser, Mind Control, Power Cosmic, Sharp Shooter, Super Strength (cracked blocks only), Telekinesis
How To Unlock: Complete The Good, the Bad and the Hungry


Gambit

Weapon: Staff
Abilities: Agility, Explosive, Sharp Shoot
How To Unlock: Collect his Character Token in Manhattan, then purchase in the character menu


Gamora

Weapon: Sword
Abilities: Agility, Sharp Shoot
How To Unlock: Collect her Character Token in Manhattan, then purchase in the character menu


Ghost Rider

Weapon: Chains, Flaming Skulls
Abilities: Laser, Pull, Sharp Shoot
How To Unlock: Complete Stunt Show Surprise, then purchase in the character menu


Green Goblin

Weapon: Melee, Pumpkin Bombs
Abilities: Explosive, Flight, Sharp Shoot, Technology
How To Unlock: Complete Doctor in the House


Green Goblin (Ultimate)

Weapon: Melee, Thunderclap
Abilities: Extinguisher, Super Strength, Toxic Immunity
How To Unlock: Collect his Character Token in The Thrill of the Chess, then purchase in the character menu


Groot

Weapon: Melee
Abilities: Super Strength, Toxic Immunity
How To Unlock: Collect his Character Token in Manhattan, then purchase in the character menu


Gwen Stacy

Weapon: Melee
Abilities: None
How To Unlock: Collect her Character Token in Manhattan, then purchase in the character menu


Havok

Weapon: Energy Blasts, Melee
Abilities: Electric, Sharp Shoot
How To Unlock: Collect his Character Token in Manhattan, then purchase in the character menu


Heimdall

Weapon: Sword
Abilities: None
How To Unlock: Collect his Character Token in Manhattan, then purchase in the character menu


H.E.R.B.I.E.

Weapon: Electric Field
Abilities: Technology
How To Unlock: Complete Times Square Off, then purchase in the character menu


Howard the Duck

Weapon: Bazooka, Melee
Abilities: Agility, Explosive, Sharp Shoot
How To Unlock: Complete Nuff Said, then purchase in the character menu


Hydra Agent

Weapon: Melee, Rifle
Abilities: Sharp Shoot
How To Unlock: Collect his Character Token in Manhattan, then purchase in the character menu


Iron Fist

Weapon: Chi Uppercut, Melee
Abilities: Agility
How To Unlock: Collect his Character Token in Manhattan, then purchase in the character menu


Iron Man (Hulkbuster)

Weapon: Energy Blasts, Melee, Missiles
Abilities: Explosive, Glide, Sharp Shoot, Super Strength, Toxic Immunity
How To Unlock: Collect his Character Token in Manhattan, then purchase in the character menu


J. Jonah Jameson

Weapon: Melee, Newspaper
Abilities: Explosive, Sharp Shoot
How To Unlock: Complete Tabloid Tidy-Up, then purchase in the character menu


Juggernaut

Weapon: Melee
Abilities: Super Strength, Toxic Immunity
How To Unlock: Complete Juggernauts and Crosses, then purchase in the character menu


Kingpin

Weapon: Cane, Gun
Abilities: Sharp Shoot, Super Strength, Toxic Immunity
How To Unlock: Complete Feeling Fisky


Kingpin Henchman

Weapon: Melee, Pistol
Abilities: Sharp Shoot
How To Unlock: Collect his Character Token in Feeling Fisky, then purchase in the character menu


Kraven the Hunter

Weapon: Spear
Abilities: Agility, Climbing, Heightened Senses, Pull (single handles only)
How To Unlock: Collect his Character Token in Manhattan, then purchase in the character menu
Characters cont.
Kurse

Weapon: Melee
Abilities: Super Strength, Toxic Immunity
How To Unlock: Collect his Character Token in Manhattan, then purchase in the character menu


Laufey

Weapon: Ice Blasts, Melee
Abilities: Freeze, Sharp Shoot
How To Unlock: Complete Bro-tunheim, then purchase in the character menu


Leader

Weapon: Melee, Pistol
Abilities: Mind Control, Sharp Shoot, Technology, Telekinesis
How To Unlock: Collect his Character Token in Manhattan, then purchase in the character menu


Liberty

Weapon: Melee
Abilities: None
How To Unlock: Complete Taking Liberties, then purchase in the character menu


Loki

Weapon: Energy Blasts, Staff
Abilities: Freeze, Grate Travel, Mind Control, Sand (travel only), Sharp Shoot, Symbiote, Telekinesis
How To Unlock: Complete The Good, the Bad and the Hungry


Magneto

Weapon: Melee, Metal Balls
Abilities: Glide, Magnet, Sharp Shoot
How To Unlock: Complete Magnetic Personality, then purchase in the character menu


Magneto Acolyte

Weapon: Electric Blasts, Melee
Abilities: Electric, Sharp Shoot
How To Unlock: Complete Magnetic Personality, then purchase in the character menu


Malekith

Weapon: Fire Blasts, Melee
Abilities: Agility, Explosive, Grate Travel, Laser, Mind Control, Sand (travel only), Sharp Shoot, Symbiote, Telekinesis
How To Unlock: Complete Bro-tunheim, then purchase in the character menu


Mandarin

Weapon: Energy Blasts, Melee
Abilities: Agility, Laser, Mind Control, Sharp Shoot, Technology, Telekinesis
How To Unlock: Complete Rebooted, Resuited, then purchase in the character menu


Mandarin (film)

Weapon: Melee
Abilities: None
How To Unlock: Collect his Character Token in Stunt Show Surprise, then purchase in the character menu


Mary Jane Watson

Weapon: Melee
Abilities: None
How To Unlock: Collect her Character Token in Manhattan, then purchase in the character menu


Mastermind

Weapon: Melee
Abilities: Mind Control
How To Unlock: Complete Taking Liberties, then purchase in the character menu


Mini Sentinel

Weapon: Energy Blasts, Melee
Abilities: Laser, Sharp Shoot
How To Unlock: Collect his Character Token in Manhattan, then purchase in the character menu


M.O.D.O.K.

Weapon: Energy Blasts, Fire Blast, Melee
Abilities: Explosive, Glide, Laser, Technology
How To Unlock: Complete That Sinking Feeling, then purchase in the character menu


Moon Knight

Weapon: Melee, Moon Shurikens
Abilities: Agility, Explosive, Sharp Shoot
How To Unlock: Collect his Character Token in A Shock Withdrawal, then purchase in the character menu


Ms. Marvel

Weapon: Energy Blasts, Melee
Abilities: Flight, Laser, Power Cosmic, Sharp Shoot
How To Unlock: Collect her Character Token in Nuff Said, then purchase in the character menu


Mysterio

Weapon: Energy Blasts, Melee
Abilities: Grate Travel, Laser, Mind Control, Sand (travel only), Sharp Shoot, Stealth, Symbiote, Technology, Telekinesis
How To Unlock: Complete The Thrill of the Chess, then purchase in the character menu


Mystique

Weapon: Melee, Pistols
Abilities: Agility, Sharp Shoot, Stealth, Technology
How To Unlock: Complete Rapturous Rise


Hold the "special" button to disguise yourself. Depending on what level/hub you are in, your disguise will vary. Here is a list of all of Mystique's disguises:

A.I.M. Agent - That Sinking Feeling
Cameraman - Times Square Off
Doombot - Doctor in the House, A Doom With a View
Extremis Agent - Rebooted, Resuited
Frost Giant - Bifrosty Reception, Bro-tunheim
Gwen Stacy - Reptilian Ruckus
Hydra Agent - Red Head Detention
J. Jonah Jameson - Tabloid Tidy Up
Joe Quesada - Nuff Said
Kingpin Henchman - Feeling Fisky
Magneto Acolyte - Juggernauts and Crosses, Taking Liberties, Rapturous Rise, Magnetic Personality
Pepper Potts - House Party Protocol
Police Officer - Manhattan
Raft Guard - Rock up at the Lock up, The Thrill of the Chess
Raft Inmate - A Shock Withdrawal, Put up your Dukes
Roxxon Guard - Sand Central Station
S.H.I.E.L.D. Agent - S.H.I.E.L.D. Helicarrier, The Good, the Bad and the Hungry
Skeleton - Stunt Show Surprise, Stranger Danger
Symbiote Scientist (Hazmat) - Exploratory Laboratory

Nightmare

Weapon: Magic Blasts, Melee
Abilities: Laser, Mind Control, Sharp Shoot, Telekinesis
How To Unlock: Complete Stunt Show Surprise, then purchase in the character menu


Nova

Weapon: Energy Blasts, Melee
Abilities: Electric, Flight, Power Cosmic, Sharp Shoot
How To Unlock: Collect his Character Token in Manhattan, then purchase in the character menu


Pepper Potts

Weapon: Melee
Abilities: Technology
How To Unlock: Collect her Character Token in Manhattan, then purchase in the character menu
Characters cont.
Rescue

Weapon: Energy Blasts, Melee
Abilities: Flight, Laser, Sharp Shoot, Technology
How To Unlock: Collect her Character Token in Manhattan, then purchase in the character menu


Polaris

Weapon: Melee, Metal Balls
Abilities: Agility, Glide, Magnet, Sharp Shoot
How To Unlock: Complete The Thrill of the Chess, then purchase in the character menu


Power Man

Weapon: Melee, Thunderclap
Abilities: Extinguisher, Super Strength
How To Unlock: Collect his Character Token in Manhattan, then purchase in the character menu


Professor X

Weapon: Mind Blasts
Abilities: Mind Control, Technology, Telekinesis
How To Unlock: Collect his Character Token in Manhattan, then purchase in the character menu


Psylocke

Weapon: Sword
Abilities: Agility, Beam Deflection, Telekinesis
How To Unlock: Collect his Character Token in Manhattan, then purchase in the character menu


Punisher

Weapon: Melee, Rifle
Abilities: Sharp Shoot
How To Unlock: Collect his Character Token in Manhattan, then purchase in the character menu


Pyro

Weapon: Fire Blasts, Melee
Abilities: Laser, Sharp Shoot
How To Unlock: Complete Juggernauts and Crosses, then purchase in the character menu


Red Hulk

Weapon: Melee, Pistol (as General Ross), Thunderclap
Abilities: Sharp Shoot (as General Ross), Super Strength, Toxic Immunity
How To Unlock: Collect his Character Token in Manhattan, then purchase in the character menu


Hold the "tag" button to transform into General Ross.


Red Skull

Weapon: Melee, Pistol
Abilities: Agility, Explosive, Sharp Shoot
How To Unlock: Complete Red Head Detention, then purchase in the character menu


Rhino

Weapon: Melee
Abilities: Super Strength, Toxic Immunity
How To Unlock: Complete Rapturous Rise, then purchase in the character menu


Rocket Raccoon

Weapon: Melee, Rifle
Abilities: Sharp Shoot
How To Unlock: Collect his Character Token in Manhattan, then purchase in the character menu


Ronan the Accuser

Weapon: Energy Blasts, Hammer
Abilities: Electric, Sharp Shoot
How To Unlock: Collect his Character Token in Manhattan, then purchase in the character menu


Roxxon Guard

Weapon: Melee, Pistol
Abilities: Sharp Shoot
How To Unlock: Complete Sand Central Station, then purchase in the character menu


Sabretooth

Weapon: Claws
Abilities: Agility, Claw, Climbing, Dig, Heightened Senses
How To Unlock: Complete Rock up at the Lock up, then purchase in the character menu


Sandman

Weapon: Melee, Sand Blasts
Abilities: Explosive, Grate Travel, Sand, Sharp Shoot
How To Unlock: Complete Sand Central Station, then purchase in the character menu


Sandman Goon

Weapon: Melee, Rifle
Abilities: Explosive, Sand, Sharp Shoot
How To Unlock: Collect his Character Token in Manhattan, then purchase in the character menu


She-Hulk

Weapon: Melee
Abilities: Agility, Super Strength, Toxic Immunity
How To Unlock: Collect her Character Token in Manhattan, then purchase in the character menu


S.H.I.E.L.D. Agent

Weapon: Melee, Pistol
Abilities: Sharp Shoot
How To Unlock: Collect his Character Token on the S.H.I.E.L.D. Helicarrier, then purchase in the character menu


Shocker

Weapon: Energy Blasts, Melee
Abilities: Explosive, Sharp Shoot
How To Unlock: Complete A Shock Withdrawal, then purchase in the character menu


Silver Samurai

Weapon: Sword
Abilities: Agility, Sharp Shoot, Super Strength (cracked blocks only)
How To Unlock: Collect his Character Token in Manhattan, then purchase in the character menu


Silver Surfer

Weapon: Energy Blasts, Melee
Abilities: Flight, Power Cosmic, Sharp Shoot
How To Unlock: Collect his Character Token in Manhattan, then purchase in the character menu


Spider-Woman

Weapon: Energy Blasts, Melee
Abilities: Agility, Climbing, Explosive, Flight, Heightened Senses, Sharp Shoot
How To Unlock: Collect her Character Token in Manhattan, then purchase in the character menu


Squirrel Girl

Weapon: Melee, Squirrel
Abilities: Agility, Dig, Explosive, Glide, Sharp Shoot
How To Unlock: Collect her Character Token in Manhattan, then purchase in the character menu
Characters cont.
Stan Lee

Weapon: Melee, Thunderclap (as Stan Hulk), Web Blasts
Abilities: Agility, Claw, Climbing, Dig, Extinguisher (as Stan Hulk), Heightened Senses, Laser, Magnet, Mind Control, Pull, Sharp Shoot, Super Strength (as Stan Hulk, cracked blocks only as Stan Lee), Technology, Telekinesis, Toxic Immunity (as Stan Hulk), Web Swing
How To Unlock: Rescue all Stan Lees in Peril


Hold the "tag" button to turn into Stan Hulk.


Star-Lord

Weapon: Melee, Pistols
Abilities: Flight, Sharp Shoot
How To Unlock: Collect his Character Token in Manhattan, then purchase in the character menu


Superior Spider-Man

Weapon: Melee, Web Blasts
Abilities: Climbing, Heightened Senses, Pull, Sharp Shoot, Web Swing
How To Unlock: Collect his Character Token in Manhattan, then purchase in the character menu


Super-Skrull

Weapon: Fire Blasts, Melee
Abilities: Flight, Grate Travel, Laser, Mind Control, Pull, Sharp Shoot, Stealth, Super Strength, Technology
How To Unlock: Collect his Character Token in Manhattan, then purchase in the character menu


Symbiote Scientist

Weapon: Melee, Symbiote Club
Abilities: None
How To Unlock: Complete Reptilian Ruckus, then purchase in the character menu


Symbiote Scientist (Hazmat)

Weapon: Melee, Symbiote Club
Abilities: None
How To Unlock: Complete Exploratory Laboratory, then purchase in the character menu


Taskmaster

Weapon: Bow and Arrow, Sword
Abilities: Agility, Arrow, Beam Deflection, Explosive, Pull (single handles only), Sharp Shoot
How To Unlock: Collect his Character Token in Manhattan, then purchase in the character menu


Toad

Weapon: Melee
Abilities: Agility, Climbing, Heightened Senses, Pull (single handles only)
How To Unlock: Collect his Character Token in Manhattan, then purchase in the character menu

Union Jack

Weapon: Melee, Pistol
Abilities: Agility, Sharp Shoot
How To Unlock: Complete The Brick Apple?, then purchase in the character menu


Venom

Weapon: Melee, Web Blasts
Abilities: Agility, Climbing, Heightened Senses, Pull, Super Strength (as Big Venom), Symbiote, Toxic Immunity (as Big Venom), Web Swing
How To Unlock: Complete Exploratory Laboratory


Hold the "tag" button to turn into Venom (Big).


Viper

Weapon: Melee, Pistol, Whip
Abilities: Agility, Pull (single handles only), Sharp Shoot
How To Unlock: Collect her Character Token in Manhattan, then purchase in the character menu


Vulture

Weapon: Melee, Pistol
Abilities: Flight, Sharp Shoot
How To Unlock: Complete Nuff Said, then purchase in the character menu


War Machine

Weapon: Melee, Missiles, Shoulder Cannon
Abilities: Explosive, Flight, Sharp Shoot
How To Unlock: Complete House Party Protocol


Iron Patriot

Weapon: Melee, Missiles, Shoulder Cannon
Abilities: Explosive, Flight, Sharp Shoot
How To Unlock: Collect his Character Token in Manhattan, then purchase in the character menu


Wasp

Weapon: Melee, Stinging Blasts
Abilities: Flight, Grate Travel, Sharp Shoot, Shrink (only while flying)
How To Unlock: Collect her Character Token in Manhattan, then purchase in the character menu


Whiplash

Weapon: Whips
Abilities: Electric, Pull
How To Unlock: Collect his Character Token in Manhattan, then purchase in the character menu

Wizard

Weapon: Energy Blasts, Melee
Abilities: Electric, Flight, Mind Control, Sharp Shoot, Technology, Telekinesis
How To Unlock: Collect his Character Token in Manhattan, then purchase in the character menu
Air Vehicles
There are a total of 15 air vehicles (not including the DLC vehicle) that you can play as in this game. Below, I list each vehicle, as well as how to unlock it.


Quinjet
How To Unlock: Create a new game


Chitauri Chariot
How To Unlock: Collect its Vehicle Token in Manhattan, then purchase at a Call-In Point


Pumpkin Chopper
How To Unlock: Collect its Vehicle Token in Manhattan, then purchase at a Call-In Point


Mandarin’s Helicopter
How To Unlock: Collect its Vehicle Token in Manhattan, then purchase at a Call-In Point


News Helicopter
How To Unlock: Collect its Vehicle Token in Manhattan, then purchase at a Call-In Point


Police Helicopter
How To Unlock: Collect its Vehicle Token in Manhattan, then purchase at a Call-In Point


Raft Helicopter
How To Unlock: Collect its Vehicle Token in Manhattan, then purchase at a Call-In Point


Spider-copter
How To Unlock: Collect its Vehicle Token in Manhattan, then purchase at a Call-In Point


Deadpool’s Helicopter
How To Unlock: Collect its Vehicle Token in Manhattan, then purchase at a Call-In Point


Fantasticar
How To Unlock: Collect its Vehicle Token in Manhattan, then purchase at a Call-In Point


Stark Jet
How To Unlock: Collect its Vehicle Token in Manhattan, then purchase at a Call-In Point


Doom Jet
How To Unlock: Collect its Vehicle Token in Manhattan, then purchase at a Call-In Point


X-Jet
How To Unlock: Collect its Vehicle Token in Manhattan, then purchase at a Call-In Point


S.H.I.E.L.D. Minicarrier
How To Unlock: Collect its Vehicle Token on the S.H.I.E.L.D. Helicarrier, then purchase at a Call-In Point


S.H.I.E.L.D. Jetfighter
How To Unlock: Collect its Vehicle Token on the S.H.I.E.L.D. Helicarrier, then purchase at a Call-In Point
Ground Vehicles
There are a total of 44 ground vehicles (not including the DLC vehicle) that you can play as in this game. Below, I list each vehicle, as well as how to unlock it.


S.H.I.E.L.D. Staff Car
How To Unlock: Collect its Vehicle Token in Manhattan, then purchase at a Call-In Point


S.H.I.E.L.D. 4x4
How To Unlock: Collect its Vehicle Token in Manhattan, then purchase at a Call-In Point


S.H.I.E.L.D. APC
How To Unlock: Collect its Vehicle Token in Manhattan, then purchase at a Call-In Point


Deadpool’s Scooter
How To Unlock: Collect its Vehicle Token in Manhattan, then purchase at a Call-In Point


Ghost Rider’s Motorcycle
How To Unlock: Collect its Vehicle Token in Manhattan, then purchase at a Call-In Point


Bus
How To Unlock: Create a new game


School Bus
How To Unlock: Create a new game


Saloon
How To Unlock: Create a new game


Small Car
How To Unlock: Create a new game


Sedan
How To Unlock: Create a new game


Limousine
How To Unlock: Create a new game


Van
How To Unlock: Create a new game


Ambulance
How To Unlock: Create a new game


Fire Engine
How To Unlock: Create a new game


Police Car
How To Unlock: Create a new game


Police Motorcycle
How To Unlock: Collect its Vehicle Token in Manhattan, then purchase at a Call-In Point


Police Truck
How To Unlock: Collect its Vehicle Token in Manhattan, then purchase at a Call-In Point


Raft Truck
How To Unlock: Collect its Vehicle Token in Manhattan, then purchase at a Call-In Point


Raid Truck
How To Unlock: Collect its Vehicle Token in Manhattan, then purchase at a Call-In Point


Punisher’s Car
How To Unlock: Collect its Vehicle Token in Manhattan, then purchase at a Call-In Point


Punisher’s Truck
How To Unlock: Collect its Vehicle Token in Manhattan, then purchase at a Call-In Point


Hydra Tank
How To Unlock: Collect its Vehicle Token in Manhattan, then purchase at a Call-In Point


Mandarin’s Buggy
How To Unlock: Collect its Vehicle Token in Manhattan, then purchase at a Call-In Point


Pizza Van
How To Unlock: Collect its Vehicle Token in Manhattan, then purchase at a Call-In Point


Pizza Bike
How To Unlock: Collect its Vehicle Token in Manhattan, then purchase at a Call-In Point


News Van
How To Unlock: Create a new game


Tanker
How To Unlock: Create a new game


Taxi
How To Unlock: Create a new game


Golf Cart
How To Unlock: Collect its Vehicle Token in Manhattan, then purchase at a Call-In Point


Garbage Truck
How To Unlock: Collect its Vehicle Token in Manhattan, then purchase at a Call-In Point


Bicycle
How To Unlock: Create a new game


Wolverine’s Motorcycle
How To Unlock: Collect its Vehicle Token in Manhattan, then purchase at a Call-In Point


Spider-Cycle
How To Unlock: Collect its Vehicle Token in Manhattan, then purchase at a Call-In Point


Spider-Trike
How To Unlock: Collect its Vehicle Token in Manhattan, then purchase at a Call-In Point


Magneto-mobile
How To Unlock: Collect its Vehicle Token in Manhattan, then purchase at a Call-In Point


Flower Car
How To Unlock: Collect its Vehicle Token in Manhattan, then purchase at a Call-In Point


Go-kart
How To Unlock: Collect its Vehicle Token on the S.H.I.E.L.D. Helicarrier, then purchase at a Call-In Point


The Britmobile
How To Unlock: Collect its Vehicle Token in Manhattan, then purchase at a Call-In Point


Stark’s Motorcycle
How To Unlock: Create a new game, then purchase at a Call-In Point


Stark’s Sportscar
How To Unlock: Create a new game, then purchase at a Call-In Point


Hot Rod
How To Unlock: Create a new game, then purchase at a Call-In Point


Avenging Cycle
How To Unlock: Create a new game, then purchase at a Call-In Point


Captain America’s Bike
How To Unlock: Collect its Vehicle Token in Manhattan, then purchase at a Call-In Point


The Cloud Rider
How To Unlock: Create a new game
Water Vehicles
There are a grand total of 2 water vehicles that you can play as in this game. I have listed them all below in the order that they appear on the vehicle selection screen.


Mandarin’s Boat
How To Unlock: Collect its Vehicle Token in Manhattan, then purchase at a Call-In Point


Speedboat
How To Unlock: Create a new game
DLC Characters
You can only get these characters by purchasing DLC. You do not need to own these characters to achieve 100% completion. Below each character's name, I list their weapon and abilities, as well as which DLC pack you need to purchase to unlock them.

A-Bomb

Weapon: Melee, Thunderclap
Abilities: Extinguisher, Super Strength, Toxic Immunity
How To Unlock: Purchase the Super Pack


Rick Jones

Weapon: Melee
Abilities: Agility
How To Unlock: Purchase the Super Pack


Thanos

Weapon: Energy Blasts, Melee
Abilities: Extinguisher, Sharp Shoot, Super Strength, Toxic Immunity
How To Unlock: Purchase the Super Pack


Beta Ray Bill

Weapon: Electric Blasts (when charged), Melee, Stormbreaker
Abilities: Electric (while charged), Flight, Sharp Shoot, Super Strength
How To Unlock: Purchase the Super Pack


Dark Phoenix

Weapon: Fire Blasts, Melee
Abilities: Beam Deflection, Flight, Laser, Mind Control, Sharp Shoot, Telekinesis
How To Unlock: Purchase the Super Pack


Falcon

Weapon: Feathers, Melee
Abilities: Flight, Sharp Shoot
How To Unlock: Purchase the Super Pack


Hawkeye (Classic)

Weapon: Bow and Arrow, Melee
Abilities: Agility, Arrow, Explosive, Pull (single handles only), Sharp Shoot
How To Unlock: Purchase the Super Pack


Spider-Man (Symbiote)

Weapon: Melee, Web Blasts
Abilities: Agility, Climbing, Heightened Senses, Pull, Sharp Shoot, Web Swing
How To Unlock: Purchase the Super Pack


Winter Soldier

Weapon: Melee, Rifle
Abilities: Agility, Sharp Shoot
How To Unlock: Purchase the Super Pack


Kurse (Dark World)

Weapon: Melee
Abilities: Super Strength, Toxic Immunity
How To Unlock: Purchase the Asgard Pack


Odin

Weapon: Energy Blasts, Staff
Abilities: Electric, Mind Control, Sharp Shoot, Super Strength, Telekinesis
How To Unlock: Purchase the Asgard Pack


Malekith (Dark World)

Weapon: Fire Blasts, Melee
Abilities: Agility, Explosive, Grate Travel, Sand (travel only), Sharp Shoot, Stealth, Symbiote
How To Unlock: Purchase the Asgard Pack


Jane Foster

Weapon: Melee
Abilities: None
How To Unlock: Purchase the Asgard Pack


Sif

Weapon: Sword
Abilities: Agility
How To Unlock: Purchase the Asgard Pack


Volstagg

Weapon: Axe
Abilities: None
How To Unlock: Purchase the Asgard Pack


Hogun

Weapon: Mace
Abilities: None
How To Unlock: Purchase the Asgard Pack


Fandral

Weapon: Sword
Abilities: None
How To Unlock: Purchase the Asgard Pack
DLC Vehicles
There are a total of 2 DLC vehicles in this game. There are several races around Manhattan that can only be done with these vehicles. See the map of "Races" in the "Maps of Manhattan" section to see the DLC Races labelled on the map. You do not have to own these vehicles or complete the races to reach 100% completion.

Spider Buggy
How To Unlock: Purchase the Super Pack


Hawkeye’s Skycycle
How To Unlock: Purchase the Super Pack
Deadpool Red Brick Extras
There are a total of 15 Extras available in this game. There are 4 that you can purchase without having to unlock them, but the other 11 will need to be unlocked by collecting Deadpool Red Bricks in Manhattan bonus levels. Once you collect a Deadpool Red Brick, the Extra can be purchased inside Deadpool's Room aboard the Helicarrier. Below I've listed each Extra in the order they appear in the menu. I have also listed what they do, and how to unlock them.

Studs x2
How To Unlock: Purchase in Deadpool's Room
What It Does: Multiplies the value of all collected studs by 2. This stacks with other stud multiplier Extras

Studs x4
How To Unlock: Collect the Deadpool Red Brick in Tabloid Tidy Up, then purchase in Deadpool's Room
What It Does: Multiplies the value of all collected studs by 4. This stacks with other stud multiplier Extras

Studs x6
How To Unlock: Collect the Deadpool Red Brick in Feeling Fisky, then purchase in Deadpool's Room
What It Does: Multiplies the value of all collected studs by 6. This stacks with other stud multiplier Extras

Studs x8
How To Unlock: Collect the Deadpool Red Brick in Reptilian Ruckus, then purchase in Deadpool's Room
What It Does: Multiplies the value of all collected studs by 8. This stacks with other stud multiplier Extras

Studs x10
How To Unlock: Collect the Deadpool Red Brick in House Party Protocol, then purchase in Deadpool's Room
What It Does: Multiplies the value of all collected studs by 10. This stacks with other stud multiplier Extras

Disguises
How To Unlock: Purchase in Deadpool's Room
What It Does: This gives all characters fake noses, glasses and a mustache

Gold Brick Detector
How To Unlock: Collect the Deadpool Red Brick in Nuff Said, then purchase in Deadpool's Room
What It Does: Yellow arrows will point to the locations of Gold Bricks in Manhattan. This will tell you WHERE the Gold Bricks will appear, not HOW to collect them

Minikit Detector
How To Unlock: Collect the Deadpool Red Brick in Put up your Dukes, then purchase in Deadpool's Room
What It Does: White arrows will point to the locations of Canisters in Story levels. This will tell you WHERE the Canisters will appear, not HOW to collect them

Mini Characters
How To Unlock: Collect the Deadpool Red Brick in Bro-tunheim, then purchase in Deadpool's Room
What It Does: This shrinks all characters down to smaller versions of themselves, giving anyone the Shrink ability

Collect Ghost Studs
How To Unlock: Collect the Deadpool Red Brick in A Shock Withdrawal, then purchase in Deadpool's Room
What It Does: This allows you to collect the red guide studs, each worth 1,000

Fast Build
How To Unlock: Collect the Deadpool Red Brick in Stranger Danger, then purchase in Deadpool's Room
What It Does: This dramatically increases your building speed

Attract Studs
How To Unlock: Collect the Deadpool Red Brick in Stunt Show Surprise, then purchase in Deadpool's Room
What It Does: This increases the distance in which you can pick up studs

Character Token Detector
How To Unlock: Collect the Deadpool Red Brick in The Thrill of the Chess, then purchase in Deadpool's Room
What It Does: White arrows will point to the locations of Character and Vehicle Tokens. This will tell you WHERE the tokens will appear, not HOW to collect them

Festive Hats
How To Unlock: Purchase in Deadpool's Room
What It Does: This gives all characters Santa hats

Extra Hearts
How To Unlock: Purchase in Deadpool's Room
What It Does: This gives you 6 hearts instead of the usual 4
Achievements
There are 45 Steam Achievements that you can complete in this game. These do not affect your overall game percentage, and you don't have to unlock all of these if you don't want to. However, I know lots of you like achievements, so I've decided to list them all here. Next to each image, I will list how to collect the achievement (taken right from the achievement list on Steam). I will then give more specifics (if necessary) and direct you to any sections of this guide that may help you out (if applicable).

Sand Central Station
How To Unlock: Complete Level 1 - Sand Central Station

See "Sand Central Station - Story Mode" for info on how to beat the level

Times Square Off
How To Unlock: Complete Level 2 - Times Square Off

See "Times Square Off - Story Mode" for info on how to beat the level

Exploratory Laboratory
How To Unlock: Complete Level 3 - Exploratory Laboratory

See "Exploratory Laboratory - Story Mode" for info on how to beat the level

Rock up at the Lock up
How To Unlock: Complete Level 4 - Rock up at the Lock up

See "Rock up at the Lock up - Story Mode" for info on how to beat the level

Rebooted, Resuited
How To Unlock: Complete Level 5 - Rebooted, Resuited

See "Rebooted, Resuited - Story Mode" for info on how to beat the level

Red Head Detention
How To Unlock: Complete Level 6 - Red Head Detention

See "Red Head Detention - Story Mode" for info on how to beat the level

Bifrosty Reception
How To Unlock: Complete Level 7 - Bifrosty Reception

See "Bifrosty Reception - Story Mode" for info on how to beat the level

Juggernauts and Crosses
How To Unlock: Complete Level 8 - Juggernauts and Crosses

See "Juggernauts and Crosses - Story Mode" for info on how to beat the level

Doctor in the House
How To Unlock: Complete Level 9 - Doctor in the House

See "Doctor in the House - Story Mode" for info on how to beat the level

That Sinking Feeling
How To Unlock: Complete Level 10 - That Sinking Feeling

See "That Sinking Feeling - Story Mode" for info on how to beat the level

Taking Liberties
How To Unlock: Complete Level 11 - Taking Liberties

See "Taking Liberties - Story Mode" for info on how to beat the level

Rapturous Rise
How To Unlock: Complete Level 12 - Rapturous Rise

See "Rapturous Rise - Story Mode" for info on how to beat the level

Magnetic Personality
How To Unlock: Complete Level 13 - Magnetic Personality

See "Magnetic Personality - Story Mode" for info on how to beat the level

A Doom with a View
How To Unlock: Complete Level 14 - A Doom with a View

See "A Doom with a View - Story Mode" for info on how to beat the level

The Good, the Bad and the Hungry
How To Unlock: Complete Level 15 - The Good, the Bad and the Hungry

See "The Good, the Bad and the Hungry - Story Mode" for info on how to beat the level

Falling... with Style
How To Unlock: Complete first Helicarrier skydive

You'll skydive off of the Helicarrier during "Interlude - Baxter Building Break-In". You should get this achievement then

Don't I Know You?
How To Unlock: Team up Captain America with Human Torch

To unlock this achievement, you'll need to have a second player join the game. You'll unlock Captain America during "Interlude - Baxter Building Break-In" and you'll unlock Human Torch after "Red Head Detention". Once you have both characters, have one player switch to Captain America and have the other switch to Human Torch to earn this achievement

Stan-tastic
How To Unlock: Rescue Stan Lee from every peril

There are 50 Stan Lees in Peril to rescue in this game, 26 of which can be found in Story/Bonus levels, and the other 24 of which can be found in the Manhattan/S.H.I.E.L.D. Helicarrier hubs. See each level's "Free Play Mode" section and the "Exploring Manhattan/S.H.I.E.L.D. Helicarrier - Stan Lee in Peril" sections for info on how to rescue your generalissimo

Road Rage
How To Unlock: Destroy 100 vehicles in the Manhattan hub

This can easily be done with either a Big Fig (like Hulk) or someone with a laser (like Human Torch). Simply hang out at an intersection and destroy all the cars that drive by and you should have this achievement in no time

It's Clobberin' Time!
How To Unlock: Defeat 100 enemies as the Thing

This is pretty self-explanatory, as you just need to defeat 100 enemies with Thing. An easy way to farm this is during Part 3 - Team Rendezvous of "Doctor in the House". When you meet up with Human Torch, you'll be attacked by an endless army of Doombots. If you want, you can simply use Thing to take them down until this achievement pops

I'm Always Angry!
How To Unlock: Transform into the Hulk 50 times

Holding the "tag" button while playing as Hulk will transform you into Brice Banner. Hold the "tag" button while playing as Bruce Banner to transform back into the Hulk. Do this 50 times to complete this achievement

Billionaire Philanthropist
How To Unlock: Collect 1,000,000,000 studs

In order to complete this achievement, you need to have 1 billion studs in your collection at one time. This can easily be done by replaying Story levels with the max score multiplier (x3840)

This Is fantastic!
How To Unlock: First time turning Mister Fantastic into a teapot

While playing as Mister Fantastic, hold the "special" button to turn yourself into a teapot

You Win a No-Prize!
How To Unlock: Complete game 100%

This achievement is earned by reaching 100% completion, which can be done by collecting and purchasing everything
Achievements cont.
Avengers Assembled
How To Unlock: Collect all Avengers characters in the game

You will need to unlock and purchase (if necessary) the following characters:
  • Iron Man (Mark 1)
  • Iron Man (Mark 6)
  • Iron Man (Mark 7)
  • Iron Man (Mark 42)
  • Hulk
  • Captain America
  • Hawkeye
  • Black Widow
  • Thor
  • Nick Fury
  • Maria Hill
  • Agent Coulson
See the "Characters" sections for info on how to unlock them

Sinister Six
How To Unlock: Collect Doc Ock, Sandman, Mysterio, Kraven the Hunter, Electro and Vulture

As you might have guessed, in order to complete this achievement, you will need to unlock and purchase Doctor Octopus, Sandman, Mysterio, Kraven the Hunter, Electro and Vulture. See the "Characters" sections for info on how to unlock them

To Me, My X-Men
How To Unlock: Collect all traditionally heroic mutants

You will need to unlock and purchase (if necessary) the following characters:
  • Archangel
  • Beast
  • Colossus
  • Cyclops
  • Emma Frost
  • Gambit
  • Havok
  • Iceman
  • Jean Grey
  • Polaris
  • Psylocke
  • Professor X
  • Storm
  • Wolverine
See the "Characters" sections for info on how to unlock them

Brotherhood
How To Unlock: Collect all traditionally evil mutants

You will need to unlock and purchase (if necessary) the following characters:
  • Blob
  • Juggernaut
  • Magneto
  • Magneto Acolyte
  • Mastermind
  • Mystique
  • Pyro
  • Sabretooth
  • Toad
See the "Characters" sections for info on how to unlock them

I Am Iron Man
How To Unlock: Collect all Iron Man armors

You will need to unlock and purchase (if necessary) the following characters:
  • Iron Man (Mark 1)
  • Iron Man (Mark 6)
  • Iron Man (Mark 7)
  • Iron Man (Mark 42)
  • Iron Man (Heartbreaker)
See the "Characters" sections for info on how to unlock them

Stan's Soapbox
How To Unlock: Turn into Stan Hulk

While playing as Stan Lee, hold the "tag" button to transform into Stan Hulk

Post-Credit Party
How To Unlock: Complete House Party Protocol

House Party Protocol is unlocked by completing the Story. See "House Party Protocol - Story Mode" for info on where to find the level, as well as how to complete it

The Toast of Croydon
How To Unlock: Create a character called "Trevor" in the character customizer

Head to the Medical Bay in the S.H.I.E.L.D. Helicarrier (see "Tour of the S.H.I.E.L.D. Helicarrier" if you don't know where this is) and you'll be able to create a custom character. Change the name of one of the characters to "Trevor" to earn this achievement

Puny God
How To Unlock: Perform Hulk's special move on Loki

After completing The Good, the Bad and the Hungry, you'll unlock Loki. Switch your partner to Loki, then switch yourself to Hulk. Attack Loki until Hulk picks him up and slams into the ground a few times

Welcome to Level 7
How To Unlock: Play as Agent Coulson

You'll first play as Coulson in Tabloid Tidy-Up (see "Tabloid Tidy-Up - Story Mode" for info on where to find that level). As soon as the level starts, you should earn this achievement

It's Me Time!
How To Unlock: Read a comic in Deadpool's room on the Helicarrier

Inside Deadpool's Room (see the "Tour of the S.H.I.E.L.D. Helicarrier" section if you don't know where that is), you'll find a console on the far right. Once you find all 10 canisters in a Story level, you'll be able to view a comic at this console. Activate the console and look at the comic to earn this achievement

Bad Luck?
How To Unlock: Unlock Black Cat

Black Cat can be unlocked by collecting her Character Token in Manhattan. See "Exploring Manhattan - Character Tokens" for more info. Once you purchase her, this achievement should pop

Zoo Believer
How To Unlock: Unlock all animal-themed characters

You will need to unlock and purchase (if necessary) the following characters:
  • Spider-Man
  • Black Widow
  • Wolverine
  • Phoenix
  • Beast
  • Ant-Man
  • Beetle
  • Black Cat
  • Black Panther
  • Doctor Octopus
  • Howard the Duck
  • Rhino
  • Rocket Raccoon
  • Sabretooth
  • Superior Spider-Man
  • Spider-Woman
  • Squirrel Girl
  • Toad
  • Viper
  • Vulture
  • Wasp
See the "Characters" sections for info on how to unlock them

Guardians of the Galaxy
How To Unlock: Unlock all the Guardians of the Galaxy

You will need to unlock and purchase (if necessary) the following characters:
  • Drax
  • Gamora
  • Groot
  • Nova
  • Rocket Raccoon
  • Star-Lord
See the "Characters" sections for info on how to unlock them

Fastball Special
How To Unlock: Perform a special throwing move as Colossus on Wolverine

You can unlock Colossus in Manhattan (see "Exploring Manhattan - Character Tokens" for more info). Switch your partner to Wolverine and switch yourself to Colossus. Attack Wolverine and Colossus should pick him up and throw him

Menace of Magneto
How To Unlock: Drive to the Baxter Building as Magneto in the Magneto-mobile

After unlocking and purchasing Magneto and the Magneto-mobile (see the "Characters" and "Ground Vehicles" sections for more info), head over to a Call-In Point and call in the Magneto-mobile. Hop inside as Magneto and drive over to the Baxter Building (the building marked by the "4" icon on the map) to earn this achievement
Achievements cont.
Alter Ego
How To Unlock: Perform all big LEGO figure transformations

In order to earn this achievement, you will need to perform the following transformations:
  • Bruce Banner to Hulk
  • Curt Connors to Lizard
  • General Ross to Red Hulk
  • Stan Lee to Stan Hulk
  • Venom to Venom (Big)
See the "Characters" sections for info on how to unlock them

Can't Hurt Me Bub
How To Unlock: Regenerate as Wolverine

While playing as Wolverine, if you lose all of your hearts, you will turn into a skeleton and slowly regenerate your health. Simply let some enemies beat you to a pulp and wait for your health to regenerate to earn this achievement

Cosplay
How To Unlock: Create a custom character

Head over to the Medical Bay in the S.H.I.E.L.D. Helicarrier (see the "Tour of the S.H.I.E.L.D. Helicarrier" section if you don't know where that is) and you'll find some tubes on the right. Stand in front of one and press the "special" button to activate it. Create a custom character to earn this achievement

Ultimate True Believer
How To Unlock: Unlock all True Believers

True Believer is earned by collecting a certain amount of studs in each level. There are 26 True Believer totals to be earned, and you can find the amount of studs required in each level's "Story Mode" section

Really?
How To Unlock: Collect Howard the Duck

You'll be able to purchase Howard after completing the level Nuff Said. See "Nuff Said - Story Mode" for info on how to beat the level, as well as where to find it
Cheat Codes
This is a list of the Cheat Codes available to use in the game. These can be entered at any time by going to the Extras menu, and can also be entered in Deadpool's room on the S.H.I.E.L.D. Helicarrier.

I have personally checked all of these codes and I can vouch for their authenticity. If you have any other Cheat Codes that you wish to share, please message me and I will check them. If they work, I will add them to this list and give credit to you.

Characters
KXFQ87 Beetle
P9OWL0 Black Cat
7HWU4L Captain America (Classic)
AA0Z50 Carnage
H8CSE6 Thor (Classic)
J58RSS Howard the Duck
B7AA3K Hydra Soldier
2NGSRZ Iron Man (Heart Breaker)
CK7SDS Iron Man (Hulkbuster)
SZ8Q06 M.O.D.O.K.
WFOZXQ Spider-Man (F.F.)
TQ4C57 War Machine
OAW2LB Wolverine (Cowl)
Q5X1J5 Iron Patriot

Vehicles
5T3CQU Avenging Cycle
35E41W Pumpkin Chopper
D5B7O3 S.H.I.E.L.D. Staff Car
SH9MZQ Spider Bike

Extras
UZFBG4 Studs x2
13 Comments
Rich 22 Dec, 2024 @ 3:55am 
i dont think i can get 100%
Rich 22 Dec, 2024 @ 3:48am 
on quest 33 the boyfriend doesnt spawn in
RedWithTheObviouslyLongUsername 11 Sep, 2024 @ 1:10pm 
I guess as a fun bonus, maybe add a section listing all the deadpool cameos in every level?
aschepler 13 Jul, 2024 @ 10:02pm 
Excellent guide!

I note you can enter Free Play mode in Manhattan and the Helicarrier after completing level 3 Exploratory Laboratory: Go to any vehicle recall point and switch to a different character. After that first swap, you can switch characters at any time by holding the Tag button. Some quests won't appear until after certain Story Levels are completed.

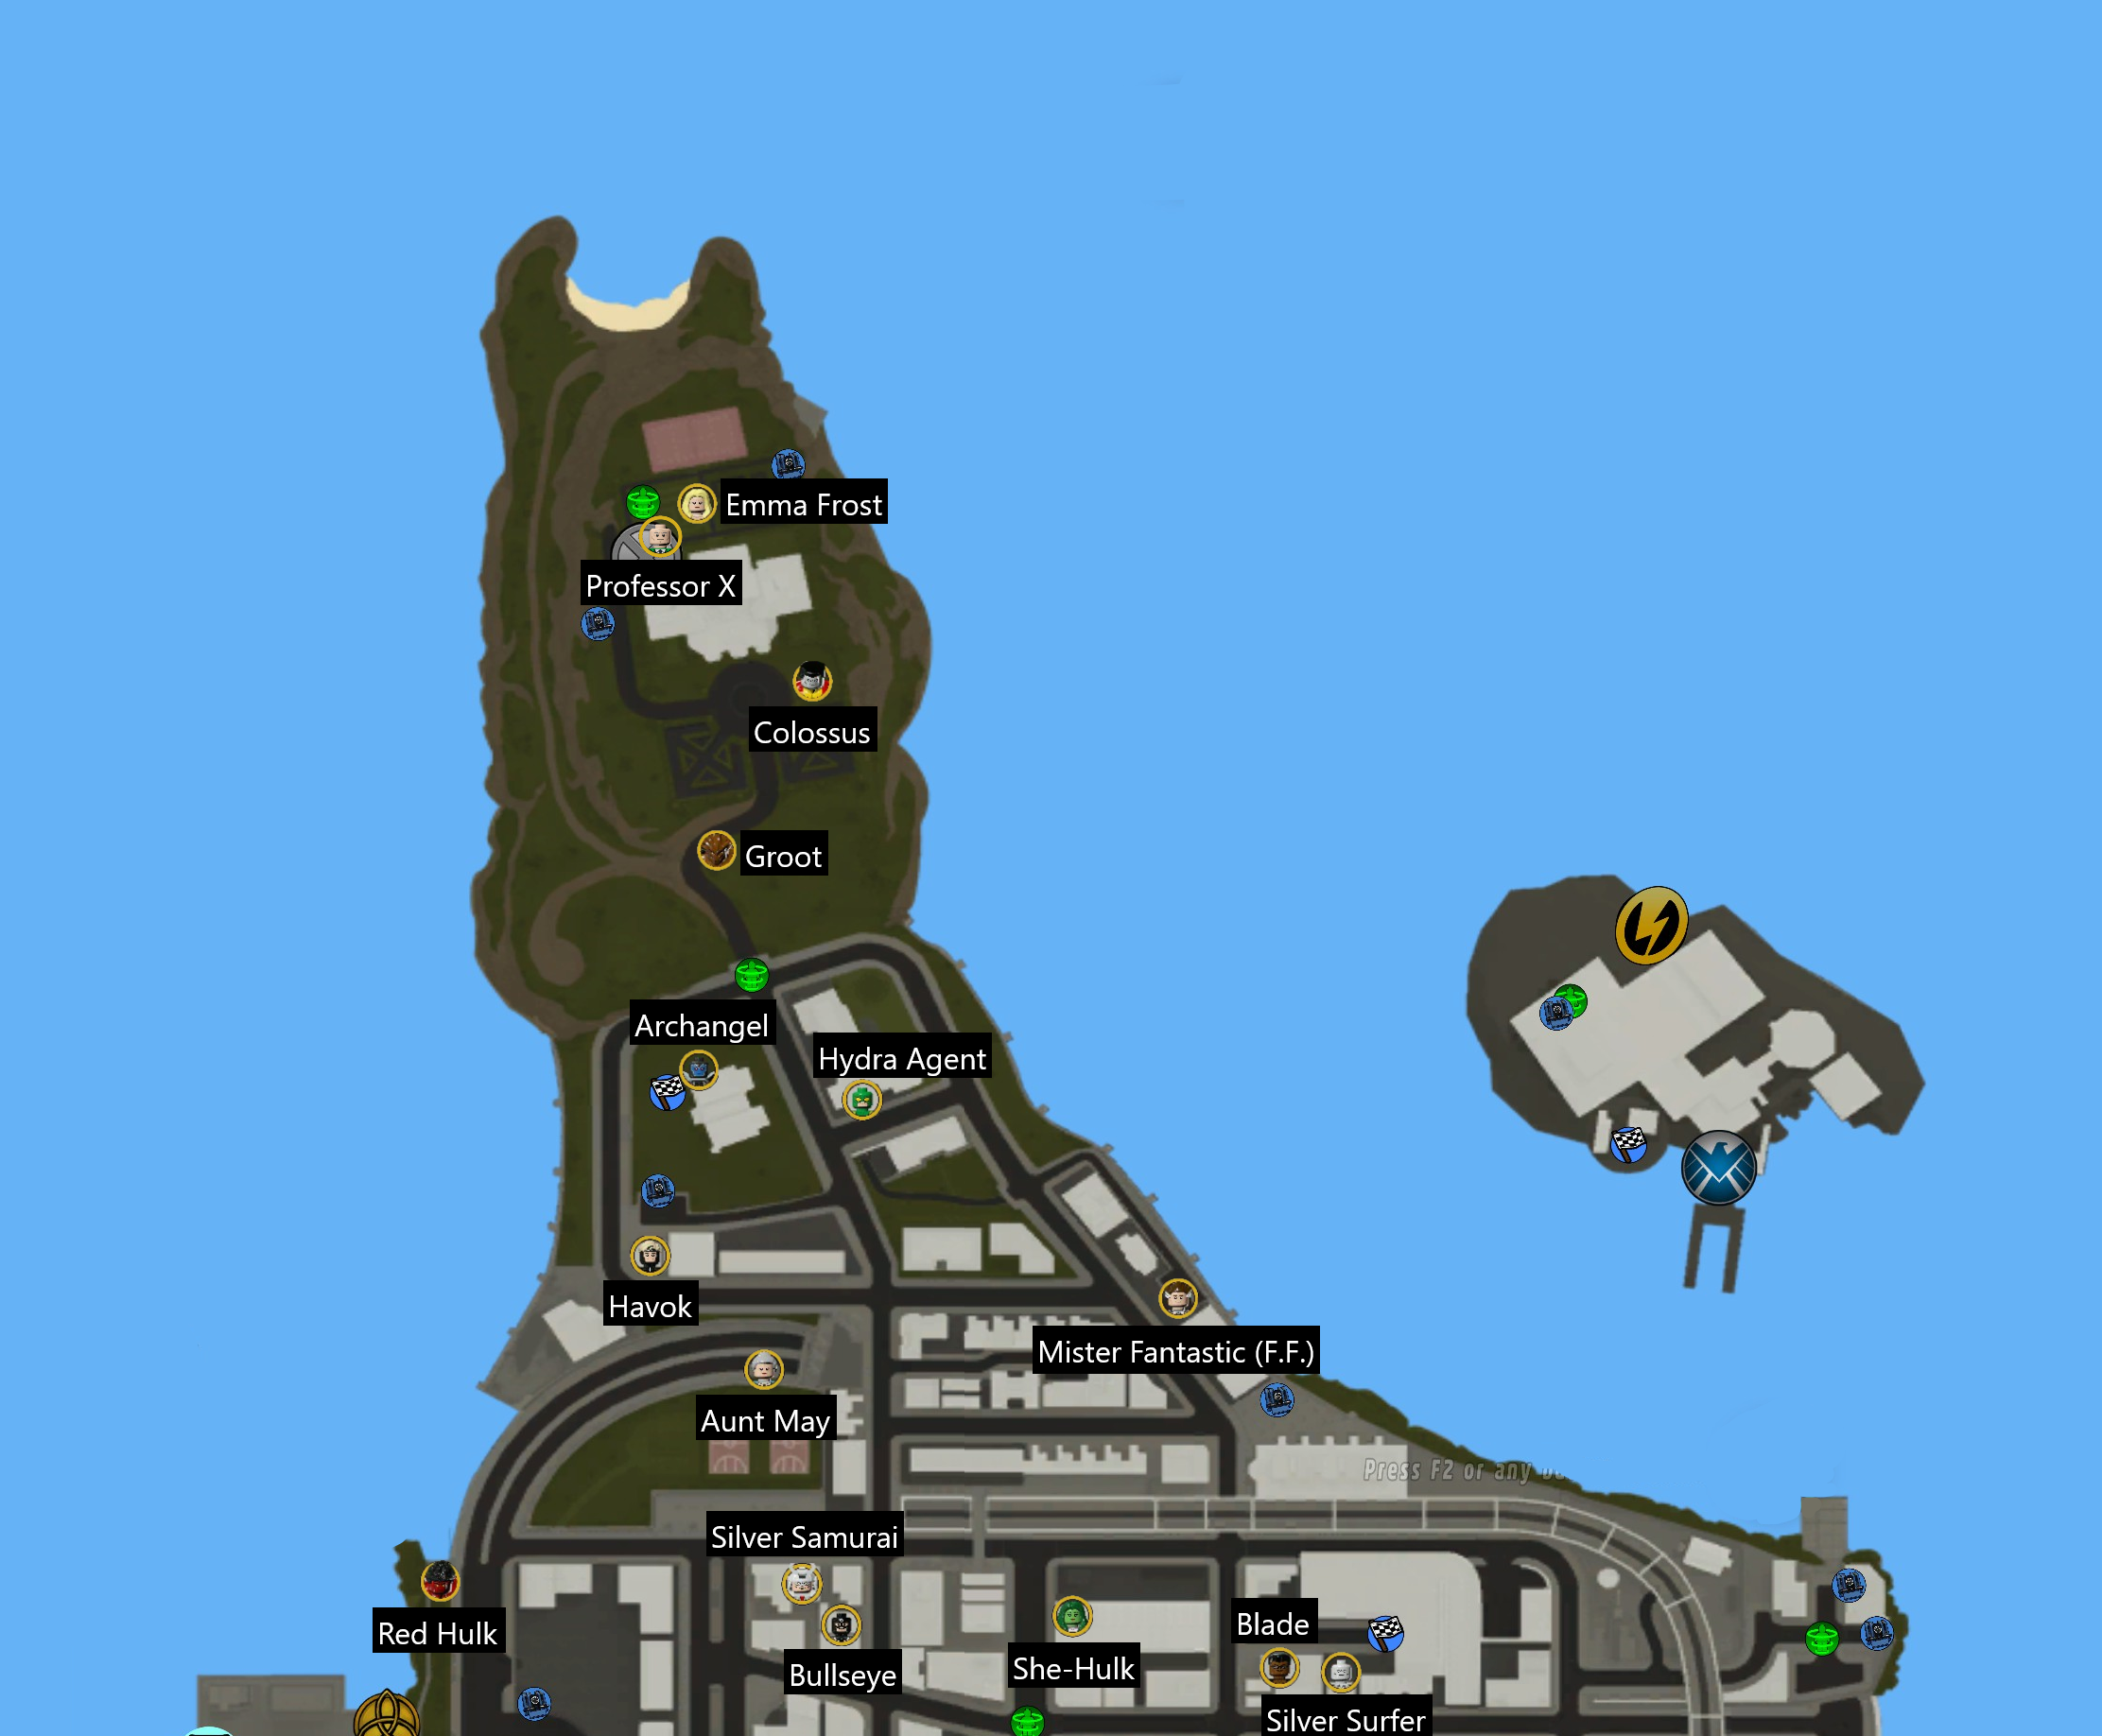
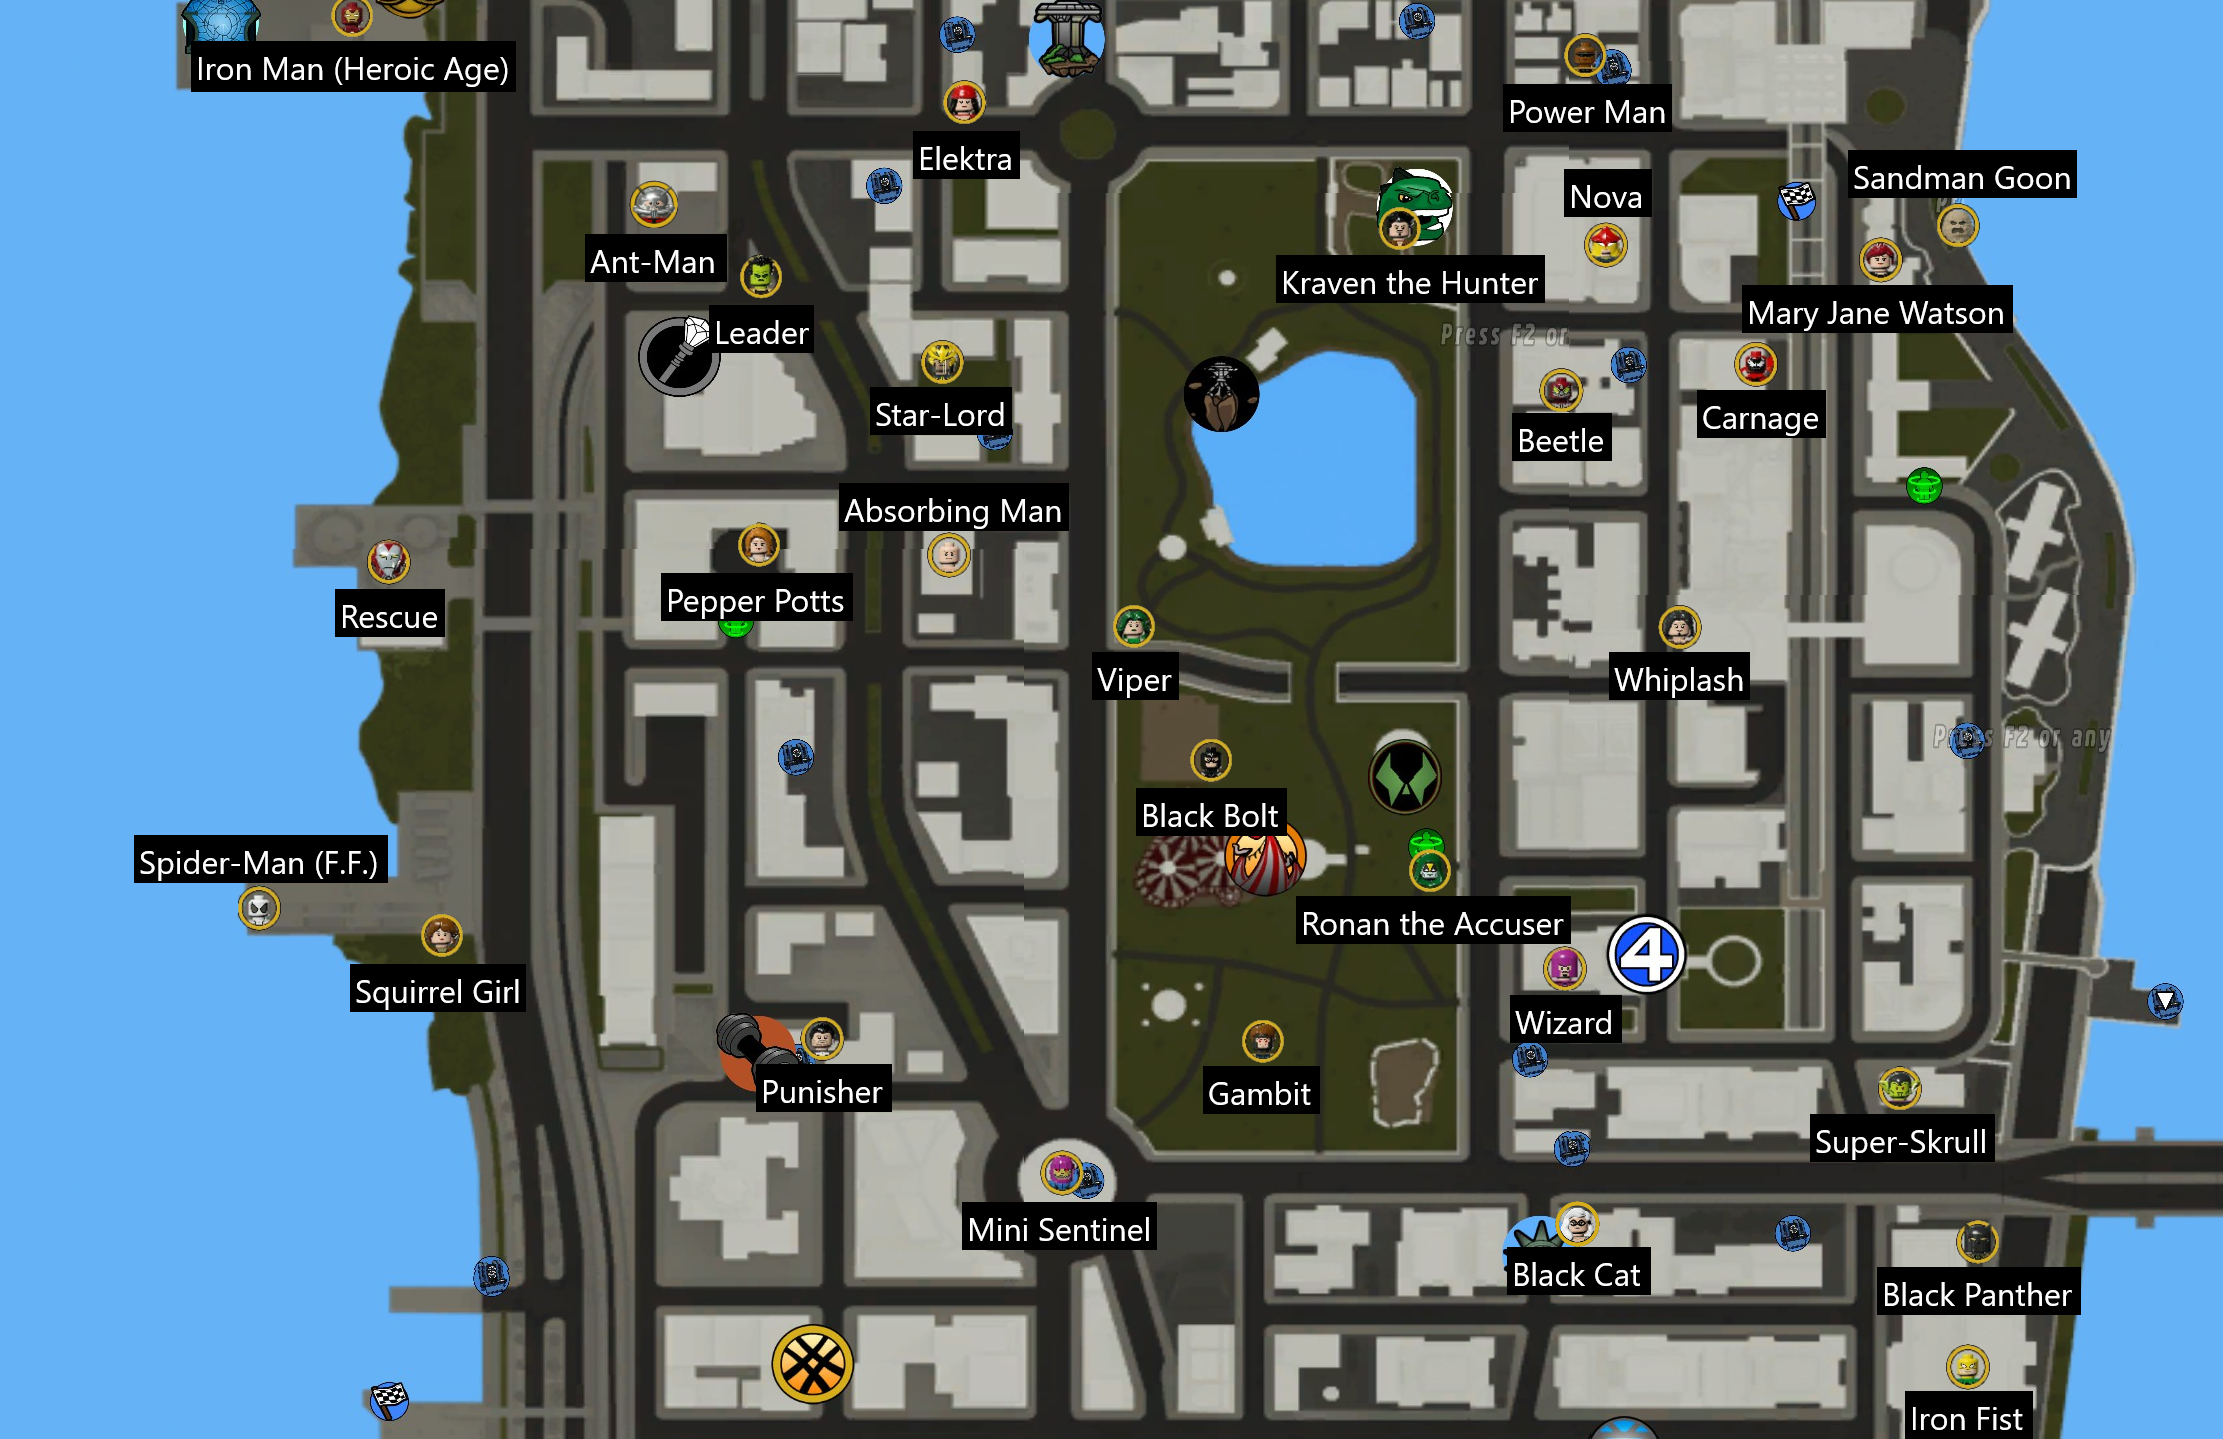
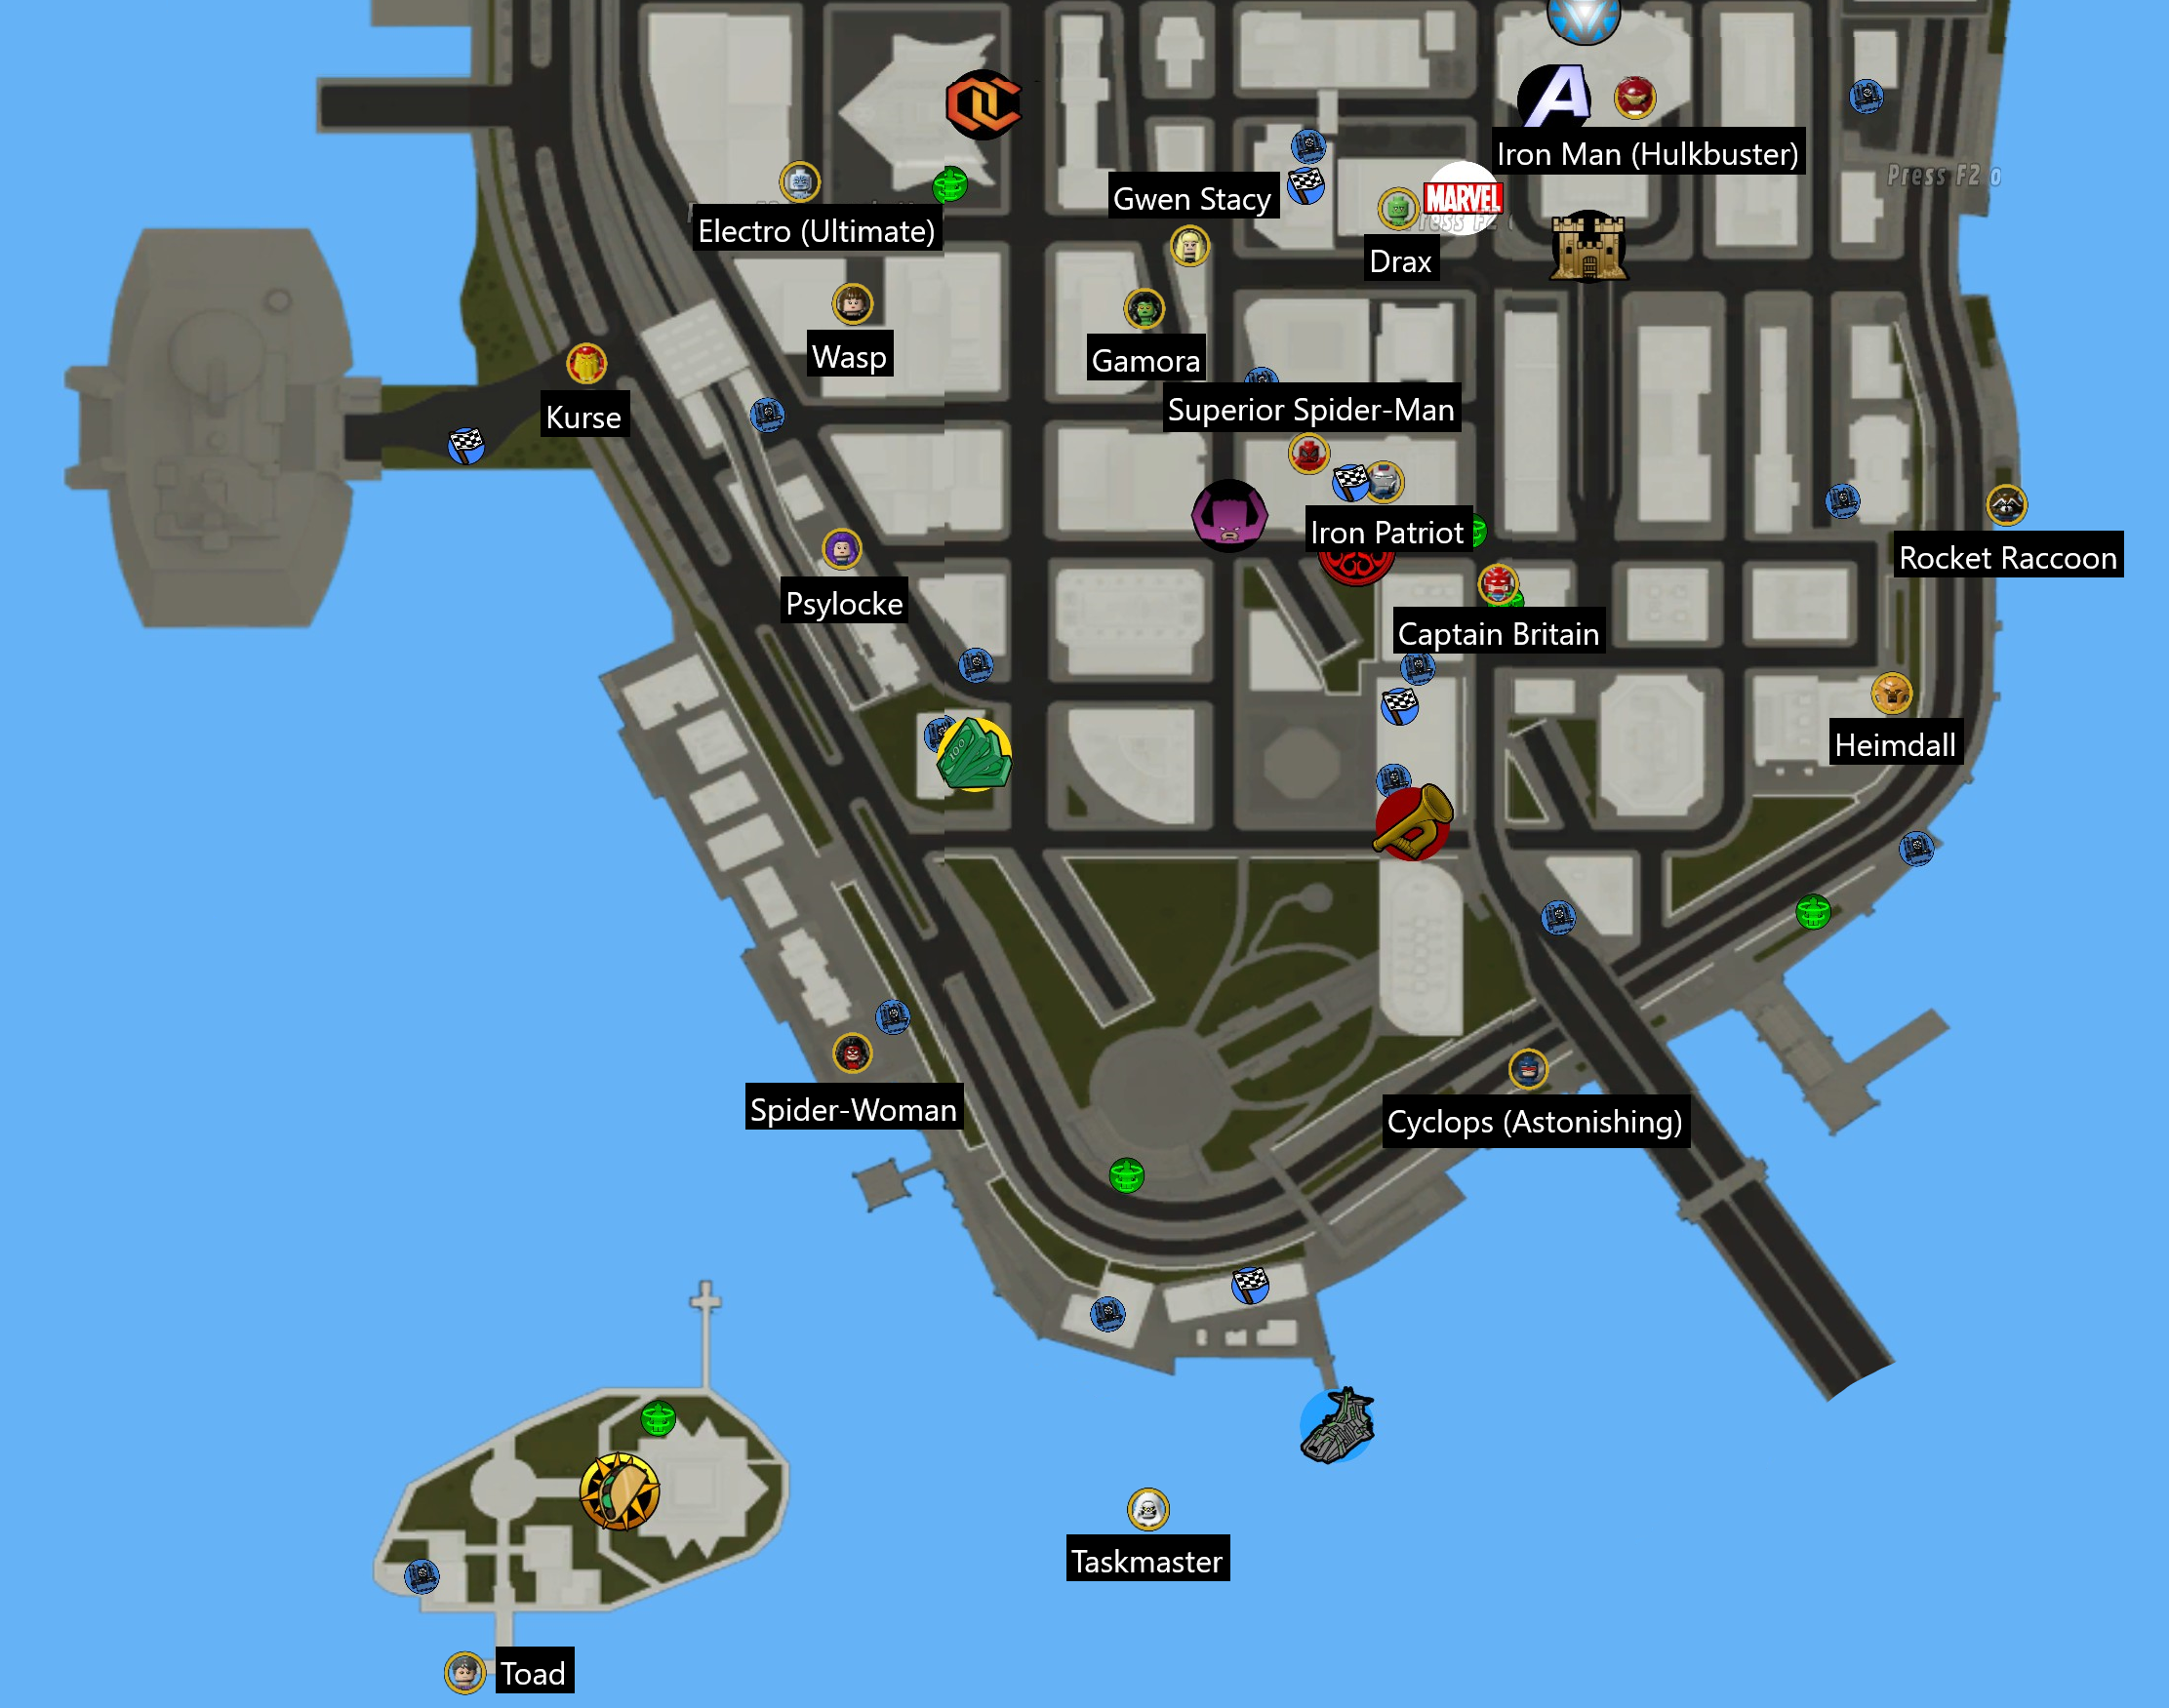
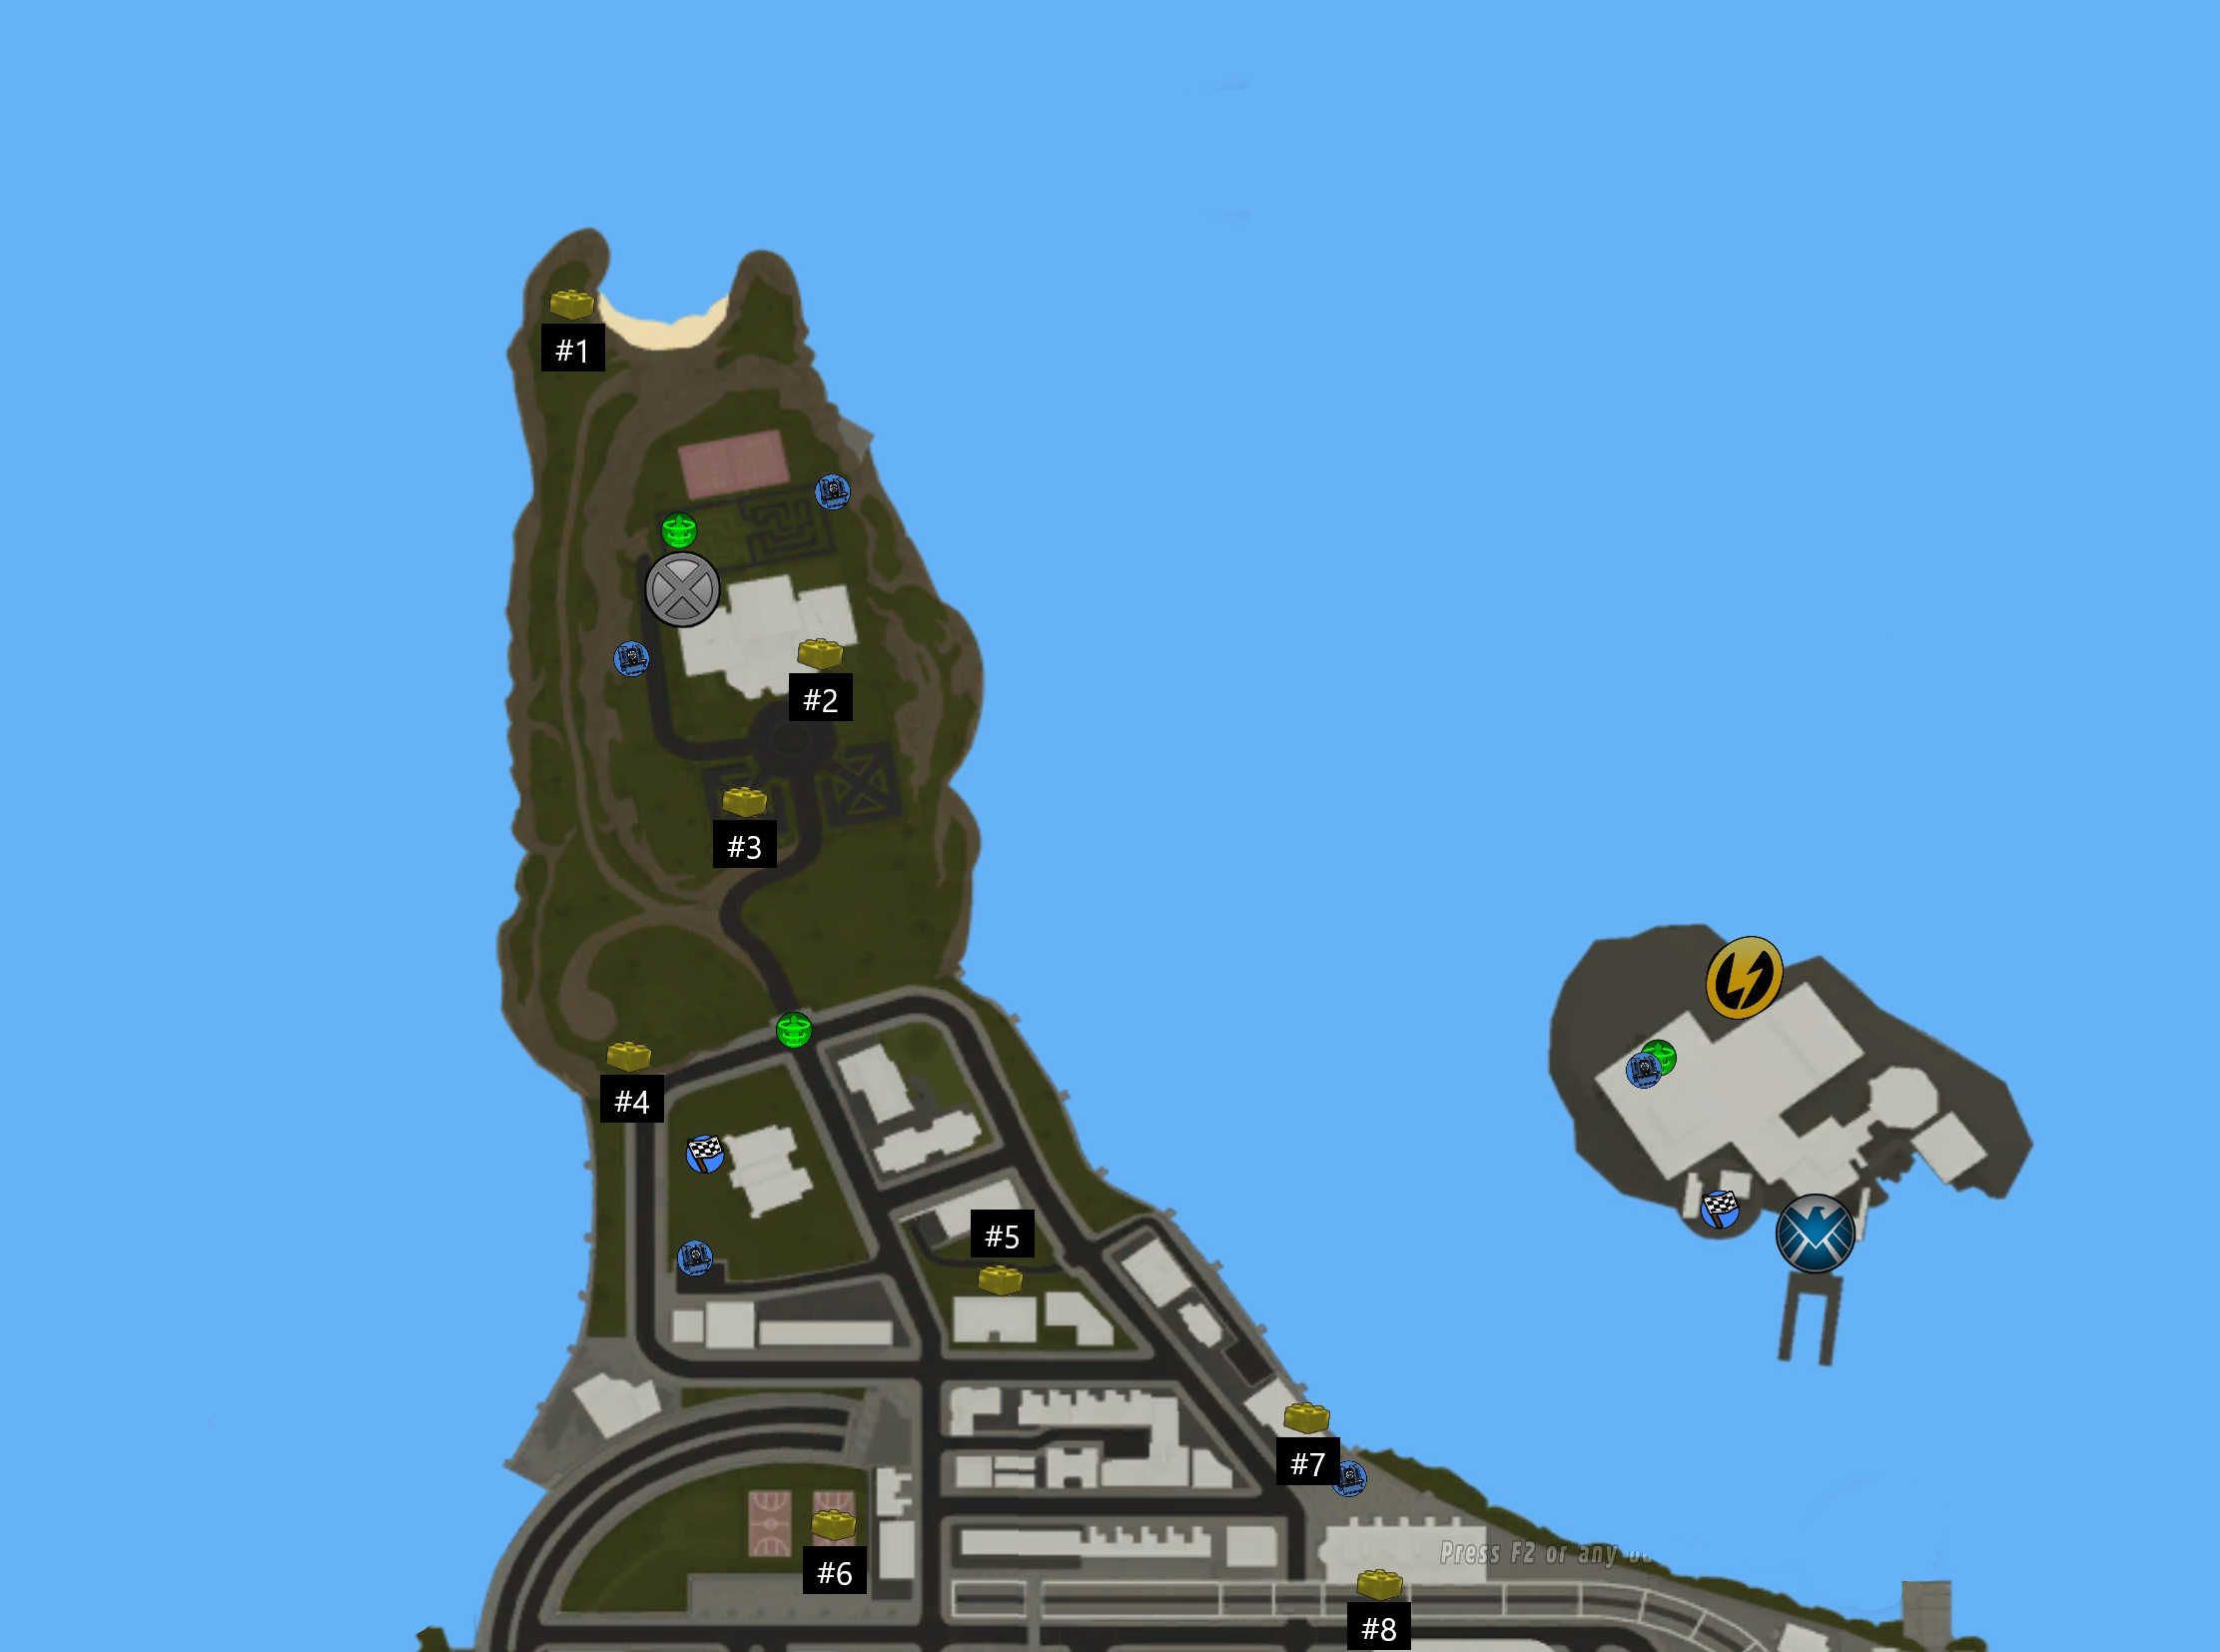
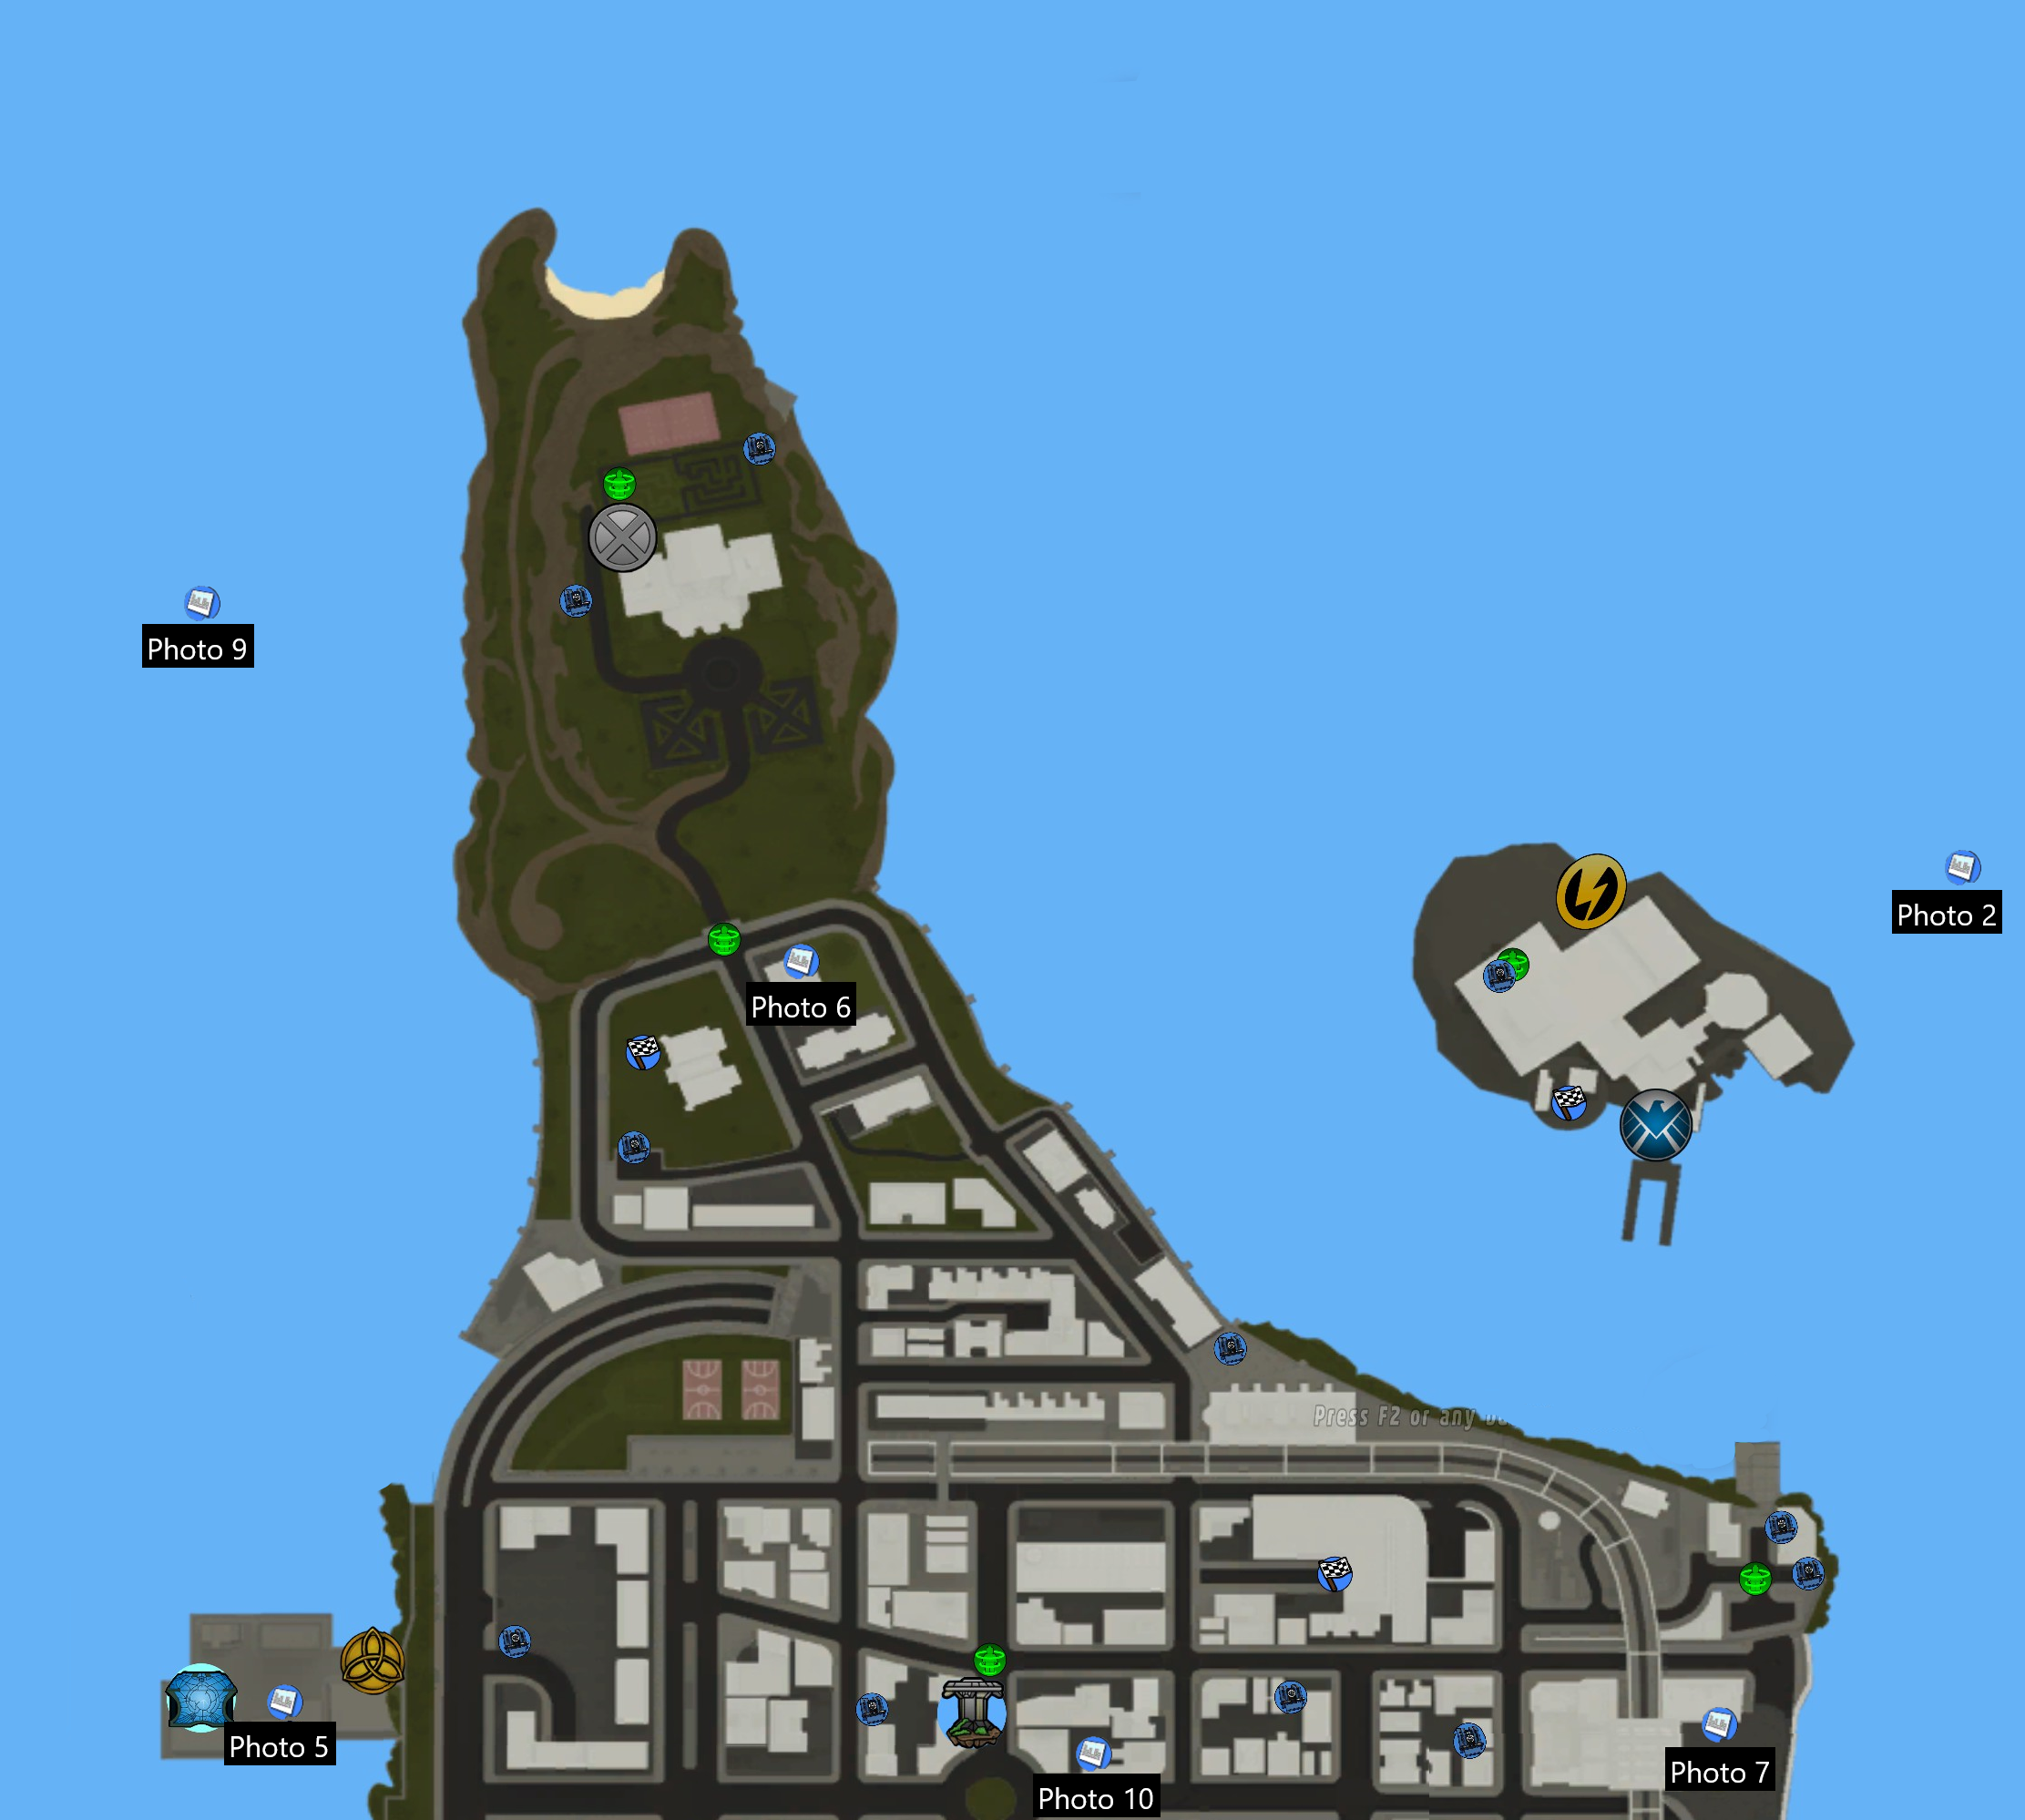
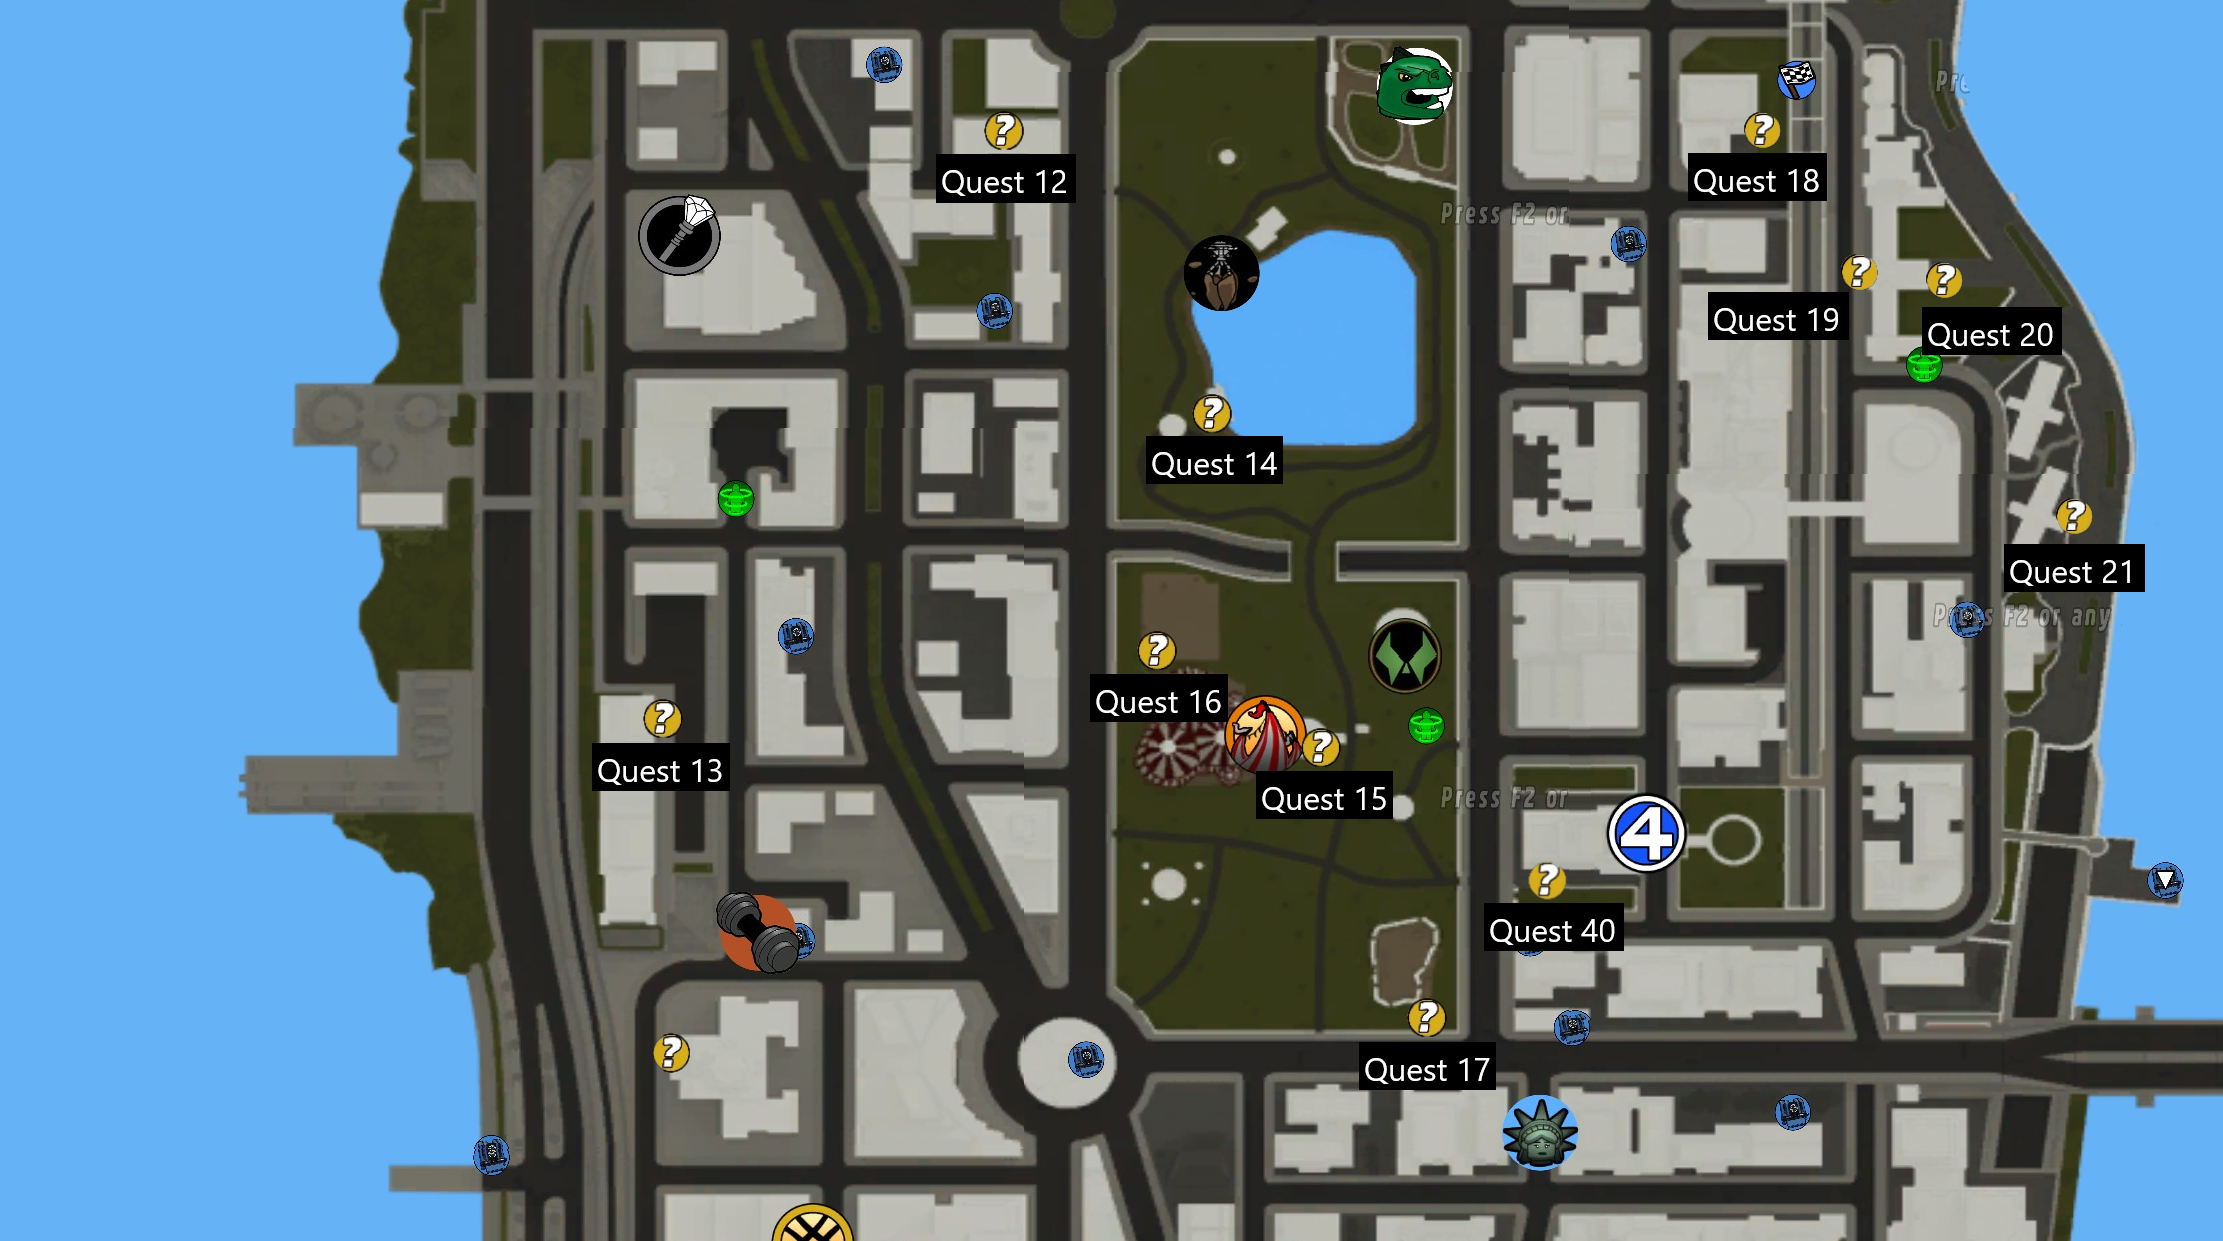
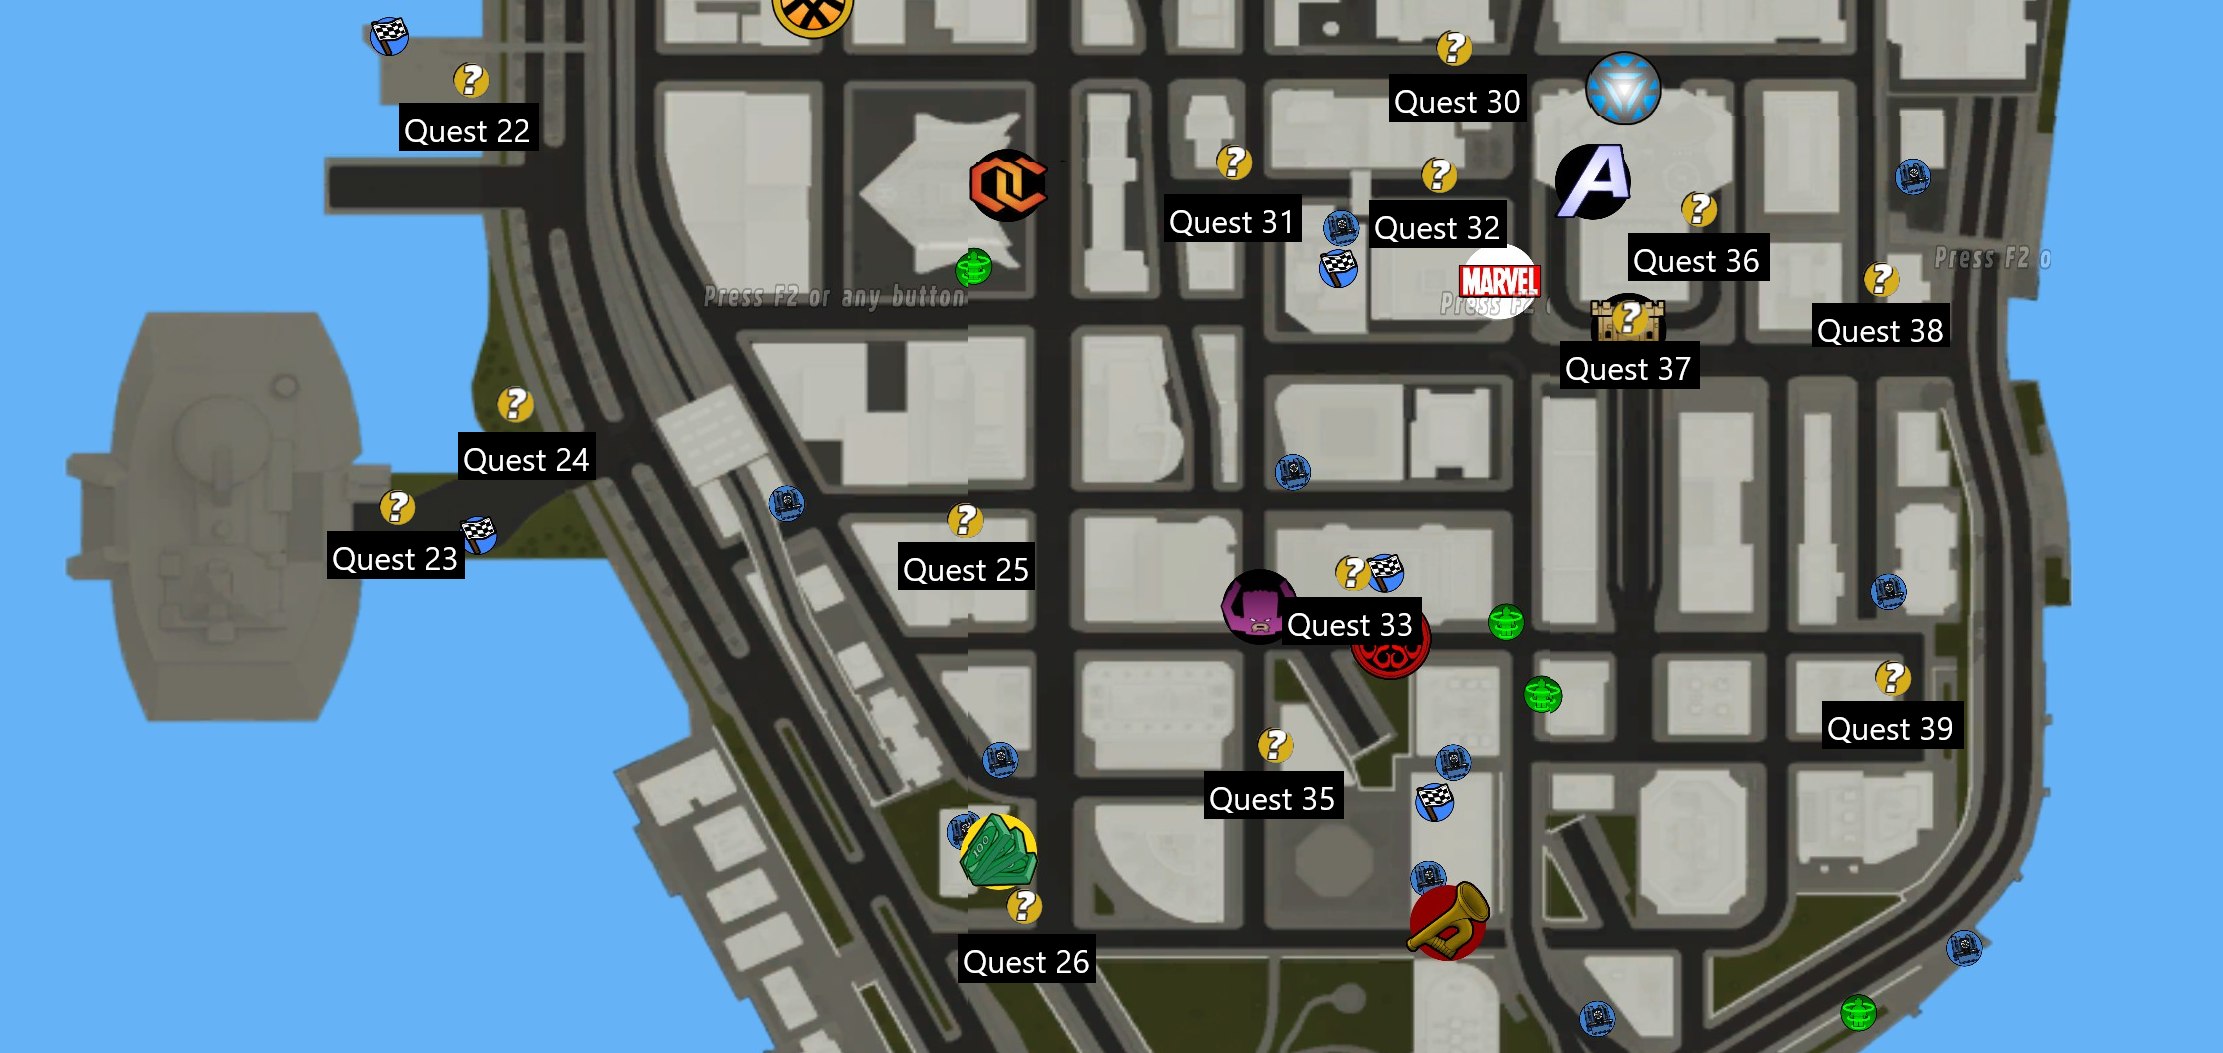
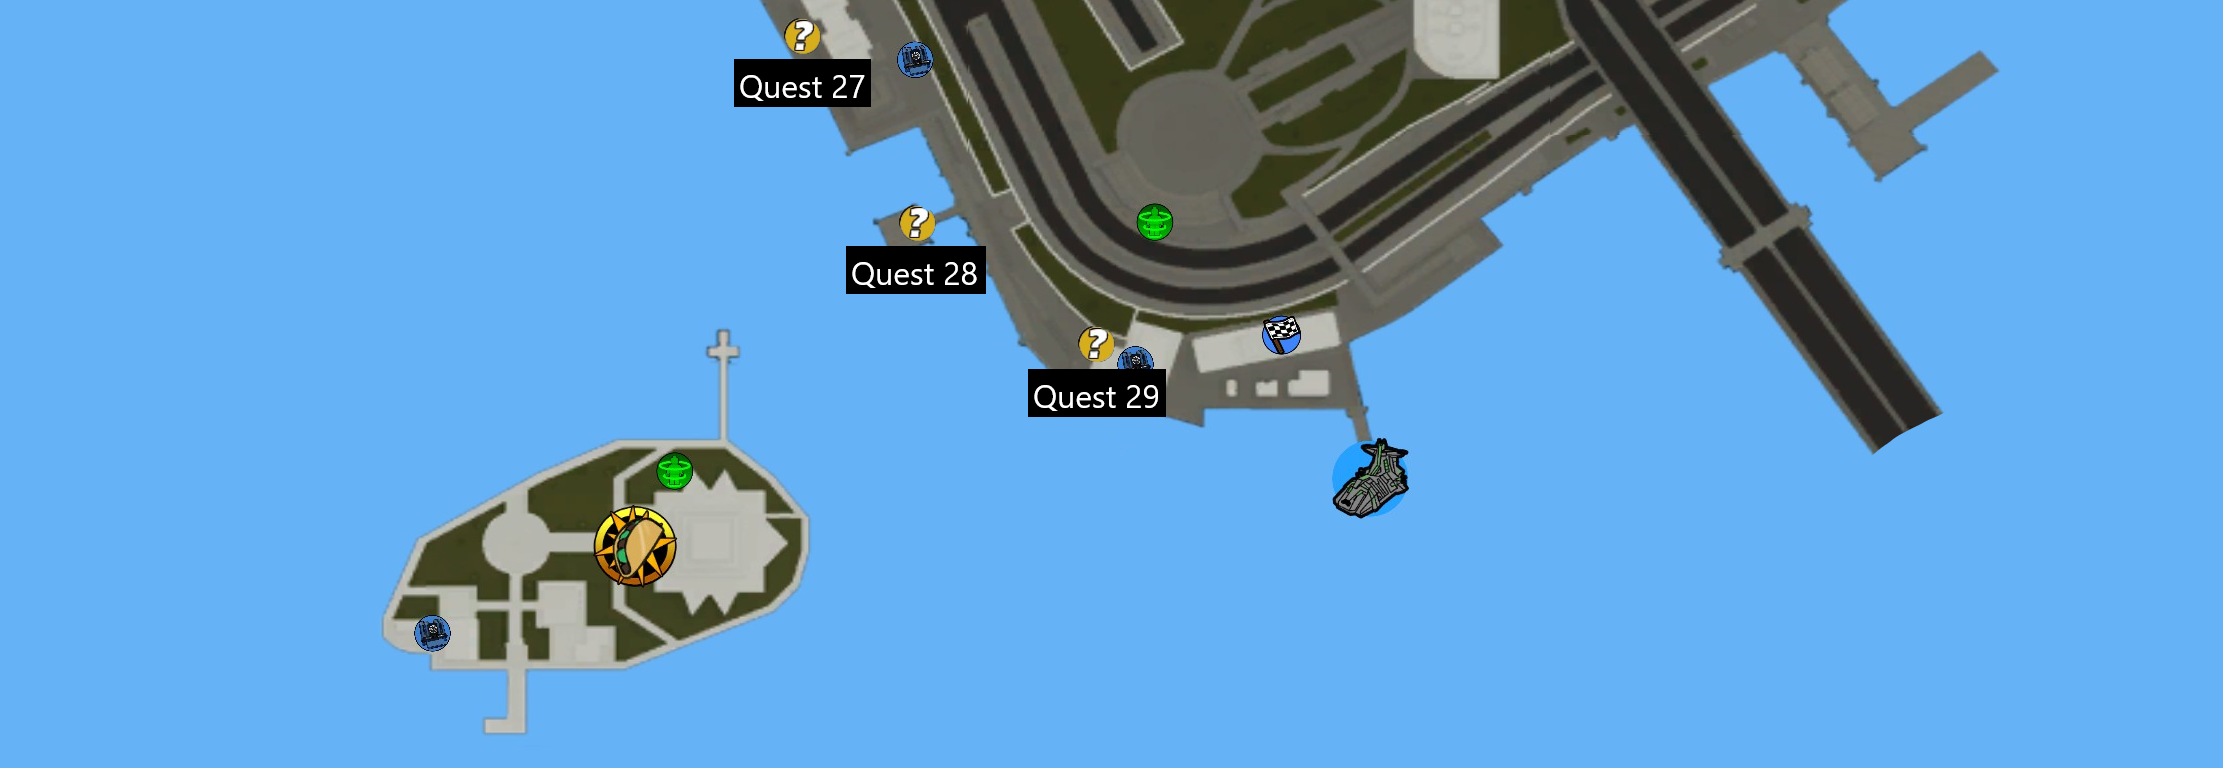
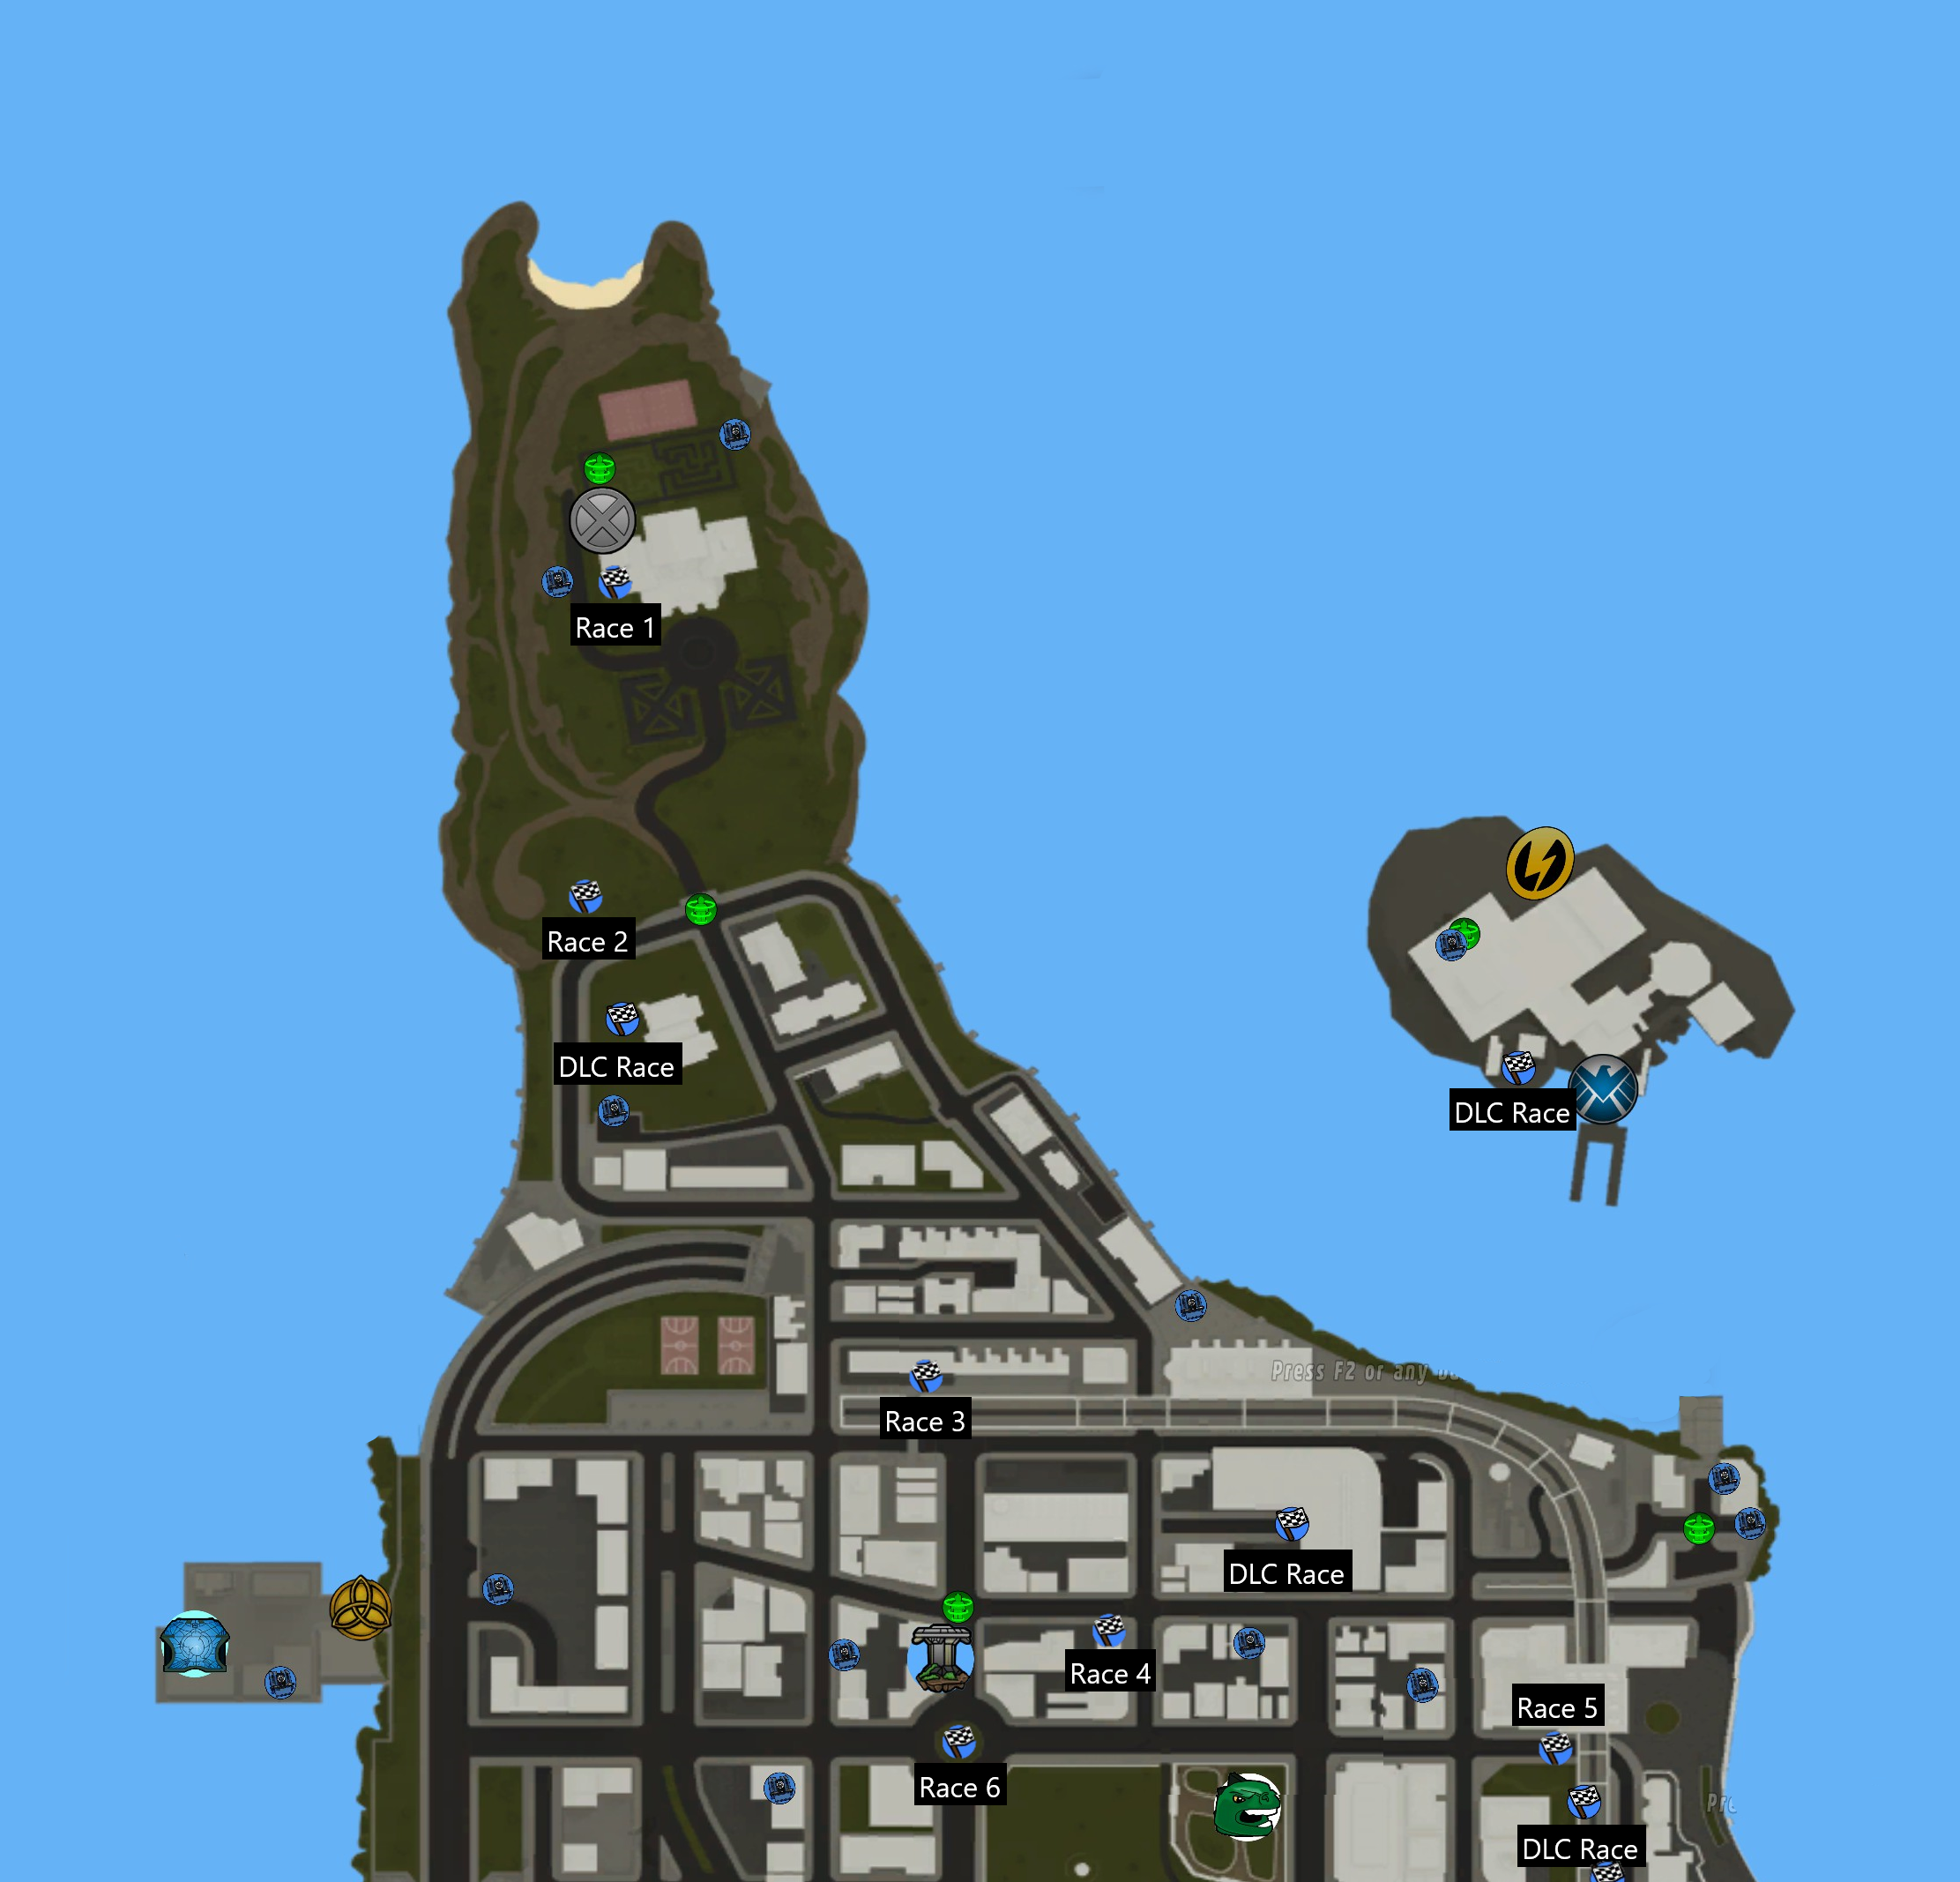
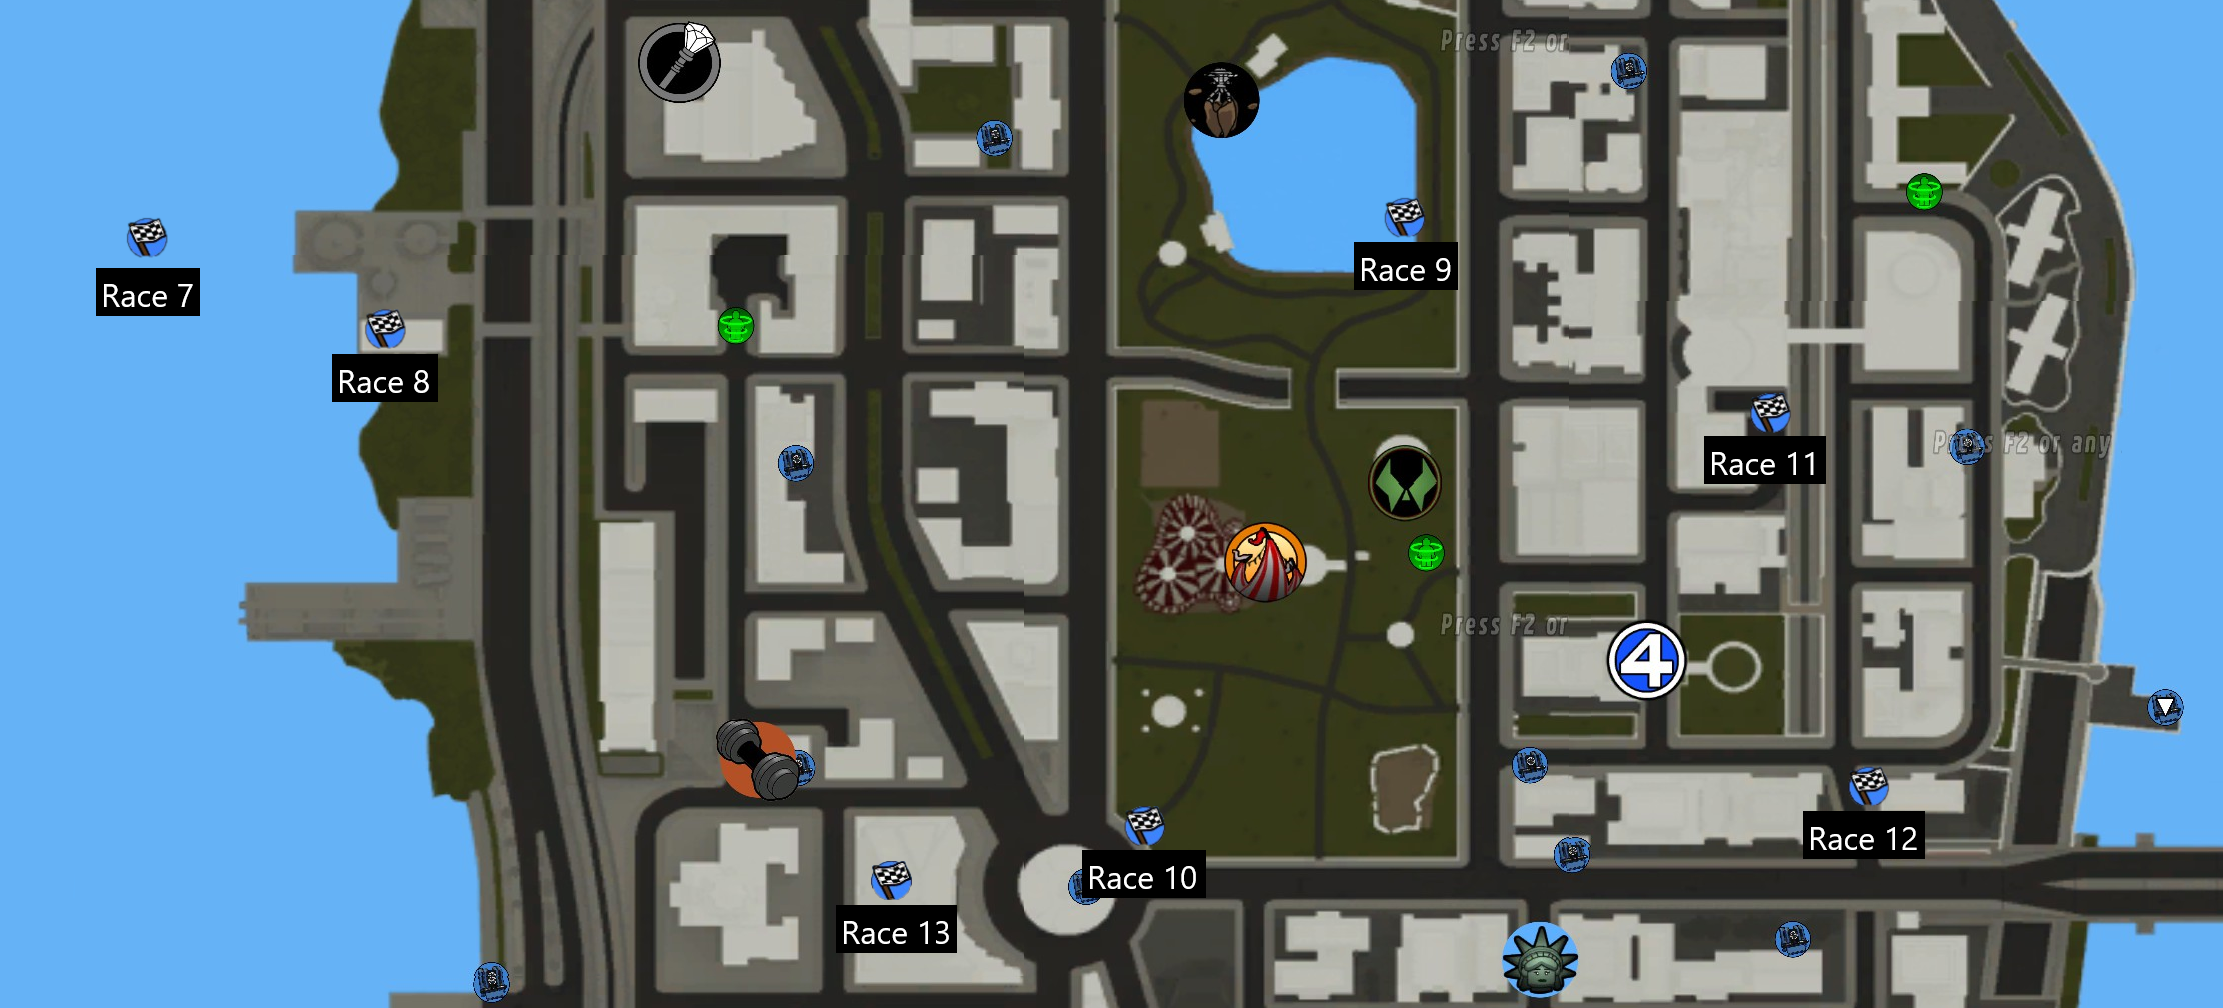
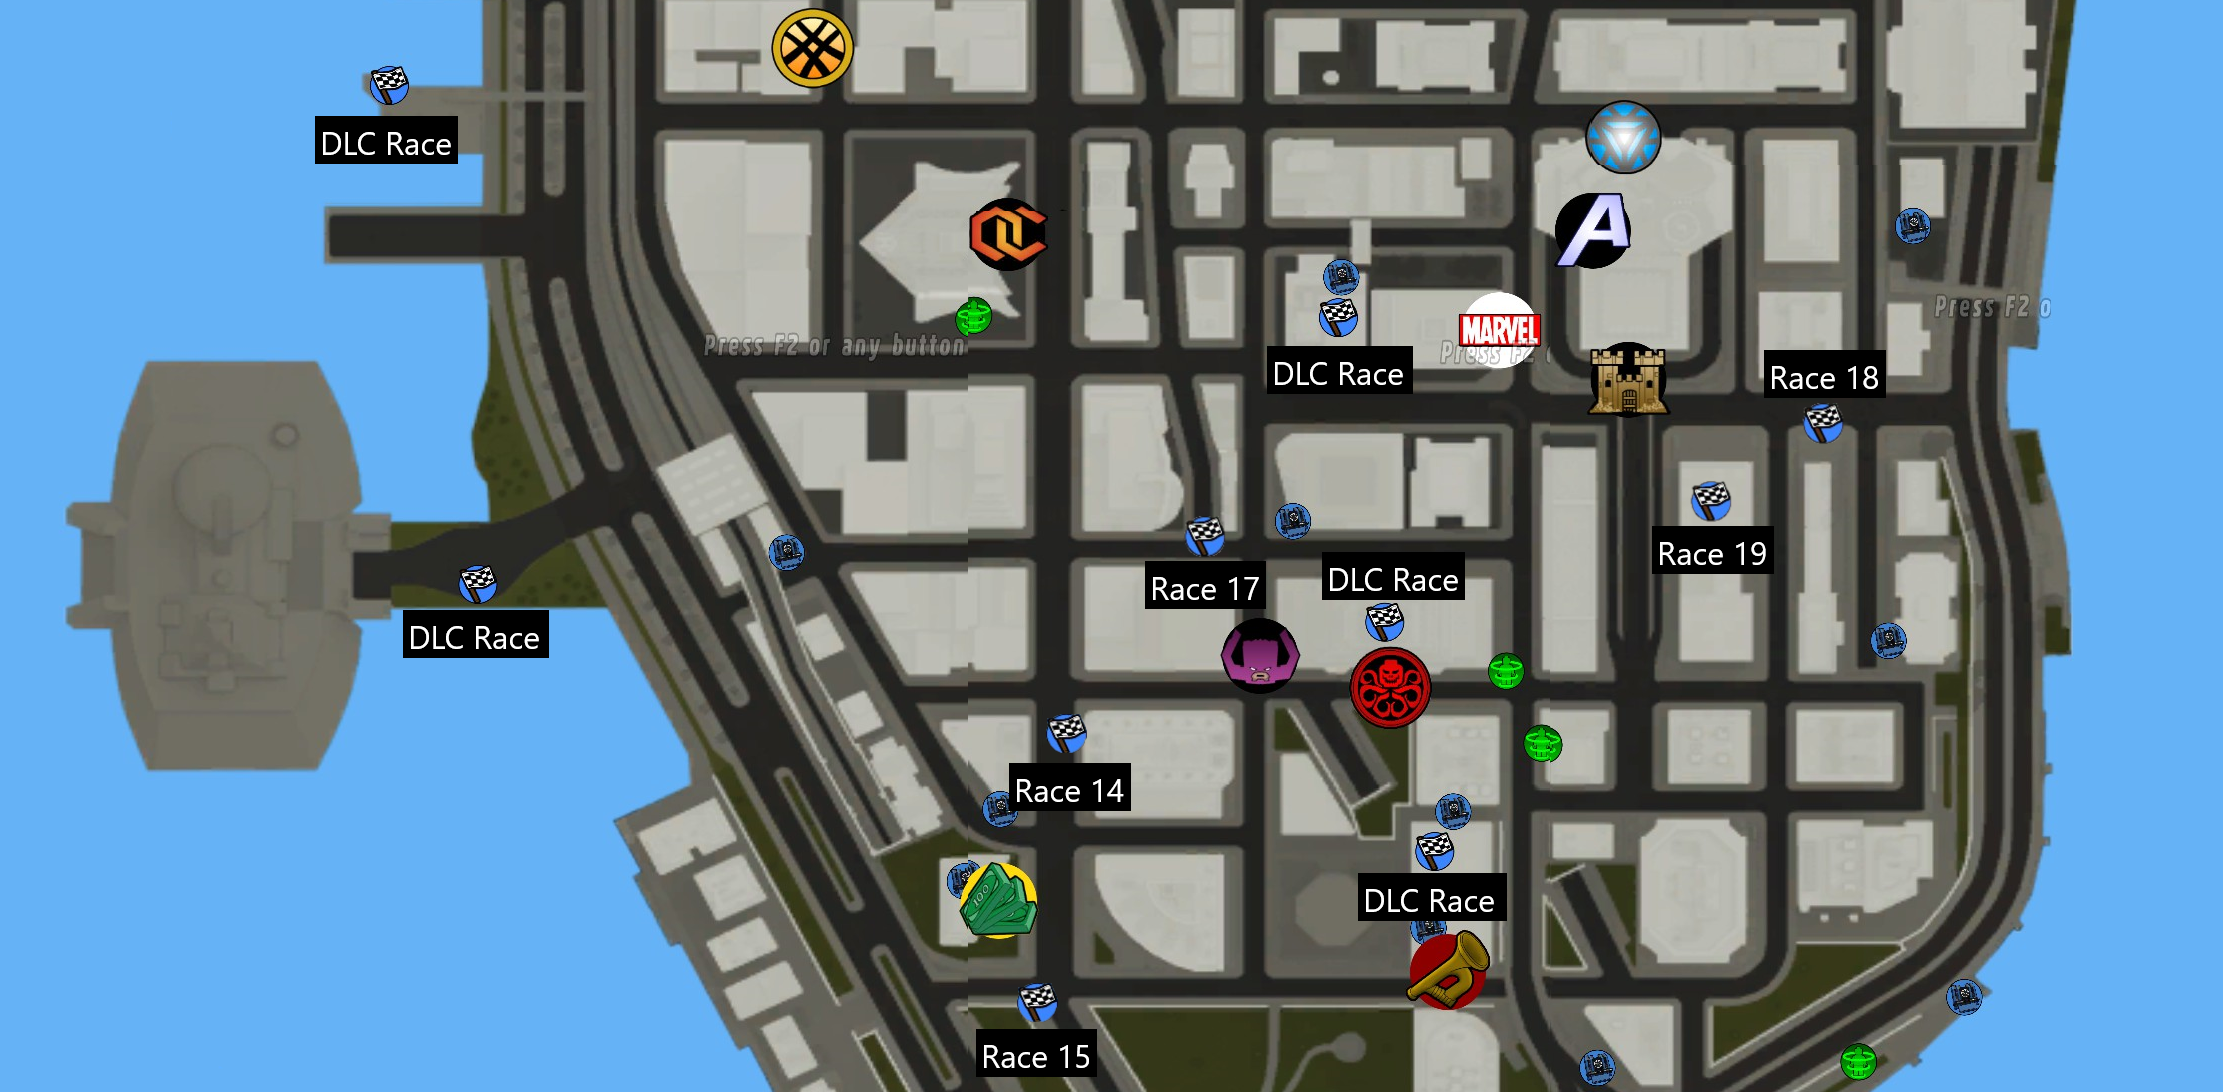
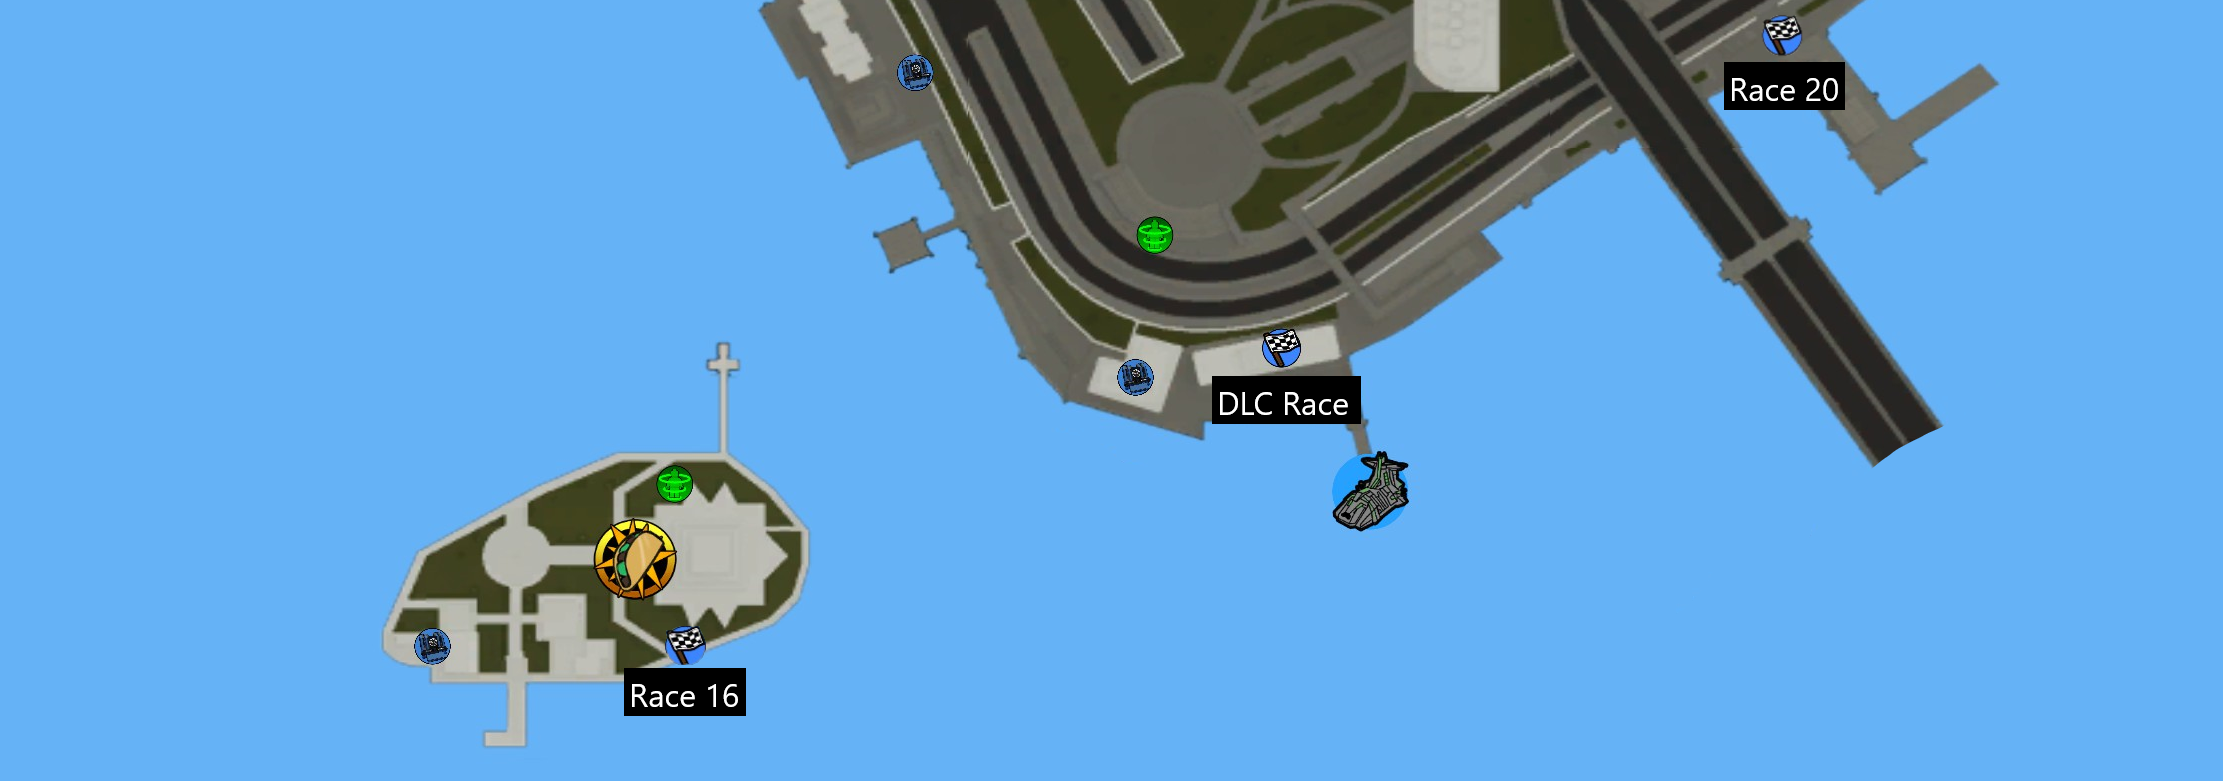
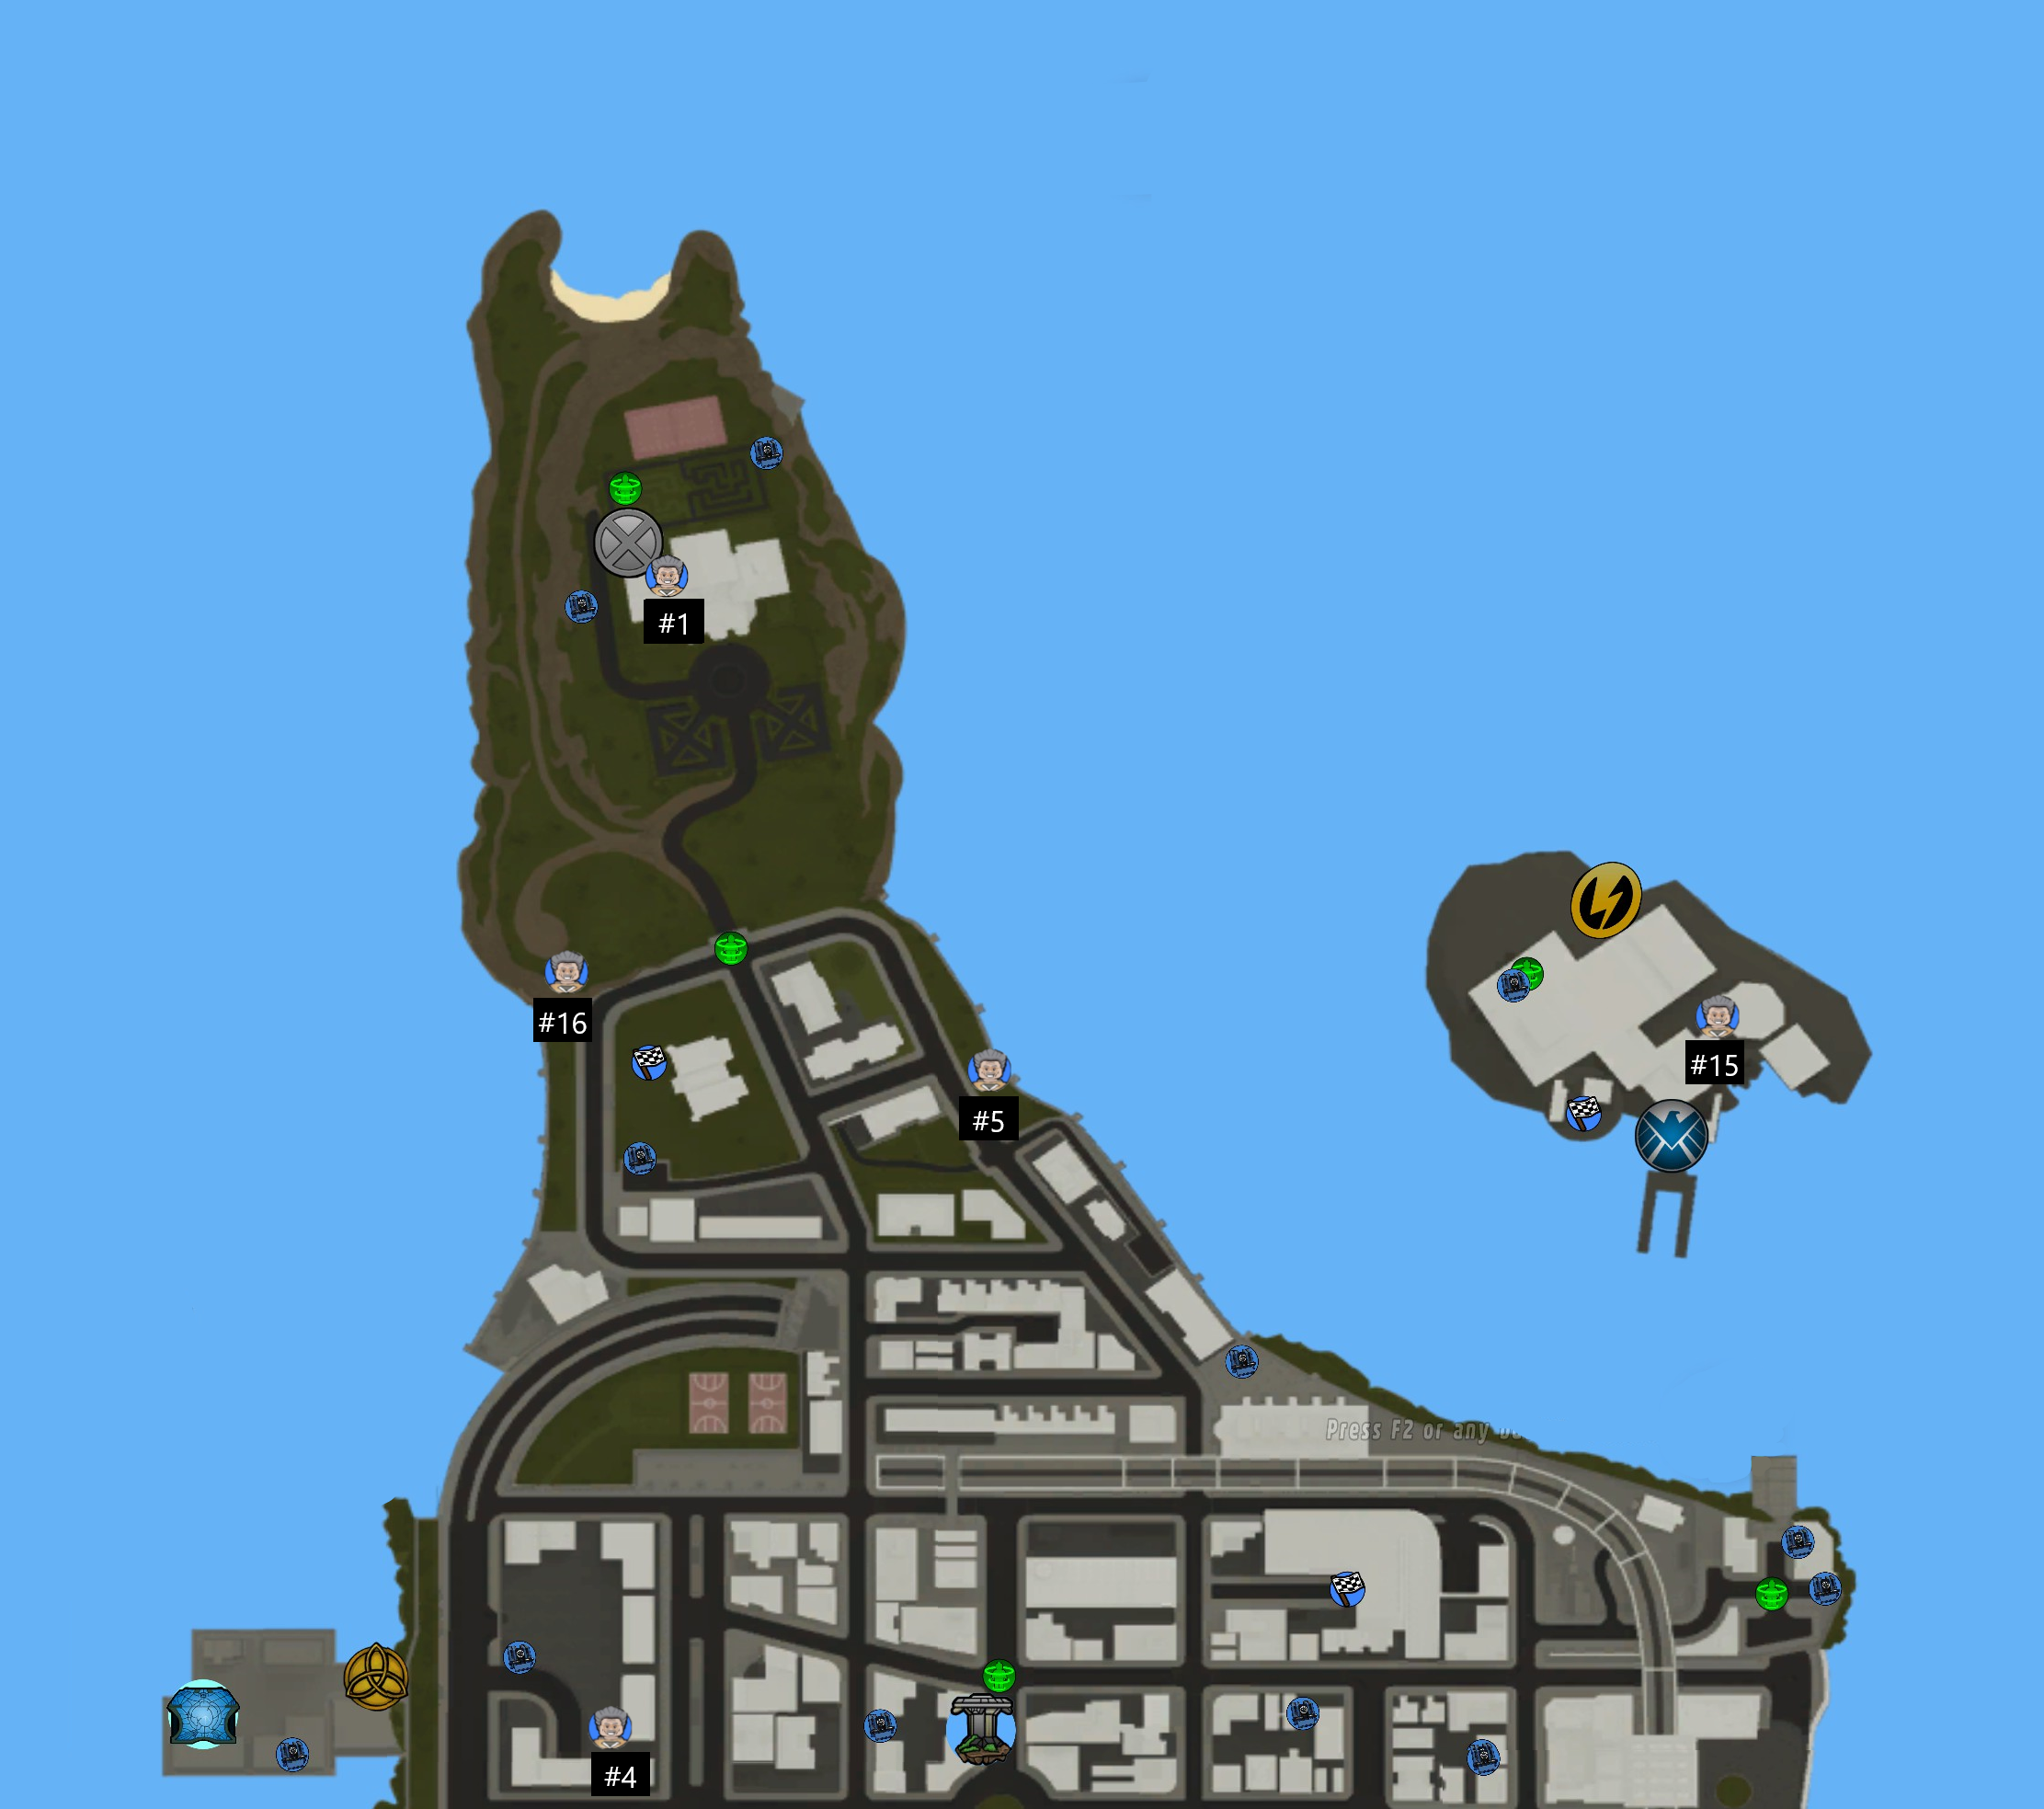
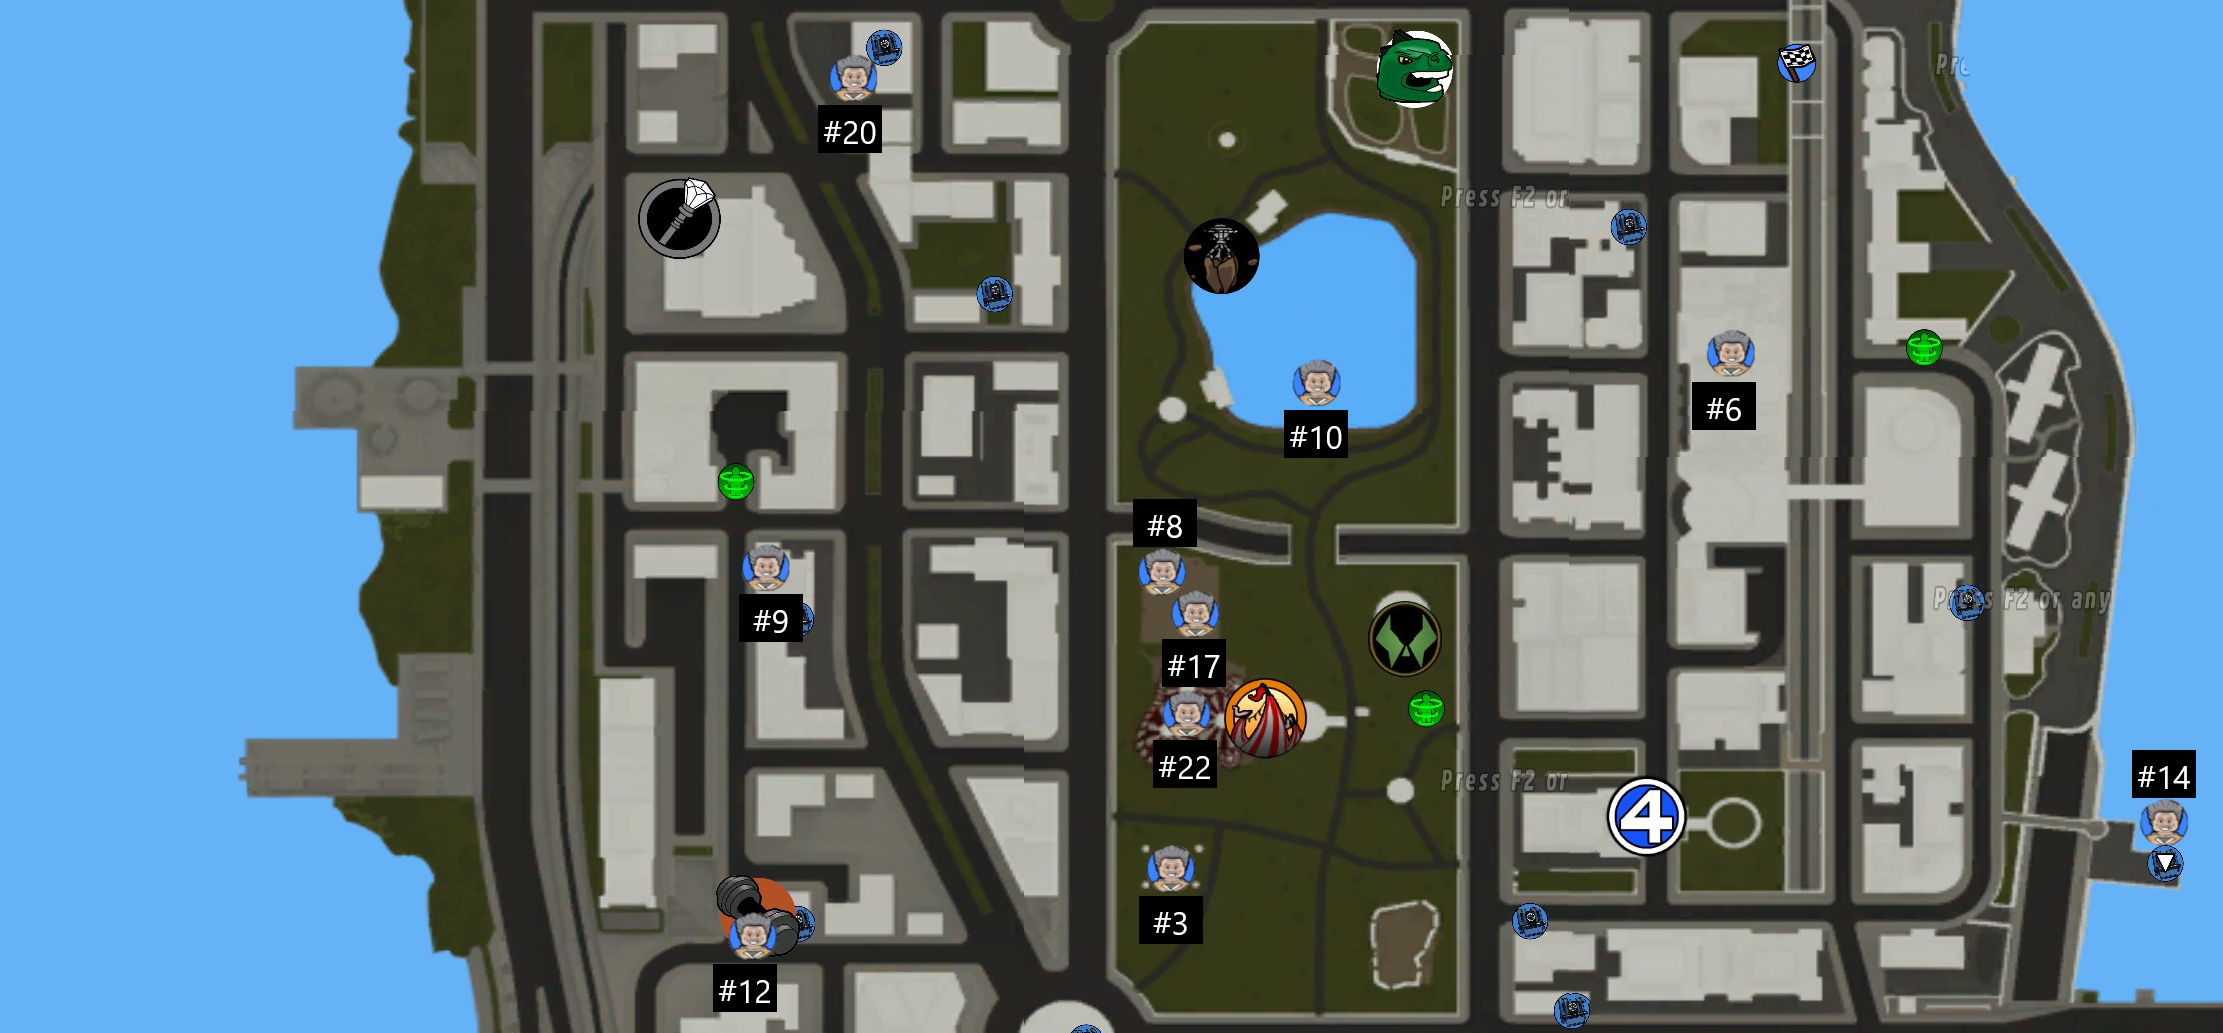
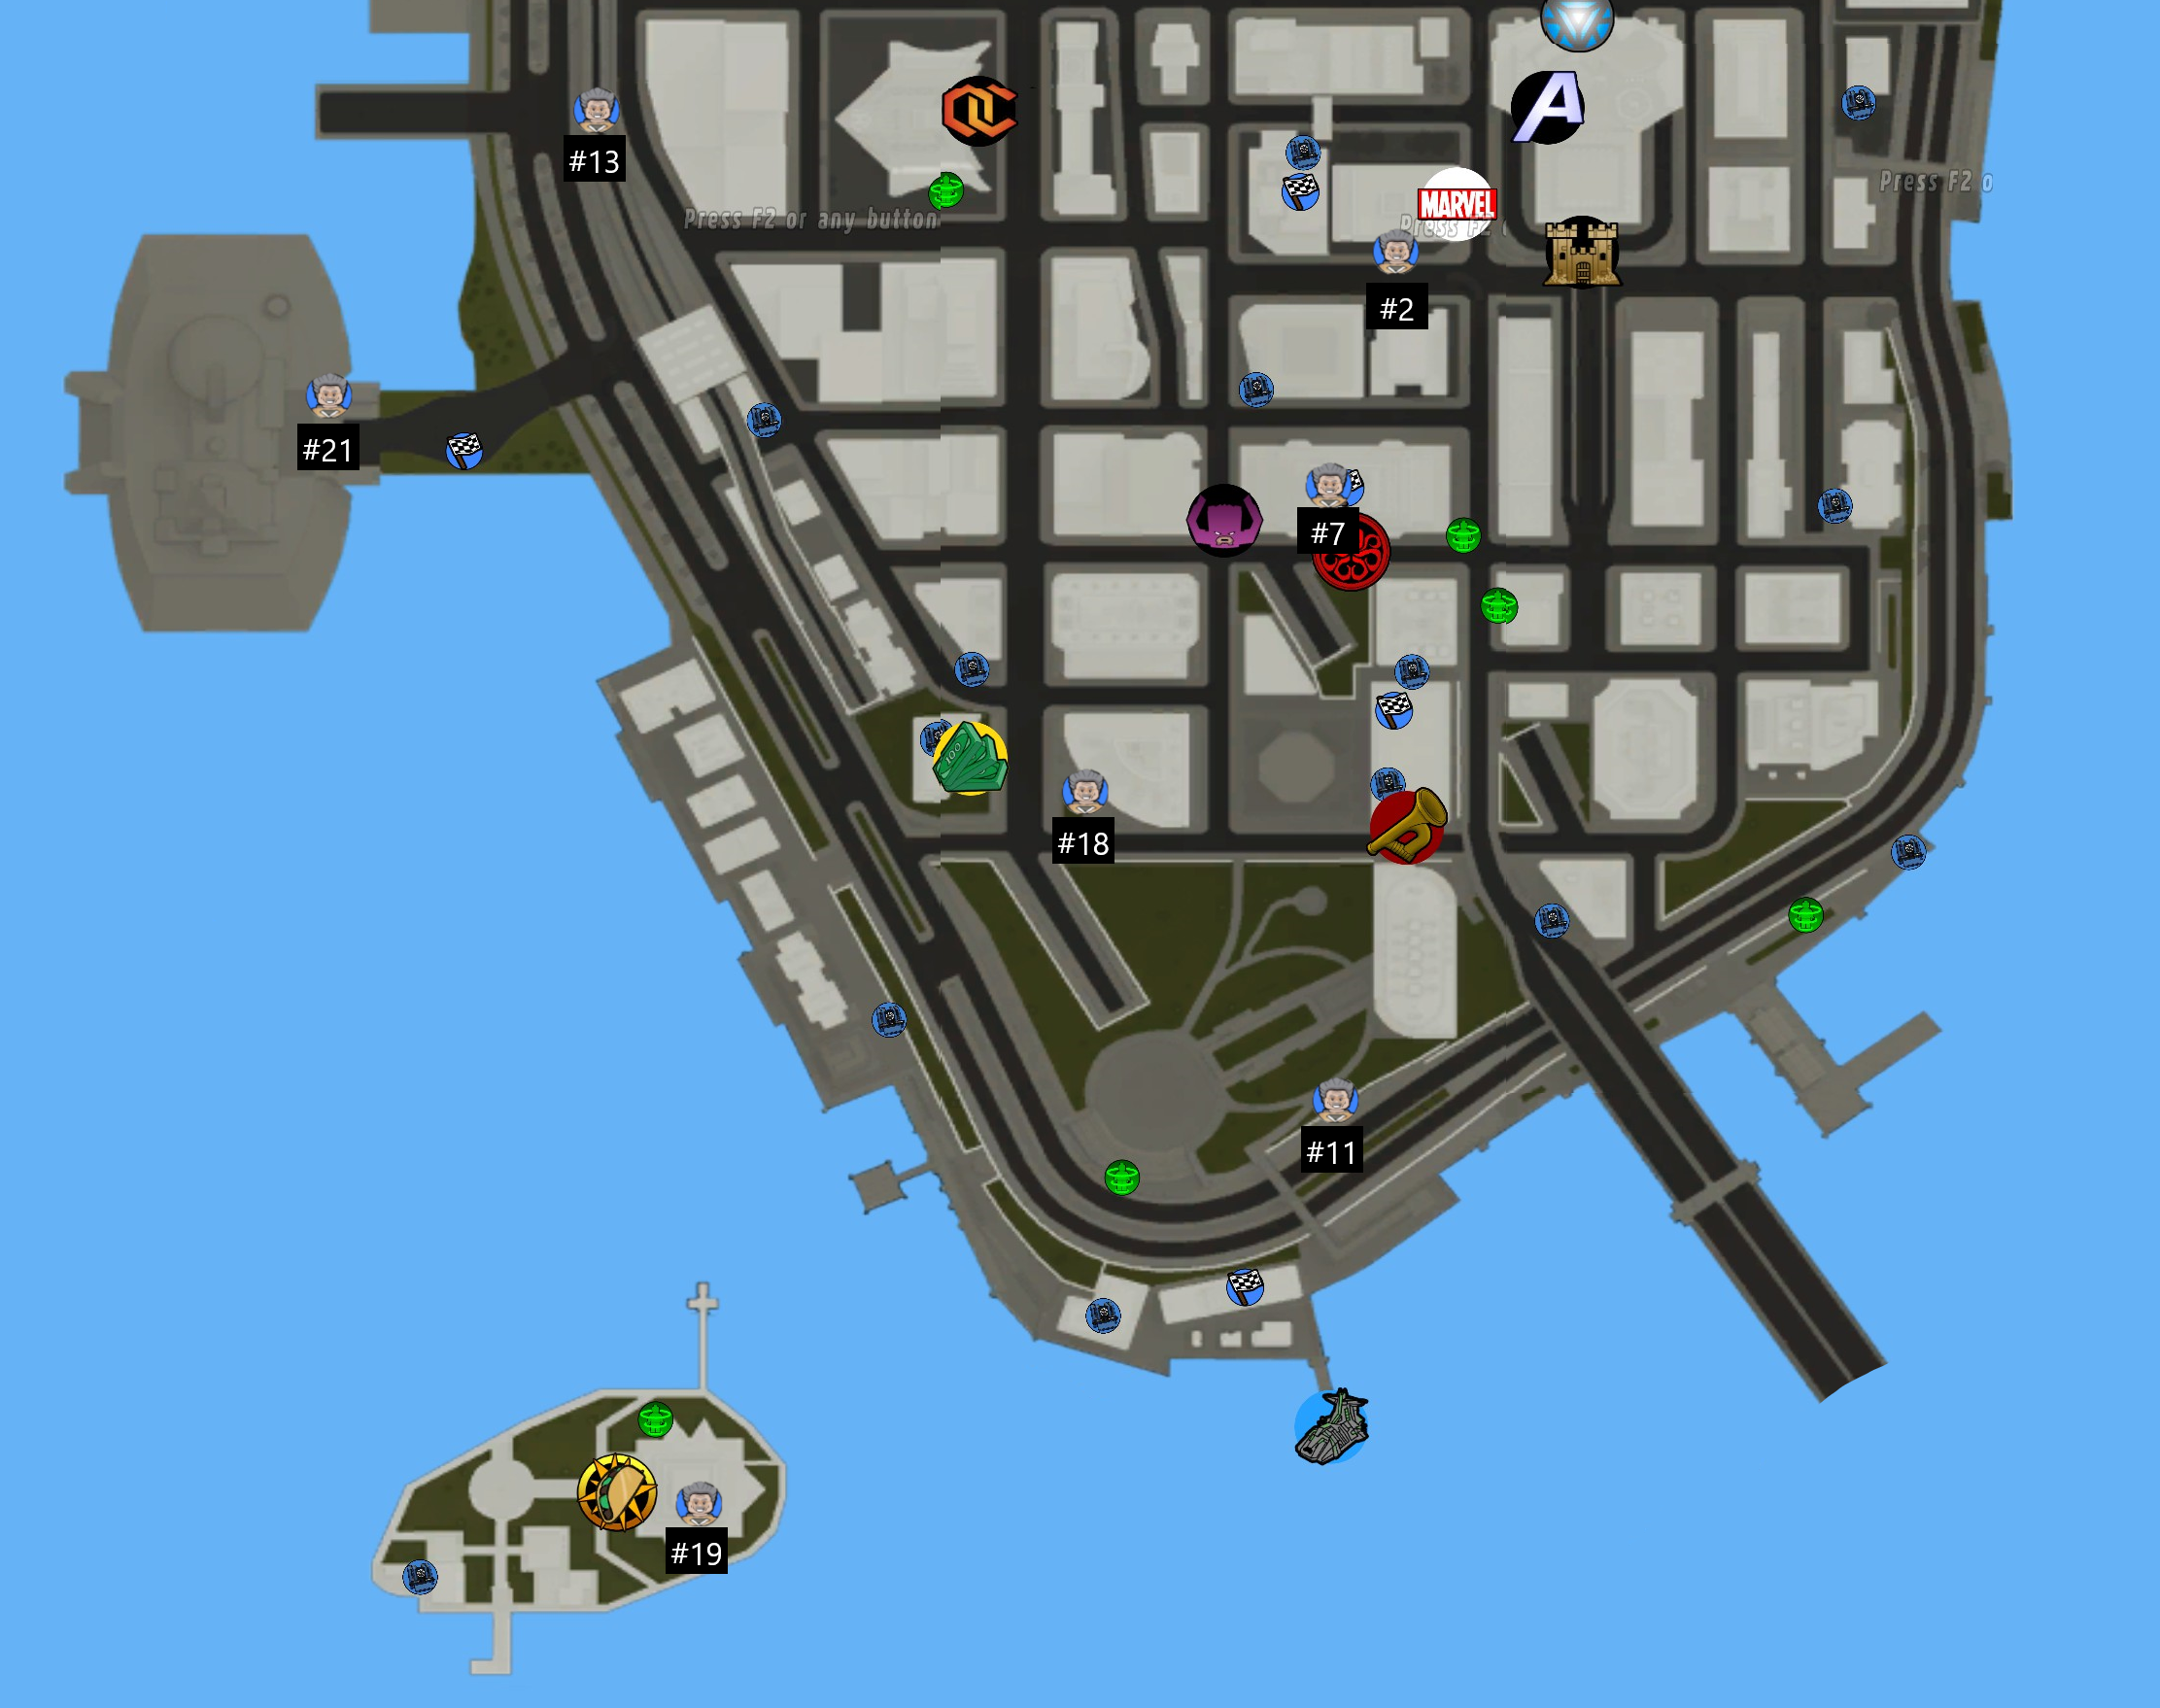
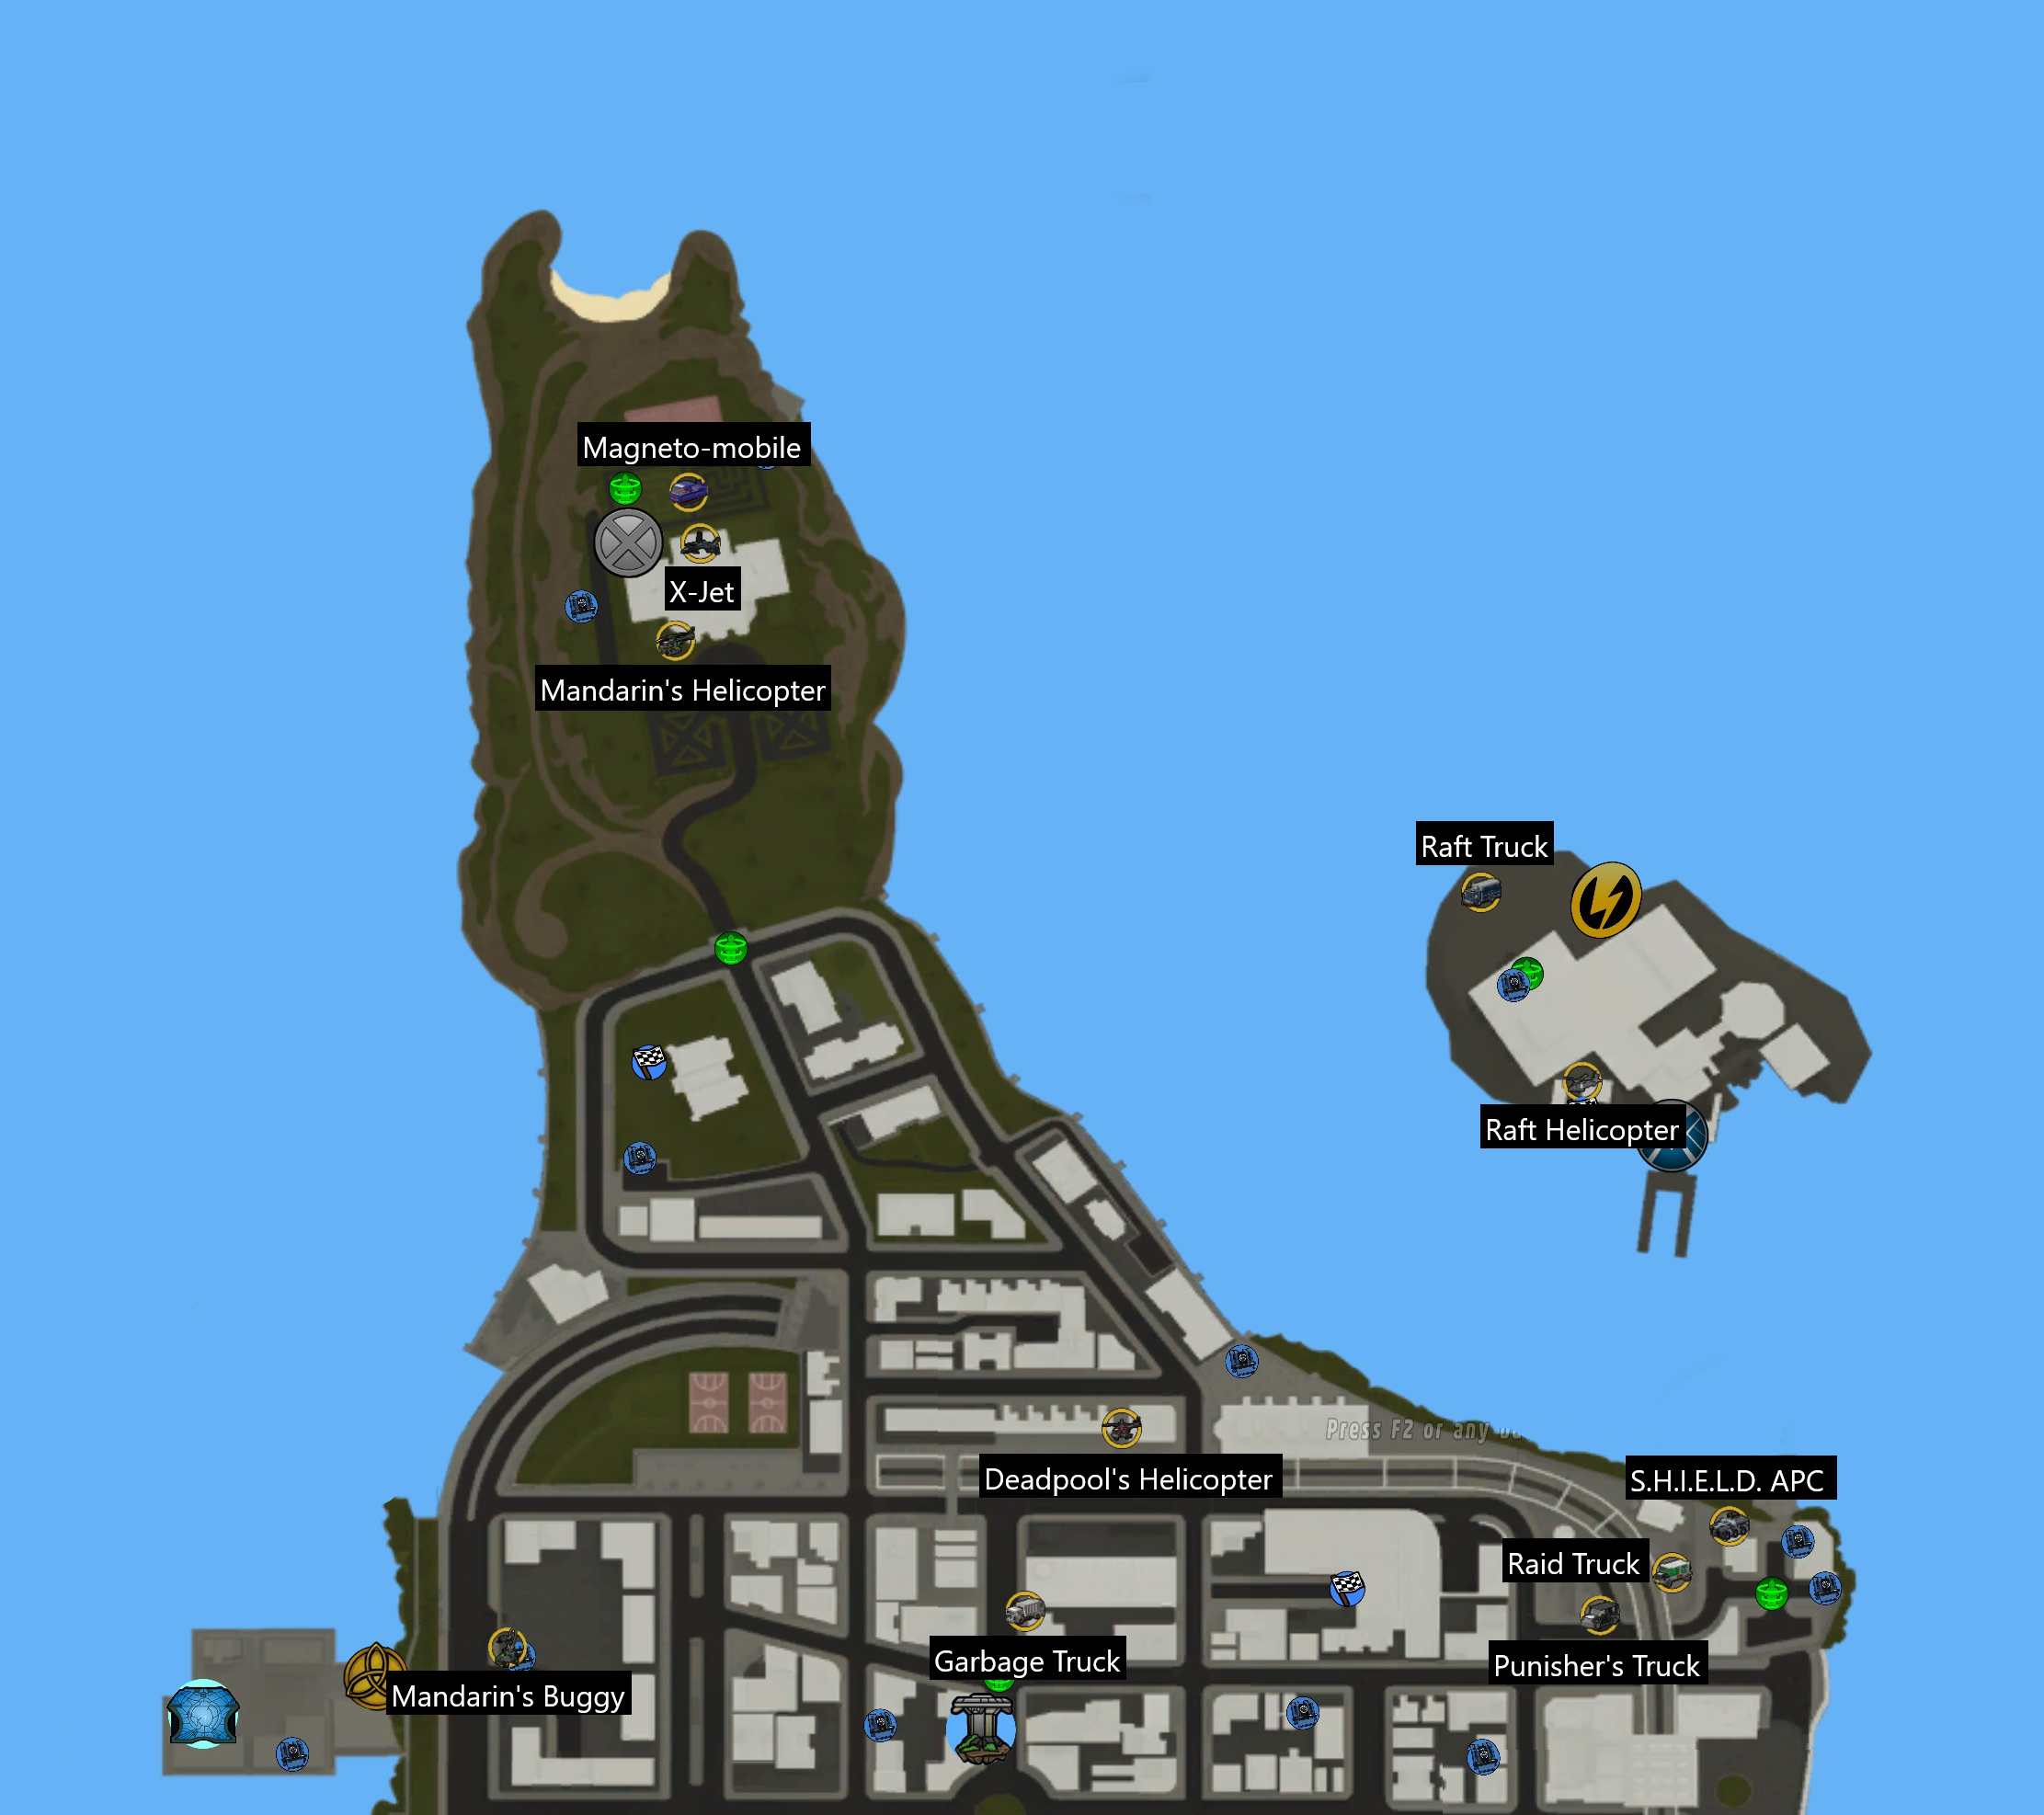
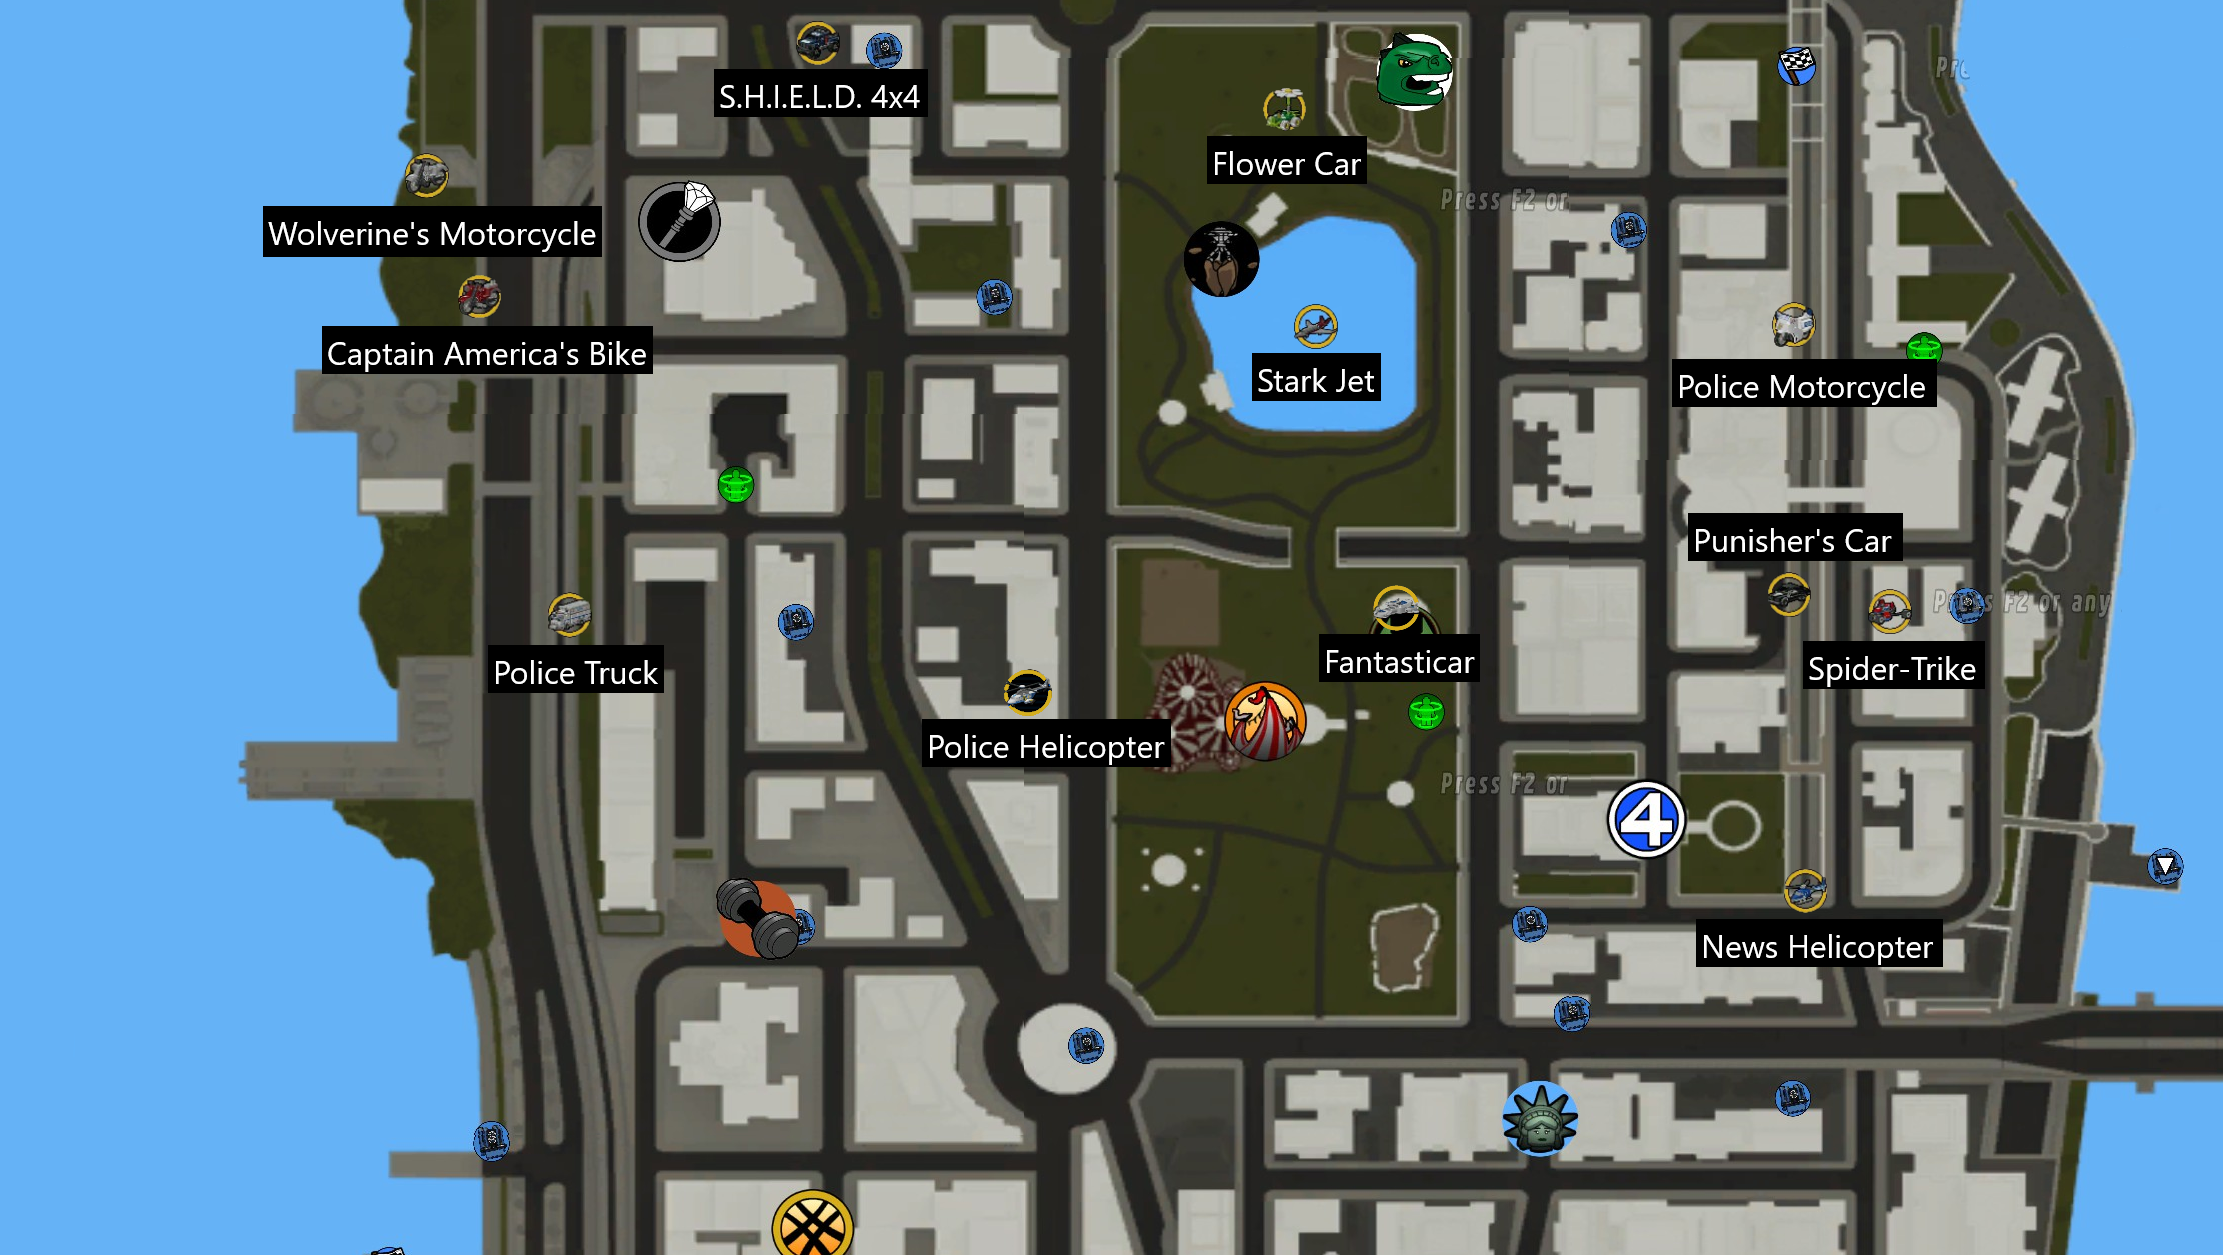
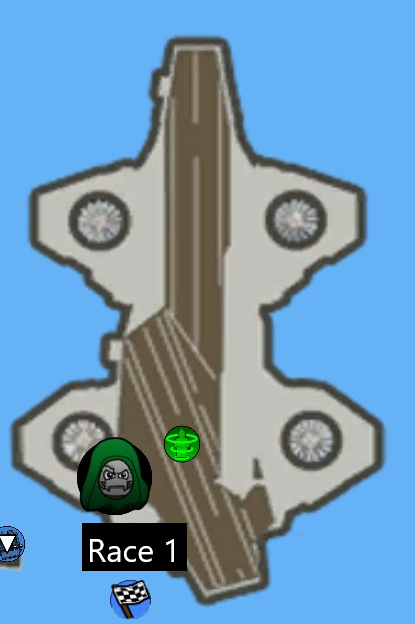
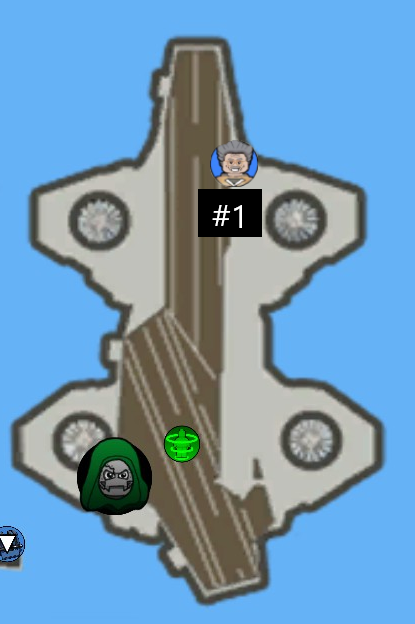
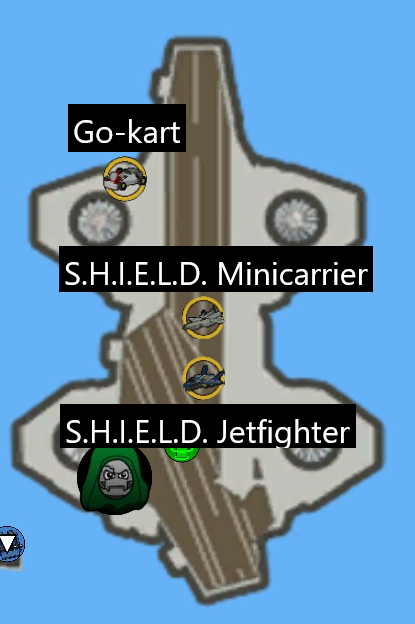
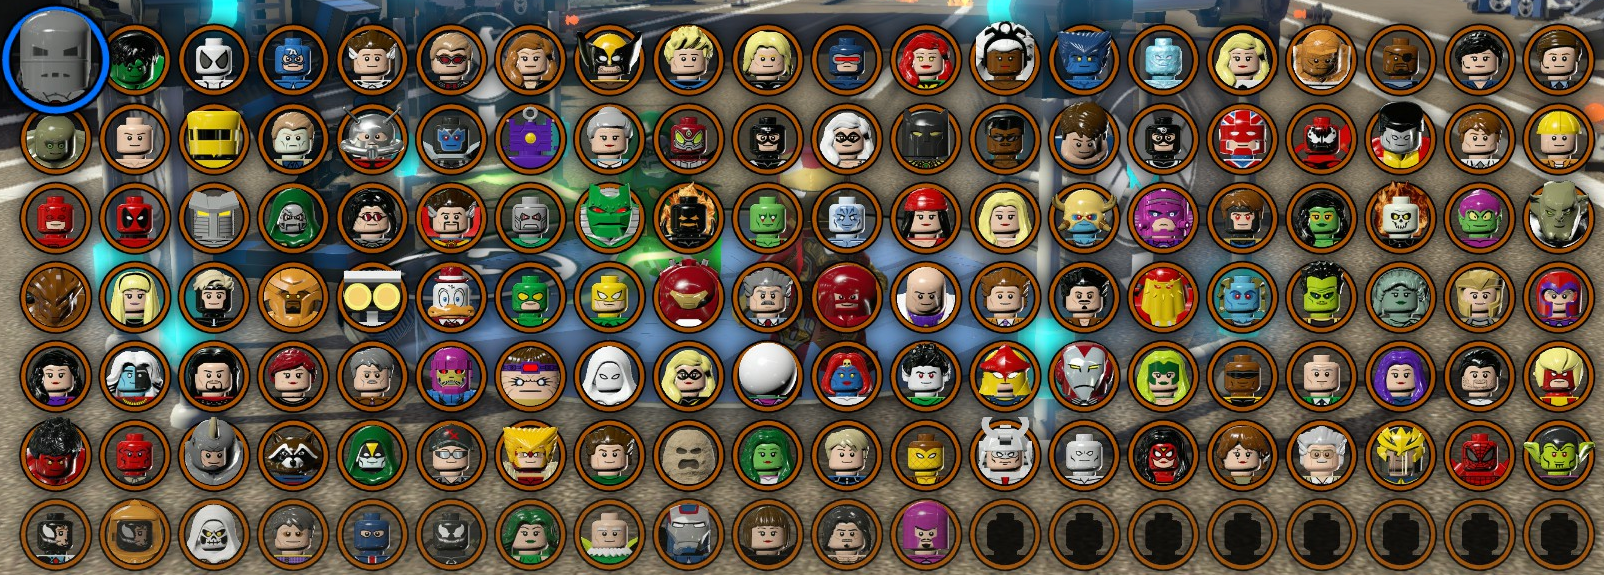
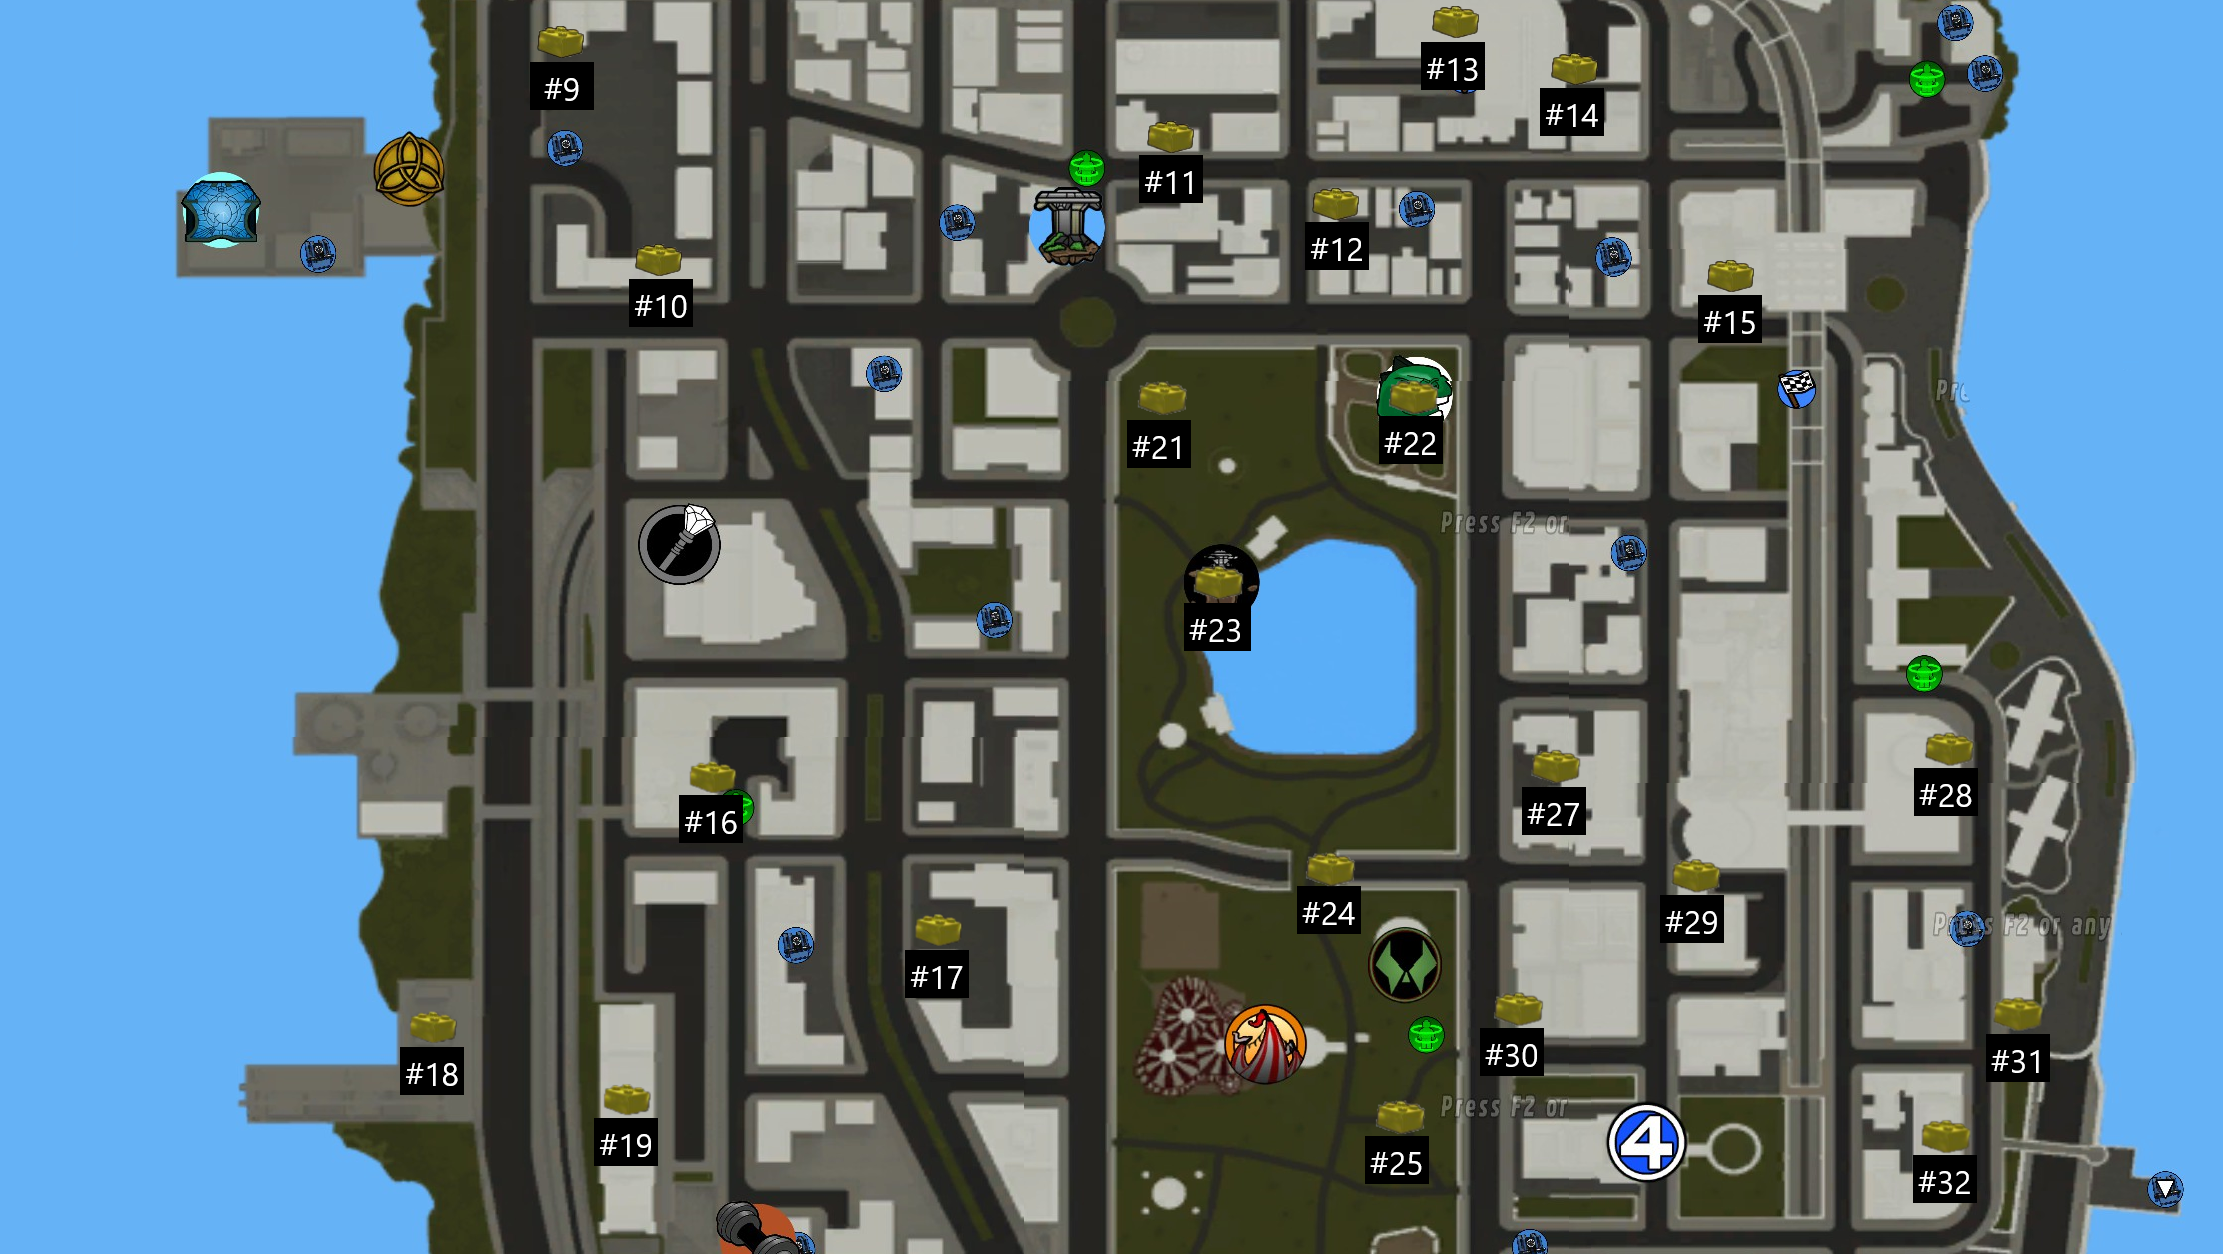
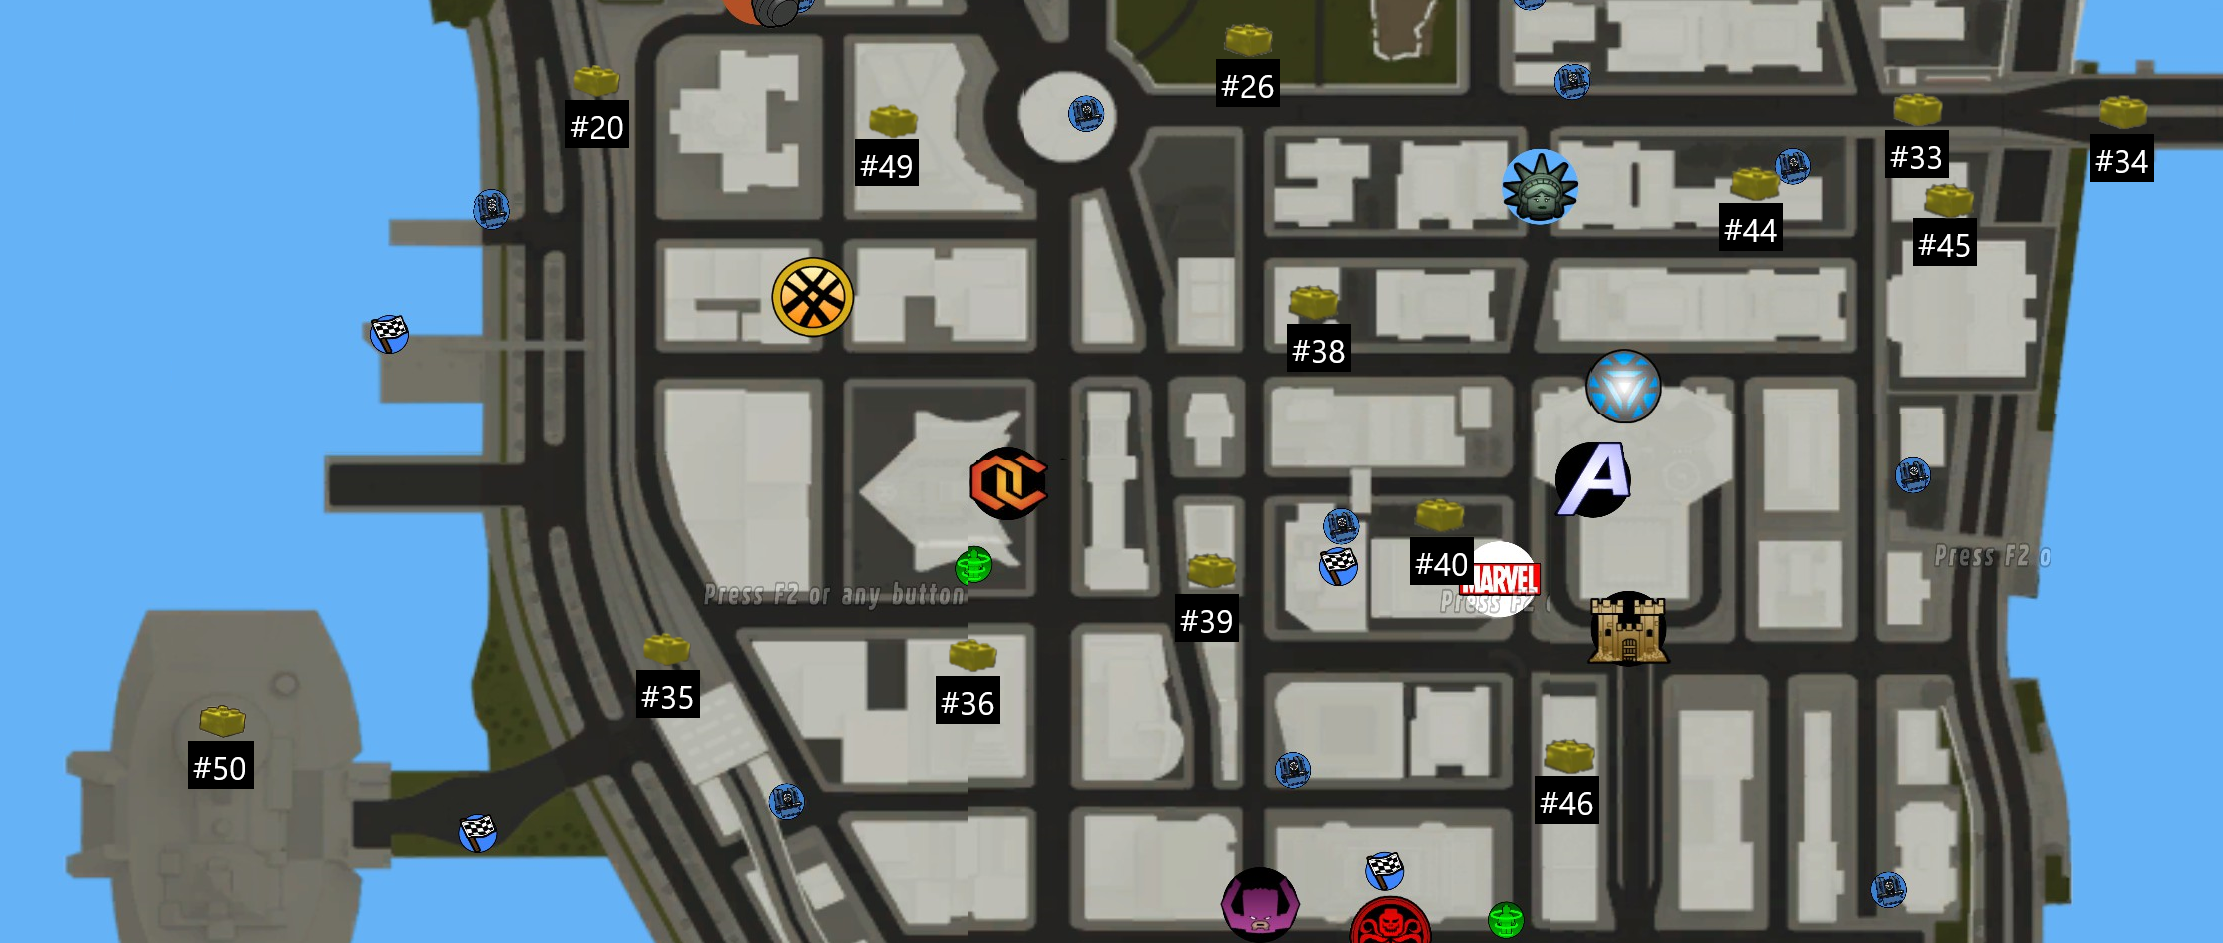
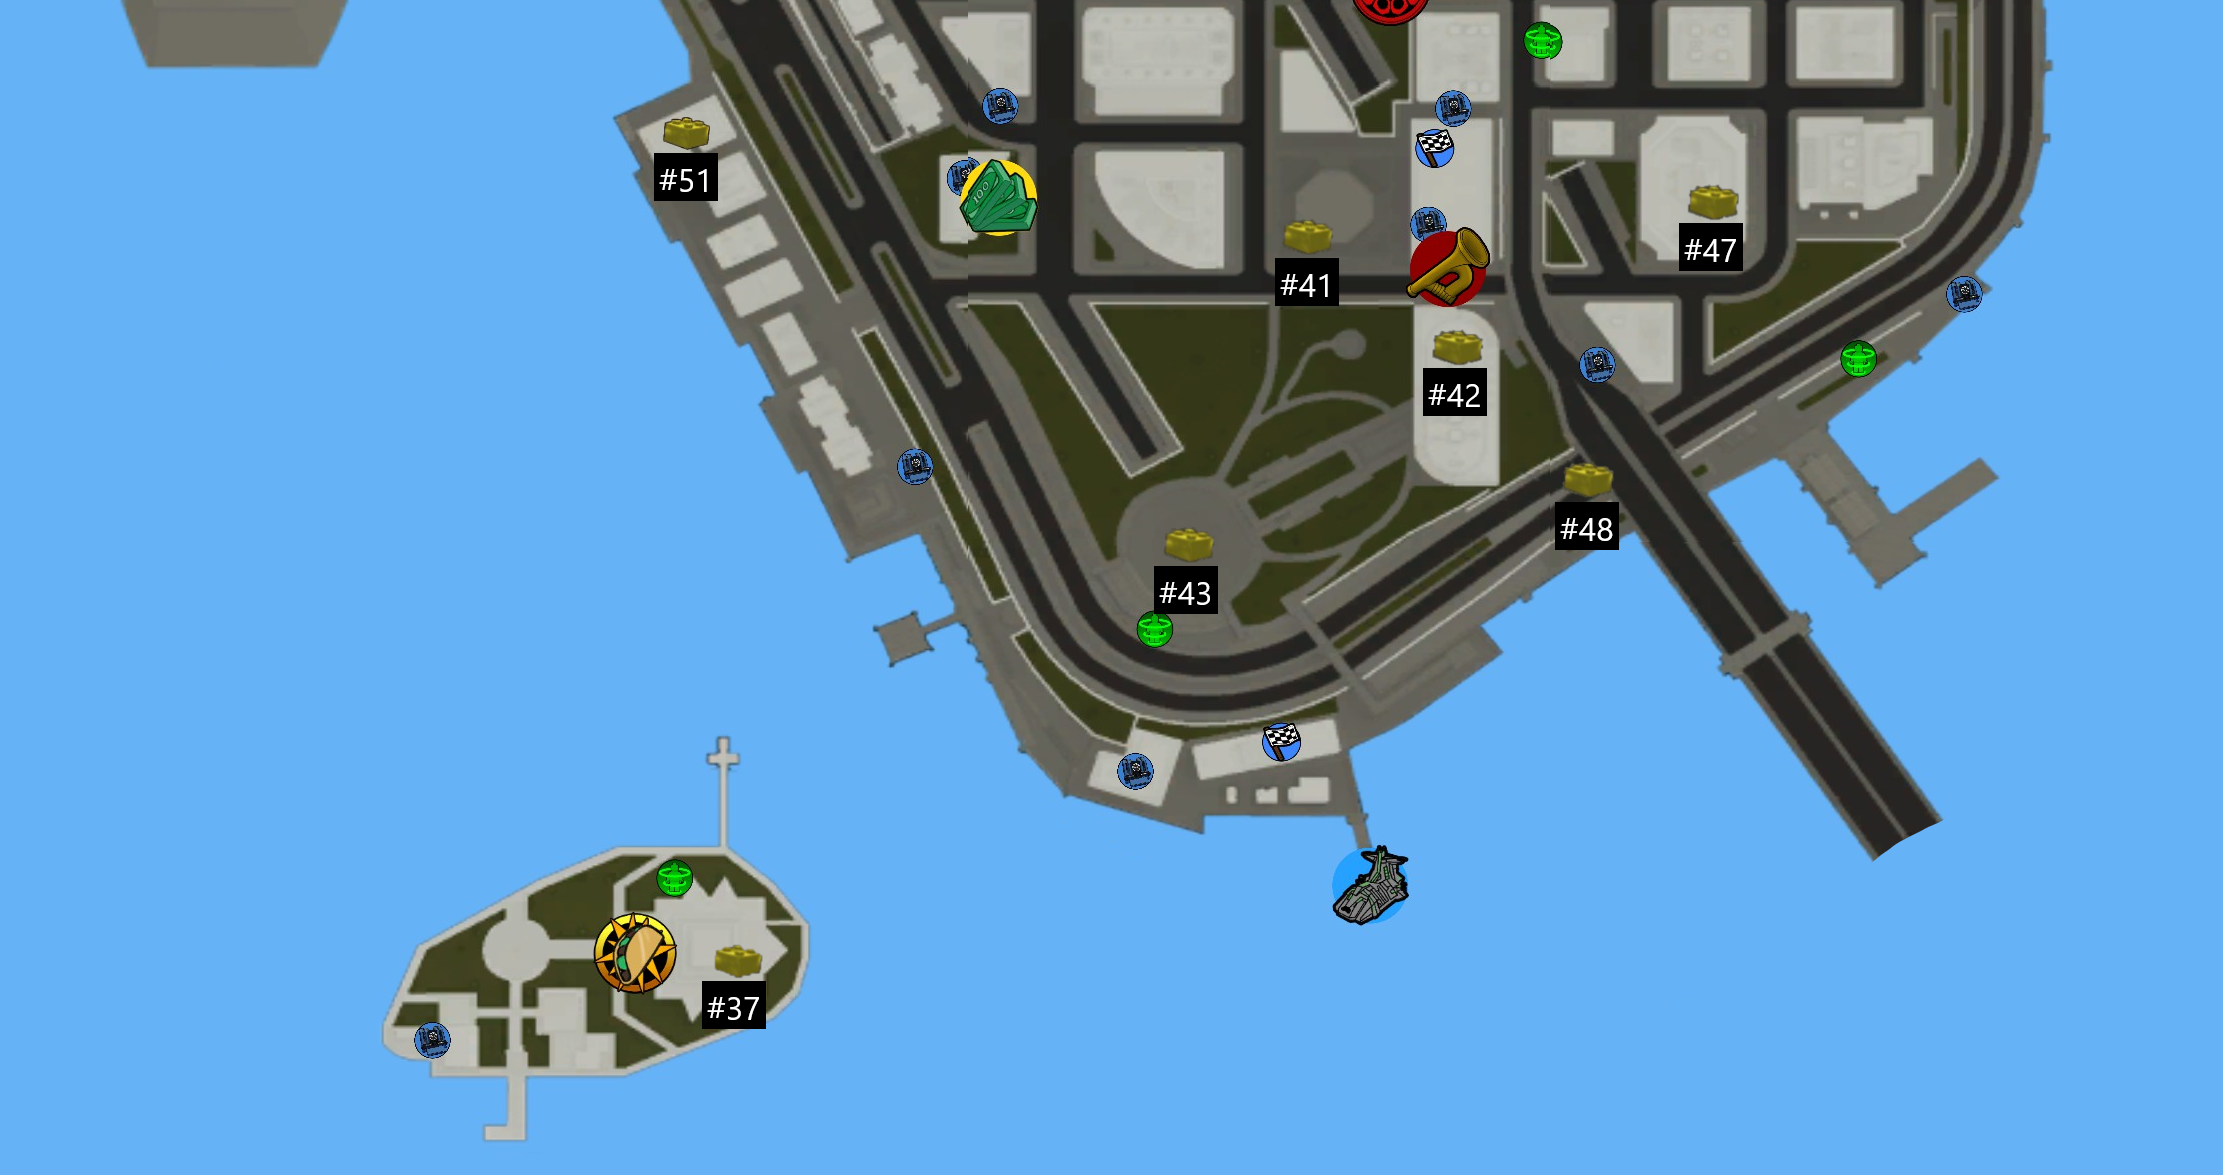
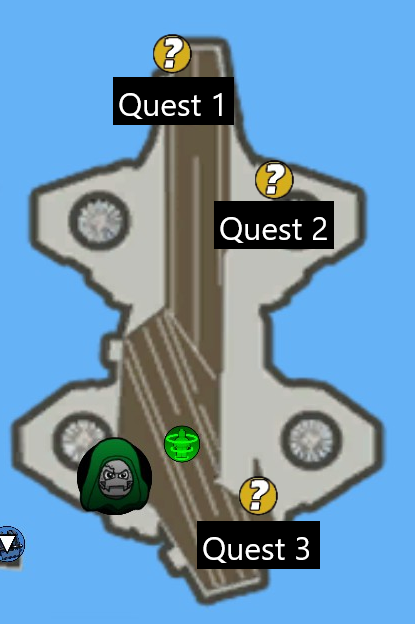
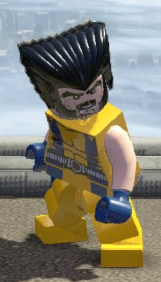
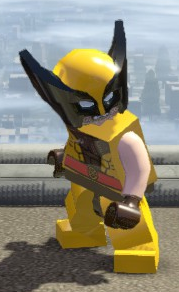
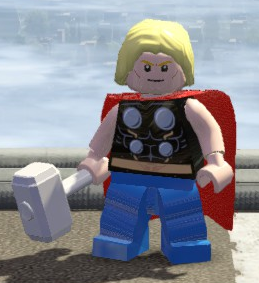
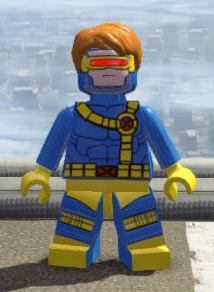
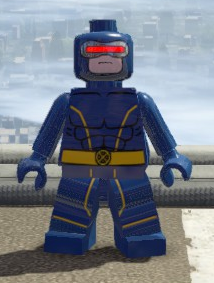
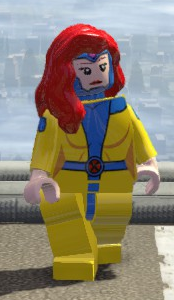
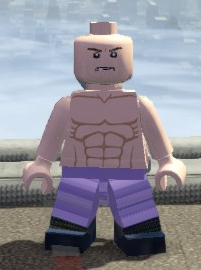
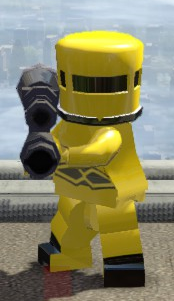
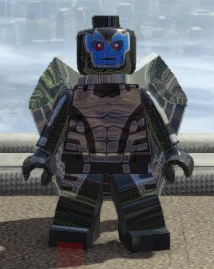
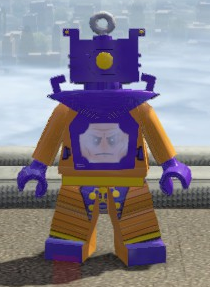
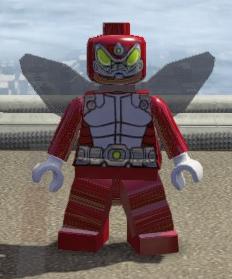
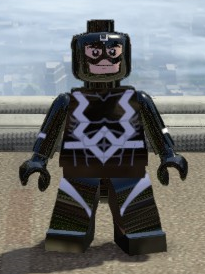
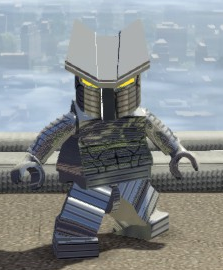
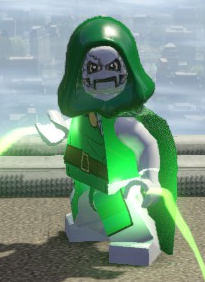
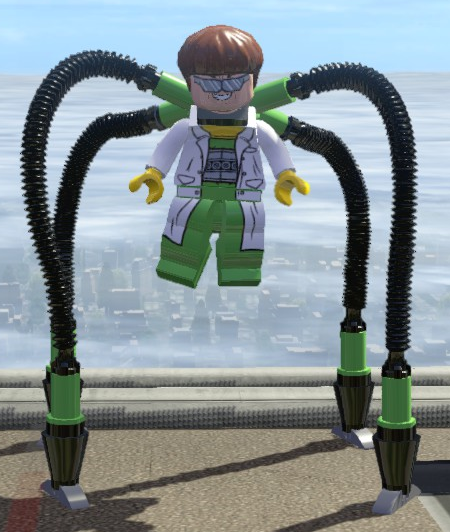
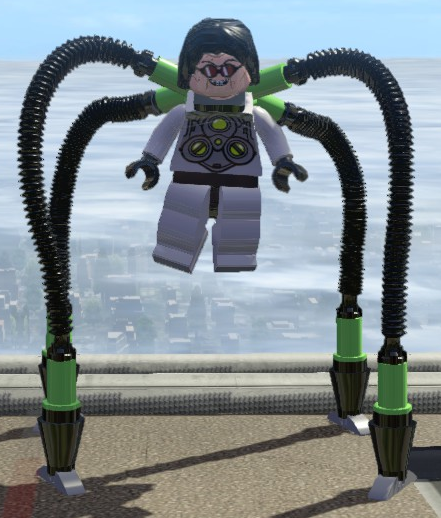
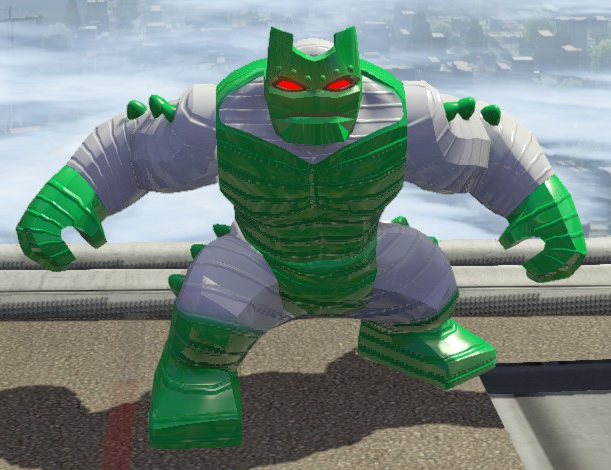
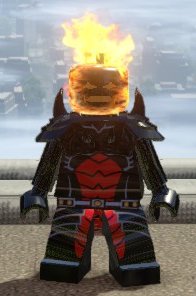
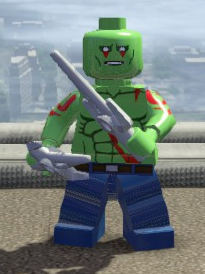
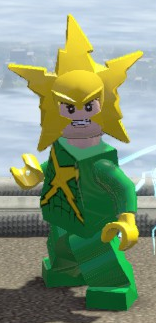
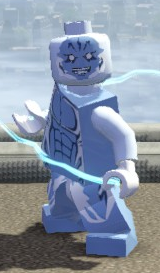
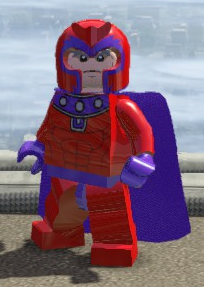
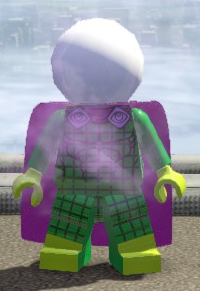
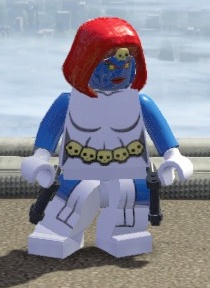
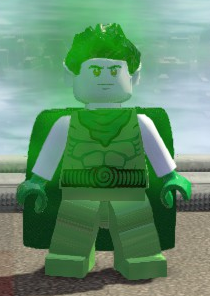
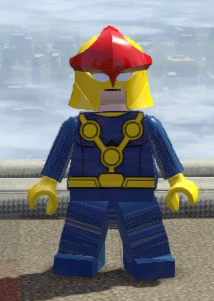
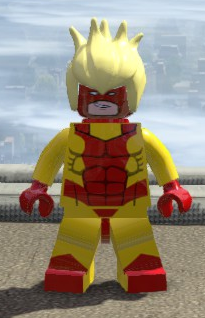
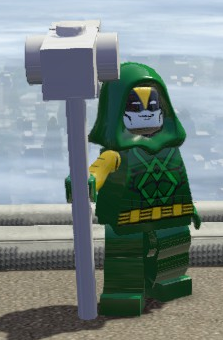
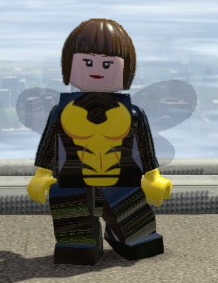
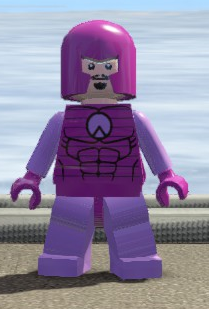
If you want to get a lot of city collectibles as soon as possible, you can immediately get Beetle for Laser, Leader for Mind Control and Telekinesis, and Nova for Electric and Power Cosmic. You can create a custom character in the medbay with Claw and Dig (though you get Wolverine after level 4 Rock Up at the Lock Up anyway). Probably you can't get Freeze before finishing level 8 Juggernauts and Crosses, or Magnet before finishing level 13 Magnetic Personality.
Wilson 7 Jul, 2024 @ 4:11pm 
muito bom
wrtgllqq 20 Mar, 2024 @ 3:14am 
1233
qiboy 16 Aug, 2023 @ 9:08am 
THANK YOU, YOU ARE AN AMAZING HUMAN BEING
Clockworks Cogstone 26 Apr, 2022 @ 12:37am 
"Warning: Do NOT use the Hulkbuster cheat if you want to get 100%. Hulkbuster needs to be earned and bought through a story mission. This cheat code prevents one of the custom figures from being unlocked thus blocking a true 100%. You will be stuck at 99.9%. It's a glitch."
Clockworks Cogstone 26 Apr, 2022 @ 12:37am 
Yes, it is the HulkBuster armor, and the warning is from this video: https://www.youtube.com/watch?v=BuUoG-IgyKY

It's written out in the description.
Clockworks Cogstone 25 Apr, 2022 @ 11:10pm 
I remember reading something from another guide saying that one of the character cheat codes breaks the game. I remember it being the Hulkbuster armor, but I also remember them mentioning The Thing, or another big-fig character that breaks it.