Deep Rock Galactic

Deep Rock Galactic

41 ratings
[UPDATED FOR S3] How To Use Grenades: Practical And Effective Deployment Strategies
By Atrocious
This guide goes through each of the grenades available to each class in Deep Rock Galactic and shows how they can be effectively utilized on Hoxxes. This guide is not satirical.

Note: the throwables introduced in Season 3 are covered in this guide, but their images are abnormally large at the moment. This will be corrected soon.
3
   
Award
Favorite
Favorited
Unfavorite
Grenade Basics
Grenades- also referred to as "Throwables"- are one of the different types of tools available for a Dwarf to use when fightng through the unending hospitality of Hoxxes' wildlife. Grenades can be thrown using the [G] key on keyboard.

Each Dwarf class has three different unlockable types of grenades at their disposal, but can only bring one type down to Hoxxes at a time. Grenades can be set per loadout, allowing them to compliment any playstyle in a myriad of different ways, depending on the type of grenade equipped. Each class generally has 4 grenades at their disposal (except for certain grenade types) and can collect more from a Resupply Pod if their supply is depleted. Knowing the effective deployment strategies for each grenade is key to using them to maximum effect against bugs and, most importantly, to absolute minimum effect against your fellow Dwarves.
Driller's Grenades
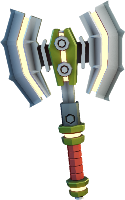
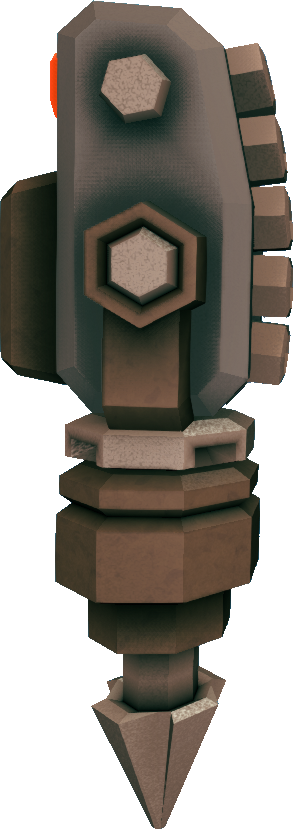
The Impact Axe is the first "grenade" that the Driller can use. When thrown, it extends into its full size and deals immense direct damage to a single target on direct impact. Additionally, it also releases an electric pulse on impact, which damages nearby enemies as well to a lesser extent. If the Impact Axe misses its target and gets lodged in the terrain, the Driller can simply interact with it to pick it back up, adding it back into their inventory for reuse. The Impact Axe is especially useful for the Driller, whose other weapons typically fall very short in terms of single-target suppression. When used against Glyphid Praetorians, for example, you can disrupt its Acid Spray attack with a single hit from the Impact Axe due to the Stun factor included in the direct damage dealt. You can deal even more damage to it by tossing an Axe at its glowing thorax on its rear flank, exploiting its weakpoint damage bonus for even higher damage dealt.

This strategy applies to any creature's weakspots, but be wary of creatures with unbreakable armor, such as the Glyphid Oppressor, whose armor can shrug off the Impact Axe with ease. Also, you will want to learn how to properly lead smaller, faster, and/or farther targets when using the Impact Axe against them for maximum accuracy. The Impact Axe is also not recommended to use against Macteras, as they can easily strafe out of the way of the axe while in the air.

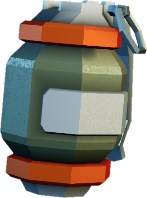
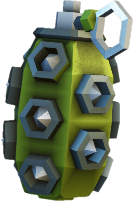
The High Explosive Grenade is the second grenade available for the Driller to use once unlocked. This is a more generic grenade and the only one of its kind in the game. It explodes a few seconds after being thrown, dealing moderate damage to anything caught in its blast radius. It can also be used for destroying terrain if needed, similarly to the Driller's Satchel Charges. Players may find this type of grenade somewhat underwhelming, especially compared to the other grenades available in the game, but its unspecialized function means that it can fit into almost any situation when no other grenades fit the bill in a given loadout.

As of Season 3, the Driller's HE grenade can be cooked by holding it without throwing. With some careful coordination, this can allow the Driller a degree of finer control over the grenade's fuse, making it easier to hit targets at closer ranges. Just don't overcook your HEs like that; company health insurance mentions 'negligent usage of high explosive armaments' for a good reason.


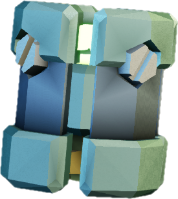
The Neurotoxin Grenade is an intriguing grenade available to the Driller once unlocked. Before this grenade is discussed, it may be worth mentioning another tactic the Driller can use. When a Glyphid Praetorian or Oppressor dies, it emits a cloud of toxic green gas that can harm Dwarves within it over time. The Driller can use this to their advantage by shooting the gas cloud with their flamethrower; this ignites the gas and creates a moderate fiery explosion, dealing damage to both bugs and Dwarves in the area, before clearing the gas cloud entirely. The Neurotoxin Grenade works based on a very similar principle, except the gas covers a much larger area and is an engineered neurotoxin compound, which can deal heavy damage over time to bugs, but doesn't harm Dwarves at all. The neurotoxin cloud can also be ignited if necessary, dealing damage to any bugs or Dwarves near it, similarly to the green gas clouds mentioned earlier.

The Neurotoxin Grenade is a very effective area-denial and crowd-control tool and excels in defensive postures. For example, in Salvage Operation missions, the Driller can toss a Neurotoxin Grenade at the base of the Uplink or Fuel Cell Dispenser to create a massive hazard to any incoming bugs. Alternatively, in Escort Duty missions, the Driller can toss one of these grenades out behind the Drilldozer while it's moving to suppress incoming bugs for a long period of time. In either case, the neurotoxin clouds can still be ignited if the need arises to deal massive damage to enemies within the cloud, but just make sure that no Dwarves are fighting inside it before doing this. Additionally, line of sight will be blocked through the neurotoxin cloud, which might actually be useful if the natives of Hoxxes were more reliant on eyesight for their predation tactics.

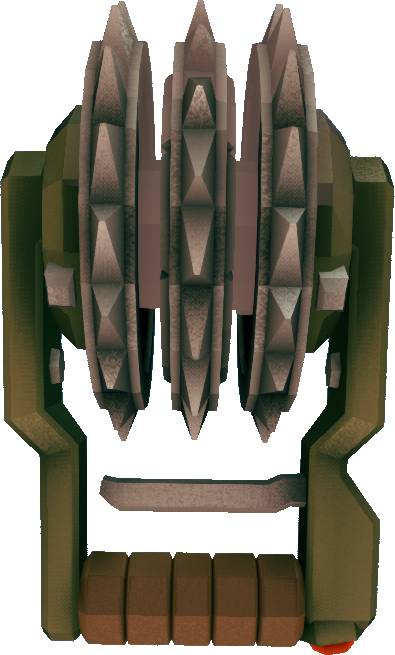
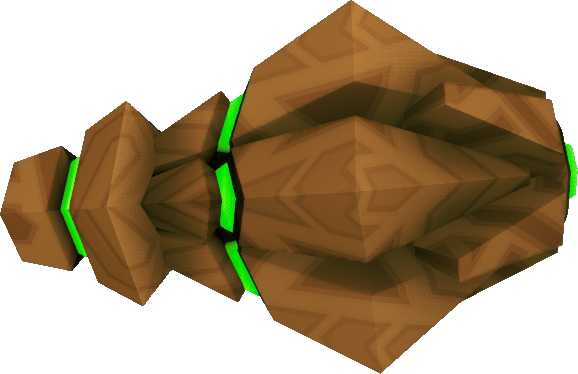
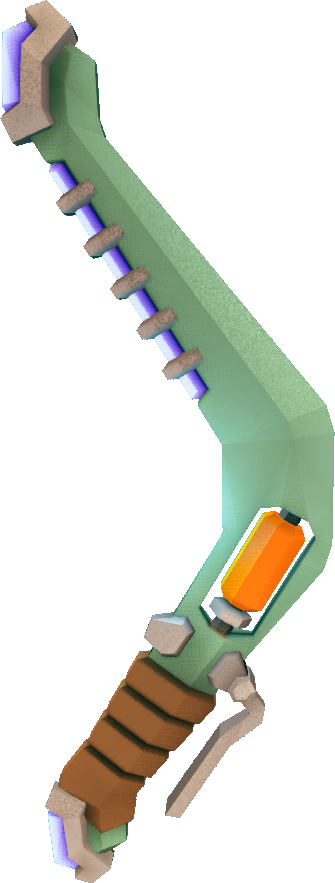
I couldn't get the image any smaller than this!! :CThe Springloaded Ripper is a peculiar throwable that the Driller can unlock as of Season 3. When held to throw, some ruby-eyed Dwarves may notice the bizarre crosshair on the HUD. This outlines the general linear trajectory that the Springloaded Ripper will travel down after being thrown. After being thrown and contacting a surface feature, the Ripper will dig into the terrain and start rolling forward, dicing up any creatures in the Ripper's path. It is worth noting that because the Springloaded Ripper digs into the terrain a bit on deployment, it can stick to surfaces as it moves, even allowing it to shred straight up sheer walls. An active Springloaded Ripper may be the last thing that any creature smaller than a Praetorian ever sees. The Ripper will roll for about 8 seconds before ripping itself apart from its own sheer torque.

Like the Engineer's Plasma Burster (discussed later in the article), the Springloaded Ripper is much less of a 'grenade' in the conventional sense and more of an unorthodox tactic, requiring selective usage for high effectiveness in the field of battle. While tossing it into a line of enemies is all well and good, the Springloaded Ripper shines in tight spaces and uneven terrain. Let's say you, a thick-bearded Driller, are busy excavating a tunnel back to the Drop Pod, and you have a group of bugs that have decided to follow in suit. They think they have you cornered, but then you pull out your new toy... Toss the Springloaded Ripper into the wall at an angle, and it will roar down your tunnel, saturating the walls with Glyphid gut juices as it rushes clumsily out. One other consideration to make when using this grenade is to not toss it into wide-open spaces unless necessary. If deployed incorrectly, your Ripper may just rush up a pillar and hug the cave ceiling until it breaks apart, not having Ripped through a single Glyphid along its merry way. In short, the Springloaded Ripper is a very situational grenade that can pose a significant threat to creepy crawlies when deployed correctly; experimentation will be key to its proper usage.

NOTE: The Driller's Satchel Charges are not counted as Grenades (they are the Driller's Support tool), despite being deployed in a similar fashion. As such, they will not be discussed in this article.
Engineer's Grenades
The L.U.R.E. (Laser Utility Refractive Emitter) is a crowd-control-oriented grenade, and the first grenade the Engineer can use. After being tossed, the L.U.R.E. waits until it comes to a standstill on the ground before displaying an obnoxious hologram of a Dwarf dancing. It's so annoying to look at that most bugs in the area will divert away from actual Dwarves and attack the hologram instead. It has its own "health" integrity, represented by the color of the hologram; once depleted, the L.U.R.E. emits a large electric pulse, electrocuting all nearby bugs upon its destruction.

This grenade is a very useful support tool for dealing with large swarms, as it can cluster up large groups of bugs into a single area for an extended time period. This can be used to make a quick getaway from a Swarm of bugs when you're alone in an area, but it can also open up opportunities for Dwarves with explosive weapons to destroy a lot of bugs at once, such as the Engineer's grenade launcher, the Gunner's autocannon, or even other grenades!

The Plasma Burster is a much more specialized grenade available to the Engineer once unlocked. Once the grenade hits a target or the ground, it releases four bursts of searing plasma in quick succession, all propagating directly from the grenade itself. The Plasma Burster is used a lot like the Impact Axe, being designed for semi-focused damage against a small amount of targets. It is recommended to toss this grenade at either a single target (ideally one up against a wall) or the front of a line of targets, such as a group of Glyphid Grunts on approach. The Plasma Burster has a slight learning curve to it, but can be very useful when deployed properly. Practice is key!


The Proximity Mine is the Engineer's third unlockable grenade, and arguably the most commonly misused grenade of them all. Proximity Mines stick to the terrain they land on, arm after a few seconds, and detonate up to four times once a bug wanders into its proximity, denoted by a yellow pulse propagating from the Mine itself. Additionally, if a Mine is misplaced, it can be safely disarmed by interacting with it, which returns the Mine to your inventory, similarly to the Impact Axes. Proximity Mines also last for a long time if they still have charges left, so they can work well for long-term defensive strategies.

The trick to using Proximity Mines effectively is to be conscientious in regards to their placement. The Mines can damage Dwarves if they're near one when it detonates, so it is crucial to place your Mines a fair distance away from where your teammates will be, especially when playing defensive missions like Escort Duty and Salvage Operation. It's also very impractical to place multiple Mines in close proximity to each other, as this often wastes the charges on your Mines by forcing them to detonate after a detected target is killed. Your best bet is to place Proximity Mines within narrow chokepoints, such as narrow tunnels, that bugs will be forced to move through to reach you and/or your teammates. Additionally, if you see a group of bugs coming at you from afar, with practice you can anticipate their path and place a mine down where they will be coming at you from, softening up their numbers and/or strength while they make their approach. No matter how you use the Proximity Mines, though, you need to be very careful to place them so that they have a minimal risk of harming your fellow Dwarves.

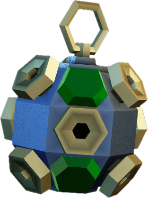
The Shredder Swarm Grenade is a peculiar throwable that the Engineer has access to. When thrown, the throwable releases a group of 5 reverse-engineered rival Shredder drones, which immediately begin ripping through bugs and other hostiles in the area of impact. Each drone deals enough damage to quickly tear through Grunts and other smaller creatures in the area, and can quickly whittle away at a Praetorian's health pool to assist with the delivery of a quick coup de grâce. The drones have a lifetime of around 40 seconds before dropping to the ground like, erm... flies...? Feels wrong to say that, having seen what Macteras are capable of.

The SSG is an excellent general-purpose combat support tool to use. The drones themselves are very efficient and very safe to use near teammates*, allowing the Engineer to make use of them in most any combat situations. Bear in mind that unlike with conventional grenades, the drones deployed from the SSG are somewhat weak on their own, especially where anything larger than a Praetorian is concerned. The SSG is best paired with other weapons and tactics for highest tactical effectiveness.

*Abounding rumors of drones occasionally going rogue or processing rival signals are as of yet completely baseless. R&D bears no responsibility for incidents of equipment malfunction linked to external interference.
Gunner's Grenades
The Sticky Grenade is the first grenade available for the Gunner to use. It functions very similarly to the Driller's HE Grenade, except the Gunner's grenade sticks to whatever it hits, be it terrain or bug, before exploding. This makes it very useful for more precise grenade throws and eliminating clumped-up groups of enemies. This makes it pair very well with the Engineer's L.U.R.E. for neutralizing tight clumps of targets all at once. Any targets smaller than a Praetorian that get caught in the blast radius but are not killed will be sent running away in terror, allowing for an area to be cleared, for example, if someone needs to be revived.


The Incendiary Grenade is the second grenade that the Gunner can unlock. Upon impacting the terrain, it coats a large area in sticky flames, similarly to the flames produced by the Driller's Flamethrower, which can damage any enemies that walk over them. This weapon works very well for softening up approaching bugs; toss it at or in front of a clump of enemies and let the harsh flames work their magic. Where the Incendiary Grenade really shines, though, is in its sheer capability against Swarmers. Any Swarmers charging through the grenade's sticky flames will die almost instantly, allowing Dwarves to focus on larger enemies instead. By extension, this makes the Incendiary Grenade an excellent tool for dealing with Swarmer Tunnels in caves as well; break off a chunk of the Tunnel with your pickaxe and toss a grenade at the Tunnel to easily kill off those Swarmers before they can get far.

The Cluster Grenade is a very indiscriminate grenade designed with crowd control in mind and with absolutely zero regard to collateral damage. The Cluster Grenade splits into nine submunitions shortly after being tossed, which disperse randomly around a wide cone towards the ground and detonate upon impact. The unfocused damage of the grenade works exceptionally well for crowd control, especially against very large hoards of incoming Grunts or the like. The Cluster Grenade is also very well-known for its uncanny teamkilling capabilities, so be very careful not to toss it anywhere near your fellow Dwarves.

The Tactical Leadburster is a lethal throwable available to the Gunner. When thrown, it attaches to the surface it makes contact with and immediately unloads three indiscriminate volleys of rapid bullet fire in a wide hemisphere around its point of activation. Fitting the Gunner's motif of widespread indiscriminate carnage, the Tactical Leadburster excels at laying down suppressing fire against incoming Glyphids and other creepers of Hoxxes. This throwable excels at clearing out groups of small- and medium-sized enemies in a wide area while giving anything larger than a Grunt something to think about.
Scout's Grenades
The Inhibitor-Field Generator (IFG) is the first grenade available for the Scout to use. It activates shortly after being thrown, creating a large energy field which slows down any bugs (but not Dwarves) that wander into it. This grenade is most useful in narrow chokepoints, where it can slow down large swaths of enemies to give other Dwarves more time to hit their targets or cover a hasty retreat. The IFG not only slows down any bugs that get caught in its field, but it also increases any damage they take by 30%, which can make it a useful tool for taking out Dreadnoughts by preventing them from turning and keeping their weakpoints exposed for suppressing fire. Additionally, because it doesn't affect Dwarves, it can be easily tossed at one's feet to give players more time to take down incoming enemies before they can get ganged-up on.

The Cryo Grenade is the second unlockable grenade for the Scout. It detonates shortly after it's tossed, flash-freezing all bugs within its area of effect. Frozen enemies take 3x damage from all sources (but weakpoint damage bonuses do not apply to frozen enemies), which makes the Cryo Grenade an excellent fire support tool against incoming hoards of enemies. Additionally, like with the IFG, the Cryo Grenade can also be used to slow down advancing hoards of enemies. Just make sure you aren't tossing the grenades near Dwarves, though, as they could get caught up in the flash-freeze as well.


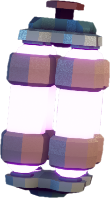
The Pheromone Canister is a curious grenade available for the Scout to unlock. When tossed at a tightly-packed group of enemies, it covers them in the Glyphid Dreadnought's infamous pheremonal bile, which drives them crazy and makes them start attacking each other. Additionally, any enemies not affected by the pheromone bile will openly attack any bugs covered in it and vice-versa. This creates utter chaos among hoards of bugs and opens them up to covering fire while keeping them in a single place, like with the Cryo Grenade and the IFG. It can also be used to clog up a chokepoint for retreating or providing covering fire.


The Voltaic Stun Sweeper is a clever throwable that the Scout has access to. When thrown towards a group of enemies, it will bounce from one enemy to another, stunning them for a short time period along the way. Among smaller groups of enemies, the Sweeper may even automatically return to the Scout after being thrown, allowing it to be used again. Like with the Scout's other throwables, the Voltaic Stun Sweeper is a versatile crowd control weapon that can easily bottleneck groups of incoming hostiles so as to make a quick escape or lay down quick surgical attacks to bring down larger groups of crawlers.

The direct damage that the Voltaic Stun Sweeper deals is pitiful and will not do much against any enemies other than Glyphid Swarmers. The real power of this throwable lies in its strong stunning power; most enemies will be stunned by it for about 8 seconds on impact, leaving them helpless against any incoming assaults. Do bear in mind, though, that the Sweeper will not return back to the Scout that threw it if it hits 9 enemies in a single sweep. That being said, the Voltaic Stun Sweeper is most efficiently deployed against smaller groups of enemies if possible, but it can still be a useful tool in most cases.
Post-Scriptum
All images sourced from the Deep Rock Galactic Wiki.[deeprockgalactic.wiki.gg] More information on the grenades is available there.
11 Comments
Dreamreamer 16 Mar, 2022 @ 2:09pm 
add that grenades can be throw very rapidly if you use animation canceling. use the laserpointer or mine button to cancel. I have grenade toss on mousewheel down and cancelation on mouse up, doing this isnt too useful with most nades, but works like a charm with impact axes, letting me kill opressors before theyre able to defrost
Kirilles 4 Nov, 2021 @ 9:08am 
Sorry for asking it here, but I've been playing scout lately, and i've got to lvl 11, but no grenades have been unlocked. Any ideas why?
Levan Shprota 17 May, 2021 @ 12:36am 
Extremely useful fact: when frozen by cryo grenades (or any source of cold), the weak points do not apply... but NEITHER DOES ARMOR. It's extremely useful against bugs with unbreakable armor, like the notorious Oppressors, who get shattered extremely easy when frozen. Also it disables a lot of bug abilities: for example, exploders and detonators won't explode when shattered, and flying enemies outright crash and insta-die. All in all, an extremely valuable crowd control tool; just remember that your fellow dorfs risk freezing as well if you're not careful.
livinghell 29 Apr, 2021 @ 3:53am 
You seem not to know about cluster grenade "Umbrella" combo.
Fatelys 21 Apr, 2021 @ 2:03am 
For the plasma burster, the 4 charges will launch in the direction you are moving : if you're moving forward while launching it, the 4 burst will move in a line going forward, if you're retreating the bursts will move in a line coming your way. It is a very good grenade but tricky to use. The increased ammo is so nice too.

Also it's pretty obvious but since freeze insta kills macteras, a cryo nade can just erase mactera swarms. Just wait for at least one in the middle to stop.
GIRL 17 Apr, 2021 @ 10:45am 
You should mention that enemies in the IFG field take 30% more damage from ALL sources. So not only can you use it to slow down enemies, but it's also useful to throw at high-priority targets like Oppressors or Dreadnoughts, as it causes them to take significantly more damage.

Also, the Scout's Zhukov Nuks have an upgrade that lets them deal more damage to enemies "In an electric field." This refers to the IFG, making them a great pair. It's also worth noting the "shock" debuff from the IFG is actually DIFFERENT than the shock debuff from other weapons (like the Engineer's Stubby SMG), so both can be stacked.
DaMedicWhoSezNi 15 Apr, 2021 @ 12:00pm 
and the impact axe should also be used after you freeze a target to deal massive damage almost enough to 2 shot pretorians oppressors wardens and menaces and get the 3x damage to any body part even the opperssors shell
DaMedicWhoSezNi 15 Apr, 2021 @ 11:59am 
i find the impact axe a great tool against macteras cause it can 1 shot spawns and trijaws and 2 shot brundles when they stop to spit at u
Jo By' Din 15 Apr, 2021 @ 9:31am 
The gunner's sticky grenade actually also fears the target it's stuck to, and some of the bugs in it's explosion. This can be used in emergencies to say, interrupt a spitting praetorian, making it turn around to run, exposing it's weak spot. Keep in mind things larger than praetorians are fear immune though.
St. Haborym 15 Apr, 2021 @ 6:15am 
Proxies actually self destruct after a set period of time