Iratus: Lord of the Dead

Iratus: Lord of the Dead

59 ratings
Addendum to 'A Necromancer's Handbook'
By Angraug
This addendum is meant to work with the information found in meh other "Iratus: Lord of the Dead" guide, A Necromancer's Handbook.
This addendum will cover specific minion abilities & battle squad combinations that Ah have found to be effective in yer eternal battle against the conniving forces of the Order. MUA-HA-HA-HA-HA-HA!
2
2
   
Award
Favorite
Favorited
Unfavorite
Abomination (Wrath of the Necromancer DLC)
Remember: Ye can always trust an Abomination! Especially if theh are butlers!
Meh best advice is: Build Abominations as tanks. Pile on the Vigor and Block & Ward. If ye have stat points left over, put thehm into Dread damage to boost the Abomination's Feature, Ultimate, and Dread Roar ability mod.

Feature: deals a tiny amount of Stress damage to all enemies at the end of Abomination's turn
This feature is actually fairly useful if ye want to finish off enemies at 0 Sanity, causing a Heart Attack.

Abilities
1. Slice, useful for stripping 3x layers of Block at once. Can be upgraded with a decent chance to stun, considering ye get 3 attacks per ability use
2. Hunger, spec according to how you want to use Abomination - for Physical or Stress damage. Useful for repositioning Abomination to absorb attacks from melee enemies. Make sure to synergize this ability with the right Intimidating Roar ability mod
3. Intimidating Roar, Ah prefer to mod this with Dread Roar, to cause Stress damage & strip Wards, but if ye're fighting enemies with high Attack, ye can also mod it the other way. Make sure to synergize this ability with the right Hunger ability mod
4. Battle Thumping, take yer pick of mods, based on yer other minions in the Battle Squad. Funeral March is better against enemies with high Initiative and Evasion (Ah have never seen this ability miss), while War March is better if yer Battle Squad is more damage- or defense-focused
5. Shield, protect yer weaker minions! Ah always go with the Deflect mod, 'cause the damage isn't worth it even with the Protect mod, in meh opinion. May as well have a 5% chance to instantly kill an enemy (ability must cause damage, does not instant-kill against Block)
6. Break & Swallow, Ultimate, use this on low-Sanity enemies to keep the healing going on yer Abomination, and to eliminate enemies that might be dangerous on thehr next turn. Mostly ineffective against enemies that have high Evasion, because the Abomination tends to have pretty low Accuracy.
This Ultimate can miss!

Items
Pound of Flesh (unique), for constant healing from turn 1 of combat!
Lantern of Souls, for a sizable burst heal when Abomination uses its Break & Swallow Ultimate (or whenever an enemy dies)
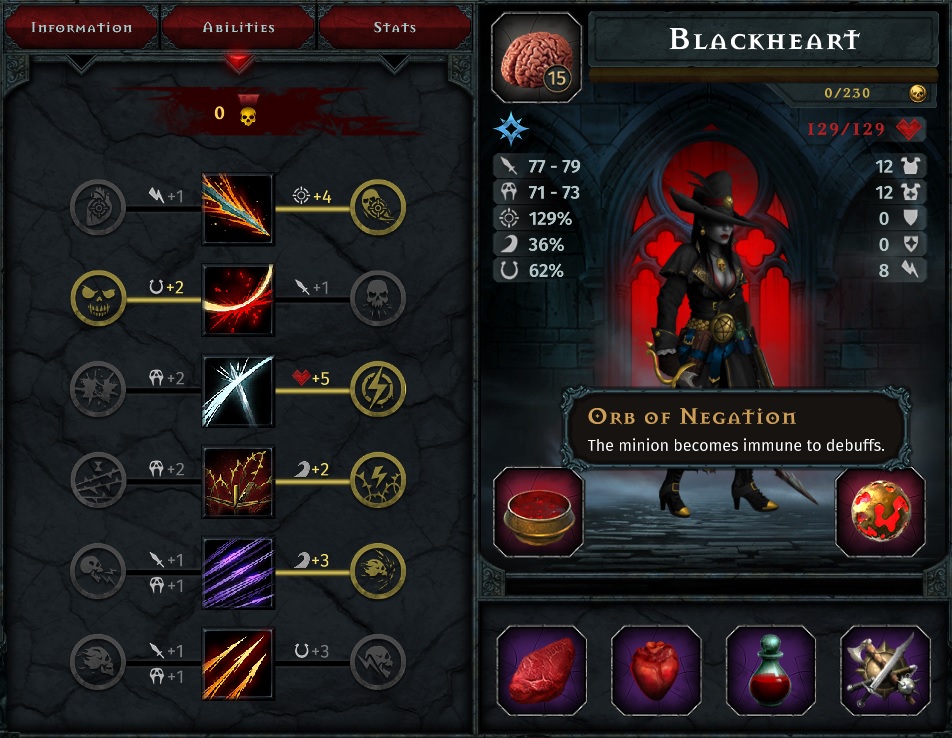
Orb of Negation, to ignore any debuffs (including Ignition) that might come along with all the other attacks that Abomination will suffer

Minion Synergies
Abominations work with other minions who need the Abomination's Shield ability - these might include Ghoul, Head Hunter, Lich, or other high-damage but low-survivability minions.
Abominations also go excellently with minions that deal high Stress damage, including Banshee, Shade, and Wraith. As soon as enough Stress damage is caused to an enemy, Abomination can remove the enemy from the battlefield with the Break & Swallow Ultimate.
Banshee
Banshee is useful for 2 things: dealing AoE Stress damage (the pink damage), and synergizing with certain other minions, primarily those who also deal Stress damage like Wraith and Shade. If ye're building such a team, ye'll probably want to put Banshee in the rear-most spot (spot #4, just so that Shade has somewhere to move back to). Sheh can use all hehr normal abilities from that spot, but not hehr Ultimate.

Feature: increase enemies' chance to Flee by 2% each combat turn, until reaching 10% per enemy
Ah am fairly certain this ability stacks with other Banshees, but Ah'd have to check.

1. Scream, single target attack that moves target to a random position in the enemy lineup. Ah THINK that if the enemy randomly moves to the same spot it already occupies, it does not interrupt stances or other abilities. (For example, if yeh target an enemy in spot 3, and it randomly moves to spot 3, basically nothing happens aside from the STRESS damage.) Ye'll have to decide for yerself which upgrade to get, since theh both have utility depending on the enemy yeh target.
2. Noo!, stance, whenever an enemy moves, Banshee deals stress damage to thehm. Really only useful if yeh have other minions which regularly move enemies, such as a Wraith using the Terrorwave Ultimate. Ah personally prefer the Nooo!!! ability mod (the one on the left), to improve Banshees survivability.
3. Absorb Fear, only really useful if yeh find yerself running low on Mana or Wrath all the time. Sometimes dangerous to use against enemies with high Sanity, because ye'll have to wear down thehr Sanity all over again. There are better and safer ways to generate tons of Mana and Wrath (such as a Shade Pain Reflection + Void Flame minion item combo).
4. Wail, a nice debuff for a Stress-damage team, and the Deafening Wail mod is good for Stress and Physical damage. The major drawback is that this can only be applied once - it doesn't stack. Could be very useful for low-level teams that really need that damage buff, but later in the game, individual minion buffs do lots better. (For example, Bride's Think of Him ability stacks with itself, so ye'll have to decide: Do ye need the entire team to deal damage, or really just 1-2 minions?)
5. Soprano, now THIS is Banshees blood-and-butter ability. For any Stress-damage team, ye'll probably just end up spamming this to cause as much Stress damage as possible. Keep in mind that if this or any minion ability crits, it causes additional Stress damage! Ah generally go for the Accelerando ability mod, because subtracting an additional -2 Attack with Crescendo ain't worth the mod, in meh book. Later on ye'll thank yerself for applying the -Evasion debuff to some enemies thanks to Accelerando. Like Wail, though, the major drawback is that these debuffs don't stack.
6. Howl, Ultimate, for some mad, mad reason, this Ultimate can only be used in spots 1 or 2, probably because it is so powerful, so ye'll need a way to bring Banshee up a spot or two when ye're ready to use hehr Ultimate. With good Wrath generation, ye could use this Ultimate every turn or every other turn! Ah prefer the security of Howl & the Shattering Howl ability mod, to make both front-line enemies lose thehr turns. Ye take a mighty risk if ye use the Morbid Howl ability mod. Ye have only a .4% chance (that's POINT four percent, folks) of afflicting all 4 enemies with turn loss (.25*.25*.25*.25 = .00391). Meh math might be off. But still, low return for spending an ability mod, mehthinks. At least the Morbid Howl ability mod ALSO interrupts stances, which is probably why yeh wanted the enemy to skip thehr turn anyway, right?

Best Position: 3rd space, or 4th if paired with Shade, [x][O][x][x]
Banshee can use all hehr abilities except hehr Ultimate from this spot. From spot 3, sheh only needs to move forward 1 spot in order to use that Ultimate. Ye can do this by shuffling other minions or using the "move forward" spell.
If ye pair Banshee with Shade, put hehr in spot 4, so that Shade can enter Pain Reflection stance from turn 1.

Items
Glass Slipper, Ah honestly forget what this does, but Ah don't remember using it much. Oh, right! The Necromancer's Handbook (the guide that this addendum is based off of, that yeh should totally go check out, hint-hint, nudge-nudge) says that Banshee restores 20% Vigor each time an attack missed hehr. Ah feel like this item defeats itself. If ye're speccing Banshee for Evasion tanking, sheh shouldn't need the healing, and if sheh needs the healing, obviously hehr Evasion ain't working well.
Ashes of a Burned Witch, in case ye want to deal health and sanity damage, maybe by pairing Banshee with a Black Widow, or to set enemies up for Reaper's Ultimate.
Crow's Paw, to keep the Stress / Sanity damage going. Use with Soprano and prejudice!
Black Widow
The Black Widow is one of the best all around-minions. Ah wouldn't say sheh has any bad abilities, just abilities that ye use less often.
Just in case it wasn't obvious from hehr name, appearance, and titles of all hehr abilities, Black Widow is the spidery-looking minion.

Feature: when using an ability on an enemy, apply a stack of Spider Venom. Each stack of Spider Venom removes a percentage of the target's Vigor and Sanity at the beginning of each of the target's turns. Spider Venom stacks up to 5 times

Stats
Perhaps one of the greatest advantages of Black Widow is that sheh really doesn't need much in the way of stats to be greatly effective. Ye can use hehr from the beginning of the game onwards with no loss of effectiveness.
The only stat Ah'd really recommend focusing on for Black Widow is Vigor, to help hehr regen when using Spider Cocoon. Secondarily, Initiative and Accuracy help hehr lay down the Spider Venom, and Armor & Resistance help hehr soak up a little damage when sheh's on the front line.

1. Spider Pack, useful for spreading Spider Venom around before ye get enough Wrath for the Spider Web Ultimate. Doubly useful if there's only two enemies!
2. Poison Spit, though Spider Venom deals % damage, it might not hurt to strip Armor & Resistance from enemies to set thehm up for attacks from yer other minions. Up through Good Always Wins (hard) difficulty, Poison Spit can strip ALL Armor & Resistance in a single application, depending on the enemy.
3. Silken Pull, a high-utility ability that pulls enemies out of position, can disrupt stances, applies Spider Venom, and can be upgraded to strip all Blocks & Wards or apply a huge -Damage debuff. Ah would recommend upgrading this ability or Spider Cocoon first.
4. Spider Strike, useful if ye've got nothing else to use. The debuff is nice (for ye).
5. Spider Cocoon stance, the heal triggers at the end of every creature's turn, minion or enemy, and it triggers no matter what the minion or enemy does. High-damage abilities can still end up killing Black Widow, but if ye can find a way to remove Black Widow from danger until the start of hehr next turn, sheh can heal tons of damage before hehr next turn (up to 32% of max Vigor with the base ability, and up to 48% with the right ability mod). Useful to "turtle-heal" Black Widow after sheh's stacked Spider Venom on all yer enemies.
If one of yer own minions counter-attacks (such as during Shade's Pain Reflection stance), Black Widow heals at the end of thehr counter-attack, as if theh had taken another turn.
This is a stance, and is interrupted by stuns & being moved by the enemy. While in this stance, Black Widow redirects attacks from the minion directly behind hehr, to hehr.
6. Spider Web, one of the best Ultimates ye can get, and pretty dang cheap, too, especially after some Talent upgrades. Good against all enemy types, including very strong enemies like bosses, since the debuff removes a percentage of Vigor & Sanity, not a flat value. Ye can use the Spider Web ultimate as a "fire and forget" ability - stack Spider Web on yer enemies, then turtle-heal the Black Widow with Spider Cocoon for the rest of the battle.
The only disadvantage Ah see with Spider Web is that if it hits, it immobilizes enemies, which makes it so theh can't be moved to interrupt stances. However, this immobilization is perfect against enemies like Demolition Expert and Heavy Firethrower.

Best Position: 1st or 2nd space = [o][o][X][X]
If ye use Black Widow's Ultimate at all (and ye should, because it's awesome and cheap), sheh'll move up to the first space regardless, so ye may as well start hehr off there. Sheh has no Block or Ward, though, so ye'll need some way to protect hehr during the first rounds of combat.
Sheh can use all of hehr abilities from either of these spaces, including Spider Cocoon, which is how ye keep hehr alive after sheh's stacked on the Spider Venom.

Items
Venom Spikes (unique), apply twice the Spider Venom with any ability! Between this item and the Poisoned Web Ultimate mod, ye can apply 4 stacks of Spider Venom in one ability use!
Acid Gland, strip Armor & Resistance from enemies to set thehm up for attacks by yer other minions
Ashes of a Burned Witch, deal extra true damage on enemies affected by Spider Web or other abilities
Burning Blood, to generate Wrath with "damage" done by Spider Venom
Essence of Mind, this SHOULD return mana when Spider Venom triggers on an enemy, but sometimes it doesn't seem to work
Vampire Fangs, for even more healing when dealing "damage" with Spider Venom
The Ancient Vampire Blood potion heals Black Widow on triggers of Spider Venom.

Minion Synergies
Black Widow pairs well with tanking minions such as Abomination or Bone Golem - minions that can survive while the Spider Venom debuff does its work. Bone Golem is slightly better, since it can stack Block & Ward on Black Widow while sheh heals.
Black Widow & Reaper go together like small German children and gingerbread. Put 'em in the same group, and as long as ye have sustained Wrath, ye can farm kills with Reaper's Ultimate, Scythe of Death, thanks to stacks of Black Widow's Spider Venom. Remember that Scythe of Death is affected by low Vigor AND low Sanity!
Ye can use a similar strategy with Black Widow & Ghoul, & Abomination, & Head Hunter. Use these minions' Ultimates when an enemy gets low enough on Vigor and/or Sanity. If ye can afford the Wrath, ye can spam Profitable Bounty with Head Hunter for extra extra parts!

Favored Enemies
Ah would seriously recommend Black Widow against just about any boss encounter - but especially Mek Brothers in the Dwarven Tunnels and the Risen Heroes in the Cemetery. Sheh might be OK against the Pyromancer in the Catacombs IF ye can keep hehr alive. Hehr Spider Venom feature wears down even the strongest of enemies over time, and this might be enough for ye to one-shot the Fire Elementals with another minion in the Pyromancer encounter, minions such as Head Hunter, Ghoul, or Lich.
Blood Phantasm
In spite of its tanky and protective abilities, Blood Phantasm highly benefits from high Attack and Luck. Ah find Blood Phantasms a little useless, just because ye WANT thehm to take damage, and enemies constantly out-damage Blood Phantasm's only healing ability.
Blood Phantasm is one of those minions who is really only useful at higher levels, when ye can specialize thehm with the right stats & ability mods.

Feature: When killed, heals allied minions for 200% of Blood Phantasm's Vigor

1. Impale,
2. Phantasmal Assault,
3. Transfusion, in addition to any targeted damage done by enemies, Transfusion triggers by any damage done by allied minions (for example, friendly-fire damage done by Lich, Ghoul, or Lost Soul). If ye regularly use Transfusion, ye will need some way to heal Blood Phantasm - Transfusion doesn't trigger on attack, only on damage, so Blocks & Wards will prevent the heal from activating. Transfusion triggers whenever the Blood Phantasm actually receives damage, so missed, Blocked, or Warded attacks do not count. However, even if the attack hits for 0 damage (if Blood Phantasm has high Armor & Resistance), it still counts for Transfusion.
4. Mark of Retribution,
5. Chains of Anger,
6. Hate Eternal, excellent to use when ye get to the point when ye have at least 50 Wrath at battle start. Though it doesn't seem like much damage (only 40% of Blood Phantasm's attack), it adds up, and works until the end of battle (or until the debuff is removed)

Best Position: 3rd or 2nd [o][X][X][o]
The third or second position allows Blood Phantasm to use all but one of it's abilities - it can use Chains of Anger for potentially VERY high damage in the 3rd space, and it can use Phantasmal Assault for Vigor-stealing in the 2nd space. If ye have an item like Vampire Fangs equipped on Blood Phantasm, any high-damage ability like Chains of Anger could keep it functioning.


Items
Vampire Fangs, for extra healing. Keep in mind that Vigor-stealing items like this heal whenever the minion deals damage - including on counterattacks and damage-reflecting abilities like Mark of Retribution

Minion Synergies
Blood Phantasm synergizes decently with Skeleton. Skeleton gives Blood Phantasm stacks of Embrace Mediocrity, to improve Armor & Resistance. Skellie can also shield Blood Phantasm if the latter needs a turn or two to heal.
Any minion that buffs Blood Phantasm's damage pays off. These include minions such as Lich, Ghoul, Banshee with the Deafening Wail ability mod, and Skellie with the Strength of Mediocrity ability mod. Extra damage for Blood Phantasm turns into more healing for yer minions (through Transfusion), more healing for Blood Phantasm (thanks to Phantasmal Assault), and of course more death for yer enemies.
Bone Golem
If ye want to regularly use Bone Golems, Ah would seriously recommend making 2, so ye can swap thehm out when one of thehm gets damaged beyond easy repair. Don't forget to use Distillation under Alchemy to heal if ye've got it.

Feature: when Bone Golem dies, enemies take physical damage equal to 200% of Bone Golem's Attack
As near as Ah can tell, if ye use the Self-Destruct ability, this feature triggers at the same time, dealing extra damage!

1. Destroy,
2. Maim,
3. Nefarious Engine,
4. Bone Armor, use Bone Armor carefully if ye plan to farm Wrath - the Block and/or Ward granted by this ability negates damage done, which negates any Wrath ye'd otherwise get from taking that damage. Ye might have to use potions or Artifacts to make up for lost Wrath. On the other appendage, ye can spam Bone Armor to keep yer squishiest minions up & kicking! Equip an Enchanted Heart minion item, and ye can replenish Vigor lost from this ability, when yer Bone Golem has enough max vigor
5. Self-Destruct,
6. Splintering March, Ultimate,

Items
Stack of Bones, unique, useful to keep yer Bone Golems alive long enough to heal back the damage theh take & Vigor theh spend on thehr abilities
Enchanted Heart, to heal back the damage Bone Golem will take from abilities like Bone Armor

Minion Synergies
Bone Golem goes with any minion that could use its tanking powers - which is most of them. Though Bone Golem's offense is nothing special, if it tanks long enough that ye feel ye're going to lose it anyway, ye can detonate it with the Self-Destruct ability and maybe take out some enemies before theh can do the same to yer minions.
Bride of Iratus
Bride is useful at lower difficulties, Ah'll give hehr that. Sheh can clear out swathes of enemies at low health thanks to hehr Ultimate, and at lower difficulties, hehr low survivability isn't as impactful.

Feature: +25 points of Luck against female enemies
This is a hugely "niche" feature, if ye ask meh. It's still a hugely niche feature even if ye don't ask meh! And considering Bride can get a guaranteed critical hit with hehr Ultimate, it's almost pointless. Ye still get a the hefty Luck bonus with normal abilities, though. The issue is, female enemies aren't all that common, and most of 'ehm can crush Bride. Ah'm thinking enemies like Conjuress and Amazon.
For example, there are only potentially 2 female enemies in the whole first Mines section of the game - the Ataman and The Mistress - and The Mistress is the section Boss! Ye might save up a Bride & stash hehr in the Arena until ye need hehr to confront Bosses like The Mistress at the end of the Mines, Pyromancer at the end of the Catacombs, or the Elf Risen Hero at the end of the Cemetery.

1. Chestpiercer,
2. Flames of Love,
3. Overwatch,
4. Think of Him, Zombie's damage buff is better, because it automatically doubles the base attack (the attack gained from actual Stat Points), whereas Bride gets roughly +50% of hehr base Attack per application. If ye can keep hehr alive to apply this buff for a few rounds, sheh might do enough damage to compensate for hehr lack of power at battle start. The advantage of this ability over Zombie's More Powder ability is that Think of Him lasts until battle end
5. Warning Shot, extremely useful for interrupting stances, but like most stance-interruptions, only works on the first 3 enemy slots
6. Rose for a Lady Ultimate, and even though it's a guaranteed critical hit for up to +225% damage, it ends up doing about as much damage as one of Bride's normal attacks. At least it hits all enemies

Items
Orb of Negation, to prevent debuffs that remove buffs from Bride (buffs such as Think of Him)
Second Brain, at lower levels and in the early part of the campaign, until ye get something better
Serpent Skull, same as Second Brain
Vampire Fangs, might help Bride stay alive by countering damage done to hehr. Ah wouldn't rely on this alone unless Bride has TONS of Luck & Damage, though, and can survive a couple good hits

Minion Synergies
Bride 100% needs a tanky minion who can help keep hehr alive - try Bone Golem specced to protect the back row (usually with the Block + Ward ability mod, to protect against enemy casters).
Bride's Overwatch ability affects all enemies who move, so if ye pair her with minions like Wraith, ye can do a bit of damage to all enemies moved by Wraith's Ultimate. If ye're playing this way, ye might include a Dark Knight and a Reaper in that squad, so Dark Knight will deal Stress damage to every enemy who moves (or gets a debuff!), and Reaper for kills & light healing.
Ah've tried to build Ignition-heavy Battle Squads with Bride, Zombie, and Blood Phantasm, but those are really only useful against enemies with high Armor and no Ward. Only Blood Phantasm's ability was worth it, since it lasts until battle end. Bride's Ignition damage might count 4-5 rounds into combat, but by then ye're better served using hehr other abilities, like Chestpiercer or Rose for a Lady.
Dark Knight
Though the Dark Knight has several damage types, hehs physical damage is the highest and most reliable.

Feature: Dark Knight cannot be critically hit

Abilities
1. Heartless Slash, the best offense is a good defense! Heartless Slash gets a damage bonus based on the Dark Knight's total Armor & Resistance, so making Dark Knight super-tanky also improves damage. This ability also hits any one of the first 3 enemy spaces, giving it good reach
2. Hollow Stare,
3. Dark Tithe, the amount of Mana & Wrath recovered by this ability is a pittance, but it can make the difference in a tight spot. Ah would recommend taking the +Mana ability mod, since it is much harder to come by in combat, whereas ye generate Wrath constantly
4. Futile Hopes,
5. Unfeeling Aggression,
6. Abyssal Hunger Ultimate, very useful for keeping the Dark Knight alive after heh's been soaking up damage, though prohibitively expensive to use every turn. Since this ability causes enemies to "lose life", its effectiveness is not reduced by Armor, Resistance, or -Damage received buffs

Items
Heart of Darkness (unique), +5 Wrath and +5 Mana every time the Dark Knight takes damage. Note that these are flat values, not percentages, so to get the most out of this item, Dark Knight has to suffer many small attacks
Jester's Mask, to attract more attacks on the Dark Knight instead of yer other minions, and hopefully trigger hehs Heart of Darkness unique item
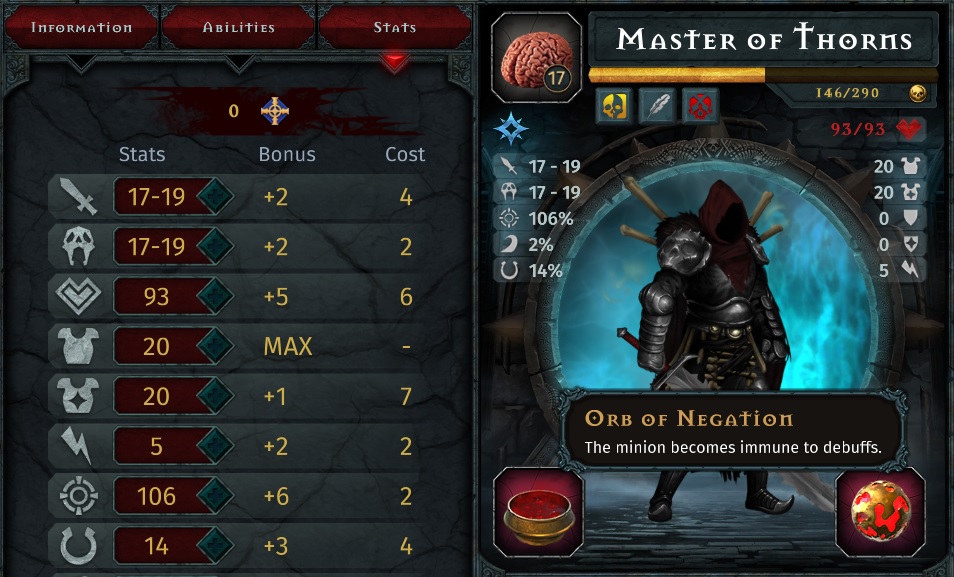
Orb of Negation, to make Dark Knight immune to debuffs that strip Armor & Resistance, or cause true damage like Ignition effects

Minion Synergies
As the difficulty increases, Dark Knight's ability to protect other minions drastically decreases. At lower difficulties, enemies batter away at Dark Knight without doing much damage - but at higher difficulties, enemies deal so much damage that Dark Knight's Armor and Resistance do next to nothing.
Credit to KronoKinesis: Ye can pair Dark Knight with Skeleton, and use Skeleton's Strength of Mediocrity buff to dramatically improve Dark Knight's Armor, Resistance, and damage, since some of Dark Knight's damage is based on a percentage of hehs Armor & Resistance. With these two tanks, ye should have more than enough protection for other, squishier minions.
Fallen Dhampir
Ah would almost label Fallen Dhampir as a "support" minion, 'cause sheh has so much utility, though hehr survivability is nothin' special. Sheh is highly dependent on critical hits, so pour those points into Luck & use hehr against enemies with low Block & low Armor. Ye can use hehr Ultimates (two of 'em, and VERY cheap!) to set up very nasty attacks.

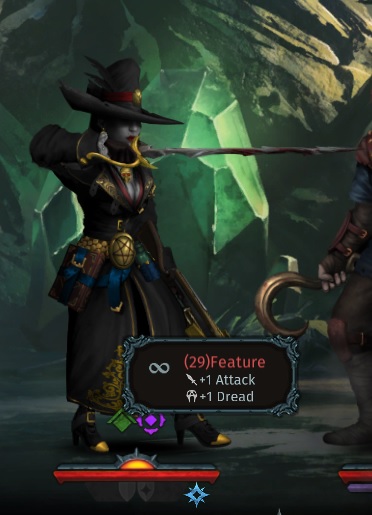
Feature: Each time Fallen Dhampir is hit, sheh gains +1 Attack and Dread
Foolishly, this Feature relies on Fallen Dhampir getting hit to work, though Ah suppose it's better than getting hit and not getting a buff. Keep in mind that even if an attack hits for 0 damage, it triggers this feature. (Ye can increase Fallen Dhampir's Armor & Resistance with Minion Items or Artifacts so sheh takes less damage.)
Ah have not seen an upper limit to how many times this Feature can stack; the highest Ah have personally seen is 29 stacks (giving +29 Attack and +29 Dread):


1. Masterful Thrust,
2. Aim for the Vein,
3. Mocking Riposte, use to interrupt Stances, but keep in mind it only works on the first 3 enemy spaces
4. Trap,
5. Pain Blast Ultimate,
6. Sundering Squall Ultimate,

Best Position: 2nd space = [o][o][X][o]
Though really Fallen Dhampir can go almost anywhere; hehr biggest utility is hehr cheap Ultimates, and those can be used from any space! But the second space allows Fallen Dhampir to use all of hehr abilities.

Advantages
  • Useful from almost any space in the Battle Squad
  • High utility with 2 inexpensive Ultimates
  • Interrupts stances

Disadvantages
  • A bit squishy. Lacks natural Armor & Resistance, but can come with up to 2 Block & Ward
  • Relies heavily on critical hits for damage & self-healing, which means putting more stat points into Luck, and less into other stats.

Items
Spider Mandibles, Ah am fairly certain that each time the Fallen Dhampir hits with an ability, the 4% max Vigor loss applies to the enemy (it's always going to be the 4% loss because Fallen Dhampir only has single-target abilities). This applies even if the target has high Armor or Resistance, applies on Counterattacks from the Mocking Riposte stance, AND it applies on EACH HIT of Fallen Dhampir's Pain Blast (5 hits) and Sundering Squall (3 hits) Ultimates! The only drawback is that Ah don't believe the extra 4% Vigor loss counts for Fallen Dhampir's self-healing abilities. More testing is needed!
Vampire Fangs, probably harvested from someone Fallen Dhampir knew... use to heal damage-focused Fallen Dhampirs, which is probably all of thehm.

Minion Synergies
With 2 cheap Ultimates that strip all Armor & Resistance for the rest of the battle, Fallen Dhampir works well with any high damage minions, such as Bride of Iratus or Ghoul. Since these Ultimates also strip Block & Ward, ye could put Fallen Dhampir with minions that need to apply debuffs, such as Black Widow or Mummy. There's really not a bad Battle Squad to put Fallen Dhampir in.
Ghoul
Buff that Ghoul, buff it, buff it! Though theh start off as a glass cannon, a Ghoul with a few buffs from items like Cannibal's Jaw or stacks of Lunch Break quickly becomes a serious force to be reckoned with. Ah have fought the Grand Magister with a Ghoul as meh main damage-dealer, and sheh brought the bugger down in 4 hits. (This was on Normal difficulty, but still! Sheh also had something like 6 stacks of Happy Meal, ultimate mod.)
Ghouls are tricky, because theh bounce around a lot. Ye have to pair thehm with other minions whose abilities aren't affected by thehr position in the squad. Ghouls are also pretty easily killed, and thehr life-stealing Feature doesn't help that much. If ye can keep thehm alive, though, theh do medium-to-crazy-high damage

Feature: 10% of damage done by the Ghoul heals the Ghoul's Vigor
The Ghoul's Vigor-stealing Feature doesn't help much, and Ah seriously wish theh would improve it to at least 25% of damage done. Healing is based on the damage done rounded to the nearest 10; so 14 damage down rounds down to 10, giving 1 point of healing. But 15 damage done rounds up to 20, giving 2 points of healing.

Abilities
1. Butcher,
2. Savage Instincts,
3. Repelling Mark, very useful for buffing other damage-specced minions like Bride, Head Hunter, or Werewolf. Two Ghouls with Repelling Mark ability mods can buff each other, improving thehr damage from medium to high on turn 1
4. Just a Bite, very useful for healing Ghoul, but if yer builds REALLY need the Wrath, ye can mod Just a Bite to get +50 Wrath, which is impressive. Use on allied minions that can afford the damage, like Abominations, Mummies, Bone Golems, or Werewolves
5. Digest, this is Ghouls saving grace as far as healing goes, since sheh's pretty fragile otherwise. With hehr unique minion item, sheh can heal as soon as sheh needs to to stay in the fight until sheh can use Lunch Break again
6. Lunch Break Ultimate, maybe the easiest way (if not the fastest way) to get enemy Vigor down to 25% or less is to use the Shade's Deep Shadows Ultimate or Black Widow's Spider Web Ultimate. After that... nom-nom-nom! Ye may have to improve Ghoul's Accuracy to make sure this attack hits - it is NOT a "does not miss" ability! (Which means it can miss!). See "Total Nomination" Battle Squad set-up for the fastest way to get enemies down to 25% Vigor

Items
Gruesome Snack (unique), because more buffs never hurt, and a stack of this is Ghouls' emergency heal when sheh uses Digest
Cannibal's Jaw, for use with the Ultimate Sacrifice Battle Squad set-up, or if ye bring along a bunch of expendable minions
Coward's Foot, so Ghoul can attack twice on the first turn, such as to use both Butcher to strip Block & Savage Instincts to deal damage
Vampire Fangs, to improve damage-based healing from Ghoul's feature
Vulture's Feathers, for use with the Ultimate Sacrifice Battle Squad set-up, or if ye bring along a bunch of expendable minions

Minion Synergies
Ghoul pairs well with other high-damage minions (such as Fallen Dhampir, Head Hunter, Lich) or minions that help Ghoul stay alive (Abomination, Blood Phantasm, Bone Golem).
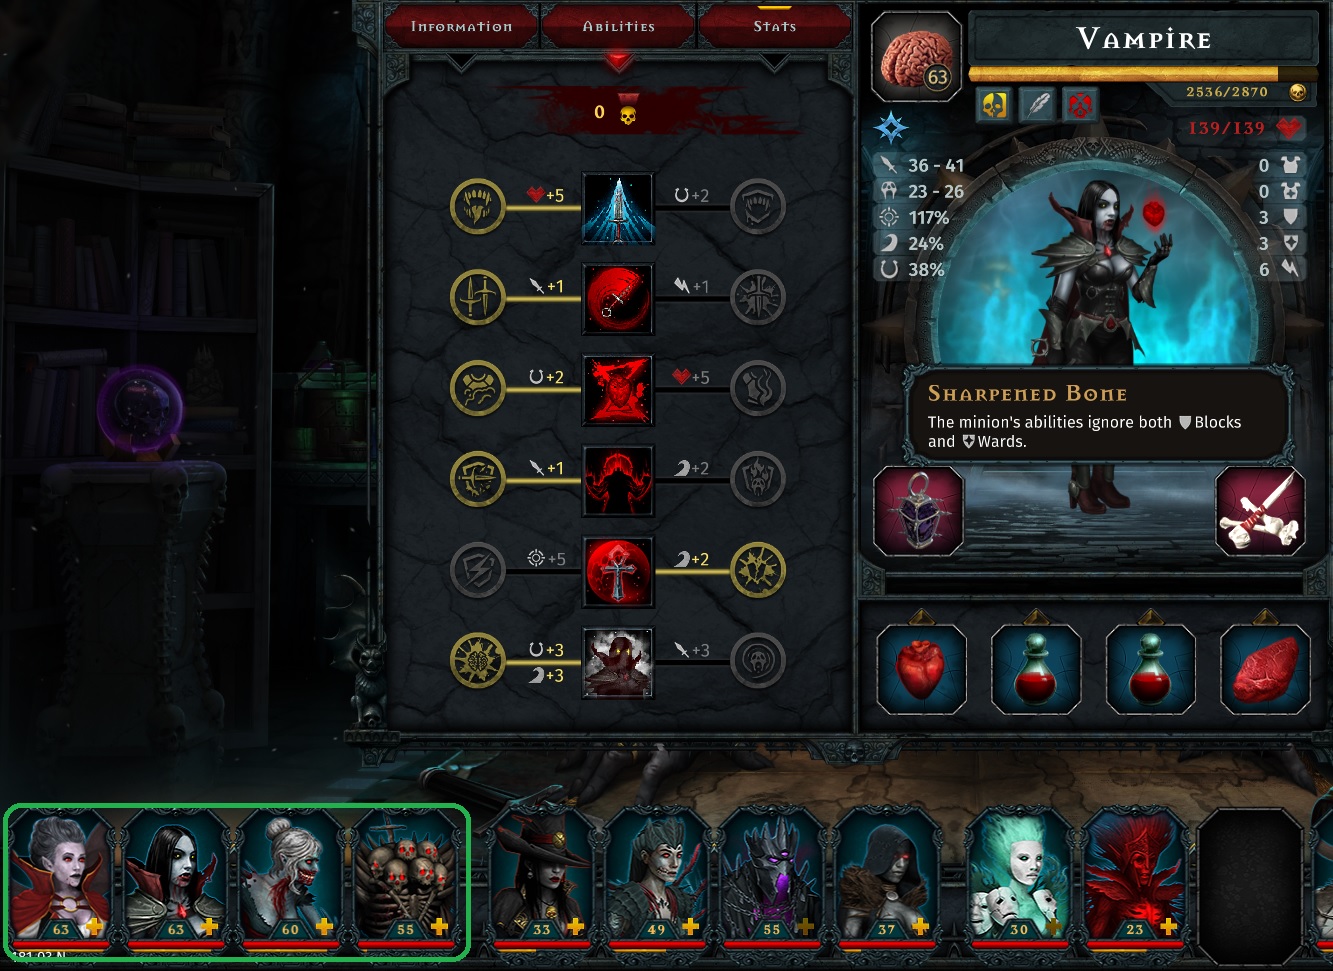
To use Ghoul's Lunch Break Ultimate, pair Ghoul with minions like Black Widow, Shade, or Vampire.
Vampire's Berserk ability mod can bring a target down to 25% health in 2 casts. If ye get 2 Vampires and a Ghoul in the Battle Squad, ye could theoretically eat an enemy on the first turn of battle. Cast Berserk once with each Vampire, then if ye have enough Wrath, use Lunch Break on the enemy. If needed, ye can postpone Ghoul's turn until the end of the round, if hehr Initiative is higher than the Vampires'. (This way, ye can eliminate the enemy before theh do too much buffed damage from going Berserk.)
Shade's Ultimate, Deep Shadows, destroys a high percentage of an enemy's Vigor, tearing huge chunks of it so Ghoul can finish thehm off. After 3 hits with Deep Shadows, enemy Vigor should be down to 21.6%**, bringing it in range of being instantly chomped by Ghoul.
Same idea, but smaller chunks with Black Widow's Spider Web Ultimate (Spider Web takes out 4% per stack, and can stack 5 times.)

** 100 - 40% = 60
60 - 40% = 36
36 - 40% = 21.6
Head Hunter
Head Hunters are yer #1 resource for eliminating enemies - but this still relies very heavily on random chance. Head Hunters are also pretty hard to keep alive, so pair them with a Bone Golem or a minion with Shield / Redirect.

Feature: -50% chance for enemies to escape the battle; stacks with other Head Hunters

1. Dual Slash, eh, it's an ability. It hits two enemies (it does NOT hit a single enemy twice, though). Useful if ye have an item on Head Hunter that spreads debuffs or damage-over-time effects, like Ashes of a Burned Witch
2. Catch 'Em, take yer pick of the mods - do ye want a guaranteed hook 'n' pull, or are ye okay with randomly stunning a victim? Either could be good, though overall Ah would more seriously recommend the Lucky Catch mod, since the Jagged Hook mod relies a little too heavily on getting lucky with multiple enemies. Very useful for interrupting stances and pulling enemies in range of strong melee minions (like maybe a second Head Hunter?)
3. Sense 'Em, IF ye can hit with it, Ah would highly recommend the Mark 'Em mod for this ability. If ye can equip yer Head Hunter with a Mechanical Eye, there should be no problem stripping Evasion from even the most annoying enemies, opening the way for attacks by yer other minions, or Head Hunter's Ultimate
4. Seething Wrath,
5. Bloody Harvest,
6. Bounty Ultimate, given the power of the Abyssal Bounty mod (which triggers a surprisingly low amount of the time!), Ah feel theh should lower the cost of the Profitable Bounty mod. But theh don't listen to a humble Abutlerntation like meh. If ye can get Head Hunter's damage & luck up high enough (especially with the Fortune Magic spell), ye can still use the Profitable Bounty mod well

Best Position: 2nd space = [o][o][X][o]
Why second space? Because ye can use most of Head Hunter's abilities from there - all except Bloody Harvest.

Advantages
  • High damage and a moderate chance to instantly kill enemies, especially with the Abyssal Bounty Ultimate mod or the Contract of Blood unique minion item

Disadvantages
  • Surprisingly squishy and prone to getting ganked

Items
Contract of Blood (unique), for an extra chance of killifulness!
Coward's Foot, when ye have tons of Wrath at battle start - ye could use the Bounty Ultimate twice!!
Hero's Blood, in case Abyssal Bounty doesn't work, and in case Head Hunter gets attacked before ye can put a shield / redirect, or Block & Ward on hehm
Mechanical Eye, because Head Hunter has pus-poor accuracy, and it never gets much better
Sharpened Bone, to cut through Block without having to spend a turn using the Intimidating Rage ability mod

Minion Synergies
If ye're the kind of necromancer who prefers to use the Profitable Bounty Ultimate mod instead of the Abyssal Bounty Ultimate mod, ye could pair Head Hunter with Vampires or Black Widow. Theh'll bring down the Vigor of targets to set thehm up for a hit from Profitable Bounty. A few rounds of the Hysteria ability (from Vampires) or Spider Venom (Black Widow's Feature) could bring several enemies in range of being instantly slain by Profitable Bounty, or another one of Head Hunter's high-damage abilities.
Ah would also recommend slotting a Bone Golem, Skeleton, or Blood Phantasm into a group with Head Hunter - in spite of hehs base Armor, heh's pretty squishy, and needs some protecting.

Unless ye've got a really... interesting strategy in mind, don't bother pairing Head Hunter with Banshee. Ye'll be doing two different kinds of damage for half the effect, and Head Hunter's Feature will cancel out Banshee's Feature.
Infested
Feature: deal very high Stress damage to all enemies when Infested is destroyed
Well, gosh, the only drawback to this Feature is that ye have to get yer Infested destroyed first! Does it make sense? Yes. Is it a useful Feature? Not really. Infested can cause more Stress damage over time than it causes by dying.

1. Slingshot,
2. Rancid Breath,
3. Absorb Malady,
4. Magnified Wretchedness,
5. Pestilent Rain, incredibly useful at stripping enemy Wards, after ye've increased Infested's Accuracy a bit (or taken the Carpet with Filth ability mod). Use to finish off enemies with 0 Sanity. Though Ah have read that the chance to die from a Heart Attack is based on the amount of Stress damage received, it never hurts to have multiple Stress attacks. Pestilent Rain therefore gives ye 4x small chances to cause a heart attack
6. Plague Garden, highly useful for long engagements, where the constant Curses will eat away at enemy Sanity. Also, these Curses stack!

Best Position: 3rd space, [o][X][o][o]
Infested can use all of its abilities from this position.

Advantages

Disadvantages
  • Infested is pretty weak to start with, and doesn't really get any tougher.

Items
Plague Body Organ (unique), to lay on the curses. Ye just have to make sure that the Infested doesn't take too much damage when attacked!
Crow's Paw, because ye can never have enough curses!

Minion Synergies
Infested goes well with other Stress-damage-heavy teams including Banshee, Mummy, Shade, and Wraith. Infested works particularly well with a Mummy that is equipped with the Cursed Bandages unique Mummy item. The additional curses applied by the Infested adds to the healing the Mummy receives from the item.
The drawback to Infested & a Stress-damage-heavy Battle Squad, though, is that fairly often ye fight enemies who are immune to Stress!
Lich
Though Lich was obviously intended as a damage-dealer, ye can give it a powerful AoE heal and some very interesting ability mods which make it excel as support until ye can build up enough damage to one-shot yer enemies (and most of the time, the rest of yer Battle Squad).

Feature: gain +10 Spellpower

1. Bone Shards, be veeeeeery careful how ye use the Shrapnel ability mod. If ye do use Shrapnel, at least try to make sure the minion in the first space has renewable Ward (such as Zombie with the Trench Loading ability mod).
2. Command Undead, don't be afraid to use Command Undead simply as a tool to reposition Lich or another minion. The base ability and the Dominate Undead mod move up the target minion 2 spaces, while the Ineffable Command moves Lich back 2 spaces. If that gets the target minion in the right position to use a high-damage ability, so much the better
3. Sacrifice,
4. Toxic Cloud,
5. Rain of Fire,
6. Reanimate, Ultimate

Items
Cannibal's Jaw, +Attack and +Dread every time ye Sacrifice an ally, good for Lich and any other non-expendable units in the Battle Squad
Vulture's Feather, +Accuracy, +Evasion, +Luck every time ye Sacrifice an ally, good for Lich and any other non-expendable units in the Battle Squad

Minion Synergies
Pair Lich with any expendable minion ye want, or - when ye get enough Wrath at battle start - just leave an empty space in yer Battle Squad so Lich can summon a Skeleton with its Reanimate Ultimate. Then cycle Sacrifice and Reanimate to support yer other minions.
Ye'd think Lich would be very useful for casting spells, since its Feature gives extra Spellpower, and it's Cruel Sacrifice ability mod resets spells - but all this means is that ye'll be using up Mana VERY quickly. To make up for this, ye can pair Lich with minions that restore Mana, like Shade or Vampire.
Lost Soul
Feature:

Lost Soul plays a fine balancing act, and ye have to control hehr initiative very carefully. What ye want to do is have hehr act last of all yer minions, but before the enemy gets thehr turn. This way, ye can apply debuffs with the rest of yer minions, let yer enemies waste thehr turn applying buffs to themselves, then soak up all the tasty buffs & debuffs with Lost Soul's Ultimate to give yer minions a BIG boost in damage.

Abilities
1. Inspire Heroics,
2. Benevolent Spirit, Ah would only use this ability on the last turn of combat, when ye know ye can kill the last enemy. This way, the follow-up attack by Lost Soul never triggers! Or ye could just slap a Ward on the target of Benevolent Spirit, and Ward will negate the follow-up attack
3. Misleading Beauty,
4. Stream of Delusion,
5. Dubious Boon,
6. Sudden Reality, Ultimate, without this Ultimate, Ah'd have veeeeeery little use for Lost Soul. It's a great damage buff for yer minions, if the enemies are stacking buffs, or if ye can stack debuffs

Items
Crow's Paw, to apply even more debuffs
Ashes of a Burned Witch, to apply even more debuffs

Minion Synergies
Lost Soul synergizes well with minions who apply AoE debuffs, such as the Abomination, Banshee, Black Widow, and Mummy. If an ability applies only a debuff, but no kind of damage, the debuff ignores Ward and Ah have never seen those debuffs miss. Ye can stick hehr with a Dark Knight with the Futile Hopes stance to deal some extra Stress damage, if it helps.
Ye can balance hehr initiative through use of minions like the Unfrozen and the Abomination, which can drastically affect the initiative of yer enemies.
Lost Soul has a little bit of synergy with Skeleton, since the buffs applied by Lost Soul with its abilities count towards the number of attacks Skeleton gets with its Smite.
Mummy
Feature: inflict -10 Luck for each enemy ability that targets the Mummy
This works on damage-less debuffs, attacks that miss, and attacks that hit Block or Ward - as long as it targets the Mummy, this feature applies. This feature also stacks an unknown number of times.
Mummy doesn't do nearly as much Stress damage as other minions like Wraith, so ye mostly just want to use Mummies for thehr AoEs and relative tankiness.

1. Cursing Touch,
2. Clinging Wraps,
3. Impending Horror,
4. Absorb Curses, Ah would recommend having 2 Mummies, one with each ability mod of Absorb Curses, and use each Mummy as appropriate
5. Hex Beam, AoE Stress damage & applies a Curse. Very useful for breaking down Wards on multiple enemies, and healing the Mummy equipped with the Cursed Bandages unique minion item
6. Amplify Curses, Ultimate,

Items
Cursed Bandages (unique), for healing when Mummy is stacking on the curses
Crow's Paw, to stack on additional Stress damage-over-time curses

Minion Synergies
Mummies can get pretty tanky thanks to the Cursed Bandages item. If ye want to make thehm more tanky, and able to heal a LOT each turn, then pair thehm with other minions that give Curses, such as Wraith, or minions equipped with the Crow's Paw item.
Reaper (Wrath of the Necromancer DLC)
Reapers do a variety of damage, but maybe thehr most useful ones deal physical damage. Theh start off a bit fragile, but are all-around good. If ye're wiling to spend the stat points, theh can become very tank pretty quickly by adding to thehr Armor & Resistance, and Block & Ward.

Feature: when killing an enemy with damage done by Reaper, heal all minions in the Battle Squad for 10% of thehr maximum Vigor
Keep in mind that this feature triggers on ANY kill made by Reaper, whether heh kills thehm by hehs Ultimate, regular abilities, or damage-over-time from Agony. Don't be afraid to postpone Reaper's turn so ye can finish off an enemy with any of hehs abilities at the end of a round (or if ye need to build up Wrath to use hehs Scythe of Death Ultimate).

Stats
Accuracy is important for Reaper only if ye want to hit with the rest of hehs ability, besides the Scythe of Death Ultimate (which always hits). It's usually beneficial to improve Reapers survivability with Block & Ward, then hehs Attack OR Dread, depending on how ye want to use hehs abilities. Luck never hurts if ye have spare points.
If ye're building a tanky Reaper, ye can increase hehs Armor & Resistance by big chunks, but it's very expensive to do so. For example, it costs 21 points EACH to bring Armor & Resistance to 12 points (5+7+9). This is a minimum of a level 21 Reaper.

Abilities
1. Dissection,
2. Spectral Wave, almost the "same difference" as far as damage type goes & damaging enemies in order to use Scythe of Death. Ah personally lean towards the Energy Wave mod for the magic damage, since everything ye face will have Vigor, but not everything has Sanity
3. Agony, can often finish off enemies that ye've damaged with other minions. Whether Agony kills with the Ignition true damage or the stress through Heart Attack, Reaper should still get credit to trigger hehs feature. Ah personally go for the Agony of Fire mod because everything has Vigor, but not everything has Sanity
4. Drain, Ah mostly use it to interrupt enemy Stances, but it also removes buffs from a single enemy
5. Reap Power,
6.Scythe of Death Ultimate, use on any low-Vigor and/or low-Sanity enemy to deal TONS of damage; if the enemy dies, all yer minions get a small heal.

Best Position = 3rd or 2nd = [o][X][X][o]
Position depends on which of Reaper's abilities ye want to use. Agony (for 3rd position) is good for setting up targets for Reaper's Ultimate. Spectral Wave (for 2nd position) does an AoE, which is useful against more & weaker enemies to kill thehm all faster.

Advantages
  • Good for finishing off enemies
  • Works well with Battle Squads that deal any damage type - Physical, Magical, or Stress

Disadvantages
  • A little squishy after Block & Ward are gone, but has self-healing
  • Reaper's position can change quite a bit, which affects which abilities it can use, so watch out

Items
Reaper is a flexible minion for items - ye can use just about any items ye need for a given strategy.

Hourglass of Doom (unique), if ye really need the extra spellpower. Reaper already comes with extra spellpower with the Reap Power ability
Lantern of Souls, especially if ye're playing Reaper as a tank, and hehs Feature just isn't doing enough by itself
Mechanical Eye, if ye find yerself using a lot of Reaper's abilities that might need to hit, like Dissection
Sharpened Bone, so ye can use abilities when ye need to without worrying about Block & Ward
Burning Blood, to maximize Wrath gain & replenish Wrath after using Scythe of Death

Minion Synergies
Reaper and Black Widows go together like small German children and gingerbread. Bring down enemies' Vigor & Sanity with Black Widow's Spider Venom Feature, and finish thehm off with Reaper's Ultimate for some light healing.
Shade
The Shade is what Ah call "damned if ye do, damned if ye don't". Thanks to its Pain Reflection stance, if an enemy hits it, it deals Stress damage back. And if an enemy misses, it deals magic damage back! The only weakness the Shade has is against enemies who have no Sanity, since it relies on Stress damage for its most powerful gains.

Feature: retaliate with a Magic attack whenever an enemy attack missions Shade

1. Pain Reflection stance, highly useful after the 1st or 2nd turn of combat, when yer minions have lost thehr Blocks & Wards. Deals high Stress damage to an enemy after the enemy damages any one of yer minions. Combined with the Void Flame unique minion item, this gives ye huge returns on Mana, Wrath, and Vigor for the Shade. Take the Pain Amplification ability mod to do even more damage and get even more returns with Void Flame
2. Trick of the Eye, very useful for repositioning Shade or another minion, especially to put Shade in the right spot to use Pain Reflection. The +Evasion is almost a bonus!
3. Dark Portal,
4. Black Light,
5. Gloom Claws, again useful if ye need to resosition Shade. The damage done by Gloom Claws usually isn't that high, but it has useful ability mods
6. Deep Shadows, Ultimate, VERY useful in combination with minions like Reaper and Ghoul. If an enemy is hit by Deep Shadows 3x, it should set thehm up for a nice Ultimate kill by Reaper, Ghoul, or Head Hunter

Items
Void Flame (unique)

Minion Synergies
Shade works well with any Stress-damage-based Battle Squad, since it can tear chunks out of enemies' Sanity with Pain Reflection. It goes especially well with Abominations, which can tank damage, trigger Pain Reflection in Shade, and then instant-kill enemies with the Break & Swallow Ultimate when theh are at low Sanity.
For similar reasons, Shade works well with Reapers. Set Shade in Pain Reflection stance, strike an enemy's Sanity, then use Gloom Claws to tear chunks out of thehr Vigor. Finish thehm off with Reaper's Scythe of Death Ultimate.
Shades work extremely well with other Shades - if ye put 2 Shades in the same Battle Squad, in spaces 4 and 3, then ye can endlessly cycle Pain Reflection stance. Just make sure the Shade in space 3 has significantly higher initiative than the Shade in space 4. This way, the Shade in space 3 goes first, cycles to the back, and now the other Shade is in position to use Pain Reflection on its turn. If ye get out of position, ye can fix that with Trick of the Eye. These Shades capitalize on one another's abilities, laying on the Stress damage, the effectiveness of Gloom Claws, and allowing ye to spam Deep Shadows against super-tough enemies like bosses.
Skeleton
In spite of the constant belittling of Skellies, theh are actually quite useful. Thehr damage is just a hair less than Bride's to start, but theh are much better at surviving. Ye can build Skellies either as tanks or support, but Ah wouldn't rely on thehr damage output too much unless ye get lucky with the Vorpal Smite ability mod.
Skeletons summoned with the Lich's Reanimate Ultimate are stronger than level 1 Skeletons. Ye can also use these summoned Skellies as a target for Ghoul's Just a Bite if ye're using the Skelly as a meatshield and don't care if it survives. It's okay. Nobodeh does.

Feature: Immune to buffs and debuffs
This feature can be countered by equipping the Enchanted Bone unique item for Skeletons. Enchanted Bone allows them to receive buffs from spells and other minion abilities. Even with this item, Skeletons stay immune to all debuffs (including Ignition!!).

Stats
Just because Skellies are obviously intended as tanks doesn't mean ye have to build yers like one. Just pick which role ye want Skelly to fill - theh can do a mediocre job as tank, support, or damage.
  • For tanks, pour most points into Armor & Resistance, Vigor, and then Initiative so Skelly can use Astounding Fortitude before enemies get off attacks. Spare points can go into Evasion to protect Skelly against inaccurate but hard-hitting enemies like Failed Experiments
  • For support, ye'll want to keep Skelly alive, so build hehm like a tank, but prioritize a little more Initiative, so Skelly can give Embrace Mediocrity to a fellow minion before that minions turn
  • For damage, obviously ye'll want Attack, Accuracy, and Luck. If ye can land all strikes with Smite. If Skelly has a way to steal Vigor, that's great. Otherwise, Armor & Resistance to keep hehm alive through the whole battle

1. Unassuming Strike, highly useful to deal with heavily-Armored enemies, and the damage is appreciable. However, this might use up a turn where Skellie could've shielded or buffed some other minion, so it's more useful in a long battle. Ah wouldn't prioritize choosing a skill mod for this until after ye've got Astounding Fortitude, Embrace Mediocrity, and Smite modded
2. Show Them Their Place,
3. Astounding Fortitude, can be used to guard any other minion, or Skeleton itself.
4. Embrace Mediocrity, useful as a way to buff yer other minions before Sacrificing Skeleton using the Lich. Take yer pick if ye want to buff more Armor & Resistance, or (Armor + Resistance + Damage + Dread). If ye have a main tank who needs EVEN MORE Armor & Resistance, Embrace Mediocrity is a good buff to apply to thehm before thehr Block & Ward run out. This ability applies well to Dark Knights & Blood Phantasms, who just need to take ANY damage to trigger some abilities, but not necessarily HIGH damage.
5. Smite, if the enemy has quite a few buffs on thehm, Smite can be used to strip away layers and layers of Block. Ye can easily get Skellie to hit 5-6 times in a row. Useful against bosses like the Mistress or the Mad Scientist, which buff thehr allies regularly
6. Shield Banger Ultimate, not to be mistaken for "Coffin Banger", which is a horrific band.

Items
Enchanted Bone (unique), so Skeleton can benefit from AoE buffs yer other minions might apply
Lantern of Souls, Skellie usually ends up taking a lot of damage in battle, what with its Shied / Redirect ability and it's whopping 0 Armor and 0 Resistance to start. Lantern of Souls helps it stay in the fight and maybe even survive until the end!

Advantages
  • Very tanky at low levels & lower difficulties, thanks to naturally high armor buffed by Astounding Fortitude

Disadvantages
  • Cannot be buffed without Enchanted Bone unique item

Minion Synergies
Skeleton works well with any minion which might need a shield / redirect. This could range from Bride to Lich to Ghoul to... ye get the idea.
If ye can pair Skelly with Lost Soul (which buffs & debuffs enemies at the same time), or face it against enemies that lay on multiple stacks of buffsm ye can actually get Skelly to strike many many times with one ability, thanks to Smite. Though the individual attacks are fairly weak, against a low-Evasion target, the damage (and Block-stripping) adds up if the target has many buffs.
Skelly goes with almost any Battle Squad, depending on how ye spec it. It's Astounding Fortitude and Embrace Mediocrity may end up being the only two abilities ye'll need, though all of its abilities have some utility. Skelly even does respectable Stress damage if ye spec it with Unnerving Fortitude and the Dismissive Banger Ultimate mod.
Unfrozen
Ah am fairly certain that Unfrozen was designed to be a direct counter to enemies such as the Inquisitor and Priestess in the later game - the ones who cause Ignition debuffs and have stances ye need to interrupt. Unfrozen has a lot of utility, not least of which all-but-guaranteeing that yer minions will act before the enemy after a few rounds of combat.
Depending on how ye want to spec hehm, Unfrozen can fill any given role: tank, damage, healer, or utility.

Feature: for each point of higher Initiative the Unfrozen has over hehs target, the Unfrozen deals +5% damage per point of difference

Abilities
1. Ice Wave, the smaller-scale version of Unfrozen's Ultimate. It strips wards and sets up enemies to take more damage from Unfrozen's Feature on hehs next turn.
2. Ice Spear, a utility ability with a nice side of damage. Pick yer more valuable ability mod - both ignore Block and have strong utility depending on what gap ye need to fill. Ice Lance is good for disrupting stances in any of the 4 enemy spaces, and Penetrating Spear sets up some very nasty follow-up attacks against Armored-up enemies
3. Call of Winter, another pocket in yer Unfrozen's skull-adorned utility belt. Base effect isn't bad, so ye can choose how to mod this ability based on what stat ye need more - Vigor or Resistance. Purging Blizzard is very useful against healers & some bosses (once ye break through enemy Wards).
4. Shattering Cold, honestly, Ah almost never remember to use this ability, even when Ah really should. Do add it to the top of yer priority list when ye're facing Inquisitors in the Cathedral. If yer Unfrozen has high enough Initiative to act before yer other minions, ye can save yer minions some some nasty Ignition or other effects, before theh move into a trapped space
5. Cold Embrace, though the heal can be powerful at lower difficulties, its effectiveness wears off pretty quick. If ye're looking for a Block ability, try the Bone Golem instead. Cold Embrace is also weak to enemies which strike more than once with an attack - the ice shield falls at the first attack, allowing the following attack(s) to hit yer minion. Best used against minions in the back line who will not be hit much anyway, but still need a heal. Two major drawbacks to Cold Embrace are 1) Unfrozen can't use the ability on itself, and 2) it stuns the ally minion, so that minion won't be able to use its abilities
For healing with Cold Embrace, ye might equip Unfrozen with the Martyr's Rags item, and place Unfrozen in one of the 2 middle spaces, to guard an enemy behind Unfrozen while theh heal
6. Winter is Close, haven't ye heard? Winter is Coming. Not much to say about this Ultimate - it sucks away a chunk of initiative. Useful for stripping Wards from 2 enemies, if ye can afford the Wrath. Ye might take the Winter's Onset mod to maximize Unfrozen's Initiative bonus, to deal extra damage with hehs Feature.

Best Position: 3rd space = [o][X][o][o]
This position allows Unfrozen to use all of its abilities. If ye have to choose, Unfrozen does better in the back ranks than the forward ranks.

Advantages
  • Unfrozen starts the game (at level 1) with 2 Block & 2 Ward, making thehm slightly tanky from the get-go

Disadvantages
  • Unfrozen tends to suffer heavy damage after its free Block & Ward are stripped (because it can't use Cold Embrace on itself), so ye might end up losing more Unfrozenses than is strictly necessary

Items
Rune of Winter, to maximize damage done by Unfrozen's Feature
Enchanted Heart, to keep Unfrozen in the fight while it's healing something else
Lantern of Souls, to keep Unfrozen alive in the later stages of battle
Martyr's Rags, to guard a minion frozen with Cold Embrace & give that minion a chance to heal. Unfrozen starts off the game with 2 free Block & Ward, so Martyr's Rags fits well with either a tank- or healer-specced Unfrozen
Orb of Negation, to remove negative effects from traps or Ignition, since Unfrozen can't target its own space with either Shattering Cold or Cold Embrace

Minion Synergies
Ah wouldn't bother pairing Unfrozen with Abomination - thehr debuffs to enemy Initiative are redundant. (And frankly, Abomination's Battle Thumping debuff creates a bigger gap in one casting, whereas Unfrozen has to get lucky with hitting enemies several times in a row with its abilities.)
If ye know ye want to heal a minion, but that minion acts before Unfrozen, ye can postpone that minions turn, then slap Cold Embrace on it when Unfrozens turn comes up. When the minion acts at the end of the round, it will still heal from Cold Embrace.
Vampire
Ah would label Vampire as "support" instead of "damage". Sheh has tons of useful abilities, but hehr straight-up damage isn't that hot. Ye can have hehr rely on high Luck, or just use hehr percentage-based abilities.

Feature: Gain +6 Attack when an enemy escapes or goes Insane
Not the single most useful Feature in the game, considering enemies who escape are pretty dang rare unless ye put in quite some effort to set thehm up for it. Insanity is much more common, but exactly 0% of Vampire's abilities deal Stress damage, so ye have to waste Battle Squad slots on minions that do deal Stress damage.
At most ye'll get +24 Attack thanks to this feature, so this Feature isn't really too useful to begin with, and really doesn't scale with difficulty.

1. Bite,
2. Blood Strike,
3. Bloody Offering,
4. Hysteria, if this ability hits a Ward, then Vampire does not lose Vigor. One HUGE advantage of Hysteria is that Ah have never seen it miss
5. Auspex, incredibly useful against enemies that stack Block & Ward - Auspex even works against Blocks & Wards applied AFTER Auspex is cast!
6. Blood Thirst, not an awful way to regain Vigor, since it's got the largest Vigor-stealing percentage in the game, but Ah strongly feel that this should be a Feature Vampires get without having to spend Wrath on it

Items
Lantern of Souls, to replenish Vigor and not spend so much time healing during or after battle
Sharpened Bone, to use abilities like Hysteria without having to use up a turn using Auspex
Vampire Fangs, to add even more Vigor recovery on top of Blood Thirst

Minion Synergies
Vampire works well with Ghoul, to set up use of Ghoul's Ultimate, Lunch Break. If ye put 2 Vampires and a Ghoul in yer Battle Squad, ye can often instantly kill 1 enemy per turn by using the Berserk mod of the Hysteria ability of Vampires, then chowing down with Ghoul's Ultimate, Lunch Break. It doesn't even cost that much Wrath!
If ye want to work Vampire's Feature at all, ye could put Vampire in with a Reaper who has the Expunge ability mod (and maybe make sure ye have the Maddening Amulet Artifact equipped). Ah wouldn't seriously recommend this, though, since ye can use Battle Squad slots and Artifacts much more effectively. If ye want to deal high Stress damage and have enemies go Insane in a more conventional way, ye can't do better than Wraith, and Shade in Pain Reflection stance.
Werewolf
Werewolf strikes meh as the even-more melee-focused version of the Head Hunter. A few of Werewolf's abilities are almost direct copies of Head Hunter's: Werewolf can deal ridiculously high damage, can strip Block & Ward OR Armor & Resistance, and has a delayed attack.
Meh personal advice is that since Werewolf already has so much damage, build 'em tanky.

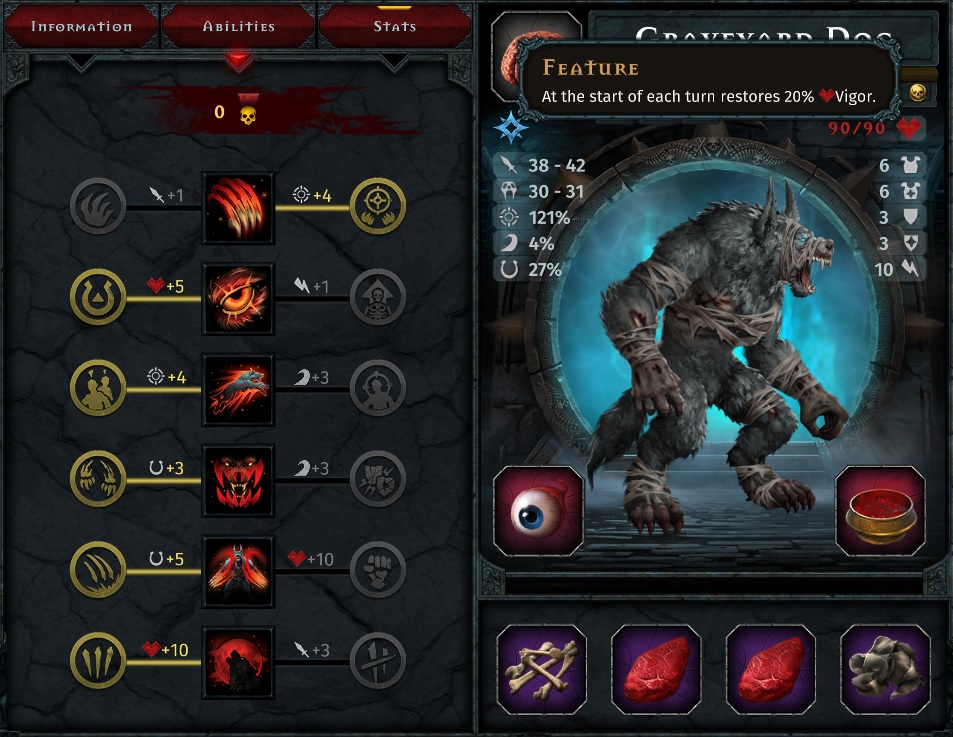
an example Werewolf, built for solo battles

Feature: Heals for 20% of max Vigor at the start of each of the Werewolf's turns

Abilities
1. Swing, it strikes twice, so good for stripping Blocks, though ye might use it for damage against enemies that have no Armor, because ye got Tear Up for ignoring Blocks
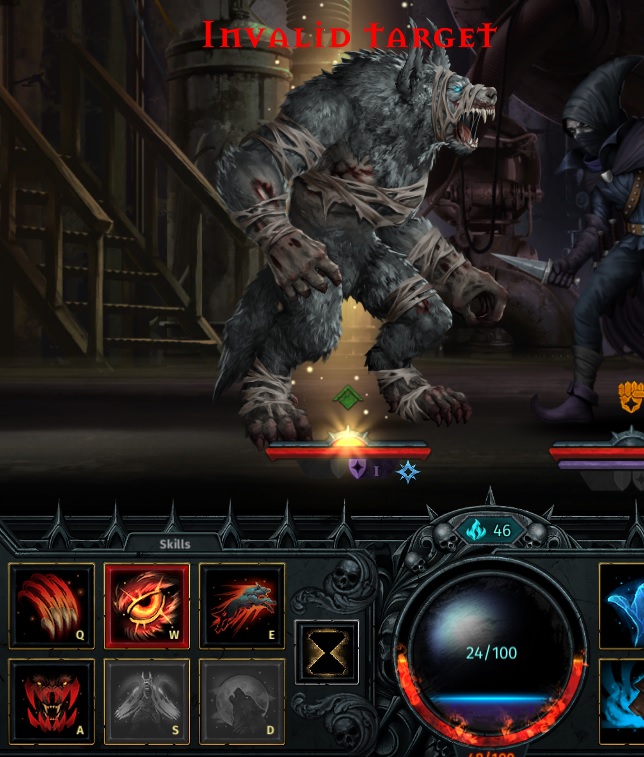
2. Curse of Madness,useful for getting Werewolf back to the 1st space, and not awful if Werewolf works with a full party of minions. Foolishly, Curse of Madness has to be used on an allied minion - if the Werewolf is alone, there is no "target" for this ability, and it cannot be used. See picture below.
3. Hunting Down, only works on enemy spaces 3 & 4 - does NOT automatically target the rear-most enemy. So if there are only enemies left in spaces 1 and 2, Werewolf cannot target thehm!
Be careful of enemy Shields / Redirects when using this power, for it will often redirect to the wrong enemy - or focus yer fire even if the redirecting enemy isn't in the 3rd or 4th space!
4. Tear Up, yer #1 damage against enemies with Block & Armor. Ye can spam this ability against enemies with multiple Blocks, instead of wearing through the blocks with Swing.
5. Ambush, deals INCREDIBLY high damage at the start of Werewolf's next turn - and since this is a delayed action, Werewolf can act again after the Ambush attack. Beware of enemies that add Block - a single Block negates all damage done by Ambush. Ah have noticed that sometimes Ambush simply does not work at the start of Werewolf's next turn - this might happen if ye use Ambush as Werewolf's first action in a turn, and then use another ability after Ambush. Always use Ambush as the last ability in a turn if ye can. Hopefully this is just a bug that will be fixed in the next patch. (Today's date: 30th April 2021). Ambush also fails if an enemy causes Werewolf to move position, or there is no enemy left in the targeted space by Werewolf's next turn (natch).
One other advantage of Ambush is that it bypasses redirects - it always hits the space that ye assign it to. Ye might have to be careful if yer enemies like shuffling positions.
6. New Moon, Ultimate, but before ye get too excited - no, extra actions does NOT mean Werewolf regenerates more than once per turn. New Moon & both its mods are incredibly useful, though, especially if ye're making a Werewolf solo build. New Moon stacks with the Madman's Eye item, meaning Werewolf could take up to THREE ACTIONS PER TURN! (Ah mention this again down below, just in case.) Ye just have to decide whether yer Werewolf needs the extra damage from Blood Moon, or ye want to save more Wrath by using Full Moon.

Best Position: 1st space, [o][o][o][X]
Werewolf can use all of its abilities in the first position, though most of its abilities can be used from any space, and Curse of Madness lets it move forward if needed.

Advantages
  • High damage & a lucky critical hit means Werewolf could theoretically 1-shot a weak enemy at lower difficulties
  • Powerful self-heal for free every turn - stacks with items like Enchanted Heart, Bloated Flesh, and Vampire Fangs
  • Can have high Armor & Resistance AND up to 3 Block & Ward through spending stat points
  • With a free heal at the start of every turn, Werewolf can start battle with less than 100% Vigor, and heal on the first turn. Werewolf's high Initiative almost certainly means it will act before the enemy

Disadvantages
  • Werewolf has low Vigor, and it cannot be improved by leveling up. Werewolf's tankiness comes from its ability to negate damage with Armor & Resistance, meaning it's very risky to pit Werewolf against enemies that bypass Armor & Resistance
  • Werewolf is a bit of a Wrath drain, simply because New Moon is so expensive. The advantage of an additional action is usually worth the cost, though

Items
Moon Shard, to capitalize on Werewolf's tankiness, give 'im a damage bonus each time heh gets hit! Whoozagoodboyden??
Bloated Flesh, added survivability in a solo Werewolf build. Ye can't have too much healing!
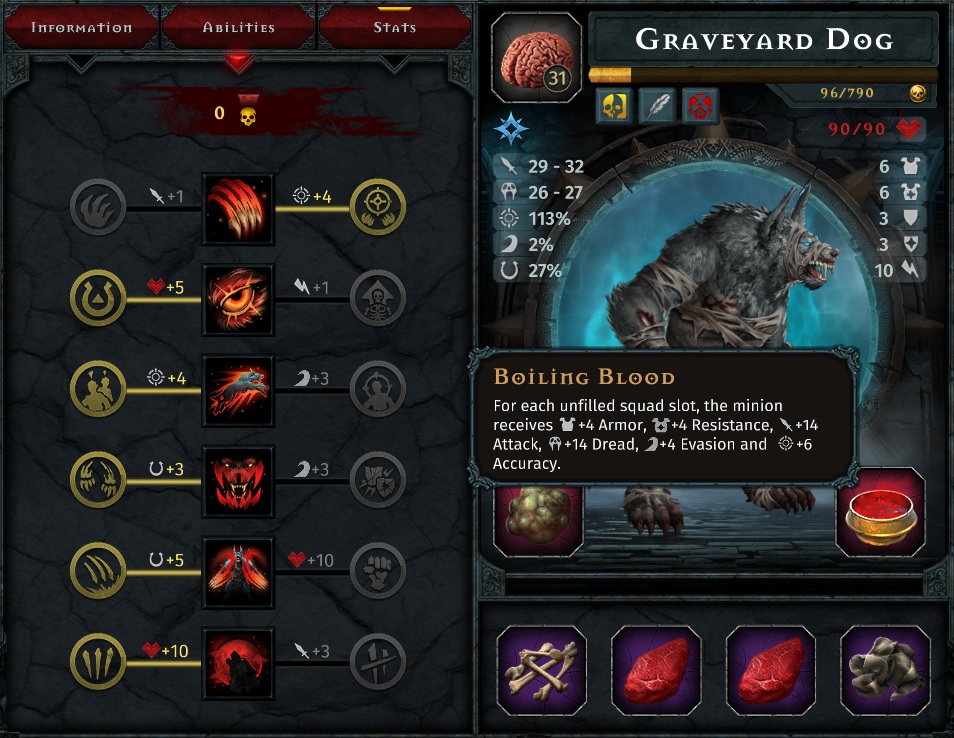
Boiling Blood, definitely equip on Werewolf for a solo build. With bonuses given by Boiling Blood, Werewolf can survive & deal high damage against most enemy squads that lack a healer and/or lack a "remove Armor/Resistance" debuff
Jester's Visage, after ye build a super-tanky Werewolf meant to work with allies, ye may as well make it soak up attacks. Pair with Moon Shard for added benefit
Madman's Eye, if ye're building a solo Werewolf. Madman's Eye stacks with the extra action given by New Moon
Vampire Fangs, maybe pulled from a minion that got too close? Improve Werewolf's self-healing by regaining Vigor when dealing high damage

Minion Synergies
With Werewolf's Curse of Madness buff, it wouldn't hurt to pair hehm with minions that rely on critical hits, like Fallen Dhampir, Bride of Iratus, Vampire, Lich, or Ghoul.
Ah am tempted to pair Werewolf with Skeleton, just so Werewolf can benefit from Skellie's Strength of Mediocrity ability mod.


Curse of Madness cannot target the Werewolf itself, and cannot be used if the Werewolf is alone
Wraith
Feature:

1. Cold Grasp,
2. Necrotic Wind,
3. Ghostly Fire,
4. Evolution,
5. Ghostly Veil,
6. Terrorwave, Ultimate,

Items
Martyr's Rags, consider using this to Evasion-tank with Wraith, after ye've gotten extremely high Evasion on Wraith
Mechanical Eye, to hit enemies with the -Evasion debuff & move them to interrupt stances
Sharpened Bone, to apply Terrorwave debuffs to enemies even through Ward

Minion Synergies
Wraiths go well with other Stress damage minions such as Banshee, Mummy, and Shade.
With the Wraith's XXXX Ultimate mod, theh also act as support to minions whose accuracy isn't that great. The XXXX Ultimate mod strips enemy Evasion (if it hits), meaning these other minions have a greater chance of hitting with thehr own abilities.
Zombie
Ah have no complaints against Zombies - theh are good-to-great damage dealers, and theh can even take some damage before being destroyed.

Feature: Attacks ignore Armor & Resistance
But Zombie's attacks do NOT ignore Block or Ward!

1. Volley,
2. Buckshot,
3. Igniting Mixture,
4. More Powder, both mods are good, depending on yer tactical needs. If yer Zombie sits at the back and bides its time, Ah would recommend the Even More Powder mod. If yer Zombie sits up from and uses Buckshot or Igniting Mixture more, Ah would recommend Trench Loading for survivability
5. Bombardment, Ah can't tell ye how many times a combination of the Even More Powder mod & Bombardment has obliterated meh enemies. Ye could have TWO Zombies, ye know - one equipped with the Shock Charges magic damage mod, and one equipped with the Abyssal Bombardment physical damage mod, to use against enemies that lack the right kind of defense
6. Cannonball Ultimate,

Best Position: 3 or 2 = [o][X][X][o]
Before ye go all googly-eyed over Bombardment, Ah would urge ye to look at Buckshot and Igniting Mixture, which can only be used from spaces 2 or 1. Though Bombardment is crazy-powerful once Zombie has had a few rounds to wind up hehs damage, Igniting Mixture is very good if ye're fighting a drawn-out battle where consistent damage helps, or if ye're fighting enemies with good Evasion where ye should spread attacks round for a better chance to hit.
The good news overall, though, is that Zombie is pretty flexible with where ye place hehm, since abilities like More Powder can be used on hehs turn even if heh's out of position for the ability ye really want.

Advantages
  • Zombie excels against enemies with high Armor & Resistance, since its Feature ignores Armor & Resistance. If ye're facing strong tank enemies (especially those with stances), ye can use Zombie to blow thehm to smithereens - or at least knock thehm back & interrupt thehr stance with Cannonball. Ignition damage from Igniting Mixture deals true damage, with also ignores Armor & Resistance.
  • Zombies make good counters to Royal Gunners in the Cathedral, because neither the More Powder nor the Bombardment (setting up or launching the attack) abilities trigger counterattacks from Sniper Stance.

Disadvantages
  • Maybe Zombie's primary weakness is the lack of a self-healing ability, but an item like Vampire Fangs will fix that right up, considering the amount of damage Zombie can do

Items
Mechanical Aim (unique), for that extra damage after building Zombie up with More Powder; negated by Zombie's Cannonball Ultimate unless Zombie is already in space 4
Legcuffs, to keep bonuses from Mechanical Aim even if Zombie would otherwise be moved
Mechanical Eye, so ye don't have to waste stat points on Accuracy
Sharpened Bone, to do damage in the early rounds of combat and/or if enemies have renewable Block & Ward
Vampire Fangs, for self-healing with Zombie's high damage output
Index of Minion Abilities & Stats
Minions with Block/Ward Stats
Block and Ward allow minions to fully negate the first attack of the corresponding damage type, per stack of Block or Ward. Block negates physical damage, and Ward negates magical damage. (Wards on enemies also negate Stress damage.) However, because Block and Ward negate all damage, this can negatively impact yer Wrath generation in the early rounds of combat.
These following minions have both Block and Ward stats ye can put Stat Points into. However, it tends to get VERY expensive VERY quickly!
  • Abomination
  • Banshee
  • Bone Golem
  • Bride of Iratus
  • Ghoul
  • Infested
  • Lich (Ward is cheaper)
  • Lost Soul
  • Mummy
  • Reaper
  • Shade (Block is cheaper)
  • Vampire
  • Wraith

Minions with "Instant Death" Abilities
  • Abomination = "Break & Swallow" Ultimate = use on enemies with low Sanity to instantly kill thehm and gain a regeneration buff
  • Ghoul = "Lunch Break" Ultimate, instantly kill an enemy at low Vigor (25% or 35% depending on the Ultimate mod) and gain a powerful buff
  • Head Hunter = "Abyssal Bounty" Ultimate mod = 50% chance to kill a non-boss enemy. Head Hunters can be upgraded with the Contract of Blood minion-specific item to add 5% instant death chance to ALL attacks

Minions with Self-Heals
  • Abomination (with Pound of Flesh unique minion item or other stack of its Break & Swallow Ultimate)
  • Black Widow, with Spider Cocoon ability
  • Bone Golem
  • Fallen Dhampir (with a lucky critical hit, or use of the Fate Magic spell)
  • Ghoul (with the Gruesome Snack unique minion item, or a stack of Lunch Break Ultimate, or with its Degustation ability mod); Ghouls also heal a little bit with every damaging attack
  • Mummy (with Cursed Bandages unique minion item and liberal use of its Hex Beam ability)
  • Shade (with Void Flame unique minion item, see below)
  • Reaper (if ye can get a kill with its Scythe of Death Ultimate)

Minions That Interrupt Stances and/or Stun
This list comprises only guaranteed stance interruptions or stuns. It does not count enemy-moving powers that might interrupt stances or effects based on critical hits.
But keep in mind that many of these abilities are negated by Block or Ward.
  • Banshee = Howl Ultimate w/ Morbid Howl mod
  • Bone Golem = Maim (both mods)
  • Bride of Iratus = Warning Shot (both mods)
  • Fallen Dhampir = Mocking Riposte (both mods)
  • Reaper = Drain (both mods)
  • Skeleton = Show Them Their Place (both mods)
  • Unfrozen = Ice Spear w/ Ice Lance mod

Minions Which Restore Mana
  • Reaper
  • Shade (especially with the Void Flame unique minion item)
  • Vampire

Minions with % Based Abilities (Useful at Higher Difficulties)
  • Black Widow, Spider Venom feature
  • Head Hunter
  • Shade
  • Vampire
Latter-Day Sinners
Meaning, here's a list of minions that might not be very useful in the early game, but after theh get the right ability mods & stats, theh can be used regularly.
Keep in mind ye can get tons of extra stat points by upgrading the ingredients used to make the minion.
  • Purple (legendary) ingredient = +14 stat points
  • Blue (rare) ingredient = +6 stat points
  • Green (uncommon) ingredient = +2 stat points

  • Blood Phantasm - useful after ye've spent some stat points to make it damage-focused or tank-focused (or both!)
  • Head Hunter - get hehm to at least level 15 before ye make much use of hehm. Heh becomes most useful after ye've gotten the right ability mods, and improved hehs damage (Attack & Luck) or tankiness. Heh starts off with OK Armor, and ye can improve this up to a maximum of 14 - and don't forget to max hehs Vigor, so hopefully heh won't be 1-shotted! Hehs Evasion ain't bad for someone who isn't specialized in Evasion tanking, either. Ye can afford to hold off on Head Hunter until ye get a level 18 brain, because with ability mods like Lucky Catch, Sundering Wrath, and Abyssal Bounty, heh is useful against strong enemies in the late game.
Notes
Abomination, Break & Swallow Ultimate = if used with the Fate Magic spell (a guaranteed critical hit IF the attack hits), ye can often use this ability when the target has a little bit more than 20% Sanity left. Ah have occasionally gotten enough stacks of Break & Swallow on the Abomination so that it healed over 100 Vigor per turn

Bride of Iratus: Personally, Ah find no use for Brides, and ye can tell thehm Ah said so! (Please don't tell them Ah said so!) Zombie can do everything theh can do, and Zombie does it better. The only possible advantages Brides have over Zombie is that 1) Brides get Evasion, 2) up to ONE WHOLE STACK of Block & Ward each, and 3) the Warning Shot ability that interrupts Stances.
At Normal difficulty or higher, Evasion is really only useful at extremely high values (50-70 Evasion or higher). If ye have a minion with a Redirect/Shield power or that grants tons of Block & Ward (such as Bone Golem), MAYBE a Bride will survive long enough to be useful.

Shade, with Void Flame unique minion item = whenever the Shade deals damage when equipped with this item, it gives Mana, Wrath, and Vigor for itself. This includes damage done on counterattacks with its Feature, counterattacks from the Pain Reflection stance, and any damage done with Gloom Claws. This does NOT include Vigor loss caused by its Ultimate!

Lost Soul = to confirm, when Sudden Reality Ultimate is cast more than once, it does not re-apply the first buff, even though it looks like it stacks the same first application. Instead, Sudden Reality simply adds Damage and Dread equal to the number of buffs/debuffs currently on enemies when Sudden Reality is cast.
With the exception of Spider Venom (a Black Widow debuff), multiple stacks of the same buff or debuff seem to count for Sudden Reality. Multiple stacks are shown with a "(#)" next to the name of the buff or debuff.
Debuffs from potions (such as Slime Vial) count for Sudden Reality, and will be removed.

1st stack of Sudden Reality ---------------------- 2nd Stack of Sudden Reality
Ultimate Sacrifice
Lich & any 1-3 expendable troops such as cheap & easy Skeletons. A Dark Knight or other tank is also recommended. Lastly, ye can field a damage-dealing minion such as Ghoul, Zombie, or Bride of Iratus, but if ye equip the right items on Lich, yer Lich should be able to clear the field after a few casts of Sacrifice.

This strategy is fairly effective even at its basic level, and gets even better if ye can equip the right items (see "Counsel" below).
1. Use yer Dark Knight to feed yerself Wrath with its Dark Tithe ability (and mod, Dark Offering). The Heart of Emptiness Dark Knight minion item is also useful to generate Wrath & Mana on the side.
2. Use yer Skeleton's Embrace Mediocrity ability to buff yer troops until ye are ready to sacrifice it.
3. When Wrath reaches 75 or higher, use the Lich's Sacrifice power on the Skeleton to heal yer minions. This does not use up an action. This should heal most or all of the damage a Vampire takes by using its abilities, allowing it to use its most powerful abilities just about every turn!
4. After Sacrificing the Skeleton, use the Lich's Ultimate power: Reanimate. This will create a brand-new Skeleton that ye can Sacrifice again when needed.
5. Repeat ad infinitum to heal yer troops and possibly gain other great bonuses.
6. High damage caused by the Lich or other non-expendable minions will keep yer Wrath cycle going.

Counsel: If ye take the Cheap Bodies Ultimate mod for the Lich, and ye can start off battle with 60 or more Wrath (easily possible by upgrading the Abode of Wrath, talents, and Artifacts), ye can save yer parts and not create an expendable minion every time ye field this Battle Squad. With sufficient Wrath, ye can just summon an expendable Skeleton with Reanimate on the first turn.
Be warned: ENEMIES REGAIN SANITY WHEN A MINION DIES. This should not be a serious problem, since the Lich does magical damage.

Further Counsel: If ye equip a Heart of Emptiness on your Dark Knight, ye can gain Wrath faster. (Ye can get a Heart of Emptiness by visiting Cultists with a Dark Knight in yer Battle Squad.)
The Reanimated Skeleton has better resistances than the level 1 Skeleton ye sacrificed, and this can be improved even more with the Dark Resurrection modifier to the Reanimate Ultimate power of the Lich, but this costs more Wrath.
Be VERY careful if ye use the Lich's Rain of Fire ability - ye can easily destroy the rest of yer own minions! After a few rounds of the Cannibal Jaw buff, the Bone Shards ability should be more than enough to systematically erase the decadent "heroes" from existence!
Use a Vampire's Auspex ability to bypass Blocks and Wards.
A summoned Skeleton will disappear at the end of the battle, and will need to be replaced.

Recommended items include:
  • Cannibal Jaw (+24 Attack and +24 Dread when an ally dies), add to Lich or yer damage-dealing minion.
  • Vulture's Feather, add to Lich, yer damage-dealing minion, or yer tank.
  • Broken Orb (+1 Block and +1 Ward when an ally dies), add to Lich or yer tank.

Ultimate Sacrifice Alternate
4 Lich 3 Ghoul 3 Ghoul 1 any expendable minion such as Skeleton or turned enemy

If ye are lucky enough to get more than one Cannibal's Jaw and/or Vulture's Feather, ye might think about equipping the spares on minions like Ghouls. Ah was very lucky once and found 3x copies of each item.
1. Use the Lich's Sacrifice + Reanimate combo the same way ye do with the other Ultimate Sacrifice battle squad.
2. The Lich and Ghoul (or other minion equipped w/ Cannibal's Jaw and/or Vulture's Feather) get bonuses whenever ye Sacrifice the expendable minion(s).
3. If absolutely needed, the Ghouls can use the Just a Bite ability to heal thehmselves.
4. Ye might need a spell or a potion to get enemies' Vigor precisely low enough to use the Ghouls' Lunch Break Ultimate.
Counsel: Ah have found this alternate Battle Squad to be very effective against large enemies such as Fallen Knights. Lich & Ghoul damage ramps up quickly, theh stay healed with the Lich's Cannon Fodder ability mod, and Ghouls can use thehr Lunch Break Ultimate to destroy large enemies without having to grind thehm down further.
Dangers of this build include suffering high damage. Ghouls only get 1 Block & 1 Ward, so longer battles can be dangerous if the Ghouls do not get high Evasion.

NOTE: Ah have read in the Strategy Guide published in April that Sacrificing minions results in less experience gain at the end of the battle! Ah have not noticed this in-game, but Ah believe it!
Mind-Eaters
Mind-Eaters
4 Banshee 3 Mummy 2 Abomination 1 Skeleton
OR
4 Wraith 3 Shade 2 Mummy 1 Abomination (Ah have had the best success with this set-up)
OR
4 Wraith 3 Shade 2 Reaper w/Spectral Flow ability mod 1 Abomination
OR
3 Shade 2 Shade 1 Abomination (leaves space 4 for a minion of yer choice, or keep it empty so ye can always cycle Pain Reflection)

1. Spec heavily into Stress damage for the Banshee, Wraith, Mummy, and Reaper.
2. Cause yer enemies to go Insane by dealing constant Stress damage. Ye can make enemies instantly Insane with the Reaper Expunge ability mod, to cause major debuffs that will impede the enemies' effectiveness. If ye have extra Wrath, ye can use a Skeleton with the Clanger Ultimate mod to cause most / all enemies to go Insane at once.
3. Hold the line with the Abomination, using its Battle Thumping buff/debuff and Shield abilities. Swap the Abomination to the back with the Shade's Trick of the Eye ability if the Abomination needs a turn or two to heal.
4. The Mummy can heal itself with its Cursed Bandages unique minion item. The Shade can heal itself with its Void Flame unique item. The Abomination can heal itself with its Break and Swallow Ultimate. It can regenerate from battle start with its Pound of Flesh unique minion item. All minions get a small heal when an enemy dies if the Reaper makes the kill; the Reaper gets an extra big heal if it kills an enemy with its Scythe of Life ultimate mod.
5. When yer enemies' Sanity is low enough, instantly remove them from the battlefield with the Abomination's Break & Swallow Ultimate or Reaper's Scythe of Death Ultimate.

Artifacts

the victory screen of a well-executed Mind-Eaters combination
Terrible Vengeance
4 Lost Soul 3 Reaper 2 Fallen Dhampir 1 Black Widow (ye can swap positions of Lost Soul and Reaper, depending on which of Lost Soul's abilities ye want to use)

This build is meant to steadily degrade yer enemies' Vigor & Sanity, and then finish each of thehm off with a powerful killing blow. It is a good all-around team, able to deal damage to all kinds of enemies, and good against enemies which have strong self-buffs that ye really want to get rid of. This combination does end up taking a lot of damage, so bring some potions or spells to counter this.
Black Widows and Reapers go together like small German children and gingerbread.
1. Spec minions for AoE attacks & debuffs (such as the Poisoned Web Ultimate mod for Black Widow).
2. Equip yer minions with items like Ashes of a Burned Witch or Crow's Paw to apply more debuffs with each ability use.
3. When enemies have a large stack of buffs and debuffs, use Lost Soul's Sudden Reality Ultimate to give yer minions a powerful +Attack and +Dread buff. Sudden Reality makes stacks of itself when used (if any enemy has at least 1 buff or debuff), so ye can use it repeatedly for no diminishing return. See example under the "Minion Abilities & Stats" section.
4. Execute each of the enemies in turn with attacks with Reaper's Scythe of Death Ultimate, or almost any attack from the Fallen Dhampir (if sheh's got low Vigor, the Aim for the Vein ability should help keep hehr alive).
5. Reaper's feature heals the battle squad no matter how Reaper kills - with hehs Ultimate, with hehs Dissection, even with hehs damage-over-time Agony.

Counsel: This build requires a LOT of Wrath to use effectively. Ye would use Wrath for Black Widow's Spider Web Ultimate to apply large stacks of debuffs to all enemies, Lost Soul's Ultimate for the large buff, and Reaper's Ultimate to execute enemies and heal yer own minions. Ah would recommend only seriously using this combination after obtaining Artifacts such as Spiked Rings and Bloody Horn, after upgrading the Abode of Wrath, and getting the Overwhelming Ire talent (under "Ire").
Total Nomination
A Battle Squad that excels at tearing apart big enemies, Elite enemies, and certain bosses.

4 Vampire 3 Vampire 2 Ghoul 1 Bone Golem
(Bone Golem is replaceable with something else that can tank & absorb attacks, or buff & heal yer minions. These might include an Abomination which can heal itself, a Blood Phantasm, or even a Skeleton.)

Tactics
1. Select the Berserk ability mod of the Hysteria ability for both Vampires. Don't worry too much - when done properly, the enemy might not even get 1 chance at an attack. If theh do manage to get off an attack, it should be negated by the Block & Ward ye have on yer Vampires & Ghoul (and Bone Golem).
2. Ah would recommend the Happy Meal Ultimate mod for the Ghoul, but either mod should work, since the point is to eliminate enemies - the buff that the Lunch Break Ultimate gives is a bonus.
3. Strip an enemy of yer choice of thehr Wards. Ye can use the Vampires' Auspex ability, spells, or certain Artifacts.
4. Cast Berserk twice total on an enemy, once with each Vampire. This will bring the enemy down to 25% of thehr maximum Vigor. If ye want to make sure the enemy doesn't get an attack off with the Berserk damage buff, postpone both Vampires' turns, and then cast Berserk at the end of the round. Ghoul should have high enough Initiative to act first on the next round.
4a. Ye can also get the same result by using a Vampire with the Berserk mod and the Coward's Foot minion item - this gives one Vampire two actions on round 1, so ye could save space for another minion.
5. If needed, postpone the Ghoul's turn until the end of the round, after both Vampires have cast Berserk.
6. Once the enemy is down to 25% Vigor or less, use the Lunch Break Ultimate of the Ghoul to instantly kill thehm and buff the Ghoul.
7. Repeat for all remaining enemies.

Counsel
  • Ye will need a minimum of 55 Wrath to use this strategy.
  • Ye will not need any Mana to use this strategy.
  • Ghoul will need high initiative for this strategy to work best. It's possible that Ghoul has the highest Initiative in the game, so this should not be difficult.
  • Keep in mind that this tactic is not as useful against inedible enemies! But after a few chomps with Lunch Break, the Ghouls should have some nice damage output & high Luck to deal with the inedible ones.
  • Use the Vampires' Auspex ability to negate the enemy's Block & Ward, to set thehm up to be targeted with Berserk. Ye can also put the Sharpened Bone item on yer Vampires (see picture). Ghoul's Lunch Break Ultimate already ignores Block.
  • If the enemy has a healer, or ye don't want to buff an enemy with +Damage from Berserk, then ye can Wait and postpone yer minions' turns until after the enemy acts. If yer Ghoul has high enough Initiative, sheh should still act first on the next turn, after the enemy is brought to 25% Vigor by yer Vampires.
  • Lunch Break cannot be used against certain "inedible" enemies such as Elementals, Golems, and Living Armor

Positioning
  • The two Vampires need to stay in the back 2 spaces, where Hysteria / Berserk works.

Abilities & Mods
  • To use this strategy the fastest, both Vampires should have the Berserk ability mod for the Hysteria ability - this will bring an enemy down to 25% Vigor after one casting from each of the Vampires.
  • Ye can use the Rage ability mod of Hysteria, but it will take longer (3 casts total) to bring an enemy down below 25% Vigor.
Solo Build Tips & Tricks
If ye want to create solo builds - where ye pit 1 minion against full enemy groups - ye'll need to get the right spells, talents, Artifacts, and ability mods. In general for solo builds, ye'll always want:
  • high mana & mana generation
  • high Wrath & Wrath generation
  • high survivability on yer minion (regeneration or damage absorption)
If ye can get all of these things, yer minion's damage output can be buffed, or ye can find other ways to kill enemies (like with the Finger of Death spell), so it's alright if damage comes second.

Minion Items
Bloated Flesh - to keep yer solo minion healed. It's possible that if the minion takes a ton of damage, it might be killed in 1 turn, so having some form of backup healing is also good practice
Boiling Blood - ye can't ever go wrong with Boiling Blood for a solo minion build, since it gives +stats useful for any minion, and it is more effective the fewer minions ye have on the field
Vampire Fangs - especially if yer solo minion is a high-damage type like Werewolf, or has a damage-over-time ability. (Warning: Damage-over-time abilities may or may not trigger vampiric healing!)

Spells & Talents
Don't forget to actively use Distillation after ye've gotten the Necromancy Power talent (Alchemy 4). It might be just enough to save yer solo minion!
  • Fortune
  • Finger of Death
  • Battle Eternal
Ye'll want to get all the passive buff Talents ye can find, including:
  • Luck Potion (Alchemy 2)
  • Durable Materials (Alchemy 3)
  • Necromancy Power (Alchemy 4), and remember to use Distillation before tough fights
  • The Blackest Lodge (Magic 1)
  • Black Incense (Magic 2)
  • Wrath Unchained (Ire 1)
  • Drums of War (Ire 1)
  • Advanced Ballistics (Ire 2)
  • Frenzied Howling (Ire 2)
  • Relentless Evil (Ire 3)
  • Overwhelming Ire (Ire 4)

Difficulty
It's risky enough using a solo minion on More Pain! (Normal) Difficulty; Ah would not recommend using solo minions on Good Always Wins (Hard) difficulty until ye are 110% fully kitted out with all the tips given here. Ah would not recommend solo minions on Eternal Harvest (Extremely Hard) difficulty at all.
The Lone Wolf (Solo Werewolf)
This build is simple: 1 Werewolf.
The trick comes down to how tanky ye can build the werewolf, and which enemies ye pit hehm against. With the proper use of spells & the right items, Ah have torn meh way through most of the Catacombs, most of the Cathedral, and most of the Cemetery, including the Mad Scientist Boss, with only the Lone Wolf on More Pain! (normal) difficulty. For the final battle with the Risen Heroes in the Cemetery, Ah also brought a Skeleton for the Strength of Mediocrity buff, but Ah'm pretty sure the Lone Wolf could've soloed 'em. See hugely braggy pictures below!
(In the final battle, poor Skelly turned out to be mostly useless, since the Mage Risen Hero stripped the Lone Wolf of all the Strength of Mediocrity buffs in short order.)

1 Werewolf

Build
Make yer Lone Wolf as tanky as possible - don't throw it into battle before ye have full Block & Ward, and at least a few ranks in Armor & Resistance. Werewolf does not get any Vigor bonuses from leveling up, but ye can get a few Vigor bonuses by choosing the right ability mods. When ye get the choice, pick the Curse of Wrath ability mod; with a solo Werewolf, this ability is otherwise useless.
Make sure ye have plenty of ways to regain Wrath. One Artifact like Bloody Horn or Spiked Rings should be enough, along with a well-stocked Abode of Wrath. After the first couple rounds of combat, Werewolf will be taking damage to generate more Wrath.
With all this Wrath, ye'll want to keep New Moon going whenever ye can, spending the rest of yer Wrath on Ambush.

After ye've built up enough tank, spec yer Werewolf for pure damage - Boiling Blood and hehs natural Vigor regeneration should keep hehm alive long enough to out-damage the enemies heh faces.

Items
Use the items that give more bonuses the fewer allied minions ye have - these are Boiling Blood, Bloated Flesh, and Madman's Eye.
Boiling Blood gives yer werewolf all the advantages it needs, and some it doesn't. The item dramatically increases Werewolf's damage, with a base damage of 70-80, and very good base Armor & Resistance.
Bloated Flesh keeps the Werewolf healed, since it will be soaking up ALL attacks. Normally Ah would say a free 20% Vigor heal per turn is enough, but it won't be against high-damage enemies. Bloated Flesh & Werewolf's Feature combined allow the Lone Wolf to recover 50% or more of hehs Vigor per turn.
If ye're feeling super-confident that Werewolf can out-heal the damage heh'll take, ye can swap out Bloated Flesh for Madman's Eye. Ah can confirm that Madman's Eye stacks with New Moon, meaning that the Lone Wolf can take three actions per turn while New Moon is active. Werewolf already does plenty of damage on lower difficulties, so ye might want to go for the Full Moon mod instead of Blood Moon.
Orb of Negation, to render the Lone Wolf immune to debuffs, ignition, and prevent hehm from losing buffs ye give hehm with spells or potions

Artifacts
Bloody Horn, for Wrath generation
Destruction Maul, to strip enemy Blocks
Ring of Decay, to strip enemy Blocks
Spiked Rings, for Wrath generation
Spirit Chainmail, for a few battles so Lone Wolf can get the maximum buff
Spirit Spear, for a few battles so Lone Wolf can get the maximum buff

Talents
Ye'll want spells that strip enemies of Block, such as Hail of Teeth (Ire 1) or Finger of Death (Magic 4), so ye don't have to waste an action using Swing or Tear Up to strip Blocks.
The Fortune spell (Magic 2) is always a good investment, since it's cheap and can often guarantee an instant kill against a weaker enemy.
Lastly, ye'll want all the passive buffs ye can lay yer claws on.
  • Durable Materials (Alchemy 3)
  • Dark Enlightenment (Alchemy 4)
  • The Blackest Lodge (Magic 1), because just why not? When one of yer minions deals a critical hit, enemies suffer a tiny bit of Stress damage based on the critting minion's Dread. This passive also starts ye down the path to Finger of Death (Magic 4)
  • Black Incense (Magic 2)
  • Wrath Unchained (Ire 1)
  • Drums of War (Ire 1)
  • Advanced Ballistics (Ire 2)
  • Frenzied Howling (Ire 2), mostly just for atmosphere
  • Relentless Evil (Ire 3)
  • Overwhelming Ire (Ire 4)
  • Indiscriminate Fire (Destruction 3), to maximize any spells ye cast on Lone Wolf's behalf

Potions
Ye'll need a few potions just to make sure Lone Wolf stays alive, and maybe a few more to maximize damage.
  • Ancient Vampire Blood, ye may as well capitalize on Werewolf's insane damage & heal hehm at the same time
  • Dead Leprechaun Potion, to maximize critical chance & damage
  • Potion of Vulnerability, especially for bosses or large enemies when ye want to be absolutely sure ye kill thehm this turn
  • Recovery Potion, for straight healing of Vigor if the Lone Wolf gets below 50%
This is really all ye need if ye have a super-tanky Werewolf. If ye're feeling vicious, ye might also throw individual buffing potions (such as Eyeball Potion) on the Lone Wolf, or debuffing potions (such as Vial of Slime) on the enemies.

Pick Yer Targets
  • As a Lone Wolf, ye'll have to be pretty selective as to which enemies Werewolf will face, and which ones ye take out first.
  • DO NOT pit Lone Wolf against enemies that ignore Block & Ward or Armor & Resistance, like Monks in the Cemetery.
  • DO NOT pit Lone Wolf against enemies that have a "remove all Armor/Resistance" debuff, like Dhampirs in the Mercenary Barracks (unless heh has Orb of Negation)
  • DO NOT pit Lone Wolf against enemies with a serious -Attack debuff, like Golden Golems in the Catacombs (unless heh has Orb of Negation)
  • DO NOT pit Lone Wolf against Royal Gunners in the Cathedral, unless ye can take Gunner out on the first turn. Royal Gunner's Sniper Stance triggers after every action, and the Lone Wolf can get 2-3 actions per turn.
  • If ye're building The Lone Wolf at higher difficulties (Good Always Wins, Eternal Harvest), treat hehm like a guerilla warrior: don't be afraid to maul one enemy to death, then retreat and return again. At the beginning of each battle, Werewolf regains all stacks of Block & Ward, increasing hehs survivability. Ye can also spend any extra stat points ye get in between battles to give hehm a slight edge in the next one. One slight advantage to this strategy is that Werewolf heals before heh retreats, and heals again on hehs first round in the next combat.

  • DO pit Lone Wolf against glass cannons, because chances are Werewolf will be able to kill them before they can deal serious damage.
  • DO pit Lone Wolf against enemies that rely on high Armor for thehr protection - one snap from Tear Up, and theh become nothing more than meat awaiting slaughter!

Battle Tactics
Take out weak enemies as soon as possible. Tear Up is good if theh are in the front spaces, and Hunting Down is good if theh are in the back spaces. If ye need to, use the Fortune spell to all-but guarantee an instant kill against a frail enemy with no Blocks. (Lookin' at you, Bard!)

the Lone Wolf confronting a full squad of enemies

the Lone Wolf & Skelly-buddy confronting the Risen Heroes

the Lone Wolf on the cusp of victory!!
Master of Thorns (Solo Dark Knight)
This is a Dark Knight solo build, but is heavily dependent on the right items & facing the right enemies. Dark Knight should make an above-average soloist, since heh is a 1st-position tank that comes with good Armor & Resistance and a self-heal. Ah call it "Master of Thorns" because yer Dark Knight will only be taking scratches.
a example of stats & minion item layout of the Master of Thorns solo build

This Master of Thorns solo build usually comes down to a battle of attrition, especially if ye face enemies with good Armor, or a healer.
Ah've witnessed the Master of Thorns equipped with Boiling Blood reliably deal over 100 damage in a single hit. With a well-timed Fortune spell, it is possible to one-shot weak enemies on lower difficulties with Heartless Slash. Ah have pitted meh Master of Thorns solo against the Bounty Hunter boss of the Mercenary Barracks, with no real problems (except that the battle took 21 turns).

a well-placed critical hit (guaranteed with the Fortune spell) can potentially instantly kill an enemy on lower difficulties... or as good as kill

Abilities
As a soloist, Dark Knight won't be able to rely on enemies getting debuffs to power up hehs abilities, since heh has no debuffs of hehs own. Ability mods like Stare Into the Void and No Tomorrow will not serve ye well unless ye pit hehm against enemies that grant tons of buffs to thehr allies, like the Oracle in the Dwarven Tunnels and Sorceress in the Catacombs. Ye probably won't want to waste Dark Knight's turn putting hehm into a stance, so hehs stress-based abilities will play second fiddle to hehs Physical damage abilities.
1. Heartless Slash, the Death Comes for Everyone mod will probably be yer go-to ability on any given turn in combat. It does high damage, letting Dark Knight simply hew hehs way through ranks of enemies. Heartless Slash has good range (the first 3 enemy spaces), so this gives ye some flexibility in the attack
2. Hollow Stare, a bit useless if Master of Thorns is focused on Physical damage. Ye might cause enemies to go Insane (to give thehm debuffs) with a couple blasts of Hollow Stare and either of its ability mods
3. Dark Tithe is an extremely useful ability, but it wastes one of Dark Knight's turns. Use with discretion. Ah personally would lean towards the Dark Cleansing ability mod, since mana is in shorter supply than Wrath with a solo Dark Knight.
4. Futile Hopes,
5. Unfeeling Aggression, in a solo build, ye simply won't be able to use this ability, since Dark Knight will always be in space #1, and this ability can only be used from spaces 4 or 3. Save this ability to mod for last. If ye put this solo build in with a full battle squad (maybe just to level hehm up), the We Are Nothing ability mod is probably better than its counterpart, All is Dust, because ye can better control how much Armor & Resistance Dark Knight will get
6. Abyssal Hunger, the Ravenous Abyss ability mod will keep Dark Knight going throughout a long battle, but Dark Greed will allow ye to finish off one enemy if Heartless Slash doesn't. Take yer pick, since both mods will improve Dark Knight's survivability as well.
As maybe an added bonus, Ah have never seen Abyssal Hunger miss or be redirected

Stats
Since Dark Knight's Armor & Resistance translate directly into damage for some of hehs abilities, ye can build hehm super-tanky and still get away with good damage output.
With Boiling Blood, a few stat points, and Artifacts, ye can get Dark Knight's Armor & Resistance to 30 or higher, making hehm all but immune to conventional damage! Muahaha... Muahahaha! MUAHAHAHAHAAAA!
After the first turn, Initiative isn't going to matter much at all, so ye're better off putting spare stats into Accuracy, Luck, and Attack.

Minion Items
Bloated Flesh - if ye just don't want to have to worry about healing
Boiling Blood - grants +Armor, +Resistance, and +Damage, which is all Master of Thorns needs
Enchanted Heart - if ye can't get an Orb of Negation, Enchanted Heart might help keep hehm alive in the face of debuffs like Ignition
Heart of Emptiness, unique - since Dark Knight will be taking ALL THE DAMAGES, this item is the single best way ye'll get to farm Mana & Wrath, which should give ye all the resources ye need to keep the Dark Knight alive
Lantern of Souls - Lantern of Souls is actually probably overkill as far as healing goes - Master of Thorns should not be taking enough damage to need to heal 25% in one turn. If heh does need that much healing, Abyssal Hunger and its ability mods will actually heal for more. But Lantern of Souls will make a good placeholder item until ye can get an Orb of Negation
Orb of Negation - to prevent -Armor and -Resistance debuffs, Ignition debuffs, and the like. Even though Dark Knight has Dark Cleaning to remove debuffs, it's better not to suffer the debuffs to begin with (especially if ye're facing enemies that have a stun or sleep)
Sharpened Bone - can be useful if ye're facing enemies that love stacking on the Blocks & Wards, like Oracle (Dwarven Tunnels). Keep in mind that the Ultimate, Abyssal Hunger, already ignores Ward

Artifacts
Bloody Horn - once ye've got Unstoppable March going, and Dark Knight isn't taking much, if any damage anymore, ye'll need another source of Wrath
Destruction Maul - to strip enemy Blocks & Wards and make the battle go faster
Spiked Rings - if ye find that Dark Knight is not enough of a Wrath farm by hehmself
Talisman of Power - to give a little buff to Dark Knight's survivability and damage
Spiked Rings - once ye've got Unstoppable March going, and Dark Knight isn't taking much, if any damage anymore, ye'll need another source of Wrath
Spirit Chainmail - just a good idea in general, and ye'll only need it for a few battles
Spirit Spear - because more damage never hurts, and ye'll only need it for a few battles
Vampire Fangs - with Master of Thorns usually dealing extremely high damage, Vampire Fangs can potentially keep hehm healed over damage from things like Ignition

Talents & Spells
Finger of Death, to remove Block & Ward, and set an enemy up to be finished off by Heartless Slash
Fortune, yer cheap-and-reliable damage dealer against enemies with low Evasion

Enemies
Master of Thorns will absorb tons of damage, and as long as heh keeps Armor & Resistance up, there should be no real problems keeping hehm healed enough with Abyssal Hunger, spells, or potions.
Dark Knight's Accuracy is nothing special, so heh does not do well against enemies with high Evasion.
Enemies with high Armor will tone down Dark Knight's damage, turning a battle in a long, drawn-out battle of attrition. If ye're fine spending 20 minutes on one battle, that's fine. If ye do face enemies with high Armor, Abyssal Hunger is yer counter to that. Since Dark Knight acts as a Wrath farm anyway, ye might well be able to use Abyssal Hunger every turn! After a certain point, ye may just have to wait until enemies flee.
DO NOT pit Dark Knight solo against enemies like Monks, who ignore Armor & Resistance without applying a debuff!! Ye CAN pit Dark Knight against enemies like Elven Ranger (with Ranger's Mark debuff) as long as ye have that Orb of Negation on Dark Knight. Crazy-stupid-high-damage enemies like Scout (Mercenary Barracks) or Royal Gunner (Cathedral) with thehr Stances can be a major threat to Dark Knight, but ye can probably out-heal the damage with spells, potions, and Abyssal Hunger.
Skel-lone-ton (Solo Skeleton)
Skeleton does not make the best soloist, since Embrace Mediocrity needs other minions to be used, and Show Them Their Place cannot be used from space 1.
Ah have used Skeloneton solo against the Bounty Hunter boss at the end of the Mercenary Barracks with no problems. Skeloneton beat Bounty Hunter down through pure Sanity damage.

Feature: Immune to all buffs & debuffs

Stats
Like most other solo builds, ye'll want to stack on the points that make Skellie tanky: Vigor, Armor, and Resistance. Other than that, ye might want to top off Initiative, to give Skellie an edge over bigger enemies that Skellie might be able to kill with Vorpal Smite before theh can act. Skellie's Initiative is nothing special, though, and maxes out quickly.

Abilities
1. Unassuming Strike, take yer own pick of ability mods - both are useful in thehr own ways. Clumsy Strike, in spite of the name, means ye won't have put as many points into Accuracy. Ah personally lean more towards Accuracy + Sudden Strike because Ah don't want to have to waste attack stripping down Blocks. Unassuming Strike lets Skeloneton deal consistent damage against enemies who have high Armor
2. Show Them Their Place,
3. Astounding Fortitude, Skeloneton can actually protect itself with Astounding Fortitude, so Ah would seriously recommend the Unnerving Fortitude ability mod to deal some Sanity damage back out when Skeloneton is attacked. The additional Armor & Resistance dramatically improves Skeloneton's survivability while facing 4 enemies, too. Combine with major Sanity damage done by Shield Banger, and Skeloneton is actually a really heavy Sanity damager. Use Astounding Fortitude when ye don't have the Wrath for Shield Banger
4. Embrace Mediocrity,
5. Smite, a minimum of two attacks, meaning twice the chance of a critical hit! Extremely useful against enemies that self-buff, like Swordsmen in the Mercenary Barracks
6. Shield Banger, Ah would definitely take the Creepy Clank mod over the Dismissive Banger mod. Dismissive Banger removes buffs that ye could otherwise use to lay on attacks from Smite - but fewer buffs means fewer attacks. With Creepy Clank, though, ye could potentially make all enemies Insane on round 1 of combat, if ye have high enough Wrath to start battle with. The major debuffs that Insanity inflicts can make battles that much easier. If ye have good Wrath generation, then ye could use Shield Banger regularly, and strip Sanity to its bare bones! (Hahahaha, see what Ah did there?). With Boiling Blood, Shield Banger actually does tons of Sanity damage to all enemies, and is a reliable (but very expensive way) to strip Wards. It's possible to have several enemies suffer a Heart Attack with one blast of Shield Banger

Artifacts
Ghostly Blade, actually useful if Skeloneton is causing a bunch of heart attacks with high Sanity damage. This means up to +12% experience per battle for Iratus
Shackles of War, to prevent enemies form becoming Inspired when using Shield Banger or Astounding Fortitude

Minion Items
Thankfully, with Skeleton's feature, ye can save on minion items and ye DON'T have to equip Orb of Negation on it to increase its survivability. Unless ye're planning on blessing Skellie with a ton of buffs from spells, ye also WON'T need to include its unique minion item, Enchanted Bone.
Obviously ye'll want Boiling Blood to give Skellie advantage in every way possible. Though it'll never be a very good Evasion tank or critical hitter, it becomes a major Armor & Resistance tank and a reliable damage dealer. Overall, Skellie's mediocrity just increases with Boiling Blood, and makes it a general all-rounder solo build.
Since Skeloneton doesn't have any healing abilities of its own, Ah'd recommend the Bloated Flesh minion item, which heals 36 Vigor per turn as long as Skeloneton is by itself.

Enemies
Skeloneton is vulnerable to enemies that deal crazy-high damage, like Scout in the Mercenary Barracks and Royal Gunner in the Cathedral.
Blackheart (Solo Fallen Dhampir)

As always, ye'll want to equip Boiling Blood on yer solo minions, and yer pick of another minion item for Fallen Dhampir. Orb of Negation is good for preventing debuffs from affecting 'n' killing hehr, though ye might also consider Enchanted Heart or Lantern of Souls if ye find sheh's not healin' away the damage sheh takes from a full enemy squad. Sheh is also still vulnerable to large single-target damage, such as critical hits from Swordsmen (in the Barracks) or Royal Gunners (in the Cathedral).
Between inflicting Insanity debuffs, and having Evasion boosted by Boiling Blood, this Blackheart solo build has a decent chance of causing attacks to miss - but even missed attacks trigger hehr counterattack with Mocking Riposte!
Critical hits are a Fallen Dhampir's blood & butter: theh deal a ton of damage, theh can heal Dhampir for extra with Aim for the Heart, and theh inflict Sanity damage on enemies.

Feature
Fallen Dhampir's feature is useful in a solo build because sheh'll be taking all enemy attacks, but getting +1 Attack and +1 Dread each and every time sheh's damaged, which only improves hehr effectiveness in long battles.

Abilities
Masterful Thrust,
Aim for the Vein,
Mocking Riposte, Ah would definitely recommend the Exploit Anger ability mod, to keep Fallen Dhampir well-healed while interrupting enemy Stances at the same time. Hehr Luck should be high enough that ye shouldn't need a guaranteed critical hit, when ye'll already have a 60% or higher chance thanks to hehr stats alone. Basically all ye need for this build is to constantly use the Exploit Anger stance, and let Blackheart whittle away the enemies while healing hehrself for free. Sheh will do absolute tons of Sanity damage, inflicting Insanity debuffs on enemies very quickly, and physical damage thanks to hehr counterattack, so sheh's good against mixed squads of enemies who may resist one damage type or the other. The truly nice thing about the Mocking Riposte stance is that sheh counterattacks whether the enemy hits or misses with thehr attack!
Trap,
Pain Blast (ultimate), perfect to use against enemies who are immune to the Stress damage caused by the Exploit Anger stance, such as Gargoyles. Coupled with a minion item like Spider Mandibles, Pain Blast more than pays for itself, especially if ye take the Terror Blast ability mod, which reduces the Wrath cost to 30, and the Overwhelming Ire (Ire 4) talent (which reduces the Wrath cost by another 10, bringing the total cost down to 20 Wrath). Use Pain Blast to clear out any Resistance that might affect future uses of Pain Blast.
Sundering Squall (ultimate), see Pain Blast, but use against enemies with high Armor instead of Resistance.

Stats
Fallen Dhampirs get no Armor or Resistance unless ye equip hehr with Boiling Blood or another minion item, so ye can pour points into other stats. Ah recommend maxing out Luck as soon as inhumanly possible, but don't neglect Attack, Vigor, or Block & Ward. Leftover points can go into Initiative, Accuracy, and Evasion. +Initiative will help ye set Blackheart into hehr Exploit Anger stance before enemies can attack.

Items & Artifacts
Boiling Blood, which ye frankly should put on all yer solo minion builds. A Fallen Dhampir does really need the +Armor and +Resistance to reduce damage taken, +Damage because damage is always good, and +Accuracy so ye can put yer stat points into something else (like Luck). Fallen Dhampir has no other armor, so Boiling Blood can make an important difference to hehr survivability
Medal of Betrayal, the Fallen Dhampir unique minion item, can be very useful in place of Orb of Negation or a +Armor/+Resistance minion item, since the Medal reduces damage by a % instead of a flat value, stacking up to 40%. The trouble is keeping Fallen Dhampir alive long enough for this item to stack.
Orb of Negation, valuable to ensure yer Fallen Dhampir doesn't die from things like Burning, and to prevent hehr from suffering huge -Damage, -Luck, or -Evasion debuffs
Spider Mandibles, if ye find that ye need to use Dhampir's ultimates more. Spider Mandibles will let ye deal an extra, guaranteed 20% of the enemy's Vigor with each use (on normal enemies, that is)
Enchanted Heart, to top off Blackheart's healing, or undo the effects of a damage-over-time debuff
Lantern of Souls, for burst healing if Blackheart doesn't otherwise have the healing sustain sheh needs, or if sheh's facing a mix of easy & strong enemies (sheh can kill the easy ones while taking damage from the stronger).

Artifacts
Destruction Maul, helps Blackheart break through enemy Blocks & Wards to start dealing damage faster
Ghostly Blade, since Blackheart deals so much Stress damage, it is very common for enemies to die from Heart Attacks, so ye can almost power-level Iratus by equipping Ghostly Blade (+3% current level XP for Iratus per Heart Attack death)
Jar of Acid, can slightly improve Blackheart's overall damage output, though ye can probably quickly replace this with something else, like Talisman of Power
Maddening Amulet, to make enemies go Insane faster, though it's almost not worth it since Blackheart causes tons of Stress damage anyway. Pair with Shackles of War to ensure enemies go Insane every time for massive debuffs
Robes of Potence, +Luck, +Accuracy, +Evasion, just as a general improvement like Talisman of Power
Shackles of War, to ensure that when enemies take sufficient Stress damage, theh will always go Insane
Talisman of Power, slightly improves Blackheart's survivability and damage

Potions & Talents
Ah would load up some damage-increase potions for Blackheart (such as Wild Beast Decoction or Dead Leprechaun Potion), even instead of healing potions. Hehr major solo mechanic, Exploit Anger, will ensure that sheh's well healed throughout battle.
Most of the Ire tree will help out the Blackheart build, especially Overwhelming Ire (Ire 4), Infectious Lunacy (Ire 3), Stoke the Flames (Ire 3), Relentless Evil (Ire 3), and Battle Eternal (Ire 4, just in case). Ye might also take Hail of Teeth (Destruction 1) to pare down enemy Blocks. Indiscriminate Fire (Destruction 3) is always nice for solo minions, and Rain of Fire (Destruction 4) might just let Blackheart one-shot an enemy. Luck Potion (Alchemy 2) will help Blackheart get even more crits.
Making Enemies Flee
An enemy's chance to flee is directly affected by
  • the Sanity theh have remaining - lower Sanity causes a higher chance to flee
  • number of allies of enemy remaining - fewer allies means higher chance to flee (a few enemies will automatically flee at the start of thehr next turn, if theh are the only enemy left)
  • the Cowardice Insanity debuff - chance to flee increases by 20% of current chance each turn (so if an enemy currently has a 10% chance to flee, it increases by +2%)
  • the presence of a Banshee - Banshee's Feature increases all enemies' chance to flee by a flat +2% per turn, up to a maximum of +10% total

Making enemies flee can be a tricky business. The chance to flee is just that - a % chance, so even if an enemy has a very high chance to flee, theh might roll lucky and not flee for several turns. On the other hand, if a hero has a very low chance to flee but rolls badly, theh could flee on the first turn of combat (true story!).


this Paladin was at 100% chance to flee for 2 turns before actually trying to run away


alternatively, ye might get incredibly lucky and fight a total coward!
5 Comments
Angraug  [author] 15 Dec, 2022 @ 7:03pm 
Iratus got to it. o.o

But, seriously, no, Ah just haven't used Banshees much since meh first playthrough.Ah''ll update it when Ah find a use for 'em again.
Hemaka 15 Dec, 2022 @ 10:33am 
It's a very nice guide, but what happened to the almost empty Banshee section?
Adam 21 Mar, 2022 @ 11:30pm 
It takes some getting used to, but funny talky thingy is okay with me. Good guide, by the way!
Angraug  [author] 11 Aug, 2021 @ 2:16pm 
If Ah did, Ah would have to publish a whole new guide... If this one is too hard on the eyes, Ah can make meh next guide in normal living speech-talk.
Melancholy Motel 11 Aug, 2021 @ 10:33am 
Do you have a translated version that's not written in ye hehhr ye arh